These BLT Turkey Wraps with Avocado Mayo are low-carb, high-protein, and bariatric-friendly. A quick lunch recipe packed with flavor, ready in under 10 minutes!
I first made this wrap during my post-op phase after gastric bypass surgery when I needed small, high-protein meals without the bulk of bread. Rolling the fillings inside turkey slices became a quick and easy way to get a satisfying meal without carbs or heavy textures.
Now I make them for the whole family—with or without a tortilla—because they’re just that good. It’s a 5-minute recipe that feels fresh, flavorful, and completely customizable.
Quick & easy: Ready in under 10 minutes. Low-carb & bariatric-friendly: No bread, high protein, and easy on digestion. Customizable: Add cheese, greens, or spices to suit your taste.
⭐ Star Ingredients
Lean Turkey Breast Slices: High in protein, soft in texture, and ideal for bariatric post-op meals. I use low-sodium, ultra-thin slices that roll well without falling apart.
Avocado Mayo: A creamy, healthy-fat spread that’s easier to digest than regular mayo and keeps things moist without being heavy.
Crispy Bacon: Adds salty crunch and a punch of flavor. For bariatric diets, use a small amount or sub in turkey bacon crumbles.
Tomato + Lettuce: Adds freshness and color. For sensitive tummies, use baby spinach or skip raw veggies during early post-op.
For the complete list of ingredients with measurements and instructions, please see the recipe card at the bottom of the post.
📖 Substitutions & Variations
Tortilla-Free: Roll ingredients inside the turkey slices instead of a wrap for a no-carb version.
Skip the bacon: Swap for smoked paprika or turkey bacon if you need a lower-fat option.
Make it dairy-free: Leave out the cheese or use vegan cheddar if you’re dairy-sensitive.
Extra protein: Add cottage cheese or a side of Greek yogurt for a full bariatric-approved lunch.
Step 1: Place the mayonnaise and avocado into a small mixing bowl and mash together with a fork until well combined, or use a food processor for a smoother texture.
Step 2: Lay a slice of turkey breast on a flat surface and spread a thin layer of the avocado mayo in the center.
Step 3: Add 1-2 slices of precooked bacon on top of the avocado mayo in the center of the turkey slice.
Step 4: Layer lettuce and tomato slices over the bacon and mayo.
Step 5: Roll the turkey slice gently around the fillings and secure it in the center with a toothpick.
Step 6: Enjoy your Turkey BLT Avocado Mayo wraps fresh and flavorful!
💡Hint: Use paper towels to blot tomatoes and lettuce dry—this helps prevent sogginess, especially in make-ahead lunches.
👩🍳 Expert Tips
Go soft: For early post-op meals, skip raw veggies and finely chop the bacon to keep textures soft.
Cool before slicing: Chill wraps for 10 minutes before cutting to help them hold their shape.
Portion smart: For bariatric needs, cut wraps into 2–3 small pinwheels and eat slowly.
Meal prep friendly: These store well wrapped in parchment or plastic wrap and can be made a day ahead.
💭 FAQs
Can I make these wraps ahead of time?
Yes! Assemble the wraps a few hours in advance, wrap them tightly in plastic wrap, and store them in the refrigerator until ready to serve.
How to keep BLT wraps from falling apart?
Use sturdy toothpicks to secure the wraps, and avoid overfilling them to make rolling easier.
Can I use something other than avocado mayo?
You can! Use mashed avocado with a squeeze of lemon or try Greek yogurt for a lighter tangy spread.
How do I keep wraps from getting soggy?
Layer lettuce between tomato and mayo, and use dry toppings. Chill after assembling to help them hold together.
💖 Serving Suggestions
Here are my favorite sides to serve with BLT Turkey Wraps with Avocado:
Did you make this recipe? Leave a review and a ⭐⭐⭐⭐⭐ rating below, or tag us in our Facebook Group! Alternatively, bookmark it in your browser or save to Pinterest.
This recipe is a fresh and tasty twist on a classic sandwich, packed with lean turkey, crispy bacon, creamy avocado mayo, and crunchy veggies all wrapped up in a soft tortilla. Perfect for a quick lunch or light dinner!
Place the mayonnaise and avocado into a small mixing bowl and mash together with a fork until well combined, or use a food processor for a smoother texture.
Lay a slice of turkey breast on a flat surface and spread a thin layer of the avocado mayo in the center.
Add 1-2 slices of precooked bacon on top of the avocado mayo in the center of the turkey slice.
Layer lettuce and tomato slices over the bacon and mayo.
Roll the turkey slice gently around the fillings and secure it in the center with a toothpick.
Enjoy your Turkey BLT Avocado Mayo wraps fresh and flavorful!
Notes
Use Fresh Ingredients: Opt for ripe avocado, crisp lettuce, and juicy tomatoes for the best flavor and texture.Chill Before Serving: Place the wraps in the refrigerator for 10-15 minutes before serving to help them hold their shape.Customize the Fillings: Add sliced cucumber, cheese, or a sprinkle of herbs for an extra flavor boost.Use Large Turkey Slices: Ensure the turkey slices are large enough to wrap securely around the fillings.Secure Well: Use sturdy toothpicks to keep the wraps intact, especially for serving or transporting.
Looking for a quick, delicious, and healthy lunch idea the whole family will love? These Roasted Chickpea Wraps With Sweet Potato are a game changer! Packed with hearty sweet potatoes, crispy chickpeas, and all your favorite fresh toppings, they’re perfect for busy days.
Whether you're meal-prepping for the week or whipping up a last-minute dinner, these wraps will keep everyone satisfied and asking for seconds!
[feast_advanced_jump_to]
💖 Why This Recipe Works
Wholesome and Satisfying: These vegan wraps are both hearty and nourishing, perfect for a filling lunch or dinner.
Super Easy to Make: Roast everything in one go and assemble in minutes! It’s a simple recipe that doesn’t require hours in the kitchen.
Meal Prep Friendly: These wraps are perfect for prepping ahead of time. Just store the ingredients separately and assemble them when you're ready to eat.
Kid-Approved: Even picky eaters will love the crispy, flavorful chickpeas and sweet potatoes tucked inside a soft tortilla!
⭐ Star Ingredients
Sweet Potatoes: Add natural sweetness and heartiness to the wraps.
Tortillas: Soft and perfect for wrapping up all the flavorful ingredients.
Tahini: A creamy, nutty sauce that brings rich flavor to every bite.
Dried Cranberries: A sweet-tart addition for a touch of sweetness.
Pumpkin Seeds: Add crunch and a nutty flavor to the wraps.
Olive Oil: Used for roasting and adding flavor to the ingredients.
Chickpeas: Crispy and protein-packed, seasoned with warm spices.
Nutmeg, Paprika, Chili Pepper, Cumin, Salt, Cinnamon: A blend of spices that brings warmth and depth of flavor to the roasted chickpeas and sweet potatoes.
Fresh Parsley and Thyme: Add a burst of freshness and herbal notes.
For the complete list of ingredients with measurements and instructions, please see the recipe card at the bottom of the post.
📖 Substitutions & Variations
Dried Cranberries: Raisins or chopped dried apricots can provide a similar sweet-tart balance.
Sweet Potatoes: Swap for butternut squash or regular potatoes for a different flavor profile. These will still offer a similar sweetness and texture.
Tortillas: Use lettuce wraps for a low-carb or gluten-free alternative.
Tahini: If you don’t have tahini, you can use almond butter or sunflower seed butter for a similar creamy consistency with a slightly different flavor.
🔪 How To Make Roasted Chickpea Wraps
Step 1: Slice the sweet potatoes and toss with half the paprika, half the cumin, 1 tablespoon of olive oil, half the chopped thyme, and nutmeg.
Step 2: In a separate bowl, mix the chickpeas with the remaining olive oil, spices (remaining paprika, cumin), and chopped herbs.
Step 3: Spread the sweet potatoes and chickpeas on a baking sheet. Do not stir. Bake at 350°F for 20 minutes.
Step 4: Once baked, place the roasted sweet potatoes on a tortilla, top with roasted chickpeas, sprinkle with cranberries and pumpkin seeds, and add a sprig of parsley. Drizzle the mixture over, roll up the tortilla, and optionally tie it as shown in the image. Serve and enjoy!
👩🍳 Expert Tips
Preheat Your Oven: Always preheat your oven to ensure even roasting and a crispy texture on your veggies and chickpeas.
Use Parchment Paper: For easy cleanup and to prevent sticking, line your baking sheet with parchment paper before roasting.
Add a Dash of Lemon Juice: A squeeze of fresh lemon juice right before serving brightens up the flavors and adds a zesty kick.
Toast the Tortilla: Lightly toast your tortilla before assembling the wrap for extra crunch and flavor.
💭 FAQs
Can I Use Canned Chickpeas, Or Should I Cook Them From Scratch?
Yes, you can use canned chickpeas for convenience. Just be sure to drain and rinse them thoroughly to remove excess sodium. If you prefer to cook chickpeas from scratch, you can soak dried chickpeas overnight and cook them until tender, but canned chickpeas will save you time.
Why Are My Roasted Chickpeas Not Crunchy?
To achieve crispy chickpeas, ensure they are thoroughly dried before roasting. If they are still soggy, it may be due to excess moisture. You can also increase the roasting time or temperature slightly. Make sure you toss them halfway through for even crisping.
What Type Of Wrap Or Tortilla Works Best For This Recipe?
A soft flour tortilla or whole wheat wrap works well with roasted chickpeas and sweet potatoes. For a gluten-free option, choose corn tortillas or gluten-free wraps.
How Do I Keep The Wraps From Getting Soggy If I Pack Them For Lunch?
To prevent sogginess, keep the components separate until you’re ready to eat. You can store the chickpeas, sweet potatoes, and dressing in separate containers. When ready to serve, assemble the wrap just before eating.
Is This A Spicy Chickpea Wrap?
The chickpea wrap has a mild to medium spice level due to the combination of chili pepper, cumin, paprika, and cinnamon. These spices add warmth and depth to the dish, but they are balanced out by the sweetness of the sweet potatoes, tahini, and dried cranberries. If you prefer a spicier wrap, you can adjust the amount of chili pepper to suit your taste.
Are The Wraps Gluten-Free Or Can They Be Made Gluten-Free?
The wraps can easily be made gluten-free by using gluten-free tortillas.
Can I Freeze The Roasted Chickpeas And Sweet Potato Filling?
Yes, you can freeze the roasted chickpeas and sweet potato filling for later use. Allow the roasted chickpeas and sweet potatoes to cool completely before freezing. This prevents excess moisture from forming ice crystals, which can affect texture and flavor.
💖 Serving Suggestions
These are some great sides to serve with these chickpea wraps:
Sweet Potato Fries: Complement the wraps with a side of crispy sweet potato fries for a complete, comfort food-inspired meal.
Pickled Red Onion: The tangy taste of pickled red onions can elevate the wraps and add an extra layer of flavor.
Spicy Sriracha Mayo: If you want a little heat, try mixing mayonnaise with sriracha, lime juice, and a pinch of salt. This spicy sauce gives the wraps a nice kick, balancing the sweetness of the sweet potatoes and cranberries.
Pomegranate Molasses: For a slightly tangy, sweet option, a drizzle of pomegranate molasses adds complexity and depth.
Roasted Vegetables: Serve with additional roasted veggies like zucchini, bell peppers, or eggplant for a more filling meal.
Did you make this recipe? Leave a review and a ⭐⭐⭐⭐⭐ rating below, or tag us in our Facebook Group! Alternatively, bookmark it in your browser or save to Pinterest.
These Roasted Chickpea Wraps with Sweet Potato are the perfect balance of savory and crunchy! Packed with flavor, they’re quick to make and absolutely delicious for lunch or dinner.
Slice the sweet potatoes and toss with half the paprika, half the cumin, 1 tablespoon of olive oil, half the chopped thyme, and nutmeg.
In a separate bowl, mix the chickpeas with the remaining olive oil, spices (remaining paprika, cumin), and chopped herbs.
Spread the sweet potatoes and chickpeas on a baking sheet. Do not stir. Bake at 350°F for 20 minutes.
Once baked, place the roasted sweet potatoes on a tortilla, top with roasted chickpeas, sprinkle with cranberries and pumpkin seeds, and add a sprig of parsley. Drizzle the mixture over, roll up the tortilla, and optionally tie it as shown in the image. Serve and enjoy!
Notes
Preheat Your Oven: Always preheat your oven to ensure even roasting and a crispy texture on your veggies and chickpeas.Use Parchment Paper: For easy cleanup and to prevent sticking, line your baking sheet with parchment paper before roasting.Add a Dash of Lemon Juice: A squeeze of fresh lemon juice right before serving brightens up the flavors and adds a zesty kick.Toast the Tortilla: Lightly toast your tortilla before assembling the wrap for extra crunch and flavor.
These Bagel Breakfast Sliders are the ultimate way to start your day! Loaded with sausage, eggs, and gooey cheddar cheese, all nestled in mini everything bagels and topped with garlicky butter, they’re a perfect blend of savory, cheesy goodness. Whether it’s a busy morning or a brunch gathering, these breakfast sliders with sausage, egg and cheese are sure to be a hit!
[feast_advanced_jump_to]
💖 Why This Recipe Works
Quick and Easy: Ready in just 20 minutes, making it perfect for those hectic mornings.
Customizable: Switch up the cheese, sausage, or bagel type to make it your own.
Crowd-Pleaser: A great option for feeding a group with minimal effort.
⭐ Star Ingredients
Mini Everything Bagels: The base of the sliders, offering a savory, seasoned flavor.
Sausage Patties: Adds hearty, savory protein to the sliders.
Cheddar Cheese: Melts perfectly for a gooey, cheesy layer.
Eggs: Scrambled to fluffy perfection for the filling.
Garlic Butter: Adds a flavorful finishing touch to the bagel tops.
For the complete list of ingredients with measurements and instructions, please see the recipe card at the bottom of the post.
📖 Substitutions & Variations
Spicy Sliders: Use spicy sausage patties or add a sprinkle of red pepper flakes to the scrambled eggs.
Different Cheese: Swap cheddar for Swiss, Pepper Jack, or American cheese for a new flavor.
Bagel Options: Use plain, sesame, or whole wheat bagels if you’re not a fan of everything bagels.
Vegetarian Version: Replace sausage patties with plant-based sausage or sliced mushrooms.
🔪How To Make Breakfast Sliders?
Step 1: Preheat your oven to 375°F (190°C). Heat a large skillet over medium-high heat and cook the sausage patties until browned and cooked through. Set aside. In the same skillet, scramble the eggs in the leftover sausage grease for added flavor. Turn off the heat once cooked.
Step 2: In a 9x13-inch baking dish, place the bottoms of the mini bagels in a single layer. Add a slice of cheddar cheese to each bagel bottom.
Step 3: Place a cooked sausage patty on each cheese slice.
Step 4: Evenly distribute the scrambled eggs over the sausage patties.
Step 5: Top with another slice of cheddar cheese and place the bagel tops on each slider. Melt the butter in a microwave-safe bowl and mix in the garlic salt. Brush this mixture generously over the tops of the bagels.
Step 6: Bake in the preheated oven for 5-10 minutes, or until the cheese is melted and the bagels are warm and slightly crispy. Use a spatula to lift the sliders out of the dish, serve, and enjoy!
👩🍳 Expert Tips
Make Ahead: Assemble the breakfast sliders the night before, then brush with garlic butter and bake in the morning.
Crispier Bagels: Bake for a few extra minutes if you prefer your bagels to have a crispier texture.
Add Veggies: Include sautéed spinach, peppers, or onions for an extra layer of flavor and nutrition.
💭 FAQs
Can I use Regular-Sized Bagels Instead Of Mini bagels?
Yes, but they’ll make larger sandwiches. You can cut them in half after assembling to make them easier to serve.
What Other Types Of Meat Could I Use?
You can use bacon, Canadian bacon, or turkey sausage as an alternative to regular sausage patties.
Can I Prepare These Sliders Ahead Of Time?
Yes, you can assemble them the night before, cover them tightly, and refrigerate them. Brush with garlic butter and bake just before serving.
Can I Freeze Sliders?
Yes, wrap individual sliders tightly in plastic wrap and freeze in a freezer-safe bag. Reheat in the oven directly from frozen.
How Long Can Sliders Last In The Fridge?
Sliders can last in the fridge for up to 3 days when stored properly in an airtight container. To maintain their freshness, let them cool completely before refrigerating.
What Is The Best Way To Reheat Sliders?
When reheating, use the oven or air fryer to bring back some of the crispiness, as microwaving may make them slightly soggy.
🧂Serving Suggestions
Wondering what to serve with breakfast sliders? Try these tasty options:
Kiwi Fruit Salad: A light and refreshing side like a mix of kiwifruit, berries, melon, and pineapple.
Hash Browns: Crispy hash browns or Breakfast Potatoes pair perfectly.
Yogurt Parfaits: Serve with yogurt, granola, and fruit for a balanced meal.
Mango Pineapple Smoothie: A fruity smoothie adds a refreshing touch to complement the savory sliders.
Dipping Sauce: Try ketchup, honey mustard, or a Garlic Parm Sauce for dipping!
Did you make this recipe? Leave a review and a ⭐⭐⭐⭐⭐ rating below, or tag us in our Facebook Group! Alternatively, bookmark it in your browser or save to Pinterest.
These Breakfast Bagel Sliders are the ultimate morning bite! Soft bagels filled with eggs, cheese, and your choice of breakfast meats – the perfect start to your day.
Preheat oven to 375°F (190°C). Cook sausage patties in a skillet until browned and cooked through. Set aside. Scramble eggs in the leftover sausage grease, then turn off heat.
Place bottom halves of mini bagels in a 9x13-inch baking dish. Add a slice of cheddar cheese to each.
Top each cheese slice with a sausage patty.
Evenly distribute scrambled eggs over the sausage patties.
Place another slice of cheddar on top. Add bagel tops. Melt butter, mix with garlic salt, and brush over bagel tops.
Bake for 5-10 minutes, until cheese is melted and bagels are crispy. Serve immediately.
Notes
Make Ahead: Assemble the sliders the night before, then brush with garlic butter and bake in the morning.Crispier Bagels: Bake for a few extra minutes if you prefer your bagels to have a crispier texture.Add Veggies: Include sautéed spinach, peppers, or onions for an extra layer of flavor and nutrition.
Looking for a fun, creamy treat that’s a hit with everyone? This Vanilla Ice Cream Milkshake with Sprinkles is a perfect choice! It's super simple to whip up and brings that classic, nostalgic taste we all love, plus a dash of colorful sprinkles for extra cheer. Perfect for cooling off on a warm day or adding a sweet moment to any afternoon – this milkshake is a guaranteed smile-maker! Vanilla Milkshakes have never been easier to make.
[feast_advanced_jump_to]
💖 Why This Recipe Works
There’s something so magical about that creamy vanilla flavor! Those little vanilla bean specks take it to a whole new level and make it feel like an extra-special treat.
It’s super easy to make, and it brings back all the cozy, classic vibes of a good ol' diner milkshake.
Perfect for sharing with the kids, treating yourself, or adding a little sweetness to any day – this shake is one of those milkshake recipes we just can’t get enough of!
⭐ Star Ingredients
Vanilla Bean Ice Cream: The creamy base that makes every sip rich and dreamy.
Hershey’s Syrup: A classic chocolatey swirl that adds just the right sweetness.
Whipped Cream: Light and fluffy, giving the perfect finishing touch on top.
Marshmallows: Soft and fun, a playful treat mixed into the shake.
Vanilla Icing: Sweet around the rim, making each sip even more delicious.
Funfetti Sprinkles: A pop of color and fun for that festive milkshake vibe!
For the complete list of ingredients with measurements and instructions, please see the recipe card at the bottom of the post.
📖 Substitutions & Variations
Vanilla Frozen Yogurt: replace half the ice cream for vanilla frozen yogurt for a lighter option.
Chocolate Milkshake: To change this homemade milkshake into chocolate flavor, simply switch the vanilla bean ice cream for chocolate ice cream. Chocolate milk is just as good as a vanilla shake.
Strawberry Sauce: Switch this up by adding strawberry sauce to the melted ice cream for a rich and creamy texture.
📖 Optional Toppings
Here are some fun optional toppings to take your vanilla milkshake to the next level:
Maraschino Cherry – A classic topper that adds a bright, sweet finish to any milkshake.
Crushed Cookies: Add a sprinkle of crushed Oreos, chocolate chip cookies, or graham crackers for extra crunch.
Chopped Nuts – Almonds, pecans, or peanuts add a nice crunch and a nutty flavor.
Fresh Berries – Strawberries, raspberries, or blueberries give a fruity burst of flavor.
Chocolate Shavings or Chips – Perfect for a touch of rich chocolate goodness.
Caramel or Chocolate Drizzle – Adds a sweet, decorative touch.
Colorful Sprinkles – Always a fun, festive choice for a pop of color.
Crushed Candy Bars – Think Snickers, Twix, or M&M’s for an indulgent treat!
🔪 How To Make Vanilla Ice Cream Milkshake With Sprinkles
Step 1: Start by blending your tub of vanilla ice cream until it's smooth. Add 6-8 tablespoons of milk and blend again. For a thicker milkshake, use less milk; for a runnier one, add more milk.
Step 2: If using a Ninja or similar blender, take out the blade. Pour in ¾ of a 9-oz bottle of sprinkles and gently fold them into the mixture with a spoon or spatula.
Step 3: Get your serving glasses ready by spreading icing around the rims. Dip the iced rims into a plate of sprinkles to cover them completely.
Step 4: Pour the milkshake into the glasses, leaving a little space at the top for whipped cream.
Step 5: Finish off your milkshake with a generous swirl of canned whipped cream. Repeat twice for a taller effect!
Step 6: Drizzle some chocolate syrup over the whipped cream. For an added touch, skew marshmallows on a wooden skewer and place on top of the milkshake.
👩🍳 Expert Tips
Here are some quick tips for making the best vanilla milkshake:
Use Quality Ice Cream: Choose a rich vanilla bean ice cream for maximum flavor and creaminess.
Chill Your Glass: Pop your serving glass in the freezer beforehand to keep your milkshake icy cold for longer.
Blend Just Right: For a thick shake, blend only until smooth. Over-blending can make it too runny. You can use a blender or milkshake machine for this recipe.
Adjust the Sweetness: Add a drizzle of syrup or extra vanilla if you want a sweeter shake.
💭 FAQs
What’s The Difference Between Vanilla And Vanilla Bean Ice Cream?
Vanilla bean ice cream gives you that bold, real vanilla flavor with those cute little specks, making it taste extra special compared to regular vanilla!
How do I Thicken A Vanilla Milk Shake?
For a thicker vanilla milkshake, use extra ice cream, and less milk, and blend just enough to keep it creamy and rich!
Where Do I Buy Sprinkles?
You can buy sprinkles from your local supermarket or buy different types such as Christmas sprinkles or Wilton Jimmies Sprinkles from Amazon.
My Milkshake Is Too Thick How Do I Make It Thinner?
If you find the milkshake is too think try adding half a cup of skim milk or whole milk to thin it down.
Do I Need To Add Vanilla Extract To This Recipe?
Adding vanilla extract to a vanilla ice cream milkshake isn’t necessary but can enhance the flavor. If you’re using a high-quality vanilla ice cream (such as vanilla bean or french vanilla), it already has a rich vanilla taste that may be enough on its own.
💖 Serving Suggestions
Pair with Fresh Berries: Add a mix of fresh berries like strawberries or raspberries to complement the creamy sweetness of the milkshake and add a fruity contrast.
Serve with Crushed Cookies: Sprinkle crushed cookies such as Oreos or chocolate chip cookies on top for an added crunch and extra flavor.
Top with a Maraschino Cherry: For a classic touch, garnish with a bright red cherry for a pop of color and sweetness.
Serve with Chocolate Chip Brownies: Pairing the milkshake with a rich chocolate chip brownie enhances the dessert experience, adding a decadent texture and flavor.
Did you make this recipe? Leave a review and a ⭐⭐⭐⭐⭐ rating below, or tag us in our Facebook Group! Alternatively, bookmark it in your browser or save to Pinterest.
Start by blending your tub of vanilla ice cream until it's smooth. Add 6-8 tablespoons of milk and blend again. For a thicker milkshake, use less milk; for a runnier one, add more milk.
If using a Ninja or similar blender, take out the blade. Pour in ¾ of a 9 oz bottle of sprinkles and gently fold them into the mixture with a spoon or spatula.
Get your serving glasses ready by spreading icing around the rims. Dip the iced rims into a plate of sprinkles to cover them completely.
Pour the milkshake into the glasses, leaving a little space at the top for whipped cream.
Finish off your milkshake with a generous swirl of canned whipped cream for a more elegant appearance.
Drizzle some chocolate syrup over the whipped cream. For an added touch, skew marshmallows on a wooden skewer and place atop the milkshake. Insert a straw and enjoy your homemade vanilla ice cream milkshake with sprinkles!
Notes
Use Quality Ice Cream: Choose a rich vanilla bean ice cream for maximum flavor and creaminess.Chill Your Glass: Pop your serving glass in the freezer beforehand to keep your milkshake icy cold for longer.Blend Just Right: For a thick shake, blend only until smooth. Over-blending can make it too runny.Adjust the Sweetness: Add a drizzle of syrup or extra vanilla if you want a sweeter shake.
These S’mores Waffles are a fun twist on the classic treat, with crispy waffles, gooey marshmallows, and melty chocolate. It’s the perfect indulgence for breakfast or dessert!
Pour the waffle mix into a large bowl. Add the egg and milk, then stir until the batter is smooth.
Preheat the waffle iron and cook the waffles until golden brown, flipping as needed.
Place pink marshmallows on top of one waffle, then top with a second waffle to create a sandwich. Close the waffle iron briefly to melt the marshmallows.
For extra fun, sprinkle small marshmallows on top of the waffles and toast them in the oven until golden brown.
Serve the gooey, marshmallow-filled waffles immediately. Enjoy the sweet treat!
Notes
Use a Non-Stick Waffle Iron: To prevent sticking, lightly grease your waffle iron before baking.Mix Smoothly: Stir the batter until just combined; overmixing can make the waffles dense.Toast Carefully: If adding marshmallows on top and toasting in the oven, keep an eye on them to avoid burning.Serve Warm: These waffles are best enjoyed right out of the waffle iron while the marshmallows are gooey.
Bring a playful twist to breakfast or dessert with these Pink Smores Waffles! They’re fluffy, gooey, and perfectly sweet, combining classic waffle goodness with toasted marshmallow magic.
Fun and Unique: Smores Waffles is a whimsical treat that’s perfect for kids, parties, or anyone who loves s’mores.
Easy to Make: Uses store-bought waffle mix for a quick and simple recipe.
Gooey Marshmallow Goodness: Pink marshmallows add a pop of color and a gooey, nostalgic vibe.
🥘 Ingredients
Waffle Mix: The base for fluffy, golden waffles. Use your favorite brand for convenience.
Egg: Adds richness and helps bind the batter.
Milk: Keeps the batter smooth and gives the waffles a tender texture.
Pink Marshmallows: The star ingredient that makes this recipe fun and colorful, melting into gooey perfection.
For the complete list of ingredients with measurements and instructions, please see the recipe card at the bottom of the post.
📖 Optional Toppings for Pink S'mores Waffles
Crushed Candy: Use pink candies or white chocolate for extra flair.
Fruit Slices: Add bananas or strawberries for a fresh twist.
Powdered Sugar: Dust over the top for a light, sweet finish.
Chocolate Chips: Melted or sprinkled on top for a classic s’mores vibe.
Sprinkles: Add a pop of color for a festive look.
🔪How To make Pink Smore's Waffles
Step One: Pour the waffle mix into a large bowl. Add the egg and milk to the waffle. mix and stir until the batter is smooth.
Step Two: mix and stir until the batter is smooth.
Step Three: Bake waffles in a preheated waffle iron until golden brown, flipping as needed.
Step Four: Place pink marshmallows on top of one waffle, then place a second waffle on top to sandwich them. Clamp the waffle iron briefly to melt the marshmallows and create a gooey filling. For extra fun, sprinkle small marshmallows on top of the waffles and toast them in the oven until golden. Enjoy.
👩🍳 Expert Tips
Use a Non-Stick Waffle Iron: To prevent sticking, lightly grease your waffle iron before baking.
Mix Smoothly: Stir the batter until just combined; overmixing can make the waffles dense.
Toast Carefully: If adding marshmallows on top and toasting in the oven, keep an eye on them to avoid burning.
Serve Warm: These waffles are best enjoyed right out of the waffle iron while the marshmallows are gooey.
💭 FAQs
How can I incorporate graham cracker flavor into the waffle batter?
To infuse the classic graham cracker taste into your waffles, consider adding graham cracker crumbs directly into the batter. For instance, you can combine all-purpose flour with graham cracker crumbs to achieve that signature flavor.
What's the best way to add marshmallows and chocolate to the waffles?
To achieve gooey marshmallow centers and melty chocolate pockets, fold mini marshmallows and chocolate chips into your waffle batter before cooking. This ensures that each bite captures the essence of a traditional s'more.
Can I use pre-made biscuit dough for a quicker version?
Yes, for a simplified approach, you can use refrigerated biscuit dough. By separating and flattening the dough, adding graham crackers, marshmallows, and chocolate chips between layers, and then cooking them in a waffle maker, you can enjoy s'mores waffles with minimal preparation.
How should I serve and garnish s'mores waffles for an authentic experience?
To replicate the campfire s'mores experience, top your waffles with toasted marshmallows and drizzle melted chocolate or chocolate syrup over them. Sprinkling additional graham cracker crumbs on top can enhance both the flavor and presentation.
Best Way to Store Smores Waffles
Store cooked waffles in an airtight container for up to 2 days. Reheat in a toaster or oven for crispness. Wrap individual waffles in plastic wrap, place in a freezer bag, and freeze for up to 2 months.
🧂Serving Suggestions
Chocolate Sauce: Drizzle over the top for extra indulgence.
Fresh Berries: Serve with strawberries or raspberries for a fruity contrast.
Hot Cocoa: Pair with a mug of hot chocolate for the ultimate cozy treat.
🍽 Related Recipes
Did you make this recipe? Leave a review and a ⭐⭐⭐⭐⭐ rating below, or tag us in our Facebook Group! Alternatively, bookmark it in your browser or save to Pinterest.
These S’mores Waffles are a fun twist on the classic treat, with crispy waffles, gooey marshmallows, and melty chocolate. It’s the perfect indulgence for breakfast or dessert!
Pour the waffle mix into a large bowl. Add the egg and milk, then stir until the batter is smooth.
Preheat the waffle iron and cook the waffles until golden brown, flipping as needed.
Place pink marshmallows on top of one waffle, then top with a second waffle to create a sandwich. Close the waffle iron briefly to melt the marshmallows.
For extra fun, sprinkle small marshmallows on top of the waffles and toast them in the oven until golden brown.
Serve the gooey, marshmallow-filled waffles immediately. Enjoy the sweet treat!
Notes
Use a Non-Stick Waffle Iron: To prevent sticking, lightly grease your waffle iron before baking.Mix Smoothly: Stir the batter until just combined; overmixing can make the waffles dense.Toast Carefully: If adding marshmallows on top and toasting in the oven, keep an eye on them to avoid burning.Serve Warm: These waffles are best enjoyed right out of the waffle iron while the marshmallows are gooey.
Bring a playful twist to breakfast or dessert with these Pink Smores Waffles! They’re fluffy, gooey, and perfectly sweet, combining classic waffle goodness with toasted marshmallow magic.
Fun and Unique: Smores Waffles is a whimsical treat that’s perfect for kids, parties, or anyone who loves s’mores.
Easy to Make: Uses store-bought waffle mix for a quick and simple recipe.
Gooey Marshmallow Goodness: Pink marshmallows add a pop of color and a gooey, nostalgic vibe.
🥘 Ingredients
Waffle Mix: The base for fluffy, golden waffles. Use your favorite brand for convenience.
Egg: Adds richness and helps bind the batter.
Milk: Keeps the batter smooth and gives the waffles a tender texture.
Pink Marshmallows: The star ingredient that makes this recipe fun and colorful, melting into gooey perfection.
For the complete list of ingredients with measurements and instructions, please see the recipe card at the bottom of the post.
📖 Optional Toppings for Pink S'mores Waffles
Crushed Candy: Use pink candies or white chocolate for extra flair.
Fruit Slices: Add bananas or strawberries for a fresh twist.
Powdered Sugar: Dust over the top for a light, sweet finish.
Chocolate Chips: Melted or sprinkled on top for a classic s’mores vibe.
Sprinkles: Add a pop of color for a festive look.
🔪How To make Pink Smore's Waffles
Step One: Pour the waffle mix into a large bowl. Add the egg and milk to the waffle. mix and stir until the batter is smooth.
Step Two: mix and stir until the batter is smooth.
Step Three: Bake waffles in a preheated waffle iron until golden brown, flipping as needed.
Step Four: Place pink marshmallows on top of one waffle, then place a second waffle on top to sandwich them. Clamp the waffle iron briefly to melt the marshmallows and create a gooey filling. For extra fun, sprinkle small marshmallows on top of the waffles and toast them in the oven until golden. Enjoy.
👩🍳 Expert Tips
Use a Non-Stick Waffle Iron: To prevent sticking, lightly grease your waffle iron before baking.
Mix Smoothly: Stir the batter until just combined; overmixing can make the waffles dense.
Toast Carefully: If adding marshmallows on top and toasting in the oven, keep an eye on them to avoid burning.
Serve Warm: These waffles are best enjoyed right out of the waffle iron while the marshmallows are gooey.
💭 FAQs
How can I incorporate graham cracker flavor into the waffle batter?
To infuse the classic graham cracker taste into your waffles, consider adding graham cracker crumbs directly into the batter. For instance, you can combine all-purpose flour with graham cracker crumbs to achieve that signature flavor.
What's the best way to add marshmallows and chocolate to the waffles?
To achieve gooey marshmallow centers and melty chocolate pockets, fold mini marshmallows and chocolate chips into your waffle batter before cooking. This ensures that each bite captures the essence of a traditional s'more.
Can I use pre-made biscuit dough for a quicker version?
Yes, for a simplified approach, you can use refrigerated biscuit dough. By separating and flattening the dough, adding graham crackers, marshmallows, and chocolate chips between layers, and then cooking them in a waffle maker, you can enjoy s'mores waffles with minimal preparation.
How should I serve and garnish s'mores waffles for an authentic experience?
To replicate the campfire s'mores experience, top your waffles with toasted marshmallows and drizzle melted chocolate or chocolate syrup over them. Sprinkling additional graham cracker crumbs on top can enhance both the flavor and presentation.
Best Way to Store Smores Waffles
Store cooked waffles in an airtight container for up to 2 days. Reheat in a toaster or oven for crispness. Wrap individual waffles in plastic wrap, place in a freezer bag, and freeze for up to 2 months.
🧂Serving Suggestions
Chocolate Sauce: Drizzle over the top for extra indulgence.
Fresh Berries: Serve with strawberries or raspberries for a fruity contrast.
Hot Cocoa: Pair with a mug of hot chocolate for the ultimate cozy treat.
🍽 Related Recipes
Did you make this recipe? Leave a review and a ⭐⭐⭐⭐⭐ rating below, or tag us in our Facebook Group! Alternatively, bookmark it in your browser or save to Pinterest.
These S’mores Waffles are a fun twist on the classic treat, with crispy waffles, gooey marshmallows, and melty chocolate. It’s the perfect indulgence for breakfast or dessert!
Pour the waffle mix into a large bowl. Add the egg and milk, then stir until the batter is smooth.
Preheat the waffle iron and cook the waffles until golden brown, flipping as needed.
Place pink marshmallows on top of one waffle, then top with a second waffle to create a sandwich. Close the waffle iron briefly to melt the marshmallows.
For extra fun, sprinkle small marshmallows on top of the waffles and toast them in the oven until golden brown.
Serve the gooey, marshmallow-filled waffles immediately. Enjoy the sweet treat!
Notes
Use a Non-Stick Waffle Iron: To prevent sticking, lightly grease your waffle iron before baking.Mix Smoothly: Stir the batter until just combined; overmixing can make the waffles dense.Toast Carefully: If adding marshmallows on top and toasting in the oven, keep an eye on them to avoid burning.Serve Warm: These waffles are best enjoyed right out of the waffle iron while the marshmallows are gooey.
Start your day with a delicious and nourishing breakfast that’s as easy as it is satisfying! These Vanilla Overnight Oats are packed with juicy blueberries and strawberries, giving you a burst of natural sweetness in every bite.
Simply prep the night before, and you’ll wake up to a creamy, flavorful treat that’s perfect for busy mornings. Healthy, convenient, and absolutely delicious—this is a filling breakfast done right!
[feast_advanced_jump_to]
💖 Why This Recipe Works
Making vanilla overnight oats is a total game-changer, especially for busy mornings! They’re super easy to prep the night before, so breakfast is ready to go when you are.
They’re creamy, delicious, and packed with good stuff like fiber and protein to keep you full and energized.
And the best part? You can customize them with your favorite toppings—berries, nuts, or a drizzle of pure maple syrup. It’s like having a healthy treat that’s ready and waiting for you!
⭐ Star Ingredients
Rolled Oats: These are my go-to for keeping us full! They soak up all that flavor and make breakfast super creamy.
Vanilla Almond Milk: I love the hint of vanilla it brings! Dairy-free and already sweetened—makes my mornings easier and tastier.
Maple Syrup: Just a little goes a long way! I love that it’s a natural sweetener and makes the oats taste like a treat.
Banana: A must for creaminess and sweetness. Plus, bananas are packed with good-for-you potassium.
Blueberries: I can’t resist adding these! They’re antioxidant-rich and add a juicy, fresh flavor we all love.
Strawberries: Strawberries make it feel like dessert for breakfast! They add a bright, sweet touch my family always enjoys.
For the complete list of ingredients with measurements and instructions, please see the recipe card at the bottom of the post.
📖 Substitutions & Variations
Experiment with Flavors: Add a sprinkle of cinnamon, or even a dash of cocoa powder to change up the flavor profile without much effort. Add vanilla extract for cinnamon vanilla overnight oats or use cocoa and coconut sugar to make Chocolate Overnight Oats are great alternatives.
Gluten FreeOption: Try using gluten-free oats for a "gluten free" healthy breakfast option.
Try Different Milks: Vanilla soy milk is delicious, but you can easily swap it with almond milk, oat milk, or coconut milk for a different flavor. Each milk adds its own unique taste, so find your family’s favorite!
Boost with Protein: Add a scoop of plant-based protein powder or a dollop of Greek yogurt to make the oats extra filling and creamy.
Switch Up the Sweetener: Maple syrup is a classic, but honey, brown sugar or agave nectar work just as well if that’s what you have on hand.
Mix in a Spoonful of Nut Butter: Stirring in almond butter, peanut butter, or sunflower seed butter before chilling gives the oats a rich, creamy texture and extra flavor.
🔪 How To Make Overnight Oats
Step 1: Measure out your rolled oats and Vanilla Almond milk.
Step 2: Combine the rolled oats and vanilla almond milk. Stir well to ensure the oats are fully coated in the milk.
Step 3: Cover the container with the lid and place it in the fridge to soak overnight, allowing the oats to soften and absorb the milk. In the morning, divide the soaked oats evenly between two jars or bowls.
Step 4: Slice your banana and strawberries and prep the blueberries.
Step 5: Layer your toppings; sliced banana, blueberries, strawberries, and a drizzle of maple syrup for extra sweetness.
Step 6: Enjoy your oats cold, or heat them briefly in the microwave if you prefer them warm.
👩🍳 Expert Tips
Use Rolled Oats, Not Quick Oats: Rolled oats soak up the milk just right, giving you that perfect creamy texture by morning. Quick oats can get a bit mushy, so stick with rolled!
Customize Your Sweetness: If you like things sweeter, add a little more maple syrup or a pinch of cinnamon for a cozy flavor boost.
Make It Ahead for the Week: Want to save time? Make a few jars at once! These keep well in the fridge for up to three days, so you’re all set for busy mornings.
💭 FAQs
Can You Heat Up Overnight Oats?
Yes, you can heat up overnight oats. Just microwave them for about 1-2 minutes or warm them on the stove. Stir well and enjoy!
Can You Make Overnight Oats With Steel-Cut Oats?
Yes, you can make overnight oats with steel-cut oats. They will be chewier and might need more soaking time, like overnight or up to 24 hours. Add extra liquid if needed for a softer texture.
Can You Make Overnight Oats With Water Instead Of Milk?
Yes, you can make overnight oats with water instead of milk. They might be less creamy, but you can add yogurt or nut butter for extra flavor and texture. Adjust the water amount to get your desired consistency.
Can You Make Overnight Oats With Instant Oatmeal?
Yes, you can make overnight oats with instant oatmeal. They will absorb liquid quickly, so they might be softer than regular oats.
Can You Freeze Overnight Oats?
You can freeze overnight oats in a freezer-safe container for up to 3 months. Thaw in the fridge overnight when you’re ready to eat them!
What Are Overnight Oats?
Overnight oats are a no-cook breakfast option where oats are soaked in liquid, like milk or water, overnight. This process softens the oats, making them ready to eat by morning. You can customize them with fruits, nuts, seeds, or sweeteners for added flavor.
Best Way To Store Overnight Oats
Transfer your overnight oats to an airtight container and refrigerate for up to 4 days. This keeps them creamy and prevents any unwanted flavors from seeping in. If you’re using crunchy toppings like nuts or seeds, add them right before eating to keep them from getting soggy. Fresh fruit can be added when you're ready to enjoy as well.
💖 Serving Suggestions
What other toppings can I use?
Top with Chopped Nuts: Add a handful of chopped almonds, walnuts, or pecans for a crunchy texture that complements the creamy oats.
Pair with a Smoothie: Serve the oats alongside a refreshing green smoothie or berry smoothie for a nutrient-packed breakfast.
Drizzle with Nut Butter: Add a spoonful of almond or peanut butter on top for extra richness and flavor, enhancing the creamy oats.
Garnish with Coconut Flakes: Sprinkle shredded coconut on top to give a tropical twist that pairs perfectly with the sweetness of the fruit and oats.
Did you make this recipe? Leave a review and a ⭐⭐⭐⭐⭐ rating below, or tag us in our Facebook Group! Alternatively, bookmark it in your browser or save to Pinterest.
Measure out your rolled oats and Vanilla Almond milk.
Combine the rolled oats and vanilla almond milk. Stir well to ensure the oats are fully coated in the milk.
Cover the container with the lid and place it in the fridge to soak overnight, allowing the oats to soften and absorb the milk. In the morning, divide the soaked oats evenly between two jars or bowls
Slice your banana and strawberries and prep the blueberries.
Layer your toppings—sliced banana, blueberries, strawberries, and a drizzle of maple syrup for extra sweetness.
Enjoy your oats cold, or heat them briefly in the microwave if you prefer them warm.
Notes
Use Rolled Oats, Not Quick Oats: Rolled oats soak up the milk just right, giving you that perfect creamy texture by morning. Quick oats can get a bit mushy, so stick with rolled!Customize Your Sweetness: If you like things sweeter, add a little more maple syrup or a pinch of cinnamon for a cozy flavor boost.Make It Ahead for the Week: Want to save time? Make a few jars at once! These keep well in the fridge for up to three days, so you’re all set for busy mornings.
Add a festive twist to your holiday table with these Healthy Celery Snacks inspired by the Grinch! Made with creamy guacamole, candy eyes, and fun decorations, these Grinch themed celery snack ideas are a playful and nutritious treat that’s perfect for parties or a kid-friendly snack. These little Grinch faces are sure to be a hit with everyone!
[feast_advanced_jump_to]
💖 Why This Recipe Works
Festive and Fun: These healthy celery snacks are dressed up like the Grinch, making them the perfect centerpiece for any holiday party!
Easy to Make: With just a few simple ingredients and no cooking required, they’re a stress-free snack that looks impressive.
Kid-Approved: Who can resist Grinch-themed party food ideas? Even the pickiest eaters will love munching on these fun and healthy treats!
⭐ Star Ingredients
Celery: The crunchy green base that’s perfect for holding your Grinchy guacamole!
Guacamole (homemade or store-bought): Creamy and delicious, it’s the star of this snack, doubling as the Grinch’s face.
Yellow Candy Balls: These make the Grinch’s iconic eyes—simple, bright, and so cute!
Black Decorating Gel: Perfect for adding those signature mischievous eyebrows.
Black Food Writer Pen: The easiest way to draw tiny pupils on the candy eyes for that classic Grinch glare!
🔪 How To Make Grinch Party Food: Celery Snacks
Step 1: Cut celery into 2 to 3-inch pieces. Save some of the celery leaves for the hair. Spread the guacamole on each piece of celery and insert a celery leaf on the top.
Step 2: With the black food writer pen, draw eyeballs on the yellow candy and place 2 eyes on each piece of celery.
Step 3: Using a black decorating gel, draw on eyebrows, nose, and mouth.
Step 4: Your Grinch celery snacks are now ready to serve. Enjoy!
Tips And Tricks
Keep Celery Crisp: Store celery in cold water in the fridge until ready to use to maintain its crunch.
Easy Assembly: Use a piping bag or a zip-top bag with the corner snipped to neatly add guacamole or cream cheese to the celery sticks.
Serve Fresh: Assemble and serve within a few hours for the best taste and texture.
Substitutions
Celery: Swap celery sticks for cucumber slices, carrot sticks, or even bell pepper strips for a different crunch.
Yellow Candy Balls: Use yellow M&Ms, raisins, or small pieces of banana if candy balls aren’t available.
Black Food Writer Pen: Use a toothpick dipped in food coloring or chocolate to draw tiny details if a food pen isn’t on hand.
Variations
Celery Cream Cheese Snack: Swap guacamole for cream cheese blended with finely chopped green cilantro for a fresh, herby twist. It still gives the Grinch his iconic green hue but with a new flavor profile.
Pesto Cream Cheese Grinch: Mix cream cheese with vibrant green pesto to create a rich and flavorful base for your celery snacks. The bold, garlicky taste adds a festive kick!
Spinach Hummus Grinch: Replace guacamole with spinach-blended hummus for a protein-packed and smooth green spread.
Avocado Yogurt Grinch: Mash ripe avocado with plain Greek yogurt for a creamy and tangy green Grinch face.
Edamame Dip Grinch: Use edamame dip for a unique twist—it’s bright green, creamy, and totally Grinch-worthy!
Best Way to Store Healthy Celery Snacks
Assembled Snacks: If already assembled, place the Grinch celery snacks in a single layer on a plate or tray. Cover them with plastic wrap or store in an airtight container in the fridge for up to 1 day to keep them fresh.
Separate Components: For longer storage, keep guacamole, celery, and decorations separate and assemble just before serving to avoid soggy snacks.
FAQ'S
Are These Snacks Kid Friendly?
Absolutely! Kids love the Grinch design, and it’s a sneaky way to get them to eat their veggies.
How Do I Keep Guacamole From Turning Brown?
Add a splash of lime or lemon juice to the guacamole and store it in an airtight container with plastic wrap pressed directly onto the surface.
Can I Make This Nut Free?
Yes! Guacamole and all the other ingredients are naturally nut-free, so just check for allergens in store-bought ingredients.
What Is The Best Way To Transport These Snacks To A Party?
Arrange the assembled snacks in a single layer in a shallow container with a lid. Keep them cool with an ice pack if traveling far. Assemble the eyes and gel details just before serving for the best look!
Did you make this recipe? Leave a review and a ⭐⭐⭐⭐⭐ rating below, or tag us on our Facebook Page! Alternatively, bookmark it in your browser or save to Pinterest.
Cut celery into 2-3 inch pieces. Save some of the celery leaves for the hair. Spread the guacamole on each piece of celery and insert a celery leaf on the top.
With the black food writer pen, draw eyeballs on the yellow candy and place 2 eyes on each piece of celery.
Using a black decorating gel, draw on eyebrows, nose, and mouth.
Your Grinch celery snacks are now ready to serve. Enjoy!
Notes
Keep Celery Crisp: Store celery in cold water in the fridge until ready to use to maintain its crunch.Easy Assembly: Use a piping bag or a zip-top bag with the corner snipped to neatly add guacamole or cream cheese to the celery sticks.Serve Fresh: Assemble and serve within a few hours for the best taste and texture.
Trust me—this isn’t your average veggie-laced dessert. This rich, fudgey Beetroot Chocolate Cake is moist, decadent, and secretly loaded with goodness. One bite and you'll be hooked.
This chocolate cake using beetroot has become a bit of a festive legend around here. Not only does the beetroot add deep moisture and natural sweetness (yes, really!), but it’s also a fun surprise for guests who don’t expect veggies in their dessert. We love this one as an alternative to traditional Christmas puddings—and it’s a great way to use up any leftover boiled beets!
Rich, Moist Texture: Thanks to the beetroot, this cake stays tender and fudgey without needing loads of oil or butter. The natural moisture means no dry crumbs here!
Festive and Unexpected: A chocolate cake with beetroot might sound unusual, but it’s a total showstopper—perfect for holidays, birthdays, or impressing your veggie-dodging friends.
Naturally Wholesome Ingredients: Beets add fiber, folate, and antioxidants while lowering the need for added sugar. Combined with almond flour and yogurt frosting, it’s a nutrient-dense treat that can work for those watching carbs or needing bariatric-friendly options.
⭐ Star Ingredients
Boiled Beets: These bring all the magic: moisture, natural sugars, and a boost of fiber. As someone who’s worked with veggie-based desserts for years, I can say beets are your chocolate cake’s secret BFF.
Cocoa Powder: Go for Dutch-processed for a deep, smooth flavor that balances the earthiness of the beets.
Whole Wheat + Almond Flour: This blend gives structure while keeping things wholesome and slightly nutty. Great for blood sugar balance too!
Yogurt Cream Frosting: Light, tangy, and so much better than heavy buttercream—especially for anyone watching their fat intake.
For the complete list of ingredients with measurements and instructions, please see the recipe card at the bottom of the post.
📖 Substitutions & Variations
Swap almond flour with oat flour for a nut-free option.
Use flax eggs to make this cake egg-free and vegan-friendly.
Try roasted beets instead of boiled for a deeper, caramelized sweetness.
Add cinnamon or espresso powder to enhance the chocolate flavor.
Top with dairy-free coconut whipped cream if you’re dairy sensitive.
Want to make it more bariatric-friendly? Reduce sugar and serve without frosting—it’s still delicious!
Step 1: Make a puree from the boiled beets and measure it into a cup.
Step 2: Combine all the dry ingredients in a bowl.
Step 3: Add eggs and liquid ingredients to the dry mixture.
Step 4: Mix everything together until just combined.
Step 5: Divide the batter into two small 8 to 9-inch molds and bake at 350°F for 35 minutes, then let cool completely.
Step 6: Add yogurt, sugar, and cocoa in a bowl.
Step 7: Whip the cream with yogurt, sugar, and cocoa powder until fluffy.
Step 8: Assemble the cake by layering the cream between the cake layers. Frost the cream over the top of the cake and finish with Christmas sprinkles.
💡Hint: Make sure the cake layers are fully cooled before adding frosting—otherwise, it’ll melt right off!
👩🍳 Expert Tips
For Smooth Beet Puree: Use a high-speed blender or food processor and blend with a splash of water.
Check Doneness Early: Start checking at 30 minutes to avoid overbaking—this cake is best ultra-moist!
Chill Before Slicing: Popping the frosted cake in the fridge for 30 minutes makes slicing cleaner and easier.
💭 FAQs
Can you taste beetroot in chocolate cake?
Not really! The beetroot blends into the rich cocoa flavor, adding moisture and natural sweetness without tasting earthy or "veggie-like."
What does beetroot do in baking?
Beetroot adds moisture, fiber, and a hint of natural sugar to baked goods. In this chocolate beetroot cake, it creates a tender crumb and deepens the chocolate flavor.
Is beet cake healthy?
Yes—especially when made with whole food ingredients like beets, almond flour, and yogurt. This chocolate beet cake is higher in fiber and nutrients than your typical dessert and can be adapted for low-sugar or bariatric diets.
Can I use canned beets instead of fresh beets?
You can! Just make sure they’re unsalted and drained well. However, fresh boiled or roasted beets give the best flavor and natural sweetness.
Can I make this beetroot chocolate cake ahead of time?
Absolutely. You can freeze the unfrosted layers for up to 3 months. Just thaw in the fridge before frosting and serving.
Did you make this recipe? Leave a review and a ⭐⭐⭐⭐⭐ rating below, or tag us in our Facebook Group! Alternatively, bookmark it in your browser or save to Pinterest.
This chocolate beetroot cake is a deliciously rich and moist treat, combining the earthy sweetness of beets with the deep flavor of chocolate. A healthier twist on your classic chocolate cake that’s sure to wow your taste buds!
Make a puree from the boiled beets and measure it into a cup.
Combine all the dry ingredients in a bowl.
Add eggs and liquid ingredients to the dry mixture.
Mix everything together until just combined.
Divide the batter into two small 8-9 inch molds and bake at 350°F for 35 minutes, then let cool completely.
Add yogurt, sugar, and cocoa in a bowl.
Whip the cream with yogurt, sugar, and cocoa powder until fluffy.
Assemble the cake by layering the cream between the cake layers. Frost the cream over the top of the cake and finish with Christmas sprinkles.
Notes
Blend Beets Smoothly: Puree the boiled beets thoroughly to avoid chunks and ensure a consistent batter.Measure the Flour Correctly: Spoon the flour into the measuring cup and level it off to avoid over-packing, which can make the cake dense.Taste the Frosting: Adjust the cocoa and sugar in the cream frosting to match your preferred level of sweetness and chocolate intensity.Let it Cool Completely: Ensure the cake is fully cooled before frosting to prevent the cream from melting.
This Christmas Charcuterie Board is just what you need to make your celebration extra special! It’s a simple yet beautiful way to bring together all your favorite cheeses, meats, fruits, and crunchy treats.
Whether you're hosting a family gathering or a festive party, this board is sure to impress your guests. Plus, it’s easy to customize with your favorite flavors! Get ready to create a fun and delicious centerpiece everyone will enjoy!
[feast_advanced_jump_to]
💖 Why This Recipe Works
It’s Festive and Fun: The colorful mix of ingredients makes it perfect for holiday gatherings.
Easy to Customize: You can mix and match your favorite cheeses, meats, and fruits to suit your taste.
A Showstopper on the Table: It looks fancy but is super simple to put together—your guests will love it!
⭐ Star Ingredients
Olives: Add a salty, savory bite that pairs well with the cheeses and meats.
Toasted Almonds: Bring a crunchy texture and nutty flavor to balance the board.
Strawberries: Provide a sweet and juicy freshness that contrasts the savory items.
Raspberries: Add a pop of vibrant color and tart sweetness.
Prosciutto: Offers a delicate, salty flavor that melts in your mouth.
Slices of Thin Salami (for roses): Create a decorative and flavorful addition with a rich, meaty taste.
Crackers: Serve as the perfect base for stacking cheeses and spreads.
Spicy Salami Nuggets: Add a bold, zesty kick to the mix.
Honey Goat Cheese: Brings a creamy, tangy, and slightly sweet element to the board.
Smoked Gouda: Offers a rich, smoky flavor that complements both savory and sweet items.
Cheddar Cheese: Adds a sharp, tangy flavor that’s a crowd-pleaser.
Brie: Creamy and mild, it’s perfect for pairing with fruits or crackers.
Pepperoni: A classic cured meat that adds a spicy, robust taste.
Mini Cucumber: Brings a refreshing crunch and a festive green touch.
Dried Fruit: Adds sweetness and chewy texture to balance the salty and savory flavors.
Rosemary (garnish): Provides a fragrant, festive finish that ties the board together.
For the complete list of ingredients with measurements and instructions, please see the recipe card at the bottom of the post.
📖 Substitutions & Variations
For my little snacker – My family loves a good snack board, so I swap fancy meats for deli slices, add cheese cubes, pretzels, and a few fruit gummies to keep it fun!
Sweet tooth takeover – Let’s be real, I’m here for the chocolate! I love swapping in caramel popcorn, holiday cookies, and festive treats to make it a dessert board dream.
Mediterranean twist – I can never say no to hummus, so I load up my board with pita chips, marinated artichokes, and sun-dried tomatoes for a bold, flavorful spread!
🔪How To Make A Christmas Charcuterie Board
Step 1: Slice the cheddar into long, thin right triangles. This will make it easier to arrange on the board later.
Step 2: Using the tip of a paring knife, cut zigzag patterns into the cucumber.
Step 3: Slice off the top of the Gouda wheel about ¼-inch thick. Use a cookie cutter to cut a tree shape out of the center of this slice.
Step 4: Add a dollop of jam to the center of the Gouda wheel. Carefully replace the cut-out slice on top to complete the design.
Step 5: Take slices of salami and fold each one over the rim of a shot glass, overlapping each slice halfway around the glass.
Step 6: After arranging 8-10 slices of salami, flip the shot glass over and gently pull it off. This will reveal a beautiful salami flower.
Step 7: Begin assembling the board by placing the cheeses first. Add crackers and small cups filled with nuts and olives around them.
Step 8: Cut the strawberries in half and place them on the board. Add other fruits like berries, vegetables like cucumber, a bowl of dried fruit, and begin adding the meats.
Step 9: Take a moment to check your arrangement. Ensure that similar ingredients aren’t touching to create visual variety. Adjust as needed.
Step 10: Add sprigs of rosemary for garnish to give it a festive feel. Serve with Christmas wooden skewers.
👩🍳 Expert Tips
Pre-Cut Cheese: Pre-slice hard cheeses like cheddar or gouda for easy serving—no one wants to struggle with a knife mid-party!
Layer for Depth: Stack some items, like crackers or dried fruit, at different heights to make the board look fuller and more inviting.
Pop of Sweetness: Drizzle a little honey over the goat cheese or Brie right before serving for a touch of indulgent sweetness.
💭 FAQs
Can You Make A Charcuterie Board The Night Before?
Yes, you can prepare a charcuterie board the night before! Simply assemble it, wrap it tightly in plastic wrap, and refrigerate overnight. Just be sure to add fresh ingredients like fruits or herbs right before serving to keep them looking their best.
Can I Make This Charcuterie Board For A Bridal Shower?
Yes, you can absolutely make this Christmas Charcuterie Board for a bridal shower! Simply swap out the Christmas-themed items for more neutral or pastel-colored decorations to fit a bridal vibe. Opt for lighter meats like prosciutto, turkey, or chicken for an elegant touch, and add sweet treats like chocolates, fruit tarts, or macaroons to make it more bridal-themed.
A variety of cheeses, including soft, creamy ones and hard cheeses, will provide a nice balance and ensure there’s something for everyone to enjoy.
What Are Some Budget-Friendly Alternatives For Charcuterie Ingredients?
Opt for affordable cheeses like cheddar or mozzarella, and include seasonal fruits and homemade dips to keep costs down without sacrificing variety.
How Do I Serve Guests With Dietary Restrictions On A Charcuterie Board?
Include a variety of options such as gluten-free crackers, dairy-free cheeses, and plant-based meats to ensure all guests can enjoy the spread.
💖 Serving Suggestions
These are my drinks to serve with charcuterie:
Citrus Lemon Lime Lemonade: The zesty, refreshing flavors pair perfectly with the rich cheeses and savory meats.
Butterfly Pea Tea Lemonade: Its stunning color and floral notes add a fun, elegant touch to your festive spread.
Watermelon Juice: Sweet and hydrating, it’s a light, fruity option that complements the salty and savory bites.
Strawberry Mojito Mocktail: Minty and slightly sweet, this drink adds a fresh, vibrant twist to the board.
Did you make this recipe? Leave a review and a ⭐⭐⭐⭐⭐ rating below, or tag us in our Facebook Group! Alternatively, bookmark it in your browser or save to Pinterest.
This festive Christmas Charcuterie Board is a delightful mix of savory meats, creamy cheeses, fresh fruits, and crunchy treats, perfect for holiday gatherings or any special occasion!
Slice the cheddar into long, thin right triangles. This will make it easier to arrange on the board later.
Using the tip of a paring knife, cut zigzag patterns into the cucumber.
Slice off the top of the Gouda wheel about ¼-inch thick. Use a cookie cutter to cut a tree shape out of the center of this slice.
Add a dollop of jam to the center of the Gouda wheel. Carefully replace the cut-out slice on top to complete the design.
Take slices of salami and fold each one over the rim of a shot glass, overlapping each slice halfway around the glass.
After arranging 8-10 slices of salami, flip the shot glass over and gently pull it off. This will reveal a beautiful salami flower.
Begin assembling the board by placing the cheeses first. Add crackers and small cups filled with nuts and olives around them.
Cut the strawberries in half and place them on the board. Add other fruits like berries, vegetable like cucmber, a bowl of dried fruit, and begin adding the meats.
Take a moment to check your arrangement. Ensure that similar ingredients aren’t touching to create visual variety. Adjust as needed.
Add sprigs of rosemary for garnish to give it a festive feel. Serve with Christmas wooden skewers.
Notes
Pre-Cut Cheese: Pre-slice hard cheeses like cheddar or gouda for easy serving—no one wants to struggle with a knife mid-party!Layer for Depth: Stack some items, like crackers or dried fruit, at different heights to make the board look fuller and more inviting.Pop of Sweetness: Drizzle a little honey over the goat cheese or Brie right before serving for a touch of indulgent sweetness.
Looking for a fun and festive snack that’s perfect for the kids or even your Christmas office party? These Rudolph Nutella and Peanut Butter Celery Sticks are as cute as they are delicious! With their little pretzel antlers and cranberry noses, they’ll steal the show at any gathering—and they’re super easy to make. Let’s bring a little holiday magic to your table with these celery snacks.
[feast_advanced_jump_to]
💖 Why This Recipe Works
Easy and Fun to Make: Turning plain celery sticks into adorable snacks with peanut butter and fun toppings is a breeze! The kids can even help, making it a perfect activity for some festive family fun.
A Crunchy, Creamy Treat: The crisp celery pairs so perfectly with the smooth peanut butter for a snack that's satisfying and oh-so-yummy! Add a little Nutella for an extra festive flair.
Perfect for Parties or Snack Time: Whether you’re impressing guests at a Christmas party or just making snack time extra special, this super fun Rudolph celery sticks recipe will be a huge hit! They're cute, creative, and oh-so-delicious!
⭐ Star Ingredients
Celery: Crunchy and perfect for holding all the tasty toppings.
Fresh Cranberries: Festive little "noses" that add a pop of tartness.
Twist Pretzels: Rudolph’s antlers! Salty, crunchy, and oh-so-cute.
Peanut Butter: Creamy, nutty, and holds everything together like magic.
Nutella: A chocolatey twist that makes these extra indulgent.
Candy Eyes: The cutest finishing touch to bring Rudolph to life!
How To Make Rudolf Celery Snacks
Step 1: Cut celery 3-4 inches long. Fill some with peanut butter and some with Nutella.
Step 2: Break pretzels in half and place near the top of the celery to represent the antlers. Next Then add 2 eyes and a cranberry for the nose.
Step 3: Once the Rudolph celery snacks are ready, place them onto a plate or platter.
Step 4: Your Nutella and Peanut butter celery sticks are now ready to enjoy.
Tips And Tricks
Cut and dry celery sticks for a neat and sturdy base.
Use a piping bag or small spoon for smooth and precise spreading of Nutella or peanut butter.
Assemble just before serving to keep celery crisp and decorations fresh.
Substitutions
Rudolph with a Crunch: Swap peanut butter for almond butter and sprinkle on crushed granola for a nutty, crunchy twist.
Snowy Rudolph: Use white chocolate spread instead of Nutella and decorate with mini marshmallows for a wintery vibe.
Vegan Rudolph: Replace peanut butter with sunflower seed butter, use vegan chocolate spread, and swap candy eyes with raisins for an allergen-friendly version.
Variations
Mix-and-Match Celery Carrot Sticks: Alternate celery and carrot sticks on your platter for a colorful Rudolph snack board that kids and adults will love.
Savory Celery Snacks: Spread cream cheese on celery and carrot sticks instead of peanut butter or Nutella, then top with pretzel antlers, black olive slices for eyes, and a cherry tomato "nose" for a savory twist on this festive treat!
How Do I Store Peanut Butter Celery Snacks?
Store prepared sticks in an airtight container in the fridge for up to 2 days. For the freshest taste, add toppings just before serving.
FAQ'S
Is Celery And Peanut Butter Good For You?
Celery and peanut butter can be part of a balanced snack, offering crunch, protein, and healthy fats to keep you feeling satisfied.
Try thin slices of apple, cucumber, or even celery leaves for a creative antler substitute!
Can I prep The Celery Ahead Of Time?
Can I meal prep celery and peanut butter snacks? Yes! Prep the celery sticks ahead of time and store them in water to keep them crisp. Add peanut butter and toppings right before serving to keep them fresh.
Did you make this recipe? Leave a review and a ⭐⭐⭐⭐⭐ rating below, or tag us on our Facebook Page! Alternatively, bookmark it in your browser or save to Pinterest.
Rudolph Peanut Butter Celery Sticks are a fun and festive holiday snack, featuring crisp celery filled with smooth peanut butter and decorated to look like everyone's favorite reindeer.
Cut celery 3-4 inches long. Fill some with peanut butter and some with Nutella.
Break pretzels in half and place near the top of the celery to represent the antlers. Next Then add 2 eyes and a cranberry for the nose.
Once the rudolph celery snacks are ready place onto a plate or platter.
Your Nutella and Peanut butter celery sticks are now ready to enjoy.
Notes
Cut and dry celery sticks for a neat and sturdy base.Use a piping bag or small spoon for smooth and precise spreading of Nutella or peanut butter.Assemble just before serving to keep celery crisp and decorations fresh.
Looking for a sweet treat that’s easy to make and perfect for gifting? This Toasted Almond and Cranberry Bark is the answer! With crunchy toasted almonds, tart cranberries, and smooth chocolate, it’s the perfect balance of flavors. It’s a holiday favorite that’s as fun to make as it is to eat!
Perfectly Balanced Flavors: Crunchy almonds, tart cranberries, and smooth chocolate make each bite irresistible.
Easy and Fun to Make: Simple to prepare, this bark is a treat that’s perfect for gifting or sharing.
Holiday Favorite: A festive, delicious snack that’s sure to impress family and friends during the season!
⭐ Star Ingredients
Vanilla Almond Bark: Serves as the creamy, sweet base of the bark, binding all ingredients together in a smooth, luscious layer.
Dried Cranberries: Add a pop of tartness and a chewy texture, balancing the sweetness of the vanilla almond bark.
Sliced Almonds: Provide a satisfying crunch and a subtle nutty flavor, enhancing the bark with a delightful texture contrast.
Chocolate Almond Bark: Introduces a rich, chocolatey element, complementing the vanilla base and adding depth to the overall flavor profile.
For the complete list of ingredients with measurements and instructions, please see the recipe card at the bottom of the post.
📖 Substitutions & Variations
Nut-Free Crunch: Swap almonds for toasted pumpkin seeds or sunflower seeds—still crunchy, still delicious, but totally nut-free!
Fruity Twist: Not a cranberry fan? Try dried cherries, apricots, or even freeze-dried raspberries for a tangy-sweet swap.
Dairy-Free Drizzle: Use dairy-free chocolate or melt coconut butter for a creamy, plant-based alternative to the chocolate drizzle.
Spiced Up: Stir in a pinch of cinnamon, cardamom, or nutmeg to the melted bark for a cozy, spiced vibe.
Vegan Sweetness: Replace traditional almond bark with vegan-friendly white or dark chocolate, and if you want an extra drizzle, go for melted date syrup or agave.
🔪 How To Make Toasted Almond and Cranberry Bark
Step 1: Add the almonds to a skillet over medium heat. Spray lightly with oil and sauté the almonds, stirring frequently, until they are toasted just barely brown.
Step 2: In a microwave-safe bowl, melt the vanilla bark according to the instructions on the package.
Step 3: Prep a baking sheet or large cutting board with a large sheet of parchment paper. Spread the melted bark across the entire sheet of parchment. Make sure the melted bark is spread evenly for a consistent thickness.
Step 4: Before the bark hardens, sprinkle the dried cranberries and cooled almonds across the entire surface of the vanilla bark. Set aside to allow the bark to cool and harden. In another mixing bowl, melt the chocolate bark according to the instructions on the packaging.
Step 5: Once the chocolate has melted, let it cool for 3 minutes and then drizzle across the entire surface of the bark generously. I like to use a small whisk to drizzle the chocolate.
Step 6: Again, let the drizzle completely cool and harden. Gently break the bark into pieces ranging 3-5” in size. Enjoy immediately or wrap for gifting.
👩🍳 Expert Tips
Toast with Care: Toast the almonds over medium heat and stir constantly to avoid burning. They can go from perfectly toasted to burnt in seconds, so remove them from the skillet immediately once they're golden brown.
Balance the Toppings: Distribute cranberries and almonds evenly to ensure every piece of bark has a balanced mix of flavors and textures.
Work Quickly: Sprinkle the toppings and drizzle the chocolate while the base bark is still soft to ensure they adhere properly.
💭 FAQs
Can I use raw almonds instead of toasted ones?
Yes, you can use raw almonds, but toasting them enhances their flavor and adds a pleasant crunch. If you’re short on time, raw almonds can still work, but the overall taste may be less robust.
How do I prevent the bark from sticking to the parchment paper?
The parchment paper acts as a non-stick surface, so sticking shouldn’t be an issue. However, you can lightly spray the paper with non-stick cooking spray for added assurance.
How long does it take for the bark to harden?
The bark typically hardens within 1–2 hours at room temperature. To speed up the process, you can place it in the refrigerator for about 30 minutes.
Why is my bark crumbling when I break it?
This might happen if the bark layer is too thin. Ensure you spread a thick and even layer of the melted bark base before adding toppings.
How to store chocolate bark?
Store the bark in an airtight container at room temperature in a cool, dry place. It will stay fresh for up to 1–2 weeks. For a longer shelf life or warmer climates, keep the bark in the fridge in an airtight container. It will stay fresh for 2–3 weeks.
Can you freeze cranberry bark?
Yes, to freeze, layer pieces of bark between parchment paper in a freezer-safe container or bag. It can be frozen for up to 3 months. Thaw in the fridge or at room temperature before serving.
💖 Serving Suggestions
These are some great ways to serve toasted almond and cranberry bark:
Plated for Gatherings: Arrange the bark pieces on a decorative platter for parties, family gatherings, or festive occasions. Add a handful of dried cranberries or whole almonds around the platter for an elegant touch.
Paired with Beverages: Serve the bark alongside hot drinks like coffee, tea, or hot chocolate for a cozy treat. For a more festive pairing, offer it with mulled wine or eggnog.
As a Gift: Wrap the bark in clear cellophane bags tied with a ribbon or place it in a decorative tin or box. It's a thoughtful, homemade gift for holidays or special occasions.
Dessert Boards: Add the bark to a dessert charcuterie board along with other treats like cookies, truffles, and fresh fruits for a delightful spread.
Simple Snack: Serve it as a standalone sweet snack for guests or as a quick indulgence after meals.
Did you make this recipe? Leave a review and a ⭐⭐⭐⭐⭐ rating below, or tag us in our Facebook Group! Alternatively, bookmark it in your browser or save to Pinterest.
Toasted Almond and Cranberry Bark is a delicious, crunchy treat with a perfect blend of sweet, nutty, and fruity flavors, drizzled with rich chocolate.
Add the almonds to a skillet over medium heat. Spray lightly with oil and sauté the almonds, stirring frequently, until they are toasted just barely brown.
In a microwave-safe bowl, melt the vanilla bark according to the instructions on the package.
Prep a baking sheet or large cutting board with a large sheet of parchment paper. Spread the melted bark across the entire sheet of parchment. Make sure the melted bark is spread evenly for a consistent thickness.
Before the bark hardens, sprinkle the dried cranberries and cooled almonds across the entire surface of the vanilla bark. Set aside to allow the bark to cool and harden. In another mixing bowl, melt the chocolate bark according to the instructions on the packaging.
Once the chocolate has melted, let cool for 3 minutes and then drizzle across the entire surface of the bark generously. I like to use a small whisk to drizzle the chocolate.
Again, let the drizzle completely cool and harden. Gently break the bark into pieces ranging 3-5” in size. Enjoy immediately or wrap for gifting.
Notes
Toast with Care: Toast the almonds over medium heat and stir constantly to avoid burning. They can go from perfectly toasted to burnt in seconds, so remove them from the skillet immediately once they're golden brown.Balance the Toppings: Distribute cranberries and almonds evenly to ensure every piece of bark has a balanced mix of flavors and textures.Work Quickly: Sprinkle the toppings and drizzle the chocolate while the base bark is still soft to ensure they adhere properly.
Say hello to the ultimate homemade bagels with these Sourdough Bagels! Chewy, golden, and packed with that signature tangy flavor, they’re perfect for breakfast sandwiches, toasting with cream cheese, or snacking straight from the oven. A must-try for sourdough lovers!
[feast_advanced_jump_to]
💖 Why This Recipe Works
Deliciously Chewy: These homemade sourdough bagels have the perfect texture—golden on the outside and soft on the inside.
Signature Sourdough Flavor: The tangy, rich taste makes these a standout compared to regular bagels.
Versatile and Fun: Perfect for breakfast, snacks, or sandwiches, and customizable with your favorite toppings!
⭐ Star Ingredients
Active Sourdough Starter: Provides natural fermentation and a signature tangy flavor for sourdough bagels.
Water: Combines with the starter to create a smooth dough texture.
Honey (or Sugar): Adds a touch of sweetness to balance the sourdough tang.
Fine Sea Salt: Enhances the flavor and strengthens the dough structure.
Flour: Forms the base of the dough, providing structure and elasticity.
For the Water Bath
Water: Used for boiling the bagels to create their signature chewy texture.
Sugar: Helps develop a shiny, golden crust during baking.
For Toppings
Everything Bagel Seasoning: A savory mix of seeds and spices for classic sourdough bagels, or customize with your favorite toppings.
For the complete list of ingredients with measurements and instructions, please see the recipe card at the bottom of the post.
📖 Substitutions & Variations
Pumpkin Seeds: Another option is to top these bagels with crunchy pepitas or pumpkin seeds for added nutrition.
Toppings: I like to use the everything bagel seasoning on these bagels but you could easily use sesame seeds or poppy seeds as an alternative.
🔪How To Make Sourdough Bagels
Step 1: In the bowl of a stand mixer, mix the active sourdough starter, water, honey, and sea salt with a spatula.
Step 2: Add the flour and combine by hand until it forms a stiff dough. Attach the dough hook and knead on the lowest speed for 6-7 minutes (or knead by hand for 10 minutes).
Step 3: Place the dough in a greased bowl, cover with plastic wrap, and allow it to rest at room temperature overnight (8-12 hours).
Step 4: Divide the dough into 8 equal portions, shape each into a ball, and poke a hole in the center with your thumb.
Step 5: Gently stretch into a ring shape and place on a parchment-lined baking sheet. Cover with a towel and let them rise for 30-60 minutes until puffy.
Step 6: Preheat the oven to 425°F (218°C). Boil 6 cups of water with 1 tablespoon of sugar in a large pot. Boil the bagels for 2 minutes per side, 3-4 at a time.
Step 7: Use a mesh strainer to remove the bagels and let them rest on the parchment paper until cool enough to handle. After cooling, add optional seasoning to one side and return it to the parchment paper.
Step 8: Bake the bagels at 425°F (218°C) for 25-28 minutes or until they turn golden brown. Let it cool and then enjoy it with your favorite schmear!
👩🍳 Expert Tips
Use an Active Starter: Ensure your sourdough starter is bubbly and active before using it for the best rise and flavor.
Check Dough Consistency: The dough should be stiff but pliable; adjust with a small amount of flour or water if necessary.
Room Temperature Fermentation: Allow the dough to ferment in a warm spot to develop flavor, but avoid overheating, which may kill the starter.
Shape Consistently: Use a scale to divide the dough evenly for uniform bagels. Stretch the holes larger than expected, as they shrink during proofing and baking.
Avoid Overcrowding the Pot: Boil a few bagels at a time to ensure they cook evenly without sticking together.
💭 FAQs
How To Store Sourdough Bagels
Store Sourdough Bagels in an airtight container or bread bag at room temperature for up to 2 days. Refrigeration is not recommended, as this can make bagels dry and tough.
Can I Freeze Homemade Bagels?
Yes, slice the bagels and wrap each half in plastic wrap or foil. Place them in a freezer-safe bag or container for up to 3 months.
💖 Serving Suggestions
Here are some great ways to serve sourdough bagels:
Honey and Butter: Keep your sourdough bagels simple with a drizzle of honey and a pat of butter for a comforting treat.
Everything Bagel SeasoningOr Any Other Seasoning You Like
Instructions
In the bowl of a stand mixer, mix the active sourdough starter, water, honey, and sea salt with a spatula.
Add the flour and combine by hand until it forms a stiff dough. Attach the dough hook and knead on the lowest speed for 6-7 minutes (or knead by hand for 10 minutes).
Place the dough in a greased bowl, cover with plastic wrap, and allow it to rest at room temperature overnight (8-12 hours).
Divide the dough into 8 equal portions, shape each into a ball, and poke a hole in the center with your thumb.
Gently stretch into a ring shape and place on a parchment-lined baking sheet. Cover with a towel and let them rise for 30-60 minutes until puffy.
Preheat the oven to 425°F (218°C). Boil 6 cups of water with 1 tablespoon of sugar in a large pot. Boil the bagels for 2 minutes per side, 3-4 at a time.
Use a mesh strainer to remove the bagels and let them rest on the parchment paper until cool enough to handle. After cooling, add optional seasoning to one side and return it to the parchment paper.
Bake the bagels at 425°F (218°C) for 25-28 minutes or until they turn golden brown. Let it cool and then enjoy it with your favorite schmear!
Notes
Check Dough Consistency: The dough should be stiff but pliable; adjust with a small amount of flour or water if necessary.Room Temperature Fermentation: Allow the dough to ferment in a warm spot to develop flavor, but avoid overheating, which may kill the starter.Shape Consistently: Use a scale to divide the dough evenly for uniform bagels. Stretch the holes larger than expected, as they shrink during proofing and baking.Avoid Overcrowding the Pot: Boil a few bagels at a time to ensure they cook evenly without sticking together.
Looking for a fun and festive way to brighten up your holiday table? This Poinsettia Sourdough Loaf is the perfect addition! It’s not just a loaf of bread—it’s a beautiful, delicious centerpiece that’ll have everyone oohing and aahing. The best part? It’s as tasty as it is stunning, with that classic sourdough tang and a soft, fluffy texture. Perfect for holiday dinners or gift-giving!
[feast_advanced_jump_to]
💖 Why This Recipe Works
Show-Stopping Design: The poinsettia pattern makes this loaf a gorgeous holiday centerpiece.
Classic Sourdough Flavor: That tangy, rich taste pairs perfectly with the soft, fluffy texture.
Versatile and Gift-Worthy: Perfect for holiday dinners, sharing with loved ones, or gifting to friends and family!
⭐ Star Ingredients
Warm Water: Activates the yeast and helps combine the dough ingredients smoothly.
Sourdough Starter: Adds a tangy flavor and helps with the loaf’s rise and texture.
Salt: Enhances the flavor and balances the tanginess of the sourdough.
Instant Yeast: Provides an extra boost to ensure a reliable rise.
Oil: Adds moisture and helps create a soft, tender crumb.
All-Purpose Flour: Forms the base of the dough, giving structure and elasticity.
Food Color Gel (Red, Green, Yellow): Adds festive colors to decorate the loaf with a poinsettia design.
White Food Coloring: Enhances the contrast in decorative details for the loaf.
For the complete list of ingredients with measurements and instructions, please see the recipe card at the bottom of the post.
📖 Substitutions & Variations
Sweet Sourdough: Add dried fruits like cranberries, raisins, or apricots, and a hint of cinnamon for a sweet take on the classic loaf.
Herb Sourdough: Add chopped rosemary, thyme, or basil to the dough for a fragrant, savory twist.
Cheese Sourdough: Fold in shredded cheddar, Parmesan, or Gruyère for a cheesy loaf with extra richness.
Olive Sourdough: Mix in chopped olives and a touch of olive oil for a Mediterranean-inspired variation.
🔪How To Make A Poinsettia Sourdough Loaf
Step 1: In a large mixing bowl, combine warm water, sourdough starter, sugar, salt, yeast, and oil. Stir until sugar and salt dissolve.
Step 2: Gradually add one cup of flour at a time, stirring until the dough becomes sticky and starts to come together.
Step 3: Cover the bowl with a kitchen towel or plastic wrap. Let the dough rise in a warm place until doubled in size (about 1-2 hours). Sprinkle a little flour on a flat surface and gently release the dough from the bowl without deflating it
Step 4: Preheat the oven to 350°F (175°C). Transfer the dough to a sheet of parchment paper. If it deflates, allow it to rise again until it doubles in size.
Step 5: Mix food gel colors with white food coloring to brighten and adjust the shades. For shadowing, mix red, green, and yellow to create grey. Begin painting your loaf directly on the parchment paper.
Step 6: Finish painting the dough with various colors, adding details to create a poinsettia design.
Step 7: Use a sharp knife to score the dough if desired. Preheat the Dutch oven for 5 minutes, then place the parchment and loaf into the preheated Dutch oven.
Step 8: Bake for 30 minutes with the lid on. Remove the lid and bake for 10 more minutes or until golden brown. Cool on a wire rack before slicing and serving.
👩🍳 Expert Tips
Use Room Temperature Starter: Let your sourdough starter come to room temperature for better rise and flavor.
Don’t Skip the Rest Time – Be patient and let your dough rise fully for a light and fluffy loaf.
Add More Color for Boldness – Feel free to mix more colors if you want a brighter, eye-catching design.
Score for a Crispy Crust – Scoring the dough helps with oven spring and gives your loaf that beautiful bakery-style look.
💭 FAQs
How Do I Ensure The Bread Has A Good Rise?
Use an active sourdough starter, allow enough time for proofing, and keep the dough in a warm, draft-free area.
How Do I Prevent My Bread From Drying Out?
Bake with steam by placing a pan of water in the oven or spraying water inside before baking.
Can I Freeze The Dough Before Baking?
Yes, freeze the shaped dough before the final proof. Thaw in the fridge overnight, then let it come to room temperature and rise before baking.
How Do I Store Sourdough Bread?
Store sourdough bread in a bread box or a paper bag at room temperature for up to 2-3 days to maintain its crusty exterior. Avoid refrigerating as it can dry out the bread and alter its texture.
💖 Serving Suggestions
Here are some great ways to serve Poinsettia Sourdough Loaf:
Butter and Jam: A classic combination that highlights sourdough’s tangy flavor with sweetness and creaminess.
Cheese Board: Pair with a variety of cheeses like brie, cheddar, or goat cheese for a delicious snack or appetizer.
Purple Cabbage Soup and stews: Perfect for dipping into hearty options like tomato soup, beef stew, or creamy potato leek soup.
Vegan avocado toast: Top with mashed avocado, salt, pepper, and a drizzle of olive oil for a simple, satisfying meal.
Did you make this recipe? Leave a review and a ⭐⭐⭐⭐⭐ rating below, or tag us in our Facebook Group! Alternatively, bookmark it in your browser or save to Pinterest.
This Poinsettia Sourdough Loaf is not only a showstopper but also packed with delicious sourdough flavor! Perfect for the holidays, it’s a festive treat that’ll wow your guests and family alike.
In a large mixing bowl, combine warm water, sourdough starter, sugar, salt, yeast, and oil. Stir until sugar and salt dissolve.
Gradually add one cup of flour at a time, stirring until the dough becomes sticky and starts to come together.
Cover the bowl with a kitchen towel or plastic wrap. Let the dough rise in a warm place until doubled in size (about 1-2 hours). Sprinkle a little flour on a flat surface and gently release the dough from the bowl without deflating it.
Preheat the oven to 350°F (175°C). Transfer the dough to a sheet of parchment paper. If it deflates, allow it to rise again until doubles in size.
Mix food gel colors with white food coloring to brighten and adjust the shades. For shadowing, mix red, green, and yellow to create grey. Begin painting your loaf directly on the parchment paper.
Finish painting the dough with various colors, adding details to create a poinsettia design.
Use a sharp knife to score the dough if desired. Preheat the Dutch oven for 5 minutes, then place the parchment and loaf into the preheated Dutch oven.
Bake for 30 minutes with the lid on. Remove the lid and bake for 10 more minutes or until golden brown. Cool on a wire rack before slicing and serving.
Notes
Use Room Temperature Starter: Let your sourdough starter come to room temperature for better rise and flavor.Don’t Skip the Rest Time – Be patient and let your dough rise fully for a light and fluffy loaf.Add More Color for Boldness – Feel free to mix more colors if you want a brighter, eye-catching design.Score for a Crispy Crust – Scoring the dough helps with oven spring and gives your loaf that beautiful bakery-style look.Score for a Crispy Crust – Scoring the dough helps with oven spring and gives your loaf that beautiful bakery-style look.
These Crispy Roasted Sweet Potatoes are about to become your new favorite side dish! Sweet, smoky, and perfectly crispy, each bite is packed with flavor that’ll have everyone coming back for seconds. With just a handful of ingredients, this Kumara dish is easy enough for weeknights but delicious enough to steal the show at any meal. You're going to love this Roasted Sweet Potato Recipe!
[feast_advanced_jump_to]
Why This Recipe Works
These little gems are your kitchen’s versatile best friends—perfect for jazzing up everything from morning breakfast hashes to elegant dinner sides.
They’re a cinch to make; just chop, season, and pop them in the oven.
Whether you’re feeding little ones or impressing grown-up guests, these crispy sweet potato cubes are sure to be a crowd-pleaser!
Here's why these ingredients make our crispy roasted sweet potatoes with bacon so irresistible:
Sweet Potatoes: Roasting these brings out a caramelized sweetness with crispy edges and soft centers—a family favorite!
Bacon: Adds a smoky, savory kick that makes everyone excited to dig in.
Butter: Butter gives extra richness and flavor to the dish.
Salt, Pepper, and Brown Sugar: Just the right amount of seasoning and a touch of brown sugar create a perfect balance of sweet and savory in every bite.
Each ingredient comes together to make this dish a comforting, crowd-pleasing side that's both easy and delicious!
For the complete list of ingredients with measurements and instructions, please see the recipe card at the bottom of the post.
📖 Substitutions & Variations
Here are some easy ways to switch up your roasted sweet potato cubes:
Honey Glazed: Drizzle with honey in the last 10 minutes of roasting for a caramelized sweetness.
Spicy Kick: Add a sprinkle of cayenne or smoked paprika for a bit of heat.
Herb-Infused: Toss in fresh rosemary or thyme for an earthy, aromatic touch.
🔪 How To Make Crispy Roasted Sweet Potatoes
Step One: Peel your sweet potato and dice into 1-inch cubes. This size is perfect for even roasting, giving you that crispy outside and tender inside.
Step Two: In a large bowl, mix the cubed sweet potatoes with melted butter, salt, pepper, and brown sugar. Give everything a good stir so each piece is nicely coated in that buttery, sweet goodness.
Step Three: Lay the sweet potatoes out in an even layer on a baking sheet. Pop them in the oven at 400 degrees and let them roast for 20 minutes to start crisping up.
Step Four: Take the sweet potatoes out of the oven, give them a little stir, and sprinkle the chopped bacon on top. Put the tray back in the oven for another 10 minutes to let everything get golden and crispy. Serve warm and enjoy every savory, sweet bite!
👩🍳 Expert Tips
To get perfectly crispy roasted sweet potatoes, try these simple tips:
Use High Heat: Roast at 400°F or higher to help the potatoes caramelize and develop a nice crispy texture.
Dry the Potatoes Well: After peeling and cutting, pat the sweet potatoes dry to remove any excess moisture—this helps them crisp up.
Flip Halfway Through: Stir or flip the potatoes about halfway through cooking to brown them evenly on all sides.
💭 FAQs
Is Sweet Potato And Kumara The Same Thing?
Yep, sweet potato and kumara are pretty much the same thing! “Kumara” is what we call it here in New Zealand, while “sweet potato” is the name most people in the U.S. use. There are a few different varieties out there, but they all bring that tasty sweetness and gorgeous color we love. So go ahead and use them interchangeably—no matter what you call it, it’s going to be delicious!
Is It Best To Parboil Sweet Potatoes Before Roasting?
No. There’s no need to parboil sweet potatoes before roasting! Sweet potatoes cook up beautifully and get perfectly crispy just by roasting them directly. Skipping the parboiling step saves time and still gives you that caramelized, tender goodness we all love!
Are The Cooking Times The Same For Roasted Purple Sweet Potatoes?
Not exactly! Purple sweet potatoes are denser than regular sweet potatoes, so they often need a bit more time to roast. You might need to add an extra 5-10 minutes to ensure they’re tender all the way through. Just keep an eye on them and check for doneness with a fork.
How Do I Convert This To A Roasted Sweet Potato Cubes Air Fryer Recipe?
To make these in the air fryer, cook the seasoned sweet potato cubes at 400°F for 15-20 minutes, shaking halfway through for even crispiness.
Can I Add Baking Soda To My Sweet Potato Cubes?
It’s best not to add baking soda to your sweet potato cubes. Baking soda can break down the surface too much, making them mushy instead of crispy. Just stick with oil and seasonings for the perfect roasted texture!
Best Way To Store Sweet Potato Cubes
The best way to store sweet potato cubes is to keep them in an airtight container in the fridge. If they’re already cooked, they’ll stay fresh for up to 4 days. For raw cubes, store them submerged in water to prevent browning, and use within 2-3 days for the best texture. Just make sure to drain and pat dry before cooking!
Do I Have To Use Bacon?
No, you don’t have to use bacon! These crispy roasted sweet potatoes are tasty on their own, but you can skip the bacon if you prefer a plain roasted sweet potatoes recipe. They’ll still turn out delicious and flavorful!
How Long To Roast Cubed Sweet Potatoes?
For this recipe, roast your cubed sweet potatoes in the oven for 30 minutes to get them perfectly crispy and tender. If roasting purple sweet potato, keep in mind they may need a bit more time, as they tend to be denser—just check for doneness and adjust as needed!
🧂Serving Suggestions
Here are some sides to serve with Crispy Roasted Sweet Potatoes:
This sweet potato side dish is such a winner because it goes with almost anything! We love serving this recipe with Jalapeno coleslaw.
If you’re in the mood for something cozy, these roasted sweet potatoes are perfect next to a warm bowl of White Chicken Chilior a big pot of Chicken Noodle Soup. It’s comfort food magic!
Did you make this recipe? Leave a review and a ⭐⭐⭐⭐⭐ rating below, or tag us in our Facebook Group! Alternatively, bookmark it in your browser or save to Pinterest.
These Crispy Roasted Sweet Potatoes are about to become your new favorite side dish! Sweet, smoky, and perfectly crispy, each bite is packed with flavor that’ll have everyone coming back for seconds.
Peel your sweet potato and dice into 1-inch cubes. This size is perfect for even roasting, giving you that crispy outside and tender inside.
In a large bowl, mix the cubed sweet potatoes with melted butter, salt, pepper, and brown sugar.
Give everything a good stir so each piece is nicely coated in that buttery, sweet goodness.
Lay the sweet potatoes out in an even layer on a baking sheet.
Pop them in the oven at 400 degrees and let them roast for 20 minutes to start crisping up.
Take the sweet potatoes out of the oven, give them a little stir, and sprinkle the chopped bacon on top.
Put the tray back in the oven for another 10 minutes to let everything get golden and crispy.
Serve warm and enjoy every savory, sweet bite!
Notes
Use High Heat: Roast at 400°F or higher to help the potatoes caramelize and develop a nice crispy texture.Dry the Potatoes Well: After peeling and cutting, pat the sweet potatoes dry to remove any excess moisture—this helps them crisp up.Flip Halfway Through: Stir or flip the potatoes about halfway through cooking to brown them evenly on all sides.
Made with tangy Granny Smith apples, molasses, brown sugar, and fall spices, this Instant Pot Apple Butter recipe is sweet, creamy and delicious! It's perfect for toast, pancakes, waffles, bagels, and more. Making pressure cooker apple butter has never been easier!
💖 Why This Recipe Works
It's Way Cheaper: This apple mixture is cheaper homemade and definitely worth it if you want to save some moolah.
Tastes Better: With fresh ingredients and spices, homemade apple butter is packed with sweet, creamy flavor that just can't be beat with any store bought jar.
Quick: Using my Instant Pot, I can have delicious apple butter in less than an hour! Recipes like this used to take hours, and now I can quickly whip it up.
⭐ Star Ingredients
For creamy apple butter, you'll need a variety of spices, sugars, and of course apples.
Apples: Sweet and tart apples provide the base and natural sweetness for the apple butter, lending a smooth and fruity flavor that is rich and satisfying.
Molasses: Adds a deep and robust sweetness to the apple butter, enhancing its caramel-like taste and giving it a unique depth of flavor.
Sugar: Helps to sweeten the apple butter, balancing the tartness of the apples and creating a deliciously sweet spread.
Vanilla: Infuses the apple butter with a warm and aromatic flavor, adding a subtle richness that complements the natural sweetness of the apples.
Lemon juice: Brings a touch of acidity to the apple butter, balancing the sweetness and brightening the overall flavor profile.
Spices (Cinnamon, Nutmeg, Allspice): Introduce a warm and comforting aroma to the apple butter, creating a delightful blend of flavors that enhance and complement the natural sweetness of the apples.
For the complete list of ingredients with measurements and instructions, please see the recipe card at the bottom of the post.
📖 Substitutions & Variations
No molasses? Swap it for maple syrup or honey for a different kind of sweetness.
Want it extra cozy? Add a pinch of cloves or ginger for even more fall spice magic.
Less sugar? Use naturally sweet apples like Fuji or Gala and skip the extra sweeteners.
Smooth or chunky? Blend it silky smooth or leave it a little rustic for some texture.
Citrus twist? Try orange zest instead of lemon juice for a bright, unexpected flavor.
🔪 How to Make Instant Pot Apple Butter
Step 1: Peel all of your apples. Then, cut the apples into quarters or slices and remove the core. Place cut apples in your Instant Pot. Then, add all the rest of the ingredients into the Instant Pot. Mix to incorporate everything.
Step 2: Place the lid on your Instant Pot, put the pressure valve into the sealing position, and hit your manual or pressure cook button. Set the time for 20 minutes. Once the time is up and your Instant Pot beeps, let the Instant Pot completely naturally release the pressure.
Step 3: Next, pour everything from your Instant Pot into the blender and blend it until smooth. Place your apple butter in mason jars.
Step 4: Place your apple butter in mason jars. Your Apple butter is now ready to serve.
👩🍳 Expert Tips
Choose the Right Apples: Use a mix of sweet and tart apples, like Granny Smith and Honeycrisp, for a balanced flavor.
Adjust Sweetness: Taste your apple butter after blending and add more sugar or spices if needed, depending on your preferences.
Cool Before Storing: Let the apple butter cool completely before transferring to jars to avoid condensation that can affect shelf life.
💭 FAQs
Will Apple Butter Thicken as It Cools?
Apple butter thickens as it cools. If you're making apple butter and it looks runny, don’t worry because it will thicken. If you find it is still too thin after it has cooled, you can simmer it on the stove until it reaches your desired thickness.
What if My Apple Butter Is Too Thick?
If the apple butter is too thick for your liking, you can thin it out by adding small amounts of applesauce to it until it reaches your desired consistency.
Can I Blend My Apple Butter?
Yes, if your apple butter is too thick, simply use an immersion blender for a few seconds to make the apple butter smooth. The finished apple butter will be smooth and thick.
💖 Serving Suggestions
Wondering how to use apple butter? Here are some great ideas!
Spread on Toast or Bread: Use apple butter as a spread on toast, bread, bagels, or Zucchini Chocolate Chip Muffins for a flavorful and comforting breakfast or snack.
Mix into Yogurt or oatmeal: Stir apple butter into yogurt or Chocolate Overnight Oats to add sweetness and flavor. It provides a delicious twist to your morning routine.
Top Pancakes or Waffles: Drizzle apple butter over Buckwheat Pancakes or waffles instead of traditional syrup for a unique and tasty topping.
Pair with Cheese: Serve apple butter alongside cheese as a condiment or dip. It pairs particularly well with sharp cheddar, brie, or goat cheese. You can also dip sliced apples into your apple butter.
Use in Baking: Incorporate apple butter into baked goods such as muffins, cakes, Crispy Peanut Butter Cookies, and bars to add moisture, sweetness, and flavor.
This Instant Pot Apple Butter is rich, spiced, and incredibly easy to make! With just a handful of ingredients, you can enjoy smooth, spreadable apple goodness in a fraction of the time. Perfect for toast, biscuits, or as a fall treat!
Peel and quarter the apple, remove apple core. Place in the instant pot
Add all other ingredients and mix.
Cook on high pressure for 20 minutes and let naturally release pressure.
Open and stir. Pour into a blender and blend until smooth.
Place in jars and enjoy
Notes
Choose the Right Apples: Use a mix of sweet and tart apples, like Granny Smith and Honeycrisp, for a balanced flavor.Adjust Sweetness: Taste your apple butter after blending and add more sugar or spices if needed, depending on your preferences.Cool Before Storing: Let the apple butter cool completely before transferring to jars to avoid condensation that can affect shelf life.
Did you make this recipe? Leave a review and a ⭐⭐⭐⭐⭐ rating below, or tag us in our Facebook Group! Alternatively, bookmark it in your browser or save to Pinterest.
More Apple Recipes
In the mood for recipes with a sweet apple flavor? Check out some of my favorites, below. You could also use your apple butter with some of these recipes as well.
This Sheet Pan BBQ Chicken is your weeknight dinner hero—juicy chicken, caramelized veggies, and sweet pineapple all roasted together on one pan. Less mess, more flavor, and no stress.
Sheet pan meals are basically my love language. Toss everything on a tray, pop it in the oven, and out comes dinner—with barely any cleanup. But this one's extra special. It’s a sweet and smoky mix of barbecue chicken, tender broccoli, caramelized sweet potatoes, and juicy pineapple.
I first whipped this up on a busy night with random leftovers in the fridge—and it turned into a go-to meal that my whole family requests on repeat. It’s colorful, wholesome, and naturally gluten-free too.
One pan wonder: Sheet pan meals, like this BBQ Chicken Sheet Pan recipe, are all about simplicity and convenience. Balanced flavor: Sweet, smoky, tangy, and savory in every bite. Kid-friendly + meal prep friendly: Works great for leftovers and lunchboxes too.
⭐ Star Ingredients
Chicken Breast: Lean and quick-cooking. Pound slightly for even roasting and juicy results.
Sweet Potatoes: Naturally sweet and hearty. Dice small so they cook through with the chicken.
Broccoli Florets: Roast up tender-crisp with nutty flavor. Keep florets large to avoid burning.
BBQ Sauce: The star of the show. Use your favorite bold-flavored sauce and brush generously.
For the complete list of ingredients with measurements and instructions, please see the recipe card at the bottom of the post.
📖 Substitutions & Variations
Use chicken thighs for a juicier bite.
Swap veggies: Try cauliflower, green beans, bell peppers, or Brussels sprouts.
Fruit twist: Mango or apple slices work instead of pineapple.
Spicy version: Add jalapeños or cayenne and use spicy BBQ sauce.
Asian fusion: Use hoisin or teriyaki sauce and add sesame seeds and snap peas.
Herb lovers: Add thyme or rosemary for an aromatic finish.
Step 1: Preheat the oven to 400 degrees F. Line a baking pan with foil and set aside. Salt and pepper both sides of the chicken breast and place them in the middle of the baking sheet. Liberally brush BBQ on both sides of the chicken.
Step 2: Chop the broccoli (leave in large pieces), large sweet potatoes, and onion. In a medium-sized bowl, add sweet potato, pineapple, and onions. Toss with 1 tablespoon of olive oil, salt, and pepper. Place on one side of the baking sheet. In that same bowl, add the broccoli. Toss with the remaining 1 tablespoon of olive oil, salt, and pepper.
Step 3: Add broccoli to the other side of the baking sheet. Bake for 25 minutes. Chicken will be done when it reaches 165 degrees F. Remove the chicken and sweet potatoes from the baking sheet and set aside. Set the oven to broil.
Step 4: Spread out the broccoli on the baking sheet. Using the bottom of a glass, press each floret to flatten. Drizzle with lemon juice and place the Parmesan cheese on top. Broil for about a minute until the cheese has melted and begins to crisp. Shred the chicken, plate your dish, and enjoy!
💡Hint: Preheat your sheet pan while the oven warms—this helps the veggies caramelize and roast more evenly.
👩🍳 Expert Tips
Dice evenly: Keep sweet potatoes and broccoli similar in size so they roast evenly.
Check doneness early: All ovens vary—start checking chicken at 20 minutes to avoid drying it out.
Meal prep win: Double the batch and portion into meal prep containers for easy lunches all week.
💭 FAQs
Can I Use Different Vegetables In This Recipe?
Yes! Bell peppers, green beans, Brussels sprouts, or carrots all work well. Just cut to similar size for even cooking.
How Do I Prevent Vegetables Getting Too Soft?
Cut veggies into large chunks and roast broccoli separately near the end, or broil briefly at the end for crispier texture.
How Do I Know When The Chicken Is Fully Cooked?
The chicken is fully cooked when it reaches an internal temperature of 165°F (75°C). Use a meat thermometer to check for doneness.
Can I freeze BBQ chicken and veggies?
Yes. Freeze chicken separately in airtight containers for up to 3 months. Veggies can be frozen but may soften slightly when reheated.
How To Store BBQ Chicken and Vegetables
Let everything cool completely. Store chicken and veggies in separate airtight containers in the fridge for up to 3–4 days.
Did you make this recipe? Leave a review and a ⭐⭐⭐⭐⭐ rating below, or tag us in our Facebook Group! Alternatively, bookmark it in your browser or save to Pinterest.
Get ready for a fuss-free, flavor-packed meal with this BBQ Chicken sheet pan recipe! Juicy, tender chicken smothered in tangy BBQ sauce and roasted to perfection.
Preheat the oven to 400 degrees F. Line a baking pan with foil and set aside.
Chop the broccoli (leave in large pieces), sweet potato and onion.
Salt and pepper both sides of the chicken breast and place them in the middle of the baking sheet. Liberally brush BBQ on both sides of the chicken
In a medium sized bowl, add in sweet potato, pineapple and onions. Toss with 1 tablespoon of olive oil, salt and pepper. Place on one side of the baking sheet.
In that same bowl add the broccoli. Toss with the remaining 1 tablespoon of olive oil, salt and pepper. Add broccoli to the other side of the baking sheet.
Bake for 25 minutes. Chicken will be done when it reaches 165 degrees F.**
Remove the chicken and sweet potatoes from the baking sheet and set aside. Set the oven to broil.
Spread out the broccoli on the baking sheet. Using the bottom of a glass press each floret to flatten. Drizzle with lemon juice and place parmesan cheese on top.
Broil for about a minute until the cheese has melted and begins to crisp.
Shred the chicken, plate your dish and enjoy!
Notes
Evenly Dice Vegetables: Ensure that the sweet potatoes and broccoli florets are cut to a similar size for even cooking and to prevent burning.Preheat the Sheet Pan: Place the sheet pan in the oven while it preheats. Adding the ingredients to a hot pan helps them cook more evenly and develop a better caramelization.
These Holiday Spiced Cookies are the perfect way to celebrate holiday season. With the perfect chewy texture and a subtle cinnamon and ginger flavor, these cookies are sure to be a total favorite in your household. Not only do they taste amazing, but can also be made in advance and stored for later, if needed.
[feast_advanced_jump_to]
💖 Why This Recipe Works
Easy Recipe: These holiday spiced cookies are simple and easy to make.
Delicious: They come together super quick, taste absolutely delicious and instantly transport me to the land of warm spices and fall flavors.
⭐ Star Ingredients
You'll need just a few simple ingredients to make these holiday-spiced cookies.
Unsalted Butter (Cold Sliced): I've used unsalted butter to make these spice cookies, but if you want, you can also choose to use salted butter instead.
White Sugar and Light Brown Sugar: Sweeten the cookies, with brown sugar adding a hint of molasses flavor and extra moisture.
Flour and Cake Flour: Form the structure of the cookies, with cake flour ensuring a tender, cake-like texture.
Ground Cinnamon, Nutmeg, Allspice, And Ginger: Infuse the cookies with a warm, aromatic flavor, perfect for a spiced cookie.
For the complete list of ingredients with measurements and instructions, please see the recipe card at the bottom of the post.
📖 Substitutions & Variations
In addition to these ingredients, you can also throw in some add-ons to bring in some variation to these holiday-spiced cookies.
Pumpkin Spice: Another great idea is to add some pumpkin spice filling to the flour mixture to make pumpkin spice cookies.
Chocolate Chips: You can add some chocolate chips to the flour baking soda salt mixture to bring some chocolatey goodness into the spice cookies.
🔪 How To Make Holiday Spiced Cookies?
Got all your ingredients ready? Here's the process you'll need to follow to make these holiday-spiced cookies.
Step One: Preheat the oven to 410°F. Line a baking sheet with parchment paper or a baking mat. In a stand mixer, cream butter and sugars on medium-high for 2-3 minutes. Add eggs and vanilla, mixing until combined. In a bowl, whisk flour, cake flour, ginger spice, nutmeg, allspice, cinnamon, baking soda, cornstarch, and salt. Mix dry ingredients into the butter mixture with a spatula. Use a large cookie scoop to portion 4 oz of dough, then roll into a ball.
Step Two: Add the chocolate sprinkles to a small bowl. Take the dough ball and lightly press it down in the chocolate sprinkles. Place the dough on a parchment or silicone-lined baking sheet, 2 inches apart. Bake for 14-15 minutes or until the dough ball is just barely set and no longer shiny. Remove from the oven and set to the side to let cookies cool. Drizzle the caramel on top and sprinkle sea salt on top.
👩🍳 Expert Tips
Remember to allow the cookie dough to chill in the refrigerator for a few hours before you bake them. This will help the cookies spread just right.
I would recommend using granulated sugar as opposed to coarse sugar or raw sugar since it is much easier to incorporate into the cookie dough.
Remember to line your baking sheets with parchment paper before you add the cookie dough balls to them. This will help keep the cookie dough from sticking to the surface of the baking sheet.
Make sure you allow the baked cookies to rest on a cooling rack before you serve them. If you let them rest on the baking sheets for too long, they'll end up getting overcooked and dry. Using a cooling rack is much better because it helps the cookies cool down faster.
💭 FAQs
How To Store Spiced Cookies
Once the cookies have cooled down completely, you can move them to an airtight container or a Ziploc bag. The cookies can stay fresh for 2-3 days, if not more.
💖 Serving Suggestions
With a Hot Drink: Serve these cookies with a warm cup of chai tea, hot cocoa, or a spiced latte to complement their cinnamon and ginger flavors.
As a Holiday Dessert Platter: Arrange these cookies on a platter with other festive treats like gingerbread or peppermint bark for a cozy holiday spread.
Ice Cream Sandwiches: For an indulgent twist, use two cookies to sandwich a scoop of vanilla or cinnamon ice cream for a delicious dessert.
Giftable Treats: Package these cookies in a decorative tin or cellophane bag, making them a perfect homemade gift for friends and family during the holidays.
Did you make this recipe? Leave a review and a ⭐⭐⭐⭐⭐ rating below, or tag us in our Facebook Group! Alternatively, bookmark it in your browser or save to Pinterest.
These deliciously soft and chewy cookies are infused with a blend of aromatic spices like cinnamon, ginger, and nutmeg, making them the perfect treat for chilly days.
Prep the Baking Sheet: Preheat the oven to 410°F. Line a baking sheet with parchment paper or a baking mat. Set aside.
Beat the Wet Ingredients with an Electric Mixer: In the medium bowl of a stand mixer with a paddle attachment, cream butter, and sugars on medium-high speed for 2-3 minutes. Add eggs and vanilla and mix until combined. Scrape down the sides of the bowl as needed.
Whisk the Dry Ingredients: In a large bowl add flour, cake flour, ginger spice, nutmeg, allspice, cinnamon, baking soda, cornstarch, and salt. Whisk to combine.
Combine Both Ingredients: Add the dry ingredients to the butter mixture. Mix and combine using a rubber spatula.
Make Dough Balls: Use a large cookie scoop and scoop 4.0 oz dough. Using your hands, roll into a ball.
Coat with Chocolate Sprinkles: Add the chocolate sprinkles to a small bowl. Take the dough ball and lightly press it down in the chocolate sprinkles.
Arrange on a Cookie Sheet & Bake: Place the dough on a parchment or silicone-lined baking sheet, 2 inches apart. Bake for 14-15 minutes or until the dough ball is just barely set and no longer shiny.
Cool Completely and Add the Toppings: Remove from the oven and set to the side to let cookies cool. Drizzle the caramel on top and sprinkle sea salt on top.
Notes
I've used granulated sugar for this recipe, but if you want to bring in a depth of flavor, you can use dark brown sugar or even some light brown sugar.I would recommend using granulated sugar as opposed to coarse sugar or raw sugar since it is much easier to incorporate into the cookie dough.Remember to line your baking sheets with parchment paper before you add the cookie dough balls to them. This will help keep the cookie dough from sticking to the surface of the baking sheet.Make sure you allow the baked cookies to rest on a cooling rack before you serve them. If you let them rest on the baking sheets for too long, they'll end up getting overcooked and dry. Using a cooling rack is much better because it helps the cookies cool down faster.I've used unsalted butter to make these spice cookies, but if you want, you can also choose to use salted butter instead.Remember to allow the cookie dough to chill in the refrigerator for a few hours before you bake them. This will help the cookies spread just right.
Cozy up with the ultimate holiday treat! This Gingerbread Latte combines the warm, spiced flavors of gingerbread with creamy milk and bold coffee for a festive drink that feels like a hug in a mug. Perfect for chilly mornings or relaxing evenings by the fire!
[feast_advanced_jump_to]
💖 Why This Recipe Works
Festive Flavor: Enjoy the cozy, spiced taste of gingerbread in every sip—perfect for the holiday season.
Easy to Make: Whip Gingerbread Syrup Latte up at home with simple ingredients for a coffee shop-quality drink.
Budget-Friendly: Skip the expensive lattes and indulge in this homemade treat anytime!
⭐ Star Ingredients
Milk or Milk Alternative: Use your favorite milk or dairy-free option for a creamy base.
Espresso or Coffee: Bold espresso or strong brewed coffee adds a rich, robust flavor.
Gingerbread Syrup: Brings the festive, spiced sweetness of classic gingerbread.
Ground Nutmeg: A sprinkle on top adds a warm, aromatic holiday touch.
For the complete list of ingredients with measurements and instructions, please see the recipe card at the bottom of the post.
📖 Substitutions & Variations
Extra Festive Toppings: Garnish with crushed gingerbread cookies, whipped cream, or a drizzle of caramel syrup for added indulgence.
Iced Gingerbread Latte: Brew coffee and let it cool. Mix it with cold milk and gingerbread syrup, then pour over ice.
Chai-Gingerbread Fusion: Blend chai tea concentrate with the gingerbread syrup for a spiced latte hybrid.
🔪 How To Make A Gingerbread Latte
Step 1: Start by preparing your coffee base. Brew two shots of espresso or make half a cup of strong coffee. Set it aside for later use.
Step 2: Pour your chosen milk into a small saucepan and gently heat it over medium heat. Whisk occasionally until it’s warm and steamy. For a frothy texture, you can use a frother or whisk vigorously.
Step 3:
Add gingerbread syrup to the warmed milk, stirring well to combine. Adjust the amount to match your preferred sweetness and spice level. Divide the coffee into two mugs. Carefully pour the flavored milk over the coffee, filling each mug and blending the flavors together.
Step 4: Top your lattes with a light sprinkle of ground nutmeg for a festive and aromatic garnish.
Step 5: Garnish with gingerbread men for extra fun!
Step 6: Serve immediately and enjoy!
👩🍳 Expert Tips
Homemade Gingerbread Syrup: Make your own syrup by simmering water, sugar, molasses, ginger, cinnamon, nutmeg, and cloves for a more authentic flavor.
Perfect Froth: For café-style froth, use a handheld frother or a French press to aerate the milk.
Adjust Sweetness: Customize the latte by adding more or less syrup based on your taste preference.
💭 FAQs
Can I Prepare This Latte In Advance?
The coffee and syrup can be made ahead of time, but it’s best to froth and heat the milk just before serving for optimal texture and freshness.
What’s The Best Way To Froth Milk Without A Frother?
You can whisk the milk vigorously in a saucepan, use a French press to pump air into it, or shake it in a jar (then warm it) to achieve a frothy texture.
Can I Make This Latte Iced?
Yes, simply brew the espresso or coffee and let it cool. Combine it with gingerbread syrup and pour over ice. Add chilled milk instead of frothing and stir well.
💖 Serving Suggestions
Here are some sides to serve with Gingerbread Latte:
Gingerbread Cookies – Soft, spiced cookies that match the gingerbread flavor.
Croissants or Pastries – Buttery croissants or almond pastries add elegance.
Cinnamon Rolls – Warm, gooey cinnamon rolls with a touch of spice.
Cheese Platter – Soft cheeses like brie or goat cheese with a drizzle of honey for a savory contrast.
Did you make this recipe? Leave a review and a ⭐⭐⭐⭐⭐ rating below, or tag us in our Facebook Group! Alternatively, bookmark it in your browser or save to Pinterest.
A Gingerbread Latte is the perfect cozy drink, blending warm spices with smooth espresso and creamy milk. It’s a holiday favorite that feels like a hug in a mug!
Brew two shots of espresso or make ½ cup of strong coffee and set aside.
Heat your milk in a small saucepan over medium heat, whisking occasionally until warm and steamy. For extra froth, use a frother or whisk vigorously.
Stir in gingerbread syrup to the warm milk, adjusting to your desired sweetness and spice. Pour the milk mixture over the coffee in two mugs, combining the flavors.
Sprinkle a light amount of ground nutmeg on top for a festive garnish.
Add a gingerbread man for extra fun, and serve immediately.
Notes
Homemade Gingerbread Syrup: Make your own syrup by simmering water, sugar, molasses, ginger, cinnamon, nutmeg, and cloves for a more authentic flavor.Perfect Froth: For café-style froth, use a handheld frother or a French press to aerate the milk.Adjust Sweetness: Customize the latte by adding more or less syrup based on your taste preference.
Get ready to sip on holiday cheer! This Homemade Egg Nog is rich, creamy, and full of festive flavors like nutmeg and vanilla. Perfect for cozy nights, holiday gatherings, or anytime you want a classic seasonal treat made from scratch!
[feast_advanced_jump_to]
💖 Why This Recipe Works
Rich and Creamy: This Eggnog Recipe is made with real ingredients for the perfect silky texture and indulgent flavor.
Customizable: Adjust the sweetness or spices to create your ideal holiday drink.
Festive and Nostalgic: A homemade classic that brings warmth and cheer to your holiday celebrations.
⭐ Star Ingredients
Egg Yolks: Provide the creamy base for the eggnog, giving it a rich and velvety texture.
Milk: Adds smoothness and helps balance the richness of the cream.
Whipping Cream: Contributes to the luxurious, silky consistency of the drink.
Granulated Sugar: Sweetens the eggnog and enhances its classic flavor.
Cinnamon Sticks: Infuse the drink with warm, aromatic spice notes.
Vanilla Extract: Adds a sweet, fragrant flavor that complements the spices.
Cinnamon Powder: Enhances the spiced profile with a subtle, earthy warmth.
Salt: Balances the sweetness and enhances the overall flavor of the eggnog.
For the complete list of ingredients with measurements and instructions, please see the recipe card at the bottom of the post.
📖 Substitutions & Variations
Vanilla Extract: Use almond extract for a nuttier flavor twist.
Milk: Swap with almond milk, coconut milk, or oat milk for a dairy-free version.
Whipping Cream: Use coconut cream or cashew cream as a non-dairy alternative.
Granulated Sugar: Replace with honey, maple syrup, or a sugar substitute like stevia for a different sweetness profile.
🔪How To Make Vanilla Eggnog
Step 1: In a medium-sized bowl, combine the egg yolks and granulated sugar. Whisk them together until the mixture thickens and becomes smooth.
Step 2: In a medium saucepan, combine the milk, whipping cream, cinnamon sticks, and salt. Mix everything well. Place the saucepan over medium-high heat and warm it up. Just before it starts to boil, turn off the heat. Remove the saucepan from the stove and let it cool for 5 minutes.
Step 3: Slowly add the hot milk to the whipped eggs, tablespoon by tablespoon, allowing the eggs to gradually adjust to the temperature. Whisk vigorously while adding the milk.
Step 4: Once the milk and eggs are thoroughly combined and whisked, pour everything back into the saucepan. Heat the mixture over medium heat until it reaches a temperature of 160 degrees Fahrenheit. Then, remove the saucepan from the heat and let it cool completely. Using a strainer, strain the eggnog into a bottle, ensuring a smooth texture, and refrigerate it to keep it chilled.
👩🍳 Expert Tips
Use Fresh Ingredients: Fresh eggs, high-quality milk, and cream make a big difference in flavor and texture.
Temper the Eggs Carefully: Gradually add the hot milk to the egg yolks while whisking to prevent curdling.
Chill Thoroughly: Allow the eggnog to chill in the refrigerator for at least a few hours to let the flavors meld and thicken.
💭 FAQs
Can I Adjust The Sweetness Of The Eggnog?
Certainly! Reduce the amount of sugar if you prefer less sweetness, or substitute with a natural sweetener like honey or maple syrup.
Is It Safe To Consume Raw Eggs In Eggnog?
This recipe cooks the eggs to a safe temperature of 160°F, ensuring there’s no risk of consuming raw eggs. If you’re concerned, you can use pasteurized eggs.
How Do I Make The Eggnog Thicker?
To make it thicker, you can simmer the mixture for a few extra minutes while stirring constantly or add a small amount of cornstarch (dissolved in cold milk) during cooking.
Best Way To Store Egg Nog?
Store eggnog in an airtight container or a sealed pitcher in the refrigerator for up to 3 days.
💖 Serving Suggestions
Here are some sides to serve with Homemade Egg Nog:
Crustless Pumpkin Pie: A perfectly spiced, creamy dessert that pairs wonderfully with the rich, festive flavors of eggnog.
Chocolate Oreo Cookies: Their chocolatey crunch provides a delightful contrast to the smooth and creamy eggnog.
Gingerbread Cookies: Classic holiday cookies with warm spices that complement the nutmeg and cinnamon in the eggnog.
Did you make this recipe? Leave a review and a ⭐⭐⭐⭐⭐ rating below, or tag us in our Facebook Group! Alternatively, bookmark it in your browser or save to Pinterest.
Homemade Egg Nog is a rich, creamy holiday drink that’s perfect for cozying up during the festive season. Made with eggs, milk, and a hint of spice, it’s a classic treat that brings warmth and cheer to any celebration!
Whisk the egg yolks and sugar in a bowl until smooth and thick.
In a saucepan, combine milk, whipping cream, cinnamon sticks, and salt. Heat over medium-high until just before boiling, then remove from heat and cool for 5 minutes.
Slowly add the hot milk to the egg mixture, one tablespoon at a time, whisking constantly.
Return the mixture to the saucepan and heat over medium heat until it reaches 160°F. Remove from heat and let it cool completely.
Strain the eggnog into a bottle and refrigerate until chilled.
Notes
Use Fresh Ingredients: Fresh eggs, high-quality milk, and cream make a big difference in flavor and texture.Temper the Eggs Carefully: Gradually add the hot milk to the egg yolks while whisking to prevent curdling.Chill Thoroughly: Allow the eggnog to chill in the refrigerator for at least a few hours to let the flavors meld and thicken.
Elevate your Tex-Mex game with these Air Fryer Chicken Fajitas. Packed with flavor and cooked to perfection in the air fryer, these fajitas are a quick and easy way to satisfy your cravings. With tender, juicy chicken, vibrant peppers, and onions, all seasoned with classic fajita spices, this dish is sure to be a hit with the whole family.
[feast_advanced_jump_to]
💖 Why This Recipe Works
Quick and Effortless: The air fryer cooks everything to perfection in no time, making fajita night easier than ever.
Perfectly Seasoned: Classic fajita spices give the chicken and veggies a bold, irresistible flavor.
Family-Friendly Favorite: Customizable and fun to serve with tortillas, rice, or your favorite toppings!
⭐ Star Ingredients
To make the chicken fajitas in the air fryer, you'll need just a few simple ingredients.
Boneless Skinless Chicken Breast: Forms the protein-rich base of the fajitas, providing a tender, juicy bite that pairs beautifully with the vibrant veggies and spices.
Bell Peppers (Sliced Into Thin Strips, Any Color): Add a sweet, slightly crunchy element to the fajitas, offering a pop of color and a delightful contrast to the savory chicken.
Onion (Sliced Thinly): Lends a bit of sharpness to the fajitas, mellowing out in the air fryer to a sweet, slightly caramelized finish that complements the other ingredients wonderfully.
Olive Oil: Helps the chicken and veggies achieve a crispy, golden exterior in the air fryer, while also enhancing their natural flavors.
Fajita Seasoning Spice Blend: Infuses the chicken and veggies with a burst of zesty, smoky homeade fajita seasoning, elevating the overall taste profile of the fajitas.
Flour Tortillas: Serve as the vessel for the fajitas, offering a soft, slightly chewy texture that balances out the crispiness of the air-fried ingredients.
Garnish:
Crumbled Cotija Cheese or Shredded Jack Cheese: Adds a creamy, tangy element that balances out the heat from the fajita seasoning.
Sour Cream: Contributes a cool, creamy contrast to the spiciness of the fajitas, and enhances the overall richness of the dish.
Diced Cilantro: Provides a fresh, herbaceous note that lifts up the flavors of the fajitas, and adds a pop of color for the final touch.
For the complete list of ingredients with measurements and instructions, please see the recipe card at the bottom of the post.
📖 Substitutions & Variations
You can also bring a bit of variation to these easy Air Fryer chicken fajitas.
You can also prepare your own custom spice blend using cayenne pepper and a few other ingredients if you have the time.
We've used shredded jack cheese for this recipe, but you can also use shredded cheddar cheese or even some mozzarella if that's what you have at hand.
You can also use refried beans as an add-on to get some more protein and a bit of extra flavor to the dish.
Another great idea is to add some more vegetables into the mix while you're air frying everything. Mushrooms, zucchini and broccoli are some good choices.
🔪 How to Make the Air Fryer Chicken Fajitas
Step 1: Preheat the air fryer at 400ºf. You can also choose to grease the chicken with some olive oil or cooking spray.
Step 2: Place the sliced chicken, peppers, and sliced red onion into a large bowl, coat with 4 tablespoons of oil, and season with 4 tablespoons of fajita seasoning. Make sure everything is evenly coated with the fajita seasoning mix. You can also squeeze a bit of lime juice to bring in some extra tanginess.
Step 3: Add the fajitas to the air fryer basket without overfilling. If you have a smaller air fryer, you might want to cook the chicken fajitas in two batches or more if needed. If you're starting off with a whole chicken breast, you might want to cut it into thin slices to cut down the cooking time.
Step 4: Cook each batch for 10 minutes, tossing halfway. Remove and let rest for a couple of minutes. If your chicken strips are thicker, you may want to check if the internal temperature reaches the recommended guidelines and adjust the cook time accordingly.
Step 5: Warm the tortillas and add a spread of sour cream.
Step 6: Next, add the fajitas mixture to the tortilla.
Step 7: Top your fajita with cotija cheese and cilantro.
Also remember that the cooking time for raw chicken will be different than the cooking time for frozen chicken. If you're confused, just check if the chicken reaches an internal temperature of 165 degrees Fahrenheit and it will be safe to eat! Additionally, you can check if the juices run clear when you cut into the chicken. That's a sure sign that it's cooked properly. Happy cooking!
💭 FAQs
What Else Can You Add to Air Fryer Fajitas?
Apart from the fajita seasoning mix, which is the key ingredient that adds all the flavor and deliciousness, you can also throw in some other seasonings and ingredients of your choice.
A dash of garlic powder, for instance, can really amp up the flavor of the Air Fryer fajitas. You can also throw in a bit of chili powder or cayenne pepper if you don’t mind the extra heat.
Can You Make Gluten-free Chicken Fajitas?
You sure can! Just swap the flour tortillas in the ingredients list with some corn tortillas instead- they’ll turn out just as delicious.
Can I Make Air Fryer Chicken In Advance?
Yes! You can. All you need to do is prep your Air Fryer basket, add the seasoned raw chicken in it and cook evenly until the chicken reaches the right internal temperature.
You can then store these chicken strips for a few days until you’re ready to assemble them along with the other veggies.
Can I Use Homemade Fajita Seasoning?
Yes sure. Either store-bought or homemade fajita seasoning mix will do the trick when making these cotija cheese fajitas.
Best Way To Store Fajita Mix
If you have some leftover Air Fryer chicken fajitas, you can transfer them to an airtight container or a Ziplock bag and refrigerate them for 2-3 days.
💖 Serving Suggestions
Here are some sides to serve with Air Fryer Chicken Fajitas:
Guacamole: Creamy avocado mashed with tomatoes, onions, and a hint of lime.
Mexican Street Corn (Elote): Grilled corn slathered in a mix of mayo, cheese, and chili powder.
Pico de Gallo: Diced tomatoes, onions, cilantro, and jalapeños for a refreshing salsa.
Refried Beans: Creamy and seasoned, a classic side to complement the fajitas.
Mexican Slaw: Shredded cabbage, carrots, and a tangy lime dressing for a crunchy bite.
Did you make this recipe? Leave a review and a ⭐⭐⭐⭐⭐ rating below, or tag us in our Facebook Group! Alternatively, bookmark it in your browser or save to Pinterest.
Looking for a quick and flavorful dinner? These Air Fryer Chicken Fajitas are perfectly seasoned, tender, and ready in no time! Serve with warm tortillas and your favorite toppings for an easy, delicious meal the whole family will love!
2Bell Pepperssliced into thin strips, any color (red, green and orange peppers are great)
1Red OnionSliced Thinly
4TablespoonsOlive Oil
4TablespoonsFajita Seasoning
Garnish
1TablespoonCrumbled Cotija Cheese
1TablespoonSour Cream
1TablespoonDiced Cilantro
Instructions
Pre-heat the air fryer at 400ºf. You can also choose to grease the chicken with some olive oil or cooking spray.
Place the sliced chicken, peppers and sliced red onion into a large bowl, coat with 4 tablespoons oil and season with 4 tablespoons of fajita seasoning.
Make sure everything is evenly coated with the fajita seasoning mix. You can also squeeze a bit of lime juice to bring in some extra tanginess.
Add the fajitas to the air fryer basket without over filling. If you have a smaller air fryer, you might want to cook the chicken fajitas in two batches or more if needed.
If you're starting off with a whole chicken breast, you might want to cut it into thin slices to cut down the cooking time.
Cook each batch for 10 minutes, tossing halfway. Remove and let rest for a couple of minutes.
If your chicken strips are thicker, you may want to check if the internal temperature reaches the recommended guidelines, and adjust the cook time accordingly.
Warm the tortillas and add a spread of sour cream. Add the fajitas, and top with cheese and cilantro, serve with some lime wedges and enjoy!
Notes
The cooking time for raw chicken will be different than the cooking time for frozen chicken. If you're confused, just check if the chicken reaches an internal temperature of 165 degrees Fahrenheit and it will be safe to eat! Additionally, you can check if the juices run clear when you cut into the chicken. That's a sure sign that it's cooked properly. Happy cooking!
Craving something crispy, juicy, and a little bit sweet? These Honey Mustard Chicken Tenders check all the boxes for an easy, delicious dinner or snack everyone will love.
This one’s been on repeat at our place—sweet and tangy, sticky in all the right ways, and pan-fried to golden perfection. Whether you’re meal-prepping lunches, serving picky eaters, or hosting game night, these tenders are just the thing.
Step 1: Combine all marinade ingredients into a medium-sized bowl. Add chicken tenders and toss to coat. Marinate for 5 minutes.
Step 2: Heat the olive oil in a pan over medium heat. Add in the chicken tenders. Cook on each side for 3 - 4 minutes or until fully cooked through.
💡Hint: Want a caramelized edge? Broil the tenders for 1–2 minutes at the end—but watch them closely so the honey doesn’t burn!
👩🍳 Expert Tips
Don’t reuse leftover marinade in the pan—it’ll burn quickly thanks to the honey. For even better flavor, marinate the chicken for 30 minutes or overnight if you have the time. Want to use your air fryer? Preheat it to 400°F, spray the basket lightly with oil, and cook the chicken tenders in a single layer for 10–12 minutes, flipping halfway through. Air circulation = crispiness!
💭 FAQs
Can I Use Chicken Breast Instead Of Tenders?
Yes, you can use chicken breasts. Simply cut them into strips to resemble tenderloins, ensuring they cook evenly and remain tender.
Are These Chicken Tenders Gluten Free?
This recipe is gluten-free so long as you use gluten-free Dijon Mustard.
Can I Prepare the Marinade Ahead of Time?
Yes, you can prepare the marinade ahead of time and store it in the refrigerator for up to 3 days. Marinating the chicken overnight will enhance the flavors even more.
How To Store Chicken Tenders?
Cool completely, then store in an airtight container in the fridge for up to 4 days. Freeze for up to 3 months. Reheat in the oven or air fryer for best results.
💖 Serving Suggestions
In the photo below, I paired my chicken tenders with creamy almond milk mashed potatoes and steamed broccoli—simple, hearty, and totally comforting. It’s a balanced plate that feels like a warm hug (and yes, it got zero complaints at the dinner table!).
Here are some more great sides to serve with chicken tenders:
Did you make this recipe? Leave a review and a ⭐⭐⭐⭐⭐ rating below, or tag us in our Facebook Group! Alternatively, bookmark it in your browser or save to Pinterest.
Combine all marinade ingredients into a medium sized bowl.
Add chicken tenders and toss to coat. Marinate for 5 minutes.
Heat the olive oil in a pan over medium heat. Add in the chicken tenders.
Cook on each side for 3 - 4 minutes or until fully cooked through.
Notes
Do not pour the leftover marinade in the skillet. It will burn. Be sure to cook the tenders on medium heat. Cooking on high heat will cause the honey in the marinade to burn.
Looking for a cozy and satisfying dinner that practically makes itself? This Slow Cooker Chicken Chili is a hearty bowl of comfort packed with tender chicken, beans, and the perfect blend of spices. It’s Plantain Tortilla Chips a family favorite that’s as easy as set-it-and-forget-it!
[feast_advanced_jump_to]
💖 Why This Recipe Works
Hearty and Flavorful: Packed with tender chicken, beans, and bold spices, every bite is bursting with comfort.
Effortless Cooking: Let the slow cooker do the work for a stress-free, delicious dinner.
Perfect for Any Occasion: Whether it’s a busy weeknight or a cozy weekend, this chili is always a crowd-pleaser!
Chicken Breasts: Provide lean protein, forming the hearty base of this chili.
White Beans: Add heartiness and texture, making the chili filling and nutritious.
Chicken Broth: Offers a rich depth of flavor, binding all ingredients together with savory goodness.
Frozen Corn: Infuses subtle sweetness, balancing the flavors with a pop of color.
Poblano Peppers: Introduce mild heat and a unique flavor, enhancing the chili's complexity.
Onion: Acts as an aromatic base, imparting a subtle sweetness and depth to the dish.
Garlic: Adds pungency and depth, elevating the overall flavor profile.
Oregano: Contributes herbal notes, complementing the chili with its earthy aroma.
Cayenne Pepper: Brings a spicy kick, adding warmth and vibrancy to the chili.
Sour Cream: Provides creaminess, rounding out the flavors with a smooth texture.
Dry Cilantro: Offers a fresh finish, adding a hint of herbaceousness to the final dish.
For the complete list of ingredients with measurements and instructions, please see the recipe card at the bottom of the post.
📖 Substitutions & Variations
Smoky Twist: Replace cayenne pepper with smoked paprika and add a dash of liquid smoke.
Vegetarian Option: Replace chicken with extra white beans or chickpeas and use vegetable broth instead of chicken broth.
Richer Flavor: Stir in a handful of shredded cheese or a dollop of cream cheese for extra creaminess.
Herb Substitutions: Use fresh cilantro instead of dried or add parsley for a milder flavor.
🔪 How To Make Slow Cooker Chicken Chili
Step 1: Mash one can of beans in the slow cooker, then add the remaining cans left whole.
Step 2: Add corn, poblano, onion, garlic, oregano, and cayenne into the mashed beans and mix well.
Step 3: Add broth to the mixture and stir until well combined.
Step 4: Add chicken cubes to the slow cooker. Cover and cook on low for 5-6 hours.
Step 5: In the last 30 minutes of cooking, stir in sour cream and cilantro.
Step 6: Serve and enjoy your delicious slow-cooker chicken chili!
👩🍳 Expert Tips
Sear the Chicken First: For extra flavor, quickly sear the chicken cubes before adding them to the slow cooker.
Add Lime Zest: A little lime zest at the end will give your chili a fresh, zesty kick!
Use Bone Broth: Swap regular broth for bone broth to add richness and depth of flavor.
Top with Cheese: Don't forget to add a sprinkle of shredded cheese on top before serving for a creamy finish!
💭 FAQs
What Kind Of Beans Work Best In Chicken Chili?
White beans like cannellini, Great Northern, or navy beans are commonly used, as they have a creamy texture and mild flavor that pairs well with chicken.
Can I Use Frozen Chicken In The Slow Cooker?
Yes, but frozen chicken may extend the cooking time slightly. Ensure the chicken reaches an internal temperature of 165°F before serving.
What Toppings Go Well With Slow Cooker Chicken Chili?
Popular toppings include shredded cheese, avocado, sour cream, chopped cilantro, tortilla strips, or green onions for added flavor and texture.
Can I Cook Chicken Chili On High Instead Of Low In The Slow Cooker?
Yes, cooking on high will reduce the cooking time to about 3-4 hours, but low and slow yields a more developed flavor.
How To Store Leftover Chicken Chili
Cool the chili completely before storing. Place in an airtight container and refrigerate for up to 3-4 days. Transfer cooled chili to a freezer-safe container or heavy-duty freezer bags. Label with the date and freeze for up to 3 months.
💖 Serving Suggestions
Here are some sides to serve with Slow Cooker Chicken Chili:
Cornbread: The slight sweetness and crumbly texture of cornbread are perfect for balancing the chili's spices. Serve warm with a dollop of butter.
Tortilla Chips: Crunchy tortilla chips are excellent for scooping chili or adding as a topping for extra texture.
Steamed Rice: Serve chili over rice to create a hearty, filling meal with a neutral base.
Garlic Bread: A savory side for dipping into the chili and soaking up the flavorful broth.
Roasted Vegetables: Serve roasted zucchini, bell peppers, or carrots as a healthy and flavorful side option.
Did you make this recipe? Leave a review and a ⭐⭐⭐⭐⭐ rating below, or tag us in our Facebook Group! Alternatively, bookmark it in your browser or save to Pinterest.
This slow cooker chicken chili is the perfect comfort food for busy days! Just toss everything in, let it cook, and enjoy a hearty, flavorful meal your whole family will love.
Mash one can of beans in the slow cooker, then add the remaining cans left whole.
Add corn, poblano, onion, garlic, oregano, and cayenne into the mashed beans and mix well.
Add broth to the mixture and stir until well combined.
Add chicken cubes to the slow cooker. Cover and cook on low for 5-6 hours.
In the last 30 minutes of cooking, stir in sour cream and cilantro.
Serve and enjoy your delicious slow-cooker chicken chili!
Notes
Sear the Chicken First: For extra flavor, quickly sear the chicken cubes before adding them to the slow cooker.Add Lime Zest: A little lime zest at the end will give your chili a fresh, zesty kick!Use Bone Broth: Swap regular broth for bone broth to add richness and depth of flavor.Top with Cheese: Don't forget to add a sprinkle of shredded cheese on top before serving for a creamy finish!
When you need warm bread fast, nothing beats this Whole Wheat Irish Soda Bread. It’s rustic, wholesome, and ready in under an hour—no yeast, no drama, just good old-fashioned comfort.
This hearty soda bread is a go-to in my kitchen when I want something cozy without waiting for dough to rise. Whole wheat gives it that nutty, nourishing vibe, and the best part? You can make it with pantry staples! Perfect for chilly nights with soup or lazy weekend brunches.
No yeast, no wait: Just mix, shape, and bake. Boom—bread in under an hour.
Hearty + wholesome: Whole wheat flour adds fiber and flavor.
Sweet or savory: Totally customizable to suit your cravings.
⭐ Star Ingredients
Whole Wheat Flour: Brings a rich, nutty flavor and keeps the loaf dense and satisfying.
Buttermilk: Tangy and creamy, it reacts with baking soda for that signature soda bread lift.
Black Raisins: Tiny pops of sweetness that surprise you in every bite.
Baking Soda: The magic behind the rise—no proofing needed.
For the complete list of ingredients with measurements and instructions, please see the recipe card at the bottom of the post.
📖 Substitutions & Variations
Swap raisins for dried cranberries, chopped figs, or currants.
Go savory by ditching the sugar and raisins—add cheddar and chives instead.
Use half all-purpose flour if you like a slightly lighter texture.
Try oat milk + lemon juice instead of buttermilk for a dairy-free version.
Throw in some pumpkin or sunflower seeds for a little crunch.
Add orange zest for a bright citrus twist!
Gluten-free or plant-based? No problem! You can make this bread vegan by swapping the buttermilk for a mix of plant milk and lemon juice. To go gluten-free, use a 1:1 gluten-free flour blend that works well in quick breads.
Use this section for process shots, alternating between the step and image showing the step. Users don't like seeing process shots cluttering up the recipe card, so include your process shots here.
Step 1: In a mixing bowl, combine all the dry ingredients, including the flour, whole wheat flour, sugar, salt, and baking soda. Stir until evenly blended.
Step 2: Add the milk or buttermilk to the dry ingredients and mix until a dough forms. Knead the dough gently on a lightly floured surface until it comes together.
Step 3: Rinse the raisins thoroughly, then add them to the dough. Knead again briefly to incorporate the raisins evenly.
Step 4: Place the dough in a greased or lined mold, shaping it as needed. Let it rest at room temperature for about 20 minutes to settle.
Step 5: Preheat the oven to 360°F (180°C). Bake the bread for 35 minutes, or until it is golden brown and sounds hollow when tapped on the bottom.
Step 6: Allow the bread to cool slightly before slicing. Serve warm and enjoy! This recipe makes one rectangular loaf, yielding about 8 slices.
💡Hint: For a crustier loaf, let the bread cool on a wire rack uncovered.
👩🍳 Expert Tips
Use cold buttermilk for a better rise and a fluffier center.
Avoid over-kneading—it’s soda bread, not sourdough!
A serrated knife works best for slicing while the crust is still warm.
💭 FAQs
How do I make whole wheat Irish soda bread without it turning out too dense?
Use fresh baking soda and don’t over-knead—just mix until the dough holds together.
Why do I need to cut a cross on top?
It helps the heat reach the center and gives that classic, rustic soda bread look.
Can I make Whole Wheat Irish Soda Bread ahead of time?
Totally! It keeps well for a day or two. Wrap it tightly and refresh in the oven for 5–7 minutes before serving.
Is it okay to skip the raisins in Irish Soda Bread?
Of course—leave them out or swap in your favorite dried fruit or nuts for a twist.
💖 Serving Suggestions
Spread thick slices with butter and Strawberry Jam or Orange Marmalade.
Serve warm with Vegan Baked Beans for a comforting, protein-packed meal.
Toast it and top with mashed avocado + chili flakes.
Did you make this recipe? Leave a review and a ⭐⭐⭐⭐⭐ rating below, or tag us in our Facebook Group! Alternatively, bookmark it in your browser or save to Pinterest.
Irish Soda Bread is a classic, no-yeast bread that's quick and easy to make. With a dense, slightly crumbly texture, it's perfect for soaking up soups, stews, or enjoying with butter. Simple ingredients like flour, baking soda, buttermilk, and salt come together to create a hearty, comforting loaf.
In a mixing bowl, combine all the dry ingredients, including the flour, whole wheat flour, sugar, salt, and baking soda. Stir until evenly blended.
Add the milk or buttermilk to the dry ingredients and mix until a dough forms. Knead the dough gently on a lightly floured surface until it comes together.
Rinse the raisins thoroughly, then add them to the dough. Knead again briefly to incorporate the raisins evenly.
Place the dough in a greased or lined mold, shaping it as needed. Let it rest at room temperature for about 20 minutes to settle.
Preheat the oven to 360°F (180°C). Bake the bread for 35 minutes, or until it is golden brown and sounds hollow when tapped on the bottom.
Allow the bread to cool slightly before slicing. Serve warm and enjoy!
Notes
Measure Accurately: Ensure precise measurement of dry and wet ingredients to achieve the correct dough consistency. Too much flour can make the bread dry, while too little can make it too sticky.Don’t Overwork the Dough: Mix and knead the dough gently to avoid developing too much gluten, which can result in a tough texture.Use Cold Ingredients: Keep the buttermilk or milk cold to maintain the traditional soda bread texture.
Ready to kick up your dinner game? This Instant Pot Cajun Chicken and Rice Recipe is bursting with bold flavors and comes together in no time. Juicy chicken, perfectly seasoned rice, and a medley of Cajun spices make this dish a winner. It’s an easy, one-pot meal that’s perfect for busy nights when you want something delicious and satisfying. Let’s get cooking and bring a taste of Louisiana to your table!
[feast_advanced_jump_to]
Why This Recipe Works
Bold Flavors: The Cajun seasoning and andouille sausage bring a spicy kick that’s full of flavor.
One-Pot Wonder: This Instant Pot chicken recipe is a complete meal made entirely in the Instant Pot, making cleanup a breeze.
Hearty and Satisfying: With tender chicken, rice, and a medley of vegetables, Instant Pot Cajun chicken and rice is a comforting and filling dish.
🥘 Ingredients
Boneless Skinless Chicken Thighs: Tender and flavorful base for the dish.
Cajun Seasoning (like Slap Yo Mama): Adds a spicy and robust flavor.
Salt: Enhances the overall taste.
Dried Oregano: Adds a subtle earthy flavor.
Black Pepper: Provides a hint of heat and depth.
Olive Oil: Used for sautéing and adding richness.
Yellow Onion, Diced: Adds sweetness and depth of flavor.
Red Bell Peppers, Seeded and Diced: Add color and sweetness.
Green Bell Peppers, Seeded and Diced: Contribute to the Cajun flavor profile.
Celery, Diced: Adds crunch and aromatic flavor.
Garlic, Minced: Infuses the dish with a rich, aromatic flavor.
Chicken Stock, Divided: Provides moisture and enhances the flavor.
Long Grain White Rice, Rinsed Well: The main carbohydrate, providing texture and substance.
Andouille Sausage, Optional: Adds a smoky, spicy element.
Diced Tomatoes: Adds acidity and depth of flavor.
Sliced Green Onion, For Garnish If Desired: Adds freshness and a pop of color to the finished dish.
For the complete list of ingredients with measurements and instructions, please see the recipe card at the bottom of the post.
📖 Substitutions & Variations
Cajun Chicken and Rice with Cannellini Beans: Add a can of cannellini beans to the mix for extra protein and fiber.
Instant Pot Cajun Shrimp and Rice: Swap chicken for shrimp in this seafood variation.
Cajun Chicken And Brown Rice: Try using long-grain brown rice for a satisfying meal with added nutrition. Brown rice will need to be pressure-cooked for an extra 10 minutes.
🔪 How To Make Instant Pot Cajun Chicken and Rice?
Step One: In a small bowl, mix the Cajun seasoning, oregano, salt, and black pepper. Lightly sprinkle on both sides of the chicken, saving any extra seasoning. Set the electric pressure cooker to “sauté” and heat. Add olive oil and heat for 10 seconds. Sear the chicken until golden brown on both sides. Remove and keep warm.
Step Two: Add the chopped onion, bell pepper, and celery to the Instant Pot. Cook for about 6 minutes, stirring frequently to prevent burning. Add the garlic and cook for another minute until it is fragrant. Add the reserved Cajun seasoning to the vegetables and stir well.
Step Three: Add rice in an even layer over the vegetables. Pour in the chicken broth and give it a quick stir.
Step Four: Place the seared chicken on top of the rice and vegetable mixture. Secure the lid on the Instant Pot and set the valve to the sealing position. Select the “manual” or “pressure cook” mode and set the timer for 10 minutes.
Step Five: Once the cooking time is complete, allow the pressure to naturally release for 5 minutes. Then, carefully perform a quick release to release any remaining pressure.
Step Six: Remove the lid and fluff the rice with a fork. Serve the Instant Pot Cajun chicken and rice hot, garnished with chopped parsley if desired. Your flavorful Instant Pot Cajun Chicken and Rice is ready to be enjoyed!
👩🍳 Expert Tips
Avoid Stirring: Once you add the rice, avoid stirring. Stirring can cause the rice to stick to the bottom and become mushy. Instead, gently press the rice down with a spoon to ensure it’s submerged in the liquid.
Garnish for Freshness: Garnish with sliced green onions just before serving. This adds a fresh, crunchy texture and a burst of color to your Instant Pot Cajun chicken and rice cooked dish.
💭 FAQs
What Toppings Go Well With Cajun Chicken And Rice?
Top Cajun Chicken and Rice with green onions, shredded cheese, sour cream, fresh herbs, or a dash of hot sauce to let everyone customize their bowl just the way they love!
What Is The Main Difference Between Cajun Rice And Dirty Rice?
The main difference between dirty rice and Cajun rice is in the ingredients and flavor.
Dirty rice typically includes chopped chicken livers or gizzards, which give it a “dirty” look and rich, deep flavor. It’s also seasoned with the classic “holy trinity” of Cajun cooking—bell pepper, onion, and celery.
Cajun rice, on the other hand, is similar but usually doesn’t contain liver or gizzards and has a lighter flavor profile with a focus on Cajun seasonings like paprika, thyme, and cayenne. Both are delicious but bring their own unique twist to Southern-style rice dishes!
How To Store Cajun Chicken Thighs And Rice?
Store any leftover Instant Pot Cajun Chicken and Rice in an airtight container in the refrigerator for up to 3-4 days. Transfer the chicken and rice to a freezer-safe container or bag and freeze for up to 2-3 months. Defrost the Instant Pot Cajun chicken and rice in the refrigerator overnight.
🧂Serving Suggestions
There are my favorite sides to serve with Instant Pot Cajun Chicken and Rice:
Naan Bread: Soft and fluffy Naan Breadis perfect for scooping up the rich and creamy sauce.
Basmati Rice: Light and aromatic, Basmati Rice complements the flavors of the butter chicken beautifully.
Cucumber Raita: A refreshing yogurt-based side dish that helps balance the spices.
Steamed Vegetables: Simple steamed vegetables like broccoli, carrots, and peas add a healthy and colorful touch to your meal.
Mango Chutney: A sweet and tangyMango Chutneyprovides a delightful contrast to the savory butter chicken.
Spice up your dinner with this Instant Pot Cajun Chicken and Rice! Juicy chicken, perfectly cooked rice, and bold Cajun spices come together in a one-pot wonder that’s bursting with flavor. It's a quick, easy, and satisfying meal that's perfect for busy weeknights!
In a small bowl, mix together the Cajun seasoning, oregano, salt, and black pepper. Lightly sprinkle the mixture on both sides of the chicken, reserving any remaining seasoning for later use.
Set the electric pressure cooker to the “sauté” setting and allow it to heat until hot. Add the olive oil and let it heat for about 10 seconds. Place the chicken in the pot and sear until it is golden brown on both sides. Remove the chicken from the pot and keep it warm.
Add the chopped onion, bell pepper, and celery to the Instant Pot. Cook for about 6 minutes, stirring frequently to prevent burning. Add the garlic and cook for another minute until it is fragrant.
Add the reserved Cajun seasoning to the vegetables and stir well. Add rice in an even layer over the vegetables. Pour in the chicken broth and give it a quick stir.
Place the seared chicken on top of the rice and vegetable mixture. Secure the lid on the Instant Pot and set the valve to the sealing position. Select the “manual” or “pressure cook” mode and set the timer for 10 minutes.
Once the cooking time is complete, allow the pressure to naturally release for 5 minutes. Then, carefully perform a quick release to release any remaining pressure.
Remove the lid and fluff the rice with a fork. Serve the Cajun Chicken and Rice hot, garnished with chopped parsley if desired. Your flavorful Instant Pot Cajun Chicken and Rice is ready to be enjoyed!
Notes
Avoid Stirring: Once you add the rice, avoid stirring. Stirring can cause the rice to stick to the bottom and become mushy. Instead, gently press the rice down with a spoon to ensure it’s submerged in the liquid.Garnish for Freshness: Garnish with sliced green onions just before serving. This adds a fresh, crunchy texture and a burst of color to your Cajun chicken and rice cooked dish.
This festive Christmas PavlovaWreath is the perfect Christmas dessert! A crispy Berry Meringue wreath topped with homemade cranberry sauce and berries. This gorgeous pavlova wreath is sure to impress your holiday guests!
[feast_advanced_jump_to]
💖 Why This Recipe Works
My mum always makes pavlova for Christmas day. It's a family tradition and is always a huge hit with no leftovers!
Festive and Fun: This Christmas Wreath Pavlova adds a beautiful, edible decoration to your holiday table.
Light and Refreshing: The fresh berries and airy meringue dessert offer a delightful contrast to heavy holiday meals.
Impress Your Guests: Despite its simplicity, this Christmas pavlova wreath is sure to wow with its presentation and taste.
⭐ Star Ingredients
Here are the ingredients needed for this Christmas pavlova recipe.
Large Eggs (Room Temperature): The egg whites are the backbone of the meringue, providing structure and volume to your pavlova.
Cream Of Tartar: This acidic ingredient stabilizes the egg whites during whipping, helping them maintain their height and form.
Salt: Enhances the overall flavor of the meringue, balancing out the sweetness.
Powdered Sugar: Icing sugar dissolves more easily than granulated sugar, sweetening the meringue while keeping it light and airy.
Cold Heavy Whipping Cream: When whipped, this transforms into a rich, creamy topping that adds a luxurious element to the pavlova.
Whole Berry Cranberry Sauce: Provides a tart contrast to the sweet meringue and cream, adding depth of flavor.
Fresh Blueberries: Add a burst of freshness and natural sweetness, enhancing the fruitiness of the pavlova.
Fresh Raspberries: Their vibrant color and tangy flavor offer a delightful contrast to the sweet and creamy elements of the pavlova.
For the complete list of ingredients with measurements and instructions, please see the recipe card at the bottom of the post.
📖 Substitutions & Variations
I like to use whipping cream or mascarpone cheese on my Pavlovas. But, you could also use Greek yogurt, ice cream, or even just a simple fruit sauce.
Wondering what fruit to put on the pavlova? I like to top my Christmas Pavlova with a mix of fresh berries. I usually use raspberries, blueberries, and strawberries. But, feel free to use whatever berries you like!
You could also top your Pavlova with other fruits, like sliced banana or kiwi fruit. Or, get creative and add a chocolate ganache or a caramel sauce!
🔪 How To Make A Christmas Wreath Pavlova
Step 1: Preheat the oven to 225 degrees and prepare a baking sheet with parchment paper. Using two bowls of different sizes, trace a wreath shape onto the parchment paper. Flip the parchment paper so the circle shows through the paper.
Step 2: Separate the egg whites from the egg yolks, discarding the yolks or reserving them for another recipe. Using a stand mixer beat the egg whites with the cream of tartar and salt until light and foamy. Do so at medium speed.
Step 3: Slowly add the powdered sugar a small scoop at a time and continue beating until all of the sugar is incorporated and the batter forms stiff peaks, about 15 minutes.
Step 4: Place dollops of the meringue around the wreath shape, smoothing very slightly around the top. Place in the oven on the middle rack for 2 hours or until the outside of the meringue is dry. Rest at room temperature until completely cooled.
Step 5: To make the berry topping, fold the blueberries and raspberries into the cranberry sauce. Refrigerate until ready to use.
Step 6: Prepare the whipped topping by beating the heavy cream until soft peaks form.
Step 7: When ready to serve, spoon the whipped topping over the meringue and top with the berry sauce.
Step 8: Garnish with additional berries and fresh mint leaves, if desired.
I hope you enjoy this Christmas Wreath Pavlova recipe! Merry Christmas!
Be sure to check out this super easy Christmas Lasagna Dessert. It's another great recipe to try this festive season.
👩🍳 Expert Tips
This Christmas Wreath Pavlova is best served immediately after assembling. But, it will keep in the fridge for a few hours if you need to.
If you wish to make individual pavlovas just use a spoon to drop the meringue mixture onto the baking sheet in small mounds. Be sure to make a small indentation in the center of each mound so that the toppings don't slide off.
💭 FAQs
Why Have Pavlova At Christmas?
Pavlova is a great Christmas dessert because it can be made ahead of time. The Christmas wreath meringue can be baked a few days in advance and then filled with cranberry sauce and berries just before serving. Pavlova is also a light and refreshing dessert, which is perfect after a heavy holiday meal. And, it looks absolutely stunning on a holiday table!
What Temperature Do You Cook A Pavlova?
The meringue for this Pavlova recipe is cooked at a low temperature, around 225 degrees Fahrenheit. This helps to ensure that the meringue is crisp on the outside and soft on the inside.
Can You Put Vinegar Or Lemon Juice In Pavlova?
Yes, a teaspoon of vinegar or lemon juice can be added to the meringue mixture. This helps to stabilize the egg whites and prevents the meringue from deflating.
Best Way To Store A Pavlova
This Christmas Pavlova will keep for 2-3 days in the fridge. Be sure to store it in an airtight container to prevent the meringue from becoming soft.
💖 Serving Suggestions
Pair Wreath Pavlova Berry Meringue With These side dishes:
Lemon Curd Tartlets: Tangy lemon curd in crispy tart shells.
Whipped Coconut Cream: Light and fluffy coconut cream with a hint of sweetness.
Fresh Fruit Salad: Colorful medley of seasonal fruits for a refreshing contrast.
Vanilla Bean Ice Cream: Creamy vanilla ice cream to balance the sweetness.
Almond Biscotti: Crunchy almond cookies for a delightful texture.
Mango Sorbet: Tropical sorbet to cleanse the palate.
Dark Chocolate Dipped Strawberries: Indulgent chocolate-covered strawberries.
Citrus Salad: Citrus segments with mint for a zesty kick.
Did you make this recipe? Leave a review and a ⭐⭐⭐⭐⭐ rating below, or tag us in our Facebook Group! Alternatively, bookmark it in your browser or save to Pinterest.
Celebrate the holidays with a show-stopping Christmas Wreath Pavlova Berry Meringue! This festive dessert features a light and airy meringue wreath, topped with whipped cream and an assortment of fresh, juicy berries.
Preheat the oven to 225 degrees. Prepare a baking sheet with parchment paper. Using two bowls of different sizes, trace a wreath shape onto the parchment paper. Flip the parchment paper so the circle shows through the paper.
Separate the egg yolks from the egg whites, discarding the egg yolks or reserving them for another recipe.
At medium speed, beat the egg whites with the cream of tartar, and salt until light and foamy. Slowly add the powdered sugar a small scoop at a time and continue beating until all of the sugar is incorporated and the batter forms stiff peaks, about 15 minutes.
Place dollops of the meringue around the wreath shape, smoothing very slightly around the top. Place in the oven on the middle rack for 2 hours or until the outside of the meringue is dry. Rest at room temperature until completely cooled.
To make the berry topping, fold the blueberries and raspberries into the cranberry sauce. Refrigerate until ready to use.
Prepare the whipped topping by beating the heavy cream until soft peaks form.
When ready to serve, spoon the whipped topping over the meringue and top with the berry sauce. Garnish with additional berries and mint leaves, if desired.
Notes
This Christmas Wreath Pavlova is best served immediately after assembling. But, it will keep in the fridge for a few hours if you need to.If you wish to make individual pavlovas just use a spoon to drop the meringue mixture onto the baking sheet in small mounds. Be sure to make a small indentation in the centre of each mound so that the toppings don’t slide off.
Get ready to bake the most wholesome and hearty bread! This Easy Oat Bread is packed with small oat flakes, creamy yogurt, and a crunchy seed topping, making it the perfect balance of texture and flavor. It’s an easy, no-fuss recipe for a rustic loaf you’ll love every slice of!
For the complete list of ingredients with measurements and instructions, please see the recipe card at the bottom of the post.
📖 Substitutions & Variations
Sweeten with Honey or Maple Syrup: Instead of sugar, drizzle in some honey or maple syrup for a natural sweetener with a rich flavor.
Add Fruit: Incorporate mashed bananas, applesauce, or chopped berries for a touch of sweetness and extra moisture. This is great for a more flavorful, naturally sweet bread.
Make It Savory: Add herbs such as rosemary, thyme, or oregano to create a savory version of the oat bread. You can also fold in grated cheese for a cheesy twist.
🔪How To Make Oat Bread
Step 1: In a mixing bowl, combine the oatmeal, kefir, and egg. Stir until the mixture is smooth and well-blended.
Step 2: Add the remaining ingredients to the bowl. Mix everything thoroughly to form a consistent batter.
Step 3: Pour the batter into a greased or lined loaf pan, spreading it evenly.
Step 4: Bake the loaf in a preheated oven at 350°F (175°C) for 55 minutes, or until a toothpick inserted into the center comes out clean. Allow the oat bread to cool slightly before slicing. Enjoy!
👩🍳 Expert Tips
Use a serrated knife: For clean slices, a serrated bread knife works best.
Check consistency: If the dough feels too dry, add a tablespoon of milk or yogurt to adjust.
Toast for texture: Lightly toast the oat flakes before mixing for a nuttier flavor in your oat bread.
💭 FAQs
Can I Use Regular Milk Instead Of Kefir For Oat Bread?
Yes, you can substitute regular milk for kefir. However, kefir adds a slightly tangy flavor and additional probiotics. If you prefer a milder taste, opt for regular milk or plant-based milk like almond milk.
How Do I Make Oat Bread Rise More?
For a fluffier oat bread, consider adding a teaspoon of baking powder or baking soda along with the dry ingredients. This will help the bread rise higher during baking.
Can I Make This Recipe Into Muffins Instead Of A Loaf?
Yes! You can make muffins by portioning the batter into greased muffin tins and baking them at the same temperature (350°F). Bake for about 20-25 minutes, or until a toothpick comes out clean.
How To Store Oat Bread?
Store the oat bread in an airtight container or wrapped in a clean kitchen towel for up to 2 days. Keep it in the refrigerator for up to 5 days. Wrap tightly in plastic or foil to maintain freshness.
Can I Freeze Oat Bread?
Slice the bread and freeze individual slices in a freezer-safe bag. Thaw at room temperature or toast directly from frozen.
💖 Serving Suggestions
Here are some great ways to serve Oat Bread with Crunchy Seed Topping:
Homemade Guacamole: Top slices of oat bread with mashed avocado, a sprinkle of salt, and a dash of red pepper flakes.
Creamy Egg Salad: Serve oat bread with creamy egg salad for a protein-packed snack.
Tomato Soup: Pair with a warm bowl of tomato soup for a comforting meal.
Beet Hummus: Serve alongside hummus for a savory, plant-based topping.
Gravlax Cured Salmon: Top oat bread slices with cream cheese, smoked salmon, and capers for a gourmet touch.
Air Fryer Roasted Veggies: Enjoy oat bread with a medley of roasted vegetables for a wholesome meal.
Did you make this recipe? Leave a review and a ⭐⭐⭐⭐⭐ rating below, or tag us in our Facebook Group! Alternatively, bookmark it in your browser or save to Pinterest.
Easy Oat Bread with Crunchy Seed Topping is a wholesome, comforting bread that combines the earthy flavor of oats with a satisfying crunch from the seed topping.
In a mixing bowl, combine the oatmeal, kefir, and egg. Stir until the mixture is smooth and well blended.
Add the remaining ingredients to the bowl. Mix everything thoroughly to form a consistent batter.
Pour the batter into a greased or lined loaf pan, spreading it evenly.
Bake the loaf in a preheated oven at 350°F (175°C) for 55 minutes, or until a toothpick inserted into the center comes out clean. Allow the oat bread to cool slightly before slicing. Enjoy!
Notes
Use a serrated knife: For clean slices, a serrated bread knife works best.Check consistency: If the dough feels too dry, add a tablespoon of milk or yogurt to adjust.Toast for texture: Lightly toast the oat flakes before mixing for a nuttier flavor in your oat bread.
Craving a cozy, flavorful meal? Try these Oven Baked Indian Butter Chicken Thighs! Juicy chicken thighs are marinated in a blend of spices, then baked to perfection and smothered in a creamy, tomato-butter sauce. It's an easy, delicious way to bring a taste of India to your dinner table. Serve with naan or rice for a family-friendly feast everyone will love!
[feast_advanced_jump_to]
💖 Why This Recipe Works
Rich and Creamy Sauce: The combination of butter, cream, and tomato sauce creates an indulgently smooth and luscious sauce that coats every bite of chicken.
Flavorful Spices: With garam masala, tandoori masala, and cayenne pepper, these Indian Butter Chicken Thighs are packed with a burst of authentic Indian flavors that are both aromatic and delicious.
Easy to Prepare: This simple recipe is perfect for busy weeknights or a relaxing weekend meal, bringing the flavors of an Indian restaurant right into your own kitchen.
⭐ Star Ingredients
Butter: Butter adds a rich and creamy base to our dish, enhancing the flavor and texture of the sauce.
Onion: Minced onion provides a sweet and savory foundation, giving depth to the butter chicken sauce.
Minced Garlic: Fresh minced garlic adds an aromatic and slightly spicy note, elevating the overall flavor profile.
Tomato Sauce: A can of tomato sauce creates the tangy and slightly sweet backbone of the butter chicken sauce, balancing the richness of the cream.
Heavy Cream: Heavy cream makes the sauce luxuriously smooth and creamy, making it the perfect complement to the spices.
Salt: Salt enhances all the flavors in the dish, making each ingredient stand out.
Cayenne Pepper: Cayenne pepper brings a hint of heat, adding a subtle kick to the sauce.
Garam Masala: Garam masala is a blend of warm spices, such as cinnamon, cloves, and cardamom, infusing the dish with a distinctive Indian flavor.
Chicken Thighs: Juicy and tender chicken thighs are the star of this recipe, absorbing all the delicious spices and flavors.
Vegetable Oil: Vegetable oil is used to cook the chicken, ensuring it remains moist and flavorful.
Tandoori Masala: Tandoori masala adds a smoky and tangy flavor to the chicken, giving it an authentic Indian touch.
For the complete list of ingredients with measurements and instructions, please see the recipe card at the bottom of the post.
📖 Substitutions & Variations
Spice Adjustments: Adjust the cayenne pepper for more or less heat according to your preference. Experiment with adding additional spices such as coriander, cumin, or smoked paprika for a different flavor profile.
Substitute Chicken Thighs: Use boneless, skinless chicken breasts for a leaner option. Adjust cooking time as breasts may cook faster. Substitute with tofu or paneer for a vegetarian version.
Dairy-Free Option: Replace butter with a dairy-free alternative like coconut oil or margarine. Use coconut cream instead of heavy cream for a dairy-free sauce with a slight coconut flavor.
🔪 How To Make Baked Butter Chicken Thighs
Step 1: In a large skillet over medium heat, melt 2 tablespoons of butter. Add the onion and garlic, cooking slowly until the onion caramelizes to a dark brown, about 15 minutes.
Step 2: In a medium saucepan, combine the cream, tomato sauce, butter, salt, cayenne, and garam masala. Heat over medium-high until it simmers, stirring frequently. Lower to medium-low, cover, and simmer for 20 minutes, stirring occasionally. Add the caramelized onions and garlic, then stir. Remove from the heat and let the sauce cool to room temperature.
Step 3: Preheat your oven to 375°F (190°C). In a large sealable bag, add the chicken thighs and tandoori masala spice. Shake to evenly coat the chicken. Add half of the sauce to the chicken, tossing or rubbing to coat evenly.
Step 4: Place the chicken thighs on a baking sheet and bake for 20 minutes. Remove from the oven, coat with a quarter of the sauce, and bake for another 15-20 minutes. Coat with the remaining sauce, broil on medium to high for 5-6 minutes until crispy. Garnish and serve.
👩🍳 Expert Tips
Marinate Overnight: For even more flavor, marinate the chicken thighs in the masala spice and sauce overnight in the refrigerator. This allows the spices to penetrate the meat more deeply.
Use Fresh Spices: Ensure your spices, especially garam masala and tandoori masala, are fresh for the best flavor. Old spices can lose their potency and won't deliver the same punch.
Rest the Chicken: After baking, let the chicken rest for a few minutes before serving. This allows the juices to redistribute, making the chicken even more tender and juicy.
💭 FAQs
How do I prevent chicken thighs from burning on the grill?
To avoid burning, maintain a medium heat on the grill and monitor the internal temperature, aiming for 165°F (74°C). Marinating the chicken can also help keep it moist and flavorful.
How long should I grill chicken thighs to ensure they are cooked properly?
Boneless chicken thighs typically require 6 to 8 minutes per side, while bone-in thighs need about 8 to 10 minutes per side. Always verify doneness with a meat thermometer, ensuring an internal temperature of 165°F (74°C).
What are some effective marinating techniques for grilled chicken thighs?
A simple marinade can consist of oil, acid (like vinegar or lemon juice), and seasonings. Marinate the chicken for at least 30 minutes, but 2–4 hours offers better results.
How can I achieve juicy and flavorful grilled chicken thighs?
Marinating the chicken enhances flavor and tenderness. Using a meat thermometer to monitor internal temperature ensures juiciness without overcooking.
Best Way to Store Grilled Butter Chicken Thighs
Allow the butter chicken thighs to cool to room temperature. Transfer the chicken and sauce to an airtight container. Refrigerate for up to 3-4 days. Let the butter chicken thighs cool completely. Place the chicken and sauce in a freezer-safe container or heavy-duty freezer bag. Freeze for up to 3 months. Transfer the frozen butter chicken thighs to the refrigerator. Allow to thaw overnight or for at least 8 hours.
💖 Serving Suggestions
These are my favorite sides to serve with Grilled Butter Chicken Thighs:
Naan Bread: Soft and fluffy Naan Breadis perfect for scooping up the rich and creamy sauce.
Basmati Rice: Light and aromatic, Basmati Rice complements the flavors of the butter chicken beautifully.
Cucumber Raita: A refreshing yogurt-based side dish that helps balance the spices.
Steamed Vegetables: Simple steamed vegetables like broccoli, carrots, and peas add a healthy and colorful touch to your meal.
Mango Chutney: A sweet and tangyMango Chutneyprovides a delightful contrast to the savory butter chicken.
Did you make this recipe? Leave a review and a ⭐⭐⭐⭐⭐ rating below, or tag us in our Facebook Group! Alternatively, bookmark it in your browser or save to Pinterest.
Fire up the grill for these mouthwatering Grilled Butter Chicken Thighs! Marinated in a rich, spiced yogurt sauce, these chicken thighs are grilled to juicy perfection.
In a large skillet, over medium heat, add 2 tablespoons butter.Heat until melted.
Add the onion and garlic, and cook slowly until the onion caramelizes to a dark brown, about 15 minutes.In a medium sized saucepan add the cream, tomato sauce, remaining butter, salt, cayenne pepper, and garam masala, whisk to combine.
Place the saucepan over medium to high heat and bring to a simmer.Stirring often.
Reduce the heat to the sauce pan to medium-low, cover, and simmer for 20 minutes.
Make sure to stir occasionally while the sauce cooks.Add the caramelized onions and minced garlic to the saucepan.
Stir to combine.Remove from the heat and allow to reach room temperature.
Preheat your oven to 375 degreesIn a large sealable bag add your chicken thighs and masala spice.
Shake your rub to evenly coat your chicken.Add 1⁄2 of your sauce to the chicken and toss or rub to evenly coat.Place the chicken thighs on the baking sheet.Bake for 20 minutes.
Remove the chicken from the oven and coat the chicken with 1⁄4 of the remaining sauce.Place back in the oven for another 15-20 minutes.
Remove the chicken from the oven and coat with the remaining sauce.
Turn your oven to broil medium to high, place the chicken back in the oven for 5-6 minutes until crispy,
Garnish and serve
Notes
Marinate Overnight: For even more flavor, marinate the chicken thighs in the masala spice and sauce overnight in the refrigerator. This allows the spices to penetrate the meat more deeply.Use Fresh Spices: Ensure your spices, especially garam masala and tandoori masala, are fresh for the best flavor. Old spices can lose their potency and won’t deliver the same punch.Rest the Chicken: After baking, let the chicken rest for a few minutes before serving. This allows the juices to redistribute, making the chicken even more tender and juicy.
Add a touch of holiday magic to your dessert table with these adorable Chocolate Covered Rudolf Strawberries! With a rich chocolate coating and cute decorations, they’re a festive treat that’s as fun to make as it is to eat!
[feast_advanced_jump_to]
💖 Why This Recipe Works
Adorable and Festive: These Rudolph-themed strawberries add a playful holiday touch to any dessert spread.
Easy to Make: Simple ingredients and decorations make them a fun project for all ages.
Delicious Treat: Juicy strawberries paired with rich chocolate create a sweet, irresistible combination.
⭐ Star Ingredients
Strawberries: The fresh, juicy base for these adorable and festive treats.
Candy Eyes: Adds a playful and fun Rudolph face detail.
Pretzels: Perfect for creating Rudolph’s antlers with a salty, crunchy touch.
Red M&M Candies: Makes the iconic red nose for each Rudolph strawberry.
Dark Chocolate Melting Wafers: Ensures a smooth, rich coating for the strawberries, bringing the chocolatey goodness.
For the complete list of ingredients with measurements and instructions, please see the recipe card at the bottom of the post.
📖 Substitutions & Variations
Caramel-Dipped Strawberries: Use caramel as a base coating before dipping in chocolate for a richer, layered flavor.
White Chocolate Rudolphs: Swap dark chocolate for white chocolate to create a lighter, snowy look for your strawberries.
Festive Sprinkle Coating: Roll the chocolate-dipped strawberries in holiday sprinkles before adding the decorations for extra color and texture.
🔪 How To Make Rudolf Strawberries
Step 1: Melt wafers as directed on the bag. Some microwaves are different. I use defrost mode and do it in one-minute increments, stirring in between.
Step 2: Lay out parchment paper. Using a skewer, press into the top of the strawberry and then dip it in the chocolate, covering most of the strawberry. Leave a place at the top not coated to add the pretzel antlers.
Step 3: Place on top parchment paper and immediately before the chocolate dries, add the red M&M for the nose and the two candy eyes.
Step 4: Break the pretzel and press it into the top area that doesn't have chocolate. Keep in the fridge until ready to serve.
💡 Hint: Arrange strawberries in a single layer to prevent decorations from smudging or breaking.
Did you make this recipe? Leave a review and a ⭐⭐⭐⭐⭐ rating below, or tag us in our Facebook Group! Alternatively, bookmark it in your browser or save to Pinterest.
Chocolate Strawberry Rudolf is a fun and festive treat featuring sweet strawberries dipped in chocolate, with cute reindeer details. Perfect for spreading holiday cheer!
10OzGhirardelli Dark Chocolate Flavored Melting Wafers
Instructions
Melt the chocolate wafers according to the instructions on the bag. (Use defrost mode and melt in 1-minute increments, stirring between.)
Lay out parchment paper. Insert a skewer into the top of each strawberry, then dip it into the melted chocolate, leaving the top uncoated for the pretzel antlers.
Place the dipped strawberries on the parchment paper. Before the chocolate hardens, add a red M&M for the nose and two candy eyes.
Break a pretzel into pieces and press them into the top of the strawberry to form the antlers.
Refrigerate until ready to serve.
Notes
Choose Firm Strawberries: Select strawberries with their green tops intact for easy dipping and a fresh presentation.Dry Thoroughly: Make sure the strawberries are completely dry after washing to ensure the chocolate sticks properly.Work Quickly with Chocolate: Melt the chocolate in small batches and dip the strawberries before it cools to get a smooth coating.Use Parchment Paper: Place dipped strawberries on parchment paper to prevent sticking as the chocolate sets.
These Baby Yogurt Bites are soft, cool, and naturally sweet—perfect for soothing gums, introducing new flavors, or simply offering a healthy snack your little one will love! They’re made with just two ingredients and freeze up in under 2 hours. A great make-ahead treat for busy parents.
Whether you're baby-led weaning or looking for infant finger foods, infant yogurt bites are a smart, nutritious option. They're rich in probiotics, easy for tiny hands to grasp, and a soothing treat for teething babies.
Step 1: Insert a toothpick into each blueberry and line a large baking pan with parchment paper.
Step 2: Dip it into the vanilla yogurt, coating the berry completely.
Step 3: Slide the yogurt-covered blueberry off the toothpick, placing it onto the prepared pan. Continue until all the blueberries are coated and on the pan.
Step 4: Freeze for 1-2 hours until firm. Store in an airtight, freezer-safe container. Serve as a refreshing snack whenever you’re ready!
💡 Freeze in single layers and portion into small zip-top bags—perfect to grab and go for daycare or stroller snacks!
👩🍳 Expert Tips
Use full-fat yogurt for babies under 2—healthy fats support brain development.
Stick to unsweetened and avoid added sugars or artificial sweeteners.
Double-dip hack: For thicker coating, freeze once, then re-dip and freeze again.
💭 FAQs
Are yogurt bites safe for babies?
Yes! As long as your baby is past the 6-month mark and has started solids, these soft, cold bites are perfect.
Can I use flavored yogurt?
Stick to plain or naturally flavored (like vanilla) without added sugar to keep it baby-friendly.
How do I store baby yogurt bites?
Keep them in a freezer-safe container for up to 2 months. Layer with parchment paper to prevent sticking.
Can you freeze yogurt bites for babies?
Absolutely! Freezing not only makes them soothing for teething babies but also keeps them fresh longer.
Do I need to use a piping bag?
Not at all! A baby spoon or teaspoon works perfectly.
🧂Serving Suggestions
Here are some great ways to serve Blueberry Yogurt Bites:
Serve with mashed banana or applesauce for a naturally sweet breakfast.
Pair with baby cereal or oatmeal for a balanced meal.
Pop into a toddler bento box alongside sliced avocado or soft scrambled eggs.
Serve after lunch for a cool, calming finish to a warm meal.
Did you make this recipe? Leave a review and a ⭐⭐⭐⭐⭐ rating below, or tag us in our Facebook Group! Alternatively, bookmark it in your browser or save to Pinterest.
These Blueberry Yogurt Bites are the perfect snack for a busy day—sweet, creamy, and oh-so-refreshing! They're super easy to make and a hit with both kids and adults alike.
Insert a toothpick into each blueberry and line a large baking pan with parchment paper.
Dip it into the vanilla yogurt, coating the berry completely.
Slide the yogurt-covered blueberry off the toothpick placing it onto the prepared pan. Continue until all the blueberries are coated and on the pan.
Freeze for 1-2 hours until firm. Store in an airtight, freezer-safe container. Serve as a refreshing snack whenever you’re ready!
Notes
Dry the Berries Well: Ensure your blueberries are completely dry before dipping to help the yogurt adhere better.Thin Coats Work Best: If you prefer a thicker yogurt layer, consider double-dipping the berries after the first coat has set in the freezer for 15 minutes.Use a Toothpick or Skewer: This makes dipping the berries less messy and ensures even coverage of yogurt.
Thai Peanut Salad is crunchy, colorful, and loaded with bold flavor! Tossed with creamy peanut dressing, this easy salad is perfect for meal prep, lunch, or dinner sides.
Inspired by Thai street-style salads like som tam, this Thai Peanut Salad delivers the same bold combo of freshness, heat, and crunch—minus the mortar and pestle. It’s a balanced bite of Southeast Asia in every forkful, and a delicious way to eat more veggies without feeling like you're eating rabbit food.
Bold Flavors & Textures: Crisp veggies meet creamy peanut dressing with a kick.
Fresh & Filling: Protein, fiber, and healthy fats in one delicious bowl.
Quick & Versatile: Ready in under 30 minutes and easy to meal prep.
⭐ Star Ingredients
Chicken Breasts: I love using pan-seared chicken for this—it soaks up the peanut dressing beautifully and keeps the salad filling.
Shredded Cabbage: My favorite for crunch! I use green or purple depending on what’s in the fridge—it holds up well to dressing.
Fresh Herbs: I always go heavy on cilantro and basil for that fragrant Thai flair. Trust me, it makes the salad pop!
Peanuts or Cashews: I like to toast them slightly for extra flavor and crunch. Cashews bring a creamy bite, peanuts keep it traditional.
For the complete list of ingredients with measurements and instructions, please see the recipe card at the bottom of the post.
📖 Substitutions & Variations
Grain or Noodle Boost: Add quinoa, rice noodles, or soba to turn it into a hearty thai peanut noodle salad.
Vegetarian Version: Swap chicken for tofu or tempeh.
Tropical Twist: Add chopped mango or pineapple.
Seafood Switch: Sub grilled shrimp or scallops.
🔪 How To Make Thai Peanut Salad
Season chicken: Sprinkle with salt and pepper. Set aside.
Cook aromatics: Sauté onion and garlic in a skillet for 2 minutes.
Cook chicken: Add to skillet, cook until browned and fully cooked. Let cool, then dice.
Make dressing: Whisk lime juice, ginger, red pepper flakes, then slowly whisk in olive oil. Finish with honey.
Build salad: Toss cabbage, red pepper, carrots, scallions, basil, cilantro, and chicken with dressing.
Top and serve: Sprinkle with peanuts or cashews.
💡Hint: Prep the dressing ahead and store separately. Toss just before serving to keep veggies crisp
👩🍳 Expert Tips
Use Fresh Herbs: They elevate everything.
Spice Control: Adjust red pepper flakes to your heat level.
Protein Swap: Works great with tofu or shrimp if you're switching things up.
💭 FAQs
Can I Make This Peanut Thai Salad Vegetarian?
Yes, you can easily make this salad vegetarian by omitting the chicken. You can replace it with tofu or tempeh for a protein-rich alternative. Marinate and cook the tofu or tempeh similarly to the chicken to infuse it with flavor.
Peanut vs Cashews Which Is Better in Thai Salad?
Peanuts are traditional and crunchy; cashews are creamy and slightly sweet. Both are great but I prefer peanuts for this thai salad.
What's The Best Way To Store Thai Salad?
Keep salad and dressing separate in airtight containers. Best within 2 days. This thai salad recipe does not freeze well.
Did you make this recipe? Leave a review and a ⭐⭐⭐⭐⭐ rating below, or tag us in our Facebook Group! Alternatively, bookmark it in your browser or save to Pinterest.
Experience a burst of bold flavors with this Thai Peanut Salad! Crisp veggies are tossed in a creamy, tangy peanut dressing, creating a refreshing and satisfying dish. It’s the perfect combination of crunch and zest, making it an irresistible choice for lunch or dinner!
Prep your skillet with cooking spray: Sprinkle the chicken with salt and pepper and set aside.
Cook the onion and garlic: Add onion and garlic to the skillet and cook for two minutes.
Add and cook the chicken: Add your chicken to the skillet with the onion and garlic, sauté the chicken until browned and fully cooked, and set the chicken aside to cool.
Dice the chicken: Once cooled, dice the chicken.
Make the Thai Salad Dressing: Add the lime juice, ginger, and red pepper flakes to a bowl, whisk together to combine all ingredients, slowly add the olive oil while whisking, then add honey and whisk until well combined.
Assemble the salad: Combine the cabbage, red pepper, carrots, scallions, basil, cilantro, and diced chicken in a large bowl, then toss with the dressing and mix well.
Top the salad: Top with peanuts or cashews and serve.
Notes
Use Fresh Ingredients: Fresh vegetables and herbs will give your salad the best flavor and crunch. Opt for crisp cabbage, fresh basil, and cilantro to elevate the taste.Adjust the Spice Level: If you prefer a milder salad, reduce the amount of red pepper flakes. If you like it spicier, feel free to add more.
Everyone in the family is going to love this easy sloppy Joe recipe. It’s literally the best Ground Turkey Sloppy Joe Recipe I’ve tried. What I love most about this recipe besides the taste and flavor is that it’s simple and a homemade sloppy joe recipe that is ready to eat and enjoy in just 30 minutes. On busy nights, this recipe is a life-saver!
[feast_advanced_jump_to]
💖 Why This Recipe Works
Big Bold Flavor: These Ground Turkey Sloppy Joes are a flavor-packed mix of tangy and savory goodness that’ll have everyone asking for seconds (and thirds!).
Quick and Easy: Perfect for those busy weeknights! You’ll have a tasty, hearty dinner on the table in no time – no fuss, just yum.
Family Favorite: This dish is always a win! From little ones to grown-ups, everyone’s gonna love digging into this fun, messy, and oh-so-delicious dinner!
⭐ Star Ingredients
Garlic Cloves, minced: These little guys pack a punch! They add that irresistible savory kick that makes every bite extra tasty.
Ground Turkey: The star of the show! It’s lean, and hearty, and soaks up all those yummy flavors like a champ.
Ketchup: Brings the perfect balance of sweet and tangy, making each bite saucy and satisfying.
Brown Sugar: A little sprinkle of sweetness that makes the sauce extra finger-licking good!
Worcestershire Sauce: This secret ingredient gives a deep, cozy flavor that takes everything up a notch.
Garlic Powder: For an extra pop of garlicky goodness in every bite without all the extra chopping.
Onion Powder: Adds that familiar oniony flavor that everyone loves, with zero tears!
Ground Pepper: Just the right amount of gentle heat to make things interesting.
Hamburger Buns: Soft, fluffy, and perfect for soaking up all that saucy goodness. The messier, the better!
Sliced Pickles: A crunchy, tangy touch that brings the whole sloppy joe experience together!
For the complete list of ingredients with measurements and instructions, please see the recipe card at the bottom of the post.
📖 Substitutions & Variations
Southwestern Style: Add corn and black beans to the mix, and spice it up with cumin and chipotle powder for a southwestern flair that adds texture and a zesty kick.
BBQ Turkey Sloppy Joes: Replace the ketchup with your favorite BBQ sauce for a smoky, tangy twist that brings out a whole new depth of flavor in the dish.
🔪 How To Cook Sloppy Joes in A Skillet
Step 1: In a bowl, combine ketchup, brown sugar, Worcestershire sauce, garlic powder, onion powder, and black pepper. Stir well until all ingredients are thoroughly mixed.
Step 2: Once mixed, your sauce is ready to add to the cooked ground meat.
Step 3: Set your stove to medium heat using a skillet. Once hot, add a small amount of olive oil, then add the ground turkey. Cook the turkey, breaking it into pieces, until browned.
Step 4: Add your prepared sauce to the browned meat. Stir until the sauce is evenly mixed with the turkey. Cover the skillet and let the sloppy joe mixture simmer for about 15 minutes.
Step 5: Serve the mixture warm on a bun and top with pickles.
Step 6: Enjoy your delicious Skillet Ground Turkey Sloppy Joes!
👩🍳 Expert Tips
Boost the Flavor with Spices: Want a little extra kick? Try adding a pinch of smoked paprika or a dash of chili powder! It’ll add a smoky or spicy twist that takes your Turkey Sloppy Joes to the next level.
Toast Those Buns: Give your buns a quick toast in the skillet or under the broiler. That little bit of crunch keeps them from getting soggy and makes every bite even better!
Let The Mixture Rest: After simmering, let the sloppy joe mixture sit, covered, for a few minutes. This lets all those yummy flavors blend together for the perfect taste and texture. Trust me, it’s worth the wait!
💭 FAQs
Can You Freeze Sloppy Joes?
Yes, you can freeze Sloppy Joes—just cool, portion into containers, and freeze for up to 3 months; thaw and reheat when ready to enjoy!
What To Do With Leftover Sloppy Joe Meat?
Turn leftover Sloppy Joe meat into loaded nachos, stuffed peppers, a baked potato topping, a pasta sauce, or use it to make a delicious Sloppy Joe quesadilla!
Why Is It Called Sloppy Joe?
Sloppy Joes got their name from their messy, “sloppy” nature and are believed to have been invented by a cook named Joe in a 1930s diner in Sioux City, Iowa. He created a saucy, loose-meat sandwich that quickly became popular for its hearty, casual vibe – and the name “Sloppy Joe” just stuck!
What Do Brits Call Sloppy Joes?
In the UK, Sloppy Joes are called a “dirty burger” or sometimes a “mince roll” when ground beef or mince is served in a bun with sauce.
💖 Serving Suggestions
Here are some really tasty sides to serve with Skillet Ground Turkey Sloppy Joes:
Did you make this recipe? Leave a review and a ⭐⭐⭐⭐⭐ rating below, or tag us in our Facebook Group! Alternatively, bookmark it in your browser or save to Pinterest.
Sizzle up a quick and hearty meal with Skillet Ground Turkey Sloppy Joes. Packed with lean turkey, a tangy sauce, and served on toasted buns, this dish is perfect for a satisfying weeknight dinner.
In a bowl, combine ketchup, brown sugar, Worcestershire sauce, garlic powder, onion powder, and black pepper. Stir well until all ingredients are thoroughly mixed.
Once mixed, your sauce is ready to add to the cooked ground meat.
Set your stove to medium heat using a skillet. Once hot, add a small amount of olive oil, then add the ground turkey. Cook the turkey, breaking it into pieces, until browned.
Add your prepared sauce to the browned meat. Stir until the sauce is evenly mixed with the turkey. Cover the skillet and let the sloppy joe mixture simmer for about 15 minutes.
Serve the mixture warm on a bun and top with pickles. Enjoy your delicious Skillet Ground Turkey Sloppy Joes!
Notes
Enhance the Flavor with Spices: Add a pinch of smoked paprika or a dash of chili powder to the sauce for an extra layer of smoky or spicy flavor that complements the turkey.Toast the Buns: Lightly toast the hamburger buns in the skillet or under a broiler for a few minutes before serving. This adds a slight crunch and prevents the buns from getting soggy.Let the Mixture Rest: After simmering, let the sloppy joe mixture sit covered for a few minutes off the heat. This allows the flavors to meld more thoroughly and makes the texture even better before serving.
Looking for a quick and tasty dinner that the whole family will love? Baked Honey Garlic Chicken Breast is the answer! This recipe has tender, juicy chicken coated in a sweet and savory honey garlic sauce and baked to perfection. It’s super easy to whip up on busy weeknights and goes great with veggies or a side of rice for a complete, satisfying meal. Get ready to enjoy a delicious, wholesome dinner with barely any effort – your family’s new favorite is just a bake away!
[feast_advanced_jump_to]
Why This Recipe Works
You’ll love Baked Honey Garlic Chicken Breast because it’s quick, flavorful, and perfect for any night.
Tender chicken infused with a sweet and savory honey garlic sauce pairs beautifully with veggies or rice, making it an effortless, crowd-pleasing dinner!
🥘 Ingredients
Boneless Skinless Chicken Breasts: Lean protein that becomes tender and flavorful when baked.
Honey: Adds a natural sweetness and helps create a delicious glaze.
Butter: Provides a rich, creamy texture and enhances the overall flavor.
Minced Garlic: Adds a bold, aromatic depth to the dish.
Dijon Mustard: Contributes a sharp, tangy flavor and balances the sweetness of the honey.
Red Pepper Flakes: Adds a touch of heat, which can be adjusted to taste.
For the complete list of ingredients with measurements and instructions, please see the recipe card at the bottom of the post.
📖 Substitutions & Variations
Citrus Honey Marinade: Marinate chicken breasts in a mixture of fresh orange juice, lemon zest, honey, butter, minced garlic, and Dijon mustard, then bake until tender for a tangy, sweet, and flavorful dish.
Double Crunch Honey Garlic Chicken Breasts: Dredge seasoned chicken breasts in flour, dip in beaten eggs, coat with panko breadcrumbs, fry until golden, then bake with the honey garlic sauce for an extra crispy texture.
🔪 How To Cook Honey Garlic Chicken Breast
Step One: Preheat oven to 425 degrees F. Salt and pepper both sides of the chicken and place in a foil-lined baking pan. Meanwhile, in a small saucepan, melt the butter on low-medium heat. Once melted, add the garlic, honey, mustard, and red pepper flakes. Mix until well combined.
Step Two: Pour the mixture on top of the chicken and place in the oven for approximately 30 minutes. Halfway through, remove chicken from the oven and baste with the sauce. Start to check the chicken for around 25 minutes for doneness. Chicken is cooked when it reaches 165 degrees F. Cooking time will vary based on the size of the chicken.
👩🍳 Expert Tips
Marinate for Maximum Flavor: Marinate the chicken breasts in the honey garlic sauce for at least 30 minutes or overnight in the refrigerator. This allows the flavors to penetrate the meat, resulting in a more flavorful dish.
Even Thickness: Pound the chicken breasts to an even thickness before cooking. This ensures they cook evenly and stay juicy.
Use Fresh Garlic: Freshly minced garlic provides a more vibrant and robust flavor compared to pre-minced or powdered garlic.
💭 FAQs
Can I Use Chicken Thighs Instead Of Chicken Breast?
Yes, you can substitute chicken thighs for chicken breasts. Chicken thighs are juicier and have a richer flavor. Adjust the cooking time as needed to ensure the thighs are fully cooked, reaching an internal temperature of 165°F (75°C).
How Do I Cook The Chicken In The Air Fryer?
Preheat the air fryer to 375°F, season and coat the chicken with honey garlic sauce, air fry for 10-12 minutes flipping halfway through until the internal temperature reaches 165°F, then brush with additional sauce and let rest before serving.
Can I Make The Honey Garlic Sauce Thicker?
To thicken the honey garlic sauce, you can make a slurry by mixing 1 tablespoon of cornstarch with 1 tablespoon of water. Add this mixture to the sauce and cook over medium heat until it reaches the desired consistency.
Best Way To Store Cooked Chicken Breast
After cooking, let the chicken breasts cool to room temperature within two hours to prevent bacterial growth. Store the cooled chicken breasts in an airtight container or resealable plastic bag to maintain freshness and prevent odor absorption. Place the container in the refrigerator at or below 40°F (4°C). Use within 3-4 days for optimal quality and safety. For longer storage, place the cooked chicken breasts in a freezer-safe bag or container, removing as much air as possible. Label with the date and use within 2-3 months for the best quality. Thaw frozen cooked chicken breasts in the refrigerator overnight or use the defrost setting on your microwave. Avoid leaving them at room temperature to prevent potential bacterial growth.
🧂Serving Suggestions
Pair Baked Honey Garlic Chicken Breast With These side dishes:
Roasted Vegetables: Serve with a medley of roasted vegetables such as carrots, broccoli, bell peppers, and zucchini for a colorful and nutritious side dish.
Mashed Potatoes: Creamy mashed potatoes provide a comforting and hearty accompaniment that pairs well with the sweet and savory flavors of the chicken.
Steamed Rice: A simple side of steamed white or brown rice absorbs the delicious honey garlic sauce, making it a perfect complement to the chicken.
Quinoa Salad: A fresh quinoa salad with cucumbers, tomatoes, and a light vinaigrette adds a healthy and refreshing contrast to the rich chicken dish.
Garlic Green Beans: Sautéed green beans with a hint of garlic and a squeeze of lemon juice offer a crisp and flavorful side.
Cauliflower Rice: For a low-carb option, serve the chicken with cauliflower rice, which soaks up the sauce beautifully while keeping the meal light.
Garden Salad: A simple garden salad with mixed greens, cherry tomatoes, cucumbers, and a light dressing provides a fresh and crunchy side.
Baked Sweet Potatoes: Baked sweet potatoes add a natural sweetness that pairs wonderfully with the honey garlic chicken.
Did you make this recipe? Leave a review and a ⭐⭐⭐⭐⭐ rating below, or tag us in our Facebook Group! Alternatively, bookmark it in your browser or save to Pinterest.
Say hello to your new favorite dinner—Baked Honey Garlic Chicken Breast! Juicy chicken breasts coated in a sweet and savory honey garlic glaze, baked to perfection. It’s a simple, delicious meal that’s sure to satisfy your cravings any night of the week!
2boneless skinless chicken breastsapproximately 8 ounces each
½cuphoney
3tablespoonbutter
3tablespoonminced garlic
2tablespoondijon mustard
¼teaspoonred pepper flakesmore if you want extra heat
Instructions
Preheat oven to 425 degree F.
Salt and pepper both sides of the chicken and place in a foil lined baking pan.
Meanwhile, in a small saucepan, melt the butter on low - medium heat.
Once melted, add the garlic, honey, mustard and red pepper flakes. Mix until well combined.
Pour the mixture on top of the chicken and place in the oven for approximately 30 minutes.
Halfway through, remove chicken from the oven and baste with the sauce.
Start to check chicken around 25 minutes for doneness. Chicken is cooked when it reaches 165 degrees F. Cooking time will vary based on size of chicken.
Notes
Marinate for Maximum Flavor: Marinate the chicken breasts in the honey garlic sauce for at least 30 minutes or overnight in the refrigerator. This allows the flavors to penetrate the meat, resulting in a more flavorful dish.Even Thickness: Pound the chicken breasts to an even thickness before cooking. This ensures they cook evenly and stay juicy.Use Fresh Garlic: Freshly minced garlic provides a more vibrant and robust flavor compared to pre-minced or powdered garlic.
When comfort food is calling your name, nothing answers quite like a skillet of Parmesan Au Gratin Potatoes. This dish is a heartwarming blend of thinly sliced potatoes, smothered in a creamy, cheesy sauce, and baked to golden perfection right in your skillet. Each bite is irresistibly crispy on top yet tender and savory underneath, making it the perfect side dish for any family dinner.
Whether you're pairing it with a roast, grilled chicken, or enjoying it on its own, these Creamy Au Gratin Potatoes promise to be a crowd-pleaser, filling your kitchen with an aroma that feels like a warm hug.
[feast_advanced_jump_to]
💖 Why This Recipe Works
Comforting and Hearty: Au gratin potatoes are the epitome of comfort food. Their creamy, cheesy texture combined with soft, tender potatoes makes every bite soothing and satisfying.
Versatile Side Dish: These potatoes pair wonderfully with a variety of main courses, from steaks and roasts to grilled chicken or fish, making them a versatile choice for any meal.
Crowd-Pleaser: Loved by adults and kids alike, au gratin potatoes are always a hit at gatherings, family dinners, and holiday meals.
⭐ Star Ingredients
Heavy cream: Adds a rich, velvety texture to the dish, forming the creamy base that envelops the potatoes.
Kosher salt: Enhances the flavors of the other ingredients, bringing out the natural sweetness of the potatoes and cheese.
Minced garlic: Infuses the cream with a pungent, aromatic flavor that complements the earthiness of the potatoes.
Salted butter: Adds a layer of richness and helps to create a golden, crispy top when baked.
Dried minced onion: Offers a subtle sharpness and sweetness, adding depth to the overall flavor profile of the gratin.
Medium potatoes: These are the star of the dish, sliced thinly to absorb the creamy sauce and bake to tender perfection.
Grated Parmesan cheese: Melts into the cream, adding a nutty, savory taste that's key to the gratin's delicious crust.
Parsley: Provides a fresh, herbal note that brightens the rich flavors and adds a pop of color to the finished dish.
For the complete list of ingredients with measurements and instructions, please see the recipe card at the bottom of the post.
📖 Substitutions & Variations
Bacon and Chive Au Gratin Potatoes: Before assembling the dish, cook and crumble some bacon. Layer the bacon bits between the potato slices and sprinkle chopped chives throughout. This adds a smoky, savory depth to the dish, making it even more irresistible.
Garlic and Herb Au Gratin Potatoes: Add a burst of flavor by incorporating minced garlic and a mix of fresh herbs such as rosemary, thyme, and parsley into your cream sauce. This version adds a fragrant and herby touch that complements the nutty Parmesan beautifully.
🔪 How To Make Creamy Au Gratin Potatoes
Step 1: In a small saucepan over low heat, mix together heavy cream, salt, and minced garlic. Let it simmer for 5 minutes to allow the garlic to infuse the cream, then remove from the heat and set aside. Set your oven to 325°F (163°C) to begin.
Step 2: Rinse and then thinly slice the potatoes into ⅛-inch thicknesses using a mandoline slicer.
Step 3: In a 16-inch cast iron skillet, melt and brown the butter over medium heat for 4 minutes until it's slightly golden. Add the minced onion during the last minute of browning, then remove from the heat. Place the sliced potatoes in a spiral pattern over the browned butter in the skillet.
Step 4: Pour the infused cream evenly over the potatoes. Cover the skillet tightly with aluminum foil and bake in the preheated oven for 1 hour and 15 minutes.
Step 5: After baking, remove the skillet and switch the oven setting to broil. Sprinkle Parmesan cheese and parsley over the potatoes. Return the skillet to the oven and broil for 3-5 minutes, or until the cheese is crispy and bubbling.
Step 6: Remove the skillet from the oven and serve the au gratin potatoes while they are still warm, ensuring a delightful and savory experience.
👩🍳 Expert Tips
Choose the Right Potatoes: For the best texture, use starchy potatoes like Russets or Yukon Golds. They have the right balance of starchiness and creaminess, making them ideal for absorbing the sauce without falling apart.
Slice Evenly: Uniformly thin slices are key. Use a mandoline slicer to get consistent, thin slices (about ⅛ inch thick). This ensures even cooking and a perfect texture in every bite.
Layer Thoughtfully: Arrange the potato slices in overlapping layers to maximize exposure to the cream mixture, which helps every slice soak up the flavor and become wonderfully tender.
Use Full-Fat Dairy: For the richest, creamiest sauce, opt for full-fat cream or half-and-half. The fat content adds to the luxurious texture and depth of flavor of the dish.
Season Each Layer: Sprinkle salt, pepper, and other seasonings like garlic powder or thyme between each layer of potatoes. This builds flavor throughout the dish rather than just on the surface.
💭 FAQs
Which type of potatoes work best for this recipe?
Russet potatoes are commonly recommended due to their starchy texture, which absorbs the creamy sauce well. However, Yukon Gold potatoes can also be used for a slightly buttery flavor and tender texture.
How can I ensure the potatoes cook evenly?
To promote even cooking, slice the potatoes uniformly to about ⅛-inch thickness. Using a mandoline slicer can help achieve consistent slices, ensuring all pieces cook at the same rate.
Can I prepare Parmesan Au Gratin Potatoes in advance?
Yes, you can assemble the dish ahead of time and refrigerate it before baking. When ready to serve, bake it in the oven, adding a few extra minutes to the cooking time if it's chilled.
How do I achieve a crispy topping on my au gratin potatoes?
To attain a crispy, golden-brown crust, sprinkle additional Parmesan cheese over the top before baking. Some recipes also suggest adding crushed crackers or breadcrumbs mixed with melted butter for extra crunch.
Best Way to Store Parmesan Au Gratin Potatoes
Cool to room temperature, then store in an airtight container or tightly covered baking dish for 3 to 5 days. Wrap well in heavy-duty aluminum foil or use freezer-safe containers to freeze for up to 3 months. Freezing may slightly alter the texture.
💖 Serving Suggestions
Pair Parmesan Au Gratin Potatoes With These side dishes:
Roasted or Grilled Meats: Serve your au gratin potatoes with Instant Pot Pesto Chicken, Air Fyrer Steak Bites, pork chops, or lamb. The rich, creamy potatoes balance beautifully with the savory flavors of these meats.
Seafood: For a more refined meal, pair with Pan Fried Salmon, Paprika Shrimp, or seared scallops. The subtle flavors of seafood are enhanced by the cheesy richness of the potatoes.
Green Salads: Offer a light, crisp green salad on the side to add freshness and balance to the meal. Consider Salads With Vinaigrette Dressings to cut through the richness of the potatoes.
Did you make this recipe? Leave a review and a ⭐⭐⭐⭐⭐ rating below, or tag us in our Facebook Group! Alternatively, bookmark it in your browser or save to Pinterest.
When comfort food is calling your name, nothing answers quite like a skillet of Parmesan Au Gratin Potatoes. This dish is a heartwarming blend of thinly sliced potatoes, smothered in a creamy, cheesy sauce, and baked to golden perfection right in your skillet.
Preheat the Oven: Set your oven to 325°F (163°C) to begin.
Prepare the Cream Mixture: In a small saucepan over low heat, mix together heavy cream, salt, and minced garlic. Let it simmer for 5 minutes to allow the garlic to infuse the cream, then remove from heat and set aside.
Prepare the Potatoes: Rinse and then thinly slice the potatoes into ⅛-inch thicknesses using a mandoline slicer.
Brown the Butter: In a 16-inch cast iron skillet, melt and brown the butter over medium heat for 4 minutes until it's slightly golden. Add the minced onion during the last minute of browning, then remove from heat.
Arrange the Potatoes: Place the sliced potatoes in a spiral pattern over the browned butter in the skillet.
Add the Garlic Cream: Pour the infused cream evenly over the potatoes.
Bake the Dish: Cover the skillet tightly with aluminum foil and bake in the preheated oven for 1 hour and 15 minutes.
Broil the Potatoes: After baking, remove the skillet and switch the oven setting to broil. Sprinkle Parmesan cheese and parsley over the potatoes.
Final Broiling: Return the skillet to the oven and broil for 3-5 minutes, or until the cheese is crispy and bubbling.
Serve Warm: Remove the skillet from the oven and serve the au gratin potatoes while they are still warm, ensuring a delightful and savory experience.
Notes
Choose the Right Potatoes: For the best texture, use starchy potatoes like Russets or Yukon Golds. They have the right balance of starchiness and creaminess, making them ideal for absorbing the sauce without falling apart.Slice Evenly: Uniformly thin slices are key. Use a mandoline slicer to get consistent, thin slices (about ⅛ inch thick). This ensures even cooking and a perfect texture in every bite.Layer Thoughtfully: Arrange the potato slices in overlapping layers to maximize exposure to the cream mixture, which helps every slice soak up the flavor and become wonderfully tender.Use Full-Fat Dairy: For the richest, creamiest sauce, opt for full-fat cream or half-and-half. The fat content adds to the luxurious texture and depth of flavor of the dish.Season Each Layer: Sprinkle salt, pepper, and other seasonings like garlic powder or thyme between each layer of potatoes. This builds flavor throughout the dish rather than just on the surface.
This Thanksgiving, why not bring a fresh twist to the table with a beautiful Thanksgiving Turkey Charcuterie Board? Packed with all the savory bites and festive flavors we love, this board is a feast for the eyes and the taste buds! Arranged to create the shape of a turkey – it's almost too cute to eat! Whether it’s the star appetizer or a fun addition to the main event, this charcuterie will have everyone nibbling and snapping pics before the turkey even hits the table.
[feast_advanced_jump_to]
💖 Why This Recipe Works
You’ll love this Thanksgiving charcuterie board turkey for its festive charm and delicious variety! With savory meats, cheeses, and seasonal fruits arranged in a turkey shape, it’s a crowd-pleasing, eye-catching appetizer that’s perfect for grazing and wowing your guests.
⭐ Star Ingredients
Rice Crackers: Crunchy little bites that go with everything!
Salami Slices: A tasty, savory classic to keep everyone snacking.
Pepperoni Slices: Spicy and perfect for stacking with cheese!
Almonds: Just a couple to add a nice little crunch.
Big Slice of Cheddar Cheese: Because who doesn’t love cheddar?
Tiny Slice of Red Cheddar: For the Turkey Beak.
Pringles: Gotta have these—everyone loves a good stackable chip.
Grapes: Sweet, juicy, and the perfect balance to the salty stuff.
Cherry Tomatoes: Fresh pops of color and yum.
Kalamata Olives: A little salty treat for the olive fans!
Cream Cheese: So smooth and spreadable, it goes with everything.
Cranberry Cheese Block: A bit of holiday flair and fruity flavor!
For the complete list of ingredients with measurements and instructions, please see the recipe card at the bottom of the post.
📖 Substitutions & Variations
For the rice crackers, you could use multigrain crackers, pita chips, or mini toasts as a substitute. Instead of salami slices, consider prosciutto, soppressata, or turkey pepperoni, and for the pepperoni slices, try swapping in spicy chorizo, summer sausage, or beef jerky slices. Replace almonds with cashews, walnuts, or pistachios for a different nutty crunch.
For the large cheddar slice, Gouda, Colby Jack, or Swiss are great alternatives, and for the red cheddar, aged Gouda or Red Leicester would work well. In place of Pringles, you could use veggie chips, tortilla chips, or cheese crisps. Swap grapes with apple slices, strawberries, or dried cranberries to keep a fruity element on the board.
Cherry tomatoes can be replaced with red bell peppers, baby carrots, or mini cucumbers, while Kalamata olives can be swapped with green olives, black olives, or pickled peppers. For cream cheese, consider using goat cheese, ricotta, or Brie. Finally, if you don’t have cranberry cheese, blueberry goat cheese or Wensleydale with cranberries makes a tasty alternative.
Pile on the Veggies – For a healthier twist, add cucumber slices, baby carrots, red bell peppers, cherry tomatoes, or Celery Sticks to balance out the meats and cheeses with fresh, crunchy bites. Try our recipe for Fermented Vegetables Using Apple Cider Vinegar and place in a bowl next to your Thanksgiving charcuterie.
Add Fresh Fruit – Brighten up your board with seasonal fruits like mandarin oranges, pear slices, strawberries, or grapes. Stuffed Bell Peppers also add a fresh crunch and a pop of color!
Swap the Cheese – Feel free to use any cheese you have on hand, but choosing high-quality options makes a difference. Try an aged cheddar, creamy brie, or tangy goat cheese for variety. Read this article, Best Cheese for Charcuterie Boards for ideas!
Experiment with Crackers – Incorporate different types of crackers, including gluten-free options to accommodate everyone. Air Fryer Pretzels also add a fun, salty twist.
🔪 How to Assemble Your Thanksgiving Turkey Charcuterie Board
Step 1: Start by placing pepperoni slices in a fan shape at the top edge of your board. Add dollops of cream onto the pepperoni slices, followed by the Pringle chips. Next, place grapes as shown in the image.
Step 2: Lay out rice crackers around the pepperoni and grape layer. This adds a crunchy texture and helps transition to the next layer.
Step 3: Fold salami slices into quarters and arrange them below the rice crackers to form the body of the turkey. Place Kalamata olives over the salami layer. Halve the cherry tomatoes and place them between the olives to add more color and texture.
Step 4: Position the cranberry cheese block in the center of the board as the turkey's head. Cut a slice of cheddar cheese and place it on top of the cranberry cheese block, slightly offset to create the turkey's face. Use red cheddar cheese to form the turkey's eyebrows and beak. For eyes, place small balls of cream cheese on the cheddar slice and top with artificial eyes.
Step 5: Arrange almonds at the base of the cranberry cheese block as feet.
Step 6: Your Thanksgiving platter is now ready to serve.
👩🍳 Expert Tips
Mix Colors and Textures – Combine different colors and textures to make the board visually appealing.
Layer for Abundance – Place larger items first, then fill gaps with smaller snacks for a fuller look.
Keep it Bite-Sized – Slice everything into easy-to-grab pieces so guests can enjoy a variety.
💭 FAQs
How do I design a charcuterie board to look like a turkey?
To craft a turkey-shaped charcuterie board: Body: Position a round or oval dish at the center to represent the turkey's body, filling it with items like hummus or a cheese ball. Feathers: Arrange rows of sliced meats, cheeses, crackers, and colorful fruits radiating outward from the "body" to mimic feathers. Head and Face: Use a small round item, such as a mini wheel of cheese, for the head. Add edible decorations like olive slices for eyes and a piece of red pepper for the wattle.
What types of foods are best to include on a Thanksgiving charcuterie board?
Meats: Cured options like salami, prosciutto, and turkey slices. Cheeses: A mix of hard and soft cheeses, such as cheddar, brie, and gouda. Fruits: Seasonal selections like grapes, apple slices, figs, and dried apricots. Nuts: Almonds, walnuts, or pecans for added crunch. Crackers and Breads: An assortment of crackers, breadsticks, and sliced baguettes. Extras: Olives, pickles, jams, and honey to complement the other items.
Can I prepare a charcuterie board in advance?
Yes, you can assemble the majority of your charcuterie board ahead of time: Dry Items: Arrange meats, cheeses, and nuts on the board, then cover tightly with plastic wrap and refrigerate. Perishable Items: Add fresh fruits, crackers, and bread closer to serving time to maintain their texture and freshness.
How can I ensure my charcuterie board offers healthier options?
To create a more health-conscious charcuterie board: Lean Proteins: Include roasted turkey slices or lean chicken instead of higher-fat meats. Whole Grains: Opt for whole-grain crackers and breads. Fresh Produce: Incorporate a variety of fresh vegetables and fruits. Lighter Dips: Choose dips made with yogurt or those that are vegetable-based.
Best Way to Store Thanksgiving Turkey Charcuterie Board
Separate components and refrigerate in airtight containers to maintain freshness; keep crackers and bread separate to prevent fogginess. Reassemble just before serving; avoid storing assembled board for extended periods to preserve texture and appearance.
💖 Serving Suggestions
A turkey snack board pairs beautifully with a variety of sides and small bites that complement its flavors. Here are some ideas:
Warm Bread Rolls or Croissants – Soft, warm bread or buttery croissants add a comforting touch and are perfect for building mini sandwiches with meats and cheeses.
Seasonal Soups – A light Butternut Squash Soup or pumpkin soup brings cozy flavors that balance the savory elements on the board.
Stuffed Mushrooms – These add a warm, earthy flavor and can be stuffed with cream cheese, herbs, or sausage to complement the meats and cheeses.
Fruit Salad or Fresh Fruit – A bowl of Fresh Fruit like apple slices, pomegranate seeds, or citrus segments keeps things light and refreshing, while adding seasonal sweetness.
Mini Quiches or Frittata Bites – These are versatile and can include flavors like spinach, cheese, or bacon, making them a filling and delicious addition.
Did you make this recipe? Leave a review and a ⭐⭐⭐⭐⭐ rating below, or tag us in our Facebook Group! Alternatively, bookmark it in your browser or save to Pinterest.
Create a stunning Thanksgiving Turkey Charcuterie Board that’s as festive as it is delicious, featuring a colorful array of meats, cheeses, and fruits arranged in a charming turkey shape
Start by placing pepperoni slices in a fan shape at the top edge of your board. Add dollops of cream onto the pepperoni slices, followed by the pringle chips. Next place grapes as shown in the image.
Lay out rice crackers around the pepperoni and grape layer. This adds a crunchy texture and helps transition to the next layer.
Fold salami slices into quarters and arrange them below the rice crackers to form the body of the turkey. Place Kalamata olives over the salami layer. Halve the cherry tomatoes and place them between the olives to add more color and texture.
Position the cranberry cheese block in the center of the board as the turkey's head. Cut a slice of cheddar cheese and place it on top of the cranberry cheese block, slightly offset to create the turkey's face. Use red cheddar cheese to form the turkey's eyebrows and beak. For eyes, place small balls of cream cheese on the cheddar slice and top with artificial eyes.
Arrange almonds at the base of the cranberry cheese block as feet.
Your Thanksgiving platter is now ready to serve.
Notes
Mix Colors and Textures – Combine different colors and textures to make the board visually appealing.
Layer for Abundance – Place larger items first, then fill gaps with smaller snacks for a fuller look.Keep it Bite-Sized – Slice everything into easy-to-grab pieces so guests can enjoy a variety.
Looking for an easy, comforting meal that’s perfect for busy nights? This Slow Cooker Chicken Stuffing is a total winner! Tender chicken, savory stuffing, and all the cozy flavors you love—set it in the morning, and come home to a delicious dinner that’s ready to serve!
[feast_advanced_jump_to]
💖 Why This Recipe Works
Comfort Food Classic: Tender chicken and savory stuffing make this a warm, hearty meal everyone will enjoy.
Effortless Cooking: Just toss everything in the slow cooker and let it work its magic—perfect for busy nights.
Family Favorite: Packed with cozy flavors, it’s a dish that’ll have everyone asking for seconds!
⭐ Star Ingredients
Chicken Breasts: Serve as the primary protein, providing a hearty and satisfying base for the dish.
Diced Onion: Adds depth and flavor, enhancing the overall taste with its savory notes.
Nature’s Seasoning: Offers a balanced blend of spices, elevating the taste profile with its well-rounded seasoning.
Minced Garlic: Infuses the dish with a rich aroma and a hint of pungency, adding warmth and depth.
Cream of Chicken Soup: Contributes creaminess and a smooth texture, binding the ingredients together beautifully.
Chicken Broth: Provides necessary moisture, ensuring the stuffing and chicken remain tender and flavorful.
Dry Gravy Mix: Delivers richness and a savory boost, intensifying the flavor of the sauce.
Stuffing: Adds texture and a delightful contrast, soaking up the flavors while providing a satisfying bite.
For the complete list of ingredients with measurements and instructions, please see the recipe card at the bottom of the post.
📖 Substitutions & Variations
Cranberry pop—toss in dried or fresh cranberries for a sweet-tart kick.
Veggie boost—peas, carrots, or green beans add texture and color.
Cheesy finish—melt some cheddar or mozzarella on top for gooey perfection.
🔪How To Make Slow Cooker Chicken Stuffing
Step 1: Sauté diced onions in a skillet until browned. Place the chicken breasts into the slow cooker and sprinkle with Nature’s Seasoning. Add the sautéed onions on top.
Step 2: In a bowl, mix chicken broth, cream of chicken soup, garlic, and dry gravy mix until smooth. Pour this mixture evenly over the chicken in the slow cooker.
Step 3: Sprinkle the stuffing mix crumbs over the top, spreading them out to cover the surface.
Step 4: Cover and cook on low for 6 hours, or until the chicken reaches an internal temperature of 165°F. Serve warm and enjoy!
👩🍳 Expert Tips
Add Fresh Herbs: Toss in some fresh thyme or rosemary for a burst of herbal flavor that complements the stuffing.
Don't Skip the Resting Time: Let the dish rest for 10 minutes after cooking for the flavors to meld together perfectly.
💭 FAQs
Can I Add Different Spices To The Recipe?
Yes, feel free to experiment with additional seasonings like garlic powder, thyme, or rosemary for enhanced flavor.
What Other Toppings Can I Add To The Casserole?
You can top it with crispy fried onions, sliced almonds, or extra cheese for added flavor and texture.
What Is The Best Way To Reheat Leftovers?
Reheat in the microwave or oven at 350°F for 10-15 minutes, until heated through.
How To Store Leftover Stuffing?
Allow the casserole to cool to room temperature before storing. Place in an airtight container and store in the fridge for up to 3-4 days.
💖 Serving Suggestions
Here are some great ways to serve Slow Cooker Chicken.
Mashed Potatoes: Creamy mashed potatoes are a comforting, complementary side dish.
Garlic Bread: A side of garlic bread adds a crunchy, buttery element to the meal.
Did you make this recipe? Leave a review and a ⭐⭐⭐⭐⭐ rating below, or tag us in our Facebook Group! Alternatively, bookmark it in your browser or save to Pinterest.
This Slow Cooker Chicken Stuffing is the perfect cozy meal for busy nights—just set it and forget it! Tender chicken, savory stuffing, and creamy goodness all in one pot.
Sauté diced onions in a skillet until browned. Place the chicken breasts into the slow cooker and sprinkle with Nature’s Seasoning. Add the sautéed onions on top.
In a bowl, mix chicken broth, cream of chicken soup, garlic, and dry gravy mix until smooth. Pour this mixture evenly over the chicken in the slow cooker.
Sprinkle the stuffing mix crumbs over the top, spreading them out to cover the surface.
Cover and cook on low for 6 hours, or until the chicken reaches an internal temperature of 165°F. Serve warm and enjoy!
Notes
Sear the Chicken: Before adding the chicken to the slow cooker, sear it in a hot pan to lock in extra flavor.Add Fresh Herbs: Toss in some fresh thyme or rosemary for a burst of herbal flavor that complements the stuffing.Don't Skip the Resting Time: Let the dish rest for 10 minutes after cooking for the flavors to meld together perfectly.
Discover Asian Pulled Pork, a delicious twist on the classic dish. With savory spices and Asian-inspired flavors, it’s sure to become a favorite. Perfect for sandwiches, tacos, or served over rice, this Instant Pot Asian Pulled Pork Recipe is a versatile and satisfying meal option for any day of the week.
[feast_advanced_jump_to]
Why This Recipe Works
Time-Saving Delight: Enjoy complex Asian flavors in a fraction of the time with the Instant Pot—perfect for busy days.
Tender Perfection: Instant Pot magic turns tough pork into melt-in-your-mouth perfection without the wait.
Asian Fusion Bliss: Bold flavors of soy sauce, hoisin, garlic, and ginger create an authentic and elevated pulled pork experience.
🥘 Ingredients
Pork Shoulder: Versatile cut for succulent pulled pork; options include boneless or bone-in, pork butt, pork loin, or tenderloin.
Peanut or Sesame Oil: Infuses nutty richness, enhancing the overall flavor profile of the Asian pulled pork.
Minced Garlic: Adds pungent and aromatic kick, contributing to the dish’s savory complexity.
Minced Ginger: Brings a zesty and fresh note, complementing the garlic for a well-rounded flavor.
Pepper: Provides a hint of heat, balancing the sweetness of other ingredients.
Sweet Chili Sauce: Introduces sweet and spicy elements, creating a dynamic flavor contrast.
Raw Honey: Adds natural sweetness, contributing to the sticky and caramelized texture.
Soy Sauce: Infuses umami and saltiness, enhancing the overall savory taste.
White Vinegar: Offers tangy acidity, balancing sweetness and richness in the sauce.
Water: Essential for cooking, creating a flavorful base for the pulled pork.
Cornstarch: Used as a thickening agent to achieve the desired sauce consistency.
Green Onions and Sesame Seeds: Fresh and crunchy toppings for visual appeal and added texture.
For the complete list of ingredients with measurements and instructions, please see the recipe card at the bottom of the post.
📖 Substitutions & Variations
Brown Sugar: If you don’t have honey you can switch this for 1 tablespoon of brown sugar instead. White vinegar can be switched with rice wine vinegar.
Rice Wine: Chinese rice wine will give the recipe even more of an Asian flair. Soy sauce can be switched with hoisin sauce. Lastly, you don’t have to use sweet chili sauce, you can also use your favorite BBQ sauce instead.
Chicken Stock: You can add chicken stock to your water for extra flavor or switch the water to chicken broth. If you love pulled pork then you’ll love this pulled pork served on a rice bowl.
Korean Pulled Pork: You can make Korean pulled pork in the Instant Pot. Simply replace the sweet chili sauce with a Korean red pepper paste and add some extra heat by including diced jalapenos or sriracha sauce or hot sauce.
🔪 How To Make Asian Pulled Pork
Here are the step-by-step instructions for making the best Chinese pulled pork.
Step One: Turn the Instant Pot to sauté mode and add the oil. Once hot, add the pork and begin to sear the meat on all sides.
Step Two: Once the pork shoulder is seared, add the ginger, garlic, and pepper. Sauté for 2 minutes more.
Step Three: Turn off the sauté function and add a splash of water to deglaze the Instant Pot liner. This will ensure the burn notice doesn’t come on from food getting stuck on the bottom of the pot. Pour in the remaining water, and add the chili sauce, soy sauce, and honey. once all the cooking liquid has been added, close the lid and seal the pressure valve.
Step Four: Cook your Asian pulled pork at high pressure for 30 minutes. Naturally release the pork shoulder for ten minutes before performing a manual release. Manually release any remaining pressure and remove the pork shoulder from the Instant Pot.
Step Five: Using forks, shred the pork and set aside. The pork shoulder or pork butt should be fall-apart tender and easy to shred. Drain the remaining liquid keeping ¾ cup and set the Instant Pot to sauté.
Step Six: Mix the cornstarch and 1 teaspoon of water to create a slurry. Once the liquid is simmering, whisk in the slurry to thicken the liquid into a sauce. Return the pork to the Instant Pot and mix so that the sauce fully coats the pork.
Step Seven: Serve the Asian pulled pork with white rice, jasmine rice or brown rice and garnish with chopped green onions and sesame seeds.
Step Eight: This is a great main course cuisine and the extremely tender pork makes it a versatile dish that can be served in a number of ways.
Why Do I Need To Deglaze The Instant Pot?
Deglazing the Instant Pot is a crucial step to extract flavorful bits stuck to the bottom, enhancing the overall taste of your dish. Here's a step-by-step guide on how to deglaze:
After Sautéing: Once you've sautéed ingredients in the Instant Pot, there may be browned bits (fond) stuck to the bottom. This is where the rich flavors are.
Add Liquid: Pour a small amount of liquid into the Instant Pot. Common choices include broth, wine, vinegar, or soy sauce, depending on your recipe.
Scrape the Bottom: Use a wooden or silicone spatula to gently scrape the bottom of the pot, loosening the browned bits. This process is crucial for incorporating those concentrated flavors into the liquid.
Sauté if Needed: If your recipe involves further sautéing, switch the Instant Pot to the sauté mode while deglazing. This allows you to continue building flavors.
Ensure Nothing Sticks: Confirm that there are no bits sticking to the bottom before proceeding with the next steps or pressure cooking. This helps prevent the Instant Pot from displaying a "Burn" notice.
Adjust Liquid Amount: If your recipe calls for a specific amount of liquid, ensure you add that required quantity during the deglazing process.
👩🍳 Expert Tips
Sear the Pork First: Browning the pork in the Instant Pot on sauté mode adds so much flavor to the final dish. Don’t skip this step; it’s worth the extra few minutes!
Use a Bold Sauce: Go for a sauce with soy sauce, hoisin, garlic, and a bit of ginger to get that rich, savory flavor. It’s the secret to giving your pork that irresistible Asian-inspired taste!
Natural Release for Extra Tenderness: Letting the pressure release naturally after cooking keeps the meat super tender and juicy, making it perfect for shredding.
💭 FAQs
Which Oil Is Best For Searing Pulled Pork?
In this recipe we use peanut oil or sesame oil; however, you can also use other oils such as vegetable oil or olive oil.
Be sure to heat your oil in the Instant Pot before adding the pork for best results. This will help to create a flavorful and tender pulled pork dish.
The Best Way To Store Aisan Pulled Pork
Keep your pulled pork fresh by placing it in the fridge in an airtight container for up to 3 days. For extended storage, place it in a freezer-safe bag or container and freeze for 2 months.
🧂Serving Suggestions
Pair Instant Pot Asian Pulled Pork With These side dishes:
Asian Pulled Pork Bowls: Combine the pork with noodles or cauliflower rice, bell peppers, carrots and fresh herbs for a healthy twist on pulled pork.
Asian Pulled Pork Sandwich or Sliders: Serve the shredded pork on a crusty roll with your favorite condiments for the best-pulled pork sandwiches. You can also make a batch of Asian pork sliders for parties and social gatherings.
Pulled Pork Stir Fry: Mix in a few of your favorite vegetables and serve the pork over white rice for a complete meal. Add some extra sauces if you like it spicy!
Asian Pulled Tacos: Fill taco shells or lettuce wraps with pulled pork, shredded cabbage, and any other desired toppings. Pork tacos are the best!
Did you make this recipe? Leave a review and a ⭐⭐⭐⭐⭐ rating below, or tag us in our Facebook Group! Alternatively, bookmark it in your browser or save to Pinterest.
Perfect for sandwiches, tacos, or served over rice, this Instant Pot Asian Pulled Pork Recipe is a versatile and satisfying meal option for any day of the week.
Turn the Instant Pot to sauté mode and add the oil. Once hot, add the pork and begin to sear the meat on all sides.
Once the pork shoulder is seared, add the ginger, garlic, and pepper. Sauté for 2 minutes more.
Turn off the sauté function and add a splash of water to deglaze the Instant Pot liner. This will ensure the burn notice doesn’t come on from food getting stuck on the bottom of the pot. Pour in the remaining water, and add the chili sauce, soy sauce, and honey. once all the cooking liquid has been added, close the lid and seal the pressure valve.
Cook your Asian pulled pork at high pressure for 30 minutes. Naturally release the pork shoulder for ten minutes before performing a manual release. Manually release any remaining pressure and remove the pork shoulder from the Instant Pot.
Using forks, shred the pork and set aside. The pork shoulder or pork butt should be fall-apart tender and easy to shred. Drain the remaining liquid keeping ¾ cup and set the Instant Pot to sauté.
Mix the cornstarch and 1 teaspoon of water to create a slurry. Once the liquid is simmering, whisk in the slurry to thicken the liquid into a sauce. Return the pork to the Instant Pot and mix so that the sauce fully coats the pork.
Serve the Asian pulled pork with white rice, jasmine rice or brown rice and garnish with chopped green onions and sesame seeds.
This is a great main course cuisine and the extremely tender pork makes it a versatile dish that can be served in a number of ways.
Notes
Sear the Pork First: Browning the pork in the Instant Pot on sauté mode adds so much flavor to the final dish. Don’t skip this step; it’s worth the extra few minutes!Use a Bold Sauce: Go for a sauce with soy sauce, hoisin, garlic, and a bit of ginger to get that rich, savory flavor. It’s the secret to giving your pork that irresistible Asian-inspired taste!Natural Release for Extra Tenderness: Letting the pressure release naturally after cooking keeps the meat super tender and juicy, making it perfect for shredding.
Whole Wheat Fettuccine Pasta offers a nutritious twist on a classic favorite, blending hearty whole grains with traditional Italian flair. Ideal for health-conscious pasta lovers, this robust option pairs perfectly with a variety of sauces. Enjoy a delicious, guilt-free meal that delivers both flavor and nutrition with every forkful!
[feast_advanced_jump_to]
Why This Recipe Works
Homemade fettuccine pasta brings a burst of fresh flavor and perfect texture to any dish, allowing for creative customization and a healthier meal without additives. Making your own pasta not only enhances the taste but also makes cooking a fun, engaging activity. This makes homemade fettuccine a delightful choice that turns a simple meal into a special occasion.
🥘 Ingredients
All-purpose flour: Provides the basic structure for the pasta, giving it the necessary gluten content to achieve a smooth and elastic dough.
Whole wheat flour: Adds a nutty flavor and rustic texture to the pasta, as well as boosting its nutritional content with extra fiber.
Kosher salt: Enhances the flavor of the pasta, helping to bring out the subtle tastes of the flours and eggs.
Large eggs: Contribute moisture and fat, which help to bind the flour into a cohesive dough while enriching its color and flavor.
Oil: Adds a slight richness to the dough and can help improve its texture, making the pasta slightly more tender.
Water: Sometimes needed to adjust the dough’s consistency, ensuring it’s pliable and easy to shape without being too sticky or dry.
For the complete list of ingredients with measurements and instructions, please see the recipe card at the bottom of the post.
📖 Substitutions & Variations
If you're making gluten-free fettuccine and need substitutions for traditional wheat flour, here are three excellent options:
Rice Flour and Tapioca Starch Mix: Combining rice flour with tapioca starch gives you a balanced mixture that is excellent for pasta making. The rice flour provides structure, while tapioca starch adds a chewy texture that mimics traditional pasta.
Gluten-Free All-Purpose Flour Blend: These blends are specifically formulated to mimic the texture and baking behavior of wheat flour. They usually contain a mix of rice flour, tapioca starch, and potato starch, and are directly substitutable in pasta recipes.
Chickpea Flour: Chickpea flour not only adds a rich, nutty flavor but also increases the protein content of your pasta. It tends to be heavier, so it's often best used in combination with lighter flours like rice flour or a starch-based gluten-free flour to balance the texture.
🔪 How To Make Whole Wheat Fettuccine Pasta
Step One: Add both flours to a mixing both with the salt and mix together until completely combined. Create a well in the center of the flour mixture using the back of a rounded bowl or large spoon.
Step Two: Crack the eggs into the well and the olive oil and water. Begin beating the egg mixture with a fork, gradually incorporating the flour from the sides. Keep mixing gently to avoid breaking the well.
Step Three: As you continue to mix, the flour will thicken the egg mixture, forming a shaggy dough. Remove the shaggy dough and on a floured surface, fold the mixture together using a bench scraper or your hands until a smooth dough ball forms.
Step Four: Knead the dough by hand for 10 to 15 minutes until smooth and elastic. If sticky, add 1 tablespoon of flour at a time while kneading. It may start out dry and crumbly, but should become smooth and slightly tacky. Shape into a ball and wrap tightly in plastic wrap.
Step Five: Bring the dough to room temperature before rolling. Lightly flour a flat surface. Divide the pasta dough into 8 pieces and loosely cover each with plastic wrap.
Step Six: Take one piece at a time and roll it into a ¼ inch thick rectangle. Sprinkle it with flour.
Step Seven: Fold each sheet of pasta into 1” to 3” folds with a dusting of flour each fold, then cut each pasta sheet into ⅛ inch sections.
Step Eight: After cutting, unravel each section into noodles. To freeze uncooked pasta, shape into small mounds on a parchment-lined baking sheet, freeze until solid, then store in an airtight container for up to 1 month. Cook frozen pasta directly without defrosting. To cook, boil a large pot of salted water, add the pasta, stir occasionally, and cook until tender, usually 3 to 5 minutes depending on size.
👩🍳 Expert Tips
Rest the Dough: After kneading, let the dough rest for at least 30 minutes at room temperature. This resting period allows the gluten to relax, making the dough easier to roll out and shape.
Roll Evenly: For consistent cooking and texture, roll the dough to an even thickness. A pasta roller can help achieve uniform thinness, but a rolling pin and a steady hand work well too.
Cut Uniform Strips: When cutting your fettuccine, aim for even, uniform strips. This ensures that all your pasta cooks at the same rate and has the same texture when served.
Prevent Sticking: Dust your fresh pasta with a little flour or line it on a tray with parchment paper to prevent sticking. This is especially important if you're not cooking the pasta immediately.
Use a Large Pot of Boiling Water: Cook fettuccine in a large pot of salted boiling water to give the noodles plenty of space to cook evenly without clumping together.
Don’t Overcook: Fresh pasta cooks much quicker than dried pasta, often in just 2-3 minutes. Taste test a strand before draining to ensure it’s al dente.
💭 FAQs
Can Fettuccine Be Used With Any Type Of Sauce?
Yes, fettuccine is versatile and can be used with a variety of sauces. It pairs exceptionally well with thicker sauces because its wide and flat shape holds onto sauces better than thinner pasta types.
How Do You Prevent Fettuccine From Sticking Together?
To prevent sticking, add the pasta to boiling water and stir during the first two minutes of cooking. Using enough water and a dash of oil can also help. Stir occasionally throughout cooking.
Is Whole Wheat Pasta Healthier Than Regular Pasta?
Allow the cooked fettuccine to cool to room temperature, but don't leave it out for more than two hours to avoid bacterial growth. Transfer the cooled pasta to an airtight container. If you've already mixed it with sauce, it can be stored as is. If it's plain, toss it with a little oil to prevent sticking. Store in the refrigerator for up to 3-5 days. For longer storage, cooked fettuccine can be frozen. Spread it out on a baking sheet to freeze individually, and then transfer the frozen noodles to a freezer-safe bag or container. This prevents the noodles from clumping together. It can be kept frozen for up to 2 months.
🧂Serving Suggestions
Pair Whole Wheat Fettuccine Pasta With These side dishes:
Protein Choices: Classic proteins like Grilled Chicken, Paprika Shrimp, or Steak Bites complement the noodles and can be tossed in or served alongside. For a vegetarian option, consider Sautéed Mushrooms or roasted chickpeas.
Sauces: Fettuccine famously pairs with Creamy Pumpkin Alfredo Sauce, but it’s also delicious with tomato-based marinara, pesto, or a creamy vodka sauce. Each sauce offers a different flavor profile that can transform the dish.
Did you make this recipe? Leave a review and a ⭐⭐⭐⭐⭐ rating below, or tag us in our Facebook Group! Alternatively, bookmark it in your browser or save to Pinterest.
Treat yourself to a wholesome and delicious meal with this Whole Wheat Fettuccine Pasta! Made with hearty whole wheat noodles and your favorite sauce, it’s a nutritious twist on a classic comfort food. Perfect for a cozy dinner that’s both satisfying and nourishing!
Add both flours to a mixing both with the salt and mix together until completely combined.
Create a well in the center of the flour mixture using the back of a rounded bowl or large spoon. Crack the eggs into the well and the olive oil and water.
Begin beating the egg mixture with a fork, gradually incorporating the flour from the sides. Keep mixing gently to avoid breaking the well. As you continue to mix, the flour will thicken the egg mixture, forming a shaggy dough.
Remove the shaggy dough and on a floured surface, fold the mixture together using a bench scraper or your hands until a smooth dough ball forms. Knead the dough by hand for about 10 to 15 minutes until it becomes smooth and elastic. If the dough feels sticky, add 1 tablespoon of flour at a time during kneading. Initially, the dough may seem dry and crumbly, but it should become smooth and slightly tacky.
Shape the dough into a ball and tightly wrap it in plastic wrap. Allow the dough to rest at room temperature for at least 30 min or up to 3 hours. Alternatively, you can refrigerate the dough for up to 24 hours. Before rolling, bring the dough to room temperature.
Lightly dust a flat surface with flour.
Divide the rested pasta dough into 8 equal pieces and loosely cover each piece with plastic wrap. Take one piece at a time and roll it into a ¼ inch thick rectangle. Sprinkle it with flour.
Fold each sheet of pasta into 1” to 3” folds with a dusting of flour each fold, then cut each pasta sheet into ⅛ inch sections. Once cut, unravel each section to for your noodles.
To freeze uncooked fresh pasta, form it into small mounds on a parchment paper-lined baking sheet and freeze until solid, then storing it in an airtight container in the freezer for up to 1 month. Cook the frozen pasta directly without defrosting.
To cook the pasta, boil a large pot of salted water and drop the pasta into it. Stir occasionally and cook until the pasta is tender, which usually takes around 3 to 5 minutes depending on the shape and size of the pasta.
Notes
Rest the Dough: After kneading, let the dough rest for at least 30 minutes at room temperature. This resting period allows the gluten to relax, making the dough easier to roll out and shape.Roll Evenly: For consistent cooking and texture, roll the dough to an even thickness. A pasta roller can help achieve uniform thinness, but a rolling pin and a steady hand work well too.Cut Uniform Strips: When cutting your fettuccine, aim for even, uniform strips. This ensures that all your pasta cooks at the same rate and has the same texture when served.Prevent Sticking: Dust your fresh pasta with a little flour or line it on a tray with parchment paper to prevent sticking. This is especially important if you’re not cooking the pasta immediately.Use a Large Pot of Boiling Water: Cook fettuccine in a large pot of salted boiling water to give the noodles plenty of space to cook evenly without clumping together.Don’t Overcook: Fresh pasta cooks much quicker than dried pasta, often in just 2-3 minutes. Taste test a strand before draining to ensure it’s al dente.
Craving a dinner that’s as fun to eat as it is delicious? These Slow Cooker Meatball Subs are a total win! Juicy, flavorful meatballs simmered in a rich sauce, then tucked into toasted rolls with melty cheese—it’s the ultimate comfort food the whole family will love!
[feast_advanced_jump_to]
💖 Why This Recipe Works
Rich and Flavorful: Tender meatballs simmered in a savory sauce make every bite unforgettable.
Easy Crowd-Pleaser: Perfect for weeknight dinners, game days, or feeding a hungry crowd.
Customizable and Fun: Toasted rolls, gooey cheese, and your favorite toppings make these subs a hit every time!
⭐ Star Ingredients
Panko Crumbs: Provide a light, crispy texture, helping to bind the meatballs while adding a subtle crunch.
Parmesan Cheese: Infuses a rich, nutty flavor, enhancing the savory profile of the meatballs.
Garlic Powder: Adds a warm, aromatic touch, infusing the dish with a classic savory essence.
Onion Powder: Delivers depth and a hint of sweetness, rounding out the flavor of the meatballs.
Italian Seasoning: Brings a blend of herbs, enriching the meatballs with authentic Italian flavors.
Salt: Enhances all the flavors, ensuring the meatballs are perfectly seasoned.
Eggs: Serve as a binding agent, keeping the meatballs intact and adding a rich texture.
Milk: Adds moisture, ensuring the meatballs remain tender and juicy.
Italian Sausage: Provides a spicy, flavorful kick, adding depth and complexity to the meatballs.
Lean Ground Beef: Contributes heartiness and a meaty richness, forming the base of the meatballs.
Crushed Tomatoes: Form a tangy, robust sauce, enveloping the meatballs in a rich flavor.
Hotdog Buns: Offer a soft, convenient vessel for serving, perfectly encasing the meatball mixture.
Shredded Mozzarella: Adds a creamy, melty layer on top, providing a classic cheesy finish.
For the complete list of ingredients with measurements and instructions, please see the recipe card at the bottom of the post.
📖 Substitutions & Variations
Bread Options: Replace hotdog buns with hoagie rolls, baguettes, or garlic bread for added texture and flavor.
Protein Swap: Use ground turkey, chicken, or plant-based ground meat instead of beef and sausage for a lighter or vegetarian version.
Sauce Variety: Use a creamy Alfredo sauce or a pesto-tomato mix instead of marinara for unique flavor profiles.
🔪 How To Make Slow Cooker Meatball Subs
Step 1: Combine crumbs, Parmesan, and spices in a small bowl. Set aside.
Step 2: In a large bowl, mix the two ground meats.
Step 3: Add eggs and milk to the meat mixture and combine well.
Step 4: Add the crumb mixture to the meat and mix until fully blended.
Step 5: Form 1”-2” meatballs and let them rest for 15 minutes. Meanwhile, mix the remaining spices into the crushed tomatoes.
Step 6: Place the meatballs in the slow cooker and set it to high.
Step 7: Cook for two hours, then add marinara sauce.
Step 8: Cook for one more hour.
Step 9: Place three cooked meatballs on a bun.
Step 10: Top with mozzarella and fresh chopped basil. Enjoy!
👩🍳 Expert Tips
Brown the Meatballs First: For extra flavor, lightly brown the meatballs in a pan before adding them to the slow cooker.
Use Fresh Breadcrumbs: Fresh breadcrumbs give a better texture and flavor compared to store-bought dry ones.
Add a Splash of Wine: A splash of red wine in the sauce can elevate the taste and add depth.
Don’t Overcrowd the Slow Cooker: Give the meatballs some space in the slow cooker to cook evenly and get that perfect tender texture..
💭 FAQs
Can I Prepare The Meatballs Ahead Of Time?
Yes, you can make and freeze the meatballs for up to 3 months. Cook directly from frozen in the slow cooker, adjusting the time as needed.
What’s The Best Way To Prevent Soggy Buns?
Lightly toast the buns before adding the meatballs to keep them from getting soggy.
What’s The Best Way To Prevent Soggy Buns?
Ensure the meat mixture is well combined and let the formed meatballs rest before cooking.
Can I Make This Without A Slow Cooker?
Yes, bake the meatballs in the oven and simmer the sauce on the stovetop. Combine before serving.
How Do I Store Leftovers?
Store leftover meatballs and sauce in an airtight container in the refrigerator for up to 4 days.
💖 Serving Suggestions
These are my favorite side dishes to serve with slow cooker meatball subs:
Did you make this recipe? Leave a review and a ⭐⭐⭐⭐⭐ rating below, or tag us in our Facebook Group! Alternatively, bookmark it in your browser or save to Pinterest.
These slow cooker meatball subs are a total game-changer—perfectly juicy meatballs smothered in marinara and melted mozzarella! Super easy to make and great for busy weeknights or a fun family dinner.
Combine crumbs, Parmesan, and spices in a small bowl. Set aside.
In a large bowl, mix the two ground meats.
Add eggs and milk to the meat mixture and combine well.
Add the crumb mixture to the meat and mix until fully blended.
Form 1”-2” meatballs and let them rest for 15 minutes. Meanwhile, mix the remaining spices into the crushed tomatoes.
Place the meatballs in the slow cooker and set it to high.
Cook for two hours, then add marinara sauce.
Cook for one more hour.
Place three cooked meatballs on a bun.
Top with mozzarella and fresh chopped basil. Enjoy!
Notes
Brown the Meatballs First: For extra flavor, lightly brown the meatballs in a pan before adding them to the slow cooker.Use Fresh Breadcrumbs: Fresh breadcrumbs give a better texture and flavor compared to store-bought dry ones.Don’t Overcrowd the Slow Cooker: Give the meatballs some space in the slow cooker to cook evenly and get that perfect tender texture.
Looking for some easy, mouth-watering, and festive appetizers for your Christmas party? Look no further, today we are sharing 31 of the Best Christmas Finger Foods. From smoked salmon bites to fun treats like snowman cheese balls and a spinach dip Christmas tree, there’s something for everyone!
These simple, Christmas snacks make holiday gatherings feel festive and fun without all the fuss. Perfect for moms looking to keep things delicious and stress-free! In fact, these easy finger food recipes will be a big hit when you gather with friends and family to enjoy the holiday season!
[feast_advanced_jump_to]
Enjoy These Christmas Appetizers
Get ready to impress your guests with these creative and delicious Christmas finger food ideas that are perfect for any festive gathering.
Breaded Air Fryer Artichoke Hearts
These crispy, flavorful Breaded Air Fryer Artichoke Hearts dish is the perfect gluten free, vegan Christmas appetizer for your Christmas party. They're easy to make in the air fryer making them good finger foods for everyone.ristmas party. They're easy to make in the air fryer and are sure to be a hit with everyone.
Smoked Salmon and Cream Cheese Bites
Decorate your Christmas table with these delicious Smoked Salmon and Cream Cheese Bites. Made with light cream cheese these Christmas appetizers are perfect as a finger food.
Smoked Bacon Wrapped Chicken Bites
These savory and satisfying Smoked Bacon Wrapped Chicken Bites are the perfect party appetizer for Christmas. Wrapped in crispy bacon, these juicy chicken bites, they're sure to be a crowd-pleaser.
Mini Cheese Stuffed Peppers
These Mini Cheese Stuffed Peppers are a perfect Christmas finger food, combining creamy cheese filling and crispy turkey bacon inside sweet mini bell peppers. Easy to prepare, these best finger foods are sure to impress at any holiday gathering.
Stuffed Mushrooms with Crab
These decadent Stuffed Mushrooms Filled with Creamy Crab Meat are the perfect Christmas appetizer for a special occasion or holiday party. Loaded with both mozzarella cheese and parmesan cheese these stuffed mushrooms make a great Christmas finger food option.
Spinach Dip Christmas Tree
This Spinach Dip Christmas Tree is a great Christmas appetizer, featuring a creamy spinach and cheese filling wrapped in a crispy pizza crust. Shaped like a festive Christmas tree, this breadsticks recipe is not only fun to look at but also delicious making it perfect for the festive season.
Holiday Charcuterie Board
A Holiday Charcuterie Board is a must-have finger foods idea for any Christmas gathering. This festive board is packed with delicious meats, cheeses, fruits, and crackers, making it the perfect Christmas finger food appetizer for your guests.
Easy Pigs In A Blanket
Pigs in a Blanket are a simple and fun finger food that everyone will love. The crispy pastry dough is filled with savory sausage, making it the perfect bite-sized Christmas treat.
Mini Goat Cheese Balls Appetizer
Mini Goat Cheese Balls make the perfect and tasty Christmas party finger food. The creamy goat cheese is mixed with herbs and spices, then rolled into balls and served with crackers or bread.
Spinach Puffs Recipe with Puff Pastry and Cheese
Need a delicious Christmas appetizer? Try Spinach Puffs Recipe with Puff Pastry and Cheese! The flaky puff pastry is filled with a creamy spinach and cheese filling, making them the perfect bite-sized Christmas treat.
Tater Tot Cups
These crispy Tater Tot Cups are the perfect Christmas finger food for parties and game day gatherings! They're easy to make and always a crowd-pleaser. Serve with sweet chili sauce or Ranch Dressing for the perfect xmas snack.
Cheese Ball Bites
These Bite-Sized Cheese Balls are great Christmas party appetizers. They're easy to make and always a hit with guests. This cute little finger food idea is made just like the big version
Round Charcuterie Board With Brie
This Christmas Tree Charcuterie Board is the perfect centerpiece for your Christmas holiday gathering. It's packed with delicious meats, cheeses, fruits, and crackers, making it the perfect Christmas finger food for the holiday season.
Stuffed Mini Baked Potatoes
These adorable Mini Stuffed Potatoes are the perfect Christmas appetizer for a family holiday gathering. They're filled with a variety of delicious toppings, such as cheese, bacon, and sour cream. It's the perfect Christmas Eve treat!
Air Fryer Chestnuts
These roasted Air Fryer Chestnuts are a classic Christmas treat. They're easy to make in the air fryer and are a delicious snack. Make chestnuts this way just once, and there will be no going back
Christmas Reindeer Cheese Ball
This festive Christmas Reindeer Cheese Ball dish is the perfect centrepiece for your holiday party. It's shaped like a reindeer and is filled with delicious cheese, herbs, and spices. It’s a perfect fun and festive holiday snack plate or Christmas appetizer (as well as a festive centerpiece at Christmas gatherings).
Antipasto Christmas Tree
This Antipasto Christmas Tree is a popular Italian take on an antipasto platter and more. It’s worth making several of these because, as well as being a delicious appetizer, it makes a gorgeous and edible table centerpiece.
This Easy Marinated Cheese is the perfect Christmas appetizer for a holiday gathering. The cheese is marinated in a delicious mixture of herbs, spices, and olive oil, making it the super tasty.
Butter Chicken Skewers
These Butter Chicken Skewers are a flavorful and easy Christmas appetizer. The tender chicken is marinated in a rich and creamy sauce, making it a great party snack.
Ranch Snowman Cheeseball
This Ranch Snowman Cheeseball is a fun holiday appetizer that's both cute and tasty. Made with creamy cheese, ranch seasoning, and mozzarella cheese, it's shaped like an adorable snowman, making it a festive addition to any party. Easy to prepare and perfect for spreading on crackers or dipping, this cheeseball is a fun and delicious treat that will surely impress your guests.
Snowman Hard-Boiled Eggs
These adorable Snowman Hard-Boiled Eggs are a fun and festive Christmas appetizer. They're easy to make and are great for a holiday party. A delicious Christmas snack kids will want to eat!
Christmas Tree Shaped Charcuterie Board
Add a festive touch to your Christmas holiday party with this fun and creative Christmas Tree Shaped Charcuterie Board. It's a delicious way to serve a variety of meats, cheeses, and other festive Finger foods.
Candy Cane Charcuterie Board
The Candy Cane Charcuterie Board is a delightful and festive appetizer that's perfect for Christmas gatherings. With an assortment of cured meats, cheeses, olives, and fresh fruit, this board not only looks like a candy cane but is also packed with flavors to please any crowd. It's super easy to assemble and guaranteed to add a cheerful touch to your holiday table while making snack time fun and tasty for everyone!
Holiday Charcuterie Board Idea
Impress your guests with this stunning Holiday Charcuterie Board Idea . It's filled with a variety of delicious snacks. This holiday charcuterie board is a great appetizer you can serve at home, at a party, or even as Christmas day food for everyone to snack on before the big meal.
Charcuterie Wreath
The Charcuterie Wreath is a delightful and festive appetizer perfect for the holiday season. This beautiful creation features a variety of savory meats, delicious cheeses, tangy olives, and colorful veggies, all artfully arranged in the shape of a wreath. Not only does it make a stunning centerpiece for your table, but it's also super easy to put together, making it an ideal choice for any Christmas gathering.
White Bean Hummus with Cranberries
This White Bean Hummus with Cranberries is a festive holiday treat, blending creamy beans with sweet-tart cranberries and a hint of citrus. Perfect dip for your Christmas holiday Gatherings, it’s a tasty twist on a classic dip!
Easy Buttered Radishes Recipe
These simple and yummy Buttered Radishes are the perfect Christmas snack for your holiday gatherings. They're easy to make and add a touch of freshness to your table. They are the perfect way to enjoy a low-carb and keto snack! It’s also great for those who don’t like raw radishes.
Best Pecan Bacon Cheese Ball
Get ready to wow your guests with this Pecan Bacon Cheese Ball! It's a delicious mix of creamy cheese, crispy bacon, and crunchy pecans, perfect for pairing with your favorite crackers. Easy to make and even easier to enjoy, it's a surefire hit for any party!
Smoked Salmon Crostini
These Smoked Salmon Crostini are perfect for a Christmas holiday party or a special occasion. This Smoked Salmon Crostini is the perfect appetizer for somebody looking for an easy appetizer that is full of different flavors and unique tastes topped on toasted baguette slices.
Cranberry Meatballs
These sweet and tangy Cranberry Meatballs are a classic Christian holiday Appetizer. They're easy to make and always a crowd-pleaser. Cranberry Meatballs are made by slow-cooking frozen meatballs in a sweet and tangy homemade cranberry bbq sauce.
Pimento Cheese Sausage Balls
These Pimento Cheese Sausage Balls are loaded with creamy, tangy palmetto cheese. Everyone will love this for an addictively delicious appetizer or snack!
Try These Finger Food Ideas This Christmas
These Christmas finger food ideas offer something for everyone, combining easy party appetizers to make Christmas extra fun. From scrumptious cheese balls and savory stuffed mushrooms to creative charcuterie boards, these Christmas finger foods are sure to impress without the stress.
Bring home the classic comfort of our Homemade Bean And Bacon Soup Recipe. This timeless and delicious recipe combines the rich flavors of savory bacon with wholesome beans, creating a hearty and delicious soup.
Say goodbye to complicated cooking and enjoy a warm bowl of homemade goodness with minimal effort and maximum flavor!
[feast_advanced_jump_to]
💖 Why This Recipe Works
Bacon: Bacon makes everything taste better, and it adds a delicious smoked flavor to this wonderful soup that will have everyone raving about it.
Simple Ingredients: You use simple everyday ingredients for this homemade soup.
It's Great Reheated: There's always leftovers and this homemade bacon and bean soup is just as delicious reheated as it is the day you cook it.
Bacon: You aren't using bacon bits for this recipe, instead grab your favorite sliced bacon.
Onion: The best onion to use in soup recipes is a yellow or sweet onion.
Fresh veggies: Head to the produce section to pick up some carrots and celery sticks.
Seasonings: For flavor, you will need garlic powder, salt, pepper, and a bay leaf.
Great Northern Beans: Drain and rinse 2 cans of cannellini beans before using them.
Chicken broth: Since you are using bacon, you could also use beef broth, but I used chicken.
Tomato sauce: You will need a 4 oz can of tomato sauce. This adds flavor and helps to thicken up your bacon soup.
For the complete list of ingredients with measurements and instructions, please see the recipe card at the bottom of the post.
📖 Substitutions & Variations
Bacon And Navy Bean Soup: Enjoy a homely bowl of this soup, filled with the goodness of creamy navy beans and chunks of tasty bacon.
Add Kale: This variation adds vitamin-rich kale for a healthy twist on the traditional soup.
Add Mushrooms: This version incorporates Earthy Mushrooms, adding an extra layer of flavor and texture.
🔪 How To Make Bean and Bacon Soup?
Step 1: In a large skillet over medium-high heat, cook the bacon until it's crispy.
Step 2: Move the bacon to a paper towel-lined plate.
Step 3: Keep 2 tablespoons of the bacon fat and sauté the onion, celery, and carrots for about 5 minutes.
Step 4: Transfer the sautéed veggies to a stock pot, and add your canned beans, broth, garlic powder, bay leaf, salt, and pepper. Stir everything until well combined. Bring everything to a boil. Then, reduce the heat to medium-low and simmer your soup for 1 hour.
Step 5: Remove the bay leaf. Blend the soup in an immersion blender until it's smooth, thick and creamy.
Step 6: Next, add the tomato sauce and ½ of the cooked bacon. Stir the soup until everything is fully incorporated. Season with more salt and pepper if you desire. Ladle the bean soup into bowls or soup pot and garnish with bacon and parsley.
👩🍳 Expert Tips
Use Quality Bacon: Choose good quality bacon. It will add a smoky depth of flavor to your soup. Cook it until it is crispy and use the rendered fat to sauté your vegetables for extra flavor.
Don't Rush the Simmering: Allow your soup to simmer slowly on the stovetop. This will help the flavors to meld together and the beans to become perfectly tender.
Gradual Seasoning: Start with less salt and pepper, adjust as needed later in the cooking process.
💭 FAQs
Can I Make This Soup In The Instant Pot Or Slow Cooker?
Yes! You can easily adapt the Bean and Bacon Soup recipe for both Instant Pot and slow cooker. For the Instant Pot, you would use the sauté function for any browning, then switch to pressure cook for 7 minutes. In a slow cooker, you can let it simmer on low for two hours adding the beans near the end.
How To Thicken Bean And Bacon Soup?
To thicken Bean and Bacon Soup, you can puree a portion of the soup using a blender or immersion blender. Alternatively, you can make a cornstarch slurry by mixing equal parts cornstarch and water, then stir it into the soup and simmer until it thickens.
Can I Use Tomato Paste Instead Of Tomato Sauce?
Yes, you can substitute tomato paste for tomato sauce in Bean and Bacon Soup.
Can I Use Ham Instead Of Bacon?
Yes, you can certainly use ham instead of bacon in bean and bacon soup. You can opt for a ham bone with chunks of ham or diced ham to add flavor and texture to the soup.
How To Store Leftover Bean Soup?
Allow soup to cool, then move the soup into an airtight container. It's best to use glass containers as they don't absorb any flavors or odors. If you plan to consume the leftovers within 3-4 days, refrigerate the soup. Ensure the temperature of your fridge is set below 40°F (4°C) for safe storage. To store soup for longer, freeze it using a freezer-safe container or bag. Leave about an inch of space at the top for expansion. Properly stored, your bean and bacon soup will maintain it's quality for 2 to 3 months.
💖 Serving Suggestions
Pair homemade Stove Top Bean and Bacon Soup With These side dishes:
Instant Pot Hawaiian Rolls: These sweet and fluffy rolls are perfect for sopping up the flavorful broth of the Bean and Bacon Soup.
Cheesy Garlic Pizza Bread or Toast: A classic choice that complements the soup well. You can brush the bread with garlic butter for extra flavor.
Cheesesteak Quesadillas: Create simple cheesesteak quesadillas to serve alongside the soup. The gooey cheese pairs nicely with the hearty flavors of the soup.
Chopped Italian Salad: Prepare a fresh salad with crisp lettuce, cherry tomatoes, cucumber, and a light vinaigrette. It provides a refreshing contrast to the rich soup.
Did you make this recipe? Leave a review and a ⭐⭐⭐⭐⭐ rating below, or tag us in our Facebook Group! Alternatively, bookmark it in your browser or save to Pinterest.
In a large skillet over medium-high heat, cook the bacon until it's crispy.
Move the bacon to a paper towel-lined plate.
Keep 2 tablespoons of the bacon fat and sauté the onion, celery, and carrots for about 5 minutes.
Transfer the sautéed veggies to a stock pot, and add your canned beans, broth, garlic powder, bay leaf, salt, and pepper. Stir everything until well combined. Bring everything to a boil. Then, reduce the heat to medium-low and simmer your soup for 1 hour.
Remove the bay leaf. Blend the soup in an immersion blender until it's smooth, thick and creamy.
Next, add the tomato sauce and ½ of the cooked bacon. Stir the soup until everything is fully incorporated. Season with more salt and pepper if you desire. Ladle the bean soup into bowls or soup pot and garnish with bacon and parsley.
Notes
Quality Bacon: Opt for good quality bacon. It will add a smoky depth of flavor to your soup. Cook it until it is crispy and use the rendered fat to sauté your vegetables for extra flavor.Don’t Rush the Simmering: Allow your soup to simmer slowly on the stovetop. This will help the flavors to meld together and the beans to become perfectly tender.Gradual Seasoning: Start with less salt and pepper, adjust as needed later in the cooking process.
Get ready to dazzle your guests with a festive twist on a classic favorite! These Christmas Tree Spinach Dip Breadsticks are not just delicious; they're a fun and eye-catching Christmas tree appetizer that's perfect for any holiday gathering. Easy to make and even easier to enjoy, these Christmas tree breadsticks will have everyone reaching for seconds while admiring your creative flair.
[feast_advanced_jump_to]
Why This Recipe Works
This Cheesy Pull Apart Christmas Tree is the ultimate holiday crowd-pleaser! You'll love how it magically transforms your table into a festive feast that's as fun to look at as it is to eat. The gooey cheese and warm, buttery bread come together to create a delightful treat that's perfect for pulling apart and sharing.
Frozen Chopped Spinach: It's my go-to for a hearty, nutritious twist that makes our festive treat not only delicious but also a bit healthier.
Cream Cheese: This is my secret for that irresistibly creamy smoothness that binds all the flavors together like a warm holiday hug.
Garlic: I love the subtle kick it brings—just enough to elevate each bite without overpowering the other flavors.
Salt: A pinch here enhances everything, making the individual flavors pop just right.
Onion Powder: It’s my little trick for adding a mild, sweet depth that complements the garlic so well.
Chili Powder: A gentle sprinkle brings a whisper of warmth and spice, perfect for those chilly winter evenings.
Pepper: This classic seasoning adds just the right edge to balance the creamy, cheesy goodness.
Italian Seasoning: Nothing beats the fragrant notes of herbs like oregano, thyme, and basil to transport your senses straight to Italy.
Grated Parmesan Cheese: It’s all about that touch of nutty, earthy flavor that makes you go, "Mmm!"
Cheddar or Mozzarella Cheese: Depending on my mood, I go bold with cheddar or choose buttery mozzarella for that perfect cheese pull.
Thin Crust Pizza Crust: It crisps up so beautifully, creating the perfect base that holds all the yummy toppings.
Butter: A final drizzle that adds richness and a golden finish.
For the complete list of ingredients with measurements and instructions, please see the recipe card at the bottom of the post.
📖 Substitutions & Variations
Pesto Punch: Swap out some of the spinach for basil pesto for a vibrant color and bold flavor. It’ll add a delightful twist that’s both festive and flavorful.
Add Some Crunch: Sprinkle crushed walnuts or pine nuts over the top before baking for a bit of crunch. This adds a lovely texture and a nutty flavor that pairs wonderfully with the creamy cheese.
Go Meaty: For a heartier version, add some finely chopped cooked bacon or prosciutto between the layers. It’s a great way to introduce a savory element that meat lovers will appreciate.
Spicy Delight: If your family likes a bit of heat, sprinkle some red pepper flakes into the cheese mixture or use spicy cheese like pepper jack to give it a warm kick.
Sweet and Savory: For a sweet-savory version, add a layer of cranberry sauce before adding the cheese mixture. This is especially good with mozzarella and gives the bread a holiday flavor boost.
Gluten-Free Adaptation: To make this recipe gluten-free, use a gluten-free pizza dough. Many stores offer ready-made options that roll out just like traditional dough.
Spinach Swap: Not a fan of spinach or simply out? Try using kale or Swiss chard instead. Just remember to cook it down and drain any excess moisture just like you would with spinach.
Cream Cheese Alternatives: If cream cheese isn’t your thing or you need a dairy-free option, you can use a vegan cream cheese or a thick cashew cream for a similar texture.
🔪 How To Make Christmas Tree Spinach Dip Breadsticks
Step One: Roll out your pizza crust into a rectangle and cut into triangles as shown in above.
Step Two: Remove the excess triangles to the side and place the main triangle onto parchment paper on a baking tray.
Step Three: In a bowl, beat together the spinach and cream cheese. Add garlic, salt, onion powder, chili powder, pepper, and Italian seasoning and beat to combine. Add parmesan cheese and ½ of the cheddar or mozzarella cheese and beat to combine. Spread the spinach dip mixture over the pizza crust and add the remaining cheese.
Step Four: Replace the remaining triangles of pizza crust on top of the spinach dip mixture as shown in the image above.
Step Five: Shape into a Christmas tree as directed in the post cutting the edges and twisting into breadsticks. Bake for about 22 minutes at 400 degrees until golden brown on top and cooked through on the bottom.
Step Six: Melt butter and stir in garlic salt and seasoning, then brush over breadsticks. Serve your Christmas tree breadsticks warm.
👩🍳 Expert Tips
Whipping up this Cheesy Christmas Tree Bread is a surefire way to spread some holiday cheer! Here are three top tips to make it a hit:
Get that Spinach Just Right: Make sure to fully thaw and squeeze out the excess water from your spinach. This little step is a game-changer to keep your breadsticks nice and crisp, not soggy!
Choose Your Cheese Wisely: Whether you're all about the sharpness of cheddar or the gooey goodness of mozzarella, pick the cheese that makes your taste buds sing. It’s all about what makes you and your family smile!
Serve it Up Warm: There’s nothing cozier than enjoying these breadsticks warm from the oven. Plan your baking time so you can serve them up fresh and toasty right as your guests are mingling.
These tips are sure to help you nail this festive treat, making it a new holiday favorite in your home
💭 FAQs
Can I Use Store-Bought Spinach Dip Instead Of Your Recipe?
Absolutely! Using store-bought spinach dip is a great shortcut that can save you time and still deliver delicious results. Just make sure to choose a dip that’s thick enough to stay put on your breadsticks without dripping off. Spread it directly on the dough, add your cheese, and you're good to go. It’s a super convenient and tasty swap that’ll make assembling your Cheesy Christmas Tree Bread even easier!
Can I Use Canned Pizza Dough?
Yes, you can definitely use canned pizza dough for your spinach dip breadsticks! It's a convenient option that works really well for this recipe. Canned dough typically rolls out easily and bakes up nicely, making it a great time-saver. Just unroll the dough, cut it into the desired shapes, add your toppings, and bake according to the instructions.
Can I Make This Christmas Tree Bread Recipe Ahead Of Time?
You can definitely prepare the tree ahead of time—just make sure to cover it tightly with plastic wrap before refrigerating to keep everything fresh. I prefer to cook my christmas tree breadsticks close to serving time as I love them warm and toasty!
Can I Freeze Spinach Dip Breadsticks?
Yes, you can freeze Christmas Tree Breadsticks! Just bake them first, let them cool completely, and then wrap them tightly in plastic wrap followed by aluminum foil. They'll keep well in the freezer for up to a month. When you're ready to enjoy them, reheat in the oven until they're warm and crispy.
🧂Serving Suggestions
Serve as a Holiday Centerpiece: This festive tree-shaped appetizer is perfect for your holiday table, acting as both a decorative centerpiece and a delicious snack.
Pair with a Creamy Dip: Serve these cheesy, spinach-filled breadsticks alongside a creamy ranch or garlic dip for extra flavor and dipping fun.
As a Side to Soups or Stews: Complement a warm bowl of tomato soup or vegetable stew with these breadsticks for a cozy, comforting meal.
For a Party Snack: These pull-apart breadsticks make a great snack at holiday parties, where guests can easily grab a piece and enjoy!
Did you make this recipe? Leave a review and a ⭐⭐⭐⭐⭐ rating below, or tag us in our Facebook Group! Alternatively, bookmark it in your browser or save to Pinterest.
These Christmas Tree Spinach Dip Breadsticks are not just delicious; they’re a fun and eye-catching Christmas tree appetizer that’s perfect for any holiday gathering.
Roll out your pizza crust into a rectangle and cut into triangles as shown in above.
Remove the excess triangles to the side and place the main triangle onto parchment paper on a baking tray.
In a bowl, beat together the spinach and cream cheese. Add garlic, salt, onion powder, chili powder, pepper, and Italian seasoning and beat to combine. Add parmesan cheese and ½ of the cheddar or mozzarella cheese and beat to combine. Spread the spinach dip mixture over the pizza crust and add the remaining cheese.
Replace the remaining triangles of pizza crust on top of the spinach dip mixture as shown in the image above.
Shape into a Christmas tree as directed in the post cutting the edges and twisting into breadsticks. Bake for about 22 minutes at 400 degrees until golden brown on top and cooked through on the bottom.
Melt butter and stir in garlic salt and seasoning, then brush over breadsticks. Serve your Christmas tree breadsticks warm.
Notes
Get that Spinach Just Right: Make sure to fully thaw and squeeze out the excess water from your spinach. This little step is a game-changer to keep your breadsticks nice and crisp, not soggy!Choose Your Cheese Wisely: Whether you’re all about the sharpness of cheddar or the gooey goodness of mozzarella, pick the cheese that makes your taste buds sing. It’s all about what makes you and your family smile!Serve it Up Warm: There’s nothing cozier than enjoying these breadsticks warm from the oven. Plan your baking time so you can serve them up fresh and toasty right as your guests are mingling.
This Instant Pot Greek Yogurt with strawberries is a total game-changer! It’s the best recipe because it’s incredibly easy to make and absolutely delicious. This homemade yogurt is topped with strawberries, this Greek yogurt has a gorgeous pink color and a fresh, fruity flavor that everyone will love!
This thick and creamy yogurt is super easy to make tastes better than store bought yogurt. Learn how to make Instant Pot Greek Yogurt today!
[feast_advanced_jump_to]
Why You'll Love Instant Pot Greek Yogurt With Strawberry Topping
Effortless Process: This Greek Yogurt recipe takes the guesswork out of your homemade yogurt.
Healthy and Pure: Control what goes into your yogurt, avoiding preservatives and excess sugar.
Versatile Base: Use this creamy yogurt as a base for countless sweet or savory dishes.
Ingredients
Fairlife Milk: Used as the base for this yogurt recipe.
Plain Greek Yogurt: Adding plain Greek yogurt as a starter culture helps in the fermentation process.
Vanilla: Enhances the flavor profile of the yogurt, giving it a subtly sweet and aromatic taste.
Strawberries: Add a burst of fruity sweetness to the yogurt.
How To Make Greek Yogurt In The Instant Pot?
This is the best way to make your own yogurt in the Instant Pot rather than having plain yogurt, we are making a great Greek yogurt which you will come back to time and again. This homemade Instant Pot Yogurt Recipe may be slightly thicker yogurt and will be better than store bought yogurt.
Step 1: Pour milk into the Instant Pot. Seal the lid and pressure valve. Select boil for 30 minutes.
Step 2: After you heat the milk, make sure the milk temperature is at 180°f, if not, set the Instant Pot to sauté and bring the warm milk to temperature.
Step 3: Remove the instant pot liner and let it cool to 105°f. To speed this up, place an instant pot liner in an ice bath in the sink. Only 3 inches of water is necessary. Once the milk is at 105°f, remove any film that formed on top of the milk.
Step 4: Remove 1 cup of milk and mix well with yogurt and vanilla.
Step 5: Add the mixture back to the milk and seal the lid and pressure valve.
Step 6: Set to yogurt mode for 8 hours. Once done, remove the instant pot liner, cover, and place in the fridge for 4 hours or overnight.
Step 7: Once chilled, yogurt should be thick enough to stand a spoon upright.
Step 8: Mash strawberries into a strawberry jam and place under or on top of yogurt for serving.
Step 9: Top with granola and or honey for a sweeter taste.
Step 10: Your Instant Pot Greek Yogurt is now ready to serve.
Tips For Making Perfect Greek Yogurt
If you want to make a larger batch of yogurt, you can double the ingredients. Just remember to use a larger Instant Pot liner so that the milk doesn't boil over.
Once your thick yogurt is ready to serve add the yogurt to a large mixing bowl and cover with cling film. you can then clean out your inner pot to use in other cooking.
Optional Toppings For Your Homemade Greek Yogurt
There are so many delicious flavors that you can add when making homemade yogurt! Some of my favorites include:
Blueberries
Raspberries. (You can use frozen berries or fresh berries)
Fresh or Frozen Strawberries
Chocolate Chips
Peanut Butter
Maple syrup
Honey
Lemon Juice
Cinnamon
Cocoa Powder
Ultra pasteurized milk
Raw Milk
Organic Milk
Coconut milk
Vanilla extract
Skim milk
Cream Cheese
Sour cream
How To Store Greek Yogurt
Storage: Homemade yogurt will last for up to 2 weeks in the fridge. Be sure to store it in an airtight container.
Refrigerate in the Back: Store Greek yogurt in the back of the fridge, where it’s coldest, to keep it fresh longer.
Freeze for Later Use: Freeze Greek yogurt in a freezer-safe container for up to two months, though the texture may change slightly.
Portion Out to Maximize Freshness: Divide yogurt into smaller containers to reduce exposure to air and bacteria, keeping it fresher for longer.
Making A New Batch of Greek Yogurt
When you are ready to make a new batch of yogurt, you can use the leftover yogurt from the previous batch as your starter culture.
This will save you from having to buy a new yogurt starter every time you want to make yogurt. The starter culture will have active cultures that will help to thicken the milk and turn it into yogurt.
What To Server With Greek yogurt With Strawberry Topping?
Granola: Crunchy granola adds a great texture contrast to the creamy yogurt and juicy strawberries. You can go for a classic honey or nutty granola for added flavor.
Nuts & Seeds: Add almonds, walnuts, or pistachios for some crunch, or sprinkle chia seeds, flax seeds, or hemp seeds for extra fiber and omega-3s.
Fresh Berries: While you're already using strawberries, adding other berries like blueberries, raspberries, or blackberries can enhance the flavor and provide more variety.
Honey or Homemade Maple Syrup: A drizzle of honey or maple syrup over the yogurt and strawberry topping will add a touch of sweetness to balance the tanginess of the Greek yogurt.
Oats: Raw or lightly toasted oats can add a chewy texture and make the dish more filling. You can also make Chocolate Overnight Oats and layer it with the yogurt and strawberry topping.
Whole Wheat Toast or Bagels: Serve a slice of whole wheat toast or a bagel on the side with a little nut butter (like almond or peanut butter) for a more hearty breakfast option.
Dark Chocolate or Almond Butter Drizzle: A little drizzle of melted dark chocolate or almond butter can make your yogurt and strawberries feel more like a decadent dessert.
FAQ'S
What Is The Difference Between Greek Yogurt And Regular Yogurt?
The main difference between Greek yogurt and regular yogurt is that Greek yogurt is strained to remove the whey, resulting in a thicker, creamier texture. Greek yogurt also has a higher protein content than regular yogurt.
What Is The Best Milk For Making Yogurt?
Whole milk (full-fat) yields the creamiest and most delicious yogurt. However, you can also use low-fat or non-fat milk. The fat content in the milk will affect the texture of the finished yogurt.
What If I Don’t Have A Yogurt Button?
If your Instant Pot doesn’t have a yogurt setting, you can still make yogurt in it. Just set the Instant Pot to the keep warm setting and set the timer for 8 hours.
What Is The Best Starter Culture for Instant Pot Yogurt?
The key to making good yogurt is to use a yogurt starter culture. This can be bought online or from some health food stores. I used Greek Yogurt Starter Culture from Amazon.
This Instant Pot Greek Yogurt With Strawberry topping is a creamy, delicious treat that's easy to make at home! With fresh strawberries and the tang of Greek yogurt, it's perfect for breakfast or a healthy snack. Just a few simple steps in the Instant Pot, and you’ll have a homemade yogurt bursting with fresh flavor!
Add milk to the instant pot. Seal the lid and pressure valve. Select boil for 30 minutes
Once finished, make sure milk temp is at 180°f, if not, set to sauté and bring to temp.
Remove instant pot liner and let cool to 105°f. To speed this up, place an instant pot liner in an ice bath in the sink. Only 3 inches of water is necessary. Once the milk is at 105°f, remove any film that formed on top of the milk.
Remove 1 cup of milk and mix well with yogurt and vanilla.
Add mixture back to the milk and seal the lid and pressure valve. Set to yogurt mode for 8 hours. Once done, remove the instant pot liner, cover, and place in the fridge for 4 hours or overnight.
Once chilled, yogurt should be thick enough to stand a spoon upright.
Mask strawberries and place under or on top of yogurt for serving.
Top with granola and or honey for a sweeter taste.
Notes
I used a 6 qt Instant Pot, but this will also work in an 8 qt!Tips For Making Perfect Greek YogurtIf you want to make a larger batch of yogurt, you can double the ingredients. Just remember to use a larger Instant Pot liner so that the milk doesn't boil over.Once your thick yogurt is ready to serve add the yogurt to a large mixing bowl and cover with cling film. you can then clean out your inner pot to use in other cooking.


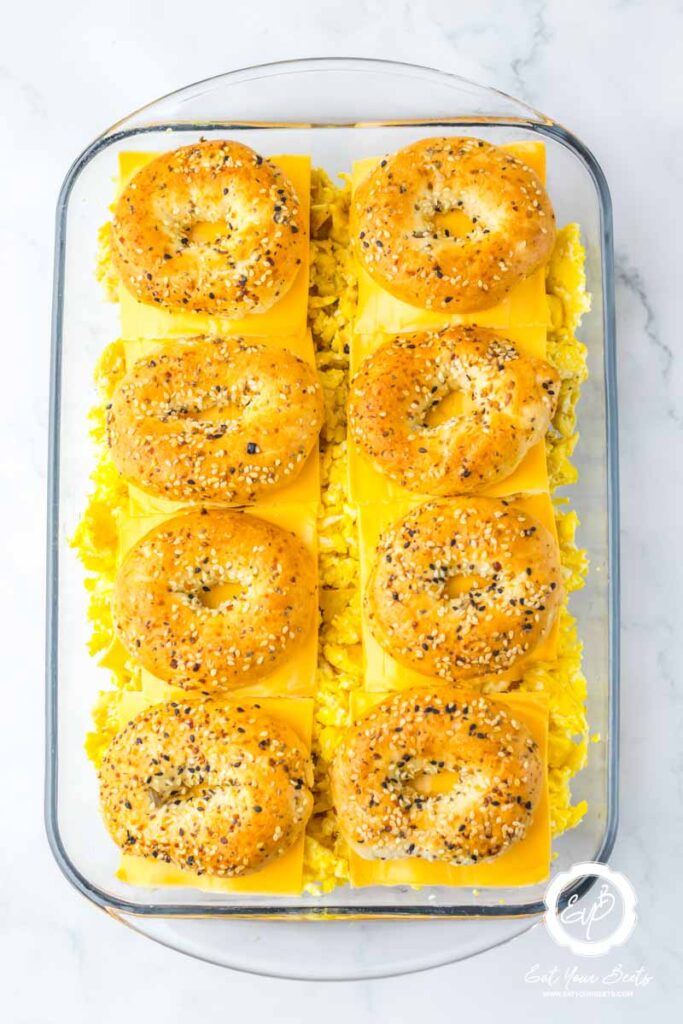


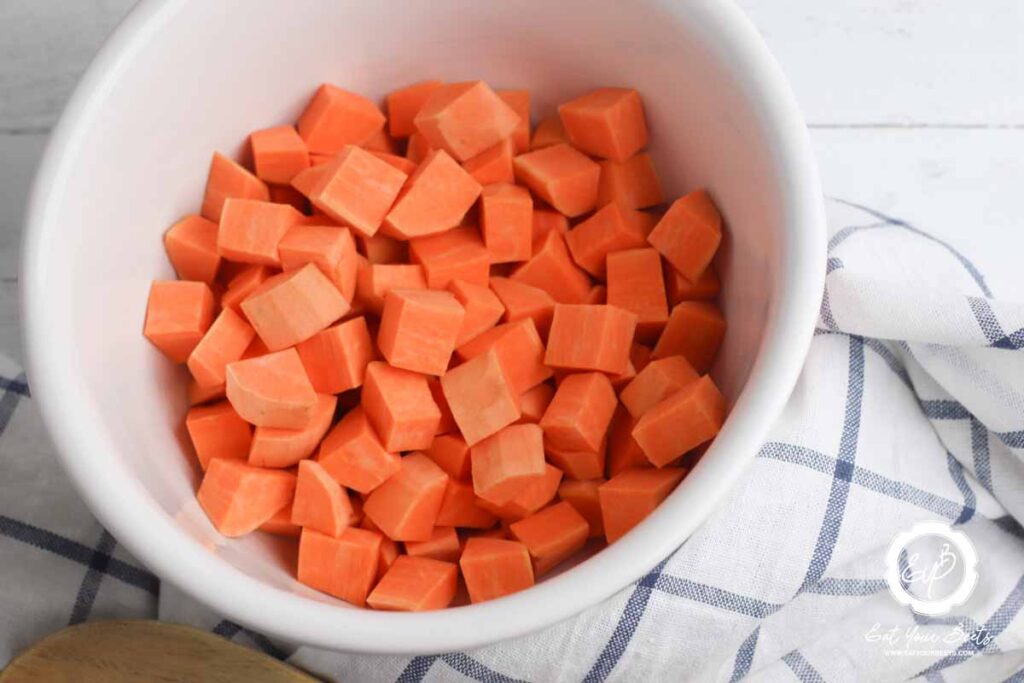

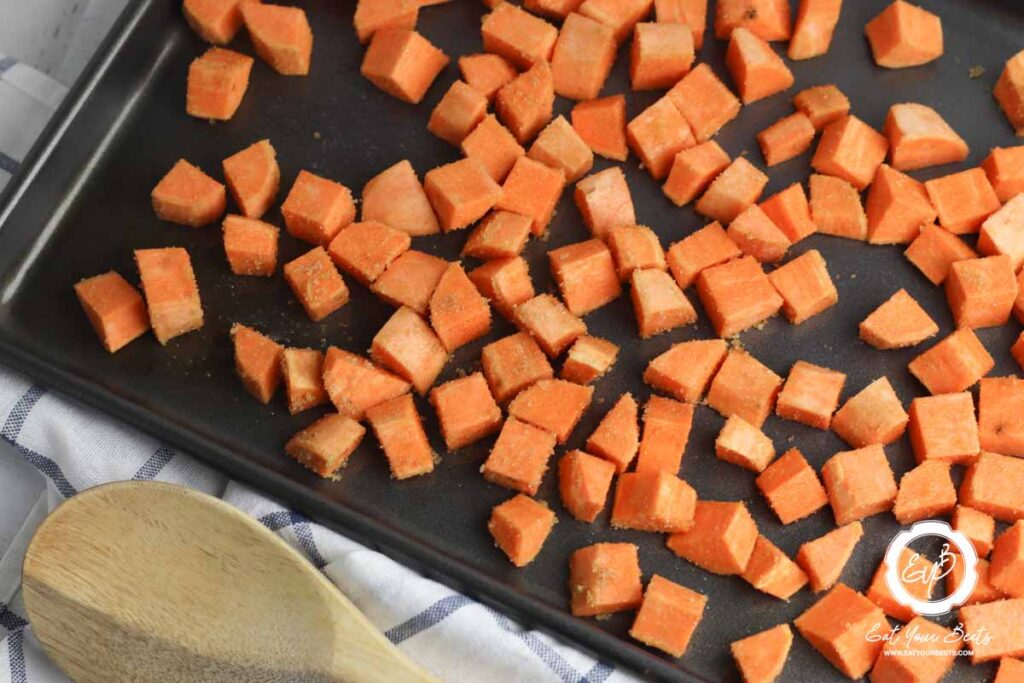


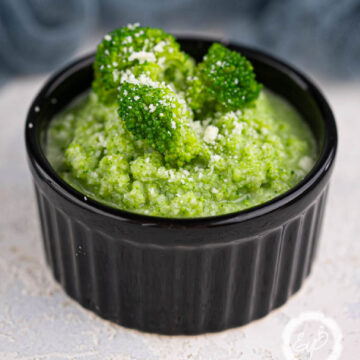


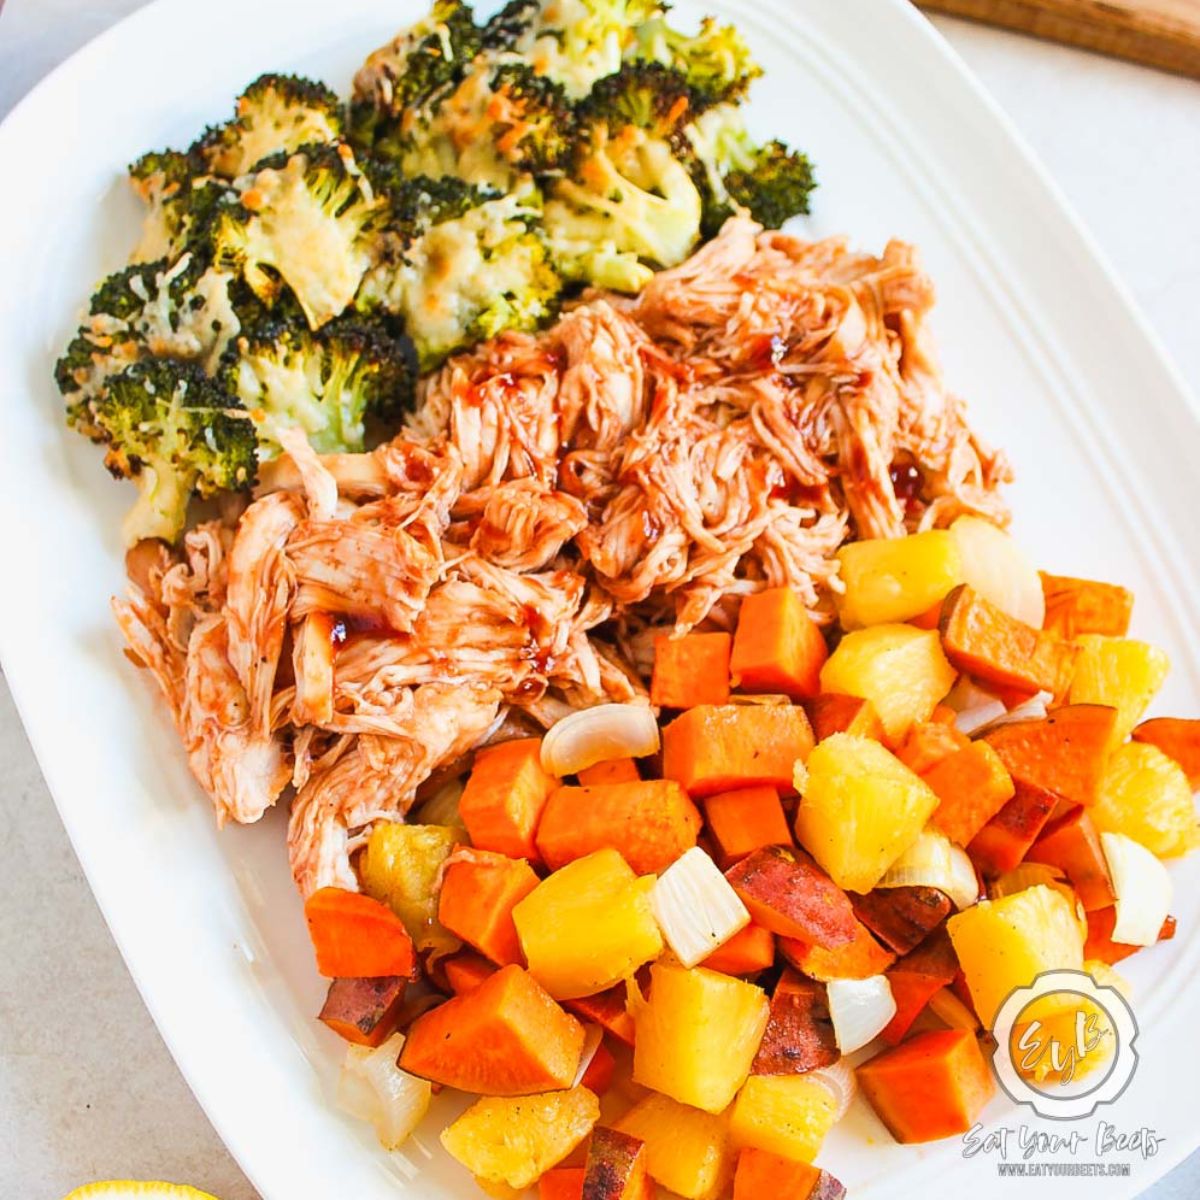

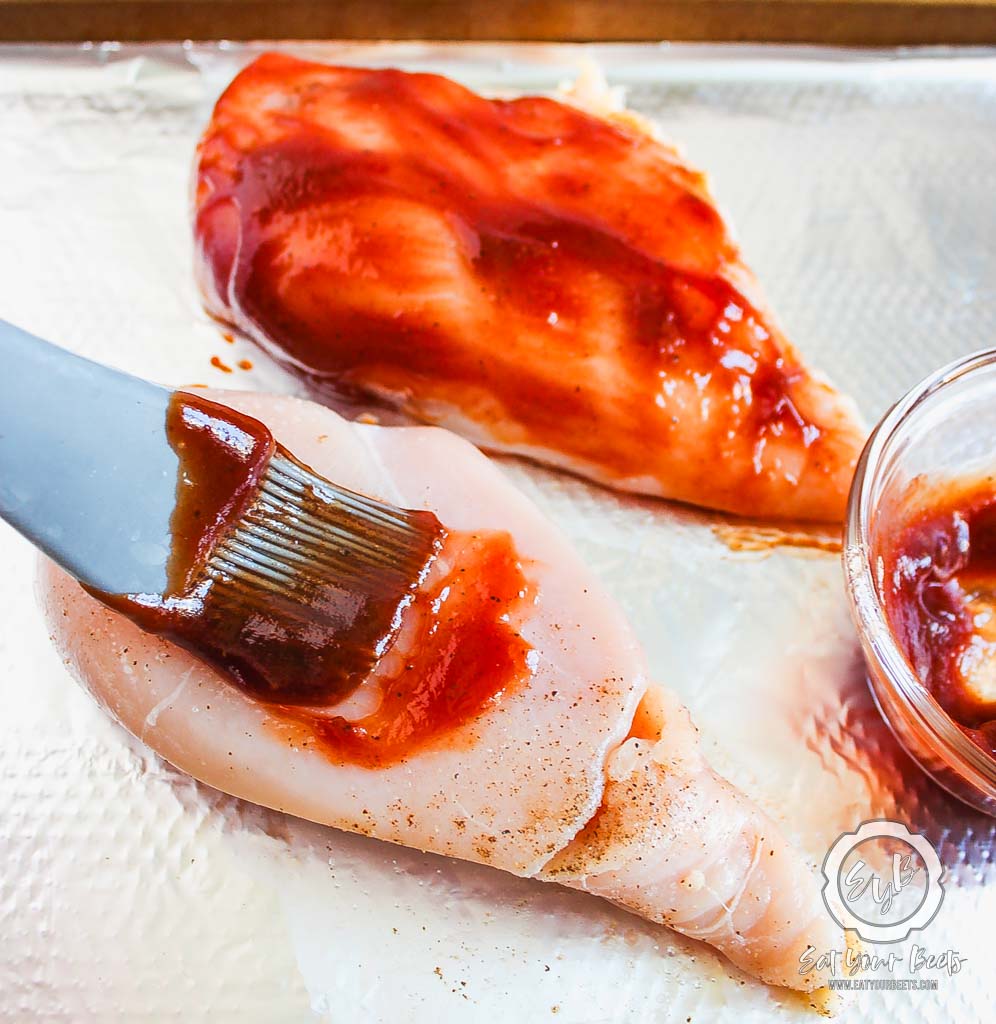


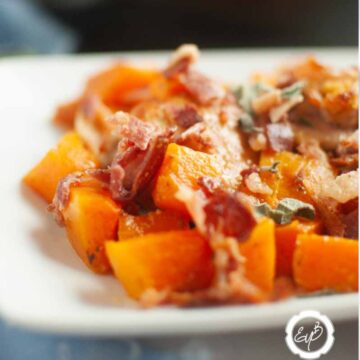


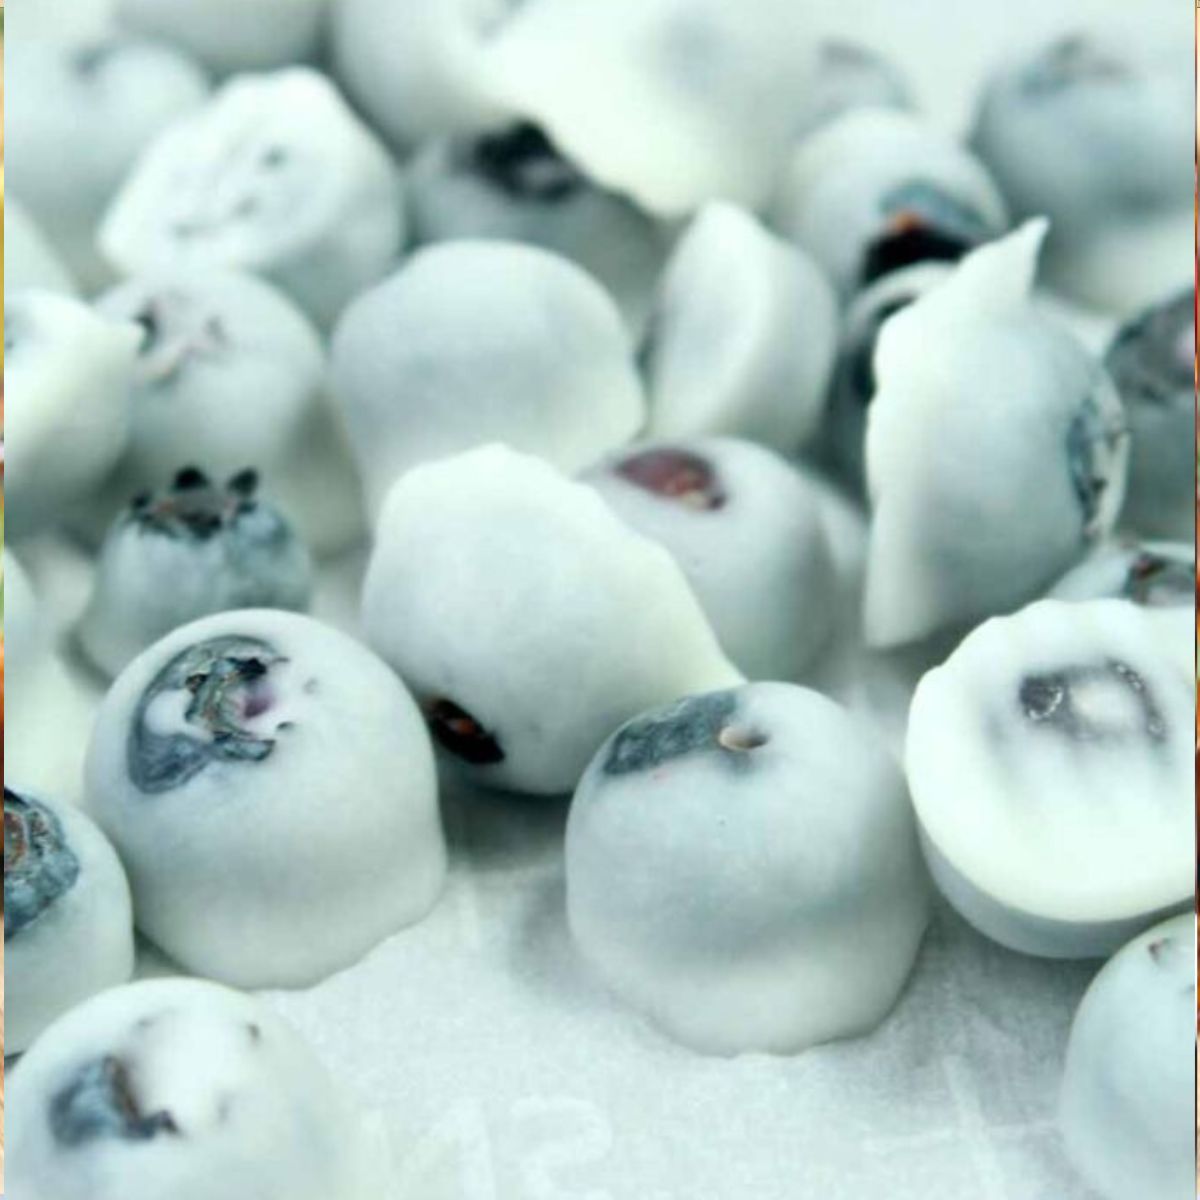


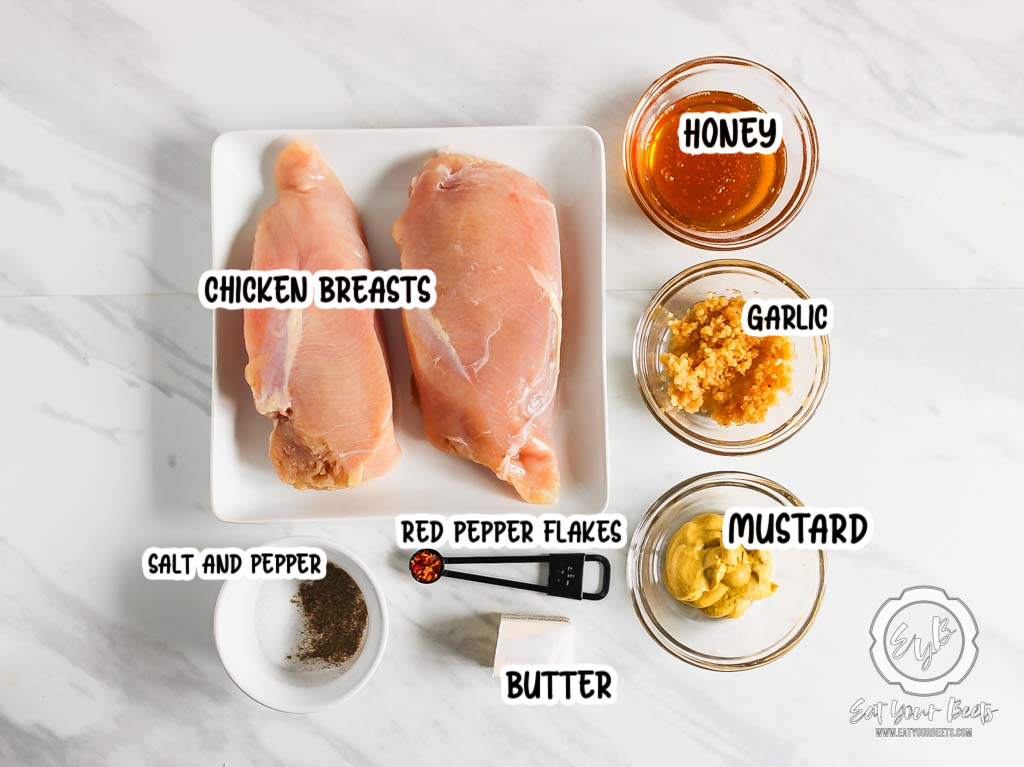


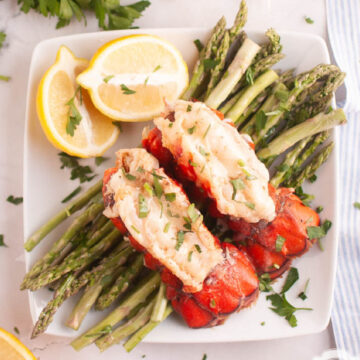


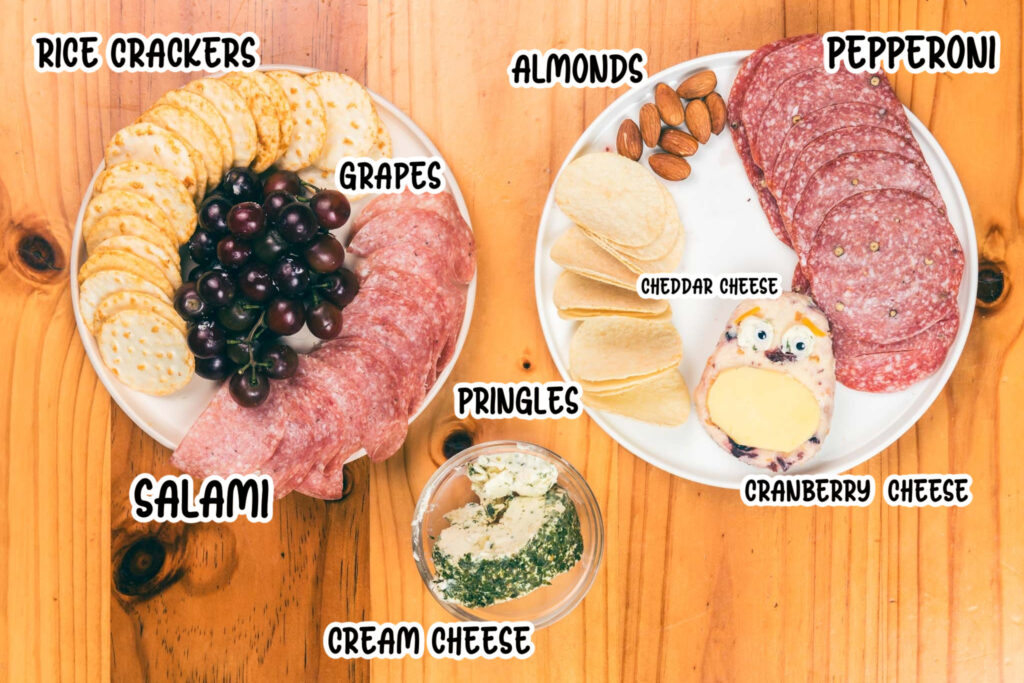


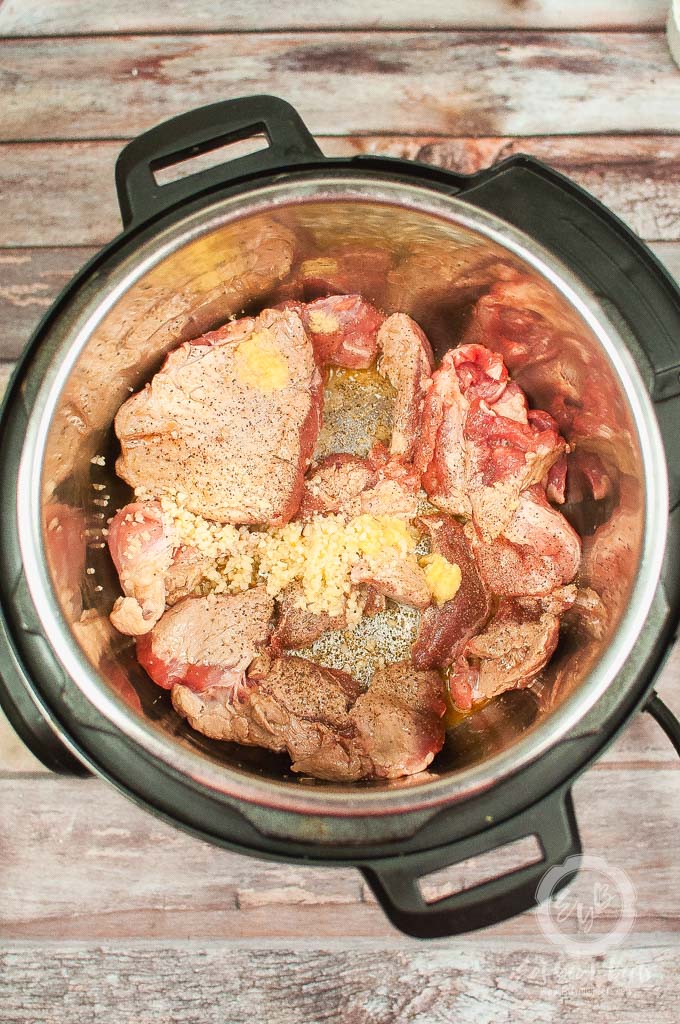


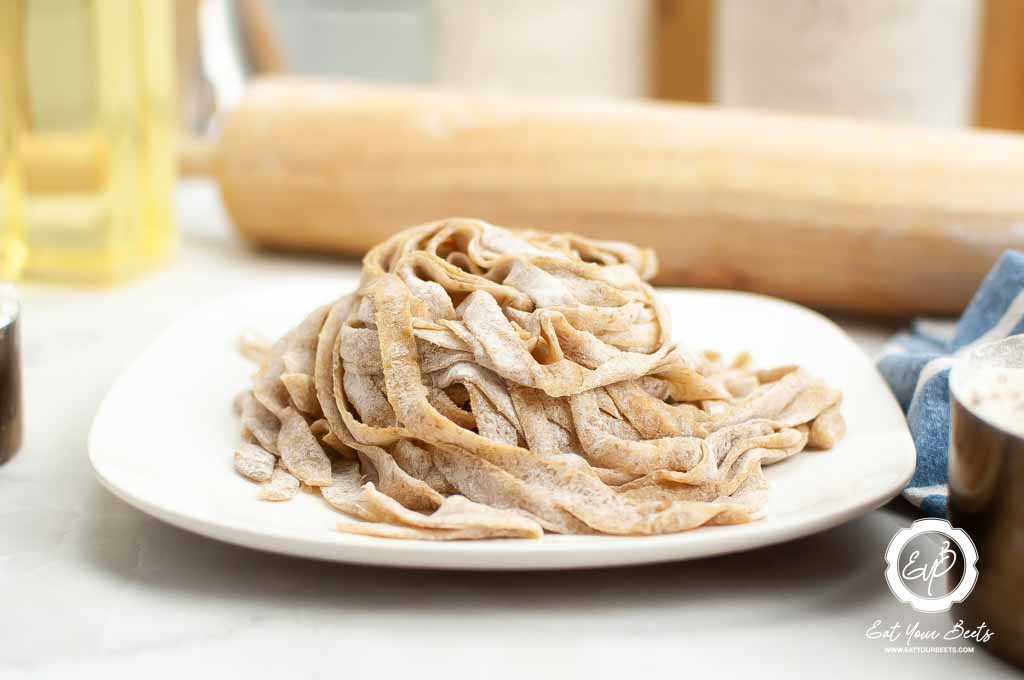


