​

Eat Your Beets

  • About
  • Spring Recipes
  • Vegetables
  • Side Dishes
  • Recipe Index
menu icon
go to homepage
  • About
  • Spring Recipes
  • Vegetables
  • Side Dishes
  • Recipe Index
    • Facebook
    • Pinterest
  • subscribe
    search icon
    Homepage link
    • About
    • Spring Recipes
    • Vegetables
    • Side Dishes
    • Recipe Index
    • Facebook
    • Pinterest
  • ×
    Sign Up To Our Newsletter →
    Home » Recipe index

    What Does Havarti Cheese Taste Like?

    May 21, 2023 by Angela Milnes

    Fresh red bananas.

    Have you ever wondered what does havarti cheese tastes like? Well, search no further - we're here to answer all your questions regarding havarti cheese!

    Havarti Cheese Slices.
    [feast_advanced_jump_to]

    What Is Havarti Cheese?

    Havarti cheese is a semi-soft cheese known for its creamy texture and small irregular holes. It was initially created in Denmark in the late 1800s by a woman named Hanne Nielsen.

    Havarti quickly rose in popularity and has become a staple in Danish cuisine. Havarti is made from cow's milk and has a pale yellow color with a slightly glossy surface. This food item can be relished or incorporated with its subtle aroma into various culinary creations.

    How Is Havarti Made?

    The original Havarti cheese is a delightful product of Danish culinary tradition, crafted by skilled cheesemakers using authentic ingredients. Double cream is at the heart of this delectable cheese, which adds a distinctive richness to its flavor and texture.

    The process begins with whole pasteurized cow's milk, ensuring the final product is safe and delicious. This milk combines rennet, starter cultures, and other essential components to create a unique blend that sets Havarti apart from other cheeses.

    As the mixture matures, it develops its characteristic creamy, buttery taste that has made Havarti a beloved staple in households worldwide.

    What Does Havarti Cheese Taste Like?

    Havarti cheese boasts a unique and delightful flavor profile that appeals to many cheese enthusiasts. Its taste can be described as mild, buttery, and slightly acidic taste, with a hint of sweetness that lingers on the palate.

    Havarti's creamy, semi-soft texture further enhances the overall tasting experience, and its subtle nutty undertones add depth to its flavor. As it ages, Havarti's taste evolves, becoming more pronounced and complex, transforming into a sharper and bolder version of its former self.

    Is Havarti Cheese Spicy?

    Havarti cheese, a Danish delight, is known for its creamy, buttery flavor and smooth texture. While it may not be inherently spicy, its versatile nature allows various flavors to be incorporated.

    Havarti can be found in plain and flavored varieties such as dill, caraway, and even jalapeño. Adding spices or herbs enhances the taste, providing a unique twist to the classic cheese.

    So, while traditional Havarti cheese is not spicy, the flavored versions can offer the spice kick that some cheese enthusiasts crave.

    Types of Havarti Cheese

    Here are the main types of Havarti cheese

    Original Havarti

    As the name suggests, original Havarti is the traditional version of this cheese. Produced from cow's milk, it possesses a slightly acidic, buttery taste. The texture is semi-soft, making it perfect for melting or enjoying as a snack.

    Young Havarti Cheese

    This is the basic, unflavored version of Havarti cheese. It's perfect for those who enjoy the mild, buttery taste of the cheese without any additional flavors.

    Aged Havarti Cheese

    As the name suggests, this type of Havarti is aged for longer, typically 3 months or more. This process results in a firmer texture and a more pronounced buttery aroma.

    Infused Havarti Cheese

    Various flavorings can be added to Havarti cheese to enhance its taste. Some popular flavored varieties include dill-infused havarti, caraway, garlic, jalapeno, and cranberry. These flavors complement the creamy texture and mild cheese taste, adding a unique twist to the traditional Havarti.

    Cream Havarti Cheese

    Cream Havarti Cheesearti is made by adding extra cream to the cheese-making process, resulting in a higher fat content and an even creamier, richer texture. Creamy Havarti cheese is perfect for those who love indulgent, velvety cheeses. Havarti can be used in place of cream cheese.

    What Is Special About Havarti Cheese?

    Havarti cheese, a Danish delight, stands out for its exceptional creaminess and mild yet distinct flavor profile. Havarti is unique due to the small irregular holes scattered throughout its interior resulting from cheese-making.

    Its unique flavor profile makes it a versatile choice for sweet and savory dishes, as it perfectly complements a variety of ingredients.

    What Is Havarti Cheese Similar To?

    Havarti cheese is a popular choice that many people enjoy. Here are some other cheeses that Havarti is similar to

    Tilsit Cheese: Havarti cheese is often compared to Tilsit cheese because they both have a creamy texture and a mild, buttery aroma. However, Tilsit cheese is usually a bit tangier than Havarti.

    Young Cheddar Cheese: Havarti cheese also shares similarities with young cheddar cheese. Both cheeses have a smooth, creamy texture and a mild flavor. However, cheddar cheese is sharper than Havarti.

    Monterey Jack: Another cheese that Havarti is similar to is Monterey Jack. Both cheeses have a mild, buttery flavor and a smooth texture. However, Monterey Jack is usually a bit firmer than Havarti.

    Swiss Cheese: Havarti cheese is sometimes compared to Swiss cheese because they both have a mild flavor and a smooth texture. However, Swiss cheese has a distinctive nutty flavor that sets it apart from Havarti.

    Danish Port Salut: Havarti cheese is also similar to Danish Port Salut. Both cheeses have a mild, buttery flavor and a smooth texture. However, Port Salut's slightly tangy flavor sets it apart from Havarti.

    Is Gouda Similar to Havarti?

    Havarti and Gouda are both popular types of cheese that share some similarities in taste and texture, but they also have distinct differences that set them apart.

    Gouda and Havarti Cheese.

    Havarti originates from Denmark and has a buttery, creamy flavor with a subtle tanginess. At the same time, Gouda, hailing from the Netherlands, is characterized by its nutty, caramel-like notes and a slightly firmer texture due to its aging process.

    Both cheeses are semi-soft and melt well, making them versatile in various dishes.

    Is Havarti a Smelly Cheese?

    Havarti, originating in the 19th century, is known for its creamy and smooth texture, making it a popular choice for cheese lovers. While some people may describe it as having a mild aroma, it's not typically considered a smelly cheese.

    Havarti is made from cow's milk and boasts a buttery flavor with a slight tanginess. Its versatility makes it ideal for various dishes, including sandwiches, salads, and cheese platters.

    The aging process can influence the intensity of Havarti's taste and aroma; an aged Havarti may have a more pronounced flavor and a slightly stronger smell.

    Is Castello Havarti Cheese Vegetarian?

    Yes, Castello Havarti cheese is suitable for vegetarians. This creamy, buttery cheese is made from cow's milk and contains no animal-derived rennet. Instead, it uses microbial or vegetable rennet, a vegetarian alternative to traditional rennet.

    Castello is committed to producing high-quality cheeses for various dietary requirements, including vegetarianism.

    Is Havarti a Melting Cheese?

    Havarti, a famous cheese, is a fantastic melting cheese that offers versatility in various culinary applications.

    Creamy Havarti cheese melts evenly and consistently, making it a top choice for grilled cheese sandwiches, Butternut Squash Macaroni and Cheese, cheese, or fondue. Its mild, buttery flavor complements a wide range of ingredients, allowing it to blend seamlessly into various recipes.

    What Are the Best Ways to Eat Havarti?

    Here are some ideas for how to enjoy havarti cheese:

    Cheeseboard: Havarti is an excellent table cheese that pairs well with sweet and savory dishes. Serve it with dried fruits, crusty bread, butter crackers and raspberry jam at your next wine and cheese party.

    Sandwiches: Havarti's mild flavor makes it a great addition to sandwiches. Try this butter cheese with whole wheat bread, or pair it with smoked ham and sour cream for a tasty lunch.

    Grilled Cheese: Elevate your grilled cheese game using Havarti instead of cheddar. It melts beautifully and has a rich, creamy texture, making the perfect gooey sandwich.

    Sour cream: Make a creamy Havarti dip by mixing the cheese with sour cream, garlic, and chives.

    Salad: Add some slices of Havarti to your favorite salad for a delicious twist. Its mild flavor won't overpower the other ingredients, and havarti pairs well with various dressings.

    Sour ale: If you're a sour ale fan, pair it with Havarti. The cheese's creamy texture and mild flavor complement the beer's tartness.

    Pinot Noir: Try serving Havarti with a glass of Pinot Noir for a more classic pairing. The cheese's buttery texture and subtle tanginess complement the wine's fruitiness.

    Smoked Havarti recipes: If you're looking for something a little more adventurous, try using smoked Havarti in your recipes. It adds a smoky flavor that pairs well with meats, vegetables, and sheet pan meals.

    How to Store Havarti Cheese?

    To ensure the best havarti cheese taste, it's essential to store it properly. To keep your cheese fresh and flavorful, follow these steps:

    • Inspect the cheese: Before storing, check for any signs of mold or spoilage. If the cheese looks and smells good, proceed to the next step.
    • Wrap the cheese: To store havarti cheese properly, wrap it in wax paper, aluminum foil, or plastic wrap. Plastic wrap is the most commonly used option, but aluminum foil or wax paper can also help preserve the cheese's flavor and texture.
    • Use a cheese storage container: If you have a cheese storage container, place the wrapped cheese inside. These containers are designed to maintain the ideal humidity level for cheese storage.
    • Store in the refrigerator: Place the wrapped cheese or cheese container in the refrigerator, preferably in the vegetable drawer or another area with slightly higher humidity.
    • Avoid strong-smelling foods: Havarti cheese can absorb odors from other foods. To maintain the best havarti cheese taste, store your cheese away from strong-smelling items like onions, garlic, or fish.
    • Rotate the cheese: Every few days, flip the cheese over to prevent moisture from accumulating on one side.
    • Check regularly: Inspect your havarti cheese every few days to ensure it's still in good condition. If you notice any mold or off smell, discard the affected portion and re-wrap the remaining cheese.
    • Consume within a reasonable time frame: Havarti cheese typically lasts 3-4 weeks when stored properly. To enjoy the best havarti cheese taste, consume it within this time.

    Where to Buy Havarti Cheese?

    Havarti cheese, known for its distinct and delightful taste, can be found in various locations. To experience the authentic havarti cheese taste, look for cheese molds that produce the original Havarti.

    Specialty cheese shops and well-stocked grocery stores often carry this delicious dairy product. You may also find a selection of Havarti online through gourmet food retailers.

    Be sure to try the creamy Havarti cheese variant, which boasts a smooth buttery texture perfect for melting or enjoying.

    Tips to Buy the Best Havarti Cheese

    When looking to purchase the best Havarti cheese, there are several things you should consider to ensure you're getting a high-quality and delicious product. First, always opt for a reputable brand or store known for its cheese selection, increasing your chances of finding a superior Havarti.

    Next, examine the cheese's appearance; it should have a smooth, creamy texture and a consistent pale yellow color. The rind, if present, should be thin and natural in appearance. Give the cheese a gentle squeeze to feel its firmness - a good Havarti should be semi-firm yet pliable.

    Don't forget to check the expiration date, as fresh cheese will offer the best taste and quality. Additionally, inquire about the origin of the cheese, as traditional Danish Havarti is often considered the most authentic and flavorful.

    Lastly, don't hesitate to ask for a sample before purchasing, as this will allow you to gauge the taste and creaminess of the cheese, ensuring you make the best choice for your taste buds.

    23 Types Of Apples: Top Apple Flavors

    May 19, 2023 by Angela Milnes

    Different types of apples.

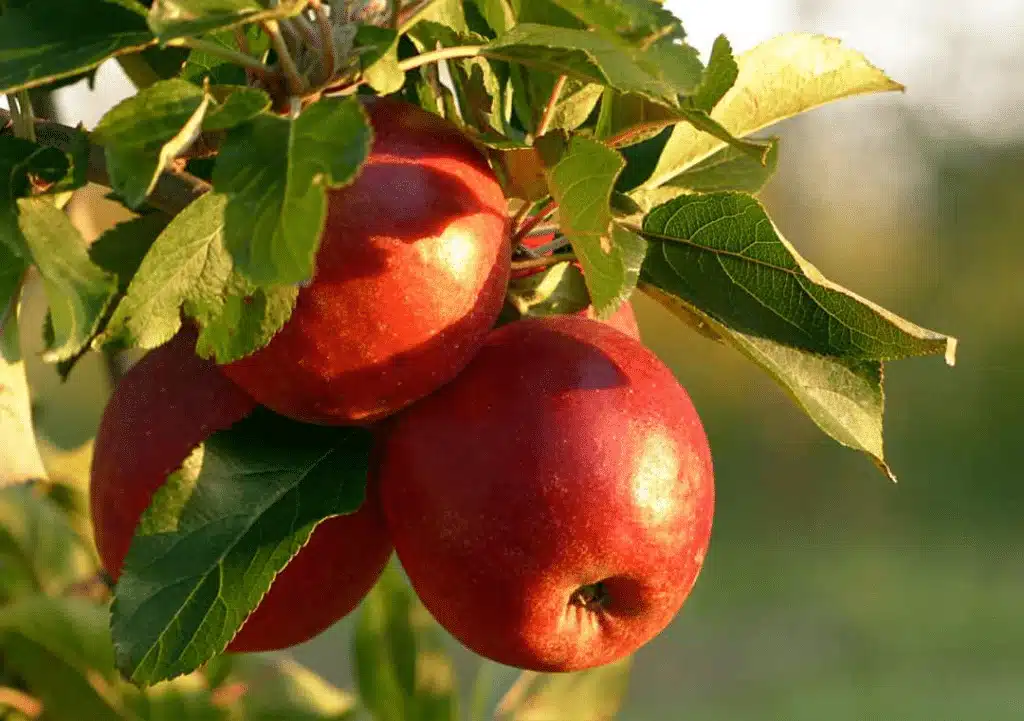
    Are you a fan of apples? Who isn't, right!? Apples are such an incredibly versatile and flavorful fruit that there is something for everyone to love.

    Whether you're a home cook, a professional chef, or someone who loves great food – apples can easily bring your favorite dishes to life. Choosing from the vast selection of apple types available in the market can be overwhelming. That's why we've created this guide featuring top varieties with top apple flavors–all with unique flavor profiles, textures and uses in the kitchen.

    Apples on a tree. Top apples flavors.
    [feast_advanced_jump_to]

    How Many Varieties of Apples Are There?

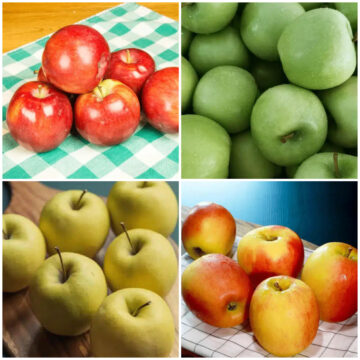
    There are over 7,500 recognized varieties of apples around the world. Every type possesses distinct traits that set it apart from the rest. Some apples are known for their incredible flavor, while others are praised for their texture, size, or color.

    Top 23 Apple Flavors

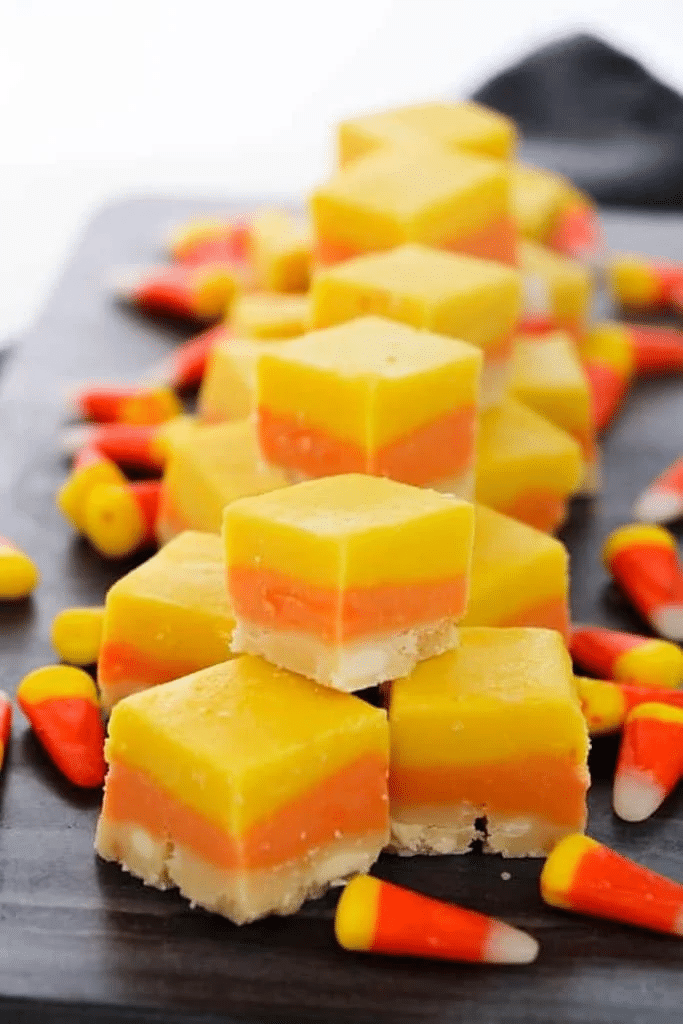
    Looking for delicious apple flavors? Check out this list of the best 23 apple flavors! With so many options, you can find something to please your taste buds. Whether cooking apple strudel or this Mini apple pie recipe, apples are a great way to brighten up your day.

    1. Pink Lady Apples/ Cripps Pink

    Pink lady apples on a tree.

    Pink Lady apples, also known as Cripps Pink initially bred in Australia by John Cripps. This variety is a cross between the Lady Williams and Golden Delicious apples.

    This Cripps pink apple has a vibrant pinkish-red color, a yellow-green base, and a smooth, firm texture. Pink lady apple is known for being incredibly juicy with a sweet finish and slightly tart flavor. Its unique flavor makes it perfect for various dishes - from apple cobbler to avocado salad to snacking.

    Pink Lady apple is typically grown in temperate climates using traditional farming methods. The price may fluctuate based on the time of year and the destination. They are usually sold at a slightly higher price point than other apple varieties. These apples are great for making apple butter.

    2. Fuji Apples

    Fuji apples have a crisp and juicy texture with a deliciously sweet taste containing on of the top apple flavors. It's a great snaking apple. This apple variety was first developed in Fujisaki, Japan, during the 1930s, by crossbreeding two American varieties, the Red Delicious and Virginia Ralls Janet apples.

    Fuji apple on a tree.

    The Fuji apple has a reddish-green hue with a yellow-toned background, giving it a beautiful appearance. This juicy apple has a firm and crunchy texture, with a cream-coloured dense flesh. Fuji apples' texture and sweetness make them perfect for eating fresh, baking, or using as an ingredient in salads and sauces.

    Fuji apples are typically grown using traditional farming methods and are mainly harvested in late autumn. The cost may depend on the season and location, but they are usually moderately priced.

    Learn more about Fuji Apples.

    3. McIntosh

    The McIntosh apple is a classic and popular apple variety that originates from Ontario, Canada. It was first bred in the early 19th century by John McIntosh, a farmer who discovered a wild apple tree on his property.

    McIntosh apples are known for their distinct bright red and green skin color, which becomes more muted as they ripen. Their firm texture is crisp and juicy, with a slightly tart flavor that makes them a favorite among many apple enthusiasts.

    This delicious apple is primarily enjoyed fresh but can also be used for baking and cooking. These apples are perfect for making apple sauce, pies, and crumbles, as their juicy flesh breaks down easily.

    McIntosh apples are typically grown using conventional farming methods, but organic options are also available. Prices vary depending on the region but are generally affordable and accessible to most consumers.

    McIntosh apples on a wooden board.

    4. Granny Smith Apples

    Granny Smith apples are known for their crisp texture and Tart flavor, making them a popular choice for eating fresh. These apples originated in Australia in the mid-1800s when a woman named Maria Ann Smith discovered a seedling apple tree in her backyard.

    Granny Smith apple has bright green skin and juicy flesh, making it an appealing addition to baked goods like apple pies and cakes.

    Granny Smith's apple is usually grown using conventional farming methods, although many farms are beginning to adopt more sustainable practices. Prices for these tart apples can vary depending on the season, but they are generally priced affordably. Perfect for a homemade apple pie!

    Granny smith apples.

    5. Golden Delicious Apples

    Golden Delicious Apples are a popular apple variety that has been enjoyed by apple lovers for over 100 years. These apples, first introduced in West Virginia in 1912, have now become popular and can be found in various countries around the globe.

    Golden Delicious Apples are known for their juicy flavor. The fruit has firm flesh and thin skin with a crisp texture, making it a great snacking apple. The semi‑firm texture and sweet juicy flavor are perfect for cooking cinnamon apples, making salads, or eating fresh.

    Growing Golden Delicious Apples requires considerable attention and care, yet the outcome is invaluable. The apples are grown across the United States In traditional farming methods.

    The price of Golden Delicious Apples varies depending on the location and season, but they are generally affordable and available year-round.

    Golden delicious apples on a wooden board.

    6. Honeycrisp Apples

    Honeycrisp apples are known for their crisp texture, tart flavor, and sweet finish, making them a great addition to any fruit bowl or recipe. The Honeycrisp apple is also famous for its honey-sweet flavor. These delicious apples have become increasingly popular due to their unique taste and texture.

    When it comes to appearance, Honeycrisp apples are easily identifiable. They are medium to large with a round shape and a light green to yellow background color.

    Honeycrisp apples are commonly grown in the United States, particularly in Minnesota, where they were first developed. They require specific growing conditions to thrive, so they are not as widely available as other types of apples.

    Due to their unique flavor and limited availability, Honeycrisp apples can be quite expensive. The cost of a single apple may be higher than other varieties.

    Honeycrisp apples on a wooden board.

    7. Ginger Gold

    The Ginger Gold apple originated in Virginia in the 1960s and is believed to be a cross between the Golden Delicious and Albemarle Pippin varieties. Its skin is thin and slightly waxy, and when you bite into it, you'll notice its juicy flesh and crispy texture.

    These delicious apples are grown in many regions throughout the United States, although they especially thrive in the southeastern states. They are harvested in August and September, making them one of the first apples of the fall season.

    Ginger Gold apples are usually reasonably priced, although their cost may fluctuate depending on the time of year and the location.

    Ginger gold apple.

    8. Pacific Rose Apple

    The Pacific Rose apple flavor is a must-try for all apple lovers! This beautiful apple is originally from New Zealand and is easily recognizable by its distinctive pinkish-red blush. Its appearance is further enhanced by its oblong shape and yellowish-green background.

    A Pacific Rose apple has a crisp flesh with a sweet-tart taste. It's not too sweet or sour, making it perfect who crave a mild flavor. In fact, many apple enthusiasts consider the Pacific Rose apple their favorite apple because of its juicy and delicious taste.

    One thing to keep in mind is the price. Since these apples are primarily grown in New Zealand, they're not as widely available as other varieties, making them slightly pricier.

    Pacific rose apple.

    9. Opal Apples

    Opal apples are a newer apple cultivar that was first discovered in Europe. They have a distinct appearance with their yellow-gold skin and occasional rosy blush.

    Opal apples are known for their unique taste profile, offering a sweet-tart flavor with a floral aroma reminiscent of honey. This variety has a sweet taste with a slightly tart finish. The apples have a crisp texture, making them perfect for eating fresh or incorporating into salads.

    Opal apples are typically slightly more expensive than others due to their rarity and unique flavor. Still, they are well worth the investment for apple lovers who are looking for something different.

    Opal apples on a wooden board.

    10. Golden Russet

    Dating back to the early 1800s, this apple variety has a fascinating and lengthy history that was first recorded in New York. The Golden Russet apple has a unique appearance, with its yellow-green skin heavily covered in russet patches.

    Its crisp texture and juicy flesh make it a delicious treat for anyone who loves the taste of a great apple. But what really sets this apple apart is its complex flavor profile, with notes of pear, nutmeg, and even hints of vanilla.

    When it comes to price, Golden Russet apples are often slightly more expensive than other apples due to their excellent flavor and limited availability.

    Golden russet apples on a tree.

    11. Red Delicious

    Red Delicious apples are a popular apple variety known for their mild sweet, and tart flavor. Originating in Iowa in the 1870s, this apple variety quickly gained popularity and is now widely cultivated in many regions worldwide.

    These crisp apples have a mild flavor, thin skin, and juicy, firm flesh, making them perfect for fresh eating. This apple variety has a sweet and tart flavor with a great crunch making it a great snacking apple.

    Red Delicious apples are reasonably priced. They are perfect for inclusion in salads and baking desserts like apple pies and crumbles.

    Red Delicious apples are most commonly associated with the state of New York, which is the largest producer of this apple variety in the United States.

    Red delicious apples on a tree.

    12. Lady Alice

    The Lady Alice apple originated from the Agricultural Experiment Station the New York State; it was created by breeding two apple varieties, the Gala and the Braeburn. These apples are not only delicious, but they are also unique. They have an attractive appearance with distinctive pink and green skin. The Lady Alice apple is known to have an unparalleled sweet-tart flavor.

    While the Lady Alice apple may be a bit pricier than other varieties, it is definitely worth the extra cost due to its incredible flavor. The apple provides a sweet and tart flavor perfect for pies, cakes, and muffins. However, this apple is best enjoyed fresh; its firm texture and juicy flavor are remarkable.

    Lady Alice apples on a tower.

    13. Empire Apple

    The Empire Apple is a visually stunning fruit, boasting an attractive red and yellow coloring that glistens in the light. But the beauty isn't just on the outside; this juicy apple has a crisp bite and a wonderful sweet-tart flavor that makes for a refreshing snack anytime.

    Empire Apple is a relatively new variety, originating in New York State in the 1940s as a cross between a McIntosh and a Red Delicious apple.

    These apples are meticulously farmed, and growers take great care to ensure optimal conditions for the fruit to thrive. From planting to harvesting, the process can take several years.

    The price of Empire Apples can vary depending on where you purchase them and the time of year, but they're usually sold at a reasonable cost.

    Empire apples on a towel.

    14. Gravenstein

    This delicious apple variety has a unique appearance with green and red speckled skin. It's known for its tart flavor and juicy, crisp texture, making it perfect for enjoying as a snack, apple juice, or desserts like apple pies and even apple cider.

    The Gravenstein apple has its roots in Denmark and, in the early 1800s, was introduced to the United States. Today, they are primarily grown in Northern California, where the climate is ideal for apple farming. The harvesting of these is usually done during August and September.

    Due to their popularity, Gravenstein apples can fetch a higher price than other varieties, but they are worth it for their unique flavor and versatility.

    Gravenstein apples.

    15. Cameo Apples

    With their sweet and tart taste, Cameo apples are the perfect blend of flavors for those who enjoy mild sweet fruits. These apples are believed to have originated in Washington state, but they are now grown in several other regions across the United States, including New York.

    This delicious apple has creamy orange skin with light striping that covers dense, juicy, and crisp flesh. They have creamy orange skin with light striping that covers dense flesh, which is both juicy and crispy.

    Cameo Apple.

    16. Winesap

    Winesap apples are easily recognizable for their reddish skin with a yellow-green background. The apples also have a unique conical shape. You can expect a sweet and sweet taste when you bite into a Winesap apple. The juicy and firm flesh of the apples makes it an ideal ingredient for cakes, pies, and delicious ciders.

    Originally from New Jersey, Winesap apples quickly spread across the United States. They can now be found in orchards throughout the country.

    The price of Winesap apples varies depending on the location and the time of year, with prices usually ranging from one to two dollars per pound. These apples are also good for making apple cider vinegar.

    17. Egremont Russet Apples

    These sweet apples are known for their distinctive appearance, with rough, russeted skin tinged with green and brown. But the taste really sets this apple apart: biting into one reveals a crisp crunch and a sweet, nutty flavor that's truly satisfying.

    The Egremont Russet has a long history, dating back to the early 1800s in England. Today, these apples are grown in orchards around the world. While they're not the easiest apple to grow, with a tendency to drop fruit before it's fully ripe, the Egremont Russet's unique flavor makes it worthwhile.

    Regarding price, you can expect to pay more for Egremont Russet apples than for some of the more common varieties.

    Egremont russet apples.

    18. Northern Spy

    These apples are known for their incredible sweet flavor and juicy texture that satisfy any taste bud. Northern Spy apples are large and round. They have green and red skin that is firm and smooth to the touch.

    The origin of Northern Spy apples can be traced back to the northeastern United States and Canada, where they were first grown in the early 1800s. Northern Spy apples are typically grown on dwarf trees, which are easier to harvest and maintain.

    Northern Spy apples are highly valued and sometimes more expensive than other apple varieties.

    Northern spy apples.

    19. Braeburn Apples

    Northern Spy Apples are known for their striking appearance - they are large, round, and have thin skin that is usually green in color with hints of yellow and red.

    Originating in Upstate New York in the early 19th century, these apples are exceptional for fresh eating due to their complex flavor. With a balance of sweetness and tartness, they have notes of honey, nutmeg, and cinnamon, making them a perfect addition to any fall dessert.

    Northern Spy Apples are large and hardy, which makes them a little more challenging to farm, but their unique flavor is worth it. Regarding pricing, Northern Spy Apples are slightly more expensive than other varieties.

    Braeburn apples on a tree.

    20. Ambrosia Apple

    Ambrosia apples are characterized by their distinctively pink-orange blush, juicy and crisp texture, and subtle honey taste that makes them unique. Originating in British Columbia in the 1990s, Ambrosia apples are now widely grown across North America and beyond.

    Ambrosia apples are typically harvested from late September through October and are carefully sorted and stored to maintain their freshness. As a result, Ambrosia apples can be slightly more expensive than some other varieties of apples, but their superior taste and texture are well worth the investment. These apples make a great addition to baked goods, such as apple pies and muffins.

    Ambrosia apple.

    21. Jonathan Apple

    Jonathan apples are a popular variety known for their bright red appearance and sweet-tart taste. Originating in the United States in the 1940s, these apples are primarily grown in California, Washington, and Oregon.

    They are typically harvested in late September and early October, making them a fall favorite. Jonathan apples are farmed using conventional and organic techniques, with some orchards using sustainable farming methods to minimize their environmental impact.

    Prices for these apples can vary, with organic options generally selling for a higher price than conventionally grown ones. Jonathan apples are excellent eaten fresh or cooked in pies, sauces, and other dishes.

    Jonathan apples.

    22. Jazz Apple

    These apples have a bright red color with yellow-green undertones and a crunchy texture that is perfect for snacking. Named after the musical genre, Jazz apples have a sweet, tangy flavor similar to the beloved Honeycrisp apple.

    Jazz apples are initially from New Zealand and were developed by crossbreeding Braeburn and Royal Gala apples.

    These apples are carefully grown in orchards through sustainable farming practices, careful water management, and organic crop protection. Despite being a premium variety, Jazz apples are sold at an affordable price.

    Jazz apples on towel.

    23. Gala Apples

    Gala apples are a popular apple variety known for their mild and sweet flavor. They originated in New Zealand in the 1930s and were later introduced to the United States. The appearance of Gala apples is a combination of yellow and pink coloring, which creates a unique and attractive appearance.

    Gala apples are relatively easy to farm, contributing to their affordable price range. The trees are adaptable to various growing locations, which makes them a favorite among farmers.

    Learn more about Gala Apples.

    Gala apples.

    How to Store Apples?

    Storing apples is simple, and you can enjoy your apples for weeks with little effort. First, choose a cool and dark place away from direct sunlight, such as a pantry, basement or garage.

    Apples are sensitive to temperature changes, so ensure the temperature is around 32-40°F (0-4°C). You can store them in your fridge's crisper drawer, but place them in a ventilated plastic bag to minimize moisture.

    Conclusion

    The 23 best types of apples, from classic Red Delicious to modern Jazz apples, offer something unique for every palate. From sweet and tart to crunchy and juicy, there is an apple for every occasion. Pie or simply snacking, these apples will be the perfect kitchen addition.

    These apples are carefully farmed using sustainable and organic methods. Apples are an excellent and nutritious choice, whether baking a pie or simply snacking on something sweet. Packed with essential vitamins and minerals, these fruits offer a variety of health benefits for everyone.

    Easy Chocolate Valentine Pretzels

    May 19, 2023 by Angela Milnes

    Chocolate valentine pretzels on a plate.

    With just a bag of pretzels, some candy melts and a few minutes of kitchen time, you'll be able to put these easy Chocolate Valentine Pretzels. They're super crunchy and flavorful and are one of the best homemade treats you'll ever have put together.

    Easy Chocolate Valentine Pretzels Recipes.
    [feast_advanced_jump_to]

    💖 Why This Recipe Works

    • Great Gifts: Apart from the fact that these Valentine Pretzel treats taste amazing, I absolutely love how they can be used as great gifts you can put together to celebrate Valentine's Day.
    • Kid-Friendly Activity: Kids love snacks, and you can actually get them on board to make this easy treat.
    • Unforgettable Flavor: Plus, the sweet and salty combination of these valentine pretzel treats makes them an unforgettable recipe you'll find yourself trying again and again.

    ⭐ Star Ingredients

    Chocolate Valentine Pretzels Ingredients.
    • Pretzels: Provide the perfect crunchy base for our treat, with their unique shape making them a fun and festive choice for Valentine's Day.
    • Pink Candy Melts: Add a layer of sweet, creamy flavor to the pretzels, while their pink color contributes to the Valentine's theme.
    • Red Candy Melts: Offer another layer of sweetness while their vibrant color adds visual appeal, creating a true Valentine's Day vibe.
    • White Candy Melts: Provide a neutral base, bringing together the flavors of pretzel and other candy melts, while adding a contrasting color for an appealing look.
    • Sprinkles (of your choice): These aren't just for decoration! They add sweetness, texture, and fun to Chocolate Valentine Pretzels.

    For the complete list of ingredients with measurements and instructions, please see the recipe card at the bottom of the post.

    📖  Substitutions & Variations

    • Sweetheart Sprinkle Pretzels: You can also just choose to use milk chocolate to coat the entire pretzel, remove any excess chocolate, and then top them with some heart sprinkles.
    • Dual Delight Valentine Pretzels: Depending on your taste preference, you can try different versions of these chocolate-covered Valentine pretzels.
    • Classic Milk Chocolate Love Knots: I like to use a mix of dark chocolate and white chocolate chips to make half-and-half flavored Valentine's pretzel treats.

    🔪 How To Make Valentine Pretzels

    Easy Chocolate Valentine Pretzels
    1. Step 1: Melt the candy melts in a microwave-safe bowl in the microwave in increments of 20 seconds. Stir in between. Remove when fully melted. Dip pretzels in the melted candy and decorate with your favorite sprinkles.
    Easy Chocolate Valentine Pretzels
    1. Step 2: Put all the dipped pretzels in the fridge for 30 minutes, or until the candy has hardened. Now it's time to serve your Valentine pretzel!
    Easy Chocolate Valentine Pretzels

    👩‍🍳 Expert Tips

    Ready to make these Valentine pretzel bites? You may want to take note of these tips and tricks too!

    • Melting Method: I have used the microwave to melt the candy melts for this recipe. You can choose to use a double boiler instead.
    • Dipping Technique: Remember to dip the pretzels in the melted chocolate mixture immediately, as the mixture will start to harden as it cools down.
    • Setting Process: I like to lay the chocolate-covered Valentine pretzels on a baking sheet lined with parchment paper or wax paper and then refrigerate them. Using parchment paper is a big plus since it keeps the pretzel treats from sticking to the surface of the baking sheet.
    valentines pretzels

    💭 FAQs

    What Can I Use Instead of Candy Melts?

    If you don't have candy melts, you could use any good quality chocolate chips and follow the exact same process to make these chocolate covered pretzels.

    You can also use Hershey's Hugs or Hershey Kisses to make these Valentine pretzel treats.

    Can I Use Any Other Kind of Pretzels?

    You sure can! I have used pretzel twists to make these chocolate covered pretzels, but you can experiment and try the exact recipe by using other kinds of pretzels too. Pretzel rod and square pretzels are both good choices for these Valentine Pretzels. 

    Easy Chocolate Valentine Pretzels

    💖 Serving Suggestions

    • As a Sweet Snack: Serve these colorful, crunchy chocolate-covered pretzels as a sweet snack at Valentine’s Day parties, alongside other festive treats like cookies and cupcakes.
    • In a Gift Box: Package the pretzels in a decorative gift box or bag as a thoughtful homemade gift for friends, family, or your significant other.
    • On a Dessert Platter: Pair them with other chocolate-themed desserts like brownies or chocolate truffles for a fun, themed dessert spread.
    • With a Hot Beverage: Enjoy these pretzels with a warm cup of hot cocoa or coffee for a perfect snack during cozy moments.

    🍽 More Desserts To Try

    • Lemon Pudding Cake Recipe.
      Lemon Pudding Cake Recipe
    • buckwheat pancakes on a plate.
      Easy Buckwheat Pancakes
    • Crumb cakes in two jars and two fresh strawberries.
      How To Make Crumb Cake In A Jar: Easy Recipe
    • Protein Cake Loaf.
      Greek Yogurt Protein Cake (High Protein Breakfast or Snack)

    Did you make this recipe? Leave a review and a ⭐⭐⭐⭐⭐ rating below, or tag us in our Facebook Group! Alternatively, bookmark it in your browser or save to Pinterest.

    Easy Chocolate Valentine Pretzels Recipes.

    Easy Chocolate Valentine Pretzels

    Angela Milnes
    Add a sweet touch to your celebration with these Valentine’s Chocolate-Covered Pretzels! Each pretzel is dipped in rich, velvety chocolate and decorated with festive sprinkles, making them the perfect treat for sharing with loved ones.
    5 from 4 votes
    Print Recipe Pin Recipe Rate this Recipe
    Prep Time 35 minutes mins
    Cook Time 0 minutes mins
    Total Time 35 minutes mins
    Course Desserts
    Cuisine American
    Servings 35 Servings
    Calories 53 kcal

    Ingredients
      

    • 12 oz Pretzels
    • 3 oz Pink Candy melts
    • 3 oz Red candy melts
    • 3 oz White candy melts
    • Sprinkles of your choice

    Instructions
     

    • Melt Chocolate: Melt the candy melts in a microwave-safe bowl in the microwave in increments of 20 seconds. Stir in between. Remove when fully melted.
    • Dip the Pretzels: Dip pretzels in the melted candy and decorate with your favorite sprinkles
    • Refrigerate and Serve: Put all the dipped pretzels in the fridge for 30 minutes, or until the candy has hardened.

    Notes

    Melting Method: I have used the microwave to melt the candy melts for this recipe. You can choose to use a double boiler instead.
    Dipping Technique: Remember to dip the pretzels in the melted chocolate mixture immediately, as the mixture will start to harden as it cools down.
    Setting Process: I like to lay the chocolate-covered Valentine pretzels on a baking sheet lined with parchment paper or wax paper and then refrigerate them. Using parchment paper is a big plus since it keeps the pretzel treats from sticking to the surface of the baking sheet.

    Nutrition

    Serving: 1gCalories: 53kcalCarbohydrates: 10gProtein: 1gFat: 1gSaturated Fat: 1gPolyunsaturated Fat: 0.1gMonounsaturated Fat: 0.1gSodium: 124mgPotassium: 22mgFiber: 0.3gSugar: 2gVitamin C: 0.2mgCalcium: 3mgIron: 0.4mg
    Print Recipe Pin Recipe Rate this Recipe
    Tried this recipe?Let us know how it was!

    More Valentine's Day Recipes

    • Valentine’s Day Heart Cookies
    • Instant Pot Chocolate Cake
    • Baked With Love Valentine Cookies
    • Best Red Velvet Cookies Recipe
    • Vegan Chocolate Covered Strawberries

    What Do Hearts of Palm Taste Like?

    May 18, 2023 by Angela Milnes

    hearts of palm on a wooden board.

    Have you ever been scrolling through the produce section of your favorite market and seen a can label "Hearts of Palm?" If you've seen it, you've probably wondered to yourself-- what do hearts of palm taste like?

    Well, wonder no more! In this article, we'll be taking an in-depth look at the flavor profile and culinary applications for Hearts of Palm.

    Hearts of palm on a serving tray.
    [feast_advanced_jump_to]

    What Are Hearts of Palm?

    Hearts of palm are derived from the inner core of palm trees and are widely consumed as a vegetable. Also known as swamp cabbage or peach palms, these creamy white cylinders have a delicate flavor and tender texture, similar to white asparagus or artichokes.

    Hearts of palm are native to Central America and South America. They are harvested from a variety of palm trees, including the single-stemmed wild palms that grow in the southeastern United States.

    Though hearts of palm can be harvested from several different species of palm, most commercial production comes from the peach palm, which is grown primarily in Costa Rica.

    However, if you want to grow them yourself, some nurseries focused on warm climates may offer them.

    What Do Hearts of Palm Taste Like?

    Hearts of Palm have a mild, subtle flavor that can be described as vegetal or slightly nutty. They have low calories, are packed with fiber, and are filled with nutrients.

    The mild flavor allows them to pair well with a variety of other ingredients and flavors, making them a versatile addition to most dishes.

    Is the Heart of Palm Sweet?

    No, the hearts of palm are not particularly sweet. Hearts of palm are a popular delicacy that comes from the inner core of various species of palm trees. The edible part, also known as palm cabbage, is harvested from the center of the growing bud.

    Hearts of palm have a delicate, creamy texture with a slightly vegetal flavor that is often compared to artichoke hearts or white asparagus.

    What Do Cooked Hearts of Palm Taste Like?

    When adequately prepared, palm hearts have a tender texture and a slightly nutty, mildly sweet flavor that pairs well with various ingredients.

    These hearts can be eaten raw or cooked, but it's crucial to cook them properly before consuming raw hearts to prevent any potential digestive problems.

    Cooked hearts of palm.

    Do Hearts of Palm Taste Like Pasta?

    Hearts of Palm, also known as palm pasta or palm noodles, have been gaining popularity as a pasta substitute for those looking to reduce their carb intake or try something new. While they have a similar shape and texture to pasta, the taste can differ.

    However, they are not as starchy as traditional pasta and may have a slightly tangy or acidic taste, depending on how they are prepared.

    Ultimately, whether or not palm Pasta or noodles taste like traditional pasta is subjective and depends on personal preference.

    What Do Hearts of Palm Noodles Taste Like?

    If you're looking for a new and exotic way to spice up your meals, hearts of Palm noodles are perfect.

    To make Hearts of Palm noodles taste good, you'll need a can of Hearts of Palm which you can find in the Asian or specialty section of your grocery store.

    Drain the liquid, rinse the hearts of the palm, and slice them into noodle-like shapes. Next, heat a pan and add some stir-fried vegetables such as bell peppers, onions, and mushrooms.

    Are Hearts of Palm Similar to Artichoke Hearts?

    Hearts of palm and artichoke hearts may seem similar at first glance. However, they have distinct differences in both taste and texture. Hearts of palm are harvested from the central portion of select palm tree species, whereas artichoke hearts come from the consumable portion of the artichoke plant.

    Hearts of palm have a subtle flavor with a tender, slightly crunchy texture, similar to water chestnuts. Although they taste different, the hearts of palm taste good in their own unique way. Both hearts can be used in various dishes and offer unique flavors to elevate any recipe.

    Artichoke hearts and hearts of palms.

    Is Heart of Palm a Superfood?

    The heart of the palm is commonly considered a superfood due to its nutritional value and essential nutrients. This vegetable contains several essential nutrients such as calcium, potassium, and vitamin C.

    Overall, consuming the heart of palm ingredients can provide numerous nutritional benefits and can be an excellent addition to anyone's diet.

    Can We Eat Raw Hearts of Palm?

    Fresh hearts of palm, which come from the inner core of certain palm trees, are a popular ingredient in many dishes worldwide.

    Raw hearts of palm can be eaten! They don't have a strong flavor, but their light, crisp texture can tantalize your taste buds.

    Some people describe the taste of fresh hearts of palm as similar to an artichoke.

    This is why they are highly sought after and are commonly referred to as "hearts" because they resemble actual hearts.

    Where Do I Buy Hearts of Palm?

    Hearts of palm are a popular and delicious ingredient in many culinary dishes. You can also find it in online retailers, but check the expiration date before purchasing.

    Hearts of palm in cans are pre-cooked and ready to eat straight from the packaging, or can be incorporated into your culinary preparations.

    In the case of jarred hearts of palm, it's crucial to rinse them extensively and pat them dry before using them in any dish.

    Shelf Life of Hearts of Palm

    Here are some key points regarding the shelf life of fresh hearts and canned or jarred hearts:

    • Grocery stores often sell fresh hearts that can last 3 to 4 days when refrigerated.
    • For the best quality and taste, consuming fresh hearts right away or as soon as possible is recommended.
    • Canned or jarred hearts have a longer shelf life, up to 2 years, with proper preservation and storage, but may not always appeal to the taste buds.
    • Checking the expiration or best-by date on food packaging is crucial to ensure the product is still within its shelf life, just like with any other food.

    How to Store Hearts of Palm?

    If you have bought fresh hearts of palm from your local farmer's market or grocery store, it is crucial to store them properly to maintain their quality and freshness.

    Since these delicate items are extremely perishable, using them within a few days of purchase is recommended for the best flavor and texture.

    To store them, rinse them thoroughly, pat them dry, and wrap them tightly in plastic or foil before placing them in the refrigerator.

    Best Ways to Have Hearts of Palm

    Here are some top cooking methods to try out:

    Raw Hearts of Palm Salad

    The Palm's hearts possess a delicate flesh that exudes a subtle taste in its natural state. Add thinly sliced hearts to your preferred salad and vegetables for a wholesome and revitalizing dish.

    Hearts of Palm Crab Cakes

    Hearts of Palm make an excellent substitute for crab meat in crab cake recipes. Just chop the hearts of palm into small pieces and use it instead of crab meat in your favourite crab cake recipe.

    Grilled Hearts of Palm

    Just brush these tasty vegetables with some olive oil and grill until they're lightly charred. With this easy cooking method, you can enjoy the natural flavor of the hearts of palm like never before.

    Hearts of Palm Soup

    Hearts of Palm can be cooked and blended into a creamy soup with other vegetables like carrots and parsnips.

    How Environmentally Sustainable Is the Heart of Palm?

    Heart of Palm is a vegetable obtained by harvesting the inner core of certain palm trees. Its delicate flavor and distinct texture have made it a favorite in vegetarian and vegan cuisine, leading to its recent popularity.

    The harvesting of the heart of the palm is done in a way that does not harm the palm tree, as only the inner core is removed and the outer part of the tree remains intact.

    This allows for sustainable cultivation of the heart of the palm and preservation of the palm species.

    To minimize waste and support sustainability efforts, it is recommended to only purchase the heart of palm from certified sustainable sources.

    Why Are Hearts of Palm So Expensive?

    Hearts of Palm, a delicacy frequently used in various dishes, come with a significant price tag. One of the main reasons for its high cost is the highly perishable nature of the hearts of palm.

    They cannot be stored for long periods without spoiling, which makes them harder to transport and more expensive to handle.

    Harvesting hearts of palm can be difficult and dangerous, as it requires cutting down entire palm trees in South and Central America. This makes the production process more costly, which drives up the price of hearts of palm for consumers.

    • close-up-watermelon-slices-with-blackberry-plastic-disposable-cup-perfect for a summer party.
      How To Host An Awesome Summer Party
    • MIni Rainbow Pizza.
      How To Revamp Leftover Pizza
    • hearts of palm on a wooden board.
      What Do Hearts of Palm Taste Like?
    • Raw taro vegetable.
      What Does Taro Taste Like?

    So, Enjoy These Tasty Hearts Of Palm!

    So, still, you have a question about "What do hearts of palm taste like?" Hearts of palm are a delicacy with a distinct flavor and texture, making them a great addition to any meal.

    They possess numerous nutritional benefits and can be enjoyed in many different ways. Although they are expensive, the sustainable harvesting of hearts of palm helps to minimize waste and promote sustainability.

    With its subtle taste, hearts of palm can bring a unique flavor to any dish. The heart of palm is an excellent choice for those looking for a new and delicious ingredient.

    Oven Baked Sausage Casserole Recipe

    May 18, 2023 by Angela Milnes

    Oven baked sausage casserole in a pot.

    This Oven Baked Sausage Casserole recipe is perfect for those busy weeknights. It's a hit with the kids and a great way to sneak in some veggies. Gather around the table for some hearty laughs and enjoy this deliciously easy sausage casserole.

    Baked Sausage Casserole
    [feast_advanced_jump_to]

    💖 Why This Recipe Works

    • Hearty and Satisfying: This sausage casserole is a comfort food classic perfect for chilly evenings.
    • Minimal Prep: With simple ingredients and steps, it's easy to put together.
    • Versatile: Add your favorite veggies or switch up the sausages for a personal touch.

    ⭐ Star Ingredients

    Oven Baked Sausage Casserole Ingredients.
    • Garlic: Adds a punch of aromatic, savory flavor that complements the sausages.
    • Sausages: Provide a hearty, meaty base for the casserole. Their natural fats add richness and flavor.
    • Eggs: Act as a binding agent, holding all the ingredients together while adding protein.
    • Fatty Cream or Sour Cream: Enhances the creaminess of the casserole, balancing the robust flavors of the sausages.
    • Sharp Cheddar Cheese: Melts into the casserole, adding a tangy, creamy richness.
    • Parsley: Provides a fresh, earthy note which contrasts nicely with the rich, savory elements.
    • Salt and Ground Pepper: Boost the other flavors in the sausage casserole.
    • Broccoli: Adds a crunchy element that pairs well with the rich sausage and cheese.

    For the complete list of ingredients with measurements and instructions, please see the recipe card at the bottom of the post.

    📖  Substitutions & Variations

    Cream Of Mushroom Soup: can serve as a flavorful substitute for fatty cream or sour cream in the oven-baked sausage Casserole, adding a rich, umami depth to the dish. Use it in the egg mixture before baking to enhance moisture and flavor.

    🔪 How To Make Sausage Casserole?

    Now it's time to get cooking! Start by preheating your oven to 180 degrees Celsius.

    Baked Sausage Casserole
    1. Step 1: In a frying pan, add the garlic and sausage. Cook sausage until it's browned and cooked through. This should take around 10 minutes.
    Baked Sausage Casserole
    1. Step 2: Blanch your broccoli for 2-3 minutes.
    Baked Sausage Casserole
    1. Step 3: Next, combine the eggs, cream, half the grated cheese, parsley, salt, and pepper. Mix using a whisk.
    Baked Sausage Casserole
    1. Step 4: Place the sausage mixture and broccoli into the baking dish. Pour the egg mixture and sprinkle the remaining cheese. Place the sausage casserole into the oven and cook for 20 minutes at 180 degrees.
    Baked Sausage Casserole

    👩‍🍳 Expert Tips

    • Add Crunch: If you want to add a bit of crunch, mix in some walnuts or almonds.
    • Add Flavor: For added flavor, try adding a pinch of chili flakes for some heat.
    • Cheese Varieties: Feel free to switch up the cheese with any type you prefer.
    • Serving Temperature: This casserole can be eaten warm or cold.
    • Vegan Adaptation: If you want to make this dish vegan-friendly, swap out the sausage for mushrooms and use almond cream instead of heavy cream.

    💭 FAQs

    Can I Add More Vegetables to Sausage Casserole?

    Yes, you can add some onions, mushrooms, zucchini, bell peppers or any other vegetables of your choice. Just keep in mind to use low-carb vegetables and measure out the right amount so it doesn't throw off your Keto diet.

    Which Sausage Should I Use?

    This recipe uses savory sausage. I picked Pork Sausage, but you can opt for any cooked sausage like chicken, beef, turkey sausage, or hot Italian sausage. Expect a flavor kick with spicy sausage. Skip ground or breakfast sausage blends; this is a family meal, not a breakfast casserole recipe.

    Can I Make This Into Sausage and Potato Casserole?

    If you're okay with carbs and want to make this into a sausage potato casserole then get 3 large potatoes and slice them into cubes. Add the potatoes to your casserole dish along with the other ingredients and bake according to the instructions above.

    Do I Have to Use Cheddar Cheese?

    No, you can use a variety of cheeses in this sausage casserole. If you don't want to use cheddar try using pepper jack cheese, feta cheese, parmesan or any other type.

    Can I Use Cauliflower Instead of Broccoli?

    Yes to make this into a sausage cauliflower casserole, simply swap out the broccoli for cauliflower following the same method.

    Best Way To Store Sausage Casserole?

    This casserole can be stored in the refrigerator for up to three days. You can freeze sausage casserole it for up to six months.

    Baked Sausage Casserole

    💖 Serving Suggestions

    These are my favorite side dishes to serve with sausage casserole:

    • Mashed Cauliflower: Pair your oven-baked sausage casserole with mashed cauliflower for a colorful twist on a classic side that adds both flavor and visual appeal to your meal.
    • Cooked Broccolini: Add cooked broccolini to introduce a crispy side dish that complements the casserole with its light and earthy flavors.
    • Green Bean Salad: Serve a green bean salad alongside the casserole for a refreshing, Mediterranean-inspired touch that balances the hearty flavors with crisp, fresh green beans.

    🍽 More Easy Oven Meals

    • Creamy Oven Baked Mac and Cheese.
      Creamy Oven Baked Mac and Cheese
    • Air Fryer Almond Crusted Chicken.
      Crispy Almond Crusted Chicken (Air Fried or Oven Baked)
    • Air Fryer Enchiladas With Turkey and Black Beans.
      Air Fryer Enchiladas (Better Than Oven-Baked!)
    • Dutch Oven Corned Beef And Cabbage.
      Dutch Oven Corned Beef And Cabbage

    Did you make this recipe? Leave a review and a ⭐⭐⭐⭐⭐ rating below, or tag us in our Facebook Group! Alternatively, bookmark it in your browser or save to Pinterest.

    Baked Sausage Casserole

    Oven Baked Sausage Casserole Recipe

    Angela Milnes
    This comforting sausage casserole combines savory sausage with tender vegetables and a blend of delicious seasonings, all baked to perfection in one dish.
    5 from 4 votes
    Print Recipe Pin Recipe Rate this Recipe
    Prep Time 15 minutes mins
    Cook Time 20 minutes mins
    Total Time 35 minutes mins
    Course Dinners
    Cuisine American
    Servings 6 Servings
    Calories 375 kcal

    Ingredients
      

    • 6 Cloves Garlic
    • 300 g Sausages I Use Pork Sausage
    • 12 Eggs
    • ½ Cup Sour Cream
    • 2 Cup Sharp Cheddar
    • 2 tablespoon Parsley
    • ¼ Teaspoon Salt
    • ¼ Teaspoon Ground pepper
    • 3 Cup Broccoli

    Instructions
     

    • Now it's time to get cooking! Start by preheating your oven to 180 degrees Celsius.
    • In a frying pan, add the garlic and sausage. Cook sausage until it's browned and cooked through. This should take around 10 minutes.
    • Blanch your broccoli for 2-3 minutes.
    • Next combine the eggs, cream, half the grated cheese, parsley, salt and pepper. Mix using a whisk.
    • Place the sausage mixture and broccoli into the baking dish. Pour the egg mixture and sprinkle the remaining cheese.
    • Place the sausage casserole into the oven and cook for 20 minutes for 180 degrees.

    Notes

    Add Crunch: If you want to add a bit of crunch, mix in some walnuts or almonds.
    Add Flavor: For added flavor, try adding a pinch of chili flakes for some heat.
    Cheese Varieties: Feel free to switch up the cheese with any type you prefer.
    Serving Temperature: This casserole can be eaten warm or cold.
    Vegan Adaptation: If you want to make this dish vegan-friendly, swap out the sausage for mushrooms and use almond cream instead of heavy cream.

    Nutrition

    Calories: 375kcalCarbohydrates: 7gProtein: 19gFat: 31gSaturated Fat: 14gPolyunsaturated Fat: 2gMonounsaturated Fat: 10gTrans Fat: 0.1gCholesterol: 86mgSodium: 602mgPotassium: 340mgFiber: 1gSugar: 3gVitamin A: 927IUVitamin C: 43mgCalcium: 323mgIron: 1mg
    Print Recipe Pin Recipe Rate this Recipe
    Tried this recipe?Let us know how it was!

    More Easy Casserole Recipes To Try

    • Bacon And Egg Casserole
    • Spinach Feta Rice Casserole
    • Slow Cooker Chicken Stuffing Casserole
    • Chicken Tamale Pie
    • Italian Sausage And Broccoli Pasta
    • Zucchini Egg Bake Recipe

    What Do Pickled Eggs Taste Like? A Detailed Guide!

    February 27, 2023 by Angela Milnes

    Raw eggs.

    You've probably seen those pickled eggs in bars and pubs. They're a popular tasty appetizer that's been around for ages, and people love munching on them while sipping an ice-cold beer. But what do pickled eggs taste like?

    Well, I'm here to spill the beans on pickled eggs and share three mouth-watering recipes you should definitely try at home! Before we begin don't forget to try these Pickled Red Beet Eggs.

    Raw eggs.
    [feast_advanced_jump_to]

    What Is a Pickled Egg?

    A pickled egg is a hard-boiled egg that's been soaked in a mixture of vinegar, salt, and spices. You just put the eggs in a jar with the pickling liquid and let them sit for a while, usually a few days or weeks. This process allows the eggs to soak up all the tasty flavors and get that tangy, slightly sour taste.

    You can use different flavorful ingredients like apple cider vinegar, salt, sugar, garlic, onion, mustard seed, and dill to make the pickling solution. It's up to you to pick and choose what you like!

    The History of Pickled Eggs

    Pickle eggs have been a go-to snack for folks across the globe for ages. Sailors and soldiers especially loved them because they're packed with protein and can last long, making them the perfect travel food. Back in the 19th and early 20th centuries, you could even find jars of pickled eggs right on the bar counter of neighborhood taverns.

    These days, people still love munching on pickled eggs, and there are all kinds of flavors to choose from. You can stick with the classic kind or try something a little more daring, like beet-pickled or jalapeño-pickled eggs. There's something for everyone!

    Nutritional Benefits of Pickled Eggs

    Pickled eggs are a fantastic source of protein that your body needs to build and repair muscle and tissues. Plus, they're low in calories and carbs, making them a great snack if you're trying to maintain a healthy weight or manage your blood sugar levels.

    But that's not all! Pickled eggs also have probiotics that help with digestion and boost your immune system. Snacking on pickled eggs is not only tasty, but also good for overall health and well-being!

    What Do Pickled Eggs Taste Like?

    Pickled eggs have a flavor that's all their own, and it can be tough to put into words. The first thing you'll taste is the tangy, sour flavor of the pickling solution. This solution is usually made with vinegar, salt, and other spices, giving the egg a distinct sweet and sour taste.

    Once you get past the tanginess, you'll start to taste the egg itself. The texture will be firmer than a boiled egg, with a slightly rubbery feel. The yolk will be creamy and rich, and it will have absorbed some of the flavors from the pickling solution.

    Why Are Pickled Eggs Rubbery?

    Pickled eggs can become rubbery due to a few different factors. One possible reason is that they have been overcooked before pickling. Overboiling eggs can cause them to become tough and rubbery, and this texture is preserved even after pickling.

    Another possible reason is that the eggs were too long in the pickling solution. The acidity of the pickling solution can cause the egg whites to become tough and rubbery if left in it for an extended period.

    Lastly, the quality of the eggs can also play a role. If the eggs were already old or not very fresh before they were pickled, they may have had a rubbery texture to begin with, which would be further intensified by the pickling process.

    How Long Is the Shelf Life of Pickled Eggs?

    The shelf life of pickled eggs can vary depending on how they are prepared and stored. When properly prepared and stored in the refrigerator, pickled eggs typically last up to 3-4 weeks.

    Note that the quality of the eggs and the pickling solution can also affect the shelf life. If the eggs were not fresh or the pickling solution was not properly prepared or stored, the pickled eggs may spoil more quickly and pose a risk of foodborne illness.

    Do Pickled Eggs Need to Be Refrigerated?

    Yes, you should keep your pickled eggs in your fridge to keep them fresh and safe to eat!

    Just make sure to keep your refrigerator pickled eggs in a sealed container, and keep the temp at or below 40°F. And if you're taking them to a picnic or party, keep them chilled and put them back in the fridge when you're done snacking.

    Three Delicious Pickled Eggs Recipe

    Here are some of the most popular pickle egg recipes to try at home!

    Beet Pickled Eggs

    Lots of people in Eastern Europe and the US love beet-pickled eggs! They make a tasty snack or appetizer and can even be used to spruce up egg salads and sandwiches.

    To make them yourself, start by boiling some farm-fresh eggs until they're hard. After peeling them, put in a jar or container with a pickling solution that includes cooked beets, vinegar, sugar, and spices. Then let them soak for a few hours or overnight, so they can absorb the color and flavor of the beets.

    Besides tasting great and looking cool, beet-pickled eggs have some nutritional benefits. The pickled beets in the solution are high in minerals, vitamins, and antioxidants, which can help lower blood pressure and improve digestion.

    Jalapeno Pickled Eggs

    Jalapeño pickled egg is a type of pickled egg that has a spicy flavor from jalapeño peppers. To make jalapeño pickled eggs, hard-boiled eggs should be soaked in a pickling solution made with vinegar, water, salt, sugar, sliced jalapeño peppers, and other seasonings like garlic and black pepper.

    The eggs absorb the spicy flavor of the peppers and become tangy and flavorful. Jalapeño pickled eggs can be served as a snack or appetizer, sliced and added to sandwiches or salads, or used as a garnish for dishes like deviled eggs or egg salad.

    Spiced Pickled Eggs

    Spiced pickled eggs are hard-boiled eggs soaked in a pickling solution infused with aromatic spices, such as cloves, cinnamon, allspice, and nutmeg. The eggs absorb the flavors of the spices and become tangy and flavorful.

    To make spiced pickled eggs, you can follow a recipe similar to the classic pickled egg recipe, but with various spices. Spiced pickled eggs are a delicious and easy snack or appetizer that can be enjoyed on their own or added to sandwiches, salads, or cheese boards for an extra burst of flavor.

    Read The Following Useful Food Tips

    • Best Cannellini Bean Substitute
    • Fermented Vegetables Using Apple Cider Vinegar
    • 12 Paprika Substitutes
    • Substitute For Sun Dried Tomatoes
    • New Zealand Green Mussels Vs Black Mussels

    What Does Taro Taste Like?

    February 6, 2023 by Angela Milnes

    Raw taro vegetable.

    If you've been exploring the world of exotic flavors, you've likely come across taro in your culinary journey. But what exactly is taro? What does it taste like?

    Taro is an ingredient used extensively in many cultures and cuisines - it's a starchy root vegetable much like a potato, but with its unique texture and flavor.

    what does taro taste like

    This versatile ingredient can pop any dish with its pungent aroma and earthy, nutty taste. In this article, we'll look at the taste of taro and some creative ways to use this delicious vegetable in your cooking!

    [feast_advanced_jump_to]

    What Is Taro?

    Taro is a tropical root vegetable popular in many Asian cultures for centuries. The taro plant grows in warm, wet climates; its edible parts are the tubers or corms of the Araceae family.

    It has a tough, brownish exterior that peels away to reveal white flesh beneath. Although this part looks plain, you'll find tiny purple spots inside when you cut it open.

    Taro is also super popular on the Pacific Island and looks similar to a potato but with a purplish-brown color and rough exterior.

    What Does Taro Taste Like?

    So what does taro taste like? Taro's unique flavor and texture set it apart from potatoes and other root vegetables. Its taste is earthy, nutty, and slightly sweet, with a hint of bitterness.

    The texture of the taro is creamy yet firm - it's not as fluffy as a potato but still has its unique character. Taro is similar to sweet potatoes but has a slightly more pungent aroma and flavor.

    Fried, baked, or roasted taro tastes sweet and has a vanilla profile similar to sweet potato.

    Is Taro Healthy?

    Yes, taro is incredibly nutritious and full of vitamins and minerals. It's a good source of dietary fiber and contains calcium, magnesium, iron, zinc, phosphorus, potassium and selenium. Taro is a great whole food.

    Health Benefits of Taro

    Taro also contains high levels of antioxidants, which can help reduce inflammation and fight free radicals in the body. Additionally, it has a low fat and calorie content, making it an ideal choice for those looking to eat healthily.

    Taro Root vs Taro Powder

    While taro root is this vegetable's most common form, there are other forms, like taro powder or taro flour. Taro powder has a more concentrated flavor and can be used in savory sweet dishes.

    It's also much easier to work with as it doesn't require any preparation - add it to your recipes, and you're good to go!

    Hawaii Taro Root vs Asian Taro Root

    The taste of taro root may vary slightly depending on its type and origin. For example, Hawaii taro is sweeter and more delicate than Asian taro, which tends to be a bit more bitter with a nutty flavor.

    No matter what type of taro you choose, you can look forward to an earthy, nutty flavor.

    Can I Eat Raw Taro?

    Taro root is safe to eat when cooked properly. However, raw taro contains calcium oxalate, which can trigger symptoms such as throat burning, gout, and kidney stones.

    Not to worry, once cooked, taro is free of calcium oxalate, making it safe and healthy to eat!

    what does taro taste like

    When preparing the taro, peel it and boil it thoroughly before consuming it. Also, wear gloves when handling taro root, as the outer layer can cause irritations and discomfort on sensitive skin.

    It's also important to use separate utensils when handling raw taro to avoid cross-contamination.

    Using Taro to Make Taro Boba Tea

    Taro root is the perfect ingredient for making boba tea or taro bubble tea. The earthy sweetness of taro pairs perfectly with creamy, milky flavors like almond and coconut to create a delicious and unique beverage.

    Boba Tea.

    Simply mix up your favorite tea base, add some taro powder, top it off with chewy tapioca pearls and enjoy taro bubble tea.

    Does Taro Tea Have Caffeine?

    No, taro tea does not contain any caffeine. This is an ideal option for those looking to reduce their intake of the stimulant or just want a more mellow flavor to their bubble tea or taro smoothie.

    What Does Taro Milk Tea Taste Like?

    So, what does taro boba milk tea taste like? Taro bubble milk tea is a popular beverage that has become increasingly popular. It is made by steeping taro root powder, milk and syrup in tea.

    The resulting drink has a mild sweet taste with an earthy taro flavor. For some people, taro boba milk tea tastes like a mild chocolate flavor.

    Where to Get Taro Bubble Tea?

    Taro boba, also known as taro bubble tea or taro milk tea, is a beverage that originated from Asia but is now enjoyed across the globe.

    If you wish to taste taro bubble tea flavor while out and about, plenty of bubble tea shops sell delicious taro milk tea. These boba tea shops tend to be in the Asian food store areas, but they're becoming more and more popular in other areas.

    How to Cook Taro?

    Taro is a delicious and versatile ingredient that can be cooked in many different ways. It's great for boiling, steaming, mashing, roasting and grilling.

    Cooked Taro in a bowl.

    You can also use it to make desserts like taro pancakes or sweet potato pie. For savory dishes, try adding it to soups or stews for a unique flavor and texture.

    To cook taro, boil it in a pot or steam your taro in an Instant pot with water or coconut milk. Fresh taro is delicious with other root vegetables such as purple sweet potatoes and yams. It also pairs well with meat, fish, tofu and mushrooms.

    How to Cook Fried Taro Root

    Cooking taro root doesn't have to be complicated. Here's a simple recipe for fried taro to help you make a delicious side dish.

    Fried Taro on a plate.

    What You'll Need

    • 2 large taro roots, peeled and cut into cubes
    • ¼ cup oil (canola or vegetable oil)
    • Salt to taste

    Instructions

    1. Heat the skillet over medium heat until the oil starts to shimmer.
    2. Add the cubed taro root and stir to coat with oil.
    3. Sprinkle salt over the taro and continue occasionally stirring for 15 minutes or until the cubes are crisp and lightly browned on all sides.
    4. Serve hot as a side dish or by itself as an appetizer!

    Can You Freeze Taro?

    Freezing taro may seem odd, but the answer is a definite yes! Taro is a root vegetable that is versatile and easy to prepare.

    Its unique flavor adds depth and complexity to many dishes, so it's worth preserving later. Just be sure to wash and peel before freezing, as the brown skin of taro can be rubbery even after cooking. Once peeled, chop into cubes or slices and store in sealed containers or vacuum-sealed bags.

    For even better results, try blanching in boiling water before freezing; this will preserve the nutrients while avoiding freezer burn. You can now enjoy your favorite recipes with frozen taro all year round!

    How to Tell if Taro Root Is Bad?

    Need help telling if your taro root is bad? Here's a helpful guide for determining the quality of your taro:

    1. Check if the roots are fresh by examining their color. They're likely past their prime if they are browning or turning grey.
    2. Give it a sniff to check for an unpleasant odor. If it smells sour or musty, it's probably gone bad.
    3. Try pressing down on the roots with your finger - if they feel the squishy and soft texture, they've most likely gone bad.
    4. Inspect the skin of the roots closely - if they have any visible mold growing on them, discard them immediately, as this indicates that they've gone bad.
    5. Test a small piece of the root by tasting it, but be sure not to eat too much, just in case! If it tastes sour or off, then you should discard it.

    More Taro Root Recipes

    Here are some Taro root recipes and food ideas that can be created using taro:

    Taro in Coconut Milk

    If you like coconut milk, make sure to give this a go – coconut milk pairs go well with taro!

    taro in coconut milk.

    Ingredients:

    • 2 cups chopped taro
    • 2 cups thick coconut milk
    • 2 tablespoons of butter or oil
    • 1 tablespoon of brown sugar
    • Salt and pepper to taste

    Method:

    1. Peel the taro root and chop it into small cubes.
    2. Heat the butter or oil in a pan over low to medium heat.
    3. Add the taro root and cook, occasionally stirring, until it softens (about 5 minutes).
    4. Simmer the coconut milk mixture, stirring in the sugar, salt and pepper to taste, for 10 minutes until the taro is cooked.
    5. Serve warm or cold, as desired. Enjoy!

    Crispy Taro Fritters

    These savory taro fritters are a delicious way to enjoy a classic dish. Made with simple ingredients and easy preparation, these crispy treats are perfect for snack time or as an appetizer!

    Crispy Taro Fritters.

    Ingredients:

    • 1 cup of mashed taro root
    • 2 tablespoons of all-purpose flour
    • ½ teaspoon of baking powder
    • ½ teaspoon of turmeric powder (optional)
    • Pinch of salt
    • 2 tablespoons of chopped cilantro
    • Oil for frying

    Instructions:

    1. Mix the mashed taro root, flour, baking powder, turmeric powder (if used), salt and cilantro until well combined. If the mixture is too dry to shape into patties, add a splash of water or milk at a time until you reach desired consistency.
    2. Heat oil in a saucepan over medium to high heat. Carefully scoop 2 tablespoon portions of the mixture using a spoon and gently flatten into patties. Fry on each side until golden brown and crispy.
    3. Serve warm with your favorite dipping sauce, and enjoy!

    Air Fryer Taro Chips

    These air-fried taro chips are easy to make and guaranteed to disappear quickly!

    Air Fryer Taro Chips.

    Ingredients:

    • 2 large taro roots
    • 2 tablespoons of olive oil or vegetable oil  
    • ½ teaspoon of salt
    • Optional: other seasonings such as garlic powder, paprika, etc.

    Method:

    1. Peel the taro roots and then slice them into thin rounds.
    2. Mix the slices with the oil and desired seasonings in a bowl.
    3. Put the slices in an even layer on the air fryer basket, ensuring they don't overlap.
    4. Cook at 360°F for 10 minutes, then flip and cook for another 5 minutes until golden brown and crispy.

    Taro and Chicken Curry

    This one-pot meal is packed with flavors and makes for a hearty dinner.

    Taro and chicken curry.

    Ingredients

    • 250g boneless chicken, diced
    • 2 tbsps fresh ginger, minced
    • 2 cloves garlic, minced
    • ½ cup diced onion
    • 1 green chili pepper, diced
    • 3 tbsps curry powder
    • ¼ teaspoon ground turmeric
    • ¼ teaspoon cumin powder
    • ¼ teaspoon garam masala powder
    • 2 cups diced taro root (kachalu)
    • 4 tablespoons vegetable oil or ghee
    • Salt to taste

    Method

    1. Heat the ghee/oil in a pan over medium heat.
    2. Add the chicken, ginger, garlic, and sauté for about 5 minutes until lightly browned.
    3. Add in the onion, chili pepper and all the spices and mix well. Cook for another 3 minutes until fragrant.
    4. Pour 1 cup of water and add the taro root to the pan. Lower the heat to simmer for 15 minutes until vegetables are tender, stirring occasionally.
    5. Season with salt to taste before serving hot with your favorite side dishes.

    Mashed Taro Root

    This delicious, creamy taro root dish is perfect for any meal! Here's how to make it.

    Creamy mashed Taro.

    Ingredients:

    • 500g taro root, peeled and cut into cubes
    • 2 tablespoons unsalted butter
    • ½ cup warm milk
    • Salt and freshly ground pepper to taste
    • 2 tablespoons chopped fresh parsley (optional)

    Method:

    1. Put the taro root cubes in a pot and cover them with water. Bring to a boil over medium-high heat. Boil until the cubes are tender, about 10 minutes.
    2. Drain the cubes and transfer them to a bowl. Mash them with a potato fork or masher until they are smooth. Add the butter and continue mashing until it is fully combined.
    3. Slowly pour the warm milk while stirring or mashing continuously until everything is evenly mixed together in a creamy consistency.
    4. Add salt and pepper according to taste, then mix in the parsley if desired. Serve hot, and enjoy!

    Taro Ice Cream

    Taro ice cream is a creamy and delicious treat, perfect for those summertime cravings. Here's the authentic recipe that will make you repeat it.

    Taro Ice Cream.

    Ingredients:

    • 2 ½ cups taro, peeled and cut into small cubes
    • 1 cup condensed milk
    • ¼ teaspoon vanilla extract
    • 1-pint heavy cream
    • 3 tablespoons sugar

    Method:

    1. Place the taro cubes in a pot of boiling water and cook until tender. Drain off any excess liquid and let cool.
    2. Combine the cooled taro, condensed milk, vanilla extract, heavy cream, and sugar in a blender or food processor. Blend or process until completely smooth.
    3. Put the mixture into a sealed, airtight container and keep it in the freezer for at least 4 to 5 hours or overnight before serving.

    Taro Buns

    Taro buns are a simple and delicious way to bring a bit of Chinese cooking into your kitchen. These fluffy buns are filled with savory taro and make for the perfect appetizer or snack.

    Taro Buns.

    Ingredients:

    • 2 cups all-purpose flour
    • 2 teaspoons baking powder
    • 1 tablespoon sugar
    • ½ teaspoon salt
    • 1 cup warm water
    • ½ cup mashed taro root (steamed and mashed)
    • 2 tablespoons oil

    Method:

    1. Mix flour, salt, baking powder and sugar in a large bowl. Add in the warm water and mix until it forms a sticky dough. Knead the dough for 5 minutes to achieve a smooth and elastic texture.
    2. Divide the dough into small pieces, then roll each piece into balls. Place these balls on a greased baking sheet lined with parchment paper. Flatten each ball slightly and evenly using your fingers or rolling pin.
    3. Fill the center of each bun with mashed taro root (about one teaspoon). Pinch the edges closed around the filling, so it is completely sealed inside each bun.
    4. Bake in preheated oven at 350 degrees Fahrenheit for 25 minutes or until golden brown.

    Taro Root Mochi

    This easy-to-follow, authentic taro root mochi recipe will satisfy your taste buds!

    Taro Root Mochi.

    Ingredients:

    • ½ cup glutinous rice flour
    • ¼ cup white sugar
    • 2 tablespoons cornstarch
    • 2 tablespoons tapioca starch
    • ½ teaspoon baking powder
    • ¾ cup mashed taro root
    • Pinch of salt

    Method:

    1. Preheat oven to 350°F.
    2. Mix the glutinous rice flour, white sugar, salt, cornstarch, baking powder, and tapioca starch in a large bowl until fully combined.
    3. Stir in the mashed taro root until it is completely incorporated into the mixture.
    4. Grease an 8x8-inch pan with butter or cooking oil. Spread the mochi mixture evenly in the pan and press firmly with a spatula until a single, cohesive layer is formed.
    5. Baking may take 25 minutes until golden brown on top and set in the center. Let cool before slicing into pieces and serving warm or at room temperature.

    Enjoy Taro Root

    Taro root is a versatile ingredient with an earthy, nutty flavor that can be used in savory and sweet dishes. With its unique texture and distinctive flavor, taro can be used to make delicious dishes such as mashed potatoes, ice cream, buns, and mochi.

    Its versatile taste makes it a great ingredient to experiment with and enjoy in many different dishes!

    Try making some taro-based dishes today and explore the deliciousness of this root vegetable.

    What Does Calamari Taste Like?

    February 5, 2023 by Angela Milnes

    Calamari served with lemon slices and a bowl of ketchup on a tray.

    Calamari is a popular seafood dish that can be found on menus across the world, but what does calamari taste like? In this article, we'll explore the unique taste of Calamari. Enjoy.

    Calamari served on a tray.
    [feast_advanced_jump_to]

    What Is Calamari?

    Calamari is a seafood dish usually made from squid that can be served in various recipes. It is considered a "Mediterranean cuisine".

    Calamari is an Italian word for squid, a type of mollusk with long, flexible bodies and eight arms. This seafood has been eaten since ancient times and is still popular today. In many cuisines worldwide (especially in Asian countries), Calamari is served as an appetizers or side dish.

    How To Pronounce Calamari?

    Calamari is pronounced "kah-lah-mahr-ee" with an emphasis on the second syllable.

    What Is Calamari Made Of?

    Calamari comprises two parts: the mantle (a tube-like fleshy body) and the tentacles. The exterior has a rubbery and more tender texture, while the inside is soft and chewy.

    Raw squid.

    Is Calamari Squid Or Octopus? 

    Calamari is usually made from squid, although it can occasionally be prepared with octopus. Calamari is cut into rings and deep-fried, while octopus is often eaten raw or cooked whole.

    Octopus and squid.

    Is Calamari Good for You?

    Is Calamari healthy? The answer is a big fat yes! Calamari is low-fat and high-protein seafood, making it a healthy choice for those with heart disease looking to up their intake of omega-3 fatty acids. In addition, squid is rich in minerals like zinc, iron, potassium, magnesium, and selenium.

    Does Calamari Have Protein?

    Yes. Calamari is a great source of protein, with 18 grams per 4 ounces.

    How Many Calories in Calamari?

    The calorie count is low whether you're having fried or grilled Calamari. For example, one serving of 6.5 ounces of grilled calamari has around 280 calories.

    On the other hand, if you opt for fried calamari, there are roughly 323 calories per 6.5 ounce serving. So don't be afraid to indulge in this classic seafood dish - it can still fit within your healthy lifestyle!

    What Does Calamari Taste Like?

    Generally speaking, calamari has a slightly salty, mild taste. It's not overpowering or too fishy by any means - instead, it takes on the flavor of whatever spices and sauces are used in preparation.

    This mild taste makes calamari incredibly versatile, as it can be cooked in an array of different ways while still maintaining its mild flavor.

    So, Does Calamari Taste Good?

    Calamari is a delicious seafood delicacy enjoyed worldwide. While some may be hesitant to try it because of its unfamiliarity, It has a unique flavor.

    Calamari is often served battered and deep-fried and accompanied by lemon and tarter sauce, giving it a light and delicious taste that is sure to tantalize your taste buds!

    How to Cook Calamari?

    Cooking Calamari can seem daunting, but with a few simple steps, you can enjoy this delicious delicacy in no time. Here's how to prepare and cook calamari like a pro:

    Cooked Calamari.

    Ingredients:

    • Freshly caught or frozen calamari rounds
    • Olive oil
    • Salt and pepper
    • Your favorite herbs and spices (optional)

    Step 1: Prepare the Calamari

    If using freshly caught Calamari, clean them by removing heads, tentacles, and quills. If using frozen calamari rounds, thaw according to package instructions. Pat dry with a paper towel and cut into rings if desired. Then sprinkle with salt and pepper. You may also add your favorite herbs or spices for extra flavor.

    Step 2: Cook the Calamari

    Heat 4-5 tablespoons olive oil in a pan over medium-high heat. Carefully place the Calamari in the pan so it doesn't stick together (or use two pans if necessary). Cook for up to 2 minutes on each side until golden brown. Serve hot or cold, accompanied by your favorite dip or sauce, with some fresh bread on the side!

    Make Deep-Fried Calamari

    Fried Calamari is a classic dish that is enjoyed in many cultures. In many countries, people eat Calamari by deep frying the squid and wrapping them in lettuce leaves with chili or mustard sauce. It's a delicious way to enjoy squid and will surely be a crowd-pleaser at your next gathering.

    Here's how to make fried Calamari that packs a punch of flavor and crunch!

    Ingredients

    • Freshly caught or frozen calamari rounds
    • All-purpose flour
    • Salt and pepper
    • Paprika, garlic powder, oregano, cayenne pepper (optional)
    • 2 eggs, beaten
    • Olive oil or other cooking for frying
    • Lemon wedges

    Step 1: Prepare the Calamari

    See Step 1 from the section "How To Cook Calamari?".

    Step 2: Fry the Calamari

    Coat all the sides of each piece of Calamari in the beaten egg mixture, then dredge it through the flour mixture. Heat olive oil or cooking oil in a skillet over medium-high heat until hot.

    Carefully place the floured calamari rings in the oil and fry for 1-2 minutes on each side until golden brown. Drain the meat on paper towels and season with salt while still hot. Serve while still hot, accompanied by your favorite dip or sauce, and enjoy with some fresh crusty bread on the side!

    What to Serve With Calamari?

    Are you looking for delicious sides to serve with your next calamari dish? Here are some ideas:

    Crispy Fried Potatoes

    Add a crispy sidekick to your next calamari dish with fried potatoes. You can cook the potatoes in a skillet or deep fryer and season them with your favorite spices and herbs.

    Roasted Vegetables

    Serve a colorful veggie side like roasted tomatoes, bell peppers, and onions alongside your Calamari. For extra flavor, add garlic cloves and sprinkle some parmesan cheese overtop before serving.

    Grilled Zucchini

    Grill up some zucchini slices on the stovetop or an outdoor grill for an easy yet flavorful accompaniment to any calamari dish. Add fresh parsley and lemon juice for a tasty twist!

    Garlic Bread

    Nothing goes better with seafood than garlic bread! Toast up some crusty bread, spread garlic butter over it, and bake until golden brown for the perfect complement to calamari dishes of all kinds.

    Marinara Sauce

    Here is a great Marinara sauce recipe to go with your cooked Calamari.

    Where Do You Buy Calamari?

    Calamari can be found at your local grocery store in the seafood section. You can buy prepared and breaded calamari rings and frozen or fresh squid that you will need to wash and prepare yourself.

    Many grocery stores carry calamari, which can usually be purchased fresh or frozen. You may also buy calamari in canned form from many canned food stores. If buying live calamari for cooking, you should look for a grocery store with a designated seafood market, where you'll get the freshest product.

    Can You Freeze Calamari?

    Calamari is delicious seafood often served as an appetizer or a side, but is it possible to freeze calamari? The answer is yes! Calamari meat is actually quite easy to freeze.

    Fresh calamari has to be blanched and prepped before freezing, but once it is in the freezer, it can last up to 6 months. Frozen squid can be used in a variety of different recipes, such as Calamari in tomato sauce or battered fried Calamari.

    How to Reheat Calamari?

    Whether you're dealing with fresh, frozen, or precooked calamari meat, the basic principle of reheating it remains the same. Preheat your oven to 375°F to get started. Then spread out your Calamari in a large bowl so that it evenly warms up and is cooked uniformly.

    If you're using frozen squid, ensure it has been fully thawed before reheating. Place the bowl in the oven for 15 minutes, then remove it and serve it warm with your favorite sides!

    So, Do You Love Calamari? 

    If you're anything like me, chances are you love a delicious serving of Calamari with a twist - people prefer it to be fried and grilled. It's tender, crunchy and always flavorful.

    Enjoying warm Calamari can be an experience, topped with the right spices, seasonings, and dips that create a unique combination bursting with flavor. Whether it's calamari served with a marinara or garlic-butter sauce, people are sure to enjoy every bite.

    Best Red Velvet Cookies Recipe

    January 14, 2023 by Angela Milnes

    Red velvet cookies on a plate.

    If you love red velvet cake, you've got to try making these Red Velvet Cookies too! These cookies are filled with a rich chocolate ganache, have a delicious red velvet cookie base, and are topped with a dreamy cream cheese frosting, making them the ultimate decadent cookies you'll ever have tried in your kitchen.

    Red velvet cookies on a tray.
    [feast_advanced_jump_to]

    💖 Why This Recipe Works

    • These soft and chewy red velvet cookies are so much more than just the visual appeal. Their rich chocolate flavor and the cream cheese frosting are a match made in heaven.
    • Making red velvet cookies may seem like a lot of work and effort, but it actually isn't all that complicated.
    • You'll need just under half an hour of prep time to get everything together, and your cookies will be ready before you know it.

    ⭐ Star Ingredients

    You'll need 3 sets of ingredients to make these red velvet cookies with cream cheese frosting.

    • Cold Unsalted Butter, Cubed: Creates the rich, buttery texture of the cookies and prevents excessive spreading during baking by staying cold.
    • Unsweetened Cocoa Powder: Provides a deep, rich chocolate flavor that contrasts beautifully with the sweet frosting.
    • White Chocolate Chips And Semi Sweet Chocolate Chips: Add a delightful chocolatey surprise in each bite, with their contrasting flavors adding depth to the cookies.
    • Heavy Cream: Creates a smooth, velvety texture in the ganache, balancing the bittersweet chocolate's intensity.

    For the complete list of ingredients with measurements and instructions, please see the recipe card at the bottom of the post.

    📖  Substitutions & Variations

    • Chocolate Chips: You can experiment with the recipe and try out different variations using different chocolate chips. I love using white chocolate chips, milk chocolate chips ,and dark chocolate chips.
    • Drizzle: If you don't have cream cheese, but still want a bit of that white drizzle on the cookies. you can simply use some melted white chocolate chips to do the trick.

    🔪 How To Make Red Velvet Cookies

    Step One: To make the chocolate ganache, place the chocolate in a medium mixing bowl. In a small saucepan add the cream, and heat over medium heat. Bring the cream to a boil. Once you reach a boil reduce the heat to low, and stir the cream.

    Pour the cream over the chocolate and whisk until the chocolate has melted and mixture is smooth. Place in the refrigerator for 1 hour.

    Step Two: Preheat oven to 410° degrees F. Line 2 baking sheets with parchment paper or silicone liners and set aside.

    Step Three: In the bowl of a stand mixer, cream together the cubed cold butter and the sugar, on low speed for 1-2 minutes. Increase speed to medium to high and continue beating for another 2-3 minutes until the mixture is light and fluffy, Scrape down the sides of the bowl with a spatula.

    Add in the eggs, one at a time, and vanilla, mixing well after each addition. Beat in the red food coloring, and mix on low until incorporated.

    Step Four: In a large bowl add the baking soda, cornstarch, salt, cocoa powder, cake flour and all-purpose our, whisk to combine. Add the flour mixture to the butter mixture 1 cup at a time. Mix until incorporated. Add both types of chocolate chips on low speed and using a stand mixer, mix until incorporated.

    Refrigerate uncovered for 20 minutes to chill. Using a digital cooking scale or a large cookie scoop measure out 4 ounces of dough, forming it into a ball. Place the cookie dough balls on a parchment-lined baking sheet.

    Red velvet cookie dough.

    Step Five: Use the palm of your hand to press down on the cookie slightly, so that the cookie dough ball creates a thin disk. Using a small cookie scoop, scoop out the chocolate ganache and place it on half of the cookie dough.

    Red velvet cookie dough.

    Step Six: Take the second dough ball and place it on top of the dough ball with the ganache. Roll the dough together to form a ball. Place the dough ball on the baking sheet.

     Velvet cookie.

    Step Seven: Bake in the center rack of the oven for 8-11 minutes. Remove from the oven and let cool for at least 30 minutes on the baking sheets.

    Red velvet cookies on a serving tray.

    Step Eight: Cream the butter and cream cheese until light and fluffy, about 2 minutes on medium speed. Add the powdered sugar a little at a time until fully combined. Add the vanilla and heavy cream, if needed. Place the frosting in a Ziploc bag and snip the corner of the bag. Drizzle the frosting on top of the itchy cookie and garnish with white chocolate shavings

    👩‍🍳 Expert Tips

    • Quality Ingredients: Make sure you use the best quality cocoa powder and food coloring to make these cookies. Natural cocoa powder is the best choice, because it really makes all the difference, and lends the cookies that classic red velvet cake flavor.
    • Sugar: To lend these cookies some extra flavor, you can use light brown sugar instead of white sugar that the recipe calls for. The caramel-like flavor of the brown sugar complements the creaminess of the white chocolate beautifully.
    • Use A Wire Rack: The best way to let the cookies cool is to transfer them to a wire rack a few minutes after they're out of the oven. You can also choose to let them stay on the prepared baking sheet if you want to, but that'll cause the cookies to become dry and crumbly.
    • Cold Butter: Remember to use cold butter, and not melted butter to make these cookies. You can choose to use salted butter or unsalted butter- it all depends on your personal preference.
    • Baking Mat: If you don't fancy prepping the cookie sheets, you can also choose to use silicone baking mats. This will cut down your need of placing the parchment paper on your baking sheets too.

    💭 FAQs

    What Kind Of Food Coloring Should I Use?

    I've used gel food coloring to give the cookies that bright red color, but you could also use some beet powder if you want to stick to using healthier ingredients.

    Regardless of what you choose, remember that red food coloring is an absolute must for this recipe, especially if you want the cookies to have that bright red color- just the cocoa powder won't cut it.

    💖 Serving Suggestions

    • With a Glass of Milk: Serve these decadent red velvet cookies alongside a tall glass of cold milk to enhance the creaminess of the cream cheese frosting and complement the rich chocolate ganache.
    • As Part of a Dessert Platter: Arrange these cookies with other festive treats like chocolate truffles or mini cupcakes to create an indulgent dessert platter perfect for holidays or special occasions.
    • Topped with Extra Frosting: Add a little extra cream cheese frosting on top of each cookie for a richer, more indulgent treat, or drizzle with melted white chocolate for an extra touch of sweetness.
    • For Gift Giving: Package these cookies in a decorative tin or gift box with a festive ribbon to make a thoughtful and delicious gift for friends, family, or coworkers.

    🍽 Treat Yourself — Again!

    • Papaya Banana Yogurt Ice Cream with Cashews.
      Best Banana Yogurt Ice Cream (With Papaya)
    • Best Pink Oreo Millecrepes.
      Best Pink Oreo Millecrepes
    • Creamy Vanilla Eclair Cake.
      Creamy Vanilla Eclair Cake
    • Traditional Banana Cream Pie.
      Old Fashioned Banana Cream Pie

    Did you make this recipe? Leave a review and a ⭐⭐⭐⭐⭐ rating below, or tag us in our Facebook Group! Alternatively, bookmark it in your browser or save to Pinterest.

    Red Velvet Cookies

    Red Velvet Cookies

    Angela Milnes
    Treat yourself to the rich, decadent flavor of Red Velvet Cookies! These soft and chewy cookies are bursting with the classic red velvet taste.
    5 from 4 votes
    Print Recipe Pin Recipe Rate this Recipe
    Prep Time 28 minutes mins
    Cook Time 13 minutes mins
    Total Time 41 minutes mins
    Course Desserts
    Cuisine American
    Servings 14 Servings
    Calories 863 kcal

    Ingredients
      

    Cookie Mixture

    • 1 cup Unsalted Butter cubed
    • 2 cups Granulated Sugar
    • 2 Eggs room temp
    • 1 teaspoon Vanilla Extract
    • 2 teaspoon Red Liquid Food Coloring
    • ½ cup Cocoa Powder Unsweetened
    • 1 teaspoon Baking Soda
    • 1 teaspoon Cornstarch
    • ½ teaspoon Salt
    • 1 ½ cups Cake Flour
    • 2 cups All Purpose Flour
    • 2 cups white Chocolate Chips
    • 1 cup Semi Sweet Chocolate Chips
    • 9 oz Bittersweet Chocolate roughly chopped
    • 1 cup Heavy Cream

    Cream Cheese Frosting

    • 3 tablespoon Butter Unsalted
    • 3 oz Cream Cheese Softened
    • 1 ½ cups Powdered Sugar
    • ½ teaspoon Vanilla Extract
    • ½ tablespoon Heavy Cream

    Garnish

    • ½ cup White Chocolate Shavings garnish

    Instructions
     

    • Prepare the Chocolate Ganache: To make the chocolate ganache, place the chocolate in a medium mixing bowl. In a small saucepan add the cream, and heat over medium heat. Bring the cream to a boil. Once you reach a boil reduce the heat to low, and stir the cream.
    • Let Cool in the Refrigerator: Pour the cream over the chocolate and whisk until the chocolate has melted and the mixture is smooth. Place in the refrigerator for 1 hour.
    • Prep the Baking Sheets: Preheat oven to 410° degrees F. Line 2 baking sheets with parchment paper or silicone liners and set aside.
    • Cream Butter and Sugar: In the bowl of a stand mixer, cream together the cubed cold butter and the sugar, on low speed for 1-2 minutes. Increase speed to medium to high and continue beating for another 2-3 minutes until the mixture is light and fluffy, Scrape down the sides of the bowl with a spatula.
    • Add Eggs and Food Coloring: Add in the eggs, one at a time, and vanilla, mixing well after each addition. Beat in the red food coloring, and mix on low until incorporated.
    • Combine Dry Ingredients and Chocolate Chips: In a large bowl add the baking soda, cornstarch, salt, cocoa powder, cake flour and all-purpose our, whisk to combine. Add the flour mixture to the butter mixture 1 cup at a time. Mix until incorporated. Add both types of chocolate chips on low speed and using a stand mixer, mix until incorporated.
    • Refrigerate and Make Red Velvet Cookie Dough Balls: Refrigerate uncovered for 20 minutes to chill. Using a digital cooking scale or a large cookie scoop measure out 4 ounces of dough, forming it into a ball. Place the cookie dough balls on a parchment-lined baking sheet.
    • Add Chocolate Ganache to the Dough Balls: Use the palm of your hand to press down on the cookie slightly, so that the cookie dough ball creates a thin disk. Using a small cookie scoop, scoop out the chocolate ganache and place it on half of the cookie dough.
    • Place Cookie Dough Balls on the Baking Sheet: Take the second dough ball and place it on top of the dough ball with the ganache. Roll the dough together to form a ball. Place the dough ball on the baking sheet.
    • Bake and Cool Completely: Bake in the center rack of the oven for 8-11 minutes. Remove from the oven and let cool for at LEAST 30 minutes on the baking sheets
    • For the frosting: Cream the butter and cream cheese until light and fluffy, about 2 minutes on medium speed. Add the powdered sugar a little at a time until fully combined. Add the vanilla and heavy cream, if needed.
    • Drizzle Over the Cooled Cookies: Place the frosting in a Ziploc bag and snip the corner of the bag. Drizzle the frosting on top of the itchy cookie and garnish with white chocolate shavings

    Notes

    Quality Ingredients: Make sure you use the best quality cocoa powder and food coloring to make these cookies. Natural cocoa powder is the best choice, because it really makes all the difference, and lends the cookies that classic red velvet cake flavor.
    Sugar: To lend these cookies some extra flavor, you can use light brown sugar instead of white sugar that the recipe calls for. The caramel-like flavor of the brown sugar complements the creaminess of the white chocolate beautifully.
    Use A Wire Rack: The best way to let the cookies cool is to transfer them to a wire rack a few minutes after they're out of the oven. You can also choose to let them stay on the prepared baking sheet if you want to, but that'll cause the cookies to become dry and crumbly.
    Cold Butter: Remember to use cold butter, and not melted butter to make these cookies. You can choose to use salted butter or unsalted butter- it all depends on your personal preference.
    Baking Mat: If you don't fancy prepping the cookie sheets, you can also choose to use silicone baking mats. This will cut down your need of placing the parchment paper on your baking sheets too.

    Nutrition

    Calories: 863kcalCarbohydrates: 103gProtein: 10gFat: 48gSaturated Fat: 29gPolyunsaturated Fat: 2gMonounsaturated Fat: 13gTrans Fat: 1gCholesterol: 99mgSodium: 249mgPotassium: 387mgFiber: 4gSugar: 72gVitamin A: 879IUVitamin C: 0.3mgCalcium: 118mgIron: 4mg
    Print Recipe Pin Recipe Rate this Recipe
    Tried this recipe?Let us know how it was!

    More Cookie Recipe Ideas

    If you enjoyed making these rich and dreamy red velvet cookies, you've got to try some more of these cookie recipes as well.

    • Baked With Love Valentine Cookies
    • Healthy Banana Oatmeal Cookies
    • Chai Peppermint Cookies
    • Homemade Pumpkin Cookies
    • Reese’s Cookies With Popcorn
    • Chocolate Peanut Butter Cookies
    • Chewy Chocolate Peppermint Cookies

    Easy Chocolate Turtle Cheesecake Recipe

    January 8, 2023 by Angela Milnes

    Chocolate Turtle Cheesecake.

    Oh my goodness! If you’re looking for a tasty dessert then you have to try this Chocolate Turtle Cheesecake Recipe! It’s so easy to make and only requires a few simple ingredients. Plus, it’s the perfect size for individual servings. I’m sure you’ll love it as much as I do!

    Turtle Cheesecake.
    [feast_advanced_jump_to]

    💖 Why This Recipe Works

    • Simple: This Chocolate Turtle Cheesecake is easy to make and only requires a few simple ingredients
    • Just Right: It’s the perfect size for individual servings
    • Tasty: The perfect combination of sweet and savory flavors!

    ⭐ Star Ingredients

    chocolate turtle cheesecake ingredients.
    • Chocolate Biscuit Crumbs: Chocolate Cookie pieces make a yummy crunchy, chocolatey base for your cheesecake. They set the stage for tasty flavors that go great with the cheesecake filling.
    • Sugar: Adds sweetness to balance the richness of the other ingredients.
    • Butter: Helps bind the biscuit crumbs together to form a solid base and adds a creamy, rich flavor to the cheesecake.
    • Pecans: Add a delightful crunch and a nutty flavor that pairs perfectly with the sweet caramel and chocolate.
    • Caramel Pieces: Melt into a sweet, gooey layer that gives the chocolate turtle cheesecake its signature caramel taste.
    • Condensed Milk: Enhances the texture of the cheesecake, making it smooth and velvety.
    • Chocolate Chips: These semi-sweet chocolate chips add rich, melty pockets of chocolatey goodness, enhancing the decadent layers of creamy cheesecake.

    For the complete list of ingredients with measurements and instructions, please see the recipe card at the bottom of the post.

    🔪 How To Make Chocolate Turtle Cheesecake?

    OREO CRUST FOR CHEESECAKE
    1. Step 1: Mix the Oreo biscuit crumbs with melted butter and half the sugar. Mix the Oreo biscuit crumbs with melted butter and half the sugar.
    OREO CRUST FOR CHEESECAKE
    1. Step 2: Pour the biscuit mixture into the serving jars and press down to create your cheesecake Oreo crust. (If you're not using a jar, you can use a 9-inch springform pan instead). We used Oreo cookies for our biscuit crust, but you can use a graham cracker crust if you prefer.
    MELTING CARAMEL FOR OREO CHEESECAKE
    1. Step 3: Melt the caramel pieces into the condensed milk and whisk into a buttery caramel sauce. Leave the bowl at room temperature while you move on to the cream cheese mixture.
    Mixing flour and ingredients for turtle cheesecake
    1. Step 4: Combine cream cheese mixture with eggs, flour, vanilla, and the remaining sugar to make the cheesecake batter. Beat the cream cheese, sugar, and vanilla along with the other ingredients until you have a decadent cheesecake mixture.
    TURTLE CHEESECAKE
    1. Step 5: Pour the cheesecake mixture into a mold and bake at 190 degrees for 35 minutes. Melt the chocolate chips and pour them as a chocolate sauce over the cheesecake mixture.
    turtle cheesecake
    1. Step 6: Put a layer of caramel sauce on the crumbs, then a layer of cooked cheesecake mixture. Add walnuts, Oreos, and toasted pecans as optional extras, and top with the remaining caramel sauce. Once set, your Chocolate Turtle Cheesecake is ready to be served. Enjoy!

    👩‍🍳 Expert Tips

    • Chill Before Serving: After your turtle cheesecake is assembled, chill it in the fridge for at least 4 hours to set everything nicely.
    • Topping Creativity: Feel free to get creative with toppings; try drizzling with sea salt or adding a dollop of whipped cream for extra flair.
    • Slow and Steady: When melting chocolate chips, do it slowly over low heat to prevent the chocolate from burning and to keep it smooth.

    💭 FAQs

    Can I Use Sour Cream In This Recipe?

    Yes! You can use sour cream in this recipe instead of cream cheese. Just make sure to add a little more sugar, as the sour cream will be slightly tangier than the cream cheese.

    Don’t Have Any Pecans, Can I Use Something Else?

    Feel free to use walnuts, almonds, or pistachios. Toast them briefly before adding to the cheesecake. Consider topping with graham crackers, coconut flakes, or mini chocolate chips. Enjoy this tasty turtle cheesecake!

    Best Cream Cheese For Turtle Cheesecake

    I always recommend using full-fat cream cheese when making cheesecake. It’s important to use a high-quality cream cheese so that your cheesecake is nice and creamy. I also recommend using block cream cheese instead of the spreadable kind in a tub. Block cream cheese has less water content and will result in a richer and more flavorful cheesecake.

    Best Biscuit Base For Cheesecake?

    For the perfect cheesecake base, try Oreo cookies or graham crackers. Their flavors complement the cream cheese filling. Other options include digestive biscuits, chocolate sandwich cookies, or vanilla wafers for a twist.

    💖 Serving Suggestions

    Ice Cream: If you’re looking for something to serve with this turtle cheesecake recipe, I suggest serving it with a scoop of vanilla ice cream or whipped cream. It’s also delicious on its own!

    Chocolate Turtle Cheesecake.

    🍽 More Sweets for Your Sweet Tooth

    • Papaya Banana Yogurt Ice Cream with Cashews.
      Best Banana Yogurt Ice Cream (With Papaya)
    • Best Pink Oreo Millecrepes.
      Best Pink Oreo Millecrepes
    • Creamy Vanilla Eclair Cake.
      Creamy Vanilla Eclair Cake
    • Traditional Banana Cream Pie.
      Old Fashioned Banana Cream Pie

    Did you make this recipe? Leave a review and a ⭐⭐⭐⭐⭐ rating below, or tag us in our Facebook Group! Alternatively, bookmark it in your browser or save to Pinterest.

    TURTLE CHEESECAKE

    Easy Chocolate Turtle Cheesecake Recipe

    Angela Milnes
    Indulge in decadence with this Easy Chocolate Turtle Cheesecake! Rich chocolate, gooey caramel, and crunchy pecans come together in a creamy cheesecake that’s simply irresistible.
    5 from 4 votes
    Print Recipe Pin Recipe Rate this Recipe
    Prep Time 4 minutes mins
    Cook Time 35 minutes mins
    Additional Time 40 minutes mins
    Total Time 1 hour hr 19 minutes mins
    Course Desserts
    Cuisine American
    Servings 4 Servings
    Calories 969 kcal

    Ingredients
      

    • 1 Cup Chocolate biscuit crumbs
    • 2 tablespoon White Sugar
    • 3 tbs Butter Melted
    • ¼ Cups Pecans Chopped
    • 1 Cup Caramel Pieces Chopped
    • ¼ Cup Condensed Milk
    • 1 ¼ Cup Cream Cheese Filling
    • 1 tablespoon All Purpose Flour
    • 2 Eggs
    • 1 teaspoon Vanilla Extract
    • ¼ cUP Semi Sweet Chocolate Chips

    Instructions
     

    • Mix the Oreo biscuit crumbs with melted butter and half the sugar. Mix the Oreo biscuit crumbs with melted butter and half the sugar. Pour the biscuit mixture into serving jars and press down to create your cheesecake Oreo crust.
    • Pour the biscuit mixture into the serving jars and press down to create your cheesecake Oreo crust. (If you're not using a jar you can use a 9-inch springform pan instead). We used Oreo cookies for our biscuit crust but you can use a graham cracker crust if you prefer.
    • Melt the caramel pieces into the condensed milk and whisk into a buttery caramel sauce. Leave the bowl at room temperature while you move onto the cream cheese mixture.
    • Combine cream cheese mixture with eggs, flour, vanilla, and the remaining sugar to make the cheesecake batter. Beat the cream cheese, sugar, and vanilla along with the other ingredients until you have a decadent cheesecake mixture.
    • Pour the cheesecake mixture into a mold and bake at 190 degrees for 35 minutes.
    • Put a layer of caramel sauce on the crumbs, then a layer of cooked cheesecake mixture.
    • Melt the chocolate chips and pour them as a chocolate sauce over the cheesecake mixture.
    • Add walnuts, Oreos, and toasted pecans as optional extras, and top with the remaining caramel sauce. The melted chocolate and caramel will create a delicious top of the chocolate turtle cheesecake.
    • Once set, your Chocolate Turtle Cheesecake is ready to be served. Enjoy!

    Notes

    Chill Before Serving: After your turtle cheesecake is assembled, chill it in the fridge for at least 4 hours to set everything nicely.
    Topping Creativity: Feel free to get creative with toppings; try drizzling with sea salt or adding a dollop of whipped cream for extra flair.
    Slow and Steady: When melting chocolate chips, do it slowly over low heat to prevent the chocolate from burning and to keep it smooth.

    Nutrition

    Serving: 1gCalories: 969kcalCarbohydrates: 103gProtein: 15gFat: 58gSaturated Fat: 28gPolyunsaturated Fat: 7gMonounsaturated Fat: 18gTrans Fat: 0.4gCholesterol: 187mgSodium: 647mgPotassium: 510mgFiber: 3gSugar: 79gVitamin A: 1420IUVitamin C: 1mgCalcium: 240mgIron: 6mg
    Print Recipe Pin Recipe Rate this Recipe
    Tried this recipe?Let us know how it was!

    More Dessert Recipes

    • Pumpkin Spice Cinnamon Rolls
    • Chocolate Covered Bananas
    • Berry Granola Bites
    • Blueberry Crumble
    • Creamy Vanilla Eclair Cake
    • Holiday Spiced Cookies

    What Does a Chestnut Taste Like?

    December 27, 2022 by Angela Milnes

    Chestnuts in a pan.

    What does a chestnut taste like and how do you use chestnuts in cooking? Today we'll be talking about the different types of chestnuts, what they taste like and how to use them.

    Chestnuts in a pan.
    [feast_advanced_jump_to]

    What Are Chestnuts?

    Chestnuts are a type of tree nut often associated with the fall season. They come from chestnut trees and have a slightly sweet and earthy flavor that sets them apart from other nuts and makes them a popular choice for a variety of dishes and snacks.

    What Do Chestnuts Taste Like?

    Chestnuts have a slightly sweet, nutty flavor that is often described as earthy or woodsy. They are not as rich and creamy as other nuts like almonds or walnuts but are still quite flavorful.

    Chestnuts are most commonly used in recipes where a nutty, slightly sweet flavor is desired.

    Chestnuts on a plate.

    What Do Roasted Chestnuts Taste Like?

    When roasted correctly, chestnuts have a tender, slightly crunchy texture and a mildly sweet flavor often described as similar to a sweet potato or yam, or a freshly baked roll or warm, toasty grain.

    The flavor of oven-roasted chestnuts can also vary depending on how they are prepared, with slow-roasted chestnuts having a more intense, smoky flavor and chestnuts baked in the oven having a milder, nuttier taste.

    Different Types of Chestnuts

    There are several different varieties of chestnuts, each with a slightly different flavor profile. Some common types of edible chestnuts include:

    Italian Chestnuts

    These large nuts have a sweet and earthy flavor that is popular in fall desserts like pies, cakes, and cookies.

    Chinese Chestnuts

    These smaller nuts are often used in savory dishes and have a spicy, rich flavor.

    Japanese Chestnuts

    These nuts are often roasted or candied and are a popular choice for snacking due to their mild sweetness and texture.

    European Chestnuts

    The European chestnut has a light and delicate flavor that works well in many cooking applications. This includes the Spanish chestnut.

    American Chestnut

    The American chestnut is one of the most common varieties of chestnuts and can be eaten raw or cooked.

    Water Chestnuts

    Water chestnuts have a slightly sweet, vegetal taste and are often used in Asian dishes. Although they taste different from other types of chestnuts, they can also be roasted, boiled, or baked.

    Are Horse Chestnuts Edible?

    No. Horse chestnuts are not edible, as they contain a compound called "aesculin", which makes them poisonous. Only the sweet chestnut varieties should be consumed, as these do not contain this compound.

    Are Chestnuts Healthy?

    Yes, chestnuts are healthy. They are a type of tree nut that is a good source of several important nutrients. Compared to other nuts, chestnuts are relatively low in fat and calories, making them a healthier choice for snacking or adding to recipes.

    Fiber in Chestnuts

    One of the main nutrients found in chestnuts is fiber, which supports healthy digestion and can lower cholesterol levels.

    Antioxidants In Chestnuts

    Chestnuts also contain a good amount of antioxidants, which can help to protect cells from damage caused by free radicals. Additionally, chestnuts are a good source of several important vitamins and minerals, including vitamins C, potassium, and B vitamins.

    What Does Spoiled Chestnut Taste Like?

    Spoiled chestnuts will have a distinctly sour or rotten flavor, and will often be discolored. If you think that your chestnuts may be spoiled, they taste sour or have a bitter taste then it is best to avoid eating them and discard them instead.

    How to Use Chestnuts in Cooking?

    There are many ways to use chestnuts in cooking and they can be used in both sweet and savory dishes.

    Roast Chestnuts

    Some ideas for using chestnuts in recipes include roasting them and adding to salads or soups, pureeing them for use as a thickener in gravy or sauces, blanching them and grinding into chestnut flour, or slicing and lightly roasting them for a simple snack.

    Boiled Chestnuts

    You can also boil chestnuts to use in recipes. This can be a great way to quickly and easily add the nutty flavor of chestnuts to dishes like pastas, risottos, or casseroles.

    Chestnut Soup

    Another idea for cooking with chestnuts is to make a delicious and comforting raw chestnut soup.

    This recipe typically involves simmering the chestnuts in chicken stock with fresh herbs until they are tender, blending them into a smooth puree, and adding other ingredients like cream or whole milk to achieve a rich and creamy consistency.

    Fresh Chestnuts vs Canned Chestnuts

    There are two main ways to get chestnuts: fresh or canned. Fresh chestnuts are typically in season from fall through winter, while canned chestnuts can be found year-round at most grocery stores.

    Fresh chestnuts have a slightly sweeter and more delicate flavor than canned chestnuts. Canned chestnuts are pre-cooked and have a more mild flavor but allow you to skip the shelling and cooking process.

    How to Use Chestnut Flour?

    Chestnut flour is a type of nut flour that is made from ground, dried chestnuts. It has a rich, nutty flavor and can be used in baking or cooking to add additional nutrients and fiber.

    One way to use chestnut flour is to substitute it for some of the regular flour in recipes like muffins, cookies, or other baked goods. It can also be mixed with other flours to make a gluten-free flour blend.

    How to Roast Chestnuts?

    Roasting chestnuts is a simple and delicious way to enjoy these tasty nuts. Here's a step-by-step guide for roasting chestnuts at home:

    • Preheat your oven to 400°F (200°C).
    • While the oven is preheating, prepare the chestnuts for roasting. Using a sharp knife, make a shallow X-shaped cut on the flat side of each chestnut. This will help to prevent the chestnuts from exploding while they are cooking.
    • Place the chestnuts in a single layer on a baking sheet.
    • Roast the chestnuts in the preheated oven for 15-20 minutes, or until the skins begin to curl and the nuts are tender when pierced with a knife.
    • Remove the chestnuts from the oven and let them cool for a few minutes. Once they are cool enough to handle, use a towel or oven mitts to gently peel off the outer skins. The skins should come off easily once the chestnuts are cooked.
    • Serve the roasted chestnuts immediately, or store them in an airtight container for later use.
    Roasted chestnuts.

    Enjoy the Tasty Chestnuts!

    Now that you know more about the unique taste of chestnuts, as well as their potential health benefits, you should try adding cooked chestnuts to your meals or snacking on raw chestnuts as a healthy and delicious treat. From savoury roasted dishes to sweet desserts, there are many tasty ways to enjoy this versatile nut.

    Vampire Halloween Pretzels: Spooky Treat for Kids

    October 23, 2022 by Angela Milnes

    Vampire Halloween pretzels in a bowl.

    Trick or treat is a great time to enjoy some delicious Halloween pretzels! These Vampire Halloween Pretzels are a ghoulish twist on the traditional chocolate-covered treat.

    Perfect for trick or treat or a Halloween party, these vampire pretzels are made with orange melted chocolate and decorated to represent vampires. Serve up these spooky Halloween pretzels as a tasty treat for your guests!

    Vampire Halloween Pretzels.
    [feast_advanced_jump_to]

    💖 Why This Recipe Works

    • Festively Fun: These Vampire Pretzels add a dash of spooky charm to your Halloween spread.
    • Kid-Friendly Activity: Children will love creating and eating their own vampire-themed treats.
    • Sweet & Salty: The perfect balance of flavors makes this treat irresistible to all taste buds.
    Spooky treats for kids.

    Serve these with some Halloween Sangria or Mummy Cookies at your Halloween table.

    ⭐ Star Ingredients

    • Pretzels: Form the foundation of Vampire Halloween Pretzels, offering a satisfying crunch and savory flavor that complements the sweet toppings.
    • Candy Eyes: Are a fun addition that brings your vampire pretzels to life, adding a playful visual element to the snack.
    • Candy Corn: Used as vampire fangs in this recipe, candy corn adds a touch of Halloween-themed whimsy and a burst of additional sweetness.
    • Orange Candy Melts: Provide a sweet and creamy coating that complements the salty pretzel.

    For the complete list of ingredients with measurements and instructions, please see the recipe card at the bottom of the post.

    📖  Substitutions & Variations

    • Classic Candy Corn Pretzel Rods- Dip pretzel rods in white, yellow, and orange candy melts to create the iconic candy corn look. Add festive sprinkles or edible glitter on dipped pretzels for extra flair.
    • White Melted Chocolate Pretzels- You can make melted white chocolate ghosts, mummy pretzels and skeleton pretzels.
    • Green Candy Melts for Halloween Pretzels- To make Frankenstein pretzels and zombie pretzels, use green candy melts and Halloween-themed candies or sprinkles. You can also make witch fingers using pretzel rod and green candy melts.
    • Purple Chocolate Melts- For a purple Monster-themed Halloween treat, use purple candy melts and Halloween sprinkles or candies.

    🔪 How To Make Vampire Halloween Pretzels

    Melting orange candy melts.
    1. Step 1: Melt chocolate (the orange candy melts) in your melting pot. You might also want to use a Wilton Chocolate Melting Pot for melting the orange candy melts. Using a skewer, dip the pretzels into the melted candy melts, then place them on parchment paper or freezer paper with the shiny side up.
    Candy corns.
    1. Step 2: Before the chocolate sets, place two candy eyes on each pretzel to create the vampire's eyes. Add two pieces of candy corn for each vampire fang. You may need to trim the top of the candy corn to fit the size of the pretzels.
    Vampire Halloween pretzels.
    1. Step 3: If using larger pretzels, you may not need to trim the candy corn pieces.
    Halloween themed pretzels.
    1. Step 4: Allow your Vampire Halloween pretzels to set on the baking sheet before serving. Enjoy your spooky treat!

    👩‍🍳 Expert Tips

    • Precision with Candy Eyes: Place the candy eyes on the pretzels before the chocolate sets to ensure they stick well and look spooky.

    💭 FAQs

    What Other Halloween Themed Shapes or Decorations Can Be Used For This Recipe?

    Other Halloween-themed shapes or decorations for this recipe could include small Halloween cookie cutters, Halloween sprinkles, Chocolate chips, candy corn, chocolate pumpkins and other Halloween-themed candy pieces. Have fun with it and get creative!

    You can even drizzle chocolate or candy melts in contrasting colors to add more Halloween flair. Happy haunting!

    How to Store Chocolate Pretzels?

    These colored chocolate-covered pretzels can be stored at room temperature in an airtight container for up to 1 week.
    Keep the pretzels in a dry environment to prevent them from becoming soggy or losing their crispness.

    💖 Serving Suggestions

    Pair Vampire Halloween Pretzels with these side dishes:

    • Monster Mash Popcorn Mix: Create a mix of popcorn, candy-coated chocolates, pretzel rods, and marshmallows for a sweet and salty snack that complements the pretzels.
    • Halloween Candy Charcuterie Board: Offer a selection of cheeses, crackers, and fruits arranged in a pumpkin patch theme for a savory option that contrasts the sugary treats.
    • Green Monster Mashed Potatoes: Add a spooky twist to classic mashed potatoes with green food coloring and serve them in a cauldron for a fun and festive side dish.
    • Spiderweb Taco Dip: Layer a taco dip with sour cream "spiderwebs" on top and serve with tortilla chips for a crowd-pleasing appetizer.
    • Mummy Hot Dogs: Wrap hot dogs in crescent roll dough to resemble mummies, perfect for a fun and savory handheld snack.
    • Halloween Finger Food Party Snacks: These Halloween FInger food ideas are not only easy to make but also spooky and fun!
    Halloween themed pretzels for kids.

    🍽 More Party Snacks to Try

    • Halloween Hot Dogs Mummies.
      Halloween Hot Dogs Mummies
    • Halloween Apple Monsters.
      Halloween Apple Monsters
    • Mini Pufts Halloween Jello Shots.
      Mini Puft Ghostbusters Halloween Jello Shots
    • Chocolate Covered Rudolf Strawberries.
      Chocolate Covered Rudolf Strawberries

    Did you make this recipe? Leave a review and a ⭐⭐⭐⭐⭐ rating below, or tag us in our Facebook Group! Alternatively, bookmark it in your browser or save to Pinterest.

    Halloween themed pretzels for kids.

    Vampire Halloween Pretzels: Spooky Treat for Kids

    Angela Milnes
    Get ready for a frightfully fun treat with these Vampire Halloween Pretzels! These spooky snacks are dipped in chocolate and decorated to look like little vampire faces.
    5 from 4 votes
    Print Recipe Pin Recipe Rate this Recipe
    Prep Time 15 minutes mins
    Cook Time 0 minutes mins
    Total Time 15 minutes mins
    Course Desserts
    Cuisine American
    Servings 12 Servings
    Calories 80 kcal

    Ingredients
      

    • 30 pieces Pretzels
    • 60 Candy Eyes
    • 60 pieces Candy Corn
    • 1 bag Orange Candy Melts

    Instructions
     

    • Melt chocolate (the orange candy melts) in your melting pot. You might also want to use a Wilton Chocolate Melting Pot for melting the orange candy melts.
    • Using a skewer, dip the pretzels into the melted candy melts, then place them on parchment paper or freezer paper with the shiny side up.
    • Before the chocolate sets, place two candy eyes on each pretzel to create the vampire's eyes.
    • Add two pieces of candy corn for each vampire fang. You may need to trim the top of the candy corn to fit the size of the pretzels.
    • If using larger pretzels, you may not need to trim the candy corn pieces.
    • Allow your Vampire Halloween pretzels to set on the baking sheet before serving. Enjoy your spooky treat!

    Notes

    Precision with Candy Eyes: Place the candy eyes on the pretzels before the chocolate sets to ensure they stick well and look spooky.

    Nutrition

    Calories: 80kcalCarbohydrates: 13gProtein: 0.3gFat: 3gSaturated Fat: 3gPolyunsaturated Fat: 0.03gMonounsaturated Fat: 0.02gSodium: 55mgPotassium: 6mgFiber: 0.1gSugar: 11gVitamin C: 0.1mgCalcium: 1mgIron: 0.1mg
    Print Recipe Pin Recipe Rate this Recipe
    Tried this recipe?Let us know how it was!

    More Recipes to try

    • Pumpkin Spice Cinnamon Rolls
    • Halloween Hot Dogs Mummies
    • Halloween Cherry Pie
    • Halloween Blondies With M&M’s
    • Halloween Apple Monsters
    • Chewy Chocolate Peppermint Cookies
    • Super Cute Animal Sprinkle Circus Cookies
    • Best Red Velvet Cookies Recipe

    Easy Halloween Monster Cookies: Sandwich Cookies

    October 20, 2022 by Angela Milnes

    Halloween monster cookies on a plate.

    Halloween is right around the corner, and I've got the perfect treat to add some spooky fun to your celebrations - Halloween Monster Cookies! I love how these cookies turn every bite into a delightful surprise with their colorful candies and eyes peeking out. You get to enjoy creating these little monsters as much as eating them!

    Halloween Monster Cookies Recipe
    [feast_advanced_jump_to]

    💖 Why This Recipe Works

    • Deliciously Spooky: These Halloween Monster Cookies bring Halloween fun to your taste buds with every bite.
    • Easy to Make: With simple ingredients and steps, they're a low-stress, high-reward baking project.
    • Perfect for Parties: Their eye-catching look makes them a hit at any Halloween gathering.

    ⭐ Star Ingredients

    Halloween Monster Cookies Ingredients.

    Ingredients For Cookie Dough

    • Flour: Provides the necessary base for the other ingredients to bind together.
    • Cocoa Powder: Gives a rich, chocolatey flavor to the cookie dough, adding depth and indulgence to every bite.
    • Baking Powder: Essential for leavening, baking powder helps the cookies rise and attain their soft, fluffy texture.
    • Sugar: Adds sweetness to the cookies, balancing out the bitter notes of the cocoa powder.
    • Unsalted Butter: Contributes to the rich, buttery taste of the cookies and aids in creating a tender crumb.
    • Egg: Adds moisture and helps the cookies achieve a soft, chewy texture.
    • Vanilla: Enhances the flavors of the other ingredients, adding a subtle depth to the overall taste of the cookies.
    • Milk: Hydrates the dry ingredients, helps to bind everything together, and adds a slight creaminess to the cookies.

    Ingredients For Filling

    • Powdered Sugar: Forms the base of the creamy filling, giving it a smooth and spreadable consistency.
    • Unsalted Butter: Makes the filling rich and creamy, and also helps to stabilize the powdered sugar.
    • Heavy Cream: Adds a luxurious, creamy texture to the filling, making it extra indulgent.
    • Vanilla: Just like in the cookie dough, vanilla extract in the filling enhances the flavors and adds a touch of warmth.
    • Salt: Balances out the sweetness of the filling and enhances its overall flavor.
    • Food Coloring: Allows you to customize the color of your filling to create fun, Halloween-themed sandwich cookies.

    For the complete list of ingredients with measurements and instructions, please see the recipe card at the bottom of the post.

    Equipment Needed

    • Large Bowl & Small Bowl: Are essential for mixing your ingredients separately before combining.
    • Wooden Spoon: Is perfect for creaming together your butter and sugar, and for stirring your wet and dry ingredients.
    • Cookie Sheets: Are necessary for baking your cookies evenly and efficiently.
    • Cooling Tray Or Rack (Optional): If you have one, it's great for cooling your cookies quickly and evenly.
    • Piping Bag: Is essential for neatly applying your colorful filling to the cookies.
    • Measuring Cups & Measuring Spoons: Are key to a successful baking project, making these tools indispensable.

    📖  Substitutions & Variations

    • Candy Eyeballs: These are a fantastic item to use when making Halloween treats and these Halloween monster cookies are no exception. You can use two candy eyes per monster cookie or if you want to try something different give your monsters more or fewer candy eyes to make them even more freaky looking. Either way they will taste delicious. Be sure to glue the eyes on using a little icing.
    • Extra Candy: You can add on some Halloween-themed sprinkles or even little candy spiders, candy corn, Reese's pieces, melted chocolate or chocolate chips for extra spookiness.
    • Chocolate Chips: Chocolate chips can add extra chocolatey deliciousness to the chocolate monster cookies. However you choose to decorate your cookies, get creative and have fun with it!

    🔪 How To Make Halloween Monster Cookies

    cookie mixture
    1. Step 1: Measure out all the ingredients for your Halloween version of monster cookies. Add the dry ingredients into a medium bowl and mix together. Next, add the wet ingredients into a small bowl. Beat the egg, milk, and unsalted butter together. Ensure there is no eggshell in the mix.
    cookie mixture
    1. Step 2: Combine the dry and wet ingredients (milk, vanilla, and egg) together. Mix and knead into cookie dough. Cut out your Halloween cookies using a round cookie cutter with patterns for Halloween Monster Cookies. If you don't have a cookie cutter, use a cookie scoop or make cookie mounds or balls to place on your baking sheet.
    Oreos
    1. Step 3: Place the cookies on a cookie sheet lined with parchment paper. Bake at 180°C for 10-12 minutes. Once cooked, all them cool completely. Mix together the powdered sugar, unsalted butter, heavy cream, vanilla, and salt until creamy.
    Halloween Monster Cookies
    1. Step 4: Add food coloring for the desired monster cookie color. Using a piping bag, add the filling onto one cookie. Top with another cookie and press down lightly. Add candy eyeballs with a dab of the filling for a spooky touch. Serve and enjoy these Chocolate Halloween Monster Cookies at any Halloween party or gathering, and don’t forget some for the trick-or-treaters!
    Halloween Monster Cookies

    👩‍🍳 Expert Tips

    • Don't Overmix: Be sure to not over-mix the dough, it can cause the cookies to be dense and tough.
    • Zip Lock Bag Option: If you don't have a piping bag, use a zip lock bag and cut off one of the corner tips to pipe out your cookie dough.
    • Add Sprinkles: Feel free to add Halloween-themed sprinkles on top for added decoration before

    💭 FAQs

    Can I Swap White Sugar For Brown Sugar?

    Yes, you can swap White sugar for brown sugar, but keep in mind that it may change the overall taste and texture of your cookies.

    Do I Have To Use Unsalted Butter?

    Yes, it is important to use unsalted butter in this recipe as it helps control the amount of salt in the cookie dough. Salted butter can affect the overall taste of the cookies. If you only have salted butter on hand, just omit the added salt in the recipe and reduce the amount of butter by about ½ tablespoon to compensate for the extra salt in the butter.

    Can I Use A Different Type Of Milk?

    You can certainly use any type of milk that you have on hand, such as almond or oat milk. Just keep in mind that it may alter the taste slightly.

    What If I Don't Have A Cooling Rack?

    That's okay you can leave your cookie on the baking sheet if you don't have a cooling tray, they will just take a little longer to cool down. While your cookies cool you can prepare the filling for your Halloween sandwich cookies.

    Why Is There No Baking Soda In This Recipe?

    In this recipe, the baking powder is enough to make the cookies rise and become fluffy. Baking soda can also be used as a leavening agent but it does have a stronger taste so it is not necessary to use baking soda in this recipe.

    Are These Halloween Monster Cookies Chewy?

    These cookies have a soft and slightly chewy texture as they are made with cocoa powder and not just regular flour. Feel free to add in some chocolate chips or chocolate chunks for added chewiness if desired. Or you can leave the cookies just the way they are in the recipe.

    Can I Make These Cookies Ahead Of Time?

    Yes, these cookies can be made ahead of time. After you bake these cookies they should stay fresh for about 4-5 days if stored in an airtight container.

    💖 Serving Suggestions

    Pair Easy Halloween Monster Cookies With These:

    • Coffee: Pair your monster cookies with a homemade cafe-style hot coffee, creating a cozy, frothy delight that complements the sweet and spooky treats perfectly. You could also pair with a Pumpkin Spice Latte or Maple Cinnamon Latte.
    • Monster Mash Popcorn Mix: Create a mix of popcorn, candy-coated chocolates, pretzel rods, and marshmallows for a sweet and salty snack that complements the pretzels.
    • Halloween Candy Charcuterie Board: Offer a selection of cheeses, crackers, and fruits arranged in a pumpkin patch theme for a savory option that contrasts the sugary treats.
    • Green Monster Mashed Potatoes: Add a spooky twist to classic mashed potatoes with green food coloring and serve them in a cauldron for a fun and festive side dish.
    • Spiderweb Taco Dip: Layer a taco dip with sour cream "spiderwebs" on top and serve with tortilla chips for a crowd-pleasing appetizer.
    • Mummy Hot Dogs: Wrap hot dogs in crescent roll dough to resemble mummies, perfect for a fun and savory handheld snack.
    • Halloween Finger Food Party Snacks: These Halloween Finger food ideas are not only easy to make but also spooky and fun!

    🍽 More Cookies To Try

    • Best Holiday Spiced Cookies.
      Best Holiday Spiced Cookies
    • Best Brown Butter Cookies Recipe.
      Best Brown Butter Cookies Recipe
    • Crispy Peanut Butter Cookies.
      Crispy Peanut Butter Cookies
    • Chewy Chocolate Peppermint Cookies.
      Chewy Chocolate Peppermint Cookies

    Did you make this recipe? Leave a review and a ⭐⭐⭐⭐⭐ rating below, or tag us in our Facebook Group! Alternatively, bookmark it in your browser or save to Pinterest.

    Easy Halloween Monster Cookies Recipe

    Easy Halloween Monster Cookies: Sandwich Cookies

    Angela Milnes
    These fun and festive treats are packed with colorful, spooky surprises, making them a delightful addition to any Halloween celebration.
    5 from 4 votes
    Print Recipe Pin Recipe Rate this Recipe
    Prep Time 10 minutes mins
    Cook Time 10 minutes mins
    Total Time 20 minutes mins
    Course Desserts
    Cuisine American
    Servings 10 Servings
    Calories 384 kcal

    Ingredients
      

    Cookie Dough Ingredients

    • 260 g Flour
    • ½ Cup Cocoa Powder
    • ½ teaspoon Baking Powder
    • ¾ Cup Sugar
    • ½ Cup Unsalted Butter
    • 1 Egg Large
    • 1 teaspoon Vanilla Extract
    • 1 tablespoon Milk

    Filling Ingredients

    • 1. ½ Cup Powdered Sugar
    • 80 g Unsalted Butter
    • 2 teaspoon Heavy Cream
    • 1 teaspoon Vanilla
    • 1 pinch Salt
    • 2 Drops Food Coloring

    Instructions
     

    • Measure out all the ingredients for your Halloween version of monster cookies. Add the dry ingredients into a medium bowl and mix together.
    • Next, add the wet ingredients into a small bowl. Beat the egg, milk, and unsalted butter together. Ensure there is no eggshell in the mix.
    • Combine the dry and wet ingredients (milk, vanilla, and egg) together. Mix and knead into cookie dough.
    • Cut out your Halloween cookies using a round cookie cutter with patterns for Halloween monster cookies. If you don't have a cookie cutter, use a cookie scoop or make cookie mounds or balls to place on your baking sheet.
    • Place the cookies on a cookie sheet lined with parchment paper. Bake at 180°C for 10-12 minutes. Once cooked, all them to cool completely.
    • Mix together the powdered sugar, unsalted butter, heavy cream, vanilla, and salt until creamy. Add food coloring for desired monster cookie color.
    • Using a piping bag, add the filling onto one cookie. Top with another cookie and press down lightly. Add candy eyeballs with a dab of the filling for a spooky touch.
    • Serve and enjoy these Chocolate Halloween monster cookies at any Halloween party or gathering, and don’t forget some for the trick-or-treaters!

    Notes

    Dont Overmix: Be sure to not over-mix the dough, it can cause the cookies to be dense and tough.
    Zip Lock Bag Option: If you don't have a piping bag, use a zip lock bag and cut off one of the corner tips to pipe out your cookie dough.
    Add Sprinkles: Feel free to add Halloween-themed sprinkles on top for added decoration before

    Nutrition

    Calories: 384kcalCarbohydrates: 56gProtein: 4gFat: 17gSaturated Fat: 11gPolyunsaturated Fat: 1gMonounsaturated Fat: 5gTrans Fat: 1gCholesterol: 59mgSodium: 36mgPotassium: 109mgFiber: 2gSugar: 33gVitamin A: 524IUVitamin C: 0.01mgCalcium: 31mgIron: 2mg
    Print Recipe Pin Recipe Rate this Recipe
    Tried this recipe?Let us know how it was!

    More Cookies Recipes to Try

    • Reese’s Cookies With Popcorn
    • Spiced Cookies
    • Chocolate Caramel Bark
    • Reese’s Cookies With Popcorn
    • Halloween Hot Dogs Mummies
    • Halloween Cherry Pie
    • Halloween Blondies With M&M’s
    • Halloween Apple Monsters
    • Halloween Chocolate Covered Strawberries
    • Red Velvet Cookies Recipe

    32 Halloween Finger Food Ideas for a Party 

    August 31, 2022 by Angela Milnes

    Halloween finger food ideas for a party.

    Looking for some super simple DIY Halloween Finger Food Party Snacks? This list of 32 recipes will have you excited to celebrate the spooky season! 

    These Halloween FInger food ideas are not only easy to make but also spooky and fun! And the best part is that they are all fairly easy to make too. Enjoy these delicious recipes with all your guests this Halloween.

    Halloween finger food recipes.
    [feast_advanced_jump_to]

    Frankenstein Kiwi Fruit

    These super cute Frankenstein Kiwi fruit snacks are fun and easy to make as a healthy Halloween option. Enjoy!

    Frankenstein Kiwi Fruits.

    Frankenstein Cake Pops

    We'll begin by sharing these exciting Halloween appetizers. These Frankenstein Cake Pops are super Fun, slightly spooky, and So much fun! A wow-worthy party snack!

    Frankenstein Cake Pops.

    Strawberry Halloween Ghosts

    These strawberry ghosts are easy to make and super cute. Enjoy this sweet and tasty halloween ghost treat at your next Halloween party or as a healthy and sweet dessert.

    Strawberry Halloween Ghosts.

    Cackling Cake Pops

    Halloween finger foods have never been easier than these cackling cakesicles! Just a taste of these and you'll be wanting more.

    These cake pops are a super fun and cute treat! Perfect for a spooktacular party or as wonderful homemade trick-or-treat candy.

    Get the recipe for Cackling Cake Pops here.

    Cackling Cake Pops.

    Spooky Spider Cookies

    Aren’t these Halloween Spider Cookies just the cutest party food idea?! They couldn’t be easier to make — only four simple ingredients including brown sugar cookie dough and these will be ready in about 30 minutes!

    Get the recipe for Spooky Spider Cookies here!

    Spooky Spider Cookies.

    Sinister Shortbread Cookies

    These Shortbread Cookies take less than 30 minutes to make and you can decorate them with your favorite Sprinkles! You could also make them in Bat or Ghost shapes.

    A simple Halloween finger food snack! Get the recipe for Sinister Shortbread Cookies here!

    Sinister Shortbread Cookies.

    Menacing Mummy Cookies

    These chocolate Mini Mummy Cookies are the perfect spooky addition to your creepy celebrations.

    These delicious little cookies make plenty to share, and are so fun! Menacing Mummy Cookies are easy to bake and taste even better with chunks of white chocolate.

    Menacing Mummy Cookies.

    Dangerous Donuts

    Dangerous Donuts are an easy and delicious spooky treat.

    These Halloween Donuts are perfect for any ghoulish gatherings and parties you have planned for October!

    Get the recipe for Dangerous Donuts here!

    Dangerous Donuts.

    Eerie Oreo Cheesecake Brownies

    Eerie Oreo Cheesecake Brownies 

    These Oreo Brownie Cheesecake Bars are such a fun DIY Halloween party food idea!

    Imagine a base layer of brownies, a layer of Oreos with bright orange frosting peeking out, and a smooth (also dyed orange) cheesecake filling, topped with another layer of brownies.

    It looks amazing, and the cheesecake filling combined with the brownies is so good!

    Eerie Oreo Cheesecake Brownies.

    Frightening Funfetti Cheesecake Bars

    Frightening Funfetti Cheesecake Bars

    Creamy and full of sprinkles, these frightening Funfetti Cheesecake Bars are made mostly in the food processor!

    No need to bake in a water bath for hours, these bars are baked in 30 minutes. 

    Frightening Funfetti Cheesecake Bars.

    Ghoulish Ghost Brownies

    Spooky, but not spine-chilling! These ghost brownies are a fun treat to make with kids or just because.

    Today we're showing you how to create adorable Halloween finger food snacks.

    These marshmallow ghosts on top of your favorite brownie recipe. It will make a great Halloween appetizer.

    Ghoulish Ghost Brownies.

    Creepy Witch Cupcakes 

    Witch Cupcakes 

    No need to break out the fondant because these witch hats are pure frosting goodness!

    Whether you’re throwing a party for the kids or just throwing it down at the office potluck, these cupcakes are sure to delight ghouls both big and small! 

    Creepy Witch Cupcakes.

    Bloody Bone Cupcakes

    Bloody Bone Cupcakes 

    This Bloody Bone Cupcakes recipe is the best DIY Halloween party food idea. But they’re not for the faint-hearted!

    If you like all the bloody and gory things about the season then these Cupcakes are just what you need to add to your creepy treats.

    Bloody Bone Cupcakes.

    Hair Raising High Hat Cupcakes

    Hair Raising High Hat Cupcakes 

    These High Hat Cupcakes are super chocolatey, frosted SKY-HIGH with vanilla buttercream, then dipped in chocolate! It's an over-the-top treat, complete with spooky marshmallow "webs!" 

    Hair Raising High Hat Cupcake.

    Haunted Tree Cupcakes

    Haunted Tree Cupcakes 

    These Easy Haunted Tree Halloween Cupcakes are a perfect recipe to cook with kids.

    My kids loved to make the trees the most – although to be honest they may have also eaten a few more trees that we ended up adding to the cupcakes.

    Haunted Tree Cupcake.

    Slime Monster Cupcakes

    Slime Monster Cupcakes 

    A spooky cupcake recipe perfect for slime-loving kids, these Slime Monster Cupcakes are sure to be a hit at your festivities!

    Slime Monster Cupcakes.

    Orange Creamsicle Cupcakes

    Orange Creamsicle Cupcakes

    These orange cupcakes are the perfect pumpkin alternative!

    They taste just like a Creamsicle: a tantalizing combination of smooth vanilla and juicy orange fruit!

    Orange Creamsicle Cupcake.

    Monster Marshmallows

    Monster Marshmallows 

    I love candy apples but they are not exactly quick and easy – especially if you have kids in the kitchen!

    As a fun alternative, we whipped up these Halloween Marshmallow Pops for a kid-made Halloween finger food snack!

    Monster Marshmallows.

    Monster Mash Popcorn

    Monster Mash Popcorn 

    This Spooky-themed popcorn snack is ghoulishly delicious and the recipe is easily scaled. It’s sweet, salty, and so much fun.

    Monster Mash Popcorn.

    Rip Halloween Cupcakes

    Why not make some fun RIP-themed Halloween Cupcakes. These cupcake tombstones are easy and fun to make and will be a huge hit at your next Halloween party.

    Petrifying Pretzels

    Petrifying Pretzels 

    This treat is just as tasty as it looks! Pop it into Ziplock bags for your potluck for an easy grab-and-go treat.

    It’s the tastiest DIY Halloween party food idea!

    Petrifying Pretzel.a

    Candy Corn Fudge

    Candy Corn Fudge 

    This easy Fudge recipe only has four ingredients and looks like candy corn! Orange and yellow fudge for fall is beautiful on a platter! 

    Candy Corn Fudge.

    Halloween Candy Fudge

    Halloween Candy Fudge 

    This recipe was fun to put together, easy to make and feeds your sweet tooth. 

    Set out some of this orange creamsicle fudge on a platter at your Halloween party, or wrap them up individually to pass out to family, friends, and neighbors, and don’t forget a class treat for school! The kids will love this gooey goodness.

    Halloween Candy Fudge.

    Candy Apples

    Candy Apples 

    Looking for classic DIY Halloween party food ideas? These candied apples will definitely please a crowd.

    Candy Apple.

    Apple Bite Slices

    Apple Bite Slices 

    If you’re looking for healthier Halloween finger food snacks for a party try these apple slices. They’re an amazing option for kids and adults too. 

    Apple Bite Slices.

    Surprise Witches Hats

    Surprise Witches Hats

    Witch Hat Surprise Cookies are pretty easy to make and you can fill them (or not) with extra candy delights! The perfect portable potluck dessert.

    Surprise Witches Hats.

    Candy Corn Krispies

    Candy Corn Krispies 

    These festive Candy Corn Rice Krispie Treats look just like the classic fall candy! They’re easy to make and tasty too!

    Candy Corn Krispies.

    Petrified Pudding Cups

    These spooky and delicious Pudding Cups are easy to make and the perfect sweet treat for after-school snacks or as Halloween party treats!

    Learn how to make these Petrified Pudding Cups here!

    Petrified Pudding Cups.

    Taco Stuffed Mummy Peppers

    Halloween finger food snacks like Stuffed Mummy Peppers will delight all your party guests.

    They’re super delicious and fun for a whole crowd. 

    Full of doughy deliciousness these Taco Stuffed Mummy Peppers  are sure to be a huge hit

    Taco Stuffed Mummy Peppers.

    Halloween Deviled Eggs

    A spooky classic and easy to make these Deviled Eggs are always a favorite. You can make a large batch for any size party too. 

    Get the Halloween Deviled Eggs recipe here!

    Halloween Deviled Eggs.

    Bone Chilling Breadsticks

    Bone Chilling Breadsticks 

    This easy recipe transforms store-bought pizza dough into Halloween Bone Breadsticks fit for a Halloween party or a family Halloween movie night!

    Don’t forget to include the “blood” for dunking! Or you could make some Instant Pot Cheese Fondue. Now that would be cool.

    Breadsticks In A Plate

    Spider Bagel Bites

    Halloween finger food snacks like these spider bagel bites will be the first to go at any get-together.

    That's why I always make a lot and I never have leftovers! These easy Halloween appetizers are sure to be a big hit. Get the recipe for Spider Bagel Bites here.

    Spider Bagel Bites.

    Mummy Hot Dogs

    Mummy Hot Dogs

    These spooky Mummy Hot Dogs are the perfect non-candy DIY Halloween party food idea! They’re easy to make using crescent dough — only 4 ingredients!

    This is a crafty Halloween appetizer the kids are sure to love.

    Mummy Hot Dogs.

    Pumpkin Cheese Ball

    Pumpkin Cheese Ball 

    Tangy cream cheese and sharp cheddar taste delicious in this cheese ball decorated to look like a pumpkin.

    Super easy and cute idea for a Halloween Party!

    Pumpkin Cheese Ball.

    Halloween Snack Board

    Halloween Snack Board 

    This snack board is packed with everyone’s favorite items. Like fruit, vegetables, candy, and dip. 

    This will. make a party-perfect Halloween appetizer.

    Halloween Snack Board.

    What Is the Easiest Halloween Finger Food to Make?

    The easiest DIY finger food recipe to make for Halloween would be something like chocolate-dipped pretzels or candy cane fudge because they require no baking and minimal ingredients. However, all these Halloween appetizers are super simple!

    All the Halloween finger food snacks on this list are easy and delicious to make for a crowd. DIY party ideas like these will surely impress your friends and loved ones alongside you're spooky decorations and Halloween costumes.

    For more fun Halloween appetizers try making the following:

    • Jack o lantern cheese balls
    • Bread Bowl Cauldron soup
    • String Cheese Ghosts
    • Tortilla Chips With a Halloween Twist
    • Sweet Cherry Tomatoes Monsters
    • Halloween Themed Mini Meat Loaves
    • Celery Hairy Leg Sticks
    • Butternut Squash Witches Brew
    • Pumpernickle bread jack o lanterns
    • Moldy Cheese Slices with Pumpkin Seeds
    • Ghost Cookie Cutter Biscuits
    • Fun Halloween Salty Pretzels
    • Cream Cheese Ghost Sandwiches
    • Puff pastry Halloween Night Owl
    • Jack Skellington Cupcakes
    • Spiders made from Black Olives

    Best Turkey Cobb Salad In A Jar

    July 8, 2022 by Angela Milnes

    Turkey cobb salad in a jar.

    This Turkey Cobb Salad is my go-to when I need something quick, healthy, and totally satisfying. Packed with lean protein, creamy avocado, and classic Cobb fixings, it’s ready in 20 minutes—no fuss, all flavor.

    Turkey cobb salad in a jar.

    This salad brings big Cobb energy—with a lean turkey twist. It’s perfect for spring and summer when fresh produce is everywhere, but honestly, I’ll make it year-round! The combo of crunchy lettuce, crispy bacon, creamy Roquefort, and juicy turkey is unbeatable. For a colorful lunch spread, pair it with beetroot hummus or wash it down with my refreshing citrus lime lemonade.

    [feast_advanced_jump_to]

    💖 Why This Recipe Works

    • Balanced Nutrition – High in protein and loaded with fresh veggies.
    • Quick & Easy – Ready in under 20 minutes.
    • Customizable – Easily adapted to different diets and preferences.

    ⭐ Star Ingredients

    Turkey Cobb Salad Ingredients.
    • Fried Turkey Breast – I love using leftover turkey or pan-fried slices here—lean, juicy, and just a little crispy.
    • Avocado – That creamy texture and healthy fat give the salad a satisfying upgrade.
    • Roquefort Cheese – Salty, tangy, bold—it’s the flavor bomb that ties everything together.
    • Hard-Boiled Eggs – Classic Cobb vibes, plus extra protein and creaminess in every bite.

    For the complete list of ingredients with measurements and instructions, please see the recipe card at the bottom of the post.

    📖  Substitutions & Variations

    This is a naturally gluten free recipe but if you need to add more variations check out the ideas below:

    • Vegetarian: Swap the turkey for chickpeas or grilled tofu.
    • Dairy-Free: Use dairy-free cheese or omit the cheese altogether.
    • Spicy: Add sliced jalapeños or a pinch of red pepper flakes.

    If you love this easy salad recipe, you may also want to try these BLT turkey wraps with avocado mayo or these simply irresistible yogurt and onion turkey patties.

    🔪 How To Make Turkey Cobb Salad

    Ingredients to make cobb turkey.
    1. Step 1: Fry the turkey breast and cook Bacon until crispy. Then, gather all the remaining ingredients.
    Salad dressing for turkey cob salad.
    1. Step 2: In a bowl, combine olive oil, wine vinegar, garlic, salt, and black pepper to make the dressing. Pour the dressing into serving jars or a large serving platter—layer fried turkey breast on the dressing, followed by the bacon pieces.
    Adding lettuce to salad.
    1. Step 3: Add hard-boiled egg halves, Roquefort cheese, cherry tomatoes, avocado with lime juice, chopped green onion, and Romaine lettuce to the jars.
    Turkey cobb salad in a jar.
    1. Step 4: Seal the jars and shake gently to mix the ingredients. Serve and enjoy your flavorful salad!

    💡 Hint: Let cooked ingredients cool slightly before adding to the salad to keep the greens crisp.

    Turkey cobb salad in a jar.

    👩‍🍳 Expert Tips

    • Season & sear turkey right – For juicy, golden turkey, pat it dry first and season with salt, pepper, and a pinch of smoked paprika. Let it rest before slicing so it stays tender.
    • Use room-temp eggs – They’re easier to peel and the yolks have better flavor when not fridge-cold.
    • Get that bacon just right – Cook it low and slow until crisp, then drain on paper towels to keep it snappy.
    • Brighten with zest & pepper – Add lemon zest to your vinaigrette and a crack of freshly ground pepper over the finished salad for a little wow.
    • Chill your greens – Toss your lettuce into the fridge for 10–15 minutes before serving—extra crunch makes a big difference!

    💭 FAQs

    Can I make this cobb salad ahead of time?


    Yes! Store the salad ingredients separately and combine just before serving. Keep any dressing on the side and add it before serving to maintain freshness and texture.

    What’s the best dressing for turkey cobb salad?


    A classic vinaigrette, ranch, or lemony olive oil blend all work well—whatever suits your flavor mood.

    Can I swap out the turkey in this cobb salad?

    Totally! Chicken, steak, salmon, or shrimp are all delicious substitutes for the turkey in this salad.

    Is this salad gluten-free?

    Yes—naturally gluten-free! Just double-check your bacon and cheese labels to be sure.

    Turkey cobb salad in a jar.

    💖 Serving Suggestions

    These are my favorite side dishes to serve with this turkey salad:

    • Lemon Beet Hummus – Adds a colorful and flavorful side.
    • Balsamic Grilled Veggies – Makes a complete and hearty meal.
    • Fresh Berry Smoothie – Perfect for a light, refreshing lunch.

    🍽 You'll Love These Tasty Salad Recipes

    • Smashed Potato Salad.
      Cripsy Smashed Potato Salad
    • Watermelon Salad With Feta and Mint.
      Watermelon Feta Mint Salad
    • Creamy Egg Salad With Fresh Dill.
      Creamy Egg Salad With Fresh Dill
    • Thai Salad in a blue bowl with chopsticks.
      Best Thai Peanut Salad Recipe (Crunchy, Creamy & Easy!)

    Did you make this recipe? Leave a review and a ⭐⭐⭐⭐⭐ rating below, or tag us on our Facebook Page! Alternatively, bookmark it in your browser or save to Pinterest.

    Turkey cobb salad in a jar.

    Turkey Cobb Salad

    Angela Milnes
    Enjoy a hearty and satisfying meal with this Turkey Salad! Packed with tender turkey, crisp lettuce, creamy avocado, crunchy bacon, and a variety of fresh veggies.
    5 from 4 votes
    Print Recipe Pin Recipe Rate this Recipe
    Prep Time 5 minutes mins
    Cook Time 0 minutes mins
    Total Time 5 minutes mins
    Course Salads
    Cuisine American
    Servings 1 Serving
    Calories 4936 kcal

    Ingredients
      

    • 6 tablespoon Olive Oil
    • 2 tablespoon Wine Vinegar
    • 1 tablespoon Garlic
    • pinch Salt
    • pinch Black Pepper
    • 2 Cup Cooked Turkey Breast
    • 1 Cup Cooked Bacon
    • 3 Hard Boiled Eggs
    • 2 Cup Roquefort Cheese
    • 1 Cup Cherry Tomatoes
    • 1 Avocado
    • 1 tablespoon Lime juice
    • 2 Cups Green Onion Chopped
    • 2 Cups Romano Chopped

    Instructions
     

    • Fry the turkey breast and cook Bacon until crispy. Then, gather all the remaining ingredients.
    • In a bowl, combine olive oil, wine vinegar, garlic, salt, and black pepper to make the dressing.
    • Pour the dressing into serving jars or a large serving platter. Layer fried turkey breast on the dressing, followed by the bacon pieces.
    • Add hard-boiled egg halves, Roquefort cheese, cherry tomatoes, avocado with lime juice, chopped green onion, and Romaine lettuce to the jars.
    • Seal the jars and shake gently to mix the ingredients. Serve and enjoy your flavorful Turkey Cobb salad!

    Notes

    Season the turkey well for maximum flavor.
    Chill ingredients before serving for an extra refreshing salad.
    Squeeze a little lemon or lime juice over the avocado to keep them from browning.

    Nutrition

    Serving: 1gCalories: 4936kcalCarbohydrates: 62gProtein: 334gFat: 376gSaturated Fat: 161gPolyunsaturated Fat: 31gMonounsaturated Fat: 163gTrans Fat: 0.2gCholesterol: 1561mgSodium: 14087mgPotassium: 4414mgFiber: 20gSugar: 13gVitamin A: 9725IUVitamin C: 99mgCalcium: 5618mgIron: 15mg
    Print Recipe Pin Recipe Rate this Recipe
    Tried this recipe?Let us know how it was!

    Best Instant Pot Asian Chicken Recipes

    January 14, 2022 by Angela Milnes

    Instant Pot Asian Chicken Recipes.

    Asian chicken recipes are loved by many. If you're looking for something to cook tonight, why not try out one of these Chinese or Asian inspired dishes?

    With an instant pot that is capable of many things, you can cook your favorite Asian recipes from the comfort of your own home in no time and you won't have to eat out at a Chinese restaurant again!

    Learn top ten instant pot Asian recipes.
    [feast_advanced_jump_to]

    Are Instant Pot Chinese Recipes Better Than Takeout?

    But wait? You say....I love Chinese take-out and we love to visit our local Chinese restaurant. Well, the good news is that you can cook healthier and cheaper Instant Pot Chinese food and in fact any Instant pot Asian recipe at home saving time money, and inches on the hips!

    That's because an Instant Pot is amazing - it pressure cooks, slow cooks, sautees, steams, and more. You can make healthier Instant Pot Chinese food in your very own kitchen!

    Instant Pot Chinese Recipes - What Goes Into an Instant Pot?

    You will need some recipes for the best Instant Pot chicken that you should try out tonight, then! You'll find here some of our favorites that are sure to please everyone at the table. But before we get ahead of ourselves, let's talk about what goes into an Instant Pot (and no, not just chicken!).

    The Instant Pot always needs liquid to come to pressure. Some of the sauces used to make the best Asian dishes can be quite thick, so it's important to follow the recipes correctly. Don't get confused with sweet and sour stir fry sauce and sweet and sour dipping sauce! The dipping sauce is way thicker and won't work correctly. Be sure to use the correct sauces when making Sweet and Sour.

    Also be sure to release your chicken according to the recipe. Natural release could result in a soggy mess when a quick steam release is required. It's all good though! Just be sure to read these best Chinese recipes and instant pot chicken recipes correctly and you should be fine!

    So what are you waiting for? Here are ten of the best Asian recipes using chicken on the internet!

    Instant Pot Asian Recipes Using Chicken

    The top ten Asian Instant Pot recipes at The Instant Pot Table (which use chicken) are:

    • Instant Pot Thai Chicken
    • Instant Pot Honey Chicken
    • Instant Pot Teriyaki Chicken
    • Instant Pot Butter Chicken
    • Instant Pot Chicken Lo Mein
    • Instant Pot Orange Chicken
    • Instant Pot Cashew Chicken
    • Instant Pot General Tso Chicken
    • Instant Pot Chicken Marsala
    • Instant Pot Sweet And Sour Chicken

    We'll give you a quick rundown of these fantastic dishes with pairing suggestions and a link to find the full recipe.

    Instant Pot Thai Chicken

    The best part about this dish is that you can use your favorite vegetables or even meat! With fantastic ingredients to provide a Thai flavor you can't go wrong with this tasty Instant Pot Thai Recipe

    Pair with: Steamed jasmine rice and vegetables. In particular, try cashews, broccoli, green beans and snow peas for a delicious meal.

    Find the full recipe here: Thai Chicken And Beans

    Instant pot Thai chicken making guide.

    Instant Pot Honey Chicken

    This delicious dish is perfect for everyone. The chicken cooks perfectly in the instant pot and the sauce provides a sweet taste that your family will love.

    Pair with: Instant Pot steamed broccoli or green beans, white rice (or cauliflower rice) and dinner rolls. Honey chicken is great because you can use whatever bread product you like to serve it with!

    Find the full recipe here: Pressure Cooker Honey Chicken

    Instant Pot Honey Chicken.

    Instant Pot Teriyaki Chicken

    This chicken teriyaki dish is perfect in every way. Serve it over white rice or brown rice - whichever your family prefers. You can also pair this up with stir fried vegetables for a healthy and amazing meal that will please all!

    Pair with: Whatever your family enjoys! This instant pot teriyaki chicken pairs well with just about everything so enjoy what YOU like best!

    Find the full recipe here: Instant Pot Teriyaki Chicken

    Instant Pot Teriyaki Chicken.

    Instant Pot Butter Chicken

    Butter Chicken is an Indian dish that has become popular around the world. This delicious Instant Pot Butter Chicken Recipe uses coconut milk and is a fantastic curry dish that you can enjoy any night of the week.

    Pair with: Instant Pot butter chicken pairs well with just about anything but a perfect pairing would be an Indian-style naan bread. Serve this delicious meal up on some fresh rice or even cauliflower rice for a wonderful meal!

    Find the full recipe here: Butter Chicken In The Instant Pot

    Instant Pot Butter Chicken.

    Instant Pot Chicken Lo Mein

    Chicken Lo mein is a classic dish and one of our favorite Asian recipes that we love to make at home. This amazing lo mein recipe combines everything you know and love about Lo Mein dishes into one amazing instant pot recipe that will not disappoint.

    Pair it up with some shrimp spring rolls, crab rangoons, or steamed vegetables.

    Find the full recipe here: Instant Pot Lo Mein

    Instant Pot Chicken Lo Mein.

    Instant Pot Orange Chicken

    This easy-to-make orange chicken recipe is a family favorite. You can serve this up with Instant Pot fried rice or even some mixed vegetables to keep it easy!

    Pairing: Steamed broccoli and cauliflower, white rice, and instant pot fried rice. Be sure to use coconut aminos in the instant pot fried rice for an authentic Asian flavor that you won't be able to get enough of!

    Find the full recipe here: Pressure Cooker Orange Chicken

    Instant Pot Orange Chicken.

    Instant Pot Cashew Chicken

    Cashew chicken is a takeout favorite and we've made it healthier and tastier with our Instant Pot Cashew Chicken recipe. Try serving this tasty dish up with some fried rice or even some cauliflower fried rice to keep it low-carb!

    Pairing: Fried rice, steamed broccoli, veggies, or cauliflower fried rice. This dish goes great with just about anything that you already have planned so don't be afraid to try something new!

    Find the full recipe here: Pressure Cooker Cashew Chicken

    Instant Pot Cashew Chicken.

    Instant Pot General Tso Chicken

    General Tso Chicken is a Chinese takeout classic that takes us right back to college days. Now we can enjoy it at home with our healthy version that is just as tasty!

    Pair it up with some stir-fried veggies and instant pot-fried rice for an easy meal.

    Pairing: Try serving this dish with some steamed veggies or stir-fried veggies. Instant pot-fried rice pairs well with this dish as well!

    Find the full recipe here: Instant Pot General Tso Chicken

    Instant Pot General Tso Chicken.

    Instant Pot Chicken Marsala

    Chicken Marsala is a classic dish that everyone loves. This simple recipe will give you the perfect marsala sauce every time!

    Pair with: Instant Pot chicken Marsala pairs well with mashed potatoes, cauliflower rice, or even instant pot green beans for an easy and tasty dinner night!

    Find the full recipe here: Chicken Marsala Instant Pot Recipe

    Instant Pot Chicken Marsala.

    Instant Pot Sweet and Sour Chicken

    Now for my all-time favorite Instant Pot Chinese Recipe: Sweet and sour chicken. It's the best sweet-and-sour chicken I've ever had, hands down.

    Pair with: Pair this delicious dish with some fried rice or even some stir-fried veggies for a great meal that you will make again and again!

    Instant Pot Sweet and Sour Chicken.

    Find the full recipe here: The Best Sweet And Sour Chicken Instant Pot Recipe Ever

    No More Takeout With These Asian Instant Pot Recipes

    There's no need to order takeout anymore, these Asian chicken instant pot recipes will surprise and delight the whole family! Plus they're convenient to make and even easier to clean up.

    Easy Halloween Bean Dip

    October 8, 2021 by Angela Milnes

    Halloween bean dip in a bowl.

    This Halloween Bean Dip is the perfect Halloween party food that you can put together in minutes, with just a handful of ingredients. With simple, delicious flavors this dip is perfect for all your Halloween festivities and is sure to be a total hit with everyone.

    Bean Dip in a bowl.

    Try serving this dish with some Cajun Crispy Fried Onions or Crispy Mashed Potato Cakes for a great Halloween snack.

    [feast_advanced_jump_to]

    💖 Why This Recipe Works

    • Ease of Preparation: This Halloween bean dip is incredibly easy to make, perfect for those who want a spooky touch without spending hours in the kitchen.
    • Flavor and Texture: The perfect blend of flavors and textures makes this bean dip recipe a hit, ensuring guests will be coming back for seconds.
    • A Simpler Alternative: Ideal for those seeking a Halloween taco dip without the complexity of a seven-layer dip, offering simplicity without sacrificing taste.

    ⭐ Star Ingredients

    Halloween Bean Dip Ingredients.
    • Refried Beans: Serve as the main component, providing a hearty and rich texture to the dip.
    • Cheddar Cheese: Brings a sharp, savory element and a gooey, melt-in-your-mouth experience.
    • Sour Cream: Balances the dish with its cool, tangy flavor, adding creaminess to the dip.
    • Black Olives: Used for decoration as 'spiders', they also provide a salty, briny contrast to the creamy dip.

    For the complete list of ingredients with measurements and instructions, please see the recipe card at the bottom of the post.

    📖  Substitutions & Variations

    • Salsa Topping: In fact, you can also spread some salsa on top of the guacamole and make another layer.
    • Layered Bean Dip Base: You can also make a layered dip by spreading a smooth layer of the black bean dip in a medium bowl, then topping it with chopped green onions or any other chopped veggies of your choice, in an even layer.
    • Guacamole Addition: If you have some guacamole, you can also spread guacamole on the refried beans mixture.

    🔪 How To Make The Halloween Bean Dip

    Bean Dip in a bowl.
    1. Step 1: In a microwave-safe bowl, add refried beans and cheese. Microwave for three minutes and stir well. If you want it spicy, you can add a package of taco seasoning.
    Bean Dip in a bowl.
    1. Step 2: Put the dip into a serving bowl. Place sour cream into a piping bag or a Ziploc bag and cut out a small portion of the bag from one corner to make a small hole.
    Easy Halloween Bean Dip Recipe
    1. Step 3: Pipe out the spider web on top of the dip. Cut the ends of a black olive and place it on the sour cream web, where you want the body of the spider to be. You can also choose to cut the olive in half lengthwise if you want to make a little spider.
    Bean Dip in a bowl.
    1. Step 4: Thinly slice the rounds and use them as the legs of the spider. Serve with your favorite tortilla chips or any snack!

    👩‍🍳 Expert Tips

    • Add Texture with Diced Tomatoes: To bring a bit of texture to the Halloween bean dip, you can also add diced tomato to the bean mixture.
    • Flavor Boost with Green Onions: Chopped green onions can also be a fantastic addition to the dish. You can choose to add the chopped green onions on the top, or mix them in- it all depends on what you prefer.
    • Cheese Variations: I've used Cheddar cheese for this recipe, but if you don't have it, you can use any other shredded cheese you prefer. Monterey Jack is a great option because its flavors complement the flavors of the black beans well.
    • Seasoning Alternatives: If you don't have taco seasoning but still want to lend this taco dip some additional flavor, you can add some cayenne pepper or smoked paprika to it.

    💭 FAQs

    Can I add other toppings to this dip?

    Yes! You can add diced tomatoes, green onions, or extra cheese for added flavor and texture. You can also layer salsa or guacamole on top for a fun variation.

    How long will the Halloween bean dip stay fresh?

    The dip can be stored in the refrigerator for 2-3 days. However, the sour cream spiderweb may lose its appearance over time, so it's best to enjoy it fresh.

    Can I make this dip spicier?

    Yes! You can add taco seasoning, cayenne pepper, or smoked paprika to the bean mixture to give it an extra kick.

    What is the best way to serve this dip?

    Serve the Halloween Bean Dip with tortilla chips, crackers, or sliced vegetables. It’s a great party appetizer that pairs well with many snacks!

    Best Way to Store Bean Dip

    The bean dip can be covered with plastic wrap and stored in the refrigerator for 2-3 days, ensuring its freshness. While refrigerating, be aware that the sour cream spiderweb decoration might not retain its fresh appearance, as sour cream can become slightly runny.

    💖 Serving Suggestions

    These are my favorite dishes to serve with bean dip:

    • Texas Smoked Turkey Breast: Pair the Halloween Bean Dip with Texas Smoked Turkey Breast for a smoky and savory combo that's perfect for any festive gathering.
    • Air Fryer Hasselback Potatoes: Enjoy the bean dip alongside Air Fryer Hasselback Potatoes for a crunchy and creamy side that's easy to make and delicious to eat.
    • Air Fryer Sweet Potato Fries: Combine the dip with Air Fryer Sweet Potato Fries for a sweet and savory snack that's satisfying.
    Easy Halloween Bean Dip Recipe

    🍽 More Dips To Try

    • Instant pot buffalo chicken dip in a dish.
      Instant Pot Buffalo Chicken Dip
    • Whipped Feta Dip.
      Creamy Whipped Feta Dip (With Greek Yogurt & Garlic)
    • Easy Smoked Salmon Dip Recipe.
      Easy Smoked Salmon Dip With Capers
    • Greek Beetroot Dip.
      Best Beetroot Dip Recipe (Greek Dip)

    Did you make this recipe? Leave a review and a ⭐⭐⭐⭐⭐ rating below, or tag us in our Facebook Group! Alternatively, bookmark it in your browser or save to Pinterest.

    Halloween Bean Dip.

    Easy Halloween Bean Dip

    Angela Milnes
    Make your Halloween party extra spooky with this Halloween Bean Dip, a simple mix of beans, cheese, and spices that's both yummy and a bit creepy to look at!
    5 from 4 votes
    Print Recipe Pin Recipe Rate this Recipe
    Prep Time 10 minutes mins
    Cook Time 0 minutes mins
    Total Time 10 minutes mins
    Course Condiments
    Cuisine American
    Servings 4 Servings
    Calories 38 kcal

    Ingredients
      

    • 14 oz Can Refried beans
    • 1 cup Cheddar cheese; extra for topping
    • ⅓ cup Sour cream
    • 4 Back Olives For Spiders

    Instructions
     

    • In a microwave-safe bowl, add refried beans and cheese. Microwave for three minutes and stir well. If you want it spicy you can add a package of taco seasoning.
    • Put the dip into a serving bowl. Place sour cream into a piping bag or a Ziploc bag and cut out a small portion of the bag from one corner to make a small hole. Pipe out the spider web on top of the dip.
    • Cut the ends of a black olive and place on sour cream web, where you want the body of the spider to be. You can also choose to cut the olive in half lengthwise if you want to make a little spider. Thinly slice the rounds and use them as the legs of the spider. Serve with your favorite tortilla chips or any snack!

    Notes

    Add Texture with Diced Tomatoes: To bring a bit of texture to the Halloween bean dip, you can also add diced tomato to the bean mixture.
    Flavor Boost with Green Onions: Chopped green onions can also be a fantastic addition to the dish. You can choose to add the chopped green onions on the top, or mix them in- it all depends on what you prefer.
    Cheese Variations: I've used Cheddar cheese for this recipe, but if you don't have it, you can use any other shredded cheese you prefer. Monterey Jack is a great option because its flavors complement the flavors of the black beans well.
    • Seasoning Alternatives: If you don't have taco seasoning but still want to lend this taco dip some additional flavor, you can add some cayenne pepper or smoked paprika to it.

    Nutrition

    Calories: 38kcalCarbohydrates: 1gProtein: 0.5gFat: 4gSaturated Fat: 2gPolyunsaturated Fat: 0.2gMonounsaturated Fat: 1gCholesterol: 11mgSodium: 6mgPotassium: 24mgSugar: 1gVitamin A: 119IUVitamin C: 0.2mgCalcium: 19mgIron: 0.01mg
    Print Recipe Pin Recipe Rate this Recipe
    Tried this recipe?Let us know how it was!

    More Easy Recipe Ideas

    • Easy Slow Cooker Spinach Artichoke Dip
    • Hot Cocoa Dip
    • Smoked Salmon Dip Recipe
    • Homemade Bagel Chips
    • Halloween Hot Dogs Mummies
    • Halloween Cherry Pie
    • Halloween Blondies With M&M’s
    • Halloween Apple Monsters
    • Baked Salmon Cauliflower Rice Sushi
    • Air Fryer Shrimp With Paprika And Garlic

    How To Make Crumb Cake In A Jar: Easy Recipe

    September 16, 2021 by Angela Milnes

    Crumb cakes in two jars and two fresh strawberries.

    Do you want to know How to Make Crumb Cake in a jar? If so you're in luck. Today we have an easy and simple recipe for you to follow. This is one of the best crumb cake recipes, perfect for those who want to make crumb cake in a jar without all of the hassle.

    Crumb cake in a jar.
    [feast_advanced_jump_to]

    💖 Why This Recipe Works

    • Portable Treat: This crumb cake in a Jar is perfect for on-the-go enjoyment.
    • Simple Steps: With easy-to-follow instructions, this crumb cake recipe is great for baking beginners.
    • Unique Presentation: The jar adds a charming touch, making it a delightful gift idea.

    ⭐ Star Ingredients

    Crumb Cake Ingredients.
    • Cup Flour: It's best to use is all-purpose, but you could also use gluten-free or cake flour 1-to-1 baking flour.
    • Butter: I opted for unsalted butter, though melted coconut oil is an alternative. Avoid using salted butter for this recipe.
    • Sour Cream: Adds richness, moistness, and body to the cake.
    • Milk: I used whole milk, but you could also use almond milk.
    • Vanilla Extract: Use a good quality vanilla extract for the best flavor.

    For the complete list of ingredients with measurements and instructions, please see the recipe card at the bottom of the post.

    📖  Substitutions & Variations

    • Powdered Sugar: Can be used in the crumble topping of your New York crumb cake recipe, adding a finer texture and a more delicate sweetness. It can effectively replace white sugar to achieve a smoother consistency in the topping.

    🔪 How To Make Crumb Cake In A Jar?

    Flour, baking powder, soda, and salt in a bowl.
    1. Step 1: Prepare all the ingredients. Add to the bowl flour, baking powder, soda, and salt. Mix.
    Melted butter, sugar, and egg in a bowl.
    1. Step 2: In the other bowl, add the melted butter, sugar, and egg. Mix. Add sour cream, milk, vanilla, and whisk again.
    Crumb cake ingredients in a bowl.
    1. Step 3: Add the dry ingredients and mix. This is the batter and can be poured into your cooking Jar. Combine all the ingredients for the crumble topping and rub until you have crumbs.
    Crumb cake mixture in a glass jar.
    1. Step 4: Fill the jars with the cake batter and sprinkle the crumble on top. Bake in the oven at 190 degrees for 35 minutes. You can sprinkle icing sugar on top before serving if you wish.

    👩‍🍳 Expert Tips

    • Grease Your Jar: Before adding batter, lightly grease the inside of your jars to make sure nothing sticks.
    • Check Doneness With A Toothpick: Insert a toothpick into th center of the cake; if it comes out clean, it's done baking.
    • Layer Your Batter And Topping: For extra yum, add a layer of crumble in the middle of your batter before baking.

    💭 FAQs

    What Are The Best Jars For Crumb Cake?

    There are many different types of jars that can be used for crumb cake. Mason jars are a popular option, but any type of jar will work.

    Crumb Cake And Crumble Cake The Same Thing?

    The terms crumb cake and crumble cake are often used interchangeably, but there is a difference between the two. A crumb cake has a streusel topping that is made with flour, sugar, and butter. A crumble cake has a topping that is made with fruit and oats.

    What Is Another Name For Crumb Cake?

    Streusel is another name for crumb cake. A German term for classic crumb cakes started in Germany as flat cakes with a sweet crumb topping called streusel, later becoming a key ingredient in American-style crumb cakes.

    💖 Serving Suggestions

    Here are some desserts to serve with Crumb Cake in a Jar:

    • Ice Cream: Scoop your favorite ice cream on top for a creamy, dreamy dessert.
    • Latte: Enjoy a this crumb cake with a Pumpkin Spice Latte for a cozy, comforting treat.
    Crumb cake in a jar.

    🍽 Dessert Recipes You'll Love

    • Creamy Vanilla Eclair Cake.
      Creamy Vanilla Eclair Cake
    • Smores Fluff With Mini Marshmallows.
      Smores Fluff With Mini Marshmallows
    • Pineapple Upside Down Cake.
      Pineapple Upside Down Cake
    • Pumpkin Crunch Cake

    Did you make this recipe? Leave a review and a ⭐⭐⭐⭐⭐ rating below, or tag us in our Facebook Group! Alternatively, bookmark it in your browser or save to Pinterest.

    Two jars of crumb cake strawberries on side.

    Crumb Cake In A Jar

    Angela Milnes
    Enjoy a delightful twist on a classic treat with this Crumb Cake in a Jar! Layers of moist cake and buttery crumb topping perfectly portioned into jars.
    5 from 4 votes
    Print Recipe Pin Recipe Rate this Recipe
    Prep Time 10 minutes mins
    Cook Time 35 minutes mins
    Total Time 45 minutes mins
    Course Desserts
    Cuisine American
    Servings 4 Servings
    Calories 926 kcal

    Ingredients
      

    Cake Mixture

    • ½ Cup Flour
    • ½ teaspoon Baking powder
    • ½ teaspoon Baking soda
    • ¼ teaspoon Salt
    • ½ cup Butter
    • ½ cup Sugar
    • 1 Egg
    • ⅓ Cup Sour cream
    • ¼ Cup Milk
    • 2 teaspoon Vanilla extract

    Crumble Topping

    • 1 ¼ Cup Flour
    • ½ Cup Brown sugar
    • ¼ Cup White Sugar
    • 2 teaspoon Cinnamon
    • ½ Cup Butter
    • ½ teaspoon Salt

    Instructions
     

    • Prepare all the ingredients. Add in the bowl flour, baking powder, soda, and salt. Mix.
    • In the other bowl add the melted butter, sugar, and egg. Mix. Add sour cream, milk, vanilla and whisk again.
    • Add the dry ingredients and mix. This is the batter and can be poured into your cooking Jar.
    • Combine all the ingredients for the crumble topping and rub until you have crumbs.
    • Fill the jars with the cake batter and sprinkle the crumble on top.
    • Bake in the oven at 190 degrees for 35 minutes.
    • You can sprinkle icing sugar on top before serving if you wish.

    Notes

    Grease Your Jar: Before adding batter, lightly grease the inside of your jars to make sure nothing sticks.
    Check Doneness with a Toothpick: Insert a toothpick into the center of the cake; if it comes out clean, it's done baking.
    Layer Your Batter and Topping: For extra yum, add a layer of crumble in the middle of your batter before baking.

    Nutrition

    Calories: 926kcalCarbohydrates: 109gProtein: 9gFat: 52gSaturated Fat: 32gPolyunsaturated Fat: 2gMonounsaturated Fat: 13gTrans Fat: 2gCholesterol: 176mgSodium: 1028mgPotassium: 179mgFiber: 2gSugar: 66gVitamin A: 1625IUVitamin C: 0.2mgCalcium: 129mgIron: 3mg
    Print Recipe Pin Recipe Rate this Recipe
    Tried this recipe?Let us know how it was!

    More Dessert Recipes

    • Chocolate Turtle Cheesecake Recipe
    • Vegan Pumpkin Waffles
    • Summer Fruit Tart
    • Buckwheat Pancakes
    • Organic Baked Apples
    • Banana Chocolate Chip Cookies
    Two jars of crumb cake.

    Mini Puft Ghostbusters Halloween Jello Shots

    August 27, 2021 by Angela Milnes

    Mini Pufts Halloween Jello Shots.

    Looking for a quick and easy sweet treat to make and serve at your Halloween party? You've got to give these mini Ghostbusters Halloween Jello Shots a try. These are also called "Jell-O Shots" You'll need just a few simple ingredients to put them together, and they'll turn out absolutely amazing!

    Mini puft ghostbusters Halloween jello shots.
    [feast_advanced_jump_to]

    Why Make Halloween Jello Shots

    • Ease and Speed: My favorite part about this Halloween jello shots recipe is the fact that it is actually super easy and quick to put together, and is a great sweet treat to serve party guests at Halloween.
    • Party Favorite: These Halloween Jello shots are sure to be a huge hit, and are a great way to celebrate Halloween with a sweet treat that's delicious, fun, and ready to serve.
    • Customizable Flavors: I also love the fact that they can be tweaked and played around with the flavors- I've also made some candy corn Jello shots using orange Jello.

    If you love this recipe be sure to check out these Red, White, and Blue Jello Shots too.

    🥘 Ingredients

    Ingredients to make mini puft jello shots.
    • Knox Gelatin: Is the key ingredient that helps your jello shots set and hold their shape, giving them a fun, gel-like consistency.
    • Cold Water And Hot Water: Are used to dissolve and activate the gelatin, ensuring your jello shots are set properly.
    • Sweetened Condensed Milk: Adds a creamy, sweet flavor to your jello shots, balancing out the flavors and lending a velvety texture.
    • Whipped Topping For Topping: Adds a light, airy contrast to the denser jello shots, providing a delightful creamy finish.
    • Red Sprinkles for Topping: Add a pop of color and a bit of crunch, making your jello shots visually appealing and fun to eat.
    • Puft Toppers: Bring the Ghostbusters theme to life, making your Halloween jello shots not just tasty, but also a fantastic conversation starter at your Halloween party.

    For the complete list of ingredients with measurements and instructions, please see the recipe card at the bottom of the post.

    🔪 How To Make Halloween Jello Shots

    Once you have all your ingredients ready, here's the process you'll need to follow to make the layered Halloween jello shots.

    Boiling condensed milk with water.

    Step One: Boil two cups of water. Add four tablespoons of sweetened condensed milk. Whisk well.

    Gelatin Knox in a bowl.

    Step Two: In a bowl, add two packages of gelatin Knox and hot water mixture. Whisk well. Add two cups of cold water. Whisk well.

    Jello in cups.

    Step Three: Carefully pour into the cups. Place the Jello in the fridge for up to 8 hours or until completely set. Once Jello is set move to the next step. Fill each cup with a little whipped cream. Sprinkle the top with sprinkles.

    Mini puft Jello shots.

    Step Four: Create toppers by uploading a PNG image to Cricut's design space and selecting "print and cut." Use a blue cutting mat and set the Cricut dial to light cardstock. After cutting, hot glue a toothpick to the back. Let dry, and they're ready for your Halloween jello shots. Place the topper into the Jello. Serve cold!

    Mini puft Jello shots.

    Tips For Nailing This Recipe

    • Choice of Containers: You can use plastic cups or Jello cups to make these shots in. If you don't have them, you can also just stick to using shot glasses instead. I prefer using plastic cups over shot glasses, simply because of their convenience.
    • Ingredients Tweaks: While the actual ingredients call for the use of condensed milk, I also like adding some sugar into the mix for a little extra sweetness.

    📖  Substitutions & Variations

    • Creamy Orange Delight: Begins with a vibrant orange layer, followed by a creamy top layer of either whipped cream or condensed milk for a smooth finish.
    • Fruity Favorites: Introduces cherry jello and grape jello as delightful fruity alternatives to the base recipe for a burst of flavor.
    • Mysterious Black Jello Magic: Crafts a dark and intriguing option by blending black gel food coloring into unflavored gelatin, topped off with black sugar for added mystique.
    • Eerie Layered Spectacle: Combines layers of grape or purple Jello, orange Jello, and black-colored unflavored gelatin, crowned with a dollop of whipped cream for a visually stunning and tasty treat.
    • Candy Corn Surprise: You can also try out another unique Halloween Jello shot by adding some candy corn into the Jello cups and turning it into candy corn Jello shots.

    Best Way To Store Jello Shots

    • Storage: Store the layered Halloween jello shots covered in the refrigerator for up to 3 days.

    What To Serve With Halloween Shots

    • Candy Corn: Serve candy corn on the side for a sweet, festive touch to complement Halloween Jello shots. Perfect pairing for a spooky treat!

    🍽 Related Recipes

    • einkorn angel hair and cherry tomato pasta in a white bowl.
      One-Pan Einkorn Angel Hair Pasta with Cherry Tomatoes
    • Salmon Dill Puree.
      Lemon Dill Salmon Mousse (Bariatric Friendly)
    • Oven baked lobster tail with garlic butter and lemon.
      How To Cook Lobster Tail At Home
    • edamame stir fry in a white bowl.
      Easy Edamame Stir Fry (15-Minute Protein-Packed Side Dish)

    Did you make this recipe? Leave a review and a ⭐⭐⭐⭐⭐ rating below, or tag us in our Facebook Group! Alternatively, bookmark it in your browser or save to Pinterest.

    Mini puft Jello shots.

    Mini Puft Ghostbusters Halloween Jello Shots

    Angela Milnes
    These adorable and spooky treats capture the spirit of the season with vibrant, layered jello and a playful nod to the iconic ghost from Ghostbusters.
    5 from 3 votes
    Print Recipe Pin Recipe Rate this Recipe
    Prep Time 20 minutes mins
    Cook Time 8 minutes mins
    Total Time 28 minutes mins
    Course Desserts
    Cuisine American
    Servings 14 Servings
    Calories 22 kcal

    Ingredients
      

    • 2 pkts Knox Gelatin
    • 2 cups Cold water
    • 2 cups Hot water
    • 4 tablespoons Sweetened condensed milk

    Topping

    • 1 pkt Whipped topping for topping
    • 1 tablespoon Red sprinkles for topping

    Instructions
     

    • Boil two cups of water. Add four tablespoons of sweetened condensed milk. Whisk well.
    • In a bowl, add in two packages of gelatin Knox and hot water mixture. Whisk well. Add two cups of cold water. Whisk well. Carefully pour into the cups.
    • Place the Jello in the fridge for up to 8 hours or until completely set. Once Jello is set move to the next step.
    • Fill each cup with a little whipped cream. Sprinkle the top with sprinkles. Place the topper into the Jello. Serve cold!
    • To make the toppers, import the PNG image into the Cricut design space. Upload it to the design board. Once it is imported then it's time to use it as a print and cut. At the top, is the print and cut selection. Make sure to select this.
    • You will need a blue cutting mat. Once you print the design then place on the blue cutting mat and follow the on-screen cut directions. Be sure to set the dial on your Cricut to light cardstock for best results.
    • Once the image is cut then hot glue a toothpick to the back. Let dry and the Halloween jello shots are ready to use.

    Notes

    Choice of Containers: You can use plastic cups or Jello cups to make these shots. If you don't have them, you can also just stick to using shot glasses instead. I prefer using plastic cups over shot glasses, simply because of their convenience.
    Ingredients Tweaks: While the actual ingredients call for the use of condensed milk, I also like adding some sugar into the mix for a little extra sweetness.

    Nutrition

    Calories: 22kcalCarbohydrates: 4gProtein: 1gFat: 1gSaturated Fat: 0.4gPolyunsaturated Fat: 0.02gMonounsaturated Fat: 0.1gCholesterol: 2mgSodium: 9mgPotassium: 21mgSugar: 4gVitamin A: 15IUVitamin C: 0.1mgCalcium: 17mgIron: 0.01mg
    Print Recipe Pin Recipe Rate this Recipe
    Tried this recipe?Let us know how it was!

    More Dessert Recipes to Try

    • Turtle Brownies Recipe
    • Pumpkin Spice Cinnamon Rolls
    • Zucchini Chocolate Chip Muffins
    • Chocolate Covered Bananas
    • Halloween Hot Dogs Mummies
    • Halloween Cherry Pie
    • « Previous Page
    • 1
    • …
    • 17
    • 18
    • 19
    Angela Milnes.

    Hi I'm Angela

    Welcome to Eat Your Beets where you'll find Healthy and Nutritious Family Recipes that are tasty and simple to cook.

    More About Me

    Spring Recipes

    • edamame stir fry in a white bowl.
      Easy Edamame Stir Fry (15-Minute Protein-Packed Side Dish)
    • Best Gravlax Salmon With Dill (Cured Salmon).
      Best Gravlax Salmon With Dill (Cured Salmon)
    • One Pan Chicken And Asparagus.
      One Pan Chicken And Asparagus
    • Chicken And Cabbage Stir Fry Recipe.
      Chicken And Cabbage Stir Fry Recipe
    • Zucchini Egg Bake Recipe.
      Best Zucchini Egg Bake Recipe
    • How To Make Sun Dried Tomatoes Without Oil.
      How To Make Sun Dried Tomatoes Without Oil – Easy Oven Method

    Popular Recipes 💗

    • best stuffed mushrooms.
      The Best Stuffed Mushrooms
    • Slow Cooker Chicken Bacon Ranch Pasta.
      Slow Cooker Chicken Bacon Ranch Pasta
    • Baked Ricotta On A Spoon.
      Bariatric Friendly Ricotta Bake Recipe
    • Fun Veggie Train With Bell Peppers.
      Fun Veggie Train With Bell Peppers
    • Best Blueberry Smoothie Bowl topped with fruit.
      Best Blueberry Smoothie Bowl Recipe
    • Grilled Eggplant With Lemon Dip.
      Grilled Eggplant With Lemon Dip
    • Air Fryer Asparagus with Parmesan.
      Air Fryer Asparagus with Parmesan
    • Sheet Pan Chicken Fajitas.
      Sheet Pan Chicken Fajitas

    Footer

    As Seen In

    As Seen In.
    • Facebook
    • Pinterest

    Privacy Policy

    Accessibility Policy

    ↑ Back To Top

    Copyright © 2025 | Eat Your Beets | All Rights Reserved

    Rate This Recipe

    Your vote:


    A rating is required
    A name is required
    An email is required