​

Eat Your Beets

  • About
  • Spring Recipes
  • Vegetables
  • Side Dishes
  • Recipe Index
menu icon
go to homepage
  • About
  • Spring Recipes
  • Vegetables
  • Side Dishes
  • Recipe Index
    • Facebook
    • Pinterest
  • subscribe
    search icon
    Homepage link
    • About
    • Spring Recipes
    • Vegetables
    • Side Dishes
    • Recipe Index
    • Facebook
    • Pinterest
  • ×
    Sign Up To Our Newsletter →
    Home » Recipe index

    Can You Freeze Eggnog?

    August 19, 2024 by Angela Milnes

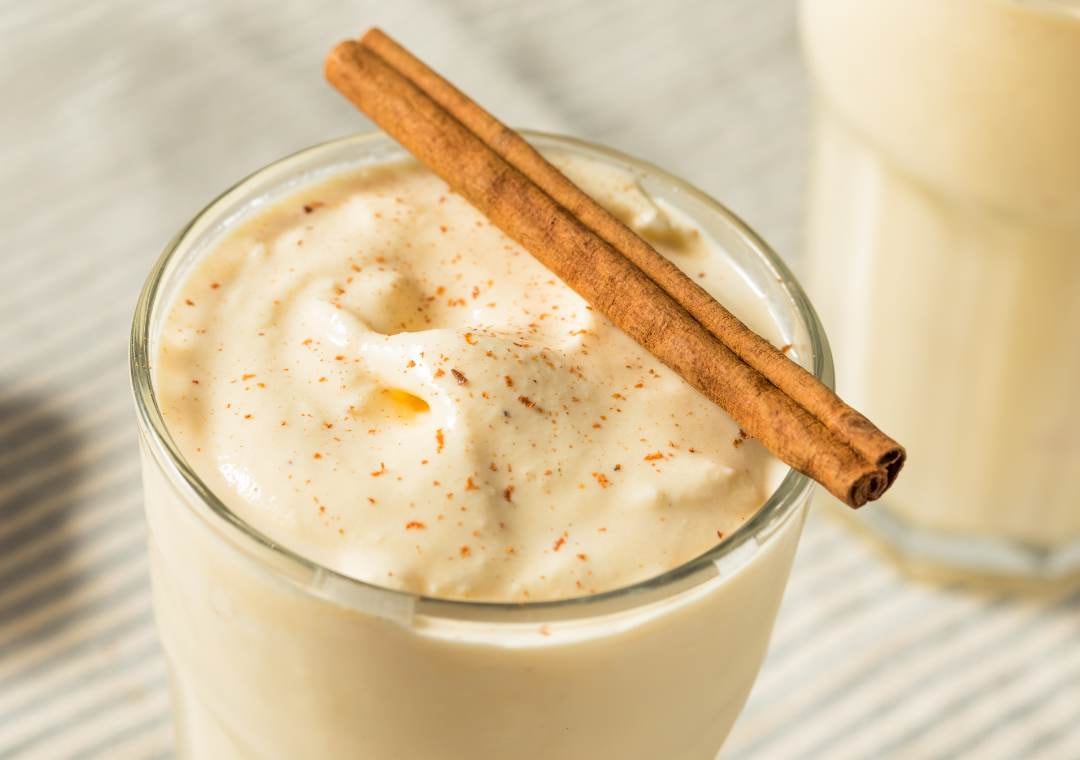
    Eggnog in a glass.

    Can you freeze eggnog? The answer is yes! Freezing eggnog is a simple way to keep this delicious, creamy drink fresh and ready to enjoy whenever you want. In this guide, we'll show you how easy it is to freeze eggnog and still enjoy its rich, festive flavor.

    Can You Freeze Eggnog? eggnog in a glass with a cinnamon stick.
    [feast_advanced_jump_to]

    Why Freeze Eggnog?

    Freezing eggnog is a practical solution to prevent waste, especially during the holidays when you might have more than you can drink. Frozen eggnog allows you to enjoy it long after the holiday season has passed, ensuring you can savor its rich, creamy taste whenever you like.

    How To Freeze Eggnog

    • Choose the Right Container: Pour the eggnog into a freezer bag or airtight container, allowing space for expansion during freezing to prevent freezer burn.
    • Portioning for Convenience: If you plan to use the eggnog in smaller amounts, consider freezing it in ice cube trays. Once frozen, transfer the eggnog cubes to a freezer bag for easy storage.
    • Label and Date: Label eggnog containers or bags with the date before freezing. Frozen eggnog is safe to consume for up to six months if stored properly.

    How To Thaw Frozen Eggnog

    • Refrigerator Thawing: The safest and most effective way to thaw frozen egg nog is to transfer it from the freezer to the refrigerator. Allow the eggnog to thaw slowly in the fridge overnight to maintain its texture and flavor.
    • Avoid Room Temperature Thawing: Never thaw eggnog at room temperature. Doing so can cause the eggnog ingredients to separate and may increase the risk of bacterial growth.
    • Stir or Shake: Once the eggnog is fully thawed, give it a good stir or shake to recombine any separated ingredients. This will help restore the creamy consistency of eggnog.
    How To Thaw Frozen Eggnog

    How To Use Thawed Eggnog

    • Drinking: Enjoy it as a refreshing holiday drink with a sprinkle of nutmeg or cinnamon.
    • Baking and Cooking: Use it in eggnog recipes like Air Fryer French Toast, Buckwheat ancakes, or even eggnog ice cream for a festive twist.
    • Coffees: Add thawed eggnog to your morning Maple Cinnamon Latte for a rich, creamy flavor.

    Does Freezing Affect The Taste And Texture Of Eggnog?

    The freezing process can slightly alter the texture of eggnog, especially if it contains heavy cream or raw eggs. However, a thorough stir after thawing can restore much of its original consistency. The taste remains largely unchanged, so you can still enjoy your eggnog just as you would fresh. Thawed eggnog might be slightly thinner than fresh, but it’s still perfect for drinking or using in eggnog recipes.

    Can You Freeze Canned Eggnog Or Store-Bought Eggnog?

    Yes, you can freeze canned eggnog and store-bought eggnog as well. Just like homemade eggnog, these types can be frozen using the same method. Be sure to transfer the eggnog from its carton or can to a freezer-safe container or freezer bag, allowing for expansion.

    Tips For Freezing Eggnog Safely

    • Use Pasteurized Eggs: If making homemade eggnog, consider using pasteurized eggs to reduce the risk of food poisoning.
    • Freeze Unopened Eggnog: If you have unopened eggnog from the grocery stores, you can freeze it directly. Just ensure you leave extra room for expansion in the container.

    FAQ'S

    Can You Refreeze Thawed Eggnog?

    It’s not recommended to refreeze thawed eggnog as it can negatively impact the texture and taste.

    Can You Freeze Eggnog Ice Cream?

    Yes, eggnog ice cream freezes well and can be enjoyed later without significant changes in texture or flavor.

    Try Freezing Eggnog Today!

    So, can you freeze eggnog? Absolutely! Whether it's freshly made, store-bought, or canned eggnog, freezing is an excellent way to extend its shelf life and enjoy it long after the holidays. Just be sure to follow the proper freezing process, store it in an airtight container, and thaw it in the refrigerator overnight for the best results. With frozen eggnog on hand, you can enjoy this classic holiday drink whenever the craving strikes!

    More Tips For freezing Food

    • Can You Freeze Cooked Cabbage?
    • Can You Freeze Croissants
    • Can You Freeze Scrambled Eggs
    • Can You Freeze Oysters

    What to Eat With Roti: Best Side Dishes

    August 18, 2024 by Angela Milnes

    Meals to serve with chapati.

    Wondering What To Eat With Roti? Roti is a common flatbread in India and Pakistan. People make it with wheat flour, salt, and water, and it doesn't have any yeast. Sometimes people call it chapati, and the names are used interchangeably, but technically, chapati is a type of roti.

    Just like many Indian foods, it's best enjoyed with different dishes. You can use it to scoop up things like alu gobhi and dal. It's a versatile bread that goes well with lots of tasty side dishes! While delicious, roti does contain calories, so keep that in mind if you're watching your intake.

    What to eat with roti. Roti on a plate.
    [feast_advanced_jump_to]

    Wondering What To Eat With Roti?

    There are many great side dishes for roti and here are 10 options which you may want to try.

    1. Alu Gobi with Chinese Cauliflower

    Alu Gobi, a classic vegetarian dish found in many Indian homes, brings comfort and joy to people of all ages. Served with soft chappatis or fluffy rice, it's a beloved meal across generations in India. Interestingly, this potato and cauliflower stir-fry isn't just loved in India but also in other countries.

    Potatoes have an interesting history. They originally came from South America and traveled through Spain, and Italy, and finally reached England in the 19th century. Each country added its own vegetables, herbs, and spices to potatoes. In the 14th century, during the Mughal Empire in India, references to "alu gobi curry" appeared. The Mughals, who were of Turkish ancestry and followers of Islam, brought rich spices and dry fruits to India. Inspired by the Central Asian recipe, the royal Mughal chef created a meatless curry with potatoes, cauliflower, and exotic spices. This delicious dish has remained a staple in Indian vegetarian cuisine, passing through generations while still delighting taste buds.

    2. Sautéed Beetroot with Spices

    Cooked beetroot is a dish that fits many dietary preferences like vegan, vegetarian, paleo, and gluten-free diets. It's a simple Indian recipe that's great for anyone, whether you're a cooking pro or just starting out. Beetroot is not only healthy but also delicious, making it a perfect ingredient for meatless meals. If you're new to vegan cooking, trying beetroot sauté can be a good start.

    Beetroot is packed with vitamins and minerals like vitamin C, vitamin A, beta-carotene, potassium, lycopene, flavonoids, and zeaxanthin. These nutrients are found in colorful fruits and veggies and are great for your health. Besides cooking, beetroots can be enjoyed in many ways: grated raw in salads, as starters, soups, salads, drinks, steamed, sautéed, in low-sugar desserts, and even as natural hair dye. They're versatile and loved both in the kitchen and as a beauty product!

    3. Shrimp Curry

    Shrimp Curry is a tasty dish loved by people who enjoy seafood. It's full of flavors and can be found in many different cultures worldwide. You can adjust the spiciness and ingredients to suit your taste. Plus, it's a healthy choice, offering good protein and fats.

    4. Spicy Vegan Potato Curry

    Spicy vegan potato curry is a delicious meal, especially for those who prefer plant-based eating. It's rich in taste and you can add your favorite veggies and spices to make it even better. This curry is also full of essential vitamins, minerals, and fiber, making it a nutritious option for any meal.

    5. Easy Vegetarian Kofta Curry

    Vegetarian kofta curry is a flavorful dish loved by vegetarians and those seeking meat-free options. It consists of veggie dumplings in a creamy sauce, providing a satisfying and tasty experience. It's simple to prepare, making it perfect for quick dinners on busy evenings.

    6. Moringa, Egg Curry

    Cook up a tasty Moringa and Egg Curry for a unique and guilt-free treat. This all-natural, gluten-free, and paleo-friendly Indian recipe is perfect for those wanting a break from the usual dishes. It pairs well with rice, roti, chapati, or even flavored rice like jeera rice or vegetable biryani. Eggs are not only versatile but also crowd-pleasers, making this curry a simple, flavorful, and healthy choice. Give it a go, and you'll discover how easy, robust in flavor, and deliciously healthy it is.

    7. Turnips in Onion, Cashew Gravy Curry 

    Try something different with Turnips in Onion and Cashew Gravy Curry. Turnips, often overlooked, are like potatoes but without the starch, offering a carrot-like texture and benefits. This vegan, gluten-free, and paleo dish is a homemade meatless option that beats store-bought dinners with additives and preservatives. Embrace a healthier lifestyle by cooking up this all-natural vegan Indian curry, perfect for various dishes like fry, curry, stew, or salad.

    8. Malanga Stir Fry 

    Explore the world of Malanga with a simple Stir Fry. This hairy vegetable, resembling colocasia and eddoe, is less starchy than potatoes and less slimy than colocasia. Like potatoes, Malanga is versatile, suitable for stir-frys, curries, and mixed with other veggies, chips, salad, or mashed Malanga. Give Malanga a try for a change of taste and a dose of different nutrients. It goes by various names like cocoyam, yautia, tannia, taro, and tanier.

    9. Chinese Yam Stir Fry

    Chinese yam is a food originally from China but it's also cooked in Japan, Korea, and Vietnam. You can eat it in many ways: raw, baked, fried, or in soups. When it's raw, it doesn't taste like much. In Chinese medicine, it's used to help with stomach, spleen, lung, and kidney problems. It's not common in Western countries, but if you see it, give it a try!

    Stir fry is a way to cook vegetables quickly with a little bit of fat. Even though they're fully cooked, the vegetables stay firm and healthy. Stir-fried veggies are a fast, healthy, and colorful addition to any meal.

    10. Beetroot Carrot Raita

    Raita, a mix of yogurt and veggies or fruits, is a favorite in India. It's great with rice, biryani, or kebabs. It's often eaten after a meal, perhaps to cool down from spicy food.

    There's no strict recipe for raita. You can mix homemade yogurt with veggies, herbs, spices, or fruits like cucumber, onions, and carrots."

    Enjoy Roti Sides Today

    So there you have it – a delicious lineup of dishes to pair with your favorite roti. Whether you're craving something spicy, savory, or sweet, there's something for everyone. So go ahead, get cooking, and explore the wonderful world of flavors!

    More Useful Food Suggestions

    • How to Make the Perfect Seasoning For Scrambled Eggs
    • Best Clam Juice Substitute
    • Best Cannellini Bean Substitute

    Can You Freeze Cooked Cabbage?

    August 18, 2024 by Angela Milnes

    Cooked cabbage in a pan.

    Cabbage is a versatile vegetable enjoyed in various dishes, from stir-fries to cabbage rolls. Whether you have leftover cabbage or want to prepare meals in advance, you may wonder, "Can you freeze cooked cabbage?" The answer is yes, you can freeze cooked cabbage, but there are important tips and tricks to keep in mind to ensure the best results.

    Cooked cabbage in a pan. Can you freeze cooked cabbage?
    [feast_advanced_jump_to]

    How Does Freezing Affect Cooked Cabbage?

    Freezing cooked cabbage is a convenient way to preserve it for later use, but the process can impact the vegetable's texture. Cooked cabbage has a high water content, and freezing it can cause the cabbage to become slightly softer when thawed. However, if you properly freeze cabbage, it can retain much of its flavor and be used in various dishes.

    How to Freeze Cooked Cabbage

    • Cool Completely: Before freezing cooked cabbage, let it cool to room temperature. This prevents condensation and helps avoid freezer burn.
    • Portioning: Divide the cooked cabbage into portion sizes that suit your future needs. This is particularly useful if you want to freeze shredded cabbage or cabbage rolls.
    • Use Freezer Bags or Airtight Containers: Place the cabbage in freezer bags or airtight containers. Squeeze out as much air as possible from the freezer bags to reduce the risk of freezer burn.
    • Label and Date: Label the cabbage bags or containers with the date of freezing. Cooked cabbage can be stored in the freezer for up to three months, but it's best used within one to two months for optimal flavor and texture.

    Should You Freeze Cabbage Without Blanching?

    Blanching cabbage before freezing is a common practice because it helps preserve the color, flavor, and texture of the vegetable. However, if you've already cooked the cabbage, blanching is unnecessary. Instead, focus on cooling the cooked cabbage completely before freezing to maintain its quality.

    Tips for Freezing Different Types of Cabbage

    • Blanched Cabbage: Blanching cabbage before freezing helps preserve its texture and flavor, especially to freeze raw cabbage.
    • Shredded Cabbage: Freezing shredded cabbage is a great way to save time for future meals, especially if you frequently use it in salads or stir-fries.
    • Cabbage Rolls: Cabbage rolls can be frozen individually or in a batch, making for a quick and easy meal later.

    How Do You Thaw and Reheat Frozen Cooked Cabbage?

    • Thawing: The best way to thaw frozen cabbage is to transfer it from the freezer to the refrigerator and let it thaw slowly overnight. This gradual thawing helps maintain the cabbage's texture.
    • Reheating: Once thawed, reheat the cabbage gently on the stovetop or in the microwave. For stovetop reheating, place the cabbage in a pan over low heat, stirring occasionally until warmed through. If using a microwave, reheat on a low power setting to avoid overcooking.

    How to Use Frozen Cooked Cabbage in Recipes

    • Thai Stir Fry: You can use frozen cabbage in stir-fries. Its softened texture blends well with other vegetables, meats, and sauces. Simply toss it in during the last few minutes of cooking to heat through.
    • Soups and Stews: Add thawed cabbage directly to soups or stews. Its flavor deepens as it simmers with the broth and other ingredients, making it a hearty addition to dishes like cabbage soup or beef stew.
    • Fried Cabbage: Sauté thawed cabbage with onions, garlic, and bacon for a quick side dish. The cabbage will caramelize nicely, adding a sweet and savory element to your meal.
    • Side Dishes: Serve thawed cabbage as a simple side dish, seasoned with butter, salt, and pepper, or mix it with other vegetables for a colorful medley.
    • Breakfast Tacos and Wraps: Use thawed cabbage as a filling for tacos or wraps. It adds a nutritious crunch and pairs well with proteins like Thin Sliced Chicken Breast beef, or tofu.
    Fried cabbage and sausage in a pan.

    Can You Freeze Dishes Containing Cooked Cabbage?

    Yes, dishes that contain cooked cabbage, such as cabbage rolls, soups, or stews, can also be frozen. The freezing and thawing process works similarly, but it's important to consider the other ingredients in the dish. Some components, like potatoes or cream, may not freeze as well as cabbage and could affect the overall texture of the dish after thawing.

    Can I refreeze cooked cabbage after thawing?

    It is generally not recommended to refreeze cooked cabbage after it has been thawed, as this can further degrade its texture and quality.

    Best Way To Freeze Cooked Cabbage

    Freezing cabbage, whether cooked or raw, is an excellent way to make the most of this versatile vegetable. By following proper freezing techniques and considering how you plan to use the cabbage, you can enjoy the convenience of having this nutritious ingredient on hand at all times. Whether you’re preparing for a busy week or looking to reduce food waste, freezing cooked cabbage is a practical solution that offers both convenience and delicious results.

    More Top Freezing Tips To Read

    • Can You Freeze Croissants
    • Can You Freeze Scrambled Eggs
    • How To Freeze Beets

    Can You Freeze Croissants

    August 18, 2024 by Angela Milnes

    Croissants ready to be served.

    Can You Freeze Croissants? The answer is yes! Freezing croissants is a great way to keep them fresh and delicious, whether you've baked a big batch at home or picked up some extras from your favorite bakery. In this post, we'll teach the best methods for freezing croissants and how to reheat them so they taste just as amazing as when they were first made.

    Croissants on a table. Can you freeze croissants?
    [feast_advanced_jump_to]

    Why Freeze Croissants?

    Freezing croissants is a smart way to preserve their freshness and extend their shelf life. Whether you've baked a batch at home or have leftovers from a bakery, freezing allows you to enjoy croissants at your convenience without worrying about them going stale.

    It’s especially useful if you’ve bought more than you can eat in a few days or if you want to keep some on hand for special occasions. By freezing croissants, you can have a delicious, flaky pastry ready whenever the craving strikes, without the need to make or buy them fresh every time.

    How To Freeze Croissants?

    • Cool Down: Allow the freshly baked croissants to cool completely at room temperature. This is crucial to prevent condensation, which can lead to freezer burn.
    • Wrap Individually: Wrap each croissant individually in plastic wrap to protect them from freezer burn.
    • Flash Freeze: Place the wrapped croissants on a baking sheet and flash freeze them for about an hour. This helps croissants maintain shape and prevents them from sticking together.
    • Store Properly: Transfer the frozen croissants to an airtight container or freezer bag and remove excess air to prevent freezer burn.

    How To Defrost Croissants?

    • Defrost in the Fridge: Place the frozen croissants in the fridge overnight. This gradual thawing process helps preserve the texture and flavor of croissants.
    • Room Temperature Finish: Once thawed, allow the croissants to sit at room temperature for about 10-15 minutes before serving or reheating.

    How To Reheat Frozen Croissants

    • Bake in the Oven: Preheat your oven to 350°F (175°C). Place the croissants on a baking tray and bake for about 5-10 minutes until warmed through.
    • Avoid the Microwave: Reheating croissants in the microwave can make them soggy and lose their flaky texture, so it’s best to avoid this method.

    How to Serve Croissants

    • Eat Them as Is: If you’ve thawed croissants overnight in the fridge, they’re ready to eat at room temperature. Simply unwrap and enjoy their buttery flavor and flaky texture without any further preparation.
    • Pair with Jam or butter: Warm the thawed croissants slightly and spread them with your favorite jam, butter, or chocolate spread.
    • Serve with Lattes or Hot Drinks: Enjoy croissants alongside a Maple Cinnamon Latte or a Pumpkin Spice Latte for a rich, flavorful treat. Alternatively, pair them with your favorite hot tea or coffee for a cozy, satisfying experience.
    • Serve as a Side with Carrot and Leek Soup or a Beet Salad With Feta And Walnuts: Thawed croissants make an excellent side for a bowl of soup or a fresh salad.  Warm them briefly and serve alongside a hearty Tomato Soup, a fresh Avocado Salad, or a bowl of Creamy Chowder.

    Can You Refreeze Croissants?

    While it’s possible to refreeze croissants, it’s generally not recommended. Refreezing can cause the croissants to lose more moisture and result in a less desirable texture. To avoid this, only thaw and reheat the number of croissants you plan to eat.

    Can You Freeze Croissant Dough?

    Yes, you can freeze croissant dough. Freezing croissant dough allows you to prepare fresh croissants anytime you desire without the hassle of making the dough from scratch each time.

    Croissants dough on a baking tray.

    Can You Freeze Filled Croissants?

    Yes, you can freeze-filled croissants, but they require a bit more care. Follow the same steps as freezing plain croissants, but keep in mind that certain fillings (like fruit or custard) may change texture slightly after freezing.

    Croissants filled with strawberries and cream.

    FAQ’S

    Does Freezing Affect The Texture And Taste Of Croissants?

    Freezing croissants may alter their texture and taste slightly, but if done right, changes are minimal.

    How Long Do Croissants Stay Good In The Freezer?

    Croissants can stay good in the freezer for up to three months. 

    Enjoy Croissants Anytime!

    Freezing croissants, whether fresh or cooked, preserves their deliciousness for later. Proper freezing and defrosting methods ensure you can enjoy their buttery flavor and flaky texture anytime. Keep frozen croissants for quick breakfasts or special treats!

    Air Fryer Crab Cakes With Fresh or Imitation Crab

    August 18, 2024 by Angela Milnes

    Air Fryer Crab Cakes.

    Crispy on the outside, tender on the inside—these Air Fryer Crab Cakes are pure magic. Quick to make, packed with flavor, and perfect for everything from fancy brunch to easy weeknight dinners.

    Air Fryer Crab Cakes.

    These golden treats are everything I love in a seafood dish: quick, craveable, and loaded with protein. Air frying takes out the mess of deep frying but keeps the same crunchy crust and tender middle. And this dish reminds me of family visits to the seaside as a child!

    Great for: Easter brunch, seafood nights, light summer dinners, or party appetizers.

    You'll love pairing these crab cakes with my Bariatric-Friendly Ricotta Bake or Baked Spinach Ricotta dish. It's a feel-good, flavor-packed meal ready to go.

    [feast_advanced_jump_to]

    💖 Why This Recipe Works

    • Protein-Packed & Delicious – Crab is naturally high in lean protein and low in fat.
    • Quick & Easy – Done in under 10 minutes of air fry time.
    • Versatile – Serve with zesty sauces, on a salad, or as sliders with slaw.

    ⭐ Star Ingredients

    Crab Cakes Ingredients.
    • Lump Crab Meat – Lump Crab Meat – When I want the best flavor and texture, lump crab is my go-to. It’s sweet, tender, and gives these cakes that melt-in-your-mouth feel that restaurant crab cakes are known for.
    • Old Bay or Creole Seasoning – Old Bay gives it that classic East Coast vibe, while Creole brings a bolder, spicier flavor. I swap depending on mood.
    • Cracker Crumbs or Panko – This gives structure and crunch. I love using crushed butter crackers or panko for that golden finish.

    🦀 Fresh Crab vs Imitation Crab

    Not sure which crab to use? Here’s a quick breakdown of the pros and cons of both options so you can pick what works best for you.

    TypeFlavorTextureCostBest For
    Lump Crab MeatSweet, delicateMoist, tender💰💰💰Special occasions, full flavor
    Imitation CrabMild, slightly sweetFirm, uniform💰Weeknight meals, kid-friendly

    💡 My tip: I go for fresh when I want that full, buttery bite—but finely chopped imitation crab totally works if that’s what you’ve got on hand. Just tone down the seasoning a bit to keep the balance right.

    For the complete list of ingredients with measurements and instructions, please see the recipe card at the bottom of the post.

    📖  Substitutions & Variations

    • Dairy-Free Option – Use a thick, unsweetened dairy-free yogurt or avocado mayo instead of Greek yogurt.
    • Low-Carb Swap – Substitute cracker crumbs with almond flour or crushed pork rinds for a keto-friendly take.
    • Gluten-Free Friendly – Use gluten-free crackers or panko to make this recipe completely gluten-free.
    • Spicy Upgrade – Mix in chopped jalapeños or a pinch of cayenne for a little heat.

    🍽 Want a full meal? Pair your crab cakes with Air Fryer Hasselback Potatoes for a crispy side or serve alongside a fresh Kale Butternut Squash Salad with Blueberries for color, crunch, and contrast.

    🥄 Topping & Sauce Ideas

    • Tartar Sauce: Classic and creamy.
    • Remoulade: Tangy, zippy, and bold (This is my favorite!).
    • Sriracha Mayo: For a spicy kick.
    • Lemon Dill Yogurt Sauce: Bright and herby.
    • Quick Slaw: Use it as a topper for crab cake sliders.

    🔪 How To Make Air Fryer Crab Cakes

    Mixing ingredients for crab cakes.
    1. Step 1: Add all the ingredients for the remoulade in a bowl, and mix well until incorporated. Place in the fridge to chill while you prepare the crab cakes.
    Mixing crab mixture for air fried crab cakes.
    1. Step 2: In another large mixing bowl, crack and whisk the egg. Add the mayonnaise, mustard, hot sauce, seasoning, and lemon juice. Gently fold the mixture until incorporated to create the binder sauce.
    Crab cakes mixture in a bowl.
    1. Step 3: In a large bowl, add the cracker crumbs and crab meat. Toss until mixed. Add the binder sauce and mix by hand. This process will create a bound crab mixture.
    Crab cakes mixture in a bowl.
    1. Step 4: Refrigerate the crab mixture for 1 hour to allow the cracker crumbs to soak up the binder sauce. This will make for an easy forming. 
    Uncooked crab cakes in air fryer.
    1. Step 5: Using a ¼ cup, scoop and shape the mixture into a ball. You can leave them round for moisture or compress them for crispiness. Preheat the Air Fryer and place the crab cakes in the basket.
    Cooked crab cakes in air fryer basket.
    1. Step 6: Cook the crab cakes for 7-8 minutes or until they are deep golden brown. Make sure you flip the cakes midway through the cooking process so that they cook evenly. Serve with tartar sauce and lemon wedges on the side.

    💡 Hint: Want an extra crispy crust? Roll the formed crab cakes in panko before air frying.

    Air fried crab cakes on a plate.

    👩‍🍳 Expert Tips

    • Don’t overcrowd the basket – Cook in batches so they crisp evenly.
    • Use parchment rounds or spray to prevent sticking.
    • Make-ahead magic – Form and chill the cakes up to a day in advance for easier handling.
    • Boost the flavor – A touch of Worcestershire or lemon zest makes a big difference!
    • No Air Fryer? No problem! Bake at 375°F for 25 minutes.

    💭 FAQs

    Can I use frozen crab cakes in the air fryer?

    Yep! No need to thaw—just air fry for 10-12 minutes at 375°F.

    Do I need to spray the crab cakes with oil before air frying?

    A light spray helps get that golden, crispy exterior.

    Can I make crab cakes ahead of time?

    Absolutely—shape and chill them up to 24 hours before cooking.

    How do I make sure my crab cakes don’t fall apart in the air fryer?

    The key to keeping crab cakes intact is the right balance of breadcrumbs and binding ingredients like egg or mayonnaise. If your mixture feels too loose, add a little more breadcrumbs. Chill time also helps them hold their shape.

    Best way to store crab cakes

    Store in an airtight container in the fridge for 2–3 days. Freeze for up to 3 months—just reheat in the air fryer for best texture.

    💖 Serving Suggestions

    Here are some vegetable sides to serve with Air Fryer Crab Balls:

    • Sweet Potato Fries: For a crispy, sweet contrast.
    • Zesty Red Cabbage Coleslaw: Tangy and refreshing.
    • Avocado Salsa: Bright, creamy, and citrusy—perfect with seafood.

    Looking for more high-protein seafood ideas? Try it with my Air Fryer Cod Fillet or Air Fryer Bang Bang Salmon for a full-on seafood feast.

    Air fried crab cakes on a plate.

    🍽 Try More Fantastic Air Fryer Sides

    • Air Fryer Bok Choy on a white plate covered in paprika.
      Air Fryer Bok Choy
    • Air Fryer Carrot Fries.
      Crispy Air Fryer Carrot Fries
    • How To Roast Peppers In Air Fryer.
      How To Roast Peppers In Air Fryer
    • Air Fryer Crispy Chicken Wings.
      Air Fryer Crispy Chicken Wings

    Did you make this recipe? Leave a review and a ⭐⭐⭐⭐⭐ rating below, or tag us in our Facebook Group! Alternatively, bookmark it in your browser or save to Pinterest.

    Air Fryer Crab Cakes.

    Air Fryer Crab Cakes

    Angela Milnes
    These Air Fryer Crab Cakes are perfectly crispy on the outside and tender on the inside, with a delicious blend of crab, herbs, and spices. Whether you're serving them as an appetizer or a main dish, these crab cakes come together in no time and are a crowd-pleaser every time!
    5 from 5 votes
    Print Recipe Pin Recipe Rate this Recipe
    Prep Time 12 minutes mins
    Cook Time 12 minutes mins
    1 hour hr
    Total Time 1 hour hr 24 minutes mins
    Course Air Fryer Recipes
    Cuisine American
    Servings 8 Servings
    Calories 139 kcal

    Ingredients
      

    • 1 teaspoon Creole Seasoning or Old Bay Seasoning

    Remoulade Sauce

    • 1 teaspoon Paprika
    • 1 tablespoon Minced Garlic
    • ½ tablespoon Mustard
    • 1-2 teaspoons Hot Sauce
    • ¼ Cup Greek Yogurt or Sour Cream

    Crab Cakes

    • 1 Egg
    • ⅓ Cup Mayonaise
    • 1 Tablespoon Mustard
    • 1-2 Teaspoons Hot Sauce
    • 2 Teaspoons Seafood Seasoning or Old Bay Seasoning
    • 1 Lemon Juiced
    • 1 Pound Crab Meat or Imitation Crab
    • 1 Cup Saltine Cracker Crumbs
    • ⅛ Cup Green Onion Diced
    • 1 Lemon cut into wedges

    Instructions
     

    • Prepare the Remoulade Sauce: Add all the ingredients for the remoulade in a bowl, and mix well until incorporated. Place in the fridge to chill while you prepare the crab cakes.
    • Create the Binder Sauce: In another large mixing bowl, crack and whisk the egg. Add the mayonnaise, mustard, hot sauce, seasoning, and lemon juice. Gently fold the mixture until incorporated to create the binder sauce
    • Prepare the Crab Cake Mixture: In a large bowl, add the cracker crumbs and crab meat. Toss until mixed. Add the binder sauce and mix by hand. This process will create a bound crab mixture
    • Refrigerate the Crab Cake Mixture: Refrigerate the crab mixture for 1 hour to allow the cracker crumbs to soak up the binder sauce. This will make for an easy forming. 
    • Shape the Crab Cakes: With a ¼-quarter cup, scoop out the mixture and form it into a ball. You can compress the cakes or leave them in a ball. I prefer the cakes to be round as they stay moist more than the compressed cakes. The compressed cakes are crispier throughout.
    • Give the Crab Cakes an Extra Coating: To get an extra crunchy texture on the outside, you can also coat the crab cakes in some more panko breadcrumbs or regular bread crumbs before you transfer them to the Air Fryer basket. (OPTIONAL)
    • Preheat the Air Fryer and place the crab cakes in the Air Fryer basket. Cook the crab cakes for 7-8 minutes or until they are deep golden brown. Make sure you flip the cakes midway through the cooking process so that they cook evenly.
    • Serve the Air Fryer crab cakes with some tartar sauce and lemon wedges on the side.

    Notes

    Remember that different Air Fryers cook differently, and to get the perfectly cooked crab cakes, you’ll need to check the crab cakes once in between the cooking process.
    Make sure you lay parchment paper inside the Air Fryer basket or lightly spray it with some cooking spray before you placing the crab cakes in there. The cooking spray will ensure that the crab cakes don’t end up sticking to the basket.
    If you don’t have the saltine cracker crumbs that the recipe calls for, you can use panko breadcrumbs or classic bread crumbs instead!

    Nutrition

    Calories: 139kcalCarbohydrates: 4gProtein: 12gFat: 8gSaturated Fat: 1gPolyunsaturated Fat: 4gMonounsaturated Fat: 2gTrans Fat: 0.02gCholesterol: 49mgSodium: 614mgPotassium: 201mgFiber: 1gSugar: 1gVitamin A: 314IUVitamin C: 19mgCalcium: 56mgIron: 1mg
    Print Recipe Pin Recipe Rate this Recipe
    Tried this recipe?Let us know how it was!
    Crab cakes on a plate.

    Weight Watchers Crustless Pumpkin Pie

    August 18, 2024 by Angela Milnes

    Weight Watchers Crustless Pumpkin Pie.

    Craving a sweet treat that won't derail your healthy eating goals? This Weight Watchers Crustless Pumpkin Pie is the perfect solution! It's creamy, full of pumpkin spice flavor, and super easy to make. With fewer calories and no crust, you can enjoy a guilt-free dessert that's perfect for any time of year. Give this Weight Watchers No Crust Pumpkin Pie a try and savor each delicious bite!

    Weight watchers crustless pumpkin pie.
    [feast_advanced_jump_to]

    💖 Why This Recipe Works

    • Low-Calorie Delight: Enjoy all the flavors of no crust pumpkin pie without the guilt, thanks to the sugar substitute and crustless design. It's only 5 points on the Weight Watchers Plan!
    • Spiced Perfection: The blend of cinnamon, nutmeg, and pumpkin pie spice gives this pie a warm and cozy flavor.
    • Easy and Quick: Simple ingredients and straightforward steps make this recipe for Weight Watchers Pumpkin Pie a hassle-free, delicious dessert.

    ⭐ Star Ingredients

    • Pumpkin Puree: Provides a rich and creamy pumpkin base for the Weight Watchers crustless pumpkin pie.
    • Granulated sugar substitute: Adds sweetness without extra calories.
    • Cinnamon: Adds warm, aromatic spice to the Weight Watchers crustless pumpkin pie.
    • Nutmeg: Infuses a nutty, slightly sweet flavor.
    • Vanilla extract: Enhances the overall flavor with a hint of vanilla.
    • Pumpkin spice: Brings a blend of spices that complements the pumpkin.
    • Large eggs: Binds the ingredients together and adds structure.
    • Unsweetened almond milk or regular milk: Adds moisture and a creamy texture to the weight watchers crustless pumpkin pie.

    For the complete list of ingredients with measurements and instructions, please see the recipe card at the bottom of the post.

    Crustless pumpkin pie on a slate.

    📖 Pumpkin Pie Variations

    • Maple Pecan Pumpkin Pie: Add maple syrup instead of sugar substitute and top with a sprinkle of chopped pecans. The filling, once blended, has a sweet and nutty variation that is perfect for enjoying in the country.
    • Spiced Apple Crustless Pie: Replace the pumpkin puree with unsweetened applesauce, add apple pie spice, and a pinch of salt for a delicious twist that the whole family, including kids, will enjoy.
    • Ginger Chocolate Pumpkin Pie: Add unsweetened cocoa powder and ground ginger to the mixture for a rich, chocolatey flavor that pairs perfectly with the pumpkin and makes the whole thing irresistibly delicious.

    🔪 How To Make Crustless Pumpkin Pie

    Preparing mixture for pumpkin pie.
    1. Step 1: Set your oven to 375°F (190°C). In a large bowl, thoroughly combine all the ingredients. Lightly grease a 9-inch pie pan to prevent sticking.
    Preparing mixture for pumpkin pie in a bowl.
    1. Step 2: Pour the pumpkin mixture into the prepared pan. Bake for 40-45 minutes, or until a toothpick inserted into the center comes out clean. Allow the Pumpkin Pie to cool completely before cutting and serving. Enjoy!
    Pumpkin pie for weight watchers.

    👩‍🍳 Expert Tips

    • Check Consistency: If the mixture is too thick, add a little more milk; if too thin, let it sit for a few minutes to thicken before pouring it into the pie dish.
    • Watch the Edges: To prevent the edges from browning too quickly, cover them with aluminum foil or a pie crust shield during the last 10-15 minutes of baking.

    💭 FAQs

    What Type Of Dish Is Best For Baking A Crustless Pumpkin Pie?

    A glass or ceramic pie dish works best for crustless pumpkin pies. These materials heat evenly, helping the pie to cook thoroughly without a crust. Make sure to grease the dish well to prevent sticking.

    How Do I Make Sure The Crustless Pumpkin Pie Doesn't Stick To The Pan?

    To prevent sticking, generously grease the pie dish with butter or non-stick cooking spray. You can also line the bottom with parchment paper for extra assurance.

    Can I Make This Pie Ahead Of Time For Thanksgiving?

    Yes, crustless pumpkin pie can be made ahead of time. Once cooled, cover it and refrigerate. This pie can be made up to two days in advance, which makes it perfect for holiday preparations.

    How Do I Know When The Pumpkin Pie Is Done Baking?

    The pie is done when the edges are set and the center is just slightly jiggly. Inserting a knife near the center should come out clean. Allow the pie to cool completely as it will continue to set.

    Best Way to Store Pumpkin Pie

    Store any leftover Crustless Pumpkin Pie in an airtight container in the refrigerator for up to 3-4 days. Wrap the pie tightly in plastic wrap or aluminum foil, then place it in a freezer-safe container or bag and freeze for up to 2-3 months. Defrost the pie in the refrigerator overnight.

    💖 Serving Suggestions

    Here are some of the best desserts to serve with Crustless Pumpkin Pie:

    • Whipped Cream: A dollop of freshly whipped topping adds a light and airy texture that pairs perfectly with the rich and creamy Weight Watchers crustless pumpkin pie.
    • Vanilla Ice Cream: A scoop of vanilla ice cream provides a cool and creamy contrast to the warm spices of the pumpkin pie.
    • Candied Pecans: Sweet and crunchy candied pecans offer a delightful topping or side that complements the flavors of the pie slice.
    • Fresh Berries: A mix of fresh berries, such as strawberries, raspberries, and blueberries, adds a burst of freshness and a slight tartness to balance the sweetness of the Weight Watchers crustless pumpkin pie.
    • Apple Compote: A warm apple compote with cinnamon and nutmeg provides a fruity and flavorful side that enhances the autumnal flavors of the pumpkin pie.
    Crustless pumpkin pie.

    🍽 More Light & Filling Recipes

    • Weight Watchers Cabbage Soup.
      Weight Watchers Cabbage Soup
    • Zesty Cabbage Soup in a white bowl.
      Zesty Cabbage Soup (With Lemon & Herbs – One Pot Wonder!)
    • Hearty Beef Pot Pie With Celery And Carrots and s lice of pie cut out.
      Easy Beef Pot Pie With Celery And Carrots
    • Smothered Cajun Cabbage in a bowl.
      Best Cajun Smothered Cabbage Recipe

    Did you make this recipe? Leave a review and a ⭐⭐⭐⭐⭐ rating below, or tag us in our Facebook Group! Alternatively, bookmark it in your browser or save to Pinterest.

    Weight Watchers Crustless Pumpkin Pie.

    Weight Watchers Crustless Pumpkin Pie

    Angela Milnes
    Indulge in the warm, spiced flavors of fall with this Crustless Pumpkin Pie! This easy, lighter version of the classic dessert is rich and creamy, packed with pumpkin puree and the perfect blend of spices.
    5 from 4 votes
    Print Recipe Pin Recipe Rate this Recipe
    Prep Time 5 minutes mins
    Cook Time 45 minutes mins
    Total Time 50 minutes mins
    Course Desserts
    Cuisine American
    Servings 8 Servings
    Calories 41 kcal

    Ingredients
      

    • 1 Can Pumpkin Puree 15 Oz can
    • ⅓ cup Granulated Sugar Substitute
    • 1 teaspoon Cinnamon
    • ½ teaspoon Nutmeg
    • ½ teaspoon Vanilla Extract
    • 1 teaspoon Pumpkin Spice
    • 2 Eggs
    • 8 oz. Unsweetened Almond Milk

    Instructions
     

    • Set your oven to 375°F (190°C).
    • In a large bowl, thoroughly combine all the ingredients.
    • Lightly grease a 9-inch pie pan to prevent sticking.
    • Pour the pumpkin mixture into the prepared pan. Bake for 40-45 minutes, or until a toothpick inserted into the center comes out clean.
    • Allow the Weight Watchers Crustless Pumpkin Pie to cool completely before cutting and serving. Enjoy!

    Notes

    Check Consistency: If the mixture is too thick, add a little more milk; if too thin, let it sit for a few minutes to thicken before pouring into the pie dish.
    Watch the Edges: To prevent the edges from browning too quickly, cover them with aluminum foil or a pie crust shield during the last 10-15 minutes of baking.

    Nutrition

    Serving: 1gCalories: 41kcalCarbohydrates: 5gProtein: 2gFat: 2gSaturated Fat: 0.5gPolyunsaturated Fat: 0.4gMonounsaturated Fat: 1gTrans Fat: 0.004gCholesterol: 41mgSodium: 55mgPotassium: 128mgFiber: 2gSugar: 2gVitamin A: 8329IUVitamin C: 2mgCalcium: 58mgIron: 1mg
    Print Recipe Pin Recipe Rate this Recipe
    Tried this recipe?Let us know how it was!

    More Dessert Recipes To Add to Your Menu

    • Organic Baked Apples
    • Best Chocolate Caramel Bark
    • Best Blueberry Crumble Recipe
    • Best Summer Fruit Tart
    • Banana Chocolate Chip Cookies

    Halloween Chocolate Covered Strawberries

    August 18, 2024 by Angela Milnes

    Halloween Chocolate Covered Strawberries.

    Get ready to delight your little ghouls and goblins with these Halloween Chocolate Covered Strawberries! They're spooky and sweet, perfect for adding a festive touch to your Halloween celebrations. With just a few simple ingredients, you can create these adorable Halloween treats that everyone will love.

    Halloween chocolate covered strawberries.
    [feast_advanced_jump_to]

    💖 Why This Recipe Works

    • Festive Fun: These spooky chocolate-covered strawberries are perfect for Halloween party, adding a spooky yet sweet touch to your celebrations.
    • Simple and Delightful: With just a few ingredients, this Halloween chocolate covered strawberries is easy to make and a delight to eat.
    • Creative and Customizable: You can get creative with the decorations, making Halloween Treats as spooky or as cute as you like.

    ⭐ Star Ingredients

    Ingredients to make chocolate covered strawberries.
    • Strawberries: Fresh and plump strawberries ready to be dipped and decorated.
    • White chocolate chips: Creamy and smooth white chocolate chips for coating the Halloween chocolate-covered strawberries.
    • Mini chocolate chips: Tiny chocolate chips for creating spooky eyes.
    • Chocolate morsels: Larger chocolate morsels for making creepy mouths.

    For the complete list of ingredients with measurements and instructions, please see the recipe card at the bottom of the post.

    🔪 How To Make Chocolate-Covered Strawberries

    Melted white chocolate in a bowl.
    1. Step 1: Place the white chocolate chips in a large microwave-safe bowl. Microwave the white chocolate on high for about 3 minutes, stirring every 1 minute, until smooth.
    Dipping strawberry in melted white chocolate.
    1. Step 2: Dip each strawberry into the melted chocolate, leaving the stem uncovered.
    Strawberry covered with white chocolate.
    1. Step 3: Place each chocolate-covered strawberry on a sheet pan lined with parchment paper and let the chocolate set completely.
    Halloween chocolate covered strawberries on a tray.
    1. Step 4: Use the mini chocolate chips to create eyes and the chocolate morsels to create a mouth on each strawberry. Repeat the dipping process for all strawberries. Refrigerate for 1 hour or until the chocolate is firm. After refrigerating, serve these delicious Halloween chocolate-covered strawberries to enjoy the sweet and tangy flavors!

    👩‍🍳 Expert Tips

    • Prep the Strawberries: Ensure the strawberries are dry before dipping to help the chocolate adhere better.
    • Add Texture: Roll the dipped strawberries in crushed nuts, coconut flakes, or cookie crumbs for added texture.

    💭 FAQs

    How do I make Halloween chocolate covered strawberries?

    Making Halloween chocolate covered strawberries is easy! Start by dipping fresh strawberries into melted white or dark chocolate. Once coated, you can decorate them with orange and black sprinkles or use food coloring to make fun Halloween designs, such as spider webs, ghosts, or pumpkins. For an extra spooky touch, drizzle some red or black chocolate on top to make them look like they have "blood" for a creepy effect.

    Can I use colored chocolate for Halloween themed strawberries?

    Absolutely! Colored chocolate works perfectly for creating Halloween-themed strawberries. You can find orange, green, or black candy melts at most stores or online. These add vibrant colors and make your treats even more festive, allowing you to create all sorts of fun designs, from pumpkins to eerie skeleton faces.

    How long do Halloween chocolate covered strawberries last?

    Halloween chocolate covered strawberries are best enjoyed within 1-2 days after making them. Since they are made with fresh fruit, they don’t last long. Store them in the fridge to keep the strawberries fresh, but be sure to let them come to room temperature for about 10 minutes before serving to enhance the chocolate’s flavor and texture.

    Can I make these ahead of time for a Halloween party?

    While it’s best to make Halloween chocolate covered strawberries on the day of your event, you can prepare them a day ahead. If making them in advance, store them in an airtight container in the fridge. Be careful not to let them sit too long, as the strawberries may begin to release moisture, which could cause the chocolate to soften.

    Best Way to Store Chocolate Covered Strawberries

    Store any leftover Halloween chocolate-covered strawberries in an airtight container in the refrigerator for up to 2-3 days. Use a tightly sealed container to maintain the freshness in the refrigerator.

    💖 Serving Suggestions

    Here are my favorite sides to serve with Halloween Chocolate Covered Strawberries:

    • Pumpkin Spice Latte: A warm and comforting pumpkin spice latte complements the sweetness of the Halloween chocolate-covered strawberries.
    • Apple Cider: A chilled or warm apple cider adds a refreshing and seasonal drink option that pairs well with the Halloween chocolate-covered strawberries.
    • Cheese Platter: A variety of cheeses, crackers, and nuts provide a savory contrast to the sweet strawberries.
    White chocolate covered strawberries.

    🍽 More Halloween Recipes

    • Halloween Hot Dogs Mummies.
      Halloween Hot Dogs Mummies
    • Spooky Halloween Cherry Pie Recipe.
      Spooky Halloween Cherry Pie Recipe
    • Halloween Apple Monsters.
      Halloween Apple Monsters
    • Halloween monster cookies on a plate.
      Easy Halloween Monster Cookies: Sandwich Cookies

    Did you make this recipe? Leave a review and a ⭐⭐⭐⭐⭐ rating below, or tag us in our Facebook Group! Alternatively, bookmark it in your browser or save to Pinterest.

    Halloween Chocolate Covered Strawberries.

    Halloween Chocolate Covered Strawberries

    Angela Milnes
    Get into the spooky spirit with Halloween Chocolate Covered Strawberries! These juicy strawberries are dipped in rich chocolate and decorated with fun, festive designs like ghosts, pumpkins, and mummies. They're an easy and delicious treat that's perfect for adding a little Halloween magic to your dessert table!
    5 from 4 votes
    Print Recipe Pin Recipe Rate this Recipe
    Prep Time 10 minutes mins
    Cook Time 0 minutes mins
    Additional Time 12 hours hrs
    Total Time 12 hours hrs 10 minutes mins
    Course Desserts
    Cuisine American
    Servings 12 Servings
    Calories 1855 kcal

    Ingredients
      

    • 12 Strawberries
    • 2 cups White Chocolate Chips
    • 24 Mini Chocolate Chips

    Instructions
     

    • Place the white chocolate chips in a large microwave-safe bowl.
    • Microwave on high for about 3 minutes, stirring every 1 minute, until smooth.
    • Dip each strawberry into the melted chocolate, leaving the stem uncovered.
    • Place each chocolate covered strawberry on a sheet pan lined with parchment paper and let chocolate set completely.
    • Use the mini chocolate chips to create eyes and the chocolate morsels to create a mouth on each strawberry.
    • Repeat the dipping process for all strawberries. Refrigerate for 1 hour or until the chocolate is firm.
    • After refrigerating, serve these delicious Halloween chocolate covered strawberries to enjoy the sweet and tangy flavors!

    Notes

    Prep the Strawberries: Ensure the strawberries are dry before dipping to help the chocolate adhere better.
    Add Texture: Roll the dipped strawberries in crushed nuts, coconut flakes, or cookie crumbs for added texture.

    Nutrition

    Serving: 12gCalories: 1855kcalCarbohydrates: 243gProtein: 17gFat: 115gSaturated Fat: 68gPolyunsaturated Fat: 41gCholesterol: 7mgSodium: 69mgFiber: 21gSugar: 210g
    Print Recipe Pin Recipe Rate this Recipe
    Tried this recipe?Let us know how it was!

    More Halloween Recipes

    • Hot Cocoa Bombs: Easy Halloween Treat
    • Easy Halloween Cookies
    • Vampire Halloween Pretzels
    • Halloween Monster Cookies
    • Easy Halloween Bean Dip
    • Halloween Jello Shots
    • Halloween Hot Dogs Mummies
    • Halloween Cherry Pie
    • Halloween Blondies With M&M’s
    • Halloween Apple Monsters

    How to Make the Perfect Seasoning For Scrambled Eggs

    August 18, 2024 by Angela Milnes

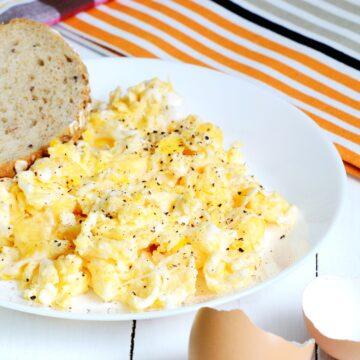
    Scrambled eggs served with a bread slice on a plate.

    Do you like your scrambled eggs plain, or do you like to add a little bit of flavor? If you're in the latter camp, then you'll want to know how to make the perfect seasoning for scrambled eggs. Luckily, it's not difficult - all you need are some basic spices and herbs.

    Today we are sharing some of the best herbs, spices, and seasonings to take your Fluffy Scrambled Eggs to the next level. Let me know which one is your favorite!

    Scrambled eggs served with a bread slice on a plate.
    [feast_advanced_jump_to]

    Don't Cook Scrambled Eggs on High

    If you've ever had dry, rubbery scrambled eggs, it's probably because they were cooked on too high of heat. The key to perfect scrambled eggs is to cook them slowly over low to medium heat. This allows the eggs to slowly set and prevents them from drying out.

    If you're in a hurry, you can turn the heat up to medium-low for the last minute or so of cooking. Just keep a close eye on them so they don't overcook.

    Add Heavy Cream or Milk for Richer Eggs

    If you want your scrambled eggs to be extra rich and creamy, add a splash of heavy cream or whole milk before you start cooking. This is especially delicious if you're using fresh herbs or spices.

    For a lighter version, you can use skim milk or even water. The eggs will still be moist, but they won't be quite as creamy.

    Add Butter or Olive Oil

    Another way to ensure that your eggs are moist and not dry is to add a little bit of butter or olive oil to the pan before you add the eggs. This will help to create a barrier between the eggs and the pan, so they don't stick and dry out.

    You don't need a lot - just a teaspoon or so will do. You can also use non-stick cooking spray if you prefer. This will help make the perfect cooked eggs to serve for breakfast.

    Whisk in a Little Bit of Mustard

    Mustard may seem like an odd addition to scrambled eggs, but it works well. It adds a little bit of tang and depth of flavor that takes the eggs to the next level.

    If you don't have mustard on hand, you can also try adding a splash of vinegar or lemon juice. These will both work to brighten up the flavors of the eggs.

    eggs in a bowl for seasoning scrambled eggs

    Why Add Spices to Eggs?

    There are many reasons to add spices to your eggs. First of all, it can change the flavor completely - giving them a more complex taste that is often more pleasing than plain eggs.

    Secondly, adding other spices can add nutrients and antioxidants to your meal.

    Lastly, spices can simply make them more visually appealing! You can also add herbs such as chives or parsley as a visual topper to your eggs.

    Love eggs? Check out our recipe for Shakshuka With Goat Cheese!

    The Best Spices for Scrambled Eggs

    Here are some of the best spices and flavorings to add to your egg mixture. By adding herbs and spices you'll get the best-scrambled eggs because seasoned scrambled eggs are simply better than plain.

    Whether you want to just add salt, create a peppery flavor or add a spice blend to your cooked eggs, the options are endless.

    Garlic Powder

    Garlic powder is a classic egg seasoning that can be used in many different dishes -not just scrambled eggs. Powdered garlic is pungent and flavorful, and a little goes a long way.

    Grab some powdered garlic and try it out on your eggs today.

    Onion Powder

    Another all-around seasoning, onion powder is a great way to add savory flavor to your eggs without having to chop up any onions.

    Salt and Pepper

    This one is a given - seasoned salt and pepper are essential for just about any dish, including scrambled eggs. They help to enhance all the other flavors in the dish and make them pop.

    Seasoned Scrambled Eggs - Using Pepper

    You can add black pepper, white pepper, crushed red pepper, or red pepper flakes to your scrambled eggs mixture.

    Add red pepper to your scramble eggs for a delicious egg dish.

    Chili Powder

    If you like your food with a little bit of a kick, then add some chili powder to your scrambled eggs. Chili powder will give them a nice spice that is sure to wake you up in the morning.

    Smoked Paprika

    Smoked paprika is a milder spice that can add a touch of sweetness and color to your eggs. It's perfect for those who don't like things too spicy.

    Cumin

    Cumin is another spice that can add a bit of heat to your dish, as well as a nutty flavor. It's often used in Mexican and Indian cuisine, so it's perfect for adding some international flair to your scrambled eggs.

    What Seasoning Is Good on Eggs

    Seasoning For Scrambled Eggs makes all the difference and there are endless possibilities when it comes to spices and seasonings for your eggs. Here are a few other ideas to get the taste buds going.

    • Italian seasoning
    • Greek seasoning
    • Cajun seasoning
    • Old Bay seasoning
    • Herbes de Provence
    • Poultry seasoning
    • Lemon pepper
    • Chili pepper
    • Dill weed
    • Curry powder
    • Cayenne pepper

    Best Herbs for Scrambled Eggs

    If you're looking for a fantastic scrambled egg recipe then you'll want to include fresh herbs. Fresh herbs add color and flavor.

    Some of the best herbs for scrambled eggs include:

    • Chives
    • Parsley
    • Basil
    • Dill
    • Cilantro
    • Oregano
    • Rosemary
    • Thyme

    What Can I Add to Scrambled Eggs for Flavor?

    In addition to spices and herbs, there are several other ingredients you can add to your eggs to change up the flavor.

    Here are some ideas:

    Mozzarella Cheese

    Shredded cheddar, goat cheese, feta, cream cheese mozzarella cheese, etc.

    Sour Cream

    For a richer flavor add some sour cream. It can help create a fantastic savory taste for your scrambled eggs.

    Milk

    Adding milk to your scrambled eggs will make them moister. You can use whole milk, 2%, skim, or even buttermilk.

    Diced Vegetables

    Why not add onions, peppers, mushrooms, or tomatoes to your scrambled egg dish. Add these egg dish ingredients to make healthy recipes for breakfast, lunch, or dinner.

    Bacon

    Bacon makes everything better - including scrambled eggs! Add some diced bacon or crumbled bacon to your dish for some extra flavor. Combine with your favorite spice blend for the best results.

    Green Onions

    Diced green onion tops are a fantastic way to add flavor and color to your dish. They're also healthy for you!

    Seafood

    Add seafood to your scrambled eggs for brighter flavors and added protein. If you love cooking seafood then try scrambled eggs with shrimp or crab meat. It's delicious.

    Salsa

    For a southwestern flair, add some salsa to your scrambled eggs. This will give them a bit of heat as well as a fantastic flavor. You might want to go for a peppery flavor salsa or choose a more earthy flavor salsa to add to your seasoned scrambled eggs.

    Ketchup

    If you're looking for a quick and easy way to change up the flavor of your scrambled eggs then add some ketchup. It might sound strange but it really does work

    Hot Sauce

    Other condiments such as hot sauce or BBQ sauce can make your scrambled eggs delicious and packed with flavor. Be careful not to add too much, you don't want to overwhelm the taste.

    Worcestershire Sauce

    Just a few dashes of Worcestershire sauce can give your scrambled eggs a fantastic flavor. It's perfect for those who love savory food.

    Soy Sauce

    Soy sauce is another ingredient that can add a lot of flavor to your dish. Be careful not to add too much, as it can make your eggs too salty. Add a little soya sauce to your breakfast eggs.

    Tabasco

    Try adding tabasco to your scrambled eggs. This will give them a bit of heat as well as a fantastic flavor. If you love cooking with spice then this is the perfect way to add some flavor to your dish.

    This is just a starting point - there are endless possibilities when it comes to adding flavor to your scrambled eggs. Get creative and experiment with different combinations until you find your perfect scramble!

    Different Ways to Season Scrambled Eggs

    So there you have it, some ideas to get you started on creating the perfect scramble. Season your eggs with care, paying attention to balance the flavors.

    Remember, you can always add more seasoning but you can't take it away once it's added! Start with a small amount and work your way up until you've achieved the perfect taste.

    Bon appetit!

    More Fantastic Food Articles:

    • Does Mustard Go Bad?
    • 55 Foods That Start With Z
    • Best Substitute For Juniper Berries
    • Slow Cooker Chicken Teriyaki
    • Monterey Jack Chicken Spaghetti

    Can You Freeze Sauerkraut

    August 17, 2024 by Angela Milnes

    Sauerkraut in a pot.

    Sauerkraut, the tangy and flavorful fermented cabbage, is a staple in many kitchens. Whether you’ve made homemade sauerkraut or have leftover sauerkraut from a recent meal, you might wonder, "Can You Freeze Sauerkraut?" The answer is yes! Learn the best methods for freezing sauerkraut, how to use it after thawing, and the effects of freezing on this fermented delicacy.

    sauerkraut in a pot on a table with a crisscross teatowel.
    [feast_advanced_jump_to]

    Can You Freeze Sauerkraut?

    Yes, you can freeze sauerkraut, whether it's homemade sauerkraut or canned sauerkraut. However, freezing impacts the beneficial bacteria that give sauerkraut its probiotic benefits. These lactic acid bacteria, produced during the lactic acid fermentation process, are sensitive to freezing temperatures. While freezing preserves the fermented cabbage and its distinct tangy flavor, the health benefits provided by live probiotics may diminish.

    Why Freeze Sauerkraut?

    Freezing sauerkraut can extend its shelf life and prevent waste, especially if you have large quantities or want to keep some for future use. The freezing process does not significantly affect the lactic acid fermentation that gives sauerkraut its distinctive sour taste, making it an excellent option for sauerkraut storage.

    How Does Freezing Affect Sauerkraut?

    Freezing sauerkraut can damage or kill the live probiotics, reducing the probiotic benefits associated with fresh sauerkraut. The freezing process can also alter the texture, making it less crisp. While the flavor remains intact, but the live probiotics may no longer be active, especially if you use it in cooked sauerkraut recipes.

    How To Freeze Sauerkraut

    Preparing for Freezing

    • Homemade Sauerkraut: Ensure the sauerkraut is well-fermented and the lactic acid bacteria have done their job. This will keep the raw cabbage from spoiling during the freezing process.
    • Canned Sauerkraut: If using canned sauerkraut, make sure to drain any excess liquid before freezing to prevent freezer burn.

    Freezing Process

    • Use Freezer Bags: Transfer the sauerkraut into freezer bags or airtight containers. This helps prevent freezer burn and preserve the quality of the sauerkraut.
    • Portioning: Divide the sauerkraut into portions that are convenient for future use. This is especially helpful if you only need a small amount at a time.

    How To Thaw Frozen sauerkraut

    • Refrigerator Method: To thaw sauerkraut, simply place it in the refrigerator overnight. Once thawed, it can be used in various dishes just like fresh sauerkraut.
    • Avoid Microwave Thawing: Thawing sauerkraut in the microwave can compromise the texture and kill some of the beneficial bacteria.

    How To Use Thawed Sauerkraut

    • Reuben Sandwich: Layer thawed sauerkraut with corned beef, Swiss cheese, and Russian dressing on rye bread, then grill until golden.
    • Sauerkraut Soup: Add sour cabbage to a pot of simmering broth with potatoes, sausage, and carrots for a hearty soup.
    • Sauerkraut and Sausage Skillet: Sauté thawed sauerkraut with onions, garlic, and smoked sausage for a savory one-pan meal.
    • Corned Beef and Sauerkraut Bake: Combine thawed sauerkraut with corned beef, grilled sweet potatoes, and cheese, then bake until bubbly and golden.
    • Sauerkraut Pierogi: Use thawed sauerkraut as a filling for homemade pierogi, combining it with sautéed onions and Mashed Potatoes.
    sauerkraut and sausages on a black plate.

    How Long Can Sauerkraut Be Frozen?

    Sauerkraut can be stored in the freezer for six months. While it will technically last longer, it's best to use frozen sauerkraut within 6 months to ensure optimal flavor and texture.

    Can You Freeze Cooked Sauerkraut?

    Yes, cooked sauerkraut can be frozen just like raw or canned sauerkraut. Since the probiotics in sauerkraut are often diminished or eliminated during cooking, freezing cooked sauerkraut is primarily about preserving its flavor and texture.

    FAQ'S

    Is Frozen Sauerkraut Safe To Eat After A Year?

    It’s safe to eat, but the flavor and texture may not be as good after a year in the freezer.

    Can I Refreeze Sauerkraut After Thawing It?

    It’s not recommended to refreeze sauerkraut as it can further affect its texture and quality.

    More Useful Food Tips

    • Best Cannellini Bean Substitute
    • Air Fryer Crab Cakes
    • Italian Sausage And Broccoli Pasta
    • How To Freeze Cooked Cabbage
    • Paprika Substitutes

    Best Cannellini Bean Substitute: Top 10 Options

    August 16, 2024 by Angela Milnes

    Cannellini bean substitute options.

    Cannellini beans are a popular ingredient in many recipes, but sometimes you might not have them on hand. Finding a good Cannellini Bean Substitute can save your dish when you're out of these white beans.

    Whether you're making a soup, stew, or salad, there are tasty alternatives that work just as well. In this article, I will guide you through some simple Cannellini Bean Substitutes that you probably already have in your pantry. Let's keep your cooking adventure smooth and delicious!

    Cannellini Bean In A Bowl. Learn about cannellini bean substitute.
    [feast_advanced_jump_to]

    About Cannellini Beans

    • What is it: Cannellini beans are a type of white bean that is often used in Italian cooking, and they are also called white kidney beans or fazolia bean.
    • Taste and flavor profile: They have a mild, slightly nutty flavor and a creamy texture when cooked.
    • Origin: Cannellini beans originally come from Italy.
    • Season of harvesting or availability: They are usually harvested in late summer to early fall, but you can find them dried or canned all year round in stores.

    Substitutes For Cannellini Beans

    There are several suitable substitutes that can be used when cannellini beans are not available, ensuring your dish remains delicious and satisfying.

    1. Navy Beans

    Navy beans are a great substitute for cannellini beans. They are small, white, and oval-shaped, also called pea beans. Their mild flavor makes them perfect for many dishes.

    Navy beans have a creamy texture when cooked, similar to cannellini beans. They also cook in about the same amount of time, so they can easily fit into recipes without much adjustment.

    Cannellini beans can sometimes be hard to find in stores, but navy beans are often more available. Try them in:

    • Navy Bean Soup
    • White Bean Chili
    • Vegan Baked Beans
    Navy beans on a plate.

    2. Butter Beans

    Butter beans, also known as lima beans, offer a great alternative for cannellini beans. These large, flat, white beans are known for their creamy flavor and smooth texture. They have a buttery taste that enriches dishes, creating a satisfying and comforting experience.

    In terms of cooking, butter beans become soft and tender, much like cannellini beans. They are often more readily available in grocery stores, easing the hassle of searching for harder-to-find ingredients.

    However, one potential drawback is their larger size, which may slightly alter the appearance of your dish. Try them in:

    • Butter Bean Stew
    • Lima Bean Salad
    • Creamy Bean Dip
    Butter beans or lima beans.

    3. Great Northern Beans

    Great Northern beans are medium-sized, white, and have a mild, nutty flavor and are an excellent option to replace cannellini beans. Similar in size to cannellini beans, they have a smooth and creamy texture when cooked.

    Canned beans, like Great Northern beans, are also convenient and often more available in stores compared to cannellini beans. Because they cook at about the same time, you can easily use them in recipes without much adjustment.

    However, Great Northern Beans may not be as robust or hearty as cannellini beans, which have a thicker skin and slightly bolder taste. Try them in:

    • Kale White Bean Soup
    • Great Northern Bean Salad
    • Bean and Vegetable Stew
    Great Northern beans in a bowl.

    4. Red Kidney Beans

    Red Kidney Beans are another good alternative to cannellini beans. These beans have dark red skin and a slightly sweet flavor. They are larger and kidney-shaped, making them easy to identify.

    When cooked, they have a firm skin with a creamy yet slightly meaty texture, which makes them suitable for hearty soups and stews. It's important to note that red kidney beans need to be soaked before cooking to reduce their cooking time and ensure they are safe to eat.

    While cannellini beans can sometimes be hard to find, red kidney beans are widely available in most grocery stores. Try them in:

    • Chili Con Carne
    • Red Bean Salad
    • Hearty Instant Pot Bean Stew

    5. Black Beans

    Black beans can be a good cannellini bean substitute. These beans are small and oval-shaped with shiny black skin. They have a rich, slightly sweet flavor and a soft, creamy texture when cooked.

    Black Beans are often used in Latin American dishes, but they work well as a substitute in many recipes that call for cannellini beans.

    Black Beans usually require about an hour to cook if you’re using dried beans, but you can also find canned black beans easily in most grocery stores, which cuts down on cooking time.

    However, their dark color might change the look of your dish, which could be a drawback if you're aiming for a specific appearance.

    • Black Bean Soup
    • Black Bean And Corn Salsa
    • Bean Tacos
    Uncooked black beans in a measuring cup.

    6. Garbanzo Beans

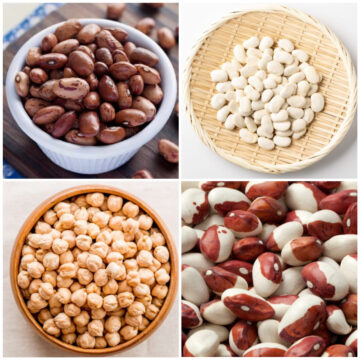
    Garbanzo Beans (also known as chickpeas) are round and beige in color, with a slightly nutty and earthy taste. When cooked, they have a firm texture that holds up well in various dishes.

    Garbanzo Beans take about an hour to cook if you're using dried beans, but canned versions are available in most grocery stores, making them convenient.

    They work well as a substitution for cannellini beans because they add a distinct flavor to dishes, similar to cannellini beans. However, their firmer texture might not be suitable for recipes that require a creamier feel. Try them in:

    • Homemade Hummus
    • Chickpea Salad
    • Garbanzo Bean Soup
    Uncooked garbanzo beans in a bowl.

    7. Pinto Beans

    Pinto Beans are medium-sized with a pinkish-brown color and speckled skin. They have a creamy texture and a mild, earthy flavor when cooked.

    Pinto Beans usually take about 1-2 hours to cook from dried, but you can also find them canned, which saves time.

    They work well as a substitute because they blend smoothly in dishes, similar to cannellini beans. However, their distinct color might change the appearance of your dish.

    Also, they are often used in refried beans, so if you're looking for a direct substitution in Italian dishes, this could be a minor drawback.

    • Instant Pot Refried Beans
    • Pinto Bean Soup
    • Bean Burritos
    Pinto beans in a bowl.

    8. Adzuki Beans

    Adzuki Beans are another option for replacing cannellini beans. These small, reddish-brown beans have a sweet and nutty flavor. They are round in shape and have a firm, chewy texture when cooked.

    Adzuki Beans typically take about 45 minutes to an hour to cook from dried, making them quicker than some other beans. Their mildly nutty and slightly sweet taste works well in many dishes, similar to cannellini beans.

    However, their distinct red color might not suit all recipes. Additionally, adzuki beans can be harder to find in regular grocery stores compared to more common beans.

    • Adzuki Bean Salad
    • Red Bean Soup
    • Instant Pot Red Beans and Rice Bowl
    Adzuki beans on a wooden spoon.

    9. Calypso Beans

    Calypso Beans are small and oval-shaped and are best known for their striking red-and-white pattern. They have a mild, potato-like flavor and a smooth texture when cooked.

    Calypso Beans become double in size during cooking and typically take about 1-1.5 hours to prepare from dried. They make a great substitute because their taste and texture are similar to cannellini beans.

    However, their distinct color pattern might change the appearance of your dish. Try them in:

    • Calypso Bean Stew
    • Bean Salad
    • Instant Pot Ham And Bean Soup
    Calypso beans.

    10. Borlotti Beans

    Borlotti beans, also known as cranberry beans, can be a great alternative to cannellini beans. These beans have a similar creamy texture and a more nutty, rich taste.

    Borlotti beans are light brown with reddish spots, while cannellini beans are white. When cooked, borlotti beans become creamy and soft, just like cannellini beans. Both types of beans take about the same time to cook, usually 45-60 minutes when dried.

    Cannellini beans might not always be available in stores, but you can often find borlotti beans at your local grocery store or online.

    One drawback is that borlotti beans have a slightly stronger flavor than cannellini beans, which might change the taste of delicate recipes. Try them in:

    • Stewed Beans
    • Weight Watchers Bean Salad
    • Pasta e Fagioli
    Borlotti beans.

    FAQ'S

    How Long Does It Take Canned Cannellini Beans To Cook?

    Canned cannellini beans are pre-cooked, so they only need to be heated for about 5-10 minutes. Simply warm them up in a saucepan on the stove or in the microwave until they’re hot. No additional cooking is required.

    What Is Your Favorite White Bean Recipe?

    One of my favorite white bean recipes is the Instant Pot Cajun Rice and Beans, featuring tender chicken, creamy white beans, and bold Cajun spices. It’s a hearty, flavorful dish that comes together quickly in the Instant Pot.

    So, Which Option Is Best For Cannellini Beans Replacement?

    Ultimately, the best option for a cannellini beans substitute will depend on personal preference and the specific recipe. Experimenting with different beans can add unique flavors and textures to your dishes.

    Don't be afraid to try something new and see what works best for you! Have you tried any of these substitutions before? Share your experiences and suggestions in the comments below!

    Easy Air Fryer Tater Tot Casserole

    August 15, 2024 by Angela Milnes

    Easy Air Fryer Tater Tot Casserole.

    Craving comfort food without the wait? This Air Fryer Tater Tot Casserole delivers crispy, cheesy, savory goodness in under 30 minutes. It's the perfect solution for busy weeknights, lazy brunches, or anytime you need a quick, satisfying meal.

    Easy Air Fryer Tater Tot Casserole.
    [feast_advanced_jump_to]

    Tater Tot Casserole is a beloved classic, and making it in the air fryer takes it to the next level. The air fryer crisps up the tots beautifully while keeping the inside tender and flavorful. Whether you're feeding a hungry family or meal prepping for the week, this dish is a game-changer.

    🧡 If you love simple air fryer meals, check out my Air Fryer Breakfast Casserole with Sausage, Crispy Air Fryer Carrot Fries, or Breakfast Potatoes with Peppers and Bacon. They’re all big hits with the fam!

    💖 Why This Recipe Works

    • Quick & Easy: Ready in under 30 minutes with minimal prep.
    • Family Favorite: A hit with kids and adults alike.
    • Customizable: Easily adapt to your taste or dietary needs.

    ⭐ Star Ingredients

    tatertot casserole ingredients.

    Here are the ingredients needed to air fry tater tots casserole:

    • Ground Beef: I use lean beef for less grease and rich, savory flavor. A little paprika and pepper go a long way in boosting the taste.
    • Cream of Mushroom Soup: The creamy binder that holds everything together. You won’t taste mushrooms—just cozy, umami-filled goodness.
    • Frozen Tater Tots: Air frying gives them that perfect golden crunch. I like standing them upright for even crisping and a fun look.
    • Shredded Cheese: A mix of cheddar and mozzarella is my go-to. Freshly shredded melts best and gives you that irresistible gooey top.

    For the complete list of ingredients with measurements and instructions, please see the recipe card at the bottom of the post.

    📖  Substitutions & Variations

    • Protein Swap: Try ground turkey or plant-based crumbles for a lighter or vegetarian take.
    • Soup Options: Swap the mushroom soup for cream of chicken or cheddar if that's what you have.
    • Cheese Varieties: Use pepper jack for a little heat, or go with mozzarella for that stretchy melt.
    • Add Veggies: Toss in corn, peas, or chopped bell peppers for extra flavor and nutrition.

    🧡 If you’re a fan of easy comfort food, check out my Cheesy Zucchini Lasagna Rolls or cozy up with this Spinach Rice Casserole with Feta. Both are weeknight winners!

    🔪 How to Make Tater Tot Casserole In the Air Fryer?

    Here are step-by-step instructions for making air fryer tater tot casserole:

    sausage meat for tater tot casserole.
    1. Step 1: In a skillet, brown off the ground beef. Cook until the beef is rare as it will continue to cook in the air fryer.
    cooking sausage meat for tater tot casserole.
    1. Step 2: Season the beef with salt, pepper, and paprika. Once the meat is cooked, mix in the can of mushroom soup and set aside.
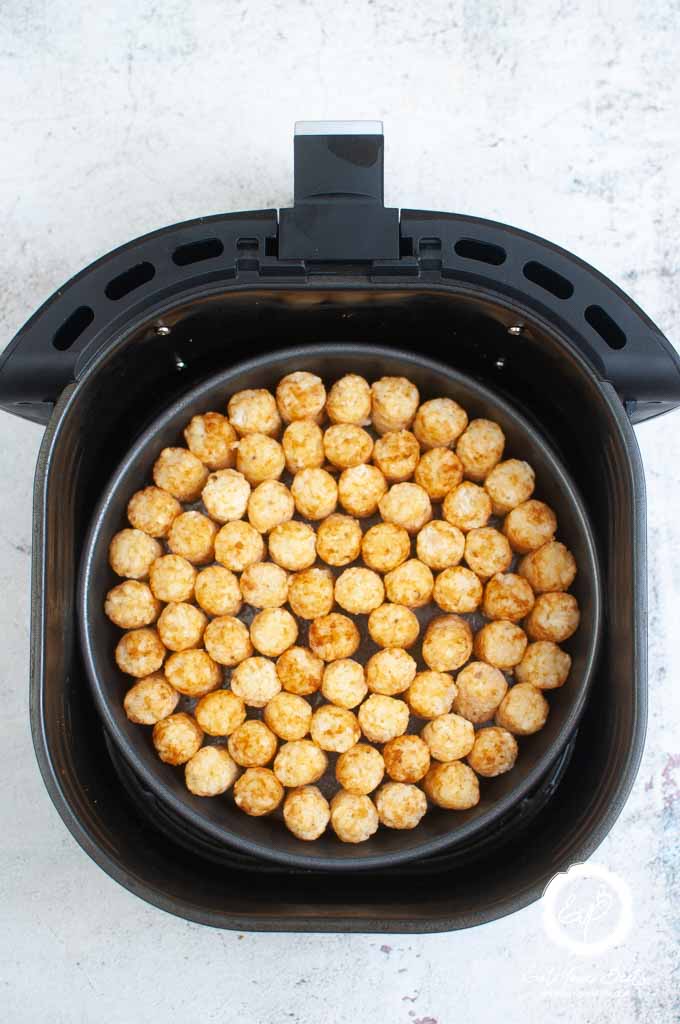
    tater tots in air fryer basket.
    1. Step 3: Fill your pan with tater tots. Stand them straight up. Cook at 400° for 7 minutes or until the top starts to crisp.
    tater tots and sausage mince in air fryer basket.
    1. Step 4: Top the tater rounds with meat mixture and cook for 3 more minutes.
    air fryer tater tot casserole.
    1. Step 5: Add the shredded cheese tot he top of your tater tot casserole and cook for a further 3 minutes.
    air fryer tater tot casserole with cheese.
    1. Step 6: Let your tater tot casserole cool, garnish with parsley and serve.

    💡 Hint: For extra crispy tots, preheat the air fryer and ensure the tater tots are arranged in a single layer without overlapping.

    air fryer tater tot casserole.

    Can You Freeze Tater Tot Casserole?

    Tater Tot Casserole is a great go-to meal when you're looking for a freezer meal! To freeze tater tot casserole, let the tater tots cool completely and then place in a freezer bag. When you're ready to eat it, just pop it into the air fryer or oven. You might also love this freezable Sausage Gravy recipe too!

    👩‍🍳 Expert Tips

    • Prep Ahead: Assemble the casserole in advance and store in the fridge until ready to cook.
    • Even Cooking: Ensure ingredients are evenly distributed for consistent flavor in every bite.
    • Cheese Perfection: Use freshly shredded cheese for better melting and flavor.
    • Tater Tot Tips: Keep tater tots frozen until ready to use to maintain their shape and texture.

    💭 FAQs

    What Are Tater Tots?

    Tater tots are simply diced potatoes that have been deep-fried or roasted. They are a popular side dish and can be found in most supermarkets. Tater tots are sometimes called hashbrowns or shredded potato wedges. Tater tots are potato puffs covered in a crispy coating and are often served with ketchup or your favorite dipping sauce.

    How Long Do You Cook Tater Tot Casserole?

    Air frying tater tots takes 7 minutes, plus another 6 minutes for the other ingredients. So it will take 13 minutes in total for cooking tater tots casserole.

    Can I Make Tater Tot Casserole Ahead Of Time?

    Yes! Assemble the casserole, cover, and refrigerate for up to 24 hours. When ready to cook, follow the air frying instructions.

    Frozen Air Fryer Tater Tots

    Air fryer frozen tater tots are super easy to cook. You can air fry both defrosted or frozen tater tots until perfectly crispy and you only need to add an extra 4 minutes to the air frying cooking time if using frozen tots for this recipe.

    💖 Serving Suggestions

    Air Fryer Tater Tot Breakfast Casserole is so versatile and can be served with just about anything! Here are some of our favorite sides to pair with it:

    • Mediterranean Farro Salad - Nutty farro with Mediterranean flavors brings a wholesome and textured option to the meal.
    • Red Cabbage Coleslaw - A crunchy, tangy slaw adds a refreshing contrast to the richness of the casserole.
    • Instant Pot Feta Pasta Salad - Creamy feta and tender pasta complement the savory flavors of the casserole.
    • Goat Cheese Apple Salad - The sweet and tangy combination of apples and goat cheese is a delightful balance to the hearty casserole.
    • Beetroot Carpaccio - Thinly sliced beets with a light dressing provide an earthy and elegant side.
    air fryer tater tot casserole.

    🍽 Try These Simple Casserole Dishes

    • Slow Cooker Million Dollar Chicken Casserole.
      Slow Cooker Million Dollar Chicken Casserole
    • Air Fryer Sloppy Joe Cornbread Casserole Recipe.
      Air Fryer Sloppy Joe Cornbread Casserole Recipe
    • Oven baked sausage casserole in a pot.
      Oven Baked Sausage Casserole Recipe
    • Bacon and egg casserole in a pan.
      Make Ahead Bacon And Egg Casserole Recipe

    Did you make this recipe? Leave a review and a ⭐⭐⭐⭐⭐ rating below, or tag us in our Facebook Group! Alternatively, bookmark it in your browser or save to Pinterest.

    Easy Air Fryer Tater Tot Casserole.

    Air Fryer Tater Tot Casserole

    Angela Milnes
    This Air Fryer Tater Tot Breakfast Casserole is the perfect way to start your day! Packed with crispy tater tots, eggs, cheese, and your favorite breakfast sausage, this easy and delicious casserole is a crowd-pleaser. Cooked to perfection in the air fryer, it’s a quick and satisfying option for busy mornings or a weekend brunch treat!
    5 from 3 votes
    Print Recipe Pin Recipe Rate this Recipe
    Prep Time 15 minutes mins
    Cook Time 20 minutes mins
    Total Time 33 minutes mins
    Course Dinners
    Cuisine American
    Servings 4 Servings
    Calories 775 kcal

    Ingredients
      

    • 1 Lb Ground Beef
    • ½ Teaspoon Salt
    • ½ Teaspoon Pepper
    • 1 Teaspoon Paprika
    • 1 Can Condensed Cream Of Mushroom Soup
    • 76 Tater Tots Frozen (We like Ore Ida Tater Tots)
    • 1 Cup Shredded Cheese
    • Parsley For Garnish

    Instructions
     

    • In a skillet, brown off the ground beef. Cook until the beef is rare as it will continue to cook in the air fryer.
    • Season the beef with salt, pepper, and paprika
    • Once the meat is cooked, mix in the can of mushroom soup and set aside.
    • Fill your pan with tater tots. Stand them straight up. Cook at 400° for 7 minutes or until the top starts to crispy.
    • Top the tater rounds with meat mixture and cook for 3 more minutes.
    • Add the shredded cheese tot he top of your tater tot casserole and cook for a further 3 minutes.
    • Let your tater tot casserole cool, garnish with parsley and serve.

    Notes

    Prep Ahead: Prepare ingredients in advance for a smoother assembly process.
    Layering is Key: Ensure even distribution of ingredients for balanced flavors and textures.
    Cheese Combo: Use a mix of cheddar and mozzarella for a perfect melt.
    Tater Tot Perfection: Arrange tater tots in a single layer for uniform crispiness.

    Nutrition

    Calories: 775kcalCarbohydrates: 50gProtein: 33gFat: 50gSaturated Fat: 18gPolyunsaturated Fat: 7gMonounsaturated Fat: 19gTrans Fat: 1gCholesterol: 113mgSodium: 1872mgPotassium: 888mgFiber: 5gSugar: 1gVitamin A: 538IUVitamin C: 12mgCalcium: 250mgIron: 4mg
    Print Recipe Pin Recipe Rate this Recipe
    Tried this recipe?Let us know how it was!
    air fryer tater tot casserole.

    Instant Pot Split Pea Soup

    August 15, 2024 by Angela Milnes

    Instant Pot Split Pea Soup.

    Craving a hearty, and delicious meal? Look no further than our Instant Pot Split Pea Soup. Perfect for fall and winter, this comforting recipe features wholesome ingredients like split peas, onions, carrots, and ham.

    Split pea soup is a filling soup that will warm you from the inside out. Let your Instant Pot do the work, making this a quick and satisfying option for cozy evenings. Embrace the goodness with every spoonful!

    Instant Pot split pea soup in a bowl.
    [feast_advanced_jump_to]

    💖 Why This Recipe Works

    • Easy To Make: This one-pot meal is quick and simple with step-by-step instructions.
    • Freezer-Friendly: This soup freezes well, so you can make a big batch and have ready-to-heat meals for later.
    • Hearty and delicious. Not only is this Split Pea Soup good for you, but it’s hearty and delicious.

    ⭐ Star Ingredients

    Split pea soup ingredients.
    • Onion: Adds a rich, sweet flavor that forms the base of the soup.
    • Vegetable Oil: Used for sautéing, it helps bring out the flavors of the other ingredients.
    • Carrots: Add color, texture, and natural sweetness to the soup.
    • Dried Split Peas: The star ingredient, they provide a hearty, earthy flavor and a creamy texture when cooked.
    • Chicken Broth: Provides a savory richness and forms the liquid base of the soup.
    • Diced Ham: Adds a smoky, savory flavor and protein to the soup.
    • Bay Leaf: Contributes a subtle, herbal depth of flavor.
    • Water: Dilutes the broth to the desired consistency without adding extra sodium.
    • Low Sodium Chicken Broth: A healthier option that still provides a savory richness to the soup.
    • Kosher Salt and Black Pepper: Essential seasonings that enhance the overall flavor of the soup.

    For the complete list of ingredients with measurements and instructions, please see the recipe card at the bottom of the post.

    📖  Substitutions & Variations

    • Vegetarian Instant Pot Split Pea Soup: Swap out the ham for extra veggies and vegetable broth to make it vegetarian-friendly.
    • Spicy Instant Pot Split Pea Soup: Add jalapenos or hot sauce for a spicy kick.
    • Add Sausage: Use sausage for a hearty, meaty twist on the classic recipe.

    Optional Toppings For Split Pea Soup

    • Fresh Herbs
    • Crispy Bacon Bits
    • Sour Cream
    • Chopped Green Onions
    • Shredded Cheddar Cheese
    • Croutons
    • Drizzle of Olive Oil

    🔪 How To Make Instant Pot Split Pea Soup With Ham

    Ingredients for split pea soup in an Instant Pot.
    1. Step 1: Turn your Instant Pot onto sauté mode. Once it is hot, add your vegetable oil and onion. Sauté your onions, stirring occasionally, for 3 to 5 minutes. Turn the saute function off. Next, add your carrots, ham, broth, water, yellow split peas, and bay leaf to the inner pot with your onion.
    Split pea soup mixture in an instant pot.
    1. Step 2: Close your Instant Pot lid and set the on high pressure for 20 minutes. Then naturally release and serve.

    👩‍🍳 Expert Tips

    • Don't Overfill Pot: Fill the Instant Pot only two-thirds full.
    • Use Quality Stock: Opt for homemade or low-sodium store-bought stock.
    • Natural Pressure Release: Allow pressure to release naturally for at least 15 minutes.

    💭 FAQs

    What Is Split Pea Soup?

    Split Pea Soup is a hearty and nourishing soup made with yellow split peas or green split peas, onions, carrots, and ham. This popular comfort food dish is much loved for its rich flavors and warming properties.

    How To Thicken Split Pea Soup?

    After pressure cooking your pea and ham soup, thicken it by adding cornstarch or flour to the Instant Pot and stirring until fully dissolved. Let the soup saute for 2-3 minutes until it reaches the desired consistency.

    Why Is My Soup Foaming?

    The foam is just starch from the peas. It's normal and harmless. You can skim it off if you prefer.

    Can I Use Whole Peas Instead Of Split Peas

    It's not recommended as whole peas take longer to cook and will not become as creamy as split peas.

    Do I Need To Soak The Peas Before Cooking?

    No, soaking is not necessary when pressure cooking split peas in the Instant Pot.

    Can I Double The Recipe?

    Yes, but ensure that you do not exceed the maximum fill line of your Instant Pot.

    Can I Use Leftover Ham In This Recipe?

    Yes, leftover ham is a perfect addition to the split pea soup. It adds depth of flavor and makes good use of your leftovers.

    What Role Does Olive Oil Play In Making Instant Pot Split Pea And Ham Soup?

    Olive oil is often used to sauté the onion, carrots, and celery at the beginning of the cooking process. This enhances their flavors and forms the base for a delicious soup.

    How Can A Ham Bone Improve This Soup?

    Adding a ham bone to your split pea soup can significantly enhance its flavor. The bone slowly releases its flavor during cooking, providing a richness that complements the peas and vegetables well.

    Can I Freeze The Leftovers?

    Absolutely. Split pea soup freezes well. Just be sure to leave some space in the container as the soup will expand when frozen.

    Best Way to Store Split Pea Soup

    Let the split pea soup cool to room temperature, but don't leave it out for more than two hours. Divide the soup into airtight containers, glass is preferred. If eating within 3-4 days, store the containers in the refrigerator. For longer storage, freeze split pea soup leaving an inch of space at the top for expansion.

    💖 Serving Suggestions

    Here are some of the best sides to serve with Instant Pot Split Pea Soup:

    • Pizza Monkey Bread: This flavorful bread pull-apart bread is a fun and tasty side to pair with this hearty soup.
    • Grilled Cheese: The ultimate comfort food, a grilled cheese sandwich makes a perfect companion to any soup, including the hearty split pea variety.
    • Crusty French Baguette: A simple yet delicious pairing, the crusty baguette is great for dipping into the creamy soup.
    • Fresh Garden Salad: A light and refreshing salad balances out the richness of the split pea soup.
    • Roasted Vegetables: For a heartier side, roasted root vegetables complement the earthy flavors in the soup.
    Split pea soup in a bowl.

    🍽 More Instant Pot Recipes

    • Instant Pot Cajun Chicken and Rice.
      Instant Pot Cajun Chicken and Rice
    • Creamy Instant Pot Tortellini Recipe.
      Creamy Instant Pot Tortellini Recipe
    • Instant Pot Kielbasa And Cabbage.
      Instant Pot Kielbasa And Cabbage
    • Instant Pot Enchilada Soup.
      Instant Pot Enchilada Soup

    Did you make this recipe? Leave a review and a ⭐⭐⭐⭐⭐ rating below, or tag us in our Facebook Group! Alternatively, bookmark it in your browser or save to Pinterest.

    Instant Pot Split Pea Soup.

    Instant Pot Split Pea Soup

    Angela Milnes
    Savor the hearty goodness of Instant Pot Split Pea Soup! This classic soup is made with tender split peas, smoky ham, and a rich, flavorful broth, all cooked to perfection in the Instant Pot. It’s a warm and satisfying meal that's easy to make and perfect for any time of year!
    5 from 3 votes
    Print Recipe Pin Recipe Rate this Recipe
    Prep Time 5 minutes mins
    Cook Time 35 minutes mins
    Total Time 38 minutes mins
    Course Lunch
    Cuisine American
    Servings 6 Servings
    Calories 412 kcal

    Ingredients
      

    • ½ Medium Onion Diced
    • 2 Tablespoons Vegetable Oil
    • 1 LB Dried Yellow Split Peas
    • 1, ½ Cups Dried Ham
    • 1 Bay Leaf
    • 2 Cups Water
    • 4 Cups Low Sodium Chicken Broth

    Instructions
     

    • Turn your Instant Pot onto sauté mode. Once it is hot, add your vegetable oil and onion. Sauté your onions stirring occasionally until they are translucent and softened. This should take about 3 to 5 minutes.
    • Turn the saute function off. Then, add your carrots, ham, broth, water, yellow split peas, and bay leaf to the inner pot with your onion.
    • Close your Instant Pot lid and lock the vent into the sealing position. Set the pressure cooker to cook on high pressure for 20 minutes.
    • Once the 20 minutes is complete allow the Instant Pot soup to natural release for at least 10 minutes. Once the 10 minutes are complete, do a manual release by moving the pressure valve toward you. This will release the remaining pressure.
    • Add salt and pepper to your liking and transfer to your soup bowl and enjoy!

    Notes

    Don’t Overfill Pot: Fill the Instant Pot only two-thirds full.
    Use Quality Stock: Opt for homemade or low-sodium store-bought stock.
    Natural Pressure Release: Allow pressure to release naturally for at least 15 minutes.

    Nutrition

    Calories: 412kcalCarbohydrates: 48gProtein: 29gFat: 12gSaturated Fat: 3gPolyunsaturated Fat: 4gMonounsaturated Fat: 4gTrans Fat: 0.03gCholesterol: 22mgSodium: 478mgPotassium: 991mgFiber: 19gSugar: 7gVitamin A: 114IUVitamin C: 2mgCalcium: 55mgIron: 4mg
    Print Recipe Pin Recipe Rate this Recipe
    Tried this recipe?Let us know how it was!

    More Easy Instant Pot Soup Recipes:

    • Purple Cabbage Soup
    • Instant Pot Enchilada Soup
    • Homemade Bean and Bacon Soup
    • Vegetarian Carrot And Leek Soup
    • Instant Pot Chicken Barley Soup
    • Instant Pot Chinese Dumpling Soup
    • Butternut Squash Soup
    • Instant Pot Clam Chowder
    Split pea soup in a serving bowl.

    Instant Pot Chicken Barley Soup

    August 15, 2024 by Angela Milnes

    Instant Pot Chicken Barley Soup.

    Experience comfort in a bowl with our Instant Pot Chicken Barley Soup. This wholesome recipe combines tender chicken, hearty barley, and a medley of vegetables, all seamlessly cooked in the Instant Pot for a quick and flavorful meal. Get ready to savor the warm and satisfying flavors of Chicken and Barley Soup!

    Instant Pot chicken barley soup in a bowl.
    [feast_advanced_jump_to]

    If you love this soup be sure to check out our Instant Pot Chicken Noodle Soup as well as our popular Zuppa Toscana Soup recipe.

    💖 Why This Recipe Works

    • Delicious Ingredients: With fresh veggies, moist tender chicken, perfectly cooked barley, and seasoned broth, you have the makings of a delicious cooked chicken soup.
    • It’s Quick: By pressure-cooking your soup you can have tasty dinner on the table in less than an hour.
    • Simple: No need to be a skilled cook to prepare a delicious meal! This Chicken Barley Soup recipe is as easy to make with super simple instructions.

    ⭐ Star Ingredients

    Chicken barley soup ingredients.
    • Chicken – The protein backbone of the soup, providing tender, hearty bites. Using boneless, skinless chicken keeps it easy to eat and ensures a lean, satisfying base.
    • Onion – A must-have for depth and sweetness, it builds a rich, savory foundation as it softens and melds with the broth.
    • Olive Oil – Enhances flavor by helping the onions caramelize slightly, drawing out their natural sweetness while adding a smooth richness to the soup.

    For the complete list of ingredients with measurements and instructions, please see the recipe card at the bottom of the post.

    📖  Substitutions & Variations

    • Slow Cooker Chicken Barley Soup: If you don't have an Instant Pot, you can make this hearty soup in a slow cooker by adding all the ingredients and cooking on low for 6-8 hours or high for 3-4 hours.
    • Instant Pot Chicken Barley Soup with Potatoes: Incorporate diced potatoes into your recipe for a heartier, more filling soup.
    • Instant Pot Chicken Barley Soup with Red Bell Peppers: Use chopped red bell peppers for a colorful twist on the classic chicken barley soup.

    🔪 How To Make Instant Pot Chicken Barley Soup

    Chicken breast, diced onion, minced garlic, salt, thyme and white pepper in an Instant Pot.
    1. Step 1: Hit the sauté function on your Instant Pot. Add olive oil and diced onion and sauté for 3-5 minutes or until softened. Next, add your chicken breast, minced garlic, salt, thyme and white pepper into the inner pot.
    chicken and soup ingredients in instant pot.
    1. Step 2: Pour the chicken broth into the pot and stir. Seal the lid on your Instant Pot and pressure cook on high pressure for 7 minutes. Once cooked, allow the soup to naturally release for 15 minutes.
    Chicken barley soup cooked in Instant Pot.
    1. Step 3: Remove the chicken from the Instant Pot and cut it into cubes or shred using two forks. Place the shredded chicken back into the pot along with the barley, parsley, and carrots. Turn the saute button on and allow the barley to come to a boil.
    Chicken barley soup in a bowl.
    1. Step 4: Place the lid back on your Instant Pot and allow the chicken barley soup to simmer for 15 minutes. Garnish your chicken barley soup with some fresh parsley fresh thyme or chopped chives.
    Chicken barley soup in a bowl.

    👩‍🍳 Expert Tips

    • Shred the Chicken: To save time, use a hand mixer to shred the chicken instead of cutting it into cubes. After cooking this meal multiple times, I prefer shredded chicken over cubed.
    • Get Baby Carrots: To cut down on the prep work, get thick baby carrots, instead. Then, you can just toss them in the Instant Pot.
    • Use Leftover Chicken: Got some leftover rotisserie chicken? Use it in this recipe! Just add the cooked chicken to the other ingredients and pressure cook it.
    • Add a Bay Leaf or Two: This Instant Pot chicken barley soup recipe is delicious on its own, but you can add some extra flavor by adding in a bay leaf or two.
    • Proper Pressure Release for Tastier Chicken: To prevent liquid from spewing out, release pressure carefully. The natural release enhances chicken tenderness.

    💭 FAQs

    Can I Use Chicken Thighs Instead of Chicken Breast?

    Definitely, you can substitute boneless skinless chicken thighs for the breast in Instant Pot Chicken Barley Soup.

    Does Barley Get Mushy in Soup?

    Barley is a grain, so it continues to absorb water, broth or any liquid. This means that it can get mushy the longer it is in the liquid.

    Can I Use Frozen Chicken Breast?

    Yes. If you don't have any raw chicken breasts or raw chicken thighs to hand, you can use frozen chicken breasts or thighs as a substitute.

    Can I Use Farro Instead Of Barley?

    Absolutely, farro can be used as a suitable substitute for barley in this Soup. However, keep in mind that farro has a slightly nuttier flavor and chewier texture.

    Can I Make This Recipe With Turkey Thighs?

    Yes, you can certainly use turkey thighs instead of chicken in your Barley Soup recipe. Just bear in mind that turkey might give the soup a slightly different flavor profile.

    💖 Serving Suggestions

    Here are some of the best sides to serve with Instant Pot Chicken Barley Soup:

    • Instant Pot Hawaiian Rolls: Sweet and fluffy Hawaiian rolls can be a delightful accompaniment, perfect for sopping up any leftover soup.
    • Pull Apart Monkey Bread: This garlicky, pull-apart bread pairs well with the savory soup, adding a touch of comfort to your meal.
    Chicken Barley Soup.

    🍽 More Instant Pot Recipes

    • Instant Pot Cajun Chicken and Rice.
      Instant Pot Cajun Chicken and Rice
    • Creamy Instant Pot Tortellini Recipe.
      Creamy Instant Pot Tortellini Recipe
    • Instant Pot Kielbasa And Cabbage.
      Instant Pot Kielbasa And Cabbage
    • Instant Pot Enchilada Soup.
      Instant Pot Enchilada Soup

    Did you make this recipe? Leave a review and a ⭐⭐⭐⭐⭐ rating below, or tag us in our Facebook Group! Alternatively, bookmark it in your browser or save to Pinterest.

    Instant Pot Chicken Barley Soup.

    Instant Pot Chicken Barley Soup

    Angela Milnes
    This Instant Pot Chicken Barley Soup is a hearty and wholesome meal, filled with tender chicken, nutty barley, and flavorful veggies. It's a quick and satisfying option for any day of the week.
    5 from 2 votes
    Print Recipe Pin Recipe Rate this Recipe
    Prep Time 10 minutes mins
    Cook Time 40 minutes mins
    Total Time 48 minutes mins
    Course Lunch
    Cuisine American
    Servings 6 Servings
    Calories 169 kcal

    Ingredients
      

    • 2 Tablespoon Olive Oil
    • 2 Chicken Breasts Boneless
    • 1 Tablespoon Minced Garlic
    • 1 Teaspoon Salt
    • 2 Teaspoons Dried Thyme Leaves Removed From Stem
    • ½ Teaspoon Ground White Pepper
    • 64 oz Chicken Broth
    • 1 Cup Quick Pearled Barley
    • 1 Tablespoon Parsley Flakes Dried
    • 1 Cup Carrots Sliced

    For Optional Cornstarch Slurry

    • 2 tablespoon Cornstarch
    • 2 tablespoon Water

    Instructions
     

    • Hit the sauté function or sear button on your Instant Pot, add olive oil and let it get hot. Next, add your diced onion and sauté it for about 3-5 minutes or until softened.
    • Hit the cancel button to turn your sauté function off. Next, add your chicken breast, minced garlic, salt, thyme and white pepper into the inner pot. Pour the chicken broth into the inner pot and stir to combine.
    • Seal the lid on your Instant Pot, move the venting valve to the sealing position, select pressure cook and set the pressure cooking time to 7 minutes on high pressure. When the Instant Pot beeps, allow the soup to sit in there until your Instant Pot has fully released all the pressure. When performing a natural pressure release, the silver pin will drop, and the lid will unlock once all the steam is released.
    • Remove the chicken from the Instant Pot and cut it into cubes or shred it with two forks. Place the cubed or shredded chicken back into the inner pot along with the barley, parsley and carrots.
    • Hit cancel on your Instant Pot, then hit the sauté button again. Bring the soup to a boil to cook the barley. Then, put the lid back on to lock in the heat, allowing your Instant Pot chicken barley soup to simmer for 15 minutes with the lid on.
    • If you want a thicker soup, make a cornstarch slurry. Mix 2 tablespoons of cornstarch and 2 tablespoons of cold water together. Then, add it to the soup.
    • Garnish your Instant Pot chicken barley soup with some fresh parsley fresh thyme or chopped chives. Enjoy this tasty and easy Instant Pot soup cuisine!

    Notes

    Get Baby Carrots: To cut down on the prep work, get thick baby carrots, instead. Then, you can just toss them in the Instant Pot.
    Add a Bay Leaf or Two: This Instant Pot chicken barley soup recipe is delicious on its own, but you can add some extra flavor by adding in a bay leaf or two.
    Proper Pressure Release for Tastier Chicken: To prevent liquid from spewing out, release pressure carefully. The natural release enhances chicken tenderness.

    Nutrition

    Calories: 169kcalCarbohydrates: 7gProtein: 18gFat: 7gSaturated Fat: 1gPolyunsaturated Fat: 1gMonounsaturated Fat: 4gTrans Fat: 0.01gCholesterol: 54mgSodium: 1614mgPotassium: 421mgFiber: 1gSugar: 2gVitamin A: 3599IUVitamin C: 3mgCalcium: 32mgIron: 1mg
    Print Recipe Pin Recipe Rate this Recipe
    Tried this recipe?Let us know how it was!

    More Instant Pot Recipes to Try

    • Purple Cabbage Soup
    • Instant Pot Enchilada Soup
    • Vegetarian Carrot And Leek Soup
    • Instant Pot Chinese Dumpling Soup
    • Butternut Squash Soup
    • Best Cheeseburger Soup Recipe
    • Bean and Bacon Soup
    • Instant Pot Split Pea Soup
    Chicken barley soup in a bowl.

    Crispy Peanut Butter Cookies

    August 15, 2024 by Angela Milnes

    Crispy Peanut Butter Cookies.

    I've always loved the creamy, nutty flavor of peanut butter, especially when it's baked into warm, chewy cookies. Making Peanut Butter Cookies is one of my favorite after-school activities because it's super easy and fun. The best part is smelling the delicious aroma fill the kitchen as they bake. Plus, sharing them with friends makes snack time way better!

    air fryer peanut butter cookies piled up.
    [feast_advanced_jump_to]

    💖 Why This Recipe Works

    • They’re crispy and delicious. You’ll love the crunch of the edge of these homemade peanut butter cookies!
    • They’re great to store. If you’re lucky enough to have any as leftovers, you can easily just store them in an airtight container.
    • Cooking them in the air fryer makes it a breeze! The air fryer is the perfect way to make this peanut butter cookie recipe because it’s a breeze to clean up!

    ⭐ Star Ingredients

    peanut butter cookie ingredients.

    Also be sure to check out these Lemon Shortbread Cookies too. They taste fantastic!

    • Creamy Peanut Butter: Provides the rich, nutty flavor that defines these classic peanut butter cookies and also contributes to the moist, chewy texture within the crispy exterior.
    • Granulated Sugar: Not only sweetens the cookies but also helps them spread and crisp up during baking, creating that irresistible crunchy outer layer.
    • Large Egg: Acts as a binding agent, adding moisture and achieving the perfect balance of crispy and chewy in cookies.
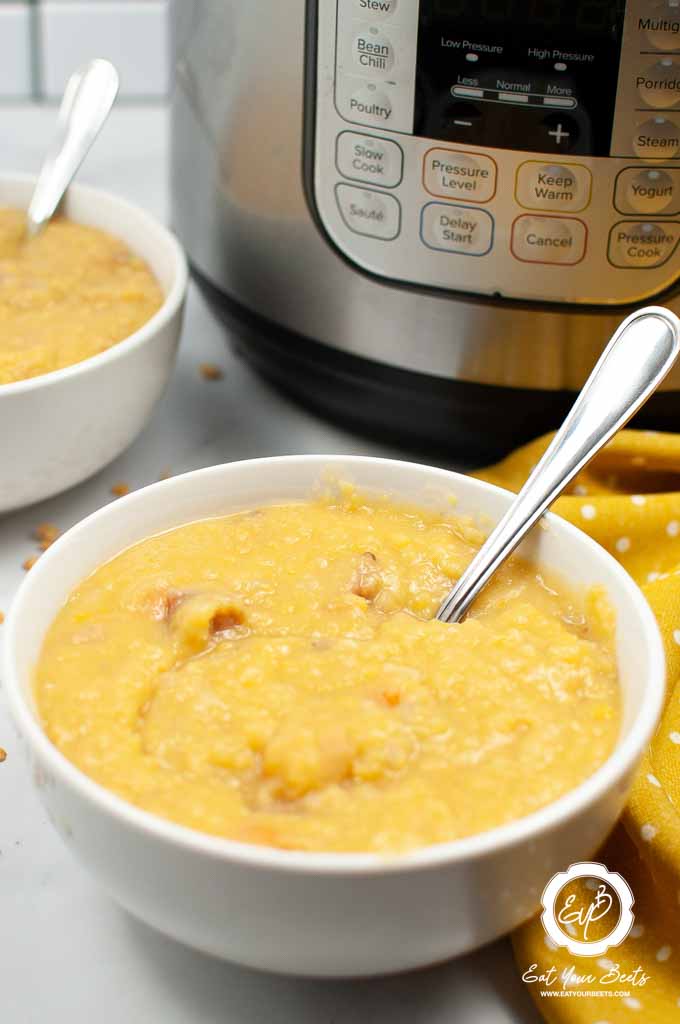
    For the complete list of ingredients with measurements and instructions, please see the recipe card at the bottom of the post.

    📖  Substitutions & Variations

    • Vanilla-Infused: Adding a teaspoon of vanilla extract can give your cookies a subtle, aromatic depth that harmonizes beautifully with the peanut butter.
    • Chocolate Chips: You can try adding chocolate chips to your cookies for a classic and irresistible combination.
    • Nutty Flavor: Mix chopped nuts into your dough for an extra crunch. Any nuts of your choice will enhance the texture and flavor.
    • Alternate Nut Butter Cookies: Swap out the peanut butter for almond butter or cashew butter to explore different nutty tastes in your cookies.
    • Sweeter Peanut Butter Cookies: For those with a sweet tooth, consider adding more sugar or even some honey to your mixture for a sweeter delight.

    🔪 How To Make Peanut Butter Cookies In The Air Fryer?

    peanut butter cookies ingredients.
    1. Step 1: Combine all three ingredients in a large mixing bowl. Mix until fully combined.
    peanut butter cookie balls.
    1. Step 2: Chill your cookie mixture in the fridge for 30 minutes. Using a 1 ½-inch cookie scoop, or a heaping tablespoon, scoop the dough onto parchment paper.
    1. Step 3: Using a fork, press the cookie flat, first in one direction, then again from the opposite direction, to make a crosshatch pattern on top. 
    1. Step 4: Line the bottom of your air fryer with parchment paper. Be sure to not have extra parchment paper running up the side of the air fryer, or it will get caught by the air and fold over the cookies.
    peanut butter cookies on baking sheet in air fryer.
    1. Step 5: Place as many cookies in your air fryer that will fit while giving each cookie a half-inch space. I was able to cook about 4-6 cookies at a time. Set your air fryer at 370 degrees and cook them for 4 minutes before letting them rest in the air fryer for 4 minutes. 
    air fryer peanut butter cookies on a chopping board.
    1. Step 6: Each crispy peanut butter cookie should be lightly browned once cooked. Transfer the peanut butter cookies to a cooling tray. Repeat until you’ve used up all your cookie dough. Allow the peanut butter cookies to cool completely on the cooling rack ready to serve.

    👩‍🍳 Expert Tips

    • Use Real Peanut Butter: Natural peanut butter flavor makes the cookies taste way better than the processed peanut butter.
    • Type of Peanut Butter: Ideally, you will use smooth peanut butter to make these peanut butter cookies, however, you can use chunky peanut butter or Jiff's crunchy peanut butter if desired. Just be sure to stir the chunky peanut butter well before adding it to the other ingredients.
    • Avoid Overbaking: Keep an eye on your cookies and take them out when they're just barely golden around the edges.

    💭 FAQs

    How Do You Know When The Peanut Butter Cookies Are Done?

    You have to visually look at these cookies. The tops should be turning a golden brown. If the edges are starting to get dark in color, take them out of the air fryer as soon as possible.

    Can I Cook These Crispy Peanut Butter Cookies In The Oven?

    Yes. If you don’t have an air fryer or prefer to use the oven, you can certainly cook these cookies in the oven. Simply preheat your oven to 350 degrees.

    Place your cookies on prepared baking sheets and cook the cookies for 12-15 minutes, until lightly golden brown on top. Cool cookies completely before enjoying!​

    Overall, these crispy peanut butter cookies are the perfect treat to enjoy any time of day. Whether you enjoy them fresh from the oven or store them for later, they're sure to satisfy your sweet tooth!

    Can You Freeze Cookie Dough?

    You can! If you want to make the cookie dough ahead of time, just wrap it in plastic wrap and store it in the freezer. Let it unthaw, and then you can bake it at a later point in time.

    Can I Use Brown Sugar Instead Of White Sugar?

    Yes, you can use light brown sugar instead of white sugar in this recipe. Just replace the ¾ cup of granulated sugar with ¾ cup of packed brown sugar. Whether using white or brown sugars in this recipe, the cookies should be just as delicious!​

    Why Is There No Flour Mixture Or Unsalted Butter In These Cookies?

    The main ingredients in these cookies are peanut butter, sugar, and egg. Other ingredients like flour, baking soda, baking powder or unsalted butter aren't necessary to achieve the desired result of a crispy, delicious cookie.

    Best Way to Store Cookies

    Keep your peanut butter cookies in an airtight container at room temperature for up to a week for the best freshness. For longer storage, place the cookies in a sealed container in the fridge; they'll stay fresh for up to two weeks. If your cookies have gone a bit stale, warm them in the oven at 300°F for 5-10 minutes to bring back their chewy texture.

    💖 Serving Suggestions

    • Serve with a Glass of Milk: Pair these crispy cookies with a cold glass of milk for a classic, comforting snack.
    • As a Dessert with Ice Cream: Use the cookies to make a delicious ice cream sandwich by adding a scoop of vanilla or chocolate ice cream between two cookies.
    • Gift Them in a Jar: Package the cookies in a cute jar with a ribbon for a thoughtful homemade gift.
    • Pair with a Cup of Coffee or Tea: Enjoy these cookies with your favorite coffee or tea for a delightful afternoon treat.
    air fryer peanut butter cookies.

    🍽 More Sweet Treats to Try

    • Chocolate peanut butter cookies on a tray.
      Chocolate Peanut Butter Cookies
    • Best Holiday Spiced Cookies.
      Best Holiday Spiced Cookies
    • Air Fryer Cinnamon Sugar Soft Pretzels.
      Air Fryer Cinnamon Sugar Soft Pretzels
    • Best Brown Butter Cookies Recipe.
      Best Brown Butter Cookies Recipe

    Did you make this recipe? Leave a review and a ⭐⭐⭐⭐⭐ rating below, or tag us in our Facebook Group! Alternatively, bookmark it in your browser or save to Pinterest.

    Crispy Peanut Butter Cookies.

    Crispy Air Fryer Peanut Butter Cookies

    Angela Milnes
    Peanut Butter Cookies are super yummy treats that mix peanut butter and sugar into a dough, baked until perfectly golden and deliciously chewy.
    5 from 3 votes
    Print Recipe Pin Recipe Rate this Recipe
    Prep Time 14 minutes mins
    Cook Time 4 minutes mins
    Additional Time 30 minutes mins
    Total Time 48 minutes mins
    Course Desserts
    Cuisine American
    Servings 18 Servings
    Calories 121 kcal

    Ingredients
      

    • 1 Cup Creamy Peanut Butter
    • ¾ Cup Sugar
    • 1 Large Egg

    Instructions
     

    • Combine all three ingredients in a large mixing bowl. Mix until fully combined.
    • Chill your cookie mixture in the fridge for 30 minutes.
    • Using a 1 ½-inch cookie scoop, or heaping tablespoon, scoop the dough onto parchment paper.
    • Using a fork, press the cookie flat, first in one direction, then again from the opposite direction, to make a crosshatch pattern on top. 
    • Place as many cookies in your air fryer that will fit while giving each cookie a half-inch space. I was able to cook about 4-6 cookies at a time. 
    • Set your air fryer at 370 degrees and cook them for 4 minutes before letting them rest in the air fryer for 4 minutes. Each crispy peanut butter cookie should be lightly browned once cooked. Transfer the peanut butter cookies to a cooling tray. Repeat until you’ve used up all your cookie dough.
    • Allow the peanut butter cookies to cool completely on the cooling rack.
    • Once cooled, serve these best peanut butter cookies immediately to enjoy their fresh, irresistible taste.

    Notes

    Use Real Peanut Butter: The natural peanut butter flavor makes the cookies taste way better than processed peanut butter.
    Type of Peanut Butter: Ideally, you will use smooth peanut butter to make these peanut butter cookies, however, you can use chunky peanut butter or Jiff’s crunchy peanut butter if desired. Just be sure to stir the chunky peanut butter well before adding it to the other ingredients.
    Avoid Overbaking: Keep an eye on your cookies and take them out when they’re just barely golden around the edges.

    Nutrition

    Calories: 121kcalCarbohydrates: 12gProtein: 4gFat: 8gSaturated Fat: 2gPolyunsaturated Fat: 2gMonounsaturated Fat: 4gTrans Fat: 0.001gCholesterol: 9mgSodium: 65mgPotassium: 84mgFiber: 1gSugar: 10gVitamin A: 13IUCalcium: 8mgIron: 0.3mg
    Print Recipe Pin Recipe Rate this Recipe
    Tried this recipe?Let us know how it was!

    Try These Super Tasty Dessert Options:

    • Pumpkin Crunch Cake
    • The Best No Bake Banana Pudding
    • Pumpkin French Toast Casserole
    • Brown Butter Cookies
    • Fluffy Pink Smores Waffles
    • Homemade Pumpkin Cookies
    • Lemon Pudding Cake
    • Vanilla French Toast With Strawberries
    • Organic Baked Apples
    • Chocolate Caramel Bark
    • Best Hot Cocoa Dip
    air fryer peanut butter cookies.

    Best Brazilian Limeade Recipe

    August 15, 2024 by Angela Milnes

    Best Brazilian Limeade Recipe.

    This Brazilian Limeade Recipe is a creamy, zesty, and ultra-refreshing drink that blends whole limes with sweetened condensed milk for a bold citrus kick. It comes together in minutes and is just what your summer menu needs.

    creamy Brazilian Limeade in a glass with lime slices next to it.

    What is Brazilian Limeade?

    Known as limonada suíça in Brazil, Brazilian Limeade blends whole limes—peel and all—with sweetened condensed milk and ice for a frothy, citrusy treat. It’s especially popular during the Brazilian summer, loved for its bold citrus flavor and rich, creamy twist.

    Bonus: Sweetened condensed milk adds a dose of calcium—so it’s sweet and secretly good for your bones!

    This delicious creamy drink will pair perfectly with our Crispy Coconut Shrimp and Tilapia Fish Tacos.

    [feast_advanced_jump_to]

    💖 Why This Recipe Works

    • Quick & Easy: Blend, strain, pour. Ready in under 5 minutes!
    • Creamy + Tart: The sweetened condensed milk creates that signature creamy twist.
    • Versatile Crowd-Pleaser: Serve it at BBQs, picnics, brunch, or beach days. Always a hit!

    ⭐ Star Ingredients

    Brazilian Limeade Ingredients.
    • Fresh Limes: Choose smooth, thin-skinned limes—they’re juicier and less bitter than thick, bumpy ones.
    • Sweetened Condensed Milk: Adds creamy sweetness—this is what makes Brazilian Limeade different from classic limeade.
    • Ice + Cold Water: Keeps it frosty and thins the drink to a sippable consistency.
    • Peppery Zest (Optional): I like to sprinkle lime zest on top for a little extra citrus aroma—totally optional but fun!

    For the complete list of ingredients with measurements and instructions, please see the recipe card at the bottom of the post.

    📖  Substitutions & Variations

    • Dairy-Free Version: Use coconut condensed milk or oat-based sweetened milk.
    • Mint-Lime Twist: Add fresh mint to the blender for a mojito vibe.
    • Sparkling Limeade: Replace 1 cup of water with sparkling water for fizzy flair.
    • Frozen Limeade Cubes: Freeze extra limeade into ice cubes and blend later for a quick slushy.

    🍃 Flavor Pairings I Love

    Back when I worked behind the bar at Valentine’s Restaurant, I loved experimenting with flavors—and citrus drinks were always my playground. Here are a few combos I still love to this day:

    Flavor PairVibe
    Lime + CoconutTropical & creamy
    Lime + MintMojito-style refreshment
    Lime + GingerZesty & bold
    Lime + StrawberrySweet-tart & fruity
    Lime + BasilHerbal & garden-fresh

    Try swapping in one of these combos when you’re feeling creative or want a fun twist on the classic.

    If you like this tropical drink, try my Citrus Lemon Lime Lemonade or Grapefruit Rosemary Mocktail next!

    🔪How To Make Brazilian Limeade

    Limes slices and water in a food processor.
    1. Step 1: Wash the limes thoroughly to remove any dirt or residue. Chop each lime into quarters.
    Limes slices, condensed milk,  and water in a food processor.
    1. Step 2: In a blender, combine the chopped limes, cold water, and sweetened condensed milk. Blend until the mixture is as smooth as possible.
    Lime juice in a food processor.
    1. Step 3: Strain the blended mixture using a fine mesh sieve to remove the pulp and any remaining lime pieces.
    Two glasses of Brazilian limeade.
    1. Step 4: Fill glasses with ice and pour the strained limeade over the ice. Serve immediately and enjoy this creamy, refreshing drink!

    💡 Hint: Pour extra limeade into silicone molds to freeze. Later, blend the cubes with a splash of water for a frozen slushie—perfect for kids or make-ahead summer parties!

    👩‍🍳 Expert Tips

    • Blend Briefly: 20 seconds max! Over-blending = bitter lime oil.
    • Strain Twice: If you want it super smooth, go for a double strain.
    • Chill the Ingredients: Use cold water, chilled limes, and cold condensed milk for max refreshment.
    • Meal Prep Tip: Blend and strain everything but the ice, then refrigerate in jars. Shake and serve over ice when ready!

    💭 FAQs

    Why is my Brazilian Limeade Bitter?

    Blending the limes too long releases oils from the peel. Stick to a short blend time and strain thoroughly.

    Can I make Brazilian Limeade Dairy-Free?

    Yes! Use a plant-based sweetened condensed milk (like coconut or oat).

    Can I Adjust The Sweetness of Brazilian Limeade?

    Yes! Add more or less sweetened condensed milk to suit your taste. You can also mix in a little sugar or honey if needed.

    Can I freeze Brazilian Limeade?

    Totally! Pour leftovers into ice cube trays. Blend frozen cubes with a splash of water for an icy treat.

    💖 Serving Suggestions

    Here are some sides to serve with Brazilian Limeade:

    • BBQ-Ready: Serve alongside Air Fryer Cod, fish tacos, or smoky veggie skewers.
    • Sweet & Savory Snacks: Pair with Cheesy Stuffed Peppers , Mango and Pineapple Salsa, or crunchy veggie sticks.
    • Light Meals: Sip with Quinoa Salad, Avocado Toast, or this Arugula Mango Salad for a summery plate.
    • Fun Garnish Ideas: Lime sugar rims, freeze-dried lime powder, or edible flowers for a party twist!

    Want more lime infused recipes? Try this Creamy Jalapeno Coleslaw with Lime or my favorite Chilean Seabass With Lime And Chili.

    Brazilian limeade served in two glasses.

    🍽 More Refreshing Summer Recipes

    • Easy No Bake Lavender Cheesecake.
      Creamy Lavender Cheesecake (15 Minutes Prep)
    • Chick Fil A Kale Crunch Salad in a white bowl.
      Best Kale Crunch Salad Chick Fil A Recipe
    • No-Churn Vegan Mango Sorbet.
      No-Churn Vegan Mango Sorbet
    • Creamy Tuscan Salmon With Sundried Tomatoes.
      Creamy Tuscan Salmon With Sundried Tomatoes

    Did you make this recipe? Leave a review and a ⭐⭐⭐⭐⭐ rating below, or tag us in our Facebook Group! Alternatively, bookmark it in your browser or save to Pinterest.

    Best Brazilian Limeade Recipe.

    Brazilian Limeade

    Angela Milnes
    Brazilian Limeade is a refreshing, tangy drink made with limes, condensed milk, and a touch of sweetness. It's the perfect tropical beverage to cool you down on a warm day!
    5 from 1 vote
    Print Recipe Pin Recipe Rate this Recipe
    Prep Time 5 minutes mins
    Cook Time 0 minutes mins
    Total Time 3 minutes mins
    Course Drinks
    Cuisine Brazilian
    Servings 4 servings
    Calories 276 kcal

    Ingredients
      

    • 2 Cups Ice
    • 6 Fresh Limes
    • 3 Cups Cold Water
    • 1 Cup Sweetened Condensed Milk

    Instructions
     

    • Rinse the limes well and cut them into quarters.
    • In a blender, combine the chopped limes, cold water, and sweetened condensed milk. Blend until smooth.
    • Use a fine mesh sieve to strain the mixture, removing any pulp or lime pieces.
    • Pour the strained limeade over glasses filled with ice. Serve immediately and enjoy!

    Notes

    Serve Immediately: This drink is best enjoyed fresh, as it can become slightly bitter if left to sit too long due to the lime rinds.
    Use Fresh Limes: Fresh limes make all the difference in flavor, so avoid bottled lime juice.
    Adjust Sweetness: If you prefer it sweeter, add more sweetened condensed milk to taste.
    Strain Thoroughly: Strain well to ensure a smooth, pulp-free limeade.

    Nutrition

    Calories: 276kcalCarbohydrates: 52gProtein: 7gFat: 7gSaturated Fat: 4gPolyunsaturated Fat: 0.3gMonounsaturated Fat: 2gCholesterol: 26mgSodium: 114mgPotassium: 386mgFiber: 3gSugar: 43gVitamin A: 255IUVitamin C: 31mgCalcium: 259mgIron: 1mg
    Print Recipe Pin Recipe Rate this Recipe
    Tried this recipe?Let us know how it was!

    Easy Dragon Fruit Smoothie Recipe

    August 15, 2024 by Angela Milnes

    Easy Dragon Fruit Smoothie Recipe.

    Bright, fruity, and so much fun, this Dragon Fruit Smoothie is a treat your whole family will love! It’s packed with tropical flavors, naturally sweet, and so easy to whip up. Plus, that gorgeous pink color? Total mom win for getting the kids excited about a healthy snack!

    Dragon fruit Smoothie In A Glass.
    [feast_advanced_jump_to]

    💖 Why This Recipe Works

    • Quick and Healthy: Easy to blend up in minutes for a nutritious snack or breakfast on the go!
    • Tropical and Refreshing: Bursting with fruity flavors, it’s like a mini tropical getaway in a glass.
    • Kid-Approved: The vibrant pink color and naturally sweet taste make it a hit with little ones.

    If you love this smoothie recipe be sure to check out our Vegan Mixed Berry Smoothie, Brazilian Limeade, Passion Fruit Juice or this tasty Mango Pineapple Smoothie.

    ⭐ Star Ingredients

    Dragon Fruit Smoothie Ingredients.
    • Frozen Dragon Fruit: Gives the dragon fruit smoothie its signature vibrant color and tropical sweetness.
    • Frozen Pineapple: Adds a tangy twist to the smoothie.
    • Milk (or Coconut Milk): Provides a creamy base for the dragon fruit smoothie.
    • Honey: Naturally sweetens the smoothie with a floral touch.

    For the complete list of ingredients with measurements and instructions, please see the recipe card at the bottom of the post.

    📖  Substitutions & Variations

    • Citrus Dragon Fruit Smoothie: Add a splash of lime or lemon juice for a refreshing citrus zing.
    • Tropical Twist: Add mango or coconut milk for an extra tropical flavor.
    • Berry Dragon Fruit Smoothie: Combine dragon fruit with strawberries, blueberries, or raspberries for a berry-infused smoothie.
    • Green Dragon Fruit Smoothie: Add spinach or kale for a nutritious boost. The earthiness of the greens will blend well with the sweet dragon fruit and pineapple.
    • Protein-Packed: Add a scoop of your favorite protein powder (whey, pea, or hemp protein) to turn the smoothie into a filling post-workout snack.

    🔪How To Make Dragon Fruit Smoothie

    Milk in a blender.
    1. Step 1: Pour milk into the blender.
    Milk, frozen dragon fruit, and pineapple in the blender.
    1. Step 2: Add frozen dragonfruit and pineapple to the blender.
    Making dragon fruit smoothie.
    1. Step 3: Add honey, then blend everything until smooth.
    Side view of dragon fruit smoothie in a glass.
    1. Step 4: Pour the smoothie into a glass. Optionally, top with one piece of pineapple and dragonfruit. Serve immediately.

    👩‍🍳 Expert Tips

    • Use Cold Milk: For an extra refreshing smoothie, try using chilled milk or adding a few ice cubes before blending.
    • Blend in Small Batches: If your blender is smaller, blend in parts to make sure everything mixes evenly.
    • Add a Splash of Lime: A tiny splash of lime juice adds a zesty twist that brightens the flavor.

    💭 FAQs

    Can I Use Fresh Dragon Fruit Instead Of Frozen?

    Yes, you can use fresh dragon fruit, but frozen dragon fruit helps thicken the smoothie and provides a more chilled texture.

    What Can I Use As A Dairy-Free Alternative For Milk?

    Almond milk, coconut milk, or oat milk are great alternatives to regular milk, providing a creamy texture without dairy.

    Is Dragon Fruit Smoothie Suitable For Children?

    Yes, this smoothie is kid-friendly and can be a fun, healthy treat for children when paired with other fruits they enjoy.

    Is Adding Vegetables To This Smoothie A Good Option?

    Yes! Adding greens like spinach or kale is a great way to increase the nutritional value without compromising flavor.

    💖 Serving Suggestions

    Best time to enjoy dragon fruit smoothie:

    • Breakfast: It's a vibrant, nutrient-packed start to your day, especially if you include protein or greens in your smoothie.
    • Post-Workout: With a balance of fruit and liquid, it's a great way to rehydrate and replenish energy levels after exercise.
    • Snack Time: Ideal for a healthy mid-day or afternoon snack, offering a refreshing break with minimal calories.
    Dragon fruit smoothie in a glass.

    🍽 Smoothie Lovers, Don’t Miss These!

    • Pineapple Smoothie Drink With banana And Honey.
      Pineapple Banana Smoothie With Honey
    • Mango Pineapple Smoothie.
      Mango Pineapple Smoothie
    • Vegan Mixed Berry Smoothie.
      Vegan Mixed Berry Smoothie
    • Vegan Banana and Beetroot Smoothie.
      Vegan Banana and Beetroot Smoothie

    Did you make this recipe? Leave a review and a ⭐⭐⭐⭐⭐ rating below, or tag us in our Facebook Group! Alternatively, bookmark it in your browser or save to Pinterest.

    Easy Dragon Fruit Smoothie Recipe.

    Dragon fruit Smoothie

    Angela Milnes
    This Dragon Fruit Smoothie is a refreshing, tropical treat that's perfect for any time of the day! With just a few ingredients, you can whip up a delicious drink in minutes.
    5 from 2 votes
    Print Recipe Pin Recipe Rate this Recipe
    Prep Time 10 minutes mins
    Cook Time 0 minutes mins
    Total Time 10 minutes mins
    Course Beverage
    Cuisine American
    Servings 1 Serving
    Calories 394 kcal

    Ingredients
      

    • 1 Cup Frozen Dragonfruit
    • ½ Cup Frozen Pineapple
    • 8 oz. Milk Can Use Coconut Milk
    • 1 tbsp. Honey

    Instructions
     

    • Pour milk into the blender.
    • Add frozen dragonfruit and pineapple to the blender.
    • Add honey, then blend everything until smooth.
    • Pour the smoothie into a glass. Optionally, top with one piece of pineapple and dragonfruit. Serve immediately.

    Notes

    Use Cold Milk: For an extra refreshing smoothie, try using chilled milk or adding a few ice cubes before blending.
    Blend in Small Batches: If your blender is smaller, blend in parts to make sure everything mixes evenly.
    Add a Splash of Lime: A tiny splash of lime juice adds a zesty twist that brightens the flavor.

    Nutrition

    Calories: 394kcalCarbohydrates: 62gProtein: 8gFat: 11gSaturated Fat: 4gPolyunsaturated Fat: 0.3gMonounsaturated Fat: 2gCholesterol: 27mgSodium: 230mgPotassium: 495mgFiber: 4gSugar: 59gVitamin A: 427IUVitamin C: 11mgCalcium: 299mgIron: 4mg
    Print Recipe Pin Recipe Rate this Recipe
    Tried this recipe?Let us know how it was!

    More Easy Smoothies Recipes

    • Vegan Banana Avocado Smoothie
    • Best Mangonada Recipe
    • Pineapple Smoothie Drink With Banana And Honey
    • Avocado And Apple Smoothie
    • Passion Fruit Juice
    • Butterfly Pea Tea Lemonade
    • Orange Carrot Ginger Juice
    • Vegan Banana and Beetroot Smoothie
    • Blueberry Smoothie Bowl Recipe
    • Homemade Egg Nog with Vanilla And Cinnamon
    Top view of dragon fruit smoothie in a glass.

    Best Sabana de Res Recipe

    August 14, 2024 by Angela Milnes

    Best Sabana de Res Recipe.

    Prepare to be wowed by this classic Colombian dish! Sabana de Res is a traditional beef recipe from Colombia, smothered in Sabana de res sauce, this traditional Latin American dish is a must try for anyone who loves a delicious and hearty meal. You'll love this cooked beef dish along with it's fantastic mouthwatering flavors.

    Sabana De Res Beef On a White Plate
    [feast_advanced_jump_to]

    What Is Sabana De Res?

    Sabana De Res is a traditional Colombian recipe made with beef that is grilled or fried. The beef is then covered with a savory Sabana sauce that includes tomatoes, garlic, onions, sesame seeds, Pasilla and Guajillo chillis and more.

    Traditional Columbian Beef Recipe

    This popular Latin American dish is often served for special occasions such as birthdays or anniversaries but can also be enjoyed any day of the week! It’s a great option for dinner parties and gatherings as it is relatively easy to prepare and cook.

    Why This Recipe Works

    • Authentic Taste: Experience the rich, traditional flavors of this classic Latin American dish.
    • Easy to Follow: Clear, step-by-step instructions make this recipe accessible for all skill levels.
    • Impressive Presentation: The thinly pounded beef makes for a visually stunning meal.

    🥘 Ingredients

    Sabana De Res Ingredients

    This Sabana De Res recipe is really easy to make! With just 10 minutes of preparation time, you'll have this tasty dish ready in no time. Here are the ingredients needed for this Latin American dish.

    • Beef Steak: The star of the dish, providing a hearty and protein-rich base.
    • Olive Oil: Used to sauté and sear the steak, enhancing its flavor and texture.
    • Garlic Cloves or Minced Garlic: Infuses the dish with a robust, savory flavor that complements the beef.
    • Pasilla Chili and Guajillo Chili: Add a depth of smoky heat to the dish.
    • Sesame Seeds: Provide a nutty flavor and crunchy texture.
    • Beef Broth/Stock: Deepens the overall flavor of the dish and adds moisture.
    • Onion: Adds a sweet, caramelized flavor when sautéed with the beef.
    • Crushed Tomatoes: Add acidity and sweetness, balancing the richness of the beef and cheese.
    • Lime Juice: Cuts through the richness of the dish with a burst of tangy freshness.
    • Avocado: Provides a creamy, cooling contrast to the heat of the chilies.
    • Cream Cheese: Adds a tangy creaminess that balances the spicy and savory flavors.
    • Rice: Serves as a filling, neutral base that soaks up the flavors of the dish.
    • Freshly Chopped Cilantro: Adds a fresh, herbaceous note to the dish.
    • Cojita Cheese: Provides a salty, tangy element that complements the rich flavors.
    • Kosher Salt and Ground Black Pepper: Enhance the natural flavors of the ingredients.

    For the complete list of ingredients with measurements and instructions, please see the recipe card at the bottom of the post.

    🔄 Substitutions & Variations

    • Meat Swap: Use chicken or pork instead of beef for a different take on this dish.
    • Mild Version: Skip the Guajillo and Pasilla chilies or use bell peppers for a milder flavor.
    • Cheese Options: Try queso fresco, parmesan, or shredded mozzarella for a unique twist.

    🔪How To Make Sabana De Res?

    Here are our step by step instructions for cooking this Sabana De Res recipe.

    flank steak in a skillet cooking

    Step One: Start by preparing the beef for the dish. Cut your beef into thin slices, then season with a bit of salt and pepper.

    Sauteed Sabana De Res Meat

    Step Two: Heat a pan over medium heat, and add some olive oil or vegetable oil. Sear until the beef is tender. Once cooked set the steak aside and let meat rest.

    Sauteed Onions and Spices and chilis.

    Step Three: Place your onion slices, garlic cloves, sesame seeds and chilies into the pan. Saute until the onions become translucent.

    Sabana De Res ingredients in a food processor

    Step Four: Transfer the sauteed ingredients to the blender or food processor. Now add the can of crushed tomatoes, beef broth and lime juice. Blitz the ingredients into a sauce.

    Sabana De Res Sauce

    Step Five: Place the delicious Sabana De Res back into the skillet or Instant Pot. Add the cream cheese and stir until melted.

    Adding flank steak to sabana de res sauce and rice

    Step Six: Plate your Sabana De res Sauce. Add cooked rice and then top with your fried steaks. (flank steak or beef sirloin). Garnish the Sabana De Res with cojita cheese, avocado slices and fresh Cilantro for a flavorful dish.

    Sabana De Res Recipe

    👩‍🍳 Expert Tips

    • Marinate Thoroughly: Allow your beef to marinate well—ideally for a few hours or even overnight—in a blend of garlic, spices, and a touch of citrus. This step not only tenderizes the meat but also infuses it with deep, rich flavor.
    • Sear for a Flavorful Crust: Before slow cooking or braising, give your beef a quick, high-heat sear. This caramelizes the exterior and locks in juices, ensuring a delicious crust that enhances the overall taste of the dish.
    • Monitor Cooking Time: Whether you’re braising or slow-cooking, keep a close eye on the beef to avoid overcooking. A well-cooked Sabana de Res should be tender but still hold its structure, offering a satisfying bite.
    • Finish with a Fresh Touch: Just before serving, consider adding a splash of fresh lime juice or a sprinkle of chopped cilantro. This not only brightens the rich, savory flavors but also adds a delightful contrast that elevates the dish.

    💭 FAQs

    Can I Cook Sabana de Res In The Pressure Cooker?

    The Sabana beef and sauce is generally cooked in a skillet or frying pan and can certainly be cooked in the Instant Pot or pressure cooker using the saute or browning function.

    Are Pasilla Chilis Hot?

    Pasilla chilis are relatively mild compared to other types of Mexican chillies, so they will not make your Sabana De Res dish too spicy. The Pasilla and Guajillo chilli peppers give this classic Latin American dish a hint of smoky flavor without too much heat.

    Where Can I Buy Pasilla And Guajillo Chilis?

    Pasilla and Guajillo chillis can often be found in international or Latin American grocery stores, but if you can’t find them locally, they are also available online.

    Best Sabana de Res Meat?

    The best type of meat to use for Sabana De Res is either flank steak, skirt steak, or sirloin beef steak. All of these cuts are fairly lean and tender and will hold up to the flavor of the Sabana De Res sauce.

    Can I Use Garlic Powder Instead Of Garlic Cloves?

    Yes, you can certainly use garlic powder instead of minced fresh garlic for this recipe. I prefer to use cloves and saute them before adding to the blender.

    Can I Make This Dish Ahead Of Time?

    Yes, Sabana De Res tastes even better the day after it is cooked so it’s a great dish to prepare in advance. To make ahead of time: cook all ingredients as per the instructions, then let cool before placing in an airtight container. Reheat when needed.

    Is Beef Broth Best?

    If you want a delicious flavor that everyone will love stick to beef broth or beef stock. If you wan to use chicken broth then that's okay but the beef flavor makes this classic dish perfect!

    Best Cheese Toppings

    For the best flavours and textures, try topping your Sabana De Res dish with a mix of cotija cheese, cream cheese and fresh cilantro. You can also top the dish with a sprinkle of parmesan cheese or shredded mozzarella for an extra cheesy version. Another popular cheese for this dish is chihuahua cheese or queso fresco.

    Best Way to Store Colombian Sabana De Res

    You can store any leftover Sabana De Res Sauce in an airtight container for 2-3 days in your fridge. To freeze your Sabana de Res sauce, place the cooled sauce into a ziplock bag or air tight container

    🧂Serving Suggestions

    Here are some top suggestions of what to serve with Sabana De Res:

    • Guacamole - A Simple Mango Guacamole would also go great with Sabana De Res. You might also want to try Strawberry Jalapeno Salsa or a Tomato Salsa as a side for your Columbian Dinner.
    • Rice - Sabana De Res goes really well with rice and helps turn this Columbian beef dish into a well rounded meal. You can cook regular Long Grain Instant Pot White Rice or try cooked Mexican Red Rice.
    • Beans - Refried Beans or Black Bean Salsa With Streetcorn is another great side dish to serve with your Sabana De Res recipe.
    • Mashed Potatoes - You might want to pair your Sabana beef and sauce with the savory flavor of Instant Pot Mashed Potatoes.
    • Tortillas - Flour or corn tortillas will help make this meal a lot more filling and are definitely a popular option to serve with this satisfying dish.
    • Plantains - Sweet plantain slices are always a great side dish for Latin American dishes like Sabana De Res. Try our Plaintain Tortillas recipe for something special!
    • Salad - Not all side dishes need to be savory, why not try a fresh Avocado Salad on the side as well? Put together your favorite salad ingredients for a light and refreshing accompaniment.
    sabana de res recipe

    🍽 Related Recipes

    • einkorn angel hair and cherry tomato pasta in a white bowl.
      One-Pan Einkorn Angel Hair Pasta with Cherry Tomatoes
    • Salmon Dill Puree.
      Lemon Dill Salmon Mousse (Bariatric Friendly)
    • close-up-watermelon-slices-with-blackberry-plastic-disposable-cup-perfect for a summer party.
      How To Host An Awesome Summer Party
    • Oven baked lobster tail with garlic butter and lemon.
      How To Cook Lobster Tail At Home

    Did you make this recipe? Leave a review and a ⭐⭐⭐⭐⭐ rating below, or tag us in our Facebook Group! Alternatively, bookmark it in your browser or save to Pinterest.

    Best Sabana de Res Recipe.

    Sabana De Res Recipe

    Angela Milnes
    This delicious and tasty Sabana De Res recipe is one you don't want to miss. Made with mouthwatering flavors this Colombian beef steak is a real winner.
    5 from 33 votes
    Print Recipe Pin Recipe Rate this Recipe
    Prep Time 10 minutes mins
    Cook Time 10 minutes mins
    Total Time 20 minutes mins
    Course Dinners
    Cuisine Colombian
    Servings 1 Servings
    Calories 518 kcal

    Ingredients
      

    • 1 Slice Beef Steak
    • 2 Tablespoon Olive Oil
    • 2 Garlic Cloves or Minced Garlic
    • 1 Piece Pasilla Chili
    • 1 Piece Guajillo Chili
    • 2 Tablespoons Sesame Seeds
    • ¼ Cup Beef Broth or Beef Stock
    • 1 Medium Onion Sliced
    • 1 Can Crushed Tomatoes
    • ¼ cup Lime Juice
    • 1 Avocado sliced
    • 1 Tablespoon Cream Cheese
    • 1 Cup Rice
    • 1 Tablespoon Freshly Chopped cilantro
    • ¼ Cup Cojita Cheese
    • Pinch Kosher Salt
    • Pinch Ground Black Pepper

    Instructions
     

    • Start by preparing the beef for the dish. Cut your beef into thin slices, then season with a bit of salt and pepper.
    • Heat a pan over medium heat, and add some olive oil or vegetable oil. Sear until the beef is tender.
    • Once cooked set the steak aside and let meat rest.Place your onion slices, garlic cloves, sesame seeds and chillies into the pan.
    • Saute until the onions become translucent.
    • Transfer the sauted ingredients to the blender or food processor.
    • Now add the can of crushed tomatoes, beef broth and lime juice. Blitz the ingredients into a sauce.
    • Place the delicious Sabana De Res back into the skillet or Instant Pot. Add the cream cheese and stir until melted.
    • Plate your Sabana De res Sauce. Add cooked rice and then top with your fried steaks. (flank steak or beef sirloin).

    Notes

    Cook rice separately and store any leftover sauce in a container in the fridge.

    Nutrition

    Serving: 1gCalories: 518kcalCarbohydrates: 32gProtein: 7gFat: 43gSaturated Fat: 8gPolyunsaturated Fat: 7gMonounsaturated Fat: 25gCholesterol: 15mgSodium: 283mgPotassium: 444mgFiber: 5gSugar: 3gVitamin A: 3657IUVitamin C: 20mgCalcium: 193mgIron: 4mg
    Print Recipe Pin Recipe Rate this Recipe
    Tried this recipe?Let us know how it was!

    We hope you enjoy your delicious and flavourful Sabana De Res dish. For best results, follow our recipe exactly. Be sure to watch our Sabana De Res video! It's pretty useful and easy to follow. This Colombian / Mexican Cuisine is sure to be a hit with family and friends! Buen Provecho!

    More Delicious Recipes

    • Mexican Elotes Corn
    • Baked Brie with Garlic and Honey
    • Easy Shrimp Cakes With Hot Sauce
    • Air Fryer Crispy Chicken Wings
    • Sheet Pan Nacho Chips
    • Mini Pigs In Blankets
    • Poinsettia Sourdough Loaf
    • Creamy Vanilla Eclair Cake
    Sabana De Res steak on a white plate

    Crispy Pan Fried Potatoes And Onions

    August 14, 2024 by Angela Milnes

    Fried Potatoes And Onions.

    Pan Fried Potatoes and Onions are crispy, golden, and full of flavor—the ultimate comfort food sidekick that works any time of day.

    Fried potatoes and onions in a plate.

    This crispy combo is the kind of cozy side dish that never goes out of style. Whether you’re making a lazy weekend breakfast or need something simple to round out dinner, pan fried potatoes and onions always deliver. They’re a budget-friendly, easy potato side dish that goes with everything.

    If you love easy veggie sides, try my Best Spanish Roast Potatoes, Parmesan Au Gratin Potatoes, or Air Fryer Steak Bites next!

    [feast_advanced_jump_to]

    💖 Why This Recipe Works

    • Crispy fried potatoes: with golden edges and caramelized onions? Yes, please.
    • Budget-friendly and basic: Simple ingredients, big payoff. It’s pantry magic.
    • Totally versatile: Pairs with eggs, meat, veggies—breakfast to dinner and everything in between.

    ⭐ Star Ingredients

    Ingredients To Make Fried Potatoes And Onions.
    • Potatoes – I love using Yukon Golds or Russets. They fry up fluffy inside and crispy outside—exactly what we want.
    • Onion – Yellow onions caramelize beautifully and bring sweet-savory flavor. Red onions work too for a bolder taste.
    • Paprika – A little smoky paprika goes a long way in adding color and depth.
    • Butter + Oil – Butter brings richness, oil keeps the pan from burning. Best of both worlds.

    For the complete list of ingredients with measurements and instructions, please see the recipe card at the bottom of the post.

    📖  Substitutions & Variations

    • Herby twist – Add chopped rosemary, thyme, or parsley at the end.
    • Southern fried potatoes – Toss in diced bell peppers and a shake of garlic powder.
    • Cheesy goodness – Stir in shredded cheddar or parmesan in the final minute.
    • Spicy kick – Add cayenne or red pepper flakes to the seasoning.
    • Vegan-friendly – Swap the butter for vegan butter or just use oil.
    • Smoky flavor – Try smoked paprika or a touch of liquid smoke.

    These potatoes also go great with my Creamy Pan Fried Salmon Fillet or Spicy Lasagna Soup With Oregano—just sayin’.

    🔪How to Cook Pan Fried Potatoes and Onions

    Peeled potatoes in a plate.
    1. Step 1: Peel the potatoes and onions. Slice the onion into thin rings.
    Sliced potatoes on a wooden cutting board.
    1. Step 2: Slice the potatoes into thin circles. Soak the potato slices in salted water for 10 minutes. Drain the water and pat the potatoes dry.
    Frying potatoes and onions in a pan.
    1. Step 3: Melt butter in a frying pan, add vegetable oil, and cook the potatoes and onions in batches until golden and crispy.
    Fried Potatoes And Onions In A Plate.
    1. Step 4: Transfer the fried potatoes and onions to a paper towel to absorb any extra oil. Sprinkle with paprika, salt, and pepper before serving.

    💡Hint: Use a wide pan or cook in batches—overcrowding traps steam and ruins the crispiness!

    Close-up view of fried potatoes and onions in a plate.

    👩‍🍳 Expert Tips

    • Soaking Matters: Soaking potatoes in salted water helps remove excess starch, making them crispier when fried.
    • Medium heat is key: Too hot and your onions burn before the potatoes cook through.
    • Slice evenly: Keep your potato slices uniform for even cooking.

    💭 FAQs

    Why are my fried potatoes sticking to the pan?

    Make sure your oil is hot before adding potatoes and use a nonstick or well-seasoned cast iron pan.

    Can I skip soaking the potatoes?

    Technically, yes—but they won’t get that signature crispy edge. Soaking helps remove excess starch.

    Can I Use Only Butter Instead Of Oil for cooking Onions and Potatoes?

    Butter alone burns too quickly. A combo of oil and butter gives you flavor and crispy texture.

    How do I store this potatoes and onions recipe?

    Let them cool completely, then store in an airtight container in the fridge for up to 3 days. Reheat in a skillet for best texture.

    💖 Serving Suggestions

    Serve the following with your fried potatoes and onions:

    • With scrambled eggs for a diner-style breakfast at home.
    • Next to grilled sausages or your favorite veggie links.
    • Alongside Vegan BBQ Baked Beans for a cozy Southern-inspired meal.
    • As a base for a breakfast bowl with avocado and hot sauce
    • Topped with Creamy Herby Ranch Dressing—trust me on this one.
    • Served with Crispy Air Fryer Cauliflower Bites for the ultimate crunchy combo.
    Fried Potatoes And Onions In A Plate.

    🍽 Try These Simple Potato Sides

    • Crispy Garlic Smashed Potatoes With Parmesan.
      Crispy Garlic Smashed Potatoes With Parmesan
    • Easy Air Fryer Roasted Potatoes.
      Easy Air Fryer Roasted Potatoes
    • Almond Milk Mashed Potatoes.
      Best Almond Milk Mashed Potatoes (Dairy Free)
    • Best Spanish Roast Potatoes.
      Crispy Spanish Roasted Potatoes With Smoky Spices

    Did you make this recipe? Leave a review and a ⭐⭐⭐⭐⭐ rating below, or tag us in our Facebook Group! Alternatively, bookmark it in your browser or save to Pinterest.

    Fried Potatoes And Onions.

    Pan Fried Potatoes And Onions

    Angela Milnes
    Crispy, golden fried potatoes and onions are the ultimate comfort side dish! Simple to make with just a few ingredients, this recipe is a family favorite you'll crave again and again.
    5 from 1 vote
    Print Recipe Pin Recipe Rate this Recipe
    Prep Time 5 minutes mins
    Cook Time 10 minutes mins
    Soak Time 10 minutes mins
    Total Time 25 minutes mins
    Course Appetizer, Side Dish
    Cuisine American, Asian
    Servings 2 Servings
    Calories 495 kcal

    Ingredients
      

    • 500 g. Potatoes
    • 3 tbsp. Vegetable Oil
    • 2 tbsp. Butter
    • ½ Onion
    • 0.5 tsp. Salt
    • 0.5 tsp. Ground Black Pepper
    • 1 tbsp. Paprika

    Instructions
     

    • Peel the potatoes and onions. Slice the onion into thin rings.
    • Slice the potatoes into thin circles. Soak the potato slices in salted water for 10 minutes. Drain the water and pat the potatoes dry.
    • Melt butter in a frying pan, add vegetable oil, and cook the potatoes and onions in batches until golden and crispy.
    • Transfer the fried potatoes and onions to a paper towel to absorb any extra oil. Sprinkle with paprika, salt, and pepper before serving.

    Notes

    Soaking Matters: Soaking potatoes in salted water helps remove excess starch, making them crispier when fried.
    Fry in Batches: Avoid overcrowding the pan to ensure even cooking and crispy potatoes.
    Control the Heat: Maintain medium heat while frying to achieve a golden exterior without burning.

    Nutrition

    Calories: 495kcalCarbohydrates: 48gProtein: 6gFat: 32gSaturated Fat: 10gPolyunsaturated Fat: 13gMonounsaturated Fat: 8gTrans Fat: 1gCholesterol: 30mgSodium: 690mgPotassium: 1183mgFiber: 7gSugar: 3gVitamin A: 2082IUVitamin C: 51mgCalcium: 50mgIron: 3mg
    Print Recipe Pin Recipe Rate this Recipe
    Tried this recipe?Let us know how it was!

    Pineapple Banana Smoothie With Honey

    August 13, 2024 by Angela Milnes

    Pineapple Smoothie Drink With banana And Honey.

    Cool off with this dreamy Pineapple Banana Smoothie. It’s sweet, refreshing, and just the right amount of creamy—perfect for busy mornings, an afternoon pick-me-up, or a tropical treat for the kids. One sip, and you’ll feel like you’re on vacation!

    Pineapple Smoothie Drink With banana And Honey.

    Whether you're kicking off a busy morning or chasing that 3 PM slump away, this smoothie brings the sunshine. With pineapple's juicy tang and banana’s creamy sweetness, it's no surprise this refreshing drink is trending hard—especially as warmer months roll in. If you're loving fruity drinks, check out our Vegan Mixed Berry Smoothie, Cucumber Juice with Greens, or our cooling Strawberry Mojito Mocktail.

    [feast_advanced_jump_to]

    💖 Why This Recipe Works

    • Tropical & Refreshing: Pineapple and banana combine for a sweet and zesty vacation-in-a-glass experience.
    • Quick to Blend: Just a handful of ingredients, one blender, and you’re set in minutes.
    • Totally Kid-Approved: Creamy, sweet, and fuss-free—perfect for picky eaters and snack time heroes.

    🍍 Star Ingredients

    Ingredients For Pineapple Smoothie Drink With banana And Honey.
    • Pineapple: Naturally sweet and packed with vitamin C, this fruit brings juicy, tropical flavor and refreshing tang.
    • Banana: Ripe banana adds natural sweetness, a silky texture, and potassium for a nutritious boost.
    • Greek Yogurt: Gives the smoothie a protein-packed creamy kick and a light tang that balances the fruitiness.
    • Milk: Acts as the base—use whatever you love, from dairy to oat milk for a custom vibe.

    For the complete list of ingredients with measurements and instructions, please see the recipe card at the bottom of the post.

    📖  Substitutions & Variations

    • Go Coconut: Swap milk for coconut milk or water for a beachy twist.
    • Add Greens: Toss in a handful of spinach or kale—you’ll barely taste it, but your body will love it.
    • Make it Zesty: Add grated ginger or a splash of orange juice for a citrusy lift.
    • Berry Boost: Blend in frozen berries for a pop of color and flavor.
    • High-Protein: Add a scoop of vanilla protein powder or a spoonful of peanut butter to keep you full longer.

    Pair this smoothie with our Avocado Toast for a filling breakfast, or sip alongside Crispy Air Fryer Beet Chips for a colorful afternoon snack!

    🔪How To Make A Pineapple Banana Smoothie

    Use this section for process shots, alternating between the step and image showing the step. Users don't like seeing process shots cluttering up the recipe card, so include your process shots here.

    adding banana to food processor.
    1. Step 1: If you’re using fresh pineapple, slice it into chunks. Peel and slice the banana into smaller pieces for easier blending.
    Adding the pineapple chunks, banana slices, milk, Greek yogurt, and ice cubes to the blender.
    1. Step 2: Add the pineapple chunks, banana slices, milk, Greek yogurt, and ice cubes to your blender.
    adding honey to smoothie ingredients.
    1. Step 3: For a touch of added sweetness, drizzle in some honey if desired.
    Adding the pineapple chunks, banana slices, milk, Greek yogurt, and ice cubes to the blender.
    1. Step 4: Blend the mixture on high speed until it’s smooth and creamy. Pause as needed to scrape down the sides of the blender to ensure everything is well mixed.
    freshly blended smoothie.
    1. Step 5: Pour the freshly blended smoothie into glasses and serve right away for the best flavor and texture.
    Pineapple Smoothie With Banana And Honey.
    1. Step 6: For a fun presentation, decorate the rim of the glass with a pineapple wedge or banana slice. Enjoy!

    💡 Hint: Using frozen pineapple not only saves prep time—it also keeps the smoothie extra frosty without watering it down.

    Pineapple Smoothie in a glass with pineapple slice and yellow straw.
    Smoothies

    👩‍🍳 Expert Tips

    • Use ripe bananas for a smoother texture and natural sweetness—no need for added sugar.
    • Adjust thickness easily: add ice for thicker texture, or a splash more milk for a thinner sip.
    • Blend in stages for the silkiest result—start low, then crank it up!

    Best Time To Have Pineapple Smoothie?

    • Morning Boost: Kickstart your day with its refreshing tropical flavor and creamy texture—it’s perfect for breakfast or as a quick meal on the go.
    • Midday Refresher: Beat the afternoon slump with a chilled pineapple smoothie that feels like a mini escape.
    • Post-Workout: Enjoy it after exercise for a delicious way to replenish energy and stay hydrated.
    • Light Dessert: End your day on a sweet and refreshing note with this guilt-free tropical treat.

    💭 FAQs

    Can I use frozen fruit in this pineapple banana smoothie?

    Yes! Frozen pineapple and banana are perfect—no need for ice, and they make the smoothie even colder.

    What’s the best milk for this pineapple banana smoothie?

    You can use any milk—dairy or plant-based like almond, oat, or coconut milk. Just pick what fits your taste and dietary needs.

    Can I use water instead of milk?

    Yes, water can be used as a base instead of milk. The smoothie will be less creamy but still delicious and refreshing.

    How do I make my banana and pineapple smoothie thicker?

    To thicken the smoothie, use less milk or add more frozen fruit, such as frozen pineapple or banana. You can also add a tablespoon of chia seeds or rolled oats before blending.

    Can I turn this banana and pineapple smoothie into a smoothie bowl?

    Use less liquid for a thicker blend, pour into a bowl, and top with fresh fruit, granola, chia seeds, or coconut flakes.

    💖 Serving Suggestions

    • Top with Granola: For crunch and fiber, especially great for breakfast-on-the-go.
    • Serve with a Tropical Fruit Salad: Double down on that sunshine vibe.
    • Sprinkle Chia Seeds: Adds texture and nutrition with a fun visual flair.
    • Pair with Russian Tarragon Soda: For a totally refreshing drink duo.
    • Enjoy with Mangonada: If you love sweet + spicy flavor play.
    Pineapple Smoothie.

    🍽 4 Refreshing Drinks To Try

    • Easy Orange Carrot Ginger Juice.
      Easy Orange Carrot Ginger Juice
    • How To Make Watermelon Juice.
      How To Make Watermelon Juice
    • Passion Fruit Juice.
      Best Passion Fruit Juice Recipe
    • Best Butterfly Pea Tea Lemonade in a mason jar with slices of lemon and a white straw.
      Best Butterfly Pea Tea Lemonade Recipe

    Did you make this recipe? Leave a review and a ⭐⭐⭐⭐⭐ rating below, or tag us in our Facebook Group! Alternatively, bookmark it in your browser or save to Pinterest.

    Pineapple Smoothie Drink With banana And Honey.

    Pineapple Banana Smoothie With Honey

    Angela Milnes
    This smoothie is a tropical treat, blending sweet pineapple, creamy banana, and a touch of honey for the perfect balance of flavor and freshness. It's an easy, energizing drink that's perfect for any time of day!
    5 from 2 votes
    Print Recipe Pin Recipe Rate this Recipe
    Prep Time 5 minutes mins
    Total Time 5 minutes mins
    Course Breakfast, Drinks, Snack
    Cuisine American
    Servings 2 servings
    Calories 229 kcal

    Ingredients
      

    • 1 Cup Fresh Pineapple Chunks (or canned pineapple in juice, drained)
    • 1 Banana sliced
    • 1 Cup Regular Milk (whole, 2%, or skim)
    • ½ Cup Greek Yogurt
    • ½ Cup Ice Cubes
    • 1 Tablespoon Honey (optional, for extra sweetness)

    Instructions
     

    • Slice the pineapple into chunks and peel and slice the banana into smaller pieces.
    • Add the pineapple, banana, milk, Greek yogurt, and ice cubes to the blender.
    • Drizzle in honey if you like your smoothie sweeter.
    • Blend on high until creamy and smooth, scraping the sides of the blender as needed.
    • Pour into glasses and serve immediately for the best flavor.
    • For a fun touch, decorate the rim of the glass with a pineapple wedge or banana slice.

    Notes

    Use Frozen Pineapple: If fresh pineapple isn’t available, frozen chunks work just as well and make the smoothie extra frosty.
    Ripe Banana for Sweetness: Choose a ripe banana for natural sweetness and a creamier texture.
    Adjust Consistency: Add more milk if the smoothie is too thick or a handful of ice cubes if you prefer it thicker and colder.
    Blend in Stages: Start on a lower speed to break down the ingredients, then gradually increase to high for a silky finish.

    Nutrition

    Calories: 229kcalCarbohydrates: 40gProtein: 10gFat: 4gSaturated Fat: 2gPolyunsaturated Fat: 0.2gMonounsaturated Fat: 1gTrans Fat: 0.01gCholesterol: 17mgSodium: 69mgPotassium: 560mgFiber: 3gSugar: 31gVitamin A: 285IUVitamin C: 45mgCalcium: 222mgIron: 0.5mg
    Print Recipe Pin Recipe Rate this Recipe
    Tried this recipe?Let us know how it was!

    15 Zucchini Baking Recipes: Easy Dessert Ideas

    August 12, 2024 by Angela Milnes

    Zucchini baking recipes to try.

    Looking for a delicious way to incorporate more veggies into your baking? Zucchini is the perfect addition to your dessert repertoire! Shredded zucchini can be used in various recipes to add moisture and nutrition. Its mild flavor and moist texture make it an ideal ingredient for a variety of sweet treats. From classic zucchini bread to decadent zucchini brownies, these zucchini baking recipes will satisfy your sweet tooth while sneaking in some extra nutrition. Dive into these Zucchini Dessert Recipes and discover a whole new world of guilt-free zucchini baking recipes!

    Looking for a delicious way to incorporate more veggies into your baking? Zucchini is the perfect addition to your dessert repertoire!
    [feast_advanced_jump_to]

    Make Baking Healthy

    You can make baking healthy by incorporating nutritious ingredients like zucchini into your desserts for a guilt-free treat that’s both delicious and wholesome. Ingredients like vegetable oil and pure vanilla extract are commonly used in zucchini baking recipes to enhance flavor and texture. Enjoy these zucchini baking recipes today!

    15 Shredded Zucchini Baking Recipes

    Try these Zucchini dessert ideas and get baking today.

    Zucchini Chocolate Chip Muffins

    Zucchini Chocolate Chip Muffins are a perfect way to start your day or enjoy as an afternoon snack. They're moist, sweet, and packed with hidden veggies that even the kids will love!

    Zucchini Chocolate Chip Muffins Are One Of The Zucchini Baking Recipes.

    Chocolate Chip Zucchini Cookies

    These Chocolate Chip Zucchini Cookies are a delightful twist on a classic treat. Soft, chewy, and loaded with chocolate chips, they're a delicious and sneaky way to add some extra veggies to your diet.

    Zucchini Cake With Cream Cheese Frosting

    Indulge in this Zucchini Cake With Cream Cheese Frosting for a dessert that’s moist, flavorful, and oh-so-decadent. To check for doneness, insert a toothpick in the center of the cake; it should come out clean or with a few moist crumbs. The cream cheese frosting adds a perfect tangy sweetness that pairs beautifully with the zucchini.

    Zucchini Cake With Cream Cheese Frosting.

    Chocolate Chip Zucchini Scones

    These Chocolate Chip Zucchini Scones are a delightful breakfast or snack option. The combination of chocolate chips and zucchini makes these scones both tasty and nutritious.

    Chocolate Chip Zucchini Scones.

    Savory Vegan Zucchini Muffins

    Savory Vegan Zucchini Muffins are a delicious and wholesome treat. Perfect for a quick breakfast or snack, these muffins are packed with zucchini and full of savory flavor.

    Zucchini Bars With Frosting

    Zucchini Bars With Frosting are a sweet and moist dessert that’s perfect for any occasion. It is important to use a prepared baking dish by lining or greasing it before adding the batter. The creamy frosting on top makes these bars irresistible.

    Savory Zucchini Pesto Muffins

    Enjoy a burst of flavor with Savory Zucchini Pesto Muffins. These muffins are perfect for a savory snack or a delicious addition to any meal, packed with zucchini and rich pesto.

    Chocolate Chip Zucchini Bundt Cake

    Chocolate Chip Zucchini Bundt Cake is a showstopper dessert that's moist, chocolaty, and full of zucchini goodness. Perfect for any gathering or special occasion!

    Chocolate Chip Zucchini Bundt Cake.

    Sweet Spicy Zucchini Relish

    Sweet Spicy Zucchini Relish is a unique and tasty treat that adds a little kick to your sweet treats. It’s a versatile addition that pairs well with many dishes, adding both sweetness and spice.

    Healthy Zucchini Bread Recipes

    Amish Zucchini Breads

    Amish Zucchini Bread is a classic, tried-and-true recipe that’s moist, flavorful, and perfect for any time of day. Pure vanilla extract is used in this recipe to add flavor and enhance the overall taste. It’s a simple, delicious way to enjoy zucchini in your baking.

    Double Chocolate Zucchini Bread

    Double Chocolate Zucchini Bread is a chocolate lover's dream come true. Rich, moist, and packed with chocolate chips, this bread is a decadent treat that you can feel good about eating.

    Double Chocolate Zucchini Bread.

    Cinnamon Raisin Zucchini Bread

    Cinnamon Raisin Zucchini Bread is a warm, comforting treat that's perfect for breakfast or a snack. The combination of cinnamon and raisins with zucchini makes this bread both flavorful and wholesome.

    Cinnamon Raisin Zucchini Bread.

    Sourdough Zucchini Bread

    Sourdough Zucchini Bread offers a tangy twist on the classic zucchini bread. It's a delicious and unique way to enjoy the benefits of zucchini and sourdough in one tasty loaf.

    Sourdough Zucchini Bread.

    Simple Vegan Zucchini Bread

    Simple Vegan Zucchini Bread is a delightful and easy-to-make recipe that's both vegan and delicious. Moist, flavorful, and packed with zucchini, it’s perfect for any occasion.

    Simple Vegan Zucchini Bread.

    Bisquick Zucchini Bread With Cinnamon Butter

    Bisquick Zucchini Bread With Cinnamon Butter is an easy and scrumptious treat. The Bisquick mix makes it a breeze to prepare, and the cinnamon butter adds a delightful finishing touch.

    Bisquick Zucchini Bread With Cinnamon Butter.

    Enjoy More Simple Dessert Ideas Here

    • Lemon Pudding Cake Recipe
    • Easy Buckwheat Pancakes
    • Hazelnut Chocolate Bark
    • Reese’s Cookies With Popcorn

    Old Fashioned Sloppy Joes recipe With Ketchup

    August 10, 2024 by Angela Milnes

    Old Fashioned Sloppy Joes recipe With Ketchup

    Craving a taste of nostalgia with a twist? This Old Fashioned Sloppy Joes Recipe With Ketchup is just what you need! It's a classic, messy, and oh-so-delicious dish that's perfect for any night of the week. Made with hearty ground beef, crispy bacon, and a tangy, savory sauce, these Sloppy Joes are sure to bring back fond memories and create new ones.

    Old fashioned sloppy joe on a plate.
    [feast_advanced_jump_to]

    💖 Why This Recipe Works

    • Rich and Hearty: Made with ground sirloin, bacon, and a mix of spices, this old-fashioned sloppy joe recipe is packed with rich, savory flavors.
    • Easy Comfort Food: This old-fashioned sloppy joe recipe offers a classic comfort food experience, perfect for family dinners or casual gatherings.
    • Flavorful Homemade Sloppy Joe Sauce: The combination of Worcestershire sauce, soy sauce, tomato sauce, and brown sugar creates a deliciously tangy and sweet sauce that everyone will enjoy.

    ⭐ Star Ingredients

    • Ground Sirloin: Lean and flavorful choice for the base of the old-fashioned sloppy joe recipe.
    • Sweet Onion: Adds sweetness and depth to the dish.
    • Red Bell Pepper: Provides color, texture, and a hint of sweetness.
    • Bacon: Adds a smoky flavor and richness to the old-fashioned sloppy joe recipe.
    • Worcestershire Sauce: Enhances the umami flavor and adds depth.
    • Soy Sauce: Adds a savory richness and depth of flavor.
    • Tomato Sauce: Forms the base of the sauce, providing acidity and richness.
    • Ketchup: Adds sweetness and tanginess to the sauce.
    • Chili Powder: Adds warmth and complexity to the flavor profile.
    • Cumin: Adds earthiness and depth to the dish.
    • Paprika: Provides color and a subtle smokiness.
    • Dry Mustard: Adds tanginess and depth of flavor.
    • Brown Sugar: Balances the acidity of the tomatoes and adds sweetness.
    • Garlic Salt: Infuses garlic flavor and adds seasoning.
    • Seasoned Salt: Adds a balanced blend of flavors to enhance the taste.
    • Hamburger Buns: Serve as the vessel for enjoying the old-fashioned sloppy joe recipe, toasted for added texture.

    For the complete list of ingredients with measurements and instructions, please see the recipe card at the bottom of the post.

    📖  Substitutions & Variations

    • BBQ Twist: Elevate the flavor of lean ground beef with the tangy sweetness of BBQ sauce, adding depth and richness to your Sloppy Joes.
    • Spicy Turkey: Elevate the flavor profile by using ground turkey, adding a tablespoon of tomato paste for depth, and tossing in some diced jalapeno for a spicy kick.
    • Veggie Delight: Add diced mushrooms, green pepper, carrots, and zucchini for extra texture and nutrition, making it a hearty vegetarian alternative.

    🔪 How To Make Old Fashioned Sloppy Joes With Ketchup

    Cooking chopped onion and ground beef in a skillet.
    1. Step 1: In a large skillet, cook the ground sirloin until fully browned and no pink remains. Drain excess fat on paper towels, then return the meat to the skillet.
    Cooking chopped onion, tomatoes, and ground beef in a skillet.
    1. Step 2: Add the chopped onion and red bell pepper to the skillet. Cook on low for 5 minutes. Cook the bacon until crispy, drain the fat, and set aside.
    Tomato sauce, ketchup, chili powder, cumin, paprika, dry mustard, brown sugar, garlic salt, and seasoned salt added to the cooked ground beef in a skillet.
    1. Step 3: Add Worcestershire and soy sauce to the skillet and stir. Then add tomato sauce, ketchup, chili powder, cumin, paprika, dry mustard, brown sugar, garlic salt, and seasoned salt. Stir to combine. Let it simmer on low heat for 20 minutes, stirring occasionally. Meanwhile, toast the buns in a toaster or in the oven until lightly toasted.
    Cooking sloppy joe mixture in a skillet.
    1. Step 4: After 20 minutes of simmering, stir the Sloppy Joe mixture. Crumble the bacon over it and mix well. Serve on toasted buns, either open-faced or as sandwiches. Pair with chips and condiments like pickles, olives, banana peppers, or relish.
    Homemade sloppy joe burger on a plate.

    👩‍🍳 Expert Tips

    • Simmer Slowly: Let the Sloppy Joe mixture simmer on low heat to allow the flavors to meld together and intensify.
    • Consistency Check: Adjust the thickness of the Sloppy Joe filling by simmering longer for a thicker consistency or adding a splash of broth if it becomes too thick.

    💭 FAQs

    How To Thicken Sloppy Joes?

    To thicken Sloppy Joes, you can simmer the mixture uncovered to reduce the sauce or mix in a tablespoon of cornstarch with water and add it to the sauce to thicken it quickly. Another quick option is to stir in some tomato paste, which enriches the flavor and adds thickness.

    What Vegetable Goes With Sloppy Joes?

    Crisp coleslaw or a tangy pickled vegetable medley makes excellent sides for Sloppy Joes, providing a refreshing contrast to the rich, savory meat. Steamed green beans or roasted Brussels sprouts also pair well, adding a nutritious and flavorful balance to the meal.

    What To Do With Leftover Sloppy Joe Meat?

    Leftover Sloppy Joe meat can be repurposed into a hearty filling for tacos, burritos, or quesadillas, adding a flavorful twist to these classic dishes. Alternatively, use it as a robust topping for baked potatoes or mix it into macaroni and cheese for a savory, meaty upgrade to the meal.

    How To Store Sloppy Joes Mixture?

    Store any leftover Sloppy Joes mixture in an airtight container in the refrigerator for up to 3-4 days.
    You can freeze sloppy joes mixture for up to 2-3 months.
    Defrost the sloppy joes mixture in the refrigerator overnight.

    💖 Serving Suggestions

    Wondering what sides go with sloppy Joes? Here are some of my favorite foods that go well with sloppy Joes.

    • Coleslaw: A classic pairing, coleslaw adds a refreshing crunch and tanginess that balances the richness of the old fashioned sloppy joes recipe.
    • Sweet Potato Fries: Serve crispy sweet potato fries on the side for a deliciously sweet and savory contrast to the old fashioned sloppy joes recipe.
    • Corn on the Cob: Boil or grill corn on the cob and serve it with butter and a sprinkle of salt for a simple and tasty side dish.
    • Baked Beans: Hearty and flavorful baked beans are a traditional accompaniment to classic sloppy joes, adding protein and sweetness to the meal.
    • Potato Salad: Creamy potato salad, flavored with mustard, mayonnaise, and herbs, provides a comforting and satisfying side dish.
    Sloppy joe burger served chips on a plate.

    🍽 More Weeknight Winners You’ll Love

    • Easy Pasta With Pancetta and Peas.
      Easy Pasta With Pancetta and Peas
    • Skillet Ground Turkey Sloppy Joes.
      Skillet Ground Turkey Sloppy Joes
    • Mushroom Risotto in a bowl.
      Creamy Spinach Mushroom Risotto (Easy & Ready in 30 Minutes!)
    • Mediterranean Zucchini Stew With Tomatoes.
      Mediterranean Zucchini Stew With Tomatoes

    Did you make this recipe? Leave a review and a ⭐⭐⭐⭐⭐ rating below, or tag us in our Facebook Group! Alternatively, bookmark it in your browser or save to Pinterest.

    Old Fashioned Sloppy Joes recipe With Ketchup

    Old Fashioned Sloppy Joes recipe

    Angela Milnes
    Bring back a classic favorite with these Old Fashioned Sloppy Joes! Made with ground beef simmered in a rich, tangy ketchup-based sauce, these sloppy joes are packed with nostalgic flavors. Served on soft buns, they’re the perfect comfort food for a quick and satisfying meal that everyone will love!
    5 from 4 votes
    Print Recipe Pin Recipe Rate this Recipe
    Prep Time 5 minutes mins
    Cook Time 30 minutes mins
    Total Time 35 minutes mins
    Course Dinners
    Cuisine American
    Servings 8 Servings
    Calories 360 kcal

    Ingredients
      

    • 1 ½ pounds Ground Sirloin
    • 1 Onion chopped
    • 1 Red Pepper chopped
    • 10 Strips Bacon
    • 2 tablespoon Worcestershire Sauce
    • 1 tablespoon Soy Sauce
    • 1 tablespoon Tomato Sauce
    • ¼ Cup Ketchup
    • 1 teaspoon Chili Powder
    • 1 teaspoon Cumin
    • 1 Tablespoon Paprika
    • 1 Tablespoon Dry Mustard
    • ¼ cup Brown Sugar
    • 1 teaspoon Garlic Salt
    • ¼ teaspoon Salt
    • 8 Hamburger Buns

    Instructions
     

    • In a large skillet, brown the ground sirloin until fully cooked and no pink remains. Ensure the meat is a dark brown. Drain the excess fat on paper towels and place the browned sirloin back in the skillet.
    • Add the chopped onion and chopped red bell pepper to the skillet. Cook on low heat for 5 minutes.
    • Cook the bacon until crispy. Drain the fat from the bacon and set it aside.
    • Add the Worcestershire sauce and soy sauce to the skillet. Stir well. Add the tomato sauce, ketchup, chili powder, cumin, paprika, dry mustard, brown sugar, garlic salt, and seasoned salt to the skillet. Stir well to combine all ingredients.
    • Let the mixture simmer on low heat for about 20 minutes, stirring occasionally.
    • While the Sloppy Joes are simmering, toast the buns. You can toast them in a toaster or on a cookie sheet in the oven until they are lightly toasted.
    • After 20 minutes of simmering, stir the Sloppy Joe mixture. Crumble the cooked bacon over the meat mixture and stir to combine.
    • Serve the Sloppy Joe mixture on the toasted buns. You can serve them open-faced or as sandwiches. Accompany with chips and condiments of your choice, such as pickles, olives, banana peppers, relish, or other favorites.

    Notes

    Simmer Slowly: Let the Sloppy Joe mixture simmer on low heat to allow the flavors to meld together and intensify.
    Consistency Check: Adjust the thickness of the Sloppy Joe filling by simmering longer for a thicker consistency or adding a splash of broth if it becomes too thick.

    Nutrition

    Serving: 1gCalories: 360kcalCarbohydrates: 34gProtein: 21gFat: 15gSaturated Fat: 5gPolyunsaturated Fat: 2gMonounsaturated Fat: 6gTrans Fat: 1gCholesterol: 58mgSodium: 916mgPotassium: 435mgFiber: 2gSugar: 13gVitamin A: 563IUVitamin C: 3mgCalcium: 98mgIron: 4mg
    Print Recipe Pin Recipe Rate this Recipe
    Tried this recipe?Let us know how it was!

    More Tasty Recipes To Add To Your Menu

    • Vegan Beetroot And Black Bean Burger
    • Best Beetroot Hummus Recipe
    • Easy Beet Cured Salmon Recipe
    • The Best Stuffed Mushrooms
    • Avocado Salad
    • Green Mashed Potatoes

    Top 12 Paprika Substitutes

    August 9, 2024 by Angela Milnes

    Paprika substitutes.

    You know those times when you're halfway through a recipe and realize you're out of paprika? Don't worry, I've been there too! But guess what? There are plenty of other spices and Paprikia Substitutes that can step in and save the day.

    Whether you're looking for something with a similar taste or color or just need a quick fix, I've got you covered. Let's explore some easy and Best Paprika Substitutes that you probably already have in your kitchen.

    [feast_advanced_jump_to]

    Why People Love Paprika

    Before talking about substitutes, let's first get to know more about paprika. Paprika is a popular spice made from ground sweet red peppers, specifically from the Capsicum Annuum plant, which includes bell peppers and chili peppers.

    Paprika originally comes from North America but became famous in Hungarian (so it is also known as Hungarian paprika) and Spanish cuisines. Paprika has a mild, sweet taste with just a hint of peppery heat.

    It is not too spicy, making it perfect for adding flavor without overwhelming your dish. The bright red color of paprika adds a lovely, vibrant touch to your meals.

    Types Of Paprika

    • Sweet Paprika: Mild and sweet, great for adding color and flavor.
    • Hot Paprika: Spicy and bold, perfect for those who love a bit of heat.
    • Smoked Paprika: Also known as Spanish paprika, adds a deep, smoky flavor to dishes.

    Best Options For Paprika Replacement

    Here are some great paprika substitutes that can bring a similar flavor and color to your meals.

    1. Red Pepper Flakes 

    Unlike the mild and sweet taste of paprika, crushed red pepper flakes bring a spicy kick with a Scoville heat level ranging from 15,000 to 30,000 units. The flavor is more robust and fiery, which can add a nice depth to your meals.

    Making crushed red pepper flakes at home is simple—just dry some red chili peppers, remove the stems, and crush them using a grinder or a mortar and pestle.

    When using crushed red pepper flakes as a paprika substitute, use about half the amount of paprika called for in the recipe to avoid overpowering the dish with heat.

    Try it in:

    • Shakshuka With Goat Cheese
    • Chili Con Carne
    • Pastle Dyed eviled Eggs
    • Air Fryer Roasted Vegetables
    • Instant Pot Tomato Soup
    Crushed red pepper flakes.

    2. Chipotle Chili Powder

    Chipotle powder can be the best paprika substitute if you're looking to add a smoky, rich flavor to your dishes. Chipotle powder offers a deep, earthy taste with a medium heat level of about 2,500 to 8,000 Scoville units. This makes it spicier than regular paprika but less hot than other chili powders.

    You can make chipotle powder at home by smoking fresh jalapeños until they're completely dried, then grinding them into a fine powder.

    When using chipotle powder as a substitute for paprika powder, start with half the amount of paprika called for in the recipe to manage the heat and smokiness. The main drawback is the difference in flavor; chipotle powder's strong smokiness might not suit all dishes that call for paprika.

    Try it in:

    • Smoky Chili
    • BBQ Chicken Rub
    • Spicy Guacamole
    • Roasted Sweet Potatoes
    • Grilled Shrimp Tacos
    Chipotle chili powder spilled from a spice jar.

    3. Tomato Powder

    Tomato powder, made from dried tomatoes, can be a unique paprika alternative, offering a rich, tangy flavor without any heat. It offers a distinct taste that’s sweet and slightly tart, making it suitable for dishes where you want to enhance the tomato flavor.

    To make tomato powder at home, simply slice tomatoes thinly, dry them in a dehydrator or oven until they are completely crisp, and then grind them into a fine powder.

    When a recipe calls for paprika, you can use an equal amount of tomato powder as a substitute. One downside is that tomato powder lacks the smoky or spicy notes of paprika, so it won't deliver the same flavor profile.

    Try it in:

    • Tomato Basil Soup
    • Homemade Ketchup
    • Pasta Sauce
    • Meatloaf
    • Pizza Sauce
    Portion of tomato powder.

    4. Cayenne Pepper Powder 

    Cayenne pepper powder is one of the spiciest paprika substitutes you can find in your spice cabinet. It has a fiery flavor with a heat level of about 30,000 to 50,000 Scoville units, so it's much hotter than regular paprika.

    If you want to make cayenne pepper powder at home, simply dry some cayenne peppers, remove the stems, and grind them into a fine powder.

    When you replace paprika with cayenne pepper powder, start with only a quarter of the amount of paprika called for in the recipe to avoid making the dish too hot.

    The main disadvantage is that cayenne lacks the smoky notes and sweetness of paprika, so it might change the overall flavor profile. Try it in:

    • Spicy Chicken Tacos
    • Fiery Chili
    • Cajun Shrimp
    • Hot Wings
    • Spiced Roasted Nuts
    Whole cayenne peppers with cayenne pepper powder.

    5. Hot Sauce 

    Hot Sauce can be a great replacement for paprika if you want to add some extra kick to your dishes. Hot sauces come in various flavor profiles, from mild to extreme heat, with Scoville levels ranging from 1,000 to over 16,000,000 units. This makes them much spicier than paprika, which is typically sweet and mild.

    Making hot sauce at home is easy—just blend together fresh chili peppers, vinegar, salt, and a bit of garlic powder. If a recipe calls for paprika, use hot sauce sparingly; start with a few drops and adjust to taste.

    One downside is that hot sauce lacks the earthy notes and vibrant red color of paprika, which might change the look and overall flavor of your dish.

    Here are five recipes where you can use hot sauce as a substitute for paprika:

    • Spicy Chicken Wings
    • Zesty Tomato Soup
    • Fiery Tacos
    • Spiced Potato Salad
    • Tangy BBQ Ribs
    Bottles of hot sauce.

    6. Achiote Powder

    Achiote powder can be a vibrant spice to substitute paprika in your recipes. It provides a slightly earthy and nutty flavor with peppery and sweet undertones, but it's not very spicy, with a heat level that can go up to 40,000 Scoville units.

    To make achiote powder at home, simply grind dried annatto seeds into a fine powder. When you replace paprika with achiote powder, use an equal amount since both have similar vibrant red hues.

    However, one disadvantage is that achiote has a more distinct, earthy flavor, which may not suit all dishes that call for paprika. Try it in:

    • Tacos Al Pastor
    • Spiced Rice
    • Marinated Grilled Chicken
    • Roasted Vegetables
    Achiote seeds.

    7. Aleppo Chili Powder

    Aleppo chili powder offers a delightfully earthy flavor with hints of fruitiness and mild heat, typically around 10,000 Scoville units. This makes it a bit hotter than paprika but still manageable for most palates.

    You can make Aleppo chili powder at home by drying Aleppo peppers and then grinding them into a fine powder. When using as an alternative for paprika, use slightly less Aleppo chili powder due to its higher heat—try using about ¾ of the amount called for in the recipe.

    One disadvantage is that its distinct, earthy flavor may not perfectly match all dishes that use paprika. Try it in:

    • Spicy Hummus
    • Grilled Chicken Marinade
    • Roasted Vegetables
    • Spiced Fish Tacos
    • Smoky Tomato Soup
    Aleppo chili powder.

    8. Ground Ancho Chile 

    Ancho chili powder, adding rich and smoky depth to your dishes, has a sweet, mildly fruity flavor with earthy undertones and a mild heat level, typically between 1,000 to 1,500 Scoville units. This makes it a bit spicier than regular paprika but still quite gentle.

    You can make ancho powder at home by drying poblano peppers and then grinding them into a fine powder. When you replace paprika with ancho chili powder, use an equal amount since the heat difference is minimal.

    One disadvantage is that ancho powder has a more pronounced smoky flavor, which might not suit all recipes calling for paprika. Try it in:

    • Chili Con Carne
    • Spicy BBQ Sauce
    • Roasted Sweet Potatoes
    • Mexican Rice
    • Grilled Chicken Rub
    Ground ancho chili powder in a bowl.

    9. Guajillo Chili Powder

    Guajillo chili powder offers a tangy, slightly sweet taste with a hint of smokiness and moderate heat, typically ranging from 2500 to 5,000 Scoville units. This makes it spicier than regular paprika but still family-friendly.

    You can make guajillo chili powder at home by drying guajillo peppers and grinding them into a fine powder. When substituting for paprika, use slightly less guajillo chili powder due to its higher heat—about ¾ of the amount called for in the recipe.

    One disadvantage is that its distinct tangy flavor might not suit all dishes that typically use paprika. Try it in:

    • Enchilada Sauce
    • Spicy Beef Stew
    • Tacos
    • Chili Beans
    Guajillo chili powder in a bowl.

    10. Liquid Smoke

    Liquid smoke is a great alternative to smoked paprika in recipes. It offers a deep, smoky flavor without heat, ideal for those who like smokiness in milder dishes. With no Scoville rating, liquid smoke delivers a rich, smoky taste.

    Making liquid smoke at home can be tricky. It requires capturing and condensing smoke from burning wood chips, not the simplest kitchen task. Luckily, you can buy liquid smoke at grocery stores or online from retailers like Amazon or specialty spice shops.

    When replacing smoked paprika with liquid smoke, start with a few drops and adjust to taste. One downside is that liquid smoke doesn't have the subtle heat of smoked paprika, so you might miss that slight kick. Also, it's strong and can overpower a dish if not used sparingly.

    Try it in:

    • Smoky Beans
    • Grilled Vegetables
    • Meat Marinades
    • Smoky Tomato Soup

    11. Bell Peppers

    Bell peppers have a sweet, crisp taste and no heat, as they range from 0 to 0 on the Scoville scale. This makes them perfect for family-friendly meals where you want to avoid any spiciness.

    You can make your own bell pepper powder at home by drying the peppers and grinding them into a fine powder. Simply slice the bell peppers thinly, dehydrate them using an oven or dehydrator, and then blend them into a powder.

    Use about 1.5 times the amount of bell pepper powder to replace smoked paprika since it has a milder flavor. One disadvantage is that bell pepper powder won't provide that smoky taste, so your dish might lack a bit of depth. Try them in:

    • Roasted Chicken
    • Vegetable Stir-Fry
    • Tomato Sauce
    • Potato Salad
    • Meatloaf
    Dried bell peppers.

    12. Maras Pepper Flakes

    Maras pepper flakes can be a wonderful spice for replacing smoked paprika in your recipes. These Turkish pepper flakes have a rich, slightly smoky flavor with a hint of fruitiness and moderate heat, typically ranging from 1,000 to 2,500 on the Scoville scale. This makes them perfect for adding a bit of warmth without overwhelming spiciness.

    You can make Maras pepper flakes at home by drying Maras peppers and then crushing them into flakes. Simply slice the peppers, dry them using an oven or dehydrator, and then crush them.

    Use an equal amount of Maras pepper flakes to replace smoked paprika in your recipes. One disadvantage is that while they offer some smokiness, they might not provide as intense a smoky flavor as smoked paprika. Try them in:

    • Grilled Chicken Rub
    • Roasted Vegetables
    • Shakshuka
    • Spicy Hummus
    • Chili Con Carne
    Maras pepper flakes.

    Which Paprika Alternative Will You Use?

    To wrap up, numerous alternatives exist to using paprika in your dishes. From vibrant achiote and Aleppo chili powder to smoky ancho chili and tangy guajillo chili, each spice offers a unique flavor profile to enhance any dish.

    Liquid smoke and bell peppers also serve as milder, non-spicy options. Maras pepper flakes are great for adding the right amount of heat without overpowering your taste buds.

    Experimenting with these spices can bring new depths of flavor to your recipes. While not exact substitutes for paprika, they can add a unique twist to your dishes.

    More Easy Substitutes:

    • Substitute For Heavy Cream
    • Best Substitutes For Emmental Cheese
    • Substitute For Avocado Oil
    • What Do Pickled Eggs Taste Like
    • Best Substitute For Black Eyed Peas

    Creamy Cajun Pasta Sauce with Parmesan

    August 8, 2024 by Angela Milnes

    Creamy Cajun Pasta Sauce with Parmesan.

    Looking for a quick and flavorful dinner idea? Try this Creamy Cajun Pasta Sauce With Parmesan! It's rich, spicy, and packed with flavor, making it the perfect addition to your favorite pasta. With a blend of Cajun spices and creamy Parmesan, this sauce will turn any meal into a deliciously satisfying treat. Perfect for busy weeknights or a cozy weekend dinner. Enjoy!

    creamy cajun pasta sauce and pasta
    [feast_advanced_jump_to]

    💖 Why This Recipe Works

    • Rich and Flavorful: The creamy Cajun pasta sauce combined with Cajun seasoning has a bold and absolutely delicious flavor that’s sure to impress.
    • Cheesy Goodness: The addition of Parmesan adds a rich, cheesy touch that makes this Cajun cream sauce irresistible.
    • Versatile: Perfect for pairing with any pasta, this creamy Cajun Pasta Sauce Recipe is easy to make and elevates your meal to restaurant-quality.

    ⭐ Star Ingredients

    • Rigatoni Pasta: A hearty pasta that holds the creamy sauce well.
    • Olive Oil: Used for sautéing and adding a smooth base flavor.
    • Bacon: Adds a smoky, savory flavor to the sauce.
    • White Wine: Provides acidity and depth of flavor.
    • Heavy Cream: Creates a rich and creamy base for the sauce.
    • Cream Cheese: Adds extra creaminess and a slight tang.
    • Cajun Spice: Infuses the sauce with bold, spicy flavors.
    • Grated Parmesan Cheese: Adds a salty, nutty flavor and helps thicken the sauce.
    • Garlic (Powdered or Minced): Provides a fragrant and savory depth to the sauce.
    • Broccoli: Adds a healthy crunch and freshness.
    • Fresh Spinach: Contributes color, nutrients, and a slight earthiness.

    For the complete list of ingredients with measurements and instructions, please see the recipe card at the bottom of the post.

    📖  What Can I Add To Cajun Pasta Sauce?

    • Spicy Sausage Cajun Pasta: Use sliced and cooked spicy sausage instead of bacon, and enhance the heat with additional cayenne pepper.
    • Creamy Cajun Chicken Pasta: Add diced cooked chicken breast and replace the white wine with chicken broth. Garnish with chopped parsley for a fresh finish.
    • Seafood Cajun Pasta: Incorporate shrimp or scallops, add a splash of fresh lemon juice, and a pinch of cayenne pepper for an extra kick.

    🔪 How To Make Creamy Cajun Pasta Sauce

    cooking bacon in a pot and adding wine to deglaze
    1. Step 1: Cook the rigatoni pasta according to the box instructions, then drain and toss it with olive oil. In a large skillet, add chopped bacon and cook over medium heat for about 8 minutes until it crisps. Drain excess bacon grease. Deglaze the pan by adding white wine and scraping it.
    cream cheese cubes in skillet with bacon
    1. Step 2: Stir in cream cheese and heavy cream until the cream cheese melts and the mixture turns creamy. Mix in Cajun spice, grated Parmesan cheese, and garlic powder or minced garlic for a flavorful boost.
    add broccoli to cajun cream
    1. Step 3: Add broccoli to the skillet, stir to combine, cover with a lid, and cook for 5-6 minutes.
    add spinach to cajun cream
    1. Step 4: Stir in fresh spinach, cover the skillet again, and cook for an additional 1-2 minutes until the spinach wilts.
    add pasta to cajun pasta sauce
    1. Step 5: Combine the cooked pasta with the creamy Cajun sauce mixture. Garnish your dish as desired and serve your delicious creamy Cajun pasta sauce for a flavorful meal.
    creamy cajun pasta sauce and pasta

    👩‍🍳 Expert Tips

    • Deglaze with the Right Liquid: After sautéing your meats and veggies, deglaze the pan with a splash of white wine or chicken broth. This adds another layer of flavor and helps incorporate all the delicious bits stuck to the pan into your sauce.
    • Consistency Control: Adjust the thickness of the sauce by simmering longer for a thicker consistency or adding a splash of chicken broth if it becomes too thick.
    • Taste Testing: Continuously taste and adjust the seasoning throughout the cooking process to ensure the sauce is perfectly seasoned before serving.

    💭 FAQs

    What Kind Of Pasta Works Best With Cajun Pasta Sauce?

    Thick pasta like fettuccine, penne, or rigatoni pairs well as they hold the sauce better, ensuring a flavorful bite each time.

    Can I Make this Sauce Vegetarian?

    Absolutely! You can skip the bacon and add more vegetables like mushrooms, zucchini, and bell peppers, or substitute the meat with a plant-based protein.

    What If I Don't Have Cajun Seasoning?

    You can make your own by mixing equal parts garlic powder, paprika, black pepper, onion powder, cayenne pepper, dried oregano, and thyme.

    Best Way to Store Cajun Pasta Sauce

    Store any leftover Creamy Cajun Pasta Sauce in an airtight container in the refrigerator for up to 3-4 days.

    💖 Serving Suggestions

    Here are some of the best sides to serve with Creamy Cajun Pasta Sauce with Parmesan:

    • Garlic Bread: Toasted garlic bread with a buttery, herb-infused spread adds a flavorful and crunchy complement to the creamy pasta.
    • Caesar Salad: A classic Caesar salad with crisp romaine lettuce, Parmesan cheese, and croutons provides a refreshing and tangy side dish.
    • Grilled Shrimp: Juicy grilled shrimp seasoned with Cajun spices offer a perfect protein to pair with the creamy Cajun pasta sauce, enhancing the overall flavor profile.
    • Steamed Broccoli: Lightly steamed broccoli adds a healthy and fresh contrast to the rich and creamy Cajun pasta sauce.
    • Caprese Salad: A simple Caprese salad with fresh tomatoes, mozzarella, basil, and a drizzle of balsamic reduction adds a bright and fresh element to the meal.

    🍽 Try These Pasta Recipes

    • Italian sausage and broccoli pasta in a skillet.
      Creamy Italian Sausage And Broccoli Pasta (With Mascarpone)
    • Slow Cooker Chicken Bacon Ranch Pasta.
      Slow Cooker Chicken Bacon Ranch Pasta
    • Instant Pot Cacio E Pepe Pasta.
      Instant Pot Cacio E Pepe Pasta
    • Cowboy Butter Pasta In Creamy Sauce, Topped with sliced lemons.
      Cowboy Butter Pasta In Creamy Sauce

    Did you make this recipe? Leave a review and a ⭐⭐⭐⭐⭐ rating below, or tag us in our Facebook Group! Alternatively, bookmark it in your browser or save to Pinterest.

    Creamy Cajun Pasta Sauce with Parmesan.

    Creamy Cajun Pasta Sauce with Parmesan

    Angela Milnes
    Spice up your pasta night with this Creamy Cajun Pasta Sauce with Parmesan! This rich and flavorful sauce combines the boldness of Cajun spices with the creaminess of Parmesan, creating a perfect balance of heat and comfort. It’s an irresistible sauce that will take your pasta dishes to the next level!
    5 from 4 votes
    Print Recipe Pin Recipe Rate this Recipe
    Prep Time 5 minutes mins
    Cook Time 25 minutes mins
    Total Time 30 minutes mins
    Course Dinners
    Cuisine American
    Servings 6 Servings
    Calories 843 kcal

    Ingredients
      

    • 16 ounces Rigatoni Pasta
    • 1 tablespoon Olive Oil
    • 10 slices Bacon chopped
    • 1 cup White Wine
    • 1 pint Heavy Cream
    • 4 ounces Cream Cheese
    • ¼ cup Cajun Spice
    • 1 cup Parmesan Cheese shredded
    • 10 cloves Garlic Minced
    • 2 Broccoli cut in small pieces
    • 4 ounces Spinach fresh

    Instructions
     

    • Cook the rigatoni pasta according to the box instructions, then drain and toss it with olive oil.
    • In a large skillet, add chopped bacon and cook over medium heat for about 8 minutes until it crisps. Drain excess bacon grease. Deglaze the pan by adding white wine and scraping it.
    • Stir in cream cheese and heavy cream until the cream cheese melts and the mixture turns creamy.
    • Mix in Cajun spice, grated Parmesan cheese, and garlic powder or minced garlic for a flavorful boost.
    • Add broccoli to the skillet, stir to combine, cover with a lid, and cook for 5-6 minutes.
    • Stir in fresh spinach, cover the skillet again, and cook for an additional 1-2 minutes until the spinach wilts.
    • Combine the cooked pasta with the creamy Cajun sauce mixture.
    • Garnish your dish as desired and serve your delicious creamy Cajun pasta sauce for a flavorful meal.

    Notes

    Consistency Control: Adjust the thickness of the sauce by simmering longer for a thicker consistency or adding a splash of chicken broth if it becomes too thick.
    Taste Testing: Continuously taste and adjust the seasoning throughout the cooking process to ensure the sauce is perfectly seasoned before serving.

    Nutrition

    Calories: 843kcalCarbohydrates: 79gProtein: 28gFat: 48gSaturated Fat: 26gPolyunsaturated Fat: 5gMonounsaturated Fat: 13gCholesterol: 120mgSodium: 636mgPotassium: 1167mgFiber: 10gSugar: 9gVitamin A: 6795IUVitamin C: 187mgCalcium: 419mgIron: 5mg
    Print Recipe Pin Recipe Rate this Recipe
    Tried this recipe?Let us know how it was!

    Add These Tasty Recipes To Your Menu

    • Black Back And Beetroot Burger
    • Instant Pot Cajun Rice And Beans Recipe
    • Monkey Pizza Bread
    • Beet Cured Salmon
    • Easy Stuffed Mushrooms
    • Chicken Thighs In Honey And Mustard Sauce

    Easy Air Fryer Pretzels With Cinnamon

    August 7, 2024 by Angela Milnes

    Easy Air Fryer Pretzels With Cinnamon.

    Craving a crunchy snack? Look no further than these Easy Air Fryer Pretzels. With just a few simple ingredients and the magic of your air fryer, you can whip up deliciously golden pretzels that are crispy on the outside and soft on the inside.

    Easy Air Fryer Pretzels With Cinnamon
    [feast_advanced_jump_to]

    💖 Why This Recipe Works

    • Quick and Convenient: Utilizing an air fryer speeds up the baking process significantly.
    • Sweet and Savory: The cinnamon topping provides a delightful contrast to the salty pretzel.
    • Perfectly Puffed: The air fryer ensures a beautifully browned and fluffy pretzel every time.

    ⭐ Star Ingredients

    cinnamon pretzel ingredients.
    • Coconut Oil Or Vegetable Oil: Coconut oil adds a hint of sweetness, while vegetable oil keeps the pretzels crisp and golden.
    • Granulated Sugar: Sweetens the pretzels and, when combined with cinnamon, forms a delightful crust that is both sweet and slightly spicy.
    • Ground Cinnamon: Brings a warm, aromatic flavor to these pretzels, transforming them from a simple snack into a delightful treat.
    • Twisted Pretzels: Provide the perfect canvas for the cinnamon sugar, with their traditional shape and chewy texture making every bite a delight.

    For the complete list of ingredients with measurements and instructions, please see the recipe card at the bottom of the post.

    📖  Substitutions & Variations

    You don’t have to use cinnamon sugar if you don’t want to. You can use any type of sugar or seasoning that you like. Some other options include:

    • Onion powder
    • Powdered sugar
    • Turbinado sugar
    • Brown sugar
    • Cajun seasoning
    • Garlic salt

    🔪 How To Make Air Fryer Pretzels?

    cinnamon and oil in a bowl for air fryer pretzels.
    1. Step 1: In a large bowl, melt the coconut oil. Stir in the sugar and cinnamon until combined.
    air fryer pretzels in a bowl.
    1. Step 2: Add your pretzels, stirring gently with a spatula or large spoon, and toss to coat every piece.
    Easy Air Fryer Pretzels With Cinnamon in air fryer basket.
    1. Step 3: Place the cinnamon-coated pretzels in the Air Fryer. Bake at 350° for 3-5 minutes.
    Easy Air Fryer Pretzels With Cinnamon on a baking tray.
    1. Step 4: Remove the pretzels and allow to sit for a minute or two before serving.

    👩‍🍳 Expert Tips

    • Use Coconut Oil for Extra Flavor: Coconut oil adds a subtle sweetness to the pretzels, enhancing the cinnamon-sugar coating. If you prefer a neutral flavor, vegetable oil works fine for a crispier texture.
    • Toss Evenly: Ensure the pretzels are evenly coated in the cinnamon-sugar mixture by tossing them gently but thoroughly. This ensures every bite is packed with flavor.
    • Don’t Overcrowd the Air Fryer: For the best texture and even crispness, cook the pretzels in batches. This allows the hot air to circulate properly around each pretzel.
    • Serve with Dipping Sauces: These cinnamon pretzels pair wonderfully with chocolate or caramel dipping sauces, adding an extra layer of sweetness for an indulgent treat.

    💭 FAQs

    When Do You Eat Pretzels?

    Pretzels are traditionally eaten as a snack food, but they can also be served as a side dish or served at a party or buffet. Pretzels are commonly eaten with dipping sauces such as mustard, ketchup, or cheese dip.

    Why Bake Pretzels In The Air Fryer?

    Air fryers are great for making pretzels because they cook them super quick and they come out nice and crispy. This is the perfect recipe for anyone who doesn’t have a lot of time or doesn’t want to heat up their oven.

    How Many Pretzels Can I Cook In The Air Fryer?

    This recipe makes 16oz of pretzels, which is about 40-50 small pretzels. If you are making larger pretzels, you can cook fewer at a time.

    Can I Make These Pretzels Ahead Of Time?

    Yes, you can make these pretzels ahead of time and store them in an airtight container. They will last for up to 2 weeks.

    How Long Do Air Fryer Pretzels Take To Cook?

    These pretzels only take about 3 minutes to cook, so they are perfect for when you need a quick snack or dessert.

    The Best Way To Store Air Fryer Pretzels with Cinnamon

    Allow the cinnamon pretzels to cool to room temperature.
    Place them in an airtight container or resealable bag.
    Refrigerate for up to 2-3 days to maintain freshness.

    💖 Serving Suggestions

    • Chocolate: You can dip your pretzels in chocolate, or you can drizzle chocolate over them. This is a great option if you are looking for a sweet snack. Check out these great Pretzel Covered Treats!
    • Caramel Sauce: Instant Pot Caramel Sauce is another great option for a sweet snack. You can make your caramel sauce or you can buy it at the store.
    Easy Air Fryer Pretzels With Cinnamon

    🍽 More Air Fryer Snacks

    • Best Air Fryer Onion Rings.
      Air Fryer Onion Rings (With Cheese!)
    • Air Fryer Apples.
      Crispy Air Fryer Apples Fries (Under 15 Minutes)
    • Crispy Air Fryer Avocado Fries Recipe.
      Crispy Air Fryer Avocado Fries Recipe
    • Air Fryer Peaches With Cream.
      Air Fryer Peaches (Cinnamon Peaches)

    Did you make this recipe? Leave a review and a ⭐⭐⭐⭐⭐ rating below, or tag us in our Facebook Group! Alternatively, bookmark it in your browser or save to Pinterest.

    Easy Air Fryer Pretzels With Cinnamon.

    Air Fryer Pretzels with Cinnamon

    Angela Milnes
    These Air Fryer Pretzels with Cinnamon are a sweet and satisfying snack that’s incredibly easy to make! Soft, warm pretzels are coated with a buttery cinnamon-sugar mixture, creating the perfect combination of chewy and sweet.
    5 from 3 votes
    Print Recipe Pin Recipe Rate this Recipe
    Prep Time 3 minutes mins
    Cook Time 5 minutes mins
    Total Time 5 minutes mins
    Course Air Fryer Recipes
    Cuisine American
    Servings 8 Servings
    Calories 455 kcal

    Ingredients
      

    • ¾ Cup Coconut Oil
    • ¾ Cup Granulated Sugar
    • 3 tablespoon Ground Cinnamon
    • 16 oz Twisted Pretzels

    Instructions
     

    • In a large bowl, melt the coconut oil. Stir in the sugar and cinnamon until combined. Add in your bag of pretzels.
    • Stirring gently with a spatula or large spoon, toss to coat every piece.
    • Add your pretzels to the air fryer basket.
    • Bake at 350° for 3-5 minutes. Once the sugar has turned color is when you want toremove them. Otherwise, the pretzels will burn.
    • Allow to sit for a minute or two and enjoy!

    Notes

    Once the pretzels are coated place in the air fryer. You may have to do this in 3 or 4 batches as you don’t want to overcrowd the air fryer basket.
    Put the air fryer on 350° for 3-5 minutes. Our Instant Pot Air Fryer took 3 minutes to cook so be sure to watch it carefully as every air fryer is different.

    Nutrition

    Calories: 455kcalCarbohydrates: 67gProtein: 6gFat: 22gSaturated Fat: 17gPolyunsaturated Fat: 1gMonounsaturated Fat: 2gSodium: 116mgPotassium: 257mgFiber: 6gSugar: 19gVitamin A: 9IUVitamin C: 1mgCalcium: 46mgIron: 2mg
    Print Recipe Pin Recipe Rate this Recipe
    Tried this recipe?Let us know how it was!
    Easy Air Fryer Pretzels With Cinnamon

    More Simple Recipe To Try!

    • Crock Pot Chicken Gravy
    • Instant Pot Pork Roast
    • Best Sausage Cannelloni Recipe
    • Creamy Instant Pot Tortellini
    • Hawaiian Pasta Salad
    • Air Fryer Hot Dogs
    • Best Sausage Gravy Recipe

    Homemade Strawberry Lemonade -Refreshing Summer Drink!

    August 7, 2024 by Angela Milnes

    Homemade Strawberry Lemonade.

    Homemade Strawberry Lemonade is the fruity, sunshine-in-a-glass we all need. It's fresh, pink, and just the right amount of sweet-tart to make any moment feel like summer.

    Homemade Strawberry Lemonade.

    I actually started making this homemade strawberry lemonade during my early blogging days when I wanted something fresh, simple, and way better than store-bought. It’s now a staple for sunny days, family hangouts, and those “I need something fun to sip” moments.

    If fruity drinks are your jam, check out my Brazilian Limeade and Fresh Fruit Strawberry Sangria too!

    [feast_advanced_jump_to]

    💖 Why This Recipe Works

    • Simple Ingredients: Made with fresh fruit, water, and sugar—easy and affordable.
    • Custom Sweetness: Control the sugar to suit your taste.
    • Full of Flavor: Juicy strawberries + zesty lemons = perfection.
    • All Ages Approved: Kid-friendly, brunch-ready, and picnic-perfect.

    ⭐ Star Ingredients

    Homemade Strawberry Lemonade Ingredients.
    • Fresh Strawberries: Sweet, juicy, and full of summery flavor. Blend ’em up for that vibrant pink hue.
    • Lemons: Freshly squeezed, not bottled—because you can taste the difference.
    • Sugar Syrup: Dissolves better than straight sugar and makes the lemonade smooth and sippable.
    • Cold Water: Balances the flavors and makes it extra refreshing.

    For the complete list of ingredients with measurements and instructions, please see the recipe card at the bottom of the post.

    📖  Substitutions & Variations

    • Honey-Sweetened: Use honey instead of sugar for a natural, floral twist.
    • Sparkling Strawberry Lemonade: Swap 1–2 cups of cold water for sparkling water or lemon soda for a fizzy, party-ready version.
    • Berry Remix: Add raspberries, blueberries, or blackberries to change up the flavor.
    • Strawberry Limeade: Switch the lemons for limes for a tangy punch.
    • Frozen Version: Blend with ice for a frosty strawberry slush.
    • Herbal Infusion: Steep basil, mint, or rosemary in the syrup for a fresh herbal hit.

    For more summer drink inspo, check out my Russian Tarragon Soda and the frosty fun of this Best Mangonada Recipe.

    🔪How To Make Strawberry Lemonade

    sugar and water in saucepan.
    1. Step 1: In a small saucepan, combine 1 cup of sugar and 1 cup of water. Bring to a boil and stir until the sugar has dissolved completely. Remove the syrup from heat and let it cool for about 30 minutes.
    lemons being juiced.
    1. Step 2: Juice the lemons: While the syrup is cooling, juice the lemons until you have 1 cup of lemon juice. Strain the juice to remove any seeds and excess pulp if you prefer a smoother lemonade.
    strawberries in a blender.
    1. Step 3: Prepare the strawberries: While the syrup is cooling, blend the strawberries with a little water to create a smooth puree.
    strawberry puree in a blender.
    1. Step 4: Strain the strawberry puree through a fine mesh if you prefer a smoother texture.
    cups of strawberry puree, sugar syrup, lemon juice and water.
    1. Step 5: Combine ingredients: In a large pitcher, mix the cooled syrup, lemon juice, strawberry puree, and 4 cups of cold water. Stir well.
    fresh homemade strawberry lemonade garnished with lemon slices and strawberries.
    1. Step 6: Taste your lemonade and if it’s too sweet, add more lemon juice. If it’s too tart, add more water or a bit more sugar. Add ice cubes to the pitcher or to individual glasses. Garnish with lemon slices, whole strawberries, and mint leaves and serve cold.

    💡Hint: Freeze extra lemonade in ice cube trays to keep future glasses chilled without diluting the flavor!

    👩‍🍳 Expert Tips

    • Always go fresh: Bottled lemon juice just doesn’t hit the same.
    • Strain for smoothness: Especially if your strawberries are a little seedy.
    • Make it ahead: Let it chill in the fridge for a few hours to boost the flavor.
    • Batch it up: Double or triple the recipe for parties or picnics.
    • Freeze for later: Freeze the base (syrup + lemon juice + purée) in ice cube trays. When you're ready for a glass, just thaw and stir in cold water—instant lemonade without the wait!

    💭 FAQs

    Can I use frozen strawberries instead of fresh ones?

    Yes, frozen strawberries can be used as a substitute for fresh ones. Ensure they are fully thawed and drained before blending to achieve the desired consistency and flavor.

    How can I adjust the sweetness of my strawberry lemonade?

    To modify the sweetness, you can adjust the amount of simple syrup or sugar added. Starting with a smaller quantity and tasting as you go allows for better control over the final sweetness level.

    How long can I store homemade strawberry lemonade?

    It’ll stay fresh in the fridge for up to 4 days. Remove any garnishes before storing to keep it tasting its best.

    Can I make strawberry lemonade ahead of time for a party?

    Absolutely! Preparing strawberry lemonade a day or two in advance allows the flavors to meld together, resulting in a more flavorful beverage. Just ensure it's stored in the refrigerator until serving.

    💖 Serving Suggestions

    Here’s what pairs beautifully with homemade strawberry lemonade:

    • Mango Chicken Salad: Fresh, zesty, and light.
    • Caprese Mini Pizzas: Tomatoes, basil, and mozzarella never disappoint.
    • Mediterranean Farro Salad: Full of texture and summery flavor.
    • Berry Salad with Goat Cheese: The perfect flavor echo.
    • Paprika Shrimp Skewers: A little smoky, a little spicy—so good.

    DIY Lemonade Bar: Hosting a party? Set up a build-your-own lemonade bar with strawberry purée, sparkling water, lemon slices, fresh herbs (mint, basil, rosemary), and optional mix-ins like flavored syrups or alcohol-free vodka alternatives. It’s interactive, easy, and a guaranteed crowd-pleaser.

    Fancy Rim Hack: Rim your glasses with lemon sugar or crushed freeze-dried strawberries for a cute, flavor-boosting edge that feels straight out of a café.

    Lemonade Jar Gifts: Pour the lemonade base (syrup + lemon + purée) into mason jars, add a cute handwritten label with “Just add water,” and boom—instant hostess gift, neighbor treat, or party favor.

    Homemade Strawberry Lemonade.

    🍽 Try More Summer Drinks

    • Best Brazilian Limeade Recipe.
      Best Brazilian Limeade Recipe
    • How To Make Watermelon Juice.
      How To Make Watermelon Juice
    • Fresh Fruit Strawberry Sangria.
      Strawberry Sangria Recipe (With Mint)
    • Grapefruit Rosemary Mocktail.
      Grapefruit Rosemary Mocktail

    Did you make this recipe? Leave a review and a ⭐⭐⭐⭐⭐ rating below, or tag us in our Facebook Group! Alternatively, bookmark it in your browser or save to Pinterest.

    Homemade Strawberry Lemonade.

    Homemade Strawberry Lemonade

    Angela Milnes
    This homemade strawberry lemonade is the perfect balance of sweet and tangy—refreshing, fruity, and so easy to make! Grab some fresh strawberries and lemon, and you’ve got a delicious summer drink ready in minutes.
    5 from 2 votes
    Print Recipe Pin Recipe Rate this Recipe
    Prep Time 10 minutes mins
    Cool Time 30 minutes mins
    Total Time 45 minutes mins
    Course Beverage
    Cuisine American
    Servings 6 Servings
    Calories 145 kcal

    Ingredients
      

    • 1 Cup Sugar (adjust to taste)
    • 1 Cup Water (for the syrup)
    • 1 Cup Lemon Juice (about 4-6 lemons, freshly squeezed)
    • 1 Cup Fresh Strawberries hulled and halved
    • 4 Cups Cold Water (to dilute)

    Optional Add-ins:

    • Slices Of Lemon
    • Whole Strawberries
    • Ice Cubes

    Instructions
     

    • Combine 1 cup sugar and 1 cup water in a saucepan. Boil until sugar dissolves, then cool for 30 minutes.
    • Blend strawberries with a little water into a smooth puree (strain if desired).
    • Juice lemons to yield 1 cup of juice, straining out seeds and pulp.
    • In a pitcher, mix cooled syrup, lemon juice, strawberry puree, and 4 cups cold water. Stir well.
    • Add more lemon juice for tartness, or water/sugar for sweetness
    • Add ice to glasses, garnish with lemon slices, strawberries, and mint. Serve chilled.

    Notes

    Use Fresh Lemons: Freshly squeezed lemon juice makes all the difference in flavor compared to bottled juice.
    Blend the Strawberries Well: For a smoother lemonade, strain the blended strawberries to remove any seeds or pulp.
    Adjust Sweetness: Taste your lemonade as you mix, and add more sugar or lemon juice to balance the flavor to your liking.
    Chill Before Serving: Let the lemonade sit in the fridge for at least an hour before serving to enhance the flavors.
    Get Creative with Garnishes: Add mint leaves, basil, or even a splash of sparkling water for a fun twist.

    Nutrition

    Calories: 145kcalCarbohydrates: 38gProtein: 0.3gFat: 0.3gSaturated Fat: 0.02gPolyunsaturated Fat: 0.05gMonounsaturated Fat: 0.01gSodium: 11mgPotassium: 79mgFiber: 1gSugar: 35gVitamin A: 5IUVitamin C: 30mgCalcium: 13mgIron: 0.1mg
    Print Recipe Pin Recipe Rate this Recipe
    Tried this recipe?Let us know how it was!

    Simple Birthday Charcuterie Board

    August 7, 2024 by Angela Milnes

    Simple Birthday Charcuterie Board.

    Looking for a fun and simple Birthday Charcuterie Board Idea? Look no further! Today we are sharing a simple Birthday themed charcuterie board perfect for grazing at your next party.

    Birthday charcuterie board.
    [feast_advanced_jump_to]

    Why This Recipe Works

    Charcuterie boards are a great way to bring people together and provide a variety of delicious snacks for everyone to enjoy. They are also visually appealing, making them perfect for special occasions like birthdays. Whether you're throwing a themed party or just looking for something unique and fun, a birthday charcuterie board is the perfect addition to any celebration.

    Choosing Your Board

    When it comes to creating your Birthday Charcuterie Board, the options are endless! You can use a traditional wooden board, or a marble platter, or even get creative with alternative options like using a pizza paddle or cake stand as your base. We ordered a range of Charcuterie Boards from Forest Decor to add some texture and variety to our display. I had my wooden charcuterie boards personalized with our blog name Eat Your Beets!

    Wood charcuterie board that is personalized.

    🥘Ingredients

    The best part about creating a charcuterie board is that you can customize it with your favorite ingredients. For a birthday-themed board, we suggest including a mix of sweet and savory options. Some ideas for your board could include:

    • Assorted cheeses such as cheddar, brie, and gouda.
    • A selection of cured meats like salami, prosciutto, or pepperoni
    • Fresh fruits like grapes, berries, and figs
    • Nuts such as almonds, cashews, or walnuts
    • Crackers and breadsticks for dipping and spreading
    • Chocolate-covered pretzels or other sweet treats
    • Birthday-themed sprinkles or confetti for added flair

    Don't be afraid to get creative and add your own unique touches!

    🔄 Substitutions & Variations

    • Themed Fun: Match colors or add movie-themed treats for a custom vibe.
    • Vegan Twist: Swap meats and cheeses for dairy-free cheese, marinated tofu, and hummus.
    • Dessert Board: Go sweet with mini cupcakes, chocolate-dipped fruit, and marshmallows.

    🔪 How To Assemble Your Charcuterie Board

    Now comes the fun part - putting together your birthday charcuterie board!

    Start by arranging your larger items, such as cheeses and meats, on the board first.

    Next, fill in any gaps with smaller ingredients like fruits and nuts.

    You can also use small dishes or ramekins to hold the olives. Be sure to vary the colors and textures of your ingredients for an eye-catching display.

    Birthday charcuterie board.

    More Fun Small Charcuterie Board Ideas

    If you want some alternative ideas, check out the following designs we came up with using our new wooden charcuterie board as a base!

    Customized Charcuterie Board.
    Charcuterie board christmas tree.

    👩‍🍳 Expert Tips

    • Play with different flavors and textures to create a well-rounded board.
    • Use contrasting colors for a visually appealing display.
    • Incorporate personalized touches, such as customized boards or special ingredients.
    • Don't be afraid to get creative and add your own unique flair!

    💭 FAQs

    Can I Make A Charcuterie Board For A Large Group?

    Absolutely! You can easily scale up the ingredients and use a larger board to accommodate more guests.

    How Long Will My Charcuterie Board Last?

    It is best to serve your board immediately after assembling. However, if you have leftovers, you can store them in an airtight container in the fridge for 1-2 days.

    Can I Make A Vegetarian Or Vegan Charcuterie Board?

    Definitely! There are plenty of plant-based options that can be included on your board, such as hummus, marinated veggies, and dairy-free cheese.

    🧂Serving Suggestions

    Your birthday charcuterie board can be served as a standalone appetizer or paired with other dishes. Some ideas for complementing your board could include:

    • A selection of wines or mocktails. Try this Strawberry Mojito Mocktail!
    • Mini sandwiches or BBQ Sliders.
    • Vegetable crudités Greek Beetroot Dip or Artichoke Dip
    • A variety of crackers or Raw Vegan Bread

    No matter how you choose to serve it, your birthday charcuterie board is sure to be a hit at any party!

    🍽 Related Recipes

    • edamame stir fry in a white bowl.
      Easy Edamame Stir Fry (15-Minute Protein-Packed Side Dish)
    • Chicken And Cabbage Stir Fry Recipe.
      Chicken And Cabbage Stir Fry Recipe
    • Zucchini Egg Bake Recipe.
      Best Zucchini Egg Bake Recipe
    • New Years charcuterie Board.
      New Years Charcuterie Board

    Did you make this recipe? Leave a review and a ⭐⭐⭐⭐⭐ rating below, or tag us in our Facebook Group! Alternatively, bookmark it in your browser or save to Pinterest.

    Simple Birthday Charcuterie Board.

    Birthday Charcuterie Board

    Celebrate in style with a fun and festive Birthday Charcuterie Board! Filled with an assortment of sweet and savory treats—like colorful fruits, cheeses, crackers, chocolates, and even birthday cake-inspired goodies—this board is the perfect centerpiece for any birthday celebration. It's a creative and delicious way to bring a special touch to the party!
    Prep Time 45 minutes minutes
    Cook Time 0 minutes minutes
    0 minutes minutes
    Total Time 45 minutes minutes
    Serving Size 1 Serving
    Print
    Pin

    Equipment

    • 1 Charcuterie Board

    Ingredients

    • 1½ Kilo cheddar All ingredients will depend on the amount of people you expect to serve.
    • 1 full Brie
    • 1 gouda
    • 1 Salami
    • prosciutto
    • 1 packet pepperoni
    • 1 bunch grapes
    • 1 box berries
    • 1 box figs
    • 1 Cup almonds
    • 1 Bag cashews
    • 1 Bag walnuts
    • 1 Box Crackers
    • 1 Box breadsticks
    • 1 bag pretzels

    Instructions

    • Size and Shape of Charcuterie Board will depend on your presentation or occasion.
    • Start by arranging your larger items, such as cheeses and meats, on the board first.
    • Next, fill in any gaps with smaller ingredients like fruits and nuts.
    • You can also use small dishes or a ramekins to hold the olives. Be sure to vary the colors and textures of your ingredients for an eye-catching display.

    Nutrition

    Calories: 5kcal | Carbohydrates: 0.4g | Protein: 0.1g | Fat: 0.3g | Saturated Fat: 0.1g | Sodium: 15mg | Fiber: 0.1g | Calcium: 1mg | Iron: 0.02mg

    Notes

    Top Tips For Making Your Small Charcuterie Board
    Play with different flavors and textures to create a well-rounded board.
    Use contrasting colors for a visually appealing display.
    Incorporate personalized touches, such as customized boards or special ingredients.
    Don’t be afraid to get creative and add your own unique flair!

    Did You Make This Recipe?

    Be sure to share with me on Instagram, Pinterest, or Facebook!

    5 from 3 votes
    Pin Recipe Share Recipe

    Enjoy A Mini Charcuterie Board For Your Birthday

    A birthday charcuterie board is not only delicious, but also adds an element of fun and creativity to any celebration. With endless possibilities for customization, it's easy to create a unique and personalized display that will impress your guests. So go ahead and give it a go.

    More Great Party Appetizers:

    • Salmon Cauliflower Rice Sushi
    • Smoked Salmon Bruschetta With Avocado
    • Mini Cheese Stuffed Peppers
    • Veggie Train With Bell Peppers
    • Stuffed Mushrooms
    • Pizza Pull Apart Bread

    Vegetarian Carrot And Leek Soup Recipe

    August 6, 2024 by Angela Milnes

    Vegetarian Carrot And Leek Soup Recipe.

    This Carrot and Leek Soup is creamy, comforting, and packed with warming flavors like ginger and paprika. Made with simple pantry staples, it's perfect for chilly nights when you want something nourishing on the table fast.

    Vegetarian Carrot And Leek Soup Recipe.

    This vibrant soup is a winter and fall favorite in my home, especially when I’m craving something cozy but light. It’s naturally gluten-free, can be made dairy-free, and works beautifully as a make-ahead lunch. It pairs well with crusty bread or a side of quinoa salad, and it’s just as good reheated the next day.

    If you love veggie-packed soups, check out my Purple Cabbage Soup or Butternut Squash Soup next.

    [feast_advanced_jump_to]

    💖 Why This Recipe Works

    • Rich Flavor: The combination of carrots, leeks, and smoked paprika creates a deep, savory flavor.
    • Minimal Ingredient List: This Carrot And Leek Soup recipe calls for just a few ingredients, making it easy to prepare without the need for a long shopping list or a complicated cooking process.
    • Healthy and Nourishing: Packed with vegetables and spices like ginger, this soup is both delicious and nutritious.

    ⭐ Star Ingredients

    Peeled carrots.
    Chopped leaks.
    • Carrots: Naturally sweet and earthy, they form the base of this soup and pair beautifully with leeks.
    • Leeks: Their mild, oniony flavor adds depth without overpowering the soup.
    • Ginger: Just a touch adds warmth and a subtle zing that wakes up the whole dish.

    For the complete list of ingredients with measurements and instructions, please see the recipe card at the bottom of the post.

    📖  Substitutions & Variations

    • Add apple: Try adding a chopped apple for a sweet twist.
    • Swap cream: Use coconut milk instead of cream for a dairy-free version.
    • Make it hearty: Stir in cooked lentils or top with toasted seeds for protein.

    You might also enjoy my Vegan Lentil Soup or Instant Pot Chicken Barley Soup for similar cozy flavors.

    🔪 How To Make Carrot And Leek Soup

    Carrots and leaks in chicken broth.
    1. Step 1: Set Instant Pot to sauté for 5 minutes. Add olive oil, carrots, and leeks. Sauté for 3-4 minutes until softened. Add garlic and sauté for 30 seconds. Stir in smoked paprika, chicken broth, and ginger. Seal the lid and cook on high pressure for 10 minutes, then do a quick release.
    Blending carrots and leaks mixture cooked in chicken broth.
    1. Step 2: Let the soup cool slightly, then carefully blend it until smooth using an immersion blender.
    Cream added to carrot and leak soup.
    1. Step 3: Add cream or any remaining ingredients and stir well
    Serving carrot and leak soup with a serving spoon.
    1. Step 4: For a tasty vegetarian carrot and leek soup, garnish with a dollop of sour cream for creaminess. Add flavor and visual appeal by sprinkling fresh herbs like parsley, chives, or dill on top.

    💡 Hint: For extra smooth soup, strain after blending or blend a second time.

    Two bowls of carrot and leek soup.

    👩‍🍳 Expert Tips

    • Sauté Leeks Properly: Begin by sautéing the leeks in butter or oil until they are soft and translucent. This enhances their sweet, onion-like flavor without any harshness.
    • Use Homemade Chicken Stock: For added depth of flavor, consider using homemade chicken stock instead of store-bought broth.
    • Don't Overcook: Be mindful not to overcook the vegetables to retain their natural sweetness and nutrients, aiming for a tender yet slightly firm texture.
    • Garnish for Impact: Garnish with fresh herbs, a drizzle of olive oil, sour cream or even a few croutons for added texture and visual appeal.

    💭 FAQs

    Can I Use Baby Carrots For Leek and Carrot Soup?

    Yes, you can use baby carrots in this recipe. They may even cook a little faster than whole carrots.

    Can I Use Vegetable Broth Instead Of Chicken Broth In This Recipe?

    Yes, you can use vegetable broth if you prefer. It will add a different but equally delicious flavor to the soup.

    Can I Use Frozen Carrots For Leek and Carrot Soup?

    Yes, you can use frozen carrots. There's no need to thaw them first, but you may need to adjust the cooking time slightly.

    How Can I Make The Soup Creamier?

    To make the soup creamier, you can blend it until smooth after cooking, or add a splash of cream or coconut milk.

    What Toppings Can I Add To This Soup?

    Some great toppings for this soup include a dollop of yogurt, croutons, fresh herbs, toasted nuts, or a drizzle of olive oil.

    How Can I Thicken The Soup?

    If you want a thicker soup, you can add more carrots or blend some cooked potatoes into the soup. Alternatively, you can reduce the amount of broth used.

    Can I Use Onions Instead Of Leeks In This Soup?

    Yes, you can use chopped onions as a substitute for leeks in carrot soup. Keep in mind that onions have a stronger flavor than leeks, so adjust the quantity to match your taste preference.

    Best Way to Store Carrot Leek Soup

    Store any leftover Carrot and Leek Soup in an airtight container in the refrigerator for up to 3-4 days. Transfer the leek and carrot soup to a freezer-safe container or bag and freeze for up to 2-3 months. Defrost the soup in the refrigerator overnight.

    💖 Serving Suggestions

    Serve this soup with warm crusty bread, a crisp green salad, or garlic toast. It also pairs wonderfully with:

    • Quinoa Salad: Light and lemony, a perfect contrast.
    • Air Fryer Roasted Carrots: Bring out the natural sweetness.
    • Homemade Beet Chips: Add crunch and color.
    • Grilled Cheese: The classic cozy combo.

    Carrot and leek soup served in a bowl.

    🍽 Try These Tasty Soup Recipes

    • Broccoli Soup With Feta Cheese.
      Creamy Broccoli Soup With Feta Cheese
    • Zesty Cabbage Soup in a white bowl.
      Zesty Cabbage Soup (With Lemon & Herbs – One Pot Wonder!)
    • French Onion Soup With Cheesy Baguette Slices.
      French Onion Soup With Cheesy Baguette Slices
    • Instant Pot Chinese Dumpling Soup.
      Best Chinese Dumpling Soup (Instant Pot Recipe)

    Did you make this recipe? Leave a review and a ⭐⭐⭐⭐⭐ rating below, or tag us in our Facebook Group! Alternatively, bookmark it in your browser or save to Pinterest.

    Vegetarian Carrot And Leek Soup Recipe.

    Carrot And Leek Soup Recipe

    Angela Milnes
    Warm up with a bowl of this comforting Carrot and Leek Soup! This deliciously smooth and creamy soup blends the natural sweetness of carrots with the mild, savory flavor of leeks. It’s a simple, wholesome recipe that’s perfect for a cozy lunch or a light dinner!
    5 from 4 votes
    Print Recipe Pin Recipe Rate this Recipe
    Prep Time 5 minutes mins
    Cook Time 10 minutes mins
    Total Time 15 minutes mins
    Course Vegetables
    Cuisine American
    Servings 8 Servings
    Calories 185 kcal

    Ingredients
      

    • 2 tablespoon Olive Oil
    • 2 Pounds Carrots peeled and roughly chopped
    • 2 Leeks chopped
    • 2-3 cloves Garlic
    • 2 teaspoons Smoked Paprika
    • 2 cups Chicken Broth
    • ¼ teaspoon Pureed Ginger
    • 3 tablespoon Butter
    • ½ Cup Cream
    • Pinch Salt
    • Pinch Pepper

    Instructions
     

    • Set the sauté mode on your Instant Pot for 5 minutes. Add olive oil. Add chopped carrots and leeks. Sauté for 3-4 minutes until they begin to soften. Add garlic and sauté for an additional 30 seconds.
    • Stir in smoked paprika, chicken broth, and ginger.
    • Seal the lid and cook on high-pressure mode for 10 minutes.
    • After 10 minutes, perform a quick release.
    • Let the soup cool slightly, then carefully blend it until smooth using an immersion blender.
    • Add any remaining ingredients and stir well. Serve Carrot and Leek Soup hot.

    Notes

    Use Homemade Chicken Stock: For added depth of flavor, consider using homemade chicken stock instead of store-bought broth.
    Don't Overcook: Be mindful not to overcook the vegetables to retain their natural sweetness and nutrients, aiming for a tender yet slightly firm texture.

    Nutrition

    Serving: 1gCalories: 185kcalCarbohydrates: 15gProtein: 2gFat: 14gSaturated Fat: 7gPolyunsaturated Fat: 1gMonounsaturated Fat: 5gTrans Fat: 0.2gCholesterol: 29mgSodium: 339mgPotassium: 443mgFiber: 4gSugar: 7gVitamin A: 19913IUVitamin C: 10mgCalcium: 67mgIron: 1mg
    Print Recipe Pin Recipe Rate this Recipe
    Tried this recipe?Let us know how it was!

    Instant Pot Cheeseburger Soup

    August 5, 2024 by Angela Milnes

    Instant Pot Cheeseburger Soup.

    Satisfy your comfort food cravings with our Instant Pot Cheeseburger Soup. This quick and easy recipe captures the essence of a classic cheeseburger in a warm and savory soup. Let the Instant Pot do the work, turning simple ingredients into a flavorful bowl of goodness.

    Get ready to enjoy the comfort of cheeseburger bliss with the convenience of Instant Pot cooking!

    Instant Pot Cheeseburger Soup in a bowl.
    [feast_advanced_jump_to]

    💖 Why This Recipe Works

    • Quick and easy. Using your Instant Pot, you can whip this creamy, cheesy soup up in less than an hour. 
    • Cheesy and delicious. Packed with ground beef, fresh seasonings, and lots of cheesy goodness, this soup is one the whole family will love. 
    • Perfect for a crowd. This Cheeseburger Soup serves 4-6 people, but can easily be doubled to serve a crowd.

    ⭐ Star Ingredients

    Ingredients For Cheeseburger Soup.
    • Ground Meat: Provides hearty protein. Beef is traditional, but ground turkey or chicken can be used for a leaner option.
    • Onion: Adds a sweet depth of flavor that balances the richness of the meat and cheese.
    • Potatoes: Contribute starchy thickness and comforting heft to the soup.
    • Cheddar Cheese Soup: This canned soup adds instant cheesy flavor and creaminess.
    • Heavy Cream: Key for creating a rich, creamy texture in the soup.
    • Shredded Cheese: Enhances the soup's cheesy flavor. The amount can be adjusted according to personal preference.
    • Seasonings (Onion Powder, Garlic Powder, Salt, Pepper): These add depth and savory notes, enhancing the overall flavor.
    • Green Onions: Used as garnish, they add a fresh, slightly spicy flavor and vibrant color.

    For the complete list of ingredients with measurements and instructions, please see the recipe card at the bottom of the post.

    📖  Substitutions & Variations

    • Bacon Cheeseburger Soup: Adds bacon and cheddar for extra richness.
    • Cheeseburger and Mushroom Soup: Add mushrooms for an earthy flavor.
    • Add Some Spice : Kick up the heat with jalapenos or hot sauce.
    • Add Sweet Potatoes: Use sweet potatoes for a unique twist.
    • Loaded Cheeseburger Soup: Includes all your favorite toppings, like tomatoes and pickles, cream cheese, and sour cream.

    🔪 How To Make Instant Pot Cheeseburger Soup

    mince and onions in instant pot.
    1. Step 1: First, hit the sauté or sear button on your Instant Pot. Then, add the ground meat and onion. Cook for 3-5 minutes. 
    potatoes added to an instant pot.
    1. Step 2: Next, add the water, potatoes, soup, onion, garlic powder, salt, and pepper to your Instant Pot. Stir to combine, but don’t overmix. 
    cheeseburger soup ingredients in the instant pot before cooking.
    1. Step 3: Place the lid on your Instant Pot, put the pressure valve into the sealing position, hit manual or pressure cook, and set the time for 1 minute. 
    Cheeseburger Soup In Instant Pot.
    1. Step 4: Once the Instant Pot beeps, flip the pressure valve to the venting position to do a quick release of the pressure. Hit cancel on your Instant Pot, and then hit the sauté or sear button.
    instant pot cheeseburger soup in a bowl.
    1. Step 5: Once it starts to simmer, add the cream, stir to incorporate, and then add the green onions. Slowly stir in your shredded cheese. Mix until the cheese is completely melted. 
    Instant Pot Cheeseburger Soup in a bowl.
    1. Step 6: Top your soup with your favorite garnishes such as bacon bits, more cheese, or green onions. Serve and Enjoy!
    Instant Pot Cheeseburger Soup in a bowl.

    👩‍🍳 Expert Tips

    • Don’t Overcook The Meat. Don’t completely cook your meat as it will continue cooking under pressure. You don’t want the meat to be overdone. 
    • Spread Out The Potatoes. Make sure the potatoes are evenly spread out in your pot. This helps them to cook evenly, so that they are tender, but not mushy. 
    • Add bacon. Instead of just bacon bits, add fresh crumbled bacon to your soup to make it even tastier. 

    💭 FAQs

    What Potatoes Do I Need to Use?

    The best potatoes to use for soup are Russet potatoes. This is because they get tender, but not mushy in soups. You can use yellow and red potatoes, but you want to be careful not to overcook them.

    What Cheese Can I Use?

    For this recipe, I used shredded cheddar cheese because it melts the best. However, you could use pepper jack, mozzarella, or any shredded cheese you prefer. Additionally, I find that Velveeta cheese leaves this soup thick, creamy, and cheesy. 

    Can I Cook Cheeseburger Soup In A Slow Cooker?

    Cook your Instant Pot Cheeseburger Cheese Soup in the slow cooker on low for 6-8 hours or on high for 3-4 hours, ensuring the ground beef is fully cooked and flavors have melded deliciously.

    Can I Add Vegetables To My Cheeseburger Soup?

    Absolutely! You can add vegetables like carrots, celery, or bell peppers to make the soup more nutritious.

    Can I Use Vegetable Broth Instead Of Chicken Broth Or Beef Broth

    Yes, vegetable broth can be used as a healthier or vegetarian alternative to chicken or beef broth in this recipe.

    How To Store Cheeseburger Soup?

    Store your Instant Pot Cheeseburger Soup in an airtight container in the refrigerator for up to 3-4 days.
    To freeze cheeseburger soup pour the soup into freezer-safe containers or heavy-duty freezer bags; it can last up to 2-3 months.

    💖 Serving Suggestions

    Here are some side dishes to serve with Instant Pot Cheeseburger Soup:

    • Tasty Broccoli Salad: Vibrant and crunchy broccoli salad pairs perfectly with hearty Instant Pot Cheeseburger Soup, enhancing the dining experience.
    • Air Fryer Corn On The Cob: Simple yet satisfying, corn on the cob offers a juicy sweetness that pairs well with the savory flavors of the cheeseburger soup.
    • Hawaiian Rolls: Sweet, fluffy, and warm rolls - a perfect accompaniment for rich soup, balancing out the savory notes.
    • Lemon Orzo Asparagus Salad: An orzo and asparagus salad complements Instant Pot Cheeseburger Soup adding some fresh veg to the mix.
    Instant Pot Cheeseburger Soup in a bowl.

    🍽 More Soup Recipes To Try

    • Broccoli Soup With Feta Cheese.
      Creamy Broccoli Soup With Feta Cheese
    • Instant Pot Chicken Barley Soup.
      Instant Pot Chicken Barley Soup
    • Chicken noodle soup in a bowl.
      Instant Pot Chicken Noodle Soup
    • vegan clam chowder.
      Creamy Vegan Clam Chowder Recipe (Dairy-Free & So Flavorful!)

    Did you make this recipe? Leave a review and a ⭐⭐⭐⭐⭐ rating below, or tag us in our Facebook Group! Alternatively, bookmark it in your browser or save to Pinterest.

    Instant Pot Cheeseburger Soup.

    Instant Pot Cheeseburger Soup

    Angela Milnes
    Craving a comforting, indulgent meal? This Instant Pot Cheeseburger Soup has all the flavors of your favorite burger in a warm, creamy soup. Loaded with ground beef, melted cheese, and potatoes, it’s a hearty dish that’s quick and easy to make. Perfect for satisfying those comfort food cravings in no time!
    5 from 3 votes
    Print Recipe Pin Recipe Rate this Recipe
    Prep Time 15 minutes mins
    Cook Time 25 minutes mins
    Total Time 40 minutes mins
    Course Soup
    Cuisine American
    Servings 3 Servings
    Calories 1352 kcal

    Ingredients
      

    • 1 lb Lean Ground Meat I Used Ground Turkey, But You Can Use Ground Chicken or Ground Beef.
    • ½ Onion Diced
    • 1 ½ Cup Water
    • 2 Cups Potatoes Diced
    • 2 Can Condensed Cheddar Cheese Soup 10.5 Ounce cans
    • 1 tablespoon Onion Powder
    • 1 tablespoon Garlic Powder
    • 1 teaspoon Salt
    • 1 teaspoon Pepper
    • 2 Cups Heavy Cream
    • 2 Cups Shredded Cheese
    • 1 tablespoon Green Onions Chopped, For Garnish

    Instructions
     

    • First, hit the sauté or sear button on your Instant Pot. Then, add the ground meat and onion. Cook for 3-5 minutes. 
    • Next, add the water, potatoes, soup, onion, garlic powder, salt, and pepper to your Instant Pot. Stir to combine, but don’t over mix. 
    • Place the lid on your Instant Pot, put the pressure valve into the sealing position, hit manual or pressure cook, and set the time for 1-minute. 
    • Once the Instant Pot beeps, flip the pressure valve to the venting position to do a quick release of the pressure. 
    • Hit cancel on your Instant Pot, and then hit the sauté or sear button. Once it starts to simmer, add the cream, stir to incorporate, and then add the green onions. 
    • Slowly stir in your shredded cheese. Mix until the cheese is completely melted. 
    • Top your soup with your favorite garnishes such as bacon bits, more cheese, or green onions. Serve and Enjoy!

    Notes

    Don’t Overcook The Meat. Don’t completely cook your meat as it will continue cooking under pressure. You don’t want the meat to be overdone. 
    Spread Out The Potatoes. Make sure the potatoes are evenly spread out in your pot. This helps them to cook evenly, so that they are tender, but not mushy. 
    Meat Selection: Choose lean ground beef for a healthier option, but remember, a little bit of fat can add more flavor to the soup.

    Nutrition

    Calories: 1352kcalCarbohydrates: 55gProtein: 62gFat: 99gSaturated Fat: 58gPolyunsaturated Fat: 6gMonounsaturated Fat: 25gTrans Fat: 1gCholesterol: 356mgSodium: 2491mgPotassium: 2333mgFiber: 6gSugar: 10gVitamin A: 3931IUVitamin C: 31mgCalcium: 756mgIron: 5mg
    Print Recipe Pin Recipe Rate this Recipe
    Tried this recipe?Let us know how it was!

    Add These Recipes To Your Menu List

    • Best Cheese for Charcuterie Boards
    • Instant Pot French Onion Chicken
    • Creamy Broccoli Bacon Recipe
    • Spanakopita With Puff Pastry
    • Homemade Bean and Bacon Soup
    • Air Fryer Cheesy Bread
    • Air Fryer Sliced Potatoes

    Best Instant Pot Vegetarian Chili

    August 5, 2024 by Angela Milnes

    Best Instant Pot Vegetarian Chili.

    This Instant Pot Vegetarian Chili is hearty, flavorful, and loaded with plant-based goodness. Made with pantry staples and ready in under an hour, it’s your new go-to for quick weeknight dinners or feeding a crowd without breaking a sweat.

    Best Instant Pot Vegetarian Chili.

    Meatless Chili That Tastes Like a Comfort Classic

    Over the years, I’ve made dozens of chili recipes—from beefy versions to bean-based stews—and I can confidently say this Instant Pot veggie chili holds its own. It delivers that rich, slow-cooked flavor you expect, but in a fraction of the time. Whether you’re cooking for a game day crowd or looking for a cozy meal prep option, this recipe delivers every time. Bonus: It’s naturally gluten free and easily made vegan.

    This meatless chili pairs perfectly with my Jalapeño Cornbread or served over an Air Fryer Baked Potato for the ultimate comfort meal.

    [feast_advanced_jump_to]

    💖 Why This Recipe Works

    • Quick-cook comfort food: Ready in under an hour with just 2 minutes of pressure cook time.
    • Protein-packed: Beans provide plant-based protein and fiber to keep you full.
    • One-pot magic: Minimal cleanup with maximum flavor.

    ⭐ Star Ingredients

    ingredients for vegetarian bean chili.
    • Mixed Beans: Red kidney, black, and pinto beans add hearty texture and protein. Use canned beans for speed and convenience.
    • Chili Powder & Spices: This is where the flavor lives. Don’t skimp! A mix of chili powder, cumin, and paprika brings boldness and warmth.
    • Masa Harina: My go-to trick for a thicker, more authentic chili. It adds a subtle corn flavor and helps create that slow-simmered texture in just minutes.

    For the complete list of ingredients with measurements and instructions, please see the recipe card at the bottom of the post.

    📖  Substitutions & Variations

    • Spice it up: Add chipotle peppers in adobo or cayenne for heat.
    • Add veggies: Zucchini, mushrooms, or sweet potatoes make tasty additions.
    • Make it smoky: Use smoked paprika or add a splash of liquid smoke.
    • Boost the protein: Stir in diced tofu or tempeh for extra meatless protein.
    • No masa harina? Use cornstarch or blend a portion of the beans to thicken.

    Serve this vegetarian chili with a slice of Whole Wheat Irish Soda Bread for a hearty, rustic pairing or Plantain Tortillas. For a lighter option, serve with Cauliflower Pizza Crust—perfect for scooping and soaking up all that flavorful chili goodness.

    🔪 How To Make This Vegetarian Chili Instant Pot Recipe

    veggies sauteed in a instant pot.
    1. Step 1: First, hit the sauté or sear button on your Instant Pot and add the oil. Then, sauté the diced onion and peppers for 6 minutes. Hit cancel. Then, add ¼ cup of the vegetable broth. Scrape the bottom of your pot to deglaze it.
    vegetarian bean chili in an instant pot.
    1. Step 2: Next, add the remaining ingredients to your Instant Pot EXCEPT the masa harina. Stir to combine everything. Close the lid, push the pressure valve to the sealing position, hit pressure cook on manual, and set the time for 2 minutes.
    vegetarian bean chili in an instant pot.
    1. Step 3: Once the Instant Pot beeps, push your pressure valve to the venting position and release all of the pressure.
    vegetarian bean chili in an instant pot.
    1. Step 4: Hit the sauté or sear button again. Once the chili is simmering, add the masa harina and let your chili thicken. If you are using cornstarch, make a cornstarch slurry using equal parts water to cornstarch. Serve and Enjoy!

    💡Hint: If using cornstarch instead of masa harina, mix it with equal parts cold water first to create a slurry. This prevents clumping in your chili.

    Instant Pot Vegetarian Chili in a bowl.

    👩‍🍳 Expert Tips

    • Always deglaze: This step is key in any pressure cooker chili to avoid that Instant Pot Burn warning.
    • Canned beans only: Because this chili cooks so quickly, dry beans won’t have enough time to soften.
    • Let it rest: The flavors deepen as it cools. Leftovers taste even better the next day.
    Instant Pot Vegetarian Chili in a bowl.

    💭 FAQs

    What adds the most flavor to chili?

    The spice blend. A mix of chili powder, cumin, paprika, oregano, and garlic builds layers of flavor. Sautéing your onions and spices boosts this even more.

    Do I need tomato paste in chili?

    Nope! This vegan chili Instant Pot version skips it and still turns out rich and hearty thanks to diced tomatoes and masa harina.

    What is masa harina and why is it in chili?

    It’s a finely ground corn flour used in tortillas. In chili, it thickens the broth and adds a delicious subtle corn flavor.

    Can I use chicken broth instead of veggie broth?

    Sure—but it won’t be vegetarian. Stick with vegetable broth for a fully plant-based chili.

    How to store leftover vegetarian chili?

    Store in the fridge for up to 5 days or freeze in airtight containers for up to 3 months.

    Instant Pot Vegetarian Chili in a bowl.

    💖 Serving Suggestions

    Wondering what to serve with vegetarian chili?

    • Serve with shredded cheese, diced avocado, or sour cream on top for some added creaminess and richness.
    • Pair with warm Jalapeno Cornbread or tortilla chips for a satisfying crunch.
    • Add a side of Instant Pot Long Grain Rice or Instant Pot Quinoa to make it a heartier meal.
    • Top with chopped cilantro, green onions, or jalapenos for a burst of freshness and flavor.
    • Serve with a simple sala, Steamed Vegetables or Twice Baked Potatoes on the side to balance out the rich and spicy flavors of chili.

    🍽 More Instant Pot Recipes To Try

    • Instant Pot White Chicken Chili.
      Instant Pot White Chicken Chili
    • Instant Pot Asian Pulled Pork.
      Instant Pot Asian Pulled Pork
    • Instant Pot Recipes.
      Best Instant Pot Pesto Chicken 
    • Instant Pot Chicken Adobo.
      Instant Pot Chicken Adobo

    Did you make this recipe? Leave a review and a ⭐⭐⭐⭐⭐ rating below, or tag us in our Facebook Group! Alternatively, bookmark it in your browser or save to Pinterest.

    Best Instant Pot Vegetarian Chili.

    Instant Pot Vegetarian Chili

    Angela Milnes
    This Instant Pot Vegetarian Chili is a hearty, flavorful dish packed with beans, veggies, and bold spices. It's an easy, satisfying meal that's perfect for busy weeknights or meatless meals. Top with your favorite garnishes for a comforting bowl of chili everyone will love!
    5 from 5 votes
    Print Recipe Pin Recipe Rate this Recipe
    Prep Time 15 minutes mins
    Cook Time 20 minutes mins
    Total Time 35 minutes mins
    Course Dinners
    Cuisine American
    Servings 4 Servings
    Calories 468 kcal

    Ingredients
      

    • 1 Onion Diced
    • 2 Bell Peppers Diced, any color
    • 1 Tablespoon Oil
    • 1, ½ Cups Northern White Beans dry and soaked overnight, or canned - drained
    • 1, ½ Cups Pinto Beans dry and soaked overnight, or canned - drained
    • 1, ½ Cups Black Beans dry and soaked overnight, or canned - drained
    • 1, ½ Cups Black Beans dry and soaked overnight, or canned - drained
    • 1, ½ Cups Kindney Beans dry and soaked overnight, or canned - drained
    • 1 Can Fire Roasted Diced Tomatoes
    • 2 Cups Vegetable Broth
    • 2 Tablespoons Chili Powder
    • ½ Teaspoon Black Pepper
    • ½ Teaspoon Salt
    • 1 Teaspoon Garlic Powder
    • 1 Teaspoon Paprika
    • ¼ Teaspoon Onion Powder
    • 3 Tablespoons Masa Harina or cornstarch as a substitute.

    Instructions
     

    • Set the instant pot to sauté. When pot is hot, add the oil and diced onion and peppers. Sauté for 6 minutes.
    • Cancel sauté mode and ¼ cups of broth. Scrape the instant pot line to deglaze the pot. 
    • Add the remaining ingredients except the masa harina, close the lid and seal the pressure valve. Cook on high pressure for 2 minutes 
    • Quick release pressure and set the pot to sauté.
    • Once chili is simmering, stir in the masa harina and let the chili thicken.

    Notes

    Deglazing The Pot: Before you pressure cook the chili be sure to deglaze the pot. If you notice that some bits have stuck to the bottom, use a wooden spoon or spatula to scrape them off gently. This will prevent the Instant Pot burn notice.

    Nutrition

    Serving: 15gCalories: 468kcalCarbohydrates: 82gProtein: 25gFat: 6gSaturated Fat: 1gPolyunsaturated Fat: 2gMonounsaturated Fat: 3gTrans Fat: 0.01gSodium: 1286mgPotassium: 1366mgFiber: 24gSugar: 8gVitamin A: 3977IUVitamin C: 81mgCalcium: 182mgIron: 9mg
    Print Recipe Pin Recipe Rate this Recipe
    Tried this recipe?Let us know how it was!

    Best Pumpkin Treats For Dogs

    August 5, 2024 by Angela Milnes

    Best Pumpkin Treats for Dogs.

    Looking to spoil your pup with something homemade and healthy? These Pumpkin Treats for Dogs are super easy, super tasty, and made with just a few simple ingredients you probably already have in your kitchen.

    Best Pumpkin Treats for Dogs.
    [feast_advanced_jump_to]

    Let’s be real—store-bought dog treats are pricey, and half the time, you can’t pronounce what’s in them. That’s why I started making homemade dog snacks for my little guy. These pumpkin peanut butter biscuits quickly became a favorite.

    They’re soft enough for older dogs but sturdy enough to be baked crisp if you prefer a crunchy version. Plus, pumpkin is full of fiber and gentle on tummies, which makes these perfect for training, rewards, or just showing your fur-baby a little extra love.

    If you enjoy making things for your pup, you’ll also love this Easy Dog Shampoo Recipe and these Peanut Butter And Bacon Dog Treats—both huge hits in our house!

    💖 Why This Recipe Works

    • Tasty: Dogs go absolutely wild for the peanut butter-pumpkin combo.
      Budget-Friendly: No more overpriced biscuits—these are made with pantry staples.
      Quick & Easy: Just 4 ingredients and an air fryer or oven. That’s it!

    ⭐ Ingredients for Pumpkin Dog Treats

    You're going to love how simple these homemade treats for dogs are!

    pumpkin dog treat ingredients.
    • Pumpkin Puree: Use 100% canned pumpkin (not pie filling!) for a fiber-rich, dog-safe base.
    • Peanut Butter: Adds protein and healthy fats. Make sure it’s xylitol-free and unsweetened.
    • Flour: Helps the treats hold shape. I use plain flour, but whole wheat, oat, or coconut flour work too.
    • Eggs: The binder that holds it all together and adds a little protein punch.

    For the complete list of ingredients with measurements and instructions, please see the recipe card at the bottom of the post.

    📖  Substitutions & Variations

    • Pumpkin Puree: Use canned or homemade. Learn how to make your own Homemade Pumpkin Puree for a fresh version.
    • Flour Options: Swap plain flour for whole wheat, coconut flour, or oat flour—just use the same measurements.
    • Crunchy Option: Add crushed oats, flaxseed, or a dash of cinnamon for extra texture and flavor.
    • Baked Version: No air fryer? No problem! Just bake at 350°F (175°C) for 20–25 minutes until golden.

    Don't forget to try more Pumpkin recipes such as Pumpkin Bread or Creamy Pumpkin Alfredo.

    🔪 How To Make Pumpkin Treats for Dogs

    ingredients for dog pumpkin treats.
    1. Step 1: Add the pumpkin puree, peanut butter, and eggs to a large mixing bowl and mix until fully combined.
    flour and pumpkin puree in a bowl.
    1. Step 2: Add in 1 cup of flour and mix until combined. Add in another cup of the flour and mix until a doughy mixture forms.
    pumpkin dough for dogs.
    1. Step 3: Knead the dough by hand and add the remaining flour as needed, until the dough reaches a soft, but not sticky or crumbly, consistency. Lay out a large piece of parchment paper and sprinkle lightly with flour before dumping the dough onto the prepared surface.
    rolled out treat dough.
    1. Step 4: Roll out with a rolling pin to about ¼-inch thickness. 
    cutting out bone shaped dog treats.
    1. Step 5: Cut out as many cookies as you can with your cookie cutter (I used the bone) and set them aside on a cookie sheet or similar dish.
    pumpkin dog treats in air fryer basket.
    1. Step 6: Line the bottom of your air fryer with parchment paper and place as many treats as you can. Cook at 370 degrees for 4-5 Minutes. Remove and let cool for a few minutes before feeding to your pooch! 
    Pumpkin Treats for Dogs

    💡Hint: For crispier treats, air fry for 7–8 minutes or bake a few minutes longer—just don’t burn them!

    👩‍🍳 Expert Tips

    • Use Pure Pumpkin: Always opt for 100% pure pumpkin puree rather than pumpkin pie filling. This ensures your treats are free from added sugars, spices, and preservatives that could upset your dog’s stomach.
    • Boost with Wholesome Ingredients: Combine the pumpkin with dog-friendly ingredients like whole wheat flour, oats, or even mashed sweet potatoes. These additions not only enhance the flavor but also increase the nutritional value with extra fiber and vitamins.
    • Mind the Portions: Treats should be just that—a treat! Adjust the serving size according to your dog’s size and overall diet. This helps prevent overfeeding while still letting your pup enjoy a healthy snack.
    • Store for Freshness: Once baked and cooled, store your pumpkin treats in an airtight container. Proper storage keeps them fresh and maintains their nutritional benefits, ensuring every treat is as good as the first.

    💭 FAQs

    What peanut butter is safe for dogs?

    Use natural, unsweetened peanut butter with no added salt or xylitol. Look for brands with one ingredient: peanuts.

    Can I make these pumpkin dog treats crispy?

    Yes! Just cook them a bit longer in the air fryer or bake in the oven for a firmer texture.

    Can I use canned pumpkin puree?

    Yes—but double-check that it’s 100% pure pumpkin, not pumpkin pie filling. The latter may contain nutmeg and sugar, which aren’t dog-safe.

    How do I store homemade pumpkin dog treats?


    Keep in the fridge in an airtight container for 5–6 days, or freeze in portions for up to 3 months. Thaw before serving.

    pumpkin dog biscuits.

    🍽 Try These Fantastic Recipes

    • Air Fryer egg plant, seasoned with salt and pepper in a bowl.
      Crispy Air Fryer Eggplant in Just 10 Minutes
    • Broccoli Soup With Feta Cheese.
      Creamy Broccoli Soup With Feta Cheese
    • Jamaican Oxtail Stew.
      Best Jamaican Oxtail Recipe For Slow Cooker
    • edamame stir fry in a white bowl.
      Easy Edamame Stir Fry (15-Minute Protein-Packed Side Dish)

    Did you make this recipe? Leave a review and a ⭐⭐⭐⭐⭐ rating below, or tag us in our Facebook Group! Alternatively, bookmark it in your browser or save to Pinterest.

    💖 Serving Suggestions

    • As a Snack for Your Dog: Serve these tasty homemade treats as a special snack for your dog during training or as a reward after walks.
    • On Special Occasions: Use them as a special treat on your dog's birthday or during the holiday season to pamper your pet.
    • In a Treat Jar: Keep these homemade pumpkin treats in a jar on the counter for easy access when your furry friend deserves a tasty bite.
    • In a Doggy Gift Basket: Pack these treats in a cute gift basket for fellow dog owners, making a thoughtful and practical gift for their pets.
    Best Pumpkin Treats for Dogs.

    Pumpkin Treats For Dogs

    Angela Milnes
    These easy, homemade treats are the perfect snack for your furry friend! With just a few simple ingredients, you'll have tail-wagging goodness in no time.
    5 from 2 votes
    Print Recipe Pin Recipe Rate this Recipe
    Prep Time 5 minutes mins
    Cook Time 5 minutes mins
    Total Time 10 minutes mins
    Course Dog Treats
    Cuisine American
    Servings 16 Servings
    Calories 123 kcal

    Ingredients
      

    • 2 ¾ Cups All Purpose Flour
    • 1 Cup Pumpkin Puree
    • ⅓ Cup Peanut Butter
    • 2 Eggs

    Instructions
     

    • Add the pumpkin puree, peanut butter, and eggs to a large mixing bowl and mix until fully combined.
    • Add in 1 cup of flour and mix until combined. Add in another cup of the flour and mix until a doughy mixture forms.
    • Knead the dough by hand and add the remaining flour as needed, until the dough reaches a soft, but not sticky or crumbly consistency. 
    • Lay out a large piece of parchment paper and sprinkle lightly with flour before dumping the dough onto the prepared surface.
    • Roll out with a rolling pin to about ¼-inch thickness. 
    • Cut out as many cookies as you can with your cookie cutter (I used the bone) and set aside on a cookie sheet or similar dish.
    • Line the bottom of your air fryer with parchment paper and place as many treats as you can, in the bottom, without them touching. I was able to fit 6-7 at a time in my particular air fryer.
    • Cook on 370 degrees for 4-5 Minutes or until just lightly browned on the top. Remove and let cool for a few minutes before feeding to your pooch! 
    • Repeat until all treats are done. Store in an airtight container away from moisture and heat.

    Nutrition

    Calories: 123kcalCarbohydrates: 19gProtein: 4gFat: 4gSaturated Fat: 1gPolyunsaturated Fat: 1gMonounsaturated Fat: 2gTrans Fat: 0.002gCholesterol: 20mgSodium: 32mgPotassium: 92mgFiber: 1gSugar: 1gVitamin A: 2413IUVitamin C: 1mgCalcium: 13mgIron: 1mg
    Print Recipe Pin Recipe Rate this Recipe
    Tried this recipe?Let us know how it was!

    More Easy and Simple Dog Treat Recipes:

    If your dog loves these simple pumpkin dog treats then they may also enjoy the following home made dog food recipes. Making dog treats has never been easier.

    • Oatmeal Banana Dog Treats
    • Homemade Dog Food Instant Pot Recipe
    • Peanut Butter And Bacon Dog Treats

    Instant Pot Tortellini Carbonara

    August 5, 2024 by Angela Milnes

    Instant Pot Tortellini Carbonara.

    Sometimes, you just need a big bowl of carb-y, creamy, cheese filled pasta. Tortellini tossed with bacon, bacon grease, and whisked into an indulgently, creamy egg and parmesan sauce, this Instant Pot Tortellini Carbonara is sure to hit the spot.

    Tortellini carbonara in a bowl.
    [feast_advanced_jump_to]

    💖 Why This Recipe Works

    • Creamy and Comforting: The carbonara sauce gives a rich, indulgent touch to the tortellini.
    • Effortless Cooking: The Instant Pot does most of the work, making Tortellini Carbonara easy.
    • Restaurant-Quality at Home: Enjoy a gourmet Italian dish without leaving your kitchen.

    ⭐ Star Ingredients

    Tortellini carbonara ingredients.
    • Tortellini: Filled pasta that adds a hearty, satisfying bite and absorbs the flavors of the carbonara sauce beautifully.
    • Bacon: Provides a savory, smoky crunch that contrasts with the creamy sauce and soft tortellini.
    • Eggs: Create the traditional carbonara sauce when mixed with the Parmesan, providing a rich, silky texture.
    • Freshly Grated Parmesan Cheese: Adds a salty, nutty flavor that elevates the sauce and complements the other ingredients.
    • Minced Garlic: Infuses the dish with a robust, aromatic flavor that balances the richness of the other components.
    • Salt and Pepper: Simple seasonings that enhance the natural flavors of the dish and provide a touch of heat.
    • Garnishes: Add color, texture, and an extra layer of flavor, making the dish visually appealing and even tastier.

    For the complete list of ingredients with measurements and instructions, please see the recipe card at the bottom of the post.

    📖  Substitutions & Variations

    Add Peas: Add a burst of color and sweetness by stirring in frozen peas along with the bacon fat and garlic, providing a vibrant contrast and extra nutrients to the creamy carbonara sauce.

    🔪 How to Make Instant Pot Tortellini Carbonara

    Tortellini pasta and water in an instant pot.
    1. Step 1: Add your tortellini to the Instant Pot with enough water to cover the pasta. Put the lid on the Instant Pot, put the pressure valve into the sealing position, push manual or pressure cook, and set the time for 5 minutes.
    Tortellini pasta cooked in an instant pot.
    1. Step 2: Once your Instant Pot beeps, you want to release the pressure quickly. Remove the tortellini from the pot and set it to side. Then, remove 1 cup of pasta water and put it in a separate bowl.
    Uncooked bacon bits in the instant pot.
    1. Step 3: Next, push your sauté or sear button on your Instant Pot. Once it is hot, add and cook bacon until crispy. Then, add the garlic and cook for 1 minute.
    Sauteed bacon on the instant pot.
    1. Step 4: Hit cancel to turn off the Instant Pot. Then, remove the bacon and garlic from the inner pot, leaving the bacon grease. Set the crispy bacon and garlic to the side.
    Cooked tortellini mixed with bacon in the instant pot.
    1. Step 5: Add the pasta back to the Instant Pot, and stir to mix it with the bacon grease. Then, mix in the bacon and garlic.
    Tortellini and bacon mixed with cheese in the instant pot.
    1. Step 6: In a separate bowl, whisk the eggs until you see soft peaks. Then, whisk in the parmesan and a splash of the pasta water to thin the sauce. Once it is done, slowly pour the egg and cheese mixture into the pasta carbonara. Stir gently to keep the egg mixture intact. Top the cheese tortellini carbonara with fresh parsley or basil.

    👩‍🍳 Expert Tips

    • Balance and Harmony: Achieve flavor balance by incorporating a hint of acidity from freshly squeezed lemon juice at the end of cooking, elevating the dish with a touch of brightness and contrast to the creamy richness of the carbonara.

    💭 FAQs

    My Sauce Is Too Thick. How Do I Thin It?

    If after you've whisked your eggs, parmesan, and a splash of water, you feel the sauce is still too thick, you can easily thin it. Just continue adding more pasta water until it reaches your desired consistency.

    Is It Safe To Consume Raw Eggs From The Sauce?

    Since the water from the tortellini is hot and you are mixing the sauce with hot pasta, the eggs should be cooked by the time you eat your tortellini carbonara. To ensure the eggs are not raw, you can heat and re-boil the water in the microwave.

    Best Way to Store Tortellini Carbonara

    Transfer the cooled tortellini carbonara into an airtight container. Refrigerate for up to 3 days, ensuring proper sealing to maintain freshness.

    💖 Serving Suggestions

    Here are some vegetable sides to serve with Instant Pot Tortellini Carbonara:

    • Cheesy Garlic Pizza Bread: Crispy on the outside, and soft on the inside –garlic bread is perfect for sopping upa creamy carbonara pasta dish.
    • Caprese Salad: Fresh tomatoes, mozzarella, and basil drizzled with balsamic glaze for a light, refreshing side.
    • Air Fryer Roasted Vegetables: Seasonal veggies like asparagus, cherry tomatoes, and bell peppers roasted to perfection in olive oil.
    • Chicken Caesar Salad: Crisp romaine lettuce tossed in Caesar dressing with Parmesan shavings – a classic pairing.
    • Sauteed Spinach: Quick and easy, sautéed spinach adds a healthy touch to balance the richness of tortellini carbonara.
    • Antipasto Platter: A selection of cured meats, olives, and cheeses for a Mediterranean twist.
    • Lemon Garlic Green Beans: Bright and zesty green beans sautéed with garlic and a splash of lemon.
    Instant Pot tortellini carbonara in a serving bowl.

    🍽 More Instant Pot Recipes

    • Instant Pot Cajun Chicken and Rice.
      Instant Pot Cajun Chicken and Rice
    • Creamy Instant Pot Tortellini Recipe.
      Creamy Instant Pot Tortellini Recipe
    • Instant Pot Kielbasa And Cabbage.
      Instant Pot Kielbasa And Cabbage
    • Instant Pot Enchilada Soup.
      Instant Pot Enchilada Soup

    Did you make this recipe? Leave a review and a ⭐⭐⭐⭐⭐ rating below, or tag us in our Facebook Group! Alternatively, bookmark it in your browser or save to Pinterest.

    Instant Pot Tortellini Carbonara.

    Instant Pot Tortellini Carbonara

    Angela Milnes
    Enjoy a creamy, indulgent meal with this Instant Pot Tortellini Carbonara! Tender tortellini is cooked in a rich, velvety carbonara sauce made with crispy bacon, eggs, and Parmesan cheese. It’s a quick and delicious dish that delivers classic Italian comfort in every bite!
    5 from 4 votes
    Print Recipe Pin Recipe Rate this Recipe
    Prep Time 10 minutes mins
    Cook Time 20 minutes mins
    Total Time 30 minutes mins
    Course Dinners
    Cuisine American
    Servings 6 Servings
    Calories 488 kcal

    Ingredients
      

    • 16 oz Dried Pesto Tortellini or Fresh If Preferred
    • 8 Slices Bacon Diced
    • 4 Large Eggs
    • 1 Cup Freshly Grated Parmesan Cheese
    • 4 tablespoon Minced Garlic
    • 2 tablespoon Fresh Parsley Chopped Optional Garnish
    • 2 Fresh Basil Chopped Optional Garnish
    • Salt and Black Pepper to Taste

    Instructions
     

    • Add your tortellini to the Instant Pot with enough water to cover the pasta. Put the lid on the Instant Pot, put the pressure valve into the sealing position, push manual or pressure cook, and set the time for 5-minutes.
    • Once your Instant Pot beeps, you want to release the pressure quickly. To do this, push the pressure valve to the venting position to release the steam. Remove the tortellini from the pot and set it to the side. Then, remove 1 cup of pasta water and put it in a separate bowl.
    • Next, push your sauté or sear button on your Instant Pot. Once it is hot, add and cook bacon until crispy. Then, add the garlic and cook for 1-minute.
    • Hit cancel to turn off the Instant Pot. Then, remove the bacon and garlic from the inner pot, leaving the bacon grease. Set the crispy bacon and garlic to the side.
    • Add the pasta back to the Instant Pot, and stir to mix it with the bacon grease. Then, mix in the bacon and garlic.
    • In a separate bowl, whisk the eggs until you see soft peaks. Then, whisk in the parmesan, and a splash of the pasta water to thin the sauce.
    • Once it is done, slowly pour egg and cheese mixture into the pasta carbonara. Stir gently to keep the egg mixture intact.
    • Top the cheese tortellini carbonara with fresh parsley or basil. Serve and Enjoy!

    Notes

    Balance and Harmony: Achieve flavor balance by incorporating a hint of acidity from freshly squeezed lemon juice at the end of cooking, elevating the dish with a touch of brightness and contrast to the creamy richness of the carbonara.

    Nutrition

    Calories: 488kcalCarbohydrates: 49gProtein: 24gFat: 22gSaturated Fat: 8gPolyunsaturated Fat: 1gMonounsaturated Fat: 4gTrans Fat: 0.03gCholesterol: 182mgSodium: 1190mgPotassium: 172mgFiber: 4gSugar: 3gVitamin A: 561IUVitamin C: 5mgCalcium: 293mgIron: 2mg
    Print Recipe Pin Recipe Rate this Recipe
    Tried this recipe?Let us know how it was!

    More Instant Pot Pasta Recipes You'll Love

    • Instant Pot Cacio E Pepe
    • Instant Pot Feta Pasta
    • Instant Pot Creamy Tortellini
    • Crock Pot Chicken Gravy
    • Instant Pot Shrimp Scampi
    • Spinach Rice Casserole With Feta Cheese
    • Spanakopita With Puff Pastry
    • Slow Cooker Pot Roast With Beer
    Tortellini carbonara in a bowl.

    Is Beetroot Good For You? Beets Nutrition Facts

    August 5, 2024 by Angela Milnes

    Sliced and whole beetroots.

    Crunchy and earthy, beetroot has become quite a popular vegetable for health and nutrition. If you find yourself asking, "Is beetroot good for you?" The answer is yes!

    This vibrant root vegetable has more to offer than just its stunning red hue; it's packed with numerous health benefits, so read on to learn all the reasons to add beetroot to your diet.

    Is Beetroot Good For You
    [feast_advanced_jump_to]

    What Is Beetroot?

    Beetroot, also known as the beet or table beet, is a versatile root vegetable that is packed with essential nutrients. Beetroots are packed with fiber, vitamins, and minerals such as potassium, iron, and Vitamin C which helps boost the immune system.

    Beetroots are scientifically known as Beta vulgaris and is native to Europe, however this delicious vegetable is now cultivated around the world for its edible roots. They have a distinctive earthy flavor and vibrant red color, which comes from the natural plant pigment betacyanin.

    Beetroots are commonly consumed raw in salads, cooked, pickled, or even used in baking for their natural sweetness and color. You'll find plenty of healthy beetroot recipe here on Eat Your Beets from Beet Salad With Feta And Walnuts to Cured Beet Salmon. The green leafy tops beet greens are also edible and highly nutritious.

    Benefits Of Raw Beets?

    Yes, beets can indeed be eaten raw. Their earthy, sweet flavor is quite enjoyable when they are fresh and raw. When eaten raw, beets retain all their nutritional value, which includes fiber which promotes good bacteria in your gut.

    Simply peel them, grate or slice them thin, and add them to make Colorful Salads or use to make a Banana Beetroot Smoothie for a healthful addition to your diet.

    Is Beetroot Good For You?

    Beetroot is indeed good for you due to its rich nutritional profile. It contains essential vitamins and minerals, including potassium, folate, fiber, manganese, and copper, and is low in calories and fat. 

    This root vegetable has been found to support heart health, improve lung function during exercise, and enhance stamina. Additionally, beetroot carries powerful antioxidant and anti-inflammatory properties while promoting gut health and promoting good bone health.

    Raw beetroots.

    Is Beet Juice Good For You?

    Beet juice is notably beneficial for health because it contains vitamins, minerals, and antioxidants. It offers impressive health benefits, including enhancing endurance by delaying exhaustion, which can be particularly helpful during cardiorespiratory exercises. 

    Beet juice can also boost stamina, improve blood flow, and help lower blood pressure. Research also suggests beet juice supports liver health as it helps reduce inflammation of the liver.

    Is Beetroot Good For You If Juiced

    Beetroot Nutritional Facts

    Here is the nutritional profile per 100 grams of raw beets:

    • Calories: 43
    • Water: 88%
    • Protein: 1.6 grams
    • Carbs: 9.6 grams
    • Sugar: 6.8 grams
    • Fiber: 2.8 grams
    • Fat: 0.2 grams

    Beets are also packed with a variety of vitamins and minerals:

    • Folate (B9): Beets are high in folate, which is important for cell growth, heart health and metabolism.
    • Manganese: A vital trace element found in high amounts in legumes, whole grains, fruits, and vegetables.
    • Potassium: Consuming a potassium-rich diet can effectively lower blood pressure levels and contribute to improved heart health.
    • Iron: An essential mineral, iron has many important bodily functions. Therefore beetroot can help increase Iron which transports oxygen in red blood cells.
    • Vitamin C: This well-known vitamin is an antioxidant that's important for skin health and immune function.

    Health Benefits Of Beetroot

    Beetroot is a highly nutritious vegetable that offers a plethora of health benefits. Below are some of the key health benefits of beetroot based on various sources:

    Beetroot For Diabetics

    Beetroot, a vibrant and nutrient-rich vegetable, can play a positive role in diabetes management. Beetroot juice's natural sugars are released slowly, maintaining stable blood sugar levels and reducing glycemic load benefiting those who are diabetic.

    Consuming beets as a dietary supplement can thus aid in controlling spikes in blood glucose levels, thereby managing symptoms of diabetes. The beets contain essential nutrients like fiber, which slow down the digestion of food and further regulate blood sugar. 

    Moreover, all the health benefits of beetroot consumption aren't just limited to diabetes management. Regular intake can also promote overall health, thanks to its high antioxidant and anti-inflammatory properties.

    Enhancing Liver Health

    Eating beets, particularly in the form of beetroot powder or beetroot juice supplementation, can significantly contribute to liver health. 

    The beet plant, scientifically known as Beta vulgaris, is rich in a compound that not only promotes cardiovascular health but also aids in breaking down fatty deposits in the liver, protecting it from damage.

    A study shows that beetroot's hepatoprotective effect prevents fat from depositing in the liver, which is crucial for those combating non-alcoholic fatty liver disease. Furthermore, beetroot juice has been shown to reduce oxidative damage and inflammation in the liver. So, is beetroot good for you? Absolutely.

    Weight Management

    Is beetroot good for you in managing weight? Beetroot plays a significant role in weight management due to its unique nutritional profile. Both beet juice and raw beets are low in calories, making them a great addition to a calorie-controlled diet. 

    Despite being low in calories, beets are high in dietary fiber, which aids in promoting feelings of fullness. This can help reduce overall calorie intake by curbing unnecessary snacking and overeating. 

    Possible Side Effects Of Beetroot

    Consuming beetroot can result in a number of side effects.

    One of the most common yet harmless reactions is a change in the color of urine and stools to pink or red, a phenomenon known as beeturia. This is due to the presence of betanin, a pigment found in beets. Excessive consumption of beetroot may cause uncommon mild reactions like itchiness or rash.

    Which Beetroot Is Best To Eat?

    When it comes to the best type of beetroot to eat, it often depends on your preference and the specific nutritional benefits you're seeking.

    1. Red Beets: These are the most common variety and are rich in fiber, vitamin C, potassium, and manganese. They have a delicious earthy taste and can be eaten raw, roasted, or boiled.
    2. Golden Beets: Golden beets are slightly sweeter than red beets and have a more mellow, less earthy flavor. Golden Beets are packed with fiber, potassium, iron, and vitamin C.
    3. Baby Beets: These are simply younger versions of regular beets. They tend to be sweeter and more tender than their fully-grown counterparts.
    4. Beetroot Supplements: These are typically made from dehydrated beets and are a good option for those who don't like the taste of beets but still want to get their health benefits.

    Read more about different Colors Of Beetroots!

    Can Pregnant Women Eat Beetroot?

    Pregnant women can safely consume beetroot in various forms, such as raw beets and beet juice, which are highly recommended due to their unique nutritional value. Beetroots are packed with folic acid, an essential nutrient that aids the baby's neural tube development. 

    Moreover, they are also known to help regulate blood pressure, a common concern during pregnancy, thanks to their rich content of dietary nitrates.

    How Do You Eat Beets?

    Here are some great ways to incorporate beets into your diet:

    • Beet Greens: Don't throw away the leafy green tops of beets! They can be sautéed in olive oil and garlic for a nutritious side dish or added to salads for a burst of color and nutrition.
    • Grate Raw Beets: Grating raw beets is a quick way to add them to your meals. You can toss them into Hearty Beetroot Salads, stir them into yogurt, or even use them as a garnish for soups.
    • Pickled Beets: Pickling is a delicious way to preserve beets and enjoy them year-round. You can use pickled beets in sandwiches, salads, or as a side dish.
    • Roasted Beets: Roasting Beetroot enhances the natural sweetness of beets. Cut into chunks, coat with olive oil and seasonings, and roast until tender. Try Balsamic Roasted Beetroot as a great addition to salads, grain bowls, or a side dish.
    • Cook Beets: There are many ways to cook beets. You can boil them until tender, steam them, or even microwave them. After cooking, they can be used in a range of dishes, from salads to soups.
    • Beetroot Soup: Beetroot soup, also known as borscht, is a traditional Eastern European dish. It's a hearty, flavorful soup that's perfect for cold winter days. Learn how to make Easy Beetroot Soup here!

    Enjoy The Health Benefits Of Beetroot!

    Beets have numerous health benefits, making them a great addition to any diet. Enjoy the health benefits of beetroot as you add this nutritious and heart healthy vegetable to your meals and smoothies.

    Can You Freeze Marshmallows?

    August 5, 2024 by Angela Milnes

    Marshmallows.

    Can You Freeze Marshmallows? Marshmallows are those soft, fluffy treats that make hot cocoa and s'mores taste fantastic. But what if you have too many or want to freeze marshamllows for later use? In this article, we'll share how freezing marshmallows might affect their texture and taste and explain exactly How To Freeze Marshmallows the right way. Read on to learn more.

    Marshmallows. Can your freeze marshmallows?
    [feast_advanced_jump_to]

    Can You Freeze Marshmallows?

    Yes, you can freeze store-bought marshmallows, including stale ones, by storing the whole bag in the freezer. This method can help preserve their quality and prevent further deterioration.

    How To Freeze Marshmallows?

    1. Choose containers to freeze marshmallows that provide a tight seal to prevent freezer burn.
    2. If desired, portion the marshmallows into smaller quantities for convenience.
    3. Place the marshmallows in the containers, leaving some space at the top for expansion.
    4. Make sure that the containers are tightly sealed to maintain freshness.
    5. Label your marshmallow containers with the date for reference.
    6. Place these containers in the freezer, ensuring they are on a flat surface.

    Does Freezing Affect The Texture of Marshmallows?

    Freezing marshmallows can affect their texture by making frozen marshmallows slightly firmer or chewier once thawed. While freezing can help preserve marshmallows, it may alter their original soft and fluffy texture.

    Best Way To Thaw Marshmallows

    • To defrost marshmallows naturally, place them at room temperature.
    • Avoid aggressive methods and handle the marshmallows gently to prevent crushing or damaging their texture.
    • Once thawed, use the marshmallows in your recipes or enjoy them as a treat.

    How To Freeze Dry Marshmallows?

    To freeze-dry marshmallows, pre-freeze them, arrange them in a freezer dryer, set the dryer, freeze dry until crispy, and store in an airtight container for long-term preservation.

    Difference Between Freezing and Freeze Drying Marshmallows

    Freezing and freeze-drying are two distinct methods for preserving marshmallows. Freezing involves placing marshmallows in a freezer at around -18°C (0°F), where the water content forms ice crystals. This method keeps the marshmallows chewy when thawed, although slightly firmer, with taste largely unchanged. Frozen marshmallows need airtight storage to prevent moisture and freezer burn and can be used in recipes involving melting or toasting, though they may become sticky when thawed.

    Freeze-drying, on the other hand, involves freezing marshmallows at extremely low temperatures, then applying a vacuum to remove air and gentle heat to sublimate ice directly from solid to gas. This results in light, crispy, and crunchy marshmallows with a concentrated taste and much longer shelf life, making them ideal for long-term storage and various culinary uses.

    What To Do With Marshmallows?

    • Make Marshmallow Treats: Transform the marshmallows into homemade marshmallow treats like crispy rice squares, marshmallow pops, or marshmallow-filled cookies for a fun and delicious twist.
    • Add to Cocoa Bombs or Hot Chocolate: Enhance the experience of cocoa bombs or hot chocolate by using leftover marshmallows as a delightful topping that melts into the warm drink.
    • Hot Cocoa Dip: Enjoy marshmallows by complementing them with a luscious Hot Cocoa Dip, creating a delectable and cozy snacking experience.
    • Bake into Desserts: Incorporate leftover marshmallows into baking recipes like brownies, cookies, or Rice Crispy Treats for added sweetness and texture.
    • Sweeten Up Your Food: Whether melted into a sauce for a unique flavor, sprinkled on top of Desserts for extra sugar, or simply enjoyed in small amounts as a sweet treat, get creative with incorporating these sugary delights into your eating experience.
    Marshmallow ladybugs with rice krispies.

    FAQ'S

    Can You Freeze Stale Marshmallows?

    Freezing stale marshmallows can help prevent them from becoming even harder or losing more moisture. By freezing them, you may be able to retain some of their original texture and make them slightly more enjoyable to eat.

    Do You Have To Store Marshmallows In An Airtight Container?

    It is not necessary to transfer marshmallows to air tight containers before freezing; you can freeze them directly in their original bag. However, ensure the bag is sealed tightly to maintain freshness and prevent freezer burn.

    More Useful Food Tip Articles

    • Green Mussels Vs Black Mussels
    • Best Liquid Smoke Substitute
    • Best Substitution For Safflower Oil

    Cauliflower Rice Sushi (With Salmon)

    August 3, 2024 by Angela Milnes

    Baked Salmon Cauliflower Rice Sushi on a plate.

    Cauliflower Rice Sushi is your low-carb answer to sushi night—without the guilt or the rolling mat! These baked salmon sushi cups are packed with flavor, easy to prep, and fun to serve for lunch, snacks, or a light dinner.

    Baked Salmon Cauliflower Rice Sushi on a plate.

    If you’ve ever wanted sushi at home but felt intimidated by rolling or carb overload, this cauliflower rice version is the game-changer. Inspired by traditional flavors but made simpler and lighter, these salmon sushi cups are fun, satisfying, and endlessly customizable.

    Looking for more low-carb ideas? Try my Baked Crispy Salmon Bites on Rice, Portobello Stuffed Mushrooms, or Ground Turkey Pasta for easy weeknight wins.

    [feast_advanced_jump_to]

    💖 Why This Recipe Works

    • Sweet & savory flavor combo – Honey + herbs = a caramelized dream.
    • Super versatile – Perfect for holidays and weeknights.
    • Sheet pan simplicity – Minimal effort, maximum flavor.

    ⭐ Star Ingredients

    Cauliflower Rice Sushi Ingredients.
    • Cauliflower Rice – Mild, grain-free, and a great stand-in for sushi rice when seasoned with rice vinegar.
    • Salmon – Adds richness and protein. You can bake it, flake it, or go spicy with a sriracha glaze.
    • Nori Sheets – Briny and crisp, they form the base of these mini sushi without rice bites.
    • Avocado & Sesame Seeds – Creamy and crunchy toppings for that classic sushi texture combo.

    For the complete list of ingredients with measurements and instructions, please see the recipe card at the bottom of the post.

    📖  Substitutions & Variations

    • Cauliflower Rice Sushi Bowl – Skip the cups and layer it all into a bowl for a deconstructed vibe.
    • Spicy Baked Salmon – Marinate salmon in sriracha, soy, and honey for sweet heat.
    • Vegan Sushi Idea – Use tofu or cucumber strips in place of salmon.
    • Add cream cheese – For a Philly roll twist with avocado and green onion.
    • Switch the nori – Try rice paper or cucumber slices if you don’t have seaweed.

    Want a creamy drizzle on top? Try my Best Vegan Mayonnaise for a plant-based finish!

    🔪 How To Make Cauliflower Rice Sushi

    Marinated salmon pieces in a bowl.
    1. Step 1: Preheat your oven to 400°F (200°C). In a bowl, mix the chopped salmon with mayonnaise and soy sauce until well combined.
    Cauliflower rice for sushi in a bowl.
    1. Step 2: In another bowl, add rice vinegar to the cauliflower rice and mix thoroughly.
    Adding rice to nori sushi.
    1. Step 3: Cut squares of nori and place them in a muffin tin, forming little cups. Fill each nori cup with the cauliflower rice mixture, pressing down to compact it.
    Baked salmon ball sushi.
    1. Step 4: Place a spoonful of salmon mixture on the cauliflower rice in each nori cup. Bake in the oven for 15 minutes until the salmon is cooked. Remove, top with diced avocado and sesame seeds, and serve immediately.

    💡Hint: Press the rice down firmly in the cups so everything holds together after baking!

    Salmon cauliflower rice sushi.

    👩‍🍳 Expert Tips

    • No mushy rice – Don’t over-steam the cauliflower. You want it fluffy, not soggy.
    • Fresh salmon only – For the best flavor, use sushi-grade or freshly cooked salmon.
    • Add variety – Top with spicy mayo, cucumber ribbons, or thin carrot strips for extra color and crunch.

    💭 FAQs

    How do you make cauliflower rice sticky for sushi?

    Making cauliflower rice sticky enough to use for sushi can be a bit challenging since it lacks the natural starches found in traditional sushi rice. However by using rice vinegar you can achieve a more cohesive and sticky consistency.

    Can I freeze cauliflower sushi?

    Not recommended. The texture of both cauliflower and nori changes too much after freezing.

    Can I use canned salmon?

    Yes, for a shortcut! Just mix with mayo and season well before adding to your sushi cups..

    Best way to store cauliflower rice sushi?

    Keep them in an airtight container in the fridge for up to 3 days. Best enjoyed cold or gently reheated.

    💖 Serving Suggestions

    Here are my favorite sides to serve with cauliflower rice salmon Sushi:

    • Miso Soup – A warm, savory pairing for light sushi cups.
    • Edamame – Steamed and lightly salted for a perfect protein snack.
    • Seaweed Salad – Refreshing and tangy with sesame oil.
    • Pickled Ginger – Classic sushi pairing to cleanse the palate.
    • Korean Cucumber Salad – Light, crunchy, and full of flavor.
    cauliflower rice sushi

    🍽 Try These Salmon Recipes

    • Best Air Fryer Salmon Recipe: Bang Bang Salmon.
      Air Fryer Bang Bang Salmon (Fast, Spicy & Crispy!)
    • Baked Crispy Salmon Bites on Rice.
      Baked Crispy Salmon Bites on Rice
    • Spicy Crispy Bang Bang Shrimp with Sweet Chili Sauce.
      Crispy Bang Bang Shrimp with Sweet Chili Sauce
    • Easy Beet Cured Salmon Recipe.
      Easy Beet Cured Salmon Recipe

    Did you make this recipe? Leave a review and a ⭐⭐⭐⭐⭐ rating below, or tag us in our Facebook Group! Alternatively, bookmark it in your browser or save to Pinterest.

    Baked Salmon Cauliflower Rice Sushi on a plate.

    Cauliflower Rice Sushi

    Angela Milnes
    Enjoy a light and healthy twist on a classic with this Cauliflower Rice Sushi! Made with tender cauliflower rice, fresh veggies, and your favorite fillings, these sushi rolls are perfect for a low-carb, flavor-packed meal. It's a fun and nutritious way to enjoy sushi at home!
    5 from 5 votes
    Print Recipe Pin Recipe Rate this Recipe
    Prep Time 10 minutes mins
    Cook Time 15 minutes mins
    Additional Time 0 minutes mins
    Total Time 25 minutes mins
    Course Appetizers
    Cuisine Japanese
    Servings 2 Servings
    Calories 873 kcal

    Ingredients
      

    • 1 Cup Cauliflower Rice
    • 1 Cup Salmon diced
    • 2 tablespoon Green onions
    • 12 tablespoon Mayonnaise
    • 1 teaspoon Sesame
    • 1 tablespoon Soy Sauce
    • 1 tablespoon Rice Vinegar
    • 1 Avocado
    • 2 piece Nori seaweed

    Instructions
     

    • In a bowl, mix the chopped salmon with mayonnaise and soy sauce until well combined.
    • In another bowl, add rice vinegar to the cauliflower rice and mix thoroughly.
    • Cut squares of nori and place them in a muffin tin, forming little cups.
    • Fill each nori cup with the cauliflower rice mixture, pressing down to compact it.
    • Place a spoonful of the salmon mixture on top of the cauliflower rice in each nori cup.
    • Bake in the preheated oven for 15 minutes, until the salmon is cooked through.
    • Remove from the oven and top each sushi cup with diced avocado and a sprinkle of sesame seeds.

    Notes

    Keep It Simple: Since cauliflower rice has a milder flavor than traditional sushi rice, it’s best to keep your fillings simple to allow the flavors of the salmon to shine through. Consider adding ingredients like cucumber, avocado, or a small amount of cream cheese.
    Fresh Salmon: Use fresh, sushi-grade salmon. This not only ensures safety when eating raw but also provides the best flavor and texture. Cut the salmon into thin slices or small cubes, depending on your preference.

    Nutrition

    Calories: 873kcalCarbohydrates: 15gProtein: 19gFat: 83gSaturated Fat: 13gPolyunsaturated Fat: 42gMonounsaturated Fat: 26gTrans Fat: 0.2gCholesterol: 73mgSodium: 1100mgPotassium: 1133mgFiber: 9gSugar: 3gVitamin A: 420IUVitamin C: 51mgCalcium: 56mgIron: 2mg
    Print Recipe Pin Recipe Rate this Recipe
    Tried this recipe?Let us know how it was!

    Mango and Pineapple Salsa (Perfect With Fish)

    August 2, 2024 by Angela Milnes

    Mango and Pineapple Salsa in a white bowl.

    This mango and pineapple salsa is sweet, zesty, and totally sunshine in a bowl. It’s the perfect no-fuss recipe for chips, tacos, fish or grilled meats—all summer long.

    Mango and Pineapple Salsa in a white bowl.

    This colorful pineapple mango salsa brings the beach party to your plate! Whether you're scooping it with chips or spooning it over fish, it's a bright, juicy way to liven up your meals.

    If you're into fruity flavors, try pairing it with my Tilapia Fish Tacos or Garlic Cilantro Rice. Want something heartier? This Instant Pot Kalua Pork is a great match.

    [feast_advanced_jump_to]

    💖 Why This Recipe Works

    • Sweet & Tangy Combo: Mango + pineapple = flavor fireworks.
    • Ultra Refreshing: This fresh pineapple mango salsa is bursting with vibrant colors and refreshing tastes, making it perfect for summer.
    • Easy to Make: This mango pineapple salsa recipe is easy to prepare and great as a dip. It's also the perfect mango pineapple salsa for salmon.

    ⭐ Star Ingredients

    Mango and pineapple  salsa ingredients.
    • Pineapple: I always go for fresh—it’s juicier and adds that perfect tropical tang you just can’t get from a can.
    • Mango: Ripe and slightly soft is key! It should give a little when you press it—too firm and you miss the magic.
    • Jalapeño: I leave the seeds in for a bit of heat, but if you're making this kid-friendly, just scoop them out.
    • Lime Juice: Freshly squeezed only! Bottled stuff doesn’t give that same bright pop.

    For the complete list of ingredients with measurements and instructions, please see the recipe card at the bottom of the post.

    📖  Substitutions & Variations

    • Add a citrus twist: A splash of orange juice brings extra brightness.
    • Bump the spice: Use serrano peppers or add chili flakes.
    • Switch the herbs: Try fresh mint or basil for a twist.
    • Bulk it out: Toss in diced cucumber or avocado for texture.
    • No fresh mango? Frozen (thawed and drained) works just fine.

    If you're craving more fun sides, my Caprese Skewers or Best Low Carb Broccoli Salad also make fab picnic additions.

    🔪How To Make Mango and Pineapple Salsa

    Diced pineapple, mango, Roma tomato, red onion, cilantro, and jalapeño in a bowl.
    1. Step 1: In a large mixing bowl, combine the diced pineapple, mango, Roma tomato, red onion, cilantro, and jalapeño. Add the lime juice and salt to the mixture.
    Mango pineapple salsa in a bowl.
    1. Step 2: Gently toss all the ingredients together until well combined. Cover the bowl and refrigerate for at least 30 minutes to allow the flavors to meld. Serve the delicious salsa chilled as a dip with chips or as a topping for various meats.

    💡Hint: Dice everything evenly for the best scoopability—especially if you're serving with tortilla chips!

    Mango and pineapple salsa in a white bowl ready to eat.

    👩‍🍳 Expert Tips

    • Use ripe fruit: Ripe mango and pineapple = max flavor and juiciness.
    • Chill before serving: Let the flavors meld for at least 30 minutes.
    • Balance the heat: Remove jalapeño seeds for a milder salsa, or leave them in for more kick.

    💭 FAQs

    Can I use frozen fruit for mango pineapple salsa?

    Yes, you can use frozen fruit if fresh isn’t available. Just be sure to thaw them first and drain any excess liquid. Fresh fruit gives a better texture, but frozen works well in a pinch.

    How spicy is pineapple mango salsa?

    The spice level depends on how much jalapeño you add. If you like it mild, use a small amount or remove the seeds before chopping. For more heat, include extra jalapeño or even add some cayenne pepper.

    How long will this mango pineapple salsa last?

    Store in an airtight container in the fridge for up to 3–4 days. Best enjoyed fresh!

    Can I make this salsa ahead of time?

    Absolutely! In fact, making it a few hours or even a day ahead allows the flavors to meld together. Just store it in the fridge until ready to serve.

    💖 Serving Suggestions

    Here are my favorite sides to serve with mango pineapple salsa:

    • Air Fryer Stuffed Chicken: Spoon it over grilled or air-fried chicken.
    • Air Fryer Cod Fillet: A tropical topping for light white fish.
      Fluffy Coconut Rice: Pairs beautifully with the sweet and zesty flavors.
      Plantain Tortilla Chips: For a fun twist on classic chips and salsa.
      Instant Pot Garlic Pork Tenderloin: A bright contrast to savory, juicy pork.

    Mango and pineapple salsa in a bowl.

    🍽 More Tasty Side Dishes

    • Canned Black Bean And Corn Salsa Recipe.
      Canned Black Bean And Corn Salsa Recipe
    • Best Strawberry Jalapeno Salsa "Pico de Gallo" with chives.
      Best Strawberry Jalapeno Salsa (Ready In 10 Minutes)
    • How To Roast Peppers In Air Fryer.
      How To Roast Peppers In Air Fryer
    • Mexican Elotes Corn.
      Mexican Elotes Corn

    Did you make this recipe? Leave a review and a ⭐⭐⭐⭐⭐ rating below, or tag us in our Facebook Group! Alternatively, bookmark it in your browser or save to Pinterest.

    Mango and Pineapple Salsa in a white bowl.

    Mango and Pineapple Salsa

    Angela Milnes
    Brighten up your meal with this Pineapple Mango Salsa! Sweet mango, juicy pineapple, and a hint of lime come together in this refreshing, tropical salsa. Perfect as a dip or a topping for grilled fish or chicken, it’s a vibrant, flavorful addition to any dish!
    5 from 3 votes
    Print Recipe Pin Recipe Rate this Recipe
    Prep Time 10 minutes mins
    Cook Time 0 minutes mins
    Total Time 10 minutes mins
    Course Condiments
    Cuisine American
    Servings 3 Servings
    Calories 135 kcal

    Ingredients
      

    • 2 cups Fresh Pineapple diced
    • 2 cups Fresh Mango diced
    • 1 Roma Tomato diced
    • ¼ cup Red Onion diced
    • 1 tablespoon Cilantro diced
    • 2 tablespoon Jalapeno finely diced
    • 2 tablespoon Lime Juice
    • ½ teaspoon Salt

    Instructions
     

    • In a large mixing bowl, combine the diced pineapple, mango, roma tomato, red onion, cilantro, and jalapeño.
    • Add the lime juice and salt to the mixture.
    • Gently toss all the ingredients together until well combined.
    • Cover the bowl and refrigerate for at least 30 minutes to allow the flavors to meld.
    • Serve the delicious salsa chilled as a dip with chips or as a topping for grilled fish or chicken.

    Notes

    Consistent Texture: Dice all ingredients finely to achieve a consistent texture that resembles the traditional salsa base.
    Enhance Flavor: Combine the sweetness of fresh fruit with the tanginess of canned fruit to create a unique taste profile.

    Nutrition

    Serving: 1gCalories: 135kcalCarbohydrates: 34gProtein: 2gFat: 1gSaturated Fat: 0.1gPolyunsaturated Fat: 0.2gMonounsaturated Fat: 0.2gSodium: 392mgPotassium: 410mgFiber: 4gSugar: 28gVitamin A: 1548IUVitamin C: 111mgCalcium: 34mgIron: 1mg
    Print Recipe Pin Recipe Rate this Recipe
    Tried this recipe?Let us know how it was!

    Try These Ideas for Your Next Meal

    • Vegan Mixed Berry Smoothie
    • Crock Pot Chili Mac And Cheese
    • Best Turkey Cobb Salad Recipe In A Jar
    • Italian Chopped Salad
    • Keto Coq Au Vin
    • Mediterranean Zucchini Stew With Tomatoes

    Best Substitute For Dijon Mustard: Top 15 Alternatives

    August 1, 2024 by Angela Milnes

    Substitutes for Dijon mustard.

    Dijon mustard is a staple in many kitchens, adding a tangy kick to everything from sandwiches to salad dressings. But what happens when you run out or simply need a Substitute For Dijon Mustard? Today we are sharing 15 of the best Dijon Mustard replacements to elevate your recipes and meals.

    Substitute For Dijon Mustard
    [feast_advanced_jump_to]

    Interesting Facts About Dijon Mustard

    • Origin: Dijon mustard originated in the city of Dijon, France, known for its distinctive and flavorful mustard production.
    • Ingredients: It is typically made with ground mustard seeds, white wine or wine vinegar, water, salt, and sometimes other spices, giving it a tangy and slightly spicy taste.
    • Smooth Texture: Dijon mustard is known for its smooth and creamy texture, making it versatile for use in dressings, marinades, and sauces.
    • Versatile Use: It adds a depth of flavor to sandwiches, salads, meats, and even dips, enhancing dishes with its unique tanginess.

    What Can You Substitute For Dijon Mustard?

    There are 15 alternatives for Dijon mustard you can consider based on your flavor preferences and the ingredients you have on hand:

    1. Whole Grain Mustard Substitute

    Whole-grain mustard is a wonderful Dijon mustard substitute that adds a unique twist to your dishes. What makes it special is the delightful crunch of the whole mustard seeds that burst with flavor in every bite.

    It has a slightly grainy texture that gives dishes an extra pop. You can easily make whole-grain mustard at home by mixing mustard seeds, vinegar, water, and spices, letting it sit for a few days to develop its flavors. It is not too expensive and can also be found in most grocery stores.

    To replace Dijon mustard with whole grain mustard, use the same amount in recipes for a tangy and textured kick. Try it in:

    • Honey Mustard Chicken Thighs
    • Mustard glazed salmon
    • Roast beef sandwich with Honey Mustard Salad Dressing
    Whole Grain Mustard

    2. Honey mustard As A replacement

    Honey mustard is a tasty Dijon mustard alternative that brings a sweet and tangy flavor to your dishes. The special thing about honey mustard is its perfect balance of sweetness from honey and the zing of mustard.

    It has a smooth, creamy texture that blends well with many foods. You can easily make honey mustard at home by mixing equal parts of honey and mustard.

    To replace Dijon mustard with honey mustard, use the same amount to maintain the flavor balance. Try it in:

    • Honey mustard Rotisserie Chicken Salad
    • Honey mustard glazed vegetables
    • Roasted Beetroot Salad
    Honey mustard In A Bowl

    3. Stone-Ground Mustard

    Stone-ground mustard is made from brown mustard seeds, which give it a rich and tangy flavor. The texture is thicker and has visible seeds, making it a bit more rustic than smooth Dijon.

    You can easily find stone-ground mustard at any grocery store, and it's usually inexpensive. If you prefer, you can make it at home by grinding brown mustard seeds with vinegar and water.

    To replace Dijon mustard in recipes, use the same amount of stone-ground mustard. Try it in:

    • Sandwiches
    • Pretzels
    • Sausages
    Stone-Ground Mustard

    4. Spicy Brown Mustard Alternative

    Spicy brown mustard is a fantastic Dijon mustard replacement. It has a spicy kick that adds more heat to your dishes. The flavor is bold and tangy, perfect if you like a bit of spice.

    The texture is slightly coarse, which gives it a rustic feel. You can easily find spicy brown mustard at most grocery stores, and it's usually inexpensive.

    If you're adventurous, you can make it at home by mixing mustard seeds with vinegar and spices. For a flavorful twist in recipes, swap Dijon mustard with spicy brown mustard using an equal amount. Try it in:

    • Halloween Mummy Hot Dogs
    • Sandwiches
    • Marinades for Meat
    Spicy Brown Mustard

    5. Substitute With Yellow Mustard

    Yellow mustard is a simple and easy substitute for Dijon mustard. It's made from yellow mustard seeds and has a milder, tangy mustard flavor. The texture is smooth and creamy, making it great for many dishes.

    You can make yellow mustard by mixing white mustard seeds with vinegar and spices. Alternatively, you can also make this mustard sauce with white mustard seeds and turmeric for coloring.

    For recipes calling for Dijon mustard, simply substitute an equal amount of yellow mustard. Try it in:

    • Pastle Dyed Deviled Eggs
    • Instant Pot Potato Salad
    • Grilled Cheese Sandwiches
    Yellow Mustard Dip

    6. Hot English Mustard

    Hot English mustard is a spicy and flavorful dijon substitute. It has a sharp, strong taste that can really wake up your taste buds. The texture is smooth and creamy, perfect for adding a kick to your dishes.

    You can find hot English mustard at most grocery stores. If you prefer, you can make it at home by mixing mustard powder, turmeric with water and vinegar.

    For a milder alternative to Dijon mustard in recipes, opt for a smaller quantity of hot English mustard to reduce the spiciness. Try it in:

    • Roast Beef Sandwiches
    • Salad Dressings: Read here: Does Salad Dressing Go Bad?
    • Pastle Dyed Deviled Eggs
    Hot English Mustard

    7. German Mustard

    German mustard has a unique, slightly sweet and tangy flavor that's different but delightful. The texture can vary from smooth to coarse, with some versions having whole mustard seeds.

    You can find German mustard in most grocery stores, and it's usually affordable. Making it at home can be fun and involves mixing mustard seeds, apple cider vinegar, and spices. To replace Dijon mustard in recipes, use the same amount of German mustard.

    Try it in:

    • Bratwurst
    • Potato Salad
    • Sandwiches

    8. Worcestershire Sauce

    Worcestershire sauce can be a surprising but tasty substitute for Dijon mustard. It has a unique, savory flavor that’s rich and slightly tangy, adding depth to your dishes. The texture is liquid, so it mixes well with other ingredients.

    You can easily find Worcestershire sauce in any grocery store. To substitute Dijon mustard, use about half the amount of Worcestershire sauce due to its strong flavor. Try it in:

    • Marinades for Meat
    • Beef Stew
    • Salad Dressings
    Worcestershire Sauce

    9. Beer Mustard

    Beer mustard combines the tang of mustard with the rich taste of beer, creating a unique and delicious flavor. The texture can be grainy or smooth, depending on the recipe.

    You can find beer mustard at specialty stores or make it at home by mixing mustard seeds, beer, and spices. It's an affordable option and adds an interesting twist to your dishes.

    To use beer mustard as a homemade Dijon mustard substitute, simply replace it in equal amounts. Try it in:

    • Pretzels
    • Grilled Sausages
    • Sandwiches
    sausages to serve with beer mustard sauce

    10. Horseradish Sauce

    Horseradish sauce is a great substitute for Dijon mustard. It has a spicy, tangy flavor that adds a punch to your dishes. The texture is smooth and creamy. You can find horseradish sauce in most grocery stores.

    If you want to make it at home, mix grated horseradish root with vinegar, mayonnaise, and a bit of salt. To make alternate to Dijon mustard in recipes, use the same amount of horseradish sauce. Try it in:

    • Roast Beef Sandwiches
    • Smashed Potato Salad
    • Deviled Eggs
    horseradish sauce

    11. White Wine Vinegar

    White wine vinegar is a handy alternative to Dijon mustard. It has a tangy and slightly sweet flavor that can brighten up your dishes. The texture is liquid, so it mixes well with other ingredients.

    To swap out Dijon mustard, use about half the amount of white wine vinegar because it’s more acidic. Try it in:

    • Salad Dressings
    • Marinades for Chicken
    White Wine Vinegar

    12. Wasabi Sauce

    Wasabi sauce has a hot, tangy flavor that adds a bold kick to your dishes. The texture is smooth and creamy, making it perfect for spreading or mixing.

    Making it at home is simple; just mix wasabi powder with water and a little mayonnaise. For a swap for Dijon mustard, go for the same amount of wasabi sauce. Try it in:

    • Sushi Rolls
    • Air Fryer Cod
    • Dipping Sauce for Air Fried Roasted Vegetables
    Wasabi Sauce

    13. Lecithin powder

    You won't believe this, but lecithin powder can be a surprising substitute for Dijon mustard! It has a much milder flavor, so it's perfect if you want just a hint of taste.

    The texture is powdery and smooth, which helps in mixing it easily with other ingredients.To replace Dijon mustard, use about half the amount since its flavor is subtler. Try it in:

    • Salad Dressings
    • Avocado Smoothie
    • Vegan Mayo
    Lecithin powder

    14. Mayonnaise

    Mayonnaise is also an amazing Dijon mustard replacement! It has a creamy texture and a mild, tangy flavor that blends well in many dishes.

    You can easily make mayo at home with eggs, oil, and vinegar, or grab a jar from any grocery store. To replace Dijon mustard, just use the same amount of mayonnaise. Try it in:

    • Potato Salad
    • Chicken Salad
    • Sandwich Spreads

    15. Sour Cream

    Mayonnaise is a creamy and has a mild, tangy flavor that works well in many recipes. The texture is smooth and thick, making it easy to spread or mix. You can make mayo at home with just eggs, oil, and vinegar, or buy it from any grocery store.

    To use it as a replacement for Dijon mustard, use the same amount of mayonnaise. Try it in:

    • Potato Salad
    • Chicken Salad
    Mayonnaise

    Pick A Dijon Mustard Alternative Today!

    In conclusion, there are many delicious and unique substitutes for Dijon mustard that can add a burst of flavor to your dishes. Whether you choose the spicy kick of hot English mustard or the tangy sweetness of German mustard, these alternatives will not disappoint.

    So next time you're in need of Dijon mustard, don't be afraid to get creative and try one of these tasty replacements!

    More Ingredient Substitutions To Try

    • Substitute For Chili Garlic Sauce
    • Best Worcestershire Sauce Substitute
    • Substitute For Lemon Pepper
    • Best Substitute For Juniper Berries
    • Fish Stock Substitute: 11 Best Alternatives

    Air Fryer Shrimp With Paprika And Garlic

    August 1, 2024 by Angela Milnes

    Air Fryer Shrimp With Paprika And Garlic.

    Craving a fast, flavorful dinner? These Air Fryer Shrimp with paprika and garlic are smoky, juicy, and done in under 10 minutes! Great for high-protein meal prep, quick dinners, or low-carb taco night.

    Air fryer shrimp with paprika on a plate.

    This recipe started as a shortcut weeknight dinner and quickly turned into a go-to for everything from meal prep to shrimp tacos. I’ve tested fresh vs frozen, pre-cooked vs raw shrimp in the air fryer—and this version gives the best texture and flavor, every time.

    Whether you’re cooking raw shrimp or wondering how long to cook frozen shrimp in air fryer, this one’s got you covered. Each serving is under 200 kcal and packed with 20g of protein.

    If you love easy recipes like my Purple Potato Salad or Harissa Sweet Potato, these crispy air fryer shrimp are about to become your new favorite.

    [feast_advanced_jump_to]

    💖 Why This Recipe Works

    • Quick Cooking – Shrimp cook in under 6 minutes with no need to thaw.
    • Big Flavor, Minimal Prep – A simple paprika-garlic blend brings smoky depth.
    • Versatile – Serve with rice, salad, tacos, or dip in sauce.

    ⭐ Star Ingredients

    air fryer shrimp ingredients.
    • Raw Shrimp – I use peeled, deveined medium or large shrimp. Jumbo works too—just add 1–2 minutes. Pat dry before seasoning for best crisp.
    • Paprika & Garlic Powder – This combo gives smoky depth and that classic shrimp seasoning without overpowering.
    • Avocado Oil – A high smoke point oil that helps spices stick and keeps the shrimp juicy.

    For the complete list of ingredients with measurements and instructions, please see the recipe card at the bottom of the post.

    📖  Substitutions & Variations

    • Frozen Shrimp? Cook straight from frozen! Just season lightly and air fry at 400°F for 8–10 minutes.
    • Lemon Herb Shrimp: Swap paprika for lemon zest and fresh herbs.
    • Spicy Cajun Shrimp: Add cayenne or Cajun seasoning.
    • Garlic Parmesan: Toss with grated Parmesan post-cook for extra savory crunch.
    • Shrimp Skewers: Thread onto skewers before air frying for party-style presentation.
    • Want a Thai twist? Add lime juice and Thai basil. Craving Mexican? Swap paprika for chipotle powder and serve with corn salsa."

    For more shrimp variations, check out my Hawaiian Garlic Shrimp or Chicken And Shrimp Alfredo.

    🔪How To Make Air Fryer Smoked Paprika Shrimp

    Avocado oil, garlic powder, paprika, salt, and black pepper in a bowl.
    1. Step 1: In a mixing bowl, blend the avocado oil, garlic powder, paprika, salt, and black pepper together.
    Marinating shrimps on a bowl.
    1. Step 2: Toss the shrimp in the bowl with the oil and spices until they're thoroughly coated. Allow the shrimp to sit in the marinade for about 10 minutes. Heat the air fryer to 400°F (200°C) and let it warm up for 3-5 minutes.
    Uncooked seasoned shrimps in an air fryer.
    1. Step 3: Arrange the marinated shrimp in a single layer in the air fryer basket, ensuring they do not overlap. Air fry the shrimp at 400°F (200°C) for 5-6 minutes, shaking the basket halfway for even cooking.
    Cooked shrimps in an air fryer.
    1. Step 4: Remove the shrimp once they turn pink and opaque. For shrimp skewers, thread the shrimp onto skewers. Serve immediately with lemon wedges and a sprinkle of chopped parsley if desired.

    💡 Hint: Cooking frozen shrimp in air fryer? Skip the marinade. Spray lightly with oil and season straight from frozen. Cook for 8–10 minutes at 400°F, flipping halfway.

    🔄 Fresh vs Frozen Shrimp: Frozen works great for convenience—just expect slightly more moisture and a softer texture. Fresh shrimp yields the crispiest edges if you're chasing that golden finish.

    Air fried shrimps on a skewer.

    👩‍🍳 Expert Tips

    • Shrimp Size Matters: Medium = 5 min, Jumbo = 6–7 min. Smaller cooks quicker.
    • Don’t Overcrowd: Cook in batches if needed to avoid steaming.
    • Meal Prep Friendly: Store in fridge up to 3 days or freeze in a single layer, then bag.
    • Preheat for Best Texture: Always heat the basket for a few minutes to ensure a golden crust.

    ⏱️ Air Fryer Shrimp Timing Guide

    Shrimp SizeAir Fry Time
    Small (41/50)4–5 minutes
    Medium (31/40)5–6 minutes
    Large (21/30)6–7 minutes
    Jumbo (16/20)7–8 minutes

    💡 Shrimp are done when pink, opaque, and curled into a C-shape.

    Best Shrimp Dipping Sauces

    • Cocktail Sauce. Learn about Cocktail Shrimp here.
    • Garlic Aioli.
    • Spicy Mayo.
    • Sweet Chili Sauce.
    • Lemon Butter.
    • Cilantro Lime Yogurt Dip.
    Air fried shrimp on a fork.

    💭 FAQs

    Can you air fry raw shrimp?

    Yes! Raw shrimp in air fryer cooks in just 5–6 minutes at 400°F.

    How long to cook frozen shrimp in air fryer?

    8–10 minutes at 400°F, no thawing required. Flip halfway through.

    Do I need to peel shrimp first?

    It’s best to peel and devein before cooking for easy eating and better seasoning coverage.

    How to reheat shrimp in air fryer?

    350°F for 3–4 minutes. Don’t overcook or it’ll go rubbery.

    Best Way to Store Air Fryer Shrimp

    Store in an airtight container in the refrigerator for up to 3 days. Place cooked shrimp in a single layer on a baking sheet to freeze, then transfer to a freezer-safe bag or container for up to 2 months.

    💖 Serving Suggestions

    Here are some great ways to serve your air fried shrimp:

    • Mango Arugula Salad – Refreshing and citrusy contrast.
    • Shrimp Tacos – Load into tortillas with slaw and avocado.
    • Rice Bowl – Serve over jasmine rice with lime crema.
    • Garlic Parmesan Fries – For a casual, satisfying combo.
    • Avocado Toast – Top crispy shrimp over creamy avocado on toast.

    Leftovers? Chop into a spicy shrimp pasta salad or wrap in rice paper rolls for a lunch reboot.

    Bonus Dipping Sauce: Mix 2 tablespoon mayo, 1 teaspoon sriracha, and a squeeze of lime for an easy spicy mayo everyone loves.

    Air fried shrimps on a plate.

    🍽 More Air Fryer Recipes

    • Air Fryer Catfish Nuggets.
      Best Air Fryer Catfish Nuggets Recipe
    • Air Fryer Cod Fillet.
      Air Fryer Cod Fillet
    • Air fryer cauliflower with teriyaki sauce and sesame seeds.
      Air Fryer Cauliflower With Teriyaki Sauce
    • Crispy Air Fryer Avocado Fries Recipe.
      Crispy Air Fryer Avocado Fries Recipe

    Did you make this recipe? Leave a review and a ⭐⭐⭐⭐⭐ rating below, or tag us in our Facebook Group! Alternatively, bookmark it in your browser ort in your browser or save to Pinterest.

    Air Fryer Shrimp With Paprika And Garlic.

    Air Fryer Shrimp With Paprika

    Angela Milnes
    Get ready for a burst of flavor with these Air Fryer Shrimp seasoned with paprika and garlic! Crispy on the outside, juicy on the inside, these shrimp are cooked to perfection in the air fryer. With the smoky kick of paprika and the savory punch of garlic, this quick and easy dish is perfect as a main course, appetizer, or a tasty addition to salads and pastas.
    5 from 4 votes
    Print Recipe Pin Recipe Rate this Recipe
    Prep Time 10 minutes mins
    Cook Time 6 minutes mins
    Total Time 16 minutes mins
    Course Dinners
    Cuisine American
    Servings 4 Servings
    Calories 162 kcal

    Ingredients
      

    • 1 pound Shrimp peeled and deveined
    • 2 tablespoons Avocado Oil
    • ¼ teaspoon Garlic Powder
    • 1 teaspoon Paprika
    • ½ teaspoon Salt
    • ¼ teaspoon Black pepper
    • Lemon Wedges for serving (optional)
    • Chopped Parsley for garnish (optional)

    Instructions
     

    • In a mixing bowl, blend the avocado oil, garlic powder, paprika, salt, and black pepper together.
    • Toss the shrimp in the bowl with the oil and spices until they're thoroughly coated. Allow the shrimp to sit in the marinade for about 10 minutes.
    • Heat the air fryer to 400°F (200°C) and let it warm up for 3-5 minutes.
    • Arrange the marinated shrimp in a single layer in the air fryer basket, ensuring they do not overlap.
    • Air fry the shrimp at 400°F (200°C) for 5-6 minutes, giving the basket a shake midway through to promote uniform cooking.
    • Remove the shrimp from the air fryer once they turn pink and opaque.
    • Serve the shrimp immediately, accompanied by lemon wedges for adding a fresh squeeze of lemon, and sprinkle with chopped parsley for garnish if you like.

    Nutrition

    Serving: 1gCalories: 162kcalCarbohydrates: 0.4gProtein: 23gFat: 8gSaturated Fat: 1gPolyunsaturated Fat: 1gMonounsaturated Fat: 5gTrans Fat: 0.01gCholesterol: 184mgSodium: 324mgPotassium: 322mgFiber: 0.2gSugar: 0.1gVitamin A: 247IUVitamin C: 0.03mgCalcium: 75mgIron: 1mg
    Print Recipe Pin Recipe Rate this Recipe
    Tried this recipe?Let us know how it was!

    Best Air Fryer Zucchini Fritters

    August 1, 2024 by Angela Milnes

    Air Fryer Zucchini Fritters piled on a plate and topped with sour cream and herbs.

    Craving a healthy, crispy snack that’s actually fun to make? These Air Fryer Zucchini Fritters are golden, crunchy, and loaded with veggies—aka the guilt-free fritter dream.

    Air Fryer Zucchini Fritters piled on a plate and topped with sour cream and herbs.

    Zucchini fritters are the perfect way to use up that overflowing pile of summer squash or sneak extra veggies into a picky kid's plate. They're light, flavorful, and made even better with the air fryer (hello, no greasy mess!). These healthy vegetable fritters are ideal for meal prep, snack time, or a fun side dish.

    If you love this recipe, don’t miss my Mini Cheese Stuffed Peppers, Air Fryer Cauliflower with Teriyaki Sauce, or Sweet Potato Gnocchi—all crowd-pleasers in my house!

    [feast_advanced_jump_to]

    💖 Why This Recipe Works

    • Crispy without the grease: Thanks to the air fryer, you get that golden crunch with barely any oil.
    • Sneaky veggie win: Zucchini + carrot = a double dose of goodness in every bite.
    • Fast and flexible: Ready in under 30 minutes and easy to tweak for different diets.

    ⭐ Star Ingredients

    Zucchini Fritter Ingredients, Salt, Pepper, Garlic Powder, Carrrots, Zucchini, eggs and Panko Bread Crumbs.
    • Fresh zucchini: Shredded and squeezed—this humble veggie brings moisture and mild flavor.
    • Carrot: Adds brightness and a touch of sweetness to balance the savory vibe.
    • Panko breadcrumbs: Key for that extra crispy coating we all love in air fryer recipes.
    • Egg: Helps everything bind together like a fritter-loving glue.

    For the complete list of ingredients with measurements and instructions, please see the recipe card at the bottom of the post.

    Substitutions And Variations

    • Vegan-friendly: Swap the egg for a flax egg or unsweetened applesauce.
    • Gluten-free: Use GF breadcrumbs or crushed rice crackers instead of panko.
    • Add cheese: Stir in grated Parmesan or crumbled feta for a salty kick.
    • Boost the herbs: Add chopped parsley, dill, or even mint for a fresh twist.
    • Spice it up: Toss in a pinch of cayenne or smoked paprika for more flavor depth.
    • Pan-fry or bake it: No air fryer? Pan-fry in a little olive oil or bake at 400°F for 20–25 minutes.

    If you like these, you’ll also enjoy my Baked Spaghetti Squash and Beetroot Ravioli with Goat Cheese—more veggie-forward deliciousness!

    How To Make Air Fryer Zucchini Fritters

    Grated zucchini and carrot in a bowl.
    1. Step 1: Grate the zucchini and the carrot. After grating the zucchini and carrots, transfer them to a dish. Ensure they are evenly distributed for the next step. Using a clean kitchen towel or cheesecloth, squeeze out as much moisture as possible from the grated zucchini and carrot.
    Mixing grated zucchini, carrot, panko breadcrumbs, egg, garlic powder, salt, and pepper in a bowl.
    1. Step 2: Mix grated zucchini, carrot, panko breadcrumbs, egg, garlic powder, salt, and pepper in a bowl. Shape into small fritters and preheat the air fryer to 375°F (190°C). Cook fritters in a single layer for 8 minutes, flipping halfway. Serve with toppings like herbs, yogurt, or lemon juice. Enjoy!

    💡Hint: Don’t skip the moisture step! Soggy zucchini = sad fritters.

    Air fried zucchini fritters on a plate.

    👩‍🍳 Expert Tips

    • Avoid soggy fritters: Really wring out your zucchini—wet veggies are the enemy of crispy fritters.
    • Batch it: Make a double batch and freeze half for easy snacks or sides later.
    • Make-ahead magic: Prep the mix the night before and store it in the fridge until ready to cook.

    FAQ'S

    I Don't Have An Air fryer! Can I Bake Zucchini Fritters Instead?

    Yes, you can make baked zucchini fritters by preheating your oven to 400°F, mixing the ingredients, and baking them on a greased sheet for 20-25 minutes, flipping halfway through.

    What Can I Use Instead Of Egg For A Vegan Option?

    For a vegan option, replace the egg with a flax egg or ¼ cup of applesauce.

    What Is The Best Way To Grate Zucchini For Fritters?

    Use the large holes of a box grater for the best texture in zucchini fritters.

    How Do I Prevent My Zucchini Fritters From Becoming Soggy?

    Ensure to thoroughly squeeze out all excess moisture from the grated zucchini before mixing with other ingredients.

    💖 Serving Suggestions

    Serve your fritters with the following options:

    • Greek yogurt dip with lemon and dill
    • Spicy garlic aioli or Beetroot Hummus.
    • Simple green salad with balsamic vinaigrette.
    • Feta Beetroot Salad: for a colorful combo.
    • Grilled Chicken Breast: for a full meal.
    • Roasted veggie platter for the ultimate crunchy veggie vibe.

    🍽 Try These Zucchini Recipe Idea

    • Mediterranean Zucchini Stew With Tomatoes.
      Mediterranean Zucchini Stew With Tomatoes
    • Easy Greek Zucchini Moussaka.
      Easy Greek Zucchini Moussaka (Vegetarian & Comforting)
    • Cheesy Sausage Lasagna With Zucchini.
      Cheesy Sausage Lasagna Recipe (With Zucchini)
    • Parmesan Roasted Zucchini.
      Simple Parmesan Roasted Zucchini

    Did you make this recipe? Leave a review and a ⭐⭐⭐⭐⭐ rating below, or tag us in our Facebook Group! Alternatively, bookmark it in your browser or save to Pinterest.

    Air fried zucchini fritters served with parsley on a plate.
    Air Fryer Zucchini Fritters piled on a plate and topped with sour cream and herbs.

    Air Fryer Zucchini Fritters

    Angela Milnes
    Crispy on the outside and tender on the inside, these Zucchini Fritters are a must-try! Packed with fresh zucchini and flavorful herbs, these fritters are a healthier twist on a classic favorite. Easy to make and perfect for a snack or side dish, they’re sure to be a hit with everyone!
    5 from 3 votes
    Print Recipe Pin Recipe Rate this Recipe
    Prep Time 5 minutes mins
    Cook Time 8 minutes mins
    Total Time 13 minutes mins
    Course Vegetables
    Cuisine American
    Servings 6 Servings
    Calories 92 kcal

    Ingredients
      

    • 1 Carrot Grated
    • 1 Zucchini Grated
    • 2 Eggs
    • 1 Cup Panko Crumbs
    • ½ teaspoon Garlic Powder
    • 2 teaspoon Salt
    • 1 teaspoon Pepper
    • 1 tablespoon Olive Oil

    Instructions
     

    • Grate the zucchinis and the carrot. Once grated, place the vegetables in a dish for further preparation.
    • After grating the zucchinis and carrot, transfer them to a dish. Ensure they are evenly distributed for the next step.
    • Using a clean kitchen towel or cheesecloth, squeeze out as much moisture as possible from the grated zucchini and carrot. This step is crucial to achieve the desired texture of the fritters.
    • In a large bowl, combine the grated zucchini, grated carrot, panko breadcrumbs, egg, garlic powder, salt, and pepper. Mix the ingredients well until they are evenly combined.
    • Take the combined mixture and shape it into small patties or fritters, aiming for sizes around 2-3 inches in diameter. This step sets the stage for cooking.
    • Preheat your air fryer to 375°F (190°C) to ensure it's ready for cooking the fritters efficiently.
    • Place the shaped fritters in the air fryer basket in a single layer, making sure they do not touch. Proper spacing allows for even cooking.
    • Air fry the fritters for 8 minutes, remembering to flip them halfway through the cooking process. Monitor until they achieve a golden brown and crispy texture.
    • Once the fritters are cooked to perfection, remove them from the air fryer and allow them to cool slightly before serving.
    • Serve the zucchini fritters garnished with your preferred toppings, such as fresh herbs, a dollop of yogurt, or a squeeze of lemon juice. Enjoy the delightful flavors you've created!

    Notes

    Use a Box Grater: Ensure uniformity in shredding the zucchini using a box grater to maintain the fritters' texture.
    Prevent Moisture Issues: As no one likes their zucchini fritters soggy, squeeze out as much moisture as possible from the grated zucchini using a clean kitchen towel.
    Experiment with More Zucchini Recipes: Explore diverse zucchini recipes beyond fritters to expand your culinary repertoire.

    Nutrition

    Serving: 1gCalories: 92kcalCarbohydrates: 10gProtein: 4gFat: 4gSaturated Fat: 1gPolyunsaturated Fat: 1gMonounsaturated Fat: 2gTrans Fat: 0.01gCholesterol: 55mgSodium: 879mgPotassium: 165mgFiber: 1gSugar: 2gVitamin A: 1845IUVitamin C: 6mgCalcium: 37mgIron: 1mg
    Print Recipe Pin Recipe Rate this Recipe
    Tried this recipe?Let us know how it was!

    21 Delicious Sriracha Recipes

    July 31, 2024 by Angela Milnes

    Delicious sriracha recipes.

    Spice up your meals with these 21 delicious Sriracha recipes! Whether you’re a fan of seafood, chicken, or veggies, there’s something here for everyone to enjoy.

    Different Sriracha Dishes To Learn.
    [feast_advanced_jump_to]

    What Is Sriracha?

    Sriracha is a type of hot sauce or chili sauce made from a paste of chili peppers, distilled vinegar, garlic, sugar, and salt. It originated in Thailand and is named after the coastal city of Si Racha in Chonburi Province. Be sure to read our article... What Does Sriracha Taste Like?

    Thai Fish Burger With Sriracha Mayonnaise

    Elevate your burger game with this Thai Fish Burger topped with creamy Sriracha mayonnaise. Perfect for a quick and tasty meal.

    Thai fish burger.

    Grilled Honey Sriracha Hot Wings

    These hot wings are grilled to perfection and coated in a sweet and spicy honey Sriracha sauce. Grilled Honey Sriracha Hot Wings are perfect for game day or any gathering!

    Honey sriracha chicken.

    Sriracha Prawn Poke Bowl

    A fresh and vibrant Sriracha Pawn Poke Bowl
    featuring succulent prawns and a spicy Sriracha dressing. A healthy and flavorful meal option.

    Prawn poke bowl.

    Honey Sriracha Chicken Lettuce Wraps

    Light and refreshing lettuce wraps filled with honey Sriracha chicken. These Honey Sriracha Chicken Lettuce Wraps are easy to make and perfect for a light lunch or dinner.

    Honey sriracha chicken lettuce wraps.

    Bang Bang Shrimp Tacos

    Bang Bang Shrimp Tacos are crispy shrimp tacos drizzled with a creamy Sriracha sauce. These tacos are a fun and tasty twist on traditional seafood tacos.

    Bang bang shrimp tacos.

    Honey Sriracha Sesame Chicken

    This Honey Sriracha Sesame Chicken has a hint of sesame. This dish is perfect for a quick and flavorful dinner.

    Honey sriracha sesame chicken.

    Spicy Baked Sriracha Tofu

    Baked tofu with a spicy Sriracha glaze. This Spicy Baked Sriracha Tofu is delicious and healthy vegetarian option that’s full of flavor.

    Baked Sriracha Tofu.

    Honey Sriracha Roasted Carrots

    Roasted carrots glazed with honey and Sriracha. This Honey Sriracha Roasted Carrots recipe is a simple yet flavorful side dish that pairs well with any main course.

    Honey sriracha carrots.

    Wasabi Sushi Shrimp Tacos

    Try these Wasabi Sushi Shrimp Tacos, topped with a spicy wasabi and Sriracha sauce. A unique and delicious fusion dish you'll love.

    Wasabi fried shrimp tacos.

    Spicy Sriracha Burger

    This Spicy Sriracha Burger recipe is a juicy burger with a spicy Sriracha kick. Perfect for those who love a bit of heat in their burgers.

    Sriracha burger.

    Honey Sriracha Tofu

    You'll love this Honey Sriracha Tofu recipe. Crispy tofu pieces tossed in a sweet and spicy honey Sriracha sauce. A great vegetarian dish that’s packed with flavor.

    Honey sriracha tofu in a bowl.

    Sriracha Meatloaf

    Sriracha Meatloaf is a classic meatloaf recipe with a spicy Sriracha twist. This meatloaf is juicy, flavorful, and perfect for a comforting dinner.

    Sriracha meatloaf in a tray.

    Sriracha Honey Garlic Pork Chops

    Pork chops glazed with a sweet and spicy Sriracha honey garlic sauce. These Sriracha Honey Garlic Pork Chops
    are sure to be a hit at the dinner table.

    Sriracha pork chops on a plate.

    Keto Chicken Satay With Spicy Peanut Sauce

    Try Chicken Satay With Spicy Peanut Sauce. This keto-friendly dish is perfect for a low-carb meal that’s big on flavor.

    Peanut satay chicken.

    Sweet Sriracha Roasted Cauliflower

    Roasted cauliflower with a sweet Sriracha glaze. This Sweet Sriracha Roasted Cauliflower is a delicious and healthy side dish that’s perfect for any meal.

    Sriracha roasted cauliflower.

    Spicy Peanut Butter Broccoli With Noodles

    Broccoli and noodles tossed in a spicy Sriracha peanut butter sauce. This Spicy Peanut Butter Broccoli With Noodles is a quick and easy meal that’s both satisfying and nutritious.

    Peanut butter broccoli.

    Tempura Green Beans With Sriracha Aioli

    Crispy tempura green beans served with a spicy Sriracha aioli. Tempura Green Beans is the perfect appetizer or snack for any occasion.

    Cooked beans served with sauces.

    Eggplant Tofu Recipe

    A delicious eggplant and tofu stir-fry with a spicy Sriracha sauce. Eggplant Tofu Recipe is a great vegetarian dish that’s full of flavor.

    Eggplant tofu in a tray.

    Miso Glazed Vegetables

    Vegetables glazed with a savory miso and spicy Sriracha sauce. A healthy and flavorful side dish that’s easy to prepare. Try this Miso Glazed Vegetables recipe today.

    Miso Glazed Roasted Vegetables.

    Spicy Pickled Garlic

    Garlic cloves pickled with a spicy Sriracha kick make this Spicy Pickled Garlic a unique and flavorful addition to any meal.

    Pickled garlic in a jar.

    Salmon Sriracha Rice Bowl

    A hearty rice bowl topped with salmon and a spicy Sriracha sauce. This Salmon Sriracha Rice Bowl is a perfect meal for lunch or dinner that’s both delicious and nutritious.

    Salmon rice in a bowl.

    Enjoy these Sriracha recipes and add a spicy kick to your meals! Which one will you try first?

    Try These Fantastic Recipe Ideas:

    • 21+ Cold Dip Recipes For Your Party
    • Air Fryer Chicken Fajitas
    • Baked Honey Mustard Chicken Tenders
    • Air Fryer Sausage Breakfast Bites
    • Chicken Broccoli Cashew Stir Fry
    • Vanilla Overnight Oats With Almond Milk

    21+ Hot Weather Summer Dishes For Dinner

    July 31, 2024 by Angela Milnes

    Hot weather summer dishes for dinner.

    Hello, sunshine! When the temperature rises, the last thing we want is a heavy, hot meal. That’s why I’ve rounded up 21 of the best Hot Weather Summer Dishes that are perfect for dinner. These recipes are light, refreshing, and bursting with seasonal flavors. From crisp salads to chilled soups and everything in between, these dishes will keep you cool and satisfied all summer long. So, grab your favorite summer produce, and let’s dive into these deliciously breezy Summer Dishes For Dinner. You’ll love these tasty and satisfying summer dinner ideas! 

    Hot Weather Summer Recipes For Dinner.
    [feast_advanced_jump_to]

    21 Summer Dishes For Dinner

    You’ll love these 21 summer dishes for dinner because they are light, refreshing, and perfect for keeping you cool and satisfied during the hot weather.

    Sesame Shrimp and Watermelon Salad

    Sesame Shrimp and Watermelon Salad is a delightful mix of sweet and savory flavors. The juicy watermelon pairs perfectly with the tender shrimp, making this salad a refreshing and light dinner option for hot summer nights.

    Sesame shrimp watermelon salad.

    Lemon Caper Pasta

    Lemon Caper Pasta is a zesty and light dish that's perfect for summer. The bright lemon flavor combined with the salty capers creates a refreshing and satisfying pasta that’s great for warm evenings.

    Lemon caper pasta in a bowl.

    Shrimp Ceviche

    Shrimp Ceviche is a classic summer dish that’s cool, light, and bursting with fresh flavors. The citrus-marinated shrimp and crisp veggies make it a refreshing and healthy option for a hot-weather dinner.

    Shrimp crevice.

    Watermelon Basil Salad

    Watermelon Basil Salad is a simple yet delicious way to enjoy summer’s bounty. The sweet watermelon and fragrant basil are a perfect match, creating a refreshing salad that’s ideal for warm days.

    Basil watermelon salad on a plate.

    Tuscan Bean Salad

    Tuscan Bean Salad is a hearty yet light dish packed with fresh vegetables and protein-rich beans. It’s a perfect summer meal that’s both satisfying and nutritious.

    Tuscan cannellini bean salad in a bowl.

    Lobster Pasta

    Lobster Pasta is a luxurious and light summer dish. The tender lobster and fresh herbs create a flavorful and elegant meal that’s perfect for a special dinner.

    Shrimp noodles in a skillet.

    Goat Cheese And Apple Salad

    Goat Cheese Apple Salad is a delightful mix of creamy goat cheese, crisp apples, and fresh greens. It’s a refreshing and tasty option for a light summer dinner.

    Apple and goat cheese salad in a bowl.

    Cold Beetroot Soup 

    Cold Beetroot Soup, also known as borscht, is a vibrant and cooling dish perfect for hot days. Its earthy flavor and refreshing chill make it a unique and delicious summer meal.

    Pink beetroot soup in a bowl.

    Chicken Caesar Salad

    Chicken Caesar Salad is a classic favorite that’s perfect for summer. The crisp romaine, grilled chicken, and creamy dressing make for a satisfying and refreshing dinner.

    Chicken Caesar Salad.

    Charred Corn Salad With Tomatoes

    Charred Corn Salad With Tomatoes is a smoky and sweet salad that’s bursting with summer flavors. The charred corn and juicy tomatoes make this a delightful and refreshing side or main dish.

    Charred corn salad.

    Air Fryer Sausage Quiche

    Air Fryer Sausage Quiche is a light and savory dish that’s perfect for a summer dinner. The air fryer makes it easy to prepare without heating up your kitchen.

    Sausage quiche on a wooden board

    Chile Lime Melon Salad

    Chile Lime Melon Salad is a spicy and sweet treat that’s perfect for cooling down on a hot day. The refreshing melon and zesty lime create a deliciously unique flavor combination.

    Watermelon balls in lime sauce on a plate.

    Cucumber Gazpacho With Avocado And Mint

    Cucumber Gazpacho With Avocado And Mint

     is a cool and creamy soup that’s perfect for summer. The fresh cucumber and mint make it incredibly refreshing, while the avocado adds a lovely creaminess.

    Cucumber avocado gazpacho in a bowl.

    Orzo Asparagus Lemon Salad

    Lemon Orzo Asparagus Salad is a bright and zesty dish that’s perfect for summer. The tender asparagus and lemony orzo make for a refreshing and satisfying meal.

    Asparagus orzo salad in a round bowl.

    Seafood Okra

    Seafood Okra is a light and flavorful dish that’s perfect for summer. The fresh seafood and tender okra create a delicious and refreshing meal that’s ideal for warm evenings.

    Seafood okra in a bowl

    Salmon Al Cartoccio

    Salmon Al Cartoccio is a light and flavorful dish where salmon is baked in parchment paper with fresh herbs and vegetables. It’s a healthy and delicious option for a summer dinner.

    Salmon al cartoccio.

    Chopped Italian Salad

    Chopped Italian Salad is a vibrant and hearty dish packed with fresh vegetables and flavorful Italian ingredients. It’s a refreshing and satisfying meal that’s perfect for a summer dinner.

    Chopped Italian salad in a bowl.

    Tuna Tartare Dish

    Classic Tuna Tartare is a sophisticated and refreshing dish that’s perfect for hot weather. The fresh, raw tuna and tangy dressing make for a light and delicious meal.

    Classic Tuna Tartare Recipe.

    Grilled Chicken Skewers

    Grilled Chicken Skewers are a simple and tasty option for a summer dinner. The grilled chicken and fresh vegetables make for a light and flavorful meal that’s perfect for warm evenings.

    Italian chicken skewers on a plate.

    Tomato And Brie Linguine

    Tomato And Brie Linguine is a creamy and flavorful pasta dish that’s light enough for summer. The fresh tomatoes and melted brie create a deliciously rich and satisfying meal.

    Tomato brie linguine.

    Chicken Thighs In Honey And Mustard Sauce

    Chicken Thighs In Honey And Mustard Sauce is a delicious and light dish perfect for summer. The sweet and tangy sauce pairs beautifully with the tender chicken, making for a satisfying and refreshing meal.

    Honey mustard chicken thighs on a plate.

    Pair Your Meals With These Summer Drinks

    • Best Butterfly Pea Tea Lemonade Recipe
    • Watermelon Juice
    • Mango Pineapple Smoothie
    • How To Make Beetroot Juice
    • Vegan Mixed Berry Smoothie
    • Russian Tarragon Soda (Yoda Soda)

    15+ Summer Pasta Salad Recipes

    July 31, 2024 by Angela Milnes

    Summer pasta salad recipes.

    Summer is the perfect time to enjoy light, refreshing dishes, and what better way to do that than with a delicious pasta salad? These 15+ Summer Pasta Salad Recipes are bursting with fresh flavors and vibrant colors, making them the ideal addition to any picnic, barbecue, or family dinner. From the sweet and tangy Strawberry Avocado Pasta Salad to the savory and creamy Chicken Caesar Pasta Salad, there's something for everyone to love. So grab your forks and get ready to dive into these delightful summer pasta salads!

    Summer Pasta Salad Recipes To Try.
    [feast_advanced_jump_to]

    15 Best Pasta Salads For Summer

    These summer pasta salads are a refreshing and delicious way to enjoy the season's bounty. Perfect for picnics, barbecues, or light dinners, each recipe is bursting with fresh flavors and vibrant colors. Enjoy!

    Strawberry Avocado Pasta Salad

    Strawberry Avocado Pasta Salad is a delightful mix of sweet strawberries and creamy avocado, tossed with pasta for a refreshing summer dish. Perfect for picnics and barbecues, it's a unique and delicious way to enjoy fresh, seasonal produce.

    Macaroni pasta in a bowl.

    Chicken Caesar Pasta Salad

    Chicken Caesar Pasta Salad combines all the classic flavors of a Caesar salad with hearty pasta. This creamy, savory dish is perfect for a light summer dinner or a potluck favorite.

    Chicken Caesar pasta salad.

    Feta Pasta Salad

    Feta Pasta Salad is a vibrant and tangy dish featuring crumbled feta cheese, fresh veggies, and pasta. It's a refreshing and satisfying option for any summer meal.

    Feta pasta salad in a bowl.

    Lemon Orzo Asparagus Salad

    Lemon Orzo Asparagus Salad is a bright and zesty dish that’s perfect for summer. The tender asparagus and lemony orzo make for a refreshing and satisfying meal.

    Orzo salad in a bowl.

    Risoni With Spinach And Feta

    Risoni With Spinach And Feta is a light and flavorful pasta salad that's perfect for summer. The fresh spinach and tangy feta cheese create a deliciously balanced dish.

    Mediterranean salad in a bowl.

    Bruschetta Chicken Pasta

    Bruschetta Chicken Pasta combines the fresh flavors of bruschetta with tender chicken and pasta. It’s a flavorful and refreshing dish that's perfect for summer gatherings.

    Bruschetta tomato pasta.

    Pesto Tortellini Pasta Salad

    Pesto Tortellini Pasta Salad is a rich and flavorful dish featuring cheese-filled tortellini and fresh pesto. It’s a hearty yet refreshing option for any summer meal.

    Pesto tortellini.

    Creamy Shrimp Pasta Salad

    Creamy Shrimp Pasta Salad is a delightful combination of tender shrimp, creamy dressing, and pasta. It’s a cool and satisfying dish that's perfect for hot summer days.

    Shrimp pasta salad in a bowl.

    Caprese Pasta Salad

    Caprese Pasta Salad is a fresh and vibrant dish that combines ripe tomatoes, fresh mozzarella, and basil with pasta. It’s a simple yet delicious option for a summer meal.

    Caprese pasta salad in a bowl.

    Catalina Pasta Salad

    Catalina Pasta Salad is a sweet and tangy dish that’s perfect for summer. The Catalina dressing gives it a unique flavor that pairs wonderfully with the fresh veggies and pasta.

    Catalina pasta salad in a bowl.

    Mediterranean Pasta Salad

    Mediterranean Pasta Salad is a healthy and flavorful option that’s packed with fresh vegetables, olives, and feta cheese. It’s a light and refreshing dish that's perfect for warm weather.

    Mediterranean pasta salad.

    Macaroni Pasta With Dill Pickles

    Macaroni Pasta With Dill Pickles is a fun and tangy twist on traditional pasta salad. The dill pickles add a refreshing crunch that makes this dish perfect for summer picnics.

    Macaroni pasta salad with dill pickles in a bowl.

    Creamy Tuna Pasta Salad

    Creamy Tuna Pasta Salad is a classic and satisfying dish that’s perfect for summer. The combination of tuna, pasta, and creamy dressing makes it a hearty and refreshing meal.

    Tuna pasta salad in a bowl.

    Macaroni Pasta Salad

    Macaroni Pasta Salad is a timeless favorite that's perfect for any summer gathering. With a creamy dressing and fresh veggies, it’s a simple and delicious option.

    Macaroni pasta in a bowl.

    Roasted Cherry Tomato Pasta

    Roasted Cherry Tomato Pasta is a flavorful and vibrant dish that’s perfect for summer. The sweet, roasted tomatoes and fresh basil make this pasta salad a delightful choice.

    Roasted Cherry Tomato Pasta.

    Asian Noodle Salad

    Asian Noodle Salad is a light and refreshing dish that’s full of bold flavors. The combination of noodles, fresh vegetables, and a tangy dressing makes it a perfect summer meal.

    Asian noodle pasta salad.

    Pair Summer Salads With These Drinks

    • Best Butterfly Pea Tea Lemonade Recipe
    • Watermelon Juice
    • Mango Pineapple Smoothie
    • How To Make Beetroot Juice
    • Brazilian Limeade Recipe
    • Passion Fruit Juice
    • Vegan Mixed Berry Smoothie
    • Dragon Fruit Smoothie Recipe
    • Russian Tarragon Soda (Yoda Soda)
    • Orange Carrot Ginger Juice

    Fish Stock Substitute: 11 Best Alternatives

    July 31, 2024 by Angela Milnes

    Fish stock substitutes.

    When you’re cooking a delicious recipe that calls for fish stock, but you don’t have any on hand, don't worry! Plenty of simple and tasty alternatives can be used as a Fish Stock Substitute.

    Whether you’re making a hearty soup or a savory stew, finding the right substitute can be easy and stress-free. Let’s dive into some common ingredients you might already have in your kitchen that can perfectly replace fish stock in your dishes.

    Best Fish Stock Substitute
    [feast_advanced_jump_to]

    Why Use Fish Stock Substitute

    Fish stock is super useful and can enhance the flavor of many dishes. Here are some useful facts about fish stock.

    • What is Fish Stock Made Of: It is made of simmering fish bones, heads, and sometimes skin, with aromatic vegetables like onions, carrots, and celery.
    • Flavor and Taste: Light, delicate, and slightly sweet; enhances seafood dishes without overpowering them.
    • Fish Stock vs. Fish Broth: Stock is made from bones and has a richer flavor; broth is made from meat and is lighter.
    • Which Dishes Use It: Soups, stews, risottos, sauces, and paellas benefit from the depth of fish stock.

    12 Best Substitutions For Fish Stock

    If you don't have fish stock on hand, don't worry! These 11 fish stock alternatives can still add great flavor to your dishes.

    1. Chicken Stock/Chicken Broth

    If you're looking for a substitute for fish stock, chicken stock/chicken broth is a great alternative. It's easy to find, and you probably already have some at home. Chicken stock has a milder flavor than fish stock but still adds a rich and savory taste to your dishes.

    You can buy chicken stock at any grocery store or make it yourself by simmering chicken bones, vegetables, and herbs in water. Use the same amount of chicken stock as you would fish stock in your recipes.

    One drawback is that chicken stock won’t give you the seafood flavor, but it's still a flavorful stock that works well in many dishes. Try it in:

    • Seafood Paella
    • Instant Pot Clam Chowder
    • Seafood Risotto
    Chicken Stock

    2. Beef Stock

    You can easily make beef stock at home by simmering beef bones with vegetables and herbs. The beef stock has a rich and hearty flavor, which is quite different from the light taste of basic fish stock, but it can add depth to your dishes.

    Just replace the same amount of beef stock as your specific recipe asks for fish stock. One drawback is that it won't have that seafood taste, but it's still a great option for many recipes. Try it in:

    • Seafood Stew
    • Mussel Soup
    • Fish Curry
    Beef Stock

    3. Vegetable Broth Using Kombu

    Kombu (made of kelp seaplant) is a type of dried seaweed that adds an oceanic taste to dishes without using fish. The kombu-infused vegetable stock has a light, savory flavor that works well in many recipes. You can buy kombu at most grocery stores or online, and making the broth at home is easy.

    Just simmer a piece of kombu in water for about 20 minutes, then strain it out. Use the same amount of this vegetable broth to replace the fish stock in your recipes. One drawback is that it might be milder than traditional fish stock. Try it in:

    • Miso soup
    • Saffron Risotto
    • Vegetable Stews
    Vegetable Broth

    4. Clam Juice

    Clam juice has a mild, salty flavor that can enhance the taste of other seafood dishes. You can buy bottled clam juice at most grocery stores or make it by steaming fresh clams and saving the liquid.

    Use an equal amount of clam juice to use it as a fish stock replacement in recipes. An easy way to use clam juice is in soups, stews, and sauces. However, it may not work as well in recipes where a strong fish flavor is necessary. Try it in:

    • Clam chowder
    • Seafood risotto
    • Paella
    Clam Juice

    5. Shrimp Stock

    When you cook shrimp, you can save the shells to make a flavorful broth. The shells add a rich, slightly sweet & briny taste that's perfect for many dishes. You can't buy shrimp shells alone, but you can easily collect them when you cook shrimp at home.

    To make the broth, simmer the shrimp shells in water with some vegetables for about 30 minutes, then strain. Use this homemade broth just like fish stock, replacing it cup for cup.

    A drawback is that it takes time to make, but the flavor is worth it. Try it in:

    • Shrimp bisque
    • Seafood risotto
    • Gumbo
    Shrimp Stock

    6. Miso Soup

    Another great alternative to fish stock is miso soup. Miso paste, used in miso soup, is a traditional Japanese ingredient made from fermented soybeans, salt, and sometimes rice or barley. Dashi is also used in miso soup as a base ingredient.

    Miso paste has a thick, pasty texture and a savory, umami flavor that's perfect for enhancing the taste of other seafood dishes. You can find it at most grocery stores or Asian markets. To make miso soup, simply mix the paste and dashi with hot water until they mix well.

    Hot Miso Soup In A Bowl

    7. Fish Bouillon Cubes

    Fish Bouillon Cubes are a great seafood stock substitute. They're small cubes made from concentrated fish stock, which dissolve in water to create a flavorful broth. These cubes are handy because they have a rich, savory taste that's perfect for soups, stews, and sauces.

    You can buy them at most grocery stores or make them at home by simmering fish bones and vegetables, reducing the liquid until it thickens, and pouring it into ice cube trays to freeze. To replace fish stock, use one cube per cup of water.

    The only drawback is that bouillon cubes can be salty, so adjust your recipe's salt content accordingly. Try them in:

    • Fish chowder
    • Seafood paella
    • Shrimp risotto
    Fish Bouillon Cubes

    8. White Wine and Water Combination

    White wine and water mix can be easily made at home by combining equal parts of white wine and water. The white wine adds a light, fruity flavor with a touch of acidity that can enhance many dishes.

    White wine can be bought at any grocery store. To use it as a fish stock substitute, one cup of the wine and water mixture is needed for each cup of fish stock.

    A drawback is that the wine flavor might not be as strong as traditional fish stock, so it may not work well in all recipes. Try it in:

    • Seafood pasta
    • Mussels in white wine sauce (Read Green Mussels Vs Black Mussels for more info)
    • Fish stew
    White Wine

    9. Fish Sauce

    Fish sauce is a strong seafood stock substitute made from fermented fish. It's usually sold in bottles at grocery stores, especially in the Asian food section. Fish sauce has a salty, umami flavor that adds depth to your dishes.

    To replace fish stock, mix one tablespoon of fish sauce with a cup of water. This will give you a similar salty flavor. A drawback is that fish sauce can be very strong, so start with a small amount and adjust to taste. Try it in:

    • Thai curry
    • Seafood stir-fry
    • Fish soup
    Fish Sauce on White Bowl.

    10. Oyster Sauce

    Oyster sauce is another great option for swapping fish stock. It's a thick, dark sauce made from oyster extracts, giving it a sweet and salty flavor with a hint of ocean taste. You can find it at most grocery stores in the Asian food section.

    Making it at home is complicated, so it's best to buy it. To use oyster sauce as a substitute, mix one tablespoon of it with a cup of water to get a similar taste to fish stock.

    The main drawback is that it can be a bit sweet, so you might need to adjust the other flavors in your dish. Try it in:

    • Stir-fried vegetables
    • Instant Pot Chicken Noodle Soup
    • Seafood fried rice
    oyster sauce

    11. Soy Sauce

    Soy sauce is a dark, salty liquid made from fermented soybeans and wheat. It adds a rich, umami flavor to dishes, making it a good swap for fish stock. You can buy soy sauce at any grocery store.

    For the fish stock alternative, mix one tablespoon of soy sauce with a cup of water. This blend can give your dish a similar depth of flavor. A drawback is that soy sauce can be quite salty, so be careful not to over-season your dish. Try it in:

    • Ramen noodle soup
    • Stir-fried rice
    • Braised fish

    Choose The Best Fish stock Replacement for Your Meal

    We've covered alternatives to fish stock for seafood dishes. From homemade shrimp stock to fish bouillon cubes, various options exist based on preference and availability.

    Non-traditional substitutes like miso soup, white wine, water combo, fish sauce, oyster sauce, and soy sauce offer unique flavors to elevate seafood dishes.

    Now it's your turn - let us know in the comments below which substitute you like to use or if there are any others you would recommend trying!

    More Substitutions For Your Recipes

    • 13 Best Substitutes For Emmental Cheese
    • Best Substitute For Sun Dried Tomatoes
    • Substitute For Chili Garlic Sauce
    • Best Worcestershire Sauce Substitute
    • « Previous Page
    • 1
    • …
    • 9
    • 10
    • 11
    • 12
    • 13
    • …
    • 19
    • Next Page »
    Angela Milnes.

    Hi I'm Angela

    Welcome to Eat Your Beets where you'll find Healthy and Nutritious Family Recipes that are tasty and simple to cook.

    More About Me

    Spring Recipes

    • edamame stir fry in a white bowl.
      Easy Edamame Stir Fry (15-Minute Protein-Packed Side Dish)
    • Best Gravlax Salmon With Dill (Cured Salmon).
      Best Gravlax Salmon With Dill (Cured Salmon)
    • One Pan Chicken And Asparagus.
      One Pan Chicken And Asparagus
    • Chicken And Cabbage Stir Fry Recipe.
      Chicken And Cabbage Stir Fry Recipe
    • Zucchini Egg Bake Recipe.
      Best Zucchini Egg Bake Recipe
    • How To Make Sun Dried Tomatoes Without Oil.
      How To Make Sun Dried Tomatoes Without Oil – Easy Oven Method

    Popular Recipes 💗

    • best stuffed mushrooms.
      The Best Stuffed Mushrooms
    • Slow Cooker Chicken Bacon Ranch Pasta.
      Slow Cooker Chicken Bacon Ranch Pasta
    • Baked Ricotta On A Spoon.
      Bariatric Friendly Ricotta Bake Recipe
    • Fun Veggie Train With Bell Peppers.
      Fun Veggie Train With Bell Peppers
    • Best Blueberry Smoothie Bowl topped with fruit.
      Best Blueberry Smoothie Bowl Recipe
    • Grilled Eggplant With Lemon Dip.
      Grilled Eggplant With Lemon Dip
    • Air Fryer Asparagus with Parmesan.
      Air Fryer Asparagus with Parmesan
    • Sheet Pan Chicken Fajitas.
      Sheet Pan Chicken Fajitas

    Footer

    As Seen In

    As Seen In.
    • Facebook
    • Pinterest

    Privacy Policy

    Accessibility Policy

    ↑ Back To Top

    Copyright © 2025 | Eat Your Beets | All Rights Reserved

    Rate This Recipe

    Your vote:


    A rating is required
    A name is required
    An email is required