​

Eat Your Beets

  • About
  • Spring Recipes
  • Vegetables
  • Side Dishes
  • Recipe Index
menu icon
go to homepage
  • About
  • Spring Recipes
  • Vegetables
  • Side Dishes
  • Recipe Index
    • Facebook
    • Pinterest
  • subscribe
    search icon
    Homepage link
    • About
    • Spring Recipes
    • Vegetables
    • Side Dishes
    • Recipe Index
    • Facebook
    • Pinterest
  • ×
    Sign Up To Our Newsletter →
    Home » Recipe index

    Citrus Lemon Lime Lemonade

    October 3, 2024 by Angela Milnes

    Citrus Lemon Lime Lemonade.

    Looking for a refreshing twist on classic lemonade? Try our Citrus Lemon Lime Lemonade! This zesty drink combines the tangy flavors of lemon and lime to create the ultimate thirst-quencher. Perfect for hot summer days or any time you need a citrusy pick-me-up, this lemonade is sure to become a family favorite. With just the right balance of sweet and sour, it’s a delightful treat that’s easy to make and even easier to enjoy. Grab your lemons and limes, and let’s make this bright, bubbly beverage!

    citrus lemon lime lemonade
    [feast_advanced_jump_to]

    Why This Recipe Works

    • Refreshing Burst of Flavor: Our Citrus Lemon Lime Lemonade refreshes you with every sip, making it the perfect drink to be served immediately on hot days.
    • Health-Packed Goodness: Loaded with Vitamin C and antioxidants from lemons and limes, this Lime Lemonade Drink boosts your immune system, aids digestion, and keeps your skin glowing.
    • Effortless to Make: Whipping up a batch of Citrus Lemon Lime Lemonade is a breeze! Perfect for those who love delicious, homemade beverages without the hassle.

    🥘 Ingredients

    • White sugar: Adds sweetness to balance the tartness of the citrus juices.
    • Lemons, juiced: Provides a tangy and refreshing flavor base.
    • Limes, juiced: Adds a zesty and slightly bitter note to the lemonade.
    • Oranges, juiced: Brings a sweet and citrusy depth to the drink.
    • Cold water: Dilutes the citrus juices and sugar to create a balanced and refreshing lemonade.

    For the complete list of ingredients with measurements and instructions, please see the recipe card at the bottom of the post.

    📖  Substitutions & Variations

    • Tropical Coconut Punch: Add a splash of coconut milk and blend with whole limes (peeled) for a tropical twist. Use cane sugar to sweeten and strain through a fine mesh strainer.
    • Brazilian Lemonade Twist: Blend the lemonade with peeled limes and sweetened condensed milk for a creamy, Brazilian-style treat.
    • Berry Burst: Mix in some fresh or frozen berries like strawberries, blueberries, or raspberries for a sweet and colorful lemonade. Infuse the lemonade with fresh herbs like basil or rosemary.

    🔪How To Make Citrus Lemon Lime Lemonade

    Step One: Gather Ingredients

    Pour the sugar, lemon juice, lime juice, and orange juice into a gallon-sized pitcher. Ensure you have all the ingredients ready before you start.

    Step Two: Mix the Ingredients

    Whisk the sugar, lemon juice, lime juice, and orange juice in the pitcher until the sugar has completely dissolved. This step ensures the flavors are well combined and evenly distributed.

    Step Three: Chill the Mixture

    Place the pitcher in the refrigerator and let the mixture chill for 2-3 hours. This allows the flavors to meld together and ensures your lemonade is refreshingly cold.

    Step Four: Serve and Garnish

    Serve the lemonade over ice. Garnish each glass with a slice of lime, lemon, or orange to add a touch of vibrant color and extra zest. Enjoy your homemade Citrus Lemon Lime Lemonade!

    citrus lemon lime lemonade

    👩‍🍳 Expert Tips

    • Chill Without Dilution: To keep your lemonade with lime cold without diluting it, freeze some of the lemonade in ice cube trays and use these cubes when serving.
    • Choose Fresh and Organic Citrus: For the best flavor, use organic and fresh limes, lemons, and oranges. The fresher the fruit, the more vibrant and zesty your lemonade will be.

    💭 FAQs

    Can I use sweetened condensed milk instead of sugar?

    Yes! For a creamier, sweeter twist, you can replace the sugar with sweetened condensed milk, as suggested in the Brazilian Lemonade variation.

    How long will the lemonade stay fresh in the refrigerator?

    The lemonade will stay fresh for 3-4 days when stored properly in an airtight container in the refrigerator.

    Can I freeze the lemonade?

    Yes! To store for longer, freeze the lemonade in ice cube trays and transfer the frozen cubes to a sealed bag for up to 2 months.

    What’s the best way to keep the lemonade cold without diluting it?

    Freeze some of the lemonade in ice cube trays and use these cubes instead of regular ice to keep your lemonade chilled without watering it down.

    Best Way to Store Citrus Lemon Lime Lemonade

    Store your Citrus Lemon Lime Lemonade in the refrigerator. Use an airtight container, such as a glass pitcher with a lid or a BPA-free plastic jug, to maintain freshness. The lemonade will stay fresh for up to 3-4 days when stored properly in the fridge. To store Citrus Lemon Lime Lemonade for longer, freeze it in ice cube trays or containers, leaving space for expansion. Transfer frozen cubes to a sealed bag for up to 2 months.

    🧂Serving Suggestions

    Here are my favorite sides to serve with Citrus Lemon Lime Lemonade:

    • Grilled Chicken Skewers: Juicy grilled chicken skewers marinated in herbs and citrus pair beautifully with the refreshing tang of the Citrus Lemon Lime Lemonade.
    • Shrimp Tacos: Light and flavorful shrimp tacos with a zesty lime crema complement the bright, citrusy flavors of the lemonade.
    • Caprese Salad: Fresh tomatoes, mozzarella, basil, and a drizzle of balsamic glaze make for a light and refreshing salad. The lemonade's citrus tones enhance the flavors of the tomatoes and basil, creating a perfect harmony.
    • Vegan Avocado Toast: Creamy avocado spread on crispy toast, topped with a sprinkle of sea salt and a squeeze of lime, pairs perfectly with the fresh squeezed lemonade.
    • Instant Pot Fish Tacos: Crispy fish fillets topped with a tangy slaw and a squeeze of lime bring out the best in the citrus lemon lime lemonade. The citrusy drink cuts through the richness of the fish, making each bite refreshing and satisfying.
    citrus lemon lime lemonade

    🍽 Related Recipes

    • einkorn angel hair and cherry tomato pasta in a white bowl.
      One-Pan Einkorn Angel Hair Pasta with Cherry Tomatoes
    • Salmon Dill Puree.
      Lemon Dill Salmon Mousse (Bariatric Friendly)
    • close-up-watermelon-slices-with-blackberry-plastic-disposable-cup-perfect for a summer party.
      How To Host An Awesome Summer Party
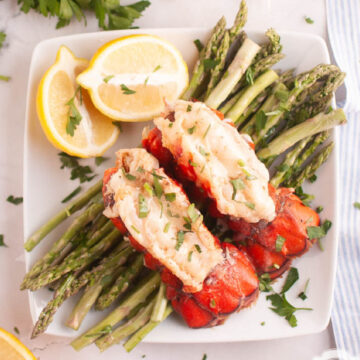
    • Oven baked lobster tail with garlic butter and lemon.
      How To Cook Lobster Tail At Home

    Did you make this recipe? Leave a review and a ⭐⭐⭐⭐⭐ rating below, or tag us in our Facebook Group! Alternatively, bookmark it in your browser or save to Pinterest.

    Citrus Lemon Lime Lemonade.

    Citrus Lemon Lime Lemonade

    Angela Milnes
    Get ready to quench your thirst with this zesty Citrus Lemon Lime Lemonade! Bursting with the perfect balance of tangy lemons and limes, this refreshing drink is just what you need to beat the heat. It's super easy to make and perfect for sipping on a sunny day. You'll love every vibrant, citrusy sip!
    5 from 2 votes
    Print Recipe Pin Recipe Rate this Recipe
    Prep Time 5 minutes mins
    Cook Time 0 minutes mins
    Additional Time 0 minutes mins
    Total Time 5 minutes mins
    Course Drinks
    Cuisine American
    Servings 4 Servings
    Calories 274 kcal

    Ingredients
      

    • 1 cup white sugar
    • 4 Full lemons juiced
    • 4 limes juiced
    • 4 oranges juiced
    • 3 quarts cold water

    Instructions
     

    • Pour the sugar, lemon juice, lime juice, and orange juice into a gallon-sized pitcher. Ensure you have all the ingredients ready before you start.
    • Whisk the sugar, lemon juice, lime juice, and orange juice in the pitcher until the sugar has completely dissolved. This step ensures the flavors are well combined and evenly distributed.
    • Place the pitcher in the refrigerator and let the mixture chill for 2-3 hours. This allows the flavors to meld together and ensures your lemonade is refreshingly cold.
    • Add ice to lemonade and serve. Garnish each glass with a slice of lime, lemon, or orange to add a touch of vibrant color and extra zest. Enjoy your homemade Citrus Lemon Lime Lemonade!

    Notes

    Chill Without Dilution: To keep your lemonade with lime cold without diluting it, freeze some of the lemonade in ice cube trays and use these cubes when serving.
    Choose Fresh and Organic Citrus: For the best flavor, use organic and fresh limes, lemons, and oranges. The fresher the fruit, the more vibrant and zesty your lemonade will be.

    Nutrition

    Calories: 274kcalCarbohydrates: 72gProtein: 2gFat: 0.5gSaturated Fat: 0.04gPolyunsaturated Fat: 0.1gMonounsaturated Fat: 0.04gSodium: 37mgPotassium: 308mgFiber: 5gSugar: 63gVitamin A: 328IUVitamin C: 90mgCalcium: 97mgIron: 1mg
    Print Recipe Pin Recipe Rate this Recipe
    Tried this recipe?Let us know how it was!

    More Easy Drinks For You

    • Best Butterfly Pea Tea Lemonade Recipe
    • Best Vegan Oat Milk Recipe
    • Mango Pineapple Smoothie
    • Best Avocado And Apple Smoothie
    • Maple Cinnamon Latte

    Does Fudge Go Bad?

    October 2, 2024 by Angela Milnes

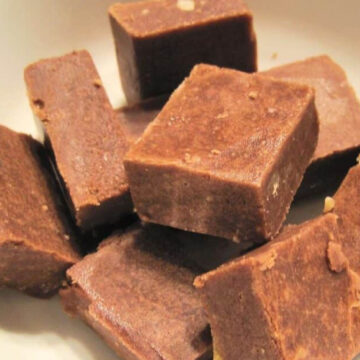
    Fudge pieces.

    Curious if that leftover fudge from last week is still good? In this quick read, we'll answer the question Does Fudge Go Bad, how to store fudge and how to tell if it's time to part ways with your sweet indulgence.

    pieces of fudge in a bowl.
    [feast_advanced_jump_to]

    How Long Does Fudge Last?

    The shelf life of fudge depends on how it's stored. Fudge that is stored in an airtight container at room temperature can last for up to three months. Fudge that is stored in the fridge will last for up to six months compared to frozen fudge which can last for up to two years.

    Homemade Fudge Vs Store Bought Fudge

    The shelf life of homemade fudge is the same as store-bought fudge. Whether it's homemade dark chocolate fudge or your favorite store bought fudge, you can check your fudge for the signs that it has gone bad.

    Signs That Old Fudge Has Gone Bad?

    So, how can you tell if your fudge has gone bad? Here are a few signs to look for.

    • Mold: If you see any mold on your fudge, it has gone bad and you should throw it away.
    • Color and Texture: If your fudge has changed color or becomes harder or softer than it was when you first made it, it has probably gone bad.
    • Deep Cracks: If your fudge has deep cracks then this is a sign that it has dried out and is past the expiration date.
    • Slimy Fudge: Slimy fudge or soggy fudge is a sign that it has gone bad. If your fudge has a slimy texture then it needs to be thrown away.
    • Flavor of Fudge: If your fudge doesn't taste as good as it used to, it has probably gone bad and you should throw it away
    • Smell of Fudge: If your sweet treat has an off odor or smells bad, this is another sign that the fudge has gone bad and you should discard it.

    How To Store Fudge?

    To store fudge, wrap it in plastic wrap, wax paper, or aluminum foil. Ensure the leftover fudge is wrapped tightly before choosing your storage method.

    salty caramel fudge pieces on a chopping board.

    Storing Fudge In The Fridge

    Place your wrapped fudge into an airtight container before refrigerating fudge. It is best to refrigerate fudge in a single layer so that the fudge doesn't stick together. The fudge shelf life should be around 3 months. If you love fudge try this Christmas Cookie Fudge recipe! It's fantastic.

    Storing Fudge In The Freezer

    To freeze fudge, place your wrapped fudge into waxed paper and then put it into an airtight container or freezer bag before placing it in the freezer.

    It is important to press as much air out of the container or bag as possible before sealing it. Proper storage will allow your frozen fudge to stroe for up to six months.

    Single Layers

    When freezing fudge, it is best to store it in a single layer so that the fudge doesn't stick together.

    sweet caramel fudge pieces.

    Storing Fudge At Room Temperature

    If you plan on storing your fudge at room temperature, find a cool and dry place in your kitchen.

    A cupboard away from any heat source is the ideal spot for storage and will help keep your fudge fresh for a few weeks. Avoid hot or humid areas in your kitchen.

    sweet fudge pieces pieced together to form a heart.

    Storing Fudge Made With Condensed Milk?

    If you want to eat fudge that has been made with condensed milk, evaporated milk, or other dairy products then it's best to store it in the fridge.

    How To Thaw Frozen Fudge?

    If you have frozen fudge, thaw it in airtight containers in the fridge overnight or for at least four hours. Smaller pieces may thaw faster than larger pieces.

    Keep the fudge in the aluminum foil or wax paper as it defrosts. Once thawed, eat your fudge within two days.

    Can Bad Fudge Make You Unwell?

    Whether you're using homemade fudge or store-bought fudge it could make you unwell if it has gone bad.The main risk from eating bad fudge is food poisoning.

    Can Bad Fudge Make You Sick?

    Yes, bad fudge can cause symptoms such as vomiting, diarrhea, and stomach cramps. In severe cases, it can even lead to hospitalization. So, if you're unsure whether your leftover fudge has gone bad, it's best to play it safe and throw it away.

    Does Fudge Go Bad: Keeping Fudge Fresh

    How long fudge lasts really depends on the method you use to store it. Frozen and refridgerated fudge will last longer than fudge left out at room temperature. Enjoy this tasty treat and be sure to check it for signs that fudge has gone bad before consuming.

    Enjoy The Following Articles:

    • Best Oil For Searing Steak
    • Bulgarian Yogurt Vs Greek Yogurt
    • Does Apple Butter Go Bad?
    • How To Soak Chia Seeds

    Easy Pureed Leeks Recipe

    October 1, 2024 by Angela Milnes

    Easy Pureed Leeks in a bowl.

    Looking for a silky, savory sidekick that instantly upgrades your meal? This Pureed Leeks Recipe is simple, smooth, and secretly a flavor bomb. It’s your new go-to for soups, sauces, or a cozy veggie boost.

    Easy Pureed Leeks in a bowl.

    Leeks are the unsung heroes of the onion family—gentler, sweeter, and totally ready for their close-up in puree form. Whether you’re making baby food, bariatric-friendly meals, or fancying up mashed potatoes, this pureed leeks recipe has range. Leek puree even stars in classic dishes like Vichyssoise, a chilled French soup that’s creamy, elegant, and all about the leeks.

    If you’re vibing with veggie-based flavor builders, check out my Pureed Squash, Carrot Puree For Infants, or the Best Cheesy Mashed Cauliflower Recipe.

    [feast_advanced_jump_to]

    💖 Why This Recipe Works

    • Delicate flavor: Leeks add subtle, sweet depth without overpowering.
    • Ridiculously versatile: Pureed leeks are a dreamy base, sauce, or side that goes with everything.
    • Quick & wholesome: Ready in minutes and packed with vitamins, fiber, and flair.
    • Versatile: This Pureed Leeks Recipe is both bariatric friendly and great for baby food. Be sure to check out our Bariatric Ricotta Bake Recipe too.

    ⭐ Star Ingredients

    Leeks on a chopping board.
    • Leeks: Mild, slightly sweet, and way less intense than onions—perfect for a velvety base.
    • Vegetable or Chicken Stock: Adds richness and helps blend everything smoothly.
    • Salt & Pepper: Just the basics—but they do all the heavy flavor lifting here.
    • Optional Garlic: One little clove can deepen the flavor in a big way.

    For the complete list of ingredients with measurements and instructions, please see the recipe card at the bottom of the post.

    📖  Substitutions & Variations

    • Veggie Stock: Use veggie stock to keep things vegetarian or chicken stock for a savory spin.
    • Potato And Leek Puree: Try adding potatoes to make a creamy and delicious potato leek puree.
    • Add Cream: Stir in a splash of cream or plant-based milk for extra richness.
    • Add Herbs: Mix in fresh herbs like thyme or tarragon for an aromatic twist.
    • Want texture? Blend just half and mix it back with the rest.
    • For Baby Food, skip salt and use a smoother puree with extra stock.
    • Flavor Upgrades: For something gourmet, drizzle with truffle oil just before serving. Or add Lemon Zest for brightness and contrast.

    Pair this puree with my Thin Sliced Chicken Breast Air Fryer, Creamy Pan Fried Salmon Fillets, or Instant Pot Risotto for a swoon-worthy meal.

    🔪How To Make Pureed Leeks

    Step One: Trim off the dark green tops and the root end of the leek. Slice the leek lengthwise and rinse under running water to remove any dirt or sand between the layers. Chop the leek into 1-inch pieces.

    Step Two: Cook Leeks

    Boiling Leeks : Place the chopped leek in a small pot and add just enough water to cover them. Bring to a boil, then reduce the heat and simmer for about 10-15 minutes until the leek is very tender.

    Steaming Leeks: Place the chopped leek in a steamer basket over boiling water. Cover and steam for about 10-15 minutes until the leek is very tender. If boiled, drain the leek and reserve a little cooking water.

    leeks in food processor next to a wooden spoon.
    1. Step 3: Transfer the cooked leek to a blender or use an immersion blender directly in the pot. Add the broth and blend until smooth.
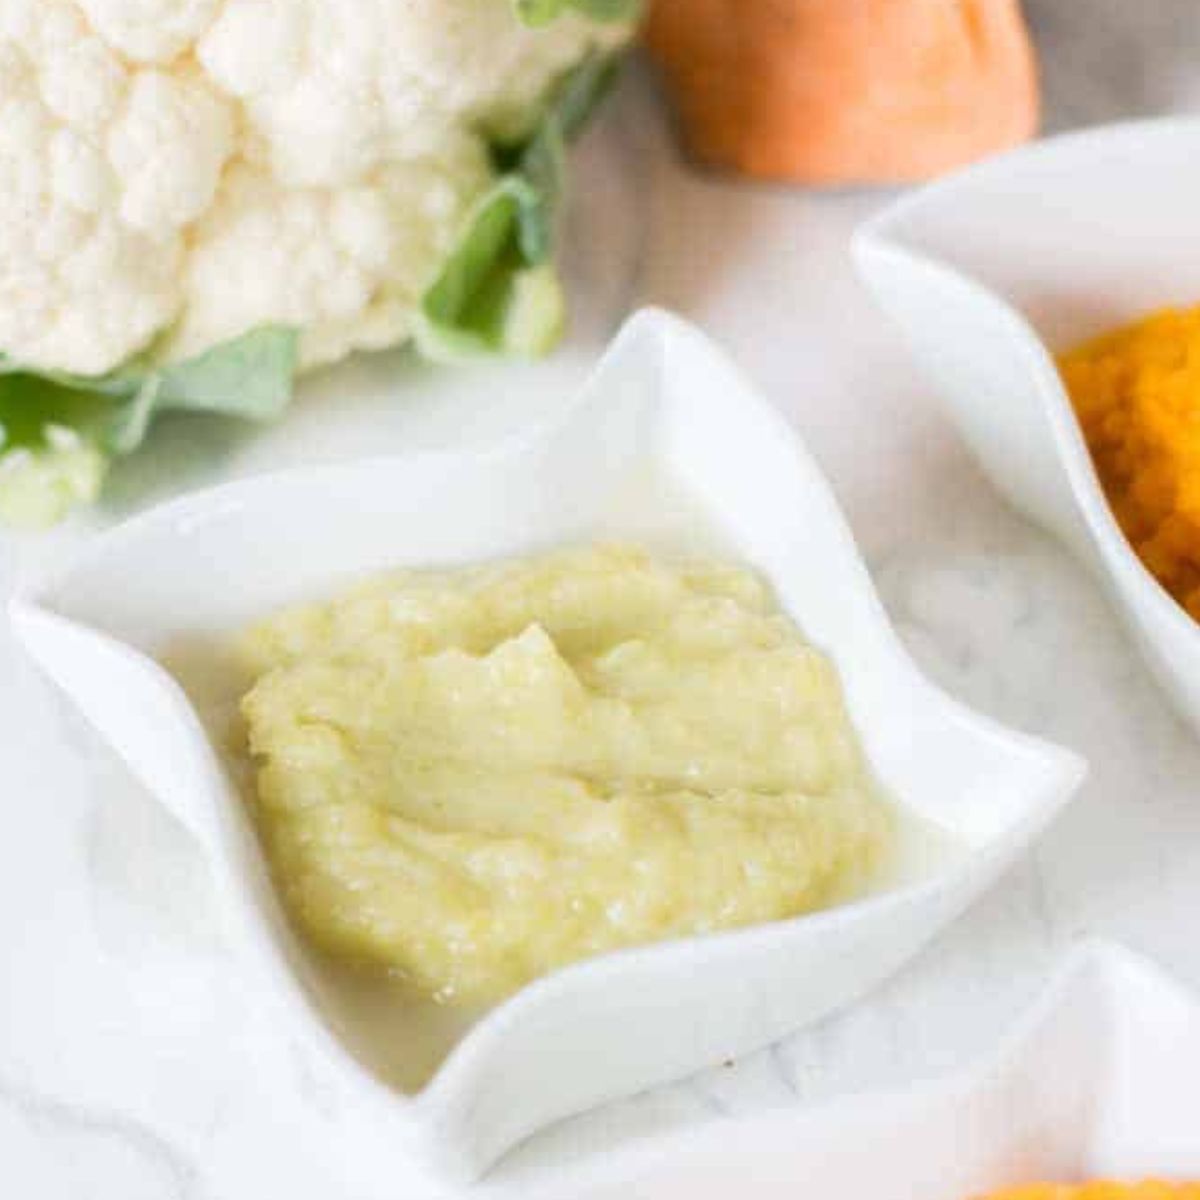
    Leek puree in a white square bowl.
    1. Step 4: Adjust consistency with a bit more stock or cooking liquid. Season to taste with salt and pepper.

    💡Hint: For a richer, deeper flavor, toss a peeled garlic clove into the pot while cooking.

    Easy Pureed Leeks Recipe In square Ramakin Dishes.

    👩‍🍳 Expert Tips

    • Blend hot leeks with care—vent the blender lid or use an immersion blender to avoid steam surprises.
    • Want it restaurant-style? Strain the puree for a silky-smooth finish.
    • Freeze extra in ice cube trays to always have flavor boosts on hand.

    💭 Pureed Leeks FAQs

    Can I store Leek Puree In Portion Sizes?

    Yes, consider freezing pureed leeks in portion sizes using an ice cube tray or small containers. Once frozen, transfer the portions to a larger freezer bag for convenient use.

    Is It Safe To Reheat Leek Puree Multiple Times?

    It's best to reheat only the amount you plan to use to maintain the quality and safety of your puree leeks. Repeated reheating can degrade the texture and flavor.

    How Can I Prevent Freezer Burn When Storing Pureed Leeks?

    Ensure the puree is completely cooled before freezing and use airtight, freezer-safe containers or bags. Remove as much air as possible before sealing to prevent freezer burn.

    💖 Serving Suggestions

    Here are some of the best uses for leek puree:

    • Soup Base: Use leek puree as a base for creamy soups, adding depth and richness to classics like Potato Leek Soup or other Vegetable Soups.
    • Sauce: Incorporate leek puree into sauces for thin sliced chicken breast, Creamy Pan Fried Salmon Fillets, or Shrimp Scampi Pasta, adding a smooth, subtle onion flavor that complements a wide range of dishes.
    • Mashed Potatoes: Mix leek puree into mashed potatoes for an extra layer of flavor and a creamy texture.
    • Risotto: Stir leek puree into Instant Pot Risotto for a creamy consistency and a delicate, aromatic flavor that pairs well with various ingredients.
    • Vegetable Side Dishes: Add leek puree to steamed or Air Fyer Roasted Vegetables for a deliciously smooth and savory addition.
    • Baby Meal Magic: Use a smooth version solo or blend with peas, pumpkin, or carrots.

    💡 Want it extra smooth? Use a high-speed blender. Craving some texture? Pulse it or blend just half and stir it back in.

    🍽 Try These Tasty Condiments

    • Best Mango Chutney Recipe: Vegan Recipe.
      Easy Mango Chutney Recipe (Sweet, Tangy & Spicy)
    • Caesar dressing in a glass jar with a spoon in it and lemon half on other side.
      Best Parmesan Caesar Dressing
    • Homemade Garlic Parm Sauce.
      Homemade Garlic Parm Sauce
    • How To Make Sun Dried Tomatoes Without Oil.
      How To Make Sun Dried Tomatoes Without Oil – Easy Oven Method

    Did you make this recipe? Leave a review and a ⭐⭐⭐⭐⭐ rating below, or tag us in our Facebook Group! Alternatively, bookmark it in your browser or save to Pinterest.

    Easy Pureed Leeks in a bowl.

    Best Pureed Leeks Recipe

    Angela Milnes
    Elevate your dishes with the delicate, savory flavor of Pureed Leeks! This smooth and creamy puree adds a subtle, onion-like taste that pairs perfectly with roasted meats, fish, or vegetables. It’s an easy and elegant way to enhance your meals with a touch of gourmet flair!
    5 from 3 votes
    Print Recipe Pin Recipe Rate this Recipe
    Prep Time 3 minutes mins
    Cook Time 15 minutes mins
    Additional Time 5 minutes mins
    Total Time 23 minutes mins
    Course Puree Recipes
    Cuisine American
    Servings 1 Serving
    Calories 128 kcal

    Ingredients
      

    • 1 Leek Large
    • ¼ cup Vegetable Broth Opt For Chicken Broth If you like
    • ¼ teaspoon Salt
    • 14 teaspoon Pepper

    Instructions
     

    • Trim off the dark green tops and the root end of the leek.
    • Slice the leek lengthwise and rinse under running water to remove any dirt or sand between the layers.
    • Chop the leek into 1-inch pieces.

    Boiling Method

    • Place the chopped leek in a small pot and add just enough water to cover them. Bring to a boil, then reduce the heat and simmer for about 10-15 minutes until the leek is very tender.

    Steaming Method

    • Place the chopped leek in a steamer basket over boiling water. Cover and steam for about 10-15 minutes until the leek is very tender.
    • If boiled, drain the leek and reserve a little cooking water.
    • Transfer the cooked leek to a blender or use an immersion blender directly in the pot.
    • Add the broth and blend until smooth. If needed, add a little reserved cooking water or more broth to achieve the desired consistency.
    • Season with salt and pepper to taste. Adjust seasoning as needed.

    Notes

    For a richer flavor, you can add a small clove of garlic to the boiling or steaming water.
    If you prefer a bit of texture, blend only half of the mixture and mix it with the unblended portion.

    Nutrition

    Serving: 1gCalories: 128kcalCarbohydrates: 31gProtein: 4gFat: 1gSaturated Fat: 0.4gPolyunsaturated Fat: 0.4gMonounsaturated Fat: 0.2gSodium: 840mgPotassium: 532mgFiber: 9gSugar: 4gVitamin A: 1762IUVitamin C: 11mgCalcium: 177mgIron: 5mg
    Print Recipe Pin Recipe Rate this Recipe
    Tried this recipe?Let us know how it was!

    Best Oil For Searing Steak : Top 7 High Smoke Point Oils

    October 1, 2024 by Angela Milnes

    Best oils for searing steak.

    What's The Best Oil For Searing Steak? This article will share the top 7 high smoke point oils that are perfect for a mouthwatering, juicy steak.

    It has everything a budding chef needs to start perfecting their technique with confidence. So, let's roll up our sleeves and discover which oil is right for making delicious Grilled Steaks!

    Using best oil for searing steak.
    [feast_advanced_jump_to]

    What Is Searing?

    Searing is a popular cooking method that involves cooking food quickly at high temperatures. This process involves heating a pan or grill to a high temperature and adding oil to the surface. Adding oil to the pan helps create a barrier between the food and the surface, preventing it from sticking.

    The high heat of the pan or grill helps caramelize the food's surface, creating a delicious crust and sealing in the natural juices. Searing is especially useful when cooking meats like Steak or Thin Sliced Chicken, as it helps to create a crispy outside layer while keeping the inside moist and tender.

    The ideal temperature for searing may differ based on the cooking technique employed and the food being cooked. Generally, temperatures between 350°F to 500°F are ideal For Searing Meat.

    Why Do You Need Special Oil For Searing Steak?

    If you are a steak lover, you surely are aware that one of the best ways to cook the steak is by searing it. However, did you know that using the right oil for searing is crucial?

    A special oil with a high smoke point, such as grape seed or Avocado Oil, is recommended for cooking steak because traditional vegetable oil can break down and smoke at high temperatures. When oil starts to burn and smoke, it produces an unpleasant flavor in your dish, and this temperature is called a smoke point.

    In addition, using an oil with a low smoke point for high-heat cooking can release Harmful Chemicals, Which Are Unpleasant And Cause A Loss Of Nutrients.

    Factors To Consider For Selecting The Best Oil For Searing Steak

    Here's a list of factors to consider when choosing the best oil for searing, along with a brief description of each:

    Smoke Point

    It is the level of temperature at which an oil begins to smoke. To avoid burning your oil and ending up with a ruined steak, choose an oil with a high smoke point, such as 350°F to 500°F.

    Flavor

    While a neutral-tasting oil like canola oil might not add much flavor to your steak, flavored oils such as herb-infused or garlic-infused oils can add a unique taste to your dish. Choose an oil that complements your steak or enhances its flavor.

    Price

    Some oils can be expensive, but it doesn't necessarily mean that expensive oils are always better. Choose an oil that suits your budget without compromising quality.

    Availability

    If you're in a time crunch, you might not have access to certain oils. Choose an oil readily available at your grocery store or online retailer.

    The Best Oil For Searing Steak

    OilSmoke PointBest Searing Method for SteakBrands
    Refined Avocado Oil520°FHigh heat searing, broilingChosen Foods, Primal Kitchen, BetterBody Foods
    Safflower Oil510°FHigh heat searing, roastingSpectrum Organics, Hollywood, LifeOiL
    Extra Light Olive Oil468°FMedium heat searing, grillingPompeian, Bertolli
    Peanut Oil450°FHigh heat searing, deep fryingSpectrum Naturals, Snappy Popcorn
    Sunflower Oil450°FHigh heat searing, roasting, broilingLa Tourangelle, Spectrum Naturals, Baja Precious
    Grapeseed Oil420°FHigh heat searingLa Tourangelle, Spectrum Naturals, Pompeian
    Canola Oil400°FLow to medium heat searing, sautéing, stir-fryingSpectrum Naturals, Wesson

    Oils with lower smoke points, like olive oil or butter, can lead to a burnt and bitter taste in your steak. Therefore, the best oil for searing steak is one which has a high smoke point, meaning it can withstand high temperatures without burning. Oils with high smoke points include:

    Refined Avocado Oil

    Bottle of avocado oil with avocado halves in the side.

    With the highest smoke point among cooking oils, avocado oil ensures your steak gets that perfect sear every time.

    It's essential to consider the smoke point of your oil when using a cast iron skillet for cooking. Avocado oil's smoke point is 520°F, which makes it the best oil for searing steak. It is excellent for high-heat cooking and has a smooth and subtle flavor that won't overpower the taste of your steak.

    But the benefits don't stop there. Refined avocado oil has Many Health Benefits as well. It's high in heart-healthy Unsaturated Fats, Has Low Saturated Fats And Contains Vitamin E.

    And while refined avocado oil may have a slightly higher price point than other cooking oils, its quality and benefits are well worth it.

    Brands

    • BetterBody Foods Refined Avocado Oil, 33.8 oz
    • Primal Kitchen Pure Avocado Oil, 16.9 oz

    Safflower Oil

    Bottle of sunflower oil with sunflower flowers in front of it.

    With a smoking point of 510°F, safflower oil contains a higher smoke point than most oils, including extra light olive oil and grapeseed oil. This makes it ideal for cooking at high temperatures, which is perfect for searing steak to perfection. Not only will you get that delicious sear, but you'll also reduce smoke and avoid a scorched oil taste in your food. But wait, there's more!

    Safflower oil is extracted from safflower seeds and has numerous Health Benefits, Like Aiding In Weight Loss And Improving Blood Sugar Levels. But what's even better is that it's one of the pure oils and expeller-pressed oils – making it a great addition to your Healthy Diet.

    Wondering about the price? You'll be pleased to know that safflower oil is affordable compared to other oils with high smoke point levels, such as avocado oil.

    So, consider using safflower oil next time you want to cook steak in your cast iron.

    Brands

    • Hollywood Safflower Oil, 32 oz
    • Spectrum Organic Safflower Oil, 16 oz
    • LifeOiL Non-GMO Sunflower Blend, 33.8 oz

    Extra Light Olive Oil

    Bottle of olive oil with bread and olives in the background.

    One of the best things about extra light olive oil is its high smoke point of 468°F because it is ultra-refined olive oil. This makes it perfect for cooking steak on cast iron skillets or other high-heat cooking methods.

    Unlike other seed oils, this searing oil won't break down or burn, leaving your delicious steak with a crispy crust. But it's not just about the cooking process. Extra light olive oil also has Many Health Benefits. Unlike extra virgin olive oil (EVOO), it has a lighter taste and a higher smoke point, which makes it the best oil for searing steak.

    While extra virgin olive oil and EVOO can get pricey, extra light olive oil is often more affordable. So fire up that cast iron skillet, grab your extra light olive oil, and get ready to cook steak that will have all your friends begging for your secret.

    Brands

    • Pompeian Light Taste Olive Oil, 24 oz
    • Bertolli Extra Light Olive Oil, 2 Liter (67.6 oz)

    Peanut Oil

    Bottle of peanut oil with peanuts scattered all around the bottle.

    Peanut oil is not only a fantastic searing oil, but it also boasts a smoke point of 450°F. With its high enough smoke point, peanut oil is the best oil for searing steak on a stovetop or grill.

    Peanut oil has Impressive Health Benefits, too. It's loaded with Heart-Healthy Monounsaturated And Polyunsaturated Fats, which Promote Healthy Cholesterol Levels And Reduce Heart Disease Risk.

    Now, when it comes to price, peanut oil is relatively affordable compared to other high smoke points oils like avocado or grapeseed. You can find it easily at the local grocery stores or online.

    Brands

    • Spectrum Naturals Refined Organic Peanut Oil, 16 oz
    • Snappy Popcorn Peanut Oil, 128 oz

    Sunflower Oil

    Sunflower oil bottle with sunflower seeds and flower in the background.

    One of the key advantages of sunflower oil is that it burns over 450°F, which is considered a high smoke point, the same as that of peanut oil. This means it can withstand high heat, making it ideal for searing steak at high temperatures without burning or smoking.

    Sunflower oil is rich in Unsaturated Fats And Antioxidants. It can help to Lower Cholesterol Levels, Improve Brain Function And Reduce The Risk Of Heart Disease. Additionally, its mild flavor profile won't overpower the natural taste of your steak, allowing you to enjoy the meat's unique flavors truly.

    Sunflower oil is also an affordable option, with prices generally lower than those of other searing oils like avocado oil.

    Brands

    • La Tourangelle Organic Sunflower Oil, 16.9 oz
    • Spectrum Organic Sunflower Oil, 16 oz

    Grapeseed Oil

    If you're a steak lover, you know that searing steaks is an art form. Achieving that crusty, caramelized exterior while keeping the inside juicy and tender is no easy feat. That's where grapeseed oil comes in. This high smoke point oil is perfect for searing steaks to perfection.

    Let's dive into why grapeseed oil is the best choice for searing steaks. With a smoke point of 420°F, grapeseed oil can handle high heat without burning. No one wants to end up with a charred piece of steak because their oil couldn't handle the heat.

    Not only is grapeseed oil a high smoke point oil, but it also has a neutral flavor. This means it won't overwhelm the steak's natural flavor like some other oils might. And unlike olive oils, grapeseed oil doesn't have a low smoke point, making it a much safer choice for high-temperature cooking methods like searing.

    When it comes to price, grapeseed oil is typically less expensive than other high smoke point oils like avocado oil or Coconut Oil. And since you only need a small amount for searing steaks, a bottle of grapeseed oil will go a long way.

    Brands

    • La Tourangelle, Expeller-Pressed Grapeseed Oil, 16.9 oz
    • Spectrum Naturals Refined Grapeseed Oil, 16 oz
    • Pompeian 100% Grapeseed Oil, 68 oz

    Canola Oil

    Canola oil bottle with  flower besides it.

    Canola oil has a moderately high smoke point of 400°F, making it a fabulous option for low to medium heat searing. And while it may not be as high as other oils, it's still more than enough to get that crispy sear on your steak.

    But that's not all - canola oil is also a Healthier alternative to other cooking oils. Because this oil is Low In Saturated Fats And High In Unsaturated Fats, it may help to Lower The Risk Of Heart Disease. Plus, it's Rich In Vitamin E, An Antioxidant that helps Keep Your Skin Healthy And Glowing.

    Another advantage of canola oil is that it's comparatively cheaper than other cooking oils like avocado or walnut oil. That means you can enjoy delicious, restaurant-quality steak at home without shelling out a fortune.

    So, canola oil is a fantastic option for creating restaurant-style steaks. With a decent smoke point, health benefits, and budget-friendly price tag, it's a clear choice for your searing needs.

    Brands

    • Spectrum Naturals Oil Canola Refined Organic, 32 oz
    • Wesson Pure Canola Oil, 1.25 Gallon (160 oz)

    What Are Some Good Tips For Searing Meat?

    Here are some tips for searing meat:

    • Use a heavy-bottomed pan: A cast-iron skillet or a stainless steel pan is ideal as they retain heat well and distribute it evenly for even cooking.
    • Make sure the meat is dry: Pat the meat dry with paper towels before placing it on the hot pan. This helps to get a good sear without steaming the meat.
    • Preheat the pan: Heat the pan over high heat before adding oil. Before adding the meat, the oil should be shimmering but not smoking.
    • Do not overcrowd the pan: Give the meat enough space to sear on all sides. Overcrowding the pan will lower the temperature, causing the meat to steam instead of sear.
    • Avoid moving the meat too much: Allow it to sear on one side for a few minutes before flipping it. Moving the meat around too much will prevent it from developing a good crust.
    • Add flavor with aromatics: Add garlic, thyme, and Rosemary to the pan towards the end of cooking for extra flavor. Read this article on the Best Seasonings For Beef.
    • Let the meat rest: Once the searing is done, take the meat out of the pan and allow it to rest for some minutes. Allowing the meat to rest for a few minutes enables the juices to spread evenly, resulting in a more tender and succulent steak.

    FAQ'S

    Are There Any Oils I Should Avoid?

    Oils with low smoking points should be avoided when searing steak. Some examples include olive and flaxseed oil, which have smoke points of around 320°F and 225°F, respectively.

    Using these oils for high-heat cooking can result in burnt meat and a foul taste.

    Is Butter Good For Searing Steak?

    Although butter is not typically used for searing steak, it can add flavor and richness to the dish. However, butter has a low smoke point, which can easily burn if cooked at high temperatures, resulting in an unpleasant taste.

    Which Oil Will You Choose For Your Steak?

    Finding the best oil for searing steak comes down to selecting an oil with a high smoke point. Grape seed, canola, avocado, safflower, sunflower, peanut, and extra light olive oil all stand out as excellent choices for getting that perfectly golden and crispy sear. So, grab your favorite oil and start searing!

    Learn More About Oils Here:

    • Best Substitution For Safflower Oil
    • Best Substitute For Avocado Oil
    • Does Coconut Oil Go Bad?

    Bulgarian Yogurt Vs Greek Yogurt: A Guide

    October 1, 2024 by Angela Milnes

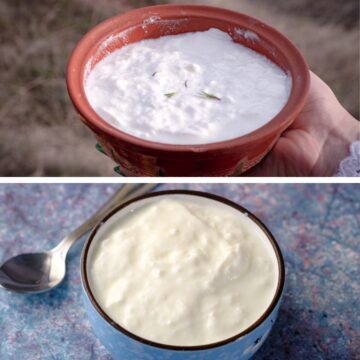
    A bowl of Bulgarian yogurt and a bowl of Greek yogurt.

    Curious about the differences between Bulgarian Yogurt and Greek yogurt? These two types of yogurt may seem similar, but they have distinct textures, flavors, and health benefits. Learn about Bulgarian Yogurt vs Greek yogurt and enjoy yogurt in your diet today.

    Yogurt in a bowl. Bulgarian Yogurt Vs Greek Yogurt.
    [feast_advanced_jump_to]

    Difference Between Greek Yogurt And Bulgarian Yogurt

    I first tried Bulgarian yogurt when my friend Sylvy brought me a pot as a gift. Sylvy is from Bulgaria and often shares yogurt and cheese from her country with me. This is how I gained my knowledge of Bulgarian dairy products.

    Let's look at the difference between Bulgarian Yogurt and Greek Yogurt

    Bulgarian Yogurt

    • Bulgarian yogurt is made from sheep's milk 
    • It has a thick, creamy texture 
    • It has a mildly sour taste due to bacterial cultures.
    • Bulgarian yogurt is High In Protein And Calcium.

    Greek Yogurt

    • Greek yogurt is made from cow's milk.
    • It has a thick consistency and is thicker than Regular Yogurt.
    • Greek Yogurt has a tart, Tangy Flavor.
    • It is Lower In Lactose. 
    • Greek yogurt is strained to remove liquid Whey. 
    • Greek contains Twice As Much Protein As Regular Yogurt. 

    Texture Of Bulgarian Yogurt

    One of the most notable differences between Bulgarian yogurt and Greek yogurt is its texture.

    Made With Whole Milk

    Bulgarian yogurt is usually thicker and creamier than Greek yogurt. This is because Bulgarian yogurt is made with whole milk. It is a beloved food in Bulgaria, and the only yogurt made in the country is made with whole milk.

    Greek Yogurt Texture

    In Greece, on the other hand, yogurt makers often use skim milk to make their product. As a result, Greek yogurt is thinner and less creamy than its Bulgarian counterpart.

    Another difference in texture has to do with the straining process. In order to achieve the signature thick consistency, Greek yogurt is strained to remove liquid whey. This extra step results in a final product that's much thicker than regular yogurt or even Bulgarian yogurt.

    Taste Of Yogurt

    In terms of taste, Bulgarian yogurt is milder and less sour than Greek yogurt.

    Bulgarian yogurt is made with Lactobacillus bulgaricus, which gives the yogurt a milder flavor.

    Greek yogurt, on the other hand, is made with Lactobacillus acidophilus, which results in a tangier taste.

    Depending on your preferences, you may prefer the milder taste of Bulgarian yogurt or the tangier flavor of Greek yogurt.

    Which Yogurt Is Richer: Bulgarian Or Greek?

    On the other hand, if you're looking for a richer, more decadent yogurt, Bulgarian Yogurt is the way to go. Either way, both yogurt options are great. Both Greek and Bulgarian yogurts are a healthy dairy product and a staple food that taste great served cold on it's own or when

    So there you have it – a quick overview of the key differences between Bulgarian yogurt and Greek yogurt. Both are delicious, but they offer different benefits depending on your

    Learn how to make Greek Yogurt In Your Instant Pot.

    A bowl of yogurt with strawberry, blueberries and granola on top.

    Which Is Best? Greek Yogurt Or Bulgarian Yogurt?

    Choosing between Bulgarian Yogurt and Greek Yogurt totally depends on your personal preferences. If you like your yogurts thick with a creamier consistency, go for the Bulgarian Option. However, if you prefer your yogurts tangy and sour, go for the Greek type. Don't forget to add fresh fruit or add flavors to enhance the taste.

    Learn More About Dairy Products Here:

    • Ricotta Cheese Vs Cottage Cheese
    • Substitute For Mozzarella: 17 Alternatives
    • Does Greek Yogurt Go Bad?
    • Substitute For Heavy Cream
    • Does Brie Cheese Go Bad

    Does Apple Butter Go Bad?

    October 1, 2024 by Angela Milnes

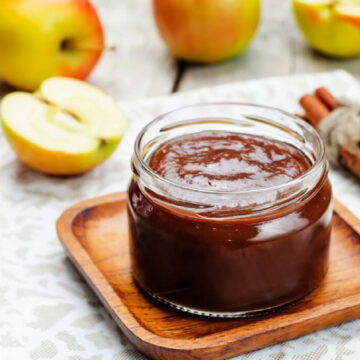
    Apple butter in a jar.

    Apple butter is one of those old-fashioned preserves that tastes delicious on toast, pancakes, and pastries, but Does Apple Butter Go Bad? The Answer is Yes, apple butter can go bad and today I'm sharing how to know if your apple butter is bad and the best ways to store apple butter for long usages.

    glass container of apple butter with wooden tray.
    [feast_advanced_jump_to]

    What Is Apple Butter?

    Apple butter is a thick, brown spread made from apples slow-cooked with cider or water until the sugars caramelize. It's often spiced and used as a golden delicious spread or in recipes. Despite its name, it contains no actual butter.

    How Long Does Apple Butter Last?

    Apple butter, a type of fruit butter, is known for its long shelf life when stored properly. On average, unopened apple butter can last up to two years at room temperature, although it's best to consume within one year to enjoy the best quality.

    Once opened, apple butter can last up to two weeks if it's stored continuously refrigerated in a properly sealed jar. If you are using a mason jar of apple butter, ensure that it is sterilized to prevent bacterial contamination that can shorten its shelf life.

    Interestingly, the lifespan of apple butter develops and extends when frozen. Freezing your apple butter can extend its shelf life to up to one year or even two in some cases.

    Remember, the key to a longer shelf life for apple butter is proper storage. Whether in a refrigerator or freezer, your apple butter should always be stored in a properly sealed and sterilized jar.

    Does Apple Butter Go Bad?

    Absolutely, like any other food product, apple butter can spoil if not properly stored or consumed within a certain period. It's a delicious concoction of apples, sugar, and spices boiled down to a rich, caramelized spread.

    However, its enticing allure doesn't make it immune to spoilage. Always ensure to store your apple butter correctly, usually in a cool, dark place for unopened jars, and always refrigerated once opened, to maintain its quality and prevent spoilage.

    Learn how to make Instant Pot Apple Butter that you can store with ease.

    Factors That Contribute To Apple Butter Going Bad

    Apple butter's shelf life is determined by several factors, including storage conditions, container integrity, and the ingredients used.

    Storage Conditions

    Ideal storage involves a cool, dark place, with refrigeration necessary once opened. Warm temperatures and light exposure can accelerate spoilage.

    Container Integrity

    Unopened apple butter can last up to two years, while an opened jar lasts about a month in the fridge. Damaged glass containers or improperly canned apple butter can let in air and bacteria, causing quicker spoilage.

    Ingredients

    The type of apples and presence of preservatives can affect shelf life. Tart Apples and added preservatives usually extend longevity.

    Always check your apple butter's smell, texture, and color before use to ensure it's not spoiled.

    How To Tell If Apple Butter Has Gone Bad?

    Knowing how to indicate spoilage is essential to ensure you're consuming a safe and quality product. Here's how to tell if your apple butter has gone bad.

    Check The Appearance

    The first thing to do is to visually inspect your apple butter. If any mold appears on the surface or inside the jar, it's a clear sign that it has gone bad. Also, any changes in color could indicate that the apple butter is no longer good to eat.

    Assess The Smell

    A change in smell is another strong indication of spoilage. Fresh apple butter has a sweet, spiced apple scent. If it smells sour, musty, or just 'off,' it's time to throw it out.

    Examine The Texture

    Fresh apple butter has a smooth, creamy texture. If it feels slimy, gritty, or has developed a layer of liquid, these are signs of spoilage.

    Taste Test

    If the apple butter passes all the previous checks, but you're still unsure, you can taste a small amount. If it tastes sour or off in any way, discard it immediately.

    How To Store Apple Butter?

    Proper storage of apple butter is crucial to balance its quality and extend its shelf life. Here's how to store your apple butter effectively:

    Storing Unopened Home Canned Apple Butter

    Whether you've made apple butter at home using a traditional recipe or you've purchased it from the store, unopened jar should be stored in a cool, dark place.

    This could be a pantry or cupboard that's away from direct light and heat sources.

    Refrigerating Opened Apple Butter

    Once the jar of apple butter has been opened, it needs to be refrigerated. It's best to keep it in the original jar with the lid tightly sealed when not in use.

    Remember, always clean mason jars using a clean utensil to scoop out the apple butter to avoid introducing bacteria into the jar. Properly refrigerate apple butter so that it stays good for up to 1 month.

    Freezing Apple Butter

    For those who prefer long-term storage, especially if you have a large batch of homemade apple butter, freeze apple butter.

    Portion the apple butter into freezer-safe container or bags, leaving about an inch space for expansion. When you're ready to use it, thaw it in the fridge overnight.

    Canning Apple Butter

    If you've made a big batch of apple butter from cooked apples and want to preserve it for use in future baked goods, Canning Jars is a great way to do so.

    Begin by ladling the hot butter into sterilized jars using a food mill to ensure a smooth consistency. Leave an ¼ inch headspace at the top of each jar and wipe lids clean.

    Once sealed, place the jars in your Canning Pot and process them according to the water bath canning method. Store these jars or airtight container in a cool and dry place away from direct light.

    In a sealed container, your apple butter can remain good for up to a year. However, always check the expiration date and look for signs of spoilage before using.

    Read the USDA Guidelines For Canning Apple Butter!

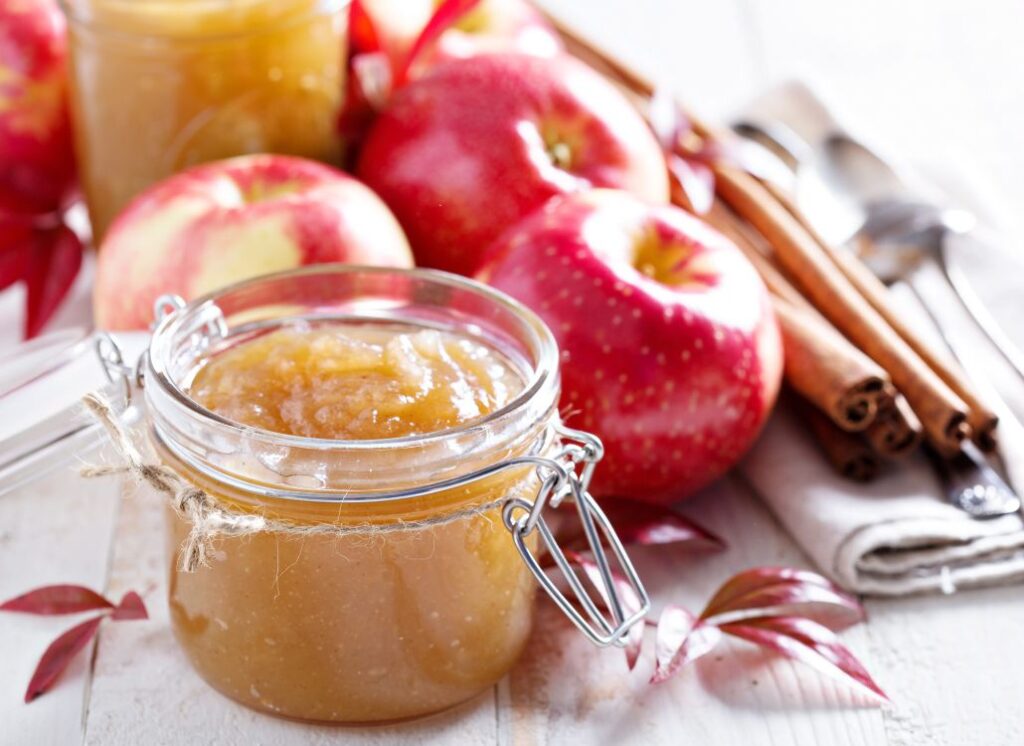
    apple butter in a mason jar with apple in the background.

    Can You Make Apple Butter At Home?

    Yes, you can make Homemade Apple Butter. An apple butter recipe involves slow-cooking apples with spices and sugar until it turns into a sweet, thick spread similar to apple sauce. Making apple butter at home allows you to enjoy this rich, delicious treat year-round.

    Improve Apple Butter Storage Life

    Apple butter can indeed go bad. While it's a delightful treat, it's not impervious to spoilage. The lifespan of apple butter can be affected by factors such as storage conditions and whether the jar has been opened.

    Storing apple butter properly, including keeping it in a cool, dark place and refrigerating after opening, can significantly extend its shelf life. Enjoy.

    Fantastic Recipes To Try Using Apples:

    • Kale Apple Salad With Pomegranates
    • Walnut Loaf With Apple Puree
    • Best Air Fryer Stuffed Chicken Breast
    • Fermented Vegetables Using Apple Cider Vinegar
    • Keto Tuna Salad With Apple and Pumpkin Seeds
    • Best Avocado And Apple Smoothie

    Does Apple Cider Vinegar Go Bad?

    September 30, 2024 by Angela Milnes

    Apple cider vinegar in a bottle.

    Does Apple Cider Vinegar Go Bad? While vinegar is known for its shelf-stable properties, apple cider vinegar can go bad if it's not stored properly. Today we'll be sharing tips on how to store apple cider vinegar and how to know when it's time to say goodbye.

    bottle apple organic vinegar cider. Does Apple Cider Vinegar Go Bad?
    [feast_advanced_jump_to]

    Does Apple Cider Vinegar Expire?

    How long does apple cider vinegar last? While it doesn't technically expire, it can start to lose its flavor and potency over time which is why it has expiration dates on the bottle.

    If you notice that your vinegar doesn't have the same sour taste as it used to, it's probably time to replace it.

    It's perfectly fine to store apple cider vinegar in your food storage cupboard for two to five years as it will last many years.

    Can I Use Apple Cider Vinegar That Has Expired?

    We don't recommend using the product after the expiration date. If it's been a few years since you've bought it, it's probably best to just get a new bottle.

    Be sure to check the printed expiration date before use as the quality may be degraded. You don't want the taste of raw fermented apples on your food!

    How Do I Know If Apple Cider Vinegar Has Gone Bad?

    There are a few signs that you should look out for to see if your vinegar has gone bad.

    Check The Color

    • The first thing you'll notice is that the color has changed. Apple cider vinegar is usually a pale yellow color, but it can turn brown over time.
    • If you see that your apple cider vinegar has changed color, it's time to toss it out.
    • The same goes for if the liquid is cloudy or has sediment in it. This means the aging process has begun and the old bottle is no good for use.
    closeup view apple vinegar glass bottle with cork fresh red apples old wooden boards.

    Check The Smell

    • Another sign that your apple cider vinegar has gone bad is the smell.
    • If the liquid in the bottle smells sour or vinegary, then it's probably still good to use. However, if it smells fermented then it's time to throw it away.
    • Fermentation can take place and if the vinegar has begun to ferment then it will smell like alcohol. This means that the acetic acid has been turned into ethanol and it's no longer best quality or good to consume.

    Check The Taste Of The Vinegar

    • Of course, the best way to tell if apple cider vinegar has gone bad is by taste.
    • If the vinegar tastes sour and vinegary then it's still good to use. However, if it tastes sweet or like alcohol then it's time to toss it out as the aging process aka the fermentation process has begun.
    • When in doubt, it's always better to err on the side of caution. If you're not sure if it's still good, it's best to just get a new bottle. after all, you want to use the best quality ingredients in your recipes.
    fresh apple juice close up shot.

    How To Store Apple Cider Vinegar Correctly

    • This type of vinegar should be stored in a bottle in a cool and dark place to avoid direct sunlight. It can be stored in the pantry, cupboard, or in the fridge if you prefer.
    • If you're going to store the liquid in the fridge, make sure to put it in a dark glass bottle. Vinegar can also be stored in the freezer, just make sure to thaw it out before using it.
    • Ensuring the right storage conditions ensures that apple cider vinegar has a good shelf life.
    • When stored correctly, apple cider vinegar can last for years. However, you may notice that the liquid starts to change color over time. This is perfectly normal and doesn't mean that it has gone bad.

    What's That Floating In My Apple Cider Vinegar?

    If you see something floating in your apple cider vinegar, don't panic! It's most likely just harmless sediment that has settled at the bottom of the bottle.

    However, if you see black spots or a black substance floating in your vinegar then it's time to get rid of it. These black spots are called "mother" and are made up of bacteria and yeast.

    While Mother is not harmful, it can give your vinegar an off-taste. Most people throw away the vinegar if they see Mother floating in it.

    How To Use Apple Cider Vinegar?

    Now that we know how to store apple cider vinegar and how to tell if it's gone bad, let's talk about how to use it.

    As we mentioned before, apple cider vinegar can be used in a variety of ways. It's commonly used in salad dressings, on veggies, as a natural cleaning solution, and even as a home remedy.

    When using condiments with vinegar, it's important to remember that a little goes a long way. The vinegar is very potent and can easily overpower the other flavors in your dish due to the acidic nature of the taste.

    Start by adding just a tablespoon or two to your recipe and then taste it before adding more. You can always add more, but you can't take it away once it's been added.

    Home Remedy

    • If you're using vinegar as a home remedy, there are a few different ways you can use it.
    • For example, some people swear by drinking a tablespoon of vinegar in filtered water first thing in the morning to help with digestion.
    • Others use it as a natural way to treat heartburn or acid reflux. Simply mix a tablespoon of vinegar with water and drink it when you're feeling the symptoms.
    • And last but not least it can also be used topically on the skin to help with various skin conditions like acne.
    • To use it topically, just dilute the vinegar with water and apply it to the affected area with a cotton ball.

    Cleaning Solutions

    • If you're using apple cider vinegar as a cleaning solution, make sure to dilute it with water before using it.
    • So, now that you know all about apple cider vinegar, go out and get yourself a bottle! Just don't forget to store it properly so that it stays fresh for years to come.

    Best Recipes Using Apple Cider Vinegar

    Here are some of our favorite recipes that use apple cider vinegar:

    • Pork Tenderloin With Apple Cider Vinegar
    • Mango Chutney
    • Instant Pot Kielbasa And Cabbage
    • Peach Pepper Jam
    • BBQ Pulled Pork

    You can also read the article: 15 Recipes That Use Apple Cider Vinegar by All recipes food group.

    Does Celery Go Bad? How To Tell If Celery Is Bad

    September 30, 2024 by Angela Milnes

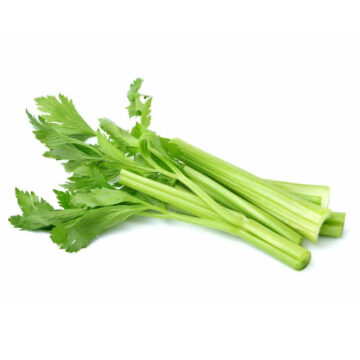
    Fresh celery.

    Does Celery Go Bad? Ever wondered how to tell if celery is bad. Today I'll share the signs to look for to know that celery has gone bad. We'll also share the best storage tips to extend celery shelf life.

    how to make celery juice.
    [feast_advanced_jump_to]

    Does Celery Go Bad?

    Celery can go bad, but it takes a while. Properly stored, celery can last for up to two weeks in the fridge. You don't want to eat limp celery and so you'll want to use your celery stalks in plenty of time before it is no longer fresh.

    Old celery has less nutrition than fresh celery as it begins to break down. If celery is wilted or has brown leaves, it is beginning to go bad.

    Does Celery Go Bad?

    Signs That Fresh Celery Has Gone Bad

    There are several signs to look for to know if celery has gone bad. The first sign is discoloration.

    Discoloration

    Fresh celery is a light green color and celery that has gone bad will start to turn brown. The leaves will also be yellow and the stalks will become limp. Limp celery is still edible but won't have the same crunch as fresh celery.

    Bad Smell

    Celery that has gone bad will also start to smell sour. If you notice a foul smell, it is best to throw the celery away. Rotten celery or spoiled celery will smell very bad.

    Mould

    If celery starts to grow mold, it should be discarded immediately. Mold can spread quickly and contaminate other food in your fridge. If you find mould on your raw celery then it's time to throw it away.

    Bugs

    If you see small bugs crawling on celery, it's time to throw it out. These bugs can contaminate other food in your kitchen and are a sign the celery's shelf life has come to an end.

    Slime

    When storing celery it may become slimy. Slime is a sign of bacteria and means the celery has gone bad.

    Taste

    If celery tastes sour or bitter, it has gone bad and should be thrown out. When celery starts to go bad, it will lose its crunch. It will lose all the excess moisture and will become dry and rubbery.

    top view female hands cutting celery wooden kitchen board with knife with tomatoes cucumbers zucchinis isolated blue wooden surface.

    How To Store Celery Correctly

    Celery should be stored in the fridge, in either the crisper drawer, or wrapped in a damp paper towel.

    Storing celery in the vegetable drawer of your fridge is the best way to keep it fresh.

    If you have a lot of chopped raw celery, you can also use a plastic bag in the fridge or store it in an airtight container.

    Celery will last longer if it is stored properly. Be sure to check celery regularly and use it

    If celery is going to be stored for more than a few days, it's best to wrap it in aluminum foil. This will help it stay fresh for up to two weeks.

    diet menu healthy lifestyle oat porridge fresh vegetables celery spinach cucumber carrot onion plate.

    Can You Freeze Celery?

    Yes, celery can be frozen. To freeze celery, wash it and cut it into the desired size. Then, place it in a freezer bag and squeeze out as much air as possible.

    Freezer bags are great for freezing celery. You can place chopped raw celery or whole celery stalks into a bag or freezer-safe container.

    Celery is a good food storage item as celery is so versatile and therefore defrosted celery can be used in many different recipes.

    How To Defrost Frozen Celery

    There are two easy ways to defrost celery. The first is to place the celery in the fridge overnight. The second way is to place the celery in a bowl of ice water.

    If you're in a hurry, you can also defrost celery in the microwave. Just place the celery on a plate and microwave it on the defrost setting for a few minutes.

    Once the celery is defrosted, it should be used within a few days.

    How To Tell If Celery Is Bad

    Celery can go bad, but it takes a while. Properly stored, celery can last for up to two weeks in the fridge and 6 months in the freezer.

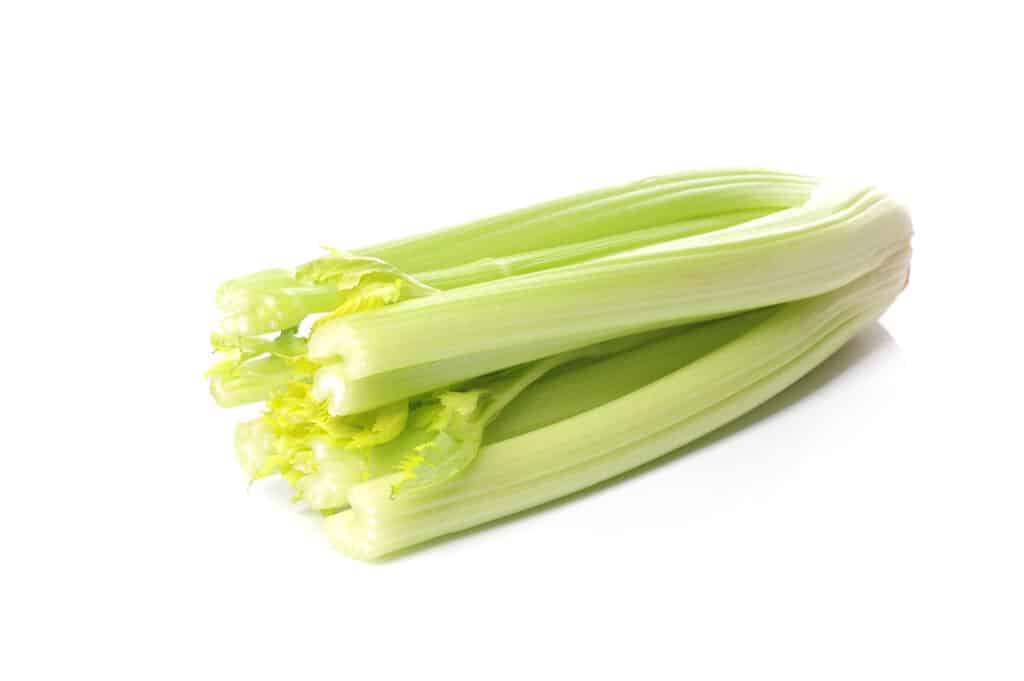
    fresh celery isolated.

    How To Use Celery

    Celery is a versatile ingredient that can be used in a variety of recipes. Here are some ideas:

    Sliced celery can be added to salads or eaten as a snack with dip.

    • Chopped celery can be added to soup or stew.
    • Celery leaves can be used as a garnish.
    • Make Celery Juice or blend it in a smoothie.
    • Use cooked celery in a Tofu Stir Fry or as a side dish.

    Celery is a healthy food that is packed with nutrients. It's a great addition to any diet and can be enjoyed in many different ways in both cold and cooked dishes.

    Celery Recipes

    Here are some more recipe that use celery:

    • Weight Watchers Jambalaya
    • Instant Pot Chicken Noodle Soup
    • Instant Pot Gumbo With Sausage And Shrimp

    Now that you know how to store celery and how to tell when it's gone bad, you can enjoy your celery recipes and keep them fresher for longer!

    More Useful Articles:

    • What Does Kimchi Taste Like
    • How To Soak Chia Seeds
    • Does Granola Go Bad
    • Does Distilled Water Go Bad
    • Does Apple Cider Vinegar Go Bad

    Does Distilled Water Go Bad? Everything You Need To Know

    September 30, 2024 by Angela Milnes

    Does Distilled Water Go Bad.

    Does Distilled Water Go Bad? and how long does distilled water last?" The answer is not as simple as you might think. While distilled water doesn't technically "go bad" in the same way that other beverages do, it can start to lose its purity and quality over time.

    man showing glass of water.
    [feast_advanced_jump_to]

    What Is Distilled Water?

    Distilled water is water that has been purified through a process of distillation. This means that the water is boiled and the resulting steam is condensed back into liquid form.

    The distillation process removes impurities, minerals, and other contaminants from the water, leaving behind only pure H2O.

    Does Distilled Water Go Bad?

    While distilled water doesn't go bad in the traditional sense, it can start to deteriorate if it's not stored properly.

    How To Tell If Distilled Water Has Gone Bad

    Several signs indicate that distilled water has gone bad.

    • The water may have a slightly off-taste.
    • The water may be more acidic than usual.
    • The water may contain traces of lead and other contaminants.

    If you notice any of these signs, it's important to discard the water and get a new batch.

    Check The Expiration Date

    One way to tell if distilled water has gone bad is to check the expiration date. If the water was distilled more than a few months ago, it has likely lost some of its quality.

    Look For Signs Of Contamination

    Another way to tell if distilled water has gone bad is to look for signs of contamination. Is there a chemical off-smell? or does the water taste strange? If so, the water may be contaminated and should be discarded.

    Does The Water Look Cloudy?

    A cloudy appearance can be a sign that the water has gone bad. This is usually due to contamination from bacteria or other impurities. When bacteria have contaminated water, it can cause the water to become murky and have a bad odor.

    If you notice any of these signs, it's important to discard the water and get a new batch.

    Green Algae In Distilled Water

    Does the water have a greenish tint? If so, this is a sign that the water has gone bad. The green tint is usually caused by algae growth. Algae can grow in distilled water if the water is exposed to sunlight or other sources of light.

    Do not drink distilled water if it has a green tint. Discard it and get a new batch. Algae can make you very unwell and it's important to be safe.

    Can Bacteria Grow In Distilled Water?

    No, bacteria cannot grow in distilled water. This is because the distillation process removes all of the impurities from the water, including the bacteria.

    However, if distilled water is exposed to air, it can become contaminated with bacteria. To avoid this, it's important to store distilled water in a sealed container and to use it within a few months of distilling.

    Do I Need To Refrigerate Distilled Water?

    No, you don't need to refrigerate distilled water. However, if you want to extend the shelf life of the water, it's a good idea to store it in the fridge.

    A Refrigerator with blue background.

    Can You Use Expired Distilled Water?

    While you can use expired distilled water. The water may have lost some of its quality and it may not be safe to drink. If the water is more than a few months old, it's best to get a new batch.

    While distilled water doesn't go bad in the traditional sense, it is always best to use freshly distilled water for the best quality.

    Can You Use Expired Distilled Water In A CPAP Machine?

    Yes. You can use expired distilled water in a CPAP machine. The water may have lost some of its quality, but it will still be safe to use.

    Can You Use Expired Distilled Water In A Humidifier?

    Again, you can use expired distilled water in a humidifier. The water may have lost some of its quality. However, so long as it shows no signs of going bad, the water will still be safe to use.

    mobile air conditioner bedroom.

    Can You Use Expired Distilled Water In A Steam Cleaner?

    Yes, you can use expired distilled water in all of these devices. The water has not gone bad and will not harm your machine. However, it is important to note that expired distilled water may not be as effective as fresh distilled water. This is because the expired water may have Lost Some Of It's Purity. If you notice that your devices are not working as well as they used to, you may want to consider using fresh distilled water.

    How To Store Distilled Water Safely?

    It's important to store distilled water in a sealed container to prevent it from absorbing impurities from the air. Glass or stainless steel containers are ideal, but you can also use plastic if necessary.

    Remove From Direct Sunlight

    You should also avoid storing distilled water in direct sunlight, as this can cause the water to deteriorate more quickly.

    Use The Correct Storage Container

    Using a distilled water container that's too large for the amount of water you have can also lead to problems. If there's too much air in the container, the water can start to absorb impurities from the air.

    This is why it's important to use a container that's only slightly larger than the amount of distilled water you have. This will help to prevent the water from coming into contact with too much air.

    Store In A Cool, Dry Place

    You should also store distilled water in a cool, dry place to prevent it from deteriorating.

    Keep Containers Closed Tight

    When opening a container of distilled water, be sure to close it tightly afterward. This will help to keep impurities out and prevent the water from losing its quality.

    Check The Container Regularly

    It's also a good idea to check the container of distilled water regularly for signs of deterioration. If you notice any changes in the water's appearance or taste,

    Keep Away From Chemicals

    You should also keep distilled water away from chemicals, as this can contaminate the water.

    Do not use distilled water that has been in contact with cleaning products, bleach, or other chemicals.

    Do not store distilled water near chemical products.

    Store In A Refrigerator

    You can also store distilled water in a refrigerator alongside your food to help it stay fresh for longer.

    Just be sure to use a clean, airtight container.

    How Long Does Distilled Water Last?

    Distilled water doesn't have an expiration date, but it will start to lose quality over time.

    The biggest threat to the quality of distilled water is exposed to air. As the water sits in a container, it will slowly absorb carbon dioxide from the air. This can cause the water to become more acidic and can give it a slightly off-taste.

    To avoid this, it's important to store distilled water in a sealed container and to use it within a few months of distilling.

    For Household Use

    If you're using distilled water for household purposes, like ironing or steam cleaning, it's important to understand that the water may not be as pure as it was when it was first distilled.

    This is because the water can pick up impurities from the environment, so it's important to only use distilled water from a trusted source.

    For Drinking

    Is distilled water drinkable?

    Drinking distilled water is generally safe, but it’s important to understand that the water may not be as pure as you think.

    While the distillation process removes impurities from the water, it doesn’t necessarily remove all of the minerals. This means that the water can still contain traces of lead and other contaminants.

    More Useful Articles:

    • Best Cheese For Lasagna
    • Best Farro Substitutes And Cooking Times
    • Does Apple Cider Vinegar Go Bad
    • What to Eat With Roti: Best Side Dishes
    • What Does Yorkshire Pudding Taste Like

    Best Air Fryer Chimichangas

    September 30, 2024 by Angela Milnes

    Air Fryer Chimichangas.

    Air Fryer Chimichangas are crispy, cheesy, and full of flavor—without the extra oil. They're quick to make, perfect for dinner or parties, and taste just like your favorite restaurant version (but healthier!).

    Air Fryer Chimichangas.

    Chimichangas are already a comfort food classic, but air frying gives them a modern, healthier twist. No messy oil, no deep fryer—just crispy, golden goodness in minutes. If you're loving air fryer meals, check out my Air Fryer Beef Taquitos and Air Fryer BBQ Chicken Wings next!

    [feast_advanced_jump_to]

    💖 Why This Recipe Works

    • Crispy without the grease – All the crunch, none of the mess.
    • Family-friendly & freezer-ready – Make extras for later (trust me, you’ll want to).
    • Totally customizable – Spice it up or keep it mild—it’s your call.

    ⭐ Star Ingredients

    Air Fryer Chimichangas ingredients.

    Here are the ingredients needed for this Air Fryer Chicken Chimichanga recipe which makes 5 servings:

    • Shredded Chicken – Juicy and satisfying, it's the perfect protein base. Use leftovers or whip up a quick batch in the Instant Pot.
    • Pickled Jalapeños – Tangy and spicy! These wake up the whole dish.
    • Shredded Cheese – Melts to gooey perfection and binds everything together.
    • Large Flour Tortillas – Soft and pliable for easy folding, then crisped to golden brown air-fried glory.

    For the complete list of ingredients with measurements and instructions, please see the recipe card at the bottom of the post.

    📖  Substitutions & Variations

    • Swap in cream cheese for a creamy, tangy center.
    • Make it vegetarian with black beans and sautéed peppers.
    • Dial up the heat with extra green chiles or a dash of cayenne.
    • Use leftover rotisserie chicken to save time.
    • Try Plantain Tortillas: For a grain-free option, use homemade plantain tortillas. They’re sturdy, naturally sweet, and pair beautifully with savory fillings.

    These also make a great seasonal game-day treat or party appetizer. For a full fiesta spread, try pairing them with Charred Corn Salad With Tomatoes or Air Fryer Onion Rings With Cheese.

    🔪How To Make Air Fryer Chimichangas

    Here are the step-by-step instructions for making air fryer chicken chimichangas:

    Use this section for process shots, alternating between the step and image showing the step. Users don't like seeing process shots cluttering up the recipe card, so include your process shots here.

    Combining shredded chicken with cheese, tomatoes, diced jalapeños, and cumin.
    1. Step 1: In a large mixing bowl combine your shredded chicken with cheese, tomatoes, diced jalapeños, and cumin. Add ½ cup of chicken filling to the center of the tortilla.
    Chimichanga mixture on a tortilla.
    1. Step 2: Fold the left and right-hand sides of the tortilla edges. The fold should reach the inside fold. Fold in the bottom edge and roll the chimichanga to the top, sealing the meat tight. Repeat steps 2-4 for all the tortillas.
    Uncooked chimichangas in an air fryer basket.
    1. Step 3: Place the chimichangas into the sprayed air fryer basket with the top fold face down. Brush the top, sides, and ends of the chimichangas with butter. Alternatively, you can use cooking spray. I like to use olive oil spray.
    Cooked chimichangas in an air fryer basket.
    1. Step 4: Fold the left and right-hand sides of the tortilla edges. The fold should reach the inside fold. Fold in the bottom edge and roll the chimichanga to the top, sealing the meat tight. Repeat steps 2-4 for all the tortillas.

    Air fried chimichangas on a plate.

    👩‍🍳 Expert Tips

    • Use toothpicks to keep the chimichangas sealed while air frying.
    • Don’t overfill – it makes rolling harder and can cause them to burst.
    • Flip halfway through for even crisping.
    • Preheat the air fryer to ensure the perfect texture.

    💭 FAQs

    What Are Chimichangas?

    Chimichangas are deep-fried burritos packed with savory fillings like chicken, cheese, beans, or beef.

    How Do You Pronounce Chimichanga?

    It’s “chi-me-CHANG-uh” – fun to say and even better to eat!

    How Long To Cook Frozen Chimichangas in Air Fryer?

    To cook a frozen chimichanga in the air fryer, cook at 400°F for 8-10 minutes, flipping halfway through.

    Best Chicken For Chicken Chimichangas

    Shredded rotisserie chicken works great, or use leftovers from your Instant Pot Shredded Chicken!

    Can You Make Chimichangas Ahead Of Time?

    Absolutely. Make the filling and wrap the chimichangas up to 24 hours in advance. Store in the fridge and cook when ready.

    💖 Serving Suggestions

    Pair your Air Fryer Chimichangas with:

    • Mexican Rice - A classic choice that adds a bit of flavor and helps balance the richness of the chimichanga.
    • Refried Beans - Creamy and savory, they make a great side to complement the crispy texture of chimichangas.
    • Guacamole, Salsa - Fresh guacamole and tangy salsa add brightness and a cool contrast to the hot, fried dish..
    • Red Cabbage Slaw - A fresh, crunchy slaw made with cabbage, lime, and cilantro adds a refreshing balance to the meal.
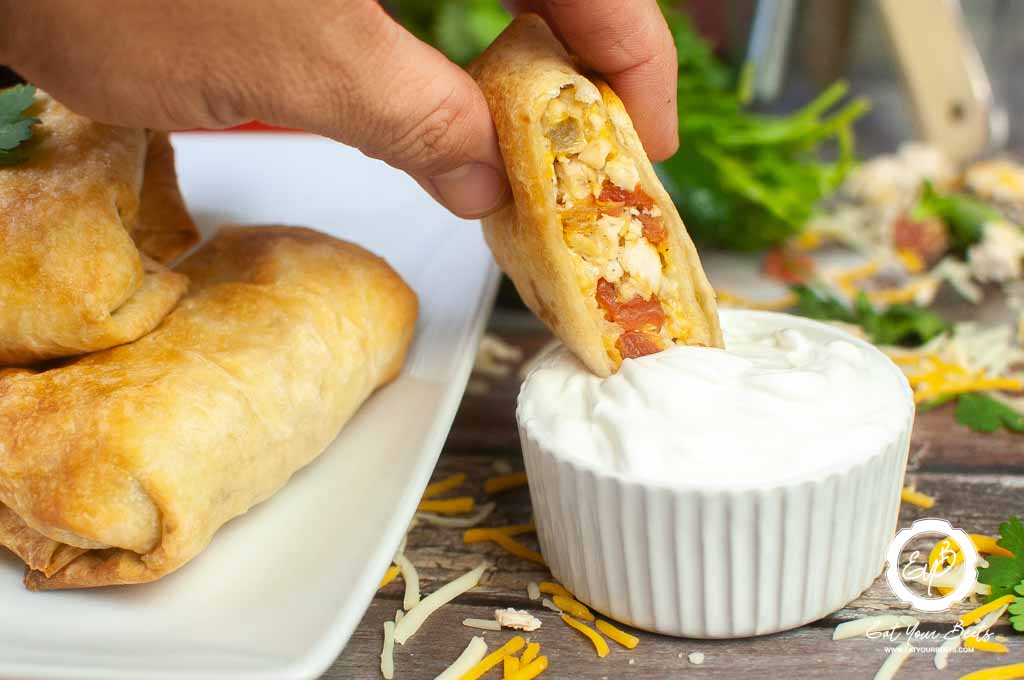
    Chimichanga being dipped into sour cream.

    🍽 More Delicious Air Fryer Dishes

    • Air Fryer Baked Potato Recipe.
      Air Fryer Baked Potato Recipe
    • Air Fryer Yorkshire Pudding.
      Air Fryer Yorkshire Pudding
    • Air Fryer Steak Bites.
      Easy Air Fryer Steak Bites Recipe
    • Air Fryer Enchiladas With Turkey and Black Beans.
      Air Fryer Enchiladas (Better Than Oven-Baked!)

    Did you make this recipe? Leave a review and a ⭐⭐⭐⭐⭐ rating below, or tag us in our Facebook Group! Alternatively, bookmark it in your browser or save to Pinterest.

    Air Fryer Chimichangas.

    Air Fryer Chimichangas

    Angela Milnes
    These Air Fryer Chimichangas are a lighter, crispy version of the classic! Stuffed with your favorite fillings and air-fried to perfection, they’re quick, easy, and perfect for a fun family dinner—without the extra oil!
    5 from 5 votes
    Print Recipe Pin Recipe Rate this Recipe
    Prep Time 15 minutes mins
    Cook Time 8 minutes mins
    Total Time 23 minutes mins
    Course Dinners
    Cuisine American
    Servings 5 Servings
    Calories 470 kcal

    Ingredients
      

    • 3 Cups Chicken Cooked And Shredded
    • 2 Cups Shredded Cheese
    • 1 Cup Diced Tomatoes And Green Chiles Drained
    • 3-4 Pickled Jalapeños
    • 2 Teaspoons Ground Cumin
    • 5 Large Flour Tortillas
    • 2 Tablespoons Butter Softened

    Instructions
     

    • In a large mixing bowl combine your shredded chicken with cheese, tomatoes, diced jalapeños, and cumin.
    • Add ½ cup of chicken filling to the center of the tortilla.
    • Fold the left and right-hand sides of the tortilla edges. The fold should reach the inside fold.
    • Fold in the bottom edge and roll the chimichanga to the top, sealing the meat tight. Repeat steps 2-4 for all the tortillas.
    • Place the chimichangas into the sprayed air fryer basket with the top fold face down. 
    • Brush the top, sides, and ends of the chimichangas with butter. Alternatively, you can use cooking spray. I like to use olive oil spray.
    • Cook the chimichangas at 400°f for 4 minutes, flip, and brush with butter. Cook for a further 4 minutes.
    • Remove the air-fried chimichangas and let them rest. Once ready garnish with guacamole, salsa, sour cream, and/or cheese.

    Notes

    Use Toothpicks: Secure the chimichangas with toothpicks to prevent them from opening while cooking in the air fryer.
    Don’t Overfill: Keep the fillings moderate to avoid the chimichangas bursting open and to ensure even cooking.
    Brush with Oil: Lightly brush or spray the chimichangas with oil before air frying for an extra crispy, golden texture.
    Preheat the Air Fryer: Preheating ensures the chimichangas cook evenly and get that crispy exterior.
    Flip for Even Crispiness: Flip the chimichangas halfway through cooking to ensure both sides get evenly crispy.

    Nutrition

    Calories: 470kcalCarbohydrates: 19gProtein: 35gFat: 28gSaturated Fat: 14gPolyunsaturated Fat: 3gMonounsaturated Fat: 7gTrans Fat: 0.2gCholesterol: 120mgSodium: 772mgPotassium: 388mgFiber: 2gSugar: 3gVitamin A: 847IUVitamin C: 5mgCalcium: 399mgIron: 3mg
    Print Recipe Pin Recipe Rate this Recipe
    Tried this recipe?Let us know how it was!
    Air fried chimichangas on a plate.

    Does Granola Go Bad? Get the Low Down

    September 30, 2024 by Angela Milnes

    Granola bars.

    Granola is a go-to snack for many, loved for its crunchy, delicious mix of oats, nuts, and sweeteners. But have you ever wondered, Does Granola Go bad? Whether you're stocking up on your favorite brand or making a homemade batch, understanding the shelf life of granola is essential to ensure you're enjoying it at its freshest.

    In this article, we'll explore how long granola lasts, signs that it may have gone bad, and tips for keeping it fresh as long as possible.

    Guide about Does granola go bad
    [feast_advanced_jump_to]

    Does Granola Go Bad?

    Yes, granola can go bad over time, especially if it's not stored properly. Granola bars, like other foods, can become stale or lose flavor after their expiration date.

    To keep Granola and granola bars fresh, store them in a cool, dry place and check for changes in taste or smell.

    How Long Does Granola Last?

    Store bought granola and homemade granola have a different shelf life. I've created a chart below to show how long each type of granola will last in according to different storage conditions.

    Granola TypeRoom TemperatureIn FridgeIn Freezer
    Store-Bought Unopened6-12 months6-12 months1 year or more
    Store-Bought Opened3-6 months6-8 months1 year
    Homemade Granola3-4 weeks1-2 months4-6 months

    Tips To Tell If Granola Has Gone Bad

    Here's a guide to help you identify signs of spoilage in both granola bars and loose granola.

    • Check the Granola Bag: Inspect the packaging for any signs of damage or exposure to air, which can speed up spoilage.
    • Off Smell: Open the granola bag and take a sniff. A sour or off smell indicates the granola has likely expired.
    • Texture Changes: Feel the granola bar. If it's overly hard or too soft, it may be stale granola that's no longer fresh.
    • Appearance: Look for any discoloration or mold on the bar, which are clear indicators of spoilage.

    Ways To Store Granola Properly

    Storing granola bars correctly ensures that they remain fresh and delicious, whether they're homemade or store-bought. Each storage method has its own guidelines, so here's a detailed guide on how to keep your granola bars at their best.

    Method One: Store At Room Temperature

    Homemade Granola Bars

    • Airtight Containers: Place homemade granola bars in an airtight container to maintain their freshness and prevent them from becoming stale.
    • Cool, Dry Place: Store the container in a cool, dry place away from direct sunlight.

    Store-Bought Granola Bars

    • Original Packaging: If unopened, keep them in their original packaging until ready to consume, as original package keeps the granola fresh for more longer time.
    • Best By Date: Check the "best by date" to ensure optimal freshness and flavor.
    • Airtight Storage: Once opened, transfer the remaining bars to an airtight container or resealable bag.

    Method Two: Store In The Fridge

    Homemade Granola Bars

    • Wrap Individually: Wrap each bar in parchment paper or plastic wrap to avoid sticking together.
    • Airtight Container: Place wrapped bars in an airtight container to prevent moisture absorption.

    Store-Bought Granola Bars

    • Transfer If Necessary: If original packaging is damaged, transfer bars to a resealable bag or container.

    Method Three: Freeze Granola Bars

    Homemade Granola Bars

    • Prepare for Freezing: Wrap each bar individually in plastic wrap or foil.
    • Freezer Bags: Place the wrapped bars in a freezer bag, removing as much air as possible to prevent freezer burn.
    • Label and Date: Always label the freezer bag with the date to monitor storage time.

    Store-Bought Granola Bars

    • Freeze in Packaging: If unopened, you can freeze them in their original packaging.
    • Transfer After Opening: Once opened, wrap individually and store in freezer bags.

    Tips For Freshness

    • Always store granola in a cool, dry place to extend its shelf life.
    • Keep granola in an airtight container or resealable bag to prevent exposure to air.
    • Regularly check the "best by date" on packaging to ensure optimal freshness.

    How To Thaw Frozen Granola?

    Thawing frozen granola properly ensures it stays fresh and delicious. Follow these steps for both granola bars and loose granola.

    1. Remove from Freezer: Take granola bars out of the granola bag and place them on a plate.
    2. Room Temperature Thawing: Leave the bars at room temperature for 1-2 hours.
    3. Check for Freshness: Ensure there is no off smell or unusual texture. If the bars are excessively hard or taste stale, they may not be fresh.

    Is It Okay To Eat Expired Granola?

    Eating expired granola is not recommended, but it's not always harmful. Sometimes, you may be able to tell if the food has gone bad by its smell, texture, or months past its expiration date. However, it's always best to err on caution and throw it out if you're unsure.

    Store-Bought Granola

    • Beyond Expiration Date: Granola from the store is generally safe to eat a few months past its expiration date due to its plant-based ingredients.
    • Safety Assurance: Consumption is unlikely to cause illness if there's no mold or significant spoilage.

    Homemade Granola

    • Butter Content: If your homemade granola contains butter and is over two years old, it might cause nausea. Check for an unpleasant odor as a warning sign.

    Can I Use Granola In Recipes?

    Absolutely, granola is a versatile ingredient that can be used in a variety of recipes! Here are some ideas:

    Yogurt Parfaits

    Mix granola with yogurt and fruits for a tasty breakfast. The crunchy granola goes well with the smooth yogurt. It keeps you full longer.

    Baked Goods

    Add granola to your Zucchini Chocolate Chip Muffins or cookies. It makes them crunchy and adds a nutty taste. This way, your treats are more filling and yummy.

    Smoothie Bowls

    Sprinkle granola on your smoothie bowl. It makes your bowl crunchy and more filling. Granola adds extra goodness and makes eating more fun.

    Salad Toppings

    Use granola as a topping for salads. It adds a nice crunch and a nutty flavor. This makes your salad more interesting and tasty.

    Trail Mix

    Make a snack mix with granola, nuts, and dried fruits. It's great for a quick energy boost. Granola keeps it crunchy and ties it all together.

    Dessert Crusts

    Use crushed granola for pie or add to No Bake Cherry Lime Cheesecake. It gives your desserts a sweet, crunchy base. This makes your sweets more exciting to eat.

    So, Store Your Granola Without Worry!

    In conclusion, granola can really go bad. Properly storing granola is crucial to maintaining its freshness and flavor. Whether you opt for homemade or store-bought granola, following the right storage methods can extend its shelf life and ensure it stays delicious.

    From airtight containers to freezing options, there are various ways to keep your granola fresh for longer. Additionally, knowing how to identify signs of spoilage and being cautious when consuming expired granola can help prevent any potential health risks.

    More Useful Articles To Read:

    • Does Fudge Go Bad?
    • Best Oil For Searing Steak
    • Does Distilled Water Go Bad
    • Best Cheese For Lasagna

    How To Soak Chia Seeds

    September 30, 2024 by Angela Milnes

    chia seeds on a spoon.

    Do you want to know how to make chia pudding, smoothies or just plain chia seeds? Today, I'm going to show you the simple steps on How To Soak Chia Seeds, so that you can incorporate them into your diet in the most effective way possible.

    Chia Seeds - How To Soak Chia Seeds.
    [feast_advanced_jump_to]

    Why Soak Chia Seeds?

    Soaking chia seeds helps to soften them and make them More Easily Digestible. This can be especially helpful for people who have difficulty digesting whole grains and seeds.

    In addition, soaking chia seeds may help to enhance the absorption of Nutrients. The soaking process helps to break down the seeds' outer layer and Make The Nutrients More Readily Available To The Body when ingested.

     chia seeds on a spoon, wooden background.

    How To Soak Chia Seeds?

    Soaking chia seeds is a simple process that only requires a few minutes of prep time. Here's how to do it: You can soak chia seeds overnight or for a shorter period of time.

    Step One: Measure Chia Seeds

    Measure out the desired amount of chia seeds. Add chia seeds to a bowl or jar.

    Step Two: Add Liquid To Chia Seeds

    Add liquid (such as water, milk, Almond milk, coconut milk or coconut water) to the bowl or jar.

    The ratio of chia seeds to liquid should be approximately 1:3, so for every 1 tablespoon of chia seeds, use 3 tablespoons of liquid.

    Step Three: Soak Whole Chia Seeds

    Step 3: Let the chia seeds soak for at least 20 minutes, or up to 12 hours depending on the desired consistency.

    The longer you soak the seeds, the softer and more gel-like they will become. Soaking chia seeds overnight will ensure they

    Step Four: Rinse Soaked Chia Seed

    Drain and rinse the soaked chia seeds if desired, then use them as desired in recipes or enjoy chia seeds as a topping for oatmeal or smoothie bowls.

    Expert Tips

    These are some useful tips for soaking chia seeds:

    • Add Salt: Add a pinch of salt to the soaking liquid: Adding a pinch of salt to the liquid in which you soak your chia seeds can help to enhance the absorption of nutrients. This is because salt can help to break down the seeds' outer layer and make the nutrients more readily available to the body.
    • Use Different Liquids: Experiment with different liquids: You can soak chia seeds in a variety of liquids, including water, almond milk, and coconut water.Experimenting with different liquids can help you find the taste and consistency that you prefer.
    • Store Chia Seeds in Fridge: Chia seeds can be stored in an airtight container in the refrigerator for up to 5 days. This can be a convenient way to have soaked chia seeds on hand for use in recipes or as a topping for oatmeal or smoothie bowl.

    Do I Soak Chia Seeds In Cold Or Warm Water?

    You can soak chia seeds in either cold or warm water, depending on how quickly you want them to swell and how soft you want them to be.

    Cold water will take longer for the chia seeds to soften, but can still provide beneficial Health Benefits. Warm water will help the chia seeds absorb more liquid faster, resulting in quicker softening.

    Recipes Using Soaked Chia Seeds

    Now that you know how to soak chia seeds, here are a few delicious recipes to try:

    • Chia Seed Pudding: Try making chia pudding. Combine soaked chia seeds with your choice of milk, sweetener, and flavorings (such as vanilla extract or cocoa powder) to create a creamy and satisfying pudding.
    • Chia Seed Jam: Create a chia gel for chia seed jam. Mix soaked chia seeds with pureed fruit, sweetener, and a splash of lemon juice to create a healthy and easy-to-make jam.
    • Chia Seed Smoothie: Why not use some organic chia seeds to make a chia seed smoothie. Add soaked chia seeds to your favorite smoothie. It's great for the Whole Foods Diet.
    • Chia Seed Muffins: Mix soaked chia seeds into your favorite muffin batter for an added crunch. This can be eaten as part of a delicious breakfast.
    • Chia Seed Oatmeal: Soak chia seeds overnight and stir them into your favorite oatmeal recipe for a nutritious start to the day.

    These are just a few of the many delicious recipes you can try with soaked chia seeds. Enjoy exploring how different ingredients blend together with these superfoods!

    Overview of Chia Seeds in a wooden spoon.

    The Benefits Of Soaking Chia Seeds

    There are several Potential Benefits To Soaking Chia Seeds before consuming them:

    • Improved Digestion: Soaking chia seeds helps to soften them and make them more Easily Digestible, which can be especially helpful for people who have difficulty digesting whole grains and seeds.
    • Improved Hydration: Chia seeds are highly absorbent and can help to Keep You Hydrated when soaked in liquid. This can be especially beneficial for people who are active or live in hot climates.

    Can You Soak Chia Seeds In Yogurt?

    Yes, you can mix chia seeds with yogurt as an alternative to soaking in water or other liquids. This can be a tasty and convenient way to incorporate soaked chia seeds into your diet.

    To soak chia seeds in yogurt, follow the same process as you would for soaking in water or other liquids. 

    Soaking chia seeds in yogurt can have several benefits. The yogurt provides a Source Of Protein And Beneficial Bacteria, which can help to Support Gut Health And Improve Digestion.

    Soaking chia seeds in yogurt can also be a convenient and tasty way to add fiber and Healthy Nutrients to your diet. Just be aware that the soaking time may vary depending on the type and thickness of yogurt you use.

    Closeup of chia seeds.

    FAQ'S

    Can I Eat Chia Seeds Raw?

    It’s worth noting that soaking chia seeds is not necessary for all recipes or uses. For example, you can add raw chia seeds to smoothies or sprinkle them over oatmeal without soaking them first.

    However, soaking the seeds can help to soften them and make them more easily digestible. But if you enjoy eating raw chia seeds or dry chia seeds then that’s perfectly okay.

    What Do Chia Seeds Taste Like?

    Chia seeds have a slightly nutty flavor, but they can easily be blended or added to other foods without altering the taste.

    What Plant Are Chia Seeds From?

    Chia seeds come from the Salvia Hispanica, or chia plant, which is a flowering plant in the mint family native to Central America.

    Which Chia Seeds Are Best?

    The best chia seeds are organic and non-GMO, as these will be free of pesticides or other chemicals.

    So, Should You Soak Chia Seeds?

    Soaking chia seeds is a simple and effective way to enhance their nutritional value and make them more easily digestible.

    Whether you add them to your morning smoothie or use them to create a tasty pudding or jam, there are plenty of tasty and healthy ways to incorporate soaked chia seeds into your diet.

    More Super Helpful Food Articles:

    • Best Cheese For Lasagna
    • Best Farro Substitutes And Cooking Times
    • Does Apple Cider Vinegar Go Bad
    • Does Distilled Water Go Bad
    • What to Eat With Roti: Best Side Dishes
    • What Does Yorkshire Pudding Taste Like

    Ricotta Cheese Vs Cottage Cheese

    September 30, 2024 by Angela Milnes

    Cottage cheese and ricotta cheese.

    Ricotta Cheese Vs Cottage Cheese. Ever wondered what the difference is between cottage cheese and ricotta cheese? Today I'll be sharing the key differences between each type of cheese. I'll also share a few ways these two cheeses are used.

    
r

ricotta cheese vs cottage cheese. bowl of Ricotta Cheese with milk in the background and cheese.
    [feast_advanced_jump_to]

    Ricotta Cheese Vs Cottage Cheese

    There is quite a few difference when it comes to cottage cheese vs cottage cheese. These fresh cheeses are both made from cow's milk but in different ways and they have different textures and tastes.

    Whilst ricotta and cottage cheese are used in many recipes interchangeably they are also very unique and different. Let's find out how.

    What Is Ricotta Cheese?

    Ricotta cheese is made from whey, the liquid leftover from making other cheeses. Ricotta cheese has a smooth texture and mild flavor.

    Ricotta cheese can be made from the whey of cow's milk or sheep's milk. The word "ricotta" means "recooked" in Italian.

    What Is Cottage Cheese?

    Cottage cheese is made from curds, the solid pieces of milk that form when milk sours. The curds are then washed and drained to remove any excess whey. This results in cottage cheese having a dryer, crumblier texture than ricotta cheese.

    Cottage cheese is made from whole milk that has been curdled and then strained. The word "curdled" means that the milk has been turned into a solid by the addition of an acid, usually vinegar or lemon juice.

    Cottage cheese can be made from a small curd, a medium curd, or a large curd. The size of the curd will determine how dry or moist the cottage cheese is. It can also be made from sheep's milk or cows' milk.

    Health Benefits of Cottage Cheese

    • Cottage cheese is also a great source of protein, calcium, and phosphorus and is low in fat.
    • Cottage cheese also has all the essential amino acids.
    • Adding cottage cheese to your diet is a great way to get soft cheese into the diet without consuming a high level of saturated fats.

    Whole Milk Vs Skim Milk Cottage Cheese

    Whole milk cottage cheese has a higher fat content than skim milk cottage cheese.

    The difference in fat content between these two types of cottage cheese is due to the different ways that they are made.

    Whole milk or full-fat cottage cheese is made from whole milk that has been curdled and then strained. Skim milk cottage cheese is made by removing the cream from whole milk and then curdling and straining the part of skimmed milk.

    The fat content in cottage cheese can also vary depending on the type of milk used to make it.

    Do Cottage Cheese And Ricotta Contain Vitamin C?

    Cottage Cheese and Ricotta do not have vitamin C.

    What's the Difference In Taste?

    Cottage cheese has a milder flavor than ricotta cheese. Ricotta cheese is also less salty than cottage cheese.

    Ricotta cheese can be used in savory or sweet dishes such as Baked Ricotta, while cottage cheese is mostly used in savory dishes.

    Ricotta and Cottage Cheese both taste delicious in a variety of recipes as we will show further down the page.

    Ricotta Cheese in a bowl ready to eat.

    Cottage Cheese Vs Ricotta Cheese Texture

    There are distinct differences in the texture of ricotta and cottage cheese

    Cottage cheese has a dryer, crumblier texture than ricotta cheese. This is because cottage cheese is made from curds, while ricotta is made from leftover whey. Therefore, cottage cheese has a slightly grainy texture.

    Both cottage cheese and ricotta are soft cheeses, but one is lumpy, whereas the other is smooth. American ricotta is more like cottage cheese in texture, while Italian ricotta is creamy and smooth.

    Learn about ricotta cheese substitutes here!

    Best Cottage Cheese Recipes

    Cottage cheese is a versatile cheese that can be used in many different recipes. Here are some of the best cottage cheese recipes that I know you are going to love.

    • Creamy Cucumber Dill Salad: This salad is a refreshing side dish that is perfect for summer BBQs and picnics.
    • Tomato Basil Cottage Cheese Pizza: Cottage cheese pizza is a delicious alternative to traditional pizza.
    • Creamy Cottage Cheese Dip: Cottage Cheese dip is perfect for parties and get-togethers. It's also a great way to get your kids to eat their vegetables.
    • Cottage Cheese Pancakes: Cottage Cheese pancakes are light and fluffy and make a delicious breakfast.
    • Cottage Cheese Lasagna: If you've never tried a lasagna with this tasty cottage cheese then you're in for a real treat. Lasagna can be made more tasty with this delicious Instant Pot Lasagna Recipe. It will be fewer calories than regular cheese too.

    Best Ricotta Cheese Recipes

    Ricotta cheese is a great food to add to casseroles and family meals. Here are some great ricotta cheese recipes:

    • Zucchini Ricotta Fritters: Ricotta fritters are a great way to use up summer zu
    • cchini. They are perfect for a light lunch or as a side dish.
    • Ricotta Stuffed Chicken: This chicken dish is full of flavor and nutrition. It's a great way to get your family to eat their vegetables.
    • Ricotta Ravioli: Beetroot Ravioli is a great meal and when you stuff it with goat cheese you'll be in for a treat. That's for sure.
    • We use ricotta in our Bacon Alfredo Pasta and Instant Pot Lasagna Soup.

    Ricotta Cheese vs Cottage Cheese: Which Is Better for You?

    In conclusion, both ricotta cheese and cottage cheese have their own unique qualities and benefits. While they may be similar in some ways, they also have distinct differences in taste, texture, and nutrition.

    Both are great sources of protein and calcium, making them a healthy addition to any diet. Whether you prefer the milder flavor of cottage cheese or the creaminess of ricotta cheese, there are endless possibilities for delicious recipes using either cheese.

    What Does Kimchi Taste Like?

    September 30, 2024 by Angela Milnes

    Kimchi in a jar.

    Have you ever wondered "What Does Kimchi Taste Like?" Well, if you haven't, then now is your chance to learn more about kimchi. Today we'll be telling you all about kimchi, the taste of Kimchi and how long kimchi lasts. Prepare for your taste buds to be tantalized!

    What Does Kimchi Taste Like
    [feast_advanced_jump_to]

    What Is Kimchi?

    Kimchi is a Korean dish that is made from fermented vegetables. It has a spicy flavor and a crunchy texture, and it can be enjoyed as a side dish or added to other recipes. But what does kimchi taste like and does it have an acquired taste?

    What Does Kim Chi Mean?

    The word kimchi literally means "salted vegetables," and it is a dish that has been enjoyed in Korea for centuries. It is made by pickling vegetables with a mixture of spices, salt, vinegar, and other ingredients such as fish paste, shrimp paste, Miso paste or other seasoning paste. This fermented food has a rich flavor and is popular in Korean culture.

    Kimchi, Korean dish of spicy fermented vegetables.

    What Is Kimchi And What Does It Taste Like?

    The taste of kimchi varies depending on the vegetables that are used and how it is prepared. This popular Korean dish is typically made from cabbage, radishes, or cucumbers, along with a mix of spices like garlic, ginger, and chili peppers.

    The fermented cabbage, daikon radish, green onion and cucumbers has both a distinct sour taste due to the lactic acid produced and has an unique umami flavor or salty flavor. The taste of kimchi is popular in Korean cuisine and it's great with other Whole Foods.

    What Does Kimchi Smell Like?

    This fermented dish has a distinct, spicy scent that may be off-putting to some people. The smell is due to the fermentation process and the addition of spices like garlic and chili peppers. However, many people enjoy the pungent aroma of kimchi and its unique flavor.

    Is Kimchi Spicy?

    Kimchi can be enjoyed fresh or fermented, and it has a tangy flavor that is slightly spicy and savory. You can add more chili powder to kimchi to make it more spicy or use fewer spices to make it milder.

    Despite its spicy flavor, kimchi is enjoyed by people of all ages in Korea and around the world. Whether you eat it fresh or fermented, this delicious dish is a staple of Korean cuisine and culture.

    kimchi with chopsticks ready to eat in bowl.

    Kimchi Vs Sauerkraut

    The main difference in taste between Sauerkraut Vs Kimchi is that sauerkraut has a tangy, sour flavor with a subtle saltiness, while kimchi offers a more complex taste profile that combines sourness with spiciness, garlic, and a hint of umami due to the additional seasonings like chili, ginger, and fish sauce.

    Sauerkraut is primarily fermented cabbage with salt, whereas kimchi is often spicier and includes a variety of seasonings and sometimes other vegetables.

    kimchi ready to eat in bowl.

    FAQ's

    Is Kimchi Healthy?

    Kimchi is high in vitamins, minerals, and antioxidants. It also contains prebiotic fiber and beneficial bacteria which can help to improve gut health by feeding the good bacteria in your system.

    Additionally, kimchi is low in calories and fat-free, making it a healthy choice for anyone looking to add more vegetables to their diet. So yes it is one of the healthiest foods you can enjoy in Korean cuisine.

    Enjoy The Taste Of Kimchi Today!

    Kimchi has a bold, spicy flavor that is both tangy and savory. It can also be a little bit sweet depending on the recipe, and some people even describe it as sour or umami. If you are looking for a flavorful and satisfying meal, then kimchi noodles are worth trying!

    More Useful Articles:

    • Ricotta Cheese Vs Cottage Cheese
    • How To Soak Chia Seeds
    • Does Celery Go Bad
    • Does Distilled Water Go Bad
    • Does Apple Cider Vinegar Go Bad

    Bariatric Friendly Ricotta Bake Recipe

    September 28, 2024 by Angela Milnes

    Baked Ricotta On A Spoon.

    Introducing a delicious and nutritious bariatric recipe: High Protein Ricotta Bake. Packed with flavor and protein, this single serve dish is perfect following weight loss surgery. With a creamy ricotta base and delicious Italian flavors, each bite is a delight. Stay tuned for the full recipe and get ready to indulge guilt-free!

    This was one of my go-to bariatric meals after my gastric bypass surgery and it's still a popular dish six years later. The whole family loves it.

    Bariatric Friendly Ricotta Bake.
    [feast_advanced_jump_to]

    Why This Recipe Works

    • High in Protein: This Ricotta Bake is packed with protein, an essential nutrient for muscle recovery and growth, making it an ideal choice for those who have undergone bariatric surgery or are looking to increase their protein intake.
    • Portion-Controlled: The recipe is designed as a single serve, helping you manage portion sizes and prevent overeating. It's perfect for those following a strict dietary plan.
    • Incredibly Flavorful: Despite being a healthy option, this recipe doesn't compromise on taste. The blend of ricotta cheese with the seasonings creates a rich and satisfying flavor that will make your taste buds dance. Ricotta Bake is one of my favorite Bariatric Recipes.
    a spoonful of baked ricotta looking creamy and delicious.

    🥘 Ingredients

    Ricotta Bake ingredients.
    • Fresh Ricotta Cheese - In this recipe we use light ricotta cheese as it contains less fat than regular ricotta.
    • Grated Parmesan Cheese - Adding a small amount of parmesan cheese adds a savory and nutty flavor to the dish.
    • Marinara Sauce - Using a high-quality marinara sauce adds depth and richness to the dish. Look for low-sugar or sugar-free options or make your own Unprocessed Marinara Sauce.
    • Fresh Basil - This fragrant herb adds a fresh and vibrant flavor to the dish.
    • Garlic Salt - I like to add a pinch of garlic salt for an extra kick of flavor.
    • Salt and Pepper Important as they help bring out the flavors of the other ingredients.
    • Olive Oil - Cooking spray or regular olive oil for the ramekins.

    For the complete list of ingredients with measurements and instructions, please see the recipe card at the bottom of the post.

    📖  Substitutions & Variations

    • To make a sweet version, skip the seasonings and marinara sauce and add lemon juice and berries to the baked ricotta mixture instead. Bake as usual and top with lemon zest.
    • You can add blended meat such as cooked chicken or turkey to this bariatric recipe for added protein.
    • You can also mix in vegetables like diced bell peppers, mushrooms, or spinach for extra flavor and nutrients.
    • You can use dry basil in place of fresh basil if needed. Just use ⅓ the amount of dried basil compared to fresh.
    • You can use cottage cheese or grated mozzarella cheese in place of ricotta for a different texture and flavor.

    Love this recipe? Try our spinach and ricotta bake recipe too! It's another real winner!

    🔪How To Make Baked Ricotta?

    Baked Ricotta is a great Bariatric meal and in ready to enjoy in only 20 minutes.

    Adding Ricotta and basil into a food processor to make ricotta bake mixture.

    Step One: Preheat your oven to 375°F (190°C). In a food processor combine the ricotta cheese, parmesan cheese, and seasonings.

    Blended Ricotta bake mixture in a food processor.

    Step Two: Pulse the ingredients until well blended.

    Ramekin dishes prepped for ricotta bake.

    Step Three: Spray the bottom of a small ramekin with non-stick cooking spray.

    bariatirc ricotta bake mixture in ramekins.

    Step Four: Pour the ricotta mixture into the single serve ramekin and spread evenly.

    Bariatric ricotta bake mixture with tomato marinara sauce topping.

    Step Five: Layer one more spoon of marinara sauce on top of the ricotta mixture. Bake for 20 minutes in the oven.

    Bariatric Friendly Ricotta Bake cooked in ramekins.

    Step Six: Let it cool for a few minutes before serving. Enjoy your delicious and protein-packed bariatric friendly Ricotta Bake!

    Bariatric Friendly Ricotta Bake in a white ramekin dish.

    👩‍🍳 Expert Tips

    • Be sure to use cooking spray to prevent sticking. You can also line the ramekin with parchment paper for easier removal.
    • For added protein, you can add in some chopped cooked chicken or turkey. Be sure to blend if you're on the soft foods, Pureed Food Stage of your bariatric diet.
    • Don't be afraid to experiment with different seasonings and sauces to create different flavor profiles. Some other ideas include using pesto or adding in some diced bell peppers.
    • This recipe is also great for meal prepping - just make several batches, let them cool completely, then wrap individually with Plastic Wrap and store in the fridge or freezer for a quick and easy protein-packed meal.

    💭 FAQs

    Can I Make More Than One Serving At A Time?

    Yes, you can easily double or triple the recipe to make more servings. You may need to adjust the baking time accordingly.

    What Size Ramekins Should I Use?

    While using ramekins is a great way to make this dish, you can also make it in a small baking dish. Just be sure to adjust the ingredient measurements accordingly and keep an eye on your bake time.

    Do I Have To Use A Food Processor?

    A food processor is recommended to make the ricotta mixture smooth and well blended – especially for the pureed food stage. However, if you do not have one, you can use a blender or simply mix the ingredients in a medium bowl.

    Can I Use Regular Ricotta Cheese Instead Of Light?

    Yes, you can use regular ricotta cheese if that is your preference. Just keep in mind that it will be higher in fat and calories.

    Can I Make This Recipe Ahead Of Time?

    Yes, you can prepare the baked ricotta ahead of time and store it in the fridge for a day or two.

    Can I Make Instant Pot Baked Ricotta?

    Yes, you can make ricotta bake in the Instant Pot. You’ll need a trivet and ramekins to do so. Simply prepare the baked ricotta following the instructions above. Next place a cup of water into the bottom of the Instant Pot and place a trivet inside. Cover the ramekins with tin foil and place on the trivet. Pressure cook for 5 minutes on high pressure. The Instant Pot version won’t have a golden brown crust but it tastes just as good and saves some time!

    Using Ramekins After Bariatric Surgery

    After Gastric bypass surgery you're tummy will be super small. I have found having small plates and ramekins super useful as it helped me to manage my portion sizes better. You can get budget friendly White Ramekins online or if you want something fancy, you might want to invest in some Colorful Ramekins.

    I'd stick with 4 ounce ramekins or 6 ounce ramekins as this is a realistic amount you would want to serve for one bariatric meal. You can also fit up to four 6 ounce ramekins into your 6 quart Instant Pot.

    This Bariatric Friendly Ricotta Bake is a delicious and nutritious option for anyone following a bariatric diet or looking to increase their protein intake. With its creamy ricotta base, savory seasonings, and easy preparation, it's a must-try recipe for anyone who loves Italian flavors.

    So next time you're craving a tasty and guilt-free meal, give this Baked Ricotta recipe a try! It's one of the best bariatric recipes around! Happy cooking!

    ricotta bake recipe for bariatric patients in ramekin dishes.

    🧂Serving Suggestions

    If you're sharing this recipe with others then you may want to serve the ramekins as a ricotta dip or cheese dip with fresh veggies such as celery sticks, cucumber slices and carrot sticks. It also tastes great with crusty bread or pita chips! If serving it as a meal, try pairing it with a Mango Chicken Salad for some added goodness.

    🍽 Related Recipes

    • edamame stir fry in a white bowl.
      Easy Edamame Stir Fry (15-Minute Protein-Packed Side Dish)
    • Chicken And Cabbage Stir Fry Recipe.
      Chicken And Cabbage Stir Fry Recipe
    • Zucchini Egg Bake Recipe.
      Best Zucchini Egg Bake Recipe
    • New Years charcuterie Board.
      New Years Charcuterie Board

    Did you make this recipe? Leave a review and a ⭐⭐⭐⭐⭐ rating below, or tag us in our Facebook Group! Alternatively, bookmark it in your browser or save to Pinterest.

    a spoonful of baked ricotta looking creamy and delicious.

    Bariatric Friendly Ricotta Bake

    Angela Milnes
    High Protein Ricotta Bake. Packed with flavor and protein, this single serve dish is perfect following weight loss surgery. With a creamy ricotta base and delicious Italian flavors, each bite is a delight.
    4.50 from 8 votes
    Print Recipe Pin Recipe Rate this Recipe
    Prep Time 5 minutes mins
    Cook Time 20 minutes mins
    Total Time 25 minutes mins
    Course Oven Baked Recipes
    Cuisine Italian
    Servings 4 Servings
    Calories 112 kcal

    Equipment

    • 4 Ramekins

    Ingredients
      

    • 2 Cups Low Fat Skim Ricotta
    • ¼ Cup Parmesan
    • Olive Oil Spray
    • 8 tablespoon Marinara Sauce
    • ¼ Cup Fresh Basil
    • ¼ Teaspoon Garlic Salt
    • Pinch Salt
    • Pinch Pepper

    Instructions
     

    • Preheat your oven to 375°F (190°C).
    • In a food processor combine the ricotta cheese, parmesan cheese, and seasonings. Pulse until well blended.
    • Spray the bottom of a small ramekin with non-stick cooking spray.
    • Add a layer of marinara sauce to the bottom of the ramekin dish.
    • Pour the ricotta mixture into the single serve ramekin and spread evenly.
    • Layer one more spoon of marinara sauce on top of the ricotta mixture.
    • Bake for 20 minutes in the oven.
    • Let it cool for a few minutes before serving.
    • Enjoy your delicious and protein-packed bariatric friendly Ricotta Bake!

    Notes

    Be sure to use cooking spray to prevent sticking. You can also line the ramekin with parchment paper for easier removal.
    For added protein, you can add in some chopped cooked chicken or turkey. Be sure to blend if you're on the soft foods, pureed food stage of your bariatric diet. Don't be afraid to experiment with different seasonings and sauces to create different flavor profiles. Some other ideas include using pesto or adding in some diced bell peppers.
    This recipe is also great for meal prepping - just make several batches, let them cool completely, then wrap individually with plastic wrap and store in the fridge or freezer for a quick and easy protein-packed meal.

    Nutrition

    Serving: 1gCalories: 112kcalCarbohydrates: 15gProtein: 7gFat: 3gSaturated Fat: 2gPolyunsaturated Fat: 0.1gMonounsaturated Fat: 1gCholesterol: 11mgSodium: 469mgPotassium: 314mgFiber: 1gSugar: 14gVitamin A: 503IUVitamin C: 3mgCalcium: 242mgIron: 1mg
    Print Recipe Pin Recipe Rate this Recipe
    Tried this recipe?Let us know how it was!

    More Puree Recipes:

    Here are a few more bariatric friendly recipes you may want to try.

    • Purple Cauliflower Puree
    • Carrot And Leek Soup
    • Cheesy Mashed Cauliflower
    • Beetroot Hummus Recipe
    • Pureed Sweet Potatoes
    • Butternut Squash Soup

    What Does Yorkshire Pudding Taste Like?

    September 28, 2024 by Angela Milnes

    Yorkshire pudding.

    Yorkshire pudding is one of those classic dishes that everyone should try at least once! Whether you’ve grown up eating it with a traditional Sunday roast or you’re curious about trying it for the first time, you might be wondering—What Does Yorkshire Pudding Taste Like? It’s a unique combination of crispy on the outside and soft and airy on the inside, with a subtle savory flavor that pairs perfectly with gravy and roasted meats. In this post, I’ll dive into the delicious world of Yorkshire pudding and describe the flavors that make it such a beloved dish.

    what does yorkshire pudding taste like?
    [feast_advanced_jump_to]

    What Is Yorkshire Pudding?

    Yorkshire pudding is a British pudding made from a batter of eggs, flour, and milk or water. The batter is traditionally baked in the oven in a muffin tin or baking dish until it puffs up and turns golden brown.

    Yorkshire pudding is often served alongside roast beef or other meat and topped with gravy. Sometimes it's even cooked in the same pan as the roasting meat. 

    Yorkshire Pudding remains a famous Side Dish in Britain, where British Yorkshire Pudding Day is celebrated on the first Sunday of February. And to the rest of the world, National Yorkshire Pudding Day is celebrated on October 13th.

    Yorkshire Puddings and gravy.

    What Does Yorkshire Pudding Taste Like?

    Yorkshire pudding is a traditional British dish that is typically served with roast beef. It is a savory dish made of a batter consisting of flour, eggs, and milk or water, which is then oven-baked until it becomes golden and crispy on the outside and soft and fluffy on the inside.

    When freshly baked, traditional Yorkshire pudding tastes like an eggy pancake with having crispy texture outside. It is often served with gravy or as a side dish with a roast dinner.

    Is Yorkshire Pudding Sweet or Savory?

    If you're a fan of British cuisine or curious about it, you may have come across Yorkshire pudding. A staple of Sunday roast beef dinner across the UK, this dish is made with a batter of flour, eggs, and milk, traditionally cooked in meat drippings.

    But one question often arises is whether Yorkshire pudding is sweet or savory. The answer is that it's primarily a savory pudding, though some versions may include a touch of sugar. It's typically served with roast beef and gravy but can also be enjoyed with other meats or filled with vegetables for a vegetarian option.

    Yorkshire Pudding Vs Popover

    Yorkshire pudding and American popover are baked dishes made from the same batter of eggs, milk, and flour. However, they are prepared slightly differently. Yorkshire pudding is a traditional British dish, typically served as part of a Sunday roast, while American popover is a popular breakfast food.

    Yorkshire puddings and popovers.

    Apart from popovers, the Yorkshire pudding also has similar flavors to that of a puffy bread roll and the Japanese savory pancake called okonomiyaki.

    Does Pancake and Yorkshire Pudding Taste the Same?

    So, you're curious whether pancake and Yorkshire pudding taste the same? Although they might look similar, they are two distinct dishes with different flavors. Even though they share some of the same ingredients, the recipe varies significantly.

    Pancakes are sweet treats, often topped with syrup or fruit, while Yorkshire pudding is a savory dish typically served as a side dish with a roast dinner or corn beef hash. Pancakes are made from a batter of flour, eggs, milk and sugar, while Yorkshires consist of flour, eggs, and milk or water.

    The key difference in making Yorkshire pudding is using hot oil in the tin before adding the batter, resulting in a crispy pudding with a slightly doughy texture.

    Yorkshire Puddings.

    Does Yorkshire Pudding Taste Like Bread?

    While the texture of Yorkshire pudding may resemble bread, it has a unique flavor – slightly savory, eggy and crispy on the outside and soft and fluffy on the inside. So, in short, while Yorkshire pudding shares some similarities with bread, it has a taste all its own.

    Is Yorkshire Pudding a Bread?

    Many people are confused about whether Yorkshire pudding is bread or not. While it may look similar to bread and be served alongside other bread items, Yorkshire pudding is a batter baked in the oven. This delicious dish is often used to soak up gravy or to accompany a hearty Sunday roast.

    Why Is Yorkshire Pudding Called A "Pudding"?

    Did you know that Yorkshire pudding has nothing to do with the dessert pudding we are accustomed to? Despite its name, Yorkshire pudding is a savory dish made from flour, eggs, and milk, traditionally served as a side dish alongside a roast dinner. So, why exactly is it called a "pudding"?

    The name's origins can be traced back to the Old English word "poding," which means a stuffed thing. Initially, the dish was made by pouring the batter into a tray under a roasting joint of meat, allowing it to soak up the juices and become infused with a meaty flavor. It was stuffed with meat and other ingredients and called "pudding."

    While it might seem confusing, one thing is for sure - there's nothing better than a well-made Yorkshire pudding to make any meal feel truly complete.

    What Pairs Well With Yorkshire Pudding?

    Yorkshire pudding is a savory side dish and pairs well with other dishes. Here are five dishes that pair well with Yorkshire puddings:

    Roast Beef: Yorkshire pudding is traditionally served as part of a classic British Roast Beef Dinner. The soft interior and crispy exterior of the pudding complement the tender and juicy beef, while the rich gravy ties it all together.

    roast beef on vegetables.

    Bangers and Mash: Another British classic, bangers and mash (sausages and mashed potatoes), is a hearty and comforting dish that goes well with Yorkshire pudding. The Sausage Gravy and rich, savory pudding flavour make for a delicious combination.

    sausages bangers and mash.

    Beef Stew: Yorkshire pudding is an excellent accompaniment to Beef Stew, especially if you serve it "toad in the hole" style (with sausage baked into the pudding). The pudding soaks up the flavorful broth from the stew, adding an extra layer of richness.

    beef stew.

    Chicken Pot Pie: Yorkshire pudding can also be served alongside Chicken Pot Pie. The buttery, slightly sweet flavor of the pudding contrasts nicely with the creamy, savory filling of the pie.

    chicken pot pies.

    Vegan Roast: Even if you're a vegetarian, you can also enjoy Yorkshire pudding! Serve it alongside a vegetarian roast made with Portobello Mushrooms, Roasted root Vegetables, or lentils. The pudding adds a satisfying crunch to the meal and complements the earthy flavors of the roast.

    Enjoy The Taste Of Yorkshire Puddings Today

    Yorkshire pudding is a savory side dish with a unique flavor. It has a fluffy and soft texture inside while crispy on the outside, with a slightly eggy and savory taste that stands out from other dishes. You'll love the taste and Yorkshire Puddings are sure to become a hot favorite.

    Best Cheese For Lasagna

    September 28, 2024 by Angela Milnes

    Best cheese options for lasagna.

    Have you ever wondered what the Best Cheese Is To Make Lasagna? The ideal cheese should melt easily and have a strong flavor. This article will share what cheeses go on lasagna and our top recommendations and tips. To learn more, read on about the best cheeses for lasagna.

    Lasagna on a plate. Selecting best cheese for lasagna.
    [feast_advanced_jump_to]

    What Cheese Is In Lasagna?

    A good lasagna generally has three types of cheese - ricotta, parmesan, and mozzarella. However, many different types of cheese are used in lasagna, from cheddar to cottage cheese.

    Which Cheese Is Better For Lasagna?

    The best cheese for lasagna depends on personal preference. Ricotta cheese is the most common cheese in traditional lasagna recipes, as it provides a creamy texture and flavor that blends nicely with the other ingredients. However, many like to use other cheeses and a combination of tasty cheese in lasagna.

    Different types of cheeses on a wooden board.

    Top 7 Best Cheeses For Lasagna

    Here are the top 7 kinds of cheese for making homemade lasagna:

    • Ricotta Cheese
    • Parmesan Cheese
    • Cottage Cheese
    • Cheddar Cheese
    • Mozzarella Cheese
    • Provolone Cheese
    • Pecorino Romano Cheese

    Ricotta Cheese

    Ricotta is a good cheese for lasagna. It has a mild, creamy taste that blends well with the other ingredients. It's also an easy cheese to spread over the lasagna layers, and it helps bind all ingredients together.

    Ricotta cheese on a plate.

    Does Italy Use Ricotta In Lasagna?

    Yes, ricotta cheese is often used in Italian lasagna recipes. It provides a delicious creamy texture and flavor that complements the other ingredients nicely.

    Overall, ricotta cheese is one of the best cheeses for making lasagna. It has a mild flavor and a creamy texture that blends well with the other ingredients.

    What Is The Best Ricotta Cheese For Lasagna?

    The best ricotta cheese for lasagna is one that is fresh and creamy. Look for ricotta cheese with a smooth texture and no grainy bits. Whole milk ricotta will provide the most flavor, but low-fat or skim milk ricottas are also available to make a healthier lasagna.

    Tips For Using Ricotta Cheese In Lasagna

    • Stir in some Italian seasonings and spices for a more flavorful lasagna.
    • Mix ricotta cheese with an egg to give your lasagna extra richness and texture.
    • You can also combine ricotta cheese with cottage cheese, parmesan or mozzarella to add extra flavor to your pasta dish.

    Parmesan Cheese

    Parmesan cheese is a hard cheese and a must-have in any good cheese lasagna! It lends an incredible nutty flavor to the overall dish and contributes a texture that complements the richness of the meat sauce.

    Parmesan cheese on a chopping board.

    When it comes to making homemade lasagna, parmesan is one of the essential ingredients. If you want your lasagna to have the most authentic Italian flavors possible, you should include parmesan cheese and use it generously!

    The key to unlocking parmesan's full potential is freshly grated parmesan cheese - definitely opt for this over pre-shredded parmesan cheese, as its freshness will add another layer of depth and complexity to your homemade lasagna. 

    Cottage Cheese

    Cottage cheese is a surprisingly tasty addition to lasagna and a hidden gem in Italian cuisine. Cottage cheese has a soft texture that works perfectly when we make lasagna. The best part is you can use it in place of ricotta in your favorite lasagna recipe.

    Cottage cheese on a wooden board.

    Adding Cottage Cheese To Lasagna

    Mix cottage cheese with the other ingredients before laying it between the layers of lasagna noodles covered with sauce. Cottage cheese gives your lasagna an extra creamy consistency, and it adds extra flavor as well..

    Cheddar Cheese

    Have you ever wanted to create the best lasagna recipe? Cheddar cheese might be the perfect addition! The sharp and tangy flavor of cheddar pairs perfectly with lasagna noodles, making it the ideal choice for a tasty lasagna dish.

    Cheddar cheese on a wooden board.

    Add Italian seasoning to the mix to take your cheese lasagna to the next level. As far as lasagna recipes go, cheddar cheese reigns supreme!

    Shredded Mozzarella Cheese

    Shredded Mozzarella cheese is the perfect ingredient to add to your cheese lasagna recipe. Shredded mozzarella cheese provides a delicious flavor and adds an amazing stretchy and creamy texture that can't be replicated with other cheese blends.

    Shredded mozzarella cheese.

    Shredded mozzarella cheese tastes even better when combined with a rich tomato sauce and fresh mozzarella cheese in the traditional Italian-style lasagna dish.

    Is Cheddar Or Mozzarella Better For Lasagna?

    Mozzarella cheese is the classic choice when making lasagna, but cheddar cheese might be the better option. Cheddar can bring a more intense flavor than mozzarella when cooked into a lasagna recipe, but mozzarella will give melt and stretch better when layered as a cheese topping. You can mix things up a bit; try both varieties.

    Combining mozzarella and cheddar can give your lasagna that extra zing and make for an even tastier dish. Ultimately, it's up to you! Experiment with different cheeses to find the perfect combination for your lasagna recipe.

    Provolone Cheese

    Provolone cheese is an excellent choice for any lasagna recipe! It offers a unique creamy texture and a hint of mild and sweet taste. Provolone melts beautifully, making it a cinch to layer into your lasagna casserole. Its semi-hard consistency also adds more body than mozzarella cheese or ricotta cheese, making it a great alternative if you're looking for something new! 

    Provolone cheese on a wooden board.

    The cooking process is simple, yet delicious when it's done. Start by preparing your cheese mixture; use grated parmesan, fresh herbs, and provolone cubes to combine all your flavors.

    After the cheese mix is ready, preheatthe oven and prepare a cooking tray. Spread cheese combinations over the pasta layers of the lasagna before adding meat or vegetables. Cook the best lasagna and finish with extra provolone cheese sprinkled over your tray.

    Pecorino Romano Cheese

    Spice up your next lasagna feast with Pecorino Romano cheese! This is a traditional Italian hard cheese made from sheep milk, and its distinctive salty flavor makes it perfect for cooking lasagna.

    Blend it with your favorite lasagna noodles and some tomato sauce to create the most delicious cheese lasagna you've ever had! Pecorino Romano cheese lends its unique saltiness that complements the sweetness of the tomatoes in the sauce, making an unbeatable combination. So every time you cook lasagna, remember to include this awesome cheese in your mix.

    Best Grated Cheese

    Grated cheese is the secret ingredient for an irresistible lasagna! It adds a creamy, savory flavor and prevents the noodle layers from sticking together. A blend of cheeses is best for making lasagna, with mozzarella cheese for richness, Parmesan cheese for savoriness, and a bit of Romano for sharpness.

    To maximize that cheesy flavor, freshly grated cheese works best — pre-grated cheese doesn't have the same texture and meltability as cheese shredded directly into your saucepan. So don't be shy - go ahead and get out that grater and sprinkle your way to some lip-smacking lasagna delight!

    Lasagna and cheese sauce.

    Best Italian Cheese For Lasagna

    Personally, I love both parmesan and pecorino romano cheese in my lasagna. Parmesan adds nutty, salty flavors that work perfectly with the other ingredients, while pecorino lends a sharp, tangy flavor to the dish.

    Can I Use Cream Cheese Or Mascarpone Cheese In Lasagna?

    Yes, you can use cream cheese or mascarpone cheese in lasagna. Cream cheese is a mild-tasting, soft cheese that adds richness and creaminess to the dish.

    Mascarpone is an Italian cream cheese with a slightly sweet flavor. Both are delicious additions to your lasagna! Try adding a tablespoon of each as you layer your lasagna.

    Best Cheese Combinations For Lasagna?

    One of the best combinations you can use is a combination of mozzarella, ricotta, provolone, and Parmesan cheese. Mozzarella adds that classic ooey-gooey texture to the top layer, while ricotta adds a creaminess that helps hold all of the lasagna layers together.

    Provolone adds a subtle tanginess, balancing out the richness of mozzarella and ricotta. Lastly, parmesan provides depth and complexity to finish this amazing cheese mix for your lasagna.

    If you love lasagna and want to cook one quickly and easily, try this 4 Cheese Lasagna Pressure Cooker Recipe. This lasagna uses 4 kinds of cheese, cottage cheese, mozzarella, parmesan, and cheddar. It has great taste, and with step-by-step instructions, it's one of the easiest lasagna recipes!

    What Is the Best Baking Dish For Lasagna?

    The best baking dish for lasagna is a 9x13-inch pan. The pan size allows enough room to layer all the ingredients and keep them from spilling over during the baking process. You can find a great baking dish on Amazon, such as this Lasagna Pan! It prevents food from sticking to the pan and allows easy cleanup afterward. No need to scrub dried-on tomato sauce with this pan!

    So, Opt for the Best Cheese For Your Lasagna

    Lasagna is a traditional Italian dish that can be served hot and cold. With the right combination of cheese, herbs, and vegetables, it's an easy meal to make that everyone will love.

    Experiment with various ingredients and techniques to create the perfect lasagna. Finally, the best cheese for lasagna

    Learn More With These Food Guides:

    • What to Eat With Roti: Best Side Dishes
    • How to Make the Perfect Seasoning For Scrambled Eggs
    • Fish Stock Substitute: 11 Best Alternatives
    • What Does Radish Taste Like
    • Creamy Oven Baked Mac and Cheese
    • Best Substitute For Sun Dried Tomatoes

    Best Farro Substitutes And Cooking Times

    September 28, 2024 by Angela Milnes

    Farro substitutes.

    Farro is one of those hearty, wholesome grains that I absolutely love using in my kitchen! It’s perfect for adding a little extra nutrition to all kinds of meals, from a Mediterranean-inspired salad loaded with fresh veggies and feta to a warm, comforting soup.

    But what if you're out of farro or can't find it at the store? Today I'll share with you the Best 6 Farro Substitutes And Cooking Times to ensure you can still whip up those delicious recipes without missing a beat!

    Best Farro Substitutes
    [feast_advanced_jump_to]

    What Is Farro?

    Farro is a wheat grain that has been enjoyed for thousands of years, particularly in the Middle East and Mediterranean regions. It's one of those ancient grains that's packed with nutrition and has a lovely chewy texture.

    In Great Britain and the USA, farro is often called Emmer, while in Germany it’s known as Einkorn, and in Italy, they refer to it as Spelt. This ancient grain is perfect for adding to soups, salads, or grain bowls, and brings a delicious nutty flavor that makes every meal feel a little more special. If you haven’t tried farro yet, it’s definitely worth adding to your pantry!

    5 Things To Consider When Choosing A Farro Substitute

    So what makes a good Farro Substitute and what should you consider when replacing farro in your recipes?

    • Texture: Think about the texture you need. Farro is chewy, so you’ll want something that provides a similar bite for your dish.
    • Flavor: Consider the flavor profile. Farro has a mild, nutty taste, so look for grains with a comparable earthy flavor.
    • Cooking Time: Pay attention to cooking times. Farro takes a bit longer to cook, so keep this in mind if you’re in a time crunch.
    • Gluten Content: Farro contains gluten, so if you’re serving gluten-free guests, you’ll need to find a suitable alternative.
    • Nutritional Value: Don’t forget about nutrition! Farro Is Packed With Fiber And Protein, so look for a substitute that offers similar benefits.

    What Type Of Grain Is Similar To Farro?

    From barley or bulgar wheat to brown rice, wheat berries and quinoa, there are plenty of healthy alternatives for farro.

    The following farro substitutes have a similar chewy texture and nutty flavor, so you won't even notice the difference. Use these simple and easy swaps to keep your meals healthy, hearty, and oh-so-satisfying!

    6 Best Farro Substitutes to Try

    Here are 6 of the best substitutes for farro to make your meals just as delicious and satisfying

    Bulgar Wheat

    Bulgur wheat is a great farro alternative because it’s quick to cook and has a similar chewy texture. It also has that mild, nutty flavor we love in farro, making it perfect for salads, soups, and grain bowls. Plus, it’s packed with fiber, so you’re still getting a nutritious option without the wait time!

    Bulgur wheat cooks much faster than farro. While farro can take about 25 to 40 minutes to cook depending on the type (pearled or whole) bulgur wheat usually cooks in just 10 to 15 minutes, making it a quicker option when you're short on time but still want that hearty grain texture.

    Uncooked Bulgar Wheat Grains

    Can I Replace Farro With Barley?

    Yes, you can definitely replace farro with barley in recipes! Both grains have a hearty, chewy texture, making barley a good stand-in for farro. One small difference between farro and barley is that barley has a slightly milder flavor, so it won’t give you the same nutty taste.

    However, barley still works well in dishes like soups, stews, and grain bowls, and it adds a good amount of fiber and nutrients to your meal. Just keep in mind the cooking time, as barley might need a bit more time to soften than farro.

    Barley typically takes about 40 to 50 minutes to cook, which is about 10 to 15 minutes longer than farro, depending on the type of farro you're using. If you're using pearled barley, it can cook faster, but hulled barley will take a bit more time compared to farro.

    Uncooked Barley Grains

    Substituting Farro With Wheat Berries

    Substituting farro with wheat berries is a great option, but there are a few factors to consider. Wheat berries have a firmer texture compared to farro and generally take longer to cook—around 50 to 60 minutes.

    One noticeable difference is that wheat berries are denser and provide a heartier bite, which can change the texture of your dish slightly. Nutritionally, Wheat Berries Are Rich In Fiber And Protein, similar to farro. If you're okay with the longer cook time and firmer texture, wheat berries work well in most recipes that call for farro!

    Uncooked Wheat Berries

    Buckwheat Groats: A Gluten-Free Substitute For Farro

    If you're looking for a gluten-free farro substitute, buckwheat groats are a fantastic option. Roasted buckwheat groats have a nutty flavor and chewy texture that can closely mimic farro in many dishes.

    The great thing about buckwheat groats is that they cook relatively quickly—usually in about 15 to 20 minutes, much faster than farro.

    Whether you're making a salad, grain bowl, or even a warm breakfast porridge, buckwheat groats will give you that hearty, satisfying bite without the gluten. Plus, their earthy flavor adds a unique twist to your recipes!

    Buckwheat Groats

    Swapping Out Farro For Quinoa

    Swapping out farro for quinoa is a great choice, especially since both quinoa and farro Contain All The Essential Animo Acids making Quinoa a nutritious alternative to farro.

    Quinoa’s softer texture and slightly nutty flavor works well in grain salads and casseroles. You could easily swap farro for quinoa in a chicken casserole, transforming it into a Quinoa Chicken Casserole without sacrificing flavor or heartiness.

    Quinoa cooks much faster than farro, taking only about 15 minutes and its gluten-free nature makes it a convenient and versatile substitute for anyone on the gluten free diet. Get the nutritional benefits of quinoa and enjoy the slightly softer texture of this grain in your meals.

    Uncooked Quinoa Grains

    Farro Vs Brown Rice

    If you've run out of farro or it's unavailable locally, brown rice is an easy and nutritious substitute. Not only does it have a similar chewy texture, but it's also packed with Dietary Fiber Making It A Heart Healthy Alternative.

    If you're short on time, you can Pressure Cook Brown Rice in just 20 to 22 minutes, compared to the typical 40 to 45 minutes on the stovetop. Once it's cooked, your brown rice will be ready to add to any dish as a farro substitute!

    Farro and brown rice

    Handy Table For Cooking Times of All Grains

    Here's a handy table for the cooking times of various grains:

    GrainCooking Time
    Farro25 to 40 minutes
    Bulgur Wheat10 to 15 minutes
    Barley40 to 50 minutes
    Wheat Berries50 to 60 minutes
    Buckwheat Groats15 to 20 minutes
    Quinoa15 minutes
    Brown Rice20 to 22 minutes

    FAQ'S

    What Does Farro Taste Like?

    Farro has a nutty, earthy flavor with a slightly sweet taste that sets it apart from other grains. Its texture is firm yet chewy, offering a satisfying bite.

    What Types Of Recipes Use Farro?

    Farro can be used in a variety of recipes and savory dishes from hearty soups and stews to grain bowls and salads. It’s also perfect for risottos, adding a nutty flavor and chewy texture, or as a base for stir-fries.

    Farro can even be used in casseroles or as a substitute for rice in pilafs, making it a versatile grain for many different types of meals. Additionally, farro can be served on its own as a simple side dish, either warm or cold.

    Where Would You Find Farro In The Grocery Store?

    You can usually find farro in the grocery store’s grain or rice aisle, right alongside quinoa, barley, and other whole grains. Some stores may also stock it in the health food section, especially if it’s labeled as organic.

    If you’re having trouble spotting it, check the bulk bins or even the pasta section, depending on how it’s packaged. And of course, you can always ask someone who works there to help you find it quickly!

    Wrapping Up

    Farro is such a versatile grain, but if you can't find it or run out, there are plenty of great substitutes to keep your meals hearty and delicious. From bulgur wheat to quinoa and brown rice, each option brings a unique texture and flavor, and they all have different cooking times to fit your needs.

    So, next time you're cooking a recipe that calls for farro, you’ll have no problem swapping it out and still creating a satisfying dish!

    Try These Delicious Recipes Using Grains

    • Instant Pot Wild Rice Blend With Pomegranates
    • Mediterranean Farro Salad
    • Easy Buckwheat Pancakes
    • Chocolate Overnight Oats
    • Instant Pot Chicken Barley Soup
    • Cilantro Garlic Rice

    Can You Freeze Cooked Turkey

    September 27, 2024 by Angela Milnes

    Cooked turkey in a foil dish.

    If you find yourself with leftover turkey after a holiday feast or a big family dinner, you might be asking, "Can you freeze cooked turkey?" The answer is, yes, you can! Freezing leftover turkey is a great way to extend its shelf life and enjoy it in various dishes later on. Let's dive into how to properly freeze turkey and the best practices to keep it fresh and safe to eat.

    Cooked turkey in a roasting tray. Can you freeze cooked turkey?
    [feast_advanced_jump_to]

    Freezing Cooked Turkey: The Basics

    Freezing cooked turkey is a simple and effective way to preserve your leftovers for future meals. Whether it’s Thanksgiving leftovers or extra turkey from a Sunday roast, freezing is an excellent method to prevent waste and make meal prep easier in the weeks ahead.

    I have plenty of turkey leftovers, so why not try making Turkey Cranberry Sliders or Air Fryer Enchiladas With Turkey and Black Beans.

    Does Freezing Affect the Taste and Texture of Turkey?

    Yes, freezing can affect the taste and texture of turkey. The texture can become slightly drier and less tender, especially if the turkey is frozen for an extended period or not properly wrapped to prevent freezer burn. The flavor may also be slightly muted compared to freshly cooked turkey. However, if the turkey is frozen and thawed properly, these changes are usually minimal.

    How To Freeze Leftover Turkey

    • Cool the Turkey: Let it cool completely first to prevent the growth of bacteria in cooked turkey that can lead to food poisoning.
    • Portioning: Divide the leftover turkey into smaller portions. It makes easier to thaw the turkey amount you need and speeds up the freezing process.
    • Airtight Container or Freezer Bag: Place the turkey portions in an airtight container or a freezer-safe bag. Remove excess air to avoid freezer burn, which can dry out the turkey meat and affect its flavor.
    • Label and Freeze: Label the cooked turkey containers or bags with the date, so you know how long the turkey has been frozen.

    How To Thaw and Reheat Frozen Turkey

    • Thaw in the Fridge: The safest way to thaw frozen leftovers is in the refrigerator. This slow thawing method helps keep the turkey out of the "danger zone" (40°F to 140°F), where bacterial growth can occur.
    • Reheat Thoroughly: After thawing, reheat the turkey in the oven or on the stove until it reaches an internal temperature of 165°F. This ensures that any bacteria present in meat are killed and it is safe to eat.

    Creative Ways to Use Leftover Turkey

    • Instant Pot Turkey Burger: Shred leftover turkey, mix with breadcrumbs, and form patties for a quick, flavorful burger.
    • Turkey Stir Fry: Stir-fry sliced turkey with veggies and soy sauce for an easy, tasty meal over rice.
    • Air-Fried Turkey Bites: Coat turkey pieces in light breading and air fry for crispy, snackable bites.
    • Turkey Cobb Salad: Toss chopped turkey with greens, cranberries, and vinaigrette for a refreshing salad.
    • Texas Smoked Turkey Breast: Reheat turkey with smoky flavors and serve with barbecue sauce for a Texas twist.

    FAQ'S

    How Long Does Cooked Turkey Last In The Freezer?

    Even though frozen turkey can last longer, for the best flavor and texture, aim to use your frozen turkey within three months. After this period, the meat may begin to lose its quality.

    Can You Refreeze Turkey After It Has Been Thawed?

    Never refreeze turkey that has already been thawed. This can lead to bacterial growth and increase the risk of food poisoning.

    Enjoy Freezing Cooked Turkey!

    Freezing cooked turkey is a fantastic way to make the most of your leftovers and reduce food waste. By following these simple steps—cooling, portioning, and storing in airtight containers—you can enjoy delicious turkey dishes for up to three months. Whether it’s a quick sandwich or a warming soup, your frozen turkey can be a lifesaver for future meals.

    More Amazing Food Tips To Try

    • Can You Freeze Sauerkraut
    • What Does Star Fruit Taste Like?
    • What Does Havarti Cheese Taste Like?

    Kale Apple Salad With Pomegranates

    September 26, 2024 by Angela Milnes

    Kale Apple Salad With Pomegranates.

    Need a fresh and vibrant salad that's bursting with flavor? This Kale Apple Salad with Pomegranates is just what you're looking for! With crisp kale, tart Granny Smith apples, juicy pomegranate arils, sweet dried cranberries, crunchy toasted pecans, and creamy feta, every bite is a delightful mix of textures and tastes.

    Tossed with a tangy maple Dijon vinaigrette, this salad is perfect for a light lunch or a colorful side dish. Enjoy!

    Kale apple salad with pomegranates in a bowl.
    [feast_advanced_jump_to]

    💖 Why This Recipe Works

    • Nutrient-Packed: This Kale Apple salad recipe is loaded with superfoods like kale, green apple, and pomegranate arils, making it a nutritious and delicious choice.
    • Sweet and Crunchy: The combination of dried cranberries, toasted pecans, and creamy feta adds a delightful mix of sweet and crunchy textures.
    • Flavorful Dressing: The maple Dijon vinaigrette, with its blend of cider vinegar, maple syrup, and Dijon mustard, ties the kale apple salad together with a perfect balance of sweet and tangy flavors.

    ⭐ Star Ingredients

    Kale Apple Salad Ingredients.
    • Chopped Kale, washed: A nutrient-dense leafy green that provides a slightly bitter, earthy flavor and a robust texture to the kale apple salad.
    • Green Apple (Granny Smith): Adds a crisp, tart, and slightly sweet flavor, balancing the bitterness of the kale.
    • Pomegranate Arils: These ruby-red seeds add a burst of juicy sweetness and a bit of crunch, along with a vibrant color.
    • Dried Cranberries: Contribute a chewy texture and a sweet-tart flavor that complements the other ingredients.
    • Pecans, toasted: Provide a rich, nutty flavor and a satisfying crunch, enhancing the overall texture and taste.
    • Feta: Adds a creamy, tangy flavor that contrasts nicely with the sweet and savory elements of the salad.
    • Green Onions: Offer a mild onion flavor and a touch of color, adding a subtle sharpness to the kale apple salad.

    For The Dressing

    Ingredients to make salad dressing.
    • Apple Cider Vinegar: Adds a tangy, slightly sweet acidity that forms the base of the vinaigrette.
    • Maple Syrup: Provides natural sweetness, balancing the acidity of the vinegar and mustard.
    • Dijon Mustard: Adds a sharp, tangy flavor and helps emulsify the dressing, giving it a smooth consistency.
    • Lemon Juice: Freshens the vinaigrette with a bright, citrusy acidity.
    • Garlic: Adds a subtle, savory depth to the dressing, enhancing the overall flavor.
    • Salt and Pepper: Season the dressing, balancing and enhancing the flavors.
    • Vegetable Oil: Provides a neutral base that helps to blend all the ingredients together into a smooth vinaigrette.

    For the complete list of ingredients with measurements and instructions, please see the recipe card at the bottom of the post.

    📖  Substitutions & Variations

    • Fresh herbs like parsley or mint + honeycrisp apples = the ultimate fresh and flavorful kale salad!
    • A drizzle of herby apple cider vinaigrette makes it even better. Brighten things up with juicy orange or grapefruit slices—because citrus makes everything more refreshing!
    • Cheese makes everything happier! Sprinkle on feta, Parmesan, or goat cheese for that dreamy creamy-salty bite.

    🔪How To Make Kale Apple Salad

    Mixing ingredients to make kale apple salad.
    1. Step 1: Remove the kale stems and chop the leaves into bite-sized pieces. Place them in a large salad bowl. Core the green apple, slice it thinly, and cut into matchsticks or cubes for texture. Add the apple to the bowl. Sprinkle pomegranate arils over the kale and apple for color and sweetness. Add dried cranberries for a chewy, sweet-tart touch.
    Kale apple salad on a plate.
    1. Step 2: Toast the pecans in a dry skillet over medium heat until fragrant and slightly browned. Let them cool, then chop and add to the salad for a nutty crunch. Crumble feta cheese over the salad for a creamy, tangy contrast. Thinly slice the green onions and scatter them for a mild onion flavor and a splash of color.
    Making salad dressing in a bowl.
    1. Step 3: Combine all the dressing ingredients and mix well to create your salad dressing.
    Pouring dressing over kale apple salad.
    1. Step 4: Drizzle the Maple Dijon Vinaigrette over the salad. Use just enough to coat the ingredients lightly. Toss the salad gently to ensure all ingredients are evenly coated with the dressing. Serve the salad immediately or refrigerate for up to an hour before serving to allow the flavors to meld.
    Kale, apple, and pomegranate salad in a bowl.

    👩‍🍳 Expert Tips

    If you're going to make this simple kale salad, be sure to follow my top tips!

    • Mix it up with baby kale, curly kale, and crisp apples—throw in some sunflower seeds for that extra crunch and color!
    • Give your kale a little spa treatment! A quick olive oil massage before roasting softens the leaves and tones down the bitterness for the perfect bite.

    💭 FAQs

    Can I use a different type of apple for this salad?

    Yes, you can use any apple variety that suits your taste. Sweet apples like Fuji or Honeycrisp work wonderfully, but tart apples like Granny Smith can add a nice contrast to the flavors.

    How can I make this salad ahead of time?

    To prepare this salad in advance, you can chop the kale and apples and store them separately. The dressing can also be made ahead and stored in the fridge. Just toss everything together when you're ready to serve to keep the ingredients fresh.

    Can I substitute the pomegranate seeds with something else?

    If pomegranates aren’t available, you can substitute them with dried cranberries, raisins, or even chopped fresh berries. These will provide a similar burst of sweetness and color to the salad.

    How can I make this salad more filling?

    To make the salad more substantial, try adding some protein like grilled chicken, chickpeas, or roasted nuts. This will help turn it into a complete meal while still keeping it light and refreshing.

    Best way to store apple kale salad

    Store any leftover Kale Apple Salad in an airtight container in the refrigerator for up to 2-3 days. Use an airtight container to keep the salad fresh and prevent it from absorbing other flavors in the refrigerator.

    💖 Serving Suggestions

    Here are some of the best sides to serve with Kale Apple Salad with Pomegranates:

    • Thin Sliced Chicken Breast: Top the salad with slices of grilled chicken breast or thighs. The tender and savory chicken pairs well with the sweet and tangy flavors of this amazing salad.
    • Sliced Almonds: Add toasted sliced almonds for a crunchy texture and nutty flavor. Almonds are also a good source of protein and healthy fats.
    • Quinoa: Toss cooked quinoa into the salad for a plant-based protein option. Quinoa adds a hearty texture and complements the other ingredients well.
    • Chickpeas: Roast chickpeas with olive oil and spices until crispy, then sprinkle them over the salad. Chickpeas add protein and a satisfying crunch.
    • Grilled Shrimp: Top kale salads with grilled or sautéed shrimp for a light and refreshing protein option. Season the shrimp with lemon, garlic, and herbs for extra flavor.
    Fresh kale and apple salad in a bowl.

    🍽 More Fantastic Salad Recipes

    • Chopped Greek Salad in a bowl.
      Chopped Greek Salad with Feta & Olives (Bariatric-Friendly)
    • Apple Grapefruit Salad.
      Apple Grapefruit Salad (Easy & Refreshing Citrus Fruit Bowl)
    • Purple Potato Salad in a white bowl garnished with parsley chives and lemon zest.
      Purple Potato Salad With Herbed Vinaigrette
    • Beet Sweet Potato Salad.
      Beet And Sweet Potato Salad With Feta

    Did you make this recipe? Leave a review and a ⭐⭐⭐⭐⭐ rating below, or tag us in our Facebook Group! Alternatively, bookmark it in your browser or save to Pinterest.

    Kale Apple Salad With Pomegranates.

    Kale Apple Salad with Pomegranates

    Angela Milnes
    Brighten up your plate with this Kale Apple Salad with Pomegranates! Crisp kale, sweet apple slices, and juicy pomegranate seeds come together in a refreshing and nutritious salad. Tossed with a light vinaigrette, it's the perfect balance of flavors and textures, making it a delightful addition to any meal!
    5 from 4 votes
    Print Recipe Pin Recipe Rate this Recipe
    Prep Time 20 minutes mins
    Cook Time 30 minutes mins
    Additional Time 0 minutes mins
    Total Time 50 minutes mins
    Course Salads
    Cuisine American
    Servings 4 Servings
    Calories 430 kcal

    Ingredients
      

    • 4 cups chopped kale washed
    • 1 large green apple Granny Smith, cored and thinly sliced
    • ½ cup pomegranate arils
    • ¼ cup dried cranberries
    • ⅓ cup toasted pecans roughly chopped
    • ¼ cup crumbled feta cheese
    • 2 green onions thinly sliced
    • ¼ cup apple cider vinegar
    • 2 tablespoons maple syrup
    • 1 tablespoon Dijon mustard
    • 1 tablespoon lemon juice
    • 1 clove garlic minced
    • Salt and pepper to taste
    • ½ cup vegetable oil

    Instructions
     

    • Prepare the Kale: Remove the stems from the kale and chop the leaves into bite-sized pieces. Place the kale in a large salad bowl.
    • Add the Apple: Core the green apple and slice it thinly. For a bit more texture, you can cut the slices into matchsticks or small cubes. Add the apple slices to the bowl with the kale.
    • Include Pomegranate Arils: Sprinkle the pomegranate arils over the kale and apple. This will add a beautiful pop of color and a burst of juicy sweetness.
    • Mix in Dried Cranberries: Add a handful of dried cranberries to the salad for a chewy, sweet-tart element.
    • Toast and Add Pecans: Toast the pecans in a dry skillet over medium heat for a few minutes until they are fragrant and slightly browned. Allow them to cool, then roughly chop and add to the salad for a rich, nutty flavor and crunch.
    • Crumble the Feta: Crumble the feta cheese over the salad. The creamy, tangy feta will contrast nicely with the sweet and savory elements.
    • Chop the Green Onions: Slice the green onions thinly and scatter them over the salad for a mild onion flavor and a touch of color.
    • Dress the Salad: Drizzle the Maple Dijon Vinaigrette over the salad. Use just enough to coat the ingredients lightly. Toss the salad gently to ensure all ingredients are evenly coated with the dressing.
    • Serve: Serve the salad immediately or refrigerate for up to an hour before serving to allow the flavors to meld.

    Notes

    Kale Medley Magic: Blend different kale varieties like baby kale and curly kale along with fresh apples, and sprinkle sunflower seeds for vibrant kale salad recipes.
    Massage Kale for Texture: Before roasting, massaging the kale with olive oil helps to soften the leaves and reduce bitterness. This simple step enhances the texture of the kale, making it more enjoyable to eat.

    Nutrition

    Serving: 1gCalories: 430kcalCarbohydrates: 27gProtein: 4gFat: 36gSaturated Fat: 6gPolyunsaturated Fat: 18gMonounsaturated Fat: 10gTrans Fat: 0.2gCholesterol: 8mgSodium: 163mgPotassium: 276mgFiber: 4gSugar: 20gVitamin A: 2229IUVitamin C: 27mgCalcium: 131mgIron: 1mg
    Print Recipe Pin Recipe Rate this Recipe
    Tried this recipe?Let us know how it was!

    More Salad Recipes

    • Mango Arugula Salad
    • Best Goat Cheese Apple Salad
    • Best Chopped Italian Salad Recipe
    • Korean Cucumber Salad
    • Mediterranean Farro Salad
    • Lemon Orzo Asparagus Salad

    Mango Chicken Salad With Avocado (Bariatric Friendly Recipe)

    September 24, 2024 by Angela Milnes

    Mango Chicken Salad With Avocado.

    Mango Chicken Salad With Avocado is the fresh, vibrant meal your weeknight dinners have been waiting for! Juicy mango, creamy avocado, and tender chicken come together in one colorful, nutrient-packed bowl. Quick to prep, easy to customize, and totally satisfying.

    Mango Chicken Salad With Avocado.

    As someone who follows a bariatric-friendly diet, I’m always on the lookout for meals that are high in protein, low in carbs, and actually satisfying. This chicken mango avocado salad ticks every box—it’s light, nutrient-dense, and packed with flavor. It gives me that sweet-salty-creamy combo I crave, without the heavy carbs.

    If you love fruity, protein-rich salads, try my Turkey Cobb Salad In A Jar or the bold flavors in my Mango Arugula Salad With Walnuts.

    [feast_advanced_jump_to]

    💖 Why This Recipe Works

    • Vibrant Flavors: Sweet mango, creamy avo, juicy chicken—each bite is balanced and bright.
    • Nutrient-Dense: Packed with healthy fats, lean protein, fiber, and antioxidants.
    • Quick & Easy: Choose grilled, air fried, or Instant Pot chicken to suit your schedule.
    • Bariatric Friendly: High protein, low carb, portionable, and easy to digest.

    ⭐ Star Ingredients

    • Chicken Breast: My go-to protein—it's lean, filling, and easy to batch cook. I usually air fry a few at once and slice them up for salads all week.
    • Fresh Mango: You want one that’s ripe but still firm—too soft and it gets mushy in the bowl. I like to cube it small so every bite has a pop of sweetness.
    • Avocado: Creamy, dreamy, and full of healthy fats. I always add it right before serving to keep it fresh (and avoid that sad browning!).
    • Spring Greens: I go for mixed greens or baby spinach depending on what’s in the fridge—they’re mild and hold up well under juicy toppings.

    For the complete list of ingredients with measurements and instructions, please see the recipe card at the bottom of the post.

    📖  Substitutions & Variations

    • Rotisserie Shortcut: Short on time? Shredded rotisserie chicken works perfectly here—just skip the cooking and go straight to tossing.
    • Herby Twist: Add fresh mint or basil for an extra layer of freshness. I love mint with mango!
    • Spicy Kick: Sprinkle on some chili flakes or drizzle with hot honey if you like a little heat with your sweet.

    Craving a soft protein side? Try our bariatric-friendly ricotta bake or this super tasty spinach ricotta bake. Both pair beautifully with this salad and are gentle on digestion.

    🔪How To Make Mango Chicken Salad With Avocado

    Air fried chicken breast.
    1. Step 1: Cook the Chicken.
    • Instant Pot: 10 minutes high pressure, quick release. Cool & slice.
    • Grilled: Season, grill ~6–7 minutes per side.
    • Air Fryer: 360°F for 22–25 mins, flip halfway.
    Mango prepared for salad.
    1. Step 2: Prep the Salad: Toss together spring greens, diced mango, sliced avocado, and blueberries.
    Chicken mango salad in a bowl.
    1. Step 3: Top with sliced chicken, drizzle with dressing, and season with salt and pepper.

    💡Hint: Add the dressing just before serving to keep the greens crisp!

    👩‍🍳 Expert Tips

    • Protein first: Start with the chicken to hit your protein goal before filling up on fruit or greens.
    • Small bites: Dice everything small—easier to chew and better for digestion.
    • Light dressing: Use vinaigrettes or yogurt-based dressings and go easy on the pour.
    • Portion smart: Post-op? Start with ½ to 1 cup and pause to check your fullness.

    💭 FAQs

    Can I use other cuts of chicken for mango chicken salad.

    Yes! Thighs, tenders, or rotisserie chicken work great. Just cook thoroughly and slice or shred before tossing in.

    What dressing pairs best with mango chicken avocado salad?


    Honey lime vinaigrette is my go-to, but avocado cilantro dressing or a light citrus vinaigrette is also amazing.

    Is this salad gluten-free or paleo?

    Yes—just ensure your dressing ingredients are compliant. This salad is naturally gluten-free and easy to make paleo or Whole30-friendly.

    Can I prep mango avocado salad ahead of time?

    Absolutely. Cook the chicken and chop everything except the avocado. Assemble just before serving.

    💖 Serving Suggestions

    • Sautéed Zucchini Ribbons: Light, buttery, and easy on digestion—pairs perfectly with tropical flavors.
    • Roasted Asparagus: Bright, fiber-rich, and non-bloating.
    • Boiled Egg Halves: A soft protein boost—sprinkle with a little smoked paprika or salt for extra flavor.
    • Stuffed Mini Bell Peppers: Fill with ricotta, egg salad, or soft tuna mix for a high-protein snack alongside your salad.
    • Crispy Air-Fried Tofu Bites: Add extra plant-based protein with lightly seasoned, no-carb tofu cubes.

    💡Tip: Keep sides soft, simple, and protein-focused to stay bariatric-smart while keeping your plate balanced and satisfying.

    Mango chicken salad with avocado.

    🍽 More Tasty Mango Recipes

    • No-Churn Vegan Mango Sorbet.
      No-Churn Vegan Mango Sorbet
    • Mangonada in a glass.
      Best Mangonada Recipe (Mango Chamoyada Drink)
    • Mango Arugula Salad.
      Mango Arugula Salad With Walnuts
    • Mango Pineapple Smoothie.
      Mango Pineapple Smoothie

    Did you make this recipe? Leave a review and a ⭐⭐⭐⭐⭐ rating below, or tag us in our Facebook Group! Alternatively, bookmark it in your browser or save to Pinterest.

    Mango Chicken Salad With Avocado.

    Mango Chicken Salad With Avocado

    Angela Milnes
    Juicy mango, tender chicken, and creamy avocado are tossed together with crisp greens for a salad that’s both vibrant and satisfying. This Mango Chicken Salad With Avocado is the best!
    5 from 4 votes
    Print Recipe Pin Recipe Rate this Recipe
    Prep Time 5 minutes mins
    Cook Time 10 minutes mins
    Additional Time 0 minutes mins
    Total Time 15 minutes mins
    Course Salads
    Cuisine American
    Servings 1 Serving
    Calories 532 kcal

    Ingredients
      

    • 1 Chicken Breast trimmed
    • 1 teaspoon Olive Oil 1 point
    • Pinch Salt and Pepper
    • 2 cups Mixed Spring Greens
    • ½ Mango cut into small cubes
    • ¼ Ripe Avocado 2 points
    • ¼ cup Fresh Blueberries

    Instructions
     

    Instant Pot Chicken

    • Place the trimmed chicken breast in the Instant Pot with a cup of water or chicken stock. Set it to high pressure for 10 minutes, then quick release. Once cooked, allow the chicken to cool before slicing it thinly.

    Grilled Chicken

    • Preheat your grill. Brush the chicken breast with olive or avocado oil, and season with salt and pepper. Grill over medium heat until the chicken is thoroughly cooked and has nice grill marks, about 6-7 minutes per side.

    Air Fryer Chicken

    • Air Fry Option: Preheat your air fryer to 360°F (182°C). Brush the chicken breast with oil and season with salt and pepper. Cook for about 22-25 minutes, flipping halfway through, or until the internal temperature reaches 165°F (74°C).

    For The Salad

    • In a large salad bowl, combine the mixed spring greens, mango cubes, sliced avocado, and fresh blueberries.
    • Once the chicken is cooled and sliced, add it to the salad bowl with the prepared ingredients.
    • Drizzle olive or avocado oil over the salad, season with salt and pepper, then gently toss everything to ensure even coating and mixing of flavors.
    • Present and enjoy the flavorful Mango Chicken Salad with Avocado immediately for a delicious and nutritious meal.

    Notes

    Fresh Ingredients: Use ripe, juicy mangoes and high-quality chicken to ensure a vibrant and flavorful salad.
    Dressing Dosage: Toss the salad in the salad dressing just before serving to prevent sogginess and preserve the crispness of the ingredients.
    Make Ahead: Prepare the dressing ahead of time and allow it to chill in the refrigerator to intensify the flavors before drizzling it over your love chicken salad.

    Nutrition

    Calories: 532kcalCarbohydrates: 39gProtein: 57gFat: 19gSaturated Fat: 3gPolyunsaturated Fat: 3gMonounsaturated Fat: 10gTrans Fat: 0.03gCholesterol: 145mgSodium: 400mgPotassium: 2200mgFiber: 12gSugar: 22gVitamin A: 36320IUVitamin C: 93mgCalcium: 201mgIron: 5mg
    Print Recipe Pin Recipe Rate this Recipe
    Tried this recipe?Let us know how it was!

    How To Freeze Fresh Herbs The Right Way

    September 24, 2024 by Angela Milnes

    fresh herbs.

    Looking for the best way to preserve your herbs? Learn How To Freeze Fresh Herbs to keep them vibrant and flavorful for longer. Freezing is an easy and effective method to ensure your herbs are always ready for cooking!

    I’ll guide you through the simple steps to freeze fresh herbs so you can easily add freshness to your dishes, even when they’re out of season. It’s a quick and easy way to preserve their goodness for months!

    How to freeze fresh herbs. fresh herbs on a table top.
    [feast_advanced_jump_to]

    Why Freeze Fresh Herbs?

    They're easy to measure and use, they don't take long to rehydrate when you need them and unless you have a green thumb, growing a fresh herb garden is most likely going to be a seasonal thing.

    You can have the same freshness and abundance that is available to us in the summer months, by freezing herbs for use all year.

    How To Prepare Fresh Herbs For Freezing?

    Pick off what you need for your recipe and place them in a colander to rinse them under cold water. Shake off the excess water and spread the herbs with a clean kitchen towel. This will help dry them out so you can get more into your freezer bag.

    Storing Fresh Herbs

    Place your ziplock bag in another freezer bag for extra protection against freezer burn, then place that bag into a large bowl or container to help protect it from getting squished when you put other items in your freezer.

    How to Rehydrate Frozen Fresh Herbs?

    To rehydrate your frozen herbs, simply place them in a small bowl of warm water and allow them to sit for about 20 minutes until they soften back up. When it comes time to use your herbs, you can just snip off what you need with some kitchen shears or tear them by hand into smaller pieces.

    Different Ways To Freeze Herbs

    There are several different ways to freeze herbs. For example, you may want to pop them directly onto a baking sheet until your extra herbs are frozen.

    Then pop in the plastic bag.

    Alternatively, if you're freezing a herb such as chives, you might want to use a cutting board to chop your herbs before freezing.

    Whilst freshly chopped herbs freeze well, you might also want to place some herbs into the food processor and create pureed herbs in ice cube trays with olive oil.

    Once frozen, the ice cubes can the be transferred to a container or plastic bag ready to be used in different meals.

    Specific Herbs

    Now, I'll go into more detail about specific herbs, so you can ensure you get the best flavor when you're cooking.

    How To Freeze Rosemary - Freezing Rosemary Easy

    Rosemary is a woody herb that's best fresh. If you happen to have an abundance of rosemary on hand, I recommend making a sugar scrub!

    It can be a little tricky to dry out rosemary because it grows in thick, spiky bunches.

    1. Lay the sprigs down on a baking sheet and freeze them until they are solid.
    2. Next, pop the sage into an airtight container for safekeeping.
    3. Label and date the container.

    Herbs to Tear or Snip?

    When it comes to chopping up rosemary, sage, thyme, and oregano, you'll want to snip with some kitchen shears. This is much easier than chopping by hand and helps you avoid bruising the herbs as you chop them. Now, basil, cilantro, and mint are best torn by hand, which will allow more of their oils to be released.

    Fresh Sage: What Can I Do With It?

    Love the fresh flavor of sage? We do! Whether it's fresh sage, dried herbs, or frozen, sage is a great companion to many recipes.

    There are so many uses for fresh sage. Here are a few versatile ways to use the herb in your cooking.

    fresh sage leaves with flower.
    • Sprinkle on top of Stews and Soups.
    • Add to roasts and Stuffing Recipes.
    • To make sage butter, combine chopped leaves with butter.
    • Tomato sauce benefits from a sprinkle of chopped leaves.
    • Serve sage with an omelet made with eggs.

    If you have an abundance of sage, then you'll want to know how to freeze sage for future use.

    How to Freeze Sage - Freezing Sage in 3 Simple Steps

    Now sage can often become a little tough when it's dried, but that doesn't mean it's not a fantastic herb to have on hand. You can easily freeze it by following these 3 simple steps:

    1. Lay Out On A Paper Towel

    Lay the fresh leaves out on a paper towel and place another paper towel over the top of them until they are dry enough to go in your freezer bag.

    2. Place In A Freezer Bag

    Place the leaves in a freezer bag, press out as much air as possible, and seal it up. Lay the bag flat to avoid squishing your sage when you store it.

    3. Label Your Sage

    Label all your bags with what they contain and put them into another freezer bag for extra protection.

    Freezing Oregano - How To Freeze Oregano

    Oregano has an intense flavor perfect for Italian dishes such as Bolognese. If you have an abundance of oregano, then you'll want to know if oregano herbs can be frozen. The answer is yes!

    1. Finely chop your oregano on a chopping board.
    2. Transfer the chopped leaves into an ice cube tray, and add a splash of olive oil and water to help it freeze.
    3. You could also do this with the basil in your freezer too, ready to use in different meals.
    4. Label and date your herb cubes

    Can You Freeze Thyme?

    Yes, you can certainly freeze thyme. Thyme is a great herb to add to recipes, it can be frozen to conveniently add flavor to your meals as and when you need.

    1. Finely chop your thyme and transfer into an ice cube tray.
    2. Add a splash of olive oil and water to help it freeze. This makes the herb easy to pop out and use in different dishes without having to defrost a bunch of thyme.
    3. Again, label, and date the fresh herbs so you know how long they will last.

    Freezing Thyme leaves, whether they are from your garden or the farmer's market, will allow you to access delicious herbs with ease whenever they are needed.

    How To Freeze Basil - Freezing Basil At Home

    Do you love the fresh flavor of basil? Basil goes well in so many dishes, but if you have a surplus of basil, then you can freeze the leaves to save you time when cooking.

    how to freeze basil.
    1. To freeze basil, take your washed basil leaves and place them on a cutting board.
    2. Finely chop it using your kitchen knives until it is all chopped up.
    3. Place the chopped basil into an ice cube tray.
    4. Leave about half of the ice cube tray empty, to allow for expansion when you freeze your basil.
    5. Add a splash of olive oil and water over top of the chopped basil. This will help it all to freeze more quickly and easily.
    6. Label and date the fresh herbs, so you know how long they have been in the freezer.

    Have you tried this Tomato And Basil Soup Recipe! The chopped herbs and great flavor make this a really tasty soup!

    Fresh Mint - The Best Uses?

    With a mint growing in your garden, you might be wondering what the best things to do with fresh mint leaves are.You could make yourself an iced tea or mulled wine at Christmas time when friends and family come around, or perhaps add it to a lamb tagine if you like Moroccan Food. Mint is also wonderful with fruit such as melons or strawberries if serving the fresh herb with desert.

    mint leaves.

    How to Freeze Mint Leaves

    Mint leaves are easy to freeze, making them great to have on hand when you need to add a splash of flavor to dishes without having to go out and buy more mint at the supermarket.

    1. If you want to freeze your mint leaves for later use, make sure they are washed in a salad spinner to remove any dirt.
    2. Be sure to pat dry your mint leaves so there is no water residue on them.
    3. Place the washed and dried mint leaves onto a plate or baking sheet.
    4. Make sure there is a space between each leaf to allow airflow.
    5. Once frozen, you can transfer your mint leaves to a labeled container or bag as needed.

    Freezing Cilantro - Can I Freeze Cilantro For Later Use?

    Cilantro is a great herb that goes well in many Mexican Recipes, but if you have too much cilantro then it can be difficult to use up. Cilantro is also known as coriander leaves, so don't get these two herbs mixed up!

    cilantro bunch.

    How to Freeze Cilantro

    If you want to freeze your cilantro for later use then follow these simple preserving herbs instructions:

    1. Finely chop your cilantro and place it onto a plate or baking sheet.
    2. Allow the leaves to fully dry out, this will help them to preserve well in the freezer.
    3. Once dried, pop your cilantro into an airtight container before placing it in the freezer for later use.
    4. If you freeze cilantro in water, the leaves will go soggy so avoid this if you can!
    5. Label and date your container of fresh cilantro so you know how long they will last for.

    Freezing Dill Leaves - How To Freeze Dill Leaves

    Dill leaves are great to use in fish dishes, but if you have an excess of the herb, then it can be difficult to use up. If you want to freeze your dill for later cooking, this is what you need to do:

    green dill.
    1. Wash and pat dry your fresh dill leaves so they are free of moisture.
    2. Finely chop the dill and spread it evenly over a baking sheet or plate.
    3. Allow the dill to dry for about an hour so that no water droplets form on them. This is important if you want your dill leaves to preserve well in the freezer without going soggy once defrosted.
    4. Once frozen solid, place the dill leaves into a container or ziplock bag.

    Freezing Herbs Can Save Money

    Freezing herbs is a good habit to get into, especially if you want to save money, live a frugal lifestyle and be more self-sufficient. It's good to avoid food waste and if you have herbs frozen and stored in the freezer, it will be easy to add them when needed to your tasty and delicious meals. Adding flavor to your recipes is a great way to make your meals even better!

    FAQ'S

    When Is The Best Time To Harvest Herbs?

    Ideally, you should harvest your herbs just before a rainstorm. Why? This will ensure that they are as lush as possible, which means more flavor and more yield. From Growing Your Herbs to harvesting them, it is important to do it in their best time.

    Wrapping Up

    So what are you waiting for? Make the most of your garden space, grow fresh herbs at home and for long-term storage. Preserve fresh herbs and enjoy them all year long.

    How To Freeze Basil

    September 24, 2024 by Angela Milnes

    basil paste in ice cubes tray.

    Wondering How to Freeze Basil and keep it fresh and flavorful? Whether you’re trying to preserve your garden’s basil or make the most of an abundance from the grocery store, freezing basil is the perfect way to avoid waste and enjoy it all year long!

    Either way, freeze-drying is an excellent option for preserving herbs like basil! In this blog post, we'll explore everything you need to know about freezing your fresh basil—from which varieties last longest in the freezer, what tools you need on hand, how long they can stay frozen, and their best uses in recipes.

    how to freeze basil.
    [feast_advanced_jump_to]

    Why Freeze Fresh Basil?

    Preserving basil is a fantastic way to maintain the abundance of this herb that often comes from growing basil plants.

    As gardeners know, basil plants can produce more leaves than you can use at once, especially during summer.

    By choosing to freeze basil, you can extend the life of these fresh herbs and ensure you have a supply ready for your culinary adventures throughout the year.

    Its vibrant taste brings an ideal enhancement to so many dishes. The freezing process transforms fresh leaves into frozen herbs that retain much of their original flavor and aroma.

    This preservation method allows you to enjoy the essence of fresh basil in your dishes long after the growing season has passed.

    Does Frozen Basil Taste Good?

    Frozen basil might have a different fresh flavor and texture than fresh basil leaves, but it certainly retains all its charm.

    Frozen fresh basil retains most of its unique aroma and taste, which can still enhance your dishes beautifully.

    The freezing process can alter the texture, making it a bit limp, so it might not be the best for garnishing. However, it is perfectly fine in sauces, soups, or stews where the texture is not as crucial and gives the dish a quick pop of herb flavor.

    Is It Better To Freeze Basil Or Dry It?

    For preserving herbs like basil, the method you choose can greatly affect the flavor and usability of the herb in your future culinary endeavors.

    Freezing fresh basil is often considered a better option compared to drying, particularly if you want to preserve the vibrant, fresh taste that basil brings to dishes.

    The freezing process can maintain the herb's robust flavor, making it ideal for use in sauces, stews, or other cooked dishes.

    On the other hand, drying basil changes its flavor profile, making it more concentrated and less fresh-tasting.

    Dried basil is commonly used to flavor pizzas, salads, pasta, and meats, as well as being a key ingredient in pesto and a seasoning for dishes like soups, rice, lentils, and chickpeas.

    Nonetheless, drying isn't the most effective preservation technique for delicate leafy herbs like basil, cilantro, tarragon, lemon balm, and mint.

    dried basil in a bowl.

    Freezing Basil: A Step-By-Step Guide

    Freezing fresh basil is an excellent way to preserve its vibrant color and distinct flavor. Here's how you can freeze it.

    Supplies Needed:

    • Fresh basil leaves
    • A colander
    • Paper towels
    • Salad spinner
    • A clean cutting board
    • A sharp knife
    • A blender or food processor
    • Ice cube trays
    • Freezer bags

    Clean And Dry The Basil Leaves

    Start by washing basil with cold water. Then place them inside a salad spinner to dry basil.

    After using the salad spinner, the leaves might still have some residual moisture. To remove this, gently pat the basil dry with a paper towel.

    Make sure to do this delicately to avoid crushing or damaging the leaves. The key here is to ensure the leaves are completely dry but still intact.

    washing basil leaves.

    Remove The Stems

    Using a sharp knife, cut the stems from the basil leaves, and remove the leaves from the stems.

    Chop The Basil

    Place the leaves on your cutting board and chop them into small pieces. The size can be imperfect, as they will be further broken down in the freezing process.

    chopping basil leaves.

    Method 1: Freezing Basil In Ice Cube Trays

    Fill the Trays

    Distribute the chopped basil evenly among the compartments of your ice cube trays.

    Add Liquid

    Either submerge the basil in water or drench it with olive oil.

    Both methods work well, but oil can help retain the basil's vibrant green color and add extra flavor.

    Freeze

    Place the trays in the freezer and wait until the cubes are solid, which should take 2-4 hours.

    Store

    Once frozen solid, pop the basil ice cubes out of the trays and transfer them to a freezer bag or freezer-safe container. Be sure to squeeze out as much air as possible before sealing the bags. These basil cubes can be stored in the freezer for up to six months.

    Method 2: Making Basil Pesto

    Blend the Basil

    Start by cleaning and coarsely chopped basil leaves. Place them in your food processor bowl. As you begin blending, gradually drizzle olive oil into the mix. This process helps to break down the basil and combines everything into a smooth paste. The slow addition of oil while blending ensures a well-emulsified and flavorful basil pesto.

    Freeze

    Spoon the basil paste into ice cube trays and freeze until solid.

    How To Freeze Basil.

    Store

    Like the first method, once the basil paste cubes are frozen, transfer them to freezer bags for long-term storage.

    Some Other Methods of Freezing

    Here are more detailed instructions for each freezing method:

    1. Flash Freezing:
    • Begin by washing and thoroughly drying the basil leaves.
    • Spread them out on a baking or cookie sheet, ensuring they don't overlap.
    • Place the tray in the freezer for a couple of hours until the leaves are entirely frozen.
    • Once frozen, quickly transfer the leaves to freezer bags or an airtight container. Make sure to remove as much air as possible to prevent freezer burn.
    1. Freeze Drying:
      • Rinse the basil leaves and gently blot them dry.
      • Lay them in a single layer on a baking sheet or tray.
      • Freeze for at least 30 minutes or until each leaf is frozen.
      • Store these leaves in airtight containers or freezer bags.
    2. Blanching and Freezing:
      • Start by boiling a pot of water.
      • As the water heats up, arrange for a large bowl filled with ice water.
      • Simply You can quickly submerge basil in boiling water for 2 seconds. (Optional)
      • When the water reaches a boil, immerse the basil leaves and let them blanch for approximately 30 second.
      • Immediately drain the leaves and plunge them into the ice water to stop the cooking process.
      • Place the blanched basil leaves on a parchment paper-covered baking sheet and freeze them until solid.
    3. Freezing Whole:
      • Wash the basil leaves and gently towel them dry.
      • Place the leaves in a uniform layer on a baking sheet lined with parchment paper. Let them freeze for a period ranging from 12 to 24 hours.
      • Afterward, move the leaves into a zip-lock freezer bag or another container safe for freezing. Make sure to label it for easy identification.
      • Freezing in Oil:
        • Start by placing the basil leaves in the compartments of an ice cube tray.
        • Add olive oil over each one, just enough to cover the leaf.
        • Place the tray in the freezer until the cubes are solid, then transfer them to a freezer bag or small plastic containers.
    4. Simple Freezing:
      • Rinse the basil leaves and thoroughly pat them dry.
      • Simply put the leaves in a freezer bag or airtight container and freeze.

    Can I Freeze Basil Without Blanching?

    Yes, you can freeze basil without blanching. One method is to pack the basil leaves straight into a baggie or container and then freeze them.

    However, it's important to note that fresh basil has enzymes that can cause it to darken in the freezer.

    If your goal is to preserve the fresh green color of the basil, blanching for 2-4 seconds in boiling water before freezing can help as it kills these enzymes.

    How Do You Defrost Frozen Basil?

    Defrosting frozen basil is a simple process. First, remove the basil from the freezer and let it sit at room temperature.

    This allows the ice crystals to melt naturally without damaging the delicate leaves. If you're in a hurry, submerge the frozen basil in a sealed plastic bag in a bowl of cold water.

    This helps speed up the thawing process but do not let the water get into the bag, as it could make the basil soggy.

    After the basil has thawed, lightly dab it using a paper towel to eliminate any surplus moisture before incorporating it into your dish.

    frozen basil.

    Tips for Freezing Basil

    1. Layering with Salt: Layer the basil leaves in a container, sprinkling salt between each layer. The salt helps to preserve the flavor of the basil.
    2. Adding Olive Oil: Drizzle enough olive oil over the basil leaves in the container to coat them lightly. This will add flavor and protect the basil from freezer burn.
    3. Vacuum Sealing: Consider sealing your basil leaves if you have a vacuum sealer. This can help to extend their shelf life and protect them from freezer burn.
    4. Label and Date: Remember to label and date your containers or bags before placing them in the freezer. This will help you track how long the basil has been stored.
    5. Store Properly: Once the cubes are fully frozen, remove them from the tray and shift them into a freezer-safe container or a resealable bag designed for freezer use.
    6.  Be sure to label the bag with the date for future reference.
    7. Use as Needed: When cooking and needing some basil, simply take a cube out of the bag and add it to your dish. The olive oil will melt, leaving the basil to flavor your meal.

    How Long Does Frozen Basil Last?

    According to various sources, frozen basil can last up to a year in the freezer. However, it's important to note that the quality may decline after about three months.

    The leaves might turn black over time, but this doesn't necessarily mean the basil is spoiled or unusable. It's recommended to use the frozen basil directly from the freezer in hot dishes or to thaw and drain it before using it in cold dishes.

    How To Use Frozen Basil?

    Here's a guide on how to use frozen basil in various dishes:

    1. In Heated Dishes: If you use your basil in heated dishes like Italian Sausage and Broccoli Pasta, Easy Zuppa Toscana Soup, Slow cooker Beef Stew, or sauces, add your frozen basil directly to the pot.
    2. Basil Cubes: Frozen basil cubes are an excellent way to infuse flavor into your dishes. Put the frozen basil cubes in a bowl and let the ice thaw. After the ice has melted, remove the excess water from the bowl and continue following the recipe as instructed.
    3. These cubes can be tossed into pasta dishes, soups, stews, and Salad Dressings for a quick pop of herb flavor.
    4. In Cold Dishes: If you want frozen basil in cold dishes, let it thaw first. Drain the water and use it as per the recipe. Remember that the basil's texture may not be as crisp as fresh basil, but it will still provide a good flavor.
    5. Substituting Frozen Basil for Fresh: If a recipe calls for fresh basil and all you have is frozen, don't worry. You can substitute frozen basil for fresh in most recipes. Use slightly more frozen leaves than the recipe calls for, as the flavor can diminish slightly when frozen.
    6. In Tomato-Based Dishes: Frozen basil works well in tomato-based dishes like marinara or Tomato Basil Soup. Toss some frozen basil cubes in, and it will taste like fresh basil.
    7. Pasta with Basil Pesto: An easy dish to utilize frozen basil in a pesto sauce. Blend your frozen basil with olive oil, garlic, and parmesan to make a delicious pesto. Combine it with your preferred pasta for a quick and tasty dish.
    8. Homemade Pizza with Basil and Tomato Sauce: Use your frozen basil in a homemade tomato sauce for Mini Pizzas. Simmer canned tomatoes with garlic, olive oil, and frozen basil cubes until it thickens into a sauce. Spread this on your pizza dough, add your favorite toppings, and bake.
    9. Frozen Pesto Pasta Sauces: Create a flavorful pasta sauce using your frozen basil pesto. Just thaw your pesto, mix in some cream or milk to make it saucy, and heat it up. Toss it with cooked pasta and have a simple, flavorful meal.
    10. Thai Basil Stir Fry: If you've frozen Thai basil, it can be used in various Asian dishes like a stir fry. Sauté your favorite vegetables and proteins, and add your frozen Thai basil at the end for a unique, aromatic twist.
    11. Tomato Basil Soup: Combine canned tomatoes, olive oil, and frozen basil in a pot. Let it simmer until the flavors meld together. Blend until smooth and serve with a grilled cheese sandwich for a comforting meal.

    Wrapping Up

    Thus, freezing basil is an easy and effective way to preserve this aromatic herb for future use. It extends its shelf life and retains much of the original flavor and aroma, making it a great addition to various dishes.

    So, the next time you find yourself with an abundance of fresh basil, don't let it go to waste. Instead, use these freezing techniques to ensure you have a ready supply of this fragrant herb to enhance your culinary creations throughout the year.

    How To Freeze Bananas The Right Way

    September 24, 2024 by Angela Milnes

    Bananas in a basket.

    How to Freeze Bananas is a lifesaver in my house, where everyone loves them! Whether we’re eating them as a snack, making smoothies, or baking my mum’s famous banana bread, having extra bananas is always handy. But when we have too many, the best solution is to freeze them for later!

    Here is a guide on Freezing Bananas the right way so you can enjoy them later on:

    how to freeze bananas.
    [feast_advanced_jump_to]

    How To Freeze Bananas Whole?

    The best way to freeze whole bananas is to cut off both ends of the banana, peel, and freeze.

    Cutting off both ends of the banana will increase the surface area for quick freezing so you don't end up with brown bananas and brown spots.

    Wrapping In Cling Film

    Wrap as many bananas as you want in cling film and then store them in a freezer bag.

    Placing a few bananas in cling film or a plastic bag will help retain moisture, reduce browning and help prevent freezer burn.

    How To Freeze Sliced Bananas?

    You can freeze sliced bananas in the freezer. Frozen banana slices can come in handy for smoothies, making baby food, adding to desserts, and making baked goods.

    To freeze your banana slices, peel and then cut them in half.

    Next slice the pieces length-wise.

    Freeze In A Single Layer

    Line a baking tray with parchment paper and place the slices in a single layer on your lined baking sheet.

    Freeze for about an hour and then place your frozen slices into a freezer-safe bag.

    Remove as much air as possible and then place bananas in the freezer until you are ready to defrost them.

    How To Freeze Mashed Bananas?

    One easy way to freeze bananas is to mash them first.

    Put banana chunks in a bowl and use a fork or masher to create a banana puree.

    Once mashed, place the mixture into an airtight container.

    Freezing Small Quantities

    If you want to freeze small portions of mashed banana and are using a pureed banana for baby food or following a gastric bypass, then fill a few ice cube trays and freeze your pureed bananas.

    Use Ice Cube Trays

    Next time you need a quick snack for the kids pop out a few banana ice cubes and let them thaw for a few minutes.

    You can also add cubes of mashed banana into your baking and smoothies.

    How To Freeze Banana Chips?

    If you want to make banana chips, here is what you should do:

    Peel your bananas and slice them into thin pieces. Place the slices of banana on a baking sheet lined with parchment paper and cook for about 30 minutes at 300° F (150° C).

    Next, let the banana chips cool down. Once they are cooled, store them in an airtight container or freezer bag.

    Is Peeling Banana Necessary?

    Yes, peeled bananas are necessary before you freeze them.

    If you peel bananas, it separates the fruit from its skin and reduces the amount of flavor transferred. Freezing banana peel will result in a mushy banana after defrosting and the skin will turn black.

    It is better to always peel the skin every time before you freeze bananas.

    whether it's a whole banana or slices, it is always best to peel it before placing in the freezer.

    You are now ready to prepare your bananas for the freezer.

    Let's recap what you need to do:

    1. Cut both ends of the banana off.

    2. Peel bananas and place them in cling film or a plastic bag.

    3. Store the wrapped banana in the freezer until you are ready to use them.

    Can I Freeze Ripe Banana?

    Yes, you can freeze ripe bananas. They are full of antioxidants and do not get damaged when they are frozen.

    Freezing ripe bananas will allow you to keep them for longer periods.

    how to freeze bananas.

    How To Defrost Frozen Bananas?

    There are three main ways to thaw frozen bananas.

    1. Place them in a fridge and allow them to defrost overnight.
    2. Put the frozen banana chunks under running water until they are soft enough to add to your recipe, baking or smoothie.
    3. Place in the microwave and defrost for 30 seconds.

    Thawed bananas can be used in so many ways. It is best to freeze bananas in small batches so they are easy to separate and thaw as and when needed.

    Do Bananas Turn Brown When They Are Frozen?

    Yes, they have an enzyme called polyphenol oxidase that produces brown compounds when it comes into contact with oxygen.

    If you do not wrap the banana in plastic or cling film, it will come into contact with oxygen and start to brown.

    Best Tips For Freezing Bananas

    • To protect your bananas from browning, wrap fresh bananas separately in cling film or a plastic bag before placing them all together in a freezer bag.
    • Bananas should be frozen individually or in small batches because this helps them freeze faster and prevents freezer burn.
    • Do not refreeze bananas that have been previously frozen.
    • Avoid freezing overripe bananas.

    If you have plenty of bananas to freeze, you won't need to go to the store to buy bananas so regularly and you don't have to throw bananas away because they have gone off.

    banana smoothie.

    How Long Will Frozen Banana Last?

    Frozen bananas can be stored in the freezer for up to 6 months. After refrigerating, they will last 1 day at the most.

    If you are planning on keeping them for more than a day, just store them in the freezer and thaw them when needed. If you plan to use them the next day, pop them in the fridge overnight.

    How To Use Frozen Bananas?

    Frozen bananas are a great alternative to ice cream, especially if you are vegan or have a nut allergy.

    Freeze Bananas For Smoothies

    One of the best ways to use frozen bananas is to add them to a smoothie. They act as a thickener and make the smoothie creamier. You can also use them as a sweetener.

    banana milkshake.

    Freeze Bananas For Baking

    Another great way to use frozen bananas is in baking recipes. They work well in cakes, bread, pies, and so much more.

    Bananas are not only healthy but they are tasty too!

    Try Making Banana Peanut Butter

    Here is what you could make:

    • Remove the frozen fruit from the freezer.
    • Add it to a blender, and blend until smooth.
    • Add some peanut butter for an even more delicious treat.

    Make Banana Bread Using Frozen Bananas

    • Defrost the puree and use a cup measurement.
    • Add 1 ½ cups of mashed bananas to the Banana bread recipe
    • Make delicious Instant Pot Banana Bread!

    Thus, if you have excessive bananas, you can store them for later by freezing them. You can use them in making smoothies and peanut butter.

    You may enjoy the following posts:

    • How To Freeze Sweet Potatoes
    • How To Freeze Liver Pate
    • How To Freeze Naan Bread
    • Can You Freeze Fresh Pumpkin

    Can You Freeze Ricotta Cheese?

    September 24, 2024 by Angela Milnes

    Ricotta cheese on a plate. with a spoon

    Can You Freeze Ricotta Cheese? The answer is yes, you absolutely can! Although ricotta has a high moisture content, freezing it is a fantastic way to extend its shelf life. This makes it perfect for saving some for future recipes like lasagna, stuffed shells, or even delicious dips.

    In this post, I’ll share tips on how to freeze ricotta cheese to maintain its texture and flavor, so you can always have it ready for your favorite dishes such as Bariatric Friendly Ricotta Bake!

    Can You Freeze Ricotta Cheese
    [feast_advanced_jump_to]

    What Is Ricotta?

    Ricotta cheese is a unique and versatile cheese that originates from Italy. This creamy cheese is made from leftover whey, a byproduct of cheese making, giving it a distinctive character.

    Its most notable attribute is its slight sweetness in flavor, which sets it apart from many other types of cheese. This slightly sweet flavor makes it an excellent addition to savory and sweet dishes, enhancing their overall taste.

    Freezing Ricotta Cheese

    Ricotta freezes well when incorporated into a pre-cooked meal. Thus, consider using your extra ricotta in a recipe first, then freeze the prepared dish for future enjoyment.

    While freezing does not impact the cheese's nutritional value, it can alter its consistency, making it more crumbly or grainy upon defrosting.

    Despite this alteration, the overall flavor remains largely intact, making frozen ricotta useful for cooking and baking.

    Does Freezing Ricotta Cheese Change the Texture?

    Freezing ricotta cheese can indeed alter its texture. This change primarily stems from the formation of ice crystals during the freezing process.

    As ricotta cheese has a high fat content, these ice crystals cause the fat to separate, resulting in an undesirable texture once thawed. Instead of the smooth and creamy consistency it's known for, the thawed ricotta may appear grainy or separated.

    The extent of this texture change can vary depending on factors such as the initial quality of the cheese and the freezing and thawing methods used.

    Can You Freeze Ricotta Cheese

    Can You Freeze Leftover Ricotta Filling?

    Indeed, it is possible to freeze the ricotta cheese mixture. However, the texture may change after thawing. It's best used in baked dishes like pasta or casseroles after freezing.

    Can I Freeze Ricotta Cheese Mixed With Raw Egg?

    Yes, you can freeze ricotta cheese mixed with raw egg. The egg helps the ricotta cheese to stay together when frozen. It should be stored in an airtight container or freezer bag for the best results.

    ricotta cheese and egg mixture. | Can You Freeze Ricotta Cheese

    Best Way To Freeze Ricotta Cheese

    To properly store ricotta cheese, follow these steps:

    Step 1: Preparation

    The initial step in freezing fresh ricotta is to handle the excess moisture often found in it. Begin by spreading a couple of paper towels on a flat surface.

    Then, place your fresh ricotta on top of these towels. To remove excess moisture, gently press another layer of paper towels onto the ricotta.

    It's essential to eliminate as much moisture as possible because excess moisture can result in a grainy texture when the cheese is eventually thawed.

    Repeat this process until most moisture is absorbed, ensuring your ricotta is adequately prepared for freezing.

    Step 2: Portions

    It's recommended to divide it into smaller, usable portions. This enables you only to defrost the amount of cheese you need at any given time instead of defrosting the entire block.

    Step 3: Packaging 

     Each portion of ricotta cheese can be stored in plastic wrap or parchment paper for protection. Once wrapped, place the ricotta in a sealable container that is suitable for freezing or in an airtight container.

    If you're utilizing a zip lock bag, expel as much air as possible before sealing it. This action helps in preventing any potential freezer burn.

    Double-bagging or use a sealed, freezable container for additional protection.

    Step 4: Label

    Label each package with the date. You can keep ricotta cheese in the freezer for up to two months. After that time, quality may degrade, though it will still be safe to eat.

    ricotta cheese and egg mixture.

    Step 5: Freeze

    Put the freezer-safe plastic bag or plastic container in the coldest part of your freezer for the quickest freezing.

    When you're ready to use the cheese, thaw it in the fridge for 5 to 6 hours. After thawing, check for any signs of spoilage, such as an off smell or mold. Stir the cheese well to mix in any separated water.

    While freezing ricotta cheese can change its texture, it should not affect its taste or safety if properly stored and handled.

    How Do You Defrost Frozen Ricotta Cheese?

    Defrosting frozen ricotta cheese can be a careful process, as you want to preserve the texture and flavor of the cheese.

    Here are several methods for how to properly thaw or defrost ricotta cheese:

    Fridge Overnight Method

    The easiest way to  Allow the ricotta to thaw overnight before using. This is the most common method to thaw ricotta cheese.

    Move your frozen ricotta cheese from the freezer to the refrigerator, and let it defrost overnight. This gradual thawing technique helps preserve the texture and taste of the fresh ricotta.

    This slow thawing process helps maintain the texture and flavor of the fresh ricotta.

    Room Temperature Method

    If you are in a hurry, you can defrost ricotta cheese at room temperature. Remove the ricotta from the freezer and place it on your kitchen counter.

    It should be adequately thawed within a few hours. However, this method may affect the texture and taste of the cheese.

    Cold Or Lukewarm Water Method

    Another quick way to thaw frozen ricotta is to use cold or lukewarm water. Place the sealed package of ricotta in a bowl of cold water and let it sit until it's thawed.

    This method is faster than the room temperature method but may also slightly alter the cheese's texture and flavor.

    Medium High Heat Method

    If you need to use the ricotta cheese immediately, you can defrost it on the stove over medium-high heat.

    Place the frozen ricotta in a pan and gently heat it, stirring constantly. This will thaw the ricotta cheese quickly but remember to keep an eye on it to prevent it from burning.

    Microwave Method

    If you're pressed for time, you can use a microwave to defrost ricotta cheese. Put the frozen ricotta into a microwave-compatible container and utilize your microwave's defrost function. Remember to agitate the cheese every 30 seconds for a consistent thaw.

    This method is the fastest, but it also has the greatest potential to change the texture of the ricotta, so it's best used when the cheese is mixed into a recipe rather than served on its own.

    How Long Does Ricotta Cheese Last In The Freezer?

    Unopened Ricotta Cheese Box

    • An unopened package of ricotta cheese can last for about 3 months in the freezer when properly stored.

    Ricotta Cheese Box Opened

    • Once opened, a package of ricotta cheese can be safely stored in the freezer for approximately 3 to 4 months.

    Homemade Ricotta Cheese:

    • Homemade ricotta cheese can also be frozen for longer storage, extending its shelf life to 3 months.

    Additional Information

    • The shelf life of any cheese in the freezer, including ricotta, largely depends on its storage conditions. Ensure it's well-sealed to prevent freezer burn and absorption of other odors.

    What To Do With Frozen Ricotta Cheese?

    After thawing frozen ricotta, it becomes perfect for baked or cooking recipes. However, it's important to understand that ricotta cheese that has been previously frozen may only be suitable for specific recipes.

    1. Baked Pasta Dishes: Ricotta is a key ingredient in many classic Italian baked goods. Use your leftover ricotta to create a creamy, cheesy baked ziti or lasagna. Thaw the frozen ricotta, mix it with other cheeses like mozzarella and Parmesan, layer it with pasta, tomato sauce, and any preferred veggies or meats, and bake until bubbly.
    2. Ricotta Cheesecake: Use ricotta cheese in a rich and delicious dessert. A ricotta cheesecake is a delightful alternative to the traditional cream cheese version. Thaw your ricotta, blend it with sugar, eggs, and a touch of lemon juice, then bake it on a graham cracker crust for a new spin on an old favorite.
    3. Cooked Recipes: Frozen ricotta can be used in various cooked dishes. For instance, mix thawed ricotta with spinach and seasonings, stuff it into large pasta shells or rolled up in lasagna noodles, and bake it with Marinara Sauce for a satisfying meal.
    4. Savory Dishes: Ricotta also works well in delicious dishes. Combine it with olive oil, garlic, and herbs to create a tasty spread for bread, or stir it into Instant Pot Risotto for extra creaminess.
    5. Fresh Food: Ricotta can be used just like fresh cheese once thawed. Add it to salads, smear it on toast with a drizzle of honey, or use it as a topping for Air Fryer Baked Potatoes.
    6. Ricotta Frittata: A frittata is an Italian omelet often filled with cheese and vegetables. Add some thawed ricotta to your frittata mixture for a creamy and delicious twist or add as a favorite Pizza Topping.
    7. Ricotta Stuffed Shells: This classic Italian dish uses leftover ricotta. Simply stuff cooked pasta shells with thawed ricotta, spinach, and other ingredients, then bake until golden.

    Can You Refreeze Ricotta?

    Yes, you can refreeze ricotta cheese, but it's important to remember that this process may alter its original properties. Previously frozen ricotta cheese might exhibit changes in texture and density.

    While it is safe to consume, the cheese tends to separate and dry out a bit after defrosting, which might affect its consistency in recipes.

    What Does Expired Ricotta Look Like?

    Expired ricotta cheese typically undergoes a noticeable change in appearance, which is often the first clue that it has gone bad.

    It may develop signs of mold on its surface, indicating spoilage and making it unfit for consumption. Furthermore, its shelf life can vary depending on whether it's opened.

    Before consuming, it's always best to check for any signs of spoilage, such as a change in smell or appearance.

    Conclusion:

    Freezing is a great way to extend the shelf life of any type of cheese, including ricotta.

    When freezing and thawing ricotta cheese, it's important to remember that its texture and flavor may be slightly altered. To avoid this, use low-heat methods, such as cold or lukewarm water, and ensure that the cheese is well-sealed and stored in a cool environment.

    Once thawed, ricotta cheese can be incorporated into various recipes, including baked pasta dishes, cheesecakes, savory dishes, frittatas, and stuffed shells.

    Can You Freeze Onions? A Quick Guide

    September 24, 2024 by Angela Milnes

    Onions in a basket.

    Today we’ll show you exactly how to freeze onions to save time and reduce waste in the kitchen. From chopping to proper storage, follow our tips for Freezing Onions so they are ready to use in your favorite recipes.

    Whole red onions. Can you freeze onions?
    [feast_advanced_jump_to]

    Freezing Onions Preparations

    First, you should consider how long it takes for your particular onion to go bad so that you can properly prepare it for the freezer bags.

    This is a good rule of thumb to remember in general, when it comes to food.In most cases, the fresh caramelized onions from your local grocery store are going to last about a week, maybe longer if they are not harvested from the field.

    If you have an overabundance of fresh onions in your kitchen, however, you might want to think about prepping them for long-term storage.

    Unfortunately, this is not the only thing you need to be thinking about.

    Cutting Onions For Freezing

    Remember this - when you cut an onion, its shelf life gets reduced in half!

    The logic behind this statement is as follows: when you cut an onion, its cellular structure opens up and releases a sulfur compound called propanediol-S-oxide.

    This is the same compound that gives you those big, puffy tears after a good cry.In short, that means that the more you cut an onion, the faster it will go bad. How do you stop this reaction?

    You simply cook your onions by whatever means necessary! In the case of freezing, this means that you should prepare your onions before putting them in the freezer.

    Just cut off any parts of the onion that might be bad and then cook it however you desire. But it doesn't mean you can't freeze them without cooking as well. Read on.

    Chopped onion preparing for freezing.

    Freezing Onions Raw Preparation

    The easiest way to freeze onions is to simply grab them off the shelf and put them into a container in the freezer.

    This is mostly suitable for those that do not have a large demand for onions, as it does lower the quality of their onions.

    However, if this is fine with you, chop the onion up and store it in an airtight container for later use.

    You can also freeze whole onions or chop them first. You can do this with the intent of using them later to make soups, stews, or casseroles.

    How To Freeze Onions?

    Freezing onions is easy. The best way to remember how to freeze onions is to utilize the same storage techniques for other vegetables.

    Onions should be wrapped in aluminum foil or placed inside an airtight freezer bag to avoid dehydrating.

    Onions can also be frozen with other foods, like carrots and celery, which are typically more flavorful once they're sautéed.

    Freezing onions with garlic is also a good idea since the garlic will add flavor to your onion while the onion helps keep the garlic from burning too quickly when you cook it.

    Freezing Diced Onions

    First, dice up your onions and put them to the side. Next, heat a pot of water on the stove and wait for it to come to a boil.

    Place your diced onions in a heat-resistant bowl and place it on top of the pot, making sure that the water does not touch the onions.

    Constantly stir the boiling water until you see your onions turn a light brown color, anywhere from 5 to 10 minutes.

    At this point, you can take out your diced onions and place them in an airtight container for later use.

    Red onions sliced.

    How Do You Store Chopped Onions In The Freezer?

    Freezing chopped onions is easy. If you are going to store chopped or sliced onions in the freezer, it is recommended to make some necessary preparations.

    First, slice them and then cook them in a little oil or butter, depending on the recipe.

    Once they cool down, place them in freezer bags and store them in your freezer.

    What Is The Best Way To Freeze Raw Onions?

    I prefer diced onions, but there are different ways to freeze raw onions. You can always do it all by yourself with some plastic bags and bottles.

    But you need to make sure that the onions are completely dry before you put them in the freezer.

    Also, remember to label any bag with the date so that you won't forget when you stored them in the freezer.

    Are Onions Good After Being Frozen?

    Yes, onions are great after being frozen. They can last for months and they can be used in most dishes that require onions.

    However, you need to remember that the texture and flavor of onions might suffer after freezing, which is why you need to pay attention to how they were frozen and cooked before storing them.

    Are Frozen Chopped Onions Any Good?

    Some people would say that frozen chopped onion is good, but it is not as good as fresh ones.

    On the other hand, they might be a better option if you don't have fresh onions in the fridge or just want to save some time.

    Even though it's good, remember that they are not the same as fresh chopped onion.

    How Do You Freeze Chopped Onions Without Them Sticking Together?

    If you are wondering how to freeze chopped onions without them sticking, then there are some simple tricks that can help you.

    First, make sure that the chopped onion is completely dry.

    Then, place them on a baking sheet and put it in the freezer for about an hour.

    After that, you can transfer them to a bag or bottle without worrying about them sticking together.

    white onion sliced.

    Is It Better To Freeze Onions Raw Or Cooked?

    You can do both but it is better to freeze onions raw, be it yellow onions or purple ones.

    Onions that are cooked lose flavor and nutrition during the process of cooking, which means you can't enjoy them as much.

    Plus, you can't do anything with them but use them in cooked dishes. It's also better to freeze sliced onions.

    How Long Can You Freeze Sauteed Onions?

    It depends on how you have prepared them. If they are solid, then you can freeze them for up to three months. Otherwise, frozen onions won't be as good as the real ones.

    Should I Thaw Frozen Onions Before Cooking?

    No, you should not thaw frozen onions before cooking. Onions are always better when they are used in their frozen state.

    If you thaw frozen onions before cooking, they will lose most of their flavor and won't be as tasty as before.

    Should I Thaw Frozen Onions Before Cooking?

    No, you should not thaw frozen onions before cooking. Onions are always better when they are used in their frozen state.

    If you thaw frozen onions before cooking, they will lose most of their flavor and won't be as tasty as previously.

    How Do You Store Fried Onions In The Freezer?

    First, dice the onions and then cook them until they are soft or brown depending on your recipe.

    After that, put them in a plastic bottle or bag and put them in the freezer. It's best to use frozen onions within a few months. Otherwise, they will lose their taste.

    How Long Can You Freeze Fried Onions?

    You can freeze fried onions as long as you want. They will still be good and tasty when you use them in your dishes.

    However, if you ever need to use them later, make sure to fry them for a little bit before using them in whatever dish you.

    Can You Buy Frozen Onions?

    Yes, you can buy frozen onions in a lot of grocery stores. They are perfectly good and they can be used in whatever dish you want.

    If you prefer to eat them instead of using them for cooking, then you can also buy frozen onions and use them as a side dish.

    Can Purple Onions Be Frozen?

    Yes, purple onions can be frozen. However, make sure that they are chopped before you freeze them.

    It's best to put them in a freezer bag or container. They will stay good in your freezer for up to 6 months.

    How Do You Freeze Cooked Onions?

    First, boil the onions until they are completely cooked. Then, place them in a freezer bag or container to freeze them.

    You can use them later on in any dish that calls for onions. It's best to use them within a few months, or else they might lose their flavor. Learn How To Caramalize Onions to make this tasty Caramalized Onion Dip With Chives. It's a great way to use up extra onions you may have in storage.

    Is It Ok To Freeze Raw Onions?

    The answer is yes, you can freeze them raw. But they do not taste as good as cooked ones. So, you can consider it as a great way to save the time of cooking beforehand.

    Does Freezing Onions Ruin Them?

    Yes, but onions are still safe to eat after being frozen. Onions are very low in acidity which makes them an ideal environment for harmful bacteria growth.
    Onions should only be frozen for three months to preserve the greatest amount of flavor and nutrition.

    How Long Do Onions Last In The Freezer?

    It depends on how you freeze them. Frozen onions can last for two to four months with perfect onion odor, but they could turn brown and lose their flavor if you leave them in the freezer for too long.

    Wrapping Up

    Thus, by freezing them you can save time and money. To get the best results, it's best to freeze them raw. This way, you can use them later in any dish you want without changing the taste.

    Can You Freeze Mushrooms?

    September 24, 2024 by Angela Milnes

    Mushrooms in a bowl.

    The answer to this common question is: Yes! Freezing mushrooms is a great way to preserve their texture and flavor for future use in soups, stir-fries, and sauces.

    In this post, I’ll show you how to properly freeze mushrooms, whether raw or cooked, so you always have them on hand for your favorite recipes.

    Mushrooms in a bowl. Can you freeze mushrooms?

    The best way to save money on mushrooms is to freeze them. Once you've frozen your mushrooms, you can add the mushrooms to any dish that calls for them.

    Freezing mushrooms is a very simple process and only takes a few minutes.

    [feast_advanced_jump_to]

    Picking The Best Mushrooms

    Whether using wild mushrooms, small button mushrooms or the large portobello variety, the first step is to pick out good mushrooms.

    Mushrooms in a bowl and in a pouch.

    Look for firm mushrooms with no blemishes or bruises. You should also avoid any mushrooms that appear wrinkled or slimy and have dark spots. Make sure to choose mushrooms that smell fresh.

    You can pick mushrooms that are whole or sliced. Sliced mushrooms may be easier to use in recipes, but whole mushrooms often have a richer flavor and texture.

    If freezing wild mushrooms are best frozen raw they soak up too much water when blanched.

    How To Freeze Mushrooms?

    Here are some methods to freeze raw mushrooms. From steam blanching to pot blanching to sauteed mushrooms, there are several different ways to freeze these tasty vegetables. Blanched mushrooms are also great for making this Mushroom Pate Recipe.

    Mushroom.

    1. Steam-Blanching Mushrooms

    One of the most popular ways of freezing mushrooms is called steam-blanching. This process involves bringing a pot of water to a boil and adding the mushrooms to a steamer basket over the pot for 3 minutes on medium-high heat.

    You can add a small teaspoon of lemon juice to the water. Lemon juice will help to preserve color and flavor, so you don't end up with dull or flavorless mushrooms after freezing.

    Once the time is up your steam-blanched mushrooms will need to be placed in cold water to prevent further cooking. You'll want to move fast here as any longer cooking of your mushrooms could leave you with a mushy mess!

    After steam blanching, all that's left to do is pat your mushrooms dry and either freeze whole or chop them first if desired.

    Mushrooms on a table.

    Add the steamed blanched mushrooms into an airtight bag or freezer-safe container and store in the freezer for up to six months. By removing as much air as possible from your freezer bag you'll be able to prevent freezer burn and food waste.

    2. Sautee Raw Mushrooms

    The sauté mushrooms method is another effective way to freeze mushrooms and preserve their flavor when needed. Start by washing mushrooms in cold water and patting them dry with a paper towel.

    Next, put the mushrooms in the Instant Pot or a frying pan with a little olive oil ready to saute. Saute your uncooked mushrooms for 3 minutes.

    Oyster mushrooms in a box.

    Allow the mushrooms to cool down. Once cool add the fully cooked mushrooms to a freezer bag. You can store frozen sauteed mushrooms for 6 months in your freezer space.

    3. The Blanch Method For Mushrooms

    The Blanch Method is a great way to preserve mushrooms' taste, texture, and nutritional content.

    The key to the frozen blanched mushrooms is to briefly cook the mushrooms in boiling water before submerging them in cold water or ice.

    Taking the mushrooms out promptly and plunging them into cold water cools them efficiently, ensuring their texture and flavor stay intact.

    Mushrooms in a basket.

    This helps neutralize naturally occurring enzymes which would otherwise limit their storage life. The blanching process not only preserves the flavour and nutritional value of the mushrooms but also prevents them from getting soggy when frozen.

    As your mushrooms will be cool from submerging them in water, you can simply dry them and flash-freeze them in freezer-safe containers.

    How Long To Store Mushrooms In The Freezer?

    Whether you freeze mushrooms raw, freeze blanched mushrooms or freeze steamed mushrooms they can all last in the freezer for around six months.

    What Dishes Can You Make With Frozen Mushrooms?

    Here are some recipes that can use frozen mushrooms. From risotto to stir-fries, to mushroom soup:

    1. Mushroom Risotto: One of the most popular dishes you can make with frozen mushrooms is mushroom risotto. Risotto is a creamy Italian rice dish typically made with Parmesan cheese and white wine.

    2. Mushroom Soup: Another great option for frozen mushrooms is to make a delicious mushroom soup. This soup can be made with any type of mushroom, but shiitake and oyster mushrooms work particularly well.

    3. Mushroom Pizza: Pizza is another great option for using sliced mushrooms that are frozen. You can use any type of mushroom on your pizza, but portobello mushrooms work particularly well.

    4. Fried Mushrooms: Fried mushrooms are a great way to use up frozen mushrooms. You can fry them as a side dish or add them to a sandwich or wrap.

    How To Defrost Frozen Mushrooms?

    There are a few methods or ways to defrost frozen mushrooms:

    • Take the frozen cooked mushrooms out of the freezer and let them thaw at room temperature.
    • Place the frozen mushrooms in a bowl of warm water. If you soak the mushrooms in a bowl of warm water, be sure to keep an eye on them to ensure they don't become too soggy.
    • Place the frozen solid mushrooms in a microwave-safe dish and heat them on low power for a few seconds.
    • Saute the frozen mushrooms over medium heat until they are thawed and cooked.
    • Roast the frozen mushrooms in a preheated oven until they are thawed and cooked through. I particularly like to roast whole button mushrooms this way.
    mushrooms in a bowl.

    Tips And Tricks For Freezing Mushrooms

    There are a few tips and tricks worth keeping in mind when it comes to freezing mushrooms. The first and foremost is to be sure your mushrooms are completely dry before freezing them.

    Remove Moisture From Mushrooms

    When freezing cooked mushrooms ensure the moisture is removed. Moisture encourages mould growth, so use a paper towel to blot away any moisture before freezing.

    Additionally, you can blanch the mushrooms briefly in boiling water before freezing them, which should help preserve texture and flavour while storing your extra mushrooms.

    Cool The Mushrooms First

    Ensure the mushrooms are completely cooled before placing them into freezer-safe bags or containers

    Whether using big or smaller mushrooms cooling them first will prevent mushrooms from sweating, which can cause freezer burn.

    Label Your Mushrooms

    Labeling these containers with the date will also help decide how long you can keep mushrooms frozen for maximum quality.

    With these simple Tips and Tricks, you'll have wonderful frozen mushroom meals ready whenever you need them.

    Wrapping Up

    Thus, freezing is the way to go if you’re looking for a quick and easy way to preserve your mushroom harvest. In this way, you can use mushrooms in your recipes at any time.

    More Recipes Using Mushrooms

    Be sure to try out some of our favourite recipes using frozen mushrooms, and let us know what you think in the comments below. Happy cooking.

    • Air Fryer Baby Bella Mushrooms
    • Slow Cooker Beef Stroganoff
    • The Best Stuffed Mushrooms
    • Chicken Yaki Soba With Mushroom
    • Tofu Stir Fry Noodles With Mushroom

    How To Freeze Pumpkin? A Detailed Guide!

    September 23, 2024 by Angela Milnes

    Pumpkin cubes in freezer.

    Freezing Pumpkin is a great way to preserve this seasonal favorite for year-round use. Whether you have leftover pumpkins from baking or want to store extra from your fall harvest, freezing is an easy and efficient method.

    In this guide, I’ll show you How To Freeze Pumpkin properly, so you can enjoy it in soups, pies, and more whenever you need it!

    Pumpkin Cubes In Freezer
    [feast_advanced_jump_to]

    Can You Freeze Pumpkin?

    Certainly! Pumpkin can be easily frozen to preserve its freshness. Whether you have pumpkin purée, cubes, or slices, freezing is a convenient way to extend its shelf life. Just follow the proper preparation and storage guidelines to ensure optimal results when you thaw and use the frozen pumpkin.

    Should I Blanch Pumpkin Before I Freeze Them?

    I recommend blanching the pumpkin before you put it in the freezer. This makes sure that delicate nutrients are preserved and the flesh remains firm after thawing. Blanching also makes portioning easier since cooked pumpkin is so soft.

    To blanch your pumpkin, first, cut it into small pieces. Then, place the pumpkin in a large pot of boiling water for about two minutes. Drain the pumpkin, and then plunge it into cold water to stop the cooking process. Finally, drain the pumpkin again and spread the pieces on a baking sheet to freeze.

    Why Freeze Pumpkin?

    Freezing your pumpkins can help you preserve them longer. It also allows you to use them at any time of the year. Just think, your favorite cubes all year round! Who wouldn't want that?

    You also want to freeze them because it lets you season them. Once you thaw frozen pumpkin, mix it with broth and spices, and enjoy! You have a delicious soup ready for you or your family.

    What Will You Need To Freeze Pumpkin?

    So, the following are the lists of things you would need to freeze them and why:

    • An average-sized pumpkin without pumpkin flesh (2-3 pounds)
    • A sharp knife to cut it into pieces.
    • Freezer bags or containers for the pumpkin
    • Parchment paper for lining the bags or containers
    • Muffin tin
    • Ice cube trays
    • A microwave-safe bowl, pot, or pan to heat your pumpkin
    • Ice trays/solution/water if you want to freeze the pumpkin into cubes for smoothies etc.
    • Zip-top baggies (optional): If you don't have enough freezer bags or containers
    • You can use zip-top baggies for pumpkin. Just make sure that it's good quality

    You can use ice cube bags or a muffin tin too, especially if making frozen pumpkin puree in small amounts.

    How To Freeze Pumpkin?

    I like to freeze my pumpkins in small portions (by type and use), so it's ready whenever I need them. Here are some tips for freezing fresh pumpkins:

    Step One: Wash Your Pumpkin

    The first step is to wash the pumpkin and remove the pumpkin flesh. Cut off the stem and the blossom end with a sharp knife.

    Washing Pumpkin

    Step Two: Chop Pumpkin

    Cut your pumpkin into manageable pieces that suit your needs.

    Cutting Pumpkin

    Step Three: Scoop Out Pulp

    Then, scoop out the seeds and any pulp with a large spoon. Save the Pumpkin Seeds for roasting later and wrap in aluminium foil.

    Step Four: Blanch Pumpkin Pieces

    Boil pumpkin pieces for 2 minutes, then place them in cold water to stop cooking.

    Boiled Pumpkin.

    Step Five: Freeze On Sheet

    Place the blanched pumpkin onto a sheet and freeze.

    Blanched Pumpkin

    Step Six: Place Into Freezer Bags

    Place the frozen pumpkin into freezer bags for future use.

    How To Defrost Pumpkin?

    There are a few ways to defrost frozen pumpkins:

    • Place the frozen pumpkin pieces in a bowl and let them thaw overnight in the refrigerator.
    • Put the frozen pumpkin in a saucepan and cook over low heat until it's soft.
    • Use the microwave to defrost the pumpkin. Start by cooking it on high for one minute. Then, let the pumpkin stand for about three minutes until it's defrosted.

    Remember that you don't need to defrost the pumpkin before using it in recipes. You can just use it straight from the freezer.

    Additional Tips For Freezing Pumpkins:

    • You can also freeze pumpkin puree. Just place the fresh pumpkin in a freezer bag with flesh peeled, seal it shut, and label it with name i.e. pumpkin puree, and date.
    • If you're freezing cooked pumpkin, make sure it's cooled completely before putting it in the freezer.
    • If you want to make a sweet pie make frozen pumpkin puree without the seeds.
    • To freeze raw pumpkin, cut it into the size and shape you need for recipes. Then, place it in freezer bags or containers.

    How Long Will Frozen Pumpkin Last?

    Frozen pumpkin will last for about six to eight months. Just make sure to label and date the packages before you freeze them.

    Also, make sure to keep preserving pumpkin in a freezer that's below 0 degrees Fahrenheit. Also, make sure to defrost raw pumpkin before cooking it.

    What Can I Use Frozen Pumpkin For?

    Freezing pumpkin is really useful for preserving this fruit long term because it offers you so many opportunities for how to use pumpkin down the road.

    Here are few dishes that you can prepare using frozen pumpkin:

    1) Pumpkin Bread: Bread is a classic way to use up pumpkin. You can also add nuts, cranberries, or even chocolate chips for extra flavor and texture.

    2) Pumpkin Muffins: Another great way to cook pumpkin is to make your pumpkin puree. These Savory Pumpkin Muffins are perfect for breakfast or a snack.

    3) Pumpkin Soup: A delicious Instant Pot Butternut Squash Soup made with homemade pumpkin puree, vegetables, and stock or broth.

    4) Pumpkin Pancakes: Pumpkins are a great way to add flavor and moisture to Buckwheat Pancakes or Pumpkin Waffles. These particular sweets are perfect for the fall season.

    5) Spiced Pumpkin Latte: A Spice Pumpkin Latte is another great way to enjoy pumpkin flavor without the need for baking. This latte is creamy and full of spices, perfect for fall or winter.

    There are so many possibilities for how to use frozen pumpkins, the list could go on and on! With a little creativity, you can use this versatile fruit in just about any recipe. You can even make Crustless Pumpkin Pie.

    The Last Thing You Want Is Freezer Burn!

    Freezer burn will make your pumpkin taste dry and beige in color. It's still safe to eat, but it's not going to taste very good.

    Once you're ready to use your frozen pumpkin, just defrost it in the fridge or under running water. It should be completely thawed in a few hours. Then, you can use it in any recipe you like.

    So, now that you know all about how to preserve pumpkin, why not make your favorite pumpkin recipes or homemade pumpkin puree? All you need is the pumpkin (with pumpkin seeds removed) and a freezer bag or containers. Go ahead and stock up for the winter!

    FAQ's

    Can We Freeze Pumpkins Into Slices?

    Yes, you can freeze pumpkins into slices after removing pumpkin flesh. But I don’t recommend it because the pumpkin might not hold its shape when you thaw it.

    Does Freezing Pumpkin Affect the Taste?

    I’ve found that freezing the pumpkin doesn’t affect the taste. However, the texture might be a little different after it’s been frozen. It might be a little more watery than fresh pumpkin.

    But this isn’t always the case, so you might want to experiment a little and see what you think. I would say that freezing pumpkin is a great way to store it for long periods of time without flesh.

    Guide On How To Freeze Pumpkin.

    How To Freeze Pumpkin

    Angela Milnes
    Learn How To Freeze Pumpkin with these simple steps.
    5 from 2 votes
    Print Recipe Pin Recipe Rate this Recipe
    Prep Time 10 minutes mins
    Cook Time 0 minutes mins
    Total Time 10 minutes mins
    Course Side Dish
    Cuisine American
    Servings 10 Servings
    Calories 35 kcal

    Equipment

    • 1 Knife
    • 1 Chopping Board
    • 1 Pan for boiling water
    • 1 Spoon
    • 1 Baking Tray
    • 2-3 Ziplock Bags

    Ingredients
      

    • 1 Whole Pumpkin

    Instructions
     

    • The first step is to wash the pumpkin and remove the pumpkin flesh. Cut off the stem and the blossom end with a sharp knife.
    • Cut your pumpkin into manageable pieces that suit your needs.
    • Then, scoop out the seeds and any pulp with a large spoon. Save the pumpkin seeds for roasting later and wrap in aluminium foil.
    • Boil pumpkin pieces for 2 minutes then place in cold water to stop cooking.
    • Place the blanched pumpkin onto a sheet and freeze.
    • Place the frozen pumpkin into freezer bags for future use.

    Notes

    If freezing pumpkin puree, place cold puree directly in zip lock bags or into a muffin tray or ice cube tray and then into the zip lock bag before freezing.

    Nutrition

    Calories: 35kcalCarbohydrates: 9gProtein: 1gFat: 0.1gSaturated Fat: 0.1gPolyunsaturated Fat: 0.01gMonounsaturated Fat: 0.02gSodium: 1mgPotassium: 462mgFiber: 1gSugar: 4gVitamin A: 11578IUVitamin C: 12mgCalcium: 29mgIron: 1mg
    Print Recipe Pin Recipe Rate this Recipe
    Tried this recipe?Let us know how it was!

    How To Freeze Tomatoes Correctly

    September 23, 2024 by Angela Milnes

    Sliced tomatoes on a wooden board.

    Freezing tomatoes is an excellent way to keep their fresh flavor intact for future use in soups, sauces, and more. If you've ever wondered How To Freeze Tomatoes, you're in the right place! In this article, I’ll guide you through the easy steps to freeze tomatoes, so you can enjoy their taste and versatility all year long.

    How to Freeze Tomatoes
    [feast_advanced_jump_to]

    Why Do You Freeze Tomatoes?

    One of the primary reasons people freeze ripe Tomatoes is to preserve their freshness and flavor for an extended period. Frozen tomatoes allow you to enjoy the fresh taste of summer's bounty even when tomato season has passed.

    As tomatoes ripen, they become increasingly delicious and are perfect for adding to various dishes. However, the summer crop is often too bountiful to consume all at once, leading to excess ripe tomatoes.

    By freezing them, you can conveniently store and preserve tomatoes for future use, ensuring that the vibrant flavors of the season remain accessible throughout the year.

    Which Method Is Most Effective?

    Here are some points to guide you in deciding which method is most effective for your needs:

    Chopping Tomatoes Before Freezing

    • Space saving: Chopped or diced tomatoes take up less space in the freezer, allowing you to store more in a smaller area.
    • Convenience: Chopped tomatoes can be easily added to recipes without needing to defrost or chop them beforehand.
    • Texture: Chopping tomatoes before freezing can help maintain consistency when thawed, as smaller pieces tend to freeze more evenly.

    Freezing Tomatoes Whole

    • Simplicity: Freezing tomatoes whole is the easiest method, requiring no additional prep work.
    • Versatility: Whole frozen tomatoes can be used in various recipes, including soups, sauces, and stews, as they can be chopped or blended after thawing.
    • Natural preservation: The skin of the tomato acts as a natural barrier, protecting the fruit from freezer burn and maintaining its quality.

    Stewed Tomatoes

    • Flavor enhancement: Stewing tomatoes before freezing can intensify their flavor, making them an excellent addition to various dishes.
    • Pre-cooked convenience: Freezing stewed tomatoes means they are already cooked and ready to be used in recipes, saving you time during meal preparation.
    • Consistency: Stewed tomatoes have a consistent texture when thawed, as cooking breaks down the tomatoes evenly.
    • Storage: Stewed tomatoes can be frozen in portion-sized containers or bags, making it easy to use only what you need for a specific recipe.

    How To Freeze Tomatoes? 3 Methods

    Here are three easy methods to freeze tomatoes: stewed tomatoes, whole tomatoes, and chopped tomatoes. Follow these simple steps for each method.

    Method 1: Stewed Tomatoes

    Ingredients and Tools

    • Fresh tomatoes
    • Boiling water
    • Ice water
    • Slotted spoon
    • Freezer bags

    Instructions

    1. Wash Tomatoes: Begin by washing the tomatoes thoroughly under running water to remove any dirt or debris.
    2. Peel the Tomatoes: Bring a pot of water to a boil. Carefully drop the tomatoes into the boiling water for about 30 seconds. Use a slotted spoon to transfer the tomatoes to a bowl of ice water to cool quickly. This process makes peeling easier.
    3. Remove Tomato Skins: Once cooled, peel the tomato skins off with your hands.
    4. Cook and Stew: Dice the tomatoes and place them in a pot. Cook them over medium heat until they break down into a stew-like consistency.
    5. Cool and Pack: Let the stewed tomatoes cool down, then transfer them into freezer bags. Seal the bags, removing as much air as possible before freezing.
    Stewed Tomatoes

    Method 2: Whole Tomatoes

    Ingredients and Tools

    • Whole tomatoes
    • Boiling water
    • Ice water
    • Slotted spoon
    • Freezer bags

    Instructions

    1. Wash Tomatoes: Rinse the whole tomatoes thoroughly under cold water.
    2. Blanch the Tomatoes: Boil a pot of water and carefully add the tomatoes using a slotted spoon. Allow them to blanch for about 30-60 seconds, then quickly transfer the tomatoes to a bowl of ice water.
    3. Peel and Pack: After cooling, peel off the tomato skins. You can freeze them with or without the skins, depending on your preference. Place the whole or peeled tomatoes in freezer bags, sealing tightly after removing excess air.
    Blanched Whole Tomatoes

    Method 3: Chopped Tomatoes

    Ingredients and Tools

    • Fresh tomatoes
    • Freezer bags
    • Sharp Knife

    Instructions

    1. Wash Tomatoes: Start by thoroughly washing the tomatoes to ensure they are clean.
    2. Chop the Tomatoes: Cut the tomatoes into desired sizes, whether diced or quartered, based on your future cooking needs.
    3. Pack and Freeze: Place the chopped tomatoes in freezer bags, ensuring you remove as much air as possible to prevent freezer burn. Seal the bags securely before placing them in the freezer.
    Chopped Tomatoes

    Does Freezing Tomatoes Change The Flavor?

    Stewed tomatoes gain a deeper, more concentrated flavor, which is ideal for cooked dishes like soups and sauces.

    Whole tomatoes become softer with a slightly subdued taste, making them better for cooked rather than fresh recipes. Chopped tomatoes may lose some flavor and become mushy, so they are best used in cooked dishes.

    How Long Will Tomatoes Last?

    MethodIn the FreezerIn the FridgeAt Room Temperature
    Stewed Tomatoes10 to 12 months4 to 5 daysNot more than 2 hours
    Whole Tomatoes8 to 12 monthsUp to 2 weeksUp to 5 days
    Chopped TomatoesUp to 12 months2 daysNot more than 2 hours

    How Do You Thaw Frozen Tomatoes?

    To thaw frozen tomatoes, you can follow these steps:

    1. Refrigerator Method: Transfer the tomatoes from the freezer bag to the refrigerator and let them thaw overnight. This gradual thawing helps maintain their texture.
    2. Room Temperature Method: If you need them thawed more quickly, you can set the tomatoes out at room temperature for about an hour.
    3. Water Method: Run the tomatoes under cool water until they are thawed. Avoid using warm water as it can affect the texture.

    What Can Frozen Tomatoes Be Used For?

    Tomatoes that have been frozen can serve multiple purposes, including:

    1. Sauces and stews: Frozen tomatoes work well in recipes that require cooking, like Pasta Sauces, stews, or Soups. Their texture softens during cooking, making them ideal for these dishes.
    2. Smoothies and juices: Blend frozen tomatoes with other fruits and vegetables to create refreshing smoothies or juices.
    3. Salsas: Thaw frozen tomatoes and combine them with onions, jalapeños, cilantro, and lime juice to make zesty Canned Black Bean And Corn Salsa for Dipping Chips or topping Breakfast Tacos.
    4. Ratatouille: Use frozen tomatoes in a classic French ratatouille, a vegetable dish that combines tomatoes, Grilled Eggplant, Zucchini, Cheese Stuffed Bell Peppers, and onions.
    5. Tomato sauce: Thaw and cook frozen tomatoes with herbs, garlic, and onions to create a simple yet flavorful Tomato Sauce for pasta, lasagna, or meat dishes.
    6. Cooking: Use frozen tomatoes as a substitute for fresh ones in various cooked recipes, such as Tofu Stir Fry, omelets, and quiches. Just remember that their texture may be softer than fresh tomatoes.
    7. Salads: While frozen tomatoes might not be ideal for all salads due to their softened texture, they can still be used in certain salads where a softer surface is acceptable. Use thawed frozen tomatoes in grain based salads like Quinoa Salad or couscous, or mix them with other Air Fried Roasted Vegetables for a warm salad.

    FAQ'S

    What Type Of Tomatoes Can I Freeze With These Methods?

    Roma and San Marzano tomatoes are ideal for freezing due to their low moisture and robust flavor, making them perfect for sauces. Beefsteak tomatoes offer a rich taste when frozen whole or chopped, though they may soften upon thawing.

    Can I Freeze Cherry Tomatoes?

    Yes! The best method for freezing cherry tomatoes is to freeze them whole without boiling. Simply wash, dry, and freeze them on a baking sheet before transferring them to a freezer bag. 

    Enjoy Freezing Tomatoes!

    Preserving tomatoes through freezing is a fantastic method for maintaining their taste and freshness, allowing you to enjoy them throughout the year.

    Selecting ripe, high-quality tomatoes and following proper freezing techniques can unlock the secret to maintaining that farm-fresh taste even when tomato season has passed. Whether you freeze them whole, chopped, or stewed, frozen tomatoes offer versatility in various dishes, from sauces and stews to smoothies and salsas.

    Can You Freeze Pate?

    September 23, 2024 by Angela Milnes

    Pate in a bowl.

    Can You Freeze Pate? The answer is yes! Freezing this rich, creamy spread is a great way to save leftovers, but it requires a few simple steps to keep the flavor and texture just right. Today, we’ll cover How To Freeze Liver Pâté and ensure it’s just as tasty when you’re ready to enjoy it again.

    Can You Freeze Pate
    [feast_advanced_jump_to]

    Can You Freeze Pate?

    Yes, pâté can generally be frozen well. However, the texture may become a bit grainy, and the taste might change slightly, but it should still be enjoyable.

    Things Needed For Freezing Pâté

    • Airtight Containers: Use freezer-safe containers to store the pâté securely.
    • Plastic Wrap or Aluminum Foil: Wrap each portion to prevent freezer burn.
    • Marker or Pen: This is used to label the containers with the freezing date.
    • Freezer-Safe Bags (optional): These can be used for additional protection if containers are not used.
    • Original Container (if suitable): Utilize if it's freezer-safe and airtight.

    How To Freeze Pate?

    Freezing pâté is a great way to extend its shelf life and enjoy it later. Follow these steps to ensure your pâté stays delicious and free from freezer burn.

    Step 1: Preparation

    • Portioning: Divide the pâté into small portions. This makes it easier to thaw only what you need and helps maintain its texture and flavor.
    • Use the Original Container: If your pâté comes in a freezer-safe container, you can freeze it in this container. If not, transfer it to an airtight, freezer-safe container.

    Step 2: Packaging

    • Prevent Freezer Burn: Wrap each portion of pâté with plastic wrap or aluminum foil before placing it in the container. This extra layer helps prevent freezer burn, which can ruin the taste and texture.
    • Remove Air: Ensure you remove as much air as possible from the container. Air can cause oxidation and freezer burn, so press the wrap tightly against the pâté and seal the container well.

    Step 3: Freeze

    • Label the container with the date you froze it. This helps you keep track of how long it has been stored.
    • Place the container in the coldest part of your freezer to ensure it freezes quickly and evenly.

    How Long Does Frozen Pate Last?

    Frozen pâté can stay fresh for up to three months when stored properly in airtight conditions.

    How To Defrost Frozen Pâté?

    Here’s a step-by-step guide to help you thaw your frozen pâté safely and efficiently, making it ready for your favorite recipes.

    1. Fridge Overnight Method: The best way to defrost pâté is to transfer it from the freezer to the fridge the night before you plan to use it. This gradual thawing process helps the pâté retain its texture and ensures it thaws evenly. Simply place the pâté in its original airtight container or wrap it in a dish to prevent any leakage.
    2. Room-Temperature Water Method: If you need to defrost pâté faster, you can use room-temperature water. Place the airtight-sealed pâté in a bowl of water, ensuring the water is not too warm, as this can affect the pâté's quality. Change the water every 30 minutes to maintain a consistent temperature. This method will take about 2-3 hours to thaw the pâté completely.

    Is It Possible To Refreeze Pate?

    Refreezing pâté is not advisable as it can lead to a grainy texture and diminish its flavor. If necessary, ensure it's only refrozen after thawing in the fridge, but be aware that quality may suffer with repeated freeze-thaw cycles.

    Can You Freeze Pate

    What Types of Pate Can You Make?

    Here's a guide to some popular types you can make at home:

    1. Chicken Liver Pate: A classic choice, chicken liver pâté is known for its smooth texture and rich flavor. It's often seasoned with brandy or cognac, herbs, and spices. You can freeze chicken liver pate to preserve its freshness, making it a convenient option for future use.
    2. Pork Liver Pâté: This pâté is hearty and robust, often incorporating spices like nutmeg and cloves. Pork liver pâté pairs well with rustic homemade white bread and makes for a satisfying appetizer.
    3. Duck Liver Pâté: Offering a luxurious taste, duck liver pâté is creamy and rich, often enhanced with port wine or truffles. It’s a gourmet option that’s perfect for special occasions.
    4. Turkey Liver Pâté: A leaner alternative, turkey liver pâté has a milder flavor compared to other liver pâtés. It’s a great option for those looking for a lighter spread.
    5. Beef Liver Pâté: Known for its bold and earthy flavor, beef liver pâté is often enriched with onions and garlic, making it a hearty spread ideal for meat lovers.
    6. Salmon Pâté: For a seafood twist, salmon pâté combines the rich taste of smoked or fresh salmon with cream cheese or butter. It’s a delightful option for those who prefer fish over traditional liver pâtés.

    If you're not a fan of meat or liver, you can make vegetarian pate using mushrooms or make a date pate with walnuts.

    How To Use Pate?

    Here’s how you can incorporate this gourmet delight into your culinary repertoire:

    As an Appetizer: Serve pâté as a sophisticated starter. For an elegant touch, spread it on slices of toasted baguette, crackers, or crostini. Accompany with cornichons, olives, or pickled onions for a balanced flavor profile.

    In Sandwiches and Wraps: Add a layer of pâté to Sandwiches or wraps for a savory twist. It pairs exceptionally well with roasted meats, fresh greens, and tangy spreads.

    In Pastries: Use pâté as a filling for puff pastries or savory tarts. It makes a luxurious filling for vol-au-vents or turnovers, adding depth and richness.

    Paired with Cheese and Charcuterie: Create a charcuterie board with pâté as a central element. Pair it with a variety of cheeses, easy-cured salmon, and kiwi fruit salad with pomegranate for an indulgent spread.

    In Sauces and Gravies: Blend pâté into sauces or gravies for a velvety finish. This works particularly well with Beef or poultry dishes, adding complexity to the flavors.

    Beverage Pairings: Complement pâté with wine or champagne for a refined dining experience. Choose a dry white wine or a light red to enhance the flavors of the pâté without overpowering it.

    FAQ'S

    How Long Does Liver Pate Last In The Fridge?

    Liver pâté can last in the fridge for about 3 to 4 days if stored properly in an airtight container.

    How Long Can I Keep Pate At Room Temperature?

    As for room temperature, pâté should not be left out for more than 2 hours.

    What Is Liver Pate?

    Liver pâté is a creamy, savory spread made from liver, often mixed with butter, cream, and spices. It’s typically served on bread or crackers as an appetizer.

    How To Know If Pate Has Gone Bad?

    To determine if pâté has gone bad, you should check for several signs. First, smell it; a sour or off odor is a strong indicator of spoilage. Next, examine its appearance—discoloration or any mold growth clearly suggests it’s no longer safe to consume.

    Additionally, consider the texture; if the pâté feels slimy or unusually dry, it may be spoiled. Finally, if you taste it and notice a sour or unpleasant flavor, it’s best to discard it.

    What Is The Most Popular Pate?

    As for the most popular pâté, Pâté de Foie Gras is renowned worldwide. Made from the liver of a specially fattened duck or goose, it’s celebrated for its rich, buttery flavor and luxurious texture.

    Enjoy Freezing Pate!

    In conclusion, freezing pâté is a convenient way to preserve this delicious spread for future use. By following the simple steps outlined above, you can ensure that your pâté maintains its texture and flavor when frozen and thawed properly.

    We hope this guide has helped you understand how to freeze, defrost, and enjoy different types of pâté. If you have any feedback on this content or would like to share your favorite pâté recipes with us, we would love to hear from you!

    Green Mashed Potatoes: Monster Mash

    September 22, 2024 by Angela Milnes

    Green Mashed Potatoes Monster Mash.

    These Green Mashed Potatoes are spooky, silly, and seriously delicious. Whether you're prepping for Halloween or just want to wow the kids at dinner, this vibrant mash is a fun twist on a classic side—and it’s naturally colored with herbs, not food dye!

    Green Mashed Potatoes Monster Mash.
    [feast_advanced_jump_to]

    These aren’t just for Halloween. You can serve green mash potatoes for St. Patrick’s Day, Dr. Seuss Day, or any time you want to add a pop of fun to your plate. As someone who’s made everything from rainbow pasta to veggie-packed dips, I’ve learned that a splash of color—especially when it’s natural—makes kids more excited to eat their greens. This mash is flavored with fresh herbs and topped with deviled egg "eyeballs" to take it next-level spooky.

    You'll also want to try these Roasted Brussels Sprouts With Maple Syrup and pairs perfectly with Air Fryer Catfish Nuggets or Air Fryer Steak Bites for a fun family meal.

    💖 Why This Recipe Works

    • Festive but easy: Uses simple ingredients you probably already have.
    • No artificial dyes: Just vibrant, fresh herbs.
    • Still creamy and comforting: All the flavor of classic mash with a fun twist.

    ⭐ Star Ingredients

    ingredients for green mashed potaotes.
    • Potatoes: Go for starchy types like Russet or Yukon Gold for the fluffiest, creamiest mash.
    • Butter and Milk: The dream team that gives your mash that classic rich, smooth texture.
    • Fresh Herbs: Parsley, chives, and tarragon bring that brilliant green color naturally—no food dye needed—and add a fresh, herby flavor that’s surprisingly irresistible.

    For the complete list of ingredients with measurements and instructions, please see the recipe card at the bottom of the post.

    📖  Substitutions & Variations

    • Want it even greener? Add a handful of steamed spinach to the herb blend.
    • No cream cheese? Use sour cream, Greek yogurt, or even a dairy-free alternative.
    • Make it dairy-free: Use oat milk and plant-based butter for a vegan-friendly version.
    • Add cheese: Stir in cheddar or Parmesan for a savory, gooey twist.
    • Go low-carb: Swap potatoes for cauliflower for a light, veggie-packed mash.
    • Spice it up: Add roasted garlic, a dash of cayenne, or wasabi for a surprising kick.

    Try it next to One Pan Chicken and Asparagus or Cheesy Mexican Steak and Rice for a full-on flavor fest.

    🔪How To Make Green Mashed Potatoes

    Boiling Potatoes in the Pan.
    1. Step 1: Chop your potatoes into chunks and boil them for 10-12 minutes until tender. At the same time, boil an egg for your deviled egg "eyeballs."
    herby green puree.
    1. Step 2: In a blender, combine cream cheese (or crème fraîche), milk, chives, tarragon, and parsley. Blitz until smooth and creamy. Set aside a small amount of this herby puree for the deviled eggs.
    Green Mashed Potatoes in a bowl.
    1. Step 3: Once the potatoes are boiled, drain the water and mash them until smooth. Stir in the herby puree, saving a small spoonful for the eggs, and mix until the mash turns a bright green. Add salt and pepper to taste.
    Monster Devilled Egg Eyeballs.
    1. Step 4: Peel the boiled egg and slice it in half. Scoop out the yolk, and mix it with a teaspoon of mayo and the reserved herby puree to turn it green. Spoon the mixture back into the egg whites to make your deviled eggs. Place an olive slice on top of each for the eyeballs. Place the green mashed potatoes in a serving bowl and top with the spooky eyeballs.

    💡Hint: For extra vibrancy, blend the herbs with just a splash of milk first, then stir the rest of the milk in gradually while blending to preserve color.

    Halloween Green Mashed Potatoes in a bowl with devilled egg eyeballs.

    👩‍🍳 Expert Tips

    • Use fresh herbs: Dried herbs won’t give you that bright green color.
    • Don’t overboil the potatoes: Too much water leads to gummy mash. Keep them just fork-tender.
    • Customize your eyeballs: No pimento-stuffed olives? Use sliced olives and add a sliver of red bell pepper for a creepy "bloodshot" look.

    💭 FAQs

    How Do You Make Mashed Potatoes Green Naturally?

    You can naturally color the mashed potatoes by adding chopped herbs like parsley, chives, or tarragon. These not only give the mash a vibrant green color but also add fresh flavor. A little spinach puree can also boost the color without changing the taste.

    Can I Make Green Mashed Potatoes Ahead Of Time?

    Yes! Make the mashed potatoes and store them in an airtight container in the fridge. When ready to serve, reheat them gently on the stovetop or in the microwave, adding milk or butter if needed.

    What’s The Best Type Of Potato To See For Monster Mash?

    Starchy potatoes like Russet or Yukon Gold are best for smooth, creamy mashed potatoes. Waxy potatoes, like red or new potatoes, may not mash as well.

    💖 Serving Suggestions

    Here are some delicious pairings for your monster mash:

    • Roast Chicken, Texas Smoked Turkey Breast. or Slow Cooker Ribs: The savory flavors pair perfectly with the creamy mashed potatoes, and the green color adds a fun twist to a classic meal.
    • Instant Pot Steak Bites: A juicy steak complements the richness of the mashed potatoes, making for a hearty and satisfying dish.
    • Creamy Pan Fried Salmon Fillet: The light, flaky texture of salmon pairs beautifully with the smooth, creamy potatoes.
    • Air Fryer Cod Fillet: A mild and tender cod fillet makes a light, delicious pairing with the creamy, herby green mashed potatoes.
    devilled egg monster eyeballs on green mashed potatoes.

    🍽 More Healthy Green Recipes

    • Broccoli Soup With Feta Cheese.
      Creamy Broccoli Soup With Feta Cheese
    • Air Fryer Bok Choy on a white plate covered in paprika.
      Air Fryer Bok Choy
    • Easy Pasta With Pancetta and Peas.
      Easy Pasta With Pancetta and Peas
    • pureed peas for babies.
      Simple Pureed Peas Recipe

    Did you make this recipe? Leave a review and a ⭐⭐⭐⭐⭐ rating below, or tag us in our Facebook Group! Alternatively, bookmark it in your browser or save to Pinterest.

    Green Mashed Potatoes Monster Mash.

    Green Mashed Potatoes: Monster Mash

    Angela Milnes
    Make Halloween fun with these creamy Green Mashed Potatoes! Naturally colored and delicious, they’re perfect for spooky meals any time! Try Monster Mash Potatoes again.
    5 from 4 votes
    Print Recipe Pin Recipe Rate this Recipe
    Prep Time 4 minutes mins
    Cook Time 25 minutes mins
    Course Side Dish
    Cuisine American
    Servings 3 People
    Calories 619 kcal

    Ingredients
      

    Green Mashed Potatoes

    • 5 Potatoes Large
    • 2 Cloves Garlic
    • 6 tablespoon Butter
    • 1 Cup Milk
    • 2 tablespoon Cream Cheese
    • Pinch Salt
    • Pinch Pepper
    • 1 ½ Cup Parsley Chopped
    • 1 ¼ Cup Chives Chopped
    • 3 tablespoon Tarragon Leaves Chopped

    Devilled Eggs

    • 1 Egg Boiled
    • 1 Olive Stuffed With Pemento

    Instructions
     

    • Chop your potatoes into chunks and boil them for 10-12 minutes until tender. At the same time, boil an egg for your deviled egg “eyeballs.”
    • In a blender, combine cream cheese (or crème fraîche), milk, chives, tarragon, and parsley.
    • Blitz until smooth and creamy. Set aside a small amount of this herby puree for the deviled eggs.
    • Once the potatoes are boiled, drain the water and mash them until smooth. 
    • Stir in the herby puree, saving a small spoonful for the eggs, and mix until the mash turns a bright green. Add salt and pepper to taste.
    • Peel the boiled egg and slice it in half. Scoop out the yolk, and mix it with a teaspoon of mayo and the reserved herby puree to turn it green. 
    • Spoon the mixture back into the egg whites to make your deviled eggs. Place an olive slice on top of each for the eyeballs. 
    • Place the green mashed potatoes in a serving bowl and top with the spooky eyeballs.

    Notes

    • Use Fresh Herbs for Vibrant Color: Opt for fresh parsley, chives, and tarragon to achieve that bright, natural green color in your mash. The fresher the herbs, the more vibrant the hue!
    • Don’t Over-Boil Potatoes: Keep an eye on the potatoes while boiling to avoid them becoming waterlogged. This ensures a better texture when mashed.
    • Making Monster Deviled Eggs: If you don't have olives with pimento, slice the olive thinly and add a tiny piece of red bell pepper inside to create a blood eye effect.

    Nutrition

    Calories: 619kcalCarbohydrates: 73gProtein: 16gFat: 31gSaturated Fat: 19gPolyunsaturated Fat: 2gMonounsaturated Fat: 8gTrans Fat: 1gCholesterol: 134mgSodium: 326mgPotassium: 2092mgFiber: 10gSugar: 8gVitamin A: 4600IUVitamin C: 124mgCalcium: 308mgIron: 7mg
    Print Recipe Pin Recipe Rate this Recipe
    Tried this recipe?Let us know how it was!
    Halloween Mashed Potatoes. Green mash with monster eyeball deviled Eggs.

    Can You Freeze Applesauce?

    September 22, 2024 by Angela Milnes

    Applesauce in jars.

    Can You Freeze Applesauce? Absolutely! Freezing is a great way to preserve homemade or store-bought applesauce, keeping it fresh for months. Whether you’ve made a big batch or just want to save some for later, freezing applesauce is quick and easy and ensures you always have some on hand!

    Can You Freeze Applesauce in a jar
    Applesauce in a bowl
    [feast_advanced_jump_to]

    Can You Freeze Applesauce?

    Yes, you can freeze applesauce! Whether it's homemade or store-bought, freezing keeps it fresh and flavorful for later use.

    Why Freeze Applesauce?

    As a chef, I know how busy life can get, so here’s why you should consider freezing your applesauce, especially during apple season:

    • Preservation: When you freeze homemade applesauce or store-bought varieties, it stays fresh and delicious for months. Simply make a big batch and enjoy it long after the season ends.
    • Store It As A Basic Food: You can also freeze applesauce puree, which is great news if you're following a Low FODMAP Diet.
    • Convenience: Freezing homemade applesauce means you always have a ready-to-use ingredient on hand. No more last-minute grocery runs!
    • Flavor Retention: Freezing locks in the sweet and tangy flavor of applesauce, whether homemade or store-bought.
    • Portion Control: By freezing in individual portions, you can easily thaw just the right amount when you need it, reducing waste and ensuring perfect serving sizes every time.

    What Things Do I Need To Freeze Applesauce?

    • Freezer-Safe Containers or Bags: Use sturdy, airtight options to prevent freezer burn and maintain freshness.
    • Ladle or Spoon: Essential for transferring applesauce into containers or bags without spills.
    • Labels: Use these to mark the date and contents on each container or bag for easy identification.
    • Marker: Permanent markers work best for writing on labels or directly on freezer bags.
    • Funnel (Optional): Useful for pouring applesauce into containers or bags with smaller openings.
    • Baking Sheet (Optional): Ideal for freezing applesauce in portions before storing in bags to prevent them from sticking together.

    How To Freeze Applesauce?

    To freeze applesauce, ensure you already have some on hand. If you've purchased it or made your own, you can skip the steps for preparing applesauce.

    Prepare Homemade Applesauce (Skip This Step If You Have Applesauce)

    Making applesauce is super simple simple!

    Ingredients:

    • 4 large apples (any variety you like)
    • ½ cup water
    • ¼ cup white or brown sugar (optional) You can also keep it unsweetened
    • ½ teaspoon cinnamon (optional)
    • A pinch of salt
    • 1 tablespoon lemon juice (optional)
    Ingredients To Make Applesauce

    Instructions:

    1. Peel and Core Apples: Start by peeling and coring the apples. Cut them into small chunks for easy cooking.
    2. Combine Ingredients: Place the apple chunks in a large pot. Add water, sugar, cinnamon, lemon juice (if using), and a pinch of salt.
    3. Cook the Apples: Bring the mixture to a boil over medium heat. Reduce the heat to low, cover, and let it simmer for about 15-20 minutes or until the apples are very soft.
    4. Mash or Blend Cooked Apples: Once cooked, use a potato masher for a chunky texture or a food processor or immersion blender for a smooth applesauce. You will love homemade applesauce!
    5. Cool the Applesauce: Allow the applesauce to cool to room temperature before proceeding to freeze.
    Cooking apples for applesauce
    Mashing Cooked Apples
    Applesauce in a bowl

    Freezing Applesauce

    Here’s how you can freeze applesauce using various methods:

    Method 1: Freezer Bags

    1. Portion the Applesauce: Use a measuring cup or ladle to scoop the applesauce into portions.
    2. Fill the Bags: Pour the cooled applesauce into freezer bags, leaving some space for expansion.
    3. Remove Air: Press out any excess air before sealing the bags.
    4. Label and Date: Clearly mark the bags with the contents and date.
    5. Freeze Flat: Lay the bags flat in the freezer for efficient storage.

    Method 2: Freezer-Safe Containers

    1. Select Containers: Choose plastic or glass containers that are freezer-safe.
    2. Fill the Containers: Spoon the applesauce into containers, leaving an inch of space at the top.
    3. Seal Tightly: Ensure the lids are securely fastened to prevent freezer burn.
    4. Label and Date: Write the date and contents on each container.
    5. Stack Carefully: Arrange containers neatly to make the most of your freezer space.

    Method 3: Ice Cube Trays

    1. Pour into Trays: Fill ice cube trays with applesauce using a spoon or small measuring cup.
    2. Freeze Until Solid: Let the trays freeze completely, usually taking a few hours.
    3. Transfer to Bags: Once frozen, pop the applesauce cubes out of the trays and into labeled freezer bags.
    4. Store and Use: Keep the bags in the freezer, using cubes as needed for recipes or snacks.

    How Long Can You Store Applesauce In The Freezer?

    Applesauce can be stored in the freezer for up to eight months. After this time, it is no longer safe to eat and should be thrown away as a precautionary measure.

    Top Tips For Freezing Apple Sauce

    My top 3 tips to ensure you freeze your applesauce well are:

    • Cook the applesauce to a high temperature before freezing
    • Freeze in Ice Cube Trays, Freezer Bags, or Containers for easy access when cooking.
    • Label and date your container or freezer bag with what you're putting inside so you know exactly what it is and how long it will last.

    How To Defrost Applesauce?

    To defrost applesauce, you can follow these simple steps:

    1. Refrigerator Method: Place the frozen applesauce in the refrigerator and let it thaw slowly overnight. This method helps maintain the texture and flavor.
    2. Room-Temperature Method: For a quicker option, you can leave the applesauce at room temperature for a few hours. Just be sure to use it promptly once it has thawed.
    3. Microwave Method: If you're in a hurry, use the defrost setting on your microwave. Heat the applesauce in short intervals, stirring occasionally to ensure even thawing.

    Can You Refreeze Applesauce?

    It's generally not recommended to refreeze applesauce once it has been thawed. Refreezing can affect the texture and flavor, leading to a less desirable product. Additionally, repeated thawing and Refreezing Can Increase The Risk Of Bacterial Growth.

    What Foods Can You Combine With Applesauce?

    Applesauce is a versatile ingredient that can enhance a variety of dishes. In desserts, it adds moisture and flavor to Lemon pudding cake, apple pies, and Zucchini Chocolate Chip Muffins.

    For breakfast, it pairs wonderfully with easy buckwheat pancakes or Vegan Waffles With Pumpkin. When it comes to main meals, applesauce complements One Pan Chicken Asparagus, roast pork, and vegan beetroot and black bean burgers beautifully.

    Additionally, it can be used as a topping for meatloaf , make ahead casseroles, and vegetarian dishes, especially when your recipe calls for extra moisture, such as gravy.

    Favorite Recipes That Use Applesauce

    Here are some fantastic recipes that use Applesauce as an ingredient.

    • Apple Pie Filling: This easy recipe creates a flavorful apple pie filling using an Instant Pot. It's perfect for pies, crumbles, or as a topping for pancakes and yogurt.
    • Crockpot Chicken With Apple Sauce: A simple slow cooker meal combining applesauce and BBQ sauce with thin sliced chicken breasts. It's a family favorite that's easy to prepare and perfect for busy days.
    • Apple Crumble Cake: A moist and gluten-free cake that combines the flavors of apple and almond with a delightful crumble topping. It's a perfect dessert served with yogurt or whipped cream.

    FAQ'S

    Why Is Homemade Applesauce Best?

    A homemade version can contain far less sugar, depending on what you are using it for, and you have control over the sweetness of each jar.

    How Long Does It Take For Applesauce To Freeze?

    Once your applesauce is in the freezer it will take between six and twelve hours to freeze.

    Make sure your airtight container or bag is sealed tightly before placing it into the freezer so that no water gets inside, which could cause ice crystals to form.

    Is Applesauce Good For Bariatric Patients?

    Yes, applesauce is a great pureed food for bariatric patients. It’s packed full of vitamins and minerals like vitamin A, B-vitamins, calcium, and magnesium.

    Whether making perfectly smooth sauce or chunkier applesauce, it can be frozen for later use in small portions which are perfect for the bariatric diet.

    You can freeze the applesauce in different sizes and use ice cube containers if you’re a gastric bypass patient.

    Yes, You Can Freeze Apple Sauce!

    You can keep homemade applesauce in the freezer for quick and easy use. It's easy to freeze and defrost and super tasty.

    Recently my husband was craving some old-fashioned apple pie so he grabbed a container of frozen applesauce out of the freezer for his dessert – yum!

    Now your turn – what do you use applesauce for? Do you like to freeze applesauce? Are you a fan of chunky sauce or the perfectly smooth type? Let me know in the comments below!

    Learn More About Freezing Foods:

    • Can You Freeze Couscous
    • Can You Freeze Jambalaya
    • How To Freeze Kiwi Fruit
    • How To Freeze Japanese Eggplant

    Can You Freeze Couscous?

    September 22, 2024 by Angela Milnes

    Couscous on a wooden spoon.

    Can You Freeze Couscous? Yes, you can! Freezing couscous is a fantastic way to save time and reduce waste. In this article, we'll walk you through how to freeze couscous properly and share some handy tips for storing it so it's fresh and ready whenever you need a quick meal fix.

    Can You Freeze Couscous - Wooden spoon on uncooked ptitim background, close up
    [feast_advanced_jump_to]

    What Is Couscous Made Of?

    First, let's discuss the basics of couscous before discussing how to freeze it. Couscous is a small pasta made from durum wheat semolina and is commonly used in Mediterranean cuisine.

    Couscous can be cooked by steaming or boiling and it has a light and fluffy texture when prepared correctly.

    Different Types of Couscous

    When it comes to couscous there are a few different types available. The most common being white or whole wheat couscous, but you can also find Israeli, Lebanese or Moroccan Couscous.

    Does Couscous Go Bad?

    Yes, if you don't store couscous correctly, then it can go bad quickly.

    How Long Does Couscous Stay In The Fridge?

    Cooked couscous should be stored in the fridge for no more than 5 days before it starts to go bad.

    Can You Freeze Couscous?

    Absolutely, you can freeze couscous! It's a great way to save leftovers and have a quick meal ready.

    Can You Freeze Uncooked Couscous?

    While it is technically possible to freeze uncooked couscous, it is not recommended as the texture of uncooked couscous may become too mushy when thawed and cooked.

    Can You Freeze Couscous Soup?

    Yes you can freeze your couscous soup. However, it is important to note that some ingredients may change in texture upon thawing and reheating. To freeze, let the soup cool completely before transferring to an airtight container or freezer bag.

    Can You Freeze Cauliflower Couscous?

    Yes, you can freeze cauliflower rice or couscous.

    How Long Does Couscous Last In The Freezer?

    Couscous can last in the freezer for up to five months. Just make sure it's stored in an airtight container or a freezer bag to keep it fresh and prevent freezer burn. 

    How To Freeze Cooked Couscous?

    Here is a quick step-by-step guide for freezing couscous if you have too much couscous leftover. You'll need to prepare couscous before you freeze couscous.

    Step One: Cool The Couscous

    Allow your cooked couscous to cool completely at room temperature. Spreading it out on a baking sheet can help it cool faster.

    Step Two: Portion The Couscous

    Divide the couscous into portion sizes that you are likely to use later. This makes it easier to thaw only what you need.

    Step Three: Pack In Freezer Bags Or Containers

    Transfer the portions into airtight freezer bags or containers. Squeeze out as much air as possible from freezer bags to prevent freezer burn.

    Step Four: Label And Date

    Write the date and contents on the bags or containers. This will help you keep track of how long they have been in the freezer.

    Step Five: Freeze

    Place the packed couscous in the freezer. Make sure they are laid flat to save space and freeze evenly.

    Best Container To Store Couscous

    It is best to store couscous in an airtight container or ziplock bag. This will ensure that it stays fresh and prevent freezer burn when freezing couscous.

    Does Freezing Affect Couscous?

    Freezing couscous can slightly alter its texture, making it less fluffy and a bit more compact. The flavor generally remains stable, but freezer burn can affect quality if not stored properly.

    How To Reheat Frozen Couscous?

    You can reheat couscous by any of the three methods:

    1. Microwave Method

    1. Place the frozen couscous in a microwave-safe bowl.
    2. Cover the bowl with a microwave-safe lid or plastic wrap, leaving a small gap for steam to escape.
    3. Heat on high for 1-2 minutes.
    4. Stir the couscous halfway through to ensure even heating.
    5. Continue heating in 30-second intervals if needed, until warmed through.

    Tips

    • Adding a splash of water or broth can help prevent dryness.
    • Use a fork to fluff the couscous after heating for better texture.

    2. Stovetop Method

    1. Transfer the frozen couscous to a pot.
    2. Add a small amount of hot water or broth to the pot.
    3. Heat over medium-high heat.
    4. Stir frequently to break up any clumps and ensure even warming.
    5. Continue cooking until the couscous is thoroughly thawed and heated.

    Tips

    • Cover the pot with a lid to help steam the couscous, which can assist in reheating evenly.
    • Adjust the liquid amount based on desired consistency.

    3. Oven Method

    1. Preheat the oven to 350°F (175°C).
    2. Spread the frozen couscous evenly in an ovenproof dish.
    3. Cover with aluminum foil to retain moisture.
    4. Bake for 10-15 minutes or until the couscous is heated through.
    5. Fluff with a fork before serving.

    Tips

    • You can add a few tablespoons of water or broth before covering to keep the couscous moist.
    • Stir halfway through the reheating process for even heating.

    Can You Refreeze Couscous?

    It is possible to refreeze couscous, but the taste and texture will be noticeably worse. Repeatedly freezing and thawing food can change its texture.

    FAQ'S

    Enjoy Freezing Couscous!

    At the end of the day couscous can easily be frozen, whether cooked or uncooked. Just remember to allow the couscous to cool before freezing. Try experimenting with this versatile ingredient and Other Foods. Enjoy!

    How To Freeze Coconut Cream In 6 Simple Steps

    September 22, 2024 by Angela Milnes

    Fresh coconut and coconut cream in a bowl.

    Freezing coconut cream is a great way to save leftovers or prep ahead for future recipes. In just six simple steps, you can master the art of How To Freeze Coconut Cream with ease. I’m here to walk you through the process so you can keep your coconut cream fresh and creamy without any fuss!

    Guide on How To Freeze Coconut Cream.
    [feast_advanced_jump_to]

    What Is Coconut Cream?

    Coconut cream is a dense cream derived from coconut milk. The top layer of cream is skimmed off chilled coconut milk and has a thicker and richer texture than coconut milk. Coconut cream is typically used in Desserts like chocolate mousse, whipped cream, and toppings.

    How To Freeze Coconut Cream?

    Now that you know the difference between coconut cream and milk, let's learn about freezing it. This is a great way to preserve your extra coconut cream so that next time you want to use it for cooking or baking purposes, all of its amazing properties will be intact!

    Step One: Open The Coconut And Drain Out The Water

    • When you open your coconut, make sure that the brown layer is facing down.
    • Use a spoon to scrape out all of the water in the center of your coconut.
    • Once drained, remove any bits left over from the inside with your hands or a fork.

    Step Two: Scoop Out The Coconut Cream

    • Once all of the water is removed, use a spoon to scoop out your coconut cream.
    • Transfer the cream into a freezer bag or pouch ready to freeze.
    • You can also transfer this mixture into an airtight container if you prefer not to use a pouch.

    Step Three: Freeze The Pouches Or Containers Of Coconut Cream

    • I love to use this reusable freezer storage pack. The storage bags are leakproof, have an easy seal zipper, and are very easy to clean! I also love that they are sold in different colors!

    How to Defrost Coconut Cream?

    To defrost, you can simply put your frozen coconut cream pouch in the fridge overnight. Alternatively, if you want it that day then let it thaw out at room temperature for an hour or two!

    Remember to always check the quality of your product before use and discard if anything seems off.

    Best Containers For Storing Coconut Cream

    You can also use containers for coconut cream instead of freezer bags.

    Here are some of the best containers for storing coconut cream that I found on Amazon!

    • Set of 12 Glass Baby Food Storage Containers - Yes these are designed for baby food but work perfectly with coconut cream and are the perfect size for 1 cup portions of coconut cream.
    • 10 Pack food prep food storage container - These come in two sizes and are great for storing larger amounts of coconut cream to add to meals such as Thai Green Curry.

    FAQ'S

    How Long Does Coconut Cream Last?

    Coconut cream can last in your freezer for up to six months.

    How To Tell If Coconut Cream Is Bad? 

    Since coconut cream is a dairy product, it will go bad if not stored properly. If you notice any discoloration or weird smells coming from the frozen cream then throw it out!

    Does Freezing Affect Coconut Cream?

    Freezing your coconut cream will not have a significant effect on its texture. When thawed, the consistency of the product is very similar to regular whipped cream!

    What Is The Difference Between Coconut Milk And Coconut Cream? 

    Coconut milk and coconut cream are both derived from coconuts. However, the difference is that coconut milk is made out of the water and shredded meat while coconut cream comes from just the fatty parts of the fruit.

    Can You Freeze Jambalaya?

    September 22, 2024 by Angela Milnes

    Jambalaya in a bowl.

    Can You Freeze Jambalaya to enjoy later? Freezing jambalaya is a convenient way to preserve its rich flavors and save leftovers for busy days. Learn the best practices to ensure your jambalaya stays delicious with these simple steps.

    Can You Freeze Jambalaya
    [feast_advanced_jump_to]

    Can You Freeze Jambalaya?

    The answer is yes, you can freeze Jambalaya, but how do you know if you're freezing Jambalaya correctly and what is the best way to do so?

    But Does Jambalaya Freeze Well?

    Jambalaya is made with rice, meat, and vegetables so it can hold up well to freezing. Follow our tips to ensure the best texture when you freeze Jambalaya to prevent the rice from going mushy or soggy.

    How To Freeze Jambalaya?

    How to freeze Jambalaya Leftovers correctly:

    Step One: Let the Jambalaya Cool

    Allow the Jambalaya to cool completely before packaging and freezing.

    Step Two: Place Into Container

    Place in an airtight container or freezer-safe zip lock bag, removing as much air as possible before sealing.

    Step Three: Label And Date Jambalaya

    Label with the name and date before placing your jambalaya in the freezer.

    How To Prevent Freezer Burn When Freezing Jambalaya?

    To prevent freezer burn when you freeze jambalaya, make sure you are using airtight containers or freezer bags.

    Also, make sure the jambalaya is completely cooled before freezing to decrease moisture and condensation in the container.

    Jambalaya freezes very well when prepared correctly.

    How Long Does Frozen Jambalaya Last?

    Jambalaya can be frozen for up to three months. Keep frozen jambalaya in the freezer until you're ready to defrost and reheat it.

    Does Creole Jambalaya and Cajun Jambalaya Both Freeze the Same?

    Both Creole and Cajun Jambalaya can be frozen using the same guidelines.

    When you freeze leftovers, be sure to add the rice and meat dish to a freezer-safe container.

    Best Way To Store Leftover Jambalaya

    The best way to store leftover Jambalaya is to place it in an airtight container and keep it in the refrigerator for up to four days.

    When storing in the fridge you can keep your Jambalaya rice dish in a ziplock bag, ice cream container or another type of freezer bag.

    If you store Jambalaya in the refrigerator overnight, you can reheat it in minutes when you're feeling hungry and ready to have some leftovers.

    How Do You Thaw Frozen Jambalaya?

    The best way to thaw frozen jambalaya is in the fridge overnight.

    If you're short on time, you can also thaw quickly by placing the frozen jambalaya in a bowl of cold water and changing out the water every 30 minutes until thawed.

    Don't add boiling water after you freeze the jambalaya, as this will affect the texture and taste of the dish. You don't want mushy rice or stodgy rice.

    How Do You Reheat Jambalaya?

    When reheating frozen jambalaya, thaw it in the fridge overnight and then reheat it in a pot on the stove or in the microwave until hot throughout.

    Be sure to cook the jambalaya in a microwave-safe container when reheating.

    Alternatively, try reheating Jambalaya in a slow cooker or put the frozen jambalaya straight into a skillet.

    Reheating Jambalaya has bever been easier!

    Can You Refreeze Jambalaya?

    No, it's not recommended to refreeze jambalaya as it can impact the texture and taste of the dish.

    You don't want to defrost Jambalaya and then refreeze because the meat will not be safe to eat once thawed a second time.

    How To Know If Jambalaya Has Gone Bad?

    Here are three ways to know if Jambalaya has gone bad

    • Smell of Jambalaya: Smell and appearance are typically the best indicators that jambalaya has gone bad. If it smells off or has visible mold, it should be thrown out.
    • Taste of Jambalaya: Taste is not a reliable indicator as jambalaya often has strong flavors, but if it tastes unusually sour or unpleasant it should be discarded.
    • Look of Jambalaya: Mold is not always visible on jambalaya, so if it has been in the fridge for longer than four days or in the freezer for more than three months, it's best to throw it out.

    How Long Can Jambalaya Sit Out?

    Jambalaya should not sit out for longer than two hours at room temperature. After that, bacteria can begin to grow and it should be thrown out.

    Jambalaya rice with chicken, shrimp, sausage and vegetables in plate on wooden table, top view

    FAQ'S

    Can I Serve Reheated Jambalaya At A Potluck?

    It’s not recommended to serve reheated jambalaya at a potluck, as it may have been sitting out for too long and could potentially cause food poisoning. It’s best to only serve jambalaya that has been freshly prepared and kept hot until serving.

    Does Jambalaya Need To Be Piping Hot?

    Jambalaya should be served hot, but not necessarily piping hot. As long as it has been heated thoroughly until all ingredients are warm, it can be served.

    How Do You Make Jambalaya Less Mushy?

    If your jambalaya is too mushy, it may have been cooked with too much liquid or for too long. To prevent this in the future, use the proper ratio of liquid to rice and cook until the rice is just tender.

    How To Thicken Jambalaya?

    If your jambalaya is too watery, you can thicken it by cooking on the stove for a longer period or adding in a thickening agent such as flour, cornstarch, or even mashed potatoes.

    You can also add in additional ingredients such as more vegetables or meat to absorb some of the excess liquid.

    How Do You Keep Jambalaya From Drying Out?

    To prevent jambalaya from drying out, it’s important to use the proper ratio of liquid to rice.

    You can also cover the dish while cooking to retain moisture, and add additional liquids such as chicken broth or tomato sauce if needed.

    When storing leftovers, make sure to seal tightly in an airtight container or zip lock bag.

    Enjoy Freezing Jambalaya!

    Jambalaya can be successfully frozen if proper steps are taken. Make sure to cool the dish completely before freezing and use airtight containers or freezer bags to prevent freezer burn.

    Jambalaya can last up to three months in the freezer and should be thawed in the fridge overnight before reheating. It is not recommended to refreeze Jambalaya and it should be discarded if it has gone bad after being left out for more than two hours or stored for longer than four days in the refrigerator.

    How To Freeze Kiwi Fruit?

    September 22, 2024 by Angela Milnes

    Kiwi fruit.

    Kiwi fruit is a favorite fruit of everyone in my family. I mean who doesn't like a juicy, delicious fruit with a sweet and sour taste? Today I will share top tips on How to Freeze Kiwi Fruit correctly.

    Fresh Kiwi Fruit. how to freeze kiwi fruit.
    [feast_advanced_jump_to]

    Why Preserve Kiwifruit?

    You can have the taste of kiwi fruit all year round by freezing it in your freezer.

    The best way to freeze kiwi slices or whole kiwis is to do so in a way that excludes air from any container or zip-lock bag.

    How To Freeze Kiwi Fruit

    Here are the steps for Freezing kiwi fruit the right way.

    1. Wash the kiwi fruit with water.
    2. Use a paper towel to pat the entire fruit dry.
    3. Peel and slice the kiwi fruit in half.
    4. Remove the flesh from the fruit. Place the kiwi fruit in a freezer-safe bag or container.
    5. Alternatively, use sliced kiwi. Place them on parchment paper or a cookie sheet and allow the multiple slices to flash freeze for one hour before popping into a container.
    6. Label each kiwi fruit bag with the date and place it in the freezer.

    How To Pick Kiwi Fruit To Freeze?

    The best kiwifruit is to pick are the slightly soft ones because these have a higher content of sugar. If you buy hard kiwis that are not ripe, they may become mushy when you freeze them.

    How To Store Kiwi Fruit?

    The best way to store completely frozen kiwifruit is in its whole form, without cutting them.

    If you need to cut the fruit, place the slices on a baking tray until frozen solid. This will help retain their taste and shape. Pop them into a bag once flash-frozen.

    TIP: If you want to store the skin from the peeled kiwis, place the peel directly into an airtight freezer bag or zip lock bag to avoid air exposure and keep it freezer safe.

    How To Defrost Kiwi Fruit?

    Now you know how to freeze kiwi fruit you can use one of the following methods to defrost your frozen fruit.

    • Take out of the freezer. Place the kiwis in a bowl and leave them on the kitchen counter for 2-3 hours. This method requires no special equipment.
    • Place the frozen fruit under warm running water for 45 seconds before placing them in a bowl. If you use this method, the frozen kiwi fruit will be thawed within 5 minutes or so.

    How To Use Frozen Kiwi Fruit?

    Frozen kiwis are perfect for making delicious smoothies and desserts. You can add them to your favorite fruit salad or smoothie recipe to make the most of them.

    Freezing kiwis for salads, breakfasts, and desserts is a great idea.

    • You can add one cup of diced kiwi fruit to 3 cups of green leafy vegetables and toss well while adding olive oil, lemon juice, salt, and pepper for taste.
    • Add some thawed kiwi fruit to your bowl of oatmeal or muesli before placing it in the microwave for two minutes.
    • Use kiwi slices to top up your pies or crumbles and pavlova desserts.
    • Mix diced frozen kiwi slices with other fruit such as frozen plum, blueberry, or strawberry puree for a tangy flavor. Add some oatmeal flakes to balance the sweet-and-sour taste and serve as a tasty dessert.
    Kiwi Juice

    Kiwi Fruit for Breakfast

    • Defrost frozen kiwifruit and mix it with granola, toasted coconut flakes, and honey for sweetness and texture.
    • Make strawberry and kiwifruit yogurt. It's super tasty and a great breakfast option for kids.
    • Defrost frozen kiwi slices to make tasty smoothies crunchier and tastier.

    Using Thawed Kiwi For Kiwi Fruit Sorbet

    You can make frozen kiwi fruit sorbet by following these easy steps:

    1. Take out the fruit and add 1 teaspoon of lemon juice before blending the mixture in a blender for one minute.
    2. Add vanilla extract, honey, plus a few ice cubes. Blend the mixture to get a smooth sorbet texture.
    3. Serve and enjoy!

    How To Make A Smoothie With Frozen Kiwi Fruit?

    If you wish to freeze kiwi fruit for smoothies then you can freeze the whole kiwifruit with the kiwi's skin or freeze just the pulp and seeds.

    Add the frozen kiwi fruit to your favorite smoothie recipe and blend them with other ingredients before serving.

    • Blend ¼ cup water, half a banana, 1 tablespoon honey, 2 kiwi fruit slices, and ice cubes in the blender until you get a smooth mixture.
    • Add one scoop of pineapple sherbet to the mixture before serving.
    This recipe makes the best smoothies!

    Kiwi smoothie made from frozen kiwi

    FAQ'S

    What Is A Kiwi Fruit?

    Kiwi fruit, also known as Chinese gooseberry, is a popular fruit that originated in China. In the 1950s New Zealand brought this fruit to the international market. It is named kiwi fruit because the skin of the fruit is furry and looks similar to the New Zealand kiwi bird.

    How Long Will Kiwi Fruit Stay Fresh In The Freezer?

    If you freeze Kiwi it will retain the taste and nutrients for up to 12 months. However, you should note that exposure to air will reduce their shelf life, so it’s best to try to use them within 6 months.

    Try Frozen Kiwi Slices or Kiwi Fruit Today!

    Now, you know how to freeze kiwi fruit and defrost it. Try out one of the above suggestions and make this summer perfect to enjoy! Let me know how you find freezing kiwi.

    How To Freeze Lasagna: Top Tips

    September 22, 2024 by Angela Milnes

    Serving Lasagna.

    Got leftover lasagna or want to make a batch ahead of time? Freezing lasagna is a fantastic way to have a hearty meal ready whenever you need it. I'll show you How To Freeze Lasagna so it stays delicious and cheesy, perfect for those busy nights when you need a quick and comforting dinner.

    guide on how to freeze lasagna
    [feast_advanced_jump_to]

    Can You Freeze Lasagna?

    Yes, lasagna can be frozen for later consumption. To freeze leftover lasagna is an excellent way to preserve it. It saves you time and money by providing you with a ready-to-eat meal that you can enjoy anytime without having to cook from scratch.

    Can You Freeze Cooked Lasagna?

    You can freeze cooked lasagna, whether it's leftover or freshly baked. Freezing cooked lasagna is a great way to save time and have dinner ready when you need it.

    Can You Freeze Uncooked Lasagna?

    Absolutely, you can freeze uncooked lasagna. Freezing uncooked lasagna is a great way to prepare ahead of time for dinner or to save leftovers for later. However, it's essential to assemble the lasagna and freeze it correctly to prevent Freezer Burn and spoilage.

    uncooked lasagna

    How To Freeze Lasagna?

    Freezing lasagna is easy, but it does require some preparation to ensure that the lasagna retains its flavor and texture.

    Step One: Cool Before Freezing

    Cooling before you freeze lasagna is an essential step in the process to ensure that the dish retains its flavor and texture when reheated. It's important to let the lasagna cool to room temperature before you wrap it tightly with plastic wrap and aluminum foil.

    Additionally, if you try to freeze warm or hot lasagna, it can cause condensation to form inside the wrapping, which can also lead to freezer burn.

    Step Two: Pre-Cut Portions

    Cutting your lasagna into portions before freezing is a great way to maximize its longevity and convenience. It's easier to reheat a single portion rather than the entire lasagna, which saves you time and energy.

    Pre-cutting your lasagna also allows you to freeze only what you need, preventing food waste. Make sure to use a sharp knife to cut through the lasagna layers without disturbing them too much. Portion size depends on your preference, but individual servings or family-sized portions are the most common.

    lasagna portion

    Step Three: Choose The Right Container

    Choosing the right container to freeze lasagna is a must. Use freezer-safe and airtight containers such as glass or plastic containers with tight-fitting lids. Zip-top freezer bags also work well for individual portions and stacking. Remember to squeeze out air before sealing the bag to prevent freezer burn.

    Step Four: Double-Wrap

    Double-wrapping before you freeze lasagna is a smart move to protect it from freezer burn and keep it fresh for longer periods.

    wrapped lasagna

    Step Five: Label And Date

    Labeling and dating your frozen lasagna is a must and ensures that you consume your food before it goes bad.

    Step Six: Freeze Flat

    This technique involves placing the leftover lasagna in a freezer-safe ziploc bag and then laying it flat on the surface of the freezer. Once frozen, you can stack it up with other frozen bags of lasagna, taking up less space in the freezer.

    Freezing the lasagna flat also allows for quicker and even thawing when you're ready to reheat it. It helps prevent the lasagna from getting crushed or losing its shape, so it's just as good as it was when first made.

    How Long Can You Safely Store Frozen Lasagna In The Freezer?

    You can safely store frozen lasagna in the freezer for up to three months, but after that, the quality may decline.

    How To Reheat Frozen Lasagna?

    • If you're reheating baked lasagna, preheat the oven to 375°F, take lasagna out of the freezer, cover it using aluminum foil, and bake lasagna in the oven for 1 hour for a full tray or 45-50 minutes for an individual portion.
    • Remove the foil during the last 10-15 minutes of cooking to allow the top to brown and become crispy. Check internal temperature of the lasagna; it should reach 165°F (74°C) to make sure it's thoroughly heated.
    reheating lasagna

    Enjoy Freezing Lasagna!

    By following these expert tips, you can store your lasagna in the freezer successfully and enjoy it at any time without worrying about freezer burn or food waste

    Best Recipe For Zuppa Toscana Soup

    September 21, 2024 by Angela Milnes

    Best Recipe For Zuppa Toscana Soup.

    If you're craving a bowl of pure comfort, this Best Recipe for Zuppa Toscana Soup is here to warm you up! This classic Italian soup is loaded with savory sausage, tender potatoes, and fresh kale, all in a creamy, flavorful broth. It's like a hug in a bowl! Perfect for cozy nights and family dinners, this soup will quickly become a favorite. Ready to make the best Zuppa Toscana you've ever tasted? Let’s get cooking!

    Zuppa toscana soup in a pot.
    [feast_advanced_jump_to]

    Why This Recipe Works

    • Rich and Creamy: This Zuppa Toscana Soup features a creamy broth that’s both comforting and indulgent.
    • Hearty and Flavorful: Loaded with savory sausage, tender potatoes, and fresh kale, each spoonful is packed with flavor.
    • Perfect for Any Occasion: Whether it’s a cozy night in or a family dinner, this soup is sure to please everyone at the table.

    🥘 Ingredients

    Ingredients needed for a recipe for zuppa toscana soup.
    • Extra Virgin Olive Oil: Used to sauté the ingredients, adding a rich, fruity flavor and a smooth texture to the soup.
    • Ground Pork: Provides a hearty, savory base with a rich and flavorful taste, making the soup filling and satisfying.
    • Fennel Seed: Adds a sweet, anise-like flavor that complements the pork and enhances the overall depth of the soup.
    • Crushed Red Pepper Flakes: Brings a subtle heat and spiciness, balancing the flavors and adding a bit of kick.
    • Paprika: Adds a mild, sweet smokiness and a vibrant color to the soup.
    • Black Pepper: Provides a gentle heat and a touch of earthiness, enhancing the other spices.
    • Garlic Powder: Adds a robust, savory flavor, enriching the taste of the broth and pork.
    • Onion Powder: Adds a sweet and savory depth, complementing the garlic and other spices.
    • Italian Seasoning: A blend of herbs like oregano, basil, and thyme that adds an aromatic, savory note to the soup.
    • Salt: Enhances all the flavors, ensuring the soup is well-seasoned and balanced.
    • Garlic Cloves, minced: Fresh garlic adds a sharp, pungent flavor that infuses the broth with a robust and savory depth.
    • Chicken Stock: Forms the base of the soup, providing a rich and savory liquid that enhances all the ingredients.
    • Radishes, peeled and halved: Add a slight peppery bite and a tender texture once cooked, offering a low-carb alternative to potatoes.
    • Tops from a farmer’s market bushel of Ramps (or low-carb leafy greens): Adds a fresh, slightly garlicky flavor and a bright green color, enhancing the nutritional value and flavor of the soup.
    • Heavy Whipping Cream: Provides a rich, creamy texture and a slight sweetness, making the soup smooth and luxurious.

    For the complete list of ingredients with measurements and instructions, please see the recipe card at the bottom of the post.

    📖  Substitutions & Variations

    • Parmesan Perfection: Finish each bowl with a sprinkle of freshly grated Parmesan cheese for a creamy and cheesy flavor enhancement.
    • Vegetarian Delight: Replace ground pork with plant-based alternatives, such as crumbled tofu or vegetarian sausage, for a meatless version.
    • Kale Powerhouse: Swap radishes for kale leaves to add a nutritious leafy green element, boosting the soup's fiber and vitamin content.
    • Spicy Sausage Kick: Opt for hot Italian sausage to intensify the heat, giving the soup a zesty and flavorful twist.
    • Cauliflower Comfort: Substitute radishes with cauliflower florets for a different low-carb alternative while maintaining a satisfying texture.
    • Bacon Bliss: Enhance smokiness by adding crumbled bacon as a topping, infusing the soup with a savory and crispy element.

    🔪How To Make Zuppa Toscana Soup

    Mixing seasonings with ground pork.

    Step One: In a mixing bowl, knead the seasonings into the ground pork. Set the Instant Pot to the “sauté” setting. Add the seasoned ground pork to it.

    Cooking ground pork in instant pot.

    Step Two: Cook until browned. Do not drain the fat, as it adds flavor to the soup. Add minced garlic to the browned meat and continue to sauté for an additional minute to enhance the flavor.

    Radishes and stock added to the cooked ground pork.

    Step Three: Add the radishes and stock to the Instant Pot. Mix well to combine all the ingredients.

    Making zupa toscana soup in an Instant Pot.

    Step Four: Lock the lid in place and set the Instant Pot to “Pressure Cook” on high for 10 minutes. Allow the Instant Pot to naturally release pressure for 5 minutes. Then, very carefully, manually release any remaining pressure.

    Stirring in the whipping cream and ramp greens in the zupa toscana soup.

    Step Five: Once it is safe to open the lid, slowly stir in the whipping cream and ramp greens. Season with salt and pepper to taste.

    Zuppa toscana soup in a pot.

    Step Six: Serve the Zuppa Toscana Soup warm and enjoy!

    👩‍🍳 Expert Tips

    Here are some top tips for cooking zuppa toscana:

    • Use Fresh Ingredients: Fresh ramps, onion, and garlic will give the comforting soup a vibrant flavor. Also, choose good quality Italian sausage for the best taste.
    • Sauté Sausage and Onions: Start by sautéing your sausage and onions directly in the Instant Pot to build layers of flavor.
    • Deglaze the Pot: After sautéing, deglaze the pot with a little broth to scrape up any browned bits, which adds more flavor to the soup.
    • Don't Overcook the ramps: Add the ramps after pressure cooking, just before serving. This keeps it bright and slightly crisp, adding texture to the soup.

    💭 FAQs

    Can I Use Kale Instead Of Ramps In This Recipe?

    Yes, you can substitute ramp greens with kale. Add the kale after pressure cooking, just like the ramp greens, to maintain its texture and flavor.

    How Do I Make The Soup Thicker?

    To thicken the soup, you can mash some of the cooked radishes with a fork and stir them back into the soup. Alternatively, you can add a slurry of cornstarch and water after pressure cooking and let it simmer until it reaches the desired consistency.

    Can I Make This Recipe Dairy Free?

    Yes, you can make this recipe dairy-free by using coconut milk or a dairy-free cream substitute instead of heavy whipping cream. This will still give the soup a rich, creamy texture.

    Can I Use a Different Type of Sausage in Zuppa Toscana?

    Yes, you can experiment with various sausages, such as spicy or mild Italian sausage or chorizo, to customize the flavor profile to your liking.

    Can I Make Zuppa Toscana Ahead of Time?

    Yes, Zuppa Toscana can be made ahead of time and reheated. However, for optimal texture, it's recommended to add leafy greens, like kale or spinach, just before serving. After your soup has cooled, store it in airtight glass containers. Store in the refrigerator for 3-4 days.
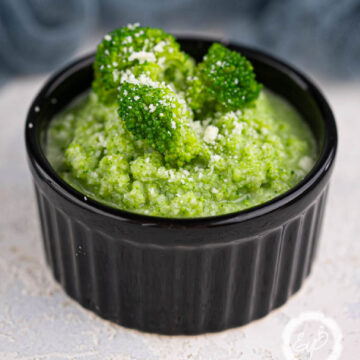
    Can I Freeze Zuppa Toscana?

    While the soup can be frozen, it's best to leave out ingredients like potatoes and dairy, adding them after reheating to maintain texture and flavor.

    How Can I Make Zuppa Toscana Spicy?

    To add heat, include crushed red pepper flakes or opt for spicy Italian sausage. Adjust the quantity based on your spice preference.

    Can I Add Other Vegetables to This Soup?

    Yes, feel free to add other vegetables like bell peppers, zucchini, or spinach.

    Can I Use Chicken Broth Instead of Chicken Stock?

    Yes, chicken broth can be used in place of chicken stock in Zuppa Toscana. Both bring a different depth of flavor, but the soup will still be delicious. You can also use vegetable broth if you do not want to use chicken.

    Can I Use Coconut Milk Instead of Heavy Cream?

    Yes, you can use regular full fat coconut milk, canned coconut milk or even coconut cream as a substitute for heavy cream.

    Coconut milk adds a creamy texture to dishes and is a great dairy-free alternative, although it may impart a slight coconut flavor.

    Are Tuscan Soup and Zuppa Toscana Soup the Same?

    Yes, Tuscan Soup and Zuppa Toscana are the same. Zuppa Toscana translates to Italian and is a popular dish in Olive Garden restaurants.

    🧂Serving Suggestions

    Here are some of the best sides to serve with Zuppa Toscana Soup:

    • Garlic Pizza Bread: Serve warm slices of garlic pizza bread alongside the soup for a comforting and indulgent addition. The garlic-infused bread pairs perfectly with the hearty flavors of the soup.
    • Chicken Caesar Salad: Toss crisp romaine lettuce with Caesar dressing, grated Parmesan cheese, and homemade croutons. The crisp and tangy salad provides a refreshing contrast to the rich and creamy soup.
    • Roasted Cherry Tomato Bruschetta: Toast slices of baguette and top them with a mixture of diced tomatoes, garlic, basil, olive oil, and balsamic vinegar. The fresh and vibrant flavors of the bruschetta complement the rustic Italian flavors of the soup.
    Best Recipe For Zuppa Toscana Soup.

    🍽 Related Recipes

    • roasted harissa sweet potatoes on a plate, drizzles with honey and pistachio nuts.
      Harissa Sweet Potato Recipe (Crispy, Spicy & Easy)
    • Cranberry Lime Mocktail.
      Easy Cranberry Lime Mocktail Recipe – No Alcohol, All Sparkle!
    • Food to Your Loved Ones this Holiday Season.
      Give from Your Heart: Give Food to Your Loved Ones this Holiday Season
    • MIni Rainbow Pizza.
      How To Revamp Leftover Pizza

    Did you make this recipe? Leave a review and a ⭐⭐⭐⭐⭐ rating below, or tag us in our Facebook Group! Alternatively, bookmark it in your browser or save to Pinterest.

    Best Recipe For Zuppa Toscana Soup.

    Recipe For Zuppa Toscana Soup

    Angela Milnes
    Warm up with a bowl of this comforting Zuppa Toscana Soup! Filled with savory Italian sausage, tender potatoes, and fresh kale, all simmered in a rich, creamy broth.
    5 from 4 votes
    Print Recipe Pin Recipe Rate this Recipe
    Prep Time 10 minutes mins
    Cook Time 15 minutes mins
    Additional Time 0 minutes mins
    Total Time 25 minutes mins
    Course Dinners
    Cuisine Italian
    Servings 6 Servings
    Calories 439 kcal

    Ingredients
      

    • 1 tablespoon extra Virgin Olive Oil
    • 1 pound Ground Pork
    • 1 teaspoon Fennel Seed
    • 1 teaspoon Crushed Red Pepper Flakes
    • 1 teaspoon Paprika
    • 1 teaspoon Black Pepper
    • 1 tablespoon Garlic Powder
    • 1 tablespoon Onion Powder
    • 1 tablespoon Italian Seasoning
    • 2 teaspoons Salt
    • 2 Garlic Cloves minced
    • 4 cups Chicken Stock
    • 1 pound Radishes peeled and halved
    • Ramps chopped into 1 inch pieces (can substitute with 2-3 cups of your choice of low carb leafy greens)
    • 1 cup Heaving Whipping Cream

    Instructions
     

    • In a mixing bowl, knead the seasonings into the ground pork.
    • Set the Instant Pot to the “sauté” setting. Add the seasoned ground pork and cook until browned. Do not drain the fat, as it adds flavor to the soup.
    • Add minced garlic to the browned meat and continue to sauté for an additional minute to enhance the flavor.
    • Add the radishes and stock to the Instant Pot. Mix well to combine all the ingredients.
    • Lock the lid in place and set the Instant Pot to “Pressure Cook” on high for 10 minutes.
    • Allow the Instant Pot to naturally release pressure for 5 minutes. Then, very carefully, manually release any remaining pressure.
    • Once it is safe to open the lid, slowly stir in the whipping cream and ramp greens. Season with salt and pepper to taste.
    • Serve the Zuppa Toscana Soup warm and enjoy!

    Notes

    Deglaze the Pot: After browning the ground pork, deglaze with chicken stock to lift flavorful bits and prevent burning.
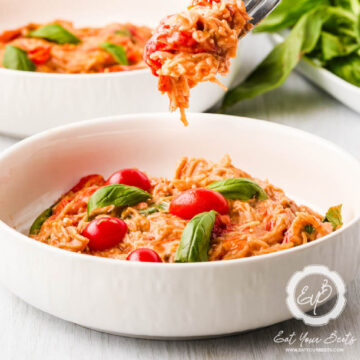
    Cut Radishes Evenly: Ensure radishes are cut evenly for consistent texture and cooking, providing a tender bite in each spoonful.
    Add Greens and Cream Last: Stir in ramp greens and cream after pressure cooking to maintain freshness and prevent curdling.
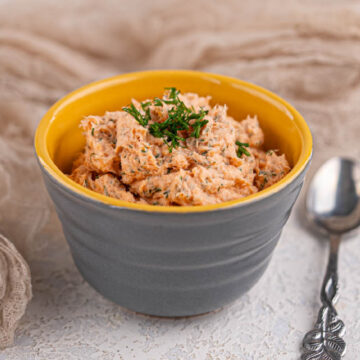
    Nutrition

    Serving: 1gCalories: 439kcalCarbohydrates: 13gProtein: 19gFat: 35gSaturated Fat: 16gPolyunsaturated Fat: 3gMonounsaturated Fat: 13gCholesterol: 104mgSodium: 1482mgPotassium: 661mgFiber: 2gSugar: 5gVitamin A: 876IUVitamin C: 13mgCalcium: 88mgIron: 2mg
    Print Recipe Pin Recipe Rate this Recipe
    Tried this recipe?Let us know how it was!

    More Easy Recipes To Try

    • Lemon Orzo Asparagus Salad
    • Grilled Eggplant With Lemon Dip
    • Butterfly Pea Tea Lemonade Recipe
    • Tofu Stir Fry Noodles With Mushroom
    • Air Fryer Baked Potato Recipe
    • Roasted Beetroot Salad With Honey Mustard Dressing

    How To Freeze Naan Bread

    September 20, 2024 by Angela Milnes

    Naan breads on a wooden board.

    Naan bread is a delicious flatbread that can be made in bulk. Making naan dough not only saves money but it saves time. Learn How To Freeze Naan Bread so you can use it with all your favorite Indian dishes!

    How to freeze naan bread?
    [feast_advanced_jump_to]

    Why Freeze Naan Bread?

    Freezing naan bread dough is an excellent way to store it for future use. You can have frozen naan ready in minutes by simply popping it into the oven or microwave when your meal is almost finished cooking.

    Defrosted naan bread is just as good as fresh naan and won't make a difference to your cooked naan once it's been in the oven.

    Storing Naan bread dough is super useful when making batch amounts and it just saves time and energy at a later date to have frozen dough stored for future use.

    Here are some simple tips on how to freeze, thaw and reheat naan bread.

    Naan Bread

    How To Freeze Naan Bread?

    Step One: Cool Bread

    To freeze your naan bread dough well you need to be sure it is fully cooked through and cooled completely.

    Step Two: Wrap Naan Bread

    Next, you want to wrap them well in freezer bags or a freezer-friendly container. You can use plastic wrap if you don't have a freezer bag. Just be sure to make sure you wrap the bread tightly.

    Step Three: Label And Date

    Label your airtight freezer bag with the date and freeze immediately. A freezer bag will help prevent freezer burn and keep the dough good until you are ready to defrost naan bread in the future.

    How Long Can You Freeze Naan Bread

    You can freeze naan bread for up to two months. When you are ready to serve simply let it thaw and then heat it back up in the oven or microwave.

    How To Store Naan Bread In The Freezer

    The best way to freeze naan bread dough in my experience is to wrap or place it in a plastic bag. If you're recycling or wanting to be eco-friendly you can even store them in an empty bread bag.

    I love these reusable large freezer storage bags! They are perfect for storing frozen naan bread - for your next curry…what do you think?

    Reheating Naan Bread

    Can You Reheat Naan Bread In The Oven?

    Yes, naan bread can be reheated in a 350 degrees Fahrenheit oven for about ten minutes until hot all throughout. This is best done using an oven-safe baking dish.

    When Reheating Naan bread, add a little extra oil or melted butter to the naan before baking to help it reach its original texture.

    Reheating Naan Bread In The Microwave

    If you want to reheat your frozen naan bread quickly, then the microwave is the best method for you! All you need to do is place them on a microwave-safe plate and heat in 30-second intervals until hot.

    Naan is a great Indian bread and side to go with your favorite Indian cuisine or curry.

    Other Methods To Reheat Naan Bread

    You can also reheat naan bread in a dry skillet over medium heat until slightly warm and crispy.

    What To Serve With Naan Bread

    So, you have plenty of naan bread stored in the freezer. The question is what should you cook to go with it? Here are few favorite Indian dish recipes which go well with Naan bread:

    • Enhance the savory flavors of One Pan Chicken and Asparagus by pairing it with warm naan bread, creating a quick and delicious meal with a perfect blend of textures and tastes.
    • Instant Pot Butter Chicken: Butter Chicken is a great dish to go with Indian bread and would go well with your frozen naan bread once defrosted!
    • Easy Instant Pot Lamb Curry: Lamb Curry is amazing, really easy to make and it tastes great with Naan bread! Enjoy this special Indian lamb dish today!
    • Pressure Cooker Beef Short Ribs: Short beef ribs are a delicious meal you can enjoy alongside a potion of your favorite homemade naan.
    • Chicken Tandoori:Try Chicken Tandoori today. Tandoori is a tasty dish which you won't want to miss!
    naan bread served with curry and rice

    FAQ'S

    What Is Naan Bread?

    Naan bread is a slightly leavened flatbread that originated in Persia. It’s typically made with all-purpose flour, yeast, and salt then it’s cooked at high heat within an oven or tandoor (clay oven) which gives naan its characteristic puffy texture.

    How Do You Keep Naan Bread Soft?

    Homemade naan bread should be eaten within a few days of making it. If the leftover naan seems dry, you can brush it with melted butter or olive oil and wrap it in plastic before placing it into an air-tight container.

    What’s The Difference Between Naan and Pita Bread?

    Naan is a soft, leavened flatbread from South Asia, often made with yogurt, while pita bread, a Middle Eastern staple, is thinner and forms a pocket when baked.

    How Long Does Naan Bread Last?

    Store-bought naan bread will typically last for about one week in the refrigerator. If you want to prolong its shelf life, store it at room temperature and make sure it’s tightly wrapped with plastic wrap or aluminum foil before placing it into an airtight container.

    Make And Freeze Some Naan Bread Today!

    If you want to save time and money, try our tips for freezing naan bread. These easy steps will help ensure your frozen naan is ready when you are! Y

    You'll also love the fact that it's a much healthier option than store-bought dough-no preservatives or additives here....and you can simply reheat when needed!

    All of this makes taking care of your family easier in just one quick step!

    How to Freeze Japanese Eggplant and Cook It

    September 20, 2024 by Angela Milnes

    Raw egg plants.

    Wondering How To Freeze Japanese Eggplant and keep it fresh for future meals? I’ve got you covered! In this post, I’ll share all my best tips for freezing this versatile veggie so it holds onto its texture and flavor. Whether you're saving leftovers or preserving your garden harvest, I’ll walk you through the easy steps on freezing Japanese eggplant to enjoy later in your favorite dishes!

    If you have plenty of eggplants, then you'll want to harvest them and store them for future use. The best way to do this is to store it in the fridge. However, if you have an abundance of eggplant, you'll need to freeze your eggplant to allow it to last longer.

    Japanese Eggplant
    [feast_advanced_jump_to]

    Japanese Egg Plant

    A Japanese Eggplant is a name for a long, thin, oval-shaped vegetable that is used in many types of Asian cooking.

    Japanese eggplant can be harvested in several ways. While some people prefer to pick them when they're still small, others choose to wait until they are larger and then scoop out the flesh from the inside.

    The best time to harvest Japanese eggplants is when the eggplant has grown to a length of 7 to 10 inches. These are typically ripe eggplants and will turn from green to yellow and eventually purple.

    It's a vegetable that can be used in many ways and having a stash of eggplant cubes in the freezer is always handy. It can bulk up any meal, is great for vegetarian dishes and there is very little prep time needed.

    How to Freeze Japanese Eggplants?

    First, wash your eggplant well, then peel it and cut it into 1 or 2-inch cubes. Then freeze it in individual bags and remove as many cubes as you need for a recipe. 

    • Chop your eggplant thinly into small cubes
    • Add them to your airtight freezer lock bags
    • Label the date and product and store in the fridge.

    How Long Can I Keep Eggplant in the Freezer?

    You can typically keep Japanese eggplant in the freezer for up to one year. However, eggplant can last much longer than a year and still be safe to eat.

    Japanese Eggplant

    Will Freezing Damage Eggplant?

    Freezing will not damage your eggplant as long as you store it at 0 degrees and keep it in an airtight container or ziplock bag. If the eggplant cubes or slices are not airtight, then they can get freezer-burned and become ruined.

    How Do I Defrost Egg Plant?

    To defrost your eggplant, most people will simply put the frozen cubes or slices in a bowl and allow them to defrost in the fridge overnight with a plate underneath to catch any liquid. You can also use warm water to thaw out the cubes but it takes much longer.

    Can You Refreeze Japanese Eggplant?

    You can refreeze eggplant after it has been defrosted, but it's best not to. It's better to freeze in small cubes or slices so you can take what you need as you need.

    Do You Need to Salt Japanese Eggplant?

    Some people say that you should salt Japanese eggplant after slicing it. This helps remove the excess liquid from the eggplant so it won't throw off the rest of your recipe. It is said to be a must when cooking certain dishes, but not all recipes require this extra step.

    How to Cook Japanese Egg Plant

    Now that you've got your eggplant cut up (fresh or defrosted) you're ready to start cooking with them. One of the best things to do is make some Filipino-style eggplant or an Indian eggplant dish. However, you can eat grilled eggplant, add it to stir-fry, or use it in an air fryer or deep fryer to make crispy eggplant chips. You can also make Pickled Eggplant using our best pickled Aubergine recipe.

    Japanese Eggplant

    Cooking Japanese Egg Plant

    If you're planning on cooking your Japanese eggplant in a skillet, oven, or grill, then it's best to brush the cubes or slices with some canola oil, sesame oil, or olive oil. Cook them until they have a nice char on them.

    Roasting Egg Plant

    You can also roast your eggplant to create a light side dish that is delicious and sweet. Add flavor and spices to the pan to create an amazing taste or combine with other vegetables to make a roast vegetable medley. Roasted Japanese eggplant is a popular dish and can taste delicious when cooked with the right flavors.

    Japanese Eggplant Recipes

    Some popular Japanese Eggplant recipes include:

    • Nasu Dengaku
    • Nasu Agebitashi
    • Stir Fry eggplant
    • Grilled eggplant
    • Eggplant Chips
    • Deep-Fried Eggplant

    Nasu Dengaku

    This is one of my favorite dishes to make with Japanese eggplant. It is sweet, savory, and very delicious. The eggplant is covered in a glaze made of mirin, sugar, and soy sauce.

    Nasu Agebitashi

    This Japanese eggplant recipe is a great way to utilize your leftovers or not have to cook them the next day. Nasu Agebitashi is an eggplant cooked in a dashi marinade or miso glaze. it can be served with rice or vegetables and has so much flavor.

    Japanese Eggplant

    Stir Fry Eggplant

    Stir fry is one of the most delicious ways to cook Japanese eggplant. It works well with other vegetables and can be paired up with other foods like tofu, sesame seeds, onions, broccoli, carrots, or anything else you like.

    Nasu Dengaku

    Pair your Nasu Dengaku (miso-glazed eggplant) with one of these complementary options for a balanced meal:

    • Steamed Jasmine Rice: The mild flavor of jasmine rice allows the sweet and savory miso glaze on the eggplant to shine.
    • Pickled Vegetables: Add a tangy, refreshing contrast with pickled cucumbers or daikon to balance the richness of Nasu Dengaku.
    • Miso Soup: A light and comforting bowl of miso soup can create a harmonious blend of flavors alongside the miso-glazed eggplant.

    These sides create a complete meal with Nasu Dengaku, highlighting its umami-rich flavors!

    Grilled Eggplant

    Grilled Eggplant is a great way to add some flavor and spice to your eggplant. It has been marinated in a sweet soy marinade and brings tons of flavor when it's grilled.

    Eggplant Chips

    Make Eggplant Chips with your Japanese eggplants by slicing them thin like fries, dusting them with cornstarch, and baking them in the oven at 450 degrees for about 20 minutes or until crispy. Once they are cooked, salt them to taste or put on some balsamic vinegar, garlic, ginger, or sriracha sauce.

    Deep Frying Eggplant

    If you want to deep fry eggplant then you certainly can, be sure to use a paper towel to remove excess oil and enjoy the great flavor of fried eggplant with salt. You can also dip deep-fried eggplant into a creamy horseradish dressing or another of your favorite sauce dips.

    Japanese Eggplant

    Wrapping Up

    Now, after this comprehensive guide on freezing Japanese Eggplant. You can save it for later use. You can enjoy the same taste and smell by defrosting the frozen Japanese eggplant for your recipe.

    Recipes With Eggplant You Will Enjoy:

    This easy and flavorful Grilled Eggplant And Lemon Dip recipe! Perfectly charred on the outside and tender on the inside, these eggplant slices make a delicious side dish or a hearty addition to any meal.

    Air Fryer French Toast Stuffed with Blueberries and Cream Cheese

    September 19, 2024 by Angela Milnes

    Air Fryer French Toast With Blueberries.

    Mornings just got sweeter! This Blueberry Stuffed French Toast is golden, fluffy, and air-fried to perfection—crispy on the outside, bursting with juicy blueberries and creamy filling on the inside, air fryer French toast is breakfast magic!

    Air Fryer French Toast With Blueberries.

    French toast has always been a breakfast favorite, but when you combine it with blueberries and cook it in the air fryer? Total game-changer. This recipe is trending hard thanks to the rise of stuffed toast hacks and air fryer everything. It’s an easy way to make a weekend-worthy breakfast without heating up the whole kitchen.

    If you're into cozy morning recipes, you’ll also love my Air Fryer Breakfast Casserole or this dreamy Blueberry Smoothie Bowl.

    [feast_advanced_jump_to]

    💖 Why This Recipe Works

    • Air Fryer Magic: No skillet needed—just crisp, golden toast every time with less mess.
    • Berry Bliss: That warm blueberry swirl tucked into cream cheese? Pure breakfast joy.
    • Perfectly Indulgent: Blueberry stuffed French toast is decadent, and still doable on a busy morning.

    ⭐ Star Ingredients

    Air Fryer French Toast ingredients.
    • Brioche Bread: Rich and buttery, brioche holds its shape and soaks up custard like a champ. I slightly toast or dry it first for max crisp.
    • Blueberries: Fresh or frozen, they give sweet-tart bursts in every bite. I simmer them into a quick syrup for extra flavor.
    • Cream Cheese: Softened and whipped with creamer and blueberry syrup, it creates a dreamy stuffed center.

    For the complete list of ingredients with measurements and instructions, please see the recipe card at the bottom of the post.

    📖  Substitutions & Variations

    • No Cream Cheese? – Try nut butter, fruit preserves, lemon curd, or even marshmallow fluff for a twist.
    • Dairy-Free Option – Use almond, oat, or coconut milk with dairy-free cream cheese.
    • Bread Swaps – Thick white, challah, Texas toast, or French sticks work too—just dry them out a little first.
    • Low Sugar Idea – Skip the syrup and top with unsweetened Greek yogurt and extra berries.
    • French Toast Sticks – Slice into dippable sticks before air frying for a kid-friendly breakfast.
    • Make It Dessert – Add mini chocolate chips or swirl in Nutella for a decadent sweet treat.

    If you love this blueberry stuffed French toast recipe, be sure to check out my Air Fryer Egg Bites With Bacon or Air Fryer Tater Tot Casserole next!

    🔪How To Make Blueberry Stuffed French Toast

    Blueberries, granulated sugar, and vanilla in a pan.
    1. Step 1: In a saucepan over medium-high heat, add blueberries, granulated sugar, and vanilla. Bring to a boil or until blueberries have burst open. Drop the heat to medium-low and allow to simmer for 5 minutes. Remove and set aside.
    Cream cheese, vanilla creamer, and blueberry syrup in a bowl.
    1. Step 2: In a mixing bowl, add cream cheese, ½ cup of vanilla creamer, and ⅓ cup of blueberry syrup. Whisk until fully incorporated and creamy. 
    Bread slices on a wooden chopping board.
    1. Step 3: Cut the brioche slices in half but not all the way through. Make sure the slices of brioche are dried. This helps prevent soggy toast. You can leave them to air dry for a few hours or toast them in the toaster oven for 30-45 seconds.
    Adding blueberry mixture to french toast bread.
    1. Step 4: Scoop a spoonful of cream cheese filling, add to the center of the sliced open pocket of the brioche. Gently press the slice of brioche to fill the whole pocket without squirting the filling out.
    Blueberry mixture filled bread slices being coated with egg mixture.
    1. Step 5: In a shallow dish, beat the eggs with ½ cup of vanilla creamer. The egg mixture with be used to coat the brioche before air frying.
    Frying blueberry mixture filled bread slices.
    1. Step 6: Place the French toast into a pan and place it in the air fryer basket. Turn on the air fryer and cook.
    Air fried French toasts.
    1. Step 7: Remove the air-fried French toast and let it cool. The cream cheese filling will be very hot. 
    Serving stuffed French toast with blueberries filling, with a fork.
    1. Step 8: Plate the toast and top with remaining blueberry syrup, sugar, whipped cream, and pancake syrup. 

    💡Hint: Let the filling cool a minute before biting in—it gets hot!

    👩‍🍳 Expert Tips

    • Choose the Right Bread: Thick brioche or challah works best and won’t fall apart.
    • Dry It Out First: Slightly stale or toasted bread = crispier finish.
    • Preheat the Air Fryer: Warm it for 2–3 minutes before adding toast.
    • Don’t Overcrowd: Leave space between slices for even airflow and crisping.
    • Flip for Crisp: Turn halfway through cooking for even browning.
    • Use Parchment Liners: Keeps things from sticking and cleanup easy.

    ⏰ Make-Ahead & Prep-Ahead Tips

    Want to sleep in and still serve a dreamy breakfast? You can prep this blueberry stuffed French toast the night before!

    • Stuff it early: Fill the brioche with the cream cheese mixture, press gently to seal, then chill in the fridge overnight.
    • Blueberry compote hack: Simmer the blueberry-sugar-vanilla mix ahead and store for up to 3 days.
    • Batter prep: Mix the egg and creamer combo and refrigerate it overnight.

    💡Hint: Less mess, more flavor, faster mornings—yes please.

    💭 FAQs

    What is French toast?

    Classic French toast is bread soaked in a custard of egg and milk, then fried until golden. It's crisp on the outside, soft inside, and perfect with syrup or fruit.

    Do I have to use brioche bread for blueberry stuffed French toast?

    Not at all! Any thick-cut bread works—try challah, Texas toast, or even sliced French sticks. Just make sure it’s sturdy and slightly dried.

    Does the bread need to be dried out first?

    Yes—this helps it soak up the egg mixture without turning soggy. Leave it out or toast it briefly.

    Do I need non-stick cooking spray for air fryer French toast?

    No, you do not need to use non-stick spray when making French toast in an air fryer. The parchment paper lining helps prevent sticking and provides an even cook for the French toast. so no need for cooking oil!

    Do I need to flip the French toast?

    Absolutely. Flip halfway through for that even, golden crisp on both sides.

    Why isn’t my air fryer French toast crispy?

    If your French toast is not getting crispy, it may be that the bread slices are too thick. Try to use thinner slices of bread so they can cook evenly in the air fryer. Additionally, make sure you preheat your air fryer first before adding the French toast and flip it halfway through cooking.

    What is the best temperature to cook air fried french toast?

    The best temperature to cook French toast in an air fryer is 350°F. This allows the bread to get golden brown and crispy on the outside while remaining soft and fluffy on the inside. Make sure to preheat your air fryer before adding the French toast for optimal results. Enjoy!

    💖 Serving Suggestions

    Wondering what to serve with French toast? Try these extras:

    • Nuts: Toasted walnuts or almonds for crunch.
    • Yogurt: Greek or coconut yogurt on the sideThere are many options to try. Try to ensure that some of those nutrition calories come from healthy fruits, yogurt and nuts.
    • Sweet Toppings: Maple syrup, honey, or fruit preserves.
    • Fruits: Fresh blueberries, bananas, or strawberries.
    French toasts with blueberries on a plate.

    🍽 Try More Fantastic Sweet Desserts

    • Peach Pie Bars.
      Homemade Peach Pie Bars – Sweet, Simple, and So Good!
    • Hazelnut Chocolate Bark.
      Hazelnut Chocolate Bark
    • Creamy Vanilla Eclair Cake.
      Creamy Vanilla Eclair Cake
    • Berry Granola Bites.
      Easy Granola Bites Recipe (With Berries & Yogurt!)

    Did you make this recipe? Leave a review and a ⭐⭐⭐⭐⭐ rating below, or tag us in our Facebook Group! Alternatively, bookmark it in your browser or save to Pinterest.

    Air Fryer French Toast With Blueberries.

    Stuffed Blueberry French Toast (Air Fryer French Toast)

    Angela Milnes
    Make your mornings extra special with this Air Fryer French Toast with Blueberries! Crispy on the outside, soft on the inside, and topped with juicy blueberries, it's an easy, delicious breakfast that’s ready in minutes!
    5 from 3 votes
    Print Recipe Pin Recipe Rate this Recipe
    Prep Time 15 minutes mins
    Cook Time 20 minutes mins
    0 minutes mins
    Total Time 35 minutes mins
    Course Breakfast
    Cuisine American
    Servings 4 Servings
    Calories 992 kcal

    Ingredients
      

    • 2 Cups Blueberries Frozen Or Thawed.
    • ¼ Cup Granulated Sugar
    • 1 teaspoon Vanilla Extract
    • 18 Oz Cream Cheese
    • 1 Cup French Vanilla Coffee Creamer
    • 8 Slices Brioche Bread Dried Out Or Slightly Toasted.
    • 4 Eggs
    • ¼ Cup Confectioners Sugar
    • 1 Cup Pancake Syrup
    • Whipped Cream Optional Topping

    Instructions
     

    • In a saucepan over medium-high heat, add blueberries, granulated sugar, and vanilla. Bring to a boil or until blueberries have burst open. Drop heat to medium-low and allow to simmer for 5 minutes. Remove and set aside.
    • In a mixing bowl, add cream cheese, ½ cup of vanilla creamer, and ⅓ cup of blueberry syrup. Whisk until fully incorporated and creamy. 
    • Cut the brioche slices in half but not all the way through. Make sure the slices of brioche are dried. This helps prevent soggy toast. You can leave them to air dry for a few hours or toast them in the toaster oven for 30-45 seconds.
    • Scooping a spoonful of cream cheese filling, add to the center of the sliced open pocket of the brioche. Gently press the slice of brioche to fill the whole pocket without squirting the filling out. 
    • In a shallow dish, beat the eggs with ½ cup of vanilla creamer. The egg mixture with be used to coat the brioche before air frying.
    • Dredge each piece of brioche in the egg mixture for 10 seconds on each side. Only dredge the slices you will cook in a batch. 
    • Place the stuffed brioche on parchment paper or wax paper in the air fryer basket and cook at 350°F for 10 minutes, flipping halfway. Air frying french toast has never been easier!
    • Remove the air-fried french toast and let cool. The cream cheese filling will be very hot. 
    • Plate the toast and top with remaining blueberry syrup, confectioners sugar, whipped Cream, and pancake syrup. You can add any of your favorite toppings and enjoy!

    Notes

    Do I Have To Use Brioche Bread?
    No, you can use any type of thick bread slices. You can use thick white bread, French bread sticks sliced, or even thick-sliced artisan bread, such as sourdough or multigrain.
    When making French toast in an air fryer, it is important to use thick slices of bread that can hold up to the high heat of the air frying process.
    You can even also air fry French toast sticks, Challah bread or Texas toast if you like.

    Nutrition

    Calories: 992kcalCarbohydrates: 82gProtein: 22gFat: 64gSaturated Fat: 36gPolyunsaturated Fat: 3gMonounsaturated Fat: 13gTrans Fat: 0.02gCholesterol: 412mgSodium: 954mgPotassium: 288mgFiber: 2gSugar: 36gVitamin A: 2591IUVitamin C: 7mgCalcium: 193mgIron: 2mg
    Print Recipe Pin Recipe Rate this Recipe
    Tried this recipe?Let us know how it was!
    Air fryer French toast with blueberries on a plate.

    How To Freeze Pizza Dough

    September 19, 2024 by Angela Milnes

    prepared pizza dough!

    It's important to save time in the kitchen. One way to do this is by freezing pizza dough for your next homemade pizza night. Today, I'll be sharing How To Freeze Pizza Dough quickly and easily so it will taste great and rise perfectly.

    Pizza dough.
    [feast_advanced_jump_to]

    What Is Basic Pizza Dough Made Of?

    First things first, you'll need to bust out your recipe for pizza dough. If you don't have one on hand, don't worry we have a basic recipe you can use!

    The ingredients are simple enough and are easy to find in the grocery store:

    • Flour
    • Yeast
    • Salt
    • Olive Oil

    You can adjust the amounts of each ingredient depending on how much dough you need as a good starting point.

    Storing Pizza Dough In The Fridge

    After you've made your yeast dough ball and allowed it to rise, store it in the fridge for about an hour before use. However, if you're freezing the dough, you'll want to pop each dough ball into the freezer for future convenience.

    Can You Freeze Pizza Dough?

    Yes! You can freeze your pizza dough balls, which is great news!

    How To Freeze Pizza Dough In Six Steps?

    Here are 6 simple steps for freezing pizza dough.

    Step One: Prepare The Dough

    Start by making your favorite pizza dough recipe. You can use any dough recipe you love, whether it's a classic or one you've created. Once your dough is ready and has risen, it's time to move on to the next step.

    Step Two: Portion The Dough

    Divide the dough into portions. Think about how much dough you'll need for each pizza and portion accordingly. This makes it easier to pull out just what you need later without defrosting too much at once.

    portions of pizza dough

    Step Three: Pre-Shape The Dough

    Lightly shape each portion into a ball. This makes it easier to roll out when you're ready to use it. Remember to coat your hands with a bit of flour to prevent sticking.

    Step Four: Wrap It Up

    Wrap each dough ball tightly in plastic wrap. This step is crucial to prevent freezer burn and to maintain the dough’s moisture. Make sure there are no air pockets.

    wrapped pizza dough in a plasic wrapper (1)

    Step Five: Store In Freezer Bags

    Place the wrapped dough balls into a freezer-safe bag. Be sure to squeeze out any excess air before sealing the bag. Label the bag with the date and type of dough, so that you know what you’re working with later.

    Step Six: Freeze

    Lay the bags flat in the freezer. This not only saves space but also helps the dough freeze evenly. Your dough is now ready to be frozen for up to three months.

    Does Pizza Dough Freeze Well?

    Yes! Frozen dough is just as good and tasty as fresh dough. This means you can make a large batch and freeze it for later. Just be sure to let your dough balls thaw completely before using, otherwise, the crust won't bake properly!

    What Does Freezing Do To Your Pizza Dough?

    Freezing pizza dough stops the yeast activity, preserving its rise until you're ready to bake. It maintains the dough's flavor and texture, making it easy to enjoy fresh, homemade pizza anytime.

    Plus, it's a convenient way to have ready-to-use dough on hand for quick meal prep!

    How Long Can You Freeze Pizza Dough?

    Pizza dough balls can last in the freezer for around three months.

    Will Pizza Dough Rise After Being Frozen?

    Yes, pizza dough will rise after being frozen once it's thawed and brought to room temperature. Freezing Pauses Yeast Activity, so expect it to resume and the dough to rise when it's ready to bake.

    pizza dough balls.

    How To Thaw Pizza Dough?

    • To thaw frozen dough, simply take it out of the freezer and let it defrost on your kitchen counter for about an hour at room temperature.
    • To thaw overnight, place the dough directly in the fridge. This will allow the base to defrost slowly, ready for making family-size or individual pizzas.

    Top Tips To Remember When Freezing Your Pizza Dough:

    • Store the dough in an airtight container. Preventing the dough from being exposed to air will stop the dough from drying out.
    • Wrap your pizza dough tightly for extra protection against the cold! Again you can use plastic wrap or a freezer bag.
    • Use Freezer Tape and a Marker pen for labelling the correct date.
    • You can make multiple balls and batch cook to save time in the future.

    Can I Defrost Pizza Dough In The Microwave?

    No - do not use a microwave to thaw the frozen pizza base as this will cause your crust to get soggy and chewy rather than crispy.

    Best Pizza Toppings

    If you want to make homemade mini pizzas. Here are some of our favorite toppings suggestions:

    No matter what pizza topping you use, be sure to cook each individual pizza in a hot oven to ensure the success of your delicious creation.

    • Vegetarian: Tomato, cheesy, and covered in basil leaves or olives make a quick yet tasty vegetarian pizza recipe!
    • Meat Lovers: Pepperoni with ham and bacon—yum! Add Mushrooms for an extra tasty option.
    • Chicken Lovers: Chicken, mushrooms, onions, and green peppers are a winning combo every time! This is one of my favorite pizzas to make at home - don't forget the BBQ sauce for more flavor!
    • Fruit Lovers: Add Fruit to your diet in an easy-to-make homemade fruit pizza!
    • Hawaiian-style: Try a tomato base with cheese, ham, and pineapple chunks.

    FAQ's

    Can You Refreeze Pizza Dough?

    While it's technically possible to refreeze pizza dough after it has been thawed, it's not recommended due to potential impacts on texture and quality.

    Refreezing can cause the dough to become dense and lose its elasticity. For best results, only thaw the amount you plan to use, and try to avoid refreezing to maintain the dough's optimal texture and flavor.

    What Type Of Dough Should I Freeze?

    When it comes to freezing, traditional pizza dough is a fantastic choice as it retains its classic texture and flavor well. Whole wheat dough freezes nicely too, keeping its hearty taste intact.

    For Gluten-Free doughs, freezing can be trickier due to their unique ingredients, but with proper wrapping, they can still be a convenient option. Just ensure all dough types are tightly wrapped to preserve their quality.

    Enjoy Freezing Your Pizza Dough!

    We hope this article helped you learn how to freeze pizza dough. If it did, feel free to share it with your friends and family! And don't forget to drop your thoughts or feedback in the comments section.

    • « Previous Page
    • 1
    • …
    • 7
    • 8
    • 9
    • 10
    • 11
    • …
    • 19
    • Next Page »
    Angela Milnes.

    Hi I'm Angela

    Welcome to Eat Your Beets where you'll find Healthy and Nutritious Family Recipes that are tasty and simple to cook.

    More About Me

    Spring Recipes

    • edamame stir fry in a white bowl.
      Easy Edamame Stir Fry (15-Minute Protein-Packed Side Dish)
    • Best Gravlax Salmon With Dill (Cured Salmon).
      Best Gravlax Salmon With Dill (Cured Salmon)
    • One Pan Chicken And Asparagus.
      One Pan Chicken And Asparagus
    • Chicken And Cabbage Stir Fry Recipe.
      Chicken And Cabbage Stir Fry Recipe
    • Zucchini Egg Bake Recipe.
      Best Zucchini Egg Bake Recipe
    • How To Make Sun Dried Tomatoes Without Oil.
      How To Make Sun Dried Tomatoes Without Oil – Easy Oven Method

    Popular Recipes 💗

    • best stuffed mushrooms.
      The Best Stuffed Mushrooms
    • Slow Cooker Chicken Bacon Ranch Pasta.
      Slow Cooker Chicken Bacon Ranch Pasta
    • Baked Ricotta On A Spoon.
      Bariatric Friendly Ricotta Bake Recipe
    • Fun Veggie Train With Bell Peppers.
      Fun Veggie Train With Bell Peppers
    • Best Blueberry Smoothie Bowl topped with fruit.
      Best Blueberry Smoothie Bowl Recipe
    • Grilled Eggplant With Lemon Dip.
      Grilled Eggplant With Lemon Dip
    • Air Fryer Asparagus with Parmesan.
      Air Fryer Asparagus with Parmesan
    • Sheet Pan Chicken Fajitas.
      Sheet Pan Chicken Fajitas

    Footer

    As Seen In

    As Seen In.
    • Facebook
    • Pinterest

    Privacy Policy

    Accessibility Policy

    ↑ Back To Top

    Copyright © 2025 | Eat Your Beets | All Rights Reserved

    Rate This Recipe

    Your vote:


    A rating is required
    A name is required
    An email is required