​

Eat Your Beets

  • About
  • Spring Recipes
  • Vegetables
  • Side Dishes
  • Recipe Index
menu icon
go to homepage
  • About
  • Spring Recipes
  • Vegetables
  • Side Dishes
  • Recipe Index
    • Facebook
    • Pinterest
  • subscribe
    search icon
    Homepage link
    • About
    • Spring Recipes
    • Vegetables
    • Side Dishes
    • Recipe Index
    • Facebook
    • Pinterest
  • ×
    Sign Up To Our Newsletter →
    Home » Recipe index

    Mango Arugula Salad With Walnuts

    June 29, 2024 by Angela Milnes

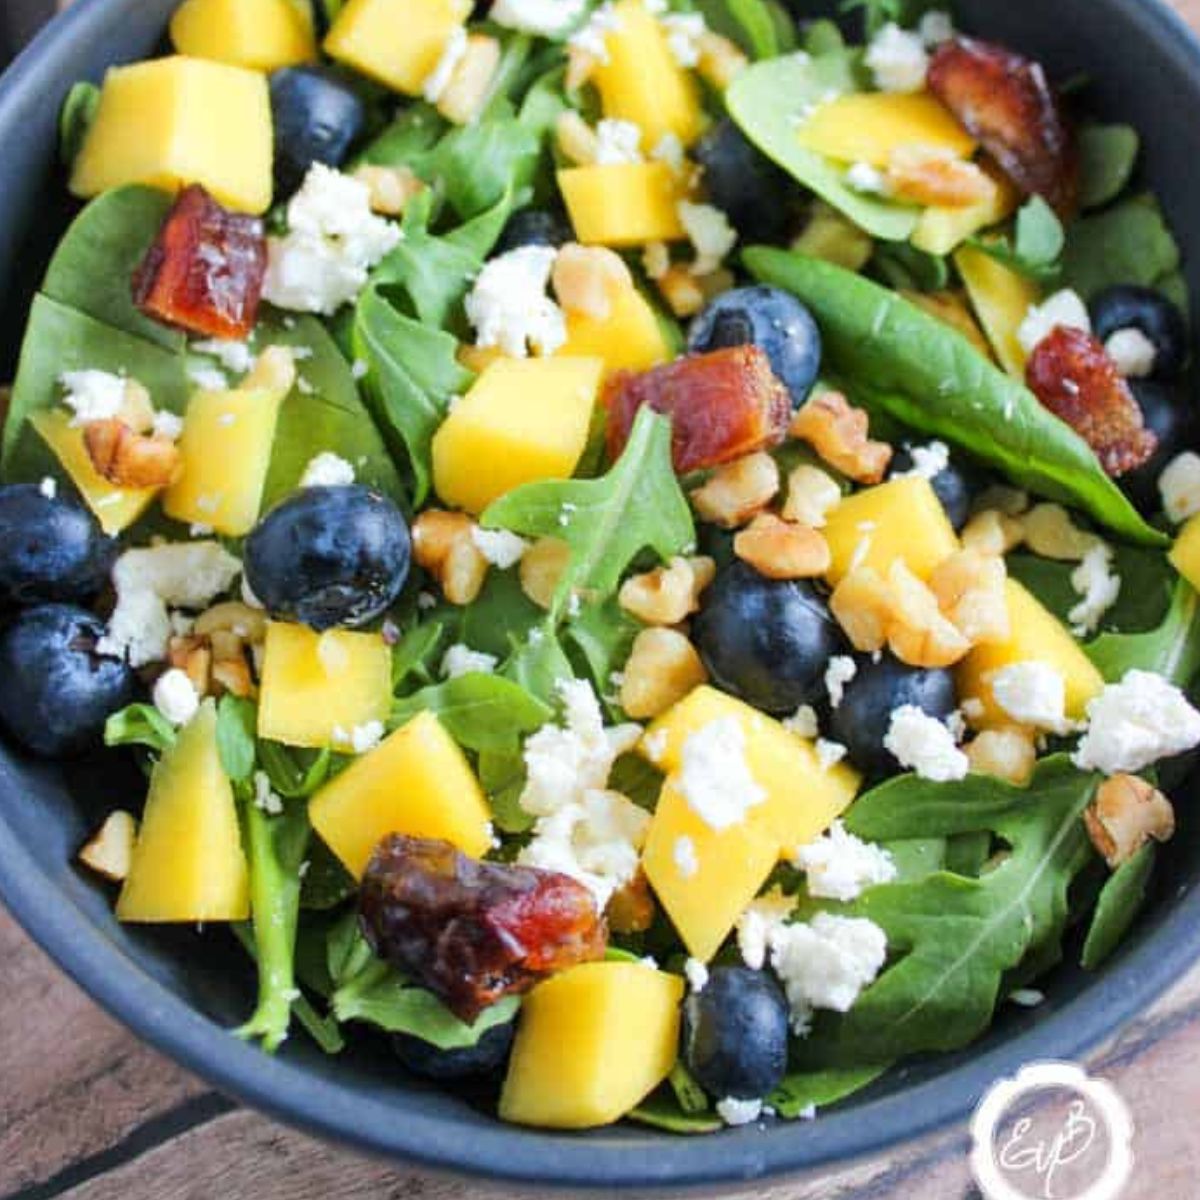
    Mango Arugula Salad.

    Mango Arugula Salad is fresh, fruity, and full of zesty flavor. It’s the perfect mix of sweet mango, peppery greens, and a tangy vinaigrette—ready in minutes and totally family-approved.

    Mango Arugula Salad.

    If you’re tired of the same old leafy greens, this arugula and mango salad is a game-changer. It’s sweet, tangy, crunchy, and loaded with texture—everything a good salad should be. It also plays well with both plant-based and protein-packed meals. I love pairing it with grilled shrimp or salmon for a fast summer dinner.

    Craving more fresh flavor? You’ll love my No-Churn Vegan Mango Sorbet, Vegan Avocado Toast, or Korean Cucumber Salad too!

    [feast_advanced_jump_to]

    💖 Why This Recipe Works

    • Bright, fruity flavors – Mango and blueberries bring juicy sweetness that balances the peppery arugula.
    • Nutrient-packed – Leafy greens, healthy fats, and fresh fruit in every bite.
    • Dressed to impress – The honey-Dijon vinaigrette ties it all together with a tangy, gourmet twist.

    ⭐ Star Ingredients

    Mango Arugula Salad Ingredients.
    • Spinach & Arugula Mix – A vibrant combo that’s soft, peppery, and packed with nutrients.
    • Fresh Mango – Sweet, tropical, and juicy—it adds major flavor and sunshine to your bowl.
    • Blueberries – Bursts of antioxidant-rich goodness that play so well with the mango.
    • Feta Cheese – Creamy and tangy, it balances the sweetness beautifully.
    • Walnuts & Dates – For crunch and a touch of natural sweetness (plus fiber and healthy fats!).

    For the complete list of ingredients with measurements and instructions, please see the recipe card at the bottom of the post.

    📖  Substitutions & Variations

    • Tropical twist – Add lime juice and pineapple for a sunshine-soaked variation.
    • Creamy dream – Swap feta for goat cheese or toss in some sliced avocado for richness.
    • Dressing swap – Use champagne vinegar and lemon juice for a lighter vinaigrette.
    • Mango Spinach Salad version – Just swap out arugula for all spinach if you prefer milder greens.

    This makes a gorgeous seasonal salad too—try adding pomegranate seeds in winter or grilled peaches in summer for a fruity green salad that works all year round.

    🔪 How To Make Mango Arugula Salad

    Ingredients to make dressing for mango arugula salad.
    1. Step 1: Dice the mango, walnuts, and date. Set them aside. In a small bowl, combine the olive oil, Dijon mustard, apple cider vinegar, honey, salt, and pepper. Whisk until well combined.
    Mango arugula salad in a round bowl.
    1. Step 2: In a large mixing bowl, combine the spinach/arugula mix, diced mango, fresh blueberries, feta cheese, chopped date, and chopped walnuts. Pour the dressing over the salad and toss gently to combine. Serve immediately and enjoy your refreshing Mango Arugula Salad!

    💡Hint: Chill the dressing before serving for an extra refreshing finish!

    Mango arugula salad in a bowl.

    👩‍🍳 Expert Tips

    • Pick ripe but firm mangoes – They should smell sweet and give slightly when pressed.
    • Dry your greens – Wet arugula = soggy salad. Use a salad spinner or pat dry with a clean towel.
    • Toast your walnuts – Just a few minutes in a dry pan will deepen their flavor and add extra crunch.
    • Mix last-minute – Add the dressing just before serving to keep everything fresh and crisp.

    💭 FAQs

    How To Tell If Mango Is Ripe Enough For A Salad?

    It should give slightly at the stem and smell sweet. Avoid mangoes that are too soft or wrinkly.

    What Type Of Mango Is Best For A Salad?

    For salads, choose a mango that is firm yet ripe enough to offer sweetness without being mushy. Varieties like Ataulfo (or Honey mango) and Kent provide a good balance of flavor and texture, holding up well when mixed with other ingredients.

    Can Mango Arugula Salad Be Made Ahead Of Time?

    It’s best to assemble the salad close to serving time to prevent the arugula from wilting and the mango from becoming too soft. However, you can prep the dressing and chop the ingredients ahead of time.

    What Protein Goes Best With Mango Salad?

    Grilled shrimp, chicken, or tofu all pair beautifully. Pan-seared salmon is a favorite at our house.

    💖 Serving Suggestions

    Wondering what to serve with this mango salad? Try the following:

    • Grilled Shrimp – Adds a smoky, savory contrast to the fruity sweetness.
    • Lemon Herb Chicken – Light and juicy, it makes this summer salad recipe a full meal.
    • Pan-Seared Salmon – Rich, flaky, and made for pairing with mango.
    • Grilled Tofu – Marinated and crispy for a plant-based boost.
    • Seared Scallops – Fancy but easy—perfect for date night or entertaining.
    Mango arugula salad in a bowl served with a fork.

    🍽 More Tasty Mango Recipes

    • Mango Chicken Salad With Avocado.
      Mango Chicken Salad With Avocado (Bariatric Friendly Recipe)
    • Mangonada in a glass.
      Best Mangonada Recipe (Mango Chamoyada Drink)
    • Mango and Pineapple Salsa in a white bowl.
      Mango and Pineapple Salsa (Perfect With Fish)
    • Mango Pineapple Smoothie.
      Mango Pineapple Smoothie

    Did you make this recipe? Leave a review and a ⭐⭐⭐⭐⭐ rating below, or tag us in our Facebook Group! Alternatively, bookmark it in your browser or save to Pinterest.

    Mango Arugula Salad.

    Mango Salad With Arugula And Walnuts

    Angela Milnes
    Brighten up your plate with this refreshing Mango and Arugula Salad! The peppery arugula pairs perfectly with sweet, juicy mango slices, creating a delightful balance of flavors. Tossed with a light vinaigrette and topped with crunchy nuts or creamy cheese, this salad is a vibrant and healthy option you'll love.
    5 from 4 votes
    Print Recipe Pin Recipe Rate this Recipe
    Prep Time 10 minutes mins
    Cook Time 0 minutes mins
    Total Time 10 minutes mins
    Course Salads
    Cuisine American
    Servings 1 Servings
    Calories 638 kcal

    Ingredients
      

    Salad Ingredients

    • 2 cups Arugula or Spinach
    • ½ cup Fresh Mango diced
    • ¼ cup Blueberries
    • 2 tablespoon Feta Cheese
    • 1 Date pitted and chopped
    • 2 tablespoon Walnuts chopped

    For The Dressing

    • 2 tablespoon Olive Oil
    • ½ tablespoon Dijon Mustard
    • ½ teaspoon Apple Cider Vinegar
    • 1 tablespoon Honey
    • Salt And Pepper

    Instructions
     

    • Dice the mango, walnuts, and date. Set them aside.
    • In a small bowl, combine the olive oil, Dijon mustard, apple cider vinegar, honey, salt, and pepper. Whisk until well combined.
    • In a large mixing bowl, combine the spinach/arugula mix, diced mango, fresh blueberries, feta cheese, chopped date, and chopped walnuts.
    • Pour the dressing over the salad and toss gently to combine.
    • Serve immediately and enjoy your refreshing Mango Arugula Salad!

    Notes

    Freshness is Key: Opt for ripe, juicy mangoes to maximize the sweetness and flavor of the Mango Arugula salad.
    Make-Ahead Friendly: Prepare the components ahead of time and assemble the salad just before serving to keep it fresh.

    Nutrition

    Calories: 638kcalCarbohydrates: 46gProtein: 10gFat: 49gSaturated Fat: 10gPolyunsaturated Fat: 13gMonounsaturated Fat: 24gCholesterol: 30mgSodium: 484mgPotassium: 494mgFiber: 5gSugar: 38gVitamin A: 2015IUVitamin C: 40mgCalcium: 272mgIron: 2mg
    Print Recipe Pin Recipe Rate this Recipe
    Tried this recipe?Let us know how it was!

    Roasted Beetroot Salad With Honey Mustard Dressing

    June 29, 2024 by Angela Milnes

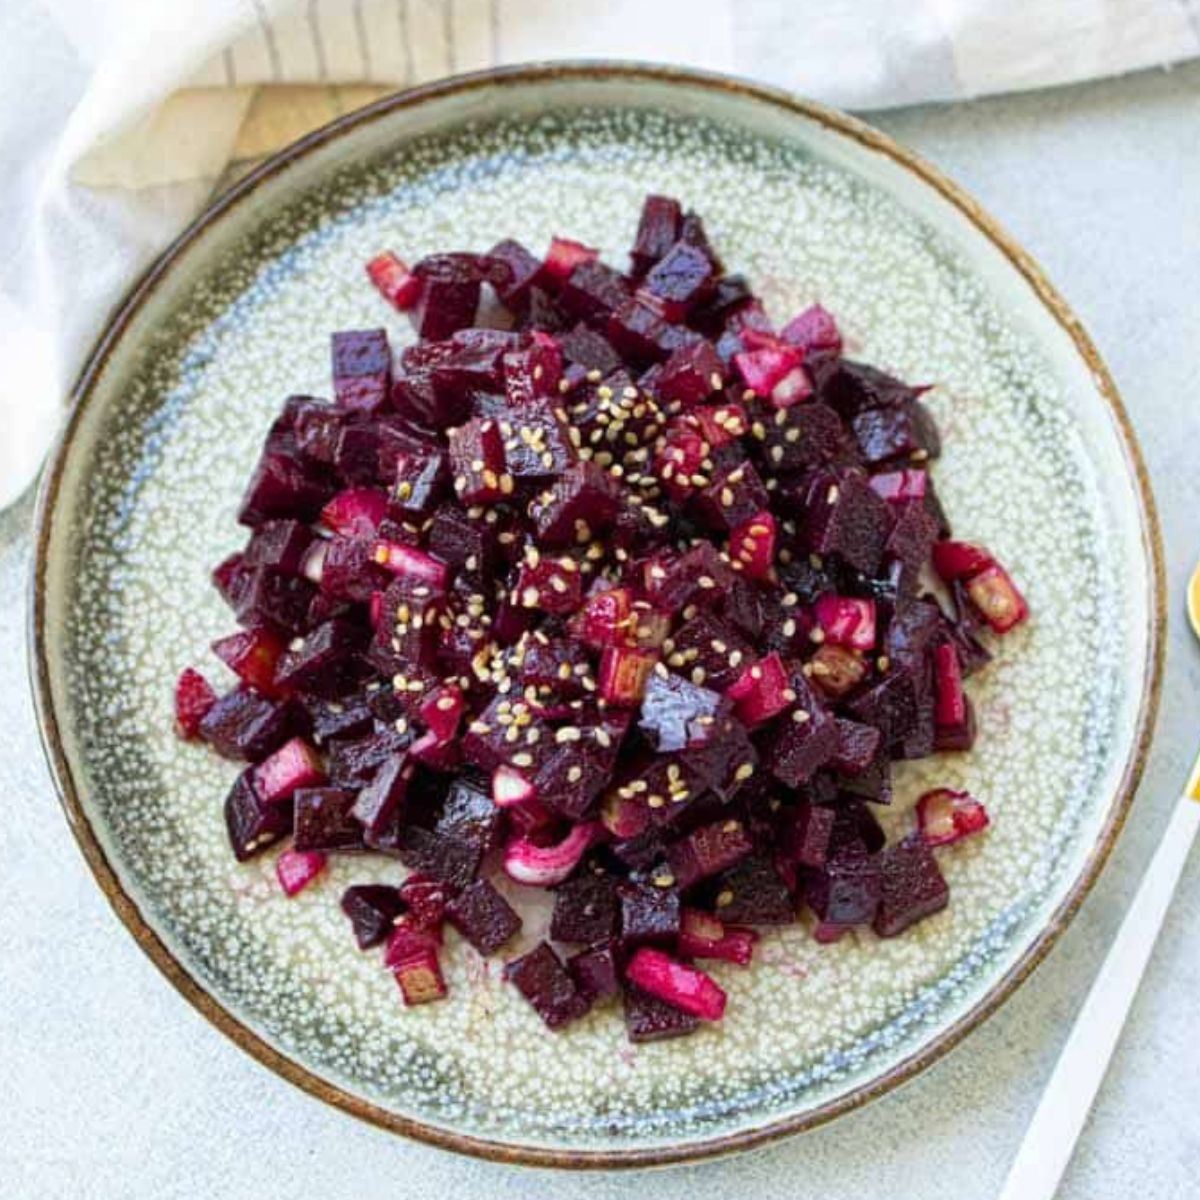
    Roasted Beetroot Salad With Honey Mustard Dressing.

    Brighten up your meals with this delicious Roasted Beetroot Salad with Honey Mustard Dressing! The sweet and earthy flavors of roasted beetroot pair perfectly with the tangy and sweet honey mustard dressing. It's a beautiful and healthy dish that's easy to make and sure to impress. Let's get roasting!

    roasted beets on a plate
    [feast_advanced_jump_to]

    💖 Why This Recipe Works

    • Vibrant and Colorful: The roasted beetroot adds a beautiful and vibrant color to the salad, making Beetroot Salad visually appealing.
    • Balanced Flavors: The combination of sweet roasted beetroot, tangy honey mustard dressing, and crunchy salad greens creates a perfectly balanced flavor profile.
    • Easy to Prepare: This Beetroot Salad recipe is quick and easy to prepare, making it ideal for a healthy and delicious meal or side dish.

    ⭐ Star Ingredients

    Roasted Beetroot Salad With Honey Mustard Dressing Ingredients.
    • Beetroot: Known for its vibrant color and earthy flavor, beetroot is roasted to bring out its natural sweetness and tender texture, making it the star of this salad.
    • Olive Oil: Used to coat the beetroots before roasting, olive oil adds richness and helps to enhance the caramelization of the vegetables.
    • Onion: Sliced and roasted alongside the beetroots, onions bring a mild sweetness and depth of flavor to the salad, complementing the earthiness of the beetroots.
    • Honey: A touch of honey is drizzled over the roasted vegetables, adding a subtle sweetness that balances the earthy flavors of the beetroots and onions.
    • Salt and Black Pepper: Used to season the salad, salt enhances the natural flavors of the ingredients, while black pepper adds a hint of spiciness.
    • Mustard: Adds a tangy and slightly spicy flavor to the salad dressing, complementing the sweetness of the honey and balancing the richness of the olive oil.
    • Apple Cider Vinegar: Used in the dressing, apple cider vinegar provides a tangy acidity that brightens the flavors of the salad and helps to cut through the richness of the olive oil.
    • Celery: Finely chopped celery adds crunch and freshness to the salad, contributing a crisp texture and a subtle hint of herbal notes.

    For the complete list of ingredients with measurements and instructions, please see the recipe card at the bottom of the post.

    📖  Substitutions & Variations

    • Arugula and Pecans: Serve the roasted beetroot on a bed of peppery arugula and top with toasted pecans. Drizzle with a balsamic glaze for a delightful contrast of flavors.
    • Goat Cheese and Walnut: Crumble creamy goat cheese over the beet salad and sprinkle with toasted walnuts for added texture and nutty flavor.
    • Citrus Twist: Add segments of orange or grapefruit to the salad for a refreshing citrusy burst. Toss with a citrus vinaigrette made with orange juice, lemon zest, and olive oil.
    • Herbaceous Delight: Mix in fresh herbs like parsley, dill, or mint to brighten up the flavors and add a burst of freshness to the salad.
    • Feta and Balsamic: Replace the mustard in the dressing with balsamic vinegar and crumble tangy feta cheese over the salad for a Mediterranean-inspired twist.

    🔪 How To Make Beetroot Salad Using Honey Mustard Dressing

    beetroot in tin foil
    1. Step 1: Wrap the beets in foil and bake in a 350°F oven for 40-50 minutes. Once cooked, set aside to cool.
    honey mustard dressing
    1. Step 2: In a separate bowl, combine olive oil, salt, black pepper, honey, mustard, and vinegar.
    making roasted beets salad in a bowl
    1. Step 3: Dice the beets, celery, and onion. Mix them together. Pour the Honey Mustard Dressing over the diced vegetables and mix well.
    roasted beets cubed on a plate
    1. Step 4: Garnish with sesame seeds. Serve and enjoy your Roasted Beetroot Salad!

    👩‍🍳 Expert Tips

    • Cooling Time: Allow the roasted beetroot to cool slightly before chopping. This makes them easier to handle and prevents burns.
    • Peeling: Once cooled, peel the beetroot using a paper towel or your fingers. The skin should easily slide off. Wearing gloves can prevent staining your hands.
    • Uniformity: Aim for uniformity in your chop size to ensure even cooking and presentation in your salad or dish.
    • Sharp Knife: Use a sharp chef's knife or a serrated knife to slice the beetroot. A dull knife can cause the beetroot to mash rather than slice cleanly.
    • Staining Prevention: Work on a cutting board that you don't mind staining, or use a plastic cutting board to minimize staining.

    💭 FAQs

    Can I use pre-cooked beets instead of roasting them?

    Yes, you can use pre-cooked or canned beets to save time, but roasting fresh beets enhances their natural sweetness and flavor.

    How can I add more protein to this salad?

    You can add grilled chicken, chickpeas, or feta cheese to make the salad more filling and add a protein boost.

    How should I store leftovers?

    Store leftover beetroot salad in an airtight container in the refrigerator for 3-4 days. Keep the dressing separate if you plan to store it.

    Can I make this salad ahead of time?

    Yes, you can prepare the salad ahead of time. Just refrigerate it and add the dressing right before serving for the best flavor.

    How to store beetroot salad

    Store any leftover Beetroot Salad in an airtight container in the refrigerator for up to 3-4 days.

    💖 Serving Suggestions

    Here are my favorite sides to serve with Roasted Beetroot Salad:

    • Thin Sliced Chicken Breast: The earthy flavors of the beetroot salad pair well with grilled chicken breasts or thighs seasoned with herbs like thyme or rosemary.
    • Creamy Pan Fried Salmon: Serve the beetroot salad with seared or grilled salmon fillets. The richness of the salmon complements the sweetness of the roasted beets.
    • Air Fryer Roasted Vegetables: Roasted vegetables such as zucchini, bell peppers, and eggplant add smoky flavors and a variety of textures that complement the beetroot salad.
    • Creamy Soup: Pair the salad with a creamy soup like Butternut Squash Soup or Potato Leek Soup. The contrast in temperatures and textures makes for a satisfying meal.
    • Southwestern Quiche: A slice of quiche, such as spinach and feta or mushroom and goat cheese, makes a satisfying vegetarian option that contrasts nicely with the beetroot salad.
    • Instant Pot Poached Chicken: Gently poached chicken breast adds a lean and tender protein that complements the sweet and tangy flavors of the salad.
    • Herb-Roasted Potatoes: Crispy roasted potatoes with rosemary and thyme offer a savory and satisfying side dish.
    roasted beets salad

    🍽 More Vibrant Salads to Try

    • Beet Salad With Feta And Walnuts.
      Roasted Beet Salad With Feta And Walnuts
    • Beet Sweet Potato Salad.
      Beet And Sweet Potato Salad With Feta
    • Roasted Beet Salad With Pomegranate Molasses.
      Roasted Beet Salad With Pomegranate Molasses
    • Watermelon Salad With Feta and Mint.
      Watermelon Feta Mint Salad

    Did you make this recipe? Leave a review and a ⭐⭐⭐⭐⭐ rating below, or tag us in our Facebook Group! Alternatively, bookmark it in your browser or save to Pinterest.

    Roasted Beetroot Salad With Honey Mustard Dressing.

    Roasted Beetroot Salad With Honey Mustard Dressing

    Angela Milnes
    Treat yourself to this Roasted Beetroot Salad with Honey Mustard Dressing, a delightful blend of earthy, sweet, and tangy flavors! Tender roasted beets are paired with fresh greens and topped with a homemade honey mustard dressing that adds the perfect touch of sweetness and zest. This salad is not only beautiful and colorful but also packed with nutrients, making it a delicious and healthy choice for any meal. Whether as a side dish or a light main course, it’s sure to impress!
    5 from 4 votes
    Print Recipe Pin Recipe Rate this Recipe
    Prep Time 5 minutes mins
    Cook Time 50 minutes mins
    Total Time 55 minutes mins
    Course Beetroot Recipes
    Cuisine American
    Servings 2 Servings
    Calories 329 kcal

    Ingredients
      

    • 3 Beetroots
    • ¼ Cup Olive Oil
    • 1 Onion
    • 1 teaspoon Honey
    • ¼ teaspoon Salt
    • pinch Black Pepper
    • 1 teaspoon Mustard
    • 2 teaspoon Apple Cider Vinegar
    • ⅓ Cup Celery

    Instructions
     

    • Wrap the beets in foil and bake in a 350°F oven for 40-50 minutes.
    • In a separate bowl, prepare the dressing by combining olive oil, salt, black pepper, honey, mustard, and vinegar.
    • Dice the beets, celery, and onion. Mix them together.
    • Pour the dressing over the diced vegetables and mix well.
    • Serve the salad, and if desired, sprinkle with sesame seeds.

    Notes

    Cooling Time: Allow the roasted beetroot to cool slightly before chopping. This makes them easier to handle and prevents burns.
    Peeling: Once cooled, peel the beetroot using a paper towel or your fingers. The skin should easily slide off. Wearing gloves can prevent staining your hands.
    Uniformity: Aim for uniformity in your chop size to ensure even cooking and presentation in your salad or dish.
    Sharp Knife: Use a sharp chef's knife or a serrated knife to slice the beetroot. A dull knife can cause the beetroot to mash rather than slice cleanly.
    Staining Prevention: Work on a cutting board that you don't mind staining, or use a plastic cutting board to minimize staining.

    Nutrition

    Calories: 329kcalCarbohydrates: 20gProtein: 3gFat: 27gSaturated Fat: 4gPolyunsaturated Fat: 3gMonounsaturated Fat: 20gSodium: 431mgPotassium: 533mgFiber: 5gSugar: 14gVitamin A: 119IUVitamin C: 11mgCalcium: 42mgIron: 1mg
    Print Recipe Pin Recipe Rate this Recipe
    Tried this recipe?Let us know how it was!

    More Easy Recipes You'll Want To Give A Try

    • Pureed Squash
    • Monkey Pizza Bread
    • Beet Cured Salmon
    • Easy Stuffed Mushrooms
    • Beetroot Ravioli
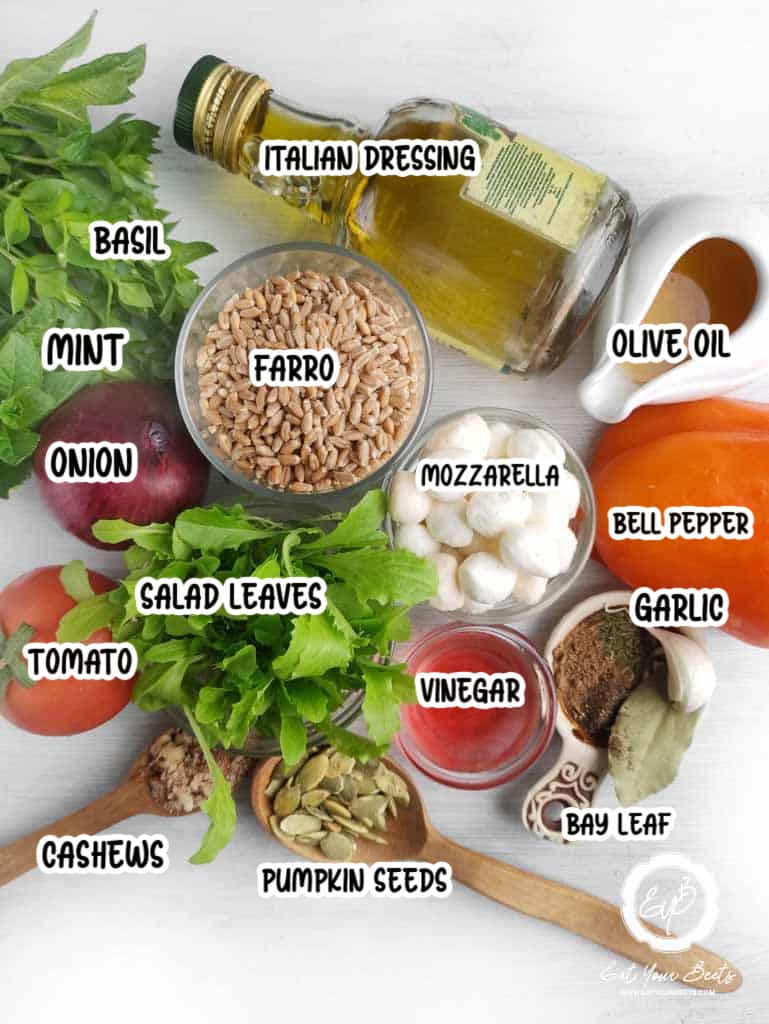
    • Mediterranean Farro Salad
    roasted beets on a plate

    Simple Parmesan Roasted Zucchini

    June 29, 2024 by Angela Milnes

    Parmesan Roasted Zucchini.

    This Parmesan Roasted Zucchini is crispy, cheesy, and totally irresistible. It’s the easiest way to turn fresh zucchini into a golden, oven-roasted side dish in 15 minutes—quick enough for busy nights, delicious enough for dinner parties!

    Parmesan Roasted Zucchini.

    Zucchini is a summer favorite, and roasting it brings out its sweet, earthy flavor. Add Parmesan cheese, garlic, and a few pantry staples, and you’ve got a veggie side dish that’s anything but boring. This one-pan recipe is perfect for using up garden zucchini or pairing with weeknight favorites like grilled fish or pasta.

    If you're into simple sides, you’ll also want to try my Honey Roasted Parsnps And Carrots or Air Fryer Zucchini Fritters.

    [feast_advanced_jump_to]

    💖 Why This Recipe Works

    • Crispy on the outside, tender on the inside—thanks to the high-heat roast
    • Uses simple ingredients for big flavor in under 25 minutes
    • Pairs perfectly with everything from grilled chicken to pasta or steak

    ⭐ Star Ingredients

    Parmesan Roasted Zucchini Ingredients.
    • Zucchini – Go for firm, medium zucchini—those big ones can be watery. Patting them dry before roasting helps them crisp instead of steam, which makes all the difference.
    • Parmesan Cheese – Freshly grated is key! It melts into a golden crust and adds that perfect salty, nutty bite. I always use Parmigiano-Reggiano for the best flavor and texture.
    • Garlic Powder – It gives deep, even flavor without burning like fresh garlic can at high heat. Just a light sprinkle brings that warm, savory vibe that makes this dish so moreish.

    For the complete list of ingredients with measurements and instructions, please see the recipe card at the bottom of the post.

    📖  Substitutions & Variations

    • Try zucchini and cherry tomatoes for a burst of color and juicy sweetness
    • Mix in sliced carrots or potatoes for a heartier vegetable side dish
    • Swap Parmesan for Asiago or Pecorino Romano for a sharper flavor
    • Use onion powder or Italian seasoning instead of garlic powder for a twist
    • Make it dairy-free with nutritional yeast or vegan Parmesan
    • Turn it into a sheet pan dinner by adding chicken or shrimp to roast alongside

    If you love savory, veggie-packed sides like this, you’ll also enjoy my Cheesy Mashed Cauliflower or Baked Spaghetti Squash with Parmesan.

    🔪 How To Make Parmesan Roasted Zucchini

    sliced zucchini on a chopping board
    1. Step 1: Preheat your oven to 400°F and lightly grease a baking sheet with olive oil. Slice the zucchini into ½-inch thick rounds and pat dry with a paper towel.
    Parmesan Roasted Zucchini
    1. Step 2: Brush or spray with olive oil, then season with garlic powder, salt, pepper, and most of the Parmesan (reserve a little for later).
    Parmesan Roasted Zucchini
    1. Step 3: Place the baking sheet in the oven. Roast for 9–10 minutes, then switch to broil for 1–2 minutes until crispy and golden on top.
    baked Parmesan Roasted Zucchini
    1. Step 4: Top with reserved Parmesan and fresh parsley, then serve hot and crispy!

    💡Hint: Don’t skip drying the zucchini slices—removing moisture helps them crisp instead of steam.

    👩‍🍳 Expert Tips

    Want that next-level crispy zucchini with loads of flavor? These quick tricks make a big difference:

    • Preheat your baking sheet – Pop the pan in the oven while it heats. That sizzle when the zucchini hits the hot surface? Instant caramelization and extra crispiness.
    • Salt before roasting – Lightly salt your zucchini slices and let them sit for 10–15 minutes, then pat them dry. This draws out excess moisture so they roast—not steam.
    • Finish with lemon zest or herbs – A sprinkle of lemon zest or chopped parsley after roasting adds freshness, aroma, and that final pop that makes it feel gourmet.

    💭 FAQs

    Can I Make Parmesan Roasted Zucchini In The Air Fryer?

    Yes! Air fry at 375°F for 8–10 minutes. You’ll still get that golden, crispy finish with even less oil.

    Can I use oil spray instead of olive oil for roasted zucchini?

    Yes, you can definitely use an oil spray instead of regular olive oil for roasting zucchini.

    Oil spray can help evenly coat the zucchini slices with a lighter layer of oil, which is great if you’re looking to reduce the overall fat content of the dish. It also ensures a more uniform and mess-free application, helping the Parmesan and seasonings adhere well to the zucchini while promoting even crisping during roasting.

    Just make sure to spray both the baking sheet and the zucchini slices thoroughly to prevent sticking and to achieve that delicious golden crust.

    Can I Freeze Roasted Zucchini?

    Not ideal—zucchini loses its texture after freezing. Best to enjoy fresh or repurpose leftovers into veggie pasta or omelets.

    Best Way to Store Parmesan Roasted Zucchini

    Store Parmesan Roasted Zucchini in an airtight container in the refrigerator for up to 3 days.

    Parmesan Roasted Zucchini

    💖 Serving Suggestions

    Serve this cheesy roasted zucchini with:

    • Grilled Chicken or Chilean Seabass for a light and healthy main.
    • Creamy pasta like Shrimp Spaghetti for a satisfying contrast.
    • Fluffy garlic rice or a quinoa salad bowl for a hearty vegetarian meal.
    • Sliced sirloin steak—cheesy zucchini cuts the richness beautifully.
    • Tossed into a chopped Italian salad or on top of a veggie pizza.
    Parmesan Roasted Zucchini

    🍽 Try These Zucchini Recipes

    • Zucchini Lasagna Rolls With Eggplant.
      Zucchini Lasagna Rolls With Eggplant
    • Zucchini Egg Bake Recipe.
      Best Zucchini Egg Bake Recipe
    • Cheesy Sausage Lasagna With Zucchini.
      Cheesy Sausage Lasagna Recipe (With Zucchini)
    • Air Fryer Zucchini Fritters piled on a plate and topped with sour cream and herbs.
      Best Air Fryer Zucchini Fritters

    Did you make this recipe? Leave a review and a ⭐⭐⭐⭐⭐ rating below, or tag us in our Facebook Group! Alternatively, bookmark it in your browser or save to Pinterest.

    Parmesan Roasted Zucchini.

    Parmesan Roasted Zucchini

    Angela Milnes
    Elevate your veggie game with this Roasted Zucchini! Tender zucchini slices are coated in savory Parmesan cheese and roasted to golden perfection. It’s a simple, flavorful side dish that’s quick to make and sure to be a hit at any meal!
    5 from 5 votes
    Print Recipe Pin Recipe Rate this Recipe
    Prep Time 10 minutes mins
    Cook Time 10 minutes mins
    Additional Time 0 minutes mins
    Total Time 20 minutes mins
    Course Vegetables
    Cuisine American
    Servings 4 Servings
    Calories 83 kcal

    Ingredients
      

    • 3 Zucchini
    • 1 tablespoon Olive Oil
    • 1 teaspoon Garlic Powder
    • ¼ cup Parmesan Cheese divided
    • 1 tablespoon Fresh Parsley chopped

    Instructions
     

    • Heat your oven to 400 degrees Fahrenheit. Lightly grease a baking sheet with half of the olive oil.
    • Cut the zucchini into ½ inch thick slices and arrange them on the prepared baking sheet.
    • Brush the slices with the remaining olive oil. Then, sprinkle them with garlic powder and most of the Parmesan cheese, saving a tablespoon for later.
    • Place the baking sheet in the oven and bake for 9 minutes.
    • After baking, switch the oven to broil on high and broil the zucchini for 1 minute to get a nice, crispy top.
    • Take the zucchini out of the oven, sprinkle with the reserved Parmesan, and add the freshly chopped parsley for a burst of color and freshness.

    Notes

    Uniform Slices: Cut the zucchini into uniform slices to ensure even cooking. Thicker slices will be juicier, while thinner slices get crisper.
    Don't Overcrowd the Pan: Spread the zucchini in a single layer on the baking sheet. Overcrowding can cause them to steam rather than roast, preventing them from getting crispy.

    Nutrition

    Calories: 83kcalCarbohydrates: 5gProtein: 4gFat: 6gSaturated Fat: 2gPolyunsaturated Fat: 1gMonounsaturated Fat: 3gCholesterol: 4mgSodium: 113mgPotassium: 404mgFiber: 2gSugar: 4gVitamin A: 427IUVitamin C: 28mgCalcium: 100mgIron: 1mg
    Print Recipe Pin Recipe Rate this Recipe
    Tried this recipe?Let us know how it was!

      Air Fryer Corn On The Cob Recipe

      June 28, 2024 by Angela Milnes

      Air Fryer Corn On The Cob Recipe.

      Craving corn on the cob without firing up the grill or boiling water? This Air Fryer Corn on the Cob is your answer. Sweet, juicy, and lightly charred, it's summer flavor in minutes—no outdoor BBQ required. Just butter, season, air fry, done.

      Air fryer corn on the cob with butter.

      This is one of those magical side dishes that works for everything—weeknight dinners, summer cookouts, or a quick veggie upgrade. It cooks faster than oven-roasted corn and tastes even better, thanks to the air fryer’s crispy edges and locked-in flavor.

      Pair it with Bacon-Wrapped Hot Dogs, Beet Cured Salmon, or Smashed Potato Salad for the ultimate backyard feast.

      [feast_advanced_jump_to]

      💖 Why This Recipe Works

      • Quick, easy, and totally grill-free.
      • Gets that roasted, charred flavor with barely any cleanup.
      • Sweet, juicy corn made even better with just butter and salt.

      🌽 Star Ingredients

      air fryer corn on the cob ingredients.
      • Fresh Corn – Sweet, plump, and perfect for crisping up in the air fryer.
      • Butter – For that classic, melty finish. Brush it on before AND after.
      • Salt – A pinch is all it takes to make the corn flavor pop.

      For the complete list of ingredients with measurements and instructions, please see the recipe card at the bottom of the post.

      📖  Substitutions & Variations

      • Garlic Parm – Mix butter, garlic powder, and Parmesan for a cheesy kick.
      • Herb Butter – Blend in fresh chives, parsley, or dill for herby vibes.
      • Elote Style – After cooking, brush with mayo, sprinkle cotija, chili powder, and lime juice.
      • Chili Lime – Add Tajín or chili powder and a spritz of lime juice.

      Feeling hungry? Pair this with Crispy Okra Chips, Citrus And Honey Roasted Beets, or Cold Chicken Pasta Salad.

      🔪 How To Make Corn On The Cob In Air Fryer

      Corn on the cobs wrapped in foil in the air fryer.
      1. Step 1: Warm your air fryer to 390°F. Rub each ear of corn with butter and a pinch of salt. Wrap in foil for juicy results.
      Corn on the cobs wrapped in foil in the air fryer.
      1. Step 2: Place the foil-wrapped corn in a single layer in the air fryer basket. Cook at 390°F for 10 minutes.
      Air fried corn on the cob in an air fryer.
      1. Step 3: Unwrap and return corn to the air fryer for 2–3 more minutes to char slightly.
      Cooked corn on the cobs on a white plate.
      1. Step 4: Serve warm with more butter or your fave toppings!

      💡 Hint: Don’t wrap the foil too tightly—leave a small opening to let a bit of steam out. This helps the corn stay juicy while still getting a touch of crisp on the edges!

      👩‍🍳 Expert Tips

      • Use fresh corn with bright green husks and moist silk for best flavor.
      • Don’t skip the second blast of air frying—it’s what gives that delicious char.
      • No foil? Go without for a drier, roasted-style corn.

      💭 FAQs

      Can I Air Fry Corn On The Cob Without Foil?

      Yep! It'll be a little drier but extra roasty—great if you love crisp edges.

      Can I Cook Frozen Corn On The Cob In The Air Fryer?

      Absolutely. No need to thaw—just add 3–5 extra minutes to the cooking time.

      How Can I Make My Air Fried Corn On The Cob Crispy?

      Skip the foil and cook a few extra minutes at the end for more browning.

      Best Way to Store Cooked Corn On The Cob

      Wrap tightly and store in the fridge for up to 3–4 days. Reheat in the air fryer at 350°F for 3–5 minutes.

      Cooked corn on the cobs topped with butter.

      💖 Serving Suggestions

      Here are my favorite sides to serve with Air Fryer Corn On The Cob:

      • Grilled Meats – Try Honey Mustard Chicken Tenders, Sirloin Steak, or perfectly seasoned Air Fryer Pork Chops.
      • Burgers and Hot Dogs – Keep it classic with Beetroot Burgers or Bacon-Wrapped Hot Dogs.
      • Seafood – Pair it with Ginger Garlic Shrimp, Baked Seabass With Lemon And Herbs, or Air Fryer Cod Fillet .
      • Salads – Serve it alongside Roasted Beet Salad with Pomegranates, Red Cabbage Coleslaw, or Korean Cucumber Salad.
      • Ribs – Sweet corn and Slow Cooker Spare Ribs are a match made in BBQ heaven.
      • Vegetarian Options – Add Grilled Vegetable Skewers or a hearty Four Bean Salad.
      • Potato Sides – Round it out with Instant Pot Potato Salad, Mashed Potatoes, or Parmesan Au Gratin Potatoes.

      🍽 More Simple Vegetable Recipes

      • Air Fryer Green Beans Crispy & Delicious.
        Air Fryer Green Beans Crispy & Delicious
      • Air Fryer Asparagus with Parmesan.
        Air Fryer Asparagus with Parmesan
      • Air Fryer Bok Choy on a white plate covered in paprika.
        Air Fryer Bok Choy
      • Breakfast Potatoes With Peppers And Bacon.
        Diced Breakfast Potatoes (Fresh or Frozen)

      Did you make this recipe? Leave a review and a ⭐⭐⭐⭐⭐ rating below, or tag us in our Facebook Group! Alternatively, bookmark it in your browser or save to Pinterest.

      Air Fryer Corn On The Cob Recipe.

      Air Fryer Corn On The Cob

      Angela Milnes
      Enjoy the perfect summer side dish with this Air Fryer Corn on the Cob! Sweet, juicy corn is cooked to golden perfection in the air fryer, giving you a quick and easy way to enjoy this classic favorite. It's crispy, tender, and absolutely delicious with a pat of butter on top!
      5 from 14 votes
      Print Recipe Pin Recipe Rate this Recipe
      Prep Time 5 minutes mins
      Cook Time 13 minutes mins
      Additional Time 0 minutes mins
      Total Time 18 minutes mins
      Course Vegetables
      Cuisine American
      Servings 4 Servings
      Calories 178 kcal

      Ingredients
        

      • 4 Ears Of Corn husked
      • 4 tablespoons Unsalted Butter divided
      • ½ teaspoon Salt

      Instructions
       

      • Preheat and Prep: Warm your air fryer to 390°F. Meanwhile, wrap each husked ear of corn with a pat of butter in aluminum foil, seasoning with salt.
      • Air Fry Wrapped Corn: Place the foil-wrapped corn in a single layer in the air fryer basket. Cook at 390°F for 10 minutes.
      • Finish and Serve: Unwrap the corn and return it to the air fryer for another 3 minutes to get a slight char. Serve the corn hot and enjoy!

      Notes

      • Use fresh corn with bright green husks and moist silk for best flavor.
      • Don’t skip the second blast of air frying—it’s what gives that delicious char.
      • No foil? Go without for a drier, roasted-style corn.

      Nutrition

      Calories: 178kcalCarbohydrates: 17gProtein: 3gFat: 13gSaturated Fat: 7gPolyunsaturated Fat: 1gMonounsaturated Fat: 3gTrans Fat: 0.5gCholesterol: 30mgSodium: 306mgPotassium: 246mgFiber: 2gSugar: 6gVitamin A: 518IUVitamin C: 6mgCalcium: 5mgIron: 0.5mg
      Print Recipe Pin Recipe Rate this Recipe
      Tried this recipe?Let us know how it was!

      Roasted Brussels Sprouts With Maple Syrup

      June 28, 2024 by Angela Milnes

      Roasted Brussels Sprouts With Maple Syrup.

      If you're looking for a simple yet delectable side dish that'll impress at any dinner table, you have to try these Roasted Brussels Sprouts with Maple Syrup! I'm always experimenting with flavors, and the natural sweetness of maple syrup brings a delightful twist to the earthy Brussels sprouts.

      Roasted brussels sprouts with maple syrup.
      [feast_advanced_jump_to]

      💖 Why This Recipe Works

      • Flavor Balance: The sweetness of maple syrup perfectly offsets the natural bitterness of Brussels sprouts, creating a deliciously harmonious taste.
      • Caramelization: The syrup enhances caramelization, giving the sprouts a crispy exterior and tender interior.
      • Health Benefits: Brussels Sprouts Are Nutrient-Rich, and using maple syrup adds sweetness without refined sugars.

      ⭐ Star Ingredients

      • Brussels Sprouts: Serve as the base of the dish, offering a hearty texture and a slightly bitter flavor that's perfect for roasting.
      • Maple Syrup: Adds a sweet, caramel-like flavor that contrasts beautifully with the earthiness of the sprouts.
      • Olive Oil: Helps the sprouts cook evenly and achieve a crispy exterior while adding a subtle richness.
      • Salt: Elevates the natural flavors of the sprouts and balances the sweetness of the syrup.
      • Black Pepper: Provides a mild heat that complements the sweet and savory elements of the dish.

      For the complete list of ingredients with measurements and instructions, please see the recipe card at the bottom of the post.

      📖  Substitutions & Variations

      • Parmesan Cheese: Sprinkle grated Parmesan cheese over the sprouts in the last few minutes of roasting. The cheese melts and adds a salty, umami flavor.
      • Bacon and Pecans: Before roasting, toss the Brussels sprouts with chopped bacon and pecans. The bacon adds a savory depth, while the pecans provide a nutty crunch.
      • Balsamic Reduction: Drizzle a balsamic reduction over the roasted sprouts before serving. This adds a tangy sweetness that contrasts beautifully with the maple syrup.
      • Cranberries and Almonds: Add dried cranberries and sliced almonds for a festive twist, perfect for holiday meals. The cranberries bring a tart brightness, and the almonds offer additional crunch.

      🔪 How To Make Roasted Brussels Sprouts With Maple Syrup

      Washed brussels sprouts.
      1. Step 1: Set your oven to 400 degrees Fahrenheit to ensure it's hot enough for roasting. Wash the Brussels sprouts, trim off the ends, and remove any blemished outer leaves. Cut each sprout in half to help them cook evenly and maximize their surface area for caramelization.
      Adding oil to brussels sprouts.
      1. Step 2: In a large mixing bowl, toss the halved Brussels sprouts with olive oil, ensuring they are evenly coated. Sprinkle with salt and black pepper, and toss again to distribute the seasoning.
      Seasoned brussels sprouts.
      1. Step 3: Drizzle the maple syrup over the seasoned Brussels sprouts and toss one more time to coat them thoroughly.
      Seasoned sprouts on roasting tray.
      1. Step 4: Spread the Brussels sprouts out on a baking sheet in a single layer, ensuring they aren't overcrowded. This helps them roast properly and turn crispy.
      Seasoned brussels sprouts are ready to be baked.
      1. Step 5: Place the baking sheet in the preheated oven and roast for about 20-25 minutes. Halfway through the roasting time, stir or flip the sprouts to ensure they brown evenly on all sides.
      Roasted brussels sprouts.
      1. Step 6: Once the Brussels sprouts are caramelized and tender, remove them from the oven. They're best served warm, either as a side dish or as part of a larger meal.

      👩‍🍳 Expert Tips

      • Choose Fresh Brussels Sprouts: For the best texture and flavor, select Brussels sprouts that are bright green and firm. Avoid any that have yellowing leaves or feel soft to the touch. Fresh sprouts will roast more evenly and have a better taste.
      • Ensure Even Roasting: Cut the Brussels sprouts in half and spread them out on the baking sheet in a single layer. This ensures that each piece gets properly roasted. Overcrowding the pan can lead to steaming rather than roasting, resulting in less crispy sprouts.

      💭 FAQs

      How Do I Stop The Brussels Sprouts From Becoming Too Soggy When Roasting?

      To prevent soggy Brussels sprouts, make sure to dry them thoroughly after washing. Cut them in half and spread them out on a baking sheet in a single layer, without overcrowding.

      What Can I Do If My Brussels Sprouts Are Too Bitter?

      If your Brussels sprouts are too bitter, try blanching them briefly in boiling water before roasting. This can help reduce the bitterness. The maple syrup in this recipe should help make the sprouts sweeter. Tossing the Brussels sprouts with a bit of balsamic vinegar or a squeeze of fresh lemon juice before serving can also enhance their natural sweetness and reduce bitterness.

      Best Way to Store Maple Syrup Brussels Sprouts

      Allow the roasted Brussels sprouts to cool completely to room temperature after cooking. This prevents condensation from forming inside the storage container, which could make them soggy. Transfer the cooled Brussels sprouts to an airtight container. This helps keep out moisture and other contaminants. Place the container in the refrigerator. Roasted Brussels sprouts will keep well for up to 3-4 days when stored this way.

      Can You Air Fry Frozen Brussels Sprouts?

      Yes, you can roast frozen Brussels sprouts! Roasting them straight from the freezer is a convenient method and can yield delicious results. The high heat of the oven helps to evaporate the moisture quickly, allowing the sprouts to caramelize and become crispy. Just make sure to roast them at a high temperature, around 425 degrees Fahrenheit, and give them enough time in the oven to turn golden and crispy.

      💖 Serving Suggestions

      Here are my favorite sides to serve with Roasted Brussels Sprouts with Maple Syrup:

      • Roasted or Grilled Meats: They complement the flavors of Roasted Pork Loin, Air Fryer Chicken Tenders, or Sirloin Beef Steak beautifully. The sweetness of the maple balances well with the savory notes of the meat.
      • Thanksgiving Turkey: These Brussels sprouts make a fantastic side dish for holiday meals, especially Thanksgiving, offering a sweet contrast to the rich flavors of Texas Smoked Turkey and Instant Pot Stuffing.
      • Fish: Try serving them with Air Fryer Bang Bang Salmon or pan-seared trout for a lighter meal that still feels indulgent.
      • Vegetarian Entrees: They go well with vegetarian dishes such as Stuffed Acorn Squash, Quinoa Salad, or a hearty Vegetable Stew.
      • Pasta Dishes: Serve alongside pasta with a creamy sauce or a simple aglio e olio to add a touch of sweetness and crunch to the meal.
      • Risotto: Complement the creaminess of a parmesan or Mushroom Risotto with these sprouts for a balanced texture and flavor profile.
      • Other Vegetables: Pair them with other roasted vegetables like carrots, beets or Grilled Sweet Potatoes for a vibrant and healthful vegetable platter.
      Roasted brussels sprouts on a serving tray.

      🍽 More Veggie Sides to Love

      • Caprese skewers on a wooden board ready to be served.
        Best Make Ahead Caprese Skewers
      • edamame stir fry in a white bowl.
        Easy Edamame Stir Fry (15-Minute Protein-Packed Side Dish)
      • Air fryer cauliflower with teriyaki sauce and sesame seeds.
        Air Fryer Cauliflower With Teriyaki Sauce
      • Zucchini Lasagna Rolls With Eggplant.
        Zucchini Lasagna Rolls With Eggplant

      Did you make this recipe? Leave a review and a ⭐⭐⭐⭐⭐ rating below, or tag us in our Facebook Group! Alternatively, bookmark it in your browser or save to Pinterest.

      Roasted Brussels Sprouts With Maple Syrup.

      Roasted Brussels Sprouts With Maple Syrup

      Angela Milnes
      Elevate your side dish game with these Roasted Brussels Sprouts with Maple Syrup! Crispy on the outside and tender on the inside, these sprouts are drizzled with just the right amount of maple syrup for a perfect balance of sweet and savory. It’s a deliciously easy way to enjoy your veggies!
      5 from 4 votes
      Print Recipe Pin Recipe Rate this Recipe
      Prep Time 5 minutes mins
      Cook Time 25 minutes mins
      Additional Time 0 minutes mins
      Total Time 30 minutes mins
      Course Vegetables
      Cuisine American
      Servings 4 Servings
      Calories 151 kcal

      Ingredients
        

      • 1 pound Brussels Sprouts trimmed and halved
      • 3 tablespoons Maple Syrup
      • 2 tablespoons Olive Oil
      • ½ teaspoon Salt
      • ¼ teaspoon Black Pepper

      Instructions
       

      • Preheat the Oven: Set your oven to 400 degrees Fahrenheit to ensure it's hot enough for roasting.
      • Prepare the Brussels Sprouts: Wash the Brussels sprouts, trim off the ends, and remove any blemished outer leaves. Cut each sprout in half to help them cook evenly and maximize their surface area for caramelization.
      • Season the Sprouts: In a large mixing bowl, toss the halved Brussels sprouts with olive oil, ensuring they are evenly coated. Sprinkle with salt and black pepper, and toss again to distribute the seasoning.
      • Add Maple Syrup: Drizzle the maple syrup over the seasoned Brussels sprouts and toss one more time to coat them thoroughly.
      • Arrange for Roasting: Spread the Brussels sprouts out on a baking sheet in a single layer, ensuring they aren't overcrowded. This helps them roast properly and turn crispy.
      • Roast the Brussels Sprouts: Place the baking sheet in the preheated oven and roast for about 20-25 minutes. Halfway through the roasting time, stir or flip the sprouts to ensure they brown evenly on all sides.

      Notes

      Choose Fresh Brussels Sprouts: For the best texture and flavor, select Brussels sprouts that are bright green and firm. Avoid any that have yellowing leaves or feel soft to the touch. Fresh sprouts will roast more evenly and have a better taste.
      Ensure Even Roasting: Cut the Brussels sprouts in half and spread them out on the baking sheet in a single layer. This ensures that each piece gets properly roasted. Overcrowding the pan can lead to steaming rather than roasting, resulting in less crispy sprouts.

      Nutrition

      Calories: 151kcalCarbohydrates: 20gProtein: 4gFat: 7gSaturated Fat: 1gPolyunsaturated Fat: 1gMonounsaturated Fat: 5gSodium: 466mgPotassium: 475mgFiber: 4gSugar: 11gVitamin A: 855IUVitamin C: 96mgCalcium: 64mgIron: 2mg
      Print Recipe Pin Recipe Rate this Recipe
      Tried this recipe?Let us know how it was!

      More Roasted Vegetable Dishes

      • Air Fryer Roasted Vegetables
      • Roasted Beet Salad With Pomegranate Molasses
      • Citrus And Honey Roasted Beets
      • Air Fryer Asparagus With Parmesan
      • Parmesan Roasted Zucchini

      Homemade Garlic Parm Sauce

      June 25, 2024 by Angela Milnes

      Homemade Garlic Parm Sauce.

      Hey there! If you're looking to add some serious flavor to your dishes, this Homemade Garlic Parm Sauce is your new best friend. It's creamy, garlicky, and packed with cheesy goodness. Perfect for pasta, drizzling over veggies, or even as a dip for your favorite snacks, this Garlic Parmesan Cream Sauce is a delicious sauce everyone will love.

      Homemade garlic parm sauce in a bowl.
      [feast_advanced_jump_to]

      💖 Why This Recipe Works

      • Creamy and Tangy: This Garlic Parmesan sauce combines the creaminess of yogurt and mayonnaise with the tangy zest of lemon juice.
      • Flavor-Packed: Fresh garlic and Parmesan cheese provide a robust and savory flavor that elevates any dish.
      • Versatile: Perfect as a dip, spread, or dressing, this sauce can be used in a variety of ways to enhance your favorite meals.

      ⭐ Star Ingredients

      Homemade Garlic Parm Sauce Ingredients.
      • Yogurt: Adds creaminess and a slight tang, serving as a healthy base for the sauce.
      • Mayonnaise: Provides a rich, smooth texture and enhances the sauce’s body.
      • Fresh Garlic: Delivers a sharp, pungent flavor that is key to the sauce’s character.
      • Lemon Juice: Brightens the sauce with fresh, citrusy zest.
      • Parsley: Offers a fresh, herbal note that complements the other flavors.
      • Parmesan Cheese: Brings a nutty, salty depth to the sauce.
      • Extra-Virgin Olive Oil: Contributes a fruity undertone and smooth consistency.
      • Salt: Enhances overall flavors and balances the parm sauce.

      For the complete list of ingredients with measurements and instructions, please see the recipe card at the bottom of the post.

      📖  Substitutions & Variations

      • Roasted Garlic Parmesan Sauce: Instead of fresh garlic, use roasted garlic for a milder, sweeter flavor. Roasted garlic blends smoothly into the sauce, enhancing its richness.
      • Spicy Garlic Parmesan Sauce: Add red pepper flakes or a splash of hot sauce to give the sauce a spicy kick. This version goes great with chicken wings or as a bold pasta sauce.
      • Herb-Infused Garlic Parmesan Sauce: Incorporate fresh herbs like basil, thyme, or rosemary. Finely chop the herbs and blend them into the sauce for an aromatic touch.

      🔪 How To Make Garlic Parmesan Sauce

      Mayonnaise, yogurt, parsley, olive oil, garlic, lemon juice, and parmesan cheese in a food processor.
      1. Step 1: In a food processor, add the following ingredients: mayonnaise, yogurt, parsley, olive oil, garlic, lemon juice, and parmesan cheese.
      Blending mayonnaise, yogurt, parsley, olive oil, garlic, lemon juice, and parmesan cheese in a food processor.
      1. Step 2: Season with salt and pepper to taste. Process the ingredients until they are well combined and the mixture is smooth. Serve the Homemade Garlic Parmesan Sauce with your choice of meats, fries, salad, pizza, or any other dish you prefer.
      Garlic parm sauce in a bowl.

      👩‍🍳 Expert Tips

      • Adjust Garlic to Taste: Start with the recommended amount of garlic, but adjust according to your preference. Remember, the flavor intensifies as the sauce sits.
      • Blend Well: Use a high-powered blender to ensure all ingredients are thoroughly combined and the sauce is smooth. This helps integrate the flavors better and achieves a creamy texture.
      • Balance the Acidity: The lemon juice is essential for balancing the creaminess of the yogurt and mayonnaise. Start with a little, taste, and add more if needed to get a bright, fresh flavor.

      💭 FAQs

      What Kind Of Blender Works Best For Garlic Parmesan Sauce?

      A high-speed blender is ideal for achieving a smooth and creamy texture, but any standard blender should work well as long as the garlic and Parmesan are finely chopped beforehand.

      What Can I Do If My Sauce Is Too Thick?

      If the sauce is too thick, you can thin it by blending in a little milk or water until you reach the desired consistency.

      Best Parmesan Garlic Sauce Substitute?

      If Parmesan isn't available, you can substitute it with another hard cheese like Grana Padano or Pecorino Romano for a similar flavor profile.

      Can I Make Homemade Garlic Parm Sauce Without Fresh Garlic?

      Fresh garlic is preferred for its flavor, but you can use ½ teaspoon of garlic powder as a substitute for each clove of garlic if fresh is unavailable.

      Is Garlic Parmesan Sauce Keto?

      Yes, Garlic Parmesan Sauce made with mayonnaise and yogurt is keto-friendly, as it is low in carbs and high in fats, aligning well with ketogenic dietary guidelines.

      Best Way to Store Garlic Parmesan Sauce

      Store any leftover Homemade Garlic Parm Sauce in an airtight container in the refrigerator for up to 5-7 days

      💖 Serving Suggestions

      Here are my favorite sides to serve with Homemade Garlic Parm Sauce:

      • Pasta: Toss cooked pasta such as FInstant Pot Fettuccine Alfredo, linguine, or spaghetti with Garlic Parm Sauce for a simple and satisfying meal. Add some sautéed vegetables like broccoli or spinach for extra flavor and nutrition.
      • Air Fryer Stuffed Chicken Breasts : Serve grilled chicken breasts or thighs smothered in garlic Parm sauce for a flavorful and comforting main dish. The creamy sauce adds richness and depth to the juicy chicken.
      • Roasted Vegetables: Drizzle roasted vegetables such as cauliflower, Brussels sprouts, or carrots with garlic Parm sauce before serving. The savory sauce enhances the natural sweetness of the vegetables and adds a creamy texture.
      • Instant Pot Red Skin Mashed Potatoes: Toss mashed potatoes with garlic Parm sauce for a decadent side dish. The creamy sauce pairs perfectly with the fluffy texture of the potatoes, creating a comforting and indulgent treat.
      • Parmesan Breadsticks: Serve warm breadsticks or garlic bread for dipping into garlic Parm sauce. The crispy exterior and soft interior of the bread soak up the sauce beautifully, making it a delicious appetizer or side dish.
      homemade garlic parm sauce in a bowl.

      🍽 More Recipes To Try

      • Hawaiian Garlic Shrimp.
        Hawaiian Garlic Shrimp Recipe (20 Minutes, So Flavorful!)
      • Mango and Pineapple Salsa in a white bowl.
        Mango and Pineapple Salsa (Perfect With Fish)
      • Carrot And Raisin Salad With Pineapple.
        Carrot And Raisin Salad With Pineapple
      • Cold Chicken Pasta Salad With Italian Dressing.
        Cold Chicken Pasta Salad With Italian Dressing

      Did you make this recipe? Leave a review and a ⭐⭐⭐⭐⭐ rating below, or tag us in our Facebook Group! Alternatively, bookmark it in your browser or save to Pinterest.

      Homemade Garlic Parm Sauce.

      Homemade Garlic Parm Sauce

      Angela Milnes
      Elevate your dishes with this creamy Homemade Garlic Parm Sauce! Bursting with rich garlic and Parmesan flavors, this versatile sauce is perfect for pasta, drizzling over vegetables, or as a dipping sauce. It's easy to make and adds a delicious, savory touch to any meal!
      5 from 4 votes
      Print Recipe Pin Recipe Rate this Recipe
      Prep Time 5 minutes mins
      Cook Time 0 minutes mins
      Total Time 5 minutes mins
      Course Condiments
      Cuisine American
      Servings 8 Servings
      Calories 250 kcal

      Ingredients
        

      • 1 cup Yogurt
      • 1 cup Mayonnaise
      • 3 cloves Fresh Garlic
      • ½ Lemon juiced
      • ¼ cup Parsley
      • ½ cup Parmesan cheese
      • 1 tablespoon Extra Virgin Olive Oil
      • Salt to taste
      • Black Pepper to taste

      Instructions
       

      • In a food processor, add the following ingredients: mayonnaise, yogurt, parsley, olive oil, garlic, lemon juice, and parmesan cheese. Season with salt and pepper to taste.
      • Process the ingredients until they are well combined and the mixture is smooth.
      • Serve the Garlic Parm Sauce with your choice of meats, fries, salad, pizza, or any other dish you prefer.
      • Enjoy your delicious homemade Garlic Parm Sauce!

      Notes

      • Adjust Garlic to Taste: Start with the recommended amount of garlic, but adjust according to your preference. Remember, the flavor intensifies as the sauce sits.
      • Blend Well: Use a high-powered blender to ensure all ingredients are thoroughly combined and the sauce is smooth. This helps integrate the flavors better and achieves a creamy texture.

      Nutrition

      Serving: 1gCalories: 250kcalCarbohydrates: 2gProtein: 5gFat: 24gSaturated Fat: 5gPolyunsaturated Fat: 13gMonounsaturated Fat: 6gTrans Fat: 0.1gCholesterol: 17mgSodium: 288mgPotassium: 71mgFiber: 0.3gSugar: 1gVitamin A: 228IUVitamin C: 6mgCalcium: 110mgIron: 0.3mg
      Print Recipe Pin Recipe Rate this Recipe
      Tried this recipe?Let us know how it was!

      Try These Tasty Salad Recipes

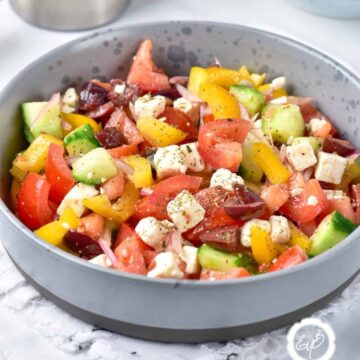
      • Best Chopped Italian Salad Recipe
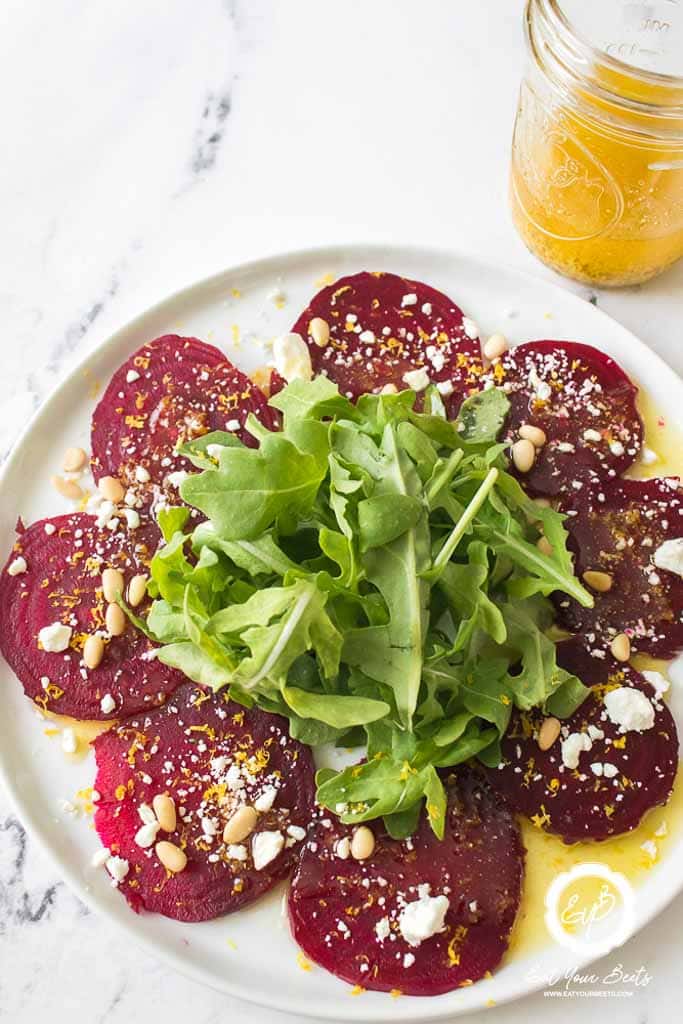
      • Beetroot Carpaccio: Best Recipe
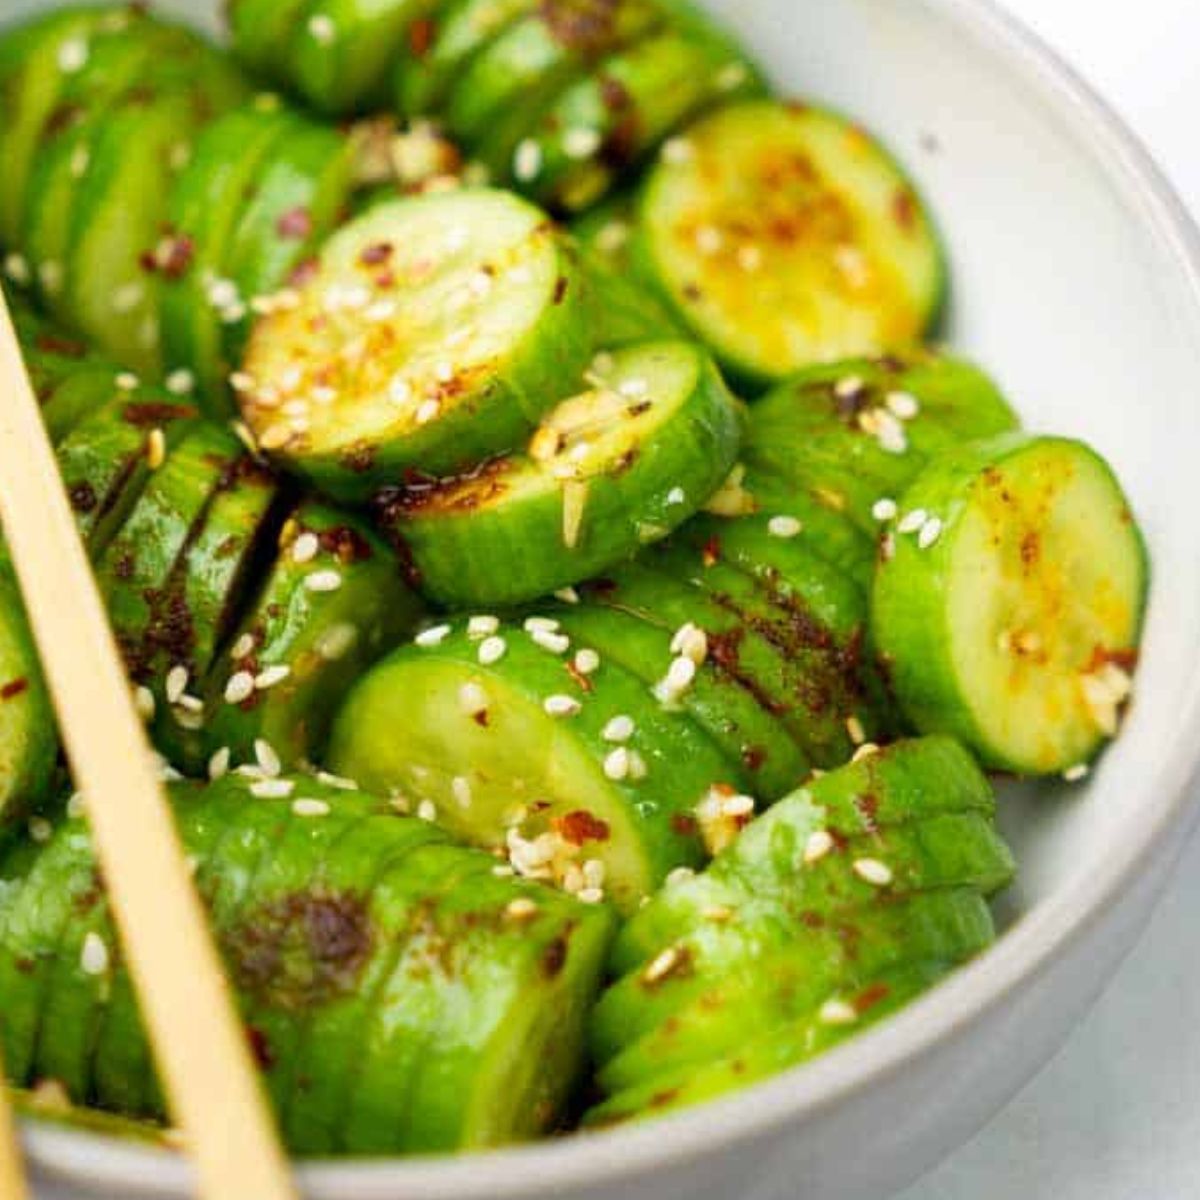
      • Korean Cucumber Salad
      • Roasted Beet Salad With Pomegranate Molasses
      • Kale Butternut Squash Salad With Blueberries
      • Red Cabbage Coleslaw Recipe

      Lemon Pudding Cake Recipe

      June 25, 2024 by Angela Milnes

      Lemon Pudding Cake Recipe.

      Get ready for a taste of sunshine with this Lemon Pudding Cake Recipe! It's like a magic trick in your oven – a fluffy cake on top with a tangy lemon sauce. The perfect lemon dessert after dinner tonight or any day you need a little pick-me-up!

      Lemon pudding cake slice on a plate.
      [feast_advanced_jump_to]

      Why This Recipe Works

      This recipe is such a fun way to add nutrition to your menu. It's flavorful, aromatic, and nutritious. The addition of curry and the sweetness of the carrots creates a perfect complex flavor everyone loves.

      Serve this as a side with many of your favorite meals from grilled meats to curries! And if you love this recipe be sure to check out our Instant Pot Wild Rice Blend too!

      🥘 Ingredients

      For Cake

      If you love cakes and desserts why not try this Twinkie Cake Recipe or give this Healthy Banana Pudding a try!

      • Lemon Cake Mix: Provides a flavorful and easy base for the cake.
      • Whole Milk: Adds richness and moisture to the cake batter.
      • Canola Oil: Keeps the cake moist and tender.
      • Large Eggs: Bind the ingredients together and add structure to the cake.
      • Lemon Juice: Enhances the lemon flavor, adding a fresh and tangy twist to the cake.

      For Pudding

      • Instant Lemon Pudding Mix: Creates a creamy and tangy layer on top of the cake.
      • Sugar: Sweetens the pudding topping.
      • Whole Milk: Enhances the creaminess of the pudding.
      • Cold Water: Helps set the pudding mix into a smooth, luscious topping.

      For Topping

      • Powdered Sugar: Adds a delicate sweetness and decorative touch.
      • Whipped Cream: Offers a light and airy contrast to the dense cake and pudding.
      • Fresh Mint Sprigs: Adds a refreshing aroma and garnish.
      • Lemon Slices: Enhances the visual appeal and adds a burst of citrus flavor.
      • Lemon Zest: Adds a fresh, vibrant citrus aroma and flavor to the finished dish.

      For the complete list of ingredients with measurements and instructions, please see the recipe card at the bottom of the post.

      📖  Substitutions & Variations

      • Lemon Pudding Bundt Cake: Prepare the lemon cake batter as instructed. Pour the batter into a greased and floured bundt cake pan for a classic lemon bundt cake.
      • Lemon Pudding Cupcakes: Divide the lemon cake batter into cupcake liners for tasty lemon pudding cupcakes.
      • Lemon Pudding Poke Cake: Bake a standard lemon cake and once it's cooled, use the handle of a wooden spoon to poke holes throughout. Pour lemon pudding over the cake, allowing it to fill the holes, for a moist and flavorful dessert.

      🔪How To Make Lemon Pudding Cake

      Preheat the oven to 350°F (175°C) and spray a 9x13-inch baking dish with non-stick baking spray.

      In a large bowl, whisk together the lemon cake mix, 1 cup whole milk, lemon juice, canola oil, egg yolks, and whites until smooth and well combined.

      Pour the batter into the prepared baking dish, spreading it out evenly.

      In another large bowl, combine the sugar, instant lemon pudding mixes, 2 cups milk, and 1 ¼ cups cold water. Whisk for about 2 minutes until the mixture is thickened and well combined.

      Spoon dollops of the pudding mixture evenly over the top of the cake batter.

      Place the baking dish on a cookie sheet (to catch any drips) and then place it in the preheated oven. Bake for 50-60 minutes, or until a toothpick inserted into the center of the cake comes out clean.

      Allow the cake to cool for about 30 minutes before serving. Dust with powdered sugar, top with lemon zest, and serve each piece with whipped cream, a slice of lemon, and a sprig of fresh mint.

      Lemon pudding cake on a plate.

      👩‍🍳 Expert Tips

      • Mixing Cake Batter: When whisking the cake batter, ensure that the egg yolks and egg whites are well incorporated for a smooth and consistent batter.
      • Cooling Time: Allow the cake to cool for at least 30 minutes to set the pudding layer properly before serving.

      💭 FAQs

      Can I use a different flavor of cake mix?

      Yes, you can substitute lemon cake mix with other citrus or vanilla cake mixes for a different flavor, but the lemon pudding layer works best with lemon cake.

      How do I know when the lemon pudding cake is done?

      The cake is done when a toothpick inserted into the center comes out clean, and the top is golden and slightly firm. It should take about 50-60 minutes to bake.

      Can I freeze leftovers?

      It's best to eat this cake fresh, but you can freeze leftovers in an airtight container for up to 2-3 months. Reheat it gently in the microwave before serving.

      Can I make this cake in advance?

      Yes, you can make the lemon pudding cake a day ahead. Simply store it in the refrigerator and allow it to cool before serving.

      Best Way to Store Lemon Pudding Cake

      Store any leftover Lemon Pudding Cake in an airtight container in the refrigerator for up to 3-4 days.

      🧂Serving Suggestions

      • Serve with Whipped Cream: Top each slice with a dollop of whipped cream for a light and airy contrast to the tangy lemon layers.
      • Garnish with Fresh Mint: Add a sprig of fresh mint and a slice of lemon to each serving for a vibrant, aromatic touch.
      • Pair with a Cup of Tea: Enjoy a slice alongside a hot cup of Earl Grey or chamomile tea for a delightful dessert experience.
      • As a Holiday Dessert: Make it part of your festive spread for occasions like Easter or Thanksgiving, where its refreshing citrus flavor will stand out.
      Lemon pudding cake.

      🍽 Enjoy More Desserts Here

      • Peach Pie Bars.
        Homemade Peach Pie Bars – Sweet, Simple, and So Good!
      • Hazelnut Chocolate Bark.
        Hazelnut Chocolate Bark
      • Creamy Vanilla Eclair Cake.
        Creamy Vanilla Eclair Cake
      • Berry Granola Bites.
        Easy Granola Bites Recipe (With Berries & Yogurt!)

      Did you make this recipe? Leave a review and a ⭐⭐⭐⭐⭐ rating below, or tag us in our Facebook Group! Alternatively, bookmark it in your browser or save to Pinterest.

      Lemon Pudding Cake Recipe.

      Lemon Pudding Cake Recipe

      Angela Milnes
      Delight in the zesty sweetness of Lemon Pudding Cake! This light and airy dessert features a delicate cake layer on top with a luscious, tangy lemon pudding underneath. It's the perfect treat for lemon lovers, combining the best of both worlds in every spoonful!
      5 from 3 votes
      Print Recipe Pin Recipe Rate this Recipe
      Prep Time 15 minutes mins
      Cook Time 1 hour hr
      Total Time 1 hour hr 15 minutes mins
      Course Desserts
      Cuisine American
      Servings 6 Servings
      Calories 631 kcal

      Ingredients
        

      For The Cake

      • 1 Box Cake Mix 9x13 size
      • 1 cup Whole Milk
      • ½ cup Canola Oil
      • 3 Eggs Large
      • 2 Instant Lemon Pudding Mix 3.4 oz each
      • ⅓ cup Sugar
      • 2 cups Whole Milk
      • 1 ¼ cups Cold Water

      Topping

      • Powdered sugar for dusting
      • Whipped cream
      • Fresh mint sprigs
      • Lemon slices

      Instructions
       

      • Preheat the oven to 350°F (175°C) and spray a 9x13-inch baking dish with non-stick baking spray.
      • In a large bowl, whisk together the lemon cake mix, 1 cup whole milk, lemon juice, canola oil, and egg yolks and whites until smooth and well combined.
      • Pour the batter into the prepared baking dish, spreading it out evenly.
      • In another large bowl, combine the sugar, instant lemon pudding mixes, 2 cups milk, and 1 ¼ cups cold water. Whisk for about 2 minutes until the mixture is thickened and well combined.
      • Spoon dollops of the pudding mixture evenly over the top of the cake batter.
      • Place the baking dish on a cookie sheet (to catch any drips) and then place it in the preheated oven. Bake for 50-60 minutes, or until a toothpick inserted into the center of the cake comes out clean.
      • Allow the cake to cool for about 30 minutes before serving. Dust with powdered sugar, top with lemon zest, and serve each piece with whipped cream, a slice of lemon, and a sprig of fresh mint.

      Notes

      Mixing Cake Batter: When whisking the cake batter, ensure that the egg yolks and egg whites are well incorporated for a smooth and consistent batter.
      Cooling Time: Allow the cake to cool for at least 30 minutes to set the pudding layer properly before serving.

      Nutrition

      Serving: 1gCalories: 631kcalCarbohydrates: 88gProtein: 10gFat: 27gSaturated Fat: 6gPolyunsaturated Fat: 6gMonounsaturated Fat: 14gTrans Fat: 0.3gCholesterol: 96mgSodium: 709mgPotassium: 254mgFiber: 1gSugar: 54gVitamin A: 316IUCalcium: 346mgIron: 2mg
      Print Recipe Pin Recipe Rate this Recipe
      Tried this recipe?Let us know how it was!

      More Weeknight Desserts To Try

      • Organic Baked Apples
      • No Bake Ocean Water Cheesecake
      • Easy Buckwheat Pancakes
      • Hazelnut Chocolate Bark
      • Reese’s Cookies With Popcorn

      Best Carrot Rice Recipe (With Tumeric and Cinnamon)

      June 20, 2024 by Angela Milnes

      Best Carrot Rice Recipe.

      If your family loves rice as much as mine, this Carrot Rice Recipe is about to become a weekly regular. It’s simple, colorful, and a fun way to get those veggies in—without anyone complaining at the dinner table.

      Best Carrot Rice Recipe.

      Whether you’re cooking up a simple weeknight dinner or planning a make-ahead lunch, this healthy rice dish delivers. Inspired by Indian carrot rice but simplified for busy families, it’s a versatile and tasty way to use up extra carrots and level up your plain white rice.

      Want more veggie-packed ideas? Try my Spinach Rice Casserole with Feta, Cauliflower Pizza Crust, or Beet Sweet Potato Salad!

      [feast_advanced_jump_to]

      💖 Why This Recipe Works

      • Veggie-packed and flavorful – great for picky eaters or anyone who loves a pop of color on the plate.
      • Quick and customizable – perfect as a last-minute side or easy meal prep base.
      • One-pot friendly – less mess, more time for, well… literally anything else.

      ⭐ Star Ingredients

      Carrot rice recipe ingredients.
      • Grated Carrots – They melt right into the rice, bringing sweetness and a soft texture kids actually like.
      • Cooked Rice – You can use white, brown, or even leftover rice—whatever you have on hand works great.
      • Garlic & Onion – A quick sauté of these two adds a base layer of flavor that makes this feel extra savory.
      • Spices – Think cumin, turmeric, or curry powder if you want a spiced rice recipe vibe—or keep it simple with salt and pepper.

      For the complete list of ingredients with measurements and instructions, please see the recipe card at the bottom of the post.

      📖  Substitutions & Variations

      • Spice it up with garam masala or a pinch of chili powder for an Indian carrot rice flair.
      • Toss in peas, corn, or chopped bell peppers for extra veg power.
      • Use basmati or jasmine rice for more aroma and flavor.
      • Make it a meal by adding chickpeas, grilled tofu, or leftover rotisserie chicken.
      • Swap garlic and onion for shallots or leeks if that’s what you’ve got.

      This also makes a fantastic lunchbox filler or quick dinner base—serve it with my Air Fryer Asparagus with Parmesan or Mango Chicken Salad for a complete plate.

      🔪 How To Make Carrot Rice

      Rice on a spoon.
      1. Step 1: Prepare your rice while you prep the remaining ingredients. Heat oil in a pan. Add mustard seeds, green chilies, and a pinch of salt. Sauté for 2 minutes until the seeds pop.
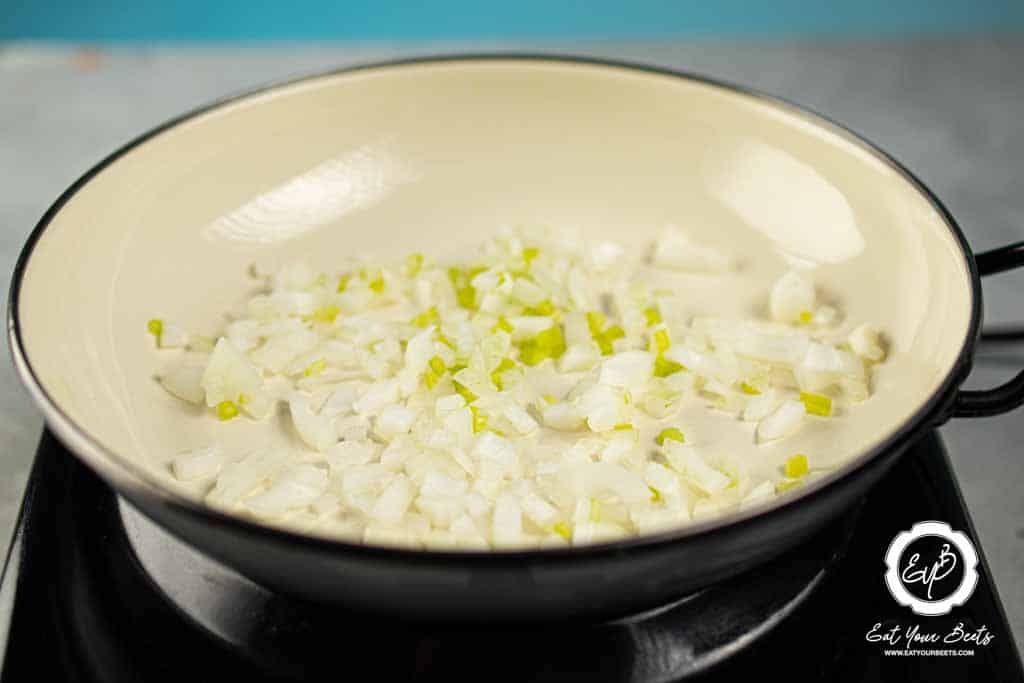
      Sauteing onion in skillet.
      1. Step 2: Add chopped onion and sauté until soft. Mix in grated carrots. Sprinkle curry or sambar powder and turmeric. Add two cinnamon sticks for flavor. Pour in three tablespoons of water to
      Preparing carrot rice in skillet.
      1. Step 3: Gently fold the cooked rice into the carrot mixture, ensuring not to break the grains.
      Cooked carrot rice in skillet.
      1. Step 4: Mix in ghee or melted butter for flavor and shine, serve carrot rice with cilantro garnish, and optionally top with cinnamon sticks for aroma.

      💡Hint: Got leftover rice? Let it come to room temp before adding so it mixes more evenly and doesn’t clump.

      Carrot rice served with cinnamon sticks.

      👩‍🍳 Expert Tips

      • Grate carrots fine if serving little ones—they blend right in and are easier to eat.
      • Use day-old rice for the best texture (less sticky, more separate grains).
      • Season in layers—add salt when cooking the carrots, then again with the rice to build flavor.

      💭 FAQs

      Can I Make Carrot Rice With Brown Rice?

      Yes, you can substitute white rice with brown rice for a healthier version. Keep in mind that brown rice has a longer cooking time, so adjust your cooking process accordingly.

      Can Carrot Rice Be Made Vegan?

      Yes, to make vegan carrot rice, simply use oil instead of butter or ghee and ensure that any broth used is vegetable-based. This modification will keep the dish plant-based without compromising flavor.

      What Are The Best Carrots To Use For Carrot Rice?

      Fresh, firm carrots are the best for this recipe. They should be bright in color and free of blemishes. Avoid overly large carrots as they can be tough and woody in texture.

      Is This Carrot Rice Recipe A Main Or A Side?

      Both! It makes a hearty base for protein or a colorful side for curries, grilled meats, or roasted veggies.

      💖 Serving Suggestions

      • With Thin Sliced Chicken Breast or Tofu for an easy dinner.
      • In a lunchbox with a hard-boiled egg and fruit.
      • Topped with a fried egg and a drizzle of hot sauce.
      • Next to dal or chickpea curry for an Indian-inspired meal.
      • Serve with Jamaican Beef Stew. The mild flavor of the rice can help balance the intensity of spicy dishes.
      • Alongside my Air Fryer Butterfly Chicken for a light yet satisfying combo.
      • Served cold as part of a veggie bowl with beet hummus and greens.
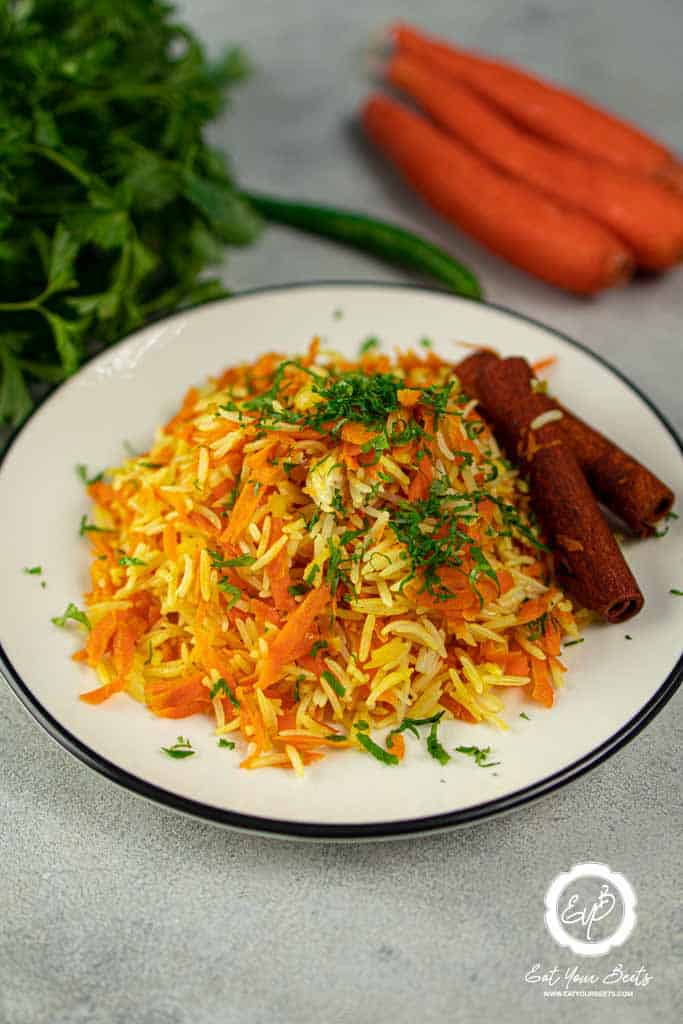
      Carrot rice served with cinnamon sticks on a plate.

      🍽 More Tasty Rice Dishes

      • Easy Garlic Rice With Cilantro in a white bowl with a wooden spoon.
        Easy Garlic Rice With Cilantro
      • Cheesy Mexican Steak And Rice.
        Cheesy Mexican Steak And Rice
      • Long grain White Rice Instant Pot Recipe.
        Long Grain White Rice Instant Pot Recipe
      • Instant Pot Wild Rice Blend With Pomegranates.
        Instant Pot Wild Rice Blend With Pomegranates

      Did you make this recipe? Leave a review and a ⭐⭐⭐⭐⭐ rating below, or tag us in our Facebook Group! Alternatively, bookmark it in your browser or save to Pinterest.

      Best Carrot Rice Recipe.

      Best Carrot Rice Recipe

      Angela Milnes
      Add a pop of color and flavor to your meal with this Carrot Rice! Tender rice is cooked with grated carrots and aromatic spices, creating a vibrant and tasty side dish that pairs perfectly with your favorite mains. It’s a simple yet delicious way to elevate your dinner!
      5 from 4 votes
      Print Recipe Pin Recipe Rate this Recipe
      Prep Time 5 minutes mins
      Cook Time 10 minutes mins
      Additional Time 0 minutes mins
      Total Time 15 minutes mins
      Course Side Dish
      Cuisine Indian
      Servings 4 Servings
      Calories 97 kcal

      Ingredients
        

      • 1.5 cups Carrot Grated
      • 1 Onion
      • 1 Green Chili
      • 1 Pinch Salt
      • 1 teaspoon Curry Powder
      • 1 teaspoon Sambar Powder
      • ¼ teaspoon Turmeric
      • ½ teaspoon Mustard
      • 1 tablespoon Oil
      • 1 tablespoon Melted Butter Or Ghee
      • teaspoon Chopped Cilantro For garnish
      • 2 Cinnamon Sticks

      Instructions
       

      • Cook your Rice: Add the rice to a pan and cook until soft and fluffy.
      • Heat the Pan: Start by heating oil in a pan. Add mustard seeds, green chilies, and a pinch of salt. Sauté for 2 minutes until the mustard seeds begin to pop.
      • Sauté Onions: Add the finely chopped onion to the pan and sauté until soft.
      • Add Carrots: Mix in the grated carrots with the onions.
      • Season the Mixture: Sprinkle curry or sambar powder and turmeric over the carrots. Add two cinnamon sticks to infuse the mixture with flavor.
      • Add Water: Pour in three tablespoons of water to help the carrots cook, ensuring they don't stick to the pan.
      • Cover and Cook: Cover the pan and let it cook for about 2 minutes.
      • Combine with Rice: Gently fold the cooked rice into the carrot mixture, ensuring not to break the grains.
      • Add Ghee or Butter: Stir in two teaspoons of ghee or melted butter to enrich the flavor and add a glossy finish.
      • Garnish and Serve: Serve the carrot rice on a plate and garnish with freshly chopped cilantro. Optionally, place the cinnamon sticks on top for an aromatic presentation.

      Notes

      Properly Temper the Spices: Heat the oil properly before adding mustard seeds to ensure they pop and release their flavor. Adding the spices at the right time during cooking helps to unlock their full aroma and infuse the rice with more depth of flavor.

      Nutrition

      Serving: 1gCalories: 97kcalCarbohydrates: 10gProtein: 1gFat: 7gSaturated Fat: 2gPolyunsaturated Fat: 1gMonounsaturated Fat: 3gTrans Fat: 0.1gCholesterol: 8mgSodium: 111mgPotassium: 214mgFiber: 3gSugar: 4gVitamin A: 8117IUVitamin C: 6mgCalcium: 44mgIron: 1mg
      Print Recipe Pin Recipe Rate this Recipe
      Tried this recipe?Let us know how it was!

      More Delicious Recipes To Try:

      • Air Fryer Cauliflower With Teriyaki Sauce
      • Purple Cauliflower Recipe (Mashed Cauliflower)
      • Air Fryer Yellow Squash
      • Butternut Squash Mac And Cheese
      • Cheesy Mashed Cauliflower
      • German Potato Pancakes With Ham
      Cooked carrot rice on a plate.

      Instant Pot Wild Rice Blend With Pomegranates

      June 20, 2024 by Angela Milnes

      Instant Pot Wild Rice Blend With Pomegranates.

      Looking for a vibrant and healthy side dish that will impress at your next gathering? Look no further than our Instant Pot Wild Rice Blend with Pomegranates! This dish combines the nutty flavors of wild rice with the sweetness of pomegranate seeds, crisp apples, and a hint of citrus. It's a delightful blend of textures and tastes that's as beautiful as it is delicious. Perfect for holiday dinners or a weeknight treat, this recipe is a winner all year round!

      instant pot wild rice wth pomegrante in a bowl
      [feast_advanced_jump_to]

      💖 Why This Recipe Works

      • Flavorful and Festive: The combination of wild rice, apples, pomegranate seeds, and dates creates a festive and flavorful dish perfect for any occasion.
      • Nutrient-Dense: Packed with fruits, nuts, and wholesome wild rice, this Instant Pot Wild Rice dish is a nutritious addition to your meal.
      • Quick and Easy: The Instant Pot makes cooking wild rice effortless and ensures a perfectly textured result every time.

      ⭐ Star Ingredients

      Instant Pot Wild Rice Blend With Orange Ingredients.
      • Wild Rice: A nutritious grain with a nutty flavor and chewy texture, it’s the perfect base for this vibrant dish.
      • Apple: Adds a sweet, crisp freshness, pairing beautifully with the other fruity elements.
      • Orange: Bright and juicy, the diced orange enhances the dish with a citrusy sweetness.
      • Pomegranate Seeds: These little gems offer a pop of tart flavor and a crunchy texture, packed with antioxidants.
      • Pine Nuts: Buttery and mild, they bring a subtle crunch and richness.
      • Medjool Dates: Their natural sweetness and caramel-like flavor enrich the dish wonderfully.
      • Olive Oil: A drizzle of olive oil binds all the flavors together with its smooth and fruity notes.
      • Apple Cider Vinegar: A splash brightens the dish, balancing the sweet with its tartness.
      • Lemon Juice: The zesty tang of lemon juice perfectly complements the sweetness.
      • Salt: Just a pinch to enhance and balance all the lovely flavors.

      For the complete list of ingredients with measurements and instructions, please see the recipe card at the bottom of the post.

      📖  Substitutions & Variations

      If you want to change this wild rice pressure cooker recipe up a little, you might want to add some of the following ingredients.

      • Protein: Make it a heartier meal by adding thin sliced chicken, Texas Smoked Turkey Breast, or even chunks of roasted salmon. These proteins complement the nutty flavor of the wild rice wonderfully.
      • Herbs and Spices: Stir in fresh herbs like parsley, thyme, or basil after cooking for a fresh flavor boost. For a warming touch, add spices like cinnamon or nutmeg, especially during the fall season.
      • Nuts and Seeds: Swap out pine nuts for almonds, Walnuts, or pecans for a different kind of crunch. Toasting them lightly enhances their flavor beautifully. Learn more here about walnuts by reading our article: Do Walnuts Go Bad?
      • Dried Fruit: In addition to or instead of dates, consider adding other dried fruits like cranberries, raisins, or apricots. These can sweeten the dish naturally and add a chewy texture.
      • Cheese: Crumble some feta or Goat Cheese on top before serving for a creamy contrast to the crunchy nuts and seeds.

      🔪 How To Cook Wild Rice In Instant Pot

      instant pot wild rice wth pomegrante in a bowl
      1. Step 1: Measure out 1 cup of wild rice and rinse it under cold water to remove any debris. Add the rinsed wild rice to the Instant Pot.
      instant pot wild rice wth pomegrante in a bowl
      1. Step 2: Pour 2 ½ cups of water into the Instant Pot with the wild rice. Secure the lid on the Instant Pot and set the valve to the sealing position. Select the "Pressure Cook" or "Manual" setting and set the timer for 25 minutes on high pressure.
      instant pot wild rice ingredients with pomegrante
      1. Step 3: Once the cooking time is complete, allow the Instant Pot to naturally release pressure for 10 minutes. Then, carefully perform a quick release to release any remaining pressure. Transfer the cooked wild rice to a large mixing bowl and allow it to cool to room temperature.
      instant pot wild rice ingredients with pomegrante
      1. Step 4: While the wild rice cools, prepare the other ingredients. Dice a large apple and an orange into small pieces. Measure 1 cup of pomegranate seeds. Toast ¼ cup of pine nuts in a dry skillet over medium heat until lightly browned, then set aside to cool. Chop about 3 Medjool dates. In a small bowl, whisk 1 tablespoon of olive oil, 2 tablespoons of apple cider vinegar, and 2 tablespoons of lemon juice. Season with salt to taste.
      instant pot wild rice ingredients with pomegrante
      1. Step 5: Add the diced apple, orange, pomegranate seeds, toasted pine nuts, and chopped Medjool dates to the bowl with the cooled wild rice. Pour the dressing over and toss until everything is well combined and coated.
      instant pot wild rice ingredients with pomegrante
      1. Step 6: Serve the Instant Pot Wild Rice with Orange chilled or at room temperature. Enjoy this flavorful, nutritious dish as a side or light main course!

      💧Instant Pot Wild Rice Water Ratio

      If you're looking to make this wild rice blend Instant Pot recipe, a great tip is to use the right wild rice to water ratio to achieve perfect results. For every 1 cup of wild rice, add 2 ½ cups of water. This ratio allows the wild rice to fully absorb the water, becoming tender and nicely puffed up without being mushy.

      instant pot wild rice ingredients with pomegrante

      👩‍🍳 Expert Tips

      • Rinse the Wild Rice: Before cooking, rinse your wild rice thoroughly under cold water to remove any debris and to minimize the natural bitterness. This will ensure a cleaner, purer taste that lets the other flavors shine through.
      • Toast the Pine Nuts: For an added depth of flavor, lightly toast the pine nuts in a dry skillet over medium heat until they're golden and fragrant. This enhances their buttery flavor, making them a perfect complement to the sweet and fruity elements of the dish.
      • Layer the Flavors: When adding the fruit to the cooked wild rice, consider the timing. Add the apple and orange while the rice is still warm to allow them to soften slightly and meld their flavors with the rice. However, stir in the pomegranate seeds and toasted pine nuts just before serving to maintain their crunch and freshness.

      💭 FAQs

      Can I Use The Instant pot Rice Setting For Wild Rice?

      Using the rice setting on your Instant Pot for wild rice isn't recommended. This setting is typically designed for white or parboiled rice, which cooks at different times and water ratios compared to wild rice. Wild rice benefits from a longer cooking time to become tender and fully open up.

      Do I Have To Toast The Pinenuts?

      Toasting the pine nuts for your dish isn't strictly necessary, but it's highly recommended. Toasting enhances their natural flavor, bringing out a richer, more buttery taste and a pleasant, crispy texture. This can add a delightful contrast to the chewy wild rice and the soft fruits in your dish.

      Can I Add Pomegranate Molasses To My Wild Rice?

      Yes, adding Pomegranate Molasses to your Instant Pot Wild Rice recipe can be a wonderful idea! Pomegranate Molasses offers a rich, tangy flavor that can add depth and a hint of sweetness to the dish. It pairs beautifully with the nutty taste of wild rice and complements other ingredients like nuts and fruits.

      How To Store Wild Rice

      Store any leftover Instant Pot Wild Rice Blend in an airtight container in the refrigerator for up to 3-4 days. Transfer the wild rice blend to a freezer-safe container or bag and freeze for up to 2-3 months. Defrost the wild rice blend in the refrigerator overnight.

      💖 Serving Suggestions

      Here are some of the sides to serve with Instant Pot Wild Rice:

      • Stuffed Mushrooms: Savory mushrooms stuffed with cheese, herbs, and breadcrumbs provide a rich and flavorful side dish.
      • Air Fyer Stuffed Chicken Breast: Tender and juicychicken breast seasoned with herbs and spices pairs perfectly with the nutty flavor of wild rice.
      • Air Fyrer Roasted Vegetables: A medley of roasted vegetables such as carrots, Brussels sprouts, and bell peppers adds color and a variety of flavors to complement the wild rice.
      • Kale Butternut Squash Salad: A fresh kale salad with butternut squash,blueberries, and a light vinaigrette offers a crisp and refreshing contrast to the hearty wild rice.
      • Air Fryer Baked Salmon: Tender baked salmon with lemon and dill provides a flavorful and nutritious main dish that pairs well with the wild rice.
      instant pot wild rice ingredients with pomegrante

      🍽 More Instant Pot Recipes

      • Instant Pot Cajun Chicken and Rice.
        Instant Pot Cajun Chicken and Rice
      • Creamy Instant Pot Tortellini Recipe.
        Creamy Instant Pot Tortellini Recipe
      • Instant Pot Kielbasa And Cabbage.
        Instant Pot Kielbasa And Cabbage
      • Instant Pot Enchilada Soup.
        Instant Pot Enchilada Soup

      Did you make this recipe? Leave a review and a ⭐⭐⭐⭐⭐ rating below, or tag us in our Facebook Group! Alternatively, bookmark it in your browser or save to Pinterest.

      Instant Pot Wild Rice Blend With Pomegranates.

      Instant Pot Wild Rice

      Angela Milnes
      Elevate your side dish game with this Instant Pot Wild Rice with Apple and Pomegranate! Nutty wild rice is cooked to perfection in the Instant Pot and then tossed with sweet apples and juicy pomegranate seeds. It's a flavorful, colorful dish that's perfect for adding a touch of elegance to any meal!
      5 from 4 votes
      Print Recipe Pin Recipe Rate this Recipe
      Prep Time 5 minutes mins
      Cook Time 25 minutes mins
      Total Time 30 minutes mins
      Course Side Dish
      Cuisine American
      Servings 4 Servings
      Calories 332 kcal

      Ingredients
        

      • 1 cup Wild Rice
      • 1 Large Apple diced
      • 1 Orange Diced
      • 1 cup Pomegranate Seeds
      • ¼ cup Pine Nuts
      • ¼ cup Medjool Dates (about 3) pitted and chopped
      • 1 Tablespoon Olive Oil
      • 2 Tablespoons Apple Cider Vinegar
      • 2 Tablespoons Lemon Juice
      • Salt to taste

      Instructions
       

      • Rinse 1 cup of wild rice under cold water. Add the rinsed wild rice to the Instant Pot.
      • Pour 2 ½ cups of water into the Instant Pot with the wild rice.
      • Secure the lid on the Instant Pot and set the valve to the sealing position. Select the "Pressure Cook" or "Manual" setting and set the timer for 25 minutes on high pressure.
      • Once the cooking time is complete, allow the Instant Pot to naturally release pressure for 10 minutes. Then, carefully perform a quick release to release any remaining pressure.
      • Open the lid and fluff the wild rice with a fork. Transfer the cooked wild rice to a large mixing bowl and allow it to cool to room temperature.
      • Dice a large apple into small cubes.
      • Peel and dice an orange into small pieces.
      • Measure 1 cup of pomegranate seeds.
      • Toast ¼ cup of pine nuts in a dry skillet over medium heat until lightly browned, then set aside to cool.
      • Pit and chop about 3 Medjool dates into small pieces.
      • In a small bowl, whisk together 1 tablespoon of olive oil, 2 tablespoons of apple cider vinegar, and 2 tablespoons of lemon juice. Season with salt to taste.
      • Add the diced apple, diced orange, pomegranate seeds, toasted pine nuts, and chopped Medjool dates to the bowl with the cooled wild rice.
      • Pour the dressing over the wild rice and fruit mixture.
      • Gently toss all the ingredients together until well combined, ensuring the dressing coats all the components evenly.
      • Serve the Instant Pot Wild Rice with Orange chilled or at room temperature. Enjoy this flavorful and nutritious dish as a side or a light main course!

      Notes

      If you're looking to make this wild rice blend Instant Pot recipe, a great tip is to use the right wild rice to water ratio to achieve perfect results. For every 1 cup of wild rice, add 2 ½ cups of water. This ratio allows the wild rice to fully absorb the water, becoming tender and nicely puffed up without being mushy.

      Nutrition

      Serving: 1gCalories: 332kcalCarbohydrates: 56gProtein: 8gFat: 10gSaturated Fat: 1gPolyunsaturated Fat: 4gMonounsaturated Fat: 4gSodium: 5mgPotassium: 503mgFiber: 7gSugar: 21gVitamin A: 122IUVitamin C: 27mgCalcium: 37mgIron: 2mg
      Print Recipe Pin Recipe Rate this Recipe
      Tried this recipe?Let us know how it was!

      More Tasty Salad Recipes

      • Chopped Italian Salad
      • Beetroot Carpaccio
      • Korean Cucumber Salad
      • Berry Salad With Goat Cheese
      • Roasted Beet Salad With Pomegranate Molasses
      • Mediterranean Farro Salad

      Air Fryer Roasted Vegetables (With Pecans)

      June 20, 2024 by Angela Milnes

      Air Fryer Roasted Vegetables.

      Say goodbye to soggy side dishes—Air Fryer Roasted Vegetables are where it’s at! Crispy, caramelized, and loaded with color and flavor, this is the easiest way to fall back in love with your veggies.

      Air Fryer Roasted Vegetables.

      Whether you're tossing together a last-minute weeknight dinner or need a healthy dish to round out your Sunday meal prep, these roasted vegetables are foolproof and endlessly flexible. You can use whatever’s in your crisper drawer, and the air fryer makes them golden and tender in under 15 minutes.

      We love pairing this dish with our Air Fryer Stuffed Chicken Breast, Air Fryer Yorkshire Pudding or as a cozy side to this hearty Chicken Mango Avocado Salad. It also works beautifully for meal prep—you’ll want these on hand all week!

      [feast_advanced_jump_to]

      💖 Why This Recipe Works

      • Quick & Easy: Done in under 20 minutes with barely any cleanup.
      • Healthier Than Roasting: Less oil, same caramelized edges.
      • Customizable: Works with any veggies and your favorite spices.

      ⭐ Star Ingredients

      Air Fryer Roasted Vegetables Ingredients.
      • Sweet Potato – I always include chopped sweet potato when roasting veggies in the air fryer. They caramelize like a dream, giving you that crisp-outside, soft-inside texture that feels indulgent but is totally wholesome.
      • Brussels Sprouts – These are my go-to for contrast and crunch. I trim and halve them so the edges get nice and crispy. Even the sprout skeptics in my house love them when they’re done right!
      • Pecans – Trust me on this one. Tossing in pecans during the last few minutes adds an irresistible toasted crunch and buttery depth. I do this often when I want my veggies to feel just a little bit fancy.

      For the complete list of ingredients with measurements and instructions, please see the recipe card at the bottom of the post.

      📖  Substitutions & Variations

      • No Pecans? Try chopped walnuts or pumpkin seeds for crunch.
      • Low-Carb Version: Swap sweet potatoes for more cauliflower or zucchini.
      • Fall Twist: Toss in diced apples or use maple instead of honey for a cozy vibe.
      • Make It Mediterranean: Finish with lemon zest, olives, and a sprinkle of feta.

      🌿 Try These Herb & Seasoning Combinations

      • Italian: Garlic powder, oregano, thyme, and a pinch of Parmesan.
      • Moroccan: Cumin, paprika, cinnamon, and lemon zest.
      • Asian-Inspired: Soy sauce, sesame oil, and ginger powder.

      If you love veggie-packed meals like this, try my Roasted Beet Salad With Feta And Walnuts or Cauliflower Pizza Crust next!

      🔪 How To Make Air Fryer Roasted Vegetables

      Chopped veggies in a bowl.
      1. Step 1: In a large bowl, toss the chopped vegetables with olive oil, salt, pepper, and any desired herbs or spices until evenly coated.
      Chopped vegetables in air fryer basket.
      1. Step 2: Preheat your air fryer to 400°F (200°C) for about 5 minutes. Place the coated vegetables in a single layer in the air fryer basket. Depending on the size of your air fryer, you may need to cook in batches to avoid overcrowding.
      Chopped vegetables and nuts in air fryer basket.
      1. Step 3: Air fry the vegetables at 400°F (200°C) for 10-15 minutes, shaking the basket halfway through to ensure even cooking. Add the pecans and continue cooking.
      Pouring oil over vegetables in air fryer basket.
      1. Step 4: Check the vegetables for doneness. They should be crispy on the outside and tender on the inside. Adjust cooking time if needed. Once cooked, remove the vegetables from the air fryer and serve immediately. Enjoy your perfectly roasted vegetables!

      💡 To reheat roasted veggies without losing their crisp, toss them back in the air fryer at 375°F for 3–5 minutes. Don’t microwave—unless you like limp veggies!

      Air fried roasted vegetables on a plate served with fork.

      👩‍🍳 Expert Tips

      • Don’t Overcrowd: Airflow = crispiness. Work in batches if needed.
      • Oil Matters: A little oil helps the spices stick and enhances browning.
      • Preheat for Success: Starting with a hot basket gives a better sear.
      • Pecans Go Last: They toast quickly—add at the end for best results.

      🔥 Roast Time Quick Guide

      Want perfect results every time? Here’s a cheat sheet I use to get individual veggies just right in the air fryer at 400°F:

      VeggieTimeNotes
      Air Fryer Zucchini8–10 minsSoft, watch for overcooking.
      Air Fryer Sweet Potato12–15 minsCut small for even cooking.
      Brussels Sprouts10–12 minsHalve for extra crispy edges.
      Air Fryer Carrots12–14 minsSlice thin for best roast.
      Cauliflower Florets10–12 minsShake the basket halfway through.

      💡 Tip: Mixing veggies with similar cook times = easier batches and better texture all around!

      💭 FAQs

      Can I use frozen vegetables in the air fryer?

      Yes! Use them straight from the freezer. Toss in oil and season, then cook a bit longer (15–20 minutes), shaking often. I sometimes chop veggies and freeze in a bag and then pop them into the air fryer when needed. It saves time and money!

      What’s the best temperature for roasting vegetables in the air fryer?

      I like 400°F for maximum crisp without burning. You can drop to 375°F if using delicate veggies like asparagus.

      How long do roasted vegetables last?

      They’ll keep in the fridge for 3–5 days in an airtight container. Reheat in the air fryer to bring back the crisp.

      Can I make roast veggies in the air fryer ahead of time?

      Absolutely! Roast them, let cool, and store. Add a fresh squeeze of lemon or chopped herbs before serving to wake them up.

      💖 Serving Suggestions

      Pair these crispy air-fried vegetables with:

      • Air Fryer Okra Chips for a vegetarian main.
      • Spicy Korean Cucumber Salad for contrast and crunch.
      • Turkey Cobb Salad as a protein-rich plate.
      • Texas Smoked Turkey Breast if you're feeling bold and flavorful.
      • Mango Arugula Salad for a fresh, peppery sidekick.

      Best way to use leftover roasted veggies:

      • Grain bowls with quinoa or rice.
      • Inside wraps with hummus.
      • Scrambled eggs or omelets.
      • Mixed into soup or Instant Pot Stews.
      Air fried roasted vegetables on a plate.

      🍽 More Fantastic Veggie Dishes To Try

      • Air Fryer Carrot Fries.
        Crispy Air Fryer Carrot Fries
      • Air Fryer Green Beans Crispy & Delicious.
        Air Fryer Green Beans Crispy & Delicious
      • Air fryer cauliflower with teriyaki sauce and sesame seeds.
        Air Fryer Cauliflower With Teriyaki Sauce
      • Crispy Air Fryer Avocado Fries Recipe.
        Crispy Air Fryer Avocado Fries Recipe

      Did you make this recipe? Leave a review and a ⭐⭐⭐⭐⭐ rating below, or tag us in our Facebook Group! Alternatively, bookmark it in your browser or save to Pinterest.

      Air Fryer Roasted Vegetables.

      Air Fryer Roasted Vegetables

      Angela Milnes
      Bring out the natural flavors of your favorite veggies with these Air Fryer Roasted Veggies! Perfectly seasoned and roasted to a crispy, golden finish, these vegetables are a quick and healthy side dish that pairs with any meal.
      5 from 3 votes
      Print Recipe Pin Recipe Rate this Recipe
      Prep Time 5 minutes mins
      Cook Time 15 minutes mins
      Total Time 20 minutes mins
      Course Vegetables
      Cuisine American
      Servings 4 Servings
      Calories 718 kcal

      Ingredients
        

      • 1 Cup Sweet Potato
      • 1 Cup Brussels Sprouts
      • 1 Cup Carrot
      • 1 Cup Cauliflower
      • 1 Cup Radish
      • ½ Cup Olive Oil
      • 2 Cups Pecans
      • ¼ Cup Honey
      • 1 tablespoon Ginger
      • 1 tablespoon Salt
      • 1 tablespoon Black Pepper
      • 1 tablespoon Nutmeg

      Instructions
       

      • Preheat your air fryer to 400°F (200°C) for about 5 minutes.
      • In a large bowl, toss the chopped vegetables with olive oil, salt, pepper, and any desired herbs or spices until evenly coated.
      • Place the coated vegetables in a single layer in the air fryer basket. Depending on the size of your air fryer, you may need to cook in batches to avoid overcrowding.
      • Air fry the vegetables at 400°F (200°C) for 10-15 minutes, shaking the basket halfway through to ensure even cooking.
      • Check the vegetables for doneness. They should be crispy on the outside and tender on the inside. Adjust cooking time if needed.
      • Once cooked, remove the vegetables from the air fryer and serve immediately. Enjoy your perfectly roasted vegetables!

      Notes

      • Preheat the Air Fryer: Start by preheating your air fryer if your model requires it. This helps achieve a more even cook and better crisping from the start.
      • Cut Evenly: Ensure your vegetables are cut into uniform sizes for even cooking. Smaller pieces will cook faster and get crispier, but they should all be roughly the same size.
      • Use Oil Sparingly: A little oil goes a long way in an air fryer. Lightly toss your vegetables in a small amount of oil to help them crisp up without becoming greasy. Opt for oils with a high smoke point like canola or avocado oil.

      Nutrition

      Serving: 1gCalories: 718kcalCarbohydrates: 39gProtein: 7gFat: 64gSaturated Fat: 7gPolyunsaturated Fat: 14gMonounsaturated Fat: 40gSodium: 3555mgPotassium: 671mgFiber: 9gSugar: 24gVitamin A: 10261IUVitamin C: 39mgCalcium: 84mgIron: 2mg
      Print Recipe Pin Recipe Rate this Recipe
      Tried this recipe?Let us know how it was!

      Thin Sliced Chicken Breast Air Fryer Recipe

      June 19, 2024 by Angela Milnes

      Thin Sliced Chicken Breast Recipe: Air Fryer Method.

      Crispy on the outside, juicy on the inside—this thin sliced chicken breast air fryer recipe is your weeknight dinner hero! It’s quick, easy, and packed with flavor, all without the need for heavy breading or deep frying. The best part? It’s ready in under 25 minutes start to finish!

      thinly sliced chicken breast on a plate.

      This recipe was born from the need for fast, healthy meals that don’t skimp on flavor. I love making this thin sliced chicken breast air fryer recipe because it cooks evenly, soaks up seasoning like a pro, and turns out golden and crisp every time.

      Whether you’re meal prepping or cooking for the fam, this is a go-to dish you'll keep on repeat. You can add your thinly sliced chicken to this delicious Chicken Mango Salad or pair it with our famous Crispy Air Fryer Carrot Fries recipe.

      [feast_advanced_jump_to]

      💖 Why This Recipe Works

      • Quick-cooking chicken with tons of flavor and minimal fuss.
      • Crispy outside, juicy inside—no dry chicken here.
      • Super versatile: serve with pasta, salads, wraps, or sides.

      🌟 Star Ingredients

      Ingredients for thin slice chicken, oil, onion powder, garlic powder, pepper, paprika, salt and chicken breasts.
      • Thin Sliced Chicken Breast – The MVP! Thin cuts cook quickly and evenly in the air fryer and absorb flavors beautifully. I like to slice them myself from full chicken breasts for maximum control.
      • Smoked Paprika – Adds that smoky-sweet punch that gives the chicken depth and a golden hue. Don’t skip it—it really makes the flavor pop.
      • Avocado Oil – This high-smoke-point oil locks in moisture and helps crisp the outside. It also helps your seasonings stick without overpowering the chicken.
      • Garlic & Onion Powder – The flavor dream team! Together, they add a savory backbone that makes every bite feel just right.

      For the complete list of ingredients with measurements and instructions, please see the recipe card at the bottom of the post.

      📖 Substitutions & Flavor Variations

      Want to mix things up? These easy marinade swaps and flavor twists will take your thin sliced chicken breast air fryer recipe to the next level—no extra effort required.

      • Lime & Cilantro – Bright, zesty, and packed with herby freshness. Perfect for taco night or summery salads.
      • Soy Garlic – Rich, savory, and totally crave-worthy. This one’s a winner for wraps, stir-fries, or rice bowls.
      • Balsamic Herb – A little sweet, a little tangy, and very Mediterranean. Try it with quinoa, couscous, or greens.

      Craving more tasty pairings for your thin sliced chicken breast air fryer recipe? Try it with a creamy scoop of Pumpkin Mac and Cheese for cozy comfort, plate it up next to these crispy Okra Chips for a crunchy side, or add a pop of green with Air Fryer Asparagus with Parmesan—because who doesn’t love crispy-cheesy veggies?

      🔪 How To Make This Thin Sliced Chicken Breast Air Fryer Recipe

      This recipe includes options for air frying sliced chicken or air frying chicken breast and slicing at the end. Both methods work well and give great results.

      Spices for chicken breast.
      1. Step 1: Preheat your air fryer to 380°F (190°C) for 3–5 minutes. While it heats, mix the smoked paprika, salt, pepper, onion powder, garlic powder, and avocado oil in a small bowl to make your marinade. You can either slice the chicken breasts into thin strips before air frying or cook them whole and slice afterward. (We cooked them whole and sliced after for the photos—both ways work great!)
      Marinated chicken breast in a bowl.
      1. Step 2: Place the chicken breasts in a shallow dish or zip-top bag, then pour the marinade over them. Make sure they’re well coated, and let them sit for 15–20 minutes so the flavors really soak in.
      Thin sliced chicken breast cooked in air fryer.
      1. Step 3: If cooking whole and slicing after: Air fry at 380°F (190°C) for 22 minutes, flipping halfway, until golden brown and the internal temperature reaches 165°F (74°C). If sliced before cooking: Air fry for 10–12 minutes, flipping halfway through, until cooked through and lightly crisp.
      Air fried chicken breasts.
      1. Step 4: Let the chicken rest for a few minutes after cooking to lock in the juices. Then slice (if needed), garnish with fresh herbs or a squeeze of lemon, and serve it up with roasted veggies, a simple avocado salad, or almond milk mashed potatoes for a full-on comfort meal.

      💡 Hint: Slice your own chicken breast to control the thickness—it’s more cost-effective and guarantees even cooking!

      Air fried chicken breasts on a tray.

      👩‍🍳 Expert Tips

      • Use a sharp knife for clean, uniform slices—it helps everything cook evenly.
      • Don’t skip the rest—letting the chicken sit for 5 minutes after cooking makes it way juicier.
      • Add flavor layers—sprinkle with lemon zest or fresh herbs just before serving for an extra kick.

      💭 Thin Sliced Chicken Air Fryer FAQs

      How Long To Cook Thin Sliced Chicken Breast?

      Cook your flavorful thinly sliced chicken breasts in the air fryer for 10-12 minutes.

      Do I Need To Preheat The Air Fryer Before Adding The Chicken?

      Yes, preheating the air fryer for about 3 to 5 minutes ensures that the chicken starts cooking immediately and helps achieve a crispier texture.

      Do I Need To Flip The Chicken Halfway?

      Definitely. Flipping ensures that golden crisp on both sides.

      Can I Layer The Sliced Chicken Breast In The Air Fryer?

      It's best not to layer chicken breast slices in the air fryer. For even cooking and a crispy finish, spread them out in a single layer so they don’t touch. This allows the hot air to circulate properly and cook the chicken evenly.

      Best Way To Store The Thin Sliced Chicken Breast Air Fryer Pieces?

      Cool thin chicken breast slices to room temperature, then store in an airtight container in the fridge for up to 4 days. Air Fryer chicken breast can be frozen for up to 3 months. Store separately in freezer safe bags.

      💖 Serving Suggestions

      Pair your thinly sliced chicken with these flavor-packed sides!

      • Spinach Rice Casserole – Creamy, cozy, and full of feta vibes.
      • Roasted Butternut Squash Salad – Sweet, roasted, and basically fall in a bowl.
      • Air Fryer Zucchini Fritters – Crispy little veggie pancakes that steal the show.
      • Garlic Cilantro Rice – Garlicky, herby goodness—total flavor sponge.
      • Red Cabbage Slaw – Crunchy, zesty, and just the right amount of sassy.
      Serving air fried chicken breast with a fork.

      🍽 More Great Chicken Recipes

      • Best Air Fryer Stuffed Chicken Breast.
        Best Air Fryer Stuffed Chicken Breast
      • Instant Pot Recipes.
        Best Instant Pot Pesto Chicken 
      • Baked Honey Garlic Chicken Breast.
        Baked Honey Garlic Chicken Breast
      • Slow Cooker Million Dollar Chicken Casserole.
        Slow Cooker Million Dollar Chicken Casserole

      Did you make this recipe? Leave a review and a ⭐⭐⭐⭐⭐ rating below, or tag us in our Facebook Group! Alternatively, bookmark it in your browser or save to Pinterest.

      Thin Sliced Chicken Breast Recipe: Air Fryer Method.

      Thin Sliced Chicken Breast Air Fryer Recipe

      Angela Milnes
      Enjoy perfectly cooked, juicy Air Fryer Chicken Breast with this simple and quick recipe! Thinly sliced chicken breasts are seasoned to perfection and cooked to a golden crisp in the air fryer.
      5 from 3 votes
      Print Recipe Pin Recipe Rate this Recipe
      Prep Time 5 minutes mins
      Cook Time 22 minutes mins
      Total Time 27 minutes mins
      Course Air Fryer Recipes
      Cuisine American
      Servings 3 Servings
      Calories 346 kcal

      Ingredients
        

      • 3 Chicken Breast Boneless and Skinless
      • 2 teaspoons Smoked Paprika
      • 1.5 teaspoons Salt
      • ½ teaspoon Black Pepper
      • ¼ teaspoon Dried Onion
      • ¼ teaspoon Dried Garlic
      • 2 tablespoons Avocado Oil

      Instructions
       

      • Preheat your air fryer to 380°F (190°C) for 3–5 minutes.
      • Combine smoked paprika, salt, black pepper, chopped onion, minced garlic, and avocado oil in a small bowl to prepare the marinade.
      • You can either slice the chicken breasts into thin strips before air frying or cook them whole and slice afterward. (We cooked them whole and sliced after for the photos—both ways work great!)
      • Place the chicken breasts in a shallow dish or zip-top bag, then pour the marinade over them. Make sure they’re well coated, and let them sit for 15–20 minutes so the flavors really soak in.
      • Once marinated, transfer the chicken breasts from the marinade to the air fryer basket, arranging them in a single layer with the rounded side down.
      • If cooking whole and slicing after: Air fry at 380°F (190°C) for 22 minutes, flipping halfway, until golden brown and the internal temperature reaches 165°F (74°C). 
      • If sliced before cooking: Let the chicken rest for a few minutes after cooking to lock in the juices. Then slice (if needed), garnish with fresh herbs or a squeeze of lemon.

      Notes

      Use a sharp knife for clean, uniform slices—it helps everything cook evenly.
      Don’t skip the rest—letting the chicken sit for 5 minutes after cooking makes it way juicier.
      Add flavor layers—sprinkle with lemon zest or fresh herbs just before serving for an extra kick.

      Nutrition

      Calories: 346kcalCarbohydrates: 1gProtein: 48gFat: 15gSaturated Fat: 2gPolyunsaturated Fat: 2gMonounsaturated Fat: 8gTrans Fat: 0.03gCholesterol: 145mgSodium: 1814mgPotassium: 877mgFiber: 1gSugar: 0.3gVitamin A: 725IUVitamin C: 3mgCalcium: 17mgIron: 1mg
      Print Recipe Pin Recipe Rate this Recipe
      Tried this recipe?Let us know how it was!

      Classic Tuna Tartare Recipe

      June 18, 2024 by Angela Milnes

      Classic Tuna Tartare Recipe.

      Looking for a light and elegant appetizer? This Classic Tuna Tartare Recipe is a surefire hit for any occasion! Fresh sushi-grade tuna mixed with zesty citrus, crisp cucumber, and a hint of spice makes for a refreshing treat that’s as easy to prepare as it is delicious. Serve this Tuna Tartare Avocado Recipe on a bed of greens for a starter that’s sure to impress!

      tuna tartare salad.
      [feast_advanced_jump_to]

      💖 Why This Recipe Works

      • Fresh and Flavorful: Made with sushi-grade tuna and seasoned to perfection, this dish is bursting with fresh flavors.
      • Elegant and Easy: Despite its sophisticated appearance, this Tuna Tartare On Avocado recipe is simple to prepare and makes a stunning appetizer.
      • Healthy and Light: Packed with protein and healthy fats from avocado, it’s a nutritious choice that’s also delicious.

      ⭐ Star Ingredients

      classic tuna tartare ingredients.
      • Fresh Sushi-Grade Ahi Tuna: Diced yellow fin Tuna into small cubes, this high-quality tuna serves as the star ingredient of the Tuna Tartare, providing a delicate texture and rich flavor.
      • Soy Sauce: Adds a savory umami flavor to the tuna tartare, enhancing its taste profile.
      • Sesame Oil: Infuses a nutty aroma and depth of flavor to the dish, complementing the freshness of the tuna.
      • Rice Vinegar: Provides a subtle tanginess that balances the richness of the tuna and adds brightness to the dish.
      • Avocado: Diced and seasoned with salt and pepper, the creamy avocado adds a smooth texture and a touch of richness to the tartare.
      • English Cucumber: Sliced thinly, the cucumber serves as a refreshing base or accompaniment to the tuna tartare, adding crispness and a hint of freshness.
      • Scallion: Thinly sliced scallions are used as a garnish, offering a mild onion flavor and a pop of color to the dish.
      • Black and White Sesame Seeds: Sprinkled on top for garnish, these seeds add visual appeal and a subtle crunch to the tuna tartare.

      For the complete list of ingredients with measurements and instructions, please see the recipe card at the bottom of the post.

      📖  Substitutions & Variations

      • Spicy Tuna Tartare: Add lime juice, rice wine vinegar, and a dash of chili garlic paste to the tuna mixture, and serve with crispy fried wonton chips.
      • Italian Tuna Tartare: Add diced tomatoes, olives, and a touch of olive oil to the fresh fish, garnishing with fresh basil.
      • Tuna Tartare With Mango: Why not add mango to the dish and create a juicy tropical tuna tartare mango variation.
      • Bluefin Tuna Tartare: Switch your ahi Yellow fin tuna for bluefin tuna. Showcase this option by combining it with finely chopped chives, a drizzle of truffle oil, and a touch of lemon zest, served on a crisp crostini for an indulgent treat.
      • Tuna Tartare Tacos: Switch the cucumber in this dish for tacos and create tuna tartare with a Mexican flair.

      🔪 How To Make Classic Tuna Tartare On Avocado

      Chopped tuna in a bowl.
      1. Step 1: In a bowl, combine the fresh raw tuna. Season with salt and pepper to your liking. Add the soy sauce, rice vinegar, and sesame oil. Mix well to coat the finely chopped raw tuna. Let it marinate in the refrigerator for 30 minutes. Season the diced avocado with salt and pepper.
      Classic Tuna Tartare Recipe
      1. Step 2: After the marinating time, drain the tuna from its marinade. To plate the tartare, use a plating ring. Start by adding a layer of diced avocado at the bottom of the ring. Follow with a layer of marinated tuna. Press down gently.
      Classic Tuna Tartare Recipe
      1. Step 3: Sprinkle a pinch of black and white sesame seeds over the tuna. Garnish with thinly sliced scallions.
      Classic Tuna Tartare Recipe
      1. Step 4: Carefully remove the plating ring to reveal a beautifully layered Tuna Tartare on Avocado. Serve with cucumber slices or crackers on the side for an extra crunch and freshness.
      Classic Tuna Tartare Recipe

      👩‍🍳 Expert Tips

      • Choose the Freshest Tuna: Use sushi-grade ahi tuna to ensure the highest quality and safest raw fish for your tartare.
      • Quick Marination: Marinate the tuna briefly before serving to enhance the flavors without overpowering the freshness of the fish. Around 5-10 minutes is ideal.
      • Avocado Choice: Choose a quality avocado using the advice below!
      • Keep It Chilled: Maintain all ingredients at a cool temperature until serving. Chilling the tuna and other components preserves their texture and enhances the refreshing nature of the tartare.

      🥑 Choosing The Best Avocado For Tuna Tartare

      When making tuna tartare on avocado, selecting the right avocado is crucial for both texture and flavor. Here are a few tips to help you choose the perfect avocado:

      • Ripeness: The avocado should be ripe but firm. You can test this by gently pressing the skin with your thumb. If it yields slightly under pressure, it's ripe. If it feels mushy, it's overripe, and if it's very hard, it needs more time to ripen.
      • Color: Look for avocados that are dark green to nearly black. The darker color often indicates ripeness, but always combine this with the feel test to ensure it's not overripe.
      • Skin Condition: Choose avocados with smooth, unblemished skin. Avoid avocados with significant dark spots, cracks, or indentations as these may indicate bruising or other internal damage.
      • Stem Check: Try peeking under the dry stem or cap at the top of the avocado. If it comes away easily and you see green underneath, the avocado is likely ripe. If it’s brown underneath, the fruit may be overripe. If the stem doesn’t come off, the avocado may need more ripening time.

      💭 FAQs

      What Is Tuna Tartare?

      Tuna tartare is a dish made from raw tuna that has been cut into small pieces or diced finely. It is often seasoned and mixed with other ingredients like avocado, onions, and a variety of sauces and spices.

      What Are The Best Seasonings For Tuna Tartare?

      Common seasonings for tuna tartare include soy sauce, sesame oil, lemon or lime juice, and herbs like chives or cilantro. Some variations also include wasabi or ginger for additional flavor.

      Can Tuna Tartare Be Made Ahead Of Time?

      It's best to prepare tuna tartare just before serving to maintain the freshness and texture of the raw tuna. However, you can prep the accompanying ingredients ahead of time and mix them with the tuna right before serving.

      Blue Fin Tuna Vs Yellow Fin Tuna?

      We use yellow fin tuna in this Tuna tartare avocado recipe. Bluefin and Yellowfin tuna for tartare, both offer excellent qualities but have distinct characteristics.

      Ahi, is leaner than Bluefin and has a slightly milder flavor. It's still highly prized for sushi and sashimi and works wonderfully in tartare, especially when you want a firmer texture and a clean, straightforward flavor that pairs well with a variety of seasonings.

      Known for its rich, buttery taste and a higher fat content, Bluefin tuna is often considered the more luxurious choice. Its fat marbling makes it exceptionally flavorful, which stands out in a simple dish like tartare. Bluefin's texture and taste can make the tartare feel more indulgent.

      Best Way to Store Tuna Tartare

      This Tuna tartare avocado dish is an appetizer which is generally eaten at the start of a meal. If you do have leftovers then place them in an airtight container in the refrigerator for up to 1-2 days

      💖 Serving Suggestions

      Here are some side dishes to serve with Tuna Tartare on Cucumber:

      • Mango Cucumber Salad: A refreshing mango cucumber salad with a touch of lime and chili provides a sweet and slightly spicy side dish..
      • Crispy Wonton Chips: Light and crispy wonton chips provide a perfect vehicle for scooping up the delicate tuna tartare.
      • Seaweed Salad: A traditional seaweed salad offers a savory and slightly sweet side that complements the flavors of the tartare.
      • Pickled Ginger: Thin slices of pickled ginger add a tangy and slightly spicy kick that enhances the delicate flavor of the tuna.
      Classic Tuna Tartare Recipe.

      🍽 More Seafood Recipes

      • vegan clam chowder.
        Creamy Vegan Clam Chowder Recipe (Dairy-Free & So Flavorful!)
      • Easy Shrimp Cakes With Hot Sauce.
        Easy Shrimp Cakes With Hot Sauce
      • Best Gravlax Salmon With Dill (Cured Salmon).
        Best Gravlax Salmon With Dill (Cured Salmon)
      • Fiery Ginger Garlic Shrimp (Chinese Shrimp).
        Fiery Ginger Garlic Shrimp (Chinese Shrimp)

      Did you make this recipe? Leave a review and a ⭐⭐⭐⭐⭐ rating below, or tag us in our Facebook Group! Alternatively, bookmark it in your browser or save to Pinterest.

      Classic Tuna Tartare Recipe.

      Classic Tuna Tartare Recipe

      Angela Milnes
      Enjoy a refreshing twist on a classic with Tuna Tartare on Cucumber! Fresh, finely diced tuna is perfectly seasoned and served atop crisp cucumber slices, adding a cool, crunchy contrast to the rich, flavorful tartare. It's a light, elegant appetizer that's as delightful to look at as it is to eat!
      5 from 4 votes
      Print Recipe Pin Recipe Rate this Recipe
      Prep Time 10 minutes mins
      Cook Time 0 minutes mins
      Total Time 10 minutes mins
      Course Appetizers
      Cuisine American
      Servings 2 Servings
      Calories 323 kcal

      Ingredients
        

      • 8 oz Sushi Grade Tuna diced into small cubes
      • ¼ cup Soy Sauce
      • 1 teaspoon Sesame Oil
      • 1 teaspoon Rice Vinegar
      • 1 Avocado diced and seasoned with salt and pepper
      • 1 English Cucumber sliced (for serving)
      • 1 Scallion thinly sliced (for garnish)
      • Black And White Sesame Seeds for garnish

      Instructions
       

      • In a bowl, combine the fresh raw tuna. Season with salt and pepper to your liking. Add the soy sauce, rice vinegar, and sesame oil. Mix well to coat the finely chopped raw tuna. Let it marinate in the refrigerator for 30 minutes.
      • Season the diced avocado with salt and pepper.
      • After the marinating time, drain the tuna from its marinade. To plate the tartare, use a plating ring. Start by adding a layer of diced avocado at the bottom of the ring. Follow with a layer of marinated tuna. Press down gently.
      • Sprinkle a pinch of black and white sesame seeds over the tuna. Garnish with thinly sliced scallions.
      • Carefully remove the plating ring to reveal a beautifully layered Tuna Tartare. Serve with cucumber slices or crackers on the side for an extra crunch and freshness.

      Notes

      Choose the Freshest Tuna: Use sushi-grade ahi tuna to ensure the highest quality and safest raw fish for your tartare.
      Quick Marination: Marinate the tuna briefly before serving to enhance the flavors without overpowering the freshness of the sushi grade fish. Around 5-10 minutes is ideal.

      Nutrition

      Serving: 1gCalories: 323kcalCarbohydrates: 16gProtein: 28gFat: 18gSaturated Fat: 3gPolyunsaturated Fat: 3gMonounsaturated Fat: 11gCholesterol: 41mgSodium: 1879mgPotassium: 986mgFiber: 8gSugar: 4gVitamin A: 429IUVitamin C: 15mgCalcium: 67mgIron: 4mg
      Print Recipe Pin Recipe Rate this Recipe
      Tried this recipe?Let us know how it was!

      Popular Salad Ideas To Add To Your Menu

      • Easy Chinese Chicken Salad
      • Homemade Garlic Parm Sauce
      • Mediterranean Green Bean Salad
      • Best Low Carb Broccoli Salad
      • Beetroot Carpaccio: Best Recipe
      • Avocado Salad

      Best Beetroot Dip Recipe (Greek Dip)

      June 14, 2024 by Angela Milnes

      Greek Beetroot Dip.

      Looking for a bold and healthy snack? This Beetroot Dip is creamy, vibrant, and bursting with flavor. Perfect for parties, picnics, or fridge-raiding moments!

      Crackers served with a bowl of Greek beetroot dip.

      Beets are having a major moment—and for good reason! This roasted Greek beet dip is not just pretty in pink (okay, more like deep magenta), it's packed with nutrients and serious flavor. It’s the kind of dip that makes healthy snacking feel luxe.

      If you love this, you might want to check out my Beet Salad With Feta And Walnuts, Citrus and Honey Roasted Beets, or Vegan Beetroot And Black Bean Burger for more beet magic.

      [feast_advanced_jump_to]

      💖 Why This Recipe Works

      • Healthy & Nutritious: Loaded with antioxidants, fiber, and a dose of gut-friendly Greek yogurt.
      • Gorgeous Color: This dip has a deep red hue turns any snack platter into a showstopper.
      • Flavor Flex: Earthy, tangy, and a little smoky—it's fab with everything from pita to grilled meats.

      ⭐ Star Ingredients

      Beetroot Dip Ingredients.
      • Beetroot: Roasted for sweetness and depth—skip boiling to avoid a watery dip.
      • Greek Yogurt: Full-fat is my go-to for creaminess and tang without extra fuss.
      • Lemon Juice: Just a splash lifts the earthy beet flavor and ties it all together.

      For the complete list of ingredients with measurements and instructions, please see the recipe card at the bottom of the post.

      📖  Substitutions & Variations

      • No yogurt? Use cashew cream or coconut yogurt for a creamy dairy-free twist.
      • Switch up the oil: Walnut or avocado oil works great if you're out of olive oil.
      • Nut-free version: Swap almonds for pumpkin or sunflower seeds for that satisfying crunch.
      • Vinegar vibe: No lemon? Use white wine vinegar or apple cider vinegar.
      • Amp up the tang: Stir in a spoonful of tahini or a crumble of goat cheese for a Mediterranean dip twist.

      For more creamy, flavor-packed spreads, try my Olive Tapenade or Roasted Red Pepper Hummus—great with veggies or crusty bread!

      🔪 How To Make Beetroot Dip With Greek Yogurt

      Yogurt and beetroot pieces in a blender.
      1. Step 1: Start by roasting the beetroots. Place them in foil and drizzle olive oil over the beets. Once cooked, chop the beets into chunks. Place the beetroot pieces into the blender followed by the plain Greek yogurt.
      Adding ingredients in a blender to make beetroot dip.
      1. Step 2: Add the cumin, parsley, cinnamon, salt, pepper, and paprika to the blender. Next, add your garlic cloves and lemon juice.
      Blending ingredients in a food processor to make beetroot dip.
      1. Step 3: Place the lid on the blender and blend for 30 second to 1 minute or until your beet mixture is smooth. Once you have the right consistency, pour your beetroot dip into a place or dip dish.
      Beetroot dip topped with feta, pine nuts, and almond slices.
      1. Step 4: Garnish the homemade beet dip with feta, pine nuts, and almond slices for a crunchy and tangy finish. Serve the dip with crackers, vegetables or pita bread. Enjoy this delicious beetroot dip. It's packed with flavor and tastes amazing!
      A bowl of Greek beetroot dip served with crackers on plate.

      👩‍🍳 Expert Tips

      • Roast, don’t boil: Roasting intensifies the flavor and prevents watery dip.
      • Use gloves when peeling: Unless you’re going for magenta hands!
      • Meal-prep friendly: Make a big batch—it keeps for days and gets better with time.

      💭 FAQs

      Can you freeze beetroot dip?

      You can freeze beetroot dip in an airtight container for up to 3 months, just be sure to stir it well after thawing as it may separate slightly.

      Is this a traditional Greek beetroot dip?

      t’s inspired by pantzarosalata, a classic Greek beetroot yogurt dip—but with a few fun extras like paprika and feta to give it a twist!

      What does beet dip go with?

      This creamy beet dip loves crackers, veggie sticks, and even grilled chicken or lamb. Try it with pita, sourdough, or as a sandwich spread.

      How long does beet dip last in the fridge?

      Store in an airtight container for up to 5 days. Stir before serving, especially if any liquid separates.

      💖 Serving Suggestions

      Here are some sides to serve with Beetroot Dip:

      • Air Fryer Beet Chips: Crispy, colorful, and made for dipping.
      • Homemade Bagel Chips: A crunchy, salty scoop for creamy beet dip.
      • Roasted Veggies: Spoon over Mediterranean-style roasted vegetables.
      • Air Fryer Falafel: Use as a zesty dip or sandwich spread.
      • Grilled Halloumi: Creamy dip meets salty cheese—so good together.
      • Wild Rice Blend: Add a dollop for flavor and color contrast.
      Beetroot dip in a bowl served with crackers.

      🍽 Love Dips? Try These!

      • Whipped Feta Dip.
        Creamy Whipped Feta Dip (With Greek Yogurt & Garlic)
      • Instant pot buffalo chicken dip in a dish.
        Instant Pot Buffalo Chicken Dip
      • Best Caramelized Onion Dip With Chives.
        Best Caramelized Onion Dip With Chives
      • Easy Slow Cooker Spinach Artichoke Dip.
        Easy Slow Cooker Spinach Artichoke Dip

      Did you make this recipe? Leave a review and a ⭐⭐⭐⭐⭐ rating below, or tag us in our Facebook Group! Alternatively, bookmark it in your browser or save to Pinterest.

      Greek Beetroot Dip.

      Best Beetroot Dip Recipe

      Angela Milnes
      Brighten up your snack time with this vibrant Beetroot Flavoured Dip! Creamy, earthy, and slightly sweet, this dip is bursting with flavor and color. Perfect for pairing with veggies, crackers, or spreading on toast, it's a healthy and delicious option that’s sure to impress!
      5 from 4 votes
      Print Recipe Pin Recipe Rate this Recipe
      Prep Time 5 minutes mins
      Cook Time 30 minutes mins
      Additional Time 0 minutes mins
      Total Time 35 minutes mins
      Course Appetizers
      Cuisine American
      Servings 6 Servings
      Calories 97 kcal

      Ingredients
        

      • 2-3 Large Beetroots
      • 1 ½ Cups Plain Greek yoghurt
      • ¼ Cup Lemon Juice
      • 5 garlic cloves
      • 1 Teaspoon Paprika
      • ½ Teaspoon Cumin
      • ½ Teaspoon Ground Parsley
      • ½ Teaspoon Cinnamon
      • Salt and Pepper
      • 1 Tablespoon Crumbled Feta Cheese
      • 1 Teaspoon Pine Nuts
      • 1 Teaspoon Sliced Almonds
      • 1 Tablespoon Olive Oil Optional

      Instructions
       

      • Start by roasting the beetroots. Place them in foil and drizzle olive oil over the beets. Once cooked, chop the beets into chunks.
      • Place the beetroot pieces into the blender followed by the plain greek yogurt.
      • Add the cumin, parsley, cinnamon, salt, pepper and paprika to the blender. Next add your garlic cloves and lemon juice.
      • Place the lid on the blender and blend for 30 second to 1 minute or until your beet mixture is smooth.
      • Once you have the right consistency, pour your beetroot dip into a place or dip dish.
      • Garnish the homemade beet dip with feta, pine nuts and almond slices for a crunchy and tangy finish!
      • Serve the dip with crackers, vegetables or pita bread. Enjoy this delicious beetroot dip. It's packed with flavor and tastes amazing!

      Notes

      Store and Reuse: Keep leftover beetroot dip in an airtight container in the refrigerator for up to a week. Use it as a spread for sandwiches or wraps for a quick and tasty meal.
      Transform into a Puree Base: Blend the leftover dip into a smoother puree and use it as a vibrant base for soups or sauces, adding a rich, earthy flavor to your dishes.
      Elevate Fine Dining Dishes: Incorporate the beetroot dip into fine dining by using it as an elegant spread on a plate for plating seared scallops or grilled fish, adding both color and a depth of flavor to your meals.

      Nutrition

      Serving: 1gCalories: 97kcalCarbohydrates: 7gProtein: 7gFat: 5gSaturated Fat: 1gPolyunsaturated Fat: 1gMonounsaturated Fat: 2gCholesterol: 6mgSodium: 78mgPotassium: 130mgFiber: 1gSugar: 4gVitamin A: 222IUVitamin C: 6mgCalcium: 96mgIron: 1mg
      Print Recipe Pin Recipe Rate this Recipe
      Tried this recipe?Let us know how it was!

      Try These Delicious Beetroot Meal Ideas:

      • Beetroot Carpaccio
      • Beet Cured Salmon
      • Beetroot Ravioli With Goat Cheese

      Refreshing Avocado and Apple Smoothie (With Spinach & Ginger!)

      June 13, 2024 by Angela Milnes

      Best Avocado And Apple Smoothie.

      Need a fast, healthy drink that’s creamy, energizing, and packed with flavor? This Avocado and Apple Smoothie blends crisp green apples, creamy avocado, and hydrating coconut water for a powerhouse breakfast or post-workout boost—ready in minutes!

      Best Avocado And Apple Smoothie.

      Smoothies are a go-to in our house, especially when we want something nourishing and easy on digestion. This recipe is particularly helpful for those following bariatric diets or anyone looking to stay fuller longer without heavy meals. The avocado provides healthy fats and creaminess, while the apple brings fiber and a burst of sweetness.

      Inspired by my Banana and Beetroot Smoothie and paired beautifully with my Maple Cinnamon Latte, this blend is a gentle, nutrient-rich way to start your day.

      [feast_advanced_jump_to]

      💖 Why This Recipe Works

      • Nutrient-Dense & Satisfying: Full of fiber, healthy fats, and antioxidants to keep you full and fueled.
      • Naturally Sweet: Uses real fruit and juice—no added sugars needed.
      • Great for Digestion: Ingredients like ginger, spinach, and zucchini support gut health and ease digestion.

      ⭐ Star Ingredients

      Avocado And Apple Smoothie Ingredients.
      • Avocado: Delivers heart-healthy monounsaturated fats, smooth texture, and helps keep you satisfied longer—especially important for bariatric needs.
      • Granny Smith Apple: Adds tartness, vitamin C, and fiber to balance the creaminess.
      • Spinach: Sneaks in extra iron, fiber, and antioxidants without overpowering the taste.
      • Ginger: Brightens flavor while offering anti-inflammatory benefits and digestive support.
      • Zucchini: Low-calorie volume that makes the smoothie thicker and more filling, without altering the taste.

      📖  Substitutions & Variations

      • Low-Sugar Option: Swap apple juice for unsweetened almond milk or more coconut water.
      • Extra Protein: Add a scoop of vegan or whey protein to make this a full meal.
      • Superfood Boost: Stir in chia seeds, flaxseeds, or hemp hearts for more omega-3s and fiber.
      • Tropical Vibes: Add frozen mango or pineapple for a sweeter, tropical twist.
      • Berry Variation: Blend in frozen berries for a gorgeous color and extra antioxidants.

      Want another fruity favorite? Try my Mango Pineapple Smoothie or Dragon Fruit Smoothie next.

      🔪 How To Make Avocado And Apple Smoothie

      Preparing avocado to make smoothie.
      1. Step 1: Step 1: Wash and chop your spinach, celery, zucchini, and apple. In a blender, add ½ cup coconut water and ¼ cup apple juice. Add spinach, zucchini, celery, and blend until smooth. Add ½ chopped Granny Smith apple, ½ avocado, 1 teaspoon grated ginger, and 1 scoop of vegan protein powder.
      Apple avocado smoothie mixture in blender.
      1. Step 2: Add ice cubes. Blend again until creamy and smooth.
        Adjust consistency with more liquid or ice if needed. Pour into a glass and enjoy!

      💡Hint: Chill your coconut water and apple juice beforehand for an extra-refreshing smoothie without needing too much ice.

      Avocado and apple smoothie in two glasses on a wooden board.

      👩‍🍳 Expert Tips

      • Use Ripe Avocado: It should be soft to the touch but not mushy—this gives the creamiest texture.
      • Chop Zucchini Small: Helps it blend faster and smoother, especially if your blender isn’t high-powered.
      • Customize Flavor: Adjust the balance between sweet and zingy by tweaking the apple juice or ginger levels.
      Avocado and apple smoothie in two glasses.

      💭 FAQs

      How long can I store this smoothie in the fridge?

      Up to 24 hours in an airtight container. Add a splash of lemon juice to reduce browning from the apple and avocado.

      When is the best time to drink this smoothie?

      Anytime! It’s ideal for breakfast, post-workout, or a mid-afternoon energy boost.

      Can I make this smoothie without protein powder?

      Yes! It’s still filling without it, but adding protein makes it better as a meal replacement.

      Is this smoothie suitable for bariatric diets?

      Yes—use unsweetened juice or reduce quantity for lower sugar. Avocado and spinach offer fiber and healthy fats ideal for post-op meals.

      What can I use instead of coconut water?

      Try filtered water, almond milk, or cucumber juice for hydration with less sweetness.

      Two glasses of avocado and apple smoothie.
      Best Avocado And Apple Smoothie.

      Avocado And Apple Smoothie

      Angela Milnes
      Refresh and energize with this creamy Avocado and Apple Smoothie! Blending the smooth richness of avocado with the crisp sweetness of apple.
      5 from 3 votes
      Print Recipe Pin Recipe Rate this Recipe
      Prep Time 10 minutes mins
      Cook Time 0 minutes mins
      Total Time 10 minutes mins
      Course Drinks
      Cuisine American
      Servings 1 Serving
      Calories 345 kcal

      Ingredients
        

      • 5 oz Coconut Water
      • 4 oz Apple Juice
      • 1 cup Spinach
      • ½ cup Zucchini
      • 3 Sticks Celery
      • ½ Granny Smith Apple
      • ½ inch Ginger
      • ¼ Avocado
      • 1 scoop Vegan Protein Powder link below
      • Ice Cubes

      Instructions
       

      • Gather all your ingredients. Wash and roughly chop the spinach, zucchini, celery, and Granny Smith apple. Peel and mince the ginger. Cut the avocado and scoop out the required amount.
      • Add the coconut water and apple juice to your blender. Then add the spinach, zucchini, and celery. Blend these until smooth to ensure all the greens are fully incorporated.
      • Add the chopped apple, minced ginger, and avocado to the blender. This step adds fresh flavors and creamy texture to your smoothie.
      • Scoop in the vegan protein powder. This will help thicken your smoothie and add protein to keep you energized.
      • Blend everything together until the mixture is completely smooth. Depending on your blender, this might take a minute or two.
      • Check the consistency of your smoothie. If it’s too thick, add more coconut water or apple juice to thin it out. If it’s too thin, you can add more ice cubes to thicken it.
      • Once your smoothie has reached the desired consistency, pour it into a glass and enjoy immediately for the best flavor and nutrient retention.

      Notes

      For a refreshingly cool smoothie without diluting it with too much ice, store your apple juice, coconut water, and even your fruits and veggies in the fridge before blending. This keeps the smoothie cold and more enjoyable, especially on warm days.

      Nutrition

      Calories: 345kcalCarbohydrates: 44gProtein: 29gFat: 10gSaturated Fat: 2gPolyunsaturated Fat: 2gMonounsaturated Fat: 5gSodium: 584mgPotassium: 1490mgFiber: 12gSugar: 28gVitamin A: 3600IUVitamin C: 37mgCalcium: 196mgIron: 7mg
      Print Recipe Pin Recipe Rate this Recipe
      Tried this recipe?Let us know how it was!

      Fun Veggie Train With Bell Peppers

      June 12, 2024 by Angela Milnes

      Fun Veggie Train With Bell Peppers.

      Choo choo! All aboard the Veggie Train! This colorful and fun dish is perfect for getting your little ones excited about eating their veggies. Bell peppers are transformed into a cute vegetable train filled with deliciousness.

      It’s a breeze to make and makes the perfect veggie appetizer for your party! Want more colorful ideas for creative snacks? Try my Crispy Air Fryer Carrot Fries, our Okra Chips recipe or these easy Avocado Deviled Eggs to round out your party spread!

      veggie train

      This bell pepper vegetable train was inspired by those snack boards that wow at kids’ parties—but with a healthy twist! It’s a playful way to serve vegetables that actually gets kids reaching for seconds (no bribery required). Whether you're throwing a birthday bash or just want to jazz up snack time, this veggie train is guaranteed to steal the show.

      Love this idea? Pair it with Beetroot Hummus, Air Fryer Sweet Potato Fries, or a platter of Cucumber Rolls With Cream Cheese And Salmon for a full snack board that’s as fun as it is nourishing.

      [feast_advanced_jump_to]

      💖 Why This Recipe Works

      • Exciting veggie train: A creative way to encourage kids to eat veggies, serving as a healthy snack and fun party food idea.
      • Colorful and Nutritious: Packed with a variety of fresh vegetables, this Veggie Train is as nutritious as it is colorful.
      • Party perfect veggie train snack – Makes a great appetizer or centerpiece for any kids’ event.

      🥑 Ingredients

      Veggie Train Ingredients.
      • Bell Peppers: To create the train cars and engine.
      • Cucumber Slices: To create the wheels for the train.
      • Baby Carrots: To fill the pepper cars for a vibrant touch.
      • Celery: For a refreshing and crunchy addition.
      • Plum Tomatoes: For a pop of color and flavor.
      • Toothpicks: To assemble the veggie train and attach the cucumber wheels to the peppers.
      • Dip – Optional: Serve with your favorite dip on the side for extra flavor.

      For the complete list of ingredients with measurements and instructions, please see the recipe card at the bottom of the post.

      📖  Substitutions & Variations

      • Mini Sushi Train—roll up sushi rice, avocado, cucumber, and smoked salmon into little train cars for a bite-sized sushi adventure.
      • Fruit Train—swap veggies for grapes, berries, and melon balls to make a fruity, fun-filled snack train.
      • Cheese Car —add cheese cubes, crackers, and mini cheese wheels to turn your train into a rolling charcuterie board!

      🔪How To Make A Veggie Train With Bell Peppers

      coring bell pepper for veggie train
      1. Step 1: Choose one bell pepper as the engine. This will be the front of your train. Cut off the top third of the bell pepper horizontally to create a flat top for the engine. For the rest of the bell peppers, cut off the tops and remove the seeds.
      adding wheels to veggie train
      1. Step 2: Use toothpicks to attach the bell peppers together, starting with the engine at the front. Place the other bell peppers behind the engine to form the body of the vegetable train. Attach cucumber slices to the sides of the bell peppers with toothpicks to create wheels.
      how to make a veggie train
      1. Step 3: Cut veggies and fill each bell pepper car with baby carrot sticks, celery sticks, and plum or cherry tomatoes.
      bell pepper veggie train for parties.
      1. Step 4: Add ranch dip or any other dip of your choice to one of the bell pepper carriages and place on a platter ready to serve.

      💡 Hint: Use different colored peppers for a rainbow train—it makes the whole display pop and gets the kids even more excited.

      👩‍🍳 Expert Tips

      • Safety First: Make sure to supervise young children when using toothpicks to assemble the train.
      • Mix and Match: Experiment with different combinations of vegetables to cater to your child's preferences and encourage them to eat vegetables of different varieties.
      • Get Creative: Encourage creativity by allowing your kids to design their own veggie train cars using different vegetables.

      💭 FAQs

      Can I use other vegetables for this veggie train?

      Absolutely! While bell peppers are the star of the recipe, you can easily swap them out for other vegetables like cucumbers, cherry tomatoes, or even carrots. Just make sure they are cut into shapes or sizes that make it easy for kids to enjoy.

      Is this veggie train a good snack for kids' parties?

      Yes, it’s perfect for kids' parties! The vibrant colors of the bell peppers and the creative "train" shape make it a fun and appealing way for kids to enjoy healthy snacks. Plus, it’s customizable based on dietary preferences.

      Can I prepare the vegetable train ahead of time?

      You can prepare the vegetables and assemble the "train" ahead of time. Just store it in the fridge until you're ready to serve. However, it’s best to add any dips or sauces right before serving to keep everything fresh.

      What kind of dip goes well with the Fun Veggie Train?

      A variety of dips can complement this bell pepper train! Try beetroot hummus, creamy and herby ranch, or a whipped feta dip. If you're looking for something a bit different, a tangy balsamic glaze or guacamole also pairs really well with the fresh veggies.

      Best way to store your veggie train?

      If you have leftovers, dismantle the train, remove the toothpicks, and store the vegetables in an airtight container in the refrigerator.

      💖 Serving Suggestions

      This Veggie Train makes the cutest centerpiece for any snack table. Pair it with slow cooker spinach artichoke dip, mini pizzas, spinach and ricotta bake, fluffy garlic knots, or a juicy fruit platter for a party spread that’s fun, balanced, and totally crowd-pleasing.

      how to make a veggie train

      🍽 More Colorful Veggie Recipes

      • Rainbow Veggie Rice Paper Rolls.
        Rainbow Vegetable Rolls With Rice Paper
      • Chicken And Cabbage Stir Fry Recipe.
        Chicken And Cabbage Stir Fry Recipe
      • Honey Roasted Parsnips and Carrots on a white plate.
        Honey Roasted Parsnips and Carrots
      • red cabbage coleslaw.
        Red Cabbage Coleslaw Recipe

      Did you make this recipe? Leave a review and a ⭐⭐⭐⭐⭐ rating below, or tag us in our Facebook Group! Alternatively, bookmark it in your browser or save to Pinterest.

      Fun Veggie Train With Bell Peppers.

      Veggie Train With Bell Peppers

      Angela Milnes
      All aboard the Veggie Train! This fun and colorful creation uses vibrant bell peppers as the train cars, each one filled with a delicious assortment of fresh veggies. It's a playful and healthy way to get everyone excited about eating their greens. Perfect for kids' parties, snack time, or even a creative appetizer, this Veggie Train is sure to be a showstopper at any gathering!
      5 from 4 votes
      Print Recipe Pin Recipe Rate this Recipe
      Prep Time 30 minutes mins
      Cook Time 0 minutes mins
      Total Time 30 minutes mins
      Course Vegetables
      Cuisine American
      Servings 10 Servings
      Calories 47 kcal

      Ingredients
        

      • 5 Bell Peppers different colors for variety
      • 1 Cucumber
      • 1 Cup Baby Carrots
      • 1 Cup Celery
      • 20 Plum Tomatoes

      Instructions
       

      • Choose one bell pepper as the engine. This will be the front of your train. Cut off the top third of the bell pepper horizontally to create a flat top for the engine.
      • For the rest of the bell peppers, cut off the tops and remove the seeds.
      • Use toothpicks to attach the bell peppers together, starting with the engine at the front.
      • Place the other bell peppers behind the engine to form the body of the train.
      • Attach cucumber slices to the sides of the bell peppers with toothpicks to create wheels.
      • Cut veggies and fill each bell pepper car with baby carrot sticks, celery sticks, and plum or cherry tomatoes.
      • Place on a serving platter and enjoy your veggie train! Serve with ranch dip or any other dip of your choice on the side, if desired.

      Notes

      Safety First: Make sure to supervise young children when using toothpicks to assemble the train to prevent any accidents.
      Mix and Match: Experiment with different combinations of vegetables to cater to your child's preferences and encourage them to eat vegetables of different varieties.
      Get Creative: Encourage creativity by allowing your kids to design their own veggie train cars using different vegetables.

      Nutrition

      Serving: 1gCalories: 47kcalCarbohydrates: 10gProtein: 2gFat: 1gSaturated Fat: 0.1gPolyunsaturated Fat: 0.2gMonounsaturated Fat: 0.05gSodium: 27mgPotassium: 517mgFiber: 3gSugar: 7gVitamin A: 4728IUVitamin C: 95mgCalcium: 29mgIron: 1mg
      Print Recipe Pin Recipe Rate this Recipe
      Tried this recipe?Let us know how it was!

      More Easy Food Ideas To Try

      • Best Stuffed Mushrooms
      • Baked Spaghetti Squash
      • Easy Avocado Salad
      • Best Purple Cabbage Soup

      Vegan Banana and Beetroot Smoothie

      June 12, 2024 by Angela Milnes

      Vegan Banana and Beetroot Smoothie.

      This Vegan Banana and Beetroot Smoothie combines the natural sweetness of ripe bananas with the earthy tones of beetroot. It’s a vibrant, nutrient-packed smoothie that’s as pretty as it is powerful—and the best part? You can blend it up in under 5 minutes flat!

      If you love this recipe be sure to check out our quick and simple Watermelon Juice, learn how to make the best Cucumber Juice With Greens or try this tangy Orange Carrot Ginger Juice.

      Banana and beetroot smoothie topped with almond slices..

      This smoothie is a year-round favorite, but it especially shines in spring and summer when you want something refreshing, colorful, and energizing. It was inspired by my obsession with bold-colored smoothies (like my Vegan Banana Avocado Smoothie), and it goes perfectly with this Easy Avocado Toast for a power breakfast combo.

      [feast_advanced_jump_to]

      💖 Why This Recipe Works

      • Naturally sweet with no added sugar
      • Great source of fiber, potassium, and antioxidants
      • Comes together in under 5 minutes flat

      🌟 Star Ingredients

      Ingredients to make banana and beetroot smoothie. Beetroot, almond slices, banana, soy milk and lemon juice.
      • Banana – Smoothie MVP! Bananas add creamy texture and natural sweetness, so there’s no need for extra sugar. Frozen slices = instant chill and thickness. I always keep a stash of sliced bananas in the freezer for that thick, frosty texture. It’s like smoothie gold.
      • Roasted Beetroot – This is where the magic (and the color!) happens. Roasting beetroot deepens its earthy flavor and makes it blend like butter. It’s packed with antioxidants and turns your smoothie into a pink powerhouse that looks as good as it tastes.
      • Soy Milk – Silky, dairy-free, and packed with plant-based protein to keep you full. It’s mild, so it lets the other flavors shine.
      • Lemon Juice – Just a splash lifts the whole smoothie. It adds brightness and cuts the earthy tones with a citrusy kick.

      📖 Substitutions & Variations

      • Dairy-free? You’re good with any non-dairy milk: almond, oat, cashew—it all works.
      • Want protein? Toss in a scoop of vanilla protein powder or a spoonful of nut butter.
      • Extra veggies? Add spinach or kale for a green upgrade with no flavor compromise.
      • Craving chocolate? A spoonful of cocoa powder gives you a chocolate beet smoothie vibe.
      • Low waste tip: Use frozen banana for extra chill without adding ice!

      See this easy beetroot juice recipe if you're into bold blends.

      How To Make Banana And Beetroot Smoothie

      We made our banana and beetroot smoothie in a Ninja blender but you can use any blender or food processor for this recipe.

      Beetroot chunks in a smoothie container.
      1. Step 1: Roast beetroot until fork-tender (about 30 minutes), let cool, and cut into chunks. Add the beetroot to your blender.
      Beetroot and banana chunks in a smoothie container.
      1. Step 2: Add diced banana to your blender.
      Adding lemon juice to soy milk, banana, and beetroot in a smoothie container.
      1. Step 3: Add the soy milk and lemon juice to the mixture and screw on the lid tightly.
      Blending beetroot, banana, and soy milk to make smoothie.
      1. Step 4: Blend the mixture until you have a smoothie consistency. Pour into a glass, sprinkle with almond flakes, and enjoy fresh!
      Beetroot and banana smoothie in a glass, toped with almond slices.

      💡 Hint: Roast and freeze your beetroot ahead of time so you always have some on hand. It blends easier and makes your smoothie even cooler! Check out this recipe if you want to know how to roast beetroot.

      👩‍🍳 Expert Tips

      • Use a high-powered blender – Beetroot can be fibrous, so you want that smooth finish!
      • Freeze bananas in slices – Makes the texture creamier without diluting it like ice.
      • Add lemon last – A splash at the end helps brighten the flavor perfectly.
      Beetroot and banana smoothie in a glass topped with almonds and beetroots on the side.

      Banana and Beetroot Smoothie FAQ'S

      Can I Use Raw Beetroot In A Banana And Beetroot Smoothie?

      Yes, raw beetroot can be used. However, roasting or boiling beetroot beforehand can mellow its earthy flavor and make it easier to blend, resulting in a smoother texture.

      How Can I Make My Banana And Beetroot Smoothie Creamier?

      To achieve a creamier texture, consider adding ingredients like Greek yogurt, avocado, or silken tofu. These additions not only enhance creaminess but also boost the protein content of your smoothie.

      What Fruits Pair Well With Beetroot In Smoothies?

      Beetroot pairs excellently with fruits like bananas, apples, berries (strawberries, blueberries, raspberries), mangoes, and citrus fruits. These fruits add natural sweetness and balance the earthy taste of beetroot.

      What Other Milk Can I Use In A Beetroot Banana Smoothie?

      You can try almond milk for a nutty flavor, oat milk for creaminess, cashew milk for smoothness, rice milk for a lighter sweetness, or hemp milk for a nutritious boost.

      What Are The Health Benefits Of A Banana And Beetroot Smoothie?


      Nutrient-Rich: Beetroot Is Loaded With Essential Vitamins and minerals like potassium, magnesium, and iron, while bananas are a great source of vitamin C, potassium, and dietary fiber. Together, they offer a powerhouse of nutrients that promote overall health.

      Energy Boosting: The natural sugars in bananas combined with the nitrates found in beetroot can Increase Your Energy Levels, making this smoothie a great choice for a pre-workout drink or a morning energizer.

      Supports Heart Health: Beetroot contains nitrates that Help Lower Blood Pressure And Improve Blood Flow, while the potassium in bananas helps maintain proper heart function and regulate blood pressure. This makes the Beetroot Banana Smoothie beneficial for cardiovascular health.

      Is It Okay To Prepare The Beetroot Smoothie Ingredients The Night Before?

      Absolutely! You can chop and measure the ingredients ahead of time and store them in the refrigerator. In the morning, simply blend everything fresh. This approach saves time without compromising the freshness and nutritional benefits of the smoothie.

      💖 Serving Suggestions

      This Banana beet smoothie is perfect with a slice of peanut butter toast, a few Berry Granola Bites, or these tasty Blueberry Yogurt Bites for a cheeky treat. It’s also great alongside my Spinach And Egg Breakfast Muffins for a balanced start to your day.

      🍽 More Delicious Drinks

      • Passion Fruit Juice.
        Best Passion Fruit Juice Recipe
      • Best Brazilian Limeade Recipe.
        Best Brazilian Limeade Recipe
      • Easy Dragon Fruit Smoothie Recipe.
        Easy Dragon Fruit Smoothie Recipe
      • Two glasses of Oreo milkshake.
        Best Vegan Oreo Milkshake (Oat Milk Milkshake)

      Did you make this recipe? Leave a review and a ⭐⭐⭐⭐⭐ rating below, or tag us on our Facebook Page! Alternatively, bookma

      Vegan Banana and Beetroot Smoothie.

      Banana And Beetroot Smoothie

      Angela Milnes
      Kickstart your morning with a vibrant Banana and Beetroot Smoothie! This unique blend combines the natural sweetness of bananas with the earthy richness of beetroot, creating a colorful and nutrient-packed drink. It’s the perfect way to fuel your day with flavor and goodness!
      5 from 3 votes
      Print Recipe Pin Recipe Rate this Recipe
      Prep Time 5 minutes mins
      Cook Time 30 minutes mins
      Additional Time 0 minutes mins
      Total Time 35 minutes mins
      Course Drinks
      Cuisine American
      Servings 1 Serving
      Calories 313 kcal

      Ingredients
        

      • 1 Banana
      • 1 Roasted Beetroot
      • 1 ½ Cups Soy Milk
      • ¼ Cup Fresh Lemon Juice
      • Sliced Almonds For Garnish

      Instructions
       

      • Roast the beetroot in the oven for 30 minutes and leave to cool. Once cooled chop the beetroot into bite size pieces and place into the blending cup.
      • Add diced banana to your blender.
      • Add the soy milk and lemon juice to the mixture and screw on the lid tightly.

      • Blend the banana and beetroot until you have a smoothie consistency.
      • Pour your banana and beet smoothie mixture into a glass. Add almond flakes for garnish and enjoy while fresh.

      Notes

      Use Roasted Beetroot: Roasting the beetroot beforehand enhances its natural sweetness and depth of flavor, making the smoothie taste richer.
      Use High-Quality Blender: To ensure a smooth consistency without any chunks, use a high-powered blender that can easily handle hard ingredients like frozen banana and fibrous beetroot.
      Freeze the Banana: Slice and freeze the banana prior to blending. This gives the smoothie a creamier texture and a cooler temperature without the need for ice.

      Nutrition

      Serving: 1gCalories: 313kcalCarbohydrates: 51gProtein: 13gFat: 8gSaturated Fat: 1gPolyunsaturated Fat: 4gMonounsaturated Fat: 2gSodium: 243mgPotassium: 1251mgFiber: 7gSugar: 30gVitamin A: 1497IUVitamin C: 63mgCalcium: 518mgIron: 3mg
      Print Recipe Pin Recipe Rate this Recipe
      Tried this recipe?Let us know how it was!

      Best Cheesy Mashed Cauliflower Recipe (Low-Carb & Creamy!)

      June 12, 2024 by Angela Milnes

      Best Cheesy Mashed Cauliflower Recipe.

      Looking for a mashed potato alternative that’s just as comforting but way lighter? This Best Cheesy Mashed Cauliflower Recipe is rich, creamy, and full of cheesy goodness—without the carbs. It’s a low-carb side dish that’s fast, fuss-free, and seriously satisfying.

      Best Cheesy Mashed Cauliflower Recipe.

      Mashed cauliflower is one of those hidden gems that fits right into keto, gluten-free, and bariatric-friendly diets. It delivers all the satisfaction of mashed potatoes—without the carb crash. I started making this cheesy cauliflower mash as a lighter weeknight side and now serve it at holiday dinners, too. It pairs perfectly with Thin Sliced Chicken Breast, Spanakopita with Puff Pastry, or Air Fryer Asparagus with Parmesan.

      This recipe also fits right into a low-carb holiday spread or weeknight dinner lineup. Pair it with Stuffed Portobello Mushrooms, Beet Feta Salad, or even Crispy Air Fryer Carrot Fries for a colorful, flavorful feast.

      [feast_advanced_jump_to]

      💖 Why This Recipe Works

      • Low-Carb & Keto Friendly: This Cheesy Mashed Cauliflower offers a healthier alternative to traditional mashed potatoes, packed with vitamins and minerals while keeping the carbs low.
      • Rich & Comforting: Blended with butter, cream, and cheese for a texture that’s velvety and indulgent.
      • Great for Meal Prep: Make it ahead and reheat easily—this Cheesy Mashed Cauliflower Recipe is perfect for busy weeknights or holiday prep.

      ⭐ Star Ingredients

      Chopping cauliflower florets.
      • Cauliflower Florets: A low-carb vegetable that blends beautifully and soaks up all the buttery, cheesy flavor.
      • Shredded Cheddar Jack Cheese: Melts smoothly into the mash for ultimate comfort food status.
      • Heavy Cream: Adds richness without making it watery—key to that “mashed potato” feel.
      • Butter: Rounds out the flavor and creates a silky texture.
      • Garlic Powder & Chives: Simple flavor boosters that make this dish anything but boring.

      For the complete list of ingredients with measurements and instructions, please see the recipe card at the bottom of the post.

      📖  Substitutions & Variations

      • Cream Cheese Swap: Use cream cheese instead of heavy cream for a tangier, denser mash.
      • Dairy-Free Option: Use plant-based butter, vegan cheese, and coconut cream.
      • Garlic Boost: Roast a few garlic cloves and blend them in for a richer, deeper flavor.
      • Bacon Topping: Add crispy bacon bits, green onions, or sour cream for a loaded cauliflower mash vibe.
      • Potato Blend: Mix in a few mashed potatoes for a hybrid mash if you’re easing into low-carb eating.
      • Use Purple Cauliflower: For a fun twist, try our Purple Cauliflower Mash for a colorful side!

      🔪How To Make Cheesy Cauliflower Mash

      chopped cauliflower in a pot.
      1. Step 1: Roughly chop the cauliflower florets into bite-size chunks. Place the cauliflower in a large pot and cover with water. Cover the pot with a lid and bring to a boil over medium-high heat. Reduce the heat to medium and simmer covered for 15 minutes, or until the cauliflower is very tender.
      Cooking chopped cauliflower in a pot.
      1. Step 2: Pour the cauliflower into a colander to drain. Pour the hot cauliflower into a large bowl and add the butter, heavy cream, garlic powder, salt, and pepper to taste.
      Blending cooked cauliflower.
      1. Step 3: Use an immersion blender to puree the cauliflower until smooth, or transfer to a food processor to puree.
      Sprinkling shredded cheese on mashed cauliflower.
      1. Step 4: Pour half of the mashed cauliflower into a 9×12 glass casserole dish. Sprinkle with half of the shredded cheese. Top with the remaining cauliflower, then sprinkle with the rest of the
      Cheesy mashed cauliflower in a serving bowl.
      1. Step 5: Bake the mashed cauliflower for 25-30 minutes at 350 degrees until the cheese is melted and the cauliflower is bubbling around the edges.
      Serving mashed cauliflower with a spoon.
      1. Step 6: Finally, your Cheesy Mashed Cauliflower is ready to serve. Garnish with fresh chives if desired.

      💡Hint: For extra smooth mash, let the cauliflower sit in a colander for a few minutes after draining to reduce water content.

      Cheesy mashed cauliflower in a bowl served with spoon.

      👩‍🍳 Expert Tips

      • Instant Pot Option: Steam cauliflower with 1 cup water for 3 minutes, quick release, then continue from Step 3.
      • Don’t Overboil: Soft is good—but too soft leads to watery mash. Cook just until fork-tender.
      • Extra Seasoning: For the best flavor, season your cheesy mashed cauliflower generously with salt and pepper, and consider adding a pinch of nutmeg. Nutmeg enhances the creamy, cheesy notes and adds a subtle warmth to the dish.

      💭 FAQs

      Can I make cheesy mashed cauliflower ahead of time?

      Yes! Store in the fridge for 2–3 days. Reheat in the oven or microwave and stir in a splash of milk if needed.

      Can I use frozen cauliflower for this recipe?

      Absolutely. Just steam or boil until very tender, drain well, and follow the recipe as written.

      What can I substitute for cream cheese in this recipe?

      If you're looking for a lighter version, you can swap the cream cheese with Greek yogurt or sour cream for a similar creamy texture. You could also use a dairy-free cream cheese substitute if you're making this recipe vegan or dairy-free.

      How do I make the mashed cauliflower extra cheesy?

      To enhance the cheesy flavor, add extra shredded cheese to the mashed cauliflower and mix it in until fully melted. You can also sprinkle more cheese on top and bake it for a few minutes to create a delicious, golden crust.

      Best Way to Store Mashed Cauliflower

      To enhance the cheesy flavor, add extra shredded cheese to the mashed cauliflower and mix it in until fully melted. You can also sprinkle more cheese on top and bake it for a few minutes to create a delicious, golden crust.

      💖 Serving Suggestions

      Here are some of the best side dishes to serve with Mashed Cauliflower:

      • With Roasted Chicken or Air Fried Chicken: Classic combo that’s satisfying and wholesome.
      • Next to Steak Bites or Tender Pork Chops : Creamy mash pairs beautifully with bold, meaty mains.
      • With Air Fryer Cod or Pan Fried Salmon: A light yet flavorful side for seafood.
      • As a Holiday Side Dish: Serve alongside Smoked Turkey Breast, stuffing, or Roasted Veggies.
      • Topped With Mushroom Gravy: For a cozy, vegetarian-friendly meal.
      Mashed cauliflower on a plate.

      🍽 More Pureed Recipes To Enjoy

      • puree squash recipe
        Easy Pureed Squash Recipe
      • Pureed Sweet Potatoes.
        Easy Pureed Sweet Potatoes
      • mashed carrots pureed carrots recipe.
        Carrot Puree Recipe For Infants
      • pureed peas for babies.
        Simple Pureed Peas Recipe

      Did you make this recipe? Leave a review and a ⭐⭐⭐⭐⭐ rating below, or tag us in our Facebook Group! Alternatively, bookmark it in your browser or save to Pinterest.

      Best Cheesy Mashed Cauliflower Recipe.

      Cheesy Mashed Cauliflower

      Angela Milnes
      Get ready to fall in love with this Cheesy Mashed Cauliflower! It's creamy, comforting, and loaded with cheesy goodness—everything you crave in mashed potatoes, but with a lighter, veggie-packed twist. Perfect as a side dish or even on its own, this recipe is sure to be a hit at your next family dinner.
      5 from 4 votes
      Print Recipe Pin Recipe Rate this Recipe
      Prep Time 5 minutes mins
      Cook Time 45 minutes mins
      Total Time 50 minutes mins
      Course Vegetables
      Cuisine American
      Servings 6 Servings
      Calories 331 kcal

      Ingredients
        

      • 2 Cauliflower
      • Water
      • ½ cup Heavy Cream
      • ½ Cup Butter
      • ½ teaspoon Garlic Powder optional
      • 1 teaspoon Salt
      • Pinch Black Pepper
      • 1 Cup Shredded Cheddar Jack Cheese or cheddar cheese blend of choice
      • tablespoon Fresh Chives chopped (optional) for garnish

      Instructions
       

      • First, preheat the oven to 350 degrees Fahrenheit.
      • Roughly chop the cauliflower florets into bite-size chunks. Place the cauliflower in a large pot and cover with water. Cover the pot with a lid and bring to a boil over medium-high heat. Reduce the heat to medium and simmer covered for 15 minutes, or until the cauliflower is very tender. Pour the cauliflower into a colander to drain.
      • Pour the hot cauliflower into a large bowl and add the butter, heavy cream, garlic powder, salt, and pepper to taste. Use an immersion blender to puree the cauliflower until smooth, or transfer to a food processor to puree.
      • Pour half of the mashed cauliflower into a 9×12 glass casserole dish. Sprinkle with half of the shredded cheese. Top with the remaining cauliflower, then sprinkle with the rest of the cheese.
      • Bake the mashed cauliflower for 25-30 minutes at 350 degrees until the cheese is melted and the cauliflower is bubbling around the edges.
      • Finally, serve hot with fresh chives if desired.

      Nutrition

      Serving: 1gCalories: 331kcalCarbohydrates: 11gProtein: 9gFat: 29gSaturated Fat: 18gPolyunsaturated Fat: 1gMonounsaturated Fat: 7gTrans Fat: 1gCholesterol: 83mgSodium: 366mgPotassium: 626mgFiber: 4gSugar: 4gVitamin A: 954IUVitamin C: 93mgCalcium: 194mgIron: 1mg
      Print Recipe Pin Recipe Rate this Recipe
      Tried this recipe?Let us know how it was!

      Avocado And Banana Smoothie (Vegan)

      June 12, 2024 by Angela Milnes

      Vegan Banana Avocado Smoothie Recipe.

      Whip up this Avocado And Banana Smoothie for a creamy, dreamy blend that hits all the right notes. It’s smooth, satisfying, and packed with feel-good nutrients—perfect for breakfast, snack time, or when you need a healthy reset without skipping flavor.

      Banana Avocado Smoothie Recipe

      Did you know? Avocado smoothies are super popular in Brazil and Vietnam, where they’re often made with sweetened condensed milk. We’re giving this a healthier spin, but it’s fun to explore the roots of this creamy favorite!

      This avocado and banana smoothie has a naturally sweet flavor and a creamy milkshake-like texture—making it a sneaky way to get greens into little tummies without a fuss. Want more smoothie inspo? Check out my Vegan Banana and Beetroot Smoothie, Mango Pineapple Smoothie, or refreshing Orange Carrot Ginger Juice.

      [feast_advanced_jump_to]

      💖 Why This Recipe Works

      • Ultra-creamy texture thanks to the banana and avocado duo.
      • Naturally sweet and satisfying—no added sugar needed.
      • Comes together in 5 minutes for a nourishing plant-based smoothie anytime.
      • Kid-friendly! It tastes like a milkshake, but sneaks in greens without little ones noticing.

      ⭐ Star Ingredients

      banana avocado smoothie ingredients
      • Avocado – The secret to a super creamy avocado smoothie. It adds healthy fats, keeps you full longer, and gives that dreamy texture.
      • Banana – A ripe banana brings natural sweetness and potassium to power up your smoothie game.
      • Swiss Chard – This leafy green blends beautifully without overpowering the taste, making it a stealthy addition for picky eaters.
      • Soy Milk – A smooth, nutty base that complements both the banana and avocado. Great for those avoiding dairy!

      For the complete list of ingredients with measurements and instructions, please see the recipe card at the bottom of the post.

      📖  Substitutions & Variations

      • Berry blast – Swap the Swiss chard for frozen berries and turn it into a fruity, antioxidant-rich banana smoothie with avocado.
      • Chocolate fix – Add a tablespoon of cocoa powder for a dessert-level creamy avocado smoothie.
      • Green power – Sub Swiss chard with spinach or kale for an even greener healthy green smoothie recipe.
      • Low-sugar hack – Replace the banana with frozen zucchini or cauliflower for a low-carb version. Add a touch of stevia or monk fruit if you like it a bit sweet.

      Pair it with my Chocolate Overnight Oats or a Fresh Kiwi Fruit Salad for a complete feel-good breakfast.

      🔪How To Make An Avocado And Banana Smoothie

      avocado banana smoothie
      1. Step 1: Peel a ripe banana and scoop out half a ripe avocado. Add to your blender.
      Add Soy Milk to smoothie.
      1. Step 2: Toss in a handful of chopped Swiss chard, pour in soy milk, and add a few ice cubes for chill factor.
      blending avocado banana smoothie
      1. Step 3: Blend on high until everything is smooth, creamy, and gloriously green.
      blending avocado banana smoothie
      1. Step 4: Pour into a glass, top with almond flakes or banana slices, and enjoy that thick, satisfying sip.

      💡Hint: Use frozen banana slices and chilled soy milk for the ultimate frosty smoothie texture.

      👩‍🍳 Expert Tips

      • Use ripe fruit – Spotty bananas and just-ripe avocados give the best natural sweetness and texture.
      • Batch it – Freeze pre-measured bags with sliced banana, cubed avocado, and greens. Just dump, blend, and go!
      • No high-speed blender? – Blend the soy milk and greens first before adding the other ingredients for a smoother result.
      • Texture Tip – Like it thicker? Use frozen banana and just a splash of milk. Prefer it drinkable? Add extra soy or oat milk until it’s the consistency you love.

      💭FAQs

      How can I increase the protein in this avocado and banana smoothie?

      Add plant-based protein powder, a scoop of peanut butter, or even a spoonful of chia or hemp seeds. Easy upgrade!

      Can I prep this avocado and banana smoothie ahead of time?

      Yep! Store it in the fridge in a sealed jar for up to 24 hours. Give it a quick stir or shake before sipping.

      Can I use a different plant milk?

      Totally! Oat, almond, or coconut milk all work great. Just go for unsweetened to keep things balanced.

      How do I know when an avocado is ripe?

      Give it a gentle squeeze—it should yield slightly. If it’s rock-hard, let it ripen at room temp for a day or two.

      💖 Serving Suggestions

      • Pair with Greek Yogurt Chia Pudding with Raspberries for a breakfast combo that keeps you full and energized.
      • Sip alongside Strawberry Mojito Mocktail for tropical vibes at brunch.
      • Enjoy with a Chocolate Chip Zucchini Muffin for a naturally sweet pairing.
      • Make mini smoothie popsicles—perfect for kiddos or hot days.
      • Serve with a Watermelon Salad for a quick lunch that doesn’t skimp on flavor.
      green avocado banana smoothie with kale

      🍽 You'll Love These Smoothies too!

      • Best Brazilian Limeade Recipe.
        Best Brazilian Limeade Recipe
      • Easy Dragon Fruit Smoothie Recipe.
        Easy Dragon Fruit Smoothie Recipe
      • Pineapple Smoothie Drink With banana And Honey.
        Pineapple Banana Smoothie With Honey
      • homemade beetroot juice in a glass.
        How To Make Beetroot Juice

      Did you make this recipe? Leave a review and a ⭐⭐⭐⭐⭐ rating below, or tag us in our Facebook Group! Alternatively, bookmark it in your browser or save to Pinterest.

      Vegan Banana Avocado Smoothie Recipe.

      Avocado and Banana Smoothie

      Angela Milnes
      Start your day with a creamy and nutritious Banana Avocado Smoothie! Blended to perfection, this smoothie combines the natural sweetness of bananas with the rich, velvety texture of avocado.
      5 from 2 votes
      Print Recipe Pin Recipe Rate this Recipe
      Prep Time 5 minutes mins
      Cook Time 0 minutes mins
      Additional Time 0 minutes mins
      Total Time 5 minutes mins
      Course Drinks
      Cuisine American
      Servings 1 Serving
      Calories 432 kcal

      Ingredients
        

      • ½ Avocado
      • 1 Banana
      • 1 Cup Swiss Chard
      • 1 ½ Cups Soy Milk
      • Almond Flakes For extra flavor to suit taste

      Instructions
       

      • Peel and slice one ripe banana, and scoop out the flesh of half a ripe avocado.
      • Add the banana and avocado along with a handful of Swiss Chard for extra nutrients.

      • Toss in a few ice cubes to make the smoothie colder and more refreshing. Blend all the ingredients on high until the mixture is smooth and creamy.

      • Blend all the ingredients on high until the mixture is smooth and creamy.

      • Pour the smoothie into a glass, garnish with a slice of banana or a sprinkle of Almond Flakes if desired, and enjoy immediately for the best flavor and texture.

      Notes

      Use Ripe Avocado and Banana: Choose ripe avocados and bananas for the best flavor and creaminess. Ripe bananas are also sweeter, which naturally enhances the smoothie’s taste.
      Chill Ingredients: For a refreshingly cold smoothie, use frozen banana slices. You can also chill the avocado and other liquid ingredients in the fridge before blending.
      Blend Thoroughly: Ensure all ingredients are blended smoothly. A high-powered blender is ideal for breaking down the fibers in the avocado and ensuring a silky texture.

      Nutrition

      Serving: 1gCalories: 432kcalCarbohydrates: 49gProtein: 14gFat: 22gSaturated Fat: 3gPolyunsaturated Fat: 6gMonounsaturated Fat: 11gSodium: 262mgPotassium: 1545mgFiber: 12gSugar: 24gVitamin A: 3815IUVitamin C: 57mgCalcium: 532mgIron: 3mg
      Print Recipe Pin Recipe Rate this Recipe
      Tried this recipe?Let us know how it was!

      Instant Pot Cajun Rice And Beans Recipe

      June 12, 2024 by Angela Milnes

      Instant Pot Cajun Rice And Beans Recipe.

      If you're in the mood for something hearty and packed with Southern charm, this Instant Pot Cajun Rice And Beans Recipe is just the thing. This dish combines tender chicken, creamy white beans, and a kick of Cajun spices for a meal that's both comforting and exciting. Plus, it all comes together quickly in the Instant Pot, making dinner a breeze.

      Cajun rice and beans on a plate served with a fork.

      If you're a fan of beans be sure to check out the following tasty recipes packed with goodness: Four Bean Salad, Roasted Chickpea Wraps With Sweet Potato, Easy Channa Masala or our simply delicious Vegan Baked Beans recipe.

      [feast_advanced_jump_to]

      💖 Why This Recipe Works

      • Flavorful and Spicy: The Cajun seasoning and spices give this Instant Pot Cajun White Beans and Chicken a bold and spicy flavor that's sure to excite your taste buds.
      • Convenient and Quick: This Instant Pot Cajun white beans and chicken recipe is perfect for busy days when you want a delicious meal without a long cooking time.

      ⭐ Star Ingredients

      Ingredients to make Cajun rice and beans.
      • Olive Oil: Adds richness and flavor to the dish while preventing sticking.
      • Onion: Adds savory sweetness and depth of flavor to the Cajun white beans and chicken.
      • Celery: Provides a subtle herbal note and adds texture to the dish.
      • Green Bell Peppers: Contribute freshness and a mild peppery flavor to the Instant Pot Cajun white beans and chicken recipe.
      • Garlic: Infuses aromatic pungency and depth into the Instant Pot Cajun white beans and chicken dish.
      • Rice: Serves as a hearty base for the Cajun white beans and chicken, adding texture and substance.
      • Navy Beans: Provide creaminess and protein to the dish, soaking up the flavors of the Cajun seasoning.
      • Cajun Seasoning: Infuses the dish with bold, spicy flavors characteristic of Cajun cuisine.
      • Dried Thyme: Adds earthy, herbal notes to complement the Cajun spices.
      • Chicken Broth: Provides a savory liquid base and enhances the overall flavor profile of Instant Pot Cajun white beans and chicken.
      • Boneless, Skinless Chicken Breasts: Offer lean protein that pairs perfectly with the creamy beans and flavorful broth.
      • Crushed Tomatoes: Add richness, acidity, and depth of flavor to the dish, creating a luscious sauce.

      For the complete list of ingredients with measurements and instructions, please see the recipe card at the bottom of the post.

      📖  Substitutions & Variations

      • Go homemade—ditch the canned beans and use dry ones for a from-scratch, hearty vibe. Cajun seasoning + chili powder = spicy magic.
      • Sausage swap—trade chicken for smoked sausage for a bold, Cajun-inspired kick. Stir in sour cream or cream cheese at the end for extra creamy goodness.
      • Thighs for the win—use juicy chicken thighs instead of breasts for a richer, more flavorful stew. Mix great northern and cannellini beans for the dreamiest texture.

      🔪How To Make Instant Pot Cajun Beans And Rice

      Chopped onion, celery, and bell peppers in an Instant Pot.
      1. Step 1: Set the electric pressure cooker to “sauté” and wait until it indicates “hot.” Add olive oil to the Instant Pot, followed by chopped onion, celery, and bell peppers. Cook, stirring often, for about 3 minutes until the vegetables soften.
      Rice on cooked veggies.
      1. Step 2: Add the garlic and cook briefly until heated through. Spread the rice in an even layer over the sautéed vegetables.
      Adding beans and seasoning on top of rice and veggies in instant pot.
      1. Step 3: Then, add the beans on top of the rice. Sprinkle the seasonings over the beans. Do not stir the mixture.
      Poring chicken broth over beans in Instant Pot.
      1. Step 4: Pour the chicken broth over the top of the seasonings.
      Chicken breasts on top of beans in instant pot.
      1. Step 5: Lay the chicken pieces on top of the contents in the pot. Pour the tomatoes over the chicken. Again, do not stir. Secure the lid on the Instant Pot and set the valve to the sealing position. Select the “manual” or “pressure cook” mode and set the timer for 22 minutes.
      Cooked Cajun white beans and chicken.
      1. Step 6: Once the cooking time is complete, allow the pressure to naturally release for 10 minutes. Then, carefully perform a quick release to release any remaining pressure. Remove the chicken from the pot and dice or shred it according to your preference.
      Combing cooked Cajun white beans and chicken cooked in an instant pot.
      1. Step 7: Stir the contents of the Instant Pot well to combine all the flavors. Add the diced or shredded chicken back into the pot and mix well.
      Cajun white beans and chicken on a plate.
      1. Step 8: Your delicious Cajun Beans and Rice dish is now ready to be served! Enjoy it as a hearty meal on its own or with your favorite side dishes.

      👩‍🍳 Expert Tips

      • Adjust Consistency: If the Instant Pot Cajun White Beans and Chicken is too thick, add more chicken broth to reach your desired consistency.
      • Garnish with Fresh Herbs: Finish the dish with a sprinkle of fresh chopped green onions for a pop of color and freshness.

      💭 FAQs

      Can I use a different type of beans for this recipe?

      Yes, you can swap the kidney beans for other types, like black beans or pinto beans. Just be mindful that cooking times may vary slightly depending on the type of beans you choose. Canned beans will also work if you're short on time.

      Is it possible to make this dish vegetarian or vegan?

      Absolutely! To make this recipe vegan, simply omit any meat-based ingredients like sausage or bacon. You can add extra vegetables or plant-based protein like tofu or tempeh to keep the dish hearty and satisfying.

      How do I store and reheat leftovers?

      This recipe stores well in the refrigerator for up to 3-4 days. Simply let it cool to room temperature before storing in an airtight container. To reheat, use the microwave or heat it in a pan on the stove, adding a little water or broth if it seems too dry.

      Can I adjust the spice level in this Cajun rice and beans recipe?

      Yes! If you prefer a milder dish, you can reduce the amount of Cajun seasoning or omit the hot peppers. For more heat, you can add additional cayenne pepper or some spicy sausage for an extra kick.

      Best Way to Store Cajun Rice and Beans

      Store any leftover Instant Pot Cajun White Beans and Chicken in an airtight container in the refrigerator for up to 3-4 days. Transfer the white beans and chicken to a freezer-safe container or bag and freeze for up to 2-3 months. Defrost the Instant Pot Cajun white beans and chicken in the refrigerator overnight.

      💖 Serving Suggestions

      Here are some of the best sides to serve with Instant Pot Cajun Rice and Beans:

      • Jalapeno Cornbread: A classic Southern accompaniment, cornbread complements the spicy flavors of Cajun cuisine. Serve it warm with a pat of butter for a comforting addition to your Instant Pot white beans.
      • Rice Pilaf: Fluffy and aromatic rice pilaf is a versatile side dish that pairs well with Cajun dishes. Prepare it with chicken broth, onions, garlic, and your choice of herbs for added flavor.
      • Sauteed Greens: Cook up a batch of sauteed greens such as collard greens, kale, or spinach. Season them with garlic, onion, and a splash of vinegar or lemon juice for a bright and tangy contrast to the Instant Pot Cajun white beans and chicken.
      • Red Cabbage Coleslaw: Creamy coleslaw provides a refreshing and crunchy element to balance out the spiciness of the Cajun flavors. Make it with shredded cabbage, carrots, and a tangy dressing like vinegar-based coleslaw dressing or creamy mayonnaise-based dressing.
      • Roasted Sweet Potatoes: Roast sweet potato wedges or cubes until caramelized and tender. The natural sweetness of the potatoes complements the spicy Cajun seasoning and adds a pop of color to your plate.
      Cajun rice beans and chicken on a plate.

      🍽 More Instant Pot Recipes

      • Instant Pot French Onion Chicken.
        Instant Pot French Onion Chicken
      • Instant Pot Cacio E Pepe Pasta.
        Instant Pot Cacio E Pepe Pasta
      • Instant Pot Recipes.
        Best Instant Pot Pesto Chicken 
      • Instant Pot Chicken Adobo.
        Instant Pot Chicken Adobo

      Did you make this recipe? Leave a review and a ⭐⭐⭐⭐⭐ rating below, or tag us in our Facebook Group! Alternatively, bookmark it in your browser or save to Pinterest.

      Instant Pot Cajun Rice And Beans Recipe.

      Instant Pot Cajun Rice And Beans Recipe

      Angela Milnes
      Spice up your dinner with this Instant Pot Cajun Rice and Beans! This hearty, flavorful dish combines perfectly cooked rice and tender beans with bold Cajun spices for a satisfying meal that's easy to prepare.
      5 from 4 votes
      Print Recipe Pin Recipe Rate this Recipe
      Prep Time 15 minutes mins
      Cook Time 22 minutes mins
      Additional Time 10 minutes mins
      Total Time 47 minutes mins
      Course Dinners
      Cuisine American
      Servings 8 Servings
      Calories 208 kcal

      Ingredients
        

      • 1 tablespoon Olive Oil
      • 1 Onion diced
      • 4 Stalks Celery diced
      • 2 Green Bell Pepper seeded and diced
      • 6 Cloves Garlic minced
      • 2 Cups Rice rinsed well
      • 2 Cans Navy Beans 15 oz
      • 1 tablespoon Cajun Seasoning
      • 1 teaspoon Dried Thyme
      • 4 cups Chicken Broth
      • 2 pounds Chicken Breast Skinless and Boneless
      • 1 Can Crushed Tomatoes 15 Oz

      Instructions
       

      • Set the electric pressure cooker to the “sauté” function and wait until it indicates it is “hot.”
      • Add olive oil to the Instant Pot. Then, add the chopped onion, celery, and bell peppers. Cook, stirring frequently, for about 3 minutes or until the vegetables start to soften. Add the garlic and cook just until it is heated through.
      • Spread the rice in an even layer over the sautéed vegetables. Then, add the beans on top of the rice. Sprinkle the seasonings over the beans. Do not stir the mixture.
      • Pour the chicken broth over the top of the seasonings. Lay the chicken pieces on top of the contents in the pot. Pour the tomatoes over the chicken. Again, do not stir.
      • Secure the lid on the Instant Pot and set the valve to the sealing position. Select the “manual” or “pressure cook” mode and set the timer for 22 minutes.
      • Once the cooking time is complete, allow the pressure to naturally release for 10 minutes. Then, carefully perform a quick release to release any remaining pressure.
      • Remove the chicken from the pot and dice or shred it according to your preference.
      • Stir the contents of the Instant Pot well to combine all the flavors. Add the diced or shredded chicken back into the pot and mix well.

      Notes

      Adjust Consistency: If the dish is too thick, add more chicken broth to reach your desired consistency.
      Garnish with Fresh Herbs: Finish the dish with a sprinkle of fresh chopped green onions for a pop of color and freshness.

      Nutrition

      Calories: 208kcalCarbohydrates: 13gProtein: 27gFat: 5gSaturated Fat: 1gPolyunsaturated Fat: 1gMonounsaturated Fat: 2gTrans Fat: 0.01gCholesterol: 75mgSodium: 754mgPotassium: 817mgFiber: 2gSugar: 5gVitamin A: 997IUVitamin C: 32mgCalcium: 41mgIron: 2mg
      Print Recipe Pin Recipe Rate this Recipe
      Tried this recipe?Let us know how it was!

      More Great Recipes To Try:

      • Beetroot Carpaccio
      • Baked Spaghetti Squash
      • Tofu Stir Fry Noodles With Mushroom
      • Vegan Avocado Toast
      • Tik Tok Egg Boil
      • Cheesy Mexican Steak And Rice
      • Cold Chicken Pasta Salad With Italian Dressing
      • Spinach Rice Casserole With Feta Cheese
      • Breakfast Sliders With Sausage, Egg And Cheese

      Instant Pot Honey Mustard Chicken (Thighs)

      June 12, 2024 by Angela Milnes

      instant pot honey mustard chicken thighs.

      Juicy chicken thighs dripping in a sweet, tangy honey mustard glaze—yes, please! This Instant Pot Honey Mustard Chicken is the perfect blend of convenience and flavor. It's a foolproof weeknight winner made with pantry staples and minimal prep, yet impressive enough to serve to guests.

      instant pot honey mustard chicken thighs.

      I started making this Instant Pot Honey Mustard Chicken on busy weeknights when I wanted something cozy without standing over the stove. It’s especially great in cooler weather, but honestly, I make it year-round because it’s just that good.

      If you love one-pot comfort food, try my Chicken Yaki Soba or the hearty Chicken Tamale Pie.

      [feast_advanced_jump_to]

      💖 Why This Recipe Works

      • Sweet & Savory Harmony: Honey and Dijon mustard are the ultimate power couple—perfectly balanced in every bite.
      • Quick Comfort: Thanks to the Instant Pot, you get tender, juicy chicken in under 30 minutes.
      • Perfect for Meal Prep: Stores well and tastes even better the next day.

      ⭐ Star Ingredients

      Chicken Thighs In Honey And Mustard Sauce Ingredients.
      • Chicken Thighs: I always reach for boneless, skinless thighs—they’re juicy, flavorful, and cook perfectly in the Instant Pot.
      • Dijon Mustard: A pantry must-have. It adds that punchy tang that cuts through the sweetness just right.
      • Honey: I use local raw honey whenever I can—it melts into the sauce and brings that classic sticky glaze.

      For the complete list of ingredients with measurements and instructions, please see the recipe card at the bottom of the post.

      📖  Substitutions & Variations

      • Turn up the heat—mix in red pepper flakes or hot sauce for a spicy honey mustard kick.
      • Herb it up—bake skin-on thighs with fresh rosemary and thyme for an aromatic, flavor-packed meal.
      • Zesty twist—garlic and lemon brighten up the honey mustard sauce for a tangy, refreshing bite.

      Love fast, flavorful dinners? Don’t miss our Air Fryer Chicken Cutlets or One Pan Chicken and Asparagus.

      🔪How To Make Instant Pot Honey Mustard Chicken

      seasoning honey mustard chicken thighs on a tray
      1. Step 1: Season the chicken thighs generously with salt and pepper. Set your pressure cooker to "sauté." Once hot, add oil. Sear the chicken on each side for about 3 minutes, until it releases easily. Keep the chicken warm and repeat until all thighs are browned.
      stock for chicken thighs in honey and mustard sauce
      1. Step 2: Pour chicken stock into the Instant Pot. Use a wooden spoon to scrape up any browned bits stuck to the bottom of the pot. This adds extra flavor to your dish.
      honey mustard chicken thighs in an instant pot
      1. Step 3: Place the browned chicken thighs back into the pressure cooker. In a small bowl, mix together the honey and mustard. Pour this mixture over the chicken thighs in the pot.
      honey mustard chicken thighs in an instant pot
      1. Step 4: Cook boneless chicken thighs in an Instant Pot using the pressure cook setting for 10 minutes. After cooking, release the pressure and remove the chicken. For a thicker sauce, use the sauté mode and whisk in cornstarch with water. Serve the chicken with mashed potatoes or a favorite side.

      💡 Hint: Let the sauce bubble for 2–3 minutes after thickening—this caramelizes the honey slightly for even deeper flavor.

      instant pot honey mustard chicken thighs

      👩‍🍳 Expert Tips

      • Use a Thermometer: Make sure chicken reaches 165°F for safe eating.
      • Don’t Skip the Sear: Browning the chicken adds flavor you won’t want to miss.
      • Double the Sauce: Want extra for drizzling over veggies or rice? Go ahead and double the honey mustard mix.

      💭 FAQs

      Can I use boneless chicken thighs for this recipe?

      Yes, you can use boneless chicken thighs instead of bone-in thighs. Just keep in mind that boneless thighs will cook faster, so adjust the cooking time accordingly to avoid overcooking.

      Can I substitute the honey in the sauce?

      If you're looking for an alternative to honey, maple syrup or agave nectar can work as a substitute, although the flavor will be slightly different. You can also use brown sugar for a more robust sweetness.

      Is this dish spicy?

      No, this recipe is not spicy, but you can add a pinch of cayenne pepper or red pepper flakes to the mustard sauce if you prefer a little heat with the sweetness.

      Can I make this dish ahead of time?

      Absolutely! You can marinate the chicken in the honey mustard sauce a few hours before cooking, or even overnight, for deeper flavor. Just make sure to refrigerate the chicken while marinating.

      Can I Freeze marinated chicken thighs

      Definitely. Let it cool completely, then freeze in a sealed container for up to 3 months.

      💖 Serving Suggestions

      Here are my favorite sides to serve with Instant Pot Honey Mustard Chicken Thighs:

      • Almond Milk Potatoes: Creamy and comforting—the perfect bed for this saucy chicken.
      • Air Fryer Roasted Carrots: Their natural sweetness pairs beautifully with the honey mustard glaze.
      • Roasted Beet Salad: A peppery, fresh contrast to balance out the rich chicken.
      • Quinoa Pilaf: Hearty, nutritious, and soaks up all the saucy goodness.
      • Cucumber Yogurt Dip: For a refreshing cool-down on the side.
      Honey mustard chicken thighs on a plate.

      🍽 More Tasty Chicken Recipes

      • Slow Cooker Chicken Teriyaki.
        Slow Cooker Chicken Teriyaki
      • Skillet Chicken With Artichokes And Sun Dried Tomatoes.
        Skillet Chicken With Artichokes And Sun Dried Tomatoes
      • One Skillet Chicken Thighs with Butternut Squash.
        One Skillet Chicken Thighs With Butternut Squash
      • Oven Baked Chicken.
        Easy Oven Baked Chicken

      Did you make this recipe? Leave a review and a ⭐⭐⭐⭐⭐ rating below, or tag us in our Facebook Group! Alternatively, bookmark it in your browser or save to Pinterest.

      instant pot honey mustard chicken thighs.

      Chicken Thighs In Honey And Mustard Sauce

      Angela Milnes
      Get ready for a deliciously tender and flavorful meal with these Instant Pot Honey Mustard Chicken Thighs! Juicy chicken thighs are cooked to perfection in a sweet and tangy honey mustard sauce, all in the convenience of your Instant Pot. It’s an easy, crowd-pleasing dish that’s perfect for any night of the week!
      5 from 4 votes
      Print Recipe Pin Recipe Rate this Recipe
      Prep Time 5 minutes mins
      Cook Time 10 minutes mins
      Total Time 15 minutes mins
      Course Dinners
      Cuisine American
      Servings 4 Servings
      Calories 984 kcal

      Ingredients
        

      • 3 to 4 pounds Chicken Thighs Skinless
      • 2 tablespoons Olive Oil Extra Virgin
      • ½ cup Dijon mustard
      • ½ cup Honey
      • 1 cup Chicken Stock
      • 1 tablespoon Cornstarch to thicken sauce if desired
      • Pinch Salt
      • Pinch Pepper

      Instructions
       

      • Generously season all sides of the chicken thighs with salt and pepper.
      • Set your pressure cooker to the “sauté” setting. Once it's hot, add oil to the pot. Place the seasoned chicken thighs into the oil and sear each side for about 3 minutes, or until the chicken releases easily from the pot. Keep the chicken warm and repeat until all the chicken thighs are browned.
      • Pour chicken stock into the Instant Pot. Use a wooden spoon to scrape up any browned bits stuck to the bottom of the pot. This adds extra flavor to your dish.
      • Place the browned chicken thighs back into the pressure cooker.
      • In a small bowl, mix together the honey and mustard. Pour this mixture over the chicken thighs in the pot.
      • Place the lid on the Instant Pot and set the valve to the sealing position. Select the “pressure cook” or “manual” setting and set the timer for 10 minutes. Once the cooking time is up, use a quick release to release the pressure.
      • Carefully remove the boneless chicken thighs from the pot. If you prefer a thicker honey mustard chicken marinade, switch the Instant Pot back to the “sauté” mode. Whisk in a thickening agent, such as cornstarch mixed with water, and stir until the honey mustard mixture reaches your desired consistency.
      • Your delicious Chicken Thighs in Honey and Mustard Sauce are ready! Serve them with creamy mashed potatoes or your favorite side dish and enjoy.

      Notes

      Even Cooking: Ensure the chicken thighs are of similar size for even cooking. If some are larger, consider cutting them to match the smaller pieces.
      Marinate for More Intensity: For deeper flavor, marinate the chicken thighs in the honey mustard sauce for at least 30 minutes, or overnight if possible, to allow the flavors to penetrate the meat.

      Nutrition

      Calories: 984kcalCarbohydrates: 41gProtein: 58gFat: 65gSaturated Fat: 16gPolyunsaturated Fat: 13gMonounsaturated Fat: 30gTrans Fat: 0.3gCholesterol: 335mgSodium: 692mgPotassium: 829mgFiber: 1gSugar: 36gVitamin A: 289IUVitamin C: 0.5mgCalcium: 51mgIron: 3mg
      Print Recipe Pin Recipe Rate this Recipe
      Tried this recipe?Let us know how it was!

      21+ Coleslaw Recipes You Will Love

      June 11, 2024 by Angela Milnes

      Coleslaw recipes.

      Hey there, friends! Are you ready to dive into a world of crunchy goodness? Get your taste buds tingling with these 21+ Coleslaw Recipes You’ll Love! Whether you're prepping for a backyard barbecue or just want to jazz up your weeknight dinners, these recipes have got you covered.

      easy coleslaw recipes
      [feast_advanced_jump_to]

      Easy Coleslaw Recipes

      Let's kick things off with some easy-peasy coleslaw recipes that are perfect for those hectic days when you need something quick and tasty on the table.

      Whether you're pairing them with hot dogs, BBQ ribs, or pulled pork sandwiches, or just enjoying them as a side dish, these homemade coleslaw creations are sure to be a hit with the whole family. Let's dig in and find some new favorites together!

      Crunchy Cabbage Coleslaw

      Try this vibrant Red Cabbage Coleslaw Recipe for a crunchy and tangy side dish. Packed with red cabbage, carrots, and fresh herbs, it's a colorful addition to any meal.

      The zesty dressing with apple cider vinegar and fresh dill adds a refreshing twist. Perfect for picnics, barbecues, or as a tasty topping for your favorite dishes!

      red cabbage coleslaw

      Easy Southern Coleslaw Recipe

      Y'all, get ready for some down-home comfort with this Easy Southern Coleslaw Recipe that also includes a coleslaw dressing recipe. It's got all the creamy tanginess of traditional coleslaw, with a hint of sweetness from good ol' apples and a sprinkle of celery seed.

      Perfect for pairing with your favorite barbecue dishes or topping off a juicy burger. It's simple, it's delicious, and it's sure to be a crowd-pleaser.

      Southern Coleslaw In A Bowl

      Vegan Pineapple Coleslaw

      Calling all my plant-based pals! This Vegan Pineapple Coleslaw is a refreshing twist on the classic favorite. Bursting with the sweetness of pineapple and the crunch of cabbage, it's the perfect accompaniment to any BBQ spread or summer potluck.

      Plus, it adds a pop of color to your plate that'll have everyone asking for the recipe.

      Pineapple Coleslaw

      Creamy Coleslaw Without Mayo

      Say goodbye to heavy dressings with this Creamy Coleslaw Without Mayo! Made with crunchy cabbage, carrots, onions, and apples, and dressed in a light and tangy mix of crème fraîche, apple cider vinegar, and mustard, it's a refreshing side dish that won't weigh you down.

      For an extra burst of flavor, sprinkle in some celery seeds, salt, and pepper. Perfect for picnics, cookouts, or any time you're craving something fresh and flavorful.

      Mayo-free Greek Coleslaw

      Traditional German Coleslaw (Krautsalat)

      Take your taste buds on a trip to Deutschland with this Traditional German Coleslaw! Made with simple ingredients like cabbage, onions, and a touch of sugar, it's a refreshing side dish that pairs perfectly with bratwurst or schnitzel. Prost!

      Krautsalat In A Bowl

      The Best Creamy Jalapeño Coleslaw

      Spice up your life with The Best Creamy Jalapeño BBQ Coleslaw! Creamy, crunchy, and just a little bit spicy, it's the perfect classic coleslaw recipe for your next barbecue or picnic. Trust me, one bite and you'll be hooked!

      Creamy Jalapeño Coleslaw

      Low FODMAP Eat-The-Rainbow Slaw

      Looking for a colorful and flavorful dish that won't upset your tummy? Look no further than this Low FODMAP Eat-The-Rainbow Slaw!

      Packed with crunchy veggies like green and red cabbage, carrots, and low FODMAP-friendly ingredients, it's a delicious option for anyone with dietary restrictions.

      Low FODMAP Eat-The-Rainbow Slaw

      Smokey & Sweet Peanut Slaw

      Get ready to fall in love with coleslaw all over again with this Smokey & Sweet Peanut Slaw! Packed with crunchy cabbage, Asian pear, and a rich peanut dressing, it's a flavor-packed twist on the classic favorite that's gluten-free and vegan-friendly.

      Smokey and Sweet Peanut Slaw

      Asian Ramen Coleslaw

      Craving something crunchy? This Asian Ramen Coleslaw has got you covered! With shredded cabbage, carrots, green onions, and crushed ramen noodles tossed in a savory-sweet coleslaw dressing, it's the perfect side dish for any meal. Trust me, you won't be able to get enough!

      Asian Ramen Coleslaw

      Broccoli Slaw

      Get ready to crunch your way to happiness with this Broccoli Slaw! Made with thinly sliced broccoli stalks and a simple dressing of mayo, apple cider vinegar, and a touch of sugar, it's the perfect sidekick for grilled meats or a tasty addition to sandwiches.

      Broccoli Slaw In A Bowl

      Spicy Coleslaw with Avocado Dressing

      Looking to spice things up? This Spicy Coleslaw with Avocado Dressing has got you covered! With crisp shredded cabbage and carrots tossed in a creamy avocado dressing with a kick of jalapeños, it's the perfect balance of spicy and cool.

      Spicy Coleslaw

      Apple Cranberry Coleslaw

      Sweet, tart, and oh-so-delicious, this Apple Cranberry Coleslaw is a flavor explosion! Packed with crunchy apples, tart cranberries, and a creamy Greek yogurt or sour cream dressing, it's the perfect accompaniment to any grilled dish.

      Apple Cranberry Coleslaw

      KFC Coleslaw Recipe

      Love the coleslaw from KFC? Now you can make it at home with this simple KFC Coleslaw Recipe. With chopped green cabbage, carrots, and a creamy dressing of mayo, vinegar, sugar, and lemon juice, this homemade coleslaw is the perfect side dish for fried chicken or barbecue.

      KFC Style Coleslaw

      Mayo-free Greek Coleslaw Recipe

      Say goodbye to mayo with this Mayo-free Greek Coleslaw Recipe! Packed with bright veggies and tossed in a light and tangy coleslaw dressing, it's the perfect addition to any family meal or BBQ.

      Mayo-free Greek Coleslaw

      Watermelon Rind Coleslaw

      Turn watermelon rind into a delicious side dish with this Watermelon Rind Coleslaw Recipe. Featuring crunchy veggies and a light, tangy dressing with grain or Dijon mustard, this cole slaw recipe is a great way to utilize leftover rinds and enhance the flavor of your meal.

      Watermelon Rind Coleslaw

      California Coleslaw

      Bring a taste of the Golden State to your table with this California Coleslaw! Made with crunchy cabbage, colorful bell peppers, and a creamy dressing, it's the perfect accompaniment to grilled meats or fish tacos.

      California Coleslaw

      Curried Coleslaw

      Spice things up with this Curried Coleslaw! Packed with crunchy cabbage and carrots and tossed in a creamy curry dressing with raisins and green onions, it's the perfect side dish for any meal.

      Curried Coleslaw

      Spicy Coleslaw with Avocado Dressing

      Get ready for a burst of flavor with this Spicy Coleslaw with Avocado Dressing! With sweet mangoes, crunchy cabbage mixture, and a tangy dressing, it's an excellent accompaniment to grilled meats or a refreshing addition to tacos.

      Spicy Coleslaw

      Kimchi Slaw

      Spice up your coleslaw game with this Kimchi Slaw! It's a fusion of Korean and classic coleslaw flavors, perfect for adding excitement to family dinners or BBQs.

      Kimchi Slaw

      Keto Coleslaw 

      Enjoy guilt-free with this Keto Coleslaw! The sugar-free creamy homemade coleslaw dressing and crunchy veggies make it a yummy side dish that adults and kids both like.

      Keto Coleslaw 

      Lexington Style Red Coleslaw

      Bring a touch of Southern charm to your plate with this Lexington-style red Coleslaw! Tangy, slightly sweet, and perfect with barbecue dishes or grilled meats.

      Lexington Style Red Coleslaw

      Jalapeno Coleslaw With Bacon Aioli 

      Spice things up with this Jalapeno Coleslaw with Bacon Aioli! Packed with heat and rich bacon flavor, it's the ideal addition to burgers or tacos for a flavor explosion.

      Jalapeno Coleslaw With Bacon Aioli 

      Miami Mango Coleslaw Recipe

      Experience a taste of Miami with this Easy Delicious Miami Mango Coleslaw Recipe! Packed with juicy mangoes and a zesty coleslaw dressing, it's the perfect side dish for any meal, whether enjoyed at a picnic or with grilled dishes.

      Miami Mango Coleslaw

      Honey Dill Coleslaw

      Looking for a sweet and tangy twist on classic coleslaw? Look no further! This Honey Dill Coleslaw combines the floral sweetness of honey with the fresh, herbaceous flavor of dill.

      It's a lighter, more flavorful alternative to traditional versions, making it the perfect sidekick to grilled meats, fish tacos, or veggie burgers. Trust me, your taste buds will thank you!

      Honey Dill Coleslaw

      Spicy Mango Coleslaw

      Transport your taste buds to the tropics with this Spicy Mango Coleslaw Perfect for summer gatherings or weeknight dinners, this cole slaw is a refreshing complement to grilled meats or Breakfast Tacos.

      Spicy Mango Coleslaw

      Enjoy The Coleslaw Recipes

      So there you have it, folks! We've got 21+ more Coleslaw Recipes to tantalize your taste buds and enhance the taste of any meal! Go ahead, pick your favorites, and get ready to enjoy a coleslaw extravaganza!

      More Great Side Dishes To Try!

      • Chopped Italian Salad Recipe
      • Cheesy Mashed Cauliflower
      • Stuffed Mushrooms
      • Keto Pulled Pork
      • Mediterranean Farro Salad
      • Spinach Artichoke Dip
      • 21 Cold Dip Recipe For Parties
      • 21 Tasty Cinco De Mayo Recipes
      • 15 Sheet Pan Dinner Recipes

      Instant Pot Buffalo Chicken Dip

      June 6, 2024 by Angela Milnes

      Instant pot buffalo chicken dip in a dish.

      Get ready for some fiery fun with this creamy and spicy appetizer that is perfect for your summer BBQs and game-day parties. This Instant Pot Buffalo Chicken Dip is like a wild-west rodeo of flavors in your mouth. You can team this delicious dip with some corn chips, veggie sticks, or any of your fried, savory appetizers. Enjoy.

      Instant pot buffalo chicken dip in a dish.
      [feast_advanced_jump_to]

      💖 Why This Recipe Works

      • Quick and Easy: The Instant Pot makes this delicious dip a breeze to prepare.
      • Perfect Party Food: This Buffalo Chicken Dip is a crowd-pleaser that's ideal for game days or gatherings.
      • Spicy and Flavorful: The buffalo sauce gives it a kick that's hard to resist.

      ⭐ Star Ingredients

      To make the Instant Pot buffalo chicken dip, here's all you'll need.

      Ingredients to make buffalo chicken dip.
      • Chicken Breasts: Lean protein that's cooked and shredded, it's the hearty base of the dip.
      • Hot Buffalo Sauce + Water: Gives the dip its signature spicy, tangy flavor. The water helps to thin it out for cooking in the Instant Pot.
      • Cream Cheese: Adds a creamy, tangy component to the dip, helping to balance the spiciness of the buffalo sauce.
      • Shredded Cheddar Cheese: Melts into the dip, adding a rich, cheesy flavor and gooey texture.
      • Creamy Ranch Dressing: Provides a tangy, creamy contrast to the hot buffalo sauce, enhancing the overall flavor profile.
      • Crumbled Blue Cheese (Optional): Adds a sharp, tangy flavor that complements the buffalo sauce. It's optional but recommended for blue cheese lovers.
      • Chopped Green Onion (Optional): Brings a fresh, mild onion flavor and adds a pop of color to the finished dip. It's an optional garnish, but a nice touch.

      For the complete list of ingredients with measurements and instructions, please see the recipe card at the bottom of the post.

      📖  Substitutions & Variations

      • I also like to pop the baking dish in the oven for a few minutes after I've finished topping it with the shredded cheese. This really gets the top layer of the dip to have that bubbly cheese texture, which tastes insanely delicious.
      • Any kind of hot sauce can work for this recipe- it is all a matter of personal choice. I absolutely love using Frank's Red Hot sauce because it has the perfect balance of heat and tanginess.
      • Don't forget to top the buffalo chicken dip with a generous sprinkle of green onions and some of the shredded cheddar cheese.

      🔪How to Make the Instant Pot Buffalo Chicken Dip

      Chicken breasts in hot buffalo sauce in instant pot.
      1. Step 1: Turn on the Instant Pot and select the Sauté button. Place frozen chicken breast in the pot, add hot sauce and water, and give it a mix.
      Chicken and buffalo sauce in instant pot.
      1. Step 2: Cancel the sauté button. Select the PRESSURE COOK button on HIGH PRESSURE for 15 minutes. (Make sure the valve is in the SEALING position).
      Cooked chicken breast on a plate.
      1. Step 3: Once the pressure-cooking cycle is over. Allow pressure to release naturally for 10 minutes, then Quick Release pressure by manually moving the valve from the SEALING to the VENTING position.
      Shredded chicken on a plate.
      1. Step 4: Select the CANCEL button and take the lid off carefully. Remove chicken pieces, shred, and set aside.
      buffalo sauce and shredded chicken in the instant pot.
      1. Step 5: Select the sauté button, and add cream cheese, shredded cheddar, and ranch dressing. Return the shredded chicken back to the pot and stir to mix well. Let the mixture simmer for a few minutes.
      Buffalo dip mixture in the instant pot.
      1. Step 6: Place your chicken dip into a container. Top it with crumbled blue cheese and chopped or sliced green onions and serve with crackers, tortilla chips, or veggie sticks.
      Buffalo chicken dip in a dish.

      👩‍🍳 Expert Tips

      Ready to give this Instant Pot buffalo chicken dip recipe a shot? Here are some more tips and tricks you need to have handy.

      • If your Buffalo chicken dip seems too thick for your liking, and you want to loosen it up, you can add a bit of milk or some chicken broth. This will add a ton of extra flavor
      • While you can always use low fat cream cheese for this recipe, I would highly recommend using full fat cream cheese instead, since it lends this buffalo chicken dip a ridiculously creamy texture.
      • The blue cheese isn't a must for the recipe, but if you have it at hand, getting some of that over it wouldn't hurt. Top the baking dish with some blue cheese crumbles towards the end for some more deliciousness.
      • If you don't have the time to cook chicken breasts, you can also just use rotisserie shredded chicken.

      💭 FAQs

      Can I use frozen chicken for Instant Pot Buffalo Chicken Dip?

      Yes, you can use frozen chicken for this recipe. Simply increase the cooking time by 5-10 minutes, depending on the thickness of the chicken. Make sure the chicken is cooked through before shredding it.

      How can I make the dip less spicy?

      To tone down the heat, reduce the amount of buffalo sauce or opt for a milder version. You can also mix in a bit more cream cheese or sour cream to help balance the spice.

      Can I make Instant Pot Buffalo Chicken Dip ahead of time?

      Absolutely! You can prepare the dip a day ahead and store it in the refrigerator. When ready to serve, simply reheat it in the Instant Pot on the "Keep Warm" setting or in the microwave until it's hot and bubbly.

      What can I serve with Buffalo Chicken Dip?

      This dip pairs perfectly with tortilla chips, celery sticks, carrot sticks, or even slices of baguette. It’s also great with crackers or as a topping for baked potatoes!

      Best Way to Store Chicken Dip

      When it comes to storing leftovers, this Instant Pot buffalo chicken dip actually makes it super easy. All you need to do is allow it to cool down completely, transfer it to an airtight container or cover the baking dish with cling wrap, and then refrigerate it for 2-3 days.

      💖 Serving Suggestions

      Here are my favorite sides to serve with Instant Pot Buffalo Chicken Dip:

      • Fresh Vegetable Crudite Train : Add a refreshing crunch with carrot sticks, celery, and cucumber slices.
      • Garlic Parmesan Breadsticks: A savory side that complements the spicy kick of the dip.
      • Homemade Bagel Chips: Bake your own bagel chips for a unique twist on traditional dippers.
      • Jalapeño Poppers: Spice things up further with these cheesy and fiery poppers.
      • Air Fryer Beet Chips: Include some air fryer beet chips for a colorful and crispy addition that’s sure to delight!
      Buffalo chicken dip in a dish.

      🍽 Try More Simple Dips Here

      • Best Caramelized Onion Dip With Chives.
        Best Caramelized Onion Dip With Chives
      • Greek Beetroot Dip.
        Best Beetroot Dip Recipe (Greek Dip)
      • Whipped Feta Dip.
        Creamy Whipped Feta Dip (With Greek Yogurt & Garlic)
      • Easy Smoked Salmon Dip Recipe.
        Easy Smoked Salmon Dip With Capers

      Did you make this recipe? Leave a review and a ⭐⭐⭐⭐⭐ rating below, or tag us in our Facebook Group! Alternatively, bookmark it in your browser or save to Pinterest.

      Instant pot buffalo chicken dip in a dish.

      Instant Pot Buffalo Chicken Dip

      Angela Milnes
      Get ready for some fiery fun with this creamy and spicy appetizer that is perfect for your summer BBQs and game day parties. This Instant Pot Buffalo Chicken Dip is like a wild-west rodeo of flavors in your mouth.
      5 from 5 votes
      Print Recipe Pin Recipe Rate this Recipe
      Prep Time 5 minutes mins
      Cook Time 30 minutes mins
      Total Time 30 minutes mins
      Course Appetizers
      Cuisine American
      Servings 4 Servings
      Calories 486 kcal

      Equipment

      • Mino Ware Japanese Pottery Set
      • Rice Bowls
      • Instant Pot Duo Nova

      Ingredients
        

      • 2 Chicken Breasts
      • 1 Cup Hot Buffalo Sauce
      • ½ Cup Water
      • ½ Cup Cream Cheese
      • 1 Cup Cheddar Cheese Shredded
      • ½ Cup Ranch Dressing
      • 2 Tablespoons Crumbled Blue Cheese OPTIONAL
      • 2 Tablespoons Chopped Green Onion OPTIONAL

      Instructions
       

      • Once you have your ingredients ready, here's the step-by-step process you'll need to follow to make this fantastic dip.
      • Turn on the Instant Pot and select the Sauté button.
      • Place frozen chicken breast in the pot, add hot sauce and water, and give it a mix.
      • Cancel the sauté button. Select the PRESSURE COOK button on HIGH PRESSURE for 15 minutes. (Make sure the valve is in the SEALING position).
      • Once the pressure-cooking cycle is over, allow pressure to release naturally for 10 minutes, then quick release pressure by manually moving the valve from the SEALING to the VENTING position.
      • Select the CANCEL button and take the lid off carefully. Remove chicken pieces, shred and set aside.
      • Select the sauté button, and add cream cheese, shredded cheddar, and ranch dressing.
      • Return the shredded chicken back to the pot and stir to mix well; let the mixture simmer for a few minutes (until the cream cheese melts completely)
      • Top it with crumbled blue cheese and chopped or sliced green onions, and serve with crackers, tortilla chips, or veggie sticks. You can also top this with an extra layer of buffalo sauce and ranch dressing if you want to enjoy extra flavor.

      Notes

      If your Buffalo chicken dip seems too thick for your liking, and you want to loosen it up, you can add a bit of milk or some chicken broth. This will add a ton of extra flavor
      While you can always use low fat cream cheese for this recipe, I would highly recommend using full fat cream cheese instead, since it lends this buffalo chicken dip a ridiculously creamy texture.
      The blue cheese isn't a must for the recipe, but if you have it at hand, getting some of that over it wouldn't hurt. Top the baking dish with some blue cheese crumbles towards the end for some more deliciousness.
      If you don't have the time to cook chicken breasts, you can also just use rotisserie shredded chicken.

      Nutrition

      Calories: 486kcalCarbohydrates: 4gProtein: 34gFat: 37gSaturated Fat: 15gPolyunsaturated Fat: 9gMonounsaturated Fat: 9gTrans Fat: 0.01gCholesterol: 140mgSodium: 2557mgPotassium: 514mgFiber: 0.1gSugar: 3gVitamin A: 766IUVitamin C: 2mgCalcium: 263mgIron: 1mg
      Print Recipe Pin Recipe Rate this Recipe
      Tried this recipe?Let us know how it was!

      More Buffalo Chicken Recipes

      Enjoyed trying this Instant Pot buffalo chicken dip recipe? Inspired to try out some more such delicious recipes? Here are a few good ones you might want to check out.

      • Easy Smoked Salmon Dip Recipe
      • Instant Pot Fondue Cheese Recipe
      • Mango and Pineapple Salsa Recipe
      • Grilled Eggplant With Lemon Dip
      • Homemade Garlic Parm Sauce
      • Canned Black Bean And Corn Salsa
      • Grilled Eggplant With Lemon Dip
      Serving buffalo chicken dip with a spoon.

      Carrot Puree Recipe For Infants

      June 5, 2024 by Angela Milnes

      mashed carrots pureed carrots recipe.

      This Carrot Puree Recipe for Infants is the perfect starter food for babies just beginning their solids journey. It's sweet, smooth, and packed with nutrients—and honestly, it's so tasty that you’ll want to sneak a spoonful yourself! Whether you're prepping for baby’s first bites or making a velvety veggie side for dinner, this simple puree does it all.

      mashed carrots pureed carrots recipe.

      Starting solids is a big milestone—and this Carrot Puree Recipe for Infants is one of the gentlest, most baby-friendly ways to begin. Carrots are naturally sweet, soft when steamed, and easy to digest, which makes them ideal for first tastes.

      As an early years teacher and mom, I love how simple this is to make, and how easily it blends into other baby food combinations as your little one grows. It’s also a handy go-to for busy weeks when you want to prep once and have healthy options on hand.

      Looking for more first-food ideas? Try my Mashed Cauliflower Puree, Easy Pureed Squash Recipe, or Simple Pureed Peas—all great for building confidence and variety in baby’s diet.

      [feast_advanced_jump_to]

      💖 Why This Carrot Puree Recipe Works

      • Naturally sweet and nutrient-dense – packed with beta-carotene and vitamins for growing babies.
      • Smooth and gentle – a great texture for early eaters and a base for many baby food combos.
      • Versatile – use it as carrot baby food, in baked goods, sauces, or soups for the whole family.

      ⭐ Star Ingredients

      carrots for carrot puree for baby recipe
      • Carrots – Naturally sweet and packed with beta-carotene, carrots are one of the best first foods for babies. Peel and chop evenly for smooth steaming.
      • Water – Used to steam the carrots and blend to the desired consistency while preserving nutrients.
      • Optional: Cinnamon or Nutmeg – A tiny pinch adds subtle flavor for older infants ready for gentle seasonings.

      For the complete list of ingredients with measurements and instructions, please see the recipe card at the bottom of the post.

      🔄 Best Carrot Puree Combinations

      Here are a few vegetable purees for babies to mix things up once carrots are well tolerated:

      • Turnip and Carrot – earthy and slightly sweet.
      • Apple and Carrot – bright and fruity, perfect for fall.
      • Carrot and Cauliflower – creamy and mild, with added fiber.
      • Carrot and Ginger – warm and vibrant (just a touch of ginger!).
      • Sweet Potato and Carrot – smooth, sweet, and full of vitamin A.

      If you love this puree recipe be sure to check out our Ricotta Bake Bariatric Recipe.

      🔪How To Make Carrot Puree for Infants

      Use this section for process shots, alternating between the step and image showing the step. Users don't like seeing process shots cluttering up the recipe card, so include your process shots here.

      steam carrots in instant pot
      1. Step 1: Rinse the carrots thoroughly under cold water. Peel and chop them into uniform pieces to ensure even cooking. Place the chopped carrots in a steaming basket over boiling water. Cover and steam for about 10-15 minutes, or until the carrots are tender and can be easily pierced with a fork. If steaming in the Instant Pot, pressure cook with 1 cup of water for 3-4 minutes.
      place carrots in food processor
      1. Step 2: Transfer the steamed carrots to a blender or food processor. Add a small amount of the water (¼ cup) to help achieve a smooth consistency. Blend until completely smooth. If desired, you can add a pinch of cinnamon or nutmeg to create a subtly enhance the flavor. Make sure any additional seasonings are appropriate for your baby’s current dietary stage. Let the puree cool to a suitable temperature before serving. Check the temperature to ensure it's safe for your baby.

      💡Hint: You can also freeze extra puree in ice cube trays for easy grab-and-go portions!

      mashed carrots pureed carrots recipe

      👩‍🍳 Expert Tips

      • Use breast milk or formula instead of water for extra nutrition and a familiar flavor.
      • For thicker puree, add less water; for thinner texture, add more until it’s right for your baby’s stage.
      • Test for texture by running a spoon through the puree—there should be no chunks or stringy bits.

      👶 A Friendly Note on Seasonings for Babies

      As an early years teacher with infant nutrition training, I always recommend introducing flavors slowly and thoughtfully. These mild herbs and spices are safe to use sparingly in baby carrot puree once solids are established:

      • Parsley – finely chopped or ground, it adds a mild herby note.
      • Thyme – a tiny pinch offers an earthy flavor.
      • Mint – fresh or dried, it gives a subtle freshness.
      • Ginger – just a smidge adds warmth and may help digestion.
      • Vanilla – a drop of natural extract adds sweetness without sugar.

      Always introduce one new ingredient at a time and consult with your pediatrician if unsure.

      💭 FAQs

      Do You Have To Use A Steamer Basket For Cooking Carrots?

      No, but steaming helps retain more nutrients than boiling. You can also microwave-steam with a splash of water in a covered bowl.

      Can You Pressure Cook The Carrots With Other Vegetables?

      Absolutely. You can steam carrots with sweet potatoes, cauliflower, or apples—just chop everything to the same size for even cooking.

      What Age Can Babies Start Eating Carrot Puree?

      Carrot puree can typically be introduced around 6 months, once your baby is ready for solids. Always check for signs of readiness.

      Best Way to Store Carrot Puree

      Refrigerate in an airtight container for up to 3 days. For longer storage, freeze in cubes for up to 3 months.

      💖 Serving Suggestions

      Here are some great ways to use this carrot puree recipe:

      • As baby food – smooth, gentle, and easy to digest.
      • In sauces – stir into pasta sauces for hidden veggie power.
      • As a soup base – blend with broth and aromatics for a quick creamy soup.
      • In baking – add to muffins, pancakes, or cakes for natural sweetness.
      • As a side – serve warm with roast chicken, potatoes, or mixed into mashed root veggies.
      • Blended into smoothies – like my Vegan Mixed Berry Smoothie for an extra nutrient boost.

      🍽 More Tasty Carrot Recipes

      • Vegetarian Carrot And Leek Soup Recipe.
        Vegetarian Carrot And Leek Soup Recipe
      • Honey Roasted Parsnips and Carrots on a white plate.
        Honey Roasted Parsnips and Carrots
      • Air Fryer Roasted Carrots.
        Air Fryer Roasted Carrots
      • Air Fryer Carrot Fries.
        Crispy Air Fryer Carrot Fries

      Did you make this recipe? Leave a review and a ⭐⭐⭐⭐⭐ rating below, or tag us in our Facebook Group! Alternatively, bookmark it in your browser or save to Pinterest.

      mashed carrots pureed carrots recipe.

      Pureed Carrots Baby Food Recipe

      Angela Milnes
      Give your little one a taste of wholesome goodness with this Pureed Carrots Baby Food! Smooth, creamy, and naturally sweet, this easy-to-make puree is packed with nutrients perfect for your baby's growing needs. It's a simple and nutritious choice for your baby's first foods!
      5 from 3 votes
      Print Recipe Pin Recipe Rate this Recipe
      Prep Time 5 minutes mins
      Cook Time 15 minutes mins
      Additional Time 5 minutes mins
      Total Time 25 minutes mins
      Course Vegetables
      Cuisine American
      Servings 4 Servings
      Calories 25 kcal

      Ingredients
        

      • 4 Large Carrots peeled and chopped
      • Water for steaming
      • Optional: a pinch of ground cinnamon or nutmeg for flavor

      Instructions
       

      • Rinse the carrots thoroughly under cold water. Peel and chop them into uniform pieces to ensure even cooking.
      • Place the chopped carrots in a steaming basket over boiling water. Cover and steam for about 10-15 minutes, or until the carrots are tender and can be easily pierced with a fork.
      • Transfer the steamed carrots to a blender or food processor. Add a small amount of the water used for steaming to help achieve a smooth consistency. Blend until completely smooth.
      • If desired, you can add a pinch of cinnamon or nutashow to subtly enhance the flavor. Make sure any additional seasonings are appropriate for your baby’s current dietary stage.
      • Let the puree cool to a suitable temperature before serving. Check the temperature to ensure it's safe for your baby.

      Notes

      • For Infants: This recipe can be used for adults and Infants. If making carrot puree for babies, consider switching the ¼ cup of water for breast milk.
      • Seasoning: When seasoning carrot puree for babies, it's best to keep it simple and mild. A tiny pinch of cinnamon or nutmeg can enhance the natural sweetness of the carrots without overpowering them. Always ensure any added spices are appropriate for your baby’s age, and introduce new seasonings one at a time to monitor for any reactions.

      Nutrition

      Calories: 25kcalCarbohydrates: 6gProtein: 1gFat: 0.1gSaturated Fat: 0.02gPolyunsaturated Fat: 0.1gMonounsaturated Fat: 0.01gSodium: 42mgPotassium: 195mgFiber: 2gSugar: 3gVitamin A: 10191IUVitamin C: 4mgCalcium: 20mgIron: 0.2mg
      Print Recipe Pin Recipe Rate this Recipe
      Tried this recipe?Let us know how it was!

      Best Italian Chopped Salad Recipe (Zesty, High-Protein, Meal Prep Friendly)

      June 4, 2024 by Angela Milnes

      Italian salad in a bowl.

      Italian Chopped Salad is a fresh, zesty explosion of flavor with every bite—think crisp veggies, tangy dressing, and creamy mozzarella all tossed together for the ultimate Italian salad bowl with Mediterranean flair.

      Italian salad in a bowl.

      This salad is my go-to when I want something bright, crunchy, and not boring. I started making it as a side dish but quickly realized it’s totally satisfying as a full meal—especially when I throw in grilled shrimp or roasted chickpeas. It’s fresh, flavorful, and gives serious antipasto salad vibes in chopped form.

      If you love Mediterranean flavors, check out my Beet Salad With Feta and Walnuts or this Mediterranean Green Bean Salad next.

      [feast_advanced_jump_to]

      💖 Why This Recipe Works

      • Bold, Zesty Flavors: Tangy red wine vinaigrette + salty olives + creamy cheese = salad that doesn’t feel like a compromise.
      • Totally Customizable: Add or skip proteins, veggies, or heat—it’s endlessly flexible.
      • Meal-Prep Friendly: Layer in a jar or keep dressing on the side for crisp, easy lunches.
      • High Protein + Low Carb Friendly: Just skip the croutons for a low-carb twist—it’s easy to adapt.

      ⭐ Star Ingredients

      Chopped Italian Salad Ingredients.
      ingredients for sauce for italian salad.
      • Romaine Lettuce: My go-to for crunch—it holds up beautifully to all the juicy toppings.
      • Salami & Mozzarella: These bring that creamy-salty Italian deli energy I love. I go for mozzarella pearls and thin salami slices.
      • Banana Peppers (Pepperoncini): My flavor secret weapon. Their tangy, briny bite cuts through the richness and totally wakes up the bowl. I always toss in a few extra!
      • Red Onion & Homemade Dressing: The red onion adds a sharp bite, and the zesty vinaigrette (red wine vinegar, Dijon, herbs) ties it all together.

      📖 Substitutions & Variations

      • Bolder Greens: Swap in arugula or kale for a peppery bite.
      • Vegetarian Version: Skip the salami—add grilled halloumi or marinated chickpeas.
      • Cheese Swap: Provolone or shaved Parmesan works beautifully here too.
      • Crunch Swap: Skip croutons and add roasted seeds or parmesan crisps for a low-carb crunch.
      • Protein Boost: Try grilled chicken, shrimp, or my Thin Sliced Air Fryer Chicken.
      • No-Lettuce Cups: Mix chopped cucumber, cherry tomatoes, olives, and mozzarella—then scoop into bell pepper halves or ramekins for a crunchy, low-maintenance twist.

      🔪 How To Make Italian Chopped Salad

      Preparing Italian salad.
      1. Step 1: Start with chopped romaine lettuce and halved cherry tomatoes in a large bowl or on a serving platter.
      Preparing Italian salad.
      1. Step 2: Layer on diced cucumber and green bell pepper, cubed mozzarella, sliced salami, thin red onion, black olives, banana peppers, and chopped basil and parsley.
      Preparing dressing for Italian salad.
      1. Step 3: Whisk or blend together olive oil, red wine vinegar, Dijon mustard, lemon juice, garlic, oregano, salt, pepper, and a pinch of sugar until smooth.
      Chopped Italian salad in a serving bowl.
      1. Step 4: Drizzle dressing over the salad, toss gently, and serve immediately while fresh and crisp.

      💡 Meal Prep Tip: Want to prep ahead? Layer ingredients in a mason jar—dressing on the bottom, then crunchy veggies (cucumber, onion), followed by salami and mozzarella, and lettuce last. Shake just before serving!

      Chopped Italian salad in a bowl.

      👩‍🍳 Expert Tips

      • Use Fresh Herbs: Basil and parsley make a huge difference.
      • Chop Everything Small: This is key for that true chopped-salad magic—every bite hits all the right notes.
      • Mix Dressing Well: I always shake it up in a mason jar until creamy.
      • Bariatric Tip: Start with ½ to 1 cup servings and go heavier on soft textures like mozzarella and cucumber. Skip extra-crunchy bits if needed.
      Italian salad in a bowl.

      💭 FAQs

      Can I make Italian chopped salad ahead of time?

      Yes! Prep everything and store separately from the dressing. Toss just before serving.

      What’s the best protein to add to chopped Italian salad?

      Grilled chicken, chickpeas, shrimp, or even turkey pepperoni work well.

      Is this Italian salad gluten-free?

      It can be! Just double-check your salami and dressing ingredients to make sure they're certified gluten-free.

      Can I make this Italian salad dairy-free?

      Sure—just skip the cheese or use a dairy-free mozzarella alternative.

      Best way to store Italian chopped salad?

      Place any leftovers in the refrigerate for up to 2-3 days. Ensure the salad is stored in a tightly sealed container to maintain freshness and crispness.

      💖 Serving Suggestions

      • Thin Sliced Air Fried Chicken: For an easy protein-packed lunch.
      • Paprika Shrimp: Tossed right on top for a Mediterranean twist.
      • Roasted Chickpeas: Crunchy, plant-based, and perfect with that zesty dressing.
      • Sourdough Focaccia or Bagel Chips: If you want to carb it up on the side.
      • Pair it with my Bariatric-Friendly Ricotta Bake for a soft, protein-rich side that’s great post-op.
      Chopped Italian salad in a bowl.

      🍽 More Mediterranean Recipes To Try

      • Creamy Tuscan Salmon With Sundried Tomatoes.
        Creamy Tuscan Salmon With Sundried Tomatoes
      • Italian Octopus Salad With Baby Spinach.
        Italian Octopus Salad With Baby Spinach
      • Mediterranean Zucchini Stew With Tomatoes.
        Mediterranean Zucchini Stew With Tomatoes
      • Mediterranean Orzo Salad With Lemon Vinaigrette.
        Mediterranean Orzo Salad With Lemon Vinaigrette

      Did you make this recipe? Leave a review and a ⭐⭐⭐⭐⭐ rating below, or tag us on our Facebook Page! Alternatively, bookmark it in your browser or save to Pinterest.

      Italian salad in a bowl.

      Italian Chopped Salad

      Angela Milnes
      Savor the vibrant flavors of this Italian Chopped Salad! Packed with crisp lettuce, juicy tomatoes, olives, and a medley of Italian-inspired ingredients.
      5 from 4 votes
      Print Recipe Pin Recipe Rate this Recipe
      Prep Time 15 minutes mins
      Cook Time 0 minutes mins
      Total Time 15 minutes mins
      Course Salads
      Cuisine Italian
      Servings 3 Servings
      Calories 515 kcal

      Ingredients
        

      • 4 cups Romaine Lettuce chopped
      • 1 cup Cherry Tomatoes halved
      • 1 cup Cucumber diced
      • ½ cup Red Onion thinly sliced
      • ½ cup Black Olives pitted and sliced
      • ½ cup Fresh Mozzarella Cheese cubed
      • ½ cup Green Bell Peppers diced
      • ¼ cup Banana Peppers sliced
      • ¼ cup Salami sliced
      • 2 tablespoons Fresh Basil chopped
      • 2 tablespoons Fresh parsley chopped
      • ½ cup Extra Virgin Olive Oil preferably labeled "extra-light tasting"
      • ¼ cup Red Wine Vinegar
      • 1 Garlic Clove minced
      • 1 teaspoon Dijon Mustard
      • 2 tablespoons Fresh Lemon Juice from 1 or 2 lemons
      • ½ teaspoon Dried Oregano
      • ½ teaspoon Sea Salt
      • ½ teaspoon Black Pepper
      • 1 Tablespoon Sugar

      Instructions
       

      For The Dressing

      • In a deep glass or mixing bowl, combine the extra-virgin olive oil, red wine vinegar, minced garlic, Dijon mustard, fresh lemon juice, dried oregano, sea salt, black pepper, and sugar. Use an immersion blender to thoroughly mix the dressing until smooth and well combined. Alternatively, you can whisk vigorously by hand.

      For The Salad

      • Prepare a salad by chopping lettuce, dicing cucumber and bell pepper, cubing mozzarella, slicing salami, red onion, black olives, and banana peppers, and chopping basil and parsley.
      • In a large serving bowl or platter, assemble the salad in layers as follows: Start with the chopped Romaine lettuce. Layer the halved cherry tomatoes. Add the diced green bell peppers and cucumbers
      • Scatter the cubed mozzarella cheese and sliced salami. Arrange the thinly sliced red onions and sliced black olives. Place the banana peppers on top. Sprinkle the chopped basil and parsley over the salad. Place the banana peppers on top.
      • Sprinkle the chopped basil and parsley over the salad.
      • Pour the prepared zesty dressing over the layered salad.
      • Toss the salad gently to combine all the ingredients and evenly coat with the dressing. Serve hearty Italian Chopped Salad immediately as a main dish or side salad.

      Notes

      • Use Fresh Herbs: Basil and parsley make a huge difference.
      • Chop Everything Small: This is key for that true chopped-salad magic—every bite hits all the right notes.
      • Mix Dressing Well: I always shake it up in a mason jar until creamy.
      • Bariatric Tip: Start with ½ to 1 cup servings and go heavier on soft textures like mozzarella and cucumber. Skip extra-crunchy bits if needed.

      Nutrition

      Serving: 1gCalories: 515kcalCarbohydrates: 16gProtein: 9gFat: 47gSaturated Fat: 9gPolyunsaturated Fat: 5gMonounsaturated Fat: 32gCholesterol: 22mgSodium: 1493mgPotassium: 540mgFiber: 4gSugar: 9gVitamin A: 6378IUVitamin C: 54mgCalcium: 167mgIron: 2mg
      Print Recipe Pin Recipe Rate this Recipe
      Tried this recipe?Let us know how it was!

      Tik Tok Egg Boil Without Old Bay Seasoning

      June 4, 2024 by Angela Milnes

      tik tok egg boil in a skillet. six eggs covered in a spicy sauce and garnished with herbs.

      Looking for a bold twist on boiled eggs? This TikTok egg boil recipe skips the Old Bay but keeps all the flavor. Tossed in a buttery, spicy sauce, it’s the viral egg snack you didn’t know you needed—ready in minutes and perfect for dipping, snacking, or meal-prepping!

      tik tok egg boil in a skillet. six eggs covered in a spicy sauce and garnished with herbs.

      This spicy egg boil recipe still brings the heat, the butter, and all the flavor. Whether you’re diving into a spicy egg boil for lunch or adding it to your weekend brunch board, it’s a quick and satisfying dish. I love making a batch of boiled eggs with sauce ahead of time and tossing them in the buttery mix just before serving.

      Want more egg inspo? Try my Air Fryer Egg Bites or dip these spicy eggs into Sweet Potato Puree for a fun flavor combo.

      [feast_advanced_jump_to]

      💖 Why This Recipe Works

      • Flavor-packed twist – The buttery, garlicky sauce turns plain eggs into something craveable.
      • Customizable heat – Keep it mild or crank up the cayenne and red pepper.
      • Quick and trendy – Go from fridge to fork in under 20 minutes.

      ⭐ Star Ingredients

      Egg Boil Ingredients.
      • Hard-Boiled Eggs – I boil mine just until the yolks are creamy but firm—about 10–12 minutes.
      • Butter – The real magic is in the butter sauce for eggs—a rich, spicy blend of garlic, lemon, and seasoning that clings to every bite.
      • Garlic & Onion – Sautéed until golden and fragrant—your kitchen will smell amazing.
      • Lemon Juice – Adds brightness and balances the richness of the buttery egg boil sauce.

      For the complete list of ingredients with measurements and instructions, please see the recipe card at the bottom of the post.

      📖  Substitutions & Variations

      This TikTok egg boil variation skips Old Bay and uses pantry staples to create that same viral-level flavor.

      • Vegan Option – Use plant-based butter and swap boiled eggs for tofu or halved baby potatoes!
      • Extra Garlicky – Add more minced garlic or garlic powder for deeper flavor.
      • Zest It Up – Add lemon zest along with the juice for a citrusy lift.
      • Spicy Upgrade – Boost the heat with hot sauce, extra cayenne, or a splash of chili oil.
      • Deviled Style – Halve and yolk-mix your boiled eggs after coating them for a fusion twist.

      Craving more recipes with bold, saucy vibes? Don’t miss my Tofu Stir Fry Noodles with Mushrooms or Beetroot Black Bean Burger—both loaded with layers of flavor.

      🔪How To Make Tik Tok Egg Boil Without Old Bay Seasoning

      Melting butter in skillet.
      1. Step 1: Begin by melting butter in a large skillet over medium heat until completely melted.
      Chopped onions added to melted butter in a skillet.
      1. Step 2: Stir in the onions and sauté for 3-4 minutes until they turn translucent.
      Cooking garlic and onion in butter.
      1. Step 3: Add the garlic and cook until fragrant.
      Adding spices to melted butter and sauteed onion.
      1. Step 4: Add the rest of the ingredients except for the eggs, stirring frequently, and cook for 2-3 minutes. Season generously with salt and pepper.
      Boiled eggs added to curry mixture in a skillet.
      1. Step 5: Once your butter base is sizzling, gently add the boiled eggs in seasoned sauce and let them simmer just enough to soak up all that flavor.
      Boiled eggs curry in a spoon.
      1. Step 6: Garnish the Tiktok Egg Boil with your choice of fresh herbs or a sprinkle of paprika before serving hot.

      💡Hint: Use room temperature eggs for easier peeling, and don’t skip the cold water bath after boiling—they’ll peel like a dream.

      boiled eggs in a spicy sauce covered in herbs.

      👩‍🍳 Expert Tips

      • Boil eggs to your texture – 9–10 minutes for slightly soft yolks, 12 for fully hard.
      • Use older eggs – Slightly aged eggs are much easier to peel than fresh ones.
      • Make the sauce ahead – It keeps for a week in the fridge and can be reheated whenever cravings hit.

      💭 FAQs

      What makes the TikTok Egg Boil different from a regular boiled egg?

      This trending egg recipe is all about the sauce! Instead of plain eggs, you're coating them in a bold, buttery, spice-loaded mixture that’s anything but boring.

      Can I make the TikTok Egg Boil without the butter?

      Yep! Swap for olive oil or a plant-based butter for a lighter or dairy-free version.

      How long should I boil the eggs for the perfect TikTok Egg Boil?

      For a slightly soft-boiled texture, boil the eggs for 9-10 minutes. If you prefer them fully hard-boiled, 12 minutes should do the trick. After boiling, make sure to shock the eggs in cold water to stop the cooking process.

      Can I make the TikTok Egg Boil ahead of time?

      Totally. Store the boiled eggs and sauce separately, then toss together when you’re ready to eat. The sauce actually gets more flavorful as it sits!

      Is Tik Tok egg boil spicy?

      It can be! You control the spice level by adjusting the cayenne, chili flakes, and paprika. Make it mild, medium, or flaming hot—your call.

      💖 Serving Suggestions

      Want to turn this TikTok egg boil into a full-on flavor fest? Pair it with these easy, satisfying sides:

      • Corn on the Cob – Sweet, juicy corn balances the buttery, spicy eggs perfectly.
      • Roasted Potatoes – Crispy and herby, perfect for scooping up leftover sauce.
      • Air Fryer Bok Choy – Light, crisp, and great for cutting through the richness.
      • Sweet Potato Fries – A sweet, crunchy contrast to the heat.
      • Creamy Herby Ranch Dressing – Use it as a dipping sauce to cool things down or drizzle over your plate.
      • Whole Wheat Irish Soda Bread – Tear and dip into the buttery sauce—it soaks up every drop!
      tik tok egg. boil in a skillet with herbs on top.

      🍽 More Recipes Using Eggs

      • Spinach Egg Muffins With Mozzarella Cheese.
        Spinach Egg Muffins With Mozzarella Cheese
      • Creamy Egg Salad With Fresh Dill.
        Creamy Egg Salad With Fresh Dill
      • Zucchini Egg Bake Recipe.
        Best Zucchini Egg Bake Recipe
      • Air Fryer Egg Bites With Bacon.
        Air Fryer Egg Bites With Bacon 

      Did you make this recipe? Leave a review and a ⭐⭐⭐⭐⭐ rating below, or tag us in our Facebook Group! Alternatively, bookmark it in your browser or save to Pinterest.

      tik tok egg boil in a skillet. six eggs covered in a spicy sauce and garnished with herbs.

      Tik Tok Egg Boil Without Old Bay Seasoning

      Angela Milnes
      Get ready to try the viral sensation with this TikTok Egg Boil! This quick and flavorful dish features soft-boiled eggs drenched in a savory, spicy sauce that’s packed with garlic, butter, and your favorite seasonings.
      5 from 4 votes
      Print Recipe Pin Recipe Rate this Recipe
      Prep Time 10 minutes mins
      Cook Time 20 minutes mins
      Total Time 30 minutes mins
      Course Appetizers
      Cuisine American
      Servings 5 Servings
      Calories 430 kcal

      Ingredients
        

      • 6 Hard Boiled Eggs
      • 1 Cup Unsalted Butter
      • ½ Onion finely diced
      • 4 Garlic Cloves minced
      • ½ Lemon
      • 1 tablespoon Fresh Herbs Optional

      For The Seasoning

      • 1 tablespoon Paprika
      • 1 tablespoon Garlic Powder
      • 1 tablespoon Onion Powder
      • 1 tablespoon Oregano
      • 1 tablespoon Cayenne Pepper
      • 1 tablespoon Brown Sugar
      • 1 teaspoon Red Crushed Pepper
      • ½ teaspoon Salt and Pepper

      Instructions
       

      • Begin by melting butter in a large skillet over medium heat until completely melted.
      • Stir in the onions and sauté for 3-4 minutes until they turn translucent.
      • Add the garlic and cook until fragrant.
      • Add the rest of the ingredients except for the eggs, stirring frequently, and cook for 2-3 minutes. Season generously with salt and pepper.
      • Gently add the hard-boiled eggs to the skillet and cook for an additional 1 minute to allow the flavors to meld. 
      • Garnish Egg Boil with your choice of fresh herbs or a sprinkle of paprika before serving hot.

      Notes

      Use Farm Fresh Eggs: Fresh eggs are less likely to have air pockets, which can cause them to crack during boiling. However, slightly older eggs are easier to peel.
      Room Temperature: Bring to room temperature before boiling eggs to reduce the risk of cracking and ensure even cooking.
      Salt or Vinegar in Water: Add a teaspoon of salt or a tablespoon of vinegar to the boiling hot water. This can help prevent the eggs from cracking and makes peeling easier.
      Starting in Cold Water: Place the eggs in a pot and cover them with cold water before heating. This helps prevent cracking and ensures even cooking.

      Nutrition

      Calories: 430kcalCarbohydrates: 4gProtein: 8gFat: 43gSaturated Fat: 25gPolyunsaturated Fat: 2gMonounsaturated Fat: 12gTrans Fat: 1gCholesterol: 321mgSodium: 80mgPotassium: 127mgFiber: 1gSugar: 1gVitamin A: 1449IUVitamin C: 7mgCalcium: 51mgIron: 1mg
      Print Recipe Pin Recipe Rate this Recipe
      Tried this recipe?Let us know how it was!

      Beetroot Ravioli With Goat Cheese

      June 4, 2024 by Angela Milnes

      Beetroot Ravioli With Goat Cheese.

      Looking for a fun and colorful twist on traditional ravioli? This easy Beetroot Ravioli recipe is perfect for you! With its vibrant pink hue and earthy, sweet flavor, it's sure to be a hit with the whole family. Plus, it's easier to make than you might think.

      Beetroot ravioli with goat cheese on a plate with fork.
      [feast_advanced_jump_to]

      Why This Recipe Works

      • Colorful and Vibrant: Beetroot gives the ravioli a beautiful pink hue that makes the dish visually appealing and unique.
      • Easy to Make: This Beetroot Ravioli Recipe simplifies the process of making homemade ravioli, making it accessible for all skill levels.
      • Deliciously Flavorful: The combination of earthy beetroot and tangy goat cheese filling creates a delightful flavor profile that's both rich and satisfying.

      🥘 Ingredients

      Beetroot Ravioli Ingredients.

      For The Pasta Dough

      • All-purpose flour: Provides the base for the homemade pasta dough, giving it structure and texture.
      • Eggs: Bind the flour together to form a cohesive dough.
      • Olive oil: Adds richness and smoothness to the pasta dough.
      • Salt: Enhances the flavor of the dough.
      • Cooked beetroots: Infuses the dough with vibrant color and subtle earthy flavor.

      For The Filling

      • Beets: Roasted and peeled, they form the sweet and earthy core of the ravioli filling.
      • Goat cheese: Provides creamy richness and tanginess to the filling.
      • Garlic: Adds a savory depth of flavor to complement the sweetness of the beets.
      • Salt and pepper: Season the filling to taste, balancing the flavors.

      For The Lemon Butter Sauce

      • Unsalted butter: Forms the base of the sauce, contributing richness and flavor.
      • Lemon zest: Infuses the sauce with bright citrusy notes.
      • Lemon juice: Adds acidity and freshness to the sauce.
      • Crumbled goat cheese (optional): Offers an additional burst of creamy goat cheese flavor as a garnish.
      • Dried chives or Fresh Thyme (optional): Provide a subtle oniony flavor and decorative touch as a garnish.

      For the complete list of ingredients with measurements and instructions, please see the recipe card at the bottom of the post.

      📖  Substitutions & Variations

      • Mushroom-Stuffed Beetroot Ravioli: Sauteed mushrooms mixed with the grated parmesan cheese filling can introduce a savory umami element to the dish.
      • Citrus Infused Beetroot Ravioli: Zest some orange or grapefruit into the pasta dough for a citrusy twist that complements the sweet beetroot and tangy goat cheese filling.
      • Spinach and Beetroot Ravioli: Incorporate finely chopped spinach into the beet and ricotta cheese filling for added color and a hint of earthy freshness.

      🔪 How To Make Beetroot Ravioli

      Purple ravioli dough ball.

      Step One: Mix flour, eggs, olive oil, salt, and grated beetroot in a bowl. Knead the mixture until it forms a smooth, elastic dough. Wrap the dough in plastic wrap and let it rest for about 30 minutes.

      Beetroot mixture in a blender.

      Step Two: In a blender or food processor, blend roasted beets, goat cheese, minced garlic, salt, and pepper until smooth. Adjust the seasoning to taste.

      Rolling purple ravioli dough.

      Step Three: Roll out the pasta dough into thin pasta sheets using a pasta machine or a rolling pin.

      To make beetroot ravioli adding mixture to dough.

      Step Four: Place small dollops of the beet and goat cheese mixture onto one pasta sheet, leaving space between each dollop. Brush the edges with a bit of water to ensure they remain sealed while cooking. Gently place another pasta sheet on top of the filling.

      Purple ravioli dough pockets filled with beetroot mixture.

      Step Five: Press down around each mound of filling to seal the ravioli. Use a ravioli cutter or a sharp knife to cut out individual ravioli pieces. Ensure they are properly sealed.

      Beetroot ravioli in a skillet.

      Step Six: Boil salted water and cook ravioli for 3-4 minutes until they float. In another pan, melt butter over medium heat, add lemon zest and juice, and cook for 1-2 minutes until fragrant. Drain ravioli and toss in lemon butter sauce. Plate, drizzle with extra sauce, and garnish with herbs or dried chives and crumbled goat cheese.

      Beetroot ravioli served with goat cheese on a plate.

      👩‍🍳 Expert Tips

      • Cook Ravioli in Batches: Avoid overcrowding the pot when cooking the ravioli to ensure they cook evenly and don't stick together.
      • Handle with Care: When transferring the ravioli from the boiling water to the serving plate, use a slotted spoon to gently lift them out, ensuring they remain intact.
      • Experiment with Fillings: While this recipe calls for a beet and goat cheese filling, don't hesitate to get creative with other fillings such as spinach and ricotta or mushroom and Parmesan to diversify your pasta recipes.

      💭 FAQs

      How do I prepare beetroot for the ravioli filling?

      To prepare beetroot for the filling, start by roasting the beets until tender. Once cooled, peel and finely chop or blend them into a purée. Combine the beetroot with cheeses like ricotta or goat cheese, and season with herbs such as thyme or dill to enhance the flavor.

      Can I make beetroot ravioli without a pasta machine?

      Yes, you can make beetroot ravioli without a pasta machine. After preparing the dough, use a rolling pin to roll it out on a floured surface until it reaches the desired thinness. Then, place small amounts of the filling onto the dough, fold, and cut into individual ravioli pieces.

      How should I cook beetroot ravioli to prevent them from falling apart?

      To prevent beetroot ravioli from falling apart during cooking, ensure the edges are sealed properly by pressing them firmly, possibly using a fork. Cook the ravioli in gently boiling salted water; they are typically done when they float to the surface, which usually takes 3 to 5 minutes.

      What sauces pair well with beetroot ravioli?

      Beetroot ravioli pairs excellently with sauces that complement its earthy flavor. A sage-infused brown butter sauce adds a nutty richness, while a walnut butter sauce introduces a delightful crunch and depth. Alternatively, a simple drizzle of olive oil with fresh herbs can also be a light and flavorful option.

      Best Way to Store Beetroot Ravioli

      Store any leftover Beetroot Ravioli in an airtight container in the refrigerator for up to 3-4 days. Place the uncooked ravioli on a baking sheet lined with parchment paper and freeze until firm. Transfer to a freezer-safe bag or container and freeze for up to 1 month. Defrost the ravioli in the refrigerator overnight or in the microwave on low power. Cook as directed when completely thawed.

      🧂Serving Suggestions

      • Mango Arugula Salad: A light and peppery arugula salad with a lemon vinaigrette and shaved Parmesan provides a refreshing contrast to the earthy sweetness of beetroot ravioli.
      • Garlic Bread: Crispy garlic bread with a buttery, garlicky flavor is a perfect side to soak up any extra sauce from the ravioli.
      • Sautéed Spinach: Lightly sautéed spinach with garlic and a hint of lemon complements the ravioli and adds a healthy, green component to the meal.
      • Air Fryer Parmesan Asparagus: Tender asparagus with a drizzle of olive oil and a sprinkle of sea salt adds a smoky flavor and crunchy texture to the plate.
      • Herb-Roasted Chicken: Juicy, herb-roasted chicken with rosemary and thyme pairs well with the beetroot ravioli, adding a savory protein to the pasta dish.
      Beetroot ravioli served fork.

      🍽 Related Recipes

      • einkorn angel hair and cherry tomato pasta in a white bowl.
        One-Pan Einkorn Angel Hair Pasta with Cherry Tomatoes
      • Salmon Dill Puree.
        Lemon Dill Salmon Mousse (Bariatric Friendly)
      • close-up-watermelon-slices-with-blackberry-plastic-disposable-cup-perfect for a summer party.
        How To Host An Awesome Summer Party
      • Oven baked lobster tail with garlic butter and lemon.
        How To Cook Lobster Tail At Home

      Did you make this recipe? Leave a review and a ⭐⭐⭐⭐⭐ rating below, or tag us on our Facebook Page! Alternatively, bookmark it in your browser or save to Pinterest.

      Beetroot Ravioli With Goat Cheese.

      Beetroot Ravioli

      Angela Milnes
      Indulge in flavorful Beetroot Ravioli, a vibrant dish bursting with savory goodness. With its vibrant pink hue and earthy, sweet flavor, you'll love the taste of this recipe.
      5 from 3 votes
      Print Recipe Pin Recipe Rate this Recipe
      Prep Time 1 hour hr
      Cook Time 6 minutes mins
      Additional Time 10 minutes mins
      Total Time 1 hour hr 16 minutes mins
      Course Beetroot Recipes
      Cuisine Italian
      Servings 2 Serving
      Calories 1284 kcal

      Ingredients
        

      For The Pasta

      • 2 ½ cups All Purpose Flour
      • 2 Eggs
      • 1 tablespoon Olive Oil
      • 1 teaspoon Salt
      • 5 tablespoons Beetroot Grated

      For The Filling

      • 2 Beetroot roasted and peeled
      • 1 cup Soft Goat Cheese
      • 1 clove Garlic minced
      • pinch Salt
      • Pinch Pepper

      For The Butter Sauce

      • 4 tablespoons Butter Unsalted
      • 1 Tablespoon Lemon Zest
      • 1 Lemon Juiced
      • 1 tablespoon Crumbled Goat Cheese for garnish (optional)
      • 1 tablespoon Dried Chives for garnish (optional)

      Instructions
       

      • Mix flour, eggs, olive oil, salt, and grated beetroot in a bowl.
      • Knead the mixture until it forms a smooth, elastic dough.
      • Wrap the dough in plastic wrap and let it rest for about 30 minutes.
      • In a blender or food processor, blend roasted beets, goat cheese, minced garlic, salt, and pepper until smooth.
      • Adjust the seasoning to taste.
      • Roll out the pasta dough into thin pasta sheets using a pasta machine or a rolling pin.
      • Place small dollops of the beet and goat cheese mixture onto one pasta sheet, leaving space between each dollop.
      • Brush the edges with a bit of water to ensure they remain sealed while cooking.
      • Gently place another pasta sheet on top of the filling. Press down around each mound of filling to seal the ravioli.
      • Use a ravioli cutter or a sharp knife to cut out individual ravioli pieces. Ensure they are properly sealed.
      • Boil a large pot of salted water. Carefully add the ravioli and cook for 3-4 minutes or until they float to the top.
      • In a separate pan, melt butter over medium heat. Add lemon zest and juice. Cook for 1-2 minutes until fragrant.
      • Drain the cooked ravioli and gently toss them in the lemon butter sauce.
      • Plate the beet ravioli, drizzle with extra lemon butter sauce, and garnish with fresh herbs of your choice or dried chives and crumbled goat cheese.

      Notes

      Cook Ravioli in Batches: Avoid overcrowding the pot when cooking the ravioli to ensure they cook evenly and don't stick together.
      Handle with Care: When transferring the ravioli from the boiling water to the serving plate, use a slotted spoon to gently lift them out, ensuring they remain intact.
      Experiment with Fillings: While this recipe calls for a beet and goat cheese filling, don't hesitate to get creative with other fillings such as spinach and ricotta or mushroom and Parmesan to diversify your pasta recipes.

      Nutrition

      Serving: 1gCalories: 1284kcalCarbohydrates: 137gProtein: 47gFat: 61gSaturated Fat: 35gPolyunsaturated Fat: 4gMonounsaturated Fat: 19gTrans Fat: 1gCholesterol: 279mgSodium: 1946mgPotassium: 747mgFiber: 9gSugar: 11gVitamin A: 2303IUVitamin C: 40mgCalcium: 263mgIron: 12mg
      Print Recipe Pin Recipe Rate this Recipe
      Tried this recipe?Let us know how it was!

      More Great Recipes

      • Beetroot Black Bean Burger
      • Sweet Potato Puree
      • Pizza Monkey Bread
      • Creamy Pan Fried Salmon Fillet
      • Pesto Chicken Sliders With Mozzarella
      • Spinach Rice Casserole With Feta Cheese
      • Breakfast Sliders With Sausage, Egg And Cheese
      • Tik Tok Egg Boil
      • Vanilla French Toast With Strawberries
      • Mediterranean Faro Salad
      Beetroot ravioli served forks on a plate.

      Instant Pot Caramel Sauce (Easy Dulce de Leche)

      June 3, 2024 by Angela Milnes

      Dulce Le Leche caramel sauce.

      Rich, glossy, and wildly easy—this Instant Pot caramel sauce is one-ingredient magic in a jar, ready in under 45 minutes.

      Dulce Le Leche caramel sauce.

      I love fruit. Juicy apples, ripe bananas, berries—I'm all in. But pair them with this creamy, dreamy Instant Pot dulce de leche, and suddenly it’s a full-on dessert situation.

      This caramel sauce is my not-so-secret weapon for dressing up a fruit platter or turning a simple snack into a party-worthy treat. If you’ve ever dipped a crisp apple slice into warm caramel, you know. And if fruity desserts are your thing too, don’t miss my favorites like Pumpkin Crunch Cake, Blueberry Crumble, or this bright and zesty Lemon Pudding Cake!


      [feast_advanced_jump_to]

      💖 Why This Recipe Works

      • No stirring, no babysitting—just set it and forget it.
      • Only one ingredient makes a luscious, creamy dulce de leche.
      • Customizable sweetness based on your cook time—light and silky or deep and rich.

      ⭐ Star Ingredients

      ingredients for caramel sauce. two cans of condensed milk.

      Sweetened Condensed Milk: This is the magic maker. When pressure-cooked, it caramelizes into a thick, golden sauce with deep toffee-like flavor. I always keep a few cans in the pantry just for this recipe.

      For the complete list of ingredients with measurements and instructions, please see the recipe card at the bottom of the post.

      🔄 Substitutions & Variations

      • Boozy Caramel – Stir in a splash of bourbon or spiced rum after it cools.
      • Dairy-Free Option – Use canned coconut condensed milk for a tropical twist.
      • Jar or Can? – Mason jars for extra safety and flavor infusions, cans for convenience. Be sure to add foil when using the can.
      • Thicker Spread – Cook an extra 10–15 minutes for spoonable goodness.

      🍂 Flavor Infusions: A Simple Twist for Extra Depth

      The first time I tried infusing the caramel, I tossed a cinnamon stick and a sliver of orange peel right into the can—and I was hooked. As the Instant Pot worked its magic, the flavors gently steeped into the sauce without me doing a thing. The result? A rich, subtly spiced caramel that felt totally gourmet. It’s now my go-to whenever I want to make something extra special without adding any real effort. Remove any infusions (like the cinnamon stick) before serving.

      If you're into flavor infusions like I am, you’ll love the vibrant twist in my Mangonada and the subtle floral notes in this Butterfly Pea Flower Tea too!

      🔪How To Make Instant Pot Caramel Sauce

      condensed milk cans covered in tin foil next to the instant pot.
      1. Step 1: Open the can of sweetened condensed milk. If you prefer using a glass jar or mason jar instead, ensure it's tightly sealed. Cover the can or jar tightly with aluminum foil.
      condensed milk cans covered in tin foil on a trivet inside the instant pot.
      1. Step 2: Place the covered can or mason jar on the trivet inside the Instant Pot. Fill up the Instant Pot with water to cover the can or jar halfway, ensuring not to exceed the max fill line. Pressure cook for 30 minutes, then let the pressure release naturally (about 15–20 minutes)
      condensed milk cans covered in tin foil on a trivet inside the instant pot.
      1. Step 3: Remove the can or mason jar from the Instant Pot using tongs. Transfer to a cooling rack. Allow it to completely cool before opening.
      caramel sauce and apples.
      1. Step 4: Your own Dulce De Leche is ready to serve! This Instant Pot Dulce De Leche is delicious with apples, ice cream, or enjoyed by itself.

      💡Hint: Want to control the caramel color?

      Cook TimeTextureColor
      25 minLight and pourablePale golden
      30 minClassic drizzleMedium amber
      40–45 minThick and spreadableDeep caramel
      apple slice in caramel sauce.

      👩‍🍳 Expert Tips

      • Use natural release for best texture and safety. To do a natural release, just let the Instant Pot sit undisturbed after cooking. You’ll know it’s finished when the float valve drops on its own—usually after 15–20 minutes. No need to turn the steam knob!
      • Let mason jars sit at room temp before cooking to prevent cracks.
      • Make a double batch and store extra in the fridge for quick dessert magic.

      💭 FAQs

      Can I make this with a mason jar instead of the can?

      Yes! Just make sure it’s room temp and sealed tight—great for infusing flavors too.

      Why use natural release instead of quick release?

      Natural release prevents bubbling and ensures smooth, thick caramel.

      How long should I cook dulce de leche in the Instant Pot?

      25 min = light; 30 min = classic; 40–45 min = thick spread. Your caramel, your call!

      How should I store leftover caramel sauce?

      Store in an airtight container in the fridge for up to 2 weeks.

      💖 Serving Suggestions

      • Baked Apples – A natural pairing.
      • Buckwheat Pancakes – Pour generously.
      • Turtle Brownies – Swirl before or after baking.
      • Zucchini Chocolate Chip Muffins – Yes, caramel belongs here.
      • Air Fryer Banana Chips – Sweet meets crispy.
      • Shortbread Cookies – Sandwich it between!
      • Salted Caramel Crust (Next-Level Garnish!) – After cooling slightly, sprinkle flaky salt and crushed caramelized sugar on top. Let it set for a crisp, photo-worthy finish.
      instant pot dulce le leche.

      🍽 More Easy Dessert Recipes

      • Peach Pie Bars.
        Homemade Peach Pie Bars – Sweet, Simple, and So Good!
      • Papaya Banana Yogurt Ice Cream with Cashews.
        Best Banana Yogurt Ice Cream (With Papaya)
      • Creamy Vanilla Eclair Cake.
        Creamy Vanilla Eclair Cake
      • The Best No Bake Banana Pudding.
        The Best No Bake Banana Pudding

      Did you make this recipe? Leave a review and a ⭐⭐⭐⭐⭐ rating below, or tag us in our Facebook Group! Alternatively, bookmark it in your browser or save to Pinterest.

      Dulce Le Leche caramel sauce.

      Instant Pot Caramel Sauce

      Angela Milnes
      This easy homemade caramel sauce is rich, smooth, and perfect for drizzling over your favorite desserts! Whether you're topping ice cream, cakes, or even pancakes, this sweet and buttery sauce adds a delicious touch to any treat.
      5 from 4 votes
      Print Recipe Pin Recipe Rate this Recipe
      Prep Time 3 minutes mins
      Cook Time 33 minutes mins
      Total Time 38 minutes mins
      Course Dessert
      Cuisine American
      Servings 3 Servings
      Calories 425 kcal

      Ingredients
        

      • 14 Ounce Can Sweetened Condensed Milk

      Instructions
       

      • Open the can of sweetened condensed milk. If you prefer using a glass jar or mason jar instead, ensure it's tightly sealed. Cover the can or jar tightly with aluminum foil.
      • Place the covered can or mason jar on the trivet inside the Instant Pot.
      • Fill up the Instant Pot with water to cover the can or jar halfway, ensuring not to exceed the max fill line.
      • Close the Instant Pot and seal it. Select “manual, high pressure” for 35 minutes. Due to the amount of water, it will take about 30 minutes to reach pressure. Ensure the pressure valve is set to the sealing position.
      • Pressure cook for 30 minutes, then let the pressure release naturally (about 15–20 minutes)
      • Remove the can or mason jar from the Instant Pot using tongs. Transfer to a cooling rack. Allow it to completely cool before opening.
      • Your own Dulce De Leche is ready to serve! This Instant Pot Dulce De Leche is delicious with apples, ice cream, or enjoyed by itself.

      Notes

      Sweetness Level: Adjust the sweetness by varying the cooking time. Longer cooking times yield a darker, richer caramel.
      Cooling Prior to Opening: Always ensure the unopened can or jar is completely cooled before opening to prevent any mishaps.

      Nutrition

      Calories: 425kcalCarbohydrates: 72gProtein: 10gFat: 12gSaturated Fat: 7gPolyunsaturated Fat: 0.4gMonounsaturated Fat: 3gCholesterol: 45mgSodium: 168mgPotassium: 491mgSugar: 72gVitamin A: 353IUVitamin C: 3mgCalcium: 376mgIron: 0.3mg
      Print Recipe Pin Recipe Rate this Recipe
      Tried this recipe?Let us know how it was!

      Best Beetroot Hummus Recipe (Vegan)

      June 3, 2024 by Angela Milnes

      Best Beetroot Hummus Recipe.

      Need a vibrant, healthy dip that tastes amazing and looks stunning? This Beetroot Hummus Recipe blends earthy beets with creamy chickpeas and bright lemon for a punchy, pretty snack you’ll want to make on repeat.

      Best Beetroot Hummus Recipe.

      Beetroot hummus has become a popular choice at parties, picnics, and plant-based feasts because it’s both gorgeous and good for you. The rich pink color turns heads, while the sweet, earthy flavor of beetroot brings something new to the traditional hummus bowl.

      If you're into easy beetroot recipes, check out our Beetroot Cured Salmon, Beetroot Carpaccio, or Beetroot Black Bean Burger for more beet-packed ideas

      [feast_advanced_jump_to]

      💖 Why This Recipe Works

      • Gorgeous Color: Beetroot makes this dip stunningly bright and totally table-worthy.
      • Full of Good Stuff: Chickpeas + beets = fiber, protein, vitamins, and minerals.
      • Quick & Easy: Toss everything in a blender and go—no fuss, just flavor.

      🌟 Star Ingredients

      Beetroot Hummus Ingredients.
      • Beetroot: Roasted or pressure-cooked, it adds earthy sweetness and that bold pink hue.
      • Chickpeas: These creamy, nutty legumes make the perfect base for any hummus.
      • Tahini & Lemon Juice: This dream team brings creamy richness and a zesty kick that balances the beets beautifully.

      For the complete list of ingredients with measurements and instructions, please see the recipe card at the bottom of the post.

      🔄 Substitutions & Variations

      • Smoky Twist: Add a pinch of smoked paprika or chipotle for depth and heat.
      • Nutty Boost: Blend in walnuts or pine nuts for added richness.
      • No Beets? Try this base with roasted red peppers or cooked carrots for a colorful spin.

      If you're a fan of beetroot then check out this list of easy beetroot salad recipes or try making our popular citrus and honey roasted beetroot.

      🔪How To Make Beetroot Hummus

      Use this section for process shots, alternating between the step and image showing the step. Users don't like seeing process shots cluttering up the recipe card, so include your process shots here.

      Beetroots in an Instant Pot.
      1. Step 1: Place the beetroots in an Instant Pot with enough water to cover them.
      Cooking beetroots in an Instant Pot.
      1. Step 2: Cook on high pressure for 15 minutes, then allow the pressure to release naturally.
      Cooked beetroot.
      1. Step 3: Remove the beetroots, let them cool, and chop them into chunks for the hummus.
      Chickpeas in a food processor.
      1. Step 4: In a food processor or blender, combine cooked chickpeas, garlic, tahini, lemon juice, olive oil, and salt.
      Chickpeas and beetroot in a food processor.
      1. Step 5: Add chopped beetroot to the food processor or blender with the hummus base ingredients. If the mixture is too thick, slowly incorporate cold water or beet juice a little at a time, until the desired consistency is reached.
      Beetroot hummus in the food processor.
      1. Step 6: Blend all the ingredients together until a smooth consistency is achieved.
      Beetroot hummus in a bowl.
      1. Step 7: Transfer the blended hummus to a bowl and refrigerate for at least 10 minutes before serving. Drizzle with olive oil, sprinkle with sesame seeds and fresh mint before serving. Enjoy Beetroot Hummus with pita bread chips for dipping!

      💡 Hint: Want ultra-creamy hummus? Peel your chickpeas before blending! It takes a few extra minutes but gives a silky-smooth finish.

      👩‍🍳 Expert Tips

      • Roast Beets for Flavor: Roasted beets make your hummus sweeter and more complex.
      • Make It Ahead: Beet hummus actually tastes better after a few hours in the fridge.
      • Balance That Sweetness: Don’t skip the lemon—it really brightens the earthy flavor of the beets.

      💭 FAQs

      Can I make beetroot hummus ahead of time?

      Yes, you can make beetroot hummus ahead of time and store it in an airtight container in the fridge for up to 3-4 days. The flavors even improve after a day or two as they have more time to meld together.

      Can I use canned beets instead of fresh?

      Yes! Just drain and pat them dry. Fresh beets will give a deeper flavor, but canned is a great shortcut.

      How healthy is beetroot hummus?

      Very! It’s full of fiber, antioxidants, iron, and vitamin C. Great for digestion and overall energy.

      Can I freeze beetroot hummus?

      Yep! Store in an airtight container or freezer bag for up to 3 months. Defrost in the fridge and stir before serving.

      💖 Serving Suggestions

      • Pita Chips or Flatbread: A crunchy classic for scooping.
      • Crudités: Think cucumber, carrots, cherry tomatoes, and bell pepper strips.
      • Grilled Halloumi: That salty, squeaky texture pairs so well with sweet beet hummus.
      • Falafel Balls: The Middle Eastern pairing you didn’t know you needed.
      • Tabbouleh Salad: Light, lemony grains that make it a perfect platter partner.
      Beetroot hummus and pitta bread chips.

      🍽 Try These Easy Dip Recipes

      • Instant pot buffalo chicken dip in a dish.
        Instant Pot Buffalo Chicken Dip
      • Whipped Feta Dip.
        Creamy Whipped Feta Dip (With Greek Yogurt & Garlic)
      • Greek Beetroot Dip.
        Best Beetroot Dip Recipe (Greek Dip)
      • Easy Smoked Salmon Dip Recipe.
        Easy Smoked Salmon Dip With Capers

      Did you make this recipe? Leave a review and a ⭐⭐⭐⭐⭐ rating below, or tag us in our Facebook Group! Alternatively, bookmark it in your browser or save to Pinterest.

      Best Beetroot Hummus Recipe.

      Beetroot Hummus Recipe

      Angela Milnes
      Brighten up your snack time with this vibrant Beetroot Hummus! Creamy, smooth, and packed with earthy flavors, this hummus is a delightful twist on the classic dip. The roasted beets add a beautiful color and a hint of sweetness, making it perfect for dipping veggies.
      5 from 4 votes
      Print Recipe Pin Recipe Rate this Recipe
      Prep Time 5 minutes mins
      Cook Time 15 minutes mins
      Additional Time 5 minutes mins
      Total Time 25 minutes mins
      Course Beetroot Recipes
      Cuisine Greek
      Servings 4 Servings
      Calories 129 kcal

      Ingredients
        

      • 2 Small Beetroots 1 Large
      • 2 Cups Cooked Chickpeas
      • 1 Garlic Clove
      • ¼ cup Tahini
      • 1 Lemon juiced
      • 1 tablespoon Extra Virgin Olive Oil
      • 2 teaspoon Salt
      • 2 tablespoon Cold Water
      • Fresh Mint sesame seeds (drizzle olive oil) garnish
      • Pita Bread

      Instructions
       

      • Place the beetroots in an Instant Pot with enough water to cover them. Cook on high pressure for 15 minutes, then allow the pressure to release naturally.
      • Remove the beetroots, let them cool, and chop them into chunks for the hummus.
      • In a food processor or blender, combine cooked chickpeas, garlic, tahini, lemon juice, olive oil, and salt.
      • Once the beetroots are cooled, add them to the food processor or blender with the hummus base ingredients.
      • Blend all the ingredients together until a smooth consistency is achieved.
      • If the mixture is too thick, slowly incorporate cold water or beet juice a little at a time, until the desired consistency is reached.
      • Transfer the blended hummus to a bowl and refrigerate for at least 10 minutes before serving.
      • Drizzle with olive oil, sprinkle with sesame seeds and fresh mint before serving. Enjoy with pita bread chips for dipping!

      Notes

      Make Ahead: Beet hummus tastes even better when flavors meld together over time. Consider making it a day ahead to allow the ingredients to fully infuse.
      Roasted Beet Hummus: For a deeper flavor, consider roasting the beetroots instead of boiling them. Roasted beets can enhance the natural sweetness and add a smoky undertone to the hummus.
      Use Canned Chickpea: Opt for canned chickpeas for convenience without sacrificing flavor or texture.

      Nutrition

      Serving: 1gCalories: 129kcalCarbohydrates: 6gProtein: 3gFat: 12gSaturated Fat: 2gPolyunsaturated Fat: 4gMonounsaturated Fat: 6gSodium: 1169mgPotassium: 109mgFiber: 1gSugar: 1gVitamin A: 16IUVitamin C: 15mgCalcium: 31mgIron: 1mg
      Print Recipe Pin Recipe Rate this Recipe
      Tried this recipe?Let us know how it was!

      Beetroot Carpaccio With Goat Cheese

      June 3, 2024 by Angela Milnes

      Beetroot Carpaccio.

      Looking for a fresh, elegant starter? This Beetroot Carpaccio with Goat Cheese is tangy, creamy, and ready in minutes—perfect for any occasion.

      Beetroot Carpaccio.

      What Is Beetroot Carpaccio?

      Carpaccio is an Italian dish traditionally made with paper-thin slices of raw meat or fish, served cold with olive oil, lemon, and seasonings. Beetroot carpaccio is a vegetarian spin that swaps the protein for tender beets—thinly sliced and beautifully dressed. It’s light, elegant, and perfect as an appetizer or side. This vegetarian carpaccio recipe is a beautiful way to serve vegetables.

      Whether you’re hosting brunch, prepping a light lunch, or putting together a holiday spread, this dish adds instant flair.

      If you love beautiful starters like Beetroot Ravioli With Goat Cheese or Cured Beetroot Salmon, this one’s your new go-to.

      [feast_advanced_jump_to]

      💖 Why This Recipe Works

      • Elegant & Impressive: Thin beet slices layered like petals—totally swoon-worthy.
      • Balanced Flavors: This beet carpaccio recipe has sweet beets, creamy goat cheese, and zippy lemon vinaigrette = magic.
      • Effortless to Make: Just slice, whisk, and plate. No cooking required!

      ⭐ Star Ingredients

      Beetroot Carpaccio Ingredients.
      • Beetroot: Cooked beets are the star—sweet, earthy, and stunning on a plate. Pre-cooked beets work great, or roast your own for more flavor.
      • Goat Cheese: Adds creamy richness and tang. Crumble it gently so every bite gets a little hit. Perfect if you love beetroot with goat cheese.
      • Pistachios: For a nutty crunch that complements both the beets and cheese beautifully.

      For the complete list of ingredients with measurements and instructions, please see the recipe card at the bottom of the post.

      📖  Substitutions & Variations

      • Cheese Swap: Try feta or blue cheese for a sharper bite.
      • Nut-Free: Skip the pistachios or sub with sunflower seeds.
      • Vegan Version: Omit the cheese or use plant-based feta.
      • Citrus Boost: Add orange zest or juice to the vinaigrette.
      • Beet Carpaccio with Feta & Orange: Try this combo for a bright, fruity twist.
      • Roasted Beet Carpaccio: Roast your beets for even more concentrated flavor before slicing.

      Also pairs beautifully with Beetroot Black Bean Burgers or Cured Beetroot Salmon for a vibrant, protein-packed meal.

      🔪How To Make Beetroot Carpaccio With Goat Cheese

      Beetroot slices on a round plate.
      1. Step 1: Cut the cooked or roasted beets into thin slices. Lay the thinly sliced beets out on a large serving plate, overlapping them slightly for a beautiful presentation.
      Adding lemon zest to beetroot slices.
      1. Step 2: Wash the lemon thoroughly and grate the zest. Sprinkle the lemon zest evenly over the beetroot slices.
      Rocket leaves on beetroot slices.
      1. Step 3: Sprinkle a handful of fresh rocket leaves over the beetroot slices.
      Beetroot carpaccio garnished with feta cheese.
      1. Step 4: Place small pieces or crumbles of your chosen cheese (such as goat cheese or feta) on top of the beetroot and rocket leaves.
      Pouring oil into a jar.
      1. Step 5: In a mason jar, combine mustard and olive oil, ensuring they are well mixed. This blend will serve as a flavorful base for your dressing, adding a rich and tangy taste to your salads or dishes.
      Pouring salad dressing over beetroot carpaccio and rocket leaves.
      1. Step 6: Drizzle a mixture of mustard and olive oil over the entire dish, ensuring an even distribution. Finish by sprinkling chopped pistachio nuts and pepper over the top for added crunch and flavor.

      💡 Hint: For restaurant-style plating, use a ring mold to shape your salad, then gently lift to reveal stacked layers.

      Beetroot carpaccio with rocket leaves and oil on a round plate.

      👩‍🍳 Expert Tips

      • Use a mandoline for paper-thin slices—uniform slices = prettier plating.
      • Chill the plate first to keep your carpaccio fresh and crisp.
      • Let the beets dry slightly before slicing to avoid bleeding.

      💭 FAQs

      Can I use pre-cooked beetroot for beetroot carpaccio?

      Yes! Pre-cooked vacuum-packed beets are a huge time saver. Just pat dry and slice thinly.

      Can I make beetroot carpaccio ahead of time?

      You can slice and prep ahead, but add cheese, greens, and dressing just before serving to keep it fresh.

      Is beetroot carpaccio healthy?

      Absolutely! It’s loaded with fiber, folate, and antioxidants—perfect for a light starter or side. Great for healthy grilled vegetable recipes. The goat cheese adds calcium and protein—delicious and good for you.

      Is beetroot carpaccio suitable for vegan diets?

      Absolutely! beetroot carpaccio is naturally vegan when you skip cheese or any dairy-based toppings. You can enhance it with plant-based ingredients like avocado, nuts, or seeds for a satisfying dish.

      Beetroot carpaccio on a plate.

      💖 Serving Suggestions

      Wondering how to serve beetroot carpaccio?

      • Smoked Salmon Bruschetta – Brushed with olive oil and garlic.
      • Mango Arugula Salad – Lightly dressed with balsamic or citrus vinaigrette.
      • Berry Salad With Goat Cheese – A fruity, tangy contrast.
      • Roasted Cherry Tomato Burrata Bruschetta – Bursting with summery flavor.
      • Pumpkin Feta Phyllo Cups – A flaky, savory bite to pair with your carpaccio.

      Hosting a dinner party? Serve individual portions on small plates for a stunning beet carpaccio appetizer course. It also looks gorgeous layered on a large platter for buffets or grazing tables. This elegant vegetable appetizer is always a conversation starter.

      Leftovers? Tuck them into wraps, top on grain bowls, or serve with grilled fish or chicken.

      🍽 Try These Healthy Beetroot Recipes

      • homemade beetroot juice in a glass.
        How To Make Beetroot Juice
      • Best Beetroot Hummus Recipe.
        Best Beetroot Hummus Recipe (Vegan)
      • Beetroot Chocolate Cake.
        Best Beetroot Chocolate Cake Recipe (Moist + Festive!)
      • pickled beets in a bowl.
        Quick Pickled Beets Recipe (Using Canned Beets)

      Did you make this recipe? Leave a review and a ⭐⭐⭐⭐⭐ rating below, or tag us in our Facebook Group! Alternatively, bookmark it in your browser or save to Pinterest.

      Beetroot Carpaccio.

      Beetroot Carpaccio With Goat Cheese

      Angela Milnes
      Delight your taste buds with this vibrant Beetroot Carpaccio! Thinly sliced beets are elegantly arranged and drizzled with a light vinaigrette, creating a dish that's as beautiful as it is delicious.
      5 from 4 votes
      Print Recipe Pin Recipe Rate this Recipe
      Prep Time 5 minutes mins
      Cook Time 0 minutes mins
      Total Time 5 minutes mins
      Course Beetroot Recipes
      Cuisine Italian
      Servings 3 Servings
      Calories 213 kcal

      Ingredients
        

      • 3 Beetroot
      • 1 Lemon Zested
      • 2 tablespoon Olive Oil
      • 1 teaspoon Dijon Mustard
      • 1 Cup Rocket Leaves
      • 50 g Goat Cheese
      • 20 g Pistachio Nuts Chopped

      Instructions
       

      • Cut the cooked or roasted beets into thin slices.
      • Lay the thinly sliced beets out on a large serving plate, overlapping them slightly for a beautiful presentation.
      • Wash the lemon thoroughly and grate the zest. Sprinkle the lemon zest evenly over the beetroot slices.
      • Sprinkle a handful of fresh rocket leaves over the beetroot slices.
      • Place small pieces or crumbles of your chosen cheese (such as goat cheese or feta) on top of the beetroot and rocket leaves.
      • Drizzle a mixture of mustard and olive oil over the entire dish, ensuring an even distribution.
      • Finish by sprinkling chopped pistachio nuts over the top for added crunch and flavor. Sprinkle some freshly ground black pepper if desired.
      • Your Beetroot Carpaccio is now ready to serve! Enjoy this elegant and flavorful appetizer.

      Notes

      Drizzle with High-Quality Olive Oil: Finish the dish with a drizzle of premium quality extra virgin olive oil to enhance the flavors and add a luscious mouthfeel.
      Select Fresh and Vibrant Beetroots: Choose beetroots that are firm, without any soft spots, and have vibrant skin color for the best flavor and texture.

      Nutrition

      Serving: 1gCalories: 213kcalCarbohydrates: 14gProtein: 6gFat: 16gSaturated Fat: 4gPolyunsaturated Fat: 2gMonounsaturated Fat: 9gCholesterol: 8mgSodium: 148mgPotassium: 414mgFiber: 4gSugar: 7gVitamin A: 387IUVitamin C: 27mgCalcium: 56mgIron: 2mg
      Print Recipe Pin Recipe Rate this Recipe
      Tried this recipe?Let us know how it was!

      Spicy Korean Cucumber Salad

      June 3, 2024 by Angela Milnes

      Korean Cucumber Salad.

      Need a quick and refreshing side? This Spicy Korean Cucumber Salad comes together in minutes with crisp cucumbers, tangy vinegar, and a spicy sesame dressing. It’s crunchy, bold, and the perfect Korean-inspired bite!

      Korean Cucumber Salad.

      This spicy Korean cucumber side dish—known as oi muchim—is the kind of recipe that makes vegetables exciting. It’s fast, flavorful, and super refreshing. The mix of chili oil, sesame, and garlic adds bold flavor while keeping things light.

      Whether you’re serving Korean BBQ or just need a zingy side for dinner, this quick Korean salad fits the bill. Love refreshing veggie dishes? Check out my Kale Butternut Squash Salad or Avocado Salad for more veggie goodness.

      [feast_advanced_jump_to]

      💖 Why This Recipe Works

      • Super crunchy + fresh: Salted cucumbers stay crisp and soak up all the flavor.
      • Big flavor, low effort: A bold, spicy Asian cucumber salad that’s done in under 15 minutes.
      • Pairs with everything: Spicy Korean cucumber salad is the perfect sidekick for grilled meats, rice bowls, and more.

      ⭐ Star Ingredients

      • Cucumbers: I always go for English or Persian cucumbers—they’re crisp, cool, and don’t make a watery mess. Basically, salad royalty.
      • Chili Oil: This stuff brings the fire! Just a drizzle and boom—your cucumbers go from mellow to wow.
      • Sesame Oil: Nutty, toasty, and honestly kind of magical. It gives the salad that rich, warm depth that makes you keep going back for “just one more bite.”

      For the complete list of ingredients with measurements and instructions, please see the recipe card at the bottom of the post.

      📖  Substitutions & Variations

      • Add avocado: For a creamy twist, mix in diced avocado for a spicy cucumber salad with extra texture.
      • Toss in daikon: Thinly sliced daikon radish brings bite and crunch.
      • Gochugaru version: Replace chili oil with gochugaru (Korean red pepper flakes) for a more traditional touch.
      • Herb it up: Add fresh mint or basil for a fragrant spin on classic Korean cucumber salad oi muchim.
      • Low-sodium swap: Use low-sodium soy sauce if watching your salt intake.

      🔪How To Make Korean Cucumber Salad

      Sliced cucumbers.
      1. Step 1: Start by slicing the cucumbers into thin rounds or your desired shape. Place the cucumber slices in a bowl and sprinkle 1 teaspoon of salt over them. Set the bowl aside for 10 minutes. After 10 minutes, strain the excess water from the cucumbers to remove excess moisture.
      Korean cucumber salad in a bowl.
      1. Step 2: In a separate bowl, combine 2 teaspoon soy sauce, 1 tablespoon chili oil, 1 teaspoon sugar, 1 teaspoon sesame oil, 3 cloves of minced garlic, and 2 teaspoon rice vinegar. Stir the dressing mixture until the sugar is completely dissolved. Add the prepared dressing to the sliced cucumbers.
      Korean cucumber salad in a bowl.
      1. Step 1: Start by slicing the cucumbers into thin rounds or your desired shape. Place the cucumber slices in a bowl and sprinkle 1 teaspoon of salt over them. Set the bowl aside for 10 minutes. After 10 minutes, strain the excess water from the cucumbers to remove excess moisture.

      Step Three: Toss the cucumbers with the dressing, ensuring they are evenly coated. Garnish the salad with sesame seeds for added flavor and texture. Enjoy your Korean-style cucumber Salad!

      💡Hint: The longer it sits, the better it tastes—give it 30 minutes to marinate if you have the time!

      👩‍🍳 Expert Tips

      • Use thin-skinned cucumbers: English or Persian cucumbers stay crisp and don’t need peeling.
      • Salt first: Salting draws out excess water so your salad stays crunchy, not soggy.
      • Chill before serving: This spicy cucumber salad is even better cold—perfect for summer meals.

      💭 FAQs

      Can I make spicy Korean cucumber salad ahead of time?

      Yes! This quick Korean salad actually improves as it sits. Just store in the fridge and drain off any excess liquid before serving.

      What type of cucumber is best for Korean cucumber salad?

      For the best texture and flavor, it's recommended to use Persian or English cucumbers. These varieties are thinner-skinned and have fewer seeds, making them perfect for the crispness and refreshing bite in the salad. Regular cucumbers can also be used, but they might require peeling and seeding.

      Can I adjust the spice level in Korean cucumber salad?

      Absolutely! Just use less chili oil if you prefer a milder flavor, or add a little extra if you're into that fiery kick. Want more heat? Try tossing in some thinly sliced fresh chili!

      Can I substitute any of the ingredients in spicy Korean cucumber salad?

      You can swap rice vinegar with white vinegar or use olive oil instead of sesame oil, though it will slightly change the flavor.

      How to store leftover cucumber salad

      Store in an airtight container in the fridge for up to 2–3 days. Drain before serving if needed.

      💖 Serving Suggestions

      Here are some of the options to serve with your spicy Korean Cucumber Salad:

      • Bulgogi (Korean BBQ Beef): A sweet-savory classic that pairs perfectly with this tangy salad.
      • Japchae (Glass Noodles): The chewy noodles and veggie mix go great with the spicy dressing.
      • Kimchi Pancakes: Crunchy, spicy, and the perfect complement.
      • Grilled Mackerel: Rich fish and light salad = a balanced bite.
      • Steamed White Rice: A simple base to soak up the flavorful dressing.
      Korean cucumber salad.

      🍽 Try These Tasty Veggie Recipes

      • pickled beets in a bowl.
        Quick Pickled Beets Recipe (Using Canned Beets)
      • Honey Roasted Parsnips and Carrots on a white plate.
        Honey Roasted Parsnips and Carrots
      • Grilled Eggplant With Lemon Dip.
        Grilled Eggplant With Lemon Dip
      • Air fryer cauliflower with teriyaki sauce and sesame seeds.
        Air Fryer Cauliflower With Teriyaki Sauce

      Did you make this recipe? Leave a review and a ⭐⭐⭐⭐⭐ rating below, or tag us in our Facebook Group! Alternatively, bookmark it in your browser or save to Pinterest.

      Korean Cucumber Salad.

      Spicy Korean Cucumber Salad

      Angela Milnes
      Refresh your palate with this crisp and tangy Korean Cucumber Salad! Thinly sliced cucumbers are tossed in a savory blend of soy sauce, sesame oil, garlic, and a touch of spice, creating a salad that’s both refreshing and full of flavor.
      5 from 5 votes
      Print Recipe Pin Recipe Rate this Recipe
      Prep Time 5 minutes mins
      Cook Time 0 minutes mins
      Total Time 5 minutes mins
      Course Salads
      Cuisine Korean
      Servings 3 Servings
      Calories 75 kcal

      Ingredients
        

      • ½ lbs Cucumbers
      • 1 teaspoon Salt
      • 2 teaspoon Soy sauce
      • 1 tablespoon Chili Oil
      • 1 teaspoon Sugar
      • 1 teaspoon Sesame oil
      • 3 cloves Garlic minced
      • 2 teaspoon Rice vinegar
      • Sesame seeds for garnish

      Instructions
       

      • Start by slicing the cucumbers into thin rounds or your desired shape.
      • Place the cucumber slices in a bowl and sprinkle 1 teaspoon of salt over them. Set the bowl aside for 10 minutes
      • After 10 minutes, strain the excess water from the cucumbers to remove excess moisture.
      • In a separate bowl, combine 2 teaspoon soy sauce, 1 tablespoon chili oil, 1 teaspoon sugar, 1 teaspoon sesame oil, 3 cloves of minced garlic, and 2 teaspoon rice vinegar.
      • Stir the dressing mixture until the sugar is completely dissolved.
      • Add the prepared dressing to the sliced cucumbers.
      • Toss the cucumbers with the dressing, ensuring they are evenly coated.
      • Garnish the salad with sesame seeds for added flavor and texture.
      • Enjoy your Korean Style Cucumber Salad!

      Notes

      Choose the Right Cucumbers: Use English cucumbers or Persian cucumbers for their thin skin and fewer seeds, which provide a crisp texture and better flavor absorption.
      Marinate for Better Flavor: Let the cucumbers marinate in the dressing for at least 30 minutes before serving. This allows the flavors to meld together and intensify, making the salad more flavorful.
      Garnish Last Minute: Sprinkle the sesame seeds just before serving to maintain their crunch and visual appeal.

      Nutrition

      Serving: 1gCalories: 75kcalCarbohydrates: 4gProtein: 1gFat: 6gSaturated Fat: 1gPolyunsaturated Fat: 1gMonounsaturated Fat: 4gSodium: 1001mgPotassium: 124mgFiber: 1gSugar: 2gVitamin A: 55IUVitamin C: 3mgCalcium: 18mgIron: 0.3mg
      Print Recipe Pin Recipe Rate this Recipe
      Tried this recipe?Let us know how it was!

      Mediterranean Farro Salad

      June 3, 2024 by Angela Milnes

      Mediterranean Farro Salad.

      Mediterranean Farro Salad, inspired by Italian cuisine, is a perfect blend of wholesome and vibrant flavors. Featuring nutty farro paired with fresh vegetables and topped with creamy mozzarella and a sprinkle of crunchy nuts and seeds, this Italian Salad is a nutritious and visually appealing dish.

      Mediterranean Farro Salad.
      [feast_advanced_jump_to]

      💖 Why This Recipe Works

      • Nutrient-Rich: Packed with farro, fresh vegetables, and herbs, this delicious salad is a wholesome and nutritious option.
      • Bold Flavors: The combination of Italian dressing, fresh basil, mint, and pomegranate vinegar brings a burst of Mediterranean flavors.
      • Versatile Dish: Perfect as a side or a main course, this Mediterranean Farro Salad recipe is great for any meal and can be easily customized with your favorite ingredients.

      ⭐ Star Ingredients

      Mediterranean farro salad ingredients.
      • Farro: A nutty and chewy ancient grain that forms the hearty base of the Mediterranean Farro Salad.
      • Water: Used to cook the farro to perfect tenderness.
      • Brightly Colored Bell Pepper: Adds a sweet crunch and vibrant color to the salad.
      • Tomatoes: Juicy and flavorful, they bring a burst of freshness.
      • Dry Bay Leaves: Infuse the farro with a subtle, aromatic flavor during cooking.
      • Pumpkin Seeds: Add a delightful crunch and are packed with nutrients.
      • Ground Cashews: Provide a creamy texture and a hint of nuttiness.
      • Mini Mozzarella: Soft and mild cheese that pairs well with the other ingredients.
      • Red Onion: Adds a sharp, savory note and a bit of crunch.
      • Basil: Fresh herb that gives the salad a fragrant, peppery flavor.
      • Mint: Adds a refreshing, cool flavor to the salad.
      • Salt: Enhances the overall flavor of the salad.
      • Salad Leaves: Serve as a crisp and refreshing base for the Mediterranean Farro Salad.
      • Italian Dressing: A tangy and flavorful dressing to tie all the ingredients together.
      • Garlic Cloves: Provide a robust, aromatic flavor to the dressing.
      • Olive Oil: Adds a rich, smooth texture to the dressing.
      • Pomegranate Vinegar: Provides a unique, tangy sweetness to the dressing.
      • Honey or Maple Syrup: Adds a touch of natural sweetness to balance the dressing.
      • Dried Italian Herbs: Bring a classic Mediterranean flavor to the dressing.
      • Nutmeg: Adds a warm, slightly sweet undertone to the dressing.

      For the complete list of ingredients with measurements and instructions, please see the recipe card at the bottom of the post.

      📖  Substitutions & Variations

      • Farro and Brown Rice Salad: Mix cooked pearled farro with brown rice to add a heartier base. Include fresh vegetables like cucumbers and cherry tomatoes, and top with feta cheese. A dressing of olive oil, lemon juice, and dried oregano will bring out the Greek salad essence.
      • Greek Farro Salad: Substitute the bell peppers and tomatoes with ingredients from a classic Greek salad, such as cucumbers, Kalamata olives, and crumbled feta cheese. Use pearled farro to maintain a nutty flavor and enhance the texture of this Mediterranean-inspired dish.

      🔪How To Make Mediterranean Farro Salad

      Farro in a pot.
      1. Step 1: Rinse farro with water, soak it in cold water for 1 hour, add salt and bay leaves, and boil the farro for about 30 minutes. Let the cooked farro cool.
      chopped tomatoes on a chopping board.
      1. Step 2: Remove the sepals and seeds from the tomatoes, then dice the fleshy pulp.
      Chopped bell pepper.
      1. Step 3: Remove the seeds from the bell peppers and cut them into medium slices.
      Chopped onion and mint leaves.
      1. Step 4: Peel and thinly slice the onion into half rings. Remove stems from the basil and mint, then chop the leaves.
      Italian dressing in a ramekin.
      1. Step 5: Peel and crush the garlic cloves, pass the crushed garlic through a press, add the rest of the dressing ingredients (such as olive oil, vinegar, or lemon juice as desired), and mix the dressing with a whisk.
      Ingredients to make Mediterranean farro salad.
      1. Step 6: Place the cooled farro, sliced onions, chopped basil, mint, bell peppers, and diced tomatoes in a large bowl. Add the mozzarella cheese and stir in the dressing, ensuring all ingredients are well-coated. Place the salad on a serving dish, sprinkle with nuts and pumpkin seeds (if using), and decorate with lettuce and extra mint leaves.
      Mediterranean farro salad on a plate.

      👩‍🍳 Expert Tips

      • Cool the Farro Properly: After cooking Farro, spread it on a baking sheet to cool. This prevents it from becoming mushy and helps maintain its chewy texture.
      • Use Fresh Herbs: Fresh basil and mint elevate the salad's flavor. Avoid using dried herbs as substitutes for these key ingredients.

      💭 FAQs

      What can I use instead of farro in this salad?

      If you don’t have farro, you can substitute it with other grains like quinoa, barley, or bulgur. Just make sure to adjust the cooking time as needed since different grains might require different amounts of water and cooking time.

      Can I make Mediterranean Farro Salad ahead of time?

      Yes, this salad actually tastes better after sitting for a few hours or overnight! The flavors have time to meld together, making it a perfect make-ahead dish. Just store it in an airtight container in the fridge, and give it a quick stir before serving.

      Can I add protein to this salad?

      Absolutely! This salad is great with added protein. You could add grilled chicken, shrimp, chickpeas, or feta cheese to make it more filling and turn it into a full meal.

      How long will Mediterranean Farro Salad last in the fridge?

      When stored in an airtight container, this salad should stay fresh for about 3-4 days in the fridge. If you're concerned about the salad becoming soggy, you can keep the dressing separate and add it just before serving.

      Best Way to Store Farro Salad

      Store any leftover Mediterranean Farro Salad in an airtight container in the refrigerator for up to 3-4 days. Use an airtight container to keep the leftover Farro salad fresh and prevent it from absorbing other flavors in the refrigerator.

      💖 Serving Suggestions

      Here are some of the best meat sides to serve with Mediterranean Farro Salad:

      • Sliced Chicken Breast: Add grilled chicken breast slices on top of Mediterranean farro salad. Marinate the chicken in a Mediterranean-inspired blend of olive oil, lemon juice, garlic, and herbs like oregano, thyme, and rosemary for extra flavor.
      • Shredded Rotisserie Chicken: Use shredded rotisserie chicken as a quick and convenient protein option for the salad. The tender and juicy chicken adds a savory element to the dish.
      • Air Fried Salmon Fillet: Top the Mediterranean Farro Salad with salmon fillets seasoned with lemon, garlic, and herbs. The rich and flaky salmon pairs well with the hearty farro and Mediterranean flavors.
      • Paprika Shrimp: Add grilled shrimp to the salad for a lighter protein option. Season the shrimp with olive oil, lemon juice, and Mediterranean spices like oregano and thyme for a burst of flavor.
      • Roasted Spicy Chickpeas: Toss cooked chickpeas with the farro salad for a plant-based protein option. Chickpeas add a creamy texture and mild flavor that complements the other Mediterranean ingredients.
      Mediterranean farro salad on a serving plate.

      🍽 Try These Salads Next

      • Chopped Greek Salad in a bowl.
        Chopped Greek Salad with Feta & Olives (Bariatric-Friendly)
      • Apple Grapefruit Salad.
        Apple Grapefruit Salad (Easy & Refreshing Citrus Fruit Bowl)
      • Chick Fil A Kale Crunch Salad in a white bowl.
        Best Kale Crunch Salad Chick Fil A Recipe
      • Beet Sweet Potato Salad.
        Beet And Sweet Potato Salad With Feta

      Did you make this recipe? Leave a review and a ⭐⭐⭐⭐⭐ rating below, or tag us in our Facebook Group! Alternatively, bookmark it in your browser or save to Pinterest.

      Mediterranean Farro Salad.

      Mediterranean Farro Salad

      Angela Milnes
      Enjoy a wholesome and flavorful dish with this Mediterranean Farro Salad! Nutty farro is tossed with fresh veggies, olives, and tangy feta, all brought together with a zesty lemon dressing.
      5 from 4 votes
      Print Recipe Pin Recipe Rate this Recipe
      Prep Time 5 minutes mins
      Cook Time 30 minutes mins
      Additional Time 10 minutes mins
      Total Time 45 minutes mins
      Course Salads
      Cuisine Mediterranean
      Servings 4 Servings
      Calories 324 kcal

      Ingredients
        

      For The Salad

      • ½ cup Farro
      • 1 ⅓ cup Water
      • 1 Red Bell Pepper
      • 2 Tomatoes
      • 1-2 Bay Leaves
      • 1 tbsp. Pumpkin Seeds
      • 1 tsp. Ground Cashews
      • ¾ cup Mini Mozzarella Balls
      • 1 Red Onion
      • ½ bunch Basil
      • ¼ bunch Mint
      • pinch Salt
      • 2 cups Salad Leaves

      For The Dressing

      • 2 Garlic Cloves
      • 3 tablespoons Olive Oil
      • 2 tablespoons Pomegranate Vinegar
      • 1 tablespoon Honey or Maple Syrup
      • 1 tsp. Italian Herbs dried
      • ⅓ tsp. Salt
      • ⅓ tsp. Nutmeg

      Instructions
       

      • Peel and thinly slice the onion into half rings. Remove stems from the basil and mint, then chop the leaves.
      • Rinse farro with water, soak it in cold water for 1 hour, add salt and bay leaves, and boil the farro for about 30 minutes. Let the cooked farro cool.
      • Remove the seeds from the bell peppers and cut them into medium slices.
      • Remove the sepals and seeds from the tomatoes, then dice the fleshy pulp.
      • Peel and crush the garlic cloves, pass the crushed garlic through a press, add the rest of the dressing ingredients (such as olive oil, vinegar, or lemon juice as desired), and mix the dressing with a whisk.
      • Place the cooled farro, sliced onions, chopped basil, mint, bell peppers, and diced tomatoes in a large bowl. Add the mozzarella cheese and stir in the dressing, ensuring all ingredients are well-coated.
      • Place the salad on a serving dish, sprinkle with nuts and pumpkin seeds (if using), and decorate with lettuce and extra mint leaves.
      • The salad is perfect for a fun outdoor party. Bon appétit!

      Notes

      Cool the Farro Properly: After cooking farro, spread it on a baking sheet to cool. This prevents it from becoming mushy and helps maintain its chewy texture.
      Use Fresh Herbs: Fresh basil and mint elevate the salad's flavor. Avoid using dried herbs as substitutes for these key ingredients.

      Nutrition

      Serving: 1gCalories: 324kcalCarbohydrates: 32gProtein: 10gFat: 18gSaturated Fat: 5gPolyunsaturated Fat: 2gMonounsaturated Fat: 10gTrans Fat: 0.003gCholesterol: 17mgSodium: 305mgPotassium: 411mgFiber: 7gSugar: 8gVitamin A: 1621IUVitamin C: 49mgCalcium: 162mgIron: 2mg
      Print Recipe Pin Recipe Rate this Recipe
      Tried this recipe?Let us know how it was!

      More Easy Salad Recipes

      • Healthy Quinoa Salad Recipe
      • Avocado Salad
      • Chinese Chicken Salad
      • Mediterranean Green Bean Salad
      • Beet Salad With Pomegrante Molasses
      • Roasted Butternut Squash Salad
      • Kale Butternut Squash Salad With Blueberries

      Best Kale Butternut Squash Salad With Blueberries

      June 3, 2024 by Angela Milnes

      Kale Butternut Squash Salad With Blueberries.

      Looking for something bright, bold, and totally delicious? This Kale Butternut Squash Salad with juicy blueberries, tangy goat cheese, and crunchy pecans is a total flavor bomb. It’s wholesome, colorful, and surprisingly easy to toss together—aka your new fall salad crush!

      Kale Butternut Squash Salad With Blueberries.

      This salad isn't just pretty—it's a full-on flavor party. The sweetness of roasted butternut squash balances out kale’s naturally bitter edge, making every bite smooth and satisfying. Then comes the creamy, tangy goat cheese to tie it all together, while the burst of juicy blueberries keeps things bright and fresh.

      Every ingredient has a role to play, and the result is a salad that’s complex, craveable, and totally restaurant-worthy—but way easier to whip up at home.

      You’ll also love my Mediterranean Green Bean Salad, Low Carb Broccoli Salad, and Goat Cheese Apple Salad if you’re into fresh, hearty, feel-good greens.

      [feast_advanced_jump_to]

      💖 Why This Recipe Works

      • Sweet + Savory Balance: Butternut squash brings the cozy, blueberries bring the zing.
      • Texture Goals: Creamy goat cheese, crisp kale, and crunchy pecans = next-level mouthfeel.
      • Simple and Customizable: Roast, toss, drizzle—done. Add your faves or keep it classic.

      ⭐ Star Ingredients

      Ingredients to make kale butternut squash salad.
      Ingredients to make salad dressing.
      • Kale – The powerhouse green that stays hearty even with dressing. Massage it for max tenderness!
      • Butternut Squash – Roasted to caramelized perfection for a sweet, nutty base.
      • Blueberries – Bursting with antioxidants and natural sweetness for a fruity contrast.
      • Goat Cheese – Creamy, tangy, and totally irresistible against the roasted squash.
      • Toasted Pecans – Add crunch and nuttiness that rounds out every bite.

      For the complete list of ingredients with measurements and instructions, please see the recipe card at the bottom of the post.

      📖  Substitutions & Variations

      • Apple & Walnut Remix – Swap blueberries for apple slices and pecans for walnuts. Feta works great too!
      • Acorn Squash Swap – Sub in roasted acorn squash for a seasonal switch-up.
      • Add Quinoa & Avocado – For a protein boost and creamy finish, toss in some cooked quinoa and chopped avo.
      • Cranberry Kick – Dried cranberries instead of blueberries give a tart and chewy vibe.
      • Vegan Option – Skip the cheese or use a plant-based feta-style alternative.

      Love this vibe? You might also enjoy my Beet Salad With Feta And Walnuts, Chinese Chicken Salad, or Mediterranean Farro Salad—they’re all perfect salad stars!

      🔪 How To Make Kale Butternut Squash Salad

      Butternut squash pieces on a roasting tray.
      1. Step 1: Cut the butternut squash into small squares and roast them until tender. This generally takes around 40 minutes in the oven.
      Pouring apple cider vinegar in a glass jar.
      1. Step 2: In a bowl, mix together apple cider vinegar, maple syrup, Dijon mustard, thyme, minced garlic, salt, and pepper.
      Kale butternut squash salad in a bowl.
      1. Step 3: Thoroughly wash and chop the kale into bite-sized pieces. In a large bowl, add the chopped kale. Add the roasted squash while it’s still warm, along with toasted pecans, blueberries, and goat cheese crumbles.
      Pouring dressing over kale butternut squash salad.
      1. Step 4: Drizzle the dressing and a bit of olive oil over the salad, then toss to combine. Serve and enjoy your Kale Butternut Squash Salad!

      💡Hint: Don’t skip massaging the kale—it’s a total game-changer for texture and taste!

      Kale butternut squash salad with blueberries.

      👩‍🍳 Expert Tips

      • Roast Smart: Cut the squash evenly and don’t overcrowd the pan—crispy edges = flavor magic.
      • Prep Ahead: Roast squash and massage kale up to 2 days in advance. Assemble fresh!
      • Dressing Bonus: Make a double batch of the dressing—it’s fab on other roasted veggie salads too.

      💭 FAQ'S

      How do I keep the kale from being too tough or bitter?

      Massage it with olive oil and a pinch of salt for 1–2 minutes until it softens. This helps mellow out that raw bite.

      What’s the best way to roast butternut squash?

      Peel and cube it, toss with oil and seasoning, and roast at high heat (425°F) until caramelized—usually 35–40 minutes.

      Can I make butternut squash salad ahead of time?

      Yes, you can roast the butternut squash and massage the kale ahead of time. Store them separately in airtight containers in the refrigerator. Assemble the salad just before serving to maintain freshness.

      Should I serve this butternut squash salad warm or cold?

      It’s delicious either way! Serve it warm right after tossing with freshly roasted squash for a cozy meal, or chill it and enjoy it cold as a refreshing lunch or make-ahead side. It’s super flexible depending on your mood (or the weather!).

      How should I store leftover butternut squash salad?

      Keep it in an airtight container in the fridge for up to 3 days. Add extra nuts or cheese before serving to refresh the texture.

      💖 Serving Suggestions

      Pair your blueberry kale salad with these sides:

      • Creamy Bang Bang Salmon – A rich, buttery salmon fillet plays so well with the sweet-savory salad vibes.
      • Thin Sliced Chicken Breast – Simple herby chicken adds protein and balance without overpowering the flavors.
      • Air Fryer Stuffed Bell Peppers – Quinoa or lentil-filled peppers are hearty, colorful, and veggie-packed.
      • Roasted Brussels Sprouts – Another fall fave that complements squash perfectly.
      • Vegan Avocado Toast – Keep it chill with creamy avo on toast and this salad on the side.
      Kale butternut squash salad with goat cheese and blueberries.

      🍽 More Super Simple Salads

      • Italian Octopus Salad With Baby Spinach.
        Italian Octopus Salad With Baby Spinach
      • Keto Tuna Salad With Apple and Pumpkin Seeds.
        Best Keto Tuna Salad Recipe With Apple and Pumpkin Seeds
      • Thai Salad in a blue bowl with chopsticks.
        Best Thai Peanut Salad Recipe (Crunchy, Creamy & Easy!)
      • Strawberry Goat Cheese Salad.
        Easy Strawberry Goat Cheese Salad

      Did you make this recipe? Leave a review and a ⭐⭐⭐⭐⭐ rating below, or tag us in our Facebook Group! Alternatively, bookmark it in your browser or save to Pinterest.

      Kale Butternut Squash Salad With Blueberries.

      Kale Butternut Squash Salad

      Angela Milnes
      Treat yourself to a burst of flavor with this Blueberry Kale Salad! Packed with juicy blueberries, tender kale, and crunchy nuts, it's a refreshing and nutrient-rich dish that's both satisfying and delicious.
      5 from 4 votes
      Print Recipe Pin Recipe Rate this Recipe
      Prep Time 10 minutes mins
      Cook Time 40 minutes mins
      Additional Time 5 minutes mins
      Total Time 55 minutes mins
      Course Salads
      Cuisine American
      Servings 4 Servings
      Calories 354 kcal

      Ingredients
        

      • 10 Cups Kale
      • 1 Cup Butternut Squash
      • 50 g Goat Cheese
      • 12 Cup Blueberries
      • ⅓ Cup Toasted Pecans
      • 1 teaspoon Olive Oil
      • 3 tablespoon Apple Cider Vinegar
      • 1 ½ tablespoon Maple Syrup
      • 1 tablespoon Dijon Mustard 1 tablespoon
      • ½ teaspoon Dried Thyme
      • 1 Clove Garlic
      • ¼ teaspoon Salt
      • ¼ teaspoon Ground Black Pepper

      Instructions
       

      • Cut the butternut squash into small squares and roast them until tender. This generally takes around 40 minutes in the oven.
      • In a bowl, mix together apple cider vinegar, maple syrup, Dijon mustard, thyme, minced garlic, salt, and pepper.
      • Thoroughly wash and chop the kale into bite-sized pieces.
      • In a large bowl, add the chopped kale. Add the roasted squash while it’s still warm, along with toasted pecans, blueberries, and goat cheese crumbles.
      • Drizzle the dressing and a bit of olive oil over the salad, then toss to combine.
      • Enjoy your Kale Butternut Squash Salad!

      Notes

      Massage the Kale: Before chopping, massage the kale leaves with a bit of olive oil to soften them and reduce bitterness, making them more palatable in the salad.
      Let it Rest: Allow the assembled salad to sit for a few minutes before serving to let the flavors mingle and intensify, enhancing the overall taste sensation.
      Roast with Precision: Ensure the butternut squash is evenly cut to promote uniform roasting and don't forget to season well for optimal flavor.

      Nutrition

      Serving: 1gCalories: 354kcalCarbohydrates: 76gProtein: 8gFat: 6gSaturated Fat: 2gPolyunsaturated Fat: 1gMonounsaturated Fat: 2gCholesterol: 6mgSodium: 103mgPotassium: 686mgFiber: 14gSugar: 50gVitamin A: 9340IUVitamin C: 100mgCalcium: 208mgIron: 3mg
      Print Recipe Pin Recipe Rate this Recipe
      Tried this recipe?Let us know how it was!

      Easy Pomegranate Molasses Recipe

      June 2, 2024 by Angela Milnes

      Easy Pomegranate Molasses Recipe.

      Pomegranate Molasses are a delightful addition to both sweet and savory dishes, offering a tangy-sweet flavor that enhances salads, marinades, sauces, and desserts.

      Made from fresh pomegranate juice, sugar, and a hint of lemon, this homemade condiment brings a rich, syrupy texture and a burst of fruity taste to your recipes. Follow these simple steps to create your own batch of molasses today!

      pomegrante Molasses.
      [feast_advanced_jump_to]

      💖 Why This Recipe Works

      • Homemade Goodness: Making your own molasses allows you to control the ingredients and customize the flavor to your liking.
      • Versatile Ingredient: Pomegranate molasses can be used in a variety of dishes, from dressings and marinades to desserts and cocktails, adding a unique sweet-tart flavor.
      • Quick and Simple: This Pomegranate Molasses recipe is easy to follow and requires only a few ingredients and minimal preparation time, making it a convenient addition to your pantry.

      ⭐ Star Ingredients

      • Fresh Pomegranate Juice: Pure pomegranate juice provides the rich, fruity base and primary flavor for the molasses.
      • Sugar: Adds sweetness to balance the tartness of the pomegranate juice and aids in caramelization during reduction.
      • Lemon Juice: Enhances tartness and adds acidity, which helps preserve the molasses.

      For the complete list of ingredients with measurements and instructions, please see the recipe card at the bottom of the post.

      📖  Substitutions & Variations

      • Bottled Pomegranate Juice: Bottled juice can be used to replace fresh pomegranate juice. It helps save time by skipping the seed extraction and juicing process. To do this use 4 cups of bottled pomegranate juice instead of fresh juice and then follow the instructions from step 5.
      • Vanilla Flavor: Stir in a teaspoon of vanilla extract after removing the pot from heat for a rich, sweet undertone.
      • Spiced Flavor: Add a cinnamon stick and a few cloves to the pot during the simmering stage for a warm, aromatic twist.
      • Orange-Infused Molasses: Replace half the lemon juice with fresh orange juice and add some grated orange zest to the recipe to transform it into tangy pomegranate molasses.

      🔪How To Make Pomegranate Molasses?

      First, wash the pomegranates thoroughly under running water. Cut each pomegranate in half horizontally. Get a large bowl and a wooden spoon ready for the next step.

      fresh pomegranate top view on dark background
      fresh pomegranate top view on dark background

      Hold a pomegranate half over the bowl with the cut side facing down. Use the wooden spoon to firmly tap the back of the pomegranate, causing the seeds to fall out into the bowl. Repeat this process with all the halves until you've collected all the seeds. Remove any white pith from the bowl as it can be bitter.

      making pomegranate molasses in a pan

      Transfer the pomegranate seeds to a blender. Blend the seeds on high-speed mode until they are completely broken down and you have a thick juice. This should take about one minute.

      Place a fine mesh strainer over a large bowl or pitcher. Pour the blended pomegranate mixture through the strainer, using a spatula to press and extract as much juice as possible. Discard the remaining pulp and seeds.

      Pour the pomegranate juice into a large, heavy-bottomed pot. Add the sugar and lemon juice.

      Place the pot over medium heat and bring the mixture to a gentle boil, stirring occasionally to dissolve the sugar.

      Once the mixture boils, reduce the heat to low and let it simmer gently. Stir occasionally and allow the mixture to cook for about 60-70 minutes, or until it has reduced by more than half and has a thick, syrupy consistency.

      Your homemade pomegranate molasses is ready when it becomes thick syrup (pourable like maple syrup) and coats the back of a spoon without immediately running off. Remove from heat and let it cool completely.

      Pour the cooled molasses into a clean, airtight jar or bottle. Store it in the refrigerator.

      Pomegranate Molasses In A Jar

      👩‍🍳 Expert Tips

      • Use Fresh Pomegranates: Always opt for fresh, ripe pomegranates to ensure the best flavor and maximum juice yield.
      • Avoid Aluminum Pots: Use a non-reactive pot like stainless steel for cooking.
      • Use a Citrus Juicer: If you find it hard to extract lemon juice by hand, use a citrus juicer to get the most out of your lemons.

      💭 FAQs

      Can I Use Store Bought Pomegranate Molasses?

      You can certainly use store-bought pomegranate molasses as a convenient alternative. Store-bought versions are often consistent in flavor and texture, saving you time in the kitchen. However, homemade pomegranate molasses tends to have a fresher, richer taste and allows you to control the sweetness and acidity according to your preference.

      Can I Make Sugar Free Pomegranate Molasses?

      Yes, you can make sugar free pomegranate molasses by simply reducing fresh pomegranate juice and lemon juice without adding sugar. This will result in a thicker, more tart syrup that still retains the essence of pomegranate flavor.

      What Can I Substitute For Pomegranate Molasses?

      If you're looking for a substitution for pomegranate molasses, try a mix of balsamic vinegar and honey or reduced cranberry juice. This pomegranate molasses substitute will achieve a similar sweet-tart flavor profile.

      Are Pomegranate Sauce And Molasses The Same?

      No, pomegranate sauce and pomegranate molasses are not the same. Pomegranate sauce is typically sweeter and less concentrated, while pomegranate molasses is a thick, tangy syrup with a more intense flavor achieved by reducing pomegranate juice.

      When Is Pomegranate Season?

      Pomegranate season in the UK and USA is usually from the end of fall through to winter during the months of November to March. In New Zealand pomegranates are available May To August.

      Best Way to Store Pomegranate Molasses

      Store any leftover pomegranate molasses in an airtight container in the refrigerator for up to 2-3 months. Transfer the molasses to a freezer-safe container or bag and freeze for up to 6 months.

      💖 Serving Suggestions

      Here are some great ways to use pomegranate molasses.

      • Salad Dressings: This molasses adds a tangy and slightly sweet depth to vinaigrettes and dressings. Mix it with olive oil, mustard, and a touch of honey to make salad dressing with pomegranate molasses.
      • Marinades: Use pomegranate molasses in marinades for meats such as easy Chinese chicken, lamb, or beef. It imparts a rich, fruity flavor that enhances the taste of grilled or roasted dishes.
      • Glazes: Create a flavorful glaze for roasted vegetables or meats. Brush pomegranate molasses over air fryer roasted carrots, eggplants, or a roast in the final minutes of cooking for a glossy, caramelized finish.
      • Dips: Incorporate pomegranate molasses into dips like
        homemade beetroot hummus
        or simple baba ganoush recipe for an extra layer of flavor. It adds a unique twist and a hint of sweetness to these classic appetizers.
      • Sauces: Add pomegranate molasses to sauces for a burst of flavor. It works well in both savory and sweet sauces, such as those served with duck, pork, or even desserts like panna cotta.

      Check out our Roasted Beets, Blood Orange, and Pomegranate Molasses Salad recipe!

      🍽 More Homemade Staples to Try

      • Best Tamarind Sauce Recipe.
        Best Tamarind Sauce Recipe
      • Homemade Garlic Parm Sauce.
        Homemade Garlic Parm Sauce
      • Dulce Le Leche caramel sauce.
        Instant Pot Caramel Sauce (Easy Dulce de Leche)
      • Cranberry orange sauce in a bowl served with a golden color spoon.
        Cranberry Orange Sauce Recipe (With Cinnamon & Fresh Juice)

      Did you make this recipe? Leave a review and a ⭐⭐⭐⭐⭐ rating below, or tag us in our Facebook Group! Alternatively, bookmark it in your browser or save to Pinterest.

      Easy Pomegranate Molasses Recipe.

      Pomegrante Molasses

      Angela Milnes
      Pomegranate molasses is a tangy, slightly sweet syrup made by reducing pomegranate juice. It's a popular ingredient in Middle Eastern and Mediterranean cooking, adding a deep, rich flavor to both sweet and savory dishes.
      5 from 4 votes
      Print Recipe Pin Recipe Rate this Recipe
      Prep Time 10 minutes mins
      Cook Time 1 hour hr 10 minutes mins
      Total Time 1 hour hr 20 minutes mins
      Course Condiments
      Cuisine Middle Eastern
      Servings 4 Servings
      Calories 200 kcal

      Ingredients
        

      • 3 Pomegrantes
      • 2 Tablespoons Lemon Juice
      • 2 Tablespoons Sugar

      Instructions
       

      • First, wash the pomegranates thoroughly under running water. Cut each pomegranate in half horizontally. Get a large bowl and a wooden spoon ready for the next step.
      • Hold a pomegranate half over the bowl with the cut side facing down. Use the wooden spoon to firmly tap the back of the pomegranate, causing the seeds to fall out into the bowl. Repeat this process with all the halves until you’ve collected all the seeds. Remove any white pith from the bowl as it can be bitter.
      • Transfer the pomegranate seeds to a blender. Blend the seeds on high-speed mode until they are completely broken down and you have a thick juice. This should take about one minute.
      • Place a fine mesh strainer over a large bowl or pitcher. Pour the blended pomegranate mixture through the strainer, using a spatula to press and extract as much juice as possible. Discard the remaining pulp and seeds.
      • Pour the pomegranate juice into a large, heavy-bottomed pot. Add the sugar and lemon juice.
      • Place the pot over medium heat and bring the mixture to a gentle boil, stirring occasionally to dissolve the sugar.
      • Once the mixture boils, reduce the heat to low and let it simmer gently. Stir occasionally and allow the mixture to cook for about 60-70 minutes, or until it has reduced by more than half and has a thick, syrupy consistency.
      • Your homemade pomegranate molasses is ready when it becomes thick syrup (pourable like maple syrup) and coats the back of a spoon without immediately running off. Remove from heat and let it cool completely.
      • Pour the cooled molasses into a clean, airtight jar or bottle. Store it in the refrigerator.

      Notes

      Use Fresh Pomegranates: Always opt for fresh, ripe pomegranates to ensure the best flavor and maximum juice yield.
      Avoid Aluminum Pots: Use a non-reactive pot like stainless steel for cooking.
      Use a Citrus Juicer: If you find it hard to extract lemon juice by hand, use a citrus juicer to get the most out of your lemons.

      Nutrition

      Calories: 200kcalCarbohydrates: 46gProtein: 4gFat: 3gSaturated Fat: 0.3gPolyunsaturated Fat: 0.2gMonounsaturated Fat: 0.2gSodium: 6mgPotassium: 507mgFiber: 8gSugar: 35gVitamin A: 0.5IUVitamin C: 24mgCalcium: 22mgIron: 1mg
      Print Recipe Pin Recipe Rate this Recipe
      Tried this recipe?Let us know how it was!

      More Simple Recipes

      • Black Bean And Beetroot Burger
      • Pureed Squash
      • Monkey Pizza Bread
      • Beet Cured Salmon
      • Easy Stuffed Mushrooms
      • Berry Salad Recipe With Goat Cheese
      • Crispy Air Fryer Avocado Fries

      Roasted Beet Salad With Pomegranate Molasses

      June 2, 2024 by Angela Milnes

      Roasted Beet Salad With Pomegranate Molasses.

      Roasted Beet Salad With Pomegrante Molasses is a delightful dish that combines the earthy flavor of roasted beets with the bright, citrusy taste of blood oranges and tangy pomgranate molasses. This vibrant salad is enhanced by fresh greens and a light, zesty dressing. Topped with sliced almonds, this Beetroot Salad is sure to impress and refresh. Enjoy the burst of colors and flavors!

      Roasted Beet Salad With Blood Orange
      [feast_advanced_jump_to]

      💖 Why This Recipe Works

      • Vibrant and Colorful: Roasted beets add a beautiful deep red color to the salad, making it visually appealing.
      • Sweet and Tangy Flavor: The pomegranate molasses dressing provides a sweet and tangy flavor that complements the earthiness of the beets perfectly.
      • Healthy and Nutritious: This roasted beet salad recipe is packed with nutrients from the beets and the antioxidants from the pomegranate molasses, making it a healthy choice. Read more about making Pomegranate Molasses here!

      ⭐ Star Ingredients

      Roasted Beet Salad Ingredients.
      • Beets: Provides a sweet and earthy base for the salad.
      • Olive Oil: Adds richness and helps to roast the beets to perfection.
      • Water: Keeps the beets moist during roasting.
      • Salt: Enhances the natural flavors of the ingredients.
      • Blood Orange Juice: Adds a bright, citrusy note to the salad.
      • Pomegranate Molasses: Provides a tangy and slightly sweet depth of flavor.
      • Lemon: Adds a fresh and zesty kick to the dressing.
      • White Wine Vinegar: Brings acidity and balance to the salad.
      • Blood Oranges: Adds vibrant color and a sweet, tangy flavor.
      • Red Onion: Offers a sharp, crunchy contrast to the sweet beets and oranges.
      • Pomegranate Seeds: Adds a burst of juicy sweetness and a beautiful visual appeal.
      • Arugula: Provides a peppery, fresh green base for the salad.
      • Roasted, Sliced Almonds: Adds a nutty crunch and enhances the texture of the salad.

      For the complete list of ingredients with measurements and instructions, please see the recipe card at the bottom of the post.

      📖  Substitutions & Variations

      • Pickled Beet and Beet Greens Salad: Use a mix of roasted and pickled beets for a complex flavor, and toss with fresh beet greens. Enhance with a dressing made of Dijon mustard, maple syrup, and red wine vinegar. Garnish with toasted walnuts for added crunch.
      • Golden Beet and Goat Cheese Salad: Use golden beets for a vibrant twist, and top with crumbled goat cheese. Drizzle with balsamic vinegar and extra virgin olive oil for a tangy finish.

      🔪How To Make Roasted Beet Salad With Pomegranate Molasses

      roasted beetroot on tin foil
      1. Step 1: Preheat the oven to 400°F (200°C) and line a small baking pan with foil for easier cleanup. Place scrubbed beets with their tops trimmed in the pan. Drizzle about 1 tablespoon of olive oil and sprinkle ½ teaspoon of salt over the beets. Toss to coat evenly. Pour ¼ cup of water into the pan. Cover with foil and roast in the preheated oven for 45-50 minutes until tender.
      pomegrante seeds being cooked into pomegrante molasses
      1. Step 2: In a saucepan, combine 3 tablespoons of pomegranate seeds, 2 tablespoons of sugar, and the juice of half a lemon. Simmer until thickened to a syrup-like consistency (about 1 tablespoon). Strain or remove pomegranate molasses with a slotted spoon into a bowl.
      making roast beet salad dressing
      1. Step 3: Squeeze juice from half a blood orange into the bowl with pomegranate molasses. Add 2 tablespoons of olive oil, white wine vinegar, and salt. Whisk until well combined.
      salad ingredients
      1. Step 4: Once cooled, peel and slice the roasted beets into thin wedges. Peel the remaining blood orange, remove the white pith, and slice into wedges. Thinly slice the red onion for layering. In a large bowl, combine roasted beets, blood orange wedges, sliced onion, and pomegranate seeds.
      roasted beets salad with pomegrante molasses
      1. Step 5: Pour dressing over salad ingredients and toss gently to coat.
      arugula in the salad bowl
      1. Step 6: Add arugula to the bowl and mix gently. Divide salad onto plates and sprinkle with toasted almonds. Serve immediately and enjoy your Roasted Beet Salad with Blood Orange!
      Roasted Beet Salad With Blood Orange and pomegrante molasses

      👩‍🍳 Expert Tips

      • Roast Beets Evenly: Cut the beets into uniform sizes to ensure they roast evenly. Wrapping them in aluminum foil while roasting can also help them cook more uniformly and retain moisture.
      • Prepare in Advance: Roast the beets and prepare the dressing with pomegranate molasses a day ahead. This allows the flavors to meld and saves time on the day you plan to serve the salad.

      💭 FAQs

      What Are Pomegranate Molasses?

      Pomegranate molasses are a thick, sweet-tart syrup made from concentrated pomegranate juice, sugar, and lemon juice. It's commonly used in Middle Eastern and Mediterranean cooking, adding a deep, fruity flavor to both sweet and savory dishes. It can be used as a glaze for meats, drizzled over salads, stirred into yogurt or sauces, or even used in cocktails and desserts.

      💖 Serving Suggestions

      Here are my favorite sides to serve with Beet Salad with Pomegranate Molasses:

      • Thin sliced chicken breast: The earthiness of this best beet salad recipe pairs perfectly with the smoky, savory flavors of grilled chicken.
      • Quinoa Pilaf: The nutty flavor and fluffy texture of quinoa complements the sweetness of the beets, creating a well-balanced meal.
      • Roasted Brussels Sprouts: These crispy yet tender sprouts add a satisfying crunch to the roasted beet salad, providing a nice contrast to the soft beets.
      • Garlic Bread: The garlic bread adds an extra layer of flavor and texture to the roasted beet salad, making it more filling and satisfying.
      • Teriyaki Salmon: This protein-packed dish adds a hearty element to the meal while bringing out the sweetness of the beets with its tangy glaze. you might also want to serve it with Cured Beet Salmon.
      beetroot salad with pomegranted molasses

      🍽 More Vibrant Salads to Try

      • Beet Salad With Feta And Walnuts.
        Roasted Beet Salad With Feta And Walnuts
      • Beet Sweet Potato Salad.
        Beet And Sweet Potato Salad With Feta
      • Roasted Beetroot Salad With Honey Mustard Dressing.
        Roasted Beetroot Salad With Honey Mustard Dressing
      • Watermelon Salad With Feta and Mint.
        Watermelon Feta Mint Salad

      Did you make this recipe? Leave a review and a ⭐⭐⭐⭐⭐ rating below, or tag us in our Facebook Group! Alternatively, bookmark it in your browser or save to Pinterest.

      Roasted Beet Salad With Pomegranate Molasses.

      Roasted Beet Salad With Pomegranate Molasses

      Angela Milnes
      Indulge in the vibrant flavors of this Roasted Beet Salad with Pomegranate Molasses! Earthy roasted beets are paired with the sweet-tart zing of pomegranate molasses, creating a beautiful and delicious salad.
      5 from 4 votes
      Print Recipe Pin Recipe Rate this Recipe
      Prep Time 15 minutes mins
      Cook Time 1 hour hr
      Total Time 1 hour hr 15 minutes mins
      Course Salads
      Cuisine American
      Servings 3 Servings
      Calories 314 kcal

      Ingredients
        

      • 3 Beetroot Medium Sized
      • 3 tablespoon Olive Oil
      • ¼ Cups Water
      • ½ teaspoon Salt plus more for seasoning at the end
      • ¼ Cup Blood Orange Juice about half a juicy orange
      • 1 tablespoon Pomegranate Molasses recipe in the instruction portion
      • 1 Lemon
      • 1 tablespoon White Wine Vinegar
      • 2-3 Blood Oranges
      • ½ Medium Red Onion
      • 1 Cups Pomegranate Seeds plus 3 tablespoon for dressing
      • 4 Cups Arugula
      • ⅓ Cup Roasted sliced almonds

      Instructions
       

      • Preheat the oven to 400°F (200°C) and line a small baking pan with foil for easier cleanup. Place scrubbed beets with their tops trimmed in the pan.
      • Drizzle about 1 tablespoon of olive oil and sprinkle ½ teaspoon of salt over the beets. Toss to coat evenly. Pour ¼ cup of water into the pan. Cover with foil and roast in the preheated oven for 45-50 minutes until tender.
      • In a saucepan, combine 3 tablespoons of pomegranate seeds, 2 tablespoons of sugar, and juice of half a lemon. Simmer until thickened to a syrup-like consistency (about 1 tablespoon). Strain or remove pomegranate molasses with a slotted spoon into a bowl.
      • Squeeze juice from half a blood orange into the bowl with pomegranate molasses. Add 2 tablespoons of olive oil, white wine vinegar, and salt. Whisk until well combined.
      • Once cooled, peel and slice the roasted beets into thin wedges. Peel the remaining blood orange, remove the white pith, and slice into wedges. Thinly slice the red onion for layering.
      • Cut onion in half and thinly slice. In a large bowl, combine roasted beets, blood orange wedges, sliced onion, and pomegranate seeds.
      • Pour dressing over salad ingredients and toss gently to coat. Add arugula to the bowl and mix gently.
      • Divide salad onto plates and sprinkle with toasted almonds. Serve immediately and enjoy your Roasted Beet Salad With Blood Orange!

      Notes

      • Roast Beets Evenly: Cut the beets into uniform sizes to ensure they roast evenly. Wrapping them in aluminum foil while roasting can also help them cook more uniformly and retain moisture.
      • Prepare in Advance: Roast the beets and prepare the dressing with pomegranate molasses a day ahead. This allows the flavors to meld and saves time on the day you plan to serve the salad.

      Nutrition

      Serving: 1gCalories: 314kcalCarbohydrates: 42gProtein: 7gFat: 16gSaturated Fat: 2gPolyunsaturated Fat: 2gMonounsaturated Fat: 10gSodium: 464mgPotassium: 630mgFiber: 8gSugar: 21gVitamin A: 729IUVitamin C: 49mgCalcium: 91mgIron: 2mg
      Print Recipe Pin Recipe Rate this Recipe
      Tried this recipe?Let us know how it was!

      More Easy Salad Recipes

      • Low Carb Broccoli Salad
      • Mediterranean Green Bean Salad
      • Chinese Chicken Salad
      • Mediterranean Farro Salad
      • Best Beetroot Carpaccio
      • Kale Butternut Squash Salad

      Mini Pizza Bites with Caprese: Easy, Fresh & Ready in 10 Minutes

      May 30, 2024 by Angela Milnes

      Caprese Mini Pizzas.

      Packed with the delicious, light flavors of a caprese salad, these Caprese Mini Pizzas are an absolute delight to make and enjoy. They're perfect for pizza night when you don't feel like putting a lot of kitchen time and effort. Time to satisfy that pizza craving with this easy mini pizza recipe folks!

      caprese mini pizzas

      Caprese mini pizzas are a fun twist on the classic Caprese salad—fresh, fast, and totally crowd-pleasing. These little bites are perfect for pizza night, party snacks, or when you're craving something cheesy and satisfying without the kitchen marathon. If you like this, try our Easter Pizza or Parmesan Roasted Zucchini.

      [feast_advanced_jump_to]

      💖 Why This Recipe Works

      • Quick and easy: These mini pizzas are ready in just 10–15 minutes.
      • Fun and customizable: Everyone gets their own mini pizza.
      • Fresh yet comforting: Classic Caprese flavors in cheesy pizza form.

      ⭐ Star Ingredients

      Caprese Mini Pizzas Ingredients
      • Mini Naan Rounds: The perfect no-prep base that crisps up beautifully.
      • Shredded Mozzarella: Melty and stretchy—essential for pizza.
      • Cherry Tomatoes & Basil: Fresh, juicy, and herby for that Caprese flavor.

      For the complete list of ingredients with measurements and instructions, please see the recipe card at the bottom of the post.

      📖  Substitutions & Variations

      • Swap the Base: Use flour tortillas, biscuit dough, or English muffins.
      • Try New Toppings: Add olives, roasted veggies, or pepperoni.
      • Gluten-Free Option: Use gluten-free mini crusts or tortillas.
      • Cheese Alternatives: Try goat cheese or burrata for a twist.

      Looking for more pizza fun? Try our recipe for Cauliflower Pizza Crust or Pizza Garlic Bread for a cheesy side.

      🔪How To Make Mini Pizza Bites

      mini pizzas
      1. Step 1: Slice your cherry tomatoes. Place your basil leaves on top of each other, roll them together, and cut them thinly. Place your mini naan rounds on a baking sheet and evenly divide the pizza sauce over the mini rounds.
      mini pizzas
      1. Step 2: Then evenly divide the shredded cheese, cherry tomatoes, and sliced basil over the mini pizzas. Season with black pepper.
      mini pizzas
      1. Step 3: Preheat the oven and pop them in for 15-20 minutes, or until the cheese is fully melted and the edges reach your desired golden brown color.
      mini pizzas
      1. Step 4: Top your Caprese Mini Pizzas with balsamic glaze and arugula. Serve and Enjoy!

      💡 Hint: For extra crispiness, pre-bake the naan rounds for 5 minutes before adding toppings.

      mini pizzas

      👩‍🍳 Expert Tips

      • Preheat your oven for even baking and better crust texture.
      • Don’t overload the mini pizzas with toppings—keep it balanced.
      • Make ahead: Assemble and refrigerate, then bake when ready.

      💭 FAQs

      What are Caprese Mini Pizzas?

      Caprese Mini Pizzas are small, bite-sized pizzas inspired by the classic Caprese salad, which typically features fresh mozzarella, tomatoes, and basil. On a mini pizza, you'll find a combination of these ingredients with a drizzle of balsamic glaze for an extra flavor boost.

      Can I use store-bought dough for Caprese Mini Pizzas?

      Yes, store-bought pizza dough works perfectly fine for these mini pizzas.

      Can I make the Mini Pizza Bites ahead of time?

      Absolutely. Assemble and refrigerate. Bake just before serving.

      How to store leftovers mini pizza bites?

      Cool completely, then store in an airtight container for 3–4 days.

      Can I Freeze Homemade Pizza?

      Yes. Wrap tightly and freeze for up to 2 months. Reheat in the oven.

      💖 Serving Suggestions

      These mini pizzas are so much fun, and you can enjoy them as is when you're hit by a pizza craving and don't want to order takeout.

      • Garlic Bread: Classic pizza side with plenty of garlic and butter.
      • Sweet Potato Fries: A sweet-savory combo that complements the tangy glaze.
      • Halloumi Fries: Crispy, cheesy, and perfect for dipping.
      • Mango Arugula Salad: A peppery, fresh contrast to the cheesy pizza.
      mini pizzas

      🍽 More Easy Appetizer Recipes

      • Salmon Sushi Balls Recipe.
        Salmon Sushi Balls Recipe
      • Mini Pigs In Blankets.
        Mini Pigs In Blankets
      • Smoked Texas Twinkies with Bacon And Brisket.
        Smoked Texas Twinkies with Bacon And Brisket
      • Roasted Cherry Tomato Burrata Bruschetta.
        Burrata Bruschetta With Roasted Cherry Tomatoes

      Did you make this recipe? Leave a review and a ⭐⭐⭐⭐⭐ rating below, or tag us in our Facebook Group! Alternatively, bookmark it in your browser or save? Leave a review and a ⭐⭐⭐⭐⭐ rating below, or tag us in our Facebook Group! Alternatively, bookmark it in your browser or save to Pinterest.

      Caprese Mini Pizzas.

      Caprese Mini Pizza Bites

      Angela Milnes
      These Caprese Mini Pizzas bring the classic flavors of Caprese salad right onto mini naan bread! With juicy tomatoes, fresh mozzarella, and fragrant basil, these little pizzas are bursting with flavor.
      5 from 4 votes
      Print Recipe Pin Recipe Rate this Recipe
      Prep Time 10 minutes mins
      Cook Time 20 minutes mins
      Total Time 30 minutes mins
      Course Appetizer
      Cuisine Mediterranean
      Servings 6 Servings
      Calories 38 kcal

      Ingredients
        

      • 6 Mini Naan Rounds
      • ½ cup Pizza Sauce
      • ½ cup Shredded Mozzarella
      • ¼ cup Cherry Tomatoes
      • ¼ cup Arugula
      • 3-4 Basil Leaves
      • 1 tablespoon Balsamic Glaze
      • ½ teaspoon Black Pepper

      Instructions
       

      • Once you have all your ingredients ready, here's what you'll need to do to make these mini pizzas.
      • Preheat your oven to 350 degrees Fahrenheit.
      • Slice your cherry tomatoes. Place your basil leaves on top of each other, roll them together and cut them thinly.
      • Place your mini naan rounds on a baking sheet and evenly divide the pizza sauce over the mini rounds.
      • Then evenly divide the shredded cheese, cherry tomatoes, and sliced basil over the mini pizzas. Season with black pepper.
      • Preheat the oven and pop them in for 15-20 minutes, or until the cheese is fully melted and the edges reach your desired golden brown color.
      • Top with balsamic glaze and arugula. Enjoy

      Notes

      • Preheat your oven for even baking and better crust texture.
      • Don’t overload with toppings—keep it balanced.
      • Make ahead: Assemble and refrigerate, then bake when ready.

      Nutrition

      Serving: 1gCalories: 38kcalCarbohydrates: 3gProtein: 2gFat: 2gSaturated Fat: 1gPolyunsaturated Fat: 0.1gMonounsaturated Fat: 1gCholesterol: 7mgSodium: 350mgPotassium: 85mgFiber: 0.4gSugar: 1gVitamin A: 212IUVitamin C: 3mgCalcium: 52mgIron: 0.3mg
      Print Recipe Pin Recipe Rate this Recipe
      Tried this recipe?Let us know how it was!

      How To Make Beetroot Juice

      May 30, 2024 by Angela Milnes

      homemade beetroot juice in a glass.

      Wondering How To Make Beetroot Juice? This beetroot juice recipe is simple, easy and packed with sweet flavors, making it one of the best vegetable juices out there. Drinking beet juice has many benefits and is simple to make. Try this delicious juice beetroot recipe for your daily nutritional fix!

      How To Make Beetroot Juice.
      [feast_advanced_jump_to]

      💖 Why This Recipe Works

      • Flavor: You might have come across a lot of beet juice recipes out there, but this one has to be one of the best, simply because of its amazing flavor.
      • Sweet: This version of beetroot juice packs in the sweetness from carrot juice and the citrusy tanginess from orange juice in one delicious concoction that's full of health benefits.
      • Vitamins: The recipe for juicing beets is Packed With Vitamin C, helps Lower Blood Pressure and is great for your Immune System.

      ⭐ Star Ingredients

      Beetroot Juice Ingredients

      To make this homemade beet juice, here's all you'll need.

      • Beet: Fresh red beets form the vibrant, nutritious base of this juice.
      • Carrots: Add a sweet, juicy element and additional nutrients.
      • Oranges: Fresh oranges or their juice provide a citrusy twist and extra Vitamin C Boost.

      For the complete list of ingredients with measurements and instructions, please see the recipe card at the bottom of the post.

      🔄 Substitutions & Variations

      • Swap the Citrus: No oranges? Use pineapple or green apples for a naturally sweet and tangy boost.
      • Amp Up the Greens: Add a handful of spinach, kale, or beet greens for an extra nutrient punch without overpowering the flavor.
      • Spice It Up: A dash of cayenne or a small knob of ginger gives this juice a warming, metabolism-boosting kick.

      🔪How To Make Beetroot Juice

      chopping oranges for beetroot juice.
      1. Step 1: Wash all your produce very thoroughly. Cut the peel off the oranges. Discard peel.
      Chopping carrots for beetroot juice
      1. Step 2: Trim both sides of the carrots. Discard ends.
      chopping beetroots for beetroot juice
      1. Step 3: Cut the root and top off the beets. Discard ends. Clean beets well.
      juicing beetroots for beetroot juice
      1. Step 4: Process the washed and prepared ingredients in your masticating juicer or blender. You can now serve your delicious beetroot juice in a glass, garnish with an orange slice.
      beetroot juice

      👩‍🍳 Expert Tips

      Ready to give this sweet beet juice recipe a try? Here are some tips and tricks you might want to take note of.

      • To add a bit of earthy flavor to the beet juice, you can add a small piece of ginger into the mix as well. Ginger is actually great, not just because it makes beet juice good, but also packs in some powerful anti-inflammatory action.
      • A little squeeze of lemon juice can also be a great addition to your fresh beetroot juice.
      • I also love the idea of adding some fresh mint leaves into the mix.
      • To add some extra nutrition to this root vegetable juice, you can also add some beet greens or other leafy greens of your choice.
      • If you don't have oranges or orange juice that the recipe calls for, apple juice can do the trick. In fact, green apple juice can be a great addition to this beet juice recipe.
      • You're likely to find some juice pulp leftover during the juicing process- even if you're using a high speed blender or one of those fancy centrifugal juicers. I would recommend keeping it in.
      • If you want to remove the beet pulp leftover from juicing beets, you can strain it using a fine mesh strainer or a nut milk bag.
      • You can also try adding other vegetables of your choice into this classic beet juice recipe.

      💭 FAQs

      Can I use a blender instead of a juicer?

      Yes, you can use a blender. After blending the ingredients, strain the juice through a fine mesh strainer or nut milk bag to remove the pulp.

      Can I add other vegetables to the beetroot juice?

      Absolutely! You can add other vegetables like celery, cucumber, or spinach to enhance the flavor and add extra nutrients.

      How long can I store beetroot juice?

      Beetroot juice is best consumed fresh, but you can store it in an airtight container in the fridge for up to 1-2 days.

      What can I add to make the juice taste even better?

      For added flavor, you can include a small piece of ginger, a squeeze of lemon juice, or some fresh mint leaves. These additions bring extra freshness and health benefits.

      Best Way to Store Beetroot Juice

      Just like most of other fresh juice recipes, this beet juice is best made and consumed fresh. Storing it for longer than a few hours isn't recommended. If you must, just transfer the juice to an airtight container and refrigerate it until you're ready to serve it.

      💖 Serving Suggestions

      • Serve Fresh for a Nutrient Boost: Enjoy this vibrant juice as a morning pick-me-up, packed with vitamins and antioxidants to start your day.
      • As a Detox Drink: Drink it as a refreshing detox option, combining the earthy flavor of beets with the citrusy tang of oranges and the sweetness of carrots.
      • Pair with a Light Breakfast: Complement the juice with a light breakfast like avocado toast or a fruit salad for a balanced meal.
      • Add Ice for a Cool Refreshment: Serve the juice chilled over ice for a refreshing summer drink or to cool off after a workout.
      beetroot juice in a glass.

      🍽 More Fruity Sips to Blend Up

      • Easy Dragon Fruit Smoothie Recipe.
        Easy Dragon Fruit Smoothie Recipe
      • Pineapple Smoothie Drink With banana And Honey.
        Pineapple Banana Smoothie With Honey
      • Mango Pineapple Smoothie.
        Mango Pineapple Smoothie
      • Vegan Mixed Berry Smoothie.
        Vegan Mixed Berry Smoothie

      Did you make this recipe? Leave a review and a ⭐⭐⭐⭐⭐ rating below, or tag us in our Facebook Group! Alternatively, bookmark it in your browser or save to Pinterest.

      homemade beetroot juice in a glass.

      Beetroot Juice

      Angela Milnes
      Start your day with a burst of color and nutrients with this Beetroot, Carrot, and Orange Juice! This vibrant juice blends the earthy sweetness of beets, the natural sweetness of carrots, and the zesty freshness of oranges into a refreshing and energizing drink.
      5 from 3 votes
      Print Recipe Pin Recipe Rate this Recipe
      Prep Time 5 minutes mins
      Cook Time 0 minutes mins
      Total Time 5 minutes mins
      Course Drinks
      Cuisine American
      Servings 3 Servings
      Calories 190 kcal

      Ingredients
        

      • 1 lbs. Beetroot
      • 4 Carrots small or 2 large
      • 4 Navel Oranges

      Instructions
       

      • Wash all your produce very thoroughly. Cut the peel off the oranges. Discard peel.
      • Trim both sides of the carrots. Discard ends.
      • Cut the root and top off the beets. Discard ends. Clean beets well.
      • Process the washed and prepared ingredients in your masticating juicer or blender. Enjoy

      Notes

      To add a bit of earthy flavor to the beet juice, you can add a small piece of ginger into the mix as well. Ginger is actually great, not just because it makes beet juice good, but also packs in some powerful anti-inflammatory action.
      A little squeeze of lemon juice can also be a great addition to your fresh beetroot juice.
      I also love the idea of adding some fresh mint leaves into the mix.
      To add some extra nutrition to this root vegetable juice, you can also add some beet greens or other leafy greens of your choice.
      If you don’t have oranges or orange juice that the recipe calls for, apple juice can do the trick. In fact, green apple juice can be a great addition to this beet juice recipe.
      You’re likely to find some juice pulp leftover during the juicing process- even if you’re using a high speed blender or one of those fancy centrifugal juicers. I would recommend keeping it in.
      If you want to remove the beet pulp leftover from juicing beets, you can strain it using a fine mesh strainer or a nut milk bag.
      You can also try adding other vegetables of your choice into this classic beet juice recipe.

      Nutrition

      Serving: 1gCalories: 190kcalCarbohydrates: 46gProtein: 5gFat: 1gSaturated Fat: 0.1gPolyunsaturated Fat: 0.2gMonounsaturated Fat: 0.1gSodium: 176mgPotassium: 1062mgFiber: 11gSugar: 30gVitamin A: 14099IUVitamin C: 123mgCalcium: 131mgIron: 2mg
      Print Recipe Pin Recipe Rate this Recipe
      Tried this recipe?Let us know how it was!

      More Simple Juice Recipes to Try

      If you enjoyed trying your hands at this homemade beet juice recipe and are inspired to try your hands at some more healthy vegetable juice recipes, here are a few good ideas to try out.

      • How To Make Celery Juice
      • How To Make Watermelon Juice
      • Cucumber Juice With Greens
      homemade beetroot juice in a glass.

      Red Cabbage Coleslaw Recipe

      May 29, 2024 by Angela Milnes

      red cabbage coleslaw.

      Looking for a colorful and refreshing side dish? This Red Cabbage Coleslaw Recipe is just what you need! It’s crunchy, tangy, and packed with flavor. Quick to prepare and always a hit, this Coleslaw With Red Cabbage is a delicious way to add some vibrant veggies to your plate. Enjoy!

      Red cabbage coleslaw. Can you freeze coleslaw?
      [feast_advanced_jump_to]

      Why This Recipe Works

      • Colorful and Crunchy: The vibrant red cabbage and carrots make this coleslaw a visually appealing and crunchy side dish.
      • Zesty and Fresh: The combination of apple cider vinegar, fresh dill, and cilantro gives this coleslaw a refreshing and tangy flavor.
      • Versatile and Easy: Whether you choose the olive oil version for a lighter option or the mayo for a creamy style, this coleslaw is quick to prepare and perfect for any occasion.
      • Great for Fish Tacos: This Red Cabbage Coleslaw recipe is a fantastic addition to Instant Pot Fish Tacos, complementing fish and seafood dishes with its fresh and tangy flavor.

      🥘 Ingredients

      Red Cabbage Coleslaw recipe Ingredients.
      • Shredded Cabbage - Red cabbage adds a vibrant color and a slightly sweet, earthy flavor to the coleslaw. It's also packed with nutrients and antioxidants.
      • Red Onion, diced - Red onion adds a sharp, tangy flavor and a bit of crunch to the mix, enhancing the overall taste of the coleslaw.
      • Roughly Chopped Cilantro - Cilantro gives a fresh, herbaceous note that complements the other flavors perfectly.
      • Olive Oil (or Mayo for Creamy Style) - Olive oil provides a lighter, healthier base, while mayo offers a rich, creamy texture. Choose according to your preference.
      • Apple Cider Vinegar - Apple cider vinegar adds a tangy kick and balances the sweetness of the carrots and sugar, making the coleslaw refreshing and zesty.
      • Chopped Fresh Dill - Fresh dill imparts a subtle, slightly sweet flavor and a fragrant aroma that enhances the overall taste of the coleslaw.

      For the complete list of ingredients with measurements and instructions, please see the recipe card at the bottom of the post.

      📖  Substitutions & Variations

      • Creamy Red Cabbage Coleslaw: For a creamy dressing, swap out the olive oil for mayonnaise. This will give the slaw a rich, smooth texture that pairs wonderfully with the crunchy vegetables. This will give the slaw a rich, smooth texture that pairs wonderfully with the crunchy vegetables.
      • Asian Red Cabbage Coleslaw: For an Asian-inspired twist, use rice vinegar, soy sauce, and sesame oil. Add in some chopped green onions and sesame seeds for extra flavor.
      • Mexican Red Cabbage Coleslaw: For a Mexican-inspired version, add lime juice, cumin, and a bit of jalapeño for some heat. You can also include some diced tomatoes and avocado for a more robust cabbage salad.
      • Extra Crunch: Add Celery seeds or toasted almonds to your red coleslaw for extra crunch.
      • Napa Cabbage: If you don't have access to red or purple cabbage, switch it out for green cabbage. This will produce a more traditional coleslaw mix. Whether you use red or green cabbage this delicious side dish will taste great.
      • Lemon Juice: Add a dash of lemon juice for a twist on this basic red cabbage slaw recipe. This will make a tangy dressing for your slaw.
      • Add Jalapenos: To make it into a tasty Jalapeno Coleslaw.

      🔪How To Make Red Cabbage Coleslaw

      Here are the step by step instructions for this best coleslaw recipe.

      ingredients for red cabbage coleslaw

      Step One: Combine shredded red cabbage, shredded carrots, diced red onion, chopped cilantro, and dill in a large bowl. Toss well to mix everything together.

      adding dressing to red cabbage coleslaw

      Step Two: For the seasoning, add white granulated sugar, salt, and pepper to enhance the flavors.

      adding dressing to red cabbage coleslaw

      Step Three: Next, pick your dressing. For a lighter touch, drizzle extra virgin olive oil or mayo for creamy style. Add a splash of apple cider vinegar for a tangy kick.

      red cabbage coleslaw

      Step Four: Stir until all ingredients are well coated. Cover the bowl and refrigerate for at least an hour, or overnight for best results. Enjoy your coleslaw and serve with grilled chicken or another dish.

      👩‍🍳 Expert Tips

      • Flavor Development: For best flavor, enjoy the coleslaw after it’s sat in the fridge overnight, allowing the veggies to soak up all the flavors. However, you can eat it immediately if desired.
      • Creamy Style Variation: If you prefer a creamy coleslaw dressing similar to classic coleslaw, swap out the olive oil for half a cup of mayo.
      • Herb Substitution: If you don’t like cilantro, you can swap it out for parsley.
      • Fresh Herbs Recommendation: Stick with fresh herbs rather than dried, as the flavor doesn’t turn out the same.
      • Lemon Juice: Add a dash of lemon juice for a twist on this basic red cabbage slaw recipe.

      💭 FAQs

      Can I make red cabbage coleslaw ahead of time?

      Yes, you can make red cabbage coleslaw a day ahead. In fact, letting it sit in the fridge overnight helps the flavors to meld together. Just be sure to give it a good toss before serving, as the cabbage might release some moisture while sitting.

      Can I substitute the red cabbage with other types of cabbage?

      While red cabbage is the star of this recipe for its vibrant color and crunch, you can absolutely swap it with green cabbage or even a mix of both. Green cabbage will give you a milder flavor, but the texture will still work well in coleslaw.

      How do I make the coleslaw less tangy?

      If you find the coleslaw too tangy, you can reduce the amount of vinegar or swap it with lemon juice for a milder citrusy note. Adding a bit more sugar or honey can also help balance the tartness of the dressing.

      Can I add other vegetables to my red cabbage coleslaw?

      Definitely! You can customize your coleslaw by adding vegetables like shredded carrots, bell peppers, or even thinly sliced onions. Just be sure to cut everything into small, uniform pieces so the texture remains consistent.

      Best Way to Store Coleslaw

      Keep any leftover Red Cabbage Coleslaw in a sealed container in the refrigerator for up to 3-4 days. Store in a well-sealed container to maintain freshness and prevent odor absorption from other foods in the fridge.

      🧂Serving Suggestions

      Whether using red cabbage coleslaw for pulled pork or as a vegetarian side, this versatile side dish cuisine can be paired in many delicious ways. Here are some ways to pair this easy coleslaw recipe.

      • Black Beans: Toss drained and rinsed black beans with the coleslaw for added protein and fiber. Beans add a hearty texture and mild flavor that complements the crunchy purple cabbage.
      • Thin Sliced Chicken Breast: Top the coleslaw with sliced grilled chicken breast or thighs. Marinate the chicken in a tangy BBQ sauce or a zesty lemon herb marinade for extra flavor.
      • Slow Cooker Pulled Pork: Serve the coleslaw alongside pulled pork for a classic combination. The crunchy texture of coleslaw pairs great with pulled pork sandwiches.
      • Crispy Baked Tofu: For a vegetarian option, add crispy tofu cubes to the slaw salad. Toss the tofu in a sweet and spicy sauce for extra flavor and serve it on top of the coleslaw.
      • Paprika Shrimp: Add grilled or sautéed shrimp to the coleslaw for a light and refreshing protein option. Season the shrimp with garlic, lemon, and herbs for a burst of flavor.
      red cabbage coleslaw

      🍽 Related Recipes

      • New Years charcuterie Board.
        New Years Charcuterie Board
      • roasted harissa sweet potatoes on a plate, drizzles with honey and pistachio nuts.
        Harissa Sweet Potato Recipe (Crispy, Spicy & Easy)
      • Cranberry Lime Mocktail.
        Easy Cranberry Lime Mocktail Recipe – No Alcohol, All Sparkle!
      • Food to Your Loved Ones this Holiday Season.
        Give from Your Heart: Give Food to Your Loved Ones this Holiday Season

      Did you make this recipe? Leave a review and a ⭐⭐⭐⭐⭐ rating below, or tag us in our Facebook Group! Alternatively, bookmark it in your browser or save to Pinterest.

      red cabbage coleslaw.

      Red Cabbage Coleslaw

      Angela Milnes
      Brighten up your meal with this vibrant Red Cabbage Coleslaw! Crisp red cabbage is tossed with a tangy, creamy dressing, making it a colorful and refreshing side dish.
      5 from 3 votes
      Print Recipe Pin Recipe Rate this Recipe
      Prep Time 10 minutes mins
      Cook Time 0 minutes mins
      Additional Time 1 hour hr
      Total Time 1 hour hr 10 minutes mins
      Course Salads
      Cuisine American
      Servings 8 servings
      Calories 86 kcal

      Ingredients
        

      • 1 Cup Shredded Carrots
      • ½ Small Red Onion diced
      • ½ Cup Roughly Chopped Cilantro
      • ¼ Cup Olive Oil or ½ Cup Mayo for Creamy Style
      • 3 Tablespoons Apple Cider Vinegar
      • 2 ½ Tablespoons White Granulated Sugar
      • 1 Tablespoon Chopped Fresh Dill
      • 1 Teaspoon Salt
      • ½ Teaspoon Pepper

      Instructions
       

      • Combine shredded red cabbage, shredded carrots, diced red onion, chopped cilantro, and dill in a large mixing bowl. Toss well to mix everything together.
      • Add white granulated sugar, salt, pepper, olive oil (or mayo for a creamy style), and apple cider vinegar to the bowl. Stir until all ingredients are well coated.
      • Cover the bowl and refrigerate for at least an hour, or overnight for best results.
      • Enjoy your red cabbage coleslaw!

      Notes

      Flavor Development: For best flavor, enjoy the coleslaw after it’s sat in the fridge overnight, allowing the veggies to soak up all the flavors. However, you can eat it immediately if desired.
      Creamy Style Variation: If you prefer a creamy coleslaw dressing similar to classic coleslaw, swap out the olive oil for half a cup of mayo.
      Herb Substitution: If you don’t like cilantro, you can swap it out for parsley.
      Fresh Herbs Recommendation: Stick with fresh herbs rather than dried, as the flavor doesn’t turn out the same.
      Lemon Juice: Add a dash of lemon juice for a twist on this basic red cabbage slaw recipe.

      Nutrition

      Serving: 1gCalories: 86kcalCarbohydrates: 6gProtein: 0.3gFat: 7gSaturated Fat: 1gPolyunsaturated Fat: 1gMonounsaturated Fat: 5gSodium: 304mgPotassium: 85mgFiber: 1gSugar: 5gVitamin A: 2763IUVitamin C: 2mgCalcium: 15mgIron: 0.3mg
      Print Recipe Pin Recipe Rate this Recipe
      Tried this recipe?Let us know how it was!

      More Easy Family Recipes

      • Slow Cooker Beef Stroganoff
      • Crock Pot Chili Mac And Cheese
      • Healthy Quinoa Salad Recipe
      • Stuffed Mushrooms
      • Pizza Pull Apart Bread
      • Korean Cucumber Salad

      Crock Pot Chili Mac And Cheese

      May 25, 2024 by Angela Milnes

      Crock Pot Chili Mac.

      Cozy up to a bowl of Crock Pot Chili Mac and Cheese! This dish combines the best of both worlds: the comforting flavors of chili and the creamy indulgence of mac and cheese. Whether it's a busy weeknight or a laid-back weekend, this Chili Mac and Cheese recipe will become your go-to comfort food favorite.

      Crock Pot Chili Mac
      [feast_advanced_jump_to]

      💖 Why This Recipe Works

      • Convenient Cooking: With the slow cooker, you can set it and forget it, allowing the flavors to meld together perfectly while you go about your day.
      • Comforting Combination: The hearty chili and creamy mac and cheese create a comforting and satisfying meal that's perfect for chilly evenings or feeding a crowd.
      • Versatile Dish: This crockpot chili mac and cheese recipe offers a balance of protein, carbs, and dairy, making it a complete meal in one pot. Plus, you can easily customize it with your favorite toppings or add-ins for extra flavor.

      If you love this recipe then why not try Million Dollar Mac And Cheese, Slow Cooker Chicken Bacon Ranch Pasta, Slow Cooker Chicken Chili and Slow Cooker Spare Ribs recipes.

      ⭐ Star Ingredients

      crock pot chili mac ingredients.
      • Lean Ground Beef: Provides a hearty and savory base for the crock pot Chili Mac.
      • Frozen Peppers and Onions: Adds convenience and a mix of flavors to the dish.
      • Chili Seasoning: Enhances the crock pot chili mac with a perfect blend of spices.
      • Garlic Powder or Minced Garlic: Adds a robust, aromatic flavor to the chili.
      • Diced Green Chiles: Brings a mild heat and extra flavor.
      • Tomatoes with Green Chiles: Adds a tangy and slightly spicy tomato base.
      • Red Kidney Beans, Undrained: Adds protein and a rich texture to the crock pot chili mac.
      • Black Beans, Rinsed and Drained: Provides additional protein and a creamy texture.
      • Tomato Paste: Thickens the chili and deepens the tomato flavor.
      • Sugar: Balances the acidity of the tomatoes and chiles.
      • Water or Beef Broth: Adds moisture and helps blend the flavors together.
      • Macaroni Noodles: Adds a pasta element to create the mac and cheese component.
      • Shredded Cheddar Cheese: Melts into the dish, creating a creamy, cheesy texture.
      • Scallions for Topping: Adds a fresh and crisp finishing touch.

      For the complete list of ingredients with measurements and instructions, please see the recipe card at the bottom of the post.

      📖  Substitutions & Variations

      • Turkey Tomato Melt: Combine ground turkey with tomato sauce, garlic powder, and chili powder, then finish by melted cheese on top for a deliciously melty and flavorful twist on a traditional dish.
      • Tex-Mex Fusion: Infuse Tex-Mex flavors by incorporating corn, diced poblano peppers, and a blend of Mexican spices like cumin and smoked paprika for a zesty twist.
      • Savory Chicken Chili Blend: Ground chicken cooked in tomato sauce with a hint of oregano and smoked paprika, topped with melted cheese for a delicious twist on a classic dish.

      🔪How To Make Crock Pot Chili Mac And Cheese

      Crock Pot Chili Mac
      1. Step 1: Cook and drain the ground beef in a skillet or Dutch oven over medium-high heat until browned. Transfer the cooked beef to a slow cooker and add onions, bell peppers, garlic, green chilies, tomatoes, tomato paste, red kidney beans, black beans, sugar, beef broth, and chili seasoning.
      Crock Pot Chili Mac
      1. Step 2: Stir to combine. Cover and cook on low for 4-6 hours. Approximately 20 minutes before serving, stir in the elbow macaroni. Five minutes before serving, mix in half of the shredded cheese.
      Crock Pot Chili Mac
      1. Step 3: Sprinkle the remaining cheese on top, cover, and let it melt.
      Crock Pot Chili Mac
      1. Step 4: Serve the delicious Slow Cooker Chili Mac hot with your favorite toppings. Enjoy this hearty and comforting dish!
      Crock Pot Chili Mac

      👩‍🍳 Expert Tips

      • Cooking Time Flexibility: If pressed for time, you can increase the cooking temperature slightly to shorten the overall cooking time while ensuring the flavors meld together.
      • Batch Cooking: Consider doubling the recipe and freezing individual portions for quick meals on busy days, reheating them for a convenient and satisfying dinner option.
      • Broil for Crispy Top: For a crispy top layer, transfer the Chili Mac to an oven-safe dish after slow cooking, sprinkle with cheese, and broil for a few minutes until bubbly and golden.

      💭 FAQs

      Can I make Crock Pot Chili Mac and Cheese ahead of time?

      Yes, you can prepare the chili and cheese mixture ahead of time and store it in the fridge for up to a day before cooking. Just transfer it to the Crock Pot when you're ready to cook and follow the instructions. This makes meal prep a breeze, especially for busy days!

      Can I use ground turkey or chicken instead of beef in this recipe?

      Absolutely! Ground turkey or chicken works well as a leaner substitute for ground beef. Just be sure to adjust seasoning to taste, as turkey and chicken can be milder in flavor than beef.

      Can I freeze Crock Pot Chili Mac and Cheese for later?

      Yes, you can freeze the leftovers! Just let the chili mac cool completely, then store it in an airtight container or freezer bag. When you're ready to eat it, thaw in the fridge overnight and reheat on the stove or in the microwave.

      How do I make Crock Pot Chili Mac and Cheese spicier?

      If you like your chili mac with more heat, consider adding extra chili powder, cayenne pepper, or diced jalapeños. You can also add a dash of hot sauce or use spicy sausage for a more robust kick. Adjust it to your spice level preference!

      Best Way to Store Chili Mac and Cheese

      Store any leftover Crock Pot Chili Mac and Cheese in an airtight container in the refrigerator for up to 3-4 days. Transfer the chili mac and cheese to a freezer-safe container or bag and freeze for up to 2-3 months. Defrost the chili mac and cheese in the refrigerator overnight.

      💖 Serving Suggestions

      Here are the best sides to serve with Crock Pot Chili Mac and Cheese:

      • Avocado Salad: A simple green salad with a tangy vinaigrette can help balance out the richness of the chili mac and cheese.
      • Cheesy Garlic Pizza Bread: Crusty garlic bread is perfect for mopping up any leftover sauce from the chili mac and cheese.
      • Vegetables: Serve some steamed broccoli, green beans, or carrots on the side for a pop of color and added nutrition.
      • Jalapeno Cornbread: Sweet or savory cornbread makes a delicious accompaniment to crock pot chili mac and cheese, adding a contrasting texture and flavor.
      • Red Cabbage Coleslaw: Coleslaw provides a refreshing contrast to the rich and spicy flavors of the crock pot chili mac and cheese.
      Crock Pot Chili Mac

      🍽 More Hearty Recipes

      • Best Cheesy Mashed Cauliflower Recipe.
        Best Cheesy Mashed Cauliflower Recipe (Low-Carb & Creamy!)
      • Creamy Cajun Pasta Sauce with Parmesan.
        Creamy Cajun Pasta Sauce with Parmesan
      • Cowboy Butter Pasta In Creamy Sauce, Topped with sliced lemons.
        Cowboy Butter Pasta In Creamy Sauce
      • Cold Chicken Pasta Salad With Italian Dressing.
        Cold Chicken Pasta Salad With Italian Dressing

      Did you make this recipe? Leave a review and a ⭐⭐⭐⭐⭐ rating below, or tag us in our Facebook Group! Alternatively, bookmark it in your browser or save to Pinterest.

      Crock Pot Chili Mac.

      Crock Pot Chili Mac And Cheese

      Angela Milnes
      Cozy up with a bowl of this Crock Pot Chili Mac and Cheese! Combining the hearty goodness of chili with the creamy comfort of mac and cheese, this dish is the ultimate in comfort food.
      5 from 5 votes
      Print Recipe Pin Recipe Rate this Recipe
      Prep Time 15 minutes mins
      Cook Time 4 hours hrs
      Total Time 4 hours hrs 15 minutes mins
      Course Dinners
      Cuisine American
      Servings 8 Servings
      Calories 458 kcal

      Ingredients
        

      • 1 Pound Lean Ground Beef
      • 1 Cup Peppers
      • 1 Cup Onions
      • 1 Ounce Chili Seasoning
      • 3 Cloves Garlic minced
      • 4 Ounce Can Diced Green chiles
      • 10 Ounce 10 Tomatoes Green Chiles
      • 15 Ounce Red Kidney Beans
      • 15 Ounce Can Black Beans
      • 1 Ounce 6 ounce can of tomato paste
      • 1 Tablespoon Sugar
      • 2 Cups water or beef broth
      • 8 Ounce macaroni noodles
      • 2 Cups cheddar cheese shredded, divided
      • Scallions for topping

      Instructions
       

      • Cook and drain the ground beef in a skillet or Dutch oven over medium-high heat until browned.
      • Transfer the cooked beef to a slow cooker and add onions, bell peppers, garlic, green chilies, tomatoes, tomato paste, red kidney beans, black beans, sugar, beef broth, and chili seasoning. Stir to combine.
      • Cover and cook on low for 4-6 hours.
      • Approximately 20 minutes before serving, stir in the elbow macaroni.
      • Five minutes before serving, mix in half of the shredded cheese. Sprinkle the remaining cheese on top, cover, and let it melt.
      • Serve the delicious Slow Cooker Chili Mac hot with your favorite toppings. Enjoy this hearty and comforting dish!

      Notes

      Cooking Time Flexibility: If pressed for time, you can increase the cooking temperature slightly to shorten the overall cooking time while ensuring the flavors meld together.
      Batch Cooking: Consider doubling the recipe and freezing individual portions for quick meals on busy days, reheating them for a convenient and satisfying dinner option.
      Broil for Crispy Top: For a crispy top layer, transfer the Chili Mac to an oven-safe dish after slow cooking, sprinkle with cheese, and broil for a few minutes until bubbly and golden.

      Nutrition

      Serving: 1gCalories: 458kcalCarbohydrates: 52gProtein: 33gFat: 14gSaturated Fat: 7gPolyunsaturated Fat: 1gMonounsaturated Fat: 3gTrans Fat: 0.2gCholesterol: 63mgSodium: 576mgPotassium: 1055mgFiber: 11gSugar: 6gVitamin A: 2212IUVitamin C: 24mgCalcium: 278mgIron: 6mg
      Print Recipe Pin Recipe Rate this Recipe
      Tried this recipe?Let us know how it was!

      More Easy Recipe Ideas

      • Vegan Mixed Berry Smoothie
      • Zucchini Chocolate Chip Muffins
      • Hasselback Potatoes
      • Summer Dishes For Dinner
      • Summer Pasta Salad Recipes
      • Baked Spaghetti Squash
      • Slow Cooker Beef Stroganoff
      Crock Pot Chili Mac

      Slow Cooker Beef Stroganoff

      May 25, 2024 by Angela Milnes

      Slow Cooker Beef Stroganoff.

      Get ready for a flavor-packed delight with Slow Cooker Beef Stroganoff! This classic dish is made effortlessly in your crockpot, resulting in tender beef, rich mushroom sauce, and creamy goodness that will melt in your mouth. Perfect for busy weeknights or cozy weekends, this best Beef Stroganoff Recipe will satisfy your cravings and leave you wanting more.

      Slow Cooker Beef Stroganoff.
      [feast_advanced_jump_to]

      💖 Why This Recipe Works

      • Convenience: With a slow cooker, you can simply set it and forget it, allowing the flavors to meld together while you go about your day.
      • Tender Beef: Slow cooking ensures that the beef becomes incredibly tender, resulting in a melt-in-your-mouth texture that's hard to resist.
      • Rich Flavor: The long cooking time allows the flavors to develop fully, resulting in a rich and savory sauce that coats the beef and noodles perfectly, creating a comforting and satisfying meal.
      Slow cooker beef stroganoff in a bowl.

      ⭐ Star Ingredients

      Beef Stroganoff Ingredients.

      Do you love using a slow cooker? Why not try these tasty recipes: Slow Cooker Chicken Bacon Ranch Pasta, Slow Cooker Chicken Chili and Slow Cooker Spare Ribs.

      • Beef Chuck Roast: A tender and flavorful cut of beef that becomes melt-in-your-mouth delicious when slow-cooked.
      • Onion, Chopped: Adds sweetness and depth of flavor to the stroganoff.
      • Garlic, Minced: Enhances the dish with a robust, aromatic flavor.
      • Sliced White Mushrooms, Rinsed: Contributes a savory, earthy taste and texture.
      • Cream of Mushroom Soup: Provides a creamy, rich base for the stroganoff sauce.
      • Salt: Enhances the natural flavors of the ingredients.
      • Pepper: Adds a hint of spice and balances the flavors.
      • Sour Cream: Adds creaminess and a slight tang to the sauce.
      • Egg Noodles, Boiled and Drained: A classic accompaniment that soaks up the delicious stroganoff sauce.
      • Parsley for Garnish: Adds a fresh, vibrant finish to the dish.

      For the complete list of ingredients with measurements and instructions, please see the recipe card at the bottom of the post.

      📖  Substitutions & Variations

      • Vegetarian Option: Replace the beef roast with fresh mushrooms, tofu cubes, or seitan strips to create a hearty vegetarian version of this Slow Cooker Beef Stroganoff.
      • Savory Kick: Elevate the slow cooker beef stroganoff sauce by incorporating beef stew meat with Worcestershire Sauce or a Dijon Mustard Substitute.
      • Cheese Lover's Delight: Sprinkle grated Parmesan, Gruyère, Swiss or Cream cheese over the crockpot beef stroganoff just before serving for a cheesy twist that adds richness and depth to the dish.

      🔪How To Make Slow Cooker Beef Stroganoff

      Beef roast, onion, mushrooms, garlic, and cream of mushroom soup in a slow cooker.
      1. Step 1: Place the beef roast in the slow cooker and add the onion, mushrooms, and garlic.
      Beef cooked in slow cooker.
      1. Step 2: Pour the cream of mushroom soup into the slow cooker over the ingredients. Add salt and pepper, then stir gently.
      Beef stroganoff in a pot.
      1. Step 3: Cover and cook on low for 6-8 hours, until the beef is tender. Before serving, shred the beef and stir in the sour cream and cooked noodles.
      Slow cooker beef stroganoff served with a fork.
      1. Step 4: Serve the slow-cooked Beef hot and enjoy!

      👩‍🍳 Expert Tips

      • Cook Noodles Separately: To prevent the noodles from becoming overcooked, consider cooking them separately and adding them to the stroganoff just before serving.
      • Thicken the Sauce: If you prefer a thicker sauce consistency, mix a tablespoon of cornstarch with cold water and stir it into the slow cooker beef stroganoff during the last 30 minutes of cooking to thicken the sauce.
      • Broth Infusion: Enhance the richness of the stroganoff by using beef broth instead of water for cooking, intensifying the savory notes and providing a more robust taste experience.

      💭 FAQs

      Can I use a different cut of beef for Slow Cooker Beef Stroganoff?

      Yes, you can substitute cuts like chuck roast, sirloin, or stew meat for a different texture or flavor. However, for the best results, cuts with some marbling, like chuck, are ideal as they become tender after slow cooking.

      Can I make Slow Cooker Beef Stroganoff without sour cream?

      If you prefer not to use sour cream, you can replace it with Greek yogurt or cream cheese. Both alternatives will provide a creamy texture, though the flavor might vary slightly.

      How do I make sure my Beef Stroganoff isn’t too watery?

      To prevent excess liquid, make sure to use the right amount of broth and consider reducing the liquid during the final 30 minutes of cooking. You can also thicken the sauce with a cornstarch slurry (cornstarch and water) if needed.

      Can I freeze leftover Slow Cooker Beef Stroganoff?

      Yes, Beef Stroganoff freezes well. Just let it cool down completely before transferring it into an airtight container. When reheating, you might need to add a splash of water or broth to loosen the sauce.

      How to store beef stroganoff?

      Store any leftover Slow Cooker Beef Stroganoff in an airtight container in the refrigerator for up to 3-4 days. Transfer the slow cooker beef stroganoff to a freezer-safe container or bag and freeze for up to 2-3 months. Defrost the beef stroganoff in the refrigerator overnight.

      💖 Serving Suggestions

      Here are some of the sides to serve with Slow Cooker Beef Stroganoff:

      • Instant Pot Mashed Potatoes: Pair slow cooker Beef Stroganoff with creamy mashed potatoes for a comforting and hearty meal.
      • Steamed Vegetables: Serve Beef Stroganoff with a side of steamed vegetables such as broccoli, carrots, or green beans for added freshness and nutrition.
      • Avocado Salad: Enjoy slow cooker Beef Stroganoff with a side salad of mixed greens, cherry tomatoes, cucumbers, and your favorite dressing for a lighter option.
      • Raw Vegan Bread: Serve Beef Stroganoff with crusty bread or garlic bread for mopping up the delicious sauce and adding extra texture to the meal.
      Slow cooked beef stroganoff on a plate served with a glass of beverage.

      🍽 More Fantastic Recipes To Try

      • Hawaiian Garlic Shrimp.
        Hawaiian Garlic Shrimp Recipe (20 Minutes, So Flavorful!)
      • Mango and Pineapple Salsa in a white bowl.
        Mango and Pineapple Salsa (Perfect With Fish)
      • Carrot And Raisin Salad With Pineapple.
        Carrot And Raisin Salad With Pineapple
      • Cold Chicken Pasta Salad With Italian Dressing.
        Cold Chicken Pasta Salad With Italian Dressing

      Did you make this recipe? Leave a review and a ⭐⭐⭐⭐⭐ rating below, or tag us in our Facebook Group! Alternatively, bookmark it in your browser or save to Pinterest.

      Slow Cooker Beef Stroganoff.

      Crock Pot Beef Stroganoff

      Angela Milnes
      Comfort food at its finest, this Slow Cooker Beef Stroganoff is rich, creamy, and incredibly satisfying! Tender beef is slow-cooked to perfection in a savory mushroom sauce, then finished with a dollop of sour cream for that classic stroganoff flavor. Serve it over egg noodles, rice, or mashed potatoes for a hearty meal that’s perfect for any night of the week. Easy to make and sure to please the whole family!
      5 from 4 votes
      Print Recipe Pin Recipe Rate this Recipe
      Prep Time 15 minutes mins
      Cook Time 8 hours hrs
      Total Time 8 hours hrs 15 minutes mins
      Course Dinners
      Cuisine Russian
      Servings 6 Servings
      Calories 873 kcal

      Ingredients
        

      • 3 Pound Beef Chuck Roast
      • 1 Small Onion Chopped
      • 2 cloves Garlic Minced
      • 8 ounce White Mushrooms Sliced
      • 15 ounce Cream Mushroom Soup
      • ½ teaspoon Salt
      • ½ teaspoon Pepper
      • 1 ½ cups Sour Cream
      • 16 ounces Egg Noodles boiled and drained
      • Parsley For Garnish

      Instructions
       

      • Place the beef roast in the slow cooker and add the onion, mushrooms, and garlic.
      • Pour the cream of mushroom soup over the ingredients in the slow cooker. Sprinkle with salt and pepper, then gently stir to combine.
      • Cover the slow cooker and cook on low for 6-8 hours, or until the beef is tender and easily falls apart with a fork.
      • Just before serving, shred the beef in the slow cooker and stir in the sour cream. Also, stir in the cooked and drained egg noodles until well combined. Serve Slow Cooked Beef hot and enjoy!

      Notes

      Cook Noodles Separately: To prevent the noodles from becoming overcooked, consider cooking them separately and adding them to the stroganoff just before serving. This helps maintain their texture.
      Thicken the Sauce: If you prefer a thicker sauce consistency, mix a tablespoon of cornstarch with cold water and stir it into the stroganoff during the last 30 minutes of cooking to thicken the sauce.
      Broth Infusion: Enhance the richness of the stroganoff by using beef broth instead of water for cooking, intensifying the savory notes and providing a more robust taste experience.

      Nutrition

      Calories: 873kcalCarbohydrates: 64gProtein: 60gFat: 42gSaturated Fat: 19gPolyunsaturated Fat: 4gMonounsaturated Fat: 18gTrans Fat: 2gCholesterol: 257mgSodium: 917mgPotassium: 1252mgFiber: 3gSugar: 5gVitamin A: 436IUVitamin C: 3mgCalcium: 134mgIron: 7mg
      Print Recipe Pin Recipe Rate this Recipe
      Tried this recipe?Let us know how it was!

      More Great Recipes For The Family

      • Crock Pot Chili Mac And Cheese
      • Zucchini Chocolate Chip Muffins
      • Hasselback Potatoes
      • Slow Cooker Rump Roast With Baby Carrots
      • Baked Spaghetti Squash
      • Vegan Mixed Berry Smoothie
      • 21 Delicious Sriracha Recipes
      Slow Cooker Beef Stroganoff.

      Honey Mustard Salad Dressing Recipe

      May 25, 2024 by Angela Milnes

      honey mustard dressing in a glass container.

      Get ready to elevate your salads with my irresistible Honey Mustard Salad Dressing Recipe. It’s sweet, tangy, and absolutely delicious – perfect for drizzling over any salad or using as a dip. With just a few simple ingredients, you can whip up one of the best homemade salad dressings in no time.

      Adding honey mustard dressing to a salad.
      [feast_advanced_jump_to]

      💖 Why This Recipe Works

      • Fresh Ingredients: This honey mustard dressing uses fresh lemon juice and extra virgin olive oil for a bright, vibrant flavor.
      • Perfect Balance: Dijon mustard and honey in this salad dressing recipe create a perfect balance of tangy and sweet.
      • Versatile: This Honey Mustard Salad Dressing is not just for salads – use it as a dip or a marinade for an extra burst of flavor.

      ⭐ Star Ingredients

      • Extra virgin olive oil: Adds a rich, smooth texture to balance the dressing.
      • Fresh lemon juice: Brings a bright, tangy flavor that enhances all the other ingredients.
      • Dijon mustard: Provides a sharp, spicy kick that complements the sweetness of the honey.
      • Honey: Adds a natural sweetness that balances the acidity and flavors in the dressing.

      For the complete list of ingredients with measurements and instructions, please see the recipe card at the bottom of the post.

      📖  Substitutions & Variations

      • Honey Mustard Garlic Dressing: Add a minced clove of garlic for an extra layer of flavor.
      • Honey Mustard Citrus Dressing: Replace half the lemon juice with orange juice for a sweeter, citrusy taste.
      • Honey Mustard Balsamic Salad Dressing: Add a 1 ½ tablespoons of balsamic vinegar in replace of the lemon juice.
      • Honey Mustard Poppy Seed Salad Dressing: Add a tablespoon of poppy seeds for added texture and crunch.

      🔪How To Make Honey Mustard Lemon Salad Dressing

      Adding oil to a glass jar.
      1. Step 1: In a small bowl or jar, combine the extra virgin olive oil, lemon juice, Dijon mustard, and honey. Pour the extra virgin olive oil into the bowl or jar.
      Honey Mustard Salad Dressing.
      1. Step 2: Using a whisk or a jar with a tight lid, mix or shake the ingredients vigorously. Whisking ensures a smooth and well-emulsified dressing. If using a jar, secure the lid and shake for 30 seconds to a minute. Once combined and smooth, taste and adjust seasoning as needed with salt, honey, or mustard. Drizzle your homemade honey mustard dressing over your salad and enjoy!
      Adding honey mustard dressing to a salad.

      👩‍🍳 Expert Tips

      • Chill Before Serving: Refrigerate the dressing for at least 30 minutes to let the flavors meld together.
      • Use Different Mustards: Experiment with different types of mustard, like regular yellow mustard, whole grain or spicy brown, for varied tastes.
      • Use a Blender: Use a blender for an ultra-smooth, creamy consistency without lumps.

      💭 FAQs

      Can I adjust the sweetness of honey mustard dressing?

      Yes, you can easily adjust the sweetness of the dressing by adding more or less honey. If you prefer a less sweet version, reduce the honey and balance it with a little more mustard or vinegar to maintain flavor.

      How long does homemade honey mustard dressing last?

      Homemade honey mustard dressing can typically last for about 1-2 weeks when stored in an airtight container in the fridge. Be sure to give it a good shake before using, as the ingredients may separate over time.

      Can I use a different type of mustard for the dressing?

      Absolutely! While yellow mustard is commonly used, you can switch it up with Dijon mustard for a tangier taste, or even spicy mustard for a kick. The flavor will change slightly but will still be delicious.

      Can I make this dressing dairy-free?

      Yes! If you want a dairy-free version, you can replace any creamy ingredients like mayonnaise or yogurt with a dairy-free alternative such as coconut yogurt or simply skip the creamy component for a vinaigrette-style dressing.

      How to store honey mustard dressing

      Store your leftover honey mustard salad dressing in an airtight container in the refrigerator for up to 1-2 weeks. Use a tightly sealed container or a glass jar to keep the dressing fresh and prevent it from absorbing other flavors in the refrigerator.

      💖 Serving Suggestions

      Best uses for honey mustard dressing:

      • Salad Dressing: Drizzle this delicious salad dressing over mixed greens, or kale salads for a sweet and tangy flavor boost. You can also use it as a pasta salad honey mustard dressing or create the honey mustard dressing for spinach salad.
      • Dipping Sauce: You can swap honey mustard dressing for honey mustard sauce, but note that the dressing is thinner. To thicken it, mix in some mayonnaise or Greek Yogurt to get a sauce-like consistency for dipping or spreading. Enjoy honey mustard dressing as a dip for Air Fryer Chicken Tenders, Air Fryer Chicken Nuggets, or Air Fryer Roasted Veggies.
      • Sandwich Spread: Spread honey mustard dressing on sandwiches or wraps for an extra layer of flavor. It pairs well with Texas Smoked Turkey Breast , Boneless Ham, or roast beef.
      • Marinade: Marinate thin sliced chicken breast, Kalua Pork, or creamy pan fried salmon in honey mustard dressing before grilling or baking to infuse the meat with a deliciously tangy and sweet taste.
      • Glaze: Brush honey mustard dressing on vegetables, such as Air Fryer Carrots, Roasted Brussels Sprouts, or Air Fryer Asparagus, for a tasty glaze.

      🍽 You'll Love These Salads

      • Chopped Greek Salad in a bowl.
        Chopped Greek Salad with Feta & Olives (Bariatric-Friendly)
      • Beet Sweet Potato Salad.
        Beet And Sweet Potato Salad With Feta
      • Chick Fil A Kale Crunch Salad in a white bowl.
        Best Kale Crunch Salad Chick Fil A Recipe
      • Watermelon Salad With Feta and Mint.
        Watermelon Feta Mint Salad

      Did you make this recipe? Leave a review and a ⭐⭐⭐⭐⭐ rating below, or tag us in our Facebook Group! Alternatively, bookmark it in your browser or save to Pinterest.

      honey mustard dressing in a glass container.

      Honey Mustard Dressing

      Angela Milnes
      Add a sweet and tangy kick to your salads with this Honey Mustard Dressing! Made with a perfect blend of honey, mustard, and a touch of vinegar, this creamy dressing is bursting with flavor.
      5 from 4 votes
      Print Recipe Pin Recipe Rate this Recipe
      Prep Time 5 minutes mins
      Cook Time 0 minutes mins
      Total Time 5 minutes mins
      Course Condiments
      Cuisine American
      Servings 4 Servings
      Calories 96 kcal

      Ingredients
        

      • 3 tablespoons Extra Virgin Olive Oil
      • 1 ½ tablespoons Fresh Lemon Juice
      • ½ teaspoon Dijon Mustard
      • ¼ teaspoon Honey

      Instructions
       

      • In a small bowl or jar, combine the extra virgin olive oil, lemon juice, Dijon mustard, and honey.
      • Pour the extra virgin olive oil into the bowl or jar.
      • Add the freshly squeezed lemon juice, ensuring it is free of seeds.
      • Add the Dijon mustard, which will give the dressing its characteristic tangy flavor.
      • Add the honey, which provides a subtle sweetness to balance the acidity of the lemon juice and the sharpness of the mustard.
      • Using a whisk or a tight-fitting lid, vigorously mix or shake the ingredients together.
      • Whisking will incorporate the ingredients thoroughly, ensuring a smooth and well-emulsified dressing.
      • If using a jar, make sure the lid is securely fastened before shaking the jar vigorously for about 30 seconds to a minute.
      • Once the dressing is well combined and has a smooth, uniform consistency, taste it and adjust the seasoning if necessary. Add a pinch of salt or a bit more honey or mustard to suit your preference.
      • Drizzle your homemade honey mustard dressing over your salad and enjoy the delightful blend of flavors!

      Notes

      Chill Before Serving: Refrigerate the dressing for at least 30 minutes to let the flavors meld together.
      Use Different Mustards: Experiment with different types of mustard, like regular yellow mustard, whole grain or spicy brown, for varied tastes.
      Use a Blender: Use a blender for an ultra-smooth, creamy consistency without lumps.

      Nutrition

      Serving: 1gCalories: 96kcalCarbohydrates: 1gProtein: 0.1gFat: 11gSaturated Fat: 1gPolyunsaturated Fat: 1gMonounsaturated Fat: 8gSodium: 7mgPotassium: 7mgFiber: 0.04gSugar: 1gVitamin A: 1IUVitamin C: 2mgCalcium: 1mgIron: 0.1mg
      Print Recipe Pin Recipe Rate this Recipe
      Tried this recipe?Let us know how it was!

      Check Out These Great Salad Recipes

      • Beet Salad With Feta And Walnuts
      • Chinese Chicken Salad
      • Red Cabbage Coleslaw
      • Low Carb Broccoli Salad
      • Turkey Cobb Salad
      • Avocado Salad

      Best Vegan Mayonnaise

      May 22, 2024 by Angela Milnes

      Vegan Mayonaise.

      Whip up a batch of Vegan Mayonnaise for a creamy, plant-based twist on a classic condiment! Whether you're spreading it on sandwiches, tossing it into salads, or using it as a dip, this Vegan Mayonnaise is a must-have in your kitchen arsenal.

      Best Vegan Mayonnaise
      [feast_advanced_jump_to]

      💖 Why This Recipe Works

      • Plant-Based Goodness: Vegan mayonnaise offers a cruelty-free alternative made from plant-based ingredients.
      • Healthier Option: With no eggs or dairy, vegan mayonnaise is cholesterol-free and lower in saturated fat, perfect for health-conscious individuals.
      • Versatile and Flavorful: Creamy and tangy, it adds rich flavor to sandwiches, salads, and dips without sacrificing taste or texture.

      ⭐ Star Ingredients

      • Vegetable Oil: Provides a smooth and creamy base for the mayonnaise.
      • Soy Milk: Acts as the emulsifying agent to help create the mayo’s creamy texture.
      • Lemon Juice: Adds a bright, tangy flavor to balance the richness.
      • Red Wine Vinegar: Enhances the mayo with a subtle acidity and depth of flavor.
      • Dijon Mustard: Adds a hint of spice and helps stabilize the emulsion.
      • Cane Sugar: Adds a touch of sweetness to balance the acidity.
      • Salt: Enhances the overall flavor, bringing all the ingredients together.
      Vegan Mayonnaise Ingredients.

      For the complete list of ingredients with measurements and instructions, please see the recipe card at the bottom of the post.

      📖  Substitutions & Variations

      • Herbed White Wine Vinegar Mayo: Infuse the mayo with a blend of fresh herbs like parsley and dill along with white wine vinegar for a flavorful and aromatic twist.
      • Spicy Chipotle Mayo: Elevate your regular mayo with chipotle peppers and lemon juice concentrate in adobo sauce for a smoky and spicy kick.
      • Creamy Almond Mayo: Create an almond variation by using almond milk, resulting in a creamy and nutty twist on traditional mayo.

      🔪How To Make Vegan Mayonnaise

      Vegan Mayonaise
      1. Step 1: Add the soy milk to a food processor or immersion blender.
      Vegan Mayonaise
      1. Step 2: Process for about 1 minute until the milk turns foamy, creating a light base for the vegan mayonnaise.
      Vegan Mayonaise
      1. Step 3: Incorporate vegetable oil, lemon juice, red wine vinegar, Dijon mustard, sugar, and salt into the foamy soy milk in the processor. Blend for 2-3 minutes until the mixture transforms into a thick and creamy consistency.
      Vegan Mayonaise
      1. Step 4: If the vegan mayonnaise appears too thin, gradually incorporate more oil to achieve the desired thickness, ensuring a velvety texture for your homemade condiment. Once the vegan mayonnaise reaches the ideal consistency, transfer it to a clean container. Refrigerate any leftovers promptly and use within a week for optimal freshness.
      Vegan Mayonaise

      👩‍🍳 Expert Tips

      • Experiment with Seasonings: Enhance the flavor profile of your vegan mayonnaise by experimenting with additional seasonings like garlic powder, smoked paprika, or fresh herbs for a personalized touch.
      • Use Chilled Ingredients: Ensure that your ingredients, especially the soy milk and oil, are chilled before blending to help the emulsion process and achieve a smoother consistency.
      • Gradually Add Oil: To avoid the mayonnaise from splitting or becoming oily, add the vegetable oil slowly in a steady stream while blending to create a stable emulsion.
      • Gluten-Free Dairy-Free Mayo: Whip up a gluten-free and dairy-free version of mayo using suitable ingredients, ensuring a delicious and inclusive condiment for all dietary preferences.

      💭 FAQs

      What is vegan mayonnaise made from?

      Vegan mayonnaise is typically made using plant-based ingredients like tofu, aquafaba (chickpea brine), or cashews as the base, along with oil, vinegar, mustard, and seasonings. The combination creates a creamy, tangy texture similar to traditional mayonnaise, but without any animal products.

      Can I make my own vegan mayo at home?

      Absolutely! Homemade vegan mayo is simple to make. You can blend ingredients like cashews, lemon juice, dijon mustard, and olive oil, adding a pinch of salt for flavor. The great thing about making it yourself is you can adjust the taste and consistency to your preference.

      How do I use vegan mayo in recipes?

      You can use vegan mayonnaise in the same way you would use regular mayonnaise. It’s great for spreading on sandwiches, mixing into coleslaws or potato salads, or as a creamy dip for fries and veggies. It’s also a fantastic base for vegan dressings and sauces.

      Does vegan mayonnaise taste the same as regular mayo?

      While vegan mayonnaise may not taste exactly like traditional mayonnaise, it’s very close! Many store-bought vegan mayo brands have perfected the flavor and texture to replicate the creamy, tangy taste of regular mayo, making it a delicious substitute in all your favorite recipes.

      Best Way to Store Vegan Mayonnaise

      Store any remaining egg free mayo in a sealed container in the refrigerator for up to 1 week. While not recommended due to changes in texture, you can freeze vegan mayo in an airtight container for up to 1 month. Thaw in the refrigerator before using. Defrost frozen vegan mayo in the refrigerator overnight.

      Vegan Mayonaise

      💖 Serving Suggestions

      • Sandwiches and Lettuce wraps: Spread egg free mayonnaise on bread or wraps for added creaminess.
      • Salad Dressings: Use as a base for creamy dressings like ranch or Caesar Dressing.
      • Smoked Salmon Dip: Mix with garlic, herbs, or hot sauce for flavorful dips.
      • Sauces: Incorporate into sauces for richness, like spicy mayo for Breakfast Tacos.
      • Baking: Swap eggs and oil with this vegan version of mayonnaise in recipes like Ocean Water Cheesecake and Zucchini Chocolate Chip Muffins.

      🍽 More Vegan Recipes For You

      • Best Beetroot Hummus Recipe.
        Best Beetroot Hummus Recipe (Vegan)
      • Vegan avocado toast on a wooden board.
        Vegan Avocado Toast
      • Lentil Soup (Vegan).
        Lentil Soup (Vegan)
      • Easy Vegan White Bean Stew.
        Easy Vegan White Bean Stew

      Did you make this recipe? Leave a review and a ⭐⭐⭐⭐⭐ rating below, or tag us in our Facebook Group! Alternatively, bookmark it in your browser or save to Pinterest.

      Vegan Mayonaise.

      Vegan Mayonaise

      Angela Milnes
      Enjoy a creamy, egg-free alternative with this Vegan Mayonnaise! Made with simple, plant-based ingredients, this mayo is rich, smooth, and perfect for spreading on sandwiches, mixing into salads, or using as a dip.
      5 from 4 votes
      Print Recipe Pin Recipe Rate this Recipe
      Prep Time 5 minutes mins
      Cook Time 0 minutes mins
      Total Time 5 minutes mins
      Course Condiments
      Cuisine American
      Servings 4 Servings
      Calories 501 kcal

      Ingredients
        

      • 1 cup Vegetable Oil
      • ½ cup Soy Milk
      • ½ Lemon Juiced
      • 1 tablespoon Red Wine Vinegar
      • 2 teaspoon Dijon Mustard
      • Pinch Sugar
      • Pinch Salt

      Instructions
       

      • Add the soy milk to a food processor or immersion blender. Process for about 1 minute until the milk turns foamy, creating a light base for the vegan mayonnaise.
      • Incorporate vegetable oil, lemon juice, red wine vinegar, Dijon mustard, sugar, and salt into the foamy soy milk in the processor. Blend for 2-3 minutes until the mixture transforms into a thick and creamy consistency.
      • If the vegan mayonnaise appears too thin, gradually incorporate more oil to achieve the desired thickness, ensuring a velvety texture for your homemade condiment.
      • Once the vegan mayonnaise reaches the ideal consistency, transfer it to a clean container. Refrigerate any leftovers promptly and use within a week for optimal freshness. Enjoy best vegan mayo on sandwiches, salads, or as a flavorful dip!

      Notes

      Experiment with Seasonings: Enhance the flavor profile of your vegan mayonnaise by experimenting with additional seasonings like garlic powder, smoked paprika, or fresh herbs for a personalized touch.
      Use Chilled Ingredients: Ensure that your ingredients, especially the soy milk and oil, are chilled before blending to help the emulsion process and achieve a smoother consistency.
      Gradually Add Oil: To avoid the mayonnaise from splitting or becoming oily, add the vegetable oil slowly in a steady stream while blending to create a stable emulsion.
      Gluten-Free Dairy-Free Mayo: Whip up a gluten-free and dairy-free version of mayo using suitable ingredients, ensuring a delicious and inclusive condiment for all dietary preferences.

      Nutrition

      Calories: 501kcalCarbohydrates: 2gProtein: 1gFat: 55gSaturated Fat: 8gPolyunsaturated Fat: 32gMonounsaturated Fat: 13gTrans Fat: 0.4gSodium: 43mgPotassium: 65mgFiber: 1gSugar: 1gVitamin A: 121IUVitamin C: 9mgCalcium: 47mgIron: 0.3mg
      Print Recipe Pin Recipe Rate this Recipe
      Tried this recipe?Let us know how it was!

      More Vegan Recipes To Try

      • Raw Vegan Bread
      • Vegan Avocado Toast
      • Vegan Pumpkin Waffles
      • Vegan Mango Sorbet
      • Vegan Mango Chutney
      Vegan Mayonaise

      Healthy Quinoa Salad Recipe

      May 22, 2024 by Angela Milnes

      Quinoa Salad.

      Packed with healthy ingredients and a delicious creamy salad dressing, this healthy Quinoa Salad recipe is an absolute must-try. Whether you're trying to get more veggies on your plate or are just trying to stick to clean eating, quinoa salads are the way to go.

      quinoa salad ingredients
      [feast_advanced_jump_to]

      💖 Why This Recipe Works

      • Fantastic Taste: This has to be, hands down, the best quinoa salad recipe in my opinion.
      • Good Meal Prep: You can actually meal prep the salad, customize it with your choice of ingredients, and it'll still turn out absolutely delicious.
      • Great Way To Use Quinoa: Another big plus is the fact that you can actually put your leftover cooked quinoa to use for this salad. It gets 5 stars in my household every time I make it.

      If you're looking for an easy salad that's filling, nutritious, healthy and flavorful all at the same time, you've got to give this recipe a try. This quinoa recipe is perfect when your craving food that is packed with goodness!

      ⭐ Star Ingredients

      To make this healthy quinoa salad recipe, here's all you'll need.

      Quinoa Salad Ingredients

      • Quinoa: Forms the nutritious, protein-rich base of the salad.
      • Red cabbage: Adds a crunch, antioxidant boost, and vibrant color to the salad.
      • Edamame: Provides additional protein and a contrasting texture.
      • Red peppers: Contribute a pop of color and sweet flavor to the salad.
      • Radishes: Offer a crunchy texture and pungent flavor note.
      • Carrots: Bring a sweet crunch to the salad's texture.
      • Parsley: Fresh parsley adds a burst of freshness and herby flavor.
      • Cashews: Enhance the salad with a delightful crunch.

      Salad Dressing Ingredients

      • Soy sauce: Infuses the salad with umami and savory undertones.
      • Oil: Acts as the base for the dressing, either olive or vegetable oil.
      • Lime (or lemon) juice: Ties the flavors together with its tangy brightness.
      • Peanut butter: Adds a creamy texture and nutty flavor to the salad.
      • Green onions: Provide a pop of color and fresh taste to the dressing.
      • Ginger: Lends an earthy spiciness to the salad dressing.
      • Garlic: Amplifies the dressing with a punch of pungent flavor.

      For the complete list of ingredients with measurements and instructions, please see the recipe card at the bottom of the post.

      📖  Substitutions & Variations

      Based on what you have at hand, you can add tons of different ingredients into the salad and experiment with the flavors and add-ons- it is a great recipe that way!

      • Top this dish with Cilantro Chimichurri sauce for a delicious variation.
      • To make the salad more flavorful and bring some creaminess and saltiness into it, you can add some crumbled feta cheese.
      • Black beans can be a another excellent addition to the salad, and can lend it some protein punch.
      • Grilled chicken is another fantastic protein source to consider adding to your salad. You can also use rotisserie shredded chicken if you want to.
      • Fresh cucumber can add a nice bit of crunchiness and flavor to the salad.
      • In addition to the chopped green onion, a sprinkle of fresh cilantro or fresh parsley can really brighten up the flavor of this easy quinoa salad.
      • You can also add some red bell pepper, red onion, cherry tomatoes and drained canned corn to the salad- basically any fresh veggies and fresh herbs that you can get your hands on.

      🔪How To Make Quinoa Salad

      quinoa salad
      1. Step 1: In a small bowl, mix the sauce, minced ginger, minced garlic, all of the peanut butter, onion, and vegetable oil. Add lime juice. Mix.
      quinoa salad
      1. Step 2: In a second bowl, add cooked quinoa.
      quinoa salad
      1. Step 3: Add finely chopped vegetables. Mix to combine. Add salad dressing.
      quinoa salad ingredients
      1. Step 4: When serving, sprinkle with chopped cashews and parsley. Serve.
      quinoa salad

      👩‍🍳 Expert Tips

      While making this simple quinoa salad recipe is super easy, you might want to note down these little tips and tricks too.

      • If you don't have fresh lime juice, you can also make do with some fresh lemon juice instead.
      • If you don't have both, you can just use some apple cider vinegar to bring that tanginess into the salad.
      • Want the salad dressing to have a bit of sweetness? You can add a dash of maple syrup into it too.
      • If you want a spicy kick to the salad, a dash of red pepper flakes is the way to go.
      • If you want a gluten free version of the dressing, just skip adding the soy sauce and instead using coconut aminos.
      • If you don't have the fresh garlic that the recipe calls for, you can also just use some garlic powder instead.

      💭 FAQs

      Can I make this quinoa salad ahead of time?

      Yes! This quinoa salad actually gets better after a few hours or even overnight as the flavors have time to meld together. Just store it in an airtight container in the fridge, and give it a quick toss before serving.

      Can I add more vegetables to this salad?

      Absolutely! This salad is highly customizable. Feel free to add any vegetables you like, such as cucumber, bell peppers, or even roasted sweet potatoes. Just ensure they're chopped into bite-sized pieces to keep the texture balanced.

      Can I substitute quinoa with another grain?

      Yes, you can substitute quinoa with other grains like farro, couscous, or bulgur. Each grain will bring its own texture, but quinoa is a great choice for its protein content and light, fluffy texture.

      How long will this quinoa salad stay fresh?

      When stored properly in the fridge, quinoa salad can last up to 3-4 days. If you're planning to keep it longer, it's best to leave out any dressings or perishable toppings until ready to serve.

      Best Way to Store Quinoa Salad

      You can store your leftover quinoa salad in an airtight container and refrigerate it for up to 2 days. This can actually be a great cold quinoa salad that you can enjoy without needing to reheat it. If you're planning to meal prep it, I would recommend storing the veggies and quinoa separately and adding the dressing in just a few minutes before you plan to have it.

      quinoa salad

      💖 Serving Suggestions

      Here are some of the best meat options to serve with Quinoa Salad:

      • Slow Cooker Pulled Pork: Cook pork shoulder or pork butt with your favorite seasoning or BBQ sauce until tender and easily shredded. The juicy and flavorful pulled pork pairs wonderfully with the lightness of quinoa salad, creating a satisfying meal with a hint of smokiness.
      • Instant Pot Chicken Thighs: Season chicken thighs with herbs and spices, then cook them in the Instant Pot until tender and juicy. The succulent chicken thighs complement the nutty quinoa and fresh vegetables in the salad, adding protein and flavor to the dish.
      • Instant Pot Shredded Chicken: Cook chicken breasts or thighs in the Instant Pot with broth and seasonings until tender, then shred the meat. The tender shredded chicken adds protein to the quinoa salad and absorbs the flavors of the dressing, creating a delicious and nutritious meal.

      🍽 More Healthy Salads

      • Apple Grapefruit Salad.
        Apple Grapefruit Salad (Easy & Refreshing Citrus Fruit Bowl)
      • Chopped Greek Salad in a bowl.
        Chopped Greek Salad with Feta & Olives (Bariatric-Friendly)
      • Chick Fil A Kale Crunch Salad in a white bowl.
        Best Kale Crunch Salad Chick Fil A Recipe
      • Best Four Bean Salad recipe.
        Best Four Bean Salad Recipe

      Did you make this recipe? Leave a review and a ⭐⭐⭐⭐⭐ rating below, or tag us in our Facebook Group! Alternatively, bookmark it in your browser or save to Pinterest.

      Quinoa Salad.

      Healthy Quinoa Salad Recipe

      Angela Milnes
      Enjoy a burst of freshness with this Healthy Quinoa Salad! Packed with protein-rich quinoa, colorful veggies, and a light, zesty dressing, this salad is as nutritious as it is delicious. It’s the perfect dish for a light lunch, a side at dinner, or a make-ahead meal that’s full of wholesome goodness!
      5 from 4 votes
      Print Recipe Pin Recipe Rate this Recipe
      Prep Time 5 minutes mins
      Cook Time 10 minutes mins
      Total Time 15 minutes mins
      Course Vegetables
      Cuisine Mediterranean
      Servings 6 Servings
      Calories 182 kcal

      Ingredients
        

      For The Salad

      • ¾ Cup Quinoa Cooked
      • ¼ Cup Red Cabbage
      • 3 tablespoon Edamame
      • ⅓ Cup Red pepper
      • 1 ½ tablespoon Radishes 1 ½ tbsp.
      • 2 ½ tablespoon Carrots
      • 2 Sprigs Parsley
      • 1 tablespoon Cashew

      For The Dressing

      • 2 tablespoon Soy Sauce
      • 1 tablespoon Vegetable Oil
      • 1 Lime Juiced or lemon juice 1 ½ tbsp
      • 1 tablespoon Peanut butter Or Almond Butter
      • 1 tablespoon Green Onion
      • ½ teaspoon Ginger
      • ½ teaspoon Garlic

      Instructions
       

      • Once you have all your ingredients ready, here's what you'll need to make the quinoa salad from scratch.
      • In a small bowl, mix the sauce, minced ginger, minced garlic, all of the peanut butter, onion, vegetable oil. Add lime juice. Mix.
      • In a second bowl, add cooked quinoa.
      • Add finely chopped vegetables. Mix.
      • Add salad dressing.
      • When serving, sprinkle with chopped cashews and parsley. Serve.

      Notes

      If you don't have fresh lime juice, you can also make do with some fresh lemon juice instead.
      If you don't have both, you can just use some apple cider vinegar to bring that tanginess into the salad.
      Want the salad dressing to have a bit of sweetness? You can add a dash of maple syrup into it too.
      If you want a spicy kick to the salad, a dash of red pepper flakes is the way to go.
      If you want a gluten free version of the dressing, just skip adding the soy sauce and instead using coconut aminos.
      If you don't have the fresh garlic that the recipe calls for, you can also just use some garlic powder instead.

      Nutrition

      Serving: 1gCalories: 182kcalCarbohydrates: 25gProtein: 7gFat: 8gSaturated Fat: 1gPolyunsaturated Fat: 4gMonounsaturated Fat: 2gTrans Fat: 0.01gSodium: 571mgPotassium: 503mgFiber: 7gSugar: 2gVitamin A: 5030IUVitamin C: 7mgCalcium: 73mgIron: 4mg
      Print Recipe Pin Recipe Rate this Recipe
      Tried this recipe?Let us know how it was!

      More Delicious Recipe Ideas

      If you enjoyed making my favorite quinoa salad and are inspired to discover more delicious recipes, here are a few handpicked ones you might want to take a look at.

      • Citrus And Honey Roasted Beets
      • Best Healthy Snacks For Travel
      • Purple Cauliflower Recipe (Mashed Cauliflower)
      • Beet Feta Salad With Walnuts
      • Canned Black Bean And Corn Salsa Recipe
      • Best Red Cabbage Coleslaw
      quinoa salad
      • « Previous Page
      • 1
      • …
      • 11
      • 12
      • 13
      • 14
      • 15
      • …
      • 19
      • Next Page »
      Angela Milnes.

      Hi I'm Angela

      Welcome to Eat Your Beets where you'll find Healthy and Nutritious Family Recipes that are tasty and simple to cook.

      More About Me

      Spring Recipes

      • edamame stir fry in a white bowl.
        Easy Edamame Stir Fry (15-Minute Protein-Packed Side Dish)
      • Best Gravlax Salmon With Dill (Cured Salmon).
        Best Gravlax Salmon With Dill (Cured Salmon)
      • One Pan Chicken And Asparagus.
        One Pan Chicken And Asparagus
      • Chicken And Cabbage Stir Fry Recipe.
        Chicken And Cabbage Stir Fry Recipe
      • Zucchini Egg Bake Recipe.
        Best Zucchini Egg Bake Recipe
      • How To Make Sun Dried Tomatoes Without Oil.
        How To Make Sun Dried Tomatoes Without Oil – Easy Oven Method

      Popular Recipes 💗

      • best stuffed mushrooms.
        The Best Stuffed Mushrooms
      • Slow Cooker Chicken Bacon Ranch Pasta.
        Slow Cooker Chicken Bacon Ranch Pasta
      • Baked Ricotta On A Spoon.
        Bariatric Friendly Ricotta Bake Recipe
      • Fun Veggie Train With Bell Peppers.
        Fun Veggie Train With Bell Peppers
      • Best Blueberry Smoothie Bowl topped with fruit.
        Best Blueberry Smoothie Bowl Recipe
      • Grilled Eggplant With Lemon Dip.
        Grilled Eggplant With Lemon Dip
      • Air Fryer Asparagus with Parmesan.
        Air Fryer Asparagus with Parmesan
      • Sheet Pan Chicken Fajitas.
        Sheet Pan Chicken Fajitas

      Footer

      As Seen In

      As Seen In.
      • Facebook
      • Pinterest

      Privacy Policy

      Accessibility Policy

      ↑ Back To Top

      Copyright © 2025 | Eat Your Beets | All Rights Reserved

      Rate This Recipe

      Your vote:


      A rating is required
      A name is required
      An email is required