​

Eat Your Beets

  • About
  • Spring Recipes
  • Vegetables
  • Side Dishes
  • Recipe Index
menu icon
go to homepage
  • About
  • Spring Recipes
  • Vegetables
  • Side Dishes
  • Recipe Index
    • Facebook
    • Pinterest
  • subscribe
    search icon
    Homepage link
    • About
    • Spring Recipes
    • Vegetables
    • Side Dishes
    • Recipe Index
    • Facebook
    • Pinterest
  • ×
    Sign Up To Our Newsletter →
    Home » Recipe index

    Best Clam Juice Substitute: Top 13 Alternatives

    July 30, 2024 by Angela Milnes

    Fish stock substitutes.

    If you're in the middle of cooking and realize you don't have clam juice, don't worry! There are plenty of ways to replace it without running to the store.

    Finding a good Clam Juice Substitute is easier than you think, and you probably already have something in your kitchen that will work perfectly. In this article, we will go over some simple alternatives you can use to keep your recipe on track. Let's dive in!

    Best Clam Juice Substitute
    [feast_advanced_jump_to]

    What is Clam Juice?

    • What Clam Juice Is Made Of: Clam juice is made from the liquid that steamed clams release.
    • Flavor And Taste: Clam juice has a briny, salty flavor that's rich and savory. It’s like taking a sip of the sea, with a deep umami taste that enhances any dish.
    • Origin: Clam juice doesn’t have a specific origin story, but it's been used for centuries in coastal cooking, especially in places where clams are abundant, like New England and the Mediterranean.
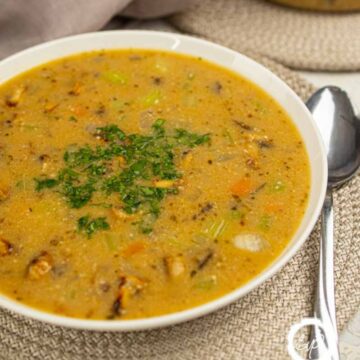
    • Clam Broth vs. Clam Juice: Clam broth is typically made by simmering clams in water along with other ingredients like onions and herbs, while clam juice is the pure liquid that comes directly from the clams themselves. Clam broth is more complex, while clam juice is pure.

    Why Use A Clam Juice Substitute?

    Using a clam juice substitute can enhance the flavor of your dishes when clam juice isn't available or suitable for your dietary needs. It's a versatile option that allows you to maintain the rich, savory taste in recipes without compromising on quality or taste.

    Best Clam Juice Alternatives?

    Finding the right substitute for clam juice can be very important for maintaining the desired flavor and texture of your dish. Here are 13 effective alternatives for clam juice you can use in various recipes.

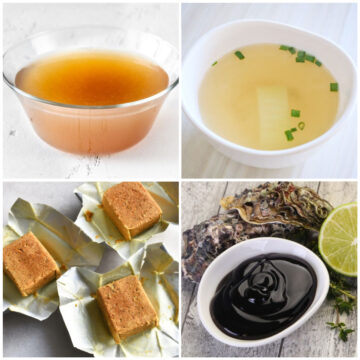
    1. Dashi No Moto

    If you need a substitute for clam juice, dashi no moto is a great option. This Japanese seasoning is made from dried fish and seaweed. It has a savory, umami flavor that adds depth to your dishes.

    You can buy dashi no moto at most Asian grocery stores or make it at home by simmering kombu (seaweed) and bonito flakes (dried fish).

    To replace clam juice, use half the amount of dashi no moto mixed with water. For example, if a recipe calls for 1 cup of clam juice, use ½ cup of dashi no moto and ½ cup of water. This will add flavor and richness to your food.

    You can use dashi no moto in these dishes:

    • Soup: Add it to miso soup or any broth-based soup.
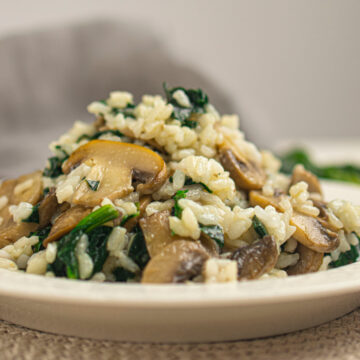
    • Saffron Risotto: Use it as a base for seafood risotto.
    • Pasta: Mix it into pasta sauces for an umami kick.

    2. Bottled Clam Juice Concentrate

    Bottled clam juice concentrate is a liquid made from fresh clams and has a strong, briny flavor that's perfect for adding seafood taste to your recipes. You can find bottled clam juice concentrate at most grocery stores, usually in the seafood or canned goods section.

    To use it as a substitute, mix the concentrate with water according to the package instructions to get the same amount of liquid as clam juice. This will ensure your dish has that delicious seafood essence. Try it in:

    • Seafood Risotto: Adds a rich, briny taste to this creamy rice dish.
    • Fish Soup: Enhances the savory flavors in this comforting soup.
    • Shrimp Scampi: Gives the sauce a burst of fresh seafood flavor.

    3. Shrimp Stock

    Shrimp stock stock is made from simmering shrimp shells and heads, which gives it a rich seafood flavor.

    You can easily make shrimp stock at home by boiling shrimp shells in water with some vegetables like onions, carrots, and celery. Let it simmer for about 30 minutes, then strain it. You can also buy shrimp stock at most grocery stores.

    To use it as a replacement for clam juice, use the same amount of shrimp stock as you would clam juice. This will add a lot of good stuff and depth to your recipes.

    You can use shrimp stock in these dishes:

    • Fish Chowder: Adds a rich seafood flavor to this creamy soup.
    • Paella: Enhances the taste of this classic Spanish dish.
    • Jamaican Jerk Seafood Pasta: Makes the sauce extra flavorful and delicious.
    Shrimp Stock

    4. Chicken Broth Or Chicken Stock

    If you're out of clam juice, chicken broth or chicken stock is a fantastic substitute. It has a rich, savory flavor that adds depth to your dishes without overpowering them.

    You can easily buy chicken broth from any grocery store, or make it at home by simmering chicken bones and vegetables in water for a few hours.

    To replace clam juice with chicken broth, use a 1:1 ratio. This means if a recipe calls for one cup of clam juice, you can use one cup of chicken broth instead. It works great in soups, stews, and sauces. Try it in:

    • Instant Pot Clam Chowder: Adds a subtle flavor while cooking fresh clams.
    • Seafood Risotto: Provides a rich base for this creamy dish.
    • Steamed Mussels: Enhances the taste when steaming mussels or other shellfish.

    Relevant Post: Can You Freeze Oysters?

    Chicken Stock

    5. Fish Stock

    Fish stock has a rich and savory flavor that mimics the taste of the sea, making it a perfect substitute. You can either make fish stock at home by simmering fish bones and vegetables for a few hours or buy it from the store. Look for it in the soup aisle or seafood section.

    If you decide to make it yourself, remember to add some salt but not too much, as you can always adjust it later. Use fish stock in the same amount as clam juice in your recipes. When cooking with it, reduce heat to let the flavors meld together perfectly.

    Here are the dishes where you can use fish stock:

    • Seafood Risotto: The fish stock enhances the seafood flavor in every bite.
    • Fish Stew: It adds depth and richness to the broth.
    • Paella: It brings out the delicious taste of all the ingredients.
    Fish Stock

    6. Fish Sauce

    Fish Sauce is a fantastic choice if you don't want fish stock. It adds umami flavor and depth to your dishes with its complex taste that isn't too fishy.

    You can make homemade fish sauce using fresh fish, salt, garlic, whole black pepper, and other ingredients, or you can easily buy it from specialty stores or online. Use fish sauce in a 1:1 ratio to replace clam juice in your recipes. Try it in:

    • Pad Thai: Adds a savory kick to this classic dish.
    • Vietnamese Soups: Enhances the broth's complex flavors.
    • Homemade Barbecue Sauce: Gives your BBQ sauce a unique, delicious twist.

    Related Article: Does Fish Sauce Go Bad?

    fish sauce on white bowl

    7. Mussel Juice

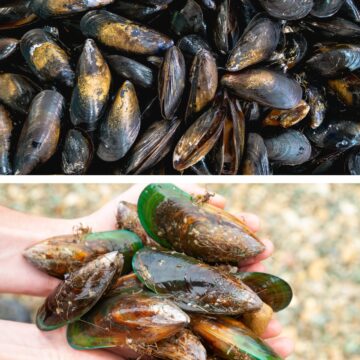
    If you're looking for briny flavor just like clam juice, mussel juice is a great alternative. Mussel juice has a rich, briny flavor, but tends to be a bit milder and sweeter. This makes it perfect for seafood dishes where you want a more delicate taste.

    You can make mussel juice at home by steaming fresh mussels and saving the liquid. Just clean the mussels, steam them until they open, and strain the liquid to remove any sand or bits. Use the same amount of mussel juice as you would clam juice in your recipes. Try it in:

    • Seafood Pasta: Adds a rich, briny note that enhances the overall seafood taste.
    • Clam chowder: Provides a delicate yet flavorful base that perfectly complements the creamy texture of the chowder.
    • Paella: Gives the dish a subtle sea essence, enriching its traditional Mediterranean flavors.
    For Making Mussel Juice

    8. Oyster Liquor

    Oyster liquor is the natural juice found inside fresh oysters. It also has a briny flavor that feels like added salt and can enhance your dishes with a rich, ocean-like taste.

    You can easily make oyster liquor at home by shucking fresh oysters and collecting the liquid. Just strain it to remove any shell bits. Use it in a 1:1 ratio as a direct substitution for clam juice in your recipes. Try it in:

    • Seafood risotto: Adds a deep, savory sea flavor, making the risotto taste even more luxurious.
    • Fish stew: Infuses the stew with a rich, salty essence that highlights the freshness of the fish.
    • New England clam chowder: Gives the chowder an extra layer of briny goodness, enhancing its classic taste.
    Oyster

    9. Seafood Bullion

    If you're out of clam juice or just want to try something new, seafood bouillon is a very suitable alternative. It's packed with savory flavors from various seafood, giving your dishes an extra depth of taste.

    What's great about seafood bouillon is that you can easily find it at most grocery stores. When swapping for clam juice, use one bouillon cube or one teaspoon of bouillon paste for every cup of clam juice needed. Simply dissolve it in hot water before adding it to your recipe. Try it in:

    • Seafood Chowder: Adds a rich, ocean-like flavor.
    • Paella: Enhances the taste of this classic Spanish rice dish.
    • Seafood Risotto: Infuses each bite with deep, savory notes.
    Seafood Bullion

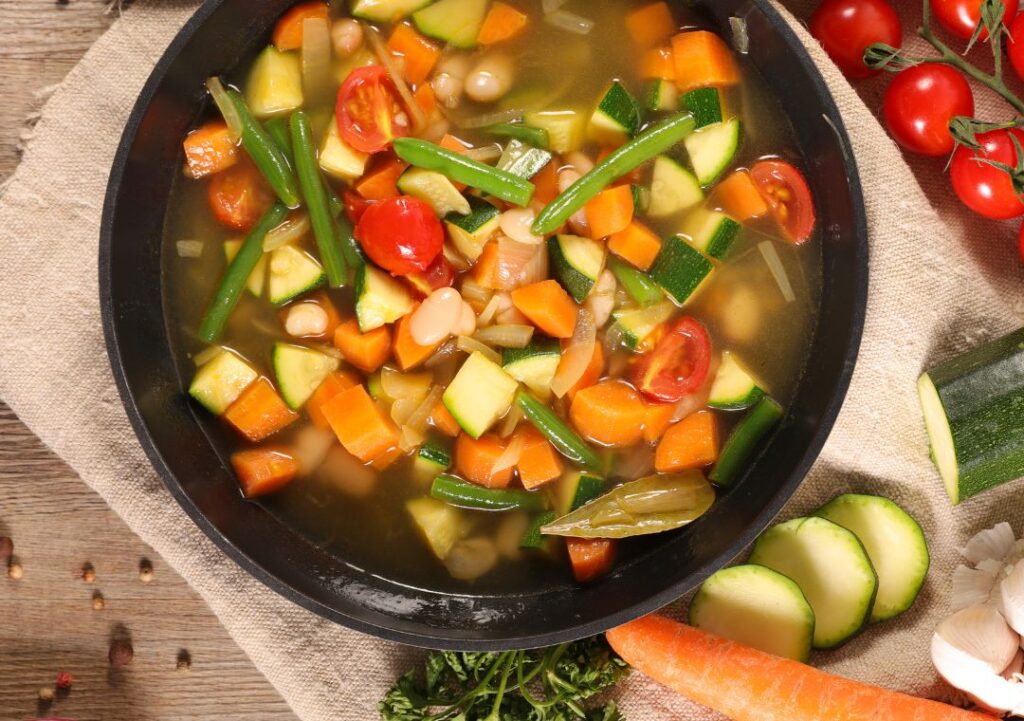
    10. Homemade Veggie Broth

    The homemade veggie broth is packed with natural flavors from vegetables, making your dishes taste fresh and hearty.

    What's special about veggie broth is that it's easy to make at home—just simmer a mix of veggies like carrots, celery, and onions with some herbs and water. Plus, it's a great vegetarian option!

    To replace clam juice, use one cup of veggie broth for every cup of clam juice needed. Just swap it in directly into your recipe. Try it in:

    • Vegetable Soup: Adds a rich, savory base.
    • Risotto: Makes the rice creamy and flavorful.
    • Pasta Sauce: Enhances the sauce with deep, fresh flavors.
    Homemade Veggie Broth

    11. Tomato Broth

    Using tomato broth as a replacement for clam juice is a great way to add a burst of flavor to your family's meals! It's special because it has a rich, savory flavor mimicking clam juice's brine taste.

    You can easily make it at home by simmering tomato juice with garlic, herbs, and some salt. Or, you can buy ready-made tomato broth from most grocery stores. When replacing clam juice, use the same amount of tomato broth in your recipes. Try it in:

    • Seafood Paella: Swap clam juice with tomato broth for a tasty twist.
    • Cioppino (Seafood Stew): Use tomato broth to enhance the flavors of the seafood.
    • Pasta with Seafood Sauce: Replace clam juice with tomato broth for a rich, tangy sauce.

    12. Chinese Dried Scallops

    Chinese dried scallops bring a similar oceanic flavor that mimics the taste of clam juice wonderfully. What makes them special is their rich umami taste, which adds depth to soups and sauces.

    You can easily make your own scallop broth at home by soaking a few dried scallops in warm water until they soften, then using the soaking water in place of clam juice.

    If you're looking to buy dried scallops, check out your local Asian grocery store or online markets. For replacement, use about one dried scallop with a half-cup of water for every cup of clam juice needed. Try in:

    • Paella: Substitute clam juice with scallop broth to enhance the dish's richness.
    Chinese Dried Scallops

    13. Lobster & Crab Soup Base

    The lobster & crab soup base brings the rich, savory flavors of lobster and crab meat right into your cooking. Lobster adds a sweet, buttery taste, while crab gives a slightly sweet, mild flavor.

    You can buy this soup base at most grocery stores or make it at home by simmering lobster and crab shells with some vegetables and herbs.

    Use it in a 1:1 ratio to substitute clam juice in recipes. It's super easy to use – just mix it into soups, sauces, or stews for an extra boost of seafood flavor. Try it in:

    • Cioppino (Seafood Stew): Intensifies the savory, seafood essence in every bite.
    • Seafood Paella: Enriches the rice with a complex, luxurious seafood taste.
    Lobster Soup Base

    Try One of these Clam Juice Replacements.

    In conclusion, there are many options for substitutes to use in place of clam juice in your recipes. From oyster liquor to lobster & crab soup base, each alternative brings its own unique flavor and can enhance dishes in different ways.

    So, which substitution will you choose? Will you choose the briny oyster liquor or a more traditional seafood bouillon? Or maybe try out something new, like dried scallops or tomato broth? Write your preference in the comment section!

    Learn More Tips About Seafood:

    • How To Store Clams: Top Tips
    • What Does Shrimp Taste Like?
    • What To Do With Leftover Shrimp?
    • How Long Can Shrimp Stay Out?
    • 12+ Classy Clam Recipes For Your Dinner

    21+ Healthy Shrimp Recipes To Try

    July 29, 2024 by Angela Milnes

    Shrimp recipes to try.

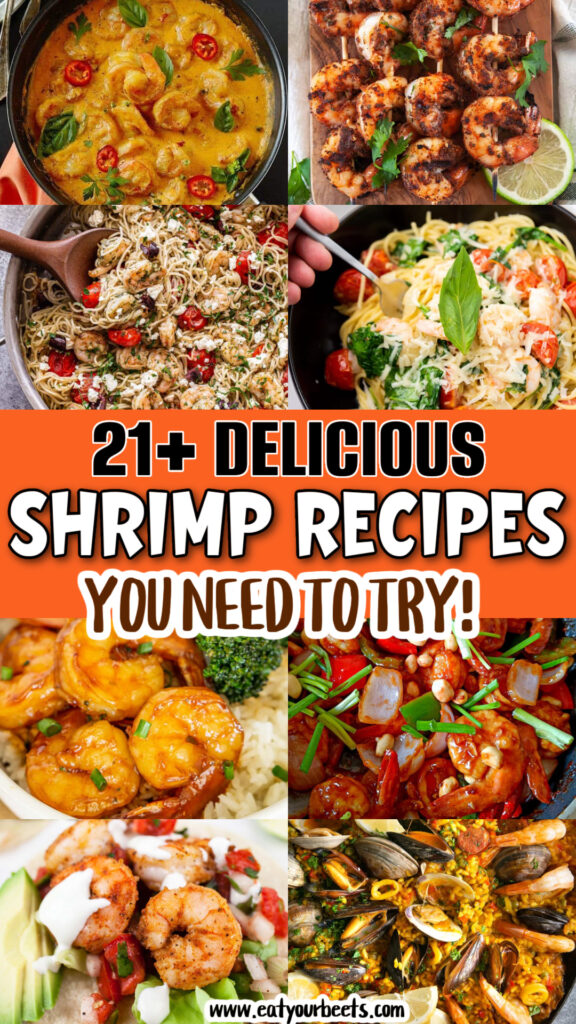
    Get ready to dive into a seafood lover's paradise with our roundup of 21+ Delicious Healthy Shrimp Recipes! Shrimp is a versatile, lean protein that's perfect for a variety of dishes, from light salads to hearty pastas. Whether you're in the mood for something quick and easy, or a meal that's sure to impress, we've got you covered. Each recipe is packed with flavor and nutrients, making it easy to eat well without sacrificing taste. Let's explore these mouthwatering shrimp dishes that are sure to become staples in your kitchen!

    Healthy shrimp recipes for a family.
    [feast_advanced_jump_to]

    Why Is Shrimp Healthy?

    • Low in Calories: Shrimp is relatively low in calories. A 3-ounce serving typically contains about 84 calories, making it a great choice for those looking to maintain or lose weight.
    • High in Protein: Shrimp is an excellent source of high-quality protein, with about 20 grams per 3-ounce serving. Protein is essential for building and repairing tissues and maintaining muscle mass.
    • Rich in Nutrients: Shrimp is packed with vitamins and minerals, including vitamin B12, phosphorus, iodine, and selenium. These nutrients play crucial roles in energy production, thyroid function, and antioxidant defense.

    If you love this recipe then be sure to check out our recipes for Fiery Ginger Garlic Shrimp, Shrimp Ceviche, Crispy Coconut Shrimp with Orange Marmalade Dip or Spicy Crispy Bang Bang Shrimp with Sweet Chili Sauce.

    21 Healthy Shrimp Recipes

    Why not try a healthy shrimp recipe from this list. I'm sure you'll find something you love.

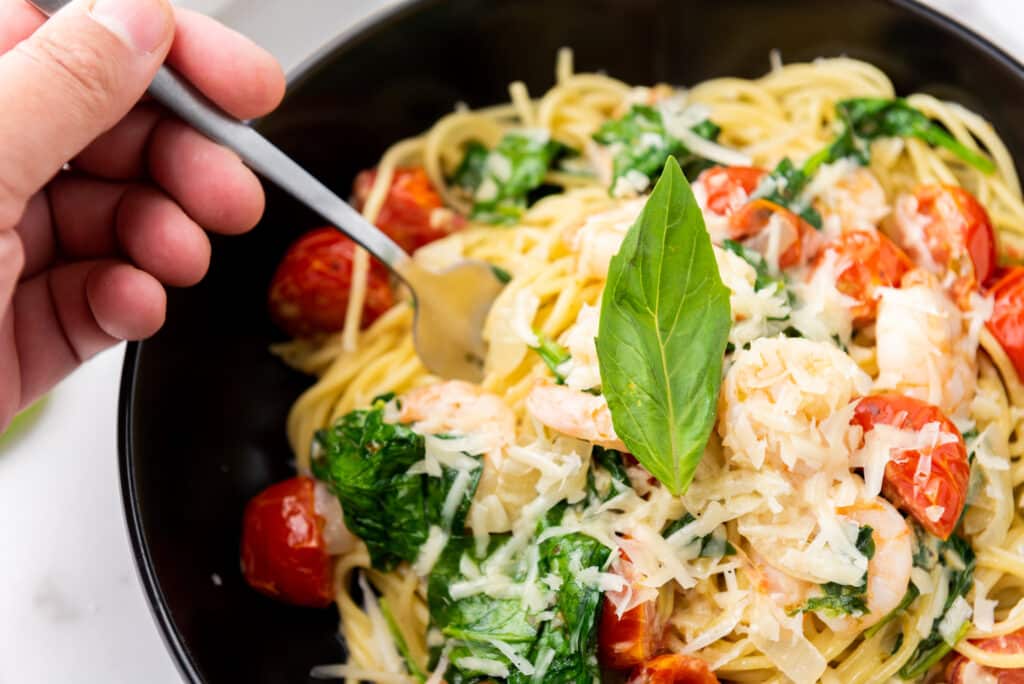
    Shrimp Scampi Spaghetti

    Try Shrimp Scampi Spaghetti for a classic Italian dish with succulent shrimp cooked over medium heat, tossed in a garlic butter sauce, and served over spaghetti for a quick and elegant meal. You can also try Instant Pot Shrimp Scampi On Fettucine here!

    Shrimp scampi served with fork.

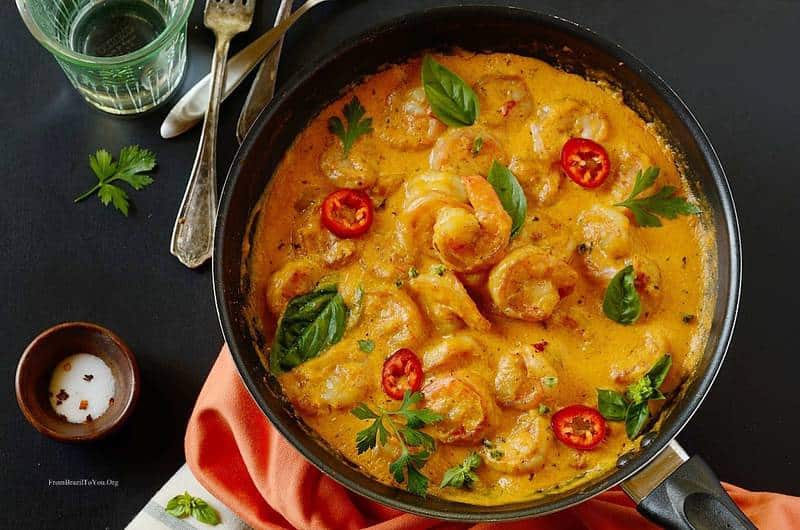
    Shrimp In Coconut Sauce

    Creamy and aromatic, Shrimp In Coconut Sauce features a rich coconut sauce with hints of tropical flavors, perfect for a comforting dinner.

    Shrimp cooked in coconut sauce.

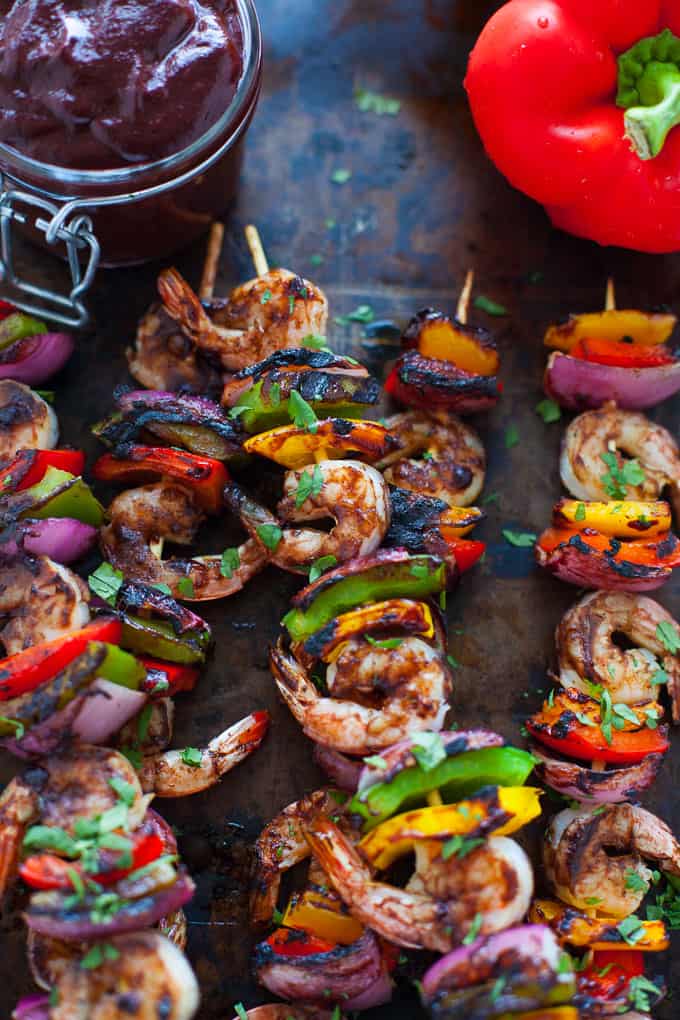
    Shrimp and Veggie Kabobs

    Grilled to perfection, these Shrimp And Veggie Kabobs combine juicy shrimp with colorful veggies, making a fun and healthy meal option.

    Shrimp and veggie kabobs.

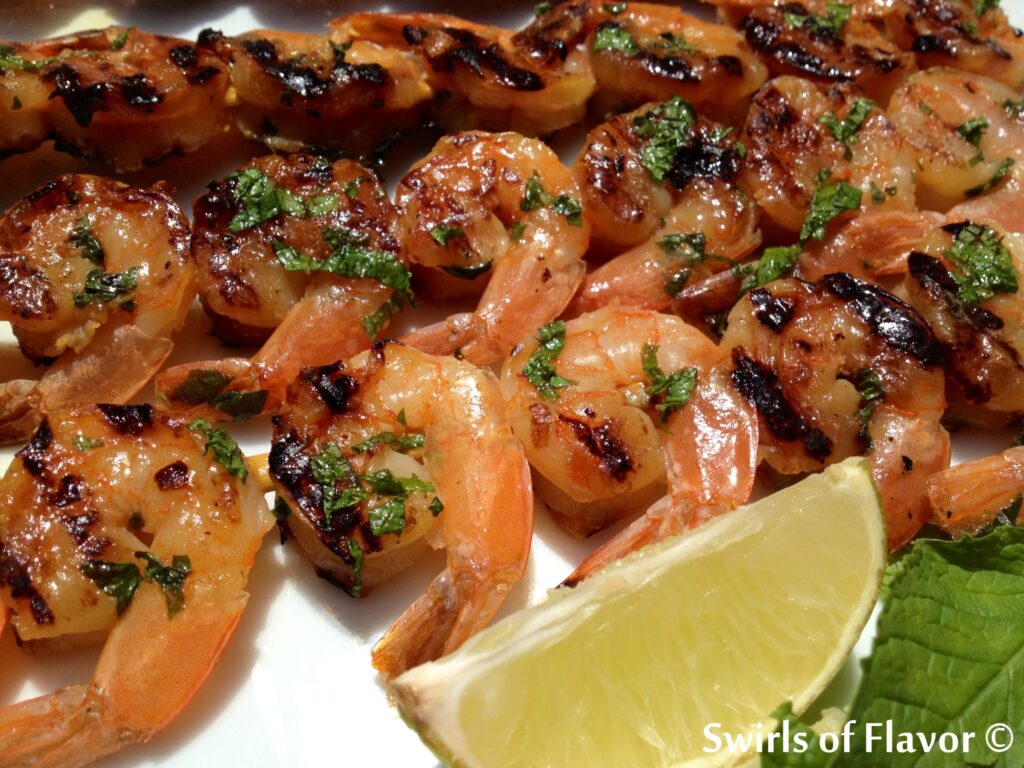
    Mojito Grilled Shrimp

    Infused with the refreshing flavors of mint and lime, Mojito Grilled Shrimp is perfect for a summer barbecue.

    Mojito shrimps.

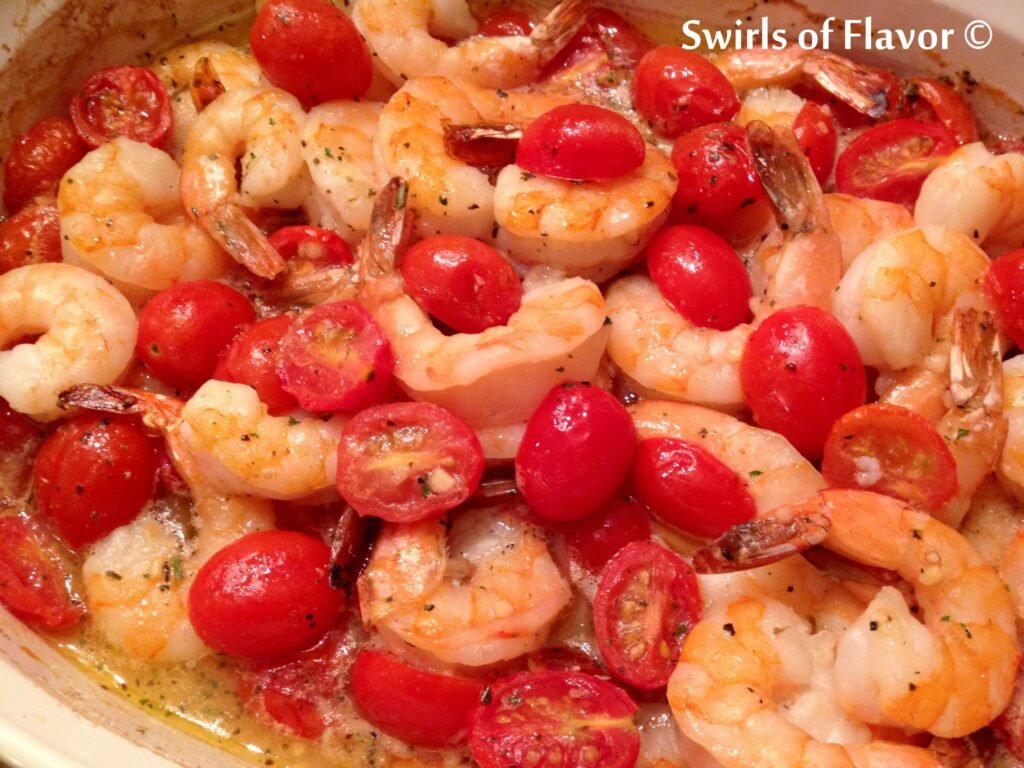
    Garlic Herb Shrimp with Extra Virgin Olive Oil

    Bursting with garlic and fresh herbs, this simple yet delicious Garlic Herb Shrimp recipe is a great addition to any meal. To enhance the flavor, saute garlic in olive oil just until brown before adding the shrimp.

    Shrimp pomodoro.

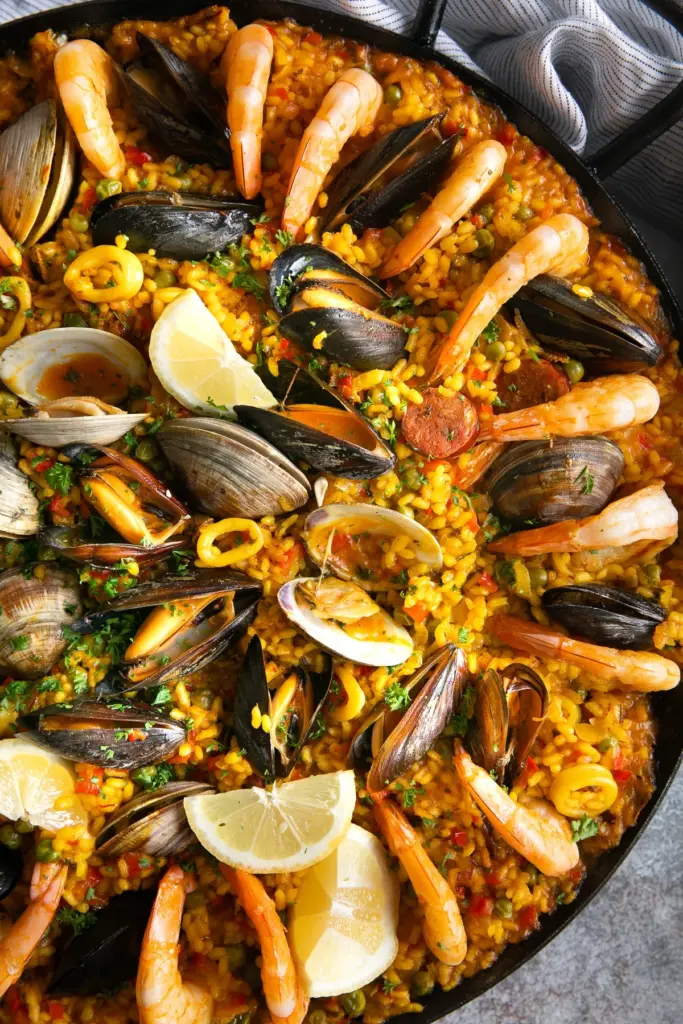
    Shrimp Paella

    A Spanish favorite, this vibrant Shrimp Paella is packed with bold flavors and is perfect for a festive gathering.

    Shrimp paella ready to be served.

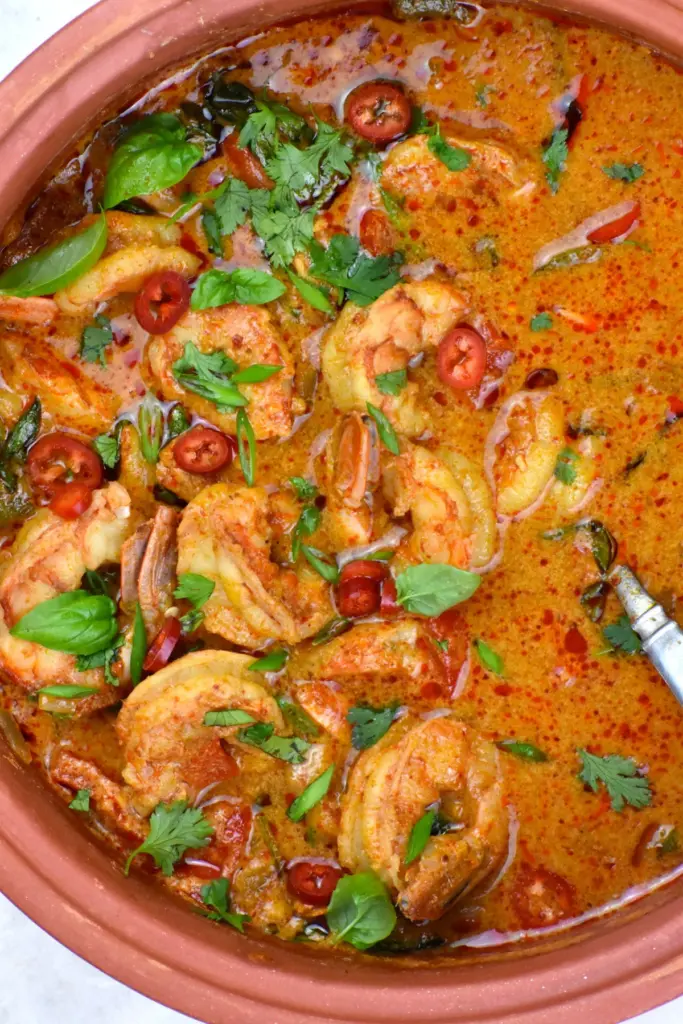
    Thai Shrimp Curry

    Spicy, creamy, and incredibly satisfying, this Thai Shrimp Curry is a delightful way to enjoy your shrimp. Adding a splash of soy sauce enhances the flavor, making the dish even more delicious.

    Thai shrimp curry in a pot.

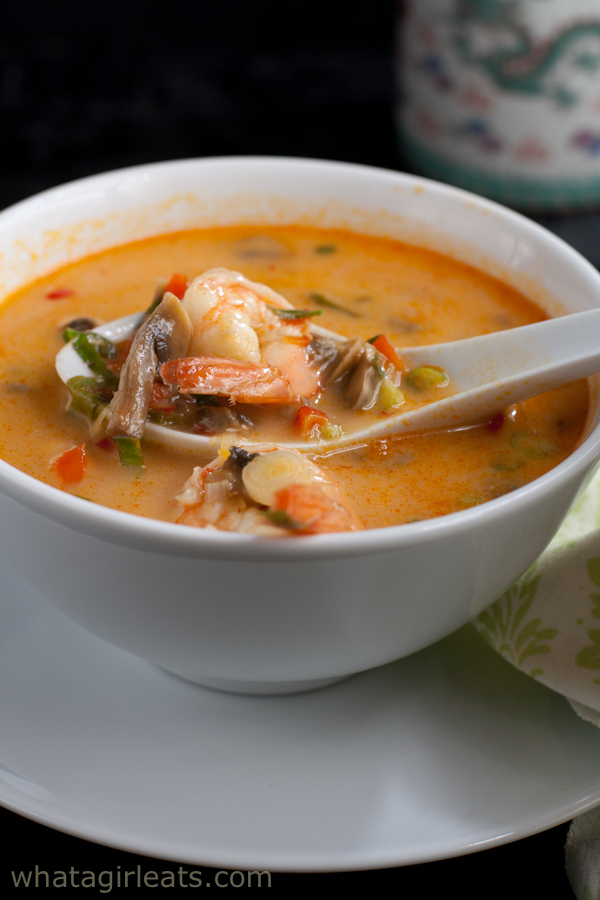
    Thai Coconut Shrimp Soup

    Warm up with this flavorful and aromatic soup, featuring Thai Coconut Shrimp Soup in a creamy coconut broth with Thai spices.

    Thai shrimp soup in a bowl.

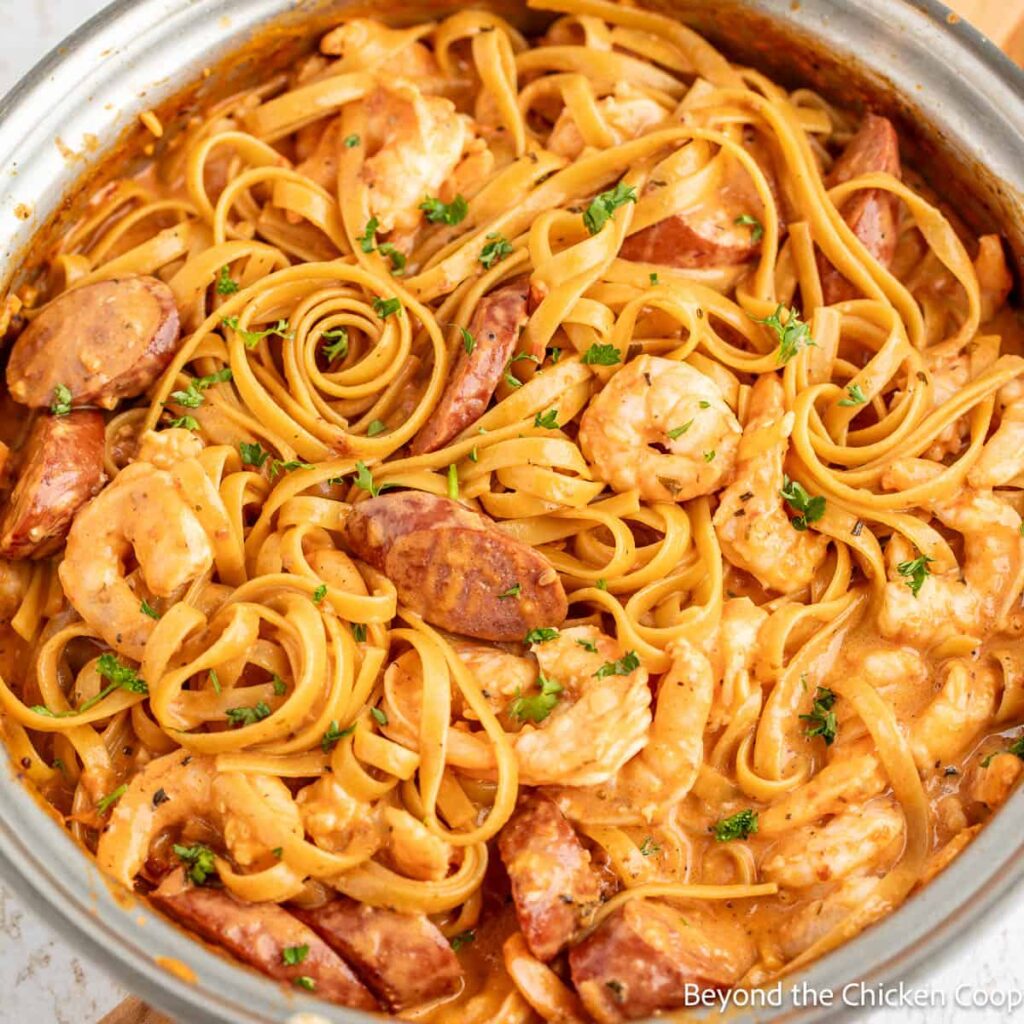
    Shrimp Sausage Pasta

    Shrimp Sausage Pasta is a hearty and flavorful pasta dish that combines succulent shrimp with savory sausage, perfect for a cozy dinner.

    Shrimp sausage and pasta in a pot.

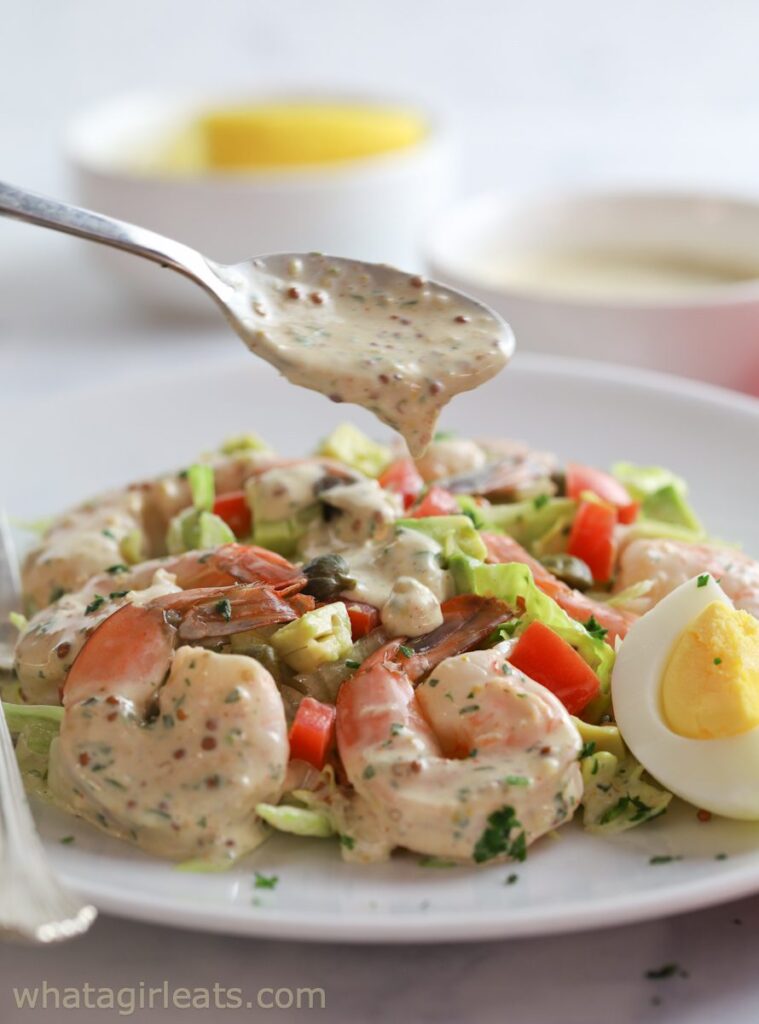
    Shrimp Remoulade

    Shrimp Remoulade is a zesty and tangy shrimp dish that’s perfect for appetizers or a light meal, served with a classic remoulade sauce. For an extra burst of flavor, squeeze fresh lemon juice on top of the shrimp after cooking, along with garlic and parsley.

    Shrimp remoulade on a plate.

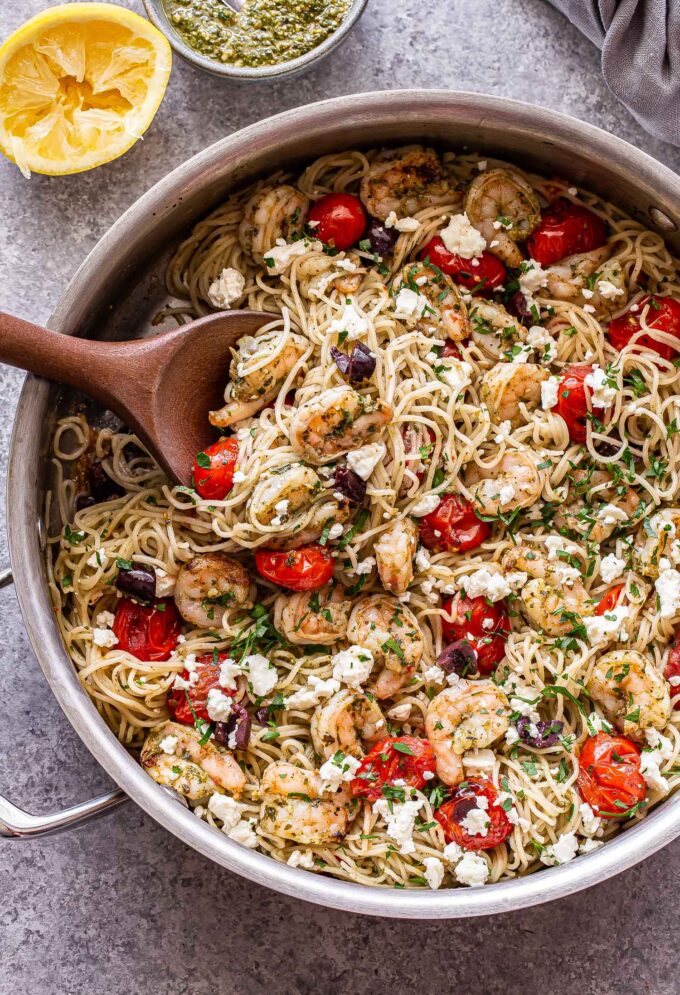
    Grilled Shrimp Pesto Pasta

    Grilled Shrimp Pesto Pasta is a fresh and vibrant pasta dish that features grilled shrimp and a homemade pesto sauce, making it a delightful summer meal.

    Grilled shrimp pesto pasta in a pot.

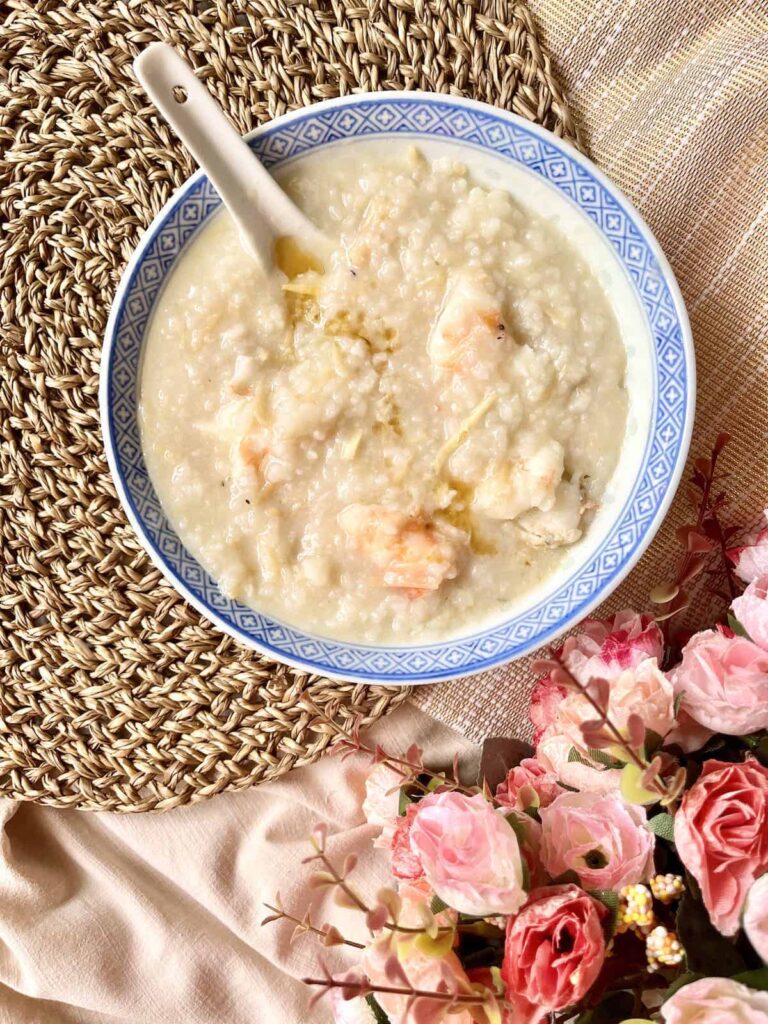
    Chinese Shrimp Congee

    Chinese Shrimp Congee is comforting and nourishing, this traditional Chinese rice porridge with shrimp is perfect for a light yet satisfying meal.

    Seafood prawn congee.

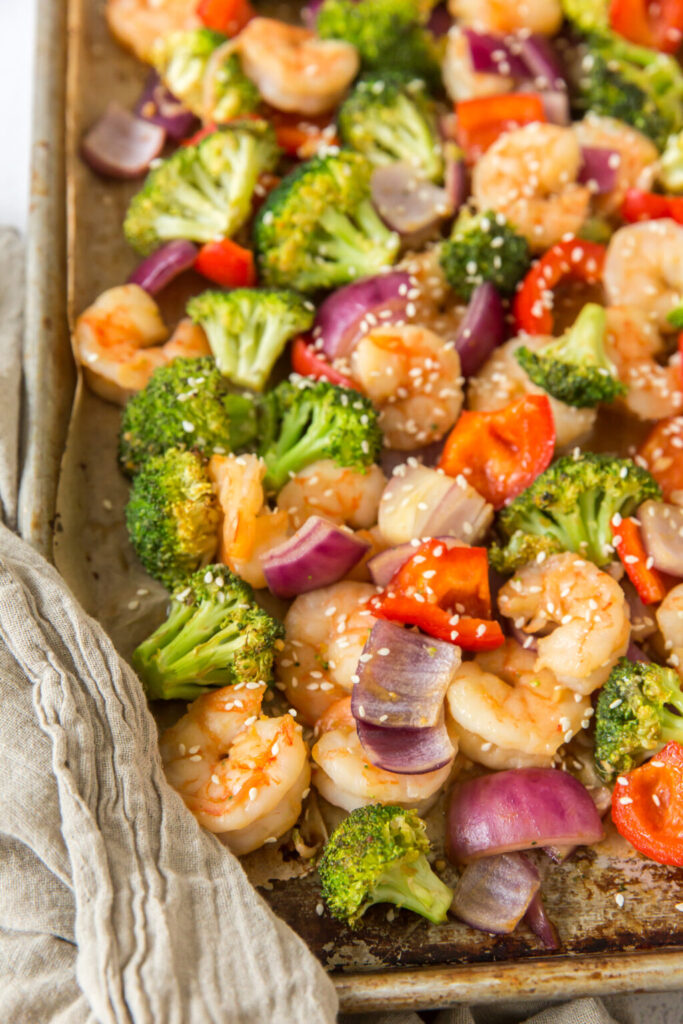
    Teriyaki Shrimp Stir Fry

    Quick and easy, this Teriyaki Shrimp Stir Fry is packed with veggies, seasoned with kosher salt, and tossed in a flavorful teriyaki sauce.

    Sheet pan shrimp dish.

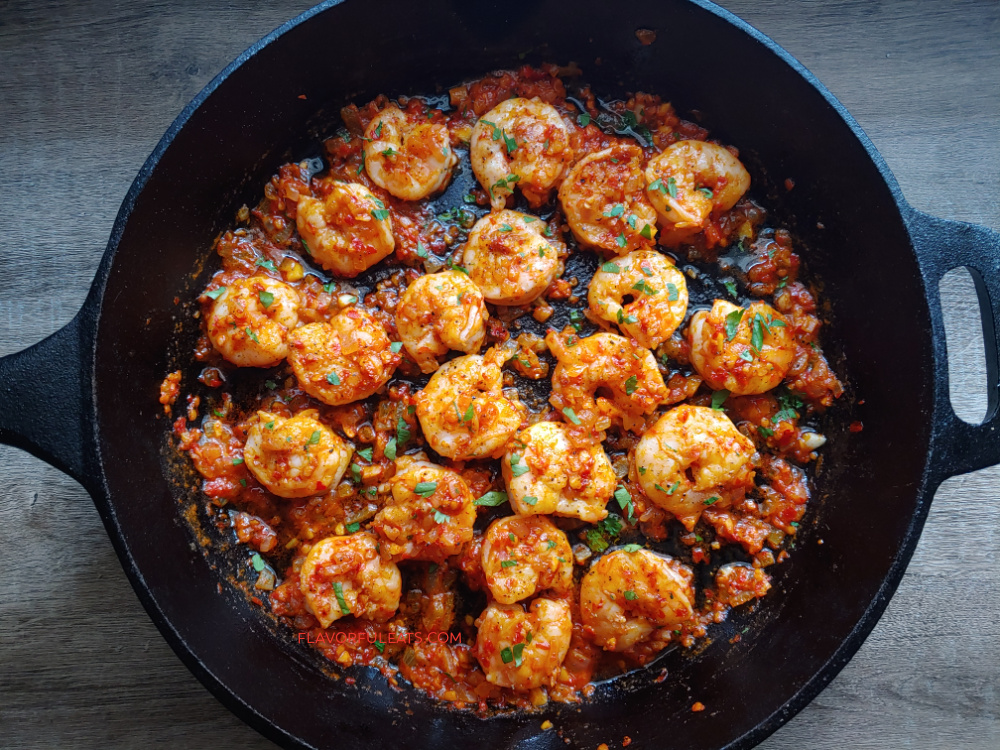
    Harissa Shrimp Skillet

    Spicy and aromatic, this Harissa Shrimp Skillet is a bold and flavorful dish that's sure to spice up your dinner.

    Harissa shrimps in a skillet.

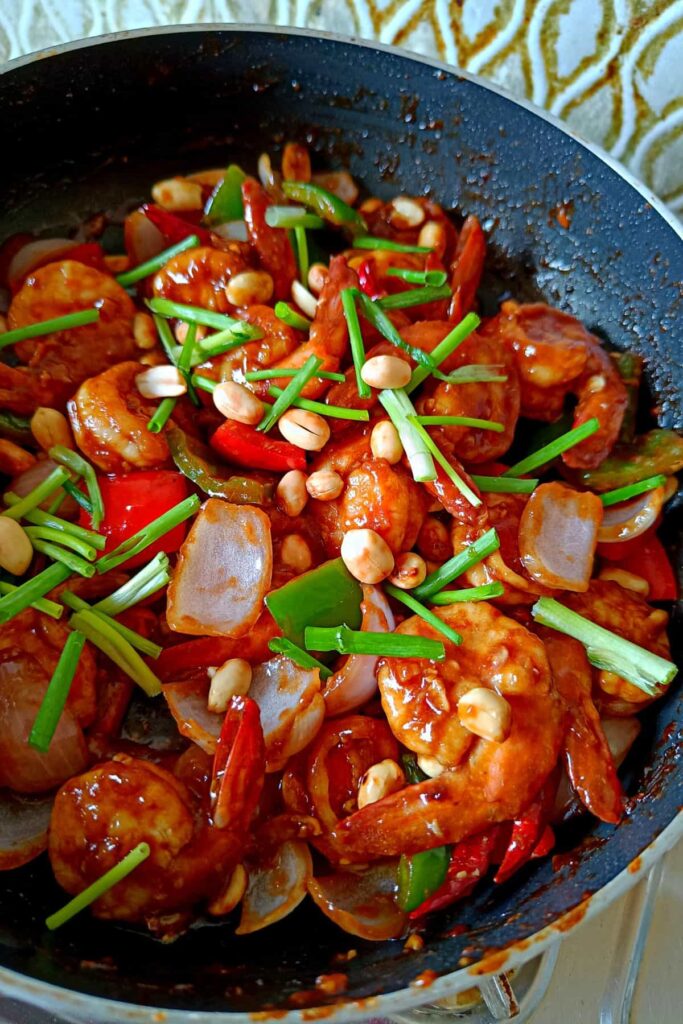
    Kung Pao Shrimp Pasta 

    Kung Pao Shrimp Pasta is a fusion dish that combines the bold flavors of Kung Pao with pasta, creating a unique and delicious meal by using jumbo shrimp for better flavor and presentation.

    kung pao shrimps in a skillet.

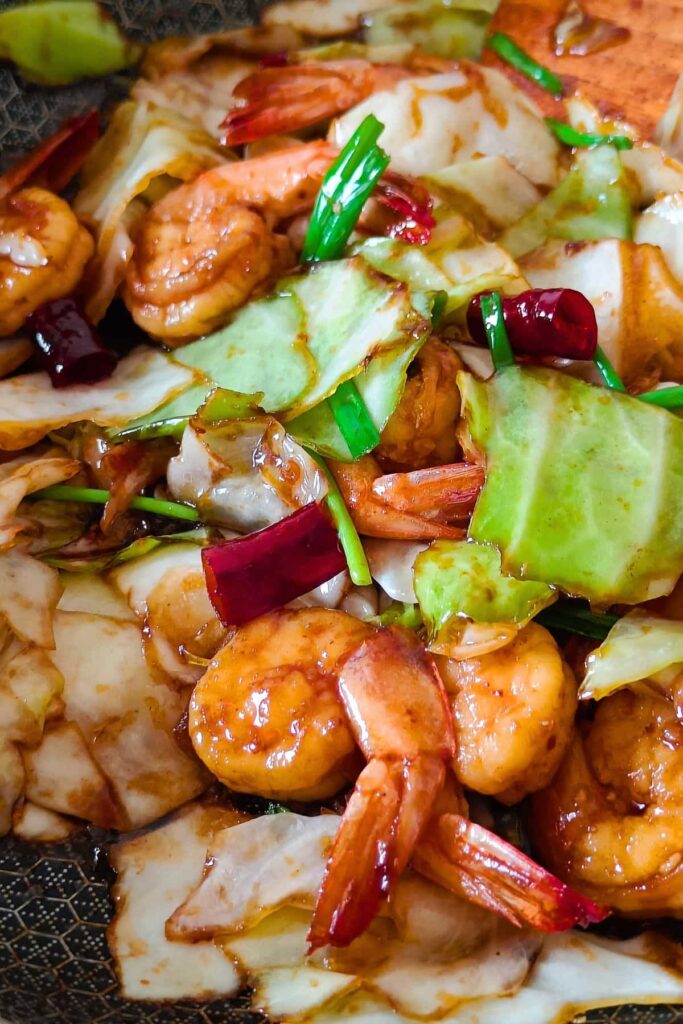
    Chinese Shrimp Cabbage Stir Fry

    Chinese Shrimp Cabbage Stir Fry is a light and healthy stir fry with shrimp and cabbage, perfect for a quick weeknight dinner.

    Chinese shrimp and cabbage.

    Parmesan Basil Shrimp And Cauliflower Rice

    Creamy and flavorful, this Parmesan Basil Shrimp And Rice combines shrimp with parmesan and basil, cooked in olive oil and served over rice for a comforting meal.

    Shrimp and rice in a skillet.

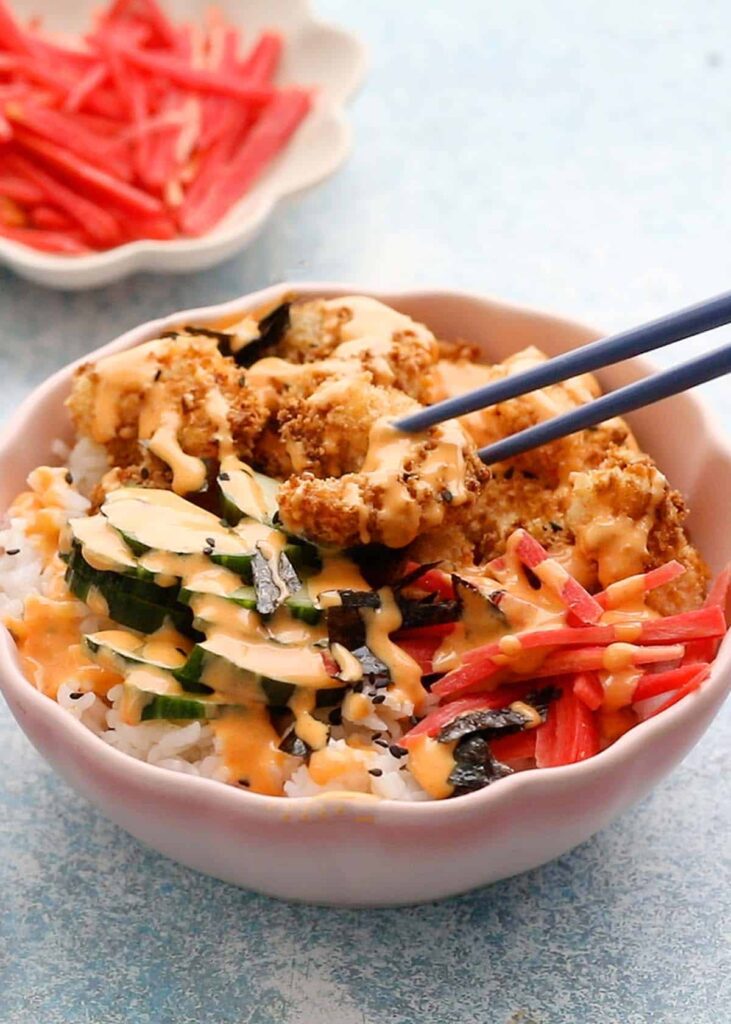
    Shrimp Sushi Bowl

    Try all the flavors of sushi in a convenient bowl, featuring shrimp, avocado, and veggies over a bed of rice you’ll love this Shrimp Sushi Bowl as much as we do. 

    Sushi shrimp in a bowl.

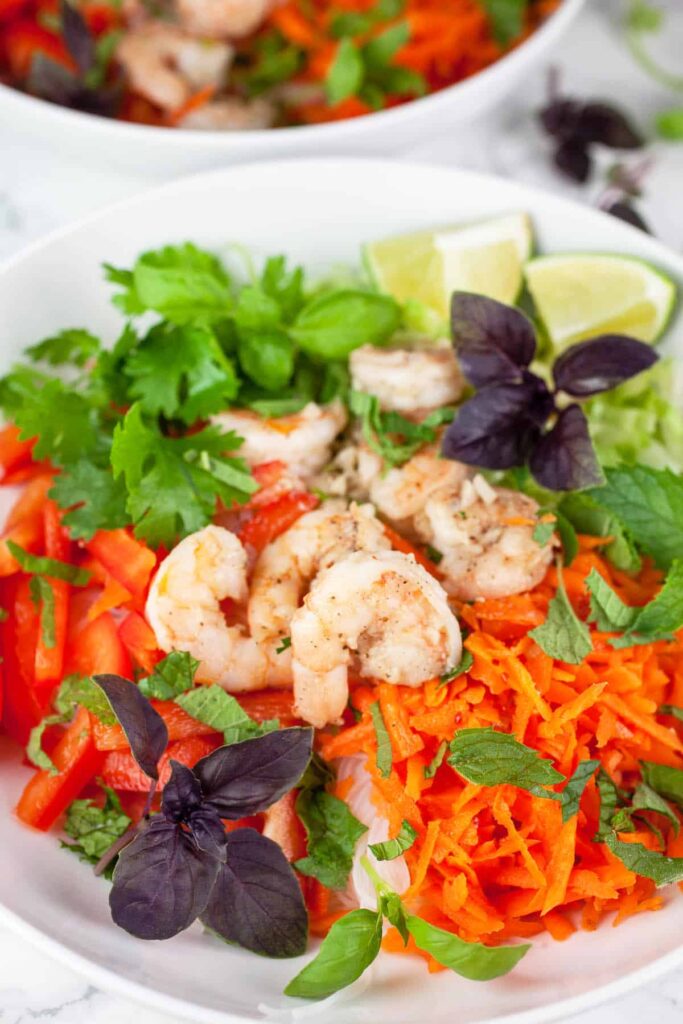
    Vietnamese Shrimp Salad With Noodles

    Fresh and light, this Vietnamese-inspired salad features shrimp, noodles, and a tangy dressing. Try this Vietnamese Shrimp Salad recipe today!

    Vietnamese shrimp salad.

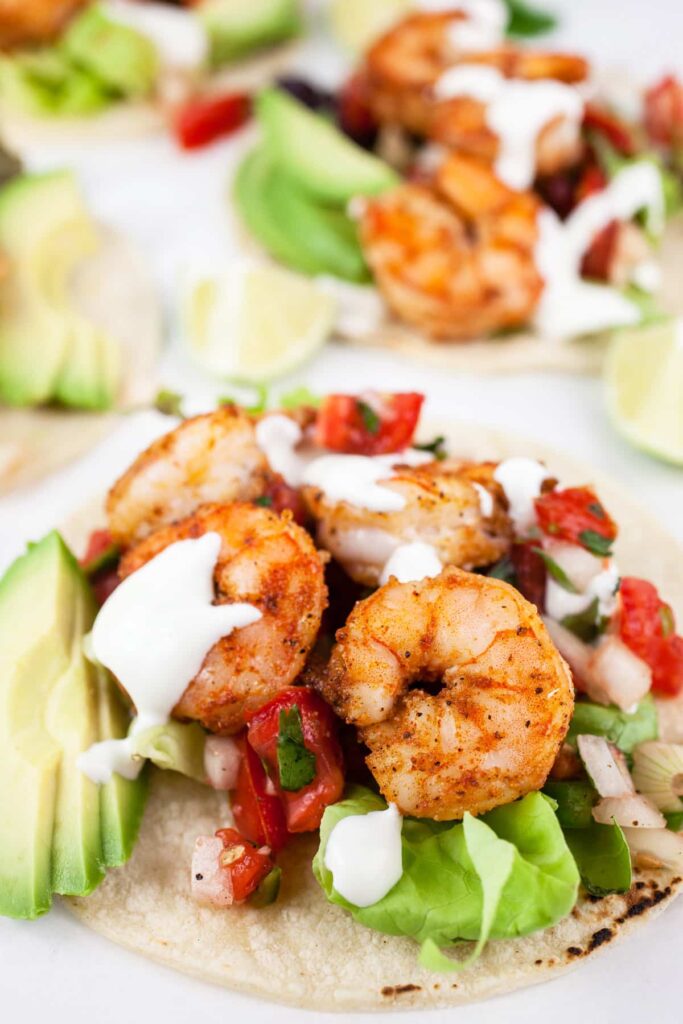
    Sheet Pan Shrimp Tacos With Pico De Gallo

    Easy and delicious, these Sheet Pan Shrimp Tacos With Pico De Gallo are perfect for a quick and flavorful meal.

    Sheet pan shrimp tacos.

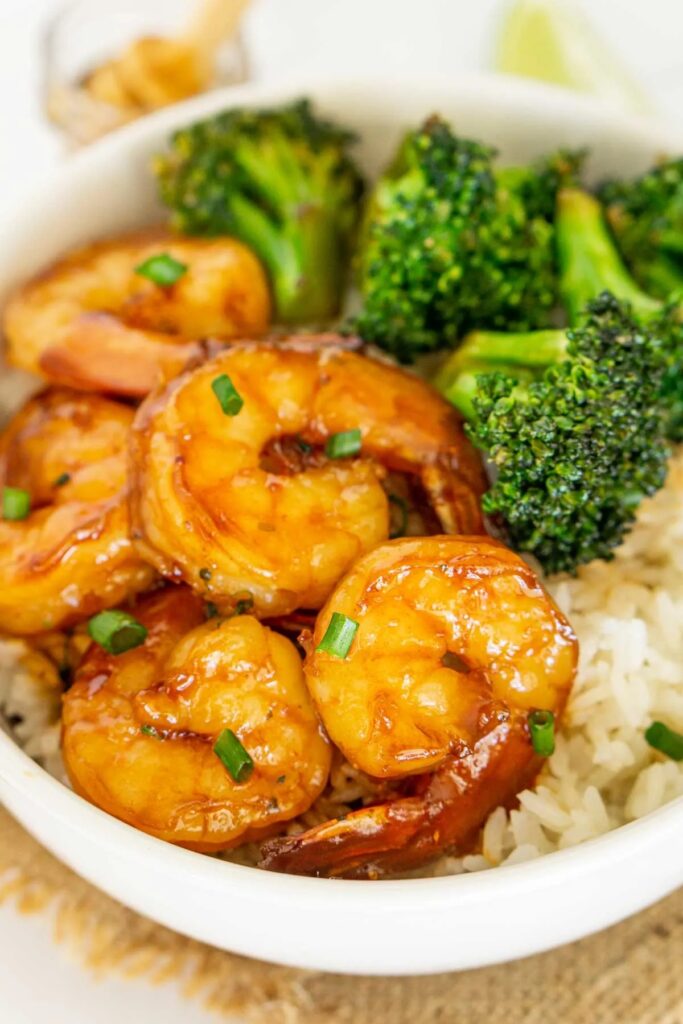
    Hot Honey Frozen Shrimp

    Sweet and spicy, these Hot Honey Shrimp are perfect for an appetizer or main dish with a kick.

    Hot honey shrimp served with broccoli and rice.

    Cajun Shrimp Fried Rice

    Cajun Shrimp Fried Rice is a spicy and flavorful fried rice dish with Cajun-seasoned shrimp, perfect for a quick and satisfying meal. For the best flavor and texture, it is recommended to use raw shrimp instead of cooked shrimp, as pre-cooked shrimp can compromise the quality of the dish.

    Cajun shrimp fried rice in a bowl.

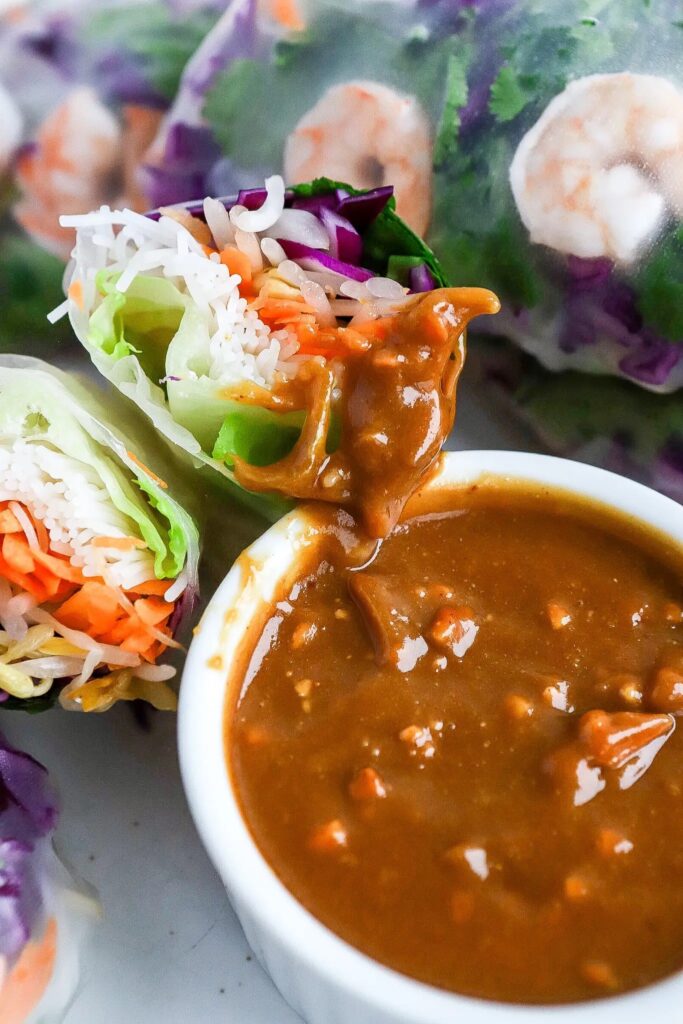
    Shrimp Rice Paper Rolls

    Fresh and light, these Shrimp Rice Paper Rolls are perfect for a healthy appetizer or light lunch.

    Peanut sauce served with shrimp rice paper rolls.

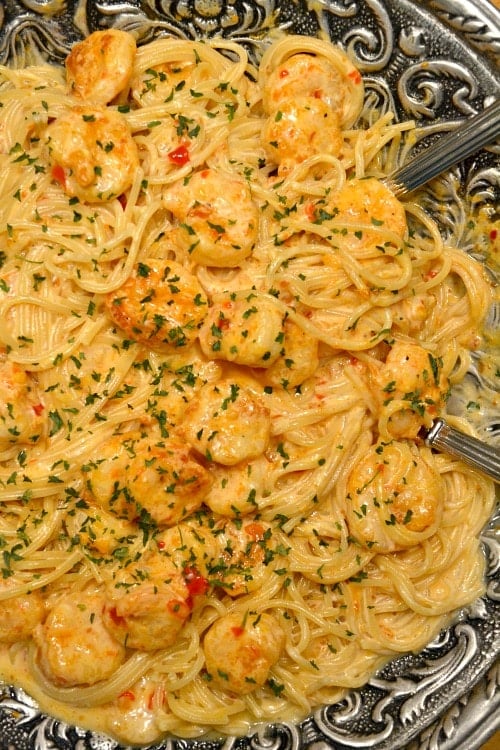
    Bang Bang Shrimp And Pasta 

    Creamy and spicy, this Bang Bang Shrimp Pasta is a crowd-pleaser that's perfect for any occasion.

    Bang bang shrimp.

    Simple Shrimp Rolls

    Light and refreshing, these Simple Shrimp Rolls are perfect for a quick lunch or appetizer. For the best flavor and texture, be sure to use raw shrimp, as pre-cooked shrimp can lead to suboptimal results.

    Shrimp rolls.

    Shrimp Corn Chowder

    Warm and comforting, this Shrimp Corn Chowder is perfect for a cozy meal on a chilly day.

    Cajun Shrimp Tacos

    Spicy and flavorful, these Cajun Shrimp Tacos are sure to be a hit at your next taco night.

    Cajun shrimp tacos.

    Air Fryer Shrimp

    Try this paprika and garlic Air Fryer Shrimp Recipe. It's tasty, delicious, and packed with flavor. Air-fried shrimp is also fast and simple and one seafood recipe you'll love.

    Air fried shrimp on a plate.

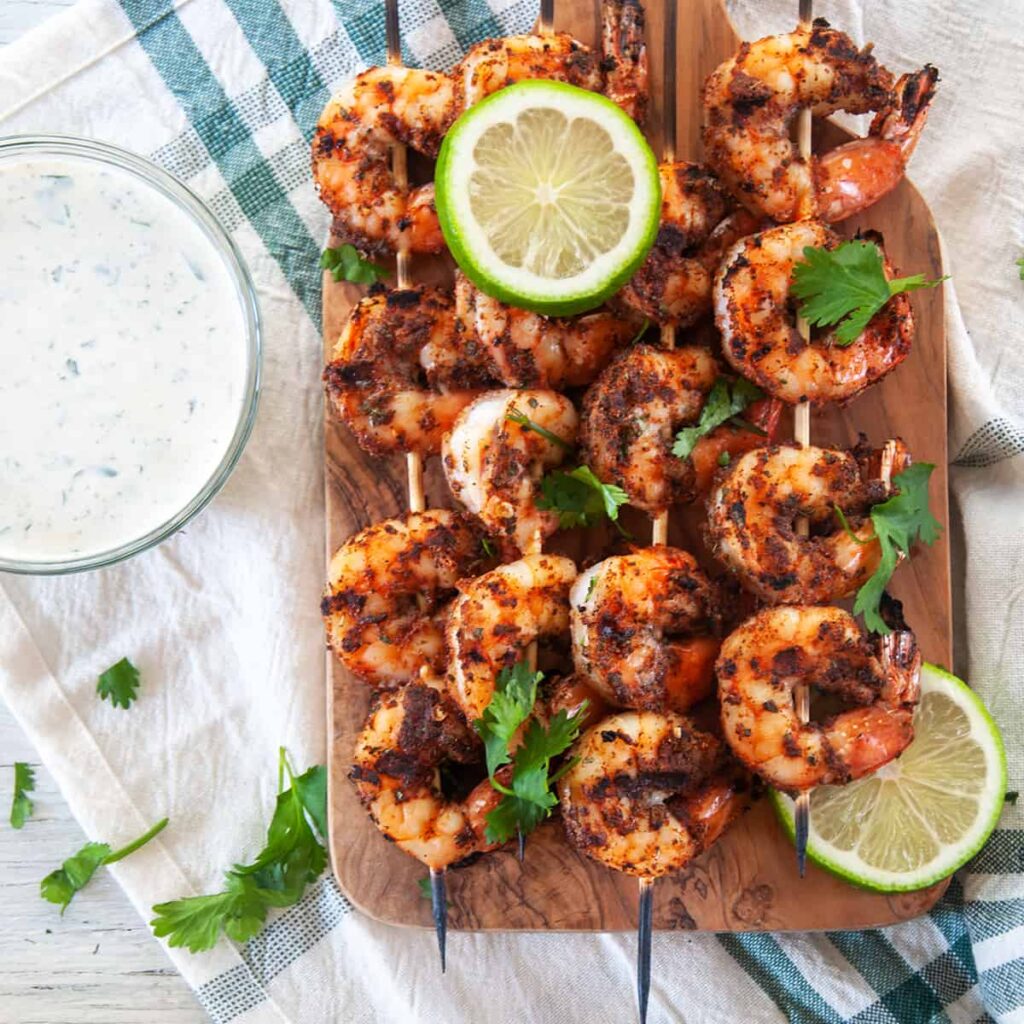
    Grilled Blackened Shrimp

    Packed with bold flavors, these Grilled Blackened Shrimp are perfect for a quick and delicious meal. Similarly, garlic shrimp is a versatile and healthy dish that can be prepared quickly, making it ideal for busy days.

    Grilled blackened shrimp on a wooden board.

    More Seafood Tips And Recipes

    • Instant Pot Shrimp Scampi
    • Jamaican Jerk Pasta With Shrimp
    • What Does Shrimp Taste Like?
    • Best Instant Pot Clam Chowder
    • What To Do With Leftover Shrimp?
    • How Long Can Shrimp Stay Out?
    • 21+ Cold Dip Recipes For Your Party
    • 21 Tasty Cinco De Mayo Recipes

    What Is Shrimp Cocktail

    July 29, 2024 by Angela Milnes

    Fresh shrimp cocktail in a glass.

    What Is Shrimp Cocktail? Shrimp Cocktail is a classic appetizer that combines plump, succulent shrimp with a zesty, tangy cocktail sauce, creating a delightful and refreshing dish that's perfect for any gathering. This timeless favorite can be served hot or cold, making it versatile for various occasions. Read on to learn more about how to perfectly poach shrimp and whether it's best enjoyed hot or cold.

    [feast_advanced_jump_to]

    What Is Shrimp Cocktail?

    The great thing about shrimp cocktails is that they're relatively easy to make. All you need is some fresh or frozen shrimp, cocktail flavored sauce, and some ice to keep everything chilled. Shrimp Is High In Protein and is known to help improve Cholesterol Levels. .

    What's in a Shrimp Cocktail Recipe?

    The great thing about shrimp cocktails is that they're relatively easy to make. All you need is some fresh or frozen shrimp, cocktail flavored sauce, and some ice to keep everything chilled.

    If you want to get fancy, you can also add some fresh lemon juice, diced avocado, or even some chopped cilantro. But really, the shrimp and sauce are all you need for a delicious appetizer.

    Related Article: What Does Shrimp Taste Like?

    What to serve with shrimp cocktail

    If you love this recipe then be sure to check out our recipes for Fiery Ginger Garlic Shrimp, Shrimp Ceviche, Crispy Coconut Shrimp with Orange Marmalade Dip or Spicy Crispy Bang Bang Shrimp with Sweet Chili Sauce.

    What's in Cocktail Sauce?

    The classic sauce recipe for shrimp cocktails is made with ketchup, horseradish, Worcestershire sauce, and lemon juice. You can also add a little hot sauce to give it some extra spice.

    Of course, you can always buy pre-made sauce at the store. But if you have the time, I highly recommend making your own. It's so much fresher and tastier that way.

    Is Shrimp Cocktail Raw Shrimp?

    No. Most recipes for shrimp cocktail call for cooked shrimp. If you have raw shrimp, you'll need to cook it first before adding it to the sauce. Otherwise, it will be tough and rubbery.

    You can cook the shrimp in a few different ways. You can cook them in boiling water, use grilled shrimp, or even bake them. Just make sure they're cooked through before adding them to the cocktail sauce.

    How to Poach Shrimp

    Poaching is one of the best ways to cook shrimp. It's quick and easy and it keeps the shrimp nice and moist.

    To poach shrimp, simply bring a pot of water to a boil and then add the shrimp to the boiling water. Cook for 2-3 minutes or until they're pink and opaque. Then remove them from the pot.

    You can then use your favorite dressings and ingredients to create the best shrimp cocktail.

    Poaching is a healthy way to cook seafood. It doesn't require any oil or butter, so it's a great option if you're watching your fat intake.

    You can poach in plain water or a chicken broth or poach in a vinegar and water mixture.

    What Is Shrimp Cocktail? Shrimp Cocktail in a glass.

    How Do You Eat Shrimp Cocktail?

    There are a few different ways you can eat your cocktail. The most popular way is to just eat it served in only sauce.

    You can also use the shrimp to create little skewers with vegetables or fruits. Another option is to put the shrimp on top of crackers or bread. That makes a great side dish!

    I love to eat shrimp cocktails in a small bowl with some chopped lettuce, diced avocado, and diced tomatoes. It's the perfect light meal or appetizer. Read here for a full list of What To Eat With Shrimp Cocktail.

    Do You Eat Shrimp Cocktail Hot or Cold?

    Shrimp cocktail is typically served cold. This is because the shrimp are cooked and then cooled before they're added to the sauce.

    If you want to eat this as a hot side dish, you can simply heat the sauce in a pot on the stove. Or, you can cook the shrimp in the sauce until they're heated through.

    A shrimp cocktail makes a great side dish whether cold or warm. It's also super healthy and packed with protein.

    more Easy Shrimp Recipes

    • Instant Pot Shrimp Scampi Recipe
    • Jamaican Jerk Pasta With Shrimp
    • Easy Shrimp Scampi Spaghetti
    • Air Fryer Shrimp With Paprika And Garlic
    • Best Shrimp Cucumber Bites

    What to Serve With Shrimp Cocktail

    July 29, 2024 by Angela Milnes

    Dishes to serve with shrimp cocktail.

    What To Serve With Shrimp Cocktail? When I went to my cousin's wedding, we were served a shrimp cocktail and it tasted so good. I decided I wanted to make this delicious seafood dish at home, however, it left me wondering What Goes With Shrimp Cocktail?

    Today I'll be sharing some delicious recipes and pairings that go well with the perfect Shrimp Cocktail. Whether it's a light and fresh salad, healthy veggies, or another side dish with unique flavors, we have a suggestion I'm sure you'll love.

    What to serve with shrimp cocktail.
    [feast_advanced_jump_to]

    What to Serve With Shrimp Cocktail?

    Here are the best side dishes to serve with shrimp cocktail. Enjoy!

    Salads to Pair With Your Shrimp Dish

    A light and refreshing salad is the perfect pairing for a shrimp cocktail. The acidity in the dressing will help to balance out the richness of the shrimp.

    Try pairing your shrimp cocktail with a simple green salad or a more unique option like this Goat Cheese Apple Salad, a Mango Arugula Salad or Watermelon Salad With Feta and Mint. You could also try the following:

    Macaroni Salad

    Macaroni salad is a flavorful salad that goes great with a shrimp cocktail. The creamy dressing and pasta make it a heartier option that is perfect for a party or potluck.

    If you're looking for a macaroni salad recipe, I recommend the tropical flavor of this Weight Watchers Macaroni Salad.

    Macaroni pasta in a bowl.

    Greek Salad

    A Mediterranean Farro Salad with tomatoes, cucumbers, feta cheese, and olives is another excellent choice as a side dish.

    The bold flavors in the salad will help to complement a grilled shrimp cocktail and bring more flavor to the meal. Greek salad is a great side dish and can be eaten as part of the Mediterranean diet.

    Tabouli Salad

    This healthy salad is made with bulgur wheat, chopped vegetables, and herbs. It's a light and flavorful salad that goes well with shrimp. Tabouli is super healthy and is a great way to add more goodness to your meal.

    Potato Salad

    Try pairing your cold shrimp with a tasty Smashed Potato Salad. Potato salad is a classic dish that is perfect for a summer BBQ or picnic.

    There are so many different ways to make potato salad, so it's easy to find recipes that you'll love. If you're looking for some inspiration, I recommend trying this Instant Potato Salad.

    Preparing potato salad.

    Broccoli Salad

    A Low Carb Broccoli Salad is another excellent option to serve with a shrimp cocktail. The crunchy broccoli pairs well with the soft shrimp.

    The salad is made with broccoli, bacon, cheese, and a creamy dressing. It's the perfect dish to bring to a potluck or picnic.

    Broccoli salad in a bowl.

    Cauliflower Salad

    This Instant Pot Cauliflower Salad is a delicious side dish and healthy option that goes great with a shrimp cocktail.

    Make your salad with roasted cauliflower, kale, and quinoa. This is one of those side dishes you will truly love!

    Caesar Salad

    A delicious Chicken Caesar Salad is another great option to serve with a shrimp cocktail.

    The crisp romaine lettuce, croutons, and parmesan cheese make it a flavorful and satisfying dish. The extra flavor will pair well with your dish and make a tasty lunch or appetizer meal.

    Caesar salad ready to eat.

    Kale Apple Salad With Pomegranates

    Kale Apple Salad is a healthier twist on the classic that I think you'll love. Make some in a large bowl and it will be delicious as a light and refreshing side dish.

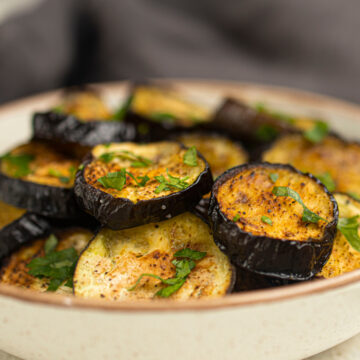
    Keto salad with roasted eggplant.

    Dragon Fruit Salad

    This Dragon Fruit Salad is a beautiful and unique salad that goes great with shrimp.

    The combination of dragon fruit, mango, and avocado is simply irresistible and makes an easy and delicious side dish.

    Beetroot And Feta Salad

    Try a Roasted Beetroot And Feta Salad. Paired with walnuts and a tangy dressing this tasty beet feta salad will go great with shrimp cocktail.

    Roasted beet salad with pomegranate molasses.

    Vegetable Sides

    Green produce always goes well with shrimp cocktails from Cabbage, Spinach And Potatoes Recipe to Air Fryer Asparagus sprinkled With Parmesan Cheese.

    Pairing a shrimp cocktail with vegetables such as Air Fryer Green Beans or Crispy Okra Chips is a great idea if you're hosting a dinner party or want to create a main dish with unique flavors for your seafood appetizer.

    Crispy Veggies

    The crispness of the veggies will contrast nicely with the sweet flavor of your best shrimp cocktail. Try Crispy Air Fryer Beet Chips, Air Fryer Carrot Fries, Crispy Air Fryer Avocado Fries or Crispy Roasted Sweet Potatoes.

    Roasted Vegetables

    You could try pairing your grilled shrimp cocktail with Balsamic Grilled Vegetables, a flavorful vegetable soup, or even a simple vegetable platter with dipping sauce.

    Whatever veggie side dish you choose be sure to have a variety of colors and textures to create an appealing presentation.

    Try roasted veggies such as:

    • Air Fryer Roasted Carrots
    • Honey Roasted Parsnips and Carrots
    • Air Fryer Sweet Potatoes
    • Citrus ands Honey Roasted Beets
    • Roasted Brussels Sprouts With Maple Syrup
    • Oven Roasted Onions With Thyme
    • Air Fryer Yellow Squash
    • Parmesan Roasted Zucchini

    Roasted Asparagus

    Roasted asparagus is a fantastic side dish that pairs well with a shrimp cocktail.

    The asparagus is roasted in the oven until it's tender and then sprinkled with Parmesan cheese or even better feta cheese! It makes a quick meal and is great for a dinner party.

    Cooked asparagus and shrimps.

    Bell Pepper and Nachos

    One fantastic way to enjoy the creamy texture of a shrimp cocktail is to serve it with nachos and bell peppers.

    Nachos or tortilla chips make the perfect vessel for the cocktail sauce and shrimp. Serve side dishes of nachos and small dipping sauces to add flavor to this fantastic meal idea.

    The bell peppers add a beautiful pop of color and their crunchy texture.

    This dish is easy to make and can be served as an appetizer or main course and might just become a favorite recipe to enjoy!

    Au Gratin Potatoes

    Rich and creamy Parmesan Au Gratin Potatoes are the perfect accompaniment to a grilled shrimp cocktail. The cheesy potatoes pair well with the acidity of the sauce and the sweetness of the shrimp.

    This dish is sure to be a hit with your guests! Try pairing au gratin potatoes with your favorite shrimp cocktail recipe. It will be a real hit!

    Parmesan Au Gratin Potatoes.

    Stuffed Tomatoes

    Another fantastic way to enjoy a shrimp cocktail is to stuff tomatoes with the seafood salad. This dish is healthy, flavorful, and easy to make.

    The tomatoes can be served as an appetizer or main course and are sure to be a hit with your guests!

    Try pairing stuffed tomatoes with your favorite recipe for shrimp. Top with mint leaves and serve at your next party.

    Sweet Potato Fries

    These Crispy and Sweet Potato Fries are a fantastic way to enjoy a shrimp dish. The sweetness of the potatoes pairs perfectly with the shrimp cocktail sauce.

    The salty flavor of the shrimp is also a great contrast to the sweetness of the fries.

    This dish is easy to make and can be served as an appetizer or main course or as a quick meal.

    Sweet potato fries served with sauce and cherry tomatoes.

    Serve Seafood

    Another great option is to pair your shrimp cocktail with other seafood dishes.

    This is a great idea if you're having a seafood-themed party or want to create a seafood feast.

    Crab or Lobster

    Some great seafood options to pair with shrimp cocktail include crab legs, Instant Pot Lobster, scallops, or Fish Tacos. You could even try making a shrimp cocktail platter with a variety of seafood options. Use ice or cold water to keep the seafood chilled and fresh.

    Fruit Side Dishes

    Fruit is a great option to pair with a shrimp cocktail. The sweetness of the fruit will balance out the savory flavors of the dish.

    Fruit can make great side dishes for shrimp and add extra flavor and nutrition to the meal.

    Some great fruit options include:

    Watermelon

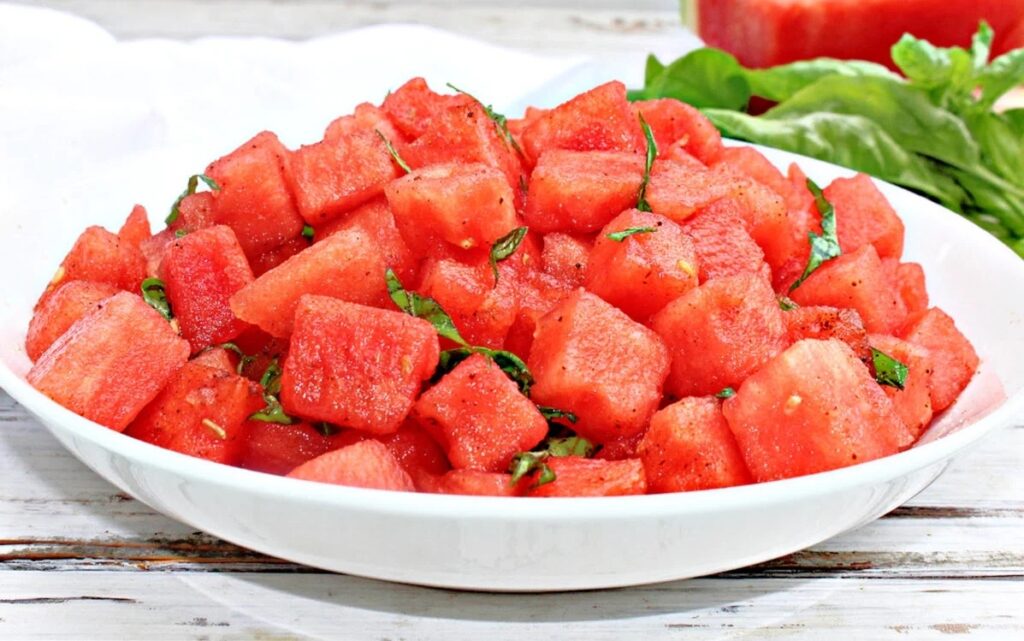
    Serve a Watermelon Salad With Feta And Mint with your shrimp cocktail for a delicious and refreshing option.

    watermelon Salad With feta and Mint.

    Cantaloupe

    Cantaloupe is a great option to add sweetness and color to your shrimp cocktail. Try our Cantaloupe Melon And Prosciutto Skewers.

    Cantaloupe pieces.

    Pineapple

    Pineapple is a delicious and juicy fruit that pairs well with shrimp. The sweetness of the pineapple will balance out the savory flavors of the dish.

    Mango

    Mango is a great option for a sweet and flavorful side dish. Fruit is a great option if you want your dish to remain gluten free. You could serve your shrimp cocktail with Mango and Pineapple Salsa or Mango Arugula Salad.

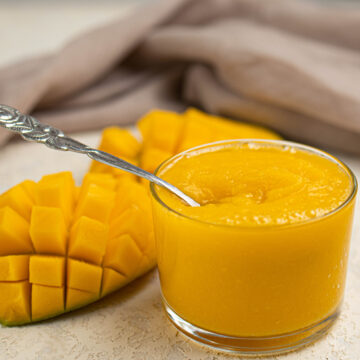
    Mango slices on a plate.

    Grapefruit

    Grapefruit has a distinct flavor that pairs well with shrimp. The juicy fruit will also help to balance out the savory flavors of the dish.

    You could even try making a shrimp cocktail salad with your favorite fruits and vegetables. This is a great way to enjoy the flavors of summer in one dish!

    Rice Side Dishes

    A shrimp cocktail is a real crowd-pleaser and goes surprisingly well with a rice dish such as Mexican Rice or even a jumbo shrimp paella.

    Shrimp can pair perfectly with many rice side dishes, even plain Long Grain Rice and is a great way to add some protein to your meal.

    Shrimp and rice.

    Bread Sides

    Bread is another fantastic option to serve a large crowd. The bread will help to soak up all of the delicious flavors of your seafood side dishes.

    Saltine Crackers

    You could also use saltine crackers, which are a classic pairing for shrimp cocktails.

    They make a delicious meal and you can pair the saltine crackers with a regular shrimp cocktail or a garlic shrimp or Mexican shrimp cocktail dish.

    Garlic Bread

    You can't go wrong with garlic bread. The savory and buttery flavors of garlic bread will pair nicely with the shrimp cocktail. Plus, it's a great way to soak up any extra sauce.

    Monkey Bread

    If you're a fan of bread then why not try a garlic and parmesan cheese monkey bread recipe as a side dish for your recipe. Pizza Monkey Bread is tasty and will be a hit with your guests.

    Zucchini Bread

    Zucchini bread is a great way to add some vegetables to your meal. Add a plate of Zucchini bread or a variety of bread side dishes to the buffet table to complement your shrimp cocktail dish.

    You could also serve your cocktail with Raw Vegan Bread, Homemade Bagels with Sesame Seeds, Sourdough Discard Focaccia or this Easy Oat Bread With Crunchy Seed Topping.

    Condiments to Go With Shrimp Cocktail

    If you wish to add some condiments, flavors, or spices to create the perfect shrimp cocktail, maybe serve them with some of these great options:

    • Lemon wedges
    • Fresh Herbs such as parsley, basil, mint leaves, or cilantro
    • Spices such as Old Bay seasoning or paprika
    • Horseradish
    • Lime Juice
    • Barbecue sauce
    • Olive Oil
    • Lime juice
    • Lemon juice
    • Balsamic vinaigrette
    • Chili powder
    • Ketchup
    • Mustard
    • Hot sauce
    Different sauces each in separate small bowl.

    More Side Dishes for Shrimp

    If you haven't found a flavorful dish that tickles your fancy then maybe try one of the following. These delicious food options are fantastic when paired with your seafood cocktail dish.

    • Red Cabbage Coleslaw
    • Cripsy Okra Chips
    • Air Fryer Green Beans
    • Air Fryer Sweet Corn
    • Smashed Potato Salad
    • Easy Twice Baked Potatoes
    • Crock Pot Chili Macaroni And Cheese
    • Baked Spaghetti Squash
    • Balsamic Grilled Vegetables
    • Air Fryer Stuffed Bell Peppers
    • Parmesan Roastred Zucchini
    • Zucchini Pizza Boats
    • Sun Dried Tomatoes

    What Can I Serve With Shrimp Besides Cocktail Sauce?

    There are many other options for sauces to accompany your shrimp cocktail other than the classic cocktail sauce.

    Sriracha mayo, ketchup, chili garlic sauce, horseradish, and barbecue sauce are all great options. You could even try making your sauces with different combinations of these ingredients.

    Another great option is to serve the shrimp with a dipping sauce on the side. This way, everyone can choose their favorite flavor sauce to use.

    Many different sauces would be great for dipping, such as Herby Ranch Dressing, Honey Mustard Salad Dressing, Creamy Ceaser Dressing and Thousand Island dressing.

    What Is Thousand Island Dressing?

    Thousand Island dressing is a salad dressing that is made with mayonnaise, ketchup, and relish. It's a great option for those who are looking for a healthier sauce to accompany their seafood dish.

    If you're looking for an even healthier option, try using Greek yogurt instead of mayonnaise with your Thousand Island dressing.

    Thousand Island dressing in a bowl with a spoon.

    What to Drink With Shrimp Cocktail?

    There are so many great drinks that go well with a shrimp cocktail. The acidity in the cocktail sauce pairs nicely with a light and refreshing white wine. For those who don't drink alcohol, try serving your shrimp cocktail with sparkling water, Passion Fruit Juice, Cranberry Lime Mocktail or a Grapefruit Rosemary Mocktail are both excellent options.

    Different drinks to serve with shrimp cocktail.

    Best Time to Serve Shrimp?

    If you're looking to serve shrimp, the best time to do so is within two hours of cooking. This will ensure that the shrimp are fresh and at their peak flavor.

    You can store them in the refrigerator for up to three days. If you need to store them for longer than that, it's best to freeze them.

    Enjoy Sides With Shrimp Cocktail Today

    When it comes to deciding what to serve with a shrimp cocktail dish, there are endless possibilities and many foods to choose from.

    Grab a large bowl, get the lime juice and dressings out of the fridge and go to town creating a tasty side dish and recipe.

    Whether serving to a large crowd or as a family meal, the most important thing is to choose dishes that you know everyone will love.

    Instant Pot Lobster Tail: Lobster Rolls

    July 29, 2024 by Angela Milnes

    Instant Pot Lobster Tail: Lobster Rolls.

    Have you ever cooked Instant Pot Lobster Tail? This Instant Pot Lobster rolls recipe is delicious, tasty and packed full of flavor. Whether cooking lobster tails to eat as is, or pressure cooking to make lobster rolls, you're going to love this recipe Read on and learn how to cook Instant Pot Lobster Tails in 4 Minutes.

    Instant Pot lobster tail: Lobster rolls on a tray.
    [feast_advanced_jump_to]

    💖 Why This Recipe Works

    • Luxurious Dining: Enjoy the taste of gourmet lobster rolls right in your own home.
    • Efficient Prep: The Instant Pot makes cooking lobster tails quick and nearly foolproof.
    • Versatile Recipe: Lobster Meat Rolls is perfect for a fancy dinner, BBQ, or a seaside-inspired picnic.

    ⭐ Star Ingredients

    Instant Pot Lobster Tail ingredients.

    Here are the ingredients you will need for these making Lobster Tail Rolls: 

    • Lobster Frozen Tails: The star of the show, lobster tail provides a succulent, sweet flavor that is luxurious and indulgent.
    • Shrimp Or Crab Meat: Add additional seafood flavors and textures, complementing the lobster beautifully.
    • Mayonnaise: Creates a creamy base for the seafood mixture, offering a tangy contrast to the sweetness of the lobster and shrimp or crab.
    • Lemon Juice: Adds acidity and brightness, lifting the flavors of the seafood.
    • Parsley: Provides a fresh, slightly peppery note that complements the other flavors.
    • Salt & Black Pepper: Basic seasonings that enhance the natural flavors of the seafood.
    • Hot Dog Buns: Provide a soft, slightly sweet contrast to the rich filling.
    • Softened Butter: Adds a rich, buttery flavor that elevates the overall taste of the lobster roll.
    • Old Bay Seasoning (Optional): Adds a complex, spicy-sweet flavor that pairs perfectly with lobster.

    For the complete list of ingredients with measurements and instructions, please see the recipe card at the bottom of the post.

    📖 Best Herbs For Lobster Tails

    Wondering how to season Lobster Tail?

    This Instant Pot Lobster Tail recipe uses old bay seasoning. If you don;t have this or want to use something different you can try the following fresh herbs or spices:

    • Fresh Parsley
    • Fresh Dill
    • Lemon Thyme
    • Garlic Powder
    • Black Pepper
    • Chili Powder
    • Paprika
    • Cayenne Pepper
    • Turmeric
    • Sage
    • Rosemary

    🔪How To Pressure Cook Lobster Tail In The Instant Pot

    Lobster tail in instant pot with seasoning.
    1. Step 1: Place 1 cup of water and Old Bay seasoning in the Instant Pot. Cut a slice down the back of the lobster tails with kitchen shears for easy opening. Put the trivet in the Instant Pot and add the lobster tails upside down. If you don’t have a trivet, use a steamer basket. Close the lid and seal. Set to high pressure for 4 minutes. When it beeps, quickly release the pressure before opening the lid.
    Mayonnaise, lemon juice, parsley, salt, pepper, and butter in a medium bowl.
    1. Step 2: As your lobster tails cook, prepare the lobster roll mixture by combining mayonnaise, fresh lemon juice, parsley, salt, pepper, and butter in a medium bowl.
    Lobster tail chopped on chopping board.
    1. Step 3: Remove your lobster tails from the Instant Pot with tongs and transfer to a cutting board. Cut open the Lobster shells from the tails and remove the lobster meat. If using four lobster tails, cut them into pieces and add them to your mayonnaise mixture.
    Lobster meat mixture in a bowl.
    1. Step 4: If using ½ lobster and ½ crab meat, add the crab into your mayonnaise mixture, then mix well. Add your Seafood mixture to your hot dog roll. Top with fresh parsley or lemon wedges as a garnish. Enjoy!
    Lobster tail rolls served on a tray.

    👩‍🍳 Expert Tips

    • Thaw and Score: If you're using frozen lobster tails, make sure they’re completely thawed before cooking. A gentle score along the shell not only helps the seasoning seep in but also promotes even cooking.
    • Flavor Infusion: Brush the tails with a blend of melted butter, garlic, and a splash of lemon juice. This simple mix keeps the lobster moist and adds a rich, savory note throughout.
    • Finishing Flair: After cooking, finish the lobster with an extra drizzle of melted butter, a squeeze of fresh lemon, and a sprinkle of chopped herbs like parsley. This adds a bright, fresh touch to the dish.

    💭 FAQs

    What Is Lobster?

    Lobster is a type of seafood that is commonly found in the coastal waters of North America, Europe, and Asia. Lobster has a firm texture with rich and buttery flavor and typically consists of meat from the tail, claws or legs.

    What Does Lobster Taste Like?

    Lobster tastes similar to crab and shrimp. Lobster meat is firm, yet smooth and soft to bite.

    Lobster is boiled or steamed which is great for maintaining all the goodness in the meat. In fact, due to the cooking method of lobster the meat has a hint of saltiness that comes with eating seafood.

    Cooked Lobster tails are sweeter than crab and does not have a fishy smell due to the higher amounts of protein stored in the meat. Both Lobster and crab can be found at the seafood counter in most supermarkets.

    What Is a Lobster Roll?

    A Lobster Roll is a popular item on many seafood restaurant menus. It typically consists of lobster meat served cold in a toasted, buttered roll with lemon or lime juice and mayonnaise.

    If you’re looking for the perfect way to enjoy lobster tails, try making these delicious lobster rolls!

    Can I Cook Frozen Lobster Tails In The Instant Pot?

    Yes absolutely. Frozen lobster tails are a great choice when you're in a hurry or just don't feel like going to the grocery store. To cook frozen Instant Pot Lobster tails, simply set the Instant Pot on high pressure for 6 minutes (add an extra minute if the lobster tail size is extra large and reduce by 1 minute if you have small lobster tails).

    Frozen Lobster Tail will taste the same once it has cooked. I'm sure you will love this lobster tails recipe. It is simple, fast and delicious. Yes absolutely. Frozen lobster tails are a great choice when you're in a hurry or just don't feel like going to the grocery store.

    What Can I Do With the Lobster Shell?

    Once you're Lobster tails are cooked perfectly, you'll be left with some empty lobster shells. If you're looking for a creative way to use the lobster shells from your Lobster tails, there are lots of fun options.

    You can use the shells in Instant Pot Lobster Stock, which is perfect for adding flavor and nutrients to soups, stews, and sauces.

    How to Defrost Lobster Tails?

    The best way to defrost frozen lobster tails is by placing them in a bowl of cold water, changing the water every 30 minutes or so until the Lobster tails have completely thawed.

    You can also defrost lobster tails in the fridge overnight, or by using the defrost setting on your microwave. To make sure that you don't end up overcooking your lobster tails when they are still partially frozen, it's best to wait until it is fully thawed before placing them in the Instant Pot for cooking.

    Best Way to Store Lobster

    Allow the lobster mixture to cool to room temperature before storing. Place it in an airtight container and refrigerate within 2 hours of preparation. Consume within 1-2 days. If you have extra lobster mixture, freeze it in a freezer-safe bag or container. Store lobster meat for up to 2-3 months. Thaw in the refrigerator before reheating.

    💖 Serving Suggestions

    Here are some of the best sides to serve with Instant Pot Lobster Rolls:

    • Crispy Sweet Potato Fries: Air Fryer sweet potato fries for a delightful contrast in textures.
    • Air Fryer Corn on the Cob: Sweet corn slathered with butter and grilled for that smoky flavor.
    • Parmesan Garlic Bread: Crusty baguette slices brushed with garlic-infused butter and topped with Parmesan for a savory bite.
    • If you love Lobster be sure to try this Chicken Cobbler with Red Lobster Cheddar Biscuit Topping. It's amazing.

    🍽 More Instant Pot Recipes

    • Instant Pot Cajun Chicken and Rice.
      Instant Pot Cajun Chicken and Rice
    • Creamy Instant Pot Tortellini Recipe.
      Creamy Instant Pot Tortellini Recipe
    • Instant Pot Kielbasa And Cabbage.
      Instant Pot Kielbasa And Cabbage
    • Instant Pot Enchilada Soup.
      Instant Pot Enchilada Soup

    Did you make this recipe? Leave a review and a ⭐⭐⭐⭐⭐ rating below, or tag us in our Facebook Group! Alternatively, bookmark it in your browser or save to Pinterest.

    Instant Pot Lobster Tail: Lobster Rolls.

    Instant Pot Lobster Tail: Lobster Rolls

    Angela Milnes
    Elevate your seafood game with these Instant Pot Lobster Rolls! Tender, juicy lobster tails are effortlessly cooked to perfection in the Instant Pot and then piled high into soft, buttery rolls. With a touch of mayo and a sprinkle of fresh herbs, these lobster rolls are the ultimate indulgence, perfect for a special occasion or a luxurious treat any day of the week.
    5 from 4 votes
    Print Recipe Pin Recipe Rate this Recipe
    Prep Time 10 minutes mins
    Cook Time 10 minutes mins
    Total Time 20 minutes mins
    Course Dinners
    Cuisine American
    Servings 4 Servings
    Calories 420 kcal

    Ingredients
      

    • 4 Lobster Tails Frozen
    • 1 Cup Shrimp cut into small pieces
    • ¼ Cup Mayonnaise
    • 1 ½ Tablespoons Lemon Juice
    • 1 Tablespoon Parsley
    • 1 teaspoon Salt
    • 1 teaspoon Black Pepper
    • 4 Hot Dog Buns
    • 2 Tablespoons Butter Softened
    • 1 tablespoon Old Bay Seasoning optional

    Instructions
     

    • Place 1 cup of water into the Instant Pot. Sprinkle in your old Bay seasoning with the water.
    • Cut a slice down the back of your lobster tails using kitchen shears or a sharp knife. This will make opening the tail easier once cooked.
    • Place the trivet inside the Instant Pot, and then add your lobster tails upside down on the trivet. If you don't have a trivet you may use a steamer basket.
    • Close the Instant Pot lid by twisting the lid on. Close the valve by pushing it away from you. Set your Instant Pot to high pressure for 4 minutes.
    • Once the cooking process is complete the Instant Pot will beep. Perform a quick release of the pressure before removing the lid.
    • While your lobster tails are cooking, mix all of the Lobster roll ingredients in a medium bowl (mayonnaise, fresh lemon juice, parsley, salt, pepper, and butter).
    • Remove your lobster tails from the Instant Pot with tongs and transfer to a cutting board.
    • Cut open the Lobster shells from the tails and remove the lobster meat.
    • If using four lobster tails cut those into pieces and add to your mayonnaise mixture.
    • If using ½ lobster and ½ crab meat, add the crab into your mayonaise mixture then mix well.
    • Add your Seafood mixture to your hotdog roll. Top with fresh parsley, or lemon wedges as a garnish. Enjoy!

    Nutrition

    Serving: 1gCalories: 420kcalCarbohydrates: 22gProtein: 38gFat: 19gSaturated Fat: 6gPolyunsaturated Fat: 8gMonounsaturated Fat: 4gTrans Fat: 0.3gCholesterol: 278mgSodium: 1616mgPotassium: 501mgFiber: 1gSugar: 3gVitamin A: 302IUVitamin C: 4mgCalcium: 222mgIron: 3mg
    Print Recipe Pin Recipe Rate this Recipe
    Tried this recipe?Let us know how it was!

    More Seafood Meal Ideas

    Looking for more fantastic seafood recipes? Why not try out the following?

    • Weight Watchers Shrimp Skewers
    • Instant Pot Shrimp Scampi
    • Instant Pot Clam Chowder
    • Beet Cured Salmon Recipe
    • Classic Tuna Tartare Recipe

    Instant Pot Shrimp Scampi Recipe

    July 29, 2024 by Angela Milnes

    Instant Pot Shrimp Scampi Recipe.

    Craving a quick yet fancy-feeling dinner? This Instant Pot Shrimp Scampi brings together juicy shrimp, garlicky lemon butter, and tender pasta in under 30 minutes

    Instant Pot Shrimp Scampi Recipe.

    Shrimp scampi is one of those classic dishes that feels fancy but is secretly so easy—especially in the Instant Pot. As a busy home cook, I love using frozen shrimp because it cooks up tender and flavorful without any fuss. The real magic happens with butter, garlic, and a splash of lemon juice to tie it all together.

    If you're a fan of quick Instant Pot dinners, you'll also love my Instant Pot Pesto Chicken or Instant Pot Asian Pulled Pork for something just as bold and satisfying.

    [feast_advanced_jump_to]

    💖 Why This Recipe Works

    • Fast, One-Pot Wonder – Cook pasta and shrimp together in the Instant Pot—easy cleanup, big flavors.
    • Zesty & Rich – Garlic, lemon, and butter hit all the right notes.
    • Fresh or Frozen Shrimp – Both work beautifully, so dinner's never far off.
    • Family Favorite – Mild, flavorful, and super satisfying.

    ⭐ Star Ingredients

    Instant Pot Shrimp Scampi Ingredients.
    • Shrimp (frozen or thawed) – I prefer peeled, deveined shrimp—they soak up flavor fast and cook evenly.
    • Fettuccine – It holds onto the buttery garlic sauce like a champ. Break it in half to fit your pot.
    • Garlic – Sautéed in butter to release max flavor. Don’t skip this—it’s the soul of scampi!
    • Fresh Lemon Juice – Brightens and balances the rich sauce. I always use freshly squeezed for best flavor.

    For the complete list of ingredients with measurements and instructions, please see the recipe card at the bottom of the post.

    📖  Substitutions & Variations

    • Fresh Shrimp: Works just as well—just reduce cooking time slightly.
    • Low-Carb Option: Serve shrimp scampi over zucchini noodles or cauliflower mash instead of pasta.
    • Add Wine: Swap half the broth for dry white wine for a restaurant-style upgrade.
    • Go Spicy: Add extra red pepper flakes for a scampi with heat.

    Shrimp scampi is super adaptable—if you're craving more quick seafood dinners, try my Instant Pot Clam Chowder or this easy Bang Bang Shrimp dish!

    🔪How To Make Instant Pot Shrimp Scampi?

    Sautéing butter, olive oil, garlic, and onion in the Instant Pot.
    1. Step 1: Start by sautéing butter, olive oil, garlic, and onion in the Instant Pot. Add frozen shrimp, cook, then remove. Add chicken broth, water, lemon juice, and fettuccine, and mix well. Pressure cook on high for 6 minutes, then manually release pressure.
    Added the cooked shrimp to the noodles.
    1. Step 2: Add the cooked shrimp to the noodles and mix well. You can enjoy this Instant Pot scampi dish as is, or you can top it with more lemon juice, lemon zest, fresh parsley, salt and pepper to taste, or parmesan cheese! Serve and enjoy your delicious meal.
    Two bowls of Instant Pot shrimp scampi.

    👩‍🍳 Expert Tips

    • Sauté First: Browning the aromatics deepens the flavor—don’t rush this step!
    • Don’t Overcook Shrimp: Remove them early and add them back at the end to avoid rubbery texture.
    • Balance the Brightness: A touch of butter and lemon juice after cooking makes the sauce extra luscious.

    💭 FAQs

    Can I use raw shrimp?

    Yes! Just cook them for 3–4 minutes on sauté mode until pink before removing them.

    Do I have to use pasta with shrimp scampi?

    Nope! Serve your Instant Pot shrimp scampi over steamed veggies, mashed cauliflower, or rice.

    Can I add wine to shrimp scampi?

    Yes, you can add wine to the shrimp scampi. Wine is a classic ingredient in this dish and will give the sauce a wonderful flavor.

    Can I make Shrimp Scampi ahead?

    This dish is best fresh, but leftovers store well for up to 3 days in the fridge.

    Instant pot shrimp scampi in a bowl.

    💖 Serving Suggestions

    Pair this shrimp scampi recipe with:

    • Air Fryer Cauliflower – A light, crispy side that keeps things low-carb.
    • Steamed Instant Pot Broccoli – Soaks up the sauce beautifully.
    • Brussels Sprouts with Maple Syrup – Sweet and savory contrast that works so well.
    • Fried Potatoes And Onions – Classic comfort side that’s always a hit.
    • Brussel Sprouts With Maple Syrup. - This green vegetable is rich in taste and pairs well with the buttery shrimp scampi.
    • Air Fryer Asparagus - This delicate and delicious vegetable is a great choice for serving with shrimp scampi.
    Instant Pot shrimp scampi in a bowl.

    🍽 More Super Shrimp Recipes

    • Fiery Ginger Garlic Shrimp (Chinese Shrimp).
      Fiery Ginger Garlic Shrimp (Chinese Shrimp)
    • Shrimp Ceviche.
      Shrimp Ceviche With Lemon And Lime
    • Easy Shrimp Cakes With Hot Sauce.
      Easy Shrimp Cakes With Hot Sauce
    • Easy Air Fryer Chicken And Shrimp Alfredo.
      Easy Air Fryer Chicken And Shrimp Alfredo

    Did you make this recipe? Leave a review and a ⭐⭐⭐⭐⭐ rating below, or tag us in our Facebook Group! Alternatively, bookmark it in your browser or save to Pinterest.

    Instant Pot Shrimp Scampi Recipe.

    Instant Pot Shrimp Scampi

    Angela Milnes
    Whip up a restaurant-quality meal in minutes with this Instant Pot Shrimp Scampi! Juicy shrimp, garlicky butter sauce, and a splash of lemon come together perfectly in this quick and easy dish. It's the ultimate weeknight dinner that's as impressive as it is delicious!
    5 from 4 votes
    Print Recipe Pin Recipe Rate this Recipe
    Prep Time 10 minutes mins
    Cook Time 15 minutes mins
    Total Time 25 minutes mins
    Course Dinners
    Cuisine American
    Servings 4 Servings
    Calories 557 kcal

    Ingredients
      

    • 2 tablespoon Butter
    • 1 tablespoon Olive Oil
    • 3 cloves Garlic minced
    • ¼ cup White Onion diced
    • ¼ cup Water
    • 1 lb. Frozen peeled shrimp, deveined
    • 12 oz Fettuccine Noodles broken in half
    • 3 cups Chicken Stock
    • ½ Whole Fresh Lemon squeezed
    • 1 pinch Sea Salt And Pepper to taste
    • ¼ teaspoon Red Pepper Flakes
    • 1 tablespoon Fresh Parsley

    Instructions
     

    • Turn your instant pot on "sauté" mode. Once it is hot, add to your pot the butter, olive oil, garlic, and white onion. Stir occasionally until your butter has melted, and your onion has softened. This should take about 3 minutes.
    • Add to your pot your frozen shrimp. Stir well allowing the shrimp to cook, as well as taking the flavors of the other ingredients in the pot.
    • Once your shrimp has cooked, remove the shrimp from the bowl. Set aside.
    • Add to the pot your chicken stock, water, juice from the lemon, and noodles. Mix well to prevent the noodles from sticking together.
    • Place the Instant Pot lid on and close the seal. Set your Instant Pot to high pressure for 6 minutes.
    • Once your Instant Pot is done, manually release by using a towel or hot pad to open the seal. You do this by bringing the valve toward you.
    • Once the steam has completely released, open your Instant Pot. Add in your shrimp to the pot and noodles. Mix well.
    • You can top with more lemon juice, fresh parsley, salt or pepper to taste, and/or parmesan cheese

    Notes

    To prevent shrimp from becoming rubbery in an Instant Pot recipe, perform a quick release of pressure. Do not perform a slow natural release, this will cause the shrimp to overcook and become rubbery.

    Nutrition

    Serving: 1gCalories: 557kcalCarbohydrates: 85gProtein: 21gFat: 16gSaturated Fat: 6gPolyunsaturated Fat: 2gMonounsaturated Fat: 6gTrans Fat: 0.3gCholesterol: 92mgSodium: 388mgPotassium: 689mgFiber: 8gSugar: 5gVitamin A: 6116IUVitamin C: 22mgCalcium: 77mgIron: 3mg
    Print Recipe Pin Recipe Rate this Recipe
    Tried this recipe?Let us know how it was!

    What To Serve With Mahi Mahi

    July 29, 2024 by Angela Milnes

    Dishes to serve with mahi mahi.

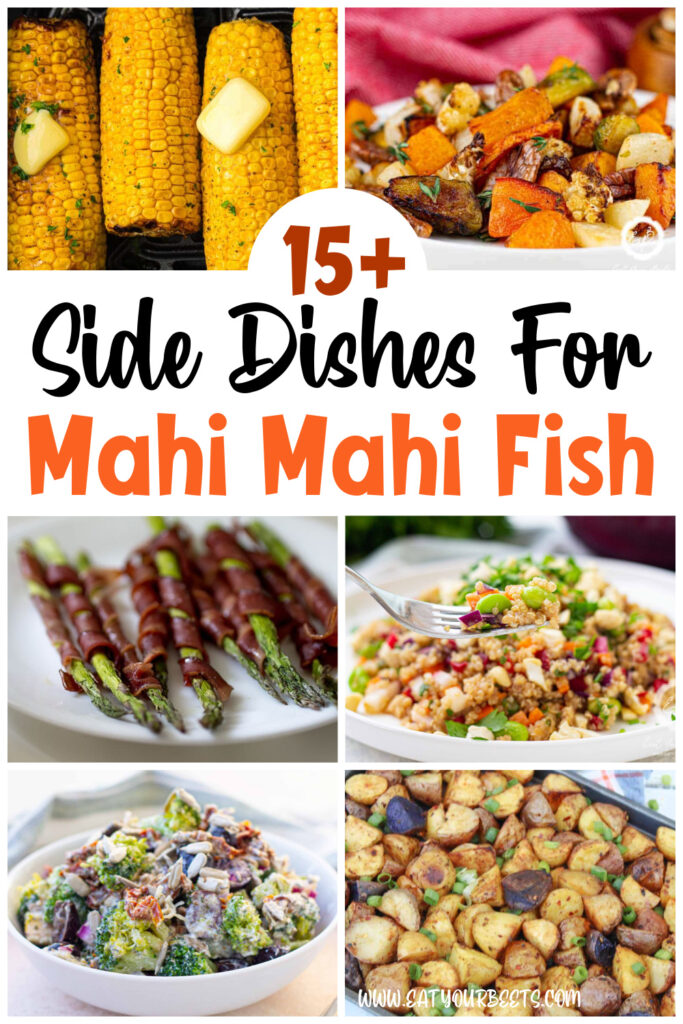
    If you need ideas for What To Serve With Mahi Mahi, look no further – we have put together an array of sides that go with Mahi Mahi. Keep reading to learn which side dishes work best when paired with this delicate fish!

    What to serve with mahi mahi
    [feast_advanced_jump_to]

    What to Serve With Blackened Mahi Mahi?

    Blackened Mahi Mahi is a delicious dish that can be served as part of an informal dinner party or a more formal meal. Blackened Mahi Mahi is great with a drizzle of olive oil and either lemon juice or lime juice. However, Mahi Mahi tastes even better with delicious and healthy side dishes.

    Popular sides to serve with Blackened Mahi Mahi include grilled corn, wilted spinach, and roasted potatoes. Today we have made a list of great side dish ideas to pair with your favorite Mahi Mahi recipe.

    What to Serve With Mahi Mahi

    Best Mahi Mahi Side Dishes

    You'll love this collection of side dishes for Mahi Mahi.

    Wild Rice and Mahi Mahi

    Combining the nutty flavor of wild rice with the mild taste of Mahi Mahi creates a perfect harmony of flavors and textures. The wild rice adds plenty of texture, while the fish gives it a touch of seafood sweetness.

    This side dish is easy to make, packed full of flavor and high in protein, making it a great option for creating a healthy yet delicious meal.

    Greek Salad With Mahi Mahi

    Greek Salad with Mahi Mahi is a fresh and flavorful combination—the perfect meal for warm summer evenings. Serve fresh from the grill, the mouth-watering Mahi Mahi pairs wonderfully with fresh veggies tossed in a traditional Greek salad.

    The classic flavors—cucumbers, tomatoes, red onion, iceberg lettuce, olives, feta cheese and a homemade Greek dressing—combine deliciously. Adding fresh red pepper flakes adds an extra zing to this tasty dish.

    Enjoy this pleasing combination of fresh fish with vibrant vegetables as a delicious main course or as part of your favorite side dishes.

    Lemon Herb Couscous

    Lemon Herb Couscous is the perfect side dish to serve with Mahi Mahi. As its name suggests, lemon couscous is cooked with lemon juice and lemon zest, adding a refreshing taste to your seafood dish.

    Red bell pepper gives this side an enticing hue, while a blend of fresh herbs - such as parsley and oregano - adds an extra kick of flavor. Heirloom tomatoes provide a hint of sweetness, and lemon wedges garnish the top for an extra touch of lemon flavor.

    Serve alongside your delicious Mahi Mahi for a flavorful and visually appealing meal!

    Creamed Spinach

    Creamed spinach is a deliciously creamy side dish commonly served alongside main meals such as Mahi Mahi. Its preparation starts with olive oil, allowing the spinach to cook down until it takes on a velvety texture and rich flavor.

    Once the spinach is cooked down, heavy cream and butter are added to create the classic creamed texture. Not only is it rich in flavor and creamy texture, but creamed spinach is also chock full of vitamins and minerals essential for a balanced diet.

    Broccoli Salad

    Broccoli salad has a slightly sweet flavor and makes a tasty side dish for Mahi Mahi. Try this easy Broccoli Salad Recipe. It pairs well with both blackened Mahi Mahi and grilled Mahi Mahi.

    Cajun Roasted Potatoes

    Cajun roasted potatoes make a delicious side dish to pair with your Mahi Mahi! This recipe begins by cutting the potatoes into cubes and tossing them in Cajun spices. They are then roasted in the oven until they become golden brown and crispy on the outside while still being soft and fluffy on the inside.

    The roasted potatoes will enhance flavors by adding cajun seasoning, such as smoked paprika, thyme, garlic powder and oregano. Any potato can make a delicious side dish for Mahi Mahi, but these cajun-roasted potatoes are top-notch!

    Enjoy this simple yet flavorful roasted potato dish with your Mahi Mahi for a delicious dining experience!

    Spanish Roasted Potatoes

    More Ideas for What to Serve With Mahi Mahi

    Pineapple Mango Salsa

    Pineapple Mango Salsa is a perfect, fresh side dish served with grilled Mahi Mahi. This bright and flavorful side dish is made with diced red onion, chopped pineapple, mangoes, and fresh cilantro - all seasoned with freshly squeezed lime juice and a sprinkle of pepper!

    Deliciously tangy and sweet, this side dish makes a wonderful accompaniment to your favorite fish entrée. Serve it as an appetizer or side to any summer BBQ - no one can resist the unique flavors of Pineapple Mango Salsa!

    pineapple mango salsa ingredients

    Bacon Wrapped Asparagus

    Bacon-wrapped asparagus is an amazing and smoky side dish to serve with Mahi Mahi! It creates a smoky flavor from the bacon combined with the crunchy grilled vegetables.

    This side dish cuisine is easy to prepare, just wrap a few pieces of asparagus in bacon and then grill them for about 6 minutes on each side. The result is a tantalizing, smoky flavor that perfectly complements the mild and flaky taste of the Mahi Mahi.

    Check out the Bacon Wrapped Asparagus Recipe to learn how to prepare bacon asparagus easily.

    Bacon Wrapped Asparagus

    Mashed Potatoes

    Mashed potatoes are a favorite recipe for many people when served with Mahi Mahi. It provides the perfect accompaniment to the delicate fish flavor of the mahi, and it's a classic combination that's delicious every time!

    When making mashed potatoes as a side dish, use butter and cream to give them a smooth, creamy texture. You can also use garlic, herbs, or cheese for added flavour.

    Learn here how to make Instant Pot Mashed Potatoes.

    Instant Pot red skinned Mashed Potato

    Lemon Brown Rice

    Lemon brown rice is a flavorful side ideal for serving with Mahi Mahi or any other fish. The bright and zesty flavors of the lemon and olive oil create an irresistible combination. Kosher salt enhances the taste, bringing out this dish's bold flavors.

    What's great about lemon brown rice is its versatility - you can easily adjust the quantity of olive oil, kosher salt, and fresh lemon juice to make it just right for your liking!

    Corn on the Cob

    You could try Air Fryer Corn On The Cob or a traditional grilled corn to serve alongside your Mahi Mahi main dish. This healthy vegetable is a great way to add flavor and nutritional value to your meal.

    Air Fryer corn On The Cob

    Also Try These Mahi Mahi Dinner Sides

    Try these easy and simple side dishes if you want something to pair perfectly with Mahi Mahi. Whether you're looking for something to whip up quickly or a more complex dish, you'll find something here that is sure to please.

    Air Fryer Carrot Fries

    Cook Air Fryer Carrot Fries to complement your Mahi Mahi fish. This delicious side dish is a healthier take on traditional french fries but with all of the same crunch and flavor.

    Air Fryer Carrot Fries

    Garlic Roasted Broccolini

    Roast garlic Broccolini with your Mahi Mahi for a healthy, flavorful side dish. This simple recipe requires minimal ingredients and comes together in just minutes.

    Air Fryer Broccolini

    Roasted Vegetables

    Roasted Vegetables make an excellent combination that goes great with any dinner spread and adds a lovely flavor to the dinner plate. Moreover, roasting vegetables requires relatively little effort compared to other cooking methods.

    It's as simple as tossing your ingredients in oil and spices and then popping them in the oven for about 40 minutes. You'll be left with perfectly cooked roasted vegetables that pair beautifully with your favorite Mahi Mahi recipe! Sprinkle a little parmesan cheese for extra flavor! 

    air fryer roasted vegetables

    Heirloom Tomato Salad

    Heirloom tomato salad is surprisingly quick and easy to prepare—it'll only take just a few minutes. It consists of grape tomatoes, fresh mozzarella and heirloom tomatoes, all sliced thin.

    Drizzled over this delicious mix is olive oil and apple cider vinegar for a tangy flavor that goes perfectly with the fish.

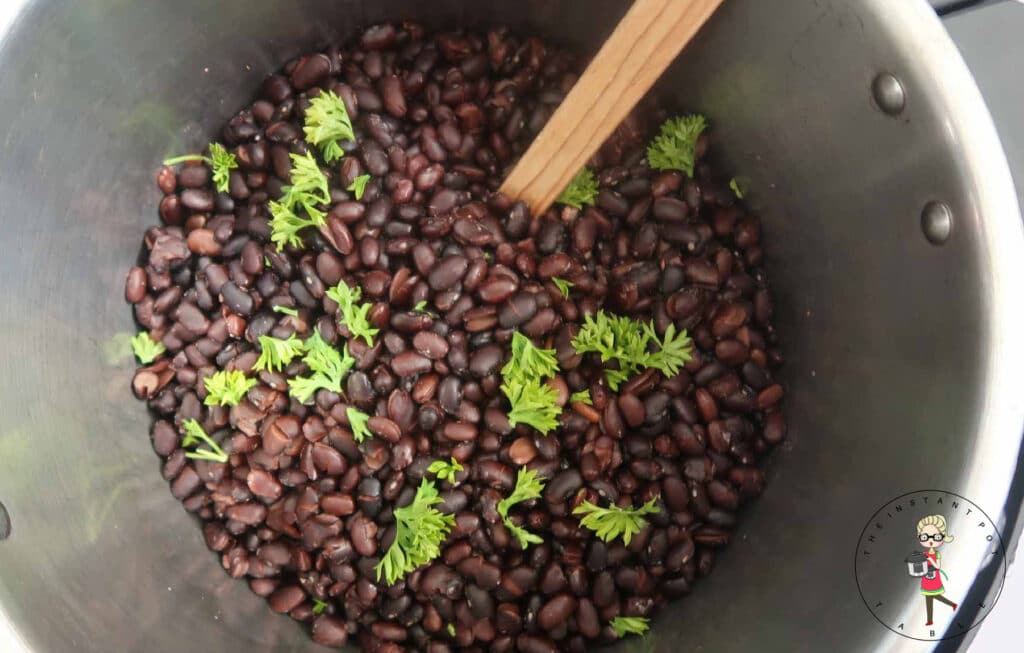
    Instant Pot Black Beans

    Try serving Mahi Mahi with Black beans. Black Beans are packed with goodness and make for a great side dish.

    instant-pot-black-beans-

    Coconut Rice

    A creamy coconut rice dish accompanies your Mahi Mahi main dish perfectly. It's easy to prepare and can be served hot or cold. 

    Quinoa Edamame Salad

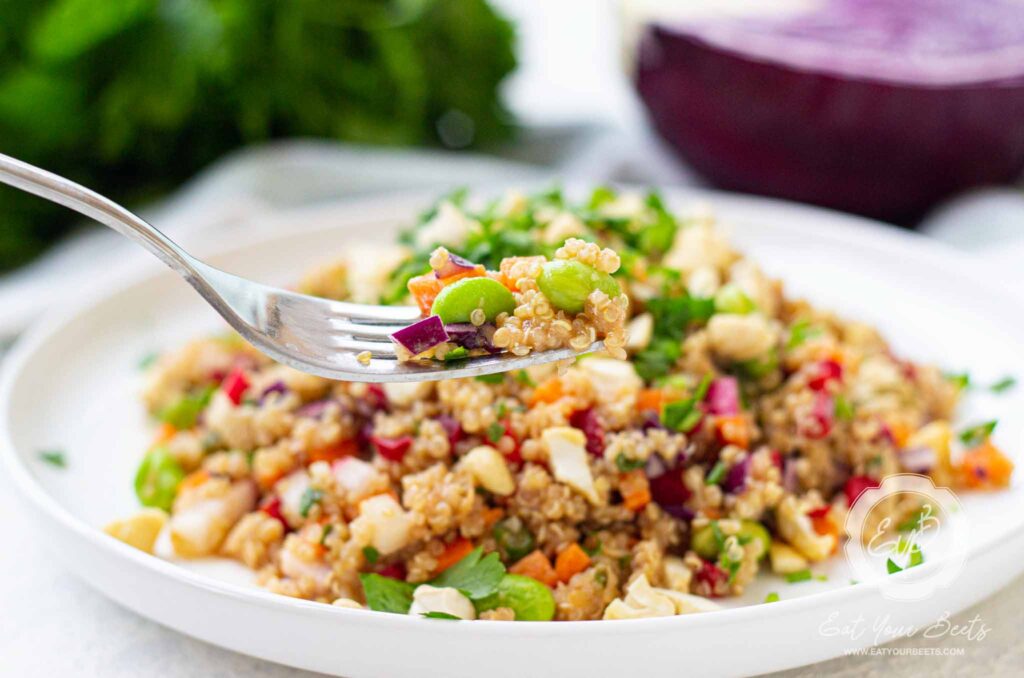
    A quinoa salad makes a delicious side dish to serve with Mahi Mahi. A flavorful salad such as Quinoa Salad is full of protein and fiber, making it a healthy choice.

    quinoa salad

    More Sides to Serve With Mahi Mahi

    Roasted Bell Peppers

    Roasted bell peppers are one of the best side dishes that pair well with Mahi Mahi, adding spicy flavors to the light and flaky fish.

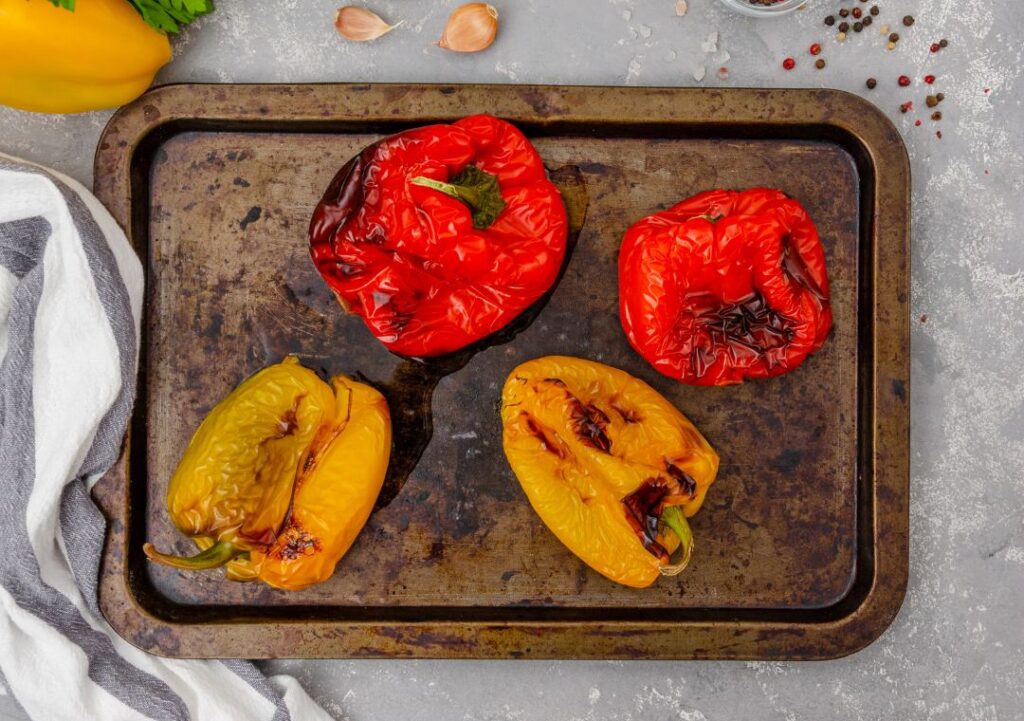
    To prepare this delicious dish, simply toss red and yellow bell pepper slices in a bowl with a tablespoon of avocado oil until the peppers are thoroughly coated.

    Spread your peppers evenly on an oven-safe tray lined with parchment paper, or place them in an oven-proof skillet. Roast at 350 degrees Fahrenheit for 15 minutes until the peppers look charred.

    Serve up alongside freshly grilled Mahi Mahi, and you've got a perfect dinner combination of flavors!

    Grilled Zucchini

    Grilled zucchini's delicate flavor combines well with many herbs and spices, and the light char from grilling adds an extra layer of texture and flavor. When combined together, Grilled Zucchini and Mahi Mahi create a truly delicious flavor experience.

    Plus, it's easy to make - just cut up your zucchini, toss it with some olive oil, sprinkle your desired seasonings, place on a hot grill, and turn it every few minutes until they are cooked to perfection!

    Parmesan Roasted Zucchini Slices.

    Baked Potatoes

    Air Fryer Baked Potatoes provide a comforting base that stays crispy and isn't overpowered by the main meal. Additionally, they're quite flexible regarding ingredients - you can top them with cheese, bacon bits, avocados, or even salt and pepper!

    air Fryer baked Potato Recipe

    With plenty of options and endless flavor combinations, there's no doubt why baked potatoes are the perfect side dish served with Mahi Mahi.

    What Will You Serve With Mahi Mahi for Your Next Meal?

    No matter what meal you plan, these delicious side dishes for Mahi Mahi will add the perfect finishing touch. From wild rice to roasted potatoes, there is something for everyone!

    What will you pair with your favorite fish dish? Share your ideas in the comments below. Happy cooking!

    FAQ'S

    What Is Mahi Mahi?

    Mahi Mahi is a type of fish found in warm ocean waters worldwide. It has a mild, sweet flavor and a moist, flaky texture. The flesh is white-colored and low in fat but contains delicious omega-3 fatty acids.

    Mahi Mahi, also known as Dolphin Fish, is an excellent choice for experimenting with new seafood dishes.

    Is Mahi Mahi Healthy?

    Mahi Mahi is a Lean Fish Packed With Essential Vitamins and minerals, such as omega-3 fatty acids, vitamin B12, selenium, and phosphorus. It is low in fat and calories, making it an excellent choice for those looking to eat healthily.

    Try The Following Simple Seafood Meals

    • Jamaican Jerk Pasta With Shrimp
    • Baked Crispy Salmon Bites
    • Instant Pot Clam Chowder
    • Smoked Salmon Bruschetta
    • Classic Tuna Tartare
    • 21+ Cold Dip Recipes For Your Party

    Jamaican Jerk Pasta With Shrimp

    July 28, 2024 by Angela Milnes

    Jamaican Jerk Pasta With Shrimp.

    Jamaican Jerk Pasta Recipe is your ticket to a flavor-packed, Caribbean-inspired dinner that's ready in under 30 minutes. Think juicy shrimp, creamy sauce, and a spicy kick that'll have everyone asking for seconds.

    Jamaican jerk pasta with shrimp in a skillet.

    This dish is a delightful fusion of bold Jamaican spices and comforting pasta. It's perfect for weeknights when you want something quick yet satisfying. If you're a fan of shrimp dishes, you might also enjoy my Shrimp Scampi Spaghetti, Shrimp Ceviche, or Spicy Crispy Bang Bang Shrimp with Sweet Chili Sauce.

    [feast_advanced_jump_to]

    💖 Why This Recipe Works

    • Bold Flavors: The homemade jerk seasoning brings heat and depth.
    • Quick & Easy: Ready in under 30 minutes with minimal cleanup.
    • Versatile: Easily adaptable with different proteins or veggies.

    ⭐ Star Ingredients

    • Shrimp: I love how the juicy shrimp soak up all that spicy jerk flavor—it’s like a mini flavor bomb in every bite.
    • Jerk Seasoning: This is where the magic happens! Allspice, thyme, and cayenne bring that bold, unmistakable island vibe we can’t get enough of.
    • Penne Pasta: I always go for penne here—those little ridges are sauce-grabbing champs and keep every forkful creamy and satisfying.
    • Bell Peppers: They’re not just pretty—they add a mellow sweetness that cools the heat just enough for the whole family to enjoy.

    For the complete list of ingredients with measurements and instructions, please see the recipe card at the bottom of the post.

    📖  Substitutions & Variations

    • Protein Swap: Use chicken, tofu, or even mushrooms instead of shrimp.
    • Creamy Coconut: Replace heavy cream with coconut milk for a tropical twist.
    • Veggie Boost: Add spinach, zucchini, or broccoli for extra nutrients.
    • Cheese Choices: Try cheddar or mozzarella if you don't have Parmesan.
    • Spice Level: Adjust the amount of jerk seasoning to your heat preference.
    • Pasta Types: Fusilli or rigatoni work well if penne isn't available.

    Pair this dish with my Pineapple Mango Salsa or Balsamic Grilled Vegetables for a complete Caribbean meal.

    🔪How To Make Jamaican Jerk Pasta?

    1. Add all of the spice ingredients in a small bowl or skillet and whisk to combine.
    2. Cook the penne pasta according to directions on the box. Drain the penne and reserve 1⁄2 cup of pasta water. Set to the side.
    3. Rinse shrimp and pat dry using a paper towel. In a large bowl add the shrimp and jerk spice. Toss to combine the shrimp and spice.
    4. Place a large non stick skillet, a non stick pan or Dutch oven over medium high heat.
    5. Add your extra virgin olive oil to the pan and cook the raw shrimp for 2-3 minutes on each side. Remove shrimp from the skillet or Dutch oven and set aside.
    6. Add the pasta water to the pan and scrape to combine the brown bits.
    7. Add peppers, fresh pineapple chunks, and garlic to the pan and cook for 5 minutes. Now, add the pasta water, heavy cream, and Jamaican jerk pasta seasoning to the pan for 3-5 minutes.
    8. Add penne pasta, and parmesan cheese and stir until combined.
    9. Remove your Jamaican Jerk Pasta from heat and add shrimp to the cooked pasta.

    💡Hint: For deeper flavor, marinate the shrimp in jerk seasoning overnight.

    👩‍🍳 Expert Tips

    • Marination Magic: Letting the shrimp marinate longer intensifies the flavor.
    • Pasta Water: Using reserved pasta water helps the sauce adhere better to the pasta.
    • Fresh Ingredients: Fresh garlic and herbs elevate the dish's overall taste.

    💭 FAQs

    Can I make Rasta Pasta with chicken instead of shrimp?

    Yes, absolutely! While the recipe calls for shrimp, you can swap it for chicken if you prefer. Simply cook the chicken until it's fully done, and follow the same steps for adding the jerk seasoning and pasta.

    How spicy is Jamaican Jerk Pasta with Shrimp?

    The heat level depends on your jerk seasoning. Start with less and adjust to taste.

    Can I make Rasta Pasta ahead of time?

    Yes, prepare the components separately and combine when ready to serve.

    Best Way to Store Jerk Pasta Leftovers?

    Store in an airtight container in the refrigerator for up to 3 days. Reheat gently before serving.

    💖 Serving Suggestions

    • Fried Plantains – Sweet meets heat. Yes, please.
    • Callaloo – Leafy greens but make it island-style.
    • Rotisserie Chicken – For when shrimp needs backup.
    • Garlic Bread – Scoop, swipe, devour.
    • Fresh Salad – Crunchy, cool, and keeps things balanced.
    • Coconut Rice – Creamy, dreamy, total flavor BFF.
    Jerk pasta with shrimp in a skillet.

    🍽 More Delicious Pasta Dishes

    • Italian sausage and broccoli pasta in a skillet.
      Creamy Italian Sausage And Broccoli Pasta (With Mascarpone)
    • Slow Cooker Chicken Bacon Ranch Pasta.
      Slow Cooker Chicken Bacon Ranch Pasta
    • Instant Pot Cacio E Pepe Pasta.
      Instant Pot Cacio E Pepe Pasta
    • Cowboy Butter Pasta In Creamy Sauce, Topped with sliced lemons.
      Cowboy Butter Pasta In Creamy Sauce

    Did you make this recipe? Leave a review and a ⭐⭐⭐⭐⭐ rating below, or tag us in our Facebook Group! Alternatively, bookmark it in your browser or save to Pinterest.

    Jamaican Jerk Pasta With Shrimp.

    Jamaican Jerk Pasta Recipe

    Angela Milnes
    Spice up your dinner with this bold and flavorful Jamaican Rasta Pasta! Creamy, zesty, and loaded with the vibrant spices of traditional jerk seasoning, this pasta dish brings a taste of the Caribbean to your table. With tender Shrimp and colorful veggies tossed in, it’s a hearty and satisfying meal that’s sure to become a new favorite.
    5 from 4 votes
    Print Recipe Pin Recipe Rate this Recipe
    Prep Time 15 minutes mins
    Cook Time 30 minutes mins
    Total Time 45 minutes mins
    Course Dinners
    Cuisine Jamaican
    Servings 4 Servings
    Calories 766 kcal

    Ingredients
      

    • 1 tablespoon Onion Powder
    • 1 tablespoon Garlic Powder
    • 2 teaspoon Cayenne Pepper
    • 2 teaspoon Salt
    • 2 teaspoon Ground Black Pepper
    • 2 teaspoon Ground Thyme
    • 2 teaspoon Granulated Sugar
    • 1 teaspoon Ground Allspice
    • 1 teaspoon Dried Parsley
    • 1 teaspoon Paprika
    • ½ teaspoon Hot Pepper Flakes
    • ½ teaspoon Ground Cinnamon
    • ½ teaspoon Ground Nutmeg
    • ½ teaspoon Ground Cloves
    • ½ teaspoon Ground Cumin
    • 8 oz Penne Pasta
    • 1 lb. Shrimp peeled and deveined
    • 2 tablespoon Jerk Seasoning
    • 2 tablespoon Olive Oil
    • 1 Red Bell Pepper thinly sliced
    • 1 Green Bell Pepper thinly sliced
    • 1 Onion thinly sliced
    • 1 cup Pineapple small chunks
    • 1 tablespoon Minced Garlic
    • ¾ cup Pasta Water
    • ¾ cup Heavy Cream
    • 1 cup Parmesan Cheese shredded
    • 1 cup Frozen Shrimp

    Instructions
     

    • Add all of the ingredients in a small bowl and whisk to combine.
    • Cook the penne pasta according to directions on the box. Drain the penne and reserve 1⁄2 cup of pasta water. Set to the side.
    • Rinse shrimp and pat dry using a paper towel. In a large bowl add the shrimp and jerk spice. Toss to combine the shrimp and spice.
    • Place a large non stick skillet, a non stick pan or Dutch oven over medium high heat.
    • Add your extra virgin olive oil to the pan and cook the raw shrimp for 2-3 minutes on each side. Remove shrimp from the skillet or Dutch oven and set aside.
    • Add the pasta water to the pan and scrape to combine the brown bits.
    • Add peppers, fresh pineapple chunks, and garlic to the pan and cook for 5 minutes. Now, add the pasta water, heavy cream, and Jamaican jerk pasta seasoning to the pan for 3-5 minutes.
    • Add penne pasta, and parmesan cheese and stir until combined.
    • Remove your Jamaican Jerk Pasta from heat and add shrimp to the cooked pasta.

    Notes

    Marinate Overnight Masterstroke: Enhance shrimp flavor by marinating in jerk seasoning overnight for a richer taste in your Jamaican jerk pasta.
    Halved Shrimp Hack: Speed up cooking and intensify flavors by using halved lengthwise shrimp for quicker, more flavorful results in your dish.

    Nutrition

    Calories: 766kcalCarbohydrates: 65gProtein: 56gFat: 33gSaturated Fat: 16gPolyunsaturated Fat: 3gMonounsaturated Fat: 12gTrans Fat: 0.01gCholesterol: 349mgSodium: 995mgPotassium: 1032mgFiber: 7gSugar: 12gVitamin A: 2918IUVitamin C: 53mgCalcium: 526mgIron: 4mg
    Print Recipe Pin Recipe Rate this Recipe
    Tried this recipe?Let us know how it was!

    Baked Crispy Salmon Bites on Rice

    July 28, 2024 by Angela Milnes

    Baked Crispy Salmon Bites on Rice.

    Craving something crispy, bold, and fast? These Crispy Salmon Bites are spicy, golden, and ready in minutes—perfect for busy nights or weekend feasts.

    Baked Crispy Salmon Bites on Rice.

    These spicy salmon cubes are having a moment—and I’m here for it. Packed with heart-healthy omega-3s, they’re a tasty, healthy dinner idea that both kids and grown-ups can get behind.

    Serve them over Instant Pot Long Grain White Rice, next to Almond Milk Mashed Potatoes, or piled into warm Plaintain Tortillas for DIY salmon tacos. Versatile, family-friendly, and full of flavor—they make any carb shine.

    [feast_advanced_jump_to]

    💖 Why This Recipe Works

    • Quick & fuss-free: Minimal prep, just toss and bake (or air-fry).
    • Super crispy texture: Perfect golden edges, tender center.
    • Big flavor payoff: Bold spices + zingy lemon = magic combo.

    ⭐ Star Ingredients

    Ingredients to make crispy salmon bites.
    • Salmon fillets: I go for center-cut pieces—they cube up beautifully and stay tender inside. Skin-on fillets add extra flavor and turn irresistibly crispy in the air fryer. These make the best salmon cubes for quick meals.
    • Paprika: Sweet paprika adds warmth and color without overpowering. It’s a go-to spice in many healthy salmon recipes and plays so well with citrus.
    • Olive oil: A drizzle of extra virgin olive oil helps create that perfect crispy coating when baked or air-fried—no deep frying necessary.
    • Lemon: A squeeze just before serving cuts through the richness. It adds brightness and makes these spicy salmon bites taste restaurant-worthy at home.

    For the complete list of ingredients with measurements and instructions, please see the recipe card at the bottom of the post.

    📖  Substitutions & Variations

    • Lemon Garlic Salmon Bites: Add lemon zest + garlic powder for zippy Mediterranean vibes.
    • Maple Glazed Salmon Bites: Swap paprika for maple syrup and soy sauce for a sweet umami glaze.
    • Hot Honey Salmon Cubes: Drizzle with honey + red chili flakes after baking for a spicy-sweet finish.
    • Teriyaki Salmon Bites: Toss the cubes in teriyaki sauce before baking for an Asian-inspired twist.
    • Panko Crusted Salmon Nuggets: Coat the salmon cubes in panko crumbs for added crunch.
    • Crispy Cajun Salmon Bites: Use Cajun seasoning instead of paprika for an extra kick.

    🍽 Love this flavor combo? Pair with my Beet and Sweet Potato Salad or our Healthy Quinoa Salad for a vibrant meal.

    🔪 How To Make Crispy Salmon Bites

    Use this section for process shots, alternating between the step and image showing the step. Users don't like seeing process shots cluttering up the recipe card, so include your process shots here.

    Salmon pieces in a bowl.
    1. Step 1: Preheat your oven to 350°F (175°C). Pour olive oil over the salmon cubes, ensuring they are well coated.
    Spice seasonings in a bowl.
    1. Step 2: In a separate bowl, mix together your chosen spices.
    Coating salmon bites with spicy seasoning.
    1. Step 3: Add the spice mixture to the salmon, tossing to ensure each piece is evenly coated.
    Seasoned salmon pieces in a baking tray.
    1. Step 4: Place the seasoned salmon pieces on a baking sheet and bake for 10-15 minutes until crispy and cooked through. Serve over rice, with fresh parsley and a lemon wedge. Enjoy!
    Crispy salmon bites served over rice in a bowl.

    👩‍🍳 Expert Tips

    • Use fresh salmon if possible—it's flakier and crisps up better than frozen.
    • Don’t overcrowd the pan—space them out for even browning.
    • Rest before serving—just 5 minutes helps the flavors settle and keeps the texture spot on.

    🍽 Nutrition at a Glance

    These salmon bites pack in protein, healthy omega-3s, and flavor without the deep-fry guilt. One serving (about 6 bites) offers roughly:

    • 220 calories
    • 20g protein
    • 14g healthy fats
    • 1g carbs

    Note: This is an estimate and may vary depending on specific ingredients used.

    💭 FAQs

    Can I make these salmon bites in the air fryer?

    Yes, to make crispy salmon air fryer bites cook them at 400°F for about 10-12 minutes, until golden and crispy.

    Can I Use Frozen Salmon For Baked Salmon Bites?

    Yes, but thaw them completely and pat dry to avoid soggy bites. Moisture is the enemy of crispiness!

    What Dipping Sauces Pair Well With Salmon Bites?

    Creamy dill sauce, garlic aioli, or a simple soy sauce-based dip can enhance the flavor of these crispy salmon bites.

    How To Store Baked Salmon Bites?

    Keep them in an airtight container in the fridge for up to 3 days. Reheat in an air fryer at 350°F for 5 minutes or in the oven at 375°F for 8–10 minutes to restore that crispy coating. Avoid microwaving—they’ll turn mushy.

    💖 Serving Suggestions

    Serve your crispy salmon bites with:

    • Cilantro Garlic Rice – light, fluffy, and perfect with lemony salmon.
    • Crispy Air Fryer Carrot Fries – crunchy, colorful, and kid-approved.
    • Kale Butternut Squash Salad – adds fall flavor and fiber to your plate.
    • Purple Cauliflower Puree – creamy, low-carb sidekick to balance the spice.
    • Beetroot Hummus & pita chips – for a fun appetizer board twist.
    • Jalepeno Coleslaw – crunchy, tangy, and totally refreshing.
    Crispy salmon bites served over rice in a bowl.

    🍽 More Delicious Salmon Recipes

    • Best Air Fryer Salmon Recipe: Bang Bang Salmon.
      Air Fryer Bang Bang Salmon (Fast, Spicy & Crispy!)
    • Creamy Tuscan Salmon With Sundried Tomatoes.
      Creamy Tuscan Salmon With Sundried Tomatoes
    • Easy Beet Cured Salmon Recipe.
      Easy Beet Cured Salmon Recipe
    • Creamy Pan Fried Salmon Fillet.
      Creamy Pan Fried Salmon Fillet

    Did you make this recipe? Leave a review and a ⭐⭐⭐⭐⭐ rating below, or tag us in our Facebook Group! Alternatively, bookmark it in your browser or save to Pinterest.

    Baked Crispy Salmon Bites on Rice.

    Best Crispy Salmon Bites on Rice

    Angela Milnes
    Savor the perfect combination of flavors and textures with these Crispy Salmon Bites on Rice! Tender salmon bites, coated in a crispy crust, are served atop a bed of fluffy rice. It’s a deliciously satisfying dish that’s both easy to make and packed with flavor—perfect for a quick lunch or dinner!
    5 from 3 votes
    Print Recipe Pin Recipe Rate this Recipe
    Prep Time 5 minutes mins
    Cook Time 15 minutes mins
    Total Time 20 minutes mins
    Course Dinners
    Cuisine American
    Servings 2 Serving
    Calories 516 kcal

    Ingredients
      

    • 1 cup Salmon Diced
    • 2 cup Boiled Rice
    • 3 tbsp. Parsley
    • 2 Lemons
    • 2 teaspoon Paprika
    • 2 teaspoon Olive Oil
    • 1 teaspoon Oregano
    • 2 teaspoon Garlic Powder
    • pinch Salt
    • pinch Black Pepper
    • pinch Chili Pepper

    Instructions
     

    • Preheat your oven to 350°F (175°C).
    • Pour olive oil over the salmon cubes, ensuring they are well coated.
    • In a separate bowl, mix together your chosen spices.
    • Add the spice mixture to the salmon, tossing to ensure each piece is evenly coated.
    • Place the seasoned salmon pieces on a baking sheet in a single layer.
    • Bake in the preheated oven for 10-15 minutes, or until the salmon is crispy and cooked through.
    • Serve the crispy salmon bites over a bed of rice, sprinkled with fresh parsley and a wedge of lemon on the side. Enjoy!

    Notes

    Use Parchment Paper Line the baking sheet with parchment paper to prevent the salmon from sticking.
    Let it Rest Allow the salmon to rest for a few minutes after baking to let the flavors meld.
    Flip Halfway Flip the salmon pieces halfway through baking for even crispiness on all sides.
    Preheat the Baking Sheet Place the baking sheet in the oven while it preheats to ensure a crispy bottom.
    Air Fryer Salmon Bites: You can air-fry salmon bites if you don't have an oven, place them in the air fryer basket and cook at 375°F (190°C) for 10-12 minutes.

    Nutrition

    Calories: 516kcalCarbohydrates: 86gProtein: 23gFat: 10gSaturated Fat: 1gPolyunsaturated Fat: 3gMonounsaturated Fat: 5gCholesterol: 37mgSodium: 57mgPotassium: 722mgFiber: 7gSugar: 3gVitamin A: 2921IUVitamin C: 87mgCalcium: 109mgIron: 9mg
    Print Recipe Pin Recipe Rate this Recipe
    Tried this recipe?Let us know how it was!

    Instant Pot Clam Chowder Recipe With Canned Clams

    July 28, 2024 by Angela Milnes

    Best Instant Pot Clam Chowder in a bowl garnished with parsley.

    This creamy Instant Pot Clam Chowder is comfort food in a bowl—quick, hearty, and full of flavor. Whether it’s a chilly night or a sunny day at the beach, this chowder hits the spot in under 30 minutes!

    Best Instant Pot Clam Chowder in a bowl garnished with parsley.
    [feast_advanced_jump_to]

    I grew up eating canned clam chowder, but once I started testing this Instant Pot version, there was no going back. It’s ridiculously easy—just one pot, a few pantry staples, and you’ve got a restaurant-worthy bowl. I’ve made it with fresh clams and canned, swapped the dairy a dozen ways, and even tested it with smoked paprika instead of bacon. Spoiler: they’re all good.

    If you love this, you’ll probably also love Instant Pot Cajun Rice and Beans, Instant Pot Butternut Squash, or Instant Pot Pesto Chicken.

    💖 Why This Recipe Works

    • Time-Saving: Pressure cooking gets dinner on the table fast.
    • Big Flavor, Low Effort: This clam chowder has a rich seafood taste without a long simmer.
    • One-Pot Simplicity: Less cleanup, more chowder.

    ⭐ Star Ingredients

    Instant Pot Clam Chowder ingredients.
    • Canned Chopped Clams – Pantry-friendly, quick to use, and full of briny flavor. I always keep a few cans on hand.
    • Russet Potatoes – They break down just enough to thicken the chowder without needing flour.
    • Bacon – A little bacon goes a long way. It adds smoky depth and makes the whole kitchen smell amazing.

    For the complete list of ingredients with measurements and instructions, please see the recipe card at the bottom of the post.

    📖  Substitutions & Variations

    • No Bacon? Use smoked paprika or liquid smoke for a meat-free version.
    • Dairy Swaps – Try heavy cream, milk, or even canned coconut milk.
    • Seafood Twist – Swap clams for cod, haddock, or scallops.
    • Add Veggies – Sweetcorn, celery, carrots, or leeks all work.
    • Low-Carb Version – Use cauliflower instead of potatoes.
    • Flavor Boost – Use clam juice or seafood broth instead of water.
    • Want a twist? Add a splash of white wine for brightness, or stir in corn and fresh thyme for a rustic chowder with depth.

    This chowder is perfect for cozy winter dinners, family seafood nights, or even summer beach cabin meals.

    New England vs. Manhattan Clam Chowder

    New England clam chowder is the creamy, comforting version made with milk, cream, potatoes, and usually bacon—no tomatoes in sight. Manhattan clam chowder, on the other hand, swaps out the cream for a tomato-based broth and usually includes more vegetables like carrots and celery. The flavor is lighter, more broth-forward, and a little tangier. If you’re craving rich and cozy, stick with New England; if you want something lighter and veggie-packed, Manhattan is your jam.

    🔪How To Make Instant Pot Clam Chowder

    saute onion for clam chowder in instant pot.
    1. Step 1: Turn your Instant Pot onto sauté mode. Once your pot becomes hot, add the olive oil. Add diced onion. Next, add bacon bits. Stir and cook for about three minutes.
    Add clams to instant pot.
    1. Step 2: Then turn off the sauté function. Add the canned clams and cornstarch to the bacon bits and diced onion. Mix well.
    adding spices to clam chowder.
    1. Step 3: Add the diced potatoes, salt, freshly ground cracked pepper, water, and half-and-half. Stir well and pressure cook at high pressure for 3 Minutes. Once done, perform a quick release. Hit the saute setting again and stir occasionally for 10 minutes. This will reduce the liquid and thicken your half-and-half, making the best clam chowder soup.
    Instant Pot Clam Chowder in a bowl garnished with herbs.
    1. Step 4: Add more salt and pepper to taste. Pour your delicious chowder into a soup bowl or a bread bowl and top with fresh parsley or crispy bacon.

    💡Hint: Chill your half-and-half and clams first to reduce curdling under pressure.

    Instant Pot Clam Chower in a bowl.

    👩‍🍳 Expert Tips

    • Reserve Clam Juice: Use the juice from canned clams as a base for extra flavor.
    • Quick Pressure Release: Use the quick-release function after cooking to prevent overcooking the clams.
    • Creamy Consistency: Mix flour with cream before adding to thicken the soup.

    💭 FAQs

    What Does Clam Chowder Taste Like?

    Clam chowder is a great seafood chowder to try. Unlike some shellfish, clams are not as fishy and so this Instant Pot chowder recipe is more subtle than other seafood options. Clam chowder tastes like a creamy soup that is slightly savory and salty thanks to the bacon and clams.

    What Is The Difference Between Soup And Chowder?

    Soups are dishes made from liquids such as water, chicken, vegetable or beef stock. Soups are combined with different ingredients whereas a chowder is a much more thicker, creamier style soup or stew type recipe.The word chowder traditionally comes from the Latin word caldeia, which meant a place for warming things. In the past vegetables and stewed fish was cooked in a cooking pot or cauldron which is how this method of cooking became known as chowder.

    Is This A New England Clam Chowder Recipe?

    Yes this clam chowder recipe is a traditional New England clam chowder as it does not include any tomatoes. Clam chowder with tomatoes would be a Manhattan Clam chowder.

    What Kind of Clams Can I Use in Instant Pot Clam Chowder?

    I used canned clams in this clam chowder Instant Pot recipe, but you can also use fresh or frozen clams. If using fresh or frozen clams, make sure to clean and remove any sandy grit from the clams before adding them to your Instant Pot.

    How To Thicken Clam Chowder?

    If the clam chowder is not thick enough, you can use a slurry mixture of cornstarch and water to thicken it up.

    Mix 1 tablespoon cornstarch with 1 tablespoon water until it forms a paste and add to the pressure cooker clam chowder while stirring. Let cook for an additional 2-3 minutes or until desired thickness is reached.

    Can Clam Chowder Be Made In The Slow Cooker?

    Yes, you can also make Instant Pot clam chowder in the slow cooker. Cook the bacon and diced onion on the stovetop before adding them to your slow cooker with all of the other ingredients. Cook on low for 6-8 hours or on high for 3-4 hours.

    Best Way to Store Clam Chowder

    Cool the clam chowder and add to airtight containers. If you plan on consuming the leftovers in the next 3-4 days, you can store them in the refrigerator. To freeze clam chowder place the cooled container into the freezer for 2-3 months. Thaw your clam chowder overnight in the refrigerator and reheat it on the stove or microwave.

    💖 Serving Suggestions

    Here are some of the best sides to serve with clam chowder:

    • Oyster Crackers: Classic and crunchy.
    • Garlic Bread: Perfect for dipping.
    • Fresh Herbs: Thyme or parsley brighten things up.
    • Bacon Bits: Extra crispy on top.
    • Side Salad: Adds freshness and contrast.
    • Cornbread Muffins: Slightly sweet and cozy.

    🥣 Leftovers & Reuse Ideas

    Quick ways to use leftover clam chowder:

    • Pour over baked potatoes.
    • Use as a sauce for pasta.
    • Add corn and top with puff pastry for chowder pot pie.
    Instant Pot Clam Chowder in a clear bowl.

    🍽 More Instant Pot Recipes

    • Instant Pot Split Pea Soup.
      Instant Pot Split Pea Soup
    • Instant Pot French Onion Chicken.
      Instant Pot French Onion Chicken
    • Instant Pot Chicken Adobo.
      Instant Pot Chicken Adobo
    • Instant Pot Tortellini Carbonara.
      Instant Pot Tortellini Carbonara

    Did you make this recipe? Leave a review and a ⭐⭐⭐⭐⭐ rating below, or tag us in our Facebook Group! Alternatively, bookmark it in your browser or save to Pinterest.

    Best Instant Pot Clam Chowder in a bowl garnished with parsley.

    Instant Pot Creamy Clam Chowder

    Angela Milnes
    Dive into a bowl of creamy comfort with this Clam Chowder Instant Pot recipe! Rich, hearty, and packed with tender clams and potatoes, this classic soup is a breeze to make in your Instant Pot. Perfect for a cozy night in, it's like a warm hug in every spoonful!
    5 from 4 votes
    Print Recipe Pin Recipe Rate this Recipe
    Prep Time 3 minutes mins
    Cook Time 13 minutes mins
    Total Time 16 minutes mins
    Course Dinners
    Cuisine American
    Servings 6 Servings
    Calories 336 kcal

    Ingredients
      

    • 4-6 ½ oz Chopped Clams juice drained
    • 2 tablespoon Olive Oil
    • ½ Onion diced
    • 4 tablespoon Cornstarch
    • 6 Russet Potatoes cubed (pealed optional – I did for this recipe)
    • 3 cups Water
    • Salt And Black Pepper
    • 4 cups Half & Half Milk
    • 1 ½ tablespoon Salt
    • 1 tablespoon Pepper

    Instructions
     

    • Turn your Instant Pot onto sauté mode. Once your pot becomes hot, add the olive oil. Add diced onion. Next, add bacon bits. Stir and cook for about three minutes. Then turn off the saute function.
    • Add the canned clams and cornstarch to the bacon bits and diced onion. Mix well.
    • Add the diced potatoes, salt, freshly ground cracked pepper, water and half-and-half. Stir well
    • Close your pressure cooker lid, set the pressure valve to closed and pressure cook in your Instant Pot at high pressure for 3 Minutes.
    • Once your Instant Pot is done cooking, do a quick release by bringing the valve toward you and opening the pressure. Once the Instant Pot has released its pressure open the lid carefully and stir with a wooden spoon.
    • To make the best clam chowder you’ll need to hit the saute setting again and stir occasionally for 10 minutes. This will reduce the liquid and thicken your half-and-half making the best clam chowder soup. Add more salt and pepper to taste.
    • Pour your delicious soup chowder into a soup bowl or a bread bowl and top with fresh parsley.

    Notes

    Quick Pressure Release: Use the quick-release function after cooking to prevent overcooking the clams.
    Creamy Consistency: Mix flour with cream before adding to thicken the soup.

    Nutrition

    Calories: 336kcalCarbohydrates: 53gProtein: 11gFat: 10gSaturated Fat: 4gPolyunsaturated Fat: 1gMonounsaturated Fat: 5gCholesterol: 20mgSodium: 1825mgPotassium: 1161mgFiber: 3gSugar: 10gVitamin A: 281IUVitamin C: 13mgCalcium: 240mgIron: 2mg
    Print Recipe Pin Recipe Rate this Recipe
    Tried this recipe?Let us know how it was!

    What Does Shrimp Taste Like?

    July 28, 2024 by Angela Milnes

    Shrimps with veggies.

    Wondering What Does Shrimp Taste Like? You're not alone! Shrimp is a popular seafood enjoyed by many, but if you've never tried it, you might wonder about its flavor.

    Whether grilled, boiled, or sautéed, shrimp's unique flavor profile pairs wonderfully with a variety of seasonings and sauces. Join us as we explore the delightful taste of shrimp and why it’s a beloved choice for seafood enthusiasts!

    Shrimps. Guide on what does shrimps taste like.
    [feast_advanced_jump_to]

    What Does Shrimp Taste Like?

    Shrimp has a sweet taste and a mild squid taste that will delight your taste buds.

    The taste may vary depending on the cooking method, but generally, it's a delicious combination of sweet and savory that pairs well with a range of flavors.

    What Does Raw Shrimp Taste Like?

    Raw shrimp has a mildly sweet and slightly briny taste with a firm texture. Along with this, you may notice a subtle nutty aroma. Eating raw seafood can be risky due to potential bacteria or parasites. Thus, it's usually recommended to cook shrimp thoroughly before eating.

    What Does Cooked Shrimp Taste Like?

    Cooked shrimp, one of the most popular seafood options, has a unique flavor. Shrimp taste like a combination of sweet and savory, with a slightly salty flavor that enhances the seafood's, natural sweetness.

    When properly cooked, shrimp are tender and juicy, and their taste can be further enhanced using various cooking methods. For example, sautéing cooked shrimp in olive oil adds a rich buttery flavor that pairs well with the shrimp's sweet and salty flavors.

    Additionally, grilling or steaming shrimp brings out their fresh and slightly sweet taste.

    What Does Overcooked Shrimp Taste Like?

    Overcooked shrimp can taste rubbery, tough, and dry. The texture becomes unappetizing as well. It can also lose its natural sweetness and become bland in flavor.

    What Does Shrimp Head Taste Like?

    Shrimp head may not be the most commonly consumed part of the shrimp, but it is a delicacy in many places. The flavor of the shrimp head is distinct and rich, and many chefs use it to add depth to their dishes.

    When properly prepared, the shrimp head can taste meaty and buttery, with hints of salty umami flavor. The texture of the head is slightly crunchy and can be a pleasant addition to a soup, stew, or stir fry.

    What Does Shrimp Paste Taste Like?

    Shrimp paste is a condiment widely consumed in many Southeast Asian countries. Fermented shrimp is the key ingredient of this flavorful condiment, known for its pungent taste that can elevate any dish with its depth and complexity.

    While the flavor of shrimp paste can vary depending on the quality, fermentation time, and origin, it often has a salty, umami-rich taste that some people describe as fishy or funky. Shrimp paste is mainly used as a seasoning in curry dishes, stir-fries, and dipping sauces.

    What Does Bad Shrimp Taste Like?

    So, what does shrimp taste like when it goes bad? Spoiled shrimp generally has an unpleasant taste and odor.

    When raw shrimp is spoiled, it will give off a fishy smell and appear slimy or discolored. Cooking spoiled shrimp will not improve its quality, as it can still possess a fishy taste and smell.

    It's important to note that fresh shrimp may have firm flesh and a slight ocean-like aroma, but this smell should not be overpowering or offensive. Eating shrimp that has gone bad can lead to food poisoning and other sicknesses, so it is crucial to be cautious when consuming seafood. Read this article on how long can shrimp stay out!

    Why Do Shrimp Have a Fishy Taste?

    Shrimp can sometimes taste fishy due to an organic compound called trimethylamine oxide (TMAO) in their bodies. TMAO is a byproduct of the metabolic process in shrimp.

    When shrimp are not kept in proper storage conditions, the TMAO can break down into trimethylamine (TMA), which has a fishy taste and odor.

    Is There a Difference Between Taste of Farmed and Wild Caught Shrimp?

    Yes, there can be a difference in taste between farmed and wild-caught shrimp.

    Wild shrimp tend to have a more robust flavor and a firmer texture since they can move around and feed on a more varied diet.

    On the other hand, farmed shrimp may have a milder flavor and a softer texture since they are typically raised in tanks with a controlled diet.

    Are Shrimps Different From Prawns?

    Are shrimps different from prawns? Well, the answer is - yes, they are! While both may look similar and belong to the same crustacean family, shrimps and prawns have some notable differences.

    For starters, prawns are larger and have longer front claws than shrimps. They also have branched gills, while shrimps have lamellar (or plate-like) gills. Additionally, prawns live in freshwater or brackish habitats, whereas shrimps can be found in freshwater and saltwater.

    Shrimp and pawn.

    And when it comes to taste, some people believe that prawns have a sweeter, more delicate flavor than shrimps.

    Some Popular Types of Shrimp

    Numerous types of shrimp are found worldwide, each with their unique flavor and texture. Some of the most popular types of shrimp include:

    • Gulf Brown Shrimp: As the name suggests, this species is mainly found in the Gulf of Mexico. With its mild sweetness and firm texture, this shrimp is perfect for grilling or frying. This is a great type for making Air Fryer Shrimp With Paprika And Garlic.
    • Brown Shrimp: Brown shrimp can be found in the United States and are known for their delicate, sweet flavor. They are often peeled and used in gumbo or added to salads like our Watermelon Salad With Feta and Mint.
    • Mobile Bay Brown Shrimp: These shrimp are native to Mobile Bay, Alabama, and are known for their distinctive flavor. They have a slightly salty taste and a firm, meaty texture, making them ideal for grilling or boiling. You can use Mobile Bay Brown shrimp to make Shrimp Cakes With Hot Sauce.
    • Tiger Shrimp: These large, colorful shrimp are named for their striped appearance. They have a mild, sweet flavor and slightly crunchy texture, making them ideal for grilling Or adding to Jerk Shrimp Pasta.
    • Rock Shrimp: These shrimp are found in the warm waters of the Gulf Coasts of the United States. They have a sweet, delicate flavor and a firm, lobster-like texture, making them perfect for Shrimp Scampi or cocktails.
    • Royal Reds: These deep-water shrimp are found off the coast of Florida and have a distinctive flavor that is sweeter and more delicate than other shrimp species. Their meat is also denser and firmer in texture, making them ideal for grilling.
    • Humpback Shrimp: These shrimp are named for their distinctive humpback shape. They have a sweet, delicate flavor and a tender texture, making them ideal for sushi or Shrimp Ceviche.
    • Spot Shrimp: These shrimp are found along the Pacific coast of North America. They have a sweet, buttery flavor and a firm, meaty texture, making them ideal for grilling or boiling.
    • Northern Coldwater Shrimp: This type of shrimp is found in the cold water of the Atlantic Ocean, particularly in the waters surrounding Canada and Greenland. The texture of Northern coldwater shrimp is firm and slightly chewy with a sweet and delicate flavor.
    • Gulf white shrimp: Gulf white shrimp can be found in the Gulf of Mexico, particularly off the coast of Texas, Louisiana, and Florida. These shrimps have a medium texture and a mildly sweet yet salty taste.

    Can I Eat Raw Shrimp?

    Raw shrimp is a topic of much debate in the culinary world. While some people enjoy it, others advise against it. Raw shrimp is often served at a sushi bar, but it's essential to ensure it's fresh and properly prepared.

    Shrimp is a much-loved seafood and can be cooked in many ways, such as grilled, sautéed, or boiled. Generally, it's best to avoid eating raw shrimp if you're unsure of its quality or preparation.

    What Are Shrimps?

    Shrimps are delicious seafood that comes in a variety of shapes and sizes. These tiny crustaceans can be found in both saltwater and freshwater, and they are known for their sweet and succulent flavor.

    Shrimps are a popular ingredient in many cuisines worldwide and are often eaten on their own as a tasty snack or as a key component in dishes such as shrimp scampi and shrimp cocktails. Whether grilled, fried, or boiled, shrimps are a versatile and healthy seafood option that can be enjoyed in many ways.

    Is Shrimp Healthy?

    Shrimp isn't just a tasty treat for seafood lovers; it's also packed with nutrients that make it a healthy choice. Shrimp is low in calories and high in protein, and contains various essential vitamins and minerals.

    Also, it is an excellent source of omega-3 fatty acids, essential for a healthy heart and promoting optimal brain functioning. So, not only can you enjoy the delicious taste of shrimp, but you can also feel good about its health benefits.

    But don't just dive into any shrimp dish you come across! Be sure to avoid deep-fried or heavily processed shrimp which can add unwanted fats and carbohydrates to your meal.

    Which Shrimp Species Taste Best?

    When you have to choose the best-tasting shrimp species, it really depends on personal preference and how you plan to cook them. Some people swear by Gulf shrimp for their sweet flavor, while others prefer the meaty texture of Black Tiger shrimp.

    Pink shrimp are also famous for their delicate taste, while Spot prawns are highly sought after for their sweetness and firm texture.

    Ultimately, the best way to find your favorite shrimp species is to experiment with different recipes and cooking methods until you find the perfect fit for your taste buds.

    More Cooking Tips For Seafood

    • How To Store Clams
    • What To Do With Leftover Shrimp?
    • What Is Toro Fish?
    • Air Fryer Fish Cakes
    • Clam Recipes For Your Dinner
    • Healthy Shrimp Recipes To Try
    • What to Serve With Shrimp Cocktail

    What To Do With Leftover Shrimp?

    July 28, 2024 by Angela Milnes

    Dishes to make with shrimps.

    Are you wondering What To Do With Leftover Shrimp? Unlock the potential of cooked shrimp with these easy leftover shrimp recipes. From the rich flavors of shrimp gumbo to the irresistible appeal of shrimp deviled eggs and refreshing shrimp cucumber bites, discover new ways to savor every last bite of your leftover shrimp.

    What To Do With Leftover shrimp?
    [feast_advanced_jump_to]

    7 Leftover Shrimp Recipes

    Not only are these 7 shrimp leftover recipes super tasty, they are packed with goodness. Shrimp is a nutrient-rich food with high protein levels, important vitamins and minerals, and heart-healthy omega-3 fatty acids. You'll love these recipes and will never have to ask what to do with leftover shrimp again!

    What To Do With Leftover shrimp?

    I hope you love these shrimp recipes as much as I do.

    Shrimp Scampi

    Shrimp scampi is a traditional and delicious way to use your leftover shrimp. To make this dish, saute the shrimp with butter, garlic, lemon juice, and spices until it's lightly browned and crispy. For the full recipe, check out this Shrimp Scampi dish here!

    Shrimp scampi served with fork.

    Shrimp Tacos

    Another delicious way to use your leftover shrimp is in taco form. Saute the cooked shrimp with some onion, garlic, and Taco Seasoning until it's lightly browned and crispy, then add it to your favorite tortillas or taco shells along with other toppings like lettuce, tomatoes, sour cream, and cheese.

    Shrimp Alfredo

    Shrimp Alfredo is a delicious and classic dish that is easy to make with leftover shrimp. You can make Shrimp Alfredo in the Instant Pot in a creamy alfredo sauce. You can then serve this on top of your favorite pasta or noodles for an elegant dinner sure to impress!

    Shrimp Alfredo

    Shrimp Cucumber Bites

    Shrimp Cucumber Bites are a healthy and tasty snack that is perfect for using up leftover shrimp. These thin slices of cucumber with shrimp make a delicious snack perfect for parties or as an appetizer at your next dinner gathering. Shrimp bites are also great as a Healthy Bariatric Snack.

    shrimp. cucumber

    Make Instant Pot Boil With Shrimp

    For a quick and easy shrimp dinner, try making Instant Pot boil with shrimp. This dish is super simple to make and only requires a few ingredients. Try adding pre-cooked shrimp to your Instant Pot Shrimp Boil dinner. Yummy!

    Make Shrimp Gumbo

    Use your boiled shrimp leftovers to make Instant Pot Shrimp Gumbo. Gumbo is a tasty and easy dish and the cooked shrimp will go great with the gumbo spices and vegetables. Cook Instant Pot Gumbo and it will be ready in minutes.

    Shrimp gumbo

    Make Shrimp Deviled Eggs 

    If you love deviled eggs but want to try something different, then try making shrimp deviled eggs instead. These make a delicious appetizer or snack perfect for parties or gatherings.

    Simply fill your Hard-Boiled Egg whites with leftover cooked shrimp, spices, and mayonnaise for a new twist on an old favorite!

    You also won't need to reheat cooked shrimp for these Devilled Shrimp Eggs as they are usually eaten cold!

    Shrimp Devilled Eggs

    FAQ'S

    How Much Is Protein In Shrimp? 

    Shrimp are a great source of protein, with about 20 grams per 100-gram serving. This is much higher than the average amount of protein found in other types of seafood, such as salmon and tuna.

    How Long Is Leftover Shrimp Good For?

    Leftover shrimp can be safely stored in the refrigerator for up to 3-4 days. If you have leftover shrimp that you won't consume within the recommended timeframe, consider freezing it. Properly sealed and stored, frozen shrimp can last for up to 3-6 months. When reheating, ensure that the shrimp reaches an internal temperature of 165°F (74°C) to ensure it's safe to eat.

    Always use your judgment and inspect the shrimp for any signs of spoilage, such as an off smell or unusual texture, before consuming. If in doubt, it's better to err on the side of caution and discard the leftover shrimp. You can also read this article to learn How Long Cooked Shrimp Can Stay Out.

    Enjoy These Recipes For Cooked Shrimp Leftovers

    I'm sure you'll love these delicious high protein recipes. You'll never wonder what to do with leftover cooked shrimp again. Which recipe do you want to try first?

    Be sure to check out these articles?: What Is Toro Fish?, What Do Clams Taste Like and Green Mussels Vs Black Mussels.

    Enjoy the following Seafood Meals

    • Healthy Shrimp Recipes To Try
    • Best Lobster Meat Recipes
    • What to Serve With Mahi Mahi
    • Easy Salmon Recipes To Try
    • Best Gravlax Salmon With Dill
    • Shrimp Ceviche
    • Air Fryer Fish Cakes
    • Creamy Tuscan Salmon With Sundried Tomatoes
    • Baked Seabass With Lemon and Herbs
    • Cucumber Rolls with Cream Cheese And Smoked Salmon

    How Long Can Shrimp Stay Out?

    July 28, 2024 by Angela Milnes

    Frozen shrimps.

    Shrimp are quite delicate, so they cannot be left outside the refrigerator for too long. Today we'll be answering the question, "How long can shrimp stay out?" and giving a detailed guide for keeping raw shrimp and cooked shrimp fresh. If you want to learn more about storing shrimp in the fridge read on for our top tips.

    Frozen shrimp in a pile.
    [feast_advanced_jump_to]

    How Long Can Cooked Shrimp Stay Out?

    Shrimp is a delicate and highly perishable type of seafood that requires careful handling and storage to stay fresh for as long as possible.

    The answer to "how long can shrimp be left out" largely depends on whether the shrimp is raw or cooked. 

    How Long Can Frozen Shrimp Saty Out? 

    If you are wondering how long frozen cooked shrimp can be left out, the general rule is that frozen cooked shrimp should be included for at most two hours or around one hour if temperatures exceed 90 degrees Fahrenheit.

    To ensure safety and quality, it's best to thaw frozen cooked shrimp in the refrigerator overnight. Thawed frozen cooked shrimp will last up to two days if it is refrigerated and kept at a safe temperature below 40 degrees Fahrenheit. When working with frozen cooked shrimp, it's important to store it promptly and not let it sit out for too long - no matter the weather forecast!

    How to Thaw Shrimp?

    Thawing shrimp is relatively easy, but it does require some basic knowledge. The best way to thaw frozen shrimp is to leave it at room temperature for about one hour. If you're pressed for time, you can gently submerge the sealed package of frozen shrimp in cold water for 20-30 minutes.

    Stop the defrosting process when the shrimp are still partially frozen and pliable but not difficult to bend — that's when they are perfectly thawed! 

    Be sure to use the frozen shrimp immediately after thawing; don't leave them in the refrigerator or sit on the counter at room temperature for a very long time, as they will spoil quickly.

    Frozen shrimp in a pot.

    Raw shrimp must be kept cold to prevent bacteria growth, while cooked shrimp should not be left out for more than 2-4 hours before it loses its freshness.

    Can I Eat Cold Cooked Shrimp?

    Yes, it is safe to eat cooked shrimp that has been left out for a short time. However, it's important to ensure that the shrimp does not come into contact with surfaces or utensils contaminated with harmful bacteria.

    I like to eat cold cooked shrimp in lemon sauce. I also use it in Shrimp Ceviche, to make Shrimp Deviled Eggs and add them to my Rainbow Veggie Rice Paper Rolls.

    Should You Store Cooked Shrimp in the Fridge?

    Since cooked shrimp have already been cooked, refrigeration can help keep them safe and prevent them from spoiling or having their taste changed by spoilage bacteria.

    On the other hand, raw shrimp should always be kept in the refrigerator as soon as possible after purchase. 

    Raw seafood should never be left at room temperature for more than two hours, so harmful bacteria cannot reproduce and make you sick. If you're making a Shrimp Cocktail or Shrimp Cucumber Bites then it is best to store them in the fridge until it is time to eat them.

    How Long Can Cooked Shrimp Last in Fridge?

    Cooked shrimp can safely sit in the fridge for up to three days when properly stored in an airtight container.

    Keep the fully cooked shrimp in an airtight container, or freezer bags or wrap it securely with plastic wrap or aluminum foil before storing it in the refrigerator. Make sure to keep cooked shrimp away from raw shrimp, as they will further increase their risk of contamination.

    Is It Ok to Eat Old Shrimp?

    No, it is not safe to eat old or expired shrimp. Shrimp is highly perishable and will quickly go bad if it's not stored properly, so it's important to inspect your shrimp carefully before consuming it.

    Is It Safe to Eat Uncooked Shrimp?

    Eating seafood can be a delicious and healthy way to add protein to your diet; however, it's important to ensure it's cooked properly before consuming. Uncooked shrimp can contain potentially harmful bacteria that could put you at risk of food poisoning.

    The best way to make sure shrimp is safe to eat is by cooking it thoroughly before consuming it - no matter if it was purchased fresh or frozen.

    Cooking the shrimp until its flesh turns pink, opaque, and firm will ensure your meal is enjoyed without any safety concerns. You can use cooked shrimp to make delicious Chinese Shrimp, Crispy Coconut Shrimp, Shrimp Cakes With Hot Sauce and my favorite Shrimp Scampi dish.

    A photo of shrimp on a plate.

    Can Shrimp Go Bad? 

    Raw shrimp that is not cooked and stored at room temperature for over 2 hours should be thrown away immediately as the chance of food poisoning increases greatly beyond that point.

    If cooked shrimps are left at room temperature for longer than 4 hours, they fall into what is known as 'the Danger Zone,' where any bacteria present can multiply quickly, making them unsafe to consume.

    So it's important to remember that room temperature affects the shelf life of both raw and cooked shrimps - leave them out too long, and you can expect them to go bad!

    How To Know If Shrimp Has Gone Bad? 

    Knowing when shrimp has gone bad is not always easy, but a few key indicators tell you if it's time to throw out your seafood. 

    First, bacterial growth can occur quickly in warm temperatures and when left untouched for too long. So, check if the shrimp has turned to a sticky and slimy texture – this is one clue that indicates that you should not eat it anymore.

    Also, look for discoloration or changes in the shape of the shrimp - these are signs of bacterial breakdown. When the food reaches temperatures higher than 40 degrees Fahrenheit or lower than 140 degrees Fahrenheit, it falls into what's called "the danger zone," where bacteria grow rapidly.

    Another sign of bad shrimp could be a fishy smell or taste, indicating spoiled food and bacterial growth. Keeping these important tips in mind will help you avoid eating bad shrimp!

    How Long Can You Store Shrimp at Room Temperature?

    Regarding raw and cooked shrimp, it is important to note that both are considered perishable food items.

    You should only leave raw shrimp at room temperature for up to two hours. Otherwise, you always run the risk of bacterial growth, which could make anyone who consumes raw shrimp sick.

    For cooked shrimp stored at room temperature, you should also be mindful and leave them out for at most four hours.

    This timely limitation ensures that no matter which type of shrimp you have, they will remain safe to consume and delicious throughout your meal.

    Will Shrimp Left Out Overnight Make You Sick?

    It is not recommended to leave shrimp out overnight, as seafood can spoil quickly, resulting in a fishy smell and taste. 

    Leaving cooked shrimp out for more than four hours could lead to food poisoning; bacteria grow rapidly on raw shrimp at room temperature.

    It is best to store cooked seafood in the refrigerator immediately after cooking or within four hours after cooking. As with any food item, it's essential to follow guidelines that limit the risk of food poisoning cases associated with raw and cooked seafood.

    Can You Refreeze Shrimp?

    Have you thawed out shrimp only to realize that you don't need it all? Worry not; you're in luck! You can refreeze the seafood delicacy if it thawed correctly and without coming into contact with other food items.

    It's important to thaw your shrimp in the refrigerator (not on the counter) overnight in an airtight container; this will allow for a longer shelf life and preserve its quality for the next time.

    When your thawed shrimp is ready to be cooked, take out only what you'll use and store the rest in an airtight container, this will also maintain its quality and last longer. This is the way to keep cooked shrimp safe for later use.

    How to Defrost Shrimp?

    Remove a freezer bag of shrimp from the freezer and place it in the refrigerator overnight. Doing so will give you perfectly thawed cooked shrimp in the morning. If you need to thaw shrimp quickly, submerge them in cold tap water for about 30 minutes.

    Next, drain and pat them dry before you cook them up – cooked shrimp needs only a couple of minutes on each side until they turn pink and plump. 

    Can You Reheat Shrimp?

    When it comes to cooked shrimp, you can reheat it. To do so safely, put the cooked shrimp in a safety-approved microwave-safe container and heat it. 

    Additionally, skip heating raw shrimp as this can be dangerous, and instead freeze cooked shrimp immediately in a freezer bag after cooking to preserve freshness.

    That way, if you'd like to reheat cooked shrimp down the road, you already have cooked and frozen shrimp on hand that's just waiting for heating! 

    Just remember, when taking cooked shrimp out of the freezer, thaw it before reheating or leave frozen shrimp submerged in cold water for a plump juicy texture.

    If done correctly following these tips, your cooked or raw shrimp will stay delicious for many future meals!

    Is Shrimp Safe To Eat?

    As with any seafood, storing shrimp properly is the best way to ensure that your shrimp stays fresh. Whether you buy raw or cooked shrimp, store it in the refrigerator or freezer as soon as possible and avoid leaving it out for long periods. Following these simple tips, you can enjoy fresh and delicious shrimp.

    Read The Following Seafood Cooking Tips

    • Green Mussels Vs Black Mussels
    • What Do Clams Taste Like
    • What Is Toro Fish?
    • Fish Stock Substitute
    • Does Fish Sauce Go Bad

    12+ Classy Clam Recipes for Your Dinner

    July 27, 2024 by Angela Milnes

    Clam dishes for dinner.

    Are you looking to impress your guests with a sophisticated seafood spread? Look no further! Our roundup of 12+ classy clam recipes will elevate your dinner party to new heights. From classic chowders to flavorful pastas, these recipes showcase the versatility and elegance of clams. Dive into these delicious clam dishes that are sure to make a splash at your next gathering.

    Different clam recipes to try.
    [feast_advanced_jump_to]

    Fregola with Clams

    Indulge in the rich and nutty flavors of fregola pasta, perfectly paired with tender clams and a light, savory broth. This Sardinian-inspired Fregola With Clams dish is a delightful and unique addition to any meal.

    Sardinian Fregola With clams.

    Linguine Pasta All Vongole

    Linguine Pasta All Vongole is a timeless Italian classic, Linguine Pasta All Vongole features delicate clams tossed in a fragrant garlic and white wine sauce. This simple yet elegant dish is perfect for any occasion.

    linguine pasta with clams.

    Instant Pot Clam Chowder

    Save time without sacrificing flavor with this creamy and hearty Instant Pot Clam Chowder. It’s packed with tender clams and potatoes, making it a comforting choice for a cozy dinner.

    Clam Chowder.

    Clams Oreganata

    Elevate your appetizer game with Clams Oreganata. These baked clams are topped with a zesty breadcrumb mixture, offering a delightful crunch and burst of flavor in every bite.

    clams oreganata.

    Cheesy Boston Clam Dip

    This Cheesy Boston Clam Dip is the ultimate crowd-pleaser. Creamy, cheesy, and loaded with clams, it’s perfect for dipping crusty bread or crackers at your next party.

    cheesy Boston clam dip.

    Manhattan Clam Chowder

    Enjoy the robust and savory flavors of Manhattan Clam Chowder. This tomato-based chowder is a lighter alternative to its creamy counterparts, packed with clams and vegetables.

    Manhattan Clam Chowder.

    Creamy Clam Chowder

    Rich, creamy, and oh-so-delicious, this Creamy Clam Chowder is a comforting bowl of goodness. Perfect for a chilly evening, it’s a dish that will warm you from the inside out.

    Omega clams in a bowl.

    New England Clam Chowder

    A classic favorite, New England Clam Chowder is thick, creamy, and loaded with tender clams and hearty potatoes. It’s a timeless dish that never fails to impress.

    new England clam chowder in a bowl.

    Bread Bowl Clam Chowder

    Take your clam chowder to the next level by serving it in a crusty bread bowl. This Bread Bowl Clam Chowder is not only delicious but also a fun and creative way to enjoy this classic soup.

    Clam Chowder Bread Bowls.

    Spanish Clams with Chorizo

    Add a touch of Spanish flair to your table with Spanish Clams with Chorizo. The smoky, spicy chorizo perfectly complements the briny clams, creating a dish full of bold and vibrant flavors.

    Spanish clams with chorizo.

    Baked Clam Dip

    Warm and inviting, this Baked Clam Dip is perfect for entertaining. It’s creamy, flavorful, and baked to golden perfection, making it an irresistible appetizer.

    Baked clam dip in a pot.

    Clam Fritters

    Crispy on the outside and tender on the inside, Clam Fritters are a delightful treat. These savory fritters are perfect as an appetizer or a snack, served with your favorite dipping sauce.

    Clam fritters on a plate.

    With these 12+ healthy clam recipes, you have a treasure trove of delightful dishes to choose from for your next gathering. From the rich and creamy clam chowders to the vibrant and flavorful pasta dishes, each recipe is designed to showcase the elegance and versatility of clams. These recipes are not only delicious but also easy to prepare, allowing you to spend more time enjoying the company of your guests and less time in the kitchen. So, go ahead and dive into these sophisticated seafood creations – your taste buds and your guests will thank you. Happy cooking and bon appétit!

    Learn More About Clams Here!

    • What Do Clams Taste Like
    • Best Clam Juice Substitute

    Best Rotisserie Chicken Salad Recipe

    July 23, 2024 by Angela Milnes

    Rotisserie Chicken Salad in a bowl garnished with dill.

    Need a speedy meal that still feels homemade? This Best Rotisserie Chicken Salad is creamy, fresh, and packed with flavor—perfect for lunchboxes, picnics, or straight from the spoon.

    Rotisserie Chicken Salad in a bowl garnished with dill.

    This recipe is the ultimate shortcut for busy weekdays, using leftover rotisserie chicken to whip up a creamy chicken salad that feels like you planned ahead (even if you didn’t). It’s also totally flexible—you can pile it on a croissant, wrap it in lettuce, or eat it by the forkful.

    If you're loving no-fuss meals like this, be sure to check out my Mediterranean Farro Salad, Apple Grapefruit Salad, and Healthy Quinoa Salad Recipe for more feel-good favorites.

    [feast_advanced_jump_to]

    💖 Why This Recipe Works

    • Rotisserie shortcut: Using store-bought or leftover rotisserie chicken saves so much time.
    • Bright + creamy combo: Fresh dill, grapes, and lemon juice balance the creamy mayo perfectly.
    • Total texture win: Crunchy celery, juicy grapes, tender chicken—hello, satisfying bite!

    ⭐ Star Ingredients

    Rotisserie Chicken Salad Ingredients.
    • Rotisserie Chicken: Juicy, flavorful, and already cooked—basically your weeknight hero.
    • Red Grapes: Sweet and juicy for that perfect pop of contrast.
    • Fresh Dill: Adds brightness and makes the salad feel garden-fresh.
    • Mayo + Lemon Juice: This duo creates a creamy base with just the right zing.

    For the complete list of ingredients with measurements and instructions, please see the recipe card at the bottom of the post.

    📖  Substitutions & Variations

    • Lighten it up: Swap mayo for Greek yogurt or use half-and-half for a healthier chicken salad.
    • Waldorf-style: Add chopped apples, walnuts, and a touch of honey for a sweet-savory mix.
    • Tex-Mex twist: Use chipotle mayo, corn, black beans, and cilantro for a smoky, spicy version.
    • Cranberry pecan delight: Add dried cranberries and chopped pecans for nutty, tangy goodness.
    • Make it a sandwich: Spoon it into croissants or wrap it in tortillas for an easy chicken salad sandwich.
    • Low-carb option: Serve in lettuce cups or over greens for a clean, satisfying lunch.

    Pair this with my Charred Corn Salad with Tomatoes or Sweet Potato Fries for the perfect no-stress meal.

    🔪How To Make Rotisserie Chicken Salad

    Chicken, grapes, celery, shallot, and dill in a bowl.
    1. Step 1: Cut the homemade or store-bought rotisserie chicken, grapes, and celery into tiny bite-size pieces and set them aside. Mince the shallot and the fresh dill, then set them aside. In a large bowl, combine the chicken, grapes, celery, shallot, and dill. Mix to combine.
    Chicken, grapes, celery, shallot, mayonnaise, and dill in a bowl.
    1. Step 2: Fold in the mayonnaise and lemon juice. Taste the mixture and add salt and pepper as necessary. Mix again to ensure everything is well combined. Enjoy the chicken salad on croissants, with crackers, or on a bed of mixed greens.

    💡Hint: Using both white and dark meat gives your chicken salad more depth of flavor (and keeps it super juicy).

    Chicken salad in a bowl.

    👩‍🍳 Expert Tips

    • Prep ahead: Make this the night before—flavors get even better after a few hours in the fridge.
    • Texture tip: Cut everything into similar-sized pieces so each bite feels balanced.
    • Versatile serving: Spoon into lettuce cups for light lunches, or serve in mini rolls for cute party sliders.
    Rotisserie chicken salad in a bowl.

    💭 FAQs

    Can You Freeze Rotisserie Chicken Salad?

    You can freeze the mixture without mayo. Once thawed, stir in the mayo and lemon juice fresh for the best texture.

    Can I Make Chicken Salad With Canned Chicken?

    Yes! Just drain it well and flake it before mixing. It's a great budget-friendly option for an easy chicken

    How Long Is This Chicken Salad Good For?

    Store it in an airtight container in the fridge for 3–4 days. It’s perfect for grab-and-go lunches.

    What if I don’t have dill?

    No worries—parsley or chives make great substitutes.

    💖 Serving Suggestions

    Here are some of the best sides to serve with your chicken salad:

    • Garlic Bread: Toasted with herbs and butter—simple and delicious.
    • Stuffed Mushrooms:: A savory side to dress things up a little.
    • Sweet Potato Fries: That sweet-salty balance is always a win.
    • Green Salad: Light and leafy is a great base for this rich chicken salad.
    • Crackers or croissants: Great for snacking or serving at parties.
    • Lettuce wraps: A fresh, low-carb lunch option that feels fancy.
    Rotisserie chicken salad in a bowl.

    🍽 Try These Tasty Chicken Recipes

    • Sheet Pan Chinese Chicken With Green Beans.
      Sheet Pan Chinese Chicken With Green Beans
    • Air Fryer Almond Crusted Chicken.
      Crispy Almond Crusted Chicken (Air Fried or Oven Baked)
    • Slow Cooker Chicken Teriyaki.
      Slow Cooker Chicken Teriyaki
    • Baked Honey Mustard Chicken Tenders.
      Honey Mustard Chicken Tenders

    Did you make this recipe? Leave a review and a ⭐⭐⭐⭐⭐ rating below, or tag us in our Facebook Group! Alternatively, bookmark it in your browser or save to Pinterest.

    Rotisserie Chicken Salad in a bowl garnished with dill.

    Rotisserie Chicken Salad Recipe

    Angela Milnes
    Whip up a quick and delicious meal with this Rotisserie Chicken Salad! Using tender, flavorful rotisserie chicken, this salad is packed with fresh veggies and tossed in a creamy dressing that ties it all together. It's perfect for a light lunch, an easy dinner, or even meal prep for the week. Simple, satisfying, and full of flavor, this chicken salad is versatile and can be enjoyed in a sandwich, wrap, or on its own!
    5 from 4 votes
    Print Recipe Pin Recipe Rate this Recipe
    Prep Time 15 minutes mins
    Cook Time 0 minutes mins
    Total Time 15 minutes mins
    Course Salads
    Cuisine American
    Servings 5 Servings
    Calories 523 kcal

    Ingredients
      

    • 4 cups Rotisserie Chicken
    • ¾ cups Red Grapes halved
    • ¾ cup Celery diced
    • 2 tablespoon Shallot diced
    • ½ cup Mayo
    • 3 tablespoon Fresh Dill minced
    • 2 tablespoon Lemon Juice
    • Pinch Salt
    • Pinch Pepper

    Instructions
     

    • Cut the homemade or store bought rotisserie chicken, grapes, and celery into tiny bite-size pieces and set them aside.
    • Mince the shallot and the fresh dill, then set them aside.
    • In a large bowl, combine the chicken, grapes, celery, shallot, and dill. Mix to combine.
    • Fold in the mayonnaise and lemon juice. Taste the mixture and add salt and pepper as necessary. Mix again to ensure everything is well combined.
    • Enjoy the chicken salad on croissants, with crackers, or on a bed of mixed greens.

    Notes

    Varied Chicken Mix: Combine light and dark rotisserie chicken pieces for flavor complexity.
    Creative Presentation: Serve in lettuce cups, croissants, or wraps for versatility. Explore more chicken salad recipes for inspiration.

    Nutrition

    Serving: 1gCalories: 523kcalCarbohydrates: 6gProtein: 53gFat: 32gSaturated Fat: 7gPolyunsaturated Fat: 10gMonounsaturated Fat: 4gTrans Fat: 0.04gCholesterol: 191mgSodium: 812mgPotassium: 108mgFiber: 1gSugar: 4gVitamin A: 117IUVitamin C: 4mgCalcium: 12mgIron: 0.2mg
    Print Recipe Pin Recipe Rate this Recipe
    Tried this recipe?Let us know how it was!

    Best Substitute For Sun Dried Tomatoes

    July 22, 2024 by Angela Milnes

    Substitutes for sun dried tomatoes.

    We all have those moments in the kitchen when we reach for an ingredient only to find it's missing from our pantry. If you've ever found yourself in need of sun dried tomatoes but didn't have any on hand, don't worry—I've got you covered!

    Today, I'm sharing some fantastic sun-dried tomato alternatives that will keep your recipes delicious and flavorful. Whether you're making hearty pasta, a fresh salad, or a savory stew, there is a suitable substitute for sun dried tomatoes that will save the day.

    Oven-Roasted Tomatoes
    [feast_advanced_jump_to]

    11 Sun Dried Tomato Substitutes To Try

    Running out of sun dried tomatoes can be a bummer, but don't worry—there are plenty of tasty alternatives. Here are some great substitutes to keep your dishes flavorful and vibrant.

    The other option is to make your own Homemade Sundried Tomatoes. Learn How To Make Sun Dried Tomatoes Without Oil using our fantastic and easy recipe

    1. Oven-Roasted Tomatoes

    Oven-roasted tomatoes are a wonderful substitute for sun-dried tomatoes. They have a rich, caramelized flavor that’s slightly sweeter and less intense than sun-dried tomatoes.

    You can easily make them at home by roasting halved Campari, Roma, Plum, or Cherry tomatoes with olive oil, salt, and pepper at 250°F for about 2-3 hours. These tomatoes add a lovely depth to your dishes, enhancing the flavors without overpowering them.

    They contribute to the recipes by adding a soft, juicy texture, unlike the chewy texture of sun-dried tomatoes. Use them in equal amounts as you would sun-dried tomatoes.

    One downside is that oven-roasted tomatoes are juicier, which might slightly alter the texture of some recipes. Try them in:

    • Pasta salads
    • Pizzas
    • Quiches
    • Soups
    • Sandwiches

    2. Tomato Puree

    Tomato puree is a great sun-dried tomato substitute! It offers an intense tomato flavor, though it’s smoother and less concentrated than sun-dried tomatoes.

    Making it at home is simple: simmer fresh tomatoes until soft, then blend and strain out the seeds and skins. You can use about 1 tablespoon of tomato puree to replace 1-2 sun-dried tomatoes.

    One downside is that tomato puree doesn’t have the chewy texture of sun-dried tomatoes, which might change the texture of some recipes. Try it in:

    • Tomato sauces
    • Stews
    • Casseroles
    • Meatballs
    • Baked Ziti
    Tomato Puree

    3. Tomato Paste

    Tomato paste is another fantastic option to substitute sun-dried tomatoes! It has a similar flavor, offering an intense tomato taste that’s savory and slightly sweet. You can make it at home by cooking down tomato puree until it becomes thick and concentrated.

    This paste adds a deep, rich flavor to your recipes while providing a smooth, thick texture. Use about 1 teaspoon of tomato paste to replace 1-2 sundried tomatoes.

    Like tomato puree, tomato paste also does not have the chewy texture of sundried tomatoes, which might change the texture of some dishes. Try it in:

    • Marinara Sauce
    • Beef Stew
    • Pasta Dishes
    • Pizza Sauce
    • Stuffed Peppers

    4. Tomato Powder

    Tomato powder offers a concentrated tomato flavor that’s sweet and tangy. You can make it at home by dehydrating thin slices of tomatoes until they’re fully dry, then grinding them into a fine powder.

    Tomato powder enhances recipes by boosting umami flavors and adding a lovely red color. It's perfect for thickening sauces without changing the texture much.

    Use about 1 teaspoon of tomato powder to replace 1-2 sun-dried tomatoes. One downside is that it lacks the chewy texture of sun-dried tomatoes, which might alter some recipes. Try it in:

    • Salad dressings
    • Spice Rubs
    • Pasta Sauces
    • Bread dough
    • Omelets
    Dried tomato powder in a wooden spoon

    5. Fresh Tomatoes

    Fresh tomatoes are a refreshing sun-dried tomato replacement! You can easily use them at home by dicing or slicing tomatoes as needed.

    They add a burst of moisture and a lighter tomato taste to your dishes, which can be perfect for when you want a less intense flavor. Fresh tomatoes are widely used in Italian, Mediterranean, and many other cuisines.

    Use about 1 medium fresh tomato to replace 2-3 sun-dried tomatoes. One downside is that fresh tomatoes are juicier, which might change the texture and moisture level of some recipes. Try the chopped or sliced tomatoes in:

    • Homemade Mini Pizzas
    • Goat Cheese Apple Salad
    • Strawberry Jalapeno Salsa
    • Caprese skewers
    • Smoked Salmon Bruschetta
    Fresh tomatoes on wooden surface

    6. Canned Tomatoes

    Canned tomatoes are a convenient way to replace sun-dried tomatoes! They have a tangy flavor with a hint of sweetness, offering a delightful tomato taste.

    While you can't make canned tomatoes at home, they are easy to find in any grocery store. Canned tomatoes add moisture and a softer texture to your dishes, different from the chewy texture of sun-dried tomatoes.

    Widely used in Italian and Mediterranean cuisines, canned tomatoes are very versatile. Use about 1 cup of canned tomatoes to replace ½ cup of chopped sun-dried tomatoes. One downside is that they can make your dish a bit more watery. Try them in:

    • Pasta sauces
    • Crock Pot Chili Mac and Cheese
    • Stews
    • Instant Pot Four Cheese Lasagna
    • Braised meats
    canned tomatoes in a plate.

    7. Tamarind Paste

    Tamarind paste is an interesting substitute for sun-dried tomatoes! It has a sour flavor with a tangy kick, adding a unique taste to your dishes. You can make it at home by soaking tamarind pulp in hot water and then straining out the seeds and fibers.

    Tamarind paste brings a smooth texture and a burst of acidity, which can be a fun twist in recipes. It's commonly used in Asian cuisines, especially Indian and Thai.

    Use about 1 teaspoon of tamarind paste to replace 1-2 chopped sun-dried tomatoes. One downside is that it lacks the rich tomato flavor and chewy texture, which might alter some dishes. Try it in:

    • Air Fryer Chicken Curry
    • Chicken Broccoli Cashew Stir Fry
    • Mango Chutney With Peppers
    • Plant Based Pad Thai
    tamarind paste in a spoon

    8. Homemade Sun Dried Tomatoes

    Homemade sun-dried tomatoes are a delightful substitute! They have an intense, sweet, and slightly tangy flavor that elevates any dish.

    You can make them at home by slicing plum tomatoes or grape tomatoes, sprinkling them with salt, and drying them in the sun for several days until they are shriveled and chewy.

    These dried tomatoes add a rich, concentrated tomato taste and a chewy texture to your recipes. They are widely used in Italian and Mediterranean cuisines.

    Use about 1 tablespoon of homemade sun-dried tomatoes to replace a similar amount of store-bought ones. One downside is that making them at home takes time and requires sunny weather. Try them in:

    • Pasta Salads
    • Pesto Chicken Sliders
    • Focaccia Bread
    • Tapenade
    • Air Fryer Stuffed Chicken Breasts
    Homemade Sun Dried Tomatoes

    9. Semi Dried Tomatoes

    Semi-dried tomatoes have a sweet and tangy flavor but with extra juiciness. You can make them at home by slicing tomatoes, sprinkling them with salt, and drying them partially in the sun or a low-temperature oven until they are still slightly plump. This method retains more moisture, giving a softer texture than fully dried tomatoes.

    Use about the same amount of semi-dried tomatoes as you would dried ones, but beware that they might add a bit more moisture to the dish. Try them in:

    • Berry Salad With Goat Cheese
    • Pasta dishes
    • Sandwiches
    • Antipasto Platters
    • Flatbreads
    Substitute For Sun-Dried Tomatoes

    10. Pecans

    Pecans are a surprising and delightful alternative to sun-dried tomatoes! While they don't have the tomato flavor, their rich, buttery taste adds a delicious twist to your dishes. You can easily find pecans in stores or even shell them at home if you have fresh ones.

    Pecans bring a crunchy texture that contrasts nicely with softer ingredients, making your meals more interesting. They are commonly used in American and Southern cuisine.

    Use about the same amount of chopped pecans as you would sun-dried tomatoes, but note that they don't provide the tanginess of tomatoes. Try them in:

    • Salads
    • Grain bowls
    • Instant Pot Stuffing
    • Cheese Platters
    • Pesto
    Pecans On A Wooden Spoon

    11. Roasted Bell Peppers

    Roasted bell peppers have a sweet, smoky flavor that adds depth to your dishes. You can easily make roasted red bell peppers at home by charring them over an open flame or baking them in the oven until the skin is blackened, then peeling off the skin.

    Roasted bell peppers contribute a tender, juicy texture, different from the chewy texture of sun-dried tomatoes. They are often used in Mediterranean and Italian cuisines.

    Use about the same amount of chopped roasted bell peppers as you would sun-dried tomatoes, but remember they add more moisture. Try them in:

    • Feta Pasta Salad
    • Sandwiches
    • Beetroot Hummus
    • Smoked Salmon Bruschetta
    • Caprese Mini Pizza
    Top View of Roasted Bell Peppers

    Which Sun Dried Tomatoes Replacement Will You Choose?

    So there you have it! A variety of tasty alternatives to sun-dried tomatoes that you can easily find or make at home. Each one brings a unique flavor and texture to your dishes, so don't be afraid to experiment and see which one becomes your new favorite ingredient.

    Whether you're making pasta dishes, salads, or stir-fries, these substitutes will surely add a delicious twist to any meal.

    More Useful Substitutions

    • Best Liquid Smoke Substitute
    • Substitute For Chili Garlic Sauce
    • Substitute For Black Eyed Peas
    • Best Substitute For Arugula
    • What Do Pickled Eggs Taste Like?

    Smoked Salmon Bruschetta With Avocado

    July 20, 2024 by Angela Milnes

    Smoked Salmon Bruschetta With Avocado.

    Looking for a delicious twist on classic bruschetta? Try this Smoked Salmon Bruschetta with Avocado! It’s a fresh and flavorful appetizer that’s perfect for any occasion. Creamy avocado, savory smoked salmon, and a hint of lemon on crispy toast – it’s a bite-sized taste of perfection. Quick to make and even quicker to disappear, this bruschetta smoked salmon recipe will have everyone coming back for seconds!

    Smoked salmon bruschetta with avocado.
    [feast_advanced_jump_to]

    💖 Why This Recipe Works

    • Gourmet Flavor: The combination of smoked salmon and creamy avocado creates a luxurious, restaurant-quality appetizer.
    • Fresh and Healthy: With fresh ingredients like ripe avocado and smoked salmon, Smoked Salmon Bruschetta With Avocado is a nutritious and delicious choice.
    • Elegant and Easy: This Smoked Salmon Bruschetta With Avocado is easy to prepare yet looks and tastes sophisticated, making it perfect for entertaining.

    ⭐ Star Ingredients

    Ingredients to make smoked salmon bruschetta.
    • French Bread: Sliced and toasted to create a crispy crostini base for the Smoked Salmon Bruschetta With Avocado.
    • Smoked Salmon: Provides a rich, savory flavor and delicate texture.
    • Avocado: Adds a creamy, smooth texture and a mild flavor.
    • Greek yogurt: Adds a tangy creaminess to the avocado spread, enhancing the Smoked Salmon Bruschetta With Avocado.
    • Mayonnaise: Enhances the creamy texture and richness of the spread.
    • Lemon: Juiced to add a bright, citrusy note that balances the flavors.
    • Dill: A few sprigs, adding a fresh, herbal touch.
    • Salt and pepper: To taste, enhance, and balance the overall flavors of the Smoked Salmon Bruschetta With Avocado.

    For the complete list of ingredients with measurements and instructions, please see the recipe card at the bottom of the post.

    📖  Substitutions & Variations

    • Tomatoes and Olive Oil: Add diced tomatoes and a drizzle of olive oil for a fresh, vibrant twist on this bruschetta salmon recipe.
    • Garlic and Lime Juice: Rub the toasted crostini with garlic and drizzle with lime juice for an extra burst of flavor.

    🔪How To Make Smoked Salmon Bruschetta

    Sliced French bread.
    1. Step 1: Preheat the oven broiler on high. Slice the French bread into ½-inch thick pieces. Place the bread slices on a baking sheet and position the rack about 6 inches below the broiler element.
    Toasted French bread slices.
    1. Step 2: Broil the bread slices for about 1.5 minutes on each side or until they are golden brown and crispy. Keep a close eye on them to prevent burning.
    Making avocado mixture.
    1. Step 3: In a bowl, scoop out the ripe avocado and mash it with a fork until smooth. Add Greek yogurt, mayonnaise, and freshly squeezed lemon juice to the mashed avocado.
    Avocado mixture in a bowl.
    1. Step 4: Mix well to combine. Season the mixture with salt and freshly ground black pepper to taste. Adjust the seasoning according to your preferences.
    Avocado mixture on bruschetta.
    1. Step 5: Once the crostini are ready, spread a generous amount of the avocado mixture onto each slice.
    Smoked salmon bruschetta on a wooden board.
    1. Step 6: Carefully drape a slice of smoked salmon over the avocado spread on each crostini. You can fold the salmon to fit nicely on the bread. Wash and chop the dill finely. Sprinkle chopped dill over the smoked salmon for a burst of fresh flavor. Serve and enjoy your delicious Smoked Salmon Bruschetta with Avocado!
    Smoked salmon bruschetta pieces on a wooden board.

    👩‍🍳 Expert Tips

    • Choose Quality Ingredients: The quality of smoked salmon can make or break your bruschetta. Opt for cold-smoked salmon for its silky texture and mild flavor. It's also essential to use fresh, high-quality French bread for the best flavor and texture in your Smoked Salmon Bruschetta with Avocado.
    • Proper Bread Preparation: Toast your bread slices to the perfect golden brown—not too soft, not too crunchy. This provides a sturdy base that holds up well against the toppings and adds a delightful crunch.

    💭 FAQs

    Is Smoked Salmon Bruschetta Healthy?

    Smoked salmon is Rich In Omega-3 Fatty Acids, which is good for heart health. When paired with whole-grain bread and topped with ingredients like avocado or yogurt, it can be a part of a healthy diet. However, smoked salmon is high in sodium, so it should be consumed in moderation.

    Best Drinks To Serve With Bruschetta

    Light and refreshing drinks like Prosecco, Champagne, or a crisp white wine such as Sauvignon Blanc complement the flavors of smoked salmon well. For non-alcoholic options, sparkling water with a twist of lemon or unsweetened iced tea are excellent choices.

    How To Store Salmon Bruschetta

    Store any leftover Salmon Bruschetta in an airtight container in the refrigerator for up to 1-2 days. For best results, store the components (smoked salmon, avocado mixture, and bread) separately to prevent the bread from becoming soggy.

    💖 Serving Suggestions

    Here are some of the best sides to serve with Smoked Salmon Bruschetta:

    • Beet and Feta Cheese Salad: The earthiness of beets combined with the creamy tang of Feta cheese offers a delightful contrast to the smoky and salty flavors of the bruschetta. Add some walnuts for crunch and dress with a balsamic glaze for a touch of sweetness.
    • Tomato Basil Soup: This classic soup brings a vibrant, acidic touch that complements the fatty richness of the salmon. The fresh flavors of tomato and basil keep the palate refreshed between bites of bruschetta.
    • Butternut Squash Soup: For a sweeter soup option, butternut squash is perfect. Its creamy texture and slightly sweet flavor provide a comforting balance, enhancing the overall dining experience without overpowering the delicate flavors of the smoked salmon bruschetta.
    • Pasta Dish: Serve a lighter pasta dish such as Lemon Garlic Shrimp Pasta or a simple Fettucine. The simplicity of these pasta dishes won't overpower the bruschetta but will complement its flavors nicely.

    If you love this appetizer be sure to check

    Salmon bruschetta with avocado cream.

    🍽 More Seafood Recipes

    • Easy Shrimp Cakes With Hot Sauce.
      Easy Shrimp Cakes With Hot Sauce
    • Creamy Tuscan Salmon With Sundried Tomatoes.
      Creamy Tuscan Salmon With Sundried Tomatoes
    • Cucumber Rolls with Cream Cheese And Smoked Salmon.
      Salmon Cucumber Roll With Cream Cheese
    • Coconut Red Curry Mussels.
      Coconut Red Curry Mussels

    Did you make this recipe? Leave a review and a ⭐⭐⭐⭐⭐ rating below, or tag us in our Facebook Group! Alternatively, bookmark it in your browser or save to Pinterest.

    Smoked Salmon Bruschetta With Avocado.

    Smoked Salmon Bruschetta

    Angela Milnes
    Delight your taste buds with this elegant Smoked Salmon Bruschetta! Crispy toasted bread is topped with rich smoked salmon, creamy cheese, and a touch of fresh herbs, creating a flavorful and sophisticated appetizer. Perfect for entertaining or as a light snack, this bruschetta is sure to impress!
    5 from 4 votes
    Print Recipe Pin Recipe Rate this Recipe
    Prep Time 10 minutes mins
    Cook Time 1 minute min
    Additional Time 0 minutes mins
    Total Time 11 minutes mins
    Course Appetizers
    Cuisine American
    Servings 4 Servings
    Calories 315 kcal

    Ingredients
      

    • ½ French Bread sliced and toasted (crostini)
    • 8 oz Smoked Salmon
    • 1 Avocado
    • 2 tablespoon Greek Yogurt
    • 1 tablespoon Mayonnaise
    • ½ Lemon juiced
    • Dill
    • Pinch Salt
    • Pinch Pepper

    Instructions
     

    • Preheat the oven broiler on high.
    • Slice the French bread into ½-inch thick pieces.
    • Place the bread slices on a baking sheet and position the rack about 6 inches below the broiler element.
    • Broil the bread slices for about 1.5 minutes on each side or until they are golden brown and crispy. Keep a close eye on them to prevent burning.
    • In a bowl, scoop out the ripe avocado and mash it with a fork until smooth.
    • Add Greek yogurt, mayonnaise, and freshly squeezed lemon juice to the mashed avocado. Mix well to combine.
    • Season the mixture with salt and pepper to taste. Adjust the seasoning according to your preferences.
    • Once the crostini are ready, spread a generous amount of the avocado mixture onto each slice.
    • Carefully drape a slice of smoked salmon over the avocado spread on each crostini. You can fold the salmon to fit nicely on the bread.
    • Wash and chop the dill finely.
    • Sprinkle chopped dill over the smoked salmon for a burst of fresh flavor.
    • Enjoy your delicious Smoked Salmon Bruschetta with Avocado!

    Notes

    Choose Fresh Ingredients: Use the freshest smoked salmon, ripe avocado, and quality bread for the best flavor and texture in your Smoked Salmon Bruschetta with Avocado.

    Nutrition

    Serving: 1gCalories: 315kcalCarbohydrates: 32gProtein: 18gFat: 14gSaturated Fat: 2gPolyunsaturated Fat: 3gMonounsaturated Fat: 7gTrans Fat: 0.01gCholesterol: 15mgSodium: 774mgPotassium: 431mgFiber: 5gSugar: 3gVitamin A: 128IUVitamin C: 12mgCalcium: 50mgIron: 3mg
    Print Recipe Pin Recipe Rate this Recipe
    Tried this recipe?Let us know how it was!

    More Salad Suggestions For Your Lunch Menu

    • Red Cabbage Coleslaw Recipe
    • Kiwi Fruit Salad With Pomegranate
    • Mediterranean Green Bean Salad
    • Chinese Chicken Salad
    • Turkey Cobb Salad
    • Chicken Yaki Soba
    • Easy Four Bean Salad Recipe
    • Octopus Salad With Baby Spinach

    Easy Beet Cured Salmon Recipe

    July 20, 2024 by Angela Milnes

    Easy Beet Cured Salmon Recipe.

    Want to add a touch of gourmet to your next meal? This Beet Cured Salmon recipe is just what you need! With its vibrant color and delicate flavor, beet cured salmon is a show-stopping dish that's surprisingly easy to make at home. Impress your guests with this elegant and delicious appetizer. Let's cure some salmon!

    beet cured salmon on a plate with lemon wedges
    [feast_advanced_jump_to]

    If you love Salmon be sure to check out our salmon based recipes for Cucumber Rolls with Cream Cheese And Smoked Salmon, Creamy Tuscan Salmon With Sundried Tomatoes and Gravlax Salmon With Dill.

    Why This Recipe Works

    • Gourmet Presentation: Beet Cured Salmon is visually striking with its vibrant pink color, making it a show-stopping dish for any occasion.
    • Delicate and Flavorful: The beet cure enhances the flavor of the salmon, adding a subtle sweetness and earthy undertones that complement the fish perfectly.
    • Homemade Goodness: Making your own beet cured salmon allows you to control the ingredients and customize the flavor, ensuring a fresh and delicious result.

    🥘 Ingredients

    Beet Cured Salmon Ingredients.
    • Fresh Salmon Fillet: Fresh, skinless, and boneless for easy curing.
    • Grated Beets: Adds vibrant color and natural sweetness to the salmon.
    • Rock Salt: Helps cure the salmon by drawing out moisture.
    • Powdered Sugar: Balances the saltiness with a touch of sweetness.
    • Horseradish: Adds a subtle spicy kick to the cure.
    • Coriander Seeds: Provides a warm, citrusy flavor to the salmon.
    • White Pepper: Adds a mild, earthy heat to the cure.
    • Dried Herbs: Infuses the salmon with aromatic flavors.

    For the complete list of ingredients with measurements and instructions, please see the recipe card at the bottom of the post.

    📖  Substitutions & Variations

    • Not a horseradish fan? Swap it for finely chopped fennel! It brings a mild, herby, anise-like flavor that pairs beautifully with cured salmon.
    • Love a citrusy kick? Add lemon zest and fresh dill to the curing mix for a bright, fragrant twist.
    • Spice things up! Mix kosher salt, lemon zest, and a dash of cayenne into the cure for a bold, fiery gravlax.

    🔪How To Make Beet Cured Salmon

    Here are the simple steps for curing salmon with beets naturally.

    making beetroot mixture for cured salmon

    Step One: Combine all the ingredients for the beet mixture in a blender: beets, horseradish, salt, powdered sugar, and spices.

    beetroot mixture

    Step Two: Blend the mixture until it reaches a smooth and homogeneous consistency.

    beetroot mixture

    Step Three: Line a plastic food container or a deep bowl with cling film to prepare for layering.

    salmon cured in beetroot mixture

    Step Four: Cover with cling film or plastic wrap and allow the salmon to cure in the refrigerator. After 48 hours, take out the cured fish, unwrap salmon, discard the beet mixture, rinse the fish thoroughly, and pat it dry with paper towels. Thinly slice the Beetroot Cured Salmon as desired and enjoy.

    beet cured salmon

    If you love this recipe then be sure to check out our tasty recipe for Beetroot Ravioli With Goat Cheese.

    👩‍🍳 Expert Tips

    • Quality Salmon Selection: Opt for high-quality, sashimi-grade salmon to ensure the best texture and flavor in your beet cured salmon.
    • Patience is Key: Allow the salmon to cure for the recommended time to develop depth of flavor and desired texture.

    💭 FAQs

    What Is Cured Salmon?

    Cured salmon is salmon that has been preserved and flavored through a curing process, which typically involves the use of salt, sugar, and sometimes other seasonings and herbs.

    How Long Should You Cure Salmon?

    We like to cure our salmon for 48 hours to get the best texture and taste.

    How To Store Cured Salmon?

    Store any leftover Beet Cured Salmon in an airtight container in the refrigerator for up to 2-3 days.

    Is It Okay To Freeze Cured Salmon?

    Yes, place in an airtight ziplock bag or container and freeze for up to 2 months.

    🧂Serving Suggestions

    Here are some of the best sides to serve with Beet Cured Salmon:

    • Korean Cucumber Salad: A refreshing cucumber salad complements the rich flavors of the beet cured salmon.
    • Roasted Baby Potatoes: Crispy roasted baby potatoes with garlic and rosemary add a hearty and savory side dish.
    • Steamed Asparagus: Tender steamed asparagus with a drizzle of olive oil and a sprinkle of sea salt provides a fresh and vibrant contrast to the salmon. You could also serve with Grilled or Air Fried Asparagus.
    • Pickled Vegetables: A variety of pickled vegetables, such as carrots, radishes, and red onions, add a tangy and crunchy element to the meal.
    beet cured salmon

    🍽 Related Recipes

    • einkorn angel hair and cherry tomato pasta in a white bowl.
      One-Pan Einkorn Angel Hair Pasta with Cherry Tomatoes
    • Salmon Dill Puree.
      Lemon Dill Salmon Mousse (Bariatric Friendly)
    • close-up-watermelon-slices-with-blackberry-plastic-disposable-cup-perfect for a summer party.
      How To Host An Awesome Summer Party
    • Oven baked lobster tail with garlic butter and lemon.
      How To Cook Lobster Tail At Home

    Did you make this recipe? Leave a review and a ⭐⭐⭐⭐⭐ rating below, or tag us in our Facebook Group! Alternatively, bookmark it in your browser or save to Pinterest.

    Easy Beet Cured Salmon Recipe.

    Beet Cured Salmon

    Angela Milnes
    This fantastic recipe for beet cured salmon is simple to follow and tastes absolutely delicious.
    5 from 4 votes
    Print Recipe Pin Recipe Rate this Recipe
    Prep Time 5 minutes mins
    Cook Time 10 minutes mins
    Additional Time 2 days d
    Total Time 2 days d 15 minutes mins
    Course Dinners
    Cuisine American
    Servings 4 Servings
    Calories 203 kcal

    Ingredients
      

    • 1 lb Salmon Fillet skinless, boneless
    • 1 cup Grated Beets
    • 3 tablespoon Rock Salt
    • 3 tablespoon Powdered Sugar
    • 2 teaspoon Horseradish
    • 1 teaspoon Coriander
    • ⅓ teaspoon White Pepper
    • ½ teaspoon Dried Herbs

    Instructions
     

    • Combine all the ingredients for the beet mixture in a blender: beets, horseradish, salt, powdered sugar, and spices.
    • Blend the mixture until it reaches a smooth and homogeneous consistency.
    • Line a plastic food container or a deep bowl with cling film to prepare for layering.
    • Pour the beetroot mixture into the lined container, smoothing it out evenly. Lay salmon flesh, skin side up, on top of the curing mixture and press it down gently.
    • Cover with cling film or plastic wrap and allow the salmon to cure in the refrigerator for 48 hours to develop flavor and texture.
    • After 48 hours, take out the cured fish, unwrap salmon, discard the beet mixture, rinse the fish thoroughly, and pat it dry with paper towels.
    • Thinly slice the Beetroot Cured salmon as desired and enjoy.

    Notes

    Quality Salmon Selection: Opt for high-quality, sashimi-grade salmon to ensure the best texture and flavor in your beet cured salmon.
    Patience is Key: Allow the salmon to cure for the recommended time to develop depth of flavor and the desired texture.

    Nutrition

    Serving: 1gCalories: 203kcalCarbohydrates: 10gProtein: 23gFat: 7gSaturated Fat: 1gPolyunsaturated Fat: 3gMonounsaturated Fat: 2gCholesterol: 62mgSodium: 5320mgPotassium: 681mgFiber: 1gSugar: 8gVitamin A: 61IUVitamin C: 2mgCalcium: 30mgIron: 1mg
    Print Recipe Pin Recipe Rate this Recipe
    Tried this recipe?Let us know how it was!

    More Beetroot Recipes

    • Best Beetroot Carpaccio
    • How To Make Beetroot Juice
    • 11 Beetroot Salad Recipes
    • Ways To Eat Raw Beets
    • Citrus And Honey Roasted Beets
    • Beetroot And Black Bean Burger

    Mediterranean Orzo Salad With Lemon Vinaigrette

    July 18, 2024 by Angela Milnes

    Mediterranean Orzo Salad With Lemon Vinaigrette.

    Looking for a refreshing salad that's bursting with Mediterranean flavors? This Mediterranean Orzo Salad With Lemon Vinaigrette is a perfect blend of fresh veggies, tangy olives, and crumbly feta cheese tossed with orzo pasta. It's a light and satisfying dish that's great as a side or a main meal. Ready in minutes and full of vibrant colors, it's sure to become a family favorite.

    Mediterranean orzo salad in a bowl.
    [feast_advanced_jump_to]

    Why This Recipe Works

    • Fresh and Flavorful: This Mediterranean orzo salad is bursting with fresh ingredients like cherry tomatoes, cucumbers, and parsley, making it a refreshing dish.
    • Tangy and Savory: The combination of feta cheese, kalamata olives, and a zesty lemon and red wine vinegar dressing creates a deliciously tangy and savory flavor profile.
    • Perfect for Any Occasion: Whether it's a quick lunch, a side dish for dinner, or a potluck contribution, this Mediterranean Orzo Salad is versatile and always a crowd-pleaser.

    🥘 Ingredients

    Ingredients to make Mediterranean orzo salad.
    • Orzo pasta: A small rice-shaped pasta that serves as the base of the orzo pasta salad, providing a hearty texture.
    • Cherry tomatoes: Vibrant and juicy tomatoes, halved to release their flavor into the Mediterranean orzo salad.
    • Persian cucumbers: Crisp and refreshing cucumbers, diced to add a fresh crunch.
    • Red onion: Finely chopped to add a subtle sharpness and color contrast to the Mediterranean orzo salad.
    • Pitted Kalamata olives: Briny and flavorful olives, pitted and sliced for a burst of Mediterranean taste.
    • Feta cheese: Creamy and tangy cheese, crumbled to impart richness to the Mediterranean orzo salad.
    • Fresh parsley: Chopped for a burst of herbaceous freshness and visual appeal.
    • Extra virgin olive oil: Provides richness and a fruity flavor to the salad dressing.
    • Red wine vinegar: Adds a tangy acidity to balance the flavors of the salad.
    • Lemon juice: Freshly squeezed for a zesty brightness that enhances the overall taste.
    • Garlic clove: Minced to infuse the dressing with a subtle garlic flavor.
    • Salt and pepper: Seasonings to taste, enhancing the flavors of all the ingredients in the Mediterranean orzo salad.

    For the complete list of ingredients with measurements and instructions, please see the recipe card at the bottom of the post.

    📖  Substitutions & Variations

    • Chickpea Orzo Salad: Combine orzo with chickpeas, roasted red peppers, and spinach. Toss in a balsamic vinaigrette and finish with crumbled goat cheese and toasted pine nuts for a satisfying crunch.
    • Shrimp Orzo Salad: Elevate this dish by combining orzo with grilled shrimp, fresh arugula, and cherry tomatoes. Toss with a lemon-herb dressing and sprinkle with crumbled feta for a refreshing touch. Garnish with fresh dill and lemon slices for extra zest.
    • Chicken Orzo Salad: Mix orzo with diced, grilled chicken breast, marinated artichokes, and kalamata olives. Dress with a creamy tzatziki sauce and top with sliced cucumbers and a sprinkle of za'atar for a flavorful fusion.

    🔪How To Make Mediterranean Orzo Salad With Lemon Vinaigrette

    Cherry tomatoes, diced Persian cucumbers, red onion, kalamata olives, and crumbled feta cheese in a bowl.

    Step One: Cook the orzo pasta according to the package instructions until al dente. Rinse the cooked orzo under cold water and drain well. In a large bowl, combine the cooked orzo with cherry tomatoes, diced Persian cucumbers, red onion, kalamata olives, and crumbled feta cheese. Add the chopped parsley to the bowl.

    Making dressing for orzo salad in a bowl.

    Step Two: Pour the lemon vinaigrette over the salad and toss gently to combine all the ingredients well. Adjust the seasoning if necessary, adding more salt, pepper, or lemon juice to your taste. Chill the salad in the refrigerator for at least 30 minutes before serving to allow the flavors to meld together.

    Mediterranean orzo salad on a plate.

    👩‍🍳 Expert Tips

    • Prep Vegetables Properly: Ensure that your vegetables are washed, chopped, and diced uniformly for even distribution throughout the salad. Consider blanching certain vegetables like asparagus or green beans for a tender-crisp texture.
    • Maintain Crunch: To maintain the crunch of fresh vegetables in the salad, consider adding them closer to serving time rather than letting them sit in the dressing for an extended period.

    💭 FAQs

    Does Orzo Get Bigger When Cooked?

    Yes, orzo does get bigger when cooked. Similar to other types of pasta, it absorbs water and expands in size during the cooking process. Typically, orzo will approximately double in size, so it's important to keep this in mind when measuring out portions for recipes.

    Are There Different Types of Orzo?

    Yes, there are different types of orzo available, catering to various dietary preferences and culinary needs. Here are a few common varieties

    Whole Wheat Orzo: Made from whole grain wheat, this type offers more fiber and nutrients than the traditional white pasta variety. It has a nuttier flavor and a firmer texture.

    Plain White Orzo: The most common type, made from refined wheat, it cooks up soft and has a mild flavor that pairs well with a wide range of ingredients.

    Gluten-Free Orzo This is made from alternative grains like corn and rice instead of wheat, making it suitable for those with gluten sensitivities or celiac disease. Some orzo varieties come infused with flavors like spinach, tomato, or saffron, adding a colorful and flavorful twist to dishes.

    Best Way To Store Orzo Salad

    Keep any leftover Mediterranean Orzo Salad in an airtight container in the refrigerator for up to 3-4 days. Use a tightly sealed container to maintain the salad's freshness.

    🧂Serving Suggestions

    Here are my favorite sides to serve with Mediterranean Orzo Salad with Lemon Vinaigrette:

    • Air Fryer Stuffed Chicken Breasts: Seasoned with Mediterranean herbs and spices like oregano, thyme, and garlic.
    • Air Fried Shrimp: Lightly seasoned with paprika, garlic, and olive oil.
    • Instant Pot Salmon Teriyaki: Seasoned with lemon, dill, and a sprinkle of sea salt.
    • Marinated Tofu: Tossed in a mixture of olive oil, lemon juice, and Mediterranean spices like paprika and cumin.
    Orzo salad combined with dressing.

    🍽 Try More Mediterranean Recipes

    • Creamy Tuscan Salmon With Sundried Tomatoes.
      Creamy Tuscan Salmon With Sundried Tomatoes
    • Italian Octopus Salad With Baby Spinach.
      Italian Octopus Salad With Baby Spinach
    • Mediterranean Zucchini Stew With Tomatoes.
      Mediterranean Zucchini Stew With Tomatoes
    • Mediterranean Green Bean Salad.
      Mediterranean Green Bean Salad

    Did you make this recipe? Leave a review and a ⭐⭐⭐⭐⭐ rating below, or tag us in our Facebook Group! Alternatively, bookmark it in your browser or save to Pinterest.

    Mediterranean Orzo Salad With Lemon Vinaigrette.

    Mediterranean Orzo Salad With Lemon Vinaigrette

    Angela Milnes
    Brighten up your meal with this Mediterranean Orzo Salad with Lemon Vinaigrette! Tender orzo is tossed with fresh veggies, tangy feta, and a zesty lemon vinaigrette for a refreshing and flavorful dish. It’s the perfect salad for a light lunch, picnic, or as a vibrant side at your next gathering!
    5 from 3 votes
    Print Recipe Pin Recipe Rate this Recipe
    Prep Time 10 minutes mins
    Cook Time 0 minutes mins
    Total Time 10 minutes mins
    Course Salads
    Cuisine Greek
    Servings 6 Servings
    Calories 335 kcal

    Ingredients
      

    • 1 ½ cups Dry Orzo Pasta
    • 2 cups Cherry Tomatoes halved
    • 3 Persian Cucumbers diced (mini cucumbers)
    • ½ Red Onion finely chopped
    • ½ cup Kalamata Olives pitted and sliced
    • 6 oz Feta Cheese crumbled
    • ¼ cup Fresh Parsley chopped
    • ¼ cup Extra Virgin Olive Oil
    • 2 tablespoons Red Wine Vinegar
    • 1 Lemon juiced
    • 1 Garlic Clove minced
    • Salt And Pepper to taste

    Instructions
     

    • Cook the orzo pasta according to the package instructions until al dente. Rinse the cooked orzo under cold water and drain well.
    • In a large bowl, combine the cooked orzo with cherry tomatoes, diced Persian cucumbers, red onion, kalamata olives, and crumbled feta cheese. Add the chopped parsley to the bowl.
    • In a small bowl, whisk together the olive oil, red wine vinegar, lemon juice, minced garlic, salt, and pepper to create the dressing.
    • Pour the dressing over the salad and toss gently to combine all the ingredients well.
    • Adjust the seasoning if necessary, adding more salt, pepper, or lemon juice to your taste.
    • Chill the salad in the refrigerator for at least 30 minutes before serving to allow the flavors to meld together.
    • Enjoy your refreshing Mediterranean Orzo Salad!

    Notes

    Prep Vegetables Properly: Ensure that your vegetables are washed, chopped, and diced uniformly for even distribution throughout the salad. Consider blanching certain vegetables like asparagus or green beans for a tender-crisp texture.
    Maintain Crunch: To maintain the crunch of fresh vegetables in the salad, consider adding them closer to serving time rather than letting them sit in the dressing for an extended period.

    Nutrition

    Serving: 1gCalories: 335kcalCarbohydrates: 35gProtein: 10gFat: 18gSaturated Fat: 5gPolyunsaturated Fat: 2gMonounsaturated Fat: 9gCholesterol: 25mgSodium: 510mgPotassium: 311mgFiber: 3gSugar: 4gVitamin A: 651IUVitamin C: 26mgCalcium: 175mgIron: 2mg
    Print Recipe Pin Recipe Rate this Recipe
    Tried this recipe?Let us know how it was!

    More Easy Salad Recipes To Test Out

    • Easy Chinese Chicken Salad
    • Best Low Carb Broccoli Salad
    • Best Turkey Cobb Salad Recipe In A Jar
    • Beet Salad With Feta And Walnuts
    • Best Strawberry Jalapeno Salsa “Pico De Gallo”
    • Mango Arugula Salad
    • Tuna Salad With Apple and Pumpkin Seeds
    • Panzanella with Mozzarella
    • Cold Chicken Pasta Salad With Italian Dressing

    Green Mussels Vs Black Mussels

    July 17, 2024 by Angela Milnes

    Green and black mussels.

    If you've ever stood in front of a seafood counter wondering about the difference between green and black mussels, you're not alone. These tasty shellfish might look similar, but they have some unique traits that set them apart. In this guide, we'll break down everything you need to know about Green Mussels Vs Black Mussels, from their flavors and textures to location.

    Whether you're a seasoned seafood lover or a curious beginner, we've got you covered. Let's dive in and discover which mussel is right for your next meal!

    [feast_advanced_jump_to]

    Key Differences: Green Mussels Vs Black Mussels

    Let's explore the key differences between black and green mussels to help you decide which one suits your taste and cooking needs:

    Origin Of Mussels

    Green Mussels

    Green mussels, such as New Zealand green-lipped mussels and Asian green mussels, are found in warm coastal waters. New Zealand green-lipped mussels are native to New Zealand, while Asian green mussels come from countries like India, Thailand, and the Philippines.

    New Zealand Green Mussels.

    Black Mussels

    Black mussels, or Mytilus edulis, come from colder waters of the Atlantic Ocean, also including the coasts of Europe and North America. They prefer cooler environments and are often seen in rocky intertidal zones along these coasts.

    black mussels.

    Texture Of Mussels

    The texture of black mussels compared to green mussels shows a distinct difference.

    Green Mussels

    Green mussels, including New Zealand green mussel varieties, have a softer, smoother texture. They are often described as more delicate and less chewy than black mussels.

    Black Mussels

    Black mussels have a tender, slightly chewy texture that many find pleasingly firm. Their flesh can be a bit meatier compared to green mussels.

    Taste Of Mussels

    When you eat mussels, you'll notice a difference in taste between green mussels and black mussels.

    Green Mussels

    Green mussels have a sweeter, milder flavor. They are less briny compared to black mussels and have a subtle ocean taste that many people find enjoyable. If you taste green mussels, you'll experience a more delicate flavor, making them great for people who prefer a lighter seafood taste.

    Black Mussels

    Black mussels, on the other hand, have a stronger, saltier flavor. They are more briny and have a richer ocean taste. When you eat black mussels, you'll notice a more robust and intense flavor, which can be very satisfying for those who love the taste of the sea.

    Shape Of Mussels

    Whether you choose green or black mussels, their unique shapes add to their distinct identities.

    Green Mussels

    Green mussels are generally larger and have long, narrow shells. Their shells are usually smooth and can have a slight curve, giving them an elongated appearance. The edges of green mussels are often more rounded and have a vibrant greenish hue on their shells.

    New Zealand Green Mussels

    Black Mussels

    Black mussels, in contrast, have a shorter and more oval-shaped shell. Their shells are darker and less smooth, with a more pronounced texture. The edges of black mussels are more uniform and less curved, and their color is typically a deep, glossy black.

    Harvesting Mussels

    Using different harvesting methods and locations, green and black mussels offer unique qualities that cater to various preferences and needs.

    Green Mussels

    Green mussels, like the New Zealand green-lipped mussel and Asian green mussel, are often farmed. In New Zealand, the Greenshell mussels are grown using long-line systems in clean waters.

    These farmed mussels are seeded onto dropper ropes suspended from a backbone and anchored to the seafloor. The mussels grow on these ropes, ensuring a high-quality harvest.

    The industry relies on wild-caught spat, mainly collected from seaweed at 90 Mile Beach. This method supports sustainable production and helps maintain environmental balance.

    Black Mussels

    Black mussels are harvested both as wild mussels and farmed mussels. Wild mussels are collected from natural rocky coastal areas in Europe and North America. Harvesting these wild mussels involves hand-picking or using special tools to detach them from rocks.

    Farmed black mussels are grown on ropes or in mesh bags in colder waters of the Atlantic Ocean. These farming techniques help produce fresh mussels year-round while preserving the natural ecosystem.

    Life Span Of Mussels

    Green Mussels

    • Lifespan: Typically, green mussels can live up to many years. They are bright green when young and become dull in color as they age to dark green or brown.
    • Farming Duration: Farmed green-lipped mussels are usually harvested after about 18 months.

    Black Mussels

    • Lifespan: The life duration of a black mussel (Choromytilus meridionalis) can be quite variable depending on environmental conditions.
    • These mussels also show a remarkable ability to tolerate environmental stresses such as silting and smothering better than some other species, which might contribute to their longevity in fluctuating conditions.

    Price Of Mussels

    The price of green and black mussels can vary due to several factors.

    Green Mussels

    Green mussels, like New Zealand mussels, tend to be more expensive. Their higher cost is due to specialized farming methods. The limited regions where they are cultivated, particularly in New Zealand, also contribute to their higher price.

    Black Mussels

    Black mussels are generally more affordable. They are widely available and easier to farm or harvest from the wild, leading to lower production costs. This makes black mussels a popular and budget-friendly option for many consumers.

    Usage Of Mussels

    Green Mussels

    • Cooking Mussels with a Mild Flavor: Green mussels are preferred for their mildly sweet and less briny taste, making them ideal for recipes that require a delicate flavor profile.
    • Tender and Soft Texture: The mussel meat of green mussels offers a tender and soft texture, which is perfect for steaming or baking.
    • Larger Mussel Meat: These mussels are generally larger than black mussels, providing more substantial pieces of mussel meat in each shell.
    • Versatile Cooking Methods: Green mussels can be used in various dishes, from soups and chowders to grilled and stuffed preparations.
    • Enhancing Visual Appeal: The attractive green shells make them a popular choice for presentation in gourmet dishes and seafood platters.

    Black Mussels

    • Cooking Mussels with Robust Flavor: Black mussels have a more pronounced briny and oceanic taste, which enhances the flavor of robust dishes like paella and cioppino.
    • Tender and Soft Texture: The mussel meat of black mussels is known for its tender and soft texture, suitable for quick-cooking methods like steaming and sautéing.
    • Common in Mediterranean Cuisine: Black mussels are often used in traditional Mediterranean recipes, such as moules marinières and seafood pasta.
    • Smaller Size, Intense Flavor: Although smaller than green mussels, the black mussel's intense flavor makes it a favorite for dishes where the taste of the seafood needs to stand out.
    • Popular in Broths and Stews: Black mussels are frequently used in broths and stews, where their rich flavor can infuse the entire dish, enhancing the overall culinary experience.

    Mussels Varieties Other Than Green And Black Mussels

    Here are some varieties of mussels other than green and black:

    • Blue Mussels: Medium-sized, often eaten for their sweet flavor, blue mussel is sustainably grown and harvested.
    • Mediterranean Mussels: Large mussels with dark blue to almost black shells; rich in flavor.
    • Horse Mussels: Larger than most, with glossy brown shells; found in the Atlantic Ocean.
    • Zebra Mussels: Small and freshwater; not typically eaten due to poor taste and potential toxicity, and they also negatively impact the ecosystem.

    FAQ'S

    Can I Use Frozen Mussels Instead Of Fresh Mussels?

    Yes, you can use frozen mussels instead of fresh mussels. Just make sure to thaw them properly before cooking to maintain their flavor and texture.

    Freshwater Mussels Vs Canned Mussels: Is There Any Difference?

    Yes, there is a difference between freshwater mussels and canned mussels. Freshwater mussels are typically harvested live and cooked fresh, while canned mussels are pre-cooked, preserved in brine or oil, and may have a different texture and flavor.

    Are Green Mussels Healthy?

    Yes. Green Mussels are packed with nutrition and have plenty of vitamins and minerals such as Iron, Calcium, zinc, manganese, vitamins A, B12, and C.

    Black Mussels Vs Green Mussels: Which Will You Try First?

    Both green mussels and black mussels offer unique flavors, textures, and cooking methods. Green mussels tend to be larger with a mild flavor, while black mussels are smaller but pack a more intense briny taste.

    The farming techniques and availability of these mussels also contribute to their differences in price. Whether you prefer the delicate taste of green mussels or the robust flavor of black mussels, both varieties provide versatile options for creating delicious seafood dishes.

    More Helpful Items

    • Wildflower Honey Vs Clover Honey: 4 Differences
    • Best Liquid Smoke Substitute

    Easy Banana Split Milkshake With A Tropical Twist

    July 17, 2024 by Angela Milnes

    Easy Banana Split Milkshake with A tropical Twist.

    Who says you need a bowl to enjoy a banana split? This Easy Banana Split Milkshake is a creamy, dreamy twist on the classic dessert! Blended with a splash of pineapple juice for a tropical kick and swirled with sweet strawberry glaze, it’s the ultimate treat to sip on. Perfect for a quick dessert fix or a fun party drink! 🥤🍌🍓

    Banana Split Milkshake.
    [feast_advanced_jump_to]

    Why This Recipe Works

    • Deliciously Nostalgic: Combines the classic banana split flavors in a fun, sippable milkshake.
    • Quick & Easy: Ready in minutes with just a few simple ingredients.
    • Perfect for Any Occasion: Great for dessert, parties, or a sweet pick-me-up anytime!

    🥘 Ingredients

    • Vanilla Ice Cream: Provides a creamy, indulgent base that sets the tone for the milkshake.
    • Milk: Ensures smooth blending, creating a perfectly sippable texture.
    • Pineapple Juice: Adds a burst of tropical sweetness, enhancing the fruity elements.
    • Banana: Delivers natural sweetness and flavor, making the milkshake authentically refreshing.
    • Magic Shell Chocolate Fudge: Offers a rich, decadent topping that adds a delightful crunch.
    • Whipped Cream: Provides a fluffy, airy finish, elevating the milkshake's creaminess.
    • Strawberry Glaze: Introduces a fruity touch, adding a vibrant contrast to the shake.

    For the complete list of ingredients with measurements and instructions, please see the recipe card at the bottom of the post.

    📖  Substitutions & Variations

    • Chocolate Shell: Swap it out for chocolate syrup for a thinner consistency or use rich chocolate sauce for a creamier texture and decadent flavor.
    • Cherry: Replace the cherry on top with a sprinkle of chopped nuts, colorful sprinkles, or even a dollop of whipped cream for a fun twist.
    • Nutty Delight: Blend in a tablespoon of peanut butter or sprinkle chopped nuts on top for a crunchy, nutty flavor.
    • Tropical Paradise: Swap strawberry glaze for mango puree or passion fruit syrup for a sunny, tropical vibe.
    • Yogurt Option: Use frozen bananas, almond milk, and a dollop of Greek yogurt for a lighter version without losing the creamy goodness.

    🔪 How to Make A Banana Split Milkshake

    Ice cream, milk, and pineapple juice in a blender.

    Step One: Start by placing your ice cream, milk, and pineapple juice into a blender.

    Ice cream, milk, and pineapple juice blended in a blender.

    Step Two: Blend on high until smooth.

    Magic shell chocolate around the rim of glass.

    Step Three: Take your glass and pour magic shell chocolate around the rim, allowing it to run down into the glass. Place in the freezer for about 5 minutes until chocolate is hardened.

    Side view of banana split milkshake in a glass.

    Step Four: Pour the milkshake into a glass. Throw in diced bananas. Add whipped cream and strawberry glaze to the top.

    👩‍🍳 Expert Tips

    • Use Ripe Bananas: Choose ripe bananas for a naturally sweet and creamy base. They blend more easily and provide a richer flavor.
    • Achieve Perfect Consistency: Start with less milk and add gradually to reach your preferred thickness. For a thicker shake, use less milk or add more ice cream.

    💭 FAQs

    Can I Use Frozen Bananas For This Milkshake?

    Absolutely! Frozen bananas make the milkshake even creamier and eliminate the need for extra ice.

    Can I Make This Dairy Free?

    Yes! Use almond milk, oat milk, or coconut milk along with a dairy-free ice cream or frozen banana base.

    Can I Make This Milkshake Ahead Of Time?

    It’s best enjoyed fresh, but you can blend the milkshake and freeze it. Let it thaw for a few minutes and re-blend before serving for the perfect texture.

    What Can I Use Instead Of Strawberry Glaze?

    You can use strawberry jam, fresh strawberry puree, or even chocolate or caramel sauce for a different flavor.

    🧂Serving Suggestions

    Here are some sides to serve with Banana Split Milkshake:

    • Mini Burgers: Serve alongside bite-sized burgers for a savory contrast to the sweet milkshake, making it a fun and filling meal.
    • Sweet Potato Fries: Offer a side of crispy sweet potato fries seasoned with a touch of cinnamon for a unique sweet and savory pairing.
    • Banana Chocolate Chip Cookies: Pair with warm, freshly baked cookies of your choice for a classic and indulgent treat.
    • Vanilla Wafers: Serve with vanilla wafers for a light, crispy option that pairs well with the creamy texture of the milkshake.
    • Turtle Brownies: Pair your Banana Split Milkshake with rich turtle brownies for a decadent treat that combines creamy, nutty, and chocolatey flavors.
    Close view of banana split milkshake in a glass.

    🍽 Related Recipes

    • edamame stir fry in a white bowl.
      Easy Edamame Stir Fry (15-Minute Protein-Packed Side Dish)
    • Chicken And Cabbage Stir Fry Recipe.
      Chicken And Cabbage Stir Fry Recipe
    • Zucchini Egg Bake Recipe.
      Best Zucchini Egg Bake Recipe
    • New Years charcuterie Board.
      New Years Charcuterie Board

    Did you make this recipe? Leave a review and a ⭐⭐⭐⭐⭐ rating below, or tag us in our Facebook Group! Alternatively, bookmark it in your browser or save to Pinterest.

    Easy Banana Split Milkshake with A tropical Twist.

    Easy Banana Split Milkshake with A tropical Twist

    Angela Milnes
    Create a creamy Banana Split Milkshake that bursts with fruity fun and a sweet chocolatey twist! It's a delightful treat sure to bring smiles to both kids and adults alike.
    5 from 1 vote
    Print Recipe Pin Recipe Rate this Recipe
    Prep Time 3 minutes mins
    Glass In Freezer Time 5 minutes mins
    Total Time 8 minutes mins
    Course Beverage, Dessert
    Cuisine American
    Servings 2 Servings
    Calories 567 kcal

    Ingredients
      

    • 3 Cups Vanilla Ice Cream
    • 1 Cup Mlik
    • ½ Cup Pineapple Juice
    • 1 Banana Diced
    • Magic Shell Chocolate Fudge
    • Whip Cream
    • Strawberry Glaze

    Instructions
     

    • Start by placing your ice cream, milk, and pineapple juice into a blender.
    • Blend on high until smooth.
    • Take your glass and pour magic shell chocolate around the rim, allowing it to run down into the glass. Place in freezer for about 5 minutes until chocolate is hardened.
    • Pour theilkshake into a glass. Throw in diced bananas. Add whip cream and strawberry glaze on to the top.

    Notes

    Use Ripe Bananas: Choose ripe bananas for a naturally sweet and creamy base. They blend more easily and provide a richer flavor.
    Achieve Perfect Consistency: Start with less milk and add gradually to reach your preferred thickness. For a thicker shake, use less milk or add more ice cream.

    Nutrition

    Calories: 567kcalCarbohydrates: 73gProtein: 12gFat: 26gSaturated Fat: 16gPolyunsaturated Fat: 1gMonounsaturated Fat: 7gCholesterol: 102mgSodium: 207mgPotassium: 865mgFiber: 3gSugar: 61gVitamin A: 1072IUVitamin C: 12mgCalcium: 414mgIron: 1mg
    Print Recipe Pin Recipe Rate this Recipe
    Tried this recipe?Let us know how it was!

    More Fantastic Drinks You'll Love:

    • Butterfly Pea Tea Lemonade
    • Mango Pineapple Smoothie
    • Vegan Mixed Berry Smoothie
    • Mangonada Recipe
    • Vegan Banana and Beetroot Smoothie
    • How To Make Watermelon Juice

    Charred Corn Salad With Tomatoes

    July 16, 2024 by Angela Milnes

    Charred Corn Salad With Tomatoes.

    This vibrant Charred Corn Salad recipe is bursting with fresh flavors and crunchy textures. It's the perfect side dish for summer barbecues or a light and healthy lunch. Easy to make and even easier to enjoy, this salad is sure to become a family favorite!

    charred corn salad
    [feast_advanced_jump_to]

    Why This Recipe Works

    • Smoky Flavor: The charred corn adds a delicious smoky flavor that elevates this salad.
    • Fresh and Colorful: Packed with fresh ingredients like cherry tomatoes, green onions, and cilantro, Roasted Corn And Tomato Salad is a vibrant and refreshing dish.
    • Tangy and Creamy: The lime dressing and queso fresco create a perfect balance of tangy and creamy in every bite.

    🥘 Ingredients

    Charred corn Salad Ingredients.
    • Fresh Corn: Fresh ears of corn grilled until charred for a smoky and sweet flavor.
    • Green Onions: Adds a mild, oniony taste with a hint of sweetness.
    • Fresh Cilantro: Provides a bright, citrusy flavor to enhance the salad.
    • Cherry or Grape Tomatoes: Juicy and sweet, adding vibrant color and freshness.
    • Olive Oil: Helps to char the corn and adds a subtle richness.
    • Queso Fresco: Crumbly cheese that adds a mild, tangy contrast to the sweet corn.
    • Olive Oil: A light base for the dressing that complements the other ingredients.
    • Fresh Lime Juice: Adds a tangy, zesty flavor to brighten up the salad.
    • Paprika: Imparts a subtle smoky spice to the dressing.
    • Salt and Pepper: Enhances the flavors of the salad and balances the dressing.

    For the complete list of ingredients with measurements and instructions, please see the recipe card at the bottom of the post.

    📖  Substitutions & Variations

    • Spicy Southwest Corn Salad: Broil corn on the cob and add kernels with roasted red bell peppers, diced jalapeños, and shredded cheddar cheese. Finish with a smoky chipotle-lime dressing and a hint of smoked paprika for an extra kick of heat.
    • Mexican-Inspired Grilled Corn Salad: Grill corn on the cob and mix the kernels with black beans, diced red onion, and avocado chunks. Drizzle with a creamy lime-cilantro dressing for a festive twist.
    • Mediterranean Charred Corn Salad: Grill corn on the cob and combine the kernels with chopped cucumbers, Kalamata olives, and crumbled feta cheese. Top with a lemon-tahini dressing for a fresh, zesty flavor.

    🔪How To Make Charred Corn Salad With Tomatoes

    corn on a baking tray

    Step One: Set your broiler to 525°F. Cut the corn off the cob, then arrange the corn kernels in a single layer on a baking sheet. Drizzle with ½ tablespoon of olive oil and mix to coat.

    corn on a baking tray

    Step Two: Place the baking sheet under the broiler and broil the corn for about 5-6 minutes, or until the kernels start to brown slightly. Keep a close eye on the corn to avoid burning. Remove from the oven and let cool.

    charred corn salad

    Step Three: Dice the green onions, cilantro, and tomatoes. In a large bowl, mix the charred corn, green onions, cilantro, tomatoes, and queso fresco. In a small bowl, whisk 3 tablespoons olive oil, 2 tablespoons lime juice, 1 tablespoon honey, 1 teaspoon cumin, and salt and pepper to taste.

    charred corn salad

    Step Four: Drizzle the dressing over the roasted corn salad and mix well to combine. Top with extra queso fresco and cilantro. Serve and Enjoy!

    charred corn salad

    👩‍🍳 Expert Tips

    • Opt for Fresh or Frozen Corn: For a quick and easy alternative, use frozen corn instead of fresh corn on the cob. Thaw and drain the frozen corn well before broiling to avoid excess moisture.
    • Balance Acidity in the Dressing: The lime juice in the dressing provides essential acidity. Taste the dressing before adding it to the salad and adjust with more lime juice or a touch of honey if needed to balance the flavors.
    • Cool the Corn to Retain Crunch: Allow the charred corn to cool completely before combining it with other ingredients. This prevents wilting and keeps the salad crisp and refreshing.

    💭 FAQs

    Can I use frozen corn instead of fresh corn?

    Yes, frozen corn can be a good substitute if fresh corn isn't available. Just be sure to thaw it completely and sauté it until it gets a nice char, similar to the fresh corn grilling process.

    Can I make this salad ahead of time?

    Absolutely! You can make this salad a few hours before serving, but for the best taste and texture, it's recommended to add any fresh herbs or dressing just before serving to keep everything vibrant.

    What are some variations I can try in this corn salad?

    You can add ingredients like avocado, black beans, or even crumbled cheese (like feta or cotija) to give it a unique twist. A squeeze of lime juice or a drizzle of your favorite dressing can also elevate the flavors.

    Is this salad a good side for BBQ or grilled dishes?

    Yes, this charred corn salad pairs perfectly with BBQ, grilled meats, or any summer grilling dishes. The smoky flavors from the corn complement the savory, grilled tastes of your main dishes.

    Best Way to Store Charred Corn Salad

    Store any leftover Charred Corn Salad in an airtight container in the refrigerator for up to 3-4 days. Use a well-sealed container to maintain the salad's freshness.

    🧂Serving Suggestions

    Here are some of the best sides to serve with Charred Corn Salad with Tomatoes:

    • Grilled Chicken Skewers: Marinated in a mix of lime juice, garlic, and cilantro, grilled chicken skewers offer a savory contrast to the sweet and smoky flavors of the charred corn salad.
    • Black Bean Tacos: Fill soft corn tortillas with seasoned black beans, avocado slices, and a dollop of sour cream or Greek yogurt. The creamy richness of the beans complements the texture and flavor of the corn salad.
    • Grilled Shrimp: Skewer large shrimp marinated with a hint of paprika, then grill until charred and cooked through. The tasty shrimp pairs well with the fresh flavors of the corn salad.
    • Chipotle Lime Grilled Steak: Marinate flank steak in a mixture of chipotle peppers, lime juice, and garlic, then grill to your desired level of doneness. Sliced thinly and served alongside the charred corn salad, the smoky-spicy steak adds depth and protein to the meal.
    • Avocado and Tomato Salad: Toss ripe avocado chunks and cherry tomatoes with lime juice, olive oil, salt, and pepper for a simple yet refreshing side dish. The creamy avocado and juicy tomatoes provide a cool contrast to the warm, charred flavors of the corn salad.
    charred corn salad

    🍽 Related Recipes

    • roasted harissa sweet potatoes on a plate, drizzles with honey and pistachio nuts.
      Harissa Sweet Potato Recipe (Crispy, Spicy & Easy)
    • Cranberry Lime Mocktail.
      Easy Cranberry Lime Mocktail Recipe – No Alcohol, All Sparkle!
    • Food to Your Loved Ones this Holiday Season.
      Give from Your Heart: Give Food to Your Loved Ones this Holiday Season
    • MIni Rainbow Pizza.
      How To Revamp Leftover Pizza

    Did you make this recipe? Leave a review and a ⭐⭐⭐⭐⭐ rating below, or tag us in our Facebook Group! Alternatively, bookmark it in your browser or save to Pinterest.

    Charred Corn Salad With Tomatoes.

    Charred Corn Salad With Tomatoes

    Angela Milnes
    Enjoy the smoky-sweet flavors of summer with this Charred Corn Salad with Tomatoes! Fresh corn is charred to perfection, bringing out its natural sweetness, and then tossed with juicy tomatoes, fresh herbs, and a light vinaigrette. This vibrant and flavorful salad is the perfect side dish for BBQs, picnics, or any warm-weather meal. Simple, colorful, and bursting with flavor, it’s a crowd-pleaser that you'll want to make again and again!
    5 from 3 votes
    Print Recipe Pin Recipe Rate this Recipe
    Prep Time 10 minutes mins
    Cook Time 6 minutes mins
    Total Time 16 minutes mins
    Course Salads
    Cuisine American
    Servings 4 Servings
    Calories 416 kcal

    Ingredients
      

    Salad Ingredients

    • 3 Cups Corn
    • 3 Green Onions
    • 2 tablespoon Fresh Cilantro
    • 1 cup Cherry Tomatoes
    • ½ tablespoon Olive Oil
    • ½ cup Queso Fresco

    Dressing Ingredients

    • 1 tablespoon Olive Oil
    • 1 Lime Juice
    • ¼ teaspoon Paprika
    • pinch Salt
    • pinch Pepper

    Instructions
     

    • Set your broiler to 525°F.
    • Cut the corn off the cob, then arrange the corn kernels in a single layer on a baking sheet. Drizzle with ½ tablespoon of olive oil and mix to coat.
    • Place the baking sheet under the broiler and broil the corn for about 5-6 minutes, or until the kernels start to brown slightly. Keep a close eye on the corn to avoid burning. Remove from the oven and let cool.
    • Dice the green onions, cilantro, and tomatoes.
    • In a large bowl, combine the charred corn, diced green onions, cilantro, tomatoes, and crumbled queso fresco.
    • In a small bowl, whisk together 3 tablespoons of olive oil, 2 tablespoons of lime juice, 1 tablespoon of honey, 1 teaspoon of cumin, and salt and pepper to taste.
    • Drizzle the dressing over the salad and mix well to combine.
    • Top with extra queso fresco and cilantro. Enjoy your Charred Corn Salad!

    Notes

    Opt for Fresh or Frozen Corn: For a quick and easy alternative, use frozen corn instead of fresh corn on the cob. Thaw and drain the frozen corn well before broiling to avoid excess moisture.
    Balance Acidity in the Dressing: The lime juice in the dressing provides essential acidity. Taste the dressing before adding it to the salad and adjust with more lime juice or a touch of honey if needed to balance the flavors.
    Cool the Corn to Retain Crunch: Allow the charred corn to cool completely before combining it with other ingredients. This prevents wilting and keeps the salad crisp and refreshing.

    Nutrition

    Calories: 416kcalCarbohydrates: 69gProtein: 11gFat: 12gSaturated Fat: 3gPolyunsaturated Fat: 2gMonounsaturated Fat: 6gTrans Fat: 0.1gCholesterol: 11mgSodium: 125mgPotassium: 363mgFiber: 6gSugar: 2gVitamin A: 657IUVitamin C: 12mgCalcium: 215mgIron: 7mg
    Print Recipe Pin Recipe Rate this Recipe
    Tried this recipe?Let us know how it was!

    More Summer Salad Recipes

    • Kale Butternut Squash Salad With Blueberries
    • Avocado Salad
    • Strawberry Jalapeno Salsa “Pico De Gallo”
    • Kiwi Fruit Salad With Pomegranate
    • Beet Salad With Feta And Walnuts
    • Mango Arugula Salad

    Pesto Chicken Sliders With Mozzarella

    July 15, 2024 by Angela Milnes

    Pesto chicken Sliders With Mozzarella.

    Elevate your sandwich game with Pesto Chicken Sliders! Juicy chicken, fresh pesto, and melty cheese are tucked into soft slider buns for the perfect bite-sized treat. Whether it’s game day, a party, or an easy weeknight dinner, these sliders are sure to be a hit with everyone!

    Pesto chicken Sliders.
    [feast_advanced_jump_to]

    💖 Why This Recipe Works

    • Bursting with Flavor: Fresh pesto, juicy chicken, and melty cheese make each bite irresistible.
    • Perfect for Any Occasion: Pesto chicken sliders are deal for game day, parties, or a fun twist on weeknight dinners.
    • Quick and Easy: Simple to assemble and bake, these sliders are a stress-free crowd-pleaser!

    ⭐ Star Ingredients

    Pesto chicken Sliders Ingredients.
    • Dried Parsley: Provides a subtle herbal note and a touch of color.
    • Slider Rolls: The soft, pillowy base for assembling the delicious Pesto Chicken Sliders.
    • Pesto: Adds a burst of herby, garlicky flavor to the sliders.
    • Boiled Chicken: The tender, protein-packed filling for Pesto Chicken Sliders.
    • Mozzarella: Melts into gooey perfection, adding creaminess to the sliders.
    • Butter: Adds richness and enhances the flavor of the toasted rolls.
    • Garlic Salt: Infuses the sliders with a savory, garlicky kick.

    For the complete list of ingredients with measurements and instructions, please see the recipe card at the bottom of the post.

    📖  Substitutions & Variations

    • Vegetarian Pesto Sliders: Replace chicken with grilled zucchini or eggplant slices for a vegetarian-friendly version.
    • Cheesy Pesto Sliders: Use a mix of mozzarella, provolone, and Parmesan for extra cheesiness and bold flavors.
    • Pesto Turkey Sliders: Substitute chicken with turkey for a leaner protein option while keeping the flavors intact.

    🔪How To Make Pesto Chicken Sliders

    pesto paste on slide rolls.
    1. Step 1: Gather all the ingredients and preheat the oven to 180°C (350°F). Cut the slider rolls in half horizontally. Brush the bottom halves with pesto sauce.
    Ingredients on slider rolls.
    1. Step 2: Layer the boiled chicken, and top with mozzarella cheese. Place the top halves of the rolls back on.
    Brushing stuffed slider rolls.
    1. Step 3: In a small bowl, mix melted butter with garlic salt and dried parsley. Brush this mixture generously over the tops of the slider rolls.
    Pesto chicken Sliders.
    1. Step 4: Place the sliders on a baking sheet and bake for 15 minutes, or until the cheese is melted and the tops are golden brown. Serve warm and enjoy!
    Side View Of chicken Slider Roll.

    👩‍🍳 Expert Tips

    • Spread Evenly: Distribute the pesto sauce evenly to ensure every bite is flavorful.
    • Prevent Soggy Sliders: Avoid over-brushing the bottom rolls with pesto to keep them from becoming soggy.

    💭 FAQs

    Can I Make These Sliders Ahead Of Time?

    Yes, assemble them and store them covered in the refrigerator. Bake just before serving for freshness.

    How Do I Keep The Sliders From Getting Soggy?

    Ensure the chicken is drained well, and use a light layer of pesto to prevent the bread from soaking.

    What type of cheese works best for these sliders?

    Mozzarella is a popular choice due to its mild flavor and excellent melting properties. However, you can experiment with other cheeses like provolone or gouda for a different taste.

    Can I use store-bought pesto, or should I make it from scratch?

    Both options work well. Store-bought pesto is convenient and saves time, while homemade pesto allows you to customize flavors to your preference. For a quick homemade version, blend fresh basil, olive oil, Parmesan, garlic, and nuts like pine nuts or walnuts.

    Best Way to Store Pesto chicken Sliders

    Store leftover Pesto Chicken Sliders in an airtight container in the refrigerator for up to 3 days. To reheat, place them in the oven at 180°C (350°F) for 5-7 minutes to keep them crisp and warm without drying out.

    💖 Serving Suggestions

    Here are some great ways to serve Pesto Chicken Sliders:

    • Sweet Potato Fries: A crispy and sweet side that pairs perfectly with the savory sliders.
    • Caesar Salad: Adds a refreshing crunch and tangy dressing to balance the richness of the sliders.
    • Tomato Soup: A warm, comforting complement to the cheesy sliders.
    • Red Cabbage Coleslaw: A creamy, tangy side that adds texture and coolness.
    • Mozzarella Onion Rings: Crispy and golden, they make for a fun and indulgent pairing.
    • Chips and Guacamole: A casual and zesty side perfect for a gathering.
    Side View of chicken Slider Roll.

    🍽 More Crowd-Pleasing Bites to Try

    • BLT Turkey Wraps With Avocado Mayo.
      BLT Turkey Wraps With Avocado Mayo
    • Air Fryer Carrot Fries.
      Crispy Air Fryer Carrot Fries
    • Air Fryer Catfish Nuggets.
      Best Air Fryer Catfish Nuggets Recipe
    • Heart Shaped Parmesan Breadsticks.
      Heart Shaped Parmesan Breadsticks

    Did you make this recipe? Leave a review and a ⭐⭐⭐⭐⭐ rating below, or tag us in our Facebook Group! Alternatively, bookmark it in your browser or save to Pinterest.

    Pesto chicken Sliders With Mozzarella.

    Pesto chicken Sliders

    Angela Milnes
    These Pesto Chicken Sliders are cheesy, buttery, and packed with flavor—perfect for parties or quick family dinners. Simple to make and absolutely delicious!
    5 from 1 vote
    Print Recipe Pin Recipe Rate this Recipe
    Prep Time 10 minutes mins
    Cook Time 15 minutes mins
    Total Time 25 minutes mins
    Course Appetizer
    Cuisine American
    Servings 9 Servings
    Calories 2033 kcal

    Ingredients
      

    • 9 Slider Rolls
    • ¼ Cup Pesto
    • 2 Cup Chicken Boiled
    • 1 Cup Mozzarella
    • 2 tbsp. Butter
    • ½ tsp. Garlic Salt
    • ½ tsp. Dried Parsley

    Instructions
     

    • Gather all the ingredients and preheat the oven to 180°C (350°F).Cut the slider rolls in half horizontally. Brush the bottom halves with pesto sauce.
    • Layer the boiled chicken, and top with mozzarella cheese. Place the top halves of the rolls back on.
    • In a small bowl, mix melted butter with garlic salt and dried parsley. Brush this mixture generously over the tops of the slider rolls.
    • Place the sliders on a baking sheet and bake for 15 minutes, or until the cheese is melted and the tops are golden. Serve warm and enjoy!

    Notes

    Spread Evenly: Distribute the pesto sauce evenly to ensure every bite is flavorful.
    Prevent Soggy Sliders: Avoid over-brushing the bottom rolls with pesto to keep them from becoming soggy.

    Nutrition

    Calories: 2033kcalCarbohydrates: 156gProtein: 122gFat: 99gSaturated Fat: 37gPolyunsaturated Fat: 6gMonounsaturated Fat: 18gTrans Fat: 1gCholesterol: 349mgSodium: 2923mgPotassium: 781mgFiber: 12gSugar: 26gVitamin A: 2749IUVitamin C: 0.1mgCalcium: 1145mgIron: 12mg
    Print Recipe Pin Recipe Rate this Recipe
    Tried this recipe?Let us know how it was!

    More Delicious Recipes To Try:

    • Air Fryer Sausage Breakfast Bites
    • Heart-shaped Parmesan Breadsticks
    • Best Air Fryer Cheesesteak Egg Rolls
    • Air Fryer Crab Cakes
    • Cheesy Garlic Bread Pizza
    • Baked Honey Mustard Chicken Tenders

    Long Grain White Rice Instant Pot Recipe

    July 13, 2024 by Angela Milnes

    Long grain White Rice Instant Pot Recipe.

    I'm super excited to share perfect Long Grain White Rice Instant Pot Recipe. This foolproof recipe recipe is quick, easy, and turns out just right every single time. Whether you're a busy parent or just someone who loves a good bowl of fluffy rice, this recipe will become your go-to. Ready to make the easiest, Instant Pot White Rice ever? Let’s get cooking!

    Long grain White Rice Instant Pot Recipe
    [feast_advanced_jump_to]

    Why This Recipe Works

    • Perfectly Cooked Every Time: The long grain white rice Instant Pot recipe ensures your rice is always fluffy and evenly cooked without any guesswork.
    • Quick and Convenient: With the Instant Pot, you can have perfect long grain white rice Instant Pot recipe in a fraction of the time it takes on the stovetop.
    • Versatile Side Dish: This long grain rice pairs well with a variety of dishes, making it a versatile addition to any meal.

    🥘 Ingredients

    uncooked rice on a spoon.
    • White Rice: Provides the base for this quick and easy Instant Pot recipe, yielding fluffy grains every time.
    • Olive Oil: Adds a hint of richness and helps prevent the long grain white rice Instant Pot recipe from sticking.
    • Water: Essential for perfect long grain white rice Instant Pot recipe, ensuring the grains are tender and fully cooked.
    • Dried Parsley: Adds a touch of color and freshness as a final garnish, enhancing the presentation of the long grain white rice Instant Pot recipe.

    For the complete list of ingredients with measurements and instructions, please see the recipe card at the bottom of the post.

    📖  Substitutions & Variations

    • Herbaceous Rice Blend: Mix in fresh herbs like parsley, thyme, or cilantro to your pressure cooker rice with vibrant flavors.
    • Savory Fried Rice: Transform your Instant Pot rice into delicious fried rice by stir-frying it with your favorite vegetables, protein, and seasonings.

    🔪How To Make Instant Pot Long grain White Rice

    Step One: Prepare the Instant Pot

    Add a small amount of oil to the Instant Pot. This helps prevent the rice from sticking to the bottom of the pot during cooking.

    Step Two: Add Rice and Water

    Measure out 1 cup of white rice and pour it into the Instant Pot. Next, pour 1 cup of water over the rice. The water-to-rice ratio is important to ensure perfectly cooked rice.

    Step Three: Secure the Lid

    Place the lid on the Instant Pot and secure it tightly. Ensure the valve is set to the sealing position to prevent steam from escaping during cooking.

    Step Four: Set the Cooking Time

    Tap the manual mode button on the Instant Pot and set the timer for 5 minutes. This is the time needed to cook the rice under pressure.

    Step Five: Pressure Cook Rice

    Allow the rice in the Instant Pot to pressure cook for 5 minutes. During this time, the Instant Pot will build up pressure and cook the rice evenly.

    Step Six: Release the Pressure

    Once the cooking time is complete, carefully perform a quick release to let out the steam. Be cautious of the hot steam and use a utensil to switch the valve to the venting position.

    Step Seven: Fluff the Rice

    Once the pressure has been fully released and it is safe to open the lid, use a fork to fluff the rice. This helps separate the grains and makes the rice light and fluffy.

    Instant Pot White Rice.

    Step Eight: Serve

    Scoop the rice into a serving dish. If desired, sprinkle dried parsley over the top for added flavor and a touch of color.

    Your perfectly cooked Instant Pot White Rice is ready to be served! Enjoy it as a side dish or as a base for your favorite main courses.

    instant pot white rice

    👩‍🍳 Expert Tips

    • Fluff with a Fork: Gently fluff the rice with a fork, moving from the edges towards the center. Using a fork helps separate the grains without crushing them, ensuring a light and fluffy texture.
    • Rinse Rice for Optimal Texture: Before cooking rice, always rinse it to remove excess starch and achieve a fluffier texture in your Instant Pot.

    💭 FAQs

    How Much Water Do I Need to Use?

    The general rule of thumb when it comes to rice ratio is that you need 1 cup of rice and 2 cups of water for every one cup of Instant Pot rice. If you add more, the rice will get mushy. If you add less, it will burn at the bottom. If cooking brown rice or wild rice, double all ingredients to make sure they cook thoroughly through.

    Exactly How Long Should I Cook My Rice?

    Altitude, or where you live, plays a big role in how long you should cook your rice. So, if the recipe you find doesn't quite work it may be due to where you live. If you found the rice to be dry or got a burn notice try taking a couple minutes off. If you open your pressure cooker and fine that there is water not absorbed by the rice, you will want to cook it a minute or 2 longer.

    Can I Use My Rice Button?

    The Instant Pot rice button is not for all rice. It was designed for the ever-popular parboiled or long grain white rice. so yes you can use it for regular rice. If using a different type of rice be sure to check our rice cooking times guide.

    My Rice Is Sticking To The Bottom?

    Did you do a quick release or a natural release? One of the reasons rice will stick to the bottom is if you leave it to naturally release slowly. This can cause the rice to burn. Was your keep warm button on? The heat from the keep warm function can continue to cook your rice. Be sure to turn off your keep warm function to prevent the rice from sticking to the bottom.

    What if I Want To Make a Small Amount Of Rice?​

    If you only have ½ cup of rice, just add ¼ cup of water! It'll mix together in the pot when it cooks. You can cook smaller amounts without having to modify your ingredients too much at all. The exact amount of water will depend on the type of rice you're cooking.

    Best Way to Store White Rice

    If you plan to use your white rice in the next 24 hours then keep it in the Instant Pot and use the keep warm button to reheat it. You can tore any leftover Instant Pot Long Grain White Rice in an airtight container in the refrigerator for up to 4-5 days. Transfer the cooked rice to a freezer-safe container or bag and freeze for up to 2-3 months. Defrost the Instant Pot rice in the refrigerator overnight.

    🧂Serving Suggestions

    Here are some of the best sides to serve with White Rice:

    • Stir-Fries: Serve white rice alongside a flavorful Stir Fry made with your choice of protein (chicken, beef, shrimp, tofu) and mixed vegetables. The rice acts as a neutral base to soak up the savory sauce from the stir-fry.
    • Curries: Long grain white rice Instant Pot recipe is a classic accompaniment to curries such as Chicken Curry, beef curry, or vegetable curry. The fluffy texture of the rice complements the rich and saucy curry dishes.
    • Grilled or Roasted Meats: Serve long grain white rice Instant Pot recipe alongside grilled or roasted meats such as Roast Beef, Roast Pork, or roasted lamb. This Instant Pot rice recipe provides a simple and satisfying side dish to balance the flavors of the meat.
    • Stews and Braises: This long grain white rice Instant Pot recipe pairs well with hearty stews and braises such as Beef Stew, Chicken Adobo, or pork adobo. The rice helps absorb the flavorful broth or sauce from the stew, creating a comforting and filling meal.
    • Beans and Legumes: Serve white rice with beans and legumes such as Black Beans, lentils, or Chickpeas. The combination of rice and beans provides a complete protein and a nutritious meal option.

    🍽 Related Recipes

    • One Pan Chicken And Asparagus.
      One Pan Chicken And Asparagus
    • Honey Roasted Parsnips and Carrots on a white plate.
      Honey Roasted Parsnips and Carrots
    • best stuffed mushrooms.
      The Best Stuffed Mushrooms
    • Wholewheat Einkorn Crackers.
      Whole Grain Einkorn Crackers With Chia Seeds And Parmesan

    Did you make this recipe? Leave a review and a ⭐⭐⭐⭐⭐ rating below, or tag us in our Facebook Group! Alternatively, bookmark it in your browser or save to Pinterest.

    Long grain White Rice Instant Pot Recipe.

    Long Grain White Rice Instant Pot Recipe

    Angela Milnes
    Make perfectly fluffy and tender Long Grain White Rice in your Instant Pot every time! With just the right water-to-rice ratio and a few simple steps, you’ll have a delicious, versatile side dish that’s ready in minutes. It’s an easy, foolproof method for consistently great rice!
    5 from 3 votes
    Print Recipe Pin Recipe Rate this Recipe
    Prep Time 5 minutes mins
    Cook Time 5 minutes mins
    Additional Time 0 minutes mins
    Total Time 10 minutes mins
    Course Side Dish
    Cuisine American
    Servings 3 Servings
    Calories 266 kcal

    Ingredients
      

    • 1 Cup White Rice
    • 1 Tablespoon Olive Oil
    • 1 Cup Water
    • 1 teaspoon Dried Parsley As Garnish

    Instructions
     

    • Add a small amount of oil to the Instant Pot. This helps prevent the rice from sticking to the bottom of the pot during cooking.
    • Measure out 1 cup of white rice and pour it into the Instant Pot. Next, pour 1 cup of water over the rice. The water-to-rice ratio is important to ensure perfectly cooked rice.
    • Place the lid on the Instant Pot and secure it tightly. Ensure the valve is set to the sealing position to prevent steam from escaping during cooking.
    • Tap the manual mode button on the Instant Pot and set the timer for 5 minutes. This is the time needed to cook the rice under pressure.
    • Allow the rice in the Instant Pot to pressure cook for 5 minutes. During this time, the Instant Pot will build up pressure and cook the rice evenly.
    • Once the cooking time is complete, carefully perform a quick release to let out the steam. Be cautious of the hot steam and use a utensil to switch the valve to the venting position.
    • Once the pressure has been fully released and it is safe to open the lid, use a fork to fluff the rice. This helps separate the grains and makes the rice light and fluffy.
    • Scoop the rice into a serving dish. If desired, sprinkle dried parsley over the top for added flavor and a touch of color.
    • Your perfectly cooked Instant Pot White Rice is ready to be served! Enjoy it as a side dish or as a base for your favorite main courses.

    Notes

    Rinse Rice for Optimal Texture: Before cooking rice, always rinse it to remove excess starch and achieve a fluffier texture in your Instant Pot.
    Natural Pressure Release: Allow the remaining pressure to release naturally to enhance the rice's texture.
    Mastering Cooking Rice: Follow the instructions specific to cooking rice in the Instant Pot, adjusting settings like the rice button for different varieties such as jasmine rice or basmati rice.

    Nutrition

    Calories: 266kcalCarbohydrates: 49gProtein: 4gFat: 5gSaturated Fat: 1gPolyunsaturated Fat: 1gMonounsaturated Fat: 4gSodium: 7mgPotassium: 72mgFiber: 1gSugar: 0.1gVitamin A: 1IUVitamin C: 0.04mgCalcium: 20mgIron: 1mg
    Print Recipe Pin Recipe Rate this Recipe
    Tried this recipe?Let us know how it was!

    More Simple Recipes For Your Menu

    • Instant Pot Chicken Noodle Soup
    • Tik Tok Egg Boil
    • Cheesy Mashed Cauliflower
    • Beetroot Hummus Recipe
    • Chicken Thighs In Honey And Mustard Sauce
    • Instant Pot Cajun Rice And Beans Recipe

    Best Liquid Smoke Substitute

    July 13, 2024 by Angela Milnes

    Imagine enjoying the rich, smoky flavor of a barbecue without needing a grill or smoker. Liquid Smoke Substitute is a handy ingredient that brings your food that delicious, smoky taste. It's perfect for adding a hint of outdoor cooking to any dish, even when you're cooking indoors.

    This unique liquid is made from natural ingredients and is easy to use in recipes. Whether you're making sauces, marinades, or even soups, liquid smoke substitutes can give your meals a mouth-watering smoky twist.

    liquid smoke alternative
    [feast_advanced_jump_to]

    Top Substitutes For Liquid Smoke

    Here are some great alternatives to liquid smoke that can give your dishes the smoky flavor you crave:

    1. Smoked Salt

    Smoked salt is a fantastic liquid smoke substitute that you can easily use in your kitchen. It's simply sea salt that's been smoked over wood, giving it a delicious smoky flavor. If you don't have any at home, you can usually find it in gourmet food stores or online.

    Smoked salt adds a rich, natural smokiness to dishes without the need for liquid smoke. You can even make it at home by cold-smoking sea salt over wood chips. It's perfect for enhancing the taste of meats, vegetables, and even desserts.

    When using smoked salt as a replacement for liquid smoke, start with about half the amount of smoked salt for the recommended liquid smoke to avoid overpowering your dish. This versatile ingredient is popular in barbecue, American, and various international cuisines.

    2. Chipotle Powder

    Chipotle powder is a great homemade liquid smoke substitute that can be found in your spice cabinet. It's made from dried, smoked jalapeño peppers, giving it a rich, smoky flavor with a bit of heat.

    It's easy to find in most grocery stores or online if you don't have it at home. You can't really make chipotle powder at home unless you have the right equipment to smoke and grind jalapeños properly.

    This spice is perfect for adding smoked flavor to Mexican dishes, barbecues, soups, and stews. When using chipotle powder as a substitute for liquid smoke, start with about half the amount of powder for the recommended liquid smoke to get that wood fire essence without overpowering your dish.

    3. Smoke Machine

    A smoke machine, or smoke gun, is a handy liquid smoke replacement that you can use to add a pure smoke flavor to your meals. It works by burning wood chips and directing the smoke to your food.

    While smoke guns are typically found in some homes, you can purchase one from kitchen supply stores or online. A smoke gun gives your dishes an authentic, fresh, smoky taste, ideal for meats, cheeses, cocktails, and even vegetables.

    To use it as a liquid smoke substitute, simply smoke your food for a few minutes until you achieve the desired smokiness. Since this method uses pure smoke flavor, you don't need to worry about measuring quantities—just smoke until it tastes right!

    4. Smoked Paprika

    Smoked paprika is a great liquid smoke alternative that many home cooks love to use. It is made from dried and smoked peppers that are then ground into a fine powder, giving it a rich, smoky flavor with a touch of sweetness.

    If you don't have it in your spice cabinet, you can easily find it in grocery stores or online. Smoked paprika adds smoke flavor to dishes like stews, soups, grilled meats, and roasted vegetables.

    To use it as your own liquid smoke substitute, start with about half a teaspoon for every teaspoon of liquid smoke the recipe calls for.

    smoked paprika.

    5. Smoked Tea

    Smoked tea, such as Lapsang Souchong, adds a unique smoky aroma to your dishes. This tea is made from Chinese black tea leaves that are smoked over pinewood fires, giving it a distinct, strong-smoked flavor.

    If you don't have it at home, you can find it in specialty tea shops or online. In addition to Lapsang Souchong, other smoked teas, like China Keemun and Vietnamese Golden Tips black tea, also work well.

    These teas are perfect for adding depth to soups, stews, and marinades. To use smoked tea as a liquid smoke substitute, brew a strong infusion and add a few teaspoons of the liquid to your recipe, adjusting to taste. This method makes smoked tea a versatile and flavorful alternative to traditional liquid smoke.

    6. Charred Vegetables

    You can easily make charred vegetables at home by grilling or roasting vegetables until they have a nice char.

    This process gives them a deep, smoked flavor that is perfect for enhancing soups, stews, and even some Asian dishes. If you don't have a grill, you can achieve similar results using a broiler in your oven.

    To use charred vegetables as a replacement for liquid smoke, finely chop them and add a few tablespoons to your dish, adjusting to taste. This method is excellent for home cooks looking to add smoke flavor without using liquid smoke.

    7. Canned Chipotle Peppers

    Canned chipotle peppers are a flavorful liquid smoke alternative. Unlike chipotle powder, these are smoked and dried jalapeños packed in a tangy adobo sauce, giving them a rich, smoky taste with a bit of heat.

    You can easily find them in most grocery stores or online if you don't have them at home. They work well in Mexican dishes, soups, stews, and marinades.

    To use canned chipotle peppers as a substitute for liquid smoke, chop one or two peppers with some adobo sauce and add them to your recipe, adjusting to taste.

    chipotle peppers.

    8. Burnt Bread

    Burnt bread can be an unconventional yet effective substitute for liquid smoke. This is simply bread that has been toasted or grilled until charred, giving it a smoky, slightly bitter flavor.

    You can easily make it at home using any type of bread you have on hand. Just toast or grill the bread until blackened. It's great for adding a unique smoky note to soups, stews, and sauces.

    To use burnt bread as a liquid smoke substitute, crumble a piece of charred bread and steep it in hot water or broth. Strain out the solids and then add the liquid to your dish. Start with a small amount, like a few tablespoons, and adjust to taste.

    9. Piece Of Charcoal

    Did you know that a piece of charcoal can serve as a unique liquid smoke alternative? It is typically found in grilling supplies at home or in stores where BBQ equipment is sold.

    The charcoal imparts a strong, smoky flavor to foods. To use it at home, heat the charcoal until red-hot, then place it in a small metal dish within your pot or bowl of food. Cover the dish immediately to trap the smoke.

    This method is often used in Indian and Middle Eastern cuisines to add a deep, smoky element. Just a single piece of charcoal can be enough to infuse a noticeable smoked flavor, so adjust based on the intensity you desire.

    charcoal liquid smoke replacement

    10. Smoked Meats

    Smoked meats, like smoked bacon or ham, add a rich, smoky flavor to savory dishes. They are cured and smoked to achieve their distinctive taste.

    You can find it in most grocery stores or specialty delis if you don't have smoked meat at home. The flavor profile is robust and deeply smoky, perfect for soups, stews, casseroles, and even pasta dishes.

    To use smoked meat as a liquid smoke replacement, simply chop a small amount (like a slice of bacon) and cook it into your dish. This will release smokiness and enhance the overall flavor, making your recipe even more delicious.

    So, Which Liquid Smoke Alternative Will You Choose?

    In conclusion, several alternatives for liquid smoke can be used to add smoky flavor to your dishes. Each option offers a unique and delicious way to achieve the desired taste, from smoked paprika to canned chipotle peppers.

    Smoked tea, charred vegetables, burnt bread, charcoal, and smoked meats are also great options that can enhance the flavor of your dishes in different ways.

    It is recommended to experiment with these substitutes and find the ones that work best for your specific recipes.

    Fresh Berry Salad Recipe With Goat Cheese (Easy Summer Salad)

    July 11, 2024 by Angela Milnes

    Berry Salad Recipe With Goat Cheese.

    This vibrant Berry Salad Recipe With Goat Cheese is bursting with juicy strawberries, sweet raspberries, tangy goat cheese, and crunchy honey-roasted pecans. It’s the perfect balance of sweet, creamy, and crisp—and just as lovely for brunch as it is for a light summer dinner.

    Berry Salad Recipe With Goat Cheese.

    Salads are a go-to for bariatric meals—but let’s be honest, plain lettuce doesn’t always hit the spot. That’s why I love this berry salad recipe. It’s light yet satisfying, full of fiber-rich greens, juicy berries for natural sweetness, and creamy goat cheese for a hit of protein and flavor without overwhelming portions.

    This is the kind of salad that feels fresh, energizing, and actually fun to eat—ideal for anyone needing nutrient-dense meals in smaller portions. For more smart salads, try my Mediterranean Farro Salad or Healthy Quinoa Salad.

    [feast_advanced_jump_to]

    💖 Why This Recipe Works

    • Sweet Meets Savory: Fresh berries and tangy goat cheese make a dynamic duo, creating contrast in flavor and texture.
    • Quick & Customizable: Toss everything in 10 minutes and swap out ingredients to suit your mood or fridge.
    • Packed With Flavor: The tangy creaminess of goat cheese cuts through the sweetness of the berries, creating balance and elevating this summer berry salad beyond basic greens.

    ⭐ Star Ingredients

    Berry Salad And Goat Cheese Ingredients.
    Berry Salad Dressing Ingredients.
    • Mixed Berries: I love using strawberries, raspberries, and blueberries for color, antioxidants, and natural sweetness.
    • Goat Cheese: Creamy, tangy, and rich—just a few crumbles add so much flavor.
    • Honey-Roasted Pecans: Sweet, nutty crunch in every bite—skip the croutons!
    • Baby Greens: A mix of spinach and arugula brings a blend of sweet and peppery greens as the perfect salad base.

    For the complete list of ingredients with measurements and instructions, please see the recipe card at the bottom of the post.

    📖  Substitutions & Variations

    • Use feta or blue cheese instead of goat cheese for a stronger or saltier flavor.
    • Swap honey-roasted pecans for walnuts, pistachios, or sliced almonds.
    • Add blackberries or pomegranate seeds for extra color and juiciness.
    • Make it a main dish by adding grilled chicken, tofu, or smoked salmon.
    • Turn it into a berry balsamic pasta salad by tossing with cooled orzo or quinoa.
    • Make it bariatric-friendly by using low-fat goat cheese, skipping the mayo, and portioning into small bowls.

    Love fruity-meets-savory dishes? Try my Strawberry Jalapeño Salsa or Roasted Beet Salad with Pomegranate too.

    🔪 How To Make Berry Salad Recipe With Goat Cheese

    Balsamic vinegar dressing in a bowl.
    1. Step 1: Combine all dressing ingredients in a small bowl. Whisk until smooth and creamy.
    Berry salad with goat cheese in a bowl.
    1. Step 2: In a large bowl, mix baby spinach, arugula, raspberries, sliced strawberries, crumbled goat cheese, and honey-roasted pecans. Pour the dressing over the salad and toss gently. Serve immediately and enjoy your delicious Berry Salad with Goat Cheese!

    💡Hint: Add a squeeze of lemon or lime juice to brighten the flavors even more.

    Berry salad and goat cheese made with berry salad recipe.

    👩‍🍳 Expert Tips

    • Choose Fresh Berries: Ensure that you use fresh, ripe berries for the best flavor and texture in your berry salad recipe.
    • Dry the Greens: After washing your spinach and arugula, make sure to thoroughly dry them to prevent your salad from becoming soggy.
    • Layer Thoughtfully: Add the goat cheese and pecans last to keep them from breaking apart as you toss.

    💭 FAQs

    Can I use different nuts in this berry salad?

    Absolutely! Walnuts, almonds, pistachios, or even sunflower seeds work beautifully.

    Is it possible to make this salad vegan?

    Yes! To make this salad vegan, you can omit the goat cheese and use a plant-based cheese alternative. You can also replace the mayonnaise with vegan mayonnaise.

    How long does berry salad last in the fridge?

    Best served fresh, but you can refrigerate leftovers (undressed) for 1–2 days. Store dressing separately for best texture.

    Can I add protein to this berry salad?

    Definitely! Add grilled chicken, shrimp, tofu, or even white beans to turn it into a satisfying main dish.

    💖 Serving Suggestions

    Wondering what to serve with your berry salad? Add some extra protein with one of these delicious options!

    • Thin Sliced Chicken Breast: Light and lean, it pairs beautifully with the creamy goat cheese and juicy berries.
    • Creamy Pan Seared Salmon: Adds richness and heart-healthy fats—try it warm over the salad.
    • Turkey Wrapped Asparagus: A fun, elegant side with extra protein and crunch.
    • Chickpea Patties or Falafel: For a vegetarian-friendly pairing that adds texture and protein.
    • Fresh Sourdough Toasts: Scoop the salad over toasted bread for an open-faced lunch.
    Berry salad.

    🍽 More Easy Veggie Dishes

    • edamame stir fry in a white bowl.
      Easy Edamame Stir Fry (15-Minute Protein-Packed Side Dish)
    • How To Make Sun Dried Tomatoes Without Oil.
      How To Make Sun Dried Tomatoes Without Oil – Easy Oven Method
    • Shakshuka in a skillet pan with eggs and cilantro.
      Bariatric Friendly Shakshuka With Goat Cheese
    • Creamy Red Potato Salad in a white serving bowl.
      Creamy Potato Salad With Feta (Red Potatoes)

    Did you make this recipe? Leave a review and a ⭐⭐⭐⭐⭐ rating below, or tag us in our Facebook Group! Alternatively, bookmark it in your briew and a ⭐⭐⭐⭐⭐ rating below, or tag us in our Facebook Group! Alternatively, bookmark it in your browser or save to Pinterest.

    Berry Salad Recipe With Goat Cheese.

    Berry Salad Recipe With Goat Cheese

    Angela Milnes
    Indulge in the fresh and vibrant flavors of this Berry Salad with Goat Cheese! Juicy strawberries, raspberries, and blueberries are paired with creamy goat cheese, crunchy nuts, and a drizzle of tangy vinaigrette. This colorful and refreshing salad is perfect for a light lunch or as a stunning side dish that will brighten up any meal. It's a delightful blend of sweet, tart, and creamy that you'll love!
    5 from 3 votes
    Print Recipe Pin Recipe Rate this Recipe
    Prep Time 10 minutes mins
    Cook Time 0 minutes mins
    Total Time 10 minutes mins
    Course Side Dish
    Cuisine American
    Servings 1 Serving
    Calories 422 kcal

    Ingredients
      

    • 1 cup Baby Spinach
    • 1 cup Arugula
    • ¼ cup Raspberries
    • ¼ cup Strawberries sliced
    • 1 tablespoon Goat Cheese crumbled
    • 2 tablespoon Honey Roasted Pecans
    • 1 tablespoon Olive Oil
    • 1 tablespoon Balsamic Vinegar
    • ½ - 1 tablespoon Mayonnaise adjust to taste for creaminess
    • ¼ teaspoon Dijon Mustard
    • 1 teaspoon Honey

    Instructions
     

    • Combine all dressing ingredients in a small bowl. Whisk until smooth and creamy.
    • In a large bowl, combine the baby spinach, arugula, raspberries, sliced strawberries, crumbled goat cheese, and honey roasted pecans.
    • Pour the salad dressing over the salad and toss gently to combine.
    • Serve immediately and enjoy your delicious Berry Salad with Goat Cheese!

    Notes

    Choose Fresh Berries: Ensure that you use fresh, ripe berries for the best flavor and texture in your berry salad recipe.
    Dry the Greens: After washing your spinach and arugula, make sure to thoroughly dry them to prevent your salad from becoming soggy.
    Add Fresh Lime Juice: A squeeze of fresh lime juice over the salad can brighten the flavors and add a fresh citrusy note.

    Nutrition

    Serving: 1gCalories: 422kcalCarbohydrates: 20gProtein: 7gFat: 37gSaturated Fat: 6gPolyunsaturated Fat: 9gMonounsaturated Fat: 20gTrans Fat: 0.01gCholesterol: 9mgSodium: 144mgPotassium: 452mgFiber: 6gSugar: 13gVitamin A: 3463IUVitamin C: 41mgCalcium: 115mgIron: 3mg
    Print Recipe Pin Recipe Rate this Recipe
    Tried this recipe?Let us know how it was!

    Creamy Pan Fried Salmon Fillet

    July 10, 2024 by Angela Milnes

    Creamy Pan Fried Salmon Fillet.

    Experience the perfect balance of savory, spicy, tangy, and sweet with this Pan Fried Salmon Fillet with Soy and Maple Glaze. Quick and easy to prepare, this dish features a luscious, creamy sauce that elevates the rich flavor of the salmon. It's a simple yet impressive recipe that's sure to become a favorite!

    Creamy Pan Fried Salmon Fillet
    [feast_advanced_jump_to]

    💖 Why This Recipe Works

    • Bursting with Flavor: The combination of soy sauce, hot sauce, lemon juice, ginger, garlic, and maple syrup creates a perfectly balanced marinade that infuses the salmon with a delightful mix of savory, spicy, tangy, and sweet flavors.
    • Easy to Prepare: With simple ingredients and straightforward steps, this Creamy Salmon Fillet recipe is quick and easy to make, perfect for a weeknight dinner or when you want to impress guests without spending hours in the kitchen.
    • Creamy and Delicious Sauce: The addition of cream to the marinade results in a luscious glaze that enhances the salmon's taste.

    ⭐ Star Ingredients

    Creamy Pan Fried Salmon Fillet Ingredients.
    • Salmon Fillet: The star of the dish, salmon is a rich, oily fish known for its tender texture and distinct, slightly sweet flavor. It's excellent for pan-frying and pairs well with bold seasonings.
    • Soy Sauce: This adds a salty, umami depth to the marinade, enhancing the natural flavors of the salmon with its fermented complexity.
    • Hot Sauce: Brings a spicy kick to the dish, adding a layer of heat that contrasts nicely with the sweetness and umami from other ingredients.
    • Salt: Just a pinch is used to enhance all the other flavors present in the dish, making them more pronounced and balanced.
    • Lemon Juice: Provides a fresh, citrusy brightness that cuts through the richness of the salmon and cream, offering a refreshing zing.
    • Ginger: Offers a sharp, spicy edge that infuses the salmon with a warm, aromatic flavor, perfect for complementing the creamy elements.
    • Garlic: Delivers a robust, earthy taste that's fundamental to building the savory base of the marinade.
    • Maple Syrup: Adds a touch of sweetness to balance the heat from the hot sauce and the tang from the lemon juice, creating a well-rounded marinade.
    • Cream: Enriches the sauce with its velvety texture and mild sweetness, melding beautifully with the spicy and savory notes to create a luxurious finish.
    • Vegetable Oil: Used for frying, it ensures the salmon fillet cooks evenly and develops a deliciously crisp exterior.

    For the complete list of ingredients with measurements and instructions, please see the recipe card at the bottom of the post.

    📖  Substitutions & Variations

    • Creamy Spinach Sauce For Salmon: Try adding spinach or herbs to your creamy salmon sauce.
    • Greek Yogurt for Cream: If you’re looking for a lighter alternative to cream in your sauce, Greek yogurt is an excellent choice.
    • Lemon Herb Topping: Mix fresh herbs like dill or parsley with lemon zest and a drizzle of olive oil. Spoon the sauce over the cooked salmon for a refreshing and aromatic finish.
    • Agave Syrup for Maple Syrup: Agave syrup is sweeter than maple syrup, meaning you can use less of it to achieve the same level of sweetness. This substitution can help reduce the overall sugar content of your dish, making it a lighter choice.

    🔪How To Pan Fry Salmon Fillets

    salmon sauce
    1. Step 1: In a small bowl, mix the soy sauce, hot sauce, salt, lemon juice, ginger, garlic, and maple syrup until well combined.
    marinate salmon
    1. Step 2: Place the salmon fillet in a shallow dish and pour the marinade over it. Make sure the salmon is well-coated. Cover and refrigerate for at least 30 minutes to let the flavors meld.
    cooking salmon in skillet
    1. Step 3: Heat the vegetable oil in a skillet over medium-high heat. Once hot, add the marinated salmon fillet to the skillet. Cook for 3-4 minutes on each side, or until the salmon is cooked to your desired level of doneness.
    Creamy Pan Fried Salmon Fillet
    1. Step 4: In the same skillet, add the cream to the remaining marinade and cook over medium heat. Stir continuously until the sauce thickens slightly. Place the cooked salmon on a plate and drizzle the creamy soy and maple glaze over the top, and serve.
    Creamy Pan Fried Salmon Fillet

    How Long To Pan Fry Salmon?

    Frying salmon fillets in a pan is super fast. Simply cook on one side for 3-4 minutes and then flip over and finish cooking for the same amount of time. The exact time may vary depending on the thickness of the fillet. Aim for a crisp, golden exterior and a slightly translucent center, which indicates the salmon is perfectly cooked through but still moist and tender.

    👩‍🍳 Expert Tips

    • Control the Heat: When cooking the salmon, use medium heat to ensure the exterior gets nicely seared without burning, while the inside cooks evenly and remains moist. This is especially important when using a creamy sauce, as high heat can cause the cream to separate or scorch.
    • Ensure Proper Skin Crispiness: If your salmon has skin on, make sure to start cooking it skin-side down and press it lightly against the pan for the first minute. This ensures the skin has full contact with the hot surface, leading to evenly crispy skin.

    We love Salmon at Eat Your Beets. It's a healthy fish and we'd love to share the following Salmon recipes too: Cucumber Rolls with Cream Cheese And Smoked Salmon, Creamy Tuscan Salmon With Sundried Tomatoes and Gravlax Salmon With Dill.

    💭 FAQs

    Best Pan To Use For Frying Salmon?

    A non-stick skillet or a well-seasoned cast-iron skillet is best for pan-frying salmon. These types of pans ensure that the fish does not stick and allows for even cooking.

    How Can You Tell If Salmon Is Fresh?

    Fresh salmon should have a mild, ocean-like smell, firm flesh that springs back when pressed, and bright, clear eyes (if whole). The skin should be shiny and moist, not slimy or dry.

    Can You Eat Salmon Skin?

    Yes, salmon skin is edible and can be quite delicious when crispy. It contains additional nutrients and omega-3 fatty acids. However, it's essential to ensure it's cooked thoroughly to enjoy safely.

    Best Way to Store Fried Salmon Fillet

    Store leftover salmon in an airtight container in the refrigerator for up to three days.

    How Long To Pan Fry Salmon?

    Frying salmon fillets in a pan is super fast. Simply cook on one side for 3-4 minutes and then flip over and finish cooking for the same amount of time. The exact time may vary depending on the thickness of the fillet.

    💖 Serving Suggestions

    Here are some of the best sides to serve with Creamy Pan-Fried Salmon:

    • Carrot Rice: Carrot rice, with its sweet and earthy flavors, makes a colorful and healthy side dish that pairs wonderfully with the rich taste of pan-fried salmon.
    • Roasted Asparagus: The crisp and slightly charred Asparagus provides a nice contrast to the tender salmon fillet.
    • Garlic Mashed Potatoes: Creamy and buttery mashed potatoes make a comforting and hearty side dish that pairs well with the salmon.
    • Mixed Green Salad: A fresh and vibrant salad with a Light Vinaigrette adds a refreshing element to the meal, balancing the rich flavors of the salmon.
    • Sautéed Spinach: Lightly sautéed spinach with garlic adds a nutritious and tasty side that enhances the overall meal.
    Creamy Pan Fried Salmon Fillet

    🍽 More Seafood Recipes

    • vegan clam chowder.
      Creamy Vegan Clam Chowder Recipe (Dairy-Free & So Flavorful!)
    • Easy Shrimp Cakes With Hot Sauce.
      Easy Shrimp Cakes With Hot Sauce
    • Best Gravlax Salmon With Dill (Cured Salmon).
      Best Gravlax Salmon With Dill (Cured Salmon)
    • Fiery Ginger Garlic Shrimp (Chinese Shrimp).
      Fiery Ginger Garlic Shrimp (Chinese Shrimp)

    Did you make this recipe? Leave a review and a ⭐⭐⭐⭐⭐ rating below, or tag us in our Facebook Group! Alternatively, bookmark it in your browser or save to Pinterest.

    Creamy Pan Fried Salmon Fillet.

    Creamy Pan Fried Salmon

    Angela Milnes
    Indulge in the rich and delicious flavors of Creamy Pan-Fried Salmon! Perfectly seared salmon fillets are cooked to golden perfection, then bathed in a luscious, creamy sauce that's bursting with flavor. This dish is not only quick and easy to make but also feels indulgent enough for a special occasion. Serve it with your favorite sides for a meal that's both satisfying and elegant!
    5 from 4 votes
    Print Recipe Pin Recipe Rate this Recipe
    Prep Time 30 minutes mins
    Cook Time 8 minutes mins
    Total Time 38 minutes mins
    Course Dinners
    Cuisine American
    Servings 1 Serving
    Calories 643 kcal

    Ingredients
      

    • 5 ounce Salmon fillet
    • 2 teaspoon Soy sauce
    • 1 tablespoon Hot sauce
    • pinch Salt
    • 1 teaspoon Lemon juice
    • 1 teaspoon Ginger
    • 1 teaspoon Garlic
    • 2 teaspoon Maple syrup
    • ⅓ Cup Cream
    • 1 tablespoon Vegetable oil

    Instructions
     

    • In a small bowl, mix the soy sauce, hot sauce, salt, lemon juice, ginger, garlic, and maple syrup until well combined.
    • :Place the salmon fillet in a shallow dish and pour the marinade over it. Make sure the salmon is well coated. Cover and refrigerate for at least 30 minutes to let the flavors meld.
    • Heat the vegetable oil in a skillet over medium-high heat. Once hot, add the marinated salmon fillet to the skillet. Cook for 3-4 minutes on each side, or until the salmon is cooked to your desired level of doneness.
    • In the same skillet, add the cream to the remaining marinade and cook over medium heat. Stir continuously until the sauce thickens slightly.
    • :Place the cooked salmon on a plate and drizzle the creamy soy and maple glaze over the top. Serve immediately and enjoy!

    Notes

    Control the Heat: When cooking the salmon, use medium heat to ensure the exterior gets nicely seared without burning, while the inside cooks evenly and remains moist. This is especially important when using a creamy sauce, as high heat can cause the cream to separate or scorch.

    Nutrition

    Serving: 1gCalories: 643kcalCarbohydrates: 14gProtein: 32gFat: 51gSaturated Fat: 22gPolyunsaturated Fat: 13gMonounsaturated Fat: 13gTrans Fat: 0.1gCholesterol: 168mgSodium: 1216mgPotassium: 852mgFiber: 0.2gSugar: 11gVitamin A: 1223IUVitamin C: 3mgCalcium: 93mgIron: 2mg
    Print Recipe Pin Recipe Rate this Recipe
    Tried this recipe?Let us know how it was!

    More Easy Recipes

    • Homemade Garlic Parm Sauce
    • Instant Pot Wild Rice Blend With Pomegranates
    • Air Fryer Roasted Vegetables
    • Classic Tuna Tartare Recipe
    • Chilean Sea Bass With Lime, Chili And Ginger
    • Carrot Puree Recipe For Baby Food
    • Mediterranean Farro Salad

    Best Goat Cheese Apple Salad

    July 10, 2024 by Angela Milnes

    Best Goat Cheese Apple Salad.

    This Apple and Goat Cheese Salad is the perfect balance of crisp, creamy, sweet, and tangy. Packed with crunchy apples, soft goat cheese, glazed pecans, and a maple-bacon vinaigrette, it’s the kind of salad that turns heads at any table.

    APPLE AND GOAT CHEESE SALAD

    As someone who’s tested every kind of fruit-and-greens combo, I can tell you—this one hits the sweet spot. I first made this for a holiday potluck, and it disappeared faster than the dessert tray. What makes this goat cheese salad special is how easily it transitions from a quick lunch to a standout holiday salad—especially in fall, when Honeycrisp apples are at their peak. The maple vinaigrette brings everything together with a touch of smoky sweetness that’s perfect for Thanksgiving, brunches, or a simple weeknight meal.

    For something equally vibrant and nourishing, try it with my Rotisserie Chicken Salad or a bowl of Butternut Squash Soup.

    [feast_advanced_jump_to]

    💖 Why This Recipe Works

    • Layered flavor and texture: Sweet apples, tangy goat cheese, chewy cranberries, and crunchy nuts in every bite.
    • Simple but elegant: Looks fancy, takes 15 minutes.
    • Customizable: Add protein, swap cheeses, or toss in extra seasonal fruit.

    ⭐ Star Ingredients

    Best Goat cheese Apple Salad Ingredients.
    • Honeycrisp Apples: Crisp, juicy, and perfectly sweet-tart. They hold their shape and stay crunchy, even after dressing.
    • Goat Cheese: Tangy, creamy, and dreamy. It melts into the greens just enough to make every bite rich without being heavy.
    • Maple Bacon Vinaigrette: Made with rendered bacon grease, maple syrup, and Dijon—it’s smoky, sweet, and ties the whole salad together.

    For the complete list of ingredients with measurements and instructions, please see the recipe card at the bottom of the post.

    📖  Substitutions & Variations

    • Add protein: Grilled chicken, crispy bacon, or air fryer salmon make this a full meal.
    • Switch the cheese: Feta, blue cheese, or shaved Parmesan work beautifully.
    • Go grainy: Add cooked quinoa, couscous, or farro for a grain bowl salad twist.
    • Fruit swap: Use sliced pears or fresh figs instead of apples.
    • Nut options: Use candied walnuts, almonds, or pistachios for different crunch.
    • Vegan version: Skip the bacon, use a maple-Dijon vinaigrette with olive oil, and swap goat cheese for a dairy-free version.

    Looking for another mixed green salad with fruit? Try my Mango Arugula Salad With Walnuts next!

    🔪 How To Make Apple And Goat Cheese Salad

    making fall salad dressing
    1. Step 1: Cook the quinoa as per package instructions and let it cool. Fry the bacon until crispy, then place it on a paper towel to drain. While the bacon cooks, chop the Honeycrisp apples into bite-sized pieces. In a small bowl, combine the bacon grease, red wine vinegar, Dijon mustard, and maple syrup. Whisk together until well blended. Season with salt and pepper to taste.
    Apple and goat cheese salad in a bowl.
    1. Step 2: In a large serving bowl, layer the spring mix, cooked quinoa, crispy bacon, chopped apples, goat cheese, glazed pecans, and dried cranberries. Drizzle the dressing over the Goat Cheese Apple Salad, toss to mix everything together evenly, and serve immediately.
    APPLE AND GOAT CHEESE SALAD

    💡Hint: Slice apples right before serving or toss with a little lemon juice to prevent browning.

    👩‍🍳 Expert Tips

    • Toast the nuts: Just a few minutes in a dry skillet makes pecans extra fragrant and flavorful.
    • Balance the dressing: Taste as you go. Adjust sweetness with maple or tang with vinegar depending on your apples.
    • Make-ahead friendly: Prep ingredients in advance and toss with dressing just before serving to keep the greens crisp.

    💭 FAQs

    Why Does Goat Cheese Pair Well With Apple Salad?

    Goat cheese, with its tangy flavor and creamy texture, complements the crisp sweetness of apples perfectly. It adds a rich and creamy element to the salad without overpowering the fresh ingredients, making it a delicious and balanced choice.

    What Apples Are Best For Salad?

    Honeycrisp, Pink Lady, Fuji, and Granny Smith all hold up well in apple walnut salad or fall salad recipes. Choose sweet-tart varieties for the best contrast.

    Can I make Apple And Goat Cheese Salad Ahead Of Time?

    Yes! Store the dressing and chopped ingredients separately. Toss everything together just before serving for the best texture.

    Can I Use A Different Dressing For Goat Cheese Apple Salad?

    Absolutely. A simple balsamic vinaigrette or honey mustard dressing works well. Or try a creamy goat cheese salad dressing with Greek yogurt and lemon.

    💖 Serving Suggestions

    Here are some of the best sides to serve with Goat Cheese Apple Salad:

    • Air Fryer Sausage Quiche: Serve alongside a slice of quiche, such as spinach and mushroom quiche or a vegan tofu quiche, for a hearty and satisfying meal.
    • Thin Sliced Chicken Breast: Serve alongside air fryer chicken breast or thighs seasoned with herbs like thyme or rosemary for a flavorful, protein-packed meal.
    • Raw Vegan Bread: Include slices of raw vegan bread, such as sprouted grain bread or nut and seed bread, to complement the salad's fresh flavors.
    • Butternut Squash Soup: Pair with a warm bowl of butternut squash soup, garnished with a swirl of coconut milk or a sprinkle of toasted pumpkin seeds for added texture.
    • Roasted Vegetables: Enjoy with a colorful array of air fryer roasted vegetables, such as zucchini, bell peppers, and sweet potatoes, seasoned with herbs and a drizzle of olive oil.
    Goat Cheese And Apple Salad

    🍽 More Fantastic Recipes To Try!

    • Air Fryer egg plant, seasoned with salt and pepper in a bowl.
      Crispy Air Fryer Eggplant in Just 10 Minutes
    • mango puree in a bowl and sliced mango on the side.
      Easy Mango Puree Recipe - Smooth, Vibrant, & Versatile!
    • Creamy Red Potato Salad in a white serving bowl.
      Creamy Potato Salad With Feta (Red Potatoes)
    • Mushroom Risotto in a bowl.
      Creamy Spinach Mushroom Risotto (Easy & Ready in 30 Minutes!)

    Did you make this recipe? Leave a review and a ⭐⭐⭐⭐⭐ rating below, or tag us in our Facebook Group! Alternatively, bookmark it in your browser or save to Pinterest.

    Best Goat Cheese Apple Salad.

    Goat Cheese Apple Salad

    Angela Milnes
    Indulge in the perfect balance of flavors with this Goat Cheese Apple Salad! Crisp apples, creamy goat cheese, and crunchy nuts come together on a bed of fresh greens for a salad that's both refreshing and satisfying. It's a deliciously light and elegant dish that’s perfect for any occasion!
    5 from 4 votes
    Print Recipe Pin Recipe Rate this Recipe
    Prep Time 5 minutes mins
    Cook Time 15 minutes mins
    Additional Time 0 minutes mins
    Total Time 20 minutes mins
    Course Salads
    Cuisine American
    Servings 2 Servings
    Calories 600 kcal

    Ingredients
      

    • 4 Cups Spring Mix
    • ½ cup Cooked Quinoa
    • 4 slices Bacon
    • 2 Honeycrisp Apples
    • ¼ cup Goat Cheese
    • ¼ cup Glazed Pecans
    • ¼ cup Dried Cranberries
    • 2 tablespoon Bacon Grease
    • 1 tablespoon Red Wine Vinegar
    • 1 tablespoon Dijon Mustard
    • 2 tablespoon Maple Syrup
    • Salt and Pepper to taste

    Instructions
     

    • Prepare the Quinoa: Follow the instructions on the package to cook the quinoa. Set aside to cool.
    • Cook the Bacon: Fry the bacon slices in a skillet until crispy. Transfer the bacon to a plate lined with paper towels to drain off excess grease.
    • Prepare the Apples: While the bacon is cooking, chop the Honeycrisp apples into bite-sized pieces.
    • Make the Dressing: In a small bowl, combine the bacon grease, red wine vinegar, Dijon mustard, and maple syrup. Whisk together until well blended. Season with salt and pepper to taste.
    • Assemble the Salad: In a large serving bowl, layer the spring mix, cooked quinoa, crispy bacon, chopped apples, goat cheese, glazed pecans, and dried cranberries.
    • Serve: Drizzle the dressing over the salad, toss to mix everything together evenly, and serve immediately.

    Notes

    Choose Fresh Ingredients: Opt for crisp apples and fresh greens to ensure vibrant flavors and textures.
    Balance Flavors: Adjust the amount of goat cheese and sweetness from apples to achieve the perfect sweet-tangy balance.
    Toast Nuts: Toasting nuts like walnuts or pecans enhances their flavor and adds a crunchy texture to the salad.

    Nutrition

    Calories: 600kcalCarbohydrates: 72gProtein: 12gFat: 31gSaturated Fat: 11gPolyunsaturated Fat: 7gMonounsaturated Fat: 12gCholesterol: 27mgSodium: 526mgPotassium: 501mgFiber: 8gSugar: 48gVitamin A: 1308IUVitamin C: 27mgCalcium: 114mgIron: 3mg
    Print Recipe Pin Recipe Rate this Recipe
    Tried this recipe?Let us know how it was!

    Grilled Eggplant With Lemon Dip

    July 10, 2024 by Angela Milnes

    Grilled Eggplant With Lemon Dip.

    Grilled Eggplant is smoky, silky, and totally underrated—especially when it’s paired with a tangy lemon yogurt dip. This one’s perfect for summer cookouts, lazy dinners, or leveling up your veggie game.

    And yes, it goes amazingly with Creamy Jalapeno Coleslaw—you’re welcome.

    Grilled eggplant served with dip.

    Eggplant gets a serious glow-up on the grill—think charred edges, tender centers, and tons of flavor. Paired with a cool and creamy lemon garlic dip, this grilled eggplant recipe is a side (or snack!) that disappears fast.

    If you’re into Mediterranean vibes, you’ll also love my Beetroot Hummus and Mediterranean Farro Salad.

    [feast_advanced_jump_to]

    💖 Why This Recipe Works

    • Foolproof Grilling – Just slice, season, and sizzle.
    • Bold Flavor – Smoky eggplant + zesty yogurt dip = magic.
    • Endlessly Flexible – Serve your grilled eggplant solo, with mains, or as part of a mezze board.

    ⭐ Star Ingredients

    Grilled eggplant ingredients.
    • Eggplant – I love how it turns buttery-soft with a touch of char.
    • Greek Yogurt – Cool, creamy, and the perfect dip base.
    • Lemon Juice – Brightens everything up with zingy freshness.
    • Garlic & Dill – Trust me, this combo makes the dip next-level.

    For the complete list of ingredients with measurements and instructions, please see the recipe card at the bottom of the post.

    📖  Substitutions & Variations

    • Go Mediterranean – Add chopped basil, oregano, or parsley. Sprinkle feta on top!
    • Spice It Up – Brush eggplant with chili oil or stir hot sauce into the dip.
    • Garlic Lover? – Double it in the dip and infuse your olive oil too.
    • Switch Veggies – No eggplant? Try portobellos or Roasted Zucchini.
    • Dairy-Free? – Swap in coconut yogurt or cashew cream.

    If smoky veggies are your thing, try this with Balsamic Grilled Vegetables or Air Fryer Bok Choy too!

    🔪How To Cook Grilled Eggplant

    Eggplant halves.
    1. Step 1: Wash the eggplant thoroughly and pat dry with a towel. Slice the eggplant into halves lengthwise.
    Brushing eggplant halves with oil and seasoning.
    1. Step 2: Brush both sides of the eggplant slices with olive oil.
    Seasoning eggplant halves.
    1. Step 3: Season each slice with salt and pepper to taste.
    Seasoned eggplant halves on a baking dish.
    1. Step 4: Preheat your grill to medium-high heat. Place the eggplant slices on the grill. Grill for about 4-5 minutes on each side, or until the eggplant is tender and has nice grill marks.
    Sauce in a bowl.
    1. Step 5: In a medium bowl, add Greek yogurt. Mince the garlic cloves finely and add to the yogurt. Chop the dill finely and add it to the bowl. Add a tablespoon of lemon juice to the mixture. Season with salt and pepper to taste. Stir well to combine all the ingredients until you have a smooth, creamy dip.
    Grilled eggplants.
    1. Step 6: Once cooked, remove eggplant from the grill and set aside to cool slightly. Arrange the grilled eggplant slices on a serving platter. Serve with the prepared yogurt dip on the side. Optionally, garnish the dip with a sprinkle of fresh dill and a drizzle of olive oil.
    Grilled eggplant halves served with sauce.

    👩‍🍳 Expert Tips

    • Pre-salt Your Eggplant – Removes bitterness and improves texture—just rinse and pat dry.
    • Brush With Oil Generously – Keeps the grilled eggplant from sticking and adds golden color.
    • Don't Skip the Chill – Cold dip + hot eggplant = next-level contrast.

    💭 FAQs

    How do I prevent grilled eggplant from becoming mushy when grilling?

    To keep your eggplant slices from getting too mushy, make sure to salt them before grilling. This helps draw out excess moisture. Also, try not to overcook them—grill each side for just a few minutes until the eggplant is tender but still has some structure.

    Can I prepare the lemon dip ahead of time?

    Yes, the lemon dip can be made a few hours in advance. In fact, allowing it to sit in the fridge for a while will help the flavors meld together. Just make sure to give it a good stir before serving.

    What are some variations I can try with the lemon dip?

    If you're looking to mix it up, you can add ingredients like fresh herbs (such as parsley or dill) or a little garlic for extra flavor. A drizzle of olive oil or a spoonful of yogurt can also give it a creamier texture.

    💖 Serving Suggestions

    Here are some great sides to serve with grilled eggplant and lemon dip:

    • Grilled Meats – Perfect with lamb, chicken, or beef.
    • Mediterranean Spread – Add Falafel, Tabbouleh, and Baba Ganoush.
    • Fresh Salads – Try with Korean Cucumber Salad or tomato basil salad.
    • Flatbreads – Scoop it all up with naan, pita, or easy soft flatbreads.
    • Veggie Platters – Serve with Air Fryer Stuffed Bell Peppers or cherry tomatoes.
    • Lemon Herb Couscous – Light, fluffy, and perfect on the side.
    Dipping grilled eggplant in a sauce.

    🍽 More Delicious Dinner Recipes

    • Easy Vegan White Bean Stew.
      Easy Vegan White Bean Stew
    • Creamy Potato and Sausage Chowder.
      Creamy Potato and Sausage Chowder
    • Hearty Beef Pot Pie With Celery And Carrots and s lice of pie cut out.
      Easy Beef Pot Pie With Celery And Carrots
    • Easy Vegetarian Instant Pot Gumbo.
      Easy Vegetarian Instant Pot Gumbo

    Did you make this recipe? Leave a review and a ⭐⭐⭐⭐⭐ rating below, or tag us in our Facebook Group! Alternatively, bookmark it in your browser or save to Pinterest.

    Grilled Eggplant With Lemon Dip.

    Grilled Eggplant And Lemon Dip

    Angela Milnes
    Experience the smoky and tangy flavors of this Grilled Eggplant and Lemon Dip! With tender, charred eggplant blended with fresh lemon juice and a hint of garlic, this dip is creamy, zesty, and utterly addictive. Perfect for spreading on bread, serving with veggies, or as a unique addition to your appetizer spread, it's
    5 from 5 votes
    Print Recipe Pin Recipe Rate this Recipe
    Prep Time 10 minutes mins
    Cook Time 5 minutes mins
    Total Time 15 minutes mins
    Course Side Dish
    Cuisine American
    Servings 4 Servings
    Calories 158 kcal

    Ingredients
      

    • 2 Eggplants
    • 2 Tablespoon Olive Oil
    • 1 Cup Greek Yogurt
    • .5 Lemon
    • 1 pinch Salt And Pepper
    • 4 Strands Dill
    • 2 Garlic Cloves

    Instructions
     

    • Prepare the Eggplant: Wash the eggplant thoroughly and pat dry with a towel. Slice the eggplant into halves lengthwise.
    • Season the Eggplant: Brush both sides of the eggplant slices with olive oil. Season each slice with salt and pepper to taste.
    • Grill the Eggplant: Preheat your grill to medium-high heat. Place the eggplant slices on the grill. Grill for about 4-5 minutes on each side, or until the eggplant is tender and has nice grill marks.
    • Prepare the Dip: In a medium bowl, add Greek yogurt. Mince the garlic cloves finely and add to the yogurt. Chop the dill finely and add it to the bowl. Add a tablespoon of lemon juice to the mixture. Season with salt and pepper to taste. Stir well to combine all the ingredients until you have a smooth, creamy dip.
    • Cool Eggplant: Once cooked, remove eggplant from the grill and set aside to cool slightly.

    Notes

    • Salt the Eggplant Before Grilling: Salt the eggplant slices before grilling to draw out excess moisture and reduce bitterness. After slicing, sprinkle both sides with salt, let sit for 15-30 minutes, then rinse and pat dry.
    • Use Medium-High Heat and Watch Closely: Use medium-high heat and watch closely. Grill eggplant for 4-5 minutes per side until tender with grill marks, flipping gently with tongs to avoid burning.
    • Brush with Oil Generously: Brush with oil generously to prevent sticking and ensure tenderness. Coat both sides of the slices with olive oil for a golden-brown exterior and soft interior.

    Nutrition

    Calories: 158kcalCarbohydrates: 18gProtein: 8gFat: 8gSaturated Fat: 1gPolyunsaturated Fat: 1gMonounsaturated Fat: 5gTrans Fat: 0.003gCholesterol: 3mgSodium: 35mgPotassium: 653mgFiber: 7gSugar: 10gVitamin A: 116IUVitamin C: 13mgCalcium: 100mgIron: 1mg
    Print Recipe Pin Recipe Rate this Recipe
    Tried this recipe?Let us know how it was!

    Air Fryer Cod Fillet

    July 10, 2024 by Angela Milnes

    Air Fryer Cod Fillet.

    Want a restaurant-quality fish dinner in minutes? This air fryer cod fillet comes out perfectly crispy on the outside, flaky on the inside, and packed with flavor. With minimal oil and no messy frying, it’s the easiest way to cook cod at home. Ready in 8 minutes!

    Air fryer cod fillet being served with spoon.
    [feast_advanced_jump_to]

    Why This Recipe Works

    • Crispy, Not Greasy – All the crunch without excess oil
    • Fast & Foolproof – Cooks in under 8 minutes
    • Easy Cleanup – No messy frying, just quick air fryer magic.

    🛒 Ingredients

    Air Fryer Cod Fillet Ingredients.
    • Cod Fillets – Mild, flaky, and cooks quickly in the air fryer, , and a great source of low-fat protein.
    • Avocado Oil – Helps crisp the fillets while keeping them moist and adding a buttery flavor.
    • Lemon – Brightens the fish with fresh acidity.
    • Salt & Black Pepper – Simple seasoning that enhances the flavor.

    For the complete list of ingredients with measurements and instructions, please see the recipe card at the bottom of the post.

    🐟 How Can I Make My Cod Taste Different?

    Try these flavor variations:

    • Asian-Inspired Fusion: Infuse your cod filets with soy sauce, ginger, and sesame oil before air frying for an Asian-inspired dish that's bursting with umami flavors.
    • Crispy Lemon Garlic Delight: Air fry frozen cod with a drizzle of olive oil, a sprinkle of garlic powder, and fresh lemon slices for a burst of citrusy goodness.
    • Spicy Cajun Kick: Spice things up by coating your cod filets in a Cajun seasoning blend before air frying, creating a bold and flavorful dish with a hint of heat.

    🔪How To Make Air Fryer Cod Fillet?

    Marinade in a bowl for cod.

    Step One: In a small bowl, combine avocado oil, fresh lemon juice, salt, dried parsley, and black pepper. Stir the mixture until well blended. Gently pat the cod fillets dry with paper towels to remove excess moisture.

    Applying the oil and spice mixture to both sides of the cod fillets using a brush.

    Step Two: Evenly apply the oil and spice mixture to both sides of the cod fillets using a brush.

    Marinated cod fillets in an air fryer basket.

    Step Three: Preheat your air fryer to 400°F (200°C) for approximately 3-5 minutes. Place the seasoned cod fillets in the air fryer basket in a single layer, ensuring they are not overlapping.

    Cooked cod fillets in an air fryer.

    Step Four: Air fry the cod at 400°F (200°C) for about 8 minutes, or until they achieve a golden brown color and easily flake with a fork. Carefully remove the cooked cod fillets from the air fryer and transfer them to a serving dish. Enjoy your perfectly cooked Air Fryer Cod Fillet!

    Air fried cod fillets on a plate.

    👩‍🍳 Expert Tips

    • Monitor Cooking Time: Keep an eye on the cod filets while they're cooking in the air fryer to prevent overcooking, as fish can become dry if cooked for too long.
    • Use A Thermometer to check for an internal temperature of 145°F.
    • Serve Immediately: For the best taste and texture, serve the air fryer fish fillets immediately after cooking to enjoy them at their freshest.

    💭 FAQs

    Can I Use Olive Oil Instead Of Avocado Oil For This Recipe?

    Yes, you can use olive oil instead of avocado oil. Olive oil will also help keep the cod fillets moist and add a slightly different flavor profile that pairs well with the other ingredients.

    How Long Should I Cook The Cod Fillets In The Air Fryer?

    Cook the cod fillets at 400°F (200°C) for 8 minutes, flipping halfway through. The exact cooking time may vary depending on the thickness of the fillets. The fish should be opaque and flake easily with a fork when done.

    Can I Use Fresh Parsley Instead Of Dried Parsley?

    Yes, you can use fresh parsley instead of dried parsley. Fresh parsley will add a brighter, more vibrant flavor. Simply chop the fresh parsley finely and sprinkle it over the cod fillets before serving.

    Best Way to Store Cod Fillets

    After cooling, store the cooked cod fillets in an airtight container or wrap them in foil before refrigerating. Enjoy within 2-3 days.

    🧂Serving Suggestions

    Here are my favorite sides to serve with Air Fryer Cod Fillet:

    • Mango Salsa: A sweet, tangy contrast to the flaky cod.
    • Roasted Asparagus: Simple yet elegant, roasted asparagus adds a nutritious crunch to your delicious fish dinner.
    • Carrot Rice: Lightly spiced for a flavorful side, carrot rice is a great dish to pair with the air fryer cod fillet.
    • Garlic Confit: Elevate your meal with creamy and aromatic garlic confit. Serve this luxurious condiment alongside the cod fillet for an indulgent touch of flavor.
    • Chopped Italian Salad: The tangy dressing from the salad contrasts nicely with the mild, delicate cod fillets, creating a well-rounded, balanced meal.
    Air fryer cod fillet being served with spoon.

    🍽 Try Cooking These In The Air Fryer

    • Air Fryer Butterfly Chicken With Citrus.
      Air Fryer Butterfly Chicken With Citrus
    • Air Fryer Green Beans Crispy & Delicious.
      Air Fryer Green Beans Crispy & Delicious
    • Air Fryer Chicken Cutlets Panko Recipe.
      Air Fryer Chicken Cutlets Panko Recipe
    • Air Fryer Salmon Fillets.
      Air Fryer Salmon Fillets (Fresh or Frozen)

    Did you make this recipe? Leave a review and a ⭐⭐⭐⭐⭐ rating below, or tag us in our Facebook Group! Alternatively, bookmark it in your browser or save to Pinterest.

    Air Fryer Cod Fillet.

    Air Fryer Cod Fillet

    Angela Milnes
    Dive into a deliciously light and flaky meal with this Air Fryer Cod Fillet! Seasoned just right and cooked to perfection in the air fryer, these cod fillets are crispy on the outside and tender on the inside. Simple, flavorful, and ready in minutes, it's an easy way to enjoy restaurant-quality fish at home!
    5 from 4 votes
    Print Recipe Pin Recipe Rate this Recipe
    Prep Time 5 minutes mins
    Cook Time 8 minutes mins
    Total Time 13 minutes mins
    Course Dinners
    Cuisine Greek
    Servings 2 Servings
    Calories 808 kcal

    Ingredients
      

    • 1 tablespoon Avocado Oil
    • ½ Lemon
    • 1 teaspoon Salt
    • ¼ teaspoon Dried Parsley
    • ¼ teaspoon Black Pepper
    • 2 Cod Fillets

    Instructions
     

    • In a small bowl, combine avocado oil, fresh lemon juice, salt, dried parsley, and black pepper. Stir the mixture until well blended.
    • Gently pat the cod fillets dry with paper towels to remove excess moisture.
    • Evenly apply the oil and spice mixture to both sides of the cod fillets using a brush.
    • Preheat your air fryer to 400°F (200°C) for approximately 3-5 minutes.
    • Place the seasoned cod fillets in the air fryer basket in a single layer, ensuring they are not overlapping.
    • Air fry the cod at 400°F (200°C) for about 8 minutes, or until they achieve a golden brown color and easily flake with a fork.
    • Carefully remove the cooked cod fillets from the air fryer and transfer them to a serving dish. Enjoy your perfectly cooked Air Fryer Cod Fillet!

    Notes

    Monitor Cooking Time: Keep an eye on the cod filets while they're cooking in the air fryer to prevent overcooking, as fish can become dry if cooked for too long.
    Use A Thermometer to check for an internal temperature of 145°F.
    Serve Immediately: For the best taste and texture, serve the air fryer fish fillets immediately after cooking to enjoy them at their freshest.

    Nutrition

    Calories: 808kcalCarbohydrates: 3gProtein: 161gFat: 13gSaturated Fat: 2gPolyunsaturated Fat: 3gMonounsaturated Fat: 6gCholesterol: 387mgSodium: 1940mgPotassium: 3755mgFiber: 1gSugar: 1gVitamin A: 366IUVitamin C: 23mgCalcium: 152mgIron: 4mg
    Print Recipe Pin Recipe Rate this Recipe
    Tried this recipe?Let us know how it was!

    More Delicious Recipes You'll Love

    • Easy Beet Cured Salmon Recipe
    • Air Fryer Asparagus With Parmesan
    • Air Fryer Corn On The Cob
    • Air Fryer Zucchini Fritters
    • Mini Cheese Stuffed Peppers
    • Salmon Sushi Balls Recipe

    Roasted Beet Salad With Feta And Walnuts

    July 10, 2024 by Angela Milnes

    Beet Salad With Feta And Walnuts.

    This vibrant, Roasted Beet Salad with Feta and Walnuts is a flavor-packed mix of earthy beets, creamy feta, and crunchy toasted walnuts—all tossed in a zesty citrus dressing. Easy to prep, and even easier to love.

    Beet Salad With Feta And Walnuts.

    This beet and feta salad is one of those dishes that looks impressive but comes together easily—especially if you roast the beets in advance. I originally made it as a festive side for the holidays, but now it’s a regular in our weekday salad lineup.

    The combination of roasted beetroot, creamy feta, and crunchy walnuts just works. If you love this flavor profile, you’ll also enjoy my Low Carb Broccoli Salad, Quinoa Salad Recipe, or even my Korean Cucumber Salad for something crisp and refreshing on the side.

    [feast_advanced_jump_to]

    💖 Why This Recipe Works

    • Gorgeous & flavorful – Earthy beets, creamy feta, and citrusy dressing = salad magic.
    • Nutritious and filling – Packed with fiber, healthy fats, and vitamins.
    • Easy to prep ahead – Roast the beets early and throw it all together in minutes.

    🥗 Star Ingredients

    Beet Salad With Feta Ingredients.
    • Beets – Naturally Sweet & Nutritious Roasting deepens their sweetness while keeping nutrients intact. Plus, they add that pop of color!
    • Feta Cheese – The Creamy Game-Changer Crumble cold for even pieces, then let it warm up for max creaminess. Salty tang balances the beets perfectly!
    • Toasted Walnuts – The Ultimate Crunch Factor I love walnut halves—they're fresh, rich, and packed with omega-3s. Toast lightly and sprinkle with sea salt for extra flavor!

    For the complete list of ingredients with measurements and instructions, please see the recipe card at the bottom of the post.

    📖  Substitutions & Variations

    • Use canned beets if you're short on time—just rinse and pat dry.
    • Swap feta for goat cheese or ricotta salata if preferred.
    • Toss in fruit like orange segments, apples, or dried cranberries.
    • Change up the greens with spinach, kale, or mixed baby lettuce.
    • Go vegan with a dairy-free feta or extra nuts and seeds for texture.

    Want more beet recipes? Try my Roasted Beet Salad with Pomegranate Molasses or Beet Sweet Potato Salad With Feta!

    🔪How To Make Roasted Beet Salad With Feta And Walnuts

    Here are the step-by-step instructions for your beetroot and feta salad:

    Preparing beetroots to roast.
    1. Step 1: Wash the beets thoroughly and trim the tops and bottoms.
    Beetroot wrapped in foil on a baking tray.
    1. Step 2: Wrap each beet individually in aluminum foil and place them on a baking sheet. Preheat your oven to 400°F (200°C).
    Roasted beetroot in tin foil.
    1. Step 3: Roast in the preheated oven for 45-60 minutes, or until they are tender when pierced with a fork. Remove the beets from the oven and allow them to cool.
    Roasted beetroot peeled.
    1. Step 4: Once cooled, peel the beets by rubbing the skins off with your hands or using a knife.
    Chopped roasted beetroot.
    1. Step 5: Dice the beets into bite-sized pieces, or if preferred, slice the beets instead.
    Beet salad with feta in a bowl.
    1. Step 6: Place the baby arugula in a large salad bowl. Add the diced roasted beets, crumbled feta cheese, thinly sliced red onion, toasted walnuts, and orange sections to the bowl.
    honey mustard dressing for beetroot salad.
    1. Step 7: In a small bowl or jar, combine the extra virgin olive oil, lemon juice, Dijon mustard, and honey. Whisk or shake the ingredients together until well combined.
    Pouring salad dressing over beetroot salad.
    1. Step 8: Drizzle the dressing over your feta and beetroot salad. Gently toss the salad to ensure all ingredients are evenly coated with the dressing. Serve your salad immediately as a refreshing and flavorful dish. Enjoy this delicious beet feta salad with walnuts!
    Beet salad in a bowl.

    💡Hint: Taste your dressing before adding it—adjust with more lemon for brightness or honey for sweetness.

    👩‍🍳 Expert Tips

    • Roasting Beets Like a Boss – Stick a fork in 'em—if it slides in like butter, they’re done! Let them cool, and the skins will practically fall off. No peeling struggle here!
    • Feta Crumbling 101 – Cold feta = perfect crumbles. Use a fork to break it up, then let it warm up for that dreamy, creamy texture.
    • Toast those nuts! – Just 5 minutes in a dry skillet makes a big difference in flavor.

    💭 FAQs

    Can I use canned beets for this salad?

    Yes! Drain and dice them. Roasted beets add more flavor, but canned works in a pinch.

    How do I store leftover beet salad?

    Keep in an airtight container in the fridge for up to 3 days. Store the dressing separately to avoid soggy greens.

    Can I substitute the feta cheese?

    If you're not a fan of feta, goat cheese or ricotta salata are great alternatives. Both will still provide a creamy, tangy contrast to the sweetness of the beets.

    How can I make this salad vegan?

    To make this salad vegan, simply swap the feta cheese for a plant-based alternative like vegan feta or nutritional yeast. You can also add more nuts or seeds for added texture and flavor.

    Best way to store beetroot and feta salad?

    Store any leftover beet salad in an airtight container in the refrigerator for up to 2-3 days.

    💖 Serving Suggestions

    Here are my favorite sides to serve with Beet Salad with Feta and Walnuts:

    • Thin Sliced Chicken Breast – Mediterranean-style goodness. Marinate with lemon, garlic, and herbs for extra flavor. A light, juicy protein to balance the hearty beets.
    • Seared Salmon – Flaky, rich, and delicious. The buttery texture of salmon pairs beautifully with the earthy beets and tangy feta. Drizzle with a citrus glaze for a next-level combo!
    • Sliced Steak – Hearty and satisfying. Slice up a juicy flank or sirloin steak, seasoned simply with salt, pepper, and garlic. Perfect for adding a bold, meaty contrast.
    • Paprika Shrimp – Light, citrusy perfection. Toss shrimp in olive oil, lemon, and paprika before grilling. Their bright, briny flavor enhances the salad’s fresh notes.
    • Crispy Chickpeas – Crunchy, smoky, and protein-packed. Roast chickpeas with smoked paprika and cumin for a plant-based protein boost. Adds a deliciously crispy texture to the mix!
    Beetroot salad in a bowl.

    🍽 More Beetroot Recipes

    • Beetroot Ravioli With Goat Cheese.
      Beetroot Ravioli With Goat Cheese
    • Roasted Beetroot Salad With Honey Mustard Dressing.
      Roasted Beetroot Salad With Honey Mustard Dressing
    • Vegan Beetroot And Black Bean Burger.
      Vegan Beetroot And Black Bean Burger
    • Beetroot Carpaccio.
      Beetroot Carpaccio With Goat Cheese

    Did you make this recipe? Leave a review and a ⭐⭐⭐⭐⭐ rating below, or tag us in our Facebook Group! Alternatively, bookmark it in your browser or save to Pinterest.

    Beet Salad With Feta And Walnuts.

    Beet Salad With Feta And Walnuts

    Angela Milnes
    This Beet Salad with Feta and Walnuts is a perfect balance of earthy, sweet, and tangy flavors! Roasted beets are paired with creamy feta and crunchy walnuts, then drizzled with a light vinaigrette for a refreshing and satisfying salad.
    5 from 4 votes
    Print Recipe Pin Recipe Rate this Recipe
    Prep Time 5 minutes mins
    Cook Time 40 minutes mins
    Total Time 45 minutes mins
    Course Salads
    Cuisine American
    Servings 3 Servings
    Calories 319 kcal

    Ingredients
      

    • 6 cups Baby Arugula
    • 2 Medium Beets roasted, peeled, and diced
    • ½ cup Feta Cheese crumbled
    • ½ Red Onion thinly sliced
    • ¼ cup Organic Walnut Halves Toasted
    • 1 Orange sectioned
    • 3 tablespoons Extra Virgin Olive Oil
    • 1 ½ tablespoons Lemon Juice
    • ½ teaspoon Dijon Mustard
    • ¼ teaspoon Honey

    Instructions
     

    • Preheat your oven to 400°F (200°C). Wash the beets thoroughly and trim the tops and bottoms.
    • Wrap each beet individually in aluminum foil and place them on a baking sheet.
    • Roast in the preheated oven for 45-60 minutes, or until they are tender when pierced with a fork.
    • Remove the beets from the oven and allow them to cool. Once cooled, peel the beets by rubbing the skins off with your hands or using a knife.
    • Place the baby arugula in a large salad bowl. Add the diced roasted beets, crumbled feta cheese, thinly sliced red onion, toasted walnuts, and orange sections to the bowl.
    • Dice the beets into bite-sized pieces.
    • In a small bowl or jar, combine the extra virgin olive oil, lemon juice, Dijon mustard, and honey. Whisk or shake the ingredients together until well combined.
    • Drizzle the dressing over the salad. Gently toss the salad to ensure all ingredients are evenly coated with the dressing.
    • Serve the salad immediately as a refreshing and flavorful dish.

    Notes

    Perfectly Roasted Beets: To ensure your beets are roasted well insert a skewer or a fork into the center of the beet; it should slide in easily without resistance. Once cooled, the skins will peel off effortlessly, leaving you with tender and flavorful beets.
    Crumbling Feta Cheese: For evenly crumbled feta cheese, use a fork to break up the block of cheese while it’s still cold. This will give you fine, even crumbles that distribute more uniformly throughout the salad. Allow the cheese to come to room temperature before adding it to the salad to enhance its creamy texture and flavor.
    Balancing Flavors: To achieve a well-balanced salad, make sure to taste your dressing before adding it to the salad. Adjust the acidity with more lemon juice if needed or add a bit more honey for sweetness. Drizzle the dressing lightly over the salad, and toss gently to ensure all ingredients are evenly coated without overpowering the delicate flavors.

    Nutrition

    Serving: 1gCalories: 319kcalCarbohydrates: 17gProtein: 8gFat: 26gSaturated Fat: 6gPolyunsaturated Fat: 6gMonounsaturated Fat: 12gCholesterol: 22mgSodium: 349mgPotassium: 499mgFiber: 4gSugar: 10gVitamin A: 1174IUVitamin C: 36mgCalcium: 228mgIron: 2mg
    Print Recipe Pin Recipe Rate this Recipe
    Tried this recipe?Let us know how it was!

    Best Butterfly Pea Tea Lemonade Recipe

    July 10, 2024 by Angela Milnes

    Best Butterfly Pea Tea Lemonade in a mason jar with slices of lemon and a white straw.

    Have you seen a drink more magical than Butterfly Pea Tea Lemonade? This vibrant blue beauty is soothing, caffeine-free, and turns a stunning purple when lemon is added. It’s the kind of drink that feels fancy but is secretly super simple.

    Best Butterfly Pea Tea Lemonade in a mason jar with slices of lemon and a white straw.

    Why Butterfly Pea Tea Is Having a Moment

    Butterfly Pea Tea is blowing up on social media, and for good reason—its natural color-shifting magic is perfect for parties, summer sips, and wellness routines. Plus, it's fun for both kids and grown-ups alike!

    If you love playful, healthy drinks, try our refreshing Watermelon Juice or the dreamy Vegan Banana Avocado Smoothie.

    [feast_advanced_jump_to]

    💖 Why This Recipe Works

    • Naturally colorful and mesmerizing—hello, purple magic!
    • Subtly floral and citrusy, with a relaxing herbal vibe
    • So easy to make and perfect for batching ahead of time

    ⭐ Star Ingredients

    Butterfly Pea Tea Ingredients.
    • Butterfly Pea Flowers: These little blue blooms are the star of the show! Mild, earthy, and totally magical when they touch lemon.
    • Lemon Juice: Not just for zing—it’s the secret to the mesmerizing color change.
    • Sugar (or your fave sweetener): Brings balance and a little extra yum to the tangy citrus notes.
    • Optional Add-Ins: Blue matcha for more antioxidant power, or lavender buds for dreamy, spa-day energy.

    For the complete list of ingredients with measurements and instructions, please see the recipe card at the bottom of the post.

    📖 Substitutions & Variations

    • Use honey or agave instead of sugar for a different twist
    • Add mint or lemongrass for a refreshing herbal edge
    • Swap lemon with lime for a tarter flavor profile
    • Make it sparkling with soda water for a fizzy, fun version
    • Serve it as a cocktail with gin or vodka—adults only!
    • Turn it into a popsicle for a cool summer treat

    You might also love my Dragon Fruit Smoothie or a chill glass of Beetroot Juice for more naturally colorful sips.

    How To Make Butterfly Pea Flower Tea Lemonade

    Butterfly pea flowers and lavender buds in a pan.
    1. Step 1: In a small saucepan over low heat, combine 1 cup of water and 1 cup of sugar. Stir over low heat until the sugar has fully dissolved. Turn off the heat and add the butterfly pea flowers, lavender buds (if using), and blue matcha. Cover the saucepan and allow the mixture to steep for up to 10 minutes.
    Butterfly pea tea in a jar.
    1. Step 2: Once the tea has finished steeping, strain out the flowers using a fine strainer or cheesecloth. Allow the syrup mixture to cool completely, then transfer it to a mason jar.
    Adding lemon juice water in butterfly pea syrup.
    1. Step 3: In a pitcher, combine the lemon juice with the remaining 5 cups of water. Slowly pour the cooled syrup into the bottom of the pitcher. Pour the lemon juice and water mixture over the syrup.
    Butterfly Lemonade with lemons a glass jar.
    1. Step 4: Stir together until well combined. Serve the Butterfly Pea Tea over ice cubes. Garnish with fresh lemon slices, if desired. Enjoy your refreshing Butterfly Pea Tea drink!

    💡Hint: For a gradient effect, pour the lemon mixture slowly over the back of a spoon onto the syrup—makes for a show-stopping party drink.

    👩‍🍳 Expert Tips

    • Don’t over-steep the flowers—too long can make the flavor bitter.
    • For a deeper color, use more butterfly pea flowers or a dash of blue matcha.
    • Want to impress guests? Serve it in clear glasses and pour the lemon last to show off the color change!

    Butterfly Pea Tea FAQs

    What is Butterfly Pea Tea good for?

    It’s naturally caffeine-free and packed with antioxidants—great for winding down without the jitters.

    Why does Butterfly Pea Tea Lemonade change color?

    The anthocyanins in the flowers react to the acidity of lemon juice, shifting the color from blue to violet or pink.

    Can I drink Butterfly Pea Tea hot?

    Yes! You can enjoy this tea hot—just skip the ice and enjoy the soothing vibes.

    How long does Butterfly Pea Tea last in the fridge?

    Store it in a sealed container and enjoy within 3–4 days for the best flavor.

    💖 Serving Suggestions

    • Pour into mason jars with lemon wheels for a party-ready pitcher.
    • Freeze in ice cube trays for colorful drink toppers.
    • Serve with Pineapple Banana Smoothie for a tropical brunch.
    • Pair with Russian Tarragon Soda (Yoda Soda) for a quirky, herbal drink bar.
    • Sip alongside a fruity snack board or summer picnic spread.

    🍽 Try These Colorful Recipes

    • Mashed purple cauliflower in a bowl.
      Purple Cauliflower Puree (Mashed Cauliflower)
    • Best Beetroot Hummus Recipe.
      Best Beetroot Hummus Recipe (Vegan)
    • Air Fryer Carrot Fries.
      Crispy Air Fryer Carrot Fries
    • Easy Beet Cured Salmon Recipe.
      Easy Beet Cured Salmon Recipe

    Did you make this recipe? Leave a review and a ⭐⭐⭐⭐⭐ rating below, or tag us on our Facebook Page! Alternatively, bookmark it in your browser or save to Pinterest.

    Butterfly pea tea lemonade served with ice in glass.
    Best Butterfly Pea Tea Lemonade in a mason jar with slices of lemon and a white straw.

    Butterfly Pea Tea Lemonade Recipe

    Angela Milnes
    Experience a sip of magic with Butterfly Pea Tea Lemonade! This enchanting blue tea, made from butterfly pea flowers, is naturally caffeine-free and packed with antioxidants.
    5 from 3 votes
    Print Recipe Pin Recipe Rate this Recipe
    Prep Time 5 minutes mins
    Cook Time 0 minutes mins
    Total Time 5 minutes mins
    Course Drinks
    Cuisine American
    Servings 6 Servings
    Calories 148 kcal

    Ingredients
      

    • ½ Cup Butterfly Pea Flowers lightly packed dried flowers
    • 6 Cups Water divided
    • 1 Cup Lemon Juice
    • 1 Cup Sugar
    • 1 Tablespoon Dried Food Grade Lavender Buds optional
    • 1 Teaspoon Blue Matcha optional

    Instructions
     

    • In a small saucepan over low heat, combine 1 cup of water and 1 cup of sugar. Stir over low heat until the sugar has fully dissolved. Turn off the heat and add the butterfly pea flowers, lavender buds (if using), and blue matcha. Cover the saucepan and allow the mixture to steep for up to 10 minutes.
    • Once the tea has finished steeping, strain out the flowers using a fine strainer or cheesecloth. Allow the syrup mixture to cool completely, then transfer it to a mason jar.
    • In a pitcher, combine the lemon juice with the remaining 5 cups of water.
    • Slowly pour the cooled syrup into the bottom of the pitcher. Pour the lemon juice and water mixture over the syrup. Stir together until well combined.
    • Serve the Butterfly Pea Tea over ice cubes. Garnish with fresh lemon slices, if desired.
    • Enjoy your refreshing Butterfly Pea Tea!

    Notes

    • Don’t over-steep the flowers—too long can make the flavor bitter.
    • For a deeper color, use more butterfly pea flowers or a dash of blue matcha.
    • Want to impress guests? Serve it in clear glasses and pour the lemon last to show off the color change!

    Nutrition

    Serving: 1gCalories: 148kcalCarbohydrates: 38gProtein: 1gSodium: 21mgFiber: 1gSugar: 35g
    Print Recipe Pin Recipe Rate this Recipe
    Tried this recipe?Let us know how it was!

    Best Vegan Oat Milk Recipe

    July 10, 2024 by Angela Milnes

    Best Vegan Oat Milk Recipe.

    This creamy Vegan Oat Milk is the easiest non-dairy milk you’ll ever make—just oats, water, and a blender. It’s smooth, budget-friendly, and ready in minutes!

    Vegan Oat Milk
    [feast_advanced_jump_to]

    💖 Why This Recipe Works

    • Tastes Better: Smooth, lightly sweet, and customizable.
    • No Fancy Equipment: Just a blender and strainer—no nut milk bags needed.
    • Budget & Eco-Friendly: Made from pantry staples in under 5 minutes!

    ⭐ Star Ingredients

    Vegan Oat Milk Ingredients
    • Old-Fashioned Oats: I always reach for rolled oats because they make the creamiest oat milk—quick oats get a little too mushy, and steel-cut oats just don’t blend the same.
    • Cold Water: Trust me, cold water is key! It keeps the milk from getting slimy and helps everything blend smoothly.
    • Medjool Dates: These are my go-to for natural sweetness. They give the milk a subtle caramel flavor without any added sugar—and no weird aftertaste like some store-bought versions.

    For the complete list of ingredients with measurements and instructions, please see the recipe card at the bottom of the post.

    📖 Substitutions & Variations

    • Sweetener Swap: Use maple syrup, agave, or leave it unsweetened.
    • No Vanilla?: Try almond extract or skip it for a neutral flavor.
    • Add a Pinch of Salt: Enhances flavor, especially in savory recipes.
    • Make it Chocolate: Blend in cocoa powder and a touch of sweetener.
    • Creamier Texture: Add a spoonful of cashew butter or soaked almonds.

    Want more oat inspiration? Try my Vanilla Overnight Oats With Almond Milk or Vegan Waffles With Pumpkin.

    🔪 How To Make Vegan Oat Milk

    Ready to make homemade oat milk? Here's the process you'll need to follow.

    Vegan Oat Milk
    1. Step 1: Remove the pit from the dates if they are not pitted yet. Make sure your water is cold, otherwise the vegan oat milk can become slimy.
    Vegan Oat Milk
    1. Step 2: Add all ingredients in the blender and blend for about 30-60 seconds.
    Vegan Oat Milk
    1. Step 3: Using a strainer or cheese cloth, gently squeeze and strain the milk and discard the oat pulp.
    Vegan Oat Milk
    1. Step 4: Keep cool for up to 2 weeks.

    💡Hint: For extra-smooth oat milk, strain twice!

    Vegan Oat Milk

    👩‍🍳 Expert Tips

    • Use Gluten-Free Oats: If you're avoiding gluten, be sure to grab certified gluten-free rolled oats.
    • No Blender?: A food processor can work in a pinch—it may take a little longer to blend and strain, but it still gets the job done.
    • Save the Pulp: Don’t toss that leftover oat pulp! Add it to muffins, cookies, pancakes, or stir into your next smoothie.
    • Customize It: Want a frothy finish? Add a spoonful of cashew butter or almond butter to the blend for a barista-style result.

    💭 FAQs

    Why Make Oat Milk?

    It’s cheaper, fresher, and free from preservatives and added sugars. Plus, you control the flavor and consistency.

    What Can I Do With The Leftover Oat Pulp?

    Use it in baking, overnight oats, energy bites, or blend it into smoothies for added fiber.

    Best Way to Store Oat Milk?

    In a sealed glass jar in the fridge. Shake before using: natural separation is normal.

    Can I freeze oat milk?

    Yes, but it may separate when thawed. Use frozen oat milk in baking or smoothies.

    💖 Serving Suggestions

    Pair your homemade oat milk with:

    • Vegan Kitchen Sink Cookies: Dunk-worthy and delicious.
    • Mixed Berry Smoothie: Use oat milk as the base for a dairy-free smoothie.
    • Granola: Classic combo for breakfast or snacking.
    • Vegan Avocado Toast: A creamy and savory pairing.
    • Fruit Salad: Refreshing and naturally sweet.

    🍽 More Plant Based Recipes

    • Zucchini Lasagna Rolls With Eggplant.
      Zucchini Lasagna Rolls With Eggplant
    • Crispy Air Fryer Avocado Fries Recipe.
      Crispy Air Fryer Avocado Fries Recipe
    • Best Vegan Fall Harvest Salad.
      Best Vegan Fall Harvest Salad
    • Best Beetroot Hummus Recipe.
      Best Beetroot Hummus Recipe (Vegan)

    Did you make this recipe? Leave a review and a ⭐⭐⭐⭐⭐ rating below, or tag us in our Facebook Group! Alternatively, bookmark it in your browser or save to Pinterest.

    Best Vegan Oat Milk Recipe.

    Best Oat Milk

    Angela Milnes
    This easy homemade oat milk recipe is super easy, and a great non dairy milk option for anyone wanting to make oat milk.
    5 from 3 votes
    Print Recipe Pin Recipe Rate this Recipe
    Prep Time 10 minutes mins
    Cook Time 0 minutes mins
    Total Time 10 minutes mins
    Course Vegan
    Cuisine American
    Servings 2 Servings
    Calories 228 kcal

    Ingredients
      

    • 1 cup Old Fashioned Oats
    • 6 cups Cold Water
    • 2 Medjool Dates
    • 1 teaspoon Vanilla Extract
    • 1 teaspoon Cinnamon Powder

    Instructions
     

    • Ready to make homemade oat milk? Here's the process you'll need to follow.
    • Remove the pit from the dates if they are not pitted yet.
    • Make sure your water is cold, otherwise the vegan oat milk can become slimy.
    • Add all ingredients in the blender and blend for about 30-60 seconds.
    • Using a strainer or cheese cloth, gently squeeze and strain the milk and discard the oat pulp.
    • Keep cool for up to 2 weeks.

    Nutrition

    Serving: 1gCalories: 228kcalCarbohydrates: 47gProtein: 6gFat: 3gSaturated Fat: 0.5gPolyunsaturated Fat: 1gMonounsaturated Fat: 1gSodium: 3mgPotassium: 321mgFiber: 6gSugar: 17gVitamin A: 39IUVitamin C: 0.04mgCalcium: 47mgIron: 2mg
    Print Recipe Pin Recipe Rate this Recipe
    Tried this recipe?Let us know how it was!

    How To Make Watermelon Juice

    July 10, 2024 by Angela Milnes

    How To Make Watermelon Juice.

    This easy 2 ingredient Watermelon Juice is the perfect summer drink that needs no prep time. Not only is it a good thirst quenched, but the blended watermelon is delicious, which makes this the perfect drink to enjoy on a hot day.

    Two glasses of watermelon juice.
    [feast_advanced_jump_to]

    💖 Why This Recipe Works

    • I've tried quite a few fruit juices and refreshing beverages, but this one has to be one of my favorite summer drinks of all times.
    • The Watermelon Juice recipe is perfect to try during watermelon season and is a great way to stay hydrated during the hot summer days.
    • Plus, it is perfectly sweet, and comes together in just minutes. Pair with Lemon Pie Traditional Banana Cream Pie or Creamy Vanilla Eclair Cake as a tasty summer treat.

    ⭐ Star Ingredients

    Here's all you'll need to make this simple watermelon juice.

    Watermelon Juice Ingredients.
    • Watermelon: You'll need fresh watermelon chunks for this recipe. I would recommend using seedless watermelon for best results and choose a ripe, juicy watermelon.
    • Water: You'll also need some ice cubes or cold water to make it easier for you to blend the watermelon chunks.

    For the complete list of ingredients with measurements and instructions, please see the recipe card at the bottom of the post.

    📖  Substitutions & Variations

    • To make this juice more healthy, you can also add some coconut water into the mix as opposed to regular water.
    • You can also top the watermelon juice with some fresh mint leaves right before serving.

    🔪How To Make Watermelon Juice

    Blending watermelon with water in food processor.
    1. Step 1: Cut the watermelon into quarters. Then remove the peel all around. Discard the peel and make watermelon cubes. Add the watermelon cubes in the blender or a food processor. Add the water to the blender.
    Straining watermelon juice.
    1. Step 2: Blend until smooth. Using a strainer, strain the juice and pour it in a pitcher. Keep refrigerated.
    Watermelon juice in a glass.

    👩‍🍳 Expert Tips

    While this juice recipe is super easy, you might want to take note of these tips and tricks too.

    • Since this juice is naturally sweet, there's no need for any added sugar.
    • If you're starting off with a whole watermelon, you might want to remove both the black and white seeds before you blend it into a juice.
    • If you want to lend this watermelon juice some extra flavor, you can add a dash of lemon juice or lime juice into the mix. This will also add a nice bit of vitamin C into this refreshing drink.
    • Use a fine mesh strainer or a nut milk bag to get rid of all the excess solids from the juice. If you love watermelon and don't mind the chunks, you can skip this step too.
    • You can also add some cubed watermelon into your glass of watermelon juice, and top it with some fresh mint and a little lime juice to make it a refreshing summer drink you'll never forget.

    💭 FAQs

    Can I use watermelon with seeds to make juice?

    Yes, you can use watermelon with seeds to make juice, but it’s easier to use seedless watermelon. If you do use a seeded watermelon, just make sure to remove the seeds before blending for a smoother juice.

    How do I make my watermelon juice sweeter?

    If your watermelon isn’t as sweet as you'd like, you can add a little honey, agave syrup, or a splash of lime juice to enhance the flavor. You could also try adding a few pieces of other fruits like pineapple or strawberries for a different twist.

    Can I store watermelon juice for later?

    Watermelon juice is best enjoyed fresh, but you can store it in an airtight container in the fridge for up to 2 days. Just give it a good shake before drinking, as it may separate over time.

    Is it necessary to strain watermelon juice?

    Straining the juice is optional. If you prefer a smoother, clearer juice, you can strain it to remove pulp. However, leaving it unstrained gives you more fiber, making it a bit thicker and more refreshing.

    Best Way to Store Watermelon Juice

    You can store your leftover watermelon juice in an airtight container or clean glasses that are covered. This juice can stay fresh for up to 2 days.

    💖 Serving Suggestions

    • Serve Over Ice: Pour the watermelon juice into glasses over ice for a refreshing, chilled drink on hot days.
    • Garnish with Fresh Mint: Add a sprig of fresh mint or a slice of lime to enhance the flavor and appearance of the juice.
    • Pair with a Light Snack: Enjoy the juice with a light snack like fresh fruit or a light salad for a refreshing and hydrating treat.
    • Serve at Summer Parties: Make a large batch and serve this vibrant juice at summer BBQs or pool parties for a cooling, crowd-pleasing beverage.
    A glass of watermelon juice in a hand.

    🍽 Other Drinks You'll Love

    • Passion Fruit Juice.
      Best Passion Fruit Juice Recipe
    • Easy Orange Carrot Ginger Juice.
      Easy Orange Carrot Ginger Juice
    • homemade beetroot juice in a glass.
      How To Make Beetroot Juice
    • Cucumber juice in a glass with a straw.
      Easy Celery and Cucumber Juice Recipe

    Did you make this recipe? Leave a review and a ⭐⭐⭐⭐⭐ rating below, or tag us in our Facebook Group! Alternatively, bookmark it in your browser or save to Pinterest.

    How To Make Watermelon Juice.

    Watermelon Juice

    Angela Milnes
    Quench your thirst with this refreshing Watermelon Juice! Made from sweet, juicy watermelon, this drink is the ultimate way to stay cool on a hot day.
    5 from 3 votes
    Print Recipe Pin Recipe Rate this Recipe
    Prep Time 5 minutes mins
    Cook Time 0 minutes mins
    Total Time 5 minutes mins
    Course Drinks
    Cuisine American
    Servings 4 Servings
    Calories 338 kcal

    Ingredients
      

    • 1 Watermelon
    • 1 cup Water

    Instructions
     

    • Cut the watermelon into quarters. Then remove the peel all around. Discard the peel and make watermelon cubes.
    • Add the watermelon cubes into the blender or a food processor. Add the water to the blender.
    • Blend until smooth. Using a strainer, strain the juice and pour it into a pitcher. Keep refrigerated.

    Notes

    Since this juice is naturally sweet, there's no need for any added sugar.
    If you're starting off with a whole watermelon, you might want to remove both the black and white seeds before you blend it into a juice.
    If you want to lend this watermelon juice some extra flavor, you can add a dash of lemon juice or lime juice into the mix. This will also add a nice bit of vitamin C into this refreshing drink.
    Use a fine mesh strainer or a nut milk bag to get rid of all the excess solids from the juice. If you love watermelon and don't mind the chunks, you can skip this step too.
    You can also add some cubed watermelon into your glass of watermelon juice, and top it with some fresh mint and a little lime juice to make it a refreshing summer drink you'll never forget.

    Nutrition

    Serving: 1gCalories: 338kcalCarbohydrates: 85gProtein: 7gFat: 2gSaturated Fat: 0.2gPolyunsaturated Fat: 1gMonounsaturated Fat: 0.4gSodium: 14mgPotassium: 1260mgFiber: 5gSugar: 70gVitamin A: 6401IUVitamin C: 91mgCalcium: 81mgIron: 3mg
    Print Recipe Pin Recipe Rate this Recipe
    Tried this recipe?Let us know how it was!

    More Fantastic Homemade Drinks

    If you enjoyed this easy juice recipe, and are interested in trying out some more delicious recipes, here are a few good ideas worth checking out.

    • Best Mangonada Recipe
    • Vegan Mixed Berry Smoothie
    • Vegan Tropical Smoothie
    • Vegan Oat Milk
    • Passion Fruit Juice
    • Butterfly Pea Tea Lemonade
    • Orange Carrot Ginger Juice
    • Homemade Egg Nog with Vanilla And Cinnamon
    • Beetroot Juice
    • Best Brazilian Limeade Recipe

    Mango Pineapple Smoothie

    July 10, 2024 by Angela Milnes

    Mango Pineapple Smoothie.

    Packed with creamy, fruity flavors, this Mango Pineapple Smoothie recipe has everything you're looking for in a healthy breakfast or an filling snack. The smoothie is super easy to make and can be a delicious and healthy tropical drink to enjoy when you're craving for something sweet and yummy.

    Mango Pineapple Smoothie

    If you love this smoothie recipe be sure to check out more smoothies. From Pineapple Smoothie Drink With Banana And Honey, to our Easy Dragon Fruit Smoothie Recipe to our Loaded Blueberry Smoothie Bowl. There is something everyone will love.

    [feast_advanced_jump_to]

    💖 Why This Recipe Works

    • Tasty: My favorite part about this Mango Pineapple Smoothie, or practically any other smoothie recipes for that matter is the fact that they pack in so many amazing Healthy Fruits and ingredients in an easy to eat format.
    • Vitamins: Smoothies are a great way to fill you up and get lots of fiber, vitamins and Important Nutrients.
    • No Mess: Plus, they make minimal mess, which means less cleanup time, which is a big win in my books.

    ⭐ Star Ingredients

    To make this tropical smoothie from scratch, here's all you'll need.

    Vegan Tropical Smoothie Ingredients
    • Coconut Milk: Adds creaminess and infuses the smoothie with a tropical coconut flavor.
    • Frozen pineapple chunks: Provides a tangy sweetness and contributes to the tropical vibe.
    • Frozen mango chunks: Imparts a sweet, refreshing flavor and boosts the vitamin C content.
    • Banana: Acts as the base, giving the smoothie a creamy texture and natural sweetness.
    • Lime: Brings in a citrusy twist, balancing out the sweetness.
    • Mint leaves: Serves as a garnish, adding a fresh and cooling touch.

    For the complete list of ingredients with measurements and instructions, please see the recipe card at the bottom of the post.

    📖  Substitutions & Variations

    • I've used mango chunks and pineapple as the key ingredients, in addition to the bananas for this amazing vegan tropical smoothie recipe.
    • To make the smoothie more healthy, you can also add some spinach into it. Read here to learn How To Freeze Spinach for useful tips.
    • Based on what you can get your hands on, you can try adding lots of different fruits too.
    • Kiwi, peaches, papaya, guava and strawberries are all great fresh fruit choices. You can also add some pineapple juice and orange juice into your tropical smoothies if want a bit of that extra sweet flavor.

    🔪How To Make Mango Pineapple Smoothie

    Vegan Tropical Smoothie
    1. Step 1: Peel your banana and break it into 2 or 4 pieces. Add to your blender.
    Vegan Tropical Smoothie
    1. Step 2: Add the frozen mango and pineapple chunks to the blender.
    Vegan Tropical Smoothie
    1. Step 3: Then, squeeze the juice of one lime and add it to the blender. Then pour your coconut milk over your ingredients in the blender.
    Vegan Tropical Smoothie
    1. Step 4: Blend until smooth. Garnish with lime wedges and mint. Serve immediately.
    Vegan Tropical Smoothie

    👩‍🍳 Expert Tips

    Ready to try this fun and refreshing smoothie recipe? Here are some more tips and tricks to help you nail the recipe.

    • Flax seeds and chia seeds can be great add ins to consider throwing into this vegan tropical fruit smoothie. They're perfect to add if you're looking for a thicker smoothie.
    • Another great idea to get a nice thick smoothie is to use frozen fruit instead of starting off with fresh fruit. Frozen banana, in particular, is great!
    • I didn't add any sugar into the drink, because I wanted to keep it healthy and let the flavor and sweetness of the fresh fruits shine.
    • If you want a thinner smoothie, you can add some coconut water into it while blending it. Coconut water can also be a great alternative if you don't have coconut milk.
    • Vanilla almond milk can be another great alternative to coconut milk in this vegan smoothie recipe, and can add some creaminess to the smoothie.
    • To make this refreshing and delicious smoothie more healthy, you can also add a scoop of protein powder into the mix.

    💭 FAQs

    Can I use frozen fruit for this smoothie?

    Yes, using frozen mango and pineapple will actually give your smoothie a thicker, creamier texture. Plus, it keeps the smoothie cold without needing ice, which can dilute the flavor.

    What can I substitute for yogurt in this smoothie?

    If you're looking for a dairy-free option, you can use coconut yogurt, almond milk, or a banana. These alternatives will still give you a creamy consistency and complement the tropical flavors well.

    How can I make my Mango Pineapple Smoothie less sweet?

    If the smoothie turns out too sweet for your taste, try reducing the amount of fruit or using unsweetened yogurt or a splash of water. You can also balance the sweetness by adding a squeeze of lime juice or a handful of leafy greens like spinach.

    Can I add protein to this smoothie?

    Definitely! You can add a scoop of protein powder, a tablespoon of chia seeds, or even a handful of oats to boost the protein content without compromising the flavor.

    💖 Serving Suggestions

    Here are some of the best sides to serve with Vegan Tropical Smoothie:

    • Fresh Fruit: Serve a platter of fresh fruit alongside the smoothie. Slices of mango, pineapple, kiwi, strawberries, and banana would be perfect complements to enhance the tropical theme.
    • Yogurt Parfait: Create individual yogurt parfaits with layers of Greek yogurt, granola, and diced tropical fruits like mango and pineapple. It adds a creamy and crunchy texture to the meal while maintaining the fruity theme.
    • Pita Chips with Hummus: Offer a savory option with pita chips and hummus. The creamy and tangy hummus pairs nicely with the sweet and refreshing smoothie, creating a well-rounded snack or light meal.
    • Grilled Shrimp Skewers: For a more substantial option, serve grilled shrimp skewers seasoned with tropical spices like chili, lime, and coconut. The juicy shrimp complements the fruity flavors of the smoothie for a satisfying meal.
    • Serve your pineapple smoothie with a delicious Pineapple Poke Cake.
    Vegan Tropical Smoothie

    🍽 More Fantastic Sips

    • Easy Dragon Fruit Smoothie Recipe.
      Easy Dragon Fruit Smoothie Recipe
    • Hazelnut Oat Milk Shaken Espresso.
      Easy Hazel Nut Oat Milk Latte – Creamy, Iced & Dairy-Free
    • Vanilla Ice Cream Milkshake With Sprinkles.
      Vanilla Ice Cream Milkshake With Sprinkles
    • Homemade Egg Nog with Vanilla And Cinnamon.
      Homemade Egg Nog With Vanilla And Cinnamon

    Did you make this recipe? Leave a review and a ⭐⭐⭐⭐⭐ rating below, or tag us in our Facebook Group! Alternatively, bookmark it in your browser or save to Pinterest.

    Mango Pineapple Smoothie.

    Vegan Tropical Smoothie

    Angela Milnes
    Escape to paradise with this Vegan Tropical Smoothie! Blended with juicy pineapple, sweet mango, and a splash of coconut milk, this smoothie is a refreshing and creamy treat that’s perfect for any time of day.
    5 from 3 votes
    Print Recipe Pin Recipe Rate this Recipe
    Prep Time 5 minutes mins
    Cook Time 0 minutes mins
    Total Time 5 minutes mins
    Course Drinks
    Cuisine American
    Servings 2 Servings
    Calories 527 kcal

    Ingredients
      

    • 1.5 cup Coconut Milk not the one in a can, but in a carton
    • 1 cup Pineapple Chunks Frozen
    • 1 cup Mango Chunks Frozen
    • 1 Banana
    • 1 Lime for juice
    • Mint leaves for garnish (optional)
    • 1 Lime for garnish (optional)

    Instructions
     

    • Peel your banana and break into 2 or 4 pieces, add to your blender.
    • Add the frozen mango and pineapple chunks to the blender.
    • Then squeeze the juice of one lime and add to the blender. Then pour your coconut milk over your ingredients in the blender.
    • Blend until smooth. Garnish with lime wedges and mint. Serve immediately.

    Notes

    Flax seeds and chia seeds can be great add ins to consider throwing into this vegan tropical fruit smoothie. They're perfect to add if you're looking for a thicker smoothie.
    Another great idea to get a nice thick smoothie is to use frozen fruit instead of starting off with fresh fruit. Frozen banana, in particular, is great!
    I didn't add any sugar into the drink, because I wanted to keep it healthy and let the flavor and sweetness of the fresh fruits shine.
    If you want a thinner smoothie, you can add some coconut water into it while blending it. Coconut water can also be a great alternative if you don't have coconut milk.

    Nutrition

    Serving: 1gCalories: 527kcalCarbohydrates: 56gProtein: 6gFat: 37gSaturated Fat: 32gPolyunsaturated Fat: 1gMonounsaturated Fat: 2gSodium: 26mgPotassium: 938mgFiber: 6gSugar: 37gVitamin A: 1023IUVitamin C: 67mgCalcium: 84mgIron: 7mg
    Print Recipe Pin Recipe Rate this Recipe
    Tried this recipe?Let us know how it was!

    More Family Friendly Recipes

    If you enjoyed this refreshing recipe and are inspired to try some more delicious recipes, here are a few handpicked ones to try out.

    • How To Make Celery Juice
    • Best Mangonada Recipe
    • Easy Beet Juice Recipe
    • Dutch Oven Corned Beef And Cabbage
    • Air Fryer Chicken Cutlets
    • Cucumber Juice With Greens
    • Homemade Egg Nog with Vanilla And Cinnamon
    • Orange Carrot Ginger Juice
    • Christmas Tree Charcuterie Board

    Honey and Orange Roasted Beets (Easy Oven Recipe)

    July 10, 2024 by Angela Milnes

    Citrus And Honey Roasted Beets.

    These Honey And Orange Roasted Beets are the upgrade your beet game’s been waiting for—zingy citrus, golden honey, and oven-roasted perfection in every bite.

    Citrus And Honey Roasted Beets.

    Let’s be honest—beets get a bad rap. If your only experience is those squishy canned ones from your nana’s pantry, I get it. But once I started roasting fresh beets with citrus and honey? Total game-changer. The natural sweetness intensifies, the edges caramelize, and that earthy beet flavor turns into something magical.

    This is one of my go-to side dishes when I want something vibrant, nourishing, and just a little fancy (without any actual effort). I’ve tested this combo with different citrus, vinegars, and cheeses over the years, and nothing beats the sweet tang of orange and honey paired with creamy goat cheese. It’s a hit at family dinners, works great for holiday spreads, and always gets the “wait, I like beets now?” reaction from skeptics.

    If you're already a fan of Honey Roast Parsnips or my cozy Shakshuka With Goat Cheese, this sweet and savory twist is right up your alley.

    [feast_advanced_jump_to]

    💖 Why This Recipe Works

    • Naturally sweet & tangy: This honey roasted beets recipe is bursting with flavor.
    • Fuss-free roasting: Simple oven steps give you a hands-off, roast beet recipe.
    • Goes with everything: Citrus and honey beets are a great side for salads, mains, or even brunch boards.

    ⭐ Star Ingredients

    Citrus And Honey Roasted Beets Ingredients.

    Here are the ingredients needed for citrus honey beets:

    • Beets: The heart of this dish. I love using large fresh beets for their earthy flavor and gorgeous color. Roasting deepens their natural sweetness and brings out their best.
    • Honey: A golden drizzle of raw honey caramelizes as it roasts, creating a gorgeous sticky glaze. (Maple syrup also works for a vegan option!)
    • Orange Zest & Juice: Adds brightness and zing, balancing the richness of the beets with citrusy notes.
    • Goat Cheese: The creamy, tangy contrast to sweet roasted beetroot is just divine. Trust me—you don’t want to skip it.

    🔀 Substitutions & Variations

    • Maple syrup: Swap the honey for maple syrup to make these vegan roasted beets with citrus glaze.
    • Use canned beets: Short on time? Use canned or pre-cooked beets, just reduce the roast time.
    • Balsamic vinegar: No citrus? A splash of balsamic adds a similar sweet-tart balance.
    • Feta instead of goat cheese: Still tangy, but with a saltier kick.
    • Roast in foil: Great for keeping cleanup easy and locking in moisture.
    • Add walnuts: For crunch and a nutty twist, toasted walnuts go beautifully with this combo.

    Love roasted veggies? Check out my Air Fryer Broccolini or Stuffed Mushrooms next!

    🔪 Honey and Orange Roasted Beets (Roasted Beetroot)

    roasted beets
    1. Step 1: Wash and scrub your beets. Cut off the tops and tails, and then peel the skin. You'll need a good vegetable peeler to peel beets like this Good Grips Swivel Peeler! Chop your beets into bite-size cubes or slices.
    roasted beets
    1. Step 2: In a cast-iron skillet or an Instant Pot, sauté the shallots in olive oil. Add the cubed beets and coat well with a little olive oil. Preheat the oven to 400 degrees.
    roasted beets
    1. Step 3: Add honey, lemon juice, and orange juice. Toss to coat. Transfer to an oven-safe dish or keep in the skillet if it’s oven-proof. Roast for 30 minutes until fork-tender. If they’re not quite soft, roast 5–10 minutes more. The beets should cook evenly; however, if any of the beets are not yet soft, continue roasting for a further five minutes.
    citrus and honey roasted beets
    1. Step 4: Let cool slightly. Top with crumbled goat cheese, fresh thyme, orange zest, and a drizzle of sour cream if desired.

    💡Hint: Want easier cleanup? Roast your roasted orange beets with honey on a parchment-lined sheet pan instead!

    citrus and honey roasted beets

    👩‍🍳 Expert Tips

    Here are some top tips for cooking your citrus beets.

    • Use gloves when peeling beets to avoid bright pink fingers.
    • Cut beets evenly so they roast at the same rate and don’t dry out.
    • Roast uncovered to help the honey caramelize and get those crispy edges.

    FAQ'S

    How do I roast beets in foil?

    Roasting beets in foil is another option. Simply preheat the oven to 375°F, place the cubed beets on a large piece of aluminum foil, wrap them up, and roast the wrapped beets.

    Drizzle with olive oil, honey, orange juice and lemon juice. Fold up the sides of the foil to create a packet and seal tightly.

    Bake for 30 minutes or until the beets are tender. Open the foil packet carefully and serve with your favorite garnishes.

    Do I need parchment paper for roasting beets?

    No, you don't need parchment paper for roasting beets. However, it can help make cleanup easier and prevent sticking. If you are using a sheet pan to roast the beets instead of a skillet, then line the sheet pan with parchment paper before adding the ingredients.

    Do I have to use shallots?

    Shallots make this recipe great but if you don't have any to hand there are plenty of substitutes you can use.

    Are these the same as honey roasted beetroot?

    Yes! "Beetroot" is just another name for beets—especially in UK and Australian recipes.

    How To Store Orange Roasted Beets?

    • Fridge Storage: Place leftover roasted beets in an airtight container; store in the fridge for up to 5 days.
      Freezer Storage: Freeze roasted beets in a single layer on a baking sheet, then transfer to a freezer bag; can be frozen for up to 8 months.
      Thawing: Thaw frozen roasted beets overnight in the fridge or by using the defrost setting on your microwave.
      Reheating: Reheat beets gently in the microwave with a splash of water, or in a covered skillet over low heat until warmed through.
    citrus and honey roasted beets

    💖 Serving Suggestions

    Here are some tasty pairings for your honey roasted beets:

    • Chinese Chicken Salad: Crunchy and tangy with just enough contrast to those sweet beets
    • Goat Cheese Salad: Take the goat cheese and beet combo even further
    • Avocado Salad: Creamy and refreshing alongside warm roasted root vegetables
    • Eggplant Shakshuka: A smoky, tomato-rich main that loves sweet beet sides
    • Purple Cabbage Soup – A cozy, colorful combo for cooler nights
    • Baked Spaghetti Squash – For a hearty yet healthy veggie dinner

    🍽 Try These Healthy Beetroot Recipes

    • homemade beetroot juice in a glass.
      How To Make Beetroot Juice
    • Best Beetroot Hummus Recipe.
      Best Beetroot Hummus Recipe (Vegan)
    • Beetroot Chocolate Cake.
      Best Beetroot Chocolate Cake Recipe (Moist + Festive!)
    • pickled beets in a bowl.
      Quick Pickled Beets Recipe (Using Canned Beets)

    Did you make this recipe? Leave a review and a ⭐⭐⭐⭐⭐ rating below, or tag us in our F

    Citrus And Honey Roasted Beets.

    Citrus And Honey Roasted Beets

    Angela Milnes
    Brighten up your meal with these Citrus and Honey Roasted Beets with Goat Cheese! Sweet, tender beets are roasted to perfection with a drizzle of honey and a splash of citrus, then topped with creamy goat cheese for a delightful contrast of flavors.
    5 from 3 votes
    Print Recipe Pin Recipe Rate this Recipe
    Prep Time 10 minutes mins
    Cook Time 30 minutes mins
    Total Time 40 minutes mins
    Course Side Dish
    Cuisine American
    Servings 5 Servings
    Calories 166 kcal

    Ingredients
      

    • 4 Beetroot Cubed
    • ¼ cup Shallots Diced
    • 2 Tablespoons Olive Oil
    • 1 Tablespoon Raw Honey pure maple syrup may be substituted
    • 2 Tablespoons Lemon Juice
    • ¼ cup Orange Juice + reserved Zest
    • pinch Salt
    • 4 oz Goat Cheese

    Instructions
     

    • Here are the step by step instructions for making fork tender honey roasted beets.
    • Preheat the oven to 400 degrees
    • Wash and scrub your beets. Cut off the tops and tails and then peel the skin. You’ll need a good vegetable peeler to peel beets like this good grips swivel peeler! Chop your beets into bite-size cubes or slices.
    • In a cast iron skillet or an Instant Pot, saute the shallots in olive oil. Add the cubed beets and coat well with a little olive oil.
    • Cover the beets with honey, lemon and orange juice. The orange will give a beautiful citrus flavor.
    • Take the skillet from the stovetop to the oven & roast for 30 minutes until the beets are soft and fork-tender. The beets should cook evenly, however, if any of the beets are not yet soft continue roasting for a further five minutes.
    • Remove the skillet from the oven and let cool slightly before topping with crumbled goat cheese, fresh thyme or dill and reserved zest. Serve warm with a drizzle of sour cream.

    Notes

    Use A Sheet Pan: In this easy roasted beets recipe, we use the skillet on the stovetop and the oven. However, you can also use a sheet pan to roast beets. Just preheat the oven to 400F, arrange cubed beets on a prepared baking sheet and bake for 30 minutes or until fork-tender. You'll get the perfect sheet pan dinner.

    Nutrition

    Serving: 1gCalories: 166kcalCarbohydrates: 13gProtein: 6gFat: 11gSaturated Fat: 4gPolyunsaturated Fat: 1gMonounsaturated Fat: 5gCholesterol: 10mgSodium: 137mgPotassium: 292mgFiber: 2gSugar: 10gVitamin A: 282IUVitamin C: 13mgCalcium: 49mgIron: 1mg
    Print Recipe Pin Recipe Rate this Recipe
    Tried this recipe?Let us know how it was!

    Super Easy Slow Cooker Keto Pulled Pork

    July 9, 2024 by Angela Milnes

    Super Easy Slow Cooker Keto Pulled Pork.

    Get ready for a hassle-free keto feast! Our Slow Cooker Keto Pulled Pork recipe is all about simplicity and flavor. Toss in seasoned pork shoulder, let it slow-cook to perfection, and enjoy tender, smoky goodness without the carb overload. It's keto-friendly comfort food made easy—bite after savory bite!

    Slow cooked keto pulled pork.
    [feast_advanced_jump_to]

    Why This Recipe Works

    • Effortless Preparation: Minimal hands-on time; simply season the pork and let the slow cooker do the work.
    • Keto-Friendly Delight: Enjoy rich, smoky flavors slow cooker pulled pork without compromising your keto goals.
    • Versatile Bulk Cooking: Prepare a sizable batch of keto pulled pork for meals all week long.

    🥘 Ingredients

    Uncooked pork meat.
    • Pork Shoulder (Pork Butt): Tender, flavorful cut ideal for slow cooking.
    • Onion Powder: Sweet, savory flavor without the texture of fresh onions.
    • Garlic Powder: Convenient seasoning with a pungent, slightly sweet taste.
    • Dried Rosemary: Fragrant herb-enhancing meat and stews.
    • Smoked Paprika: Adds smoky, sweet essence to dishes.
    • Cayenne Pepper: Fiery spice with intense heat and vibrant color.
    • Ground Fennel Seeds: Anise-like flavor for subtle sweetness and warmth.
    • Cocoa Powder: Bittersweet chocolate flavor for savory dishes.
    • Sea Salt: Unrefined salt to enhance natural flavors.
    • Black Pepper: Pungent spice adding depth and heat to dishes.
    • Organic Sugar-Free Chicken Broth: Rich base for soups, stews, and braises without added sugars.
    • Iceberg Lettuce Leaves: Crisp, refreshing low-carb alternative for wraps.

    For the complete list of ingredients with measurements and instructions, please see the recipe card at the bottom of the post.

    📖  Substitutions & Variations

    • Liquid Smoke: Can be used as an optional ingredient in the keto pulled pork recipe to intensify the smoky flavor, complementing the smoked paprika. A few drops mixed into the spice rub or brushed onto the pork before cooking will imbue the meat with a rich, barbecue-like aroma without altering its keto-friendly profile.
    • Keto BBQ Sauce: Enhance the dish with a smoky, tangy flavor without adding extra carbs. Use this keto barbecue sauce as a finishing touch by mixing it into the pork once cooked or serving it on the side for added taste.
    • Apple Cider Vinegar: Adds a tangy depth and can tenderize the pork. Mix it with the chicken broth before cooking for best results.
    • Without Slow Cooker: You can make keto pulled pork in an Instant Pot by setting it to the 'Meat/Stew' function for about 90 minutes. This method will give you tender, flavorful pork quickly and easily.

    🔪 How To Make Easy Keto Pulled Pork

    Step One: Combine Spices: Combine all spices and the cocoa in a small bowl and season with salt and black pepper, to taste. Rub the spice mix all over the pork shoulder and transfer to a 5 or 6-quart slow cooker crock.

    Step Two: Add Chicken Broth And Slow Cook: Add the organic chicken broth to the crock pot and cook on high for 4 hours or on low for 6.

    Step Three: Pull Apart Pork: Once the cooking time is complete, use two forks to pull the pork apart while it is still in the slow cooker crock. Allow the pulled pork to remain in the juices with the slow cooker set to “warm” for 20-30 minutes to absorb more flavor.  

    Step Four: Serve: To serve, fill each lettuce leaf with some crunchy keto broccoli slaw and top with some pulled pork.

    Keto pulled pork cooked in a slow cooker.

    👩‍🍳 Expert Tips

    • Layered Flavors: For a slow cooker recipe, layering flavors is key. Start by browning meats or sautéing aromatics before transferring them to the slow cooker. This extra step enhances the depth of flavor in your dish.
    • Timing is Everything: Not all ingredients cook at the same rate in a slow cooker. Add delicate veggies like peas or herbs closer to the end of the cooking time to maintain their freshness and vibrant color. This ensures each element of your dish is perfectly cooked and bursting with flavor.
    • Pork Roast: You can also use leftover pork roast to make pulled pork from pork loin roast or pork shoulder roast.

    💭 FAQs

    Can I make Keto Pulled Pork without a slow cooker?

    Yes! If you don’t have a slow cooker, you can use an Instant Pot. Set it to the 'Meat/Stew' function and cook for about 90 minutes for tender, flavorful pork.

    What can I use instead of iceberg lettuce for wraps?

    If you don’t have iceberg lettuce, you can try other low-carb alternatives like cabbage leaves, which also work well for keto wraps.

    How can I enhance the smoky flavor of the pulled pork?

    You can add a few drops of liquid smoke to the spice rub or the chicken broth to boost the smoky flavor without affecting the recipe's keto-friendly nature.

    How should I store and reheat the leftover pulled pork?

    Store the pulled pork in an airtight container in the refrigerator for up to 4 days, or freeze it for 2-3 months. To reheat, thaw it in the fridge and then heat in a skillet or microwave.

    Best Way to Store Keto Pulled Pork

    After your keto pulled pork has tantalized your taste buds, let it cool to room temperature, then store it in an airtight container or wrap it securely with aluminum foil. Label the container with a touch of planning and the freezing date, then freeze your keto-pulled pork for up to 2-3 months. It'll be your low-carb culinary hero when you defrost and savor.

    🧂Serving Suggestions

    Here are some side dishes to serve with Slow Cooker Keto Pulled Pork:

    • Brown Rice: Pair your keto pulled pork with wholesome brown rice for a hearty and fulfilling meal.
    • Cauliflower Rice: Complement your pulled pork with light and fluffy cauliflower rice, perfect for a low-carb option.
    • Coleslaw: Add a crunchy and refreshing touch to your pulled pork with a side of tangy coleslaw.

    🍽 Related Recipes

    • Best Butternut Squash Soup.
      Best Butternut Squash Soup
    • Smothered Cajun Cabbage in a bowl.
      Best Cajun Smothered Cabbage Recipe
    • Caramelized Onions in a bowl/.
      Quick Caramelized Onions (Air Fryer Recipe)
    • Chopped Greek Salad in a bowl.
      Chopped Greek Salad with Feta & Olives (Bariatric-Friendly)

    Did you make this recipe? Leave a review and a ⭐⭐⭐⭐⭐ rating below, or tag us in our Facebook Group! Alternatively, bookmark it in your browser or save to Pinterest.

    Super Easy Slow Cooker Keto Pulled Pork.

    Super Easy Slow Cooker Keto Pulled Pork

    Angela Milnes
    Satisfy your cravings with this Slow Cooker Keto Pulled Pork! Tender, juicy, and packed with flavor, this pulled pork is cooked low and slow to perfection. With just the right blend of spices and a hint of smokiness, it's a delicious and easy keto-friendly meal that you can enjoy on its own, in lettuce wraps, or over cauliflower rice. Perfect for meal prep or a hearty family dinner!
    5 from 2 votes
    Print Recipe Pin Recipe Rate this Recipe
    Prep Time 15 minutes mins
    Cook Time 4 hours hrs
    Additional Time 20 minutes mins
    Total Time 4 hours hrs 35 minutes mins
    Course Dinners
    Cuisine American
    Servings 4 Servings
    Calories 223 kcal

    Ingredients
      

    • 2 lbs Pork Shoulder
    • 2 teaspoon Onion Powder
    • 1 teaspoon Garlic Powder
    • 2 teaspoon Dried Rosemary
    • 2 teaspoon Smoked Paprika
    • ½ teaspoon Cayenne Pepper
    • 1 teaspoon Ground Fennel Seeds
    • 2 teaspoon Cocoa Powder
    • 1 tablespoon Sea Salt
    • Pinch Black Pepper
    • ⅓ cup Sugar Free Chicken Broth
    • 8 Iceburg Lettuce Leaves

    Instructions
     

    • Combine all spices and the cocoa in a small bowl and season with salt and black pepper, to taste. Rub the spice mix all over the pork shoulder and transfer to a 5 or 6-quart slow cooker crock.
    • Add the organic chicken broth to the crock pot and cook on high for 4 hours or on low for 6.
    • Once the cooking time is complete, use two forks to pull the pork apart while it is still in the slow cooker crock. Allow the pulled pork to remain in the juices with the slow cooker set to “warm” for 20-30 minutes to absorb more flavor.  
    • To serve, fill each lettuce leaf with some crunchy keto broccoli slaw and top with some pulled pork.

    Notes

    Layered Flavors: For a slow cooker recipe, layering flavors is key. Start by browning meats or sautéing aromatics before transferring them to the slow cooker. This extra step enhances the depth of flavor in your dish.
    Timing is Everything: Not all ingredients cook at the same rate in a slow cooker. Add delicate veggies like peas or herbs closer to the end of the cooking time to maintain their freshness and vibrant color. This ensures each element of your dish is perfectly cooked and bursting with flavor.
    Pork Roast: You can also use leftover pork roast to make pulled pork from pork loin roast or pork shoulder roast.

    Nutrition

    Calories: 223kcalCarbohydrates: 3gProtein: 28gFat: 10gSaturated Fat: 4gPolyunsaturated Fat: 1gMonounsaturated Fat: 5gCholesterol: 93mgSodium: 1859mgPotassium: 575mgFiber: 1gSugar: 1gVitamin A: 687IUVitamin C: 2mgCalcium: 38mgIron: 2mg
    Print Recipe Pin Recipe Rate this Recipe
    Tried this recipe?Let us know how it was!

    More Slow-Cooker Recipes

    • Slow Cooker Beef Stroganoff
    • Slow Cooker Spinach Artichoke Dip
    • Slow Cooker Mongolian Beef
    • Crock Pot Chili Mac And Cheese
    • Slow Cooker Chicken And Dumplings

    Canned Black Bean And Corn Salsa Recipe

    July 9, 2024 by Angela Milnes

    Canned Black Bean And Corn Salsa Recipe.

    Fresh, zesty, and packed with flavor, this Canned Black Bean and Corn Salsa is the perfect addition to any gathering. With just a few pantry staples, it comes together fast—and tastes like summer in every bite.

    Canned Black Bean And Corn Salsa Recipe.

    Black bean corn salsa is one of those recipes that shows up everywhere—from cookouts and potlucks to Taco Tuesday and game day spreads. It’s colorful, satisfying, and endlessly adaptable.

    If you love this, try our Smoked Texas Twinkies or Plantain Tortilla Chips for scooping!

    [feast_advanced_jump_to]

    💖 Why This Recipe Works

    • Fast and foolproof: Made in 10 minutes with zero cooking.
    • Pantry-friendly: Uses canned staples you probably already have.
    • Canning option included: Great for preserving the goodness all year long.

    ⭐ Star Ingredients

    corn salsa ingredients.
    • Black Beans: A hearty, protein-rich base that gives the salsa substance and flavor.
    • Mexican Corn: Sweet, smoky, and vibrant. Adds crunch and pops of color.
    • Green Onions & Roma Tomatoes: Bright and fresh with just enough bite.
    • Lime Juice & Red Wine Vinegar: Tangy and citrusy, balancing the sweet corn and savory beans.

    For the complete list of ingredients with measurements and instructions, please see the recipe card at the bottom of the post.

    📖  Substitutions & Variations

    • Mango Black Bean and Corn Salsa: Dice in ripe mango for tropical sweetness.
    • Spicy Black Bean and Corn Salsa: Add jalapeños, chili powder, or cayenne for heat.
    • Fire-Roasted Tomato Salsa: Use fire-roasted canned tomatoes to add a smoky layer of flavor.
    • Avocado Salsa: Stir in cubed avocado just before serving for creaminess.
    • Southwest Corn Salsa: Add cumin, black pepper, and chopped red onion.

    For more salsa inspiration, try our Red Cabbage Coleslaw or Mediterranean Green Bean Salad.

    🔪 How To Make Simple Black Bean and Corn Salsa

    black bean and corn salsa ingredients in a bowl
    1. Step 1: Drain the black beans and corn. Dice the tomatoes and green onions. Add the black beans, corn, tomatoes, and green onions to a large bowl.
    black bean and corn salsa ingredients
    1. Step 2: Mix until all ingredients are well combined. Season the bean mixture with salt and pepper if desired. Serve with chips and enjoy your fresh and flavorful Black Bean and Corn Salsa!
    black bean and corn salsa in a bowl with lime.

    👩‍🍳 Expert Tips

    • Use fresh lime juice for a brighter, fresher finish.
    • Let it chill: 30 minutes in the fridge helps the flavors blend beautifully.
    • Add last-minute herbs: Stir in fresh cilantro just before serving to keep it vibrant.

    How To Can Homemade Black Bean Salsa

    Follow this Recipe For Canning Black Beans And Corn Salsa

    • Prepare Your Salsa: Combine all ingredients in a large pot and simmer for about 10 minutes.
    • Fill Your Jars: Ladle the salsa into sterilized jars, leaving a half-inch headspace. Remove any air bubbles with a bubble remover.
    • Seal the Jars: Wipe the jar rims, place the lids, and tighten the bands to fingertip tight.
    • Process the Jars: In a canning pot, ensure jars are submerged by at least an inch of water, bring to a boil, and process for 15 minutes (adjust for altitude).
    • Cool Down: Use a jar lifter to remove jars and let them cool on a rack for 24 hours.
    • Check Seals: Press the center of each lid to check it is sealed and store.

    This is a foolproof recipe for canning black bean and corn salsa!

    Equipment For Canning Black Bean And Corn Salsa

    If you want to batch cook black bean and corn salsa for canning then you'll need 2 cups of apple cider vinegar and a few extra items.

    • Canning jars: Sterilized jars suitable for preserving.
    • Lids and bands: Ensure they are new or in good condition to secure a proper seal.
    • Large pot: For cooking the salsa.
    • Canning pot with a rack: To process the jars.
    • Jar lifter: For safely removing hot jars from the canning pot.
    • Funnel and ladle: For filling the jars without mess.
    • Bubble remover or a non-metallic spatula: To remove air bubbles before sealing the jars.

    💭 FAQs

    Can I use fresh corn instead of canned?

    Yes, you can use fresh corn. Just make sure to cook it and remove the kernels before adding it to the salsa for the best texture and flavor.

    How long can I store the black bean and corn salsa?

    You can store the salsa in an airtight container in the fridge for up to 3-4 days.

    Can I make the salsa spicier?

    Yes, you can add jalapeños, chili powder, or cayenne pepper to spice up the salsa, depending on your preference.

    Can I freeze this salsa?

    It’s best fresh or canned. Freezing may change the texture.

    Is this salsa good for tacos?

    Yes! This black bean salsa for tacos is perfect with chicken, fish, or as a taco topping.

    💖 Serving Suggestions

    Here are my favorite sides to serve with Black Bean and Corn Salsa:

    • Plantain Tortilla Chips: Sweet and salty crunch that complements the salsa beautifully.
    • Tacos: Spoon over carne asada, Paprika Shrimp, or Thin Sliced Chicken Breast tacos for flavor-packed freshness.
    • Grilled Fish: Try it as a topping for grilled white fish or salmon.
    • Rice Bowls: Add to bowls with quinoa, avocado, and protein for a quick weeknight dinner.
    black bean and corn salsa

    🍽 More Easy Appetizer Recipes

    • Salmon Sushi Balls Recipe.
      Salmon Sushi Balls Recipe
    • Mini Pigs In Blankets.
      Mini Pigs In Blankets
    • Smoked Texas Twinkies with Bacon And Brisket.
      Smoked Texas Twinkies with Bacon And Brisket
    • Roasted Cherry Tomato Burrata Bruschetta.
      Burrata Bruschetta With Roasted Cherry Tomatoes

    Did you make this recipe? Leave a review and a ⭐⭐⭐⭐⭐ rating below, or tag us in our Facebook Group! Alternatively, bookmark it in your browser or savea ⭐⭐⭐⭐⭐ rating below, or tag us in our Facebook Group! Alternatively, bookmark it in your browser or save to Pinterest.

    Canned Black Bean And Corn Salsa Recipe.

    Black Bean And Corn Salsa

    Angela Milnes
    Add a burst of color and flavor to your table with this Black Bean and Corn Salsa!
    5 from 5 votes
    Print Recipe Pin Recipe Rate this Recipe
    Prep Time 10 minutes mins
    Cook Time 0 minutes mins
    Total Time 10 minutes mins
    Course Salads
    Cuisine Mexcian
    Servings 3 Servings
    Calories 446 kcal

    Ingredients
      

    • 1, 15 oz Black Beans Can drained
    • 1 , 15 oz Mexican Corn Can drained
    • Peppers
    • ¼ cup Green Onions diced
    • 2 Roma Tomatoes diced
    • 2 tablespoon Olive Oil
    • 2 tablespoon Red Wine Vinegar
    • ½ teaspoon Salt
    • 1 Lime juiced
    • Cilantro garnish

    Instructions
     

    • Drain the black beans and corn. Dice the tomatoes and green onions.
    • Add the black beans, corn, tomatoes, and green onions to a large bowl. Mix until all ingredients are well combined. Season the bean mixture with salt and pepper if desired.
    • Serve with chips and enjoy your fresh and flavorful Black Bean and Corn Salsa!

    Notes

    Use Fresh Veggies: Use fresh veggies for the best flavor. Look for plump and juicy tomatoes and crisp green onions.
    Let It Rest: Allow the salsa to sit for at least 30 minutes before serving to allow the flavors to meld together.

    Nutrition

    Calories: 446kcalCarbohydrates: 72gProtein: 19gFat: 13gSaturated Fat: 2gPolyunsaturated Fat: 2gMonounsaturated Fat: 7gSodium: 395mgPotassium: 1014mgFiber: 18gSugar: 9gVitamin A: 845IUVitamin C: 22mgCalcium: 64mgIron: 4mg
    Print Recipe Pin Recipe Rate this Recipe
    Tried this recipe?Let us know how it was!

    Salmon Sushi Balls Recipe

    July 6, 2024 by Angela Milnes

    Salmon Sushi Balls Recipe.

    Looking for a fun and delicious twist on traditional sushi? Try these Salmon Sushi Balls! They’re perfect for a light lunch, an elegant appetizer, or a party snack. Made with savory smoked salmon and seasoned rice, these bite-sized Salmon Sushi delights are easy to make and full of flavor.

    salmon Sushi Balls.
    [feast_advanced_jump_to]

    If you love Salmon, be sure to check out the following delicious and tasty recipes using Salmon. Cucumber Rolls with Cream Cheese And Smoked Salmon, Creamy Tuscan Salmon With Sundried Tomatoes, Baked Crispy Salmon Bites on Rice and Gravlax Salmon With Dill.

    Why This Recipe Works

    • Easy to Make: With simple ingredients and straightforward steps, this Salmon Sushi Balls recipe is perfect for both beginners and seasoned cooks.
    • Flavorful: The combination of savory smoked salmon and soy-sauce-seasoned rice creates a delicious umami taste that's hard to resist.
    • Impressive Presentation: These neatly wrapped sushi balls are visually appealing and sure to impress your guests with their elegant look.

    🥘 Ingredients

    salmon Sushi Balls ingredients.
    • Cooked Rice: Provides a sticky base that holds the ingredients together, forming the foundation and adding a comforting texture.
    • Smoked Salmon Slices: Adds a rich, smoky flavor to the dish, offering a savory contrast to the rice and enhancing the overall taste experience of the sushi rice balls.
    • Soy Sauce: Infuses a salty and umami kick to the recipe, elevating the flavors of the dish and providing a familiar sushi taste that ties everything together.
    • Nori Seaweed: Wraps around the rice and salmon, delivering a subtle oceanic essence, a hint of earthiness, and a satisfying crunch to each bite.

    For the complete list of ingredients with measurements and instructions, please see the recipe card at the bottom of the post.

    📖  Substitutions & Variations

    • Canned Salmon: Can be used as a substitute for smoked salmon in sushi balls. It provides a convenient alternative with a similar flavor profile, making it suitable for those who prefer a different texture or have limited access to fresh seafood.
    • Beet Cured Salmon: Try using some beet cured salmon for a variation of flavor for your sushi balls. This will give the sushi a bright pink look.
    • Avocado Rice Balls: Use an avocado mixture for a creamy option. You can also use finely chopped cucumbers with avocado.

    🔪 How To Make Salmon Sushi Balls

    Salmon in breadcrumbs.

    Step One: Mix the cooked rice with soy sauce until evenly combined.

    balls of sushi rolled up.

    Step Two: Divide rice mixture into equal small portions, take each portion of the rice, and form them into small, compact balls.

    sliced salmon.

    Step Three: Lay a slice of smoked salmon on a piece of cling film.

    wrapping sushi rice in salmon.

    Step Four: Place a rice ball on the smoked salmon slice. Wrap the salmon around the rice ball tightly with cling film. Refrigerate the sushi balls for an hour to set. Remove the cling film and serve immediately.

    👩‍🍳 Expert Tips

    If you've never made these before - these tips are just what you need to make sure they turn out perfectly every single time.

    • Damp Hands: Keep your hands slightly damp to fold the rice mixture for making balls to prevent the rice from sticking to your fingers.
    • Practice Patience: Allow the salmon sushi balls to chill in the fridge for longer than an hour if possible; this will help them hold their shape better and enhance the flavors.

    💭 FAQs

    Which Is The Best Salmon For Sushi?

    Typically a high-quality, fresh, and specifically labeled sushi-grade or sashimi-grade. These popular choices include are known for their rich and buttery flavor and offers a deep red color and robust taste.

    Best Way to Store Homemade Sushi Balls Good

    Store leftover sushi balls in an airtight container in the refrigerator. Enjoy within 1-2 days for the best taste and texture.

    🧂Serving Suggestions

    • Cucumber Salad: A refreshing Korean Cucumber Salad with a light rice vinegar dressing adds a crisp and tangy contrast to the sushi balls.
    • Miso Soup: A warm bowl of Miso Soup with tofu and seaweed provides a comforting and savory complement.
    • Edamame: Steamed Edamame sprinkled with sea salt offers a simple and satisfying side.
    salmon rice ball sushi

    🍽 Related Recipes

    • Zesty Cabbage Soup in a white bowl.
      Zesty Cabbage Soup (With Lemon & Herbs – One Pot Wonder!)
    • Apple Grapefruit Salad.
      Apple Grapefruit Salad (Easy & Refreshing Citrus Fruit Bowl)
    • One Skillet Chicken Thighs with Butternut Squash.
      One Skillet Chicken Thighs With Butternut Squash
    • Broccoli Soup With Feta Cheese.
      Creamy Broccoli Soup With Feta Cheese

    Did you make this recipe? Leave a review and a ⭐⭐⭐⭐⭐ rating below, or tag us in our Facebook Group! Alternatively, bookmark it in your browser or save to Pinterest.

    Salmon Sushi Balls Recipe.

    Salmon Sushi Balls Recipe

    Angela Milnes
    Elevate your sushi game with these Salmon Sushi Balls! Bite-sized and packed with fresh, flavorful salmon, these sushi balls are as fun to make as they are to eat. Perfect for a light meal or impressive appetizer, they bring a delicious twist to traditional sushi!
    5 from 4 votes
    Print Recipe Pin Recipe Rate this Recipe
    Prep Time 10 minutes mins
    Cook Time 20 minutes mins
    Additional Time 1 hour hr
    Total Time 1 hour hr 30 minutes mins
    Course Appetizer
    Cuisine Japanese
    Servings 2 Servings
    Calories 210 kcal

    Ingredients
      

    • 1 cup Cooked Rice
    • ½ cup Smoked Salmon Slices
    • ¼ cup Soy Sauce
    • 2-3 Sheets Nori Seaweed

    Instructions
     

    • Mix the cooked rice with soy sauce until evenly combined.
    • Divide rice mixture into equal small portions, take each portion of the rice, and form them into small, compact balls.
    • Lay a slice of smoked salmon on a piece of cling film.
    • Place a rice ball on top of the smoked salmon slice.
    • Use the cling film to wrap the salmon around the rice ball tightly, ensuring it holds its shape.
    • Place the wrapped sushi balls in the refrigerator for an hour to set.
    • Remove the salmon sushi balls from the cling film and serve immediately.

    Notes

    Damp Hands: Keep your hands slightly damp to fold rice mixture for making balls to prevent the rice from sticking to your fingers.
    Practice Patience: Allow the salmon sushi balls to chill in the fridge for longer than an hour if possible; this will help them hold their shape better and enhance the flavors.

    Nutrition

    Calories: 210kcalCarbohydrates: 24gProtein: 19gFat: 4gSaturated Fat: 0.1gPolyunsaturated Fat: 0.1gMonounsaturated Fat: 0.1gSodium: 1622mgPotassium: 98mgFiber: 1gSugar: 1gVitamin A: 319IUVitamin C: 1mgCalcium: 51mgIron: 2mg
    Print Recipe Pin Recipe Rate this Recipe
    Tried this recipe?Let us know how it was!

    More Simple Appetizers To Try

    • Spinach Artichoke Dip
    • Hot Cocoa Dip
    • Pinto Bean Dip
    • Easy Sourdough Discard Focaccia Recipe
    • Air Fryer Crispy Chicken Wings
    • Salmon Bites On Rice
    • Octopus Salad With Baby Spinach
    • Beetroot Hummus Recipe
    • Pizza Monkey Bread: Pizza Pull Apart Bread
    salmon sushi rice balls.

    Easy Lemon Orzo Asparagus Salad

    July 4, 2024 by Angela Milnes

    Easy Lemon Orzo Asparagus Salad.

    This Easy Lemon Orzo Asparagus Salad is light, bright, and bursting with spring flavor. Tender orzo pasta is tossed with crisp asparagus, a zingy lemon dressing, and fresh herbs for a side dish that’s perfect for potlucks, picnics, or a quick weekday lunch.

    Easy Lemon Orzo Asparagus Salad.

    This lemony orzo asparagus salad is a warm-weather favorite, especially during spring when asparagus is in peak season. The combination of citrus, herbs, and pasta makes it ideal for everything from brunch tables to BBQ spreads.

    If you love fresh, herby salads, don’t miss our Charred Corn Salad with Tomatoes, Mediterranean Green Bean Salad, or Roasted Beet Salad with Pomegranate.


    [feast_advanced_jump_to]

    💖 Why This Recipe Works

    • Zingy & Fresh: The lemon dressing adds brightness that complements the earthy asparagus.
    • Easy to Prep: Just cook, chop, toss, and serve—done in 20 minutes or less!
    • Great Make-Ahead Dish: Tastes even better after the flavors mingle in the fridge.

    🥘 Star Ingredients

    Orzo Salad With Asparagus Ingredients.
    • Asparagus: Sautéed until tender-crisp, it brings vibrant color and freshness to each bite.
    • Orzo Pasta: Tiny and tender, orzo is the perfect base for soaking up the lemony dressing.
    • Lemon Juice & Zest: Adds citrusy brightness that wakes up all the other flavors.

    For the complete list of ingredients with measurements and instructions, please see the recipe card at the bottom of the post.

    📖  Substitutions & Variations

    • Add Cheese: Crumbled feta or goat cheese adds a creamy, tangy touch.
    • Protein Boost: Stir in chickpeas or grilled chicken for a heartier meal.
    • Herb Swap: Try dill, mint, or chives instead of parsley for different flavor vibes.
    • Make it Gluten-Free: Use gluten-free orzo or cooked quinoa as a base.
      alternative and use tempeh bacon instead of regular bacon.

    Craving more fresh salad energy? Pair your orzo asparagus salad with flavor-packed favorites like Easy Chinese Chicken Salad, Cured Beet Salmon Recipe, Vegan Beetroot And Black Bean Burger, Korean Cucumber Salad, or Chopped Italian Salad. They're the cool cousins to this lemony orzo salad!

    🔪 How To Make Orzo Salad With Asparagus

    Cooked orzo in a white bowl.
    1. Step 1: Preheat the oven to 400°F (200°C). Boil a pot of water. Place the bacon on a foil-lined sheet pan and bake for 20 minutes or until crisp. Transfer the bacon to a paper towel to drain, then cut into bite-sized pieces. While the bacon is in the oven, cook the orzo according to the package instructions. Once cooked, drizzle 1 tablespoon of olive oil on the orzo to prevent it from sticking together. Spread cooked orzo out on a sheet pan or plate to cool.
    Cooked asparagus in a pan.
    1. Step 2: Trim the thick ends of the fresh asparagus and discard them. Cut the remaining stalks into 1-inch pieces. Saute the chopped asparagus with 1 tablespoon of olive oil over medium heat until slightly browned, approximately 4-5 minutes. Set aside to cool.
    Ingredients for orzo salad. orzo, asparagus, tomatoes, bacon bits, lemon and more.
    1. Step 3: Halve the cherry tomatoes. Dice the shallot. Pit and halve the Kalamata olives. Crumble the feta cheese. Whisk together all the dressing ingredients in a bowl until well combined.
    orzo salad ingredients in a bowl.
    1. Step 4: In a large mixing bowl, combine the cooled orzo, cherry tomatoes, asparagus, bacon, shallot, kalamata olives, and feta cheese. Pour the lemon dressing over the salad and toss to combine. Season with salt and pepper to taste. Serve your asparagus orzo pasta salad immediately or refrigerate until ready to serve.

    💡 Hint: No need to blanch—sautéing the asparagus adds flavor and keeps it crisp-tender without the hassle.

    Asparagus orzo salad in a round bowl.

    👩‍🍳 Expert Tips

    • Cook Orzo Al Dente: Slightly firm pasta holds up better in salads.
    • Make Ahead: This salad is great the next day—just freshen up with an extra squeeze of lemon.
    • Add Crunch: Top with toasted almonds or sunflower seeds for added texture.

    💭 Lemon Orzo Asparagus Salad FAQs

    Can I serve lemon orzo asparagus salad warm or cold?

    Both! It’s delicious freshly made and warm, or chilled as a refreshing side.

    How long does lemon orzo asparagus salad last?

    Store in an airtight container in the fridge for up to 3 days. Stir before serving.

    Can I add other veggies to this orzo salad?

    Absolutely. Try cherry tomatoes, peas, cucumbers, or roasted bell peppers.

    Is there a dairy-free replacement for the feta cheese?

    Yes! Try crumbled tofu mixed with lemon juice, nutritional yeast, and a pinch of salt to mimic feta. Or use a store-bought vegan feta for convenience.

    💖 Serving Suggestions

    This salad is super versatile—here’s what to pair it with:

    • Stuffed Apple Chicken Breast: Classic combo with citrusy vibes.
    • Air Fryer Cod Fillet: Light, flaky fish meets zesty pasta salad.
    • Stuffed Portobello Mushrooms: Hearty and flavorful vegetarian main.
    • Pan Fried Salmon Fillet: The ultimate dish to serve with this salad!
    Orzo asparagus salad in a bowl with cherry tomatoes.

    🍽 More Tasty Salad Recipes

    • Italian Octopus Salad With Baby Spinach.
      Italian Octopus Salad With Baby Spinach
    • Keto Tuna Salad With Apple and Pumpkin Seeds.
      Best Keto Tuna Salad Recipe With Apple and Pumpkin Seeds
    • Thai Salad in a blue bowl with chopsticks.
      Best Thai Peanut Salad Recipe (Crunchy, Creamy & Easy!)
    • Instant Pot Feta Pasta Salad.
      Instant Pot Feta Pasta Salad

    Did you make this recipe? Leave a review and a ⭐⭐⭐⭐⭐ rating below, or tag us in our Facebook Group! Alternatively, bookmark it in your browser or save to Pinterest.

    Easy Lemon Orzo Asparagus Salad.

    Orzo Salad With Asparagus

    Angela Milnes
    Enjoy a fresh and vibrant dish with this Orzo Salad with Asparagus! Tender orzo and crisp asparagus are combined with a light, tangy dressing, creating a simple yet flavorful salad. Perfect as a side dish or a light lunch, it’s a delicious way to enjoy seasonal veggies in every bite!
    5 from 5 votes
    Print Recipe Pin Recipe Rate this Recipe
    Prep Time 10 minutes mins
    Cook Time 0 minutes mins
    Total Time 10 minutes mins
    Course Salads
    Cuisine American
    Servings 4 Servings
    Calories 389 kcal

    Ingredients
      

    Ingredients For Salad

    • 1 cup Dry Orzo
    • 1 cup Cherry Tomatoes halved
    • 1 lb Asparagus
    • 6 slices Bacon
    • ¼ Shallot diced
    • ½ Kalamata Olives Pitted
    • ½ cup Feta
    • 2 tablespoon olive oil

    Ingredients For Dresssing

    • 2 tablespoon Olive Oil
    • 2 tablespoon Lemon Juice
    • 1 tablespoon Dijon Mustard
    • Salt and Pepper

    Instructions
     

    • Preheat the oven to 400°F (200°C). Bring a pot of water to a boil.
    • Place the bacon on a foil-lined sheet pan. Bake in the preheated oven for 20 minutes or until crisp. Transfer the cooked bacon to a paper towel to drain excess grease. Cut the bacon into small, bite-sized pieces.
    • While the bacon is in the oven, cook the orzo according to the package instructions. Once cooked, drizzle 1 tablespoon of olive oil on the orzo to prevent it from sticking together. Spread cooked orzo out on a sheet pan or plate to cool.
    • Trim the thick ends of the fresh asparagus and discard them. Cut the remaining stalks into 1-inch pieces. Saute the chopped asparagus with 1 tablespoon of olive oil over medium heat until slightly browned, approximately 4-5 minutes. Set aside to cool.
    • Halve the cherry tomatoes. Dice the shallot. Pit and halve the kalamata olives. Crumble the feta cheese.
    • Whisk together all the dressing ingredients in a bowl until well combined.
    • In a large mixing bowl, combine the cooled orzo, cherry tomatoes, asparagus, bacon, shallot, kalamata olives, and feta cheese.
    • Pour the dressing over the salad and toss to combine. Season with salt and pepper to taste.
    • Serve delicious Orzo Pasta Salad immediately or refrigerate until ready to serve.

    Notes

    Flavor Enhancement: Add a touch of fresh herbs like basil or parsley to brighten up the flavors of the salad.
    Dressing Infusion: For a deeper flavor profile, allow the assembled salad to marinate in the dressing for about 30 minutes before serving to let the flavors meld together.

    Nutrition

    Calories: 389kcalCarbohydrates: 37gProtein: 12gFat: 22gSaturated Fat: 5gPolyunsaturated Fat: 4gMonounsaturated Fat: 12gCholesterol: 17mgSodium: 448mgPotassium: 436mgFiber: 5gSugar: 5gVitamin A: 1124IUVitamin C: 18mgCalcium: 140mgIron: 4mg
    Print Recipe Pin Recipe Rate this Recipe
    Tried this recipe?Let us know how it was!

    Mini Cheese Stuffed Peppers

    June 29, 2024 by Angela Milnes

    Mini Cheese Stuffed Peppers.

    With a delicious cream cheese filling and a flavorful turkey bacon topping, these Mini Cheese Stuffed Peppers are a delicious appetizer that you absolutely need to try out. You'll need just a few simple pantry staples apart from the mini sweet peppers, and when they're done, the results are sure to take your taste buds on a ride.

    Cheese stuffed peppers on a wooden board.
    [feast_advanced_jump_to]

    💖 Why This Recipe Works

    • My favorite part about these cheese-stuffed sweet peppers is the fact that they're super versatile. You can team them up with pretty much any main dish of your choice.
    • They're also super customizable! You can tweak and play around with the fillings based on your personal preference.
    • Plus, Cheese Stuffed Peppers have always turned out to be a total hit with everyone whenever I've made them!

    ⭐ Star Ingredients

    Ingredients to make cheese stuffed pepper.

    You'll need just 4 simple ingredients to make these cream cheese stuffed peppers.

    • Mini sweet bell peppers: The vessel for the stuffing, these add color and a sweet crunch.
    • Cream cheese: Provides a creamy, smooth base for the stuffing.
    • Turkey bacon: Adds a crispy texture and savory flavor to the dish.
    • Cheddar cheese: Enhances the stuffing with its sharp, tangy taste.

    For the complete list of ingredients with measurements and instructions, please see the recipe card at the bottom of the post.

    📖  Substitutions & Variations

    • You can also choose to use jalapeno peppers instead of the sweet peppers that this recipe calls for, especially if you're craving for that spicy kick.
    • If you don't have either of these, you can make do with baby bell peppers or even just regular sized bell peppers. Just remember to cut the bell peppers lengthways before you stuff them with the cheese.
    • Don't forget to top the peppers with some extra cheese!
    • In addition to the cream cheese filling, you can experiment and try out a lot of other fillings for these mini peppers.
    • To make these stuffed peppers a more filling dish, you can use seasoned and cooked ground turkey or ground beef.
    • In fact, you can also team up some cooked rice along with the meat mixture if you want to.

    🔪 How To Make Cheese Stuffed Peppers

    Peppers.
    1. Step 1: Cut the peppers in half lengthwise, and remove any seeds.
    Cream cheese and cheddar cheese in a mixing bowl.
    1. Step 2: Stir the cream cheese and cheddar cheese in a mixing bowl until well combined.
    Stuffing pepper halves with cheese mixture.
    1. Step 3: Stuff each pepper half with the cheese mixture.
    Cheese stuffed peppers.
    1. Step 4: Top each stuffed pepper with bacon pieces. Enjoy right away, or cover and refrigerate until ready to serve.
    Stuffed peppers.

    👩‍🍳 Expert Tips

    • In addition to the shredded cheese and cream cheese, you can also add a dash of garlic powder and some red pepper flakes to the filling for the sweet peppers.
    • To bring some more flavor to the cream cheese stuffed peppers, you can also add a bit of green onion to the mixture.
    • If you're planning to bake these stuffed mini peppers, you may want to rub them with a little olive oil on the outside so that they're nice and golden.
    • Another great option is to pop the stuffed mini peppers in the Air Fryer until they start to get that little char on the outside.

    💭 FAQs

    Can I use regular bell peppers instead of mini sweet peppers?

    Yes, you can use regular bell peppers, but be sure to cut them lengthwise to create halves that are easy to stuff.

    Can I make these stuffed peppers in advance?

    Yes, you can prepare these stuffed peppers ahead of time. Store them in the fridge for up to 1 day before serving.

    What other types of cheese can I use for the filling?

    You can substitute cheddar cheese with other varieties like goat cheese, mozzarella, or pepper jack for different flavor profiles.

    Can I bake these cheese stuffed peppers?

    Yes, you can bake the stuffed peppers for a crispy exterior. Simply rub them with olive oil and bake until golden brown. Alternatively, you can use an air fryer for a quicker option.

    Best Way to Store Cheese Stuffed Peppers

    To store cheese-stuffed peppers properly, allow them to cool down to room temperature before storing. Store the container in the refrigerator for up to 3-4 days.

    What Other Types Of Cheese Can I Use?

    For this recipe, I used a mix of shredded cheddar cheese and cream cheese, but you can try a lot of other kinds of cheese as well. Goat Cheese, mozzarella cheese, and pepper jack cheese are all great choices. Remember to team them up with cream cheese as the base.

    💖 Serving Suggestions

    • You can serve the cream cheese stuffed peppers on their own, just as I did, or bake them until they're golden brown.
    • To lend some extra flavor and a pop of color, top them with some chopped fresh parsley or green onions.
    • If you love these be sure to check out this Air Fryer Frozen Jalapeño Poppers recipe too.
    Stuffed cheese peppers on a pepper.

    🍽 More Simple Appetizers

    • Crispy Air Fryer Avocado Fries Recipe.
      Crispy Air Fryer Avocado Fries Recipe
    • Air Fryer Carrot Fries.
      Crispy Air Fryer Carrot Fries
    • Christmas Tree Cheese Platter.
      Christmas Tree Cheese Platter
    • Cantaloupe Melon And Prosciutto Skewers.
      Cantaloupe Melon And Prosciutto Skewers

    Did you make this recipe? Leave a review and a ⭐⭐⭐⭐⭐ rating below, or tag us in our Facebook Group! Alternatively, bookmark it in your browser or save to Pinterest.

    Mini Cheese Stuffed Peppers.

    Stuffed Cheese Peppers

    Angela Milnes
    Get ready to indulge in these irresistible Cheese Stuffed Peppers! Sweet bell peppers are loaded with a rich, creamy cheese filling and baked to perfection, creating a dish that's both comforting and flavorful.
    5 from 5 votes
    Print Recipe Pin Recipe Rate this Recipe
    Prep Time 15 minutes mins
    Cook Time 0 minutes mins
    Total Time 15 minutes mins
    Course Appetizers
    Cuisine American
    Servings 24 Servings
    Calories 62 kcal

    Ingredients
      

    • 16 Ounce Mini Sweet Bell Peppers
    • 8 Ounces Cream Cheese softened
    • ¼ cup Turkey Bacon Pieces
    • ½ cup Cheddar Cheese shredded

    Instructions
     

    • Cut the peppers in half lengthwise, and remove any seeds.
    • Stir the cream cheese and cheddar cheese in a mixing bowl until well combined.
    • Stuff each pepper half with the cheese mixture. Top each stuffed pepper with bacon pieces.
    • Enjoy right away, or cover and refrigerate until ready to serve.

    Notes

    In addition to the shredded cheese and cream cheese, you can also add a dash of garlic powder and some red pepper flakes into the filling for the sweet peppers.
    To bring some more flavor to the cream cheese stuffed peppers, you can also add a bit of green onion into the mixture.
    If you have a few extra minutes, I would highly recommend making a baked version of these stuffed mini peppers. All you need to do is arrange them on a baking dish or a large baking sheet lined with parchment paper, and pop them into a preheated oven until they're nice and golden brown.
    If you're planning to bake these stuffed mini peppers, you may want to rub them with a little olive oil on the outside so that they're nice and golden.
    Another great option is to pop the stuffed mini peppers in the Air Fryer until they start to get that little char on the outside.
    If you have any leftovers, you can transfer them to an airtight container and refrigerate them for up to 2 days.

    Nutrition

    Serving: 1gCalories: 62kcalCarbohydrates: 2gProtein: 2gFat: 5gSaturated Fat: 3gPolyunsaturated Fat: 0.2gMonounsaturated Fat: 1gCholesterol: 15mgSodium: 84mgPotassium: 54mgFiber: 0.4gSugar: 1gVitamin A: 742IUVitamin C: 24mgCalcium: 27mgIron: 0.1mg
    Print Recipe Pin Recipe Rate this Recipe
    Tried this recipe?Let us know how it was!

    More Appetizer Recipes

    If you enjoyed this easy gluten free appetizer, and are looking for some more fun and interesting appetizer recipes to try your hands at, here are a few good ones you might want to check out.

    • Caprese Skewers
    • Mediterranean Green Bean Salad
    • Air Fryer Yellow Squash
    • Greek Beetroot Dip
    • Veggie Train With Bell Peppers
    • Classic Tuna Tartare Recipe
    Cheese stuffed peppers on a board.

    How To Make Balsamic Roast Beetroot

    June 29, 2024 by Angela Milnes

    Balsamic Roast Beetroot Recipe.

    Want to elevate your side dish game? This Balsamic Roast Beetroot recipe brings out the earthy sweetness of beets with a sticky, tangy balsamic glaze—perfect for salads, wraps, or snacking.

    Balsamic Roast Beetroot Recipe.

    Roasted beetroot is trending—and for good reason. It’s naturally sweet, vibrant, and super versatile. Whether you're prepping a winter salad or building a nutrient-rich bowl, balsamic beets add a major flavor boost. Love beet recipes?

    Try my Beetroot Carpaccio, Sundried Tomatoes Without Oil , or Beetroot Ravioli with Goat Cheese next.

    [feast_advanced_jump_to]

    💖 Why This Recipe Works

    • Sweet & Earthy: Roasting intensifies beet flavor and caramelizes the natural sugars.
    • Effortless: A handful of ingredients, minimal prep.
    • So Versatile: Add to salads, wraps, bowls, or enjoy warm with herbs.
    • Nutritious: Beets are rich in antioxidants, fiber, and folate—an easy, healthy add-on to any meal.

    ⭐ Star Ingredients

    Balsamic Roasted Beetroot Ingredients.
    • Fresh Beets – Red, golden, or Chioggia all work. Roasting brings out their natural sweetness and vibrant color.
    • Balsamic Vinegar – Choose a high-quality aged balsamic for a deeper, richer glaze.
    • Honey – Balances out the acidity and gives that glossy finish.

    📖 Substitutions & Variations

    • Golden Beets – A milder flavor and stunning yellow hue.
    • Maple Syrup – A cozy fall-inspired sub for honey.
    • Avocado Oil – Works well in place of olive oil with a buttery finish.
    • Spicy Kick – Add a pinch of red pepper flakes to the glaze.
    • Citrus Twist – Mix in orange zest or a splash of juice to brighten things up.

    Give these beet-loving recipes a try: whip up some Beetroot Hummus with your extras, serve Beetroot Black Bean Burgers for a hearty plant-based dinner, or pair with Beetroot Cured Salmon for a bold and elegant combo.

    How To Make Balsamic Roast Beetroot?

    Preparing beetroots to roast.
    1. Step 1: Start by washing the fresh beets thoroughly and chopping the tops from the beets. Wrap each beet in aluminum foil to prepare it for roasting and place it on a baking sheet or baking dish.
    Beetroots on tin foil.
    1. Step 2: Place the foil-covered beets in an oven preheated to 400°F (200°C) and roast for 60 to 80 minutes until the roasted beets are tender. You can check for doneness by inserting a fork into the beets; it should easily pierce through.
    Roasted peeled beetroot in a hand.
    1. Step 3: Once the beets are roasted and tender, allow them to cool slightly before handling. Gently peel off the skin from each beet using your fingers or a paper towel (a vegetable peeler will also work). The skin should come off easily.
    chopped roasted beetroot.
    1. Step 4: After peeling, slice the roasted beets into bite-sized pieces or slices. In a small bowl, whisk together balsamic vinegar, olive oil, honey, salt, and pepper to taste. Place the beets in a serving bowl and drizzle with the dressing. Toss gently to coat evenly. Your balsamic roast beetroot is ready to serve!

    💡 Hint: Marinate sliced beets in the dressing for an hour for maximum flavor. Add chopped rosemary or thyme for an herby finish.

    Balsamic roasted beetroot topped with sesame seeds.

    👩‍🍳 Expert Tips

    • Roast beets with the skin on—peels slip off easily after cooling.
    • Use gloves when peeling red beets to avoid staining your hands.
    • Batch roast extra beets—they freeze beautifully and reheat well.

    FAQ'S

    Can I use golden beets instead of red?

    es! Golden beets are milder and less earthy—perfect if you want a lighter, sweeter variation.

    Do I need to peel the beets before roasting?

    Nope. Roasting makes the skins super easy to remove afterward.

    Is this recipe vegan?

    Yes, just swap the honey for maple syrup to make it 100% plant-based.

    Can I freeze roasted beets?

    Yes, roasted beets freeze well for up to 6 months. Slice or dice before freezing for easier use later.

    💖 Serving Suggestions

    If you're wondering how to use roasted beets, here are some great suggestions:

    • Serve with Roasted Asparagus With Goat Cheese.
    • On a hummus plate with Toasted Pita Chips.
    • Next to Air Fryer Crispy Chicken Wings or Salmon Gravlax.
    • Blended into your favorite Beetroot Hummus.
    • Grain Bowls: Incorporate roasted beets into grain bowls with quinoa, Farro, or Brown Rice.
    • Add other toppings like Roasted Vegetables, feta cheese or a lemon Tahini dressing for a delicious meal.

    🍽 More Healthy Beetroot Recipe Ideas

    • homemade beetroot juice in a glass.
      How To Make Beetroot Juice
    • Best Beetroot Hummus Recipe.
      Best Beetroot Hummus Recipe (Vegan)
    • Beetroot Chocolate Cake.
      Best Beetroot Chocolate Cake Recipe (Moist + Festive!)
    • pickled beets in a bowl.
      Quick Pickled Beets Recipe (Using Canned Beets)

    Did you make this recipe? Leave a review and a ⭐⭐⭐⭐⭐ rating below, or tag us in our Facebook Group! Alternatively, bookmark it in your browser or save to Pinterest.

    Balsamic Roast Beetroot Recipe.

    Balsamic Roast Beetroot Recipe

    Angela Milnes
    Elevate your side dish game with this Balsamic Roast Beetroot! Tender, caramelized beetroot is roasted to perfection and drizzled with a tangy balsamic glaze, creating a deliciously earthy and sweet flavor. It’s a simple yet elegant dish that adds a pop of color and taste to any meal!
    5 from 3 votes
    Print Recipe Pin Recipe Rate this Recipe
    Prep Time 10 minutes mins
    Cook Time 1 hour hr 20 minutes mins
    Additional Time 0 minutes mins
    Total Time 1 hour hr 30 minutes mins
    Course Beetroot Recipes
    Cuisine American
    Servings 5 Servings
    Calories 75 kcal

    Ingredients
      

    • 3 Fresh Beets
    • 1-½ tablespoons Balsamic Vinegar
    • 1-½ tablespoons Extra Virgin Olive Oil
    • 1 tablespoon Honey
    • ¾ teaspoon Salt
    • pinch Black Pepper optional

    Instructions
     

    • Start by washing the fresh beets thoroughly and chopping the tops from the beetroot.
    • Then, individually wrap each beet in aluminum foil to prepare them for roasting and place them on a baking sheet or baking dish.
    • Place the foil-covered beets in an oven preheated to 400°F (200°C) and roast them for 60 to 80 minutes until they are tender. You can check for doneness by inserting a fork into the beets; it should easily pierce through.
    • Once the beets are roasted and tender, allow them to cool slightly before handling. Gently peel off the skin from each beet using your fingers or a paper towel (a vegetable peeler will also work). The skin should come off easily.
    • After peeling, slice the roasted beets into bite-sized pieces or slices, depending on your preference.
    • In a small bowl, whisk together balsamic vinegar, extra virgin olive oil, honey, salt, and pepper to taste (if desired).
    • Place the sliced beets in a serving bowl and drizzle the prepared balsamic dressing over them. Gently toss to ensure the beets are evenly coated with the flavorful dressing.
    • Your delicious balsamic roast beetroot is now ready to be served! Enjoy this flavorful dish as a side or a standalone salad.

    Notes

    Marinating Magic: Consider letting the sliced beets marinate in the balsamic dressing for an hour before serving for enhanced flavor.
    Herb Power: Try adding chopped herbs like fresh rosemary or thyme to the balsamic dressing for an extra burst of flavor.

    Nutrition

    Calories: 75kcalCarbohydrates: 9gProtein: 1gFat: 4gSaturated Fat: 1gPolyunsaturated Fat: 0.5gMonounsaturated Fat: 3gSodium: 389mgPotassium: 168mgFiber: 1gSugar: 7gVitamin A: 16IUVitamin C: 2mgCalcium: 10mgIron: 0.5mg
    Print Recipe Pin Recipe Rate this Recipe
    Tried this recipe?Let us know how it was!
    • « Previous Page
    • 1
    • …
    • 10
    • 11
    • 12
    • 13
    • 14
    • …
    • 19
    • Next Page »
    Angela Milnes.

    Hi I'm Angela

    Welcome to Eat Your Beets where you'll find Healthy and Nutritious Family Recipes that are tasty and simple to cook.

    More About Me

    Spring Recipes

    • edamame stir fry in a white bowl.
      Easy Edamame Stir Fry (15-Minute Protein-Packed Side Dish)
    • Best Gravlax Salmon With Dill (Cured Salmon).
      Best Gravlax Salmon With Dill (Cured Salmon)
    • One Pan Chicken And Asparagus.
      One Pan Chicken And Asparagus
    • Chicken And Cabbage Stir Fry Recipe.
      Chicken And Cabbage Stir Fry Recipe
    • Zucchini Egg Bake Recipe.
      Best Zucchini Egg Bake Recipe
    • How To Make Sun Dried Tomatoes Without Oil.
      How To Make Sun Dried Tomatoes Without Oil – Easy Oven Method

    Popular Recipes 💗

    • best stuffed mushrooms.
      The Best Stuffed Mushrooms
    • Slow Cooker Chicken Bacon Ranch Pasta.
      Slow Cooker Chicken Bacon Ranch Pasta
    • Baked Ricotta On A Spoon.
      Bariatric Friendly Ricotta Bake Recipe
    • Fun Veggie Train With Bell Peppers.
      Fun Veggie Train With Bell Peppers
    • Best Blueberry Smoothie Bowl topped with fruit.
      Best Blueberry Smoothie Bowl Recipe
    • Grilled Eggplant With Lemon Dip.
      Grilled Eggplant With Lemon Dip
    • Air Fryer Asparagus with Parmesan.
      Air Fryer Asparagus with Parmesan
    • Sheet Pan Chicken Fajitas.
      Sheet Pan Chicken Fajitas

    Footer

    As Seen In

    As Seen In.
    • Facebook
    • Pinterest

    Privacy Policy

    Accessibility Policy

    ↑ Back To Top

    Copyright © 2025 | Eat Your Beets | All Rights Reserved

    Rate This Recipe

    Your vote:


    A rating is required
    A name is required
    An email is required