​

Eat Your Beets

  • About
  • Spring Recipes
  • Vegetables
  • Side Dishes
  • Recipe Index
menu icon
go to homepage
  • About
  • Spring Recipes
  • Vegetables
  • Side Dishes
  • Recipe Index
    • Facebook
    • Pinterest
  • subscribe
    search icon
    Homepage link
    • About
    • Spring Recipes
    • Vegetables
    • Side Dishes
    • Recipe Index
    • Facebook
    • Pinterest
  • ×
    Sign Up To Our Newsletter →
    Home » Recipe index

    Instant Pot Kielbasa And Cabbage

    September 19, 2024 by Angela Milnes

    Instant Pot Kielbasa And Cabbage.

    If you're looking for a hearty, flavorful meal, my Instant Pot Kielbasa and Cabbage is a real winner! This classic combo of cabbage and sausage cooks up quickly and easily in the Instant Pot, making it perfect for busy weeknights.

    instant pot keilbasa and sauterkraut.
    [feast_advanced_jump_to]

    Why This Recipe Works

    • Hearty and Comforting: Instant Pot Kielbasa And Cabbage is packed with hearty ingredients like kielbasa, potatoes, and cabbage, making it a comforting meal for any day.
    • Quick and Easy: The Instant Pot makes this Kielbasa And Cabbage recipe quick and easy to prepare, perfect for busy weeknights.
    • Flavorful and Tangy: The combination of kielbasa, cabbage, and apple cider vinegar creates a deliciously tangy and savory flavor profile.

    🥘 Ingredients

    Instant Pot Kielbasa And Sauerkraut Ingredients.
    • Red potatoes: Scrubbed and halved for a hearty base.
    • Onion: Chopped for added flavor and aroma.
    • Cabbage: Cored and cut into 2-inch pieces for a tender texture.
    • Chicken broth: Provides a rich and savory cooking liquid.
    • Apple cider vinegar: Adds a tangy kick to balance the flavors of the recipe
    • Dried thyme: Infuses a subtle herbal note.
    • Salt and black pepper: Season to taste for balanced seasoning.
    • Butter: Cut into pats to add richness and flavor to dish.
    • Kielbasa: Sliced to add smoky, savory goodness.

    For the complete list of ingredients with measurements and instructions, please see the recipe card at the bottom of the post.

    📖  Substitutions & Variations

    • Vegetarian Option: Replace kielbasa with plant-based sausage and add extra veggies like bell peppers and zucchini. Stir in a dollop of sour cream or cream cheese at the end for a creamy finish to the dish.
    • Smoky Green Bean Delight: Combine smoked sausage with canned green beans, Yukon Gold potatoes, and a hint of caraway seeds for a flavorful and hearty one-pot meal.
    • Potato Heat Infusion: Introduce a spicy twist to the recipe with fresh green beans, brown sugar, cubed potatoes, and a generous sprinkle of paprika or hot sauce to elevate the flavors with a fiery and satisfying heat.

    🔪How To Make Instant Pot Kielbasa And Cabbage

    potatoes and cabbage in instant pot

    Step One: Chop the red potatoes, slice the onion, chop the cabbage, and slice the kielbasa into bite-sized pieces.

    cabbage in instant pot with seasoning

    Step Two: Dump the red potatoes, onion, cabbage, and kielbasa into the pressure cooker pot.

    cabbage and kielbasa in instant pot

    Step Three: Top the ingredients with butter, chicken broth, vinegar, thyme, salt, and pepper. Place the lid on the pressure cooker, set the valve to sealing, and select the "manual" or "pressure cook" setting for 5 minutes.

    cooked keilbasa and cabbage in a pot.

    Step Four: After cooking, allow a 10-minute natural release of pressure before opening the pressure cooker. Gently toss the ingredients together in the pot, then serve up your delicious Instant Pot Kielbasa and Cabbage!

    👩‍🍳 Expert Tips

    • Sauté for Flavor: Consider sautéing the kielbasa and onions before pressure cooking to enhance their flavors.
    • Let Flavors Marinate: For even more flavor, allow the dish to sit for a few minutes after cooking to let the flavors meld together.

    💭 FAQs

    What Is Kielbasa?

    Kielbasa is a type of Polish sausage that is popular in many countries. The word literally means sausage in Polish. Kielbasa can be made from a variety of meats, including pork, beef, turkey, and lamb. It is often flavored with garlic, marjoram, and other spices, which give it a distinct, savory taste.

    What Are The Different Types Of Kielbasa?

    There are many types of kielbasa, each with its own unique preparation and flavor profile. Some common varieties include:

    Kiełbasa Biała (White Sausage): A fresh, uncooked sausage made with pork, garlic, and spices.

    Kiełbasa Krakowska (Krakow Sausage): A smoked sausage made with lean pork and a few spices, often served sliced.

    Kiełbasa Wiejska (Country Sausage): A smoked sausage made with pork and beef, known for its strong garlic flavor.

    Can I Use Frozen Kielbasa In This Instant Pot Recipe?

    Yes, you can use frozen kielbasa. However, it's best to thaw it first for more even cooking and better flavor. If you use it frozen, you will need to add 2 extra minutes to the pressure cooking time to ensure it's heated through.

    🧂Serving Suggestions

    Here are some of the best sides to serve with Instant Pot Kielbasa and Cabbage:

    • Almond Milk Mashed Potatoes: Creamy mashed potatoes provide a comforting and hearty base for the savory flavors of the Instant Pot cabbage and kielbasa. You can even mix in some grated cheese or chopped herbs for extra flavor.
    • Rye Bread or Soft Pretzels: Serve slices of hearty rye bread or soft pretzels on the side for dipping into the flavorful broth from the dish. The bread's earthy flavor and chewy texture complement the richness of this Instant Pot sausage recipe.
    • German Potato Salad: This tangy and slightly sweet potato salad, made with bacon, onions, and a vinegar-based dressing, pairs perfectly with the smoky flavors of the Polish sausage and cabbage. Plus, it's served cold, making it a refreshing contrast to the warm main dish.
    instant pot keilbasa and sauterkraut

    🍽 Related Recipes

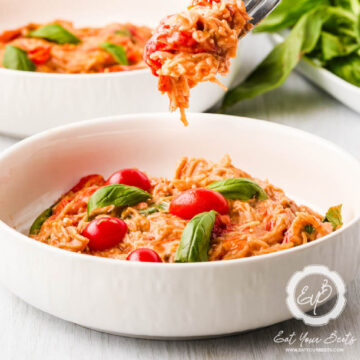
    • einkorn angel hair and cherry tomato pasta in a white bowl.
      One-Pan Einkorn Angel Hair Pasta with Cherry Tomatoes
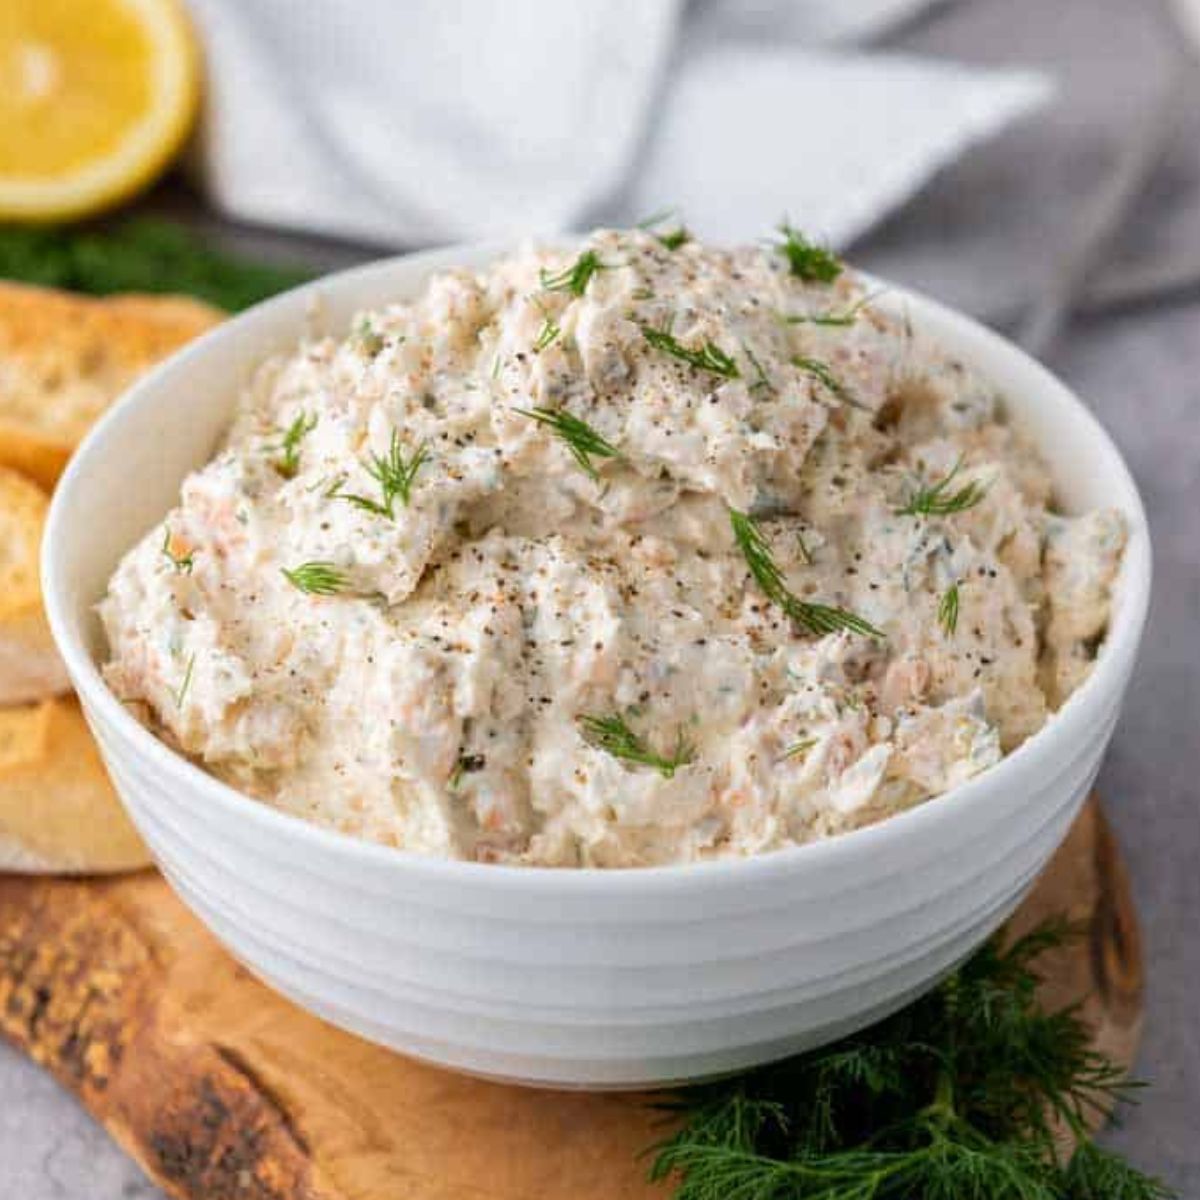
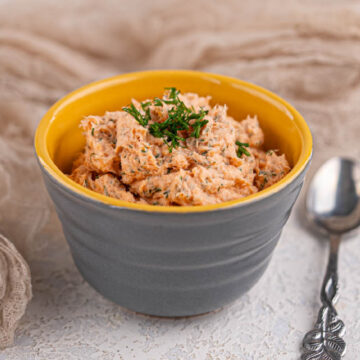
    • Salmon Dill Puree.
      Lemon Dill Salmon Mousse (Bariatric Friendly)
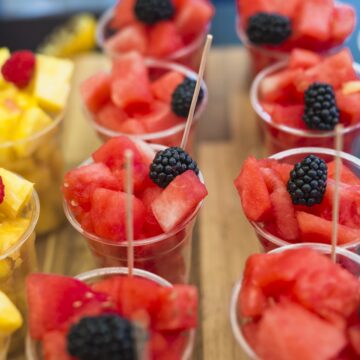
    • close-up-watermelon-slices-with-blackberry-plastic-disposable-cup-perfect for a summer party.
      How To Host An Awesome Summer Party
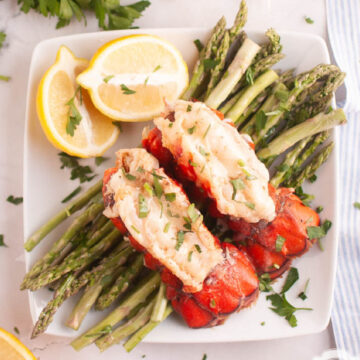
    • Oven baked lobster tail with garlic butter and lemon.
      How To Cook Lobster Tail At Home

    Did you make this recipe? Leave a review and a ⭐⭐⭐⭐⭐ rating below, or tag us in our Facebook Group! Alternatively, bookmark it in your browser or save to Pinterest.

    Instant Pot Kielbasa And Cabbage.

    Instant Pot Kielbasa And Cabbage

    Angela Milnes
    Enjoy a hearty and comforting meal with this Instant Pot Kielbasa and Cabbage! Savory kielbasa is cooked to perfection with tender cabbage, potatoes, and flavorful spices, all in the Instant Pot.
    5 from 3 votes
    Print Recipe Pin Recipe Rate this Recipe
    Prep Time 5 minutes mins
    Cook Time 5 minutes mins
    Additional Time 10 minutes mins
    Total Time 20 minutes mins
    Course Dinners
    Cuisine Polish
    Servings 6 Servings
    Calories 197 kcal

    Ingredients
      

    • 1 ½ Pound Red Potatoes scrubbed and halved
    • 1 Onion chopped
    • 1 Medium Head Cabbage cored and cut into 2 inch pieces
    • 1 ½ Cups Chicken Broth
    • 1 Tablespoons Apple Cider Vinegar
    • ½ Teaspoon Dried Thyme
    • Salt And Black Pepper to taste
    • ¼ Cup 1 stick butter, cut into pats
    • 1 14 ounce package kielbasa, sliced

    Instructions
     

    • Chop the red potatoes, slice the onion, chop the cabbage, and slice the kielbasa into bite-sized pieces.
    • Dump the red potatoes, onion, cabbage, and kielbasa into the electric pressure cooker pot.
    • Top the ingredients with butter, chicken broth, vinegar, thyme, salt, and pepper.
    • Place the lid on the pressure cooker, set the valve to sealing, and select the "manual" or "pressure cook" setting for 5 minutes.
    • After cooking, allow a 10-minute natural release of pressure before opening the pressure cooker.
    • Gently toss the ingredients together in the pot, then serve up your delicious Instant Pot Kielbasa and Sauerkraut!

    Notes

    Sauté for Flavor: Consider sautéing the kielbasa and onions before pressure cooking to enhance their flavors.
    High Pressure Success: Ensure a well-sealed Instant Pot on high pressure for efficient and thorough cooking.
    Let Flavors Marinate: For even more flavor, allow the dish to sit for a few minutes after cooking to let the flavors meld together.

    Nutrition

    Serving: 1gCalories: 197kcalCarbohydrates: 29gProtein: 5gFat: 8gSaturated Fat: 5gPolyunsaturated Fat: 0.4gMonounsaturated Fat: 2gTrans Fat: 0.3gCholesterol: 22mgSodium: 329mgPotassium: 816mgFiber: 6gSugar: 7gVitamin A: 397IUVitamin C: 67mgCalcium: 82mgIron: 2mg
    Print Recipe Pin Recipe Rate this Recipe
    Tried this recipe?Let us know how it was!

    More Fantastic Recipes To Try:

    • Mediterranean Farro Salad
    • Best Cheesy Mashed Cauliflower Recipe
    • Instant Pot Cajun Rice And Beans Recipe
    • Vegan Beetroot And Black Bean Burger
    • Dutch Oven Corned Beef And Cabbage
    • Easy Air Fryer Broccolini
    instant pot keilbasa and sauterkraut

    How To Freeze Oranges

    September 19, 2024 by Angela Milnes

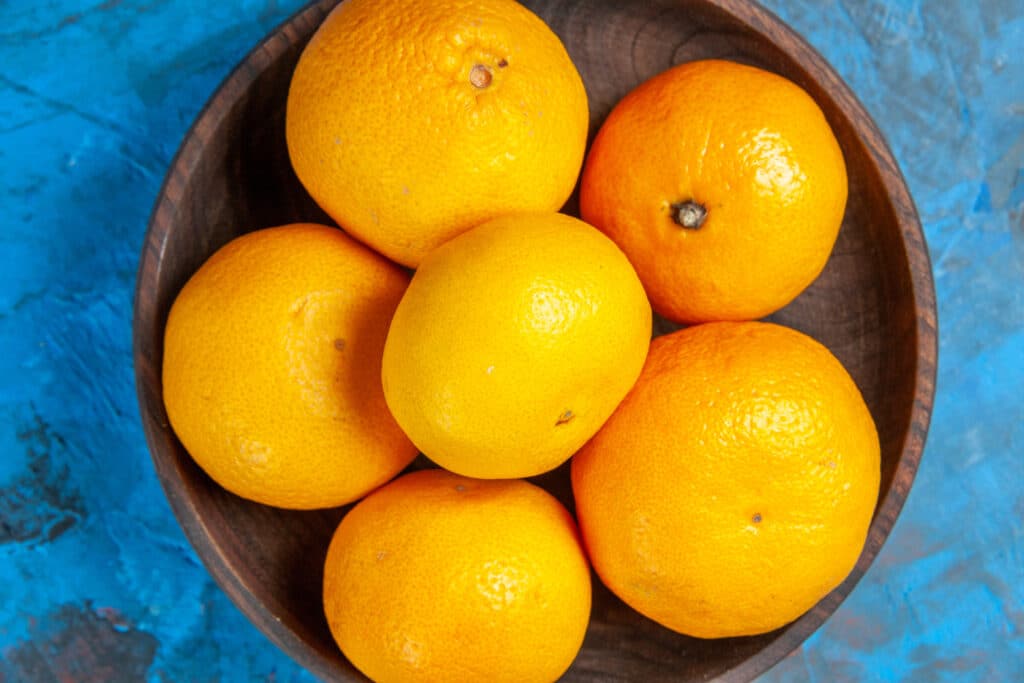
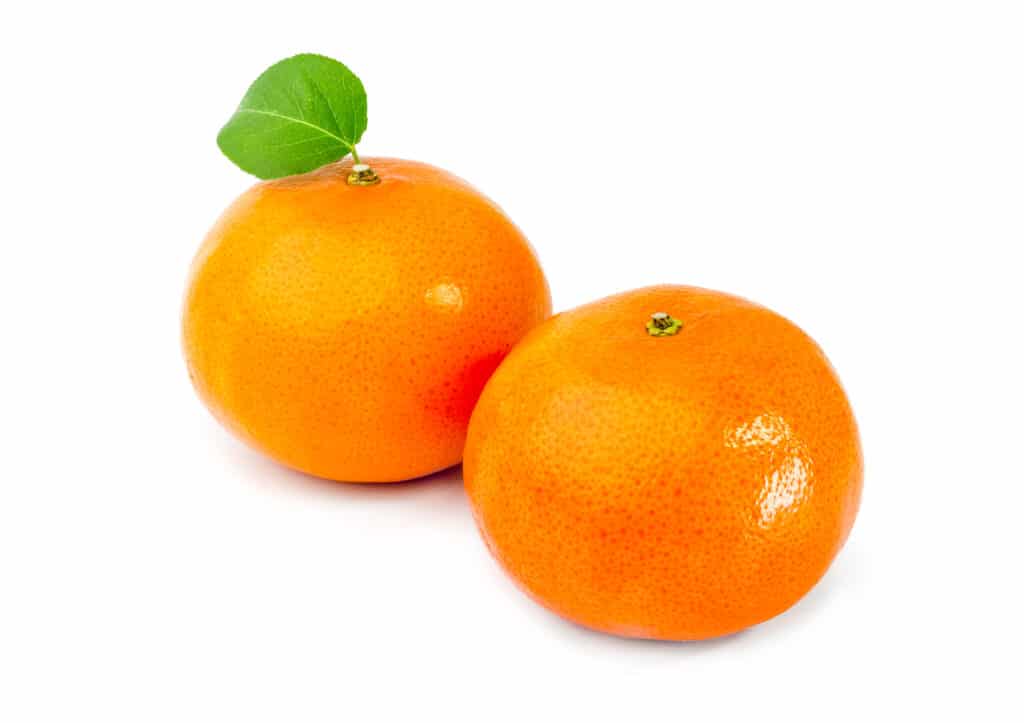
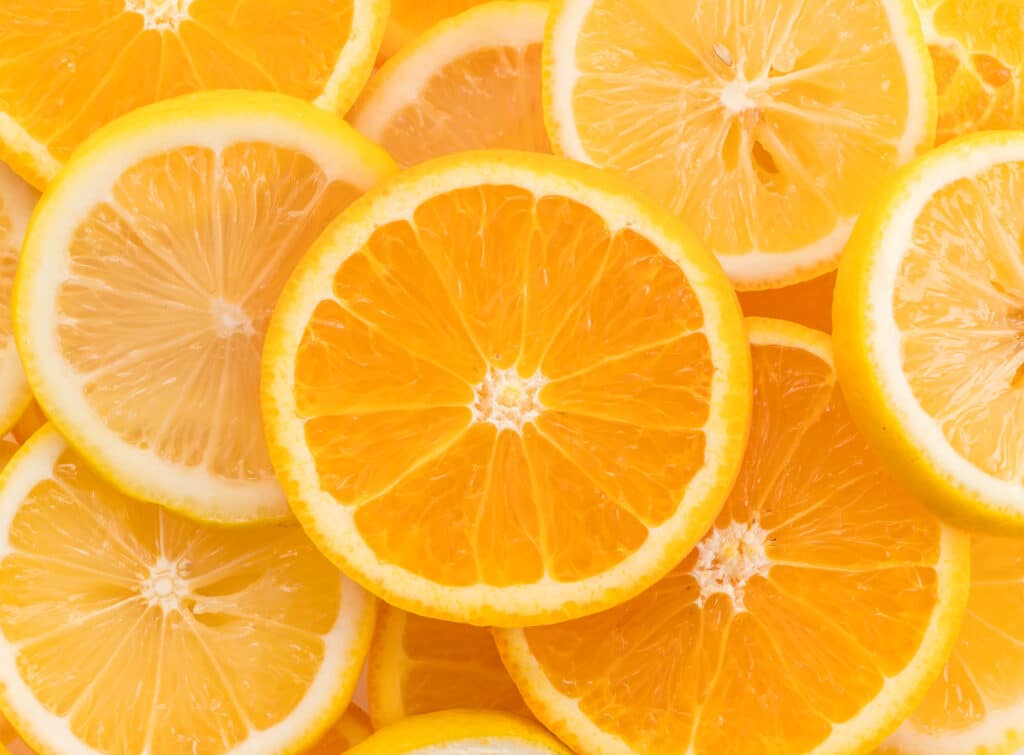
    Oranges.

    Wondering How To Freeze Oranges and save that citrusy goodness for later? You’re in luck! Freezing oranges is a simple way to preserve their fresh flavor for smoothies, desserts, or even a quick snack anytime. I’ll walk you through the easy steps on freezing oranges, so you can enjoy them whenever you like!

    How To Freeze Oranges
    [feast_advanced_jump_to]

    Can We Freeze Citrus Fruits?

    Yes, you can! Freezing oranges is quite easy and it won't affect the flavor or quality of oranges. You'll still end up with good-tasting oranges after freezing them, but not-so-good-looking oranges.

    What Are The Pros And Cons Of Freezing Oranges?

    By freezing oranges, you can keep their taste, nutrients, and vitamins. Moreover, you can also eat them when they thaw.

    The bad things about oranges are that they take up a lot of space and the peels may crack if you freeze them for too long.

    How To Freeze Oranges

    Why Freeze Oranges:

    1. To save oranges from going bad.

    2. To enjoy their taste during the off-season. As they are expensive when they aren't in season.

    3. By freezing the orange whole (or in chunks), you can take out the seeds and peel them.

    4. You can eat them when you feel like it (fresh orange or frozen fruit).

    5. Freeze oranges and use them as ice cubes. So, you can have fresh juice whenever you want!

    6. You can make orange-flavored candy, jelly, or marmalade by freezing them.

    How To Freeze Oranges

    Can We Freeze Orange Juice?

    Yes! It is quite easy to do, but keep in mind that the frozen orange will have a different texture from what you are used to.It will also have a lower nutritional value!

    Can We Freeze Orange Slices?

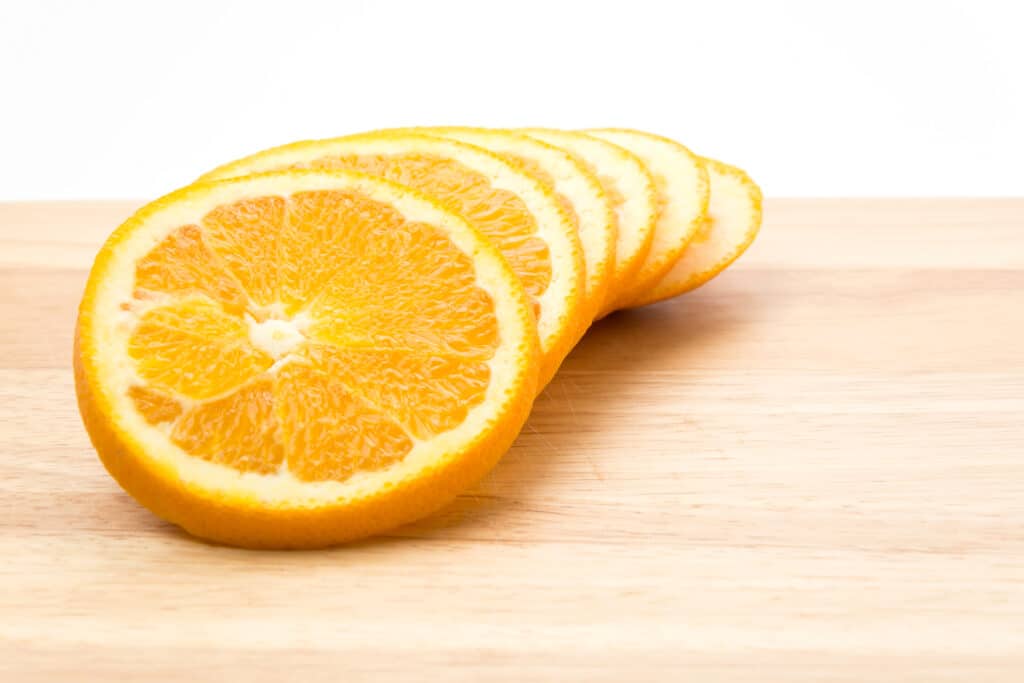
    Yes! You can freeze orange slices. If you want to use the orange slices, later on, make sure you cook the slices first.

    Can We Freeze Orange Chunks?

    Yes! They are so easy to do and you can use them at any time after they thaw!

    Can We Freeze Orange Wedges?

    Yes, you can easily do that by cutting the oranges into wedges and then putting them into a zipper bag.

    However, if you need to use the wedges for cooking or other things, try not to thaw all of them at once.

    Expert Tips:

    Freezing oranges is very simple and easy. However, there are some important things to keep in mind:

    • Make sure you choose good oranges otherwise, the texture and taste of your oranges may not be very good after you thaw them.
    • Use gallon-size bags and put the oranges vertically into the bags. This way, you can remove as much air as possible from the bag.
    • You can use a vacuum sealer to remove the maximum amount of air from the bags.
    • For freezing orange segments in ice cube trays, you should remove as much air as possible, just like when you freeze oranges.
    • Try to seal the zipper bags properly; otherwise, your oranges may taste bitter!
    • You can use most kinds of oranges for freezing, including Valencia, Navel, and Hamlin.
    • Do not overfill your zipper bags; otherwise, the juice may spill out and make a mess!
    • Do not freeze oranges if their quality isn't very good.
    • You can use other containers for freezing oranges; just make sure they are watertight and that the lid is tightly closed!
    • You can use your freezer to store your oranges! Let them stay in the freezer until they are completely frozen. Then, you can move them to the refrigerator.
    • Do not thaw your oranges before you use them; otherwise, their texture will change! If you need to use them before they thaw, put them in the refrigerator and let them stay there until they defrost.
    • If you want to use orange slices for cooking, you should cook the oranges until they are tender first!
    How To Freeze Oranges

    How To Freeze Oranges?

    First, prepare a bowl of cold water and put the oranges in the bowl. Leave them for about an hour so their skin will be soft.

    Second, peel the oranges and remove their seeds! Make sure you handle them with care to avoid damaging or breaking them.

    Third, cut the oranges into small pieces. It is recommended that you use a sharp knife for this step!

    Fourth, seal the bag and put it in the freezer so it can freeze for a few hours or overnight.

    Fifth, transfer them to freezer bag, label with the date and put back into the refrigerator.

    How To Freeze Oranges With Peels On?

    You can freeze oranges without peeling them. Simply, add their peels to the bag to freeze them. However, the peeled oranges will taste better than the ones with peels on when freezing.

    How To Thaw Frozen Oranges?

    You can thaw your oranges in many ways; however, the best way to do it is by putting them in the refrigerator at least overnight. You can also put them in a bowl of cold water to speed up the process!

    You can also thaw oranges by putting them on your kitchen counter. They will thaw gradually, which is why it may take more time than putting them in the refrigerator overnight.

    How To Freeze Whole Oranges?

    Freezing whole oranges is easy. Just wash them, put them in a bowl and freeze them. When you freeze them, the skin regulates the internal temperature of the oranges.

    How To Freeze Orange Juice?

    The best way to freeze orange juice is in an ice cube tray. When you want to use it, all you need to do is remove the amount of orange juice that you need and let it thaw in your refrigerator.

    You can also use other containers for freezing orange juice, but make sure the container is watertight!

    You can also freeze without a container. You can pour it into a flat tray and let it freeze overnight.

    When you use the frozen orange juice, you can break it into small pieces by hitting the tray on your counter.

    How Long Can I Keep Frozen Oranges?

    You can keep frozen oranges for up to 6 months. You can also keep it for about 3 to 4 months! If you go for more than this, the taste and texture of the oranges will change a lot!

    Usually, if you want to eat oranges after 3 months, it is better to refreeze them!

    How To Use Frozen Orange Slices?

    You can eat Oranges alone or you can add frozen orange slices to your favorite desserts and meals. Some people even use frozen citrus in recipes!

    You can also add frozen orange slices to other fruits that don't have a lot of flavors, such as bananas, apples, or strawberries!

    How To Freeze Oranges

    FAQS

    How Do You Freeze Citrus Fruit? 


    To freeze citrus fruit, you have to peel them off first! Make sure you wash them before peeling them! After that, place their peels in a container and put them in your freezer until you need them for cooking or baking.

    After that, cut the oranges into pieces and place them in a freezer bag. Finally, label the freezer bag and put it back in your freezer! It’s that easy!

    Can You Freeze Whole Clementines? 

    Yes, you can! Clementines are great to freeze and they taste just as good after being frozen.

    Unlike orange zest, clementines don’t have thick skin, which makes them very easy to peel off! Make sure you wash your clementines before freezing them and remove any seeds or stems!

    Enjoy Freezing Oranges!

    So, there you have it! Now you know how to use frozen and thawed oranges. Now, you can enjoy the citrus all year long. From juices to recipes you will get the same pleasure each time.

    You may enjoy the following:

    • Tangerine vs Clementine: What’s the Difference?
    • Clementine VS Mandarin Oranges: A Detailed Guide

    How To Freeze Parsley

    September 19, 2024 by Angela Milnes

    Parsley in ice cubes tray.

    Looking for How To Freeze Parsley and keep its fresh flavor all year long? You’re in the right place! Freezing parsley is an easy and effective way to preserve this versatile herb for all your favorite soups, sauces, and more. In this post, I’ll walk you through the simple steps to freeze parsley so you’ll always have some on hand when you need it!

    How To Freeze Parsley
    [feast_advanced_jump_to]

    What Is Parsley?

    Parsley is a green herb that is widely used as a garnish for a variety of dishes. Parsley is part of the Apiaceae family, which includes other vegetables like carrots, celery, and fennel.

    How To Freeze Parsley

    Can You Freeze Parsley?

    Yes, you can freeze parsley for later use and to maintain its freshness. Freezing fresh parsley is a convenient option for those with a surplus of parsley or who want to keep it on hand for future use.

    How to Freeze Parsley?

    Freezing parsley is a great way to preserve this herb for later use while maintaining its fresh taste and nutritional value. Follow these steps to freeze parsley:

    Step 1: Choose Fresh Parsley

    Start by choosing fresh parsley. Look for vibrant green leaves with no signs of wilting or yellowing.

    Consider purchasing parsley from local farmer's markets, where you can find freshly harvested and organic herbs. By starting with high-quality parsley, you can ensure the best taste and texture when it's time to use it in your favorite recipes.

    How To Freeze Parsley

    Step 2: Wash the Parsley

    Before freezing parsley, it's essential to wash the parsley leaves thoroughly to remove any dirt or debris. To clean the parsley, hold the bunch of parsley under running cool water and gently rub the leaves between your fingers.

    Be sure to wash all the parsley, including the stems, as they also contain flavor and nutrients. By taking the time to wash the parsley before freezing, you can ensure that it stays fresh and flavorful for longer.

    How To Freeze Parsley

    Step 3: Blanch The Parsley (Optional)

    Blanching parsley is an optional step when freezing parsley, but it can help maintain the quality and preserve the bright green color and texture of Parsley.

    To blanch the parsley leaves, boil water in a pot and prepare a bowl of ice water. Once the water is boiling, add the whole parsley leaves to the pot and let them cook for 15-20 seconds.

    How To Freeze Parsley

    Step 4: Drain And Dry The Parsley

    After washing and blanching the whole parsley, it's crucial to drain and dry excess moisture thoroughly before freezing. You can use a salad spinner to remove excess water or lay the parsley leaves on a paper towel to pat them dry.

    Alternatively, you can let the parsley air dry for a few hours before freezing. Ensure the parsley is completely dry before storing it in a freezer-safe container.

    Step 5: Chop The Parsley

    Remove the leaves from the stems of parsley and finely chop them on a cutting board using a sharp knife.

    It's important to use a sharp knife to ensure that the parsley doesn't bruise and lose its flavor. Once chopped, spread the parsley evenly on a baking sheet and place parsley in the freezer for 30 minutes to an hour or until frozen solid.

    How To Freeze Parsley

    Step 6: Pack The Parsley Into Containers

    Packing chopped parsley in resealable plastic bags or freezer bags is a great way to store it for later use. When packing the parsley, be sure to remove excess air as much as possible from the container to prevent freezer burn on the parsley.

    A glass jar with a tight-fitting lid is an excellent choice for storing frozen herbs, including parsley.

    Step 7: Label And Freeze The Parsley

    Once you have prepared parsley, the final step is to label and freeze it in the refrigerator. This helps you keep track of what you have and when you freeze it.

    Labeling is especially important if you plan on storing a big batch of frozen herbs. Be sure to include the date and the contents of the container on the label. This ensures you'll use the oldest parsley first and always know what's in each container.

    By following these simple steps, you can enjoy fresh-tasting parsley all year round!

    How To Freeze Parsley

    Alternative Methods for Storing Parsley

    Ice Cube Tray Method

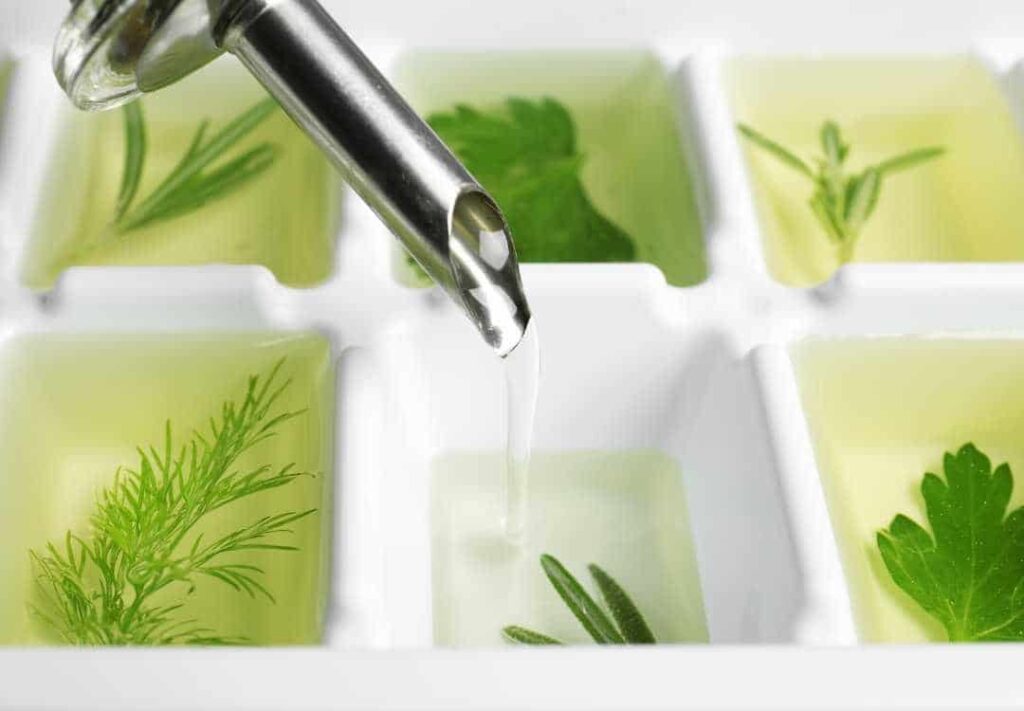
    One of the alternative storage methods for storing parsley is by using ice cube trays. To use this method, simply chop the parsley and fill each compartment of ice cube trays about halfway with the chopped herb.

    Then, pour olive oil over the parsley until it's completely covered. In this way, you can preserve parsley with oil cubes and prevent it from freezer burn. Pop out the parsley frozen cubes and store them in a resealable bag or container.

    These parsley ice cubes are a convenient way to add taste to soups, stews such as Instant Pot Chicken Pot Pie Soup, Jamaican Oxtail Stew and other recipes without having to chop Fresh Herbs every time you cook.

    How To Freeze Parsley

    Freezing Parsley Pesto

    Another storage method to freeze parsley is making parsley pesto and storing it in the freezer. To freeze parsley pesto, simply prepare parsley by chopping it and combining it with nuts, parmesan cheese, garlic, and olive oil in your food processor and mix until smooth.

    Once you've made the pesto, transfer it to a container or resealable bag and store it in the freezer until ready to use it. This is a great way to store parsley and have a quick and easy flavor boost for meals.

    You can also make "herb bombs" by spooning the pesto into an ice cube tray and freezing it until solid. These herb bombs can then be used to add flavor to soups, sauces, and other dishes whenever you need a burst of fresh herb flavor.

    How To Freeze Parsley

    How Long Can You Freeze Parsley?

    Frozen parsley can last for up to six months in the freezer, but for the best flavor and texture, it's recommended to use it within 2-3 months. For this reason, it may be best to freeze small portions of parsley to avoid wasting any of it.

    Can You Freeze Parsley With Other Herbs?

    Yes, parsley can be frozen with other herbs. Freezing herbs together is a great way to create ready-to-use flavor combinations for your favorite dishes.

    You can chop a variety of herbs together and freeze them in the same container or bag. However, it's important to note that some herbs may have different freezing times, so it's best to freeze herbs with similar textures and moisture content together.

    Does Frozen Parsley Look And Taste The Same As Fresh Parsley?

    The frozen parsley may not look or taste exactly like fresh parsley. The freezing process can alter its texture and flavor by causing the water inside the parsley cells to expand and rupture, resulting in slightly wilted or discolored parsley when thawed. While the texture and flavor of frozen parsley may be different from fresh parsley, it can still be a useful ingredient in cooked dishes.

    So, follow the tips mentioned above on how to freeze parsley and enjoy it all year round!

    How To Freeze Parsley

    How Can You Tell If Frozen Parsley Has Gone Bad?

    Freezer burn, changes in color and texture, and strange odors are all signs of spoilage.

    If you notice any of these signs, discard the frozen parsley immediately. Proper freezing and storage techniques can help maintain the quality and safety of frozen parsley.

    How To Freeze Parsley

    How Do You Prevent Freezer Burn On Frozen Parsley?

    Freezer burn can leave the herb dry and leathery. Proper packaging, quick freezing, and storing at 0°F (-18°C) or lower in a quality freezer bag can help keep parsley fresh in the freezer.

    Can You Freeze Parsley Stems Or Just The Leaves?

    Parsley leaves and stems can both be frozen, but the texture and flavor of the stems may differ. You can freeze the stems with the leaves if you plan to use them in cooked dishes where texture is less important.

    However, if you prefer using only the leaves, you can remove the stems before freezing, although doing so means missing out on some of the parsley's nutrition.

    How Much Parsley Should You Freeze At A Time?

    There is no specific amount of parsley that you should freeze at a time, as it depends on how much you plan to use. However, it's important to freeze only the amount that you will use within a reasonable timeframe to maintain its quality.

    How Do You Thaw Frozen Parsley?

    To thaw frozen parsley, transfer it to the refrigerator and leave it overnight or submerge it in cold water for up to 30 minutes. Avoid using a microwave or hot water. Use within a few days of thawing for the best flavor.

    Can You Use Frozen Parsley In Raw Dishes Like Salads?

    Frozen parsley is unsuitable for raw dishes like salads because its texture changes when it thaws, becoming limp and mushy. To ensure optimal quality and flavor, it is recommended to use fresh parsley for salads. If fresh parsley isn't available, consider substituting it with other fresh herbs or omitting it altogether.

    What Recipes Can You Use Frozen Parsley In?

    Learning how to freeze parsley is just the first step. Here are some delicious recipes you can use frozen parsley in:

    Soups and stews: For this recipe, add a few sprigs of frozen parsley to your favorite soup or stew for extra flavor.

    Sauces and marinades: use frozen parsley cubes in homemade sauces and Marinades for Meats, Seafood, or Vegetables.

    Parsley and Pine Nut Dip: Combine thawed frozen parsley, pine nuts, and olive oil in a food processor. Blend until smooth and creamy. You can use it as a dip for crackers or vegetables.

    There are many other recipes in which you may add frozen parsley as a garnish.

    FAQ's

    What Does Parsley Taste Like?

    Parsley has a mild and slightly bitter taste with a fresh and herbaceous aroma. The flavor of parsley can vary based on the type of parsley, as curly parsley has a milder taste than Italian (flat-leaf) parsley.

    While parsley is not a strongly flavored herb, it adds complexity to dishes and complements other flavors.

    Wrapping Up

    Thus, with these valuable insights, you can enjoy parsley's flavor and health benefits throughout the year.

    Adding parsley to your meals can help increase your intake of monounsaturated fat, which can improve heart health.

    So, go ahead and try freezing parsley today and incorporate this nutritious ingredient into your daily diet!

    Recipes With Parsley You May Enjoy.

    Check out our Cheesy Mexican Steak And Rice Recipe with uses parsley as an optional garnish. Also, go and check out this Baked Crispy Salmon Bites recipe which also uses parsley as a garnish option.

    How To Freeze Wedding Cake

    September 19, 2024 by Angela Milnes

    Wedding cake.

    Want to save a slice of your wedding cake for your first anniversary? Freezing it is the perfect way to keep it fresh and delicious! I’ll guide you through the steps on How To Freeze Wedding Cake properly, so you can relive that sweet moment a year later with a perfectly preserved slice.

    vertical closeup shot three layer wedding cake decorated with flowers silver platter.
    [feast_advanced_jump_to]

    Why Do People Save Wedding Cakes?

    Wedding cake isn't just for eating on your wedding day - it's also a tradition to have some saved so that you can eat this on your first anniversary.

    So let's get started on how to freeze your Wedding Cake so you can indulge on your anniversary.

    Can You Put Wedding Cake In The Freezer?

    Yes! Freezing is one of the best ways to make your wedding cake last longer. However, there are certain steps you'll need to take to make sure your cake is stored properly and that it doesn't go soggy or stale.

    Why Do People Keep Wedding Cake In The Freezer?

    Generally, people keep their wedding cake in the freezer for several reasons.

    • To make sure it lasts as long as possible - some couples are saving the top tier of their wedding cake for a special anniversary or upcoming birthdays!
    • Some people want to enjoy their Wedding Cake at home on normal days with family and friends without having to make a trip to the bakery or spend money on delivery.
    • You can also take your wedding cake with you for an Anniversary Celebration elsewhere, even if it’s not in your hometown.

    Can You Freeze A Cake With Icing?

    Yes! You can freeze your wedding cake with icing, but it's important to note that the moisture in any buttercream will not be able to escape.

    This means if you have a buttercream cake you will have to thaw your wedding cake in a fridge and not at room temperature...even when if you use aluminum foil and wrap airtight.

    Beautiful Wedding Cake

    How Do You Store A Wedding Cake In The Freezer?

    There are several different methods for freezing your wedding cake. Let's take a look at how you can freeze wedding cake step by step:

    Step 1: Removing The Cake From Its Stand  

    After the celebrations have come to an end and when it's time for the couple to go home, carefully remove the top tier of your beautiful wedding cake from its stand and place it on a large plate.

    Step 2: Wrap The Cake

    Next, cover the cake in a layer of greaseproof paper and wrap that up tightly also. If too much air gets into the foil or paper wrapping then condensation may form on the inside which will cause the cake to go soggy.

    You don't want the frosting, filling, or cake layers to go stale so take your time to wrap the cake well and try to do it on the wedding night.

    Step 3: Placing Cake Into A Box And Freezing

    Place the wrapped cake inside a box and into your freezer. This will help to keep it from getting squashed or broken when put into storage.

    You can freeze uncovered but a box will protect your cake and allow it to last longer and will help prevent freezer burn.

    Step 4: Placing In The Freezer  

    Now that your wedding cake is wrapped up, place it into the freezer until frozen solid. You can store this for up to a year or longer. If you want to store more than one tier, you can save the top tier for your first anniversary and save the second tier of your wedding cake for eating at your first child's christening.

    Step 5: Thawing Your Wedding Cake

    Remove the cake out of the freezer, allow the cake to thaw or defrost in the fridge for 12 hours before bringing it to room temperature.

    Once at room temperature, you can remove all the paper and aluminum foil from around your cake and place it on a cake stand ready to display and enjoy as you celebrate your first anniversary.

    Beautiful cake

    Best Storage Containers For Wedding Cake

    After wrapping your wedding cake in foil and baking paper you'll need a plastic cake box to properly freeze the keep it in top condition.

    Here are a few fantastic cake boxes that I'd recommend for your wedding cake.

    The Rubber Maid Serving Cake Saver: The Rubbermaid Servin' Saver Round Cake Keeper can hold up to 10" cakes or pies and features a base with molded-in centering rings plus a tight-fitting, see-through lid that keeps cakes fresh and lets you identify the contents without removing them.

    The base can be used as a serving tray by itself, and the entire package is top-rack dishwasher safe. I love this wedding cake box and it's a good size for a top tier cake.

    Hello Cupcake Portable Cake and Cupcake Carrier: This caddy/storage container holds all of your tastiest homemade creations including 12-inch wedding cakes. Whether you have a traditional fruit cake or a wedding cake topped with ganache or icing, this cake storage box is one you will love to use.

    Using A Cake Preservation Box

    At the end of the day, a cake preservation box or storage container is essential to prevent damage to your cake.

    FAQ's

    When Should I Cut My Wedding Cake?

    The wedding cake should be cut just before it is served to the guests. It's good to cut the cake in the final hour of the reception.

    Why Is It A Tradition To Cut The Cake At A Wedding?

    It's tradition to cut the cake at a wedding because it is believed that this will bring good luck and prosperity for the couple throughout their life.

    What Are Some Of The Meanings Of Cutting Cakes?

    There are many different types of cuts, each having an individual meaning; these include:

    The straight cut which represents eternity;
    The heart-shaped cut which represents love;
    The wavy cut which signifies waves of emotion;
    The circle-cut is symbolic of wholeness.

    Who Gets The First Bite Of Wedding Cake?

    Tradition has it that the bride gets to eat her slice first. This is because the cake is decorated in white, the color of purity.

    Eating the first bite also symbolizes luck, wealth, and fertility and when the bride eats her piece of cake before anyone else, tradition is said to ensure that she will enjoy all the wonderful things in life from now on!

    How To Freeze Spinach The Right Way

    September 19, 2024 by Angela Milnes

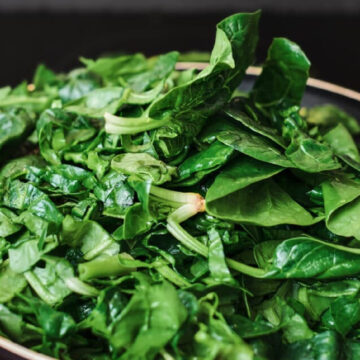
    Fresh spinach leaves.

    Got extra spinach on hand and wondering how to save it for later? Freezing spinach is a quick and easy way to keep it fresh and ready for all your favorite dishes. I’ll show you exactly How To Freeze Spinach, so you can enjoy its goodness and taste.

    How To Freeze Spinach
    [feast_advanced_jump_to]

    What You Should Know Before Freezing Spinach?

    First, you have to be aware of what type of spinach you are going to freeze. You can either go for the regular leafy type or Baby Leaves. Both are great for freezing.

    Decide how you want to freeze your green veg, directly in the freezer or by using the blanched spinach method.

    What Are The Benefits Of Freezing Spinach?

    Here are the benefits of freezing spinach:

    1. Frozen Spinach is convenient - it's already cooked and ready to use in a variety of dishes.
    2. Freezing spinach in freezer bags couldn't be easier! Just place the leaves in a freezer bag and pop them into your freezer.

    What Is the Best Way To Freeze Spinach?

    The best way to freeze spinach is to blanch, dry, and then pack into freezer bags or containers.

    Freezing fresh spinach and incorporating it into the cooking process, is a great way to add extra nutrition to your meals.

    How To Freeze Spinach Leaves?

    The process of freezing spinach leaves is easy but it's important to make sure you do it properly so you can enjoy this superfood for months to come...

    • First, wash your spinach leaves in a large pot.
    • Trim the roots and stems.
    • Blanch the fresh spinach in boiling water for two minutes.
    • Remove and allow to cool down in ice water.
    • Remove and squeeze excess water out once your leafy greens are at room temperature.
    • Lay the blanched spinach out on paper towels.
    • Once dry you can bag it into zip-lock freezer bags.
    • Label with the date before freezing your raw spinach.

    Freeze Spinach In Containers

    Another great way of preserving raw spinach from the garden is by freezing it directly in containers. You will need air-tight freezer containers to help remove as much air as possible.

    Label your container with a marker before placing it in the freezer.

    This will make it easier to find when you need some frozen spinach on a cold winter day1

    Want to know more ways to use spinach? Try this recipe for Spinach Rice Casserole With Feta Cheese.

    Freeze Spinach Cubes

    My favorite way to preserve fresh spinach for later use is to make spinach cubes using ice cube trays.

    • Place your cooked and drained spinach leaves in a blender.
    • Blend until it forms a puree.
    • Add your pureed spinach into an ice cube tray. I prefer to use silicone trays.
    • Freeze overnight.
    • Remove the spinach ice cubes from the ice cube trays and add them into freezer bags or a container.
    • When needed, just place the frozen cubes of spinach into a pan and warm over medium heat.
    frozen spinach cubes

    Freeze Fresh Spinach For Smoothies

    The best way to freeze your fresh greens for smoothies is by freezing pureed spinach.

    Spinach puree is great in a smoothie. You can grab just the right amount of frozen cubes from your freezer bag and add them to your Breakfast Smoothie.

    Using ice cube trays and making frozen spinach puree can help prevent freezer burn which is a bonus!

    When you freeze fresh spinach it allows the raw spinach to last longer. I always recommend you freeze spinach when you have too much.

    spinach on table

    How To Thaw Frozen Spinach Leaves?

    There are three ways to thaw frozen spinach leaves.

    1. Place your frozen leaves in the refrigerator overnight before using them.
    2. Remove spinach from the container or bag. Place the spinach submerged into a bowl of cold water for about an hour before using it.
    3. Heat the frozen spinach in a microwave for 30 seconds if adding to a meal.

    Now you know how to freeze spinach, you can store it in the freezer and use it to make tasty recipes and smoothies. Enjoy

    FAQ'S

    Will Freezing Ruin Spinach?

    No, this green leafy vegetable can be kept fresh in the freezer for up to nine months. Just make sure you blanch spinach before placing it in freezer bags.

    You can thaw a big handful to use in new recipes and when you’re making smoothies. It’s so easy to freeze spinach and use in your favorite recipes.

    How Long Do You Blanch Spinach For Freezing?

    Add spinach to boiling water for two minutes to blanch spinach. When freezing baby leaves, I prefer to blanch them before freezing.

    Can You Freeze Half and Half

    September 18, 2024 by Angela Milnes

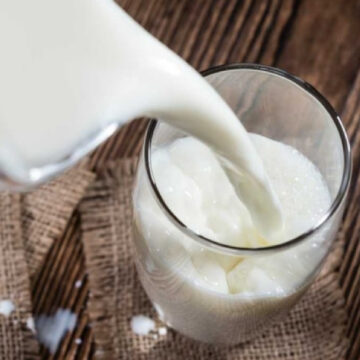
    pouring milk in a glass.

    Can you freeze half and half? The answer is yes. Whether you seek to freeze half and half, whole milk, or heavy cream, understanding the nuances of freezing dairy is key. Let's explore the ins and outs of freezing half and half.

    Milk In A Glass  can you freeze half and half milk
    [feast_advanced_jump_to]

    Can You Freeze Half and Half?

    Yes, you can freeze half and half. This dairy product, a blend of half milk and half cream, is often used in cooking and baking. Freezing half and half can be a convenient option if you have more than you need or want to keep it on hand for future use.

    Does Freezing Affect Its Taste and Texture?

    Freezing half and half can cause slight changes in texture. You might notice some separation or graininess after thawing. However, these changes are usually minimal, and the half and half should still be suitable for cooking or baking.

    How to Freeze Half and Half

    Freezing Unopened Half and Half

    • Ensure It’s Fresh: Ensure the half and half is within its expiration date. Freezing milk or half and half close to its expiration date may affect quality.
    • Freeze Directly: Unopened cartons of half and half can be placed directly in the freezer. Make sure there’s enough room in the freezer for expansion.
    • Label the Carton: Label its carton with the date of freezing.

    Freezing Opened Half and Half

    • Transfer to Airtight Containers: Pour the remaining half and half into an airtight plastic container or freezer bag, leaving some space at the top for expansion.
    • Ice Cube Tray for Portioning: Another easy way to freeze is to pour half and half into ice cube trays. This method ensures you can thaw only what you need, similar to freeze milk.
    • Label and Date: Label the half and half container with the date.

    Thawing Half and Half

    • Transfer to the Fridge: Move the frozen half and half to the refrigerator and let it thaw overnight. Thawing in the fridge helps maintain its texture and flavor.
    • Shake or Stir: Thawed half and half can separate. Shake well or stir to recombine, similar to frozen milk.

    How to Use Thawed Half and Half in Recipes

    • Soups and Sauces: Incorporate thawed half and half into creamy soups and sauces. It can add richness and a smooth texture to recipes like Leek and Potato Soup, Instant Pot Chicken Gnocchi Soup, and Instant Pot Clam Chowder.
    • Baking: Use thawed half and half in baking recipes where it replaces milk or cream, such as in Pumpkin Crunch Cake, Zucchini Chocolate Chip Muffins, and pastries.
    • Instant Pot Mashed Potatoes: Add thawed half and half to mashed potatoes for a creamy and rich texture. It enhances the flavor and smoothness of the dish.
    Instant Pot Clam Chowder

    How Long Can You Freeze Half and Half?

    For the best quality, use frozen half and half within 3 months. While it may remain safe to consume beyond this period, the texture and flavor might deteriorate over time.

    Can You Freeze Fat Free Half and Half?

    Yes, you can freeze fat-free half and half that is made by combining skim milk with corn syrup and thickeners to mimic the consistency of regular half and half. But, due to its lower fat content, fat-free half and half may become grainy or watery, making it more suitable for cooking and baking rather than for use in coffee or tea.

    FAQ'S

    Can You Refreeze Half and Half?

    Avoid refreezing half and half after thawing. Refreezing can further affect the texture and quality. Only thaw the amount you plan to use to avoid the need for refreezing

    Can You Freeze Half and Half With Additives?

    You can freeze half and half with additives like corn syrup or sour cream, but it's important to be aware of potential changes in texture and consistency. It's best to use thawed half and half with additives in the recipes where texture changes will be less noticeable.

    Check Out These Great Recipes

    • Best Vegan Oat Milk Recipe
    • Vegan Oreo Milkshake
    • Mango Pineapple Smoothie
    • Best Goat Cheese Apple Salad
    • Air Fryer Zucchini Fritters

    How To Freeze Cabbage?

    September 18, 2024 by Angela Milnes

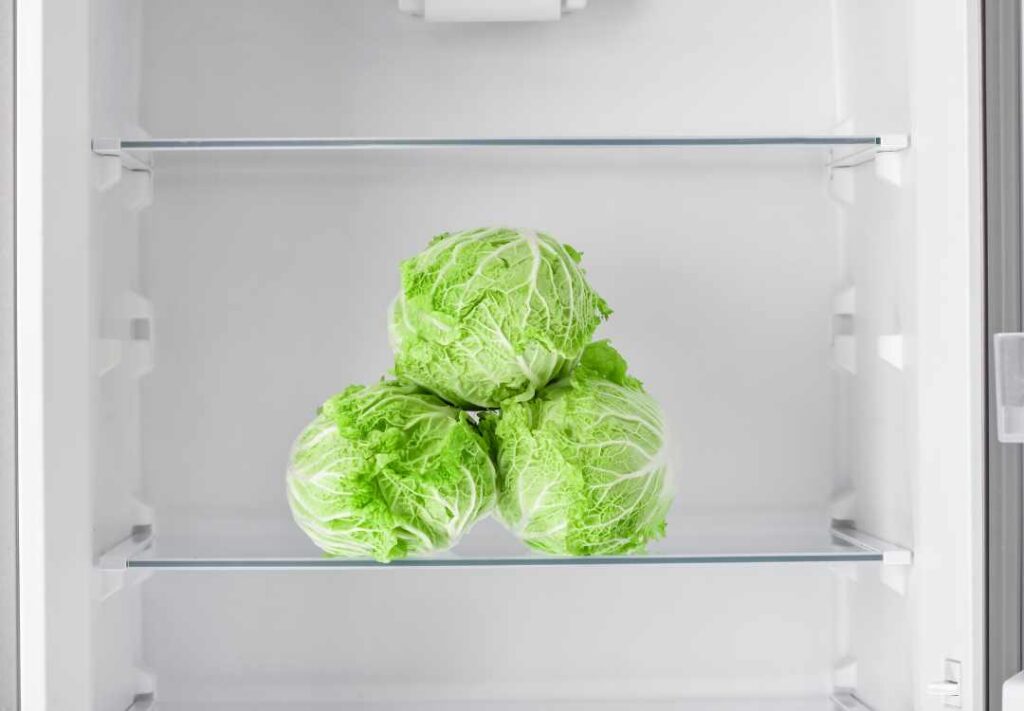
    Raw cabbage in a fridge rack.

    Freezing Cabbage is a great way to extend the life of this versatile vegetable for use in soups, stir-fries, or casseroles. In this post, I’ll guide you through the easy steps to freeze cabbage, ensuring it stays fresh and ready for whenever you need it!

    How To Freeze Cabbage
    xr:d:DAFooj5Sa04:192,j:4722421548461947707,t:23072216
    [feast_advanced_jump_to]

    What Is Cabbage?

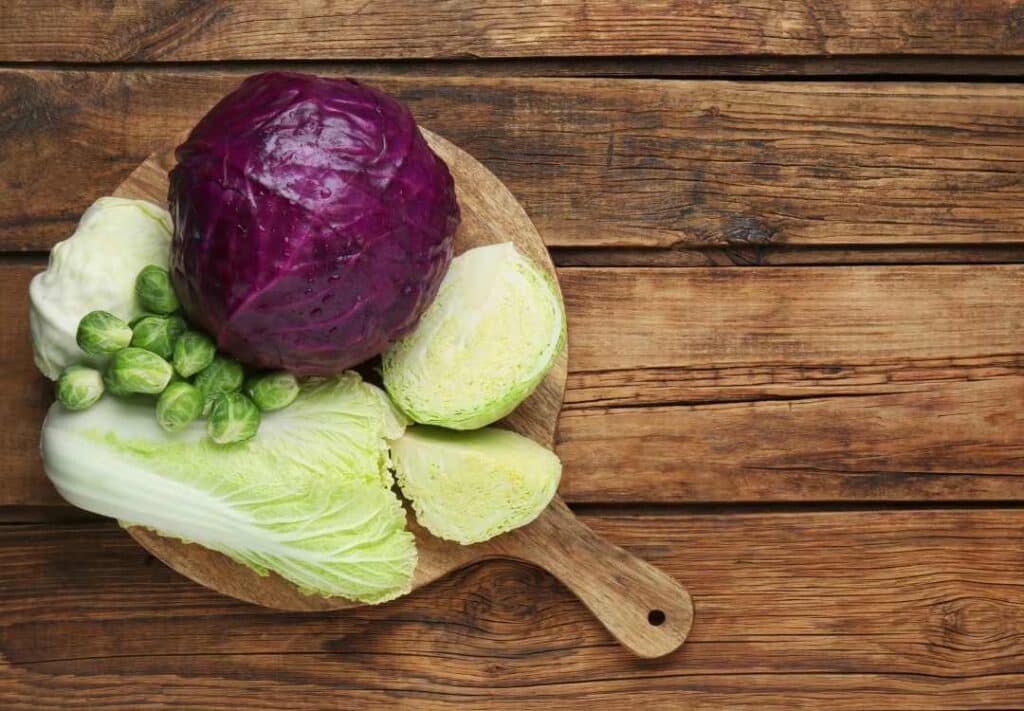
    Cabbage is a cruciferous vegetable known for its dense, round, or oval-shaped heads with smooth or crinkled leaves. It belongs to the Brassica family and comes in various colors, including green, red, and Savoy.

    Chinese Chicken Salad, or cooked in different dishes like Tofu Stir Fry with Mushrooms, Purple Cabage Soup, and Mexcian Beef Stew.

    Types Of Cabbage

    There are several types of cabbage, each with its unique characteristics and uses. Some popular varieties include:

    • Red Cabbage: Known for its vibrant purple-red color, red cabbage has a slightly peppery and earthy flavor. It is often used raw in salads or pickled, and it retains its color well when cooked.
    • Chinese Cabbage (Napa Cabbage): Chinese cabbage has long, oblong-shaped heads with pale green to white leaves. It has a mild and sweet flavor, which makes it a common ingredient in Asian Dishes, Thai Stir Fry, and kimchi.
    • Savoy Cabbage: Savoy cabbage features crinkled, curly leaves with a milder taste than other types. It is excellent for Stuffing, Braising, or using in Fall Soups and Stews.
    • Green Cabbage: Green cabbages are one of the most common varieties, with smooth, round heads and a slightly sweet flavor. It is versatile and can be used in a wide range of dishes, such as coleslaw, stir-fries, and sautés.

    Each type of cabbage offers its own culinary potential and nutritional benefits, making them valuable additions to any kitchen.

    Purple and Green Cabbage on a wooden chopping board.

    Health Benefits Of Cabbage

    Cabbage offers a host of health benefits :

    • Nutrient-Rich: It is a rich source of Vitamins C, K, and B6, also the dietary fiber and essential minerals like calcium and potassium.
    • Antioxidant Properties: Cabbage contains antioxidants, such as Flavonoids and polyphenols, which help protect the body from oxidative stress and reduce inflammation.
    • Digestive Health: The fiber content promotes Healthy Digestion and supports regular bowel movements.
    • Heart Health: The potassium in cabbage Helps Maintain Healthy Blood Pressure Levels, reducing the risk of cardiovascular issues.
    • Immune Support: The high vitamin C content Boosts Your Immune System and helps your body fight infections.
    • Anticancer Properties: Cabbage contains compounds with Potential Anticancer Effects, especially about certain types of cancers like colon and breast cancer.

    Adding cabbage to your diet can contribute to overall well-being and support various aspects of your health.

    Can You Freeze Fresh Cabbage?

    Yes, you can. Cabbage is one of those wonder vegetables: tasty, versatile, and surprisingly easy to freeze. It's the perfect vegetable to add nutrition & flavor to a variety of dishes year-round, even when it isn't in season.

    Whether you harvest your cabbage from your garden or purchase it from the supermarket, freezing cabbage is a great way to ensure that you always have a supply on hand for fresh salads or cooked meals.

    What Type Of Cabbage Is Best For Freezing?

    When it comes to freezing cabbage, the best type is usually green cabbage. It is the most common variety, and it freezes well without losing its texture and flavor.

    While other types of cabbage, like red cabbage and Savoy cabbage, can also be frozen, they may have slightly different textures after thawing compared to green cabbage.

    Nevertheless, you can freeze any type of cabbage successfully if you follow proper freezing procedures.

    How To Freeze Cabbage Raw?

    Here are the steps necessary to successfully freeze your fresh-picked raw cabbage safely so that it will last for months and still retain its taste and nutrition.

    Read on to find out everything you need to know about freezing simple, delicious dishes like coleslaw:

    Step 1: Select Fresh Cabbage

    Choose fresh, firm, and unblemished cabbage heads for freezing. Avoid ones that show signs of wilting or damage. Fresh cabbage ensures better quality and taste when frozen.

    red cabbage in a bowl with wooden spoon.

    Step 2: Clean And Remove Outer Leaves

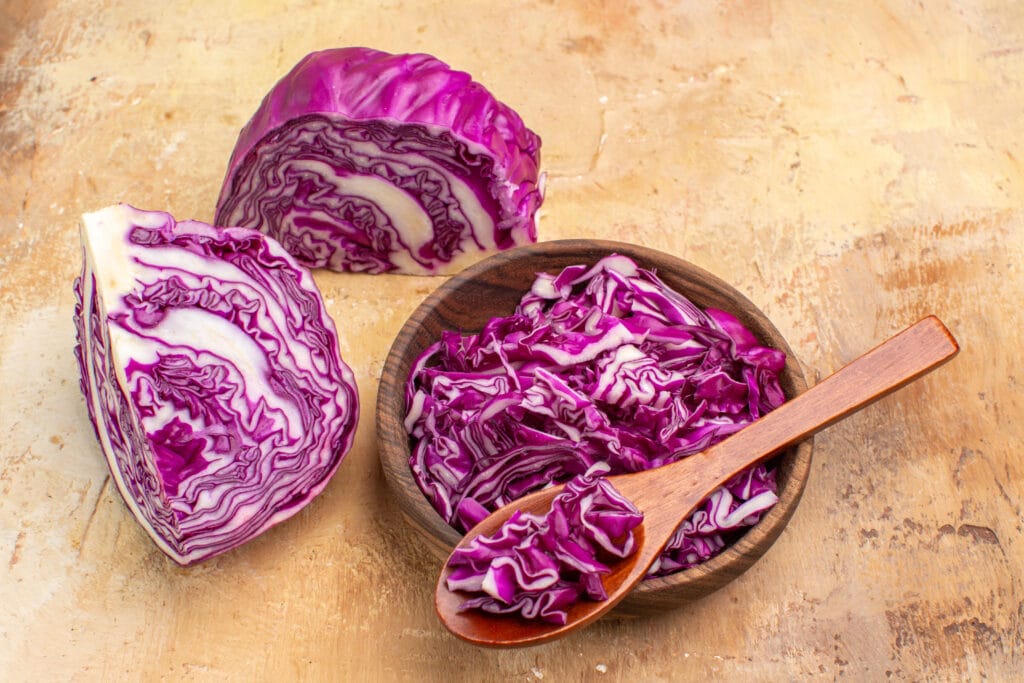
    To freeze cabbage, start by rinsing the whole cabbage under cold running water to remove any dirt or debris. Next, peel off and discard the outer leaves if they appear wilted or discolored. Remove the cabbage head as well.

    Step 3: Cut And Shred

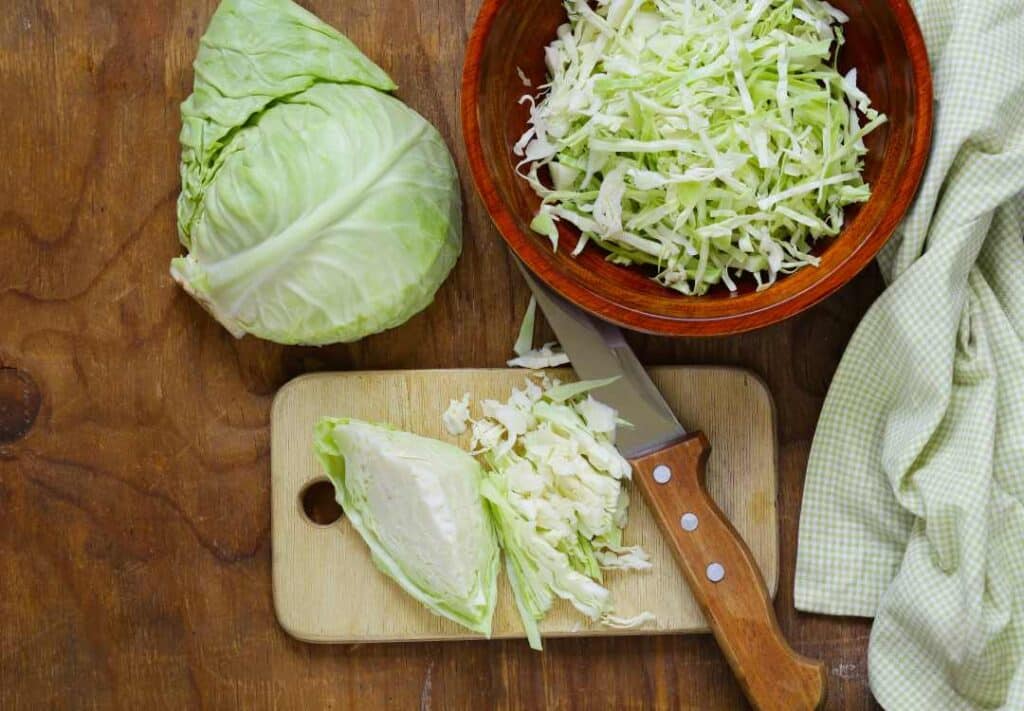
    After selecting fresh cabbage and cleaning it, place it on a clean cutting board and cut the whole head into thin wedges or shred it as desired. Properly cut cabbage ensures even freezing and extends its shelf life when frozen.

    shredded cabbage in a bowl and on a chopping board ready for freezing.

    Step 4: Blanch Cabbage

    Once the cabbage is cut or shredded, blanch it to preserve its texture and color during the freezing process. Bring a large pot of water to a rolling boil and carefully add the shredded cabbage.

    Blanch in boiling water for a short time, typically 1-2 minutes, to partially cook the cabbage. Next, using a slotted spoon, remove the blanched chopped cabbage and immediately transfer it to a large bowl of ice water, creating an ice bath.

    This rapid cooling process stops the cooking process and prevents the cabbage from becoming overcooked. After draining the cabbage, pack it in airtight containers or freezer bags and proceed with the freezing process.

    Blanching helps maintain the quality of frozen cabbage and ensures better results when using it in future recipes.

    Step 5: Drain And Dry

    After blanching the shredded cabbage, drain it thoroughly to remove excess water. You can use a colander or a large sieve to accomplish this. Once drained, transfer the cabbage to a clean kitchen towel or you may use several layers of paper towels.

    Gently press the cabbage to remove any remaining water. Then, let the cabbage cool completely to room temperature. It is crucial to ensure that the cabbage is dry and cool before proceeding with the freezing process.

    This step helps prevent ice crystals from forming during freezing and preserves the quality of the frozen cabbage.

    Step 6: Portion And Pack

    After draining and cooling the blanched and dried cabbage, you can portion it into desired serving sizes suitable for your needs. Pack the portions into Airtight Containers or resealable Freezer bags, making sure to remove as much air as possible from the bags before sealing.

    Label bags or containers with the date of freezing for easy tracking. Proper portioning and packing help ensure convenience when using frozen cabbage in future recipes, as you can take out only the amount needed without thawing the entire batch.

    cabbage soup in a bowl with a wooden spoon.

    Step 7: Freeze Cabbage

    After blanching and draining the cabbage or directly cutting and packing it, you can proceed to freeze the cabbage in the freezer. Place the packed cabbage in the coldest part of your freezer, ensuring it is kept at a consistent freezing temperature of 0°F (-18°C) or lower.

    The freezing process preserves the cabbage and keeps it safe for consumption for an extended period.

    Step 8: Store Cabbage

    To store cabbage, keep it in a cool, dry place away from direct sunlight. If you have a whole head of cabbage, you can wrap it loosely in plastic wrap or store it in a perforated plastic bag in the vegetable drawer of your refrigerator. This helps to maintain its freshness and prevent it from wilting or drying out.

    If you have leftover cut or shredded cabbage, transfer it to an airtight container. You can use a freezer bag or Resealable Plastic Bag to store it in the refrigerator. Use it within a few days to maintain its quality.

    how to feeeze cabbage.

    If you have blanched cabbage that you intend to freeze for longer-term storage, ensure it is completely cooled and dry before packing it into airtight containers or freezer bags. Label the containers with the date and place them in the freezer, where the cabbage can remain for up to 12 months.

    How To Avoid Freezer Burn On Your Cabbage While Freezing?

    To avoid freezer burn on your cabbage while freezing, take the following precautions:

    • Use airtight containers or resealable freezer bags to minimize air exposure.
    • Squeeze out excess air from the bags before you seal them.
    • Ensure the cooked or blanched cabbage is cooled completely before freezing.
    • Label containers with the date to keep track of storage time.
    • Avoid over-packing the freezer to maintain consistent temperatures.
    • Use a deep freeze setting or a separate freezer for longer storage periods.
    • Freeze cabbage at its freshest state to preserve quality.

    Do You Thaw Frozen Cabbage?

    Yes, it is advisable to thaw frozen cabbage before using it in recipes. Thawing allows the cabbage to regain its texture and flavor, making it more suitable for cooking or eating raw, depending on your preference.

    To thaw frozen cabbage, transfer it from the freezer to the refrigerator and let it thaw slowly. This gradual thawing process helps maintain the cabbage's quality and reduces the risk of bacterial growth.

    Once thawed, you can use the cabbage in various dishes as desired. Avoid refreezing thawed cabbage to preserve its taste and texture.

    How To Use Frozen Cabbage In Recipes?

    • Stir-Fried Cabbage and Veggies: A quick and nutritious side dish or main course.
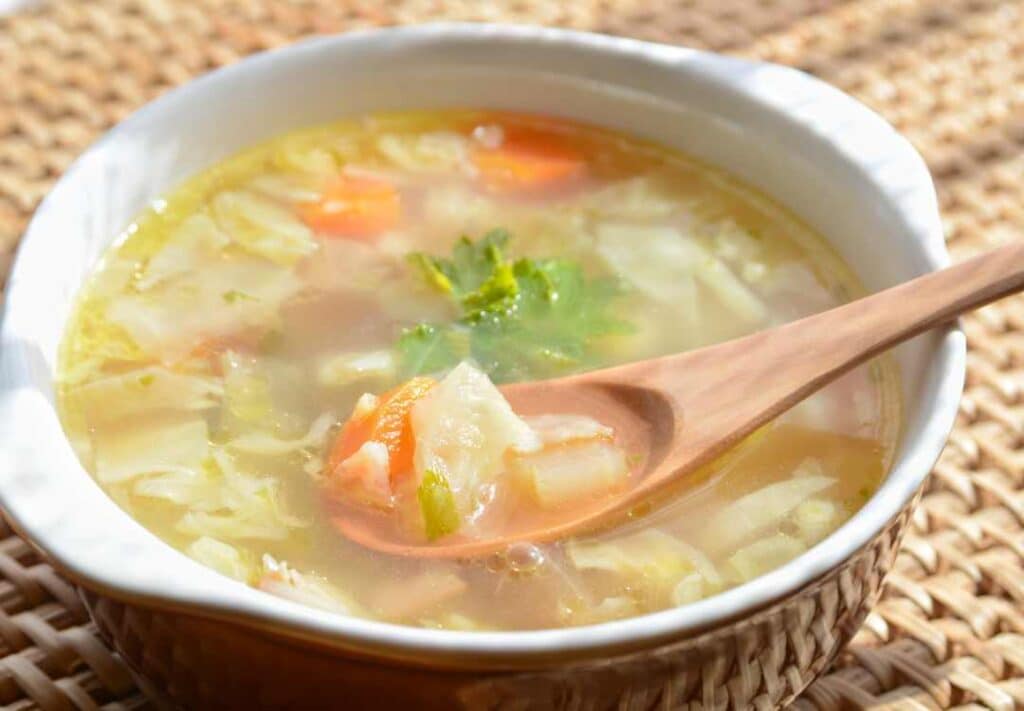
    • Cabbage Soup: A comforting and flavorful way to use frozen cabbage in a hearty soup.
    • Cabbage and Sausage Skillet: A delicious one-pan meal with a savory combination of flavors.
    • Cabbage Roll Casserole: All the flavors of classic cabbage rolls in an easy-to-make casserole.
    • Cabbage and Potato Curry: A flavorful vegetarian curry with tender cabbage and potatoes.
    • Cabbage and Noodle Stir-Fry: A tasty and satisfying stir-fry with noodles and mixed vegetables.
    • Stuffed Cabbage Rolls: Traditional and delicious cabbage rolls filled with a flavorful mixture.
    • Cabbage and Beef Stir-Fry: A savory stir fry combining cabbage with tender beef.
    • Cabbage and Chicken Stir-Fry: A quick and healthy stir-fry combining cabbage with tender chicken.
    • Dutch Oven Corned Beef and Cabbage: A hearty and flavorful dish cooked in a Dutch oven, such as Tender Corned Beef With Cabbage.

    Using frozen cabbage in these recipes allows you to enjoy the convenience of pre-prepared cabbage while adding a nutritious and flavorful element to your dishes.

    cabbage soup in a bowl with a wooden spoon.

    FAQ's

    Can You Freeze Cabbage Without Blanching?

    Yes, you can freeze cabbage without blanching, but blanching is recommended to maintain the best quality and texture of the frozen cabbage.

    Blanching helps to preserve the color, flavor, and nutrients of the cabbage while also stopping enzyme activity that can lead to loss of texture and taste over time.

    Can You Freeze Cooked Cabbage?

    Yes, you can freeze cooked cabbage. However, it’s essential to cool the cooked cabbage completely before freezing the cooked cabbage. 

    Does Frozen Cabbage Lose Its Texture and Flavor?

    Frozen cabbage can experience slight changes in texture, becoming softer and losing some crispness.

    The flavor may also be slightly diminished after freezing.
    However, it remains suitable for use in cooked dishes, like soups and stir-fries, though it may not be as ideal for raw preparations like salads.

    Proper storage and thawing can help preserve its nutritional value and make it a convenient option for longer-term use.

    Enjoy Freezing Cabbage!

    Now you know, to freeze cabbage, blanch it briefly in boiling water, cool it in an ice-water bath, drain, and pat it dry. Portion the cabbage into airtight containers or freezer bags, label, and freeze.

    Properly frozen cabbage can retain its quality and nutritional value for several months, providing a convenient and versatile ingredient for various recipes and dishes.

    Tasty Recipes You May Love to Try:

    • Cheesy Mexican Steak And Rice
    • Easy Chicken Yaki Soba Recipe
    • Tofu Stir Fry Noodles With Mushroom
    • Air Fryer Salmon Fillets
    • Grilled Eggplant With Lemon Dip

    Dutch Oven Corned Beef And Cabbage

    September 18, 2024 by Angela Milnes

    Dutch Oven Corned Beef And Cabbage.

    Get ready to savor the comforting flavors of a classic dish with this Dutch Oven Corned Beef and Cabbage recipe! Perfect for St. Patrick's Day or any time you crave a hearty, flavorful meal, this recipe combines tender corned beef, perfectly cooked cabbage, and a medley of vegetables, all slow-cooked to perfection in a Dutch oven.

    Dutch Oven Corn Beef And Cabbage
    [feast_advanced_jump_to]

    If you love Corned Beef be sure to check our our Slow Cooker Corned Beef Hash recipe. You'll also want to try these tasty sides, Mexican Mexican Elotes Corn, Honey Roasted Parsnips and Carrots and this delicious recipe for Breakfast Potatoes With Peppers And Bacon.

    💖 Why This Recipe Works

    • You’ll love this Corned Beef and Cabbage Dutch Oven recipe because it delivers melt-in-your-mouth tender beef, infused with rich, savory flavors through slow cooking.
    • It's a hearty and satisfying meal combining corned beef, cabbage, and a medley of vegetables, perfect for any occasion, especially celebrations like St. Patrick's Day.
    • The Dutch oven makes the cooking process easy and convenient, while the Corned Beef And Cabbage Dutch Oven Recipe itself is versatile and nutritious, packed with protein, fiber, and essential nutrients.

    ⭐ Star Ingredients

    Dutch Oven Corn Beef And Cabbage Ingredients.
    Dutch Oven Corn Beef And Cabbage Ingredients.
    • Large Yellow Onion: Imparts a sweet, caramelized flavor into the beef.
    • Corned Beef Brisket: The star of the dish, it’s tender, flavorful, and brined for a distinct taste.
    • Corned Beef Seasoning Packet: Adds traditional flavors like coriander, mustard seeds, and bay leaves.
    • Ginger Beer: Gives the broth a spicy, sweet depth of flavor.
    • Water: Dilutes the ginger beer and creates the cooking liquid for the dish.
    • Baby Carrots: Add sweetness and a bright pop of color to the dish.
    • Red or Baby Potatoes: These become tender and absorb the flavors of the cooking liquid.
    • Green Cabbage: Cooked until just tender, it adds a fresh, slightly bitter contrast to the rich meat and potatoes.

    For the complete list of ingredients with measurements and instructions, please see the recipe card at the bottom of the post.

    🔪How To Make Corned Beef And Cabbage In The Oven

    corned beef in dutch oven
    1. Step 1: Heat oil in a large Dutch oven. Heat over medium heat and add the corned beef brisket. Brown all sides of the brisket. Add Onions, Carrots, and Seasoning Packet.
    cooked corned beef
    1. Step 2: Add the Ginger Beer and water to the Dutch oven. Make sure the liquid reaches the top of the meat. Cover with a lid. Cook the corned beef over high heat to bring it to a boil. Reduce the heat to low to medium and cook for 3 1⁄2 hours on a low simmer until fork tender.
    cabbage and corned beef in a dutch oven.
    1. Step 3: After one hour, add your potatoes. Check the liquid level at this point. If it has cooked down too low, add a cup of water or broth to prevent scorching.
    Dutch oven corned beef and cabbage
    1. Step 4: After 2 ½ hours, add the cut cabbage wedges. Once the 3 ½ hours are over, check that the food is cooked. Serve straight from the Dutch oven. Cooking corned beef has never been easier.

    👩‍🍳 Expert Tips

    • Choose the Right Cut: Opt for a flat cut of corned beef brisket for even cooking and consistent tenderness. This cut is leaner and slices more evenly.
    • Slow and Low Cooking: Cook corned beef slowly over low heat. Whether using a Dutch oven, slow cooker, or stovetop, low and slow cooking ensures this cabbage corned beef recipe becomes tender without drying out.

    💭 FAQs

    Can I Make This Recipe In A Slow Cooker Instead Of A Dutch Oven?

    Yes, you can make corned beef and cabbage in a slow cooker. Simply place all the ingredients in the slow cooker, set it on low for 8-10 hours or high for 4-5 hours, and cook until the beef is tender.

    How Do I Know When The Corned Beef Is Done?

    Corned beef is done when it reaches an internal temperature of 160°F (71°C). It should be tender enough to pull apart with a fork. Using a meat thermometer can help ensure it's cooked to the proper temperature.

    What Type Of Cabbage Should I Use?

    Green cabbage is the most common choice for this dish, but you can also use Savoy cabbage or even a mix of green and red cabbage for added color and texture.

    How Can I Make The Corned Beef Less Salty?

    If your corned beef is too salty, you can soak it in cold water for a few hours before cooking, changing the water once or twice. This helps draw out some of the salt.

    How Should I Store Leftovers?

    Store leftover corned beef and cabbage in an airtight container in the refrigerator for up to 3-4 days. Reheat gently in the oven, on the stovetop, or in the microwave, adding a little broth or water if necessary to keep the meat moist.

    💖 Serving Suggestions

    Here are some of the best sides to serve with Dutch Oven Corned Beef and Cabbage:

    • Boiled Potatoes: Traditional and simple, boiled potatoes are a classic side that complements the flavors of corned beef and cabbage perfectly.
    • Whole Wheat Irish Soda Bread: This dense, slightly sweet bread is perfect for soaking up the savory juices from the corned beef and cabbage.
    • Carrots and Parsnips: Roasted or boiled carrots and parsnips add a touch of sweetness and additional nutrients to the meal.
    • Mustard or Horseradish Sauce: A tangy mustard or horseradish sauce adds a zesty kick that pairs well with the rich flavors of the corned beef.
    • Green Beans: Lightly steamed or Sautéed Green Beans provide a fresh, crunchy contrast to the hearty main dish.
    Dutch oven corned beef and cabbage

    🍽 More Delicious Recipes

    • Smothered Cajun Cabbage in a bowl.
      Best Cajun Smothered Cabbage Recipe
    • Caramelized Onions in a bowl/.
      Quick Caramelized Onions (Air Fryer Recipe)
    • Zucchini Lasagna Rolls With Eggplant.
      Zucchini Lasagna Rolls With Eggplant
    • Chicken And Cabbage Stir Fry Recipe.
      Chicken And Cabbage Stir Fry Recipe

    Did you make this recipe? Leave a review and a ⭐⭐⭐⭐⭐ rating below, or tag us in our Facebook Group! Alternatively, bookmark it in your browser or save to Pinterest.

    Dutch Oven Corned Beef And Cabbage.

    Dutch Oven Corn Beef And Cabbage

    Angela Milnes
    Enjoy a classic, comforting meal with this Dutch Oven Corned Beef and Cabbage! Tender, flavorful corned beef is slow-cooked with hearty cabbage and potatoes, soaking up all the delicious juices.
    5 from 5 votes
    Print Recipe Pin Recipe Rate this Recipe
    Prep Time 10 minutes mins
    Cook Time 5 hours hrs 15 minutes mins
    Additional Time 0 minutes mins
    Total Time 5 hours hrs 25 minutes mins
    Course Dinners
    Cuisine Irish
    Servings 5 Servings
    Calories 813 kcal

    Ingredients
      

    • 2 Onion sliced
    • 1 3- pound Corned Beef Brisket
    • 1 Pkt Corned Beef Seasoning
    • 2 Bottles Of Ginger Beer
    • 2 cups Water
    • 1 bag Baby Carrots
    • 1 bag Red Potatoes small and halved
    • 1 Green Cabbage cut into wedges

    Instructions
     

    • Heat oil in a large Dutch oven. Heat over medium heat and add the corned beef brisket. Brown all sides of the brisket. Add Onions, Carrots and Seasoning Packet.
    • Add the Ginger Beer and water to the Dutch oven. Make sure the liquid reaches the top of the meat. Cover with lid. 
    • Cook corned beef over high heat to bring it to a boil. Reduce the heat to low to medium and cook for 3 1⁄2 hours on a low simmer until fork tender.
    • After one hour add your potatoes. Check the liquid level at this point. If it has cooked down too low, add a cup of water or broth to prevent scorching.
    • After 2 ½ hours add the cut cabbage wedges. 
    • Once the 3 ½ hours are over check the food is cooked. Serve straight from the Dutch oven. Cooking corned beef has never been easier.

    Notes

    Choose the Right Cut: Opt for a flat cut of corned beef brisket for even cooking and consistent tenderness. This cut is leaner and slices more evenly.
    Soak to Reduce Salt: If your corned beef is too salty, soak it in cold water for a few hours before cooking, changing the water once or twice. This helps draw out excess salt.
    Slow and Low Cooking: Cook corned beef slowly over low heat. Whether using a Dutch oven, slow cooker, or stovetop, low and slow cooking ensures this cabbage corned beef recipe becomes tender without drying out.

    Nutrition

    Serving: 1gCalories: 813kcalCarbohydrates: 22gProtein: 57gFat: 54gSaturated Fat: 17gPolyunsaturated Fat: 2gMonounsaturated Fat: 26gCholesterol: 196mgSodium: 4465mgPotassium: 1652mgFiber: 6gSugar: 8gVitamin A: 461IUVitamin C: 171mgCalcium: 119mgIron: 7mg
    Print Recipe Pin Recipe Rate this Recipe
    Tried this recipe?Let us know how it was!

    Try These Fantastic Recipes:

    • Air Fryer Salmon Fillets
    • Tofu Stir Fry Noodles With Mushroom
    • Italian Sausage And Broccoli Pasta
    • Slow Cooker Keto Pulled Pork
    • Air Fryer Baked Potato Recipe
    • Crispy Cauliflower Bites (Air Fried)
    • Oven Roasted Onions With Thyme
    • Air Fryer Yorkshire Pudding

    How To Freeze Sweet Potatoes

    September 18, 2024 by Angela Milnes

    Sweet potatoes on a wooden tray.

    Wondering How To Freeze Sweet Potatoes? If you’ve got some extras on hand and want to save them for later, freezing is the perfect solution! Whether you’ve got cooked, mashed, or raw sweet potatoes, freezing them as cubes or fries is super easy. I’ll show you step-by-step how to freeze sweet potatoes so you can enjoy their yummy goodness anytime and keep them fresh for all your future meals!

    How to Freeze Sweet Potatoes
    [feast_advanced_jump_to]

    Can I Freeze Sweet Potatoes?

    Yes, you can. Freezing sweet potatoes, especially in season, will ensure you have a good supply of sweet potatoes to enjoy all year round. Sweet Potato freezes well when slightly cooked or blanched.

    What Is The Best Way To Freeze Sweet Potatoes?

    Several simple steps will help you to freeze sweet potatoes safely and retain their flavor and texture without compromising the quality.

    The first thing is, blanching sweet potatoes for freezing. You can freeze sweet potatoes in their normal cubed form or mashed, as part of a casserole, fries, or even as chips.

    Here are the three best methods for freezing sweet potatoes without losing texture:

    1. Frozen sweet potato cubes.
    2. Freezing mashed sweet potatoes.
    3. Freezing sweet potato fries.
    How to Freeze Sweet Potatoes

    Method 1: How To Freeze Sweet Potatoes Cubed Or Diced?

    Start by washing the pieces thoroughly under cold running water. Then remove any bumps or bruises on them.

    Prepare a large bowl of ice-cold water and keep it ready.

    Bring enough water to cover the sweet potatoes in a saucepan. Then, add half a teaspoon of salt to that water. Also, squeeze lemon juice into the water before adding cubed kumara to keep it from darkening during the blanching process.

    Next, put the cubes in the boiling salted water for about 5 minutes or until they turn slightly translucent or fork-tender. Quickly remove them from the hot liquid and drain thoroughly.

    Now freeze the sweet potato cubes in Suitable Freezer Bags or Freezer Containers. Layer with paper towels to absorb any moisture from the kumara cubes and then seal tightly. You can freeze sweet potatoes for months in the freezer.

    How to Freeze Sweet Potatoes

    Method 2: How To Freeze Mashed Sweet Potatoes?

    To freeze mashed sweet potato, first wash and peel the skin off and then cut it into small pieces.

    Then, bring enough water to cover the potatoes in a saucepan along with half a teaspoon of salt. Add your kumara to boiling salted water and cook until fork-tender or for 5 minutes on medium heat.

    Drain thoroughly once done and let it cool down completely before freezing in suitable freezer bags or containers. Frozen sweet potato mash can last for up to 6 months in the freezer and is a great option when you're busy and want to defrost some mash to go with dinner!

    Method 3: How to Freeze Sweet Potato Fries

    Firstly, peel the skin off and then cut into the desired size or shape of fries. Here is my Favourite Potato Peeler On Amazon. It's the Oxo good grip which is easy to handle and use. However, if you struggle with peeling, why not try my grandma's favorite peeler? It's an Electric Potato Peeler!

    Next, bring enough water to cover the potatoes in a saucepan along with half a teaspoon of salt. Put your chips in boiling salted water until fork-tender. Drain thoroughly once done and seal tightly into a freezer bag or air-tight container.

    In this manner, you can freeze sweet potato fries for months in the freezer. So next time when you see a great deal on fresh sweet potatoes at your local market or grocery store, don't hesitate to stock it up to make this healthy superfood easily accessible to your family all year round!

    Fantastic Sweet Potato Recipes

    Now that you know how to freeze kumara, why not enjoy a few of my favorite sweet potato recipes once your sweet potatoes have defrosted?

    • Sweet Potato Cottage Pie - Family Meal
    • Sweet Potato Roasted Potatoes - Perfect with Pot Roast
    • Sweet Potato Casserole - Thanksgiving Side dish
    • Sweet Potato Pie - Dessert With Marshmallow Meringue
    How to Freeze Sweet Potatoes

    Tips For Reheating Sweet Potato Cubes

    When reheating sweet potatoes, there are a few important things to remember.

    • Defrost your sweet potato naturally before reheating!
    • The best way to reheat sweet potato is slowly in an oven around 150 degrees Celsius (300 Fahrenheit).
    • You can also microwave at medium heat until fully reheated throughout. This takes about 10 minutes on average.
    • To microwave your sweet potatoes, remove all wrapping and cover with a damp cloth or paper towel, then cook on medium or until soft, turning twice during cooking time.
    • When reheating, you should also remember not to overcook your sweet potato.
    • Alternatively, bring a pot of water to a boil and add your sweet potatoes for 10 minutes or until soft again.
    How to Freeze Sweet Potatoes

    Reheating Mashed Kumara After Frozen

    If you've frozen mash in an air-tight container, you can boil the mash the frozen sweet potato mixture. Be sure to add a little more butter, salt, and pepper to taste, along with half a cup of milk.

    Mashed Kumara makes a great side dish or shepherd's pie topper!

    Reheating Frozen Sweet Potato Fries

    Thaw out sweet potato fries before sprinkling some light seasoning over them and roast them under the broiler (grill) until they are crispy again.

    FAQ's

    Should You Freeze Sweet Potato Quickly?

    Yes, the process needs to take place quickly. When you freeze something fast, it preserves more of its great taste and nutrients than if you were to freeze it slowly over time. The key is to make your frozen vegetable with as little exposure to air or water as possible.

    How To Avoid Freezer Burn?

    When you freeze a food, you must freeze it in a way that will keep the food from drying out. If freezer burn is occurring, your frozen veggie will be dry and tasteless. To avoid freezer burn, make sure to place your sweet potato into a plastic bag or container with as little air as possible before placing it in the freezer.

    Also, freeze the pieces quickly. If juices are forming on your sweet potato because of being exposed to air for too long during the freezing process, just drain them before storing them in the freezer.

    Enjoy Freezing Sweet Potatoes!

    So next time when you see a great deal on fresh sweet potatoes at your local market or grocery store, don't hesitate to stock it up as the healthy superfood is easily accessible all year round!

    How about learning what you can do with Puréed Sweet Potatoes, we have just the blog post for you.

    For more Sweet Potato Inspiration, check out this list of 20 Simple Sweet Potato Recipes.

    Other Sweet Potato Recipes You Will Enjoy!

    • Grilled Sweet Potatoes
    • Air Fryer Sweet Potato Fries
    • Sweet Potato Gnocchi

    Air Fryer Salmon Fillets (Fresh or Frozen)

    September 17, 2024 by Angela Milnes

    Air Fryer Salmon Fillets.

    Looking for a quick, healthy, and seriously tasty dinner? These Air Fryer Salmon Fillets are crispy on the outside, juicy on the inside, and packed with flavor—plus they cook in under 15 minutes. Whether you're using fresh or frozen salmon fillets, the air fryer makes it effortless.

    Air Fryer Salmon Fillets On A Plate.

    After my gastric bypass, high-protein meals became my go-to—and salmon quickly earned a top spot on the list. It’s rich in omega-3s, keeps me full, and is super easy to prep. This air fryer salmon is one of those meals that feels fancy but takes barely any effort, especially when I’m starting with frozen salmon fillets straight from the freezer.

    If you love quick dinners like my Creamy Pan Fried Salmon Fillet or Air Fryer Cod Fillet, this one’s a must-try.

    [feast_advanced_jump_to]

    💖 Why This Recipe Works

    • Healthy & Low Fuss – No need for heavy oils or breading—just fresh ingredients and high-heat cooking.
    • Great Texture – Crispy skin and buttery-soft center, thanks to hot circulating air.
    • Frozen Friendly – Works with fresh or frozen salmon fillets—no thawing required.

    ⭐ Star Ingredients

    Air Fryer Salmon Fillets Ingredients.
    • Salmon Fillets – I like using wild-caught when I can for that bold, clean flavor—but honestly, frozen or fresh both work beautifully in the air fryer. Skin-on is a must for that golden, crispy layer.
    • Avocado Oil – My go-to for high-heat cooking. It helps keep the salmon juicy while getting that sizzle without smoking up the kitchen.
    • Lemon Zest – A little grated zest lifts the whole dish and cuts through the richness. I never skip it—it’s the secret flavor booster.

    For the complete list of ingredients with measurements and instructions, please see the recipe card at the bottom of the post.

    📖  Substitutions & Variations

    • Frozen Salmon Fillets in Air Fryer – Cook directly from frozen! Just add 2–4 extra minutes and season halfway through.
    • Honey Garlic Glaze – Mix honey, garlic, soy sauce, and lemon juice. Brush on halfway through cooking.
    • Spicy Cajun – Rub fillets with Cajun seasoning, olive oil, and a touch of brown sugar.
    • Herb-Crusted – Press chopped dill, parsley, and thyme onto the fillets before air frying.

    🔪How To Make Air Fryer Salmon

    Brushing oil on salmon fillets.
    1. Step 1: Preheat your air fryer to 400°F (200°C) for about 5 minutes. Use a paper towel to gently pat the salmon fillets dry, removing any excess moisture to help the seasonings stick. Lightly brush avocado oil on both sides of the salmon fillets to prevent sticking and enhance flavor.
    Salt and black pepper in small bowl to season the salmon fillets.
    1. Step 2: Sprinkle salt and black pepper over the fillets, making sure they are evenly seasoned.
    Grating lemon zest over salmon fillets.
    1. Step 3: Grate lemon zest over the seasoned salmon fillets, distributing it uniformly for a fresh, citrusy aroma.
    Seasoned salmon fillets in an air fryer.
    1. Step 4: Arrange the salmon fillets in the air fryer basket in a single layer, placing them skin-side down.
    Cooked salmon fillets in an air fryer.
    1. Step 5: Cook the salmon for 7-10 minutes, or until it reaches an internal temperature of 145°F (63°C) and the flesh is opaque and easily flakes with a fork.
    Serving air fried salmon fillets with a fork.
    1. Step 6: Remove the salmon from the air fryer and allow it to rest for a few minutes to let the juices settle. Serve with lemon wedges or your favorite sauce.

    💡Salmon Too Dry? You may have overcooked it—check at the 7-minute mark and remove once it flakes easily. Also, brushing with oil helps lock in moisture!

    👩‍🍳 Expert Tips

    • Glaze Like a Pro – Want to add a glaze? Brush it on during the last 1–2 minutes of cooking to avoid burning. Or, drizzle it on after cooking for a bold finish.
    • Don’t Crowd the Basket: Give each fillet space to crisp up.
    • Stop Salmon From Sticking: Use parchment liners or lightly grease the basket to prevent sticking.

    ❄️ Air Fryer Frozen Salmon Fillets: How Long to Cook & Tips

    Wondering how long to cook frozen salmon in the air fryer? It’s easier than you think:

    • Temperature: Preheat to 400°F (200°C).
    • Cook Time: 12–15 minutes depending on thickness.
    • Mid-Cook Seasoning: After 3–4 minutes, the surface softens—perfect time to season.
    • Check Doneness: Internal temp should reach 145°F (63°C).

    This method makes weeknight dinners a breeze—perfect if you're after a quick salmon dinner recipe when you forget to defrost!

    💭 FAQs

    What Temperature Do I Cook Salmon In The Air Fryer?

    400°F (200°C) is ideal temperature for crispy skin and tender flesh.

    How Do I Know When The Salmon Fillets Are Fully Cooked?

    The salmon should flake easily with a fork and reach an internal temp of 145°F (63°C). You can use a meat thermometer to check the internal temperature for accuracy.

    How Should I Store Leftover Salmon Fillets?

    Store in an airtight container in the fridge for up to 3 days or freeze for up to 2 months.

    How Do I Reheat Salmon in the Air Fryer?

    Preheat to 350°F (175°C) and air fry for 3–4 minutes. Don’t overdo it—salmon dries out fast. A splash of lemon juice helps refresh the flavor.

    💖 Serving Suggestions

    Here are some great sides to serve with air fried salmon fillets:

    • Purple Cauliflower Mash: Creamy cauliflower mash is low-carb and colorful.
    • Quinoa Salad: For a protein-packed, fresh meal.
    • Parmesan Roasted Zucchini: Crispy and flavorful.
    • Garlic Cilantro Rice: Light and zesty pairing.
    • Roasted Asparagus With Goat Cheese: Quick and classic side.

    Finishing Touches – Drizzle with lemon-butter sauce, serve with a dollop of dill-lemon yogurt, or pair with classic tartar sauce for an extra flavor kick.

    Air fried salmon fillets.

    🍽 Try These Air Fryer Dishes

    • Air Fryer Butterfly Chicken With Citrus.
      Air Fryer Butterfly Chicken With Citrus
    • Air Fryer Green Beans Crispy & Delicious.
      Air Fryer Green Beans Crispy & Delicious
    • Air Fryer Chicken Cutlets Panko Recipe.
      Air Fryer Chicken Cutlets Panko Recipe
    • Air Fryer Cod Fillet.
      Air Fryer Cod Fillet

    Did you try this air fryer salmon recipe? I’d love to hear what you served it with! Drop a comment below or share your plate in our Facebook Group! Alternatively, bookmark it in your browser or save to Pinterest.

    Air Fryer Salmon Fillets.

    Air Fryer Salmon Fillets

    Angela Milnes
    Enjoy perfectly cooked salmon in a flash with these Air Fried Salmon Fillets! With a crispy exterior and tender, flaky inside, these fillets are full of flavor and super easy to make.
    5 from 5 votes
    Print Recipe Pin Recipe Rate this Recipe
    Prep Time 5 minutes mins
    Cook Time 10 minutes mins
    Additional Time 0 minutes mins
    Total Time 15 minutes mins
    Course Air Fryer Recipes
    Cuisine American
    Servings 4 Servings
    Calories 305 kcal

    Ingredients
      

    • 4 Salmon Fillets Size: 7 oz Fillets are recommended for this recipe
    • 2 tablespoons Avocado Oil
    • 1 teaspoon Salt
    • ½ teaspoon Black Pepper
    • 1 Lemon Zest
    • 1 Fresh Lemon Wedges for serving

    Instructions
     

    • Preheat your air fryer to 400°F (200°C) for about 5 minutes to ensure it reaches the right temperature.
    • Use a paper towel to gently pat the salmon fillets dry, removing any excess moisture to help the seasonings stick.
    • Lightly brush avocado oil on both sides of the salmon fillets to prevent sticking and enhance flavor.
    • Sprinkle salt and black pepper over the fillets, making sure they are evenly seasoned.
    • Grate lemon zest over the seasoned salmon fillets, distributing it uniformly for a fresh, citrusy aroma.
    • Arrange the salmon fillets in the air fryer basket in a single layer, placing them skin-side down.
    • Cook the salmon for 7-10 minutes, or until it reaches an internal temperature of 145°F (63°C) and the flesh is opaque and easily flakes with a fork.
    • Remove the salmon from the air fryer and allow it to rest for a few minutes to let the juices settle.
    • Serve the salmon with fresh lemon wedges on the side, perfect for squeezing over the fish to enhance its flavor.

    Notes

    Perfect Timing: Ensure you cook the salmon fillets for the recommended time to avoid overcooking and maintain their juicy texture.
    Skin-Side Down: While cooking salmon, place the skin-side down in the air fryer to achieve a crispy exterior while keeping the flesh tender. 

    Nutrition

    Serving: 1gCalories: 305kcalCarbohydrates: 1gProtein: 34gFat: 18gSaturated Fat: 2gPolyunsaturated Fat: 5gMonounsaturated Fat: 9gCholesterol: 94mgSodium: 947mgPotassium: 842mgFiber: 0.3gSugar: 0.2gVitamin A: 70IUVitamin C: 4mgCalcium: 24mgIron: 1mg
    Print Recipe Pin Recipe Rate this Recipe
    Tried this recipe?Let us know how it was!

    Best Substitute For Capers: 12 Options

    September 17, 2024 by Angela Milnes

    Substitute for capers.

    Looking for a Substitute for Capers? Whether you’ve run out or need an alternative, we’ve got you covered with top picks like olives and pickles. These simple swaps will help your dishes keep that signature caper tang. Let’s dive into the best options to keep your cooking on track without missing a beat!

    If you love capers, be sure to check out this recipe for Smoked Salmon Dip.

    Substitute For Capers
    [feast_advanced_jump_to]

    Some Facts About Capers

    • Cooking Use: Capers add a tangy and salty taste to Mediterranean dishes, especially in sauces and meat dishes like Sabana De Res.
    • Taste: They have a sharp, salty, and lemony flavor, made stronger through curing.
    • History: Capers have been used since ancient times in Greece and Rome for their taste.
    • Special Feature: Picked as tiny flower buds from a bush that can survive dry weather, capers are cured to taste savory.
    • Cultural Role: In Sicilian cooking, capers are important in dishes like Caponata, where they add a sour taste to balance sweetness.

    Best Substitute for Capers

    Capers add a unique tangy and salty flavor to dishes, but if you need a substitute, here are a few options:

    1. Anchovies

    Anchovies offer a unique twist as a substitute for capers, infusing dishes with a deep, umami flavor that complements their briny taste. While anchovies are more intense and salty than capers, they beautifully enhance the savory profile of many recipes.

    Their soft, oily texture contrasts with the firm bite of capers, and their darker hue doesn't match the vibrant green of capers. To replace capers, use anchovies sparingly, as their potent flavor can quickly dominate a dish. Just a small fillet can transform the taste, making them ideal for dishes such as:

    • Caesar Salad Dressing
    • Puttanesca Pasta Sauce
    • Tapenade
    • Citrus And Honey Roasted Beets
    Substitute For Capers

    2. Kalamata Olives

    Chopped Kalamata Olives are a great choice to replace capers, offering a milder flavor that maintains the capers taste without overpowering your dish.

    These olives provide a rich, fruity, and slightly tangy flavor that pairs well with Mediterranean and Greek-inspired recipes. Their texture is firm and meaty, adding a delightful bite, though their dark purple color differs from the green of capers.

    You can use chopped Kalamata olives in similar quantities as capers to keep the flavor balance intact. They are considered the best substitute when you want to enhance dishes like:

    • Greek Feta Salad
    • Pasta Salad
    • Chicken Pizza With Alfredo Sauce
    • Tapenade
    Substitute For Capers

    3. Green Olives

    Chopped green olives bring a similar salty and slightly bitter taste to your dishes. These large green olives offer a briny flavor that complements Mediterranean and Italian cuisine wonderfully.

    Unlike capers, they have a firm, fleshy texture, and although their green color is close, it might not be an exact match. You can use chopped green olives in the same amount as capers to keep the flavor balanced. They are perfect for enhancing pasta dishes and other meals like:

    • Pasta Puttanesca
    • Pesto Chicken
    • Tapenade
    • Instant Pot Potato Salad
    Substitute For Capers

    4. Lemon juice

    Lemon zest offers a refreshing lemony taste that enhances the flavors of various dishes. It provides a bright, tangy flavor that pairs well with fish dishes, salads, and pasta, adding a citrusy lift that is quite distinct from the briny capers taste.

    While the texture of lemon zest is different—being finely grated rather than firm—the vibrant yellow color can add a visually appealing contrast to your dishes.

    You can use lemon zest sparingly, starting with a small pinch to avoid overpowering the dish. It's a great substitute for capers in recipes such as:

    • Instant Pot Fish Tacos
    • Chicken Caesar Salad
    • Lemon Pasta
    • Thin Sliced Chicken Breast
    Substitute For Capers

    5. Thyme

    Fresh herbs, especially ground or dried thyme brings an earthy and slightly peppery taste to dishes. Thyme offers a unique flavor that pairs well with Mediterranean and Italian cuisine, enhancing both meat and vegetable dishes.

    While the texture of thyme is more delicate compared to the firm bite of capers, its green color can somewhat mimic that of capers.

    You can use thyme in moderate amounts, adjusting to taste, to infuse your dishes with its aromatic essence. It's an excellent capers alternative in recipes like:

    • Instant Pot Lamb Chops
    • Roasted Vegetables
    • Herb-Crusted Chicken
    • Tomato Basil Soup
    Substitute For Capers

    6. Nasturtium Seeds

    Nasturtium seeds offer a similar peppery and tangy flavor that can enhance a variety of dishes. These seeds have a spicy taste that pairs well with salads, pickles, and seafood, providing a fresh twist.

    In terms of texture, they are firm like capers, and their color, once pickled, closely resembles that of capers, making them a great visual match.

    You can pickle nasturtium seeds in similar quantities to capers to ensure the desired taste is achieved. They are a wonderful addition to dishes such as:

    • Smashed Potato Salad
    • Smoked Salmon Bruschetta
    • Tartar Sauce
    • Niçoise Salad
    Substitute For Capers

    7. Vinegar

    Vinegar is a fantastic substitute for capers, offering a sharp acidic flavor that enhances various dishes. While it doesn’t have the same texture or green color as capers, its liquid form blends seamlessly into recipes.

    To substitute capers with vinegar, start with a small amount, such as a teaspoon, and adjust according to taste.

    Vinegar's acidic flavor is perfect for balancing the rich profiles of slow cooked dishes and adding a bright note to salad dressings. Here are some dishes where vinegar can be suitable:

    • Potato Salad
    • Chicken Piccata
    • Ratatouille
    • Deviled Eggs
    Substitute For Capers

    8. Green Peppercorns

    Green peppercorns has a mild, tangy flavor with a hint of peppery spice. They share a similar green color and slightly crunchy texture, making them a great visual and textural substitute.

    When using green peppercorns instead of capers, start with a tablespoon and adjust to your taste. They pair well with creamy, savory, and rich dishes, adding a subtle heat and depth. Here are some dishes where green peppercorns can be effectively used:

    • Steak With Peppercorn Sauce
    • Pasta puttanesca
    • Tuna Salad
    • Roasted Vegetable medley
    Substitute For Capers

    9. Dill Pickles

    Dill pickles can be a great alternative to capers, bringing a tangy and slightly sweet flavor to your dishes. They pair wonderfully with flavors like fish, chicken, and fresh salads.

    While dill pickles don't match the dark green color of capers, their crunchy texture and burst of flavor make up for it. To use dill pickles as a substitute, chop them finely and use a similar quantity as you would with capers. Here are some dishes where dill pickles can shine as a replacement:

    • Smoked Salmon Bagels
    • Tartar Sauce
    Substitute For Capers

    10. Artichoke Hearts

    Artichoke hearts add a mild and slightly tangy flavor to your dishes. They blend beautifully with flavors like pasta, chicken, and Mediterranean cuisine.

    Although artichoke hearts don't match the dark green color of capers, they offer a tender texture and a distinctive taste that stands out.

    When using artichoke hearts as a substitute, chop them into small pieces and use a slightly larger quantity than you would with capers, as their flavor is milder. Here are some dishes where artichoke hearts can be a great replacement:

    • Orzo Pasta Salad
    • Chicken Piccata
    • Mediterranean Pizza
    • Antipasto Platter
    Substitute For Capers

    11. Caper Berries

    Caper berries can offer a tangy and slightly salty flavor to enhance your dishes. They pair beautifully with seafood, salads, and Mediterranean cuisine.

    While caper berries are larger and lighter in color than capers, they have a firm texture and provide a unique taste experience.

    To use caper berries as a substitute, slice them and use fewer than you would capers because of their larger size. Here are some dishes where caper berries can work wonderfully as a replacement:

    • Jamaican Jerk Pasta
    • Farro Salad
    • Roasted Chicken
    • Charcuterie Board
    Substitute For Capers

    12. Pickled Onions

    Pickled onions are a tasty alternative to capers with their tangy and slightly sweet flavor. They pair beautifully with flavors in fish dishes, salads, and pasta, adding a delightful crunch.

    Unlike the green color of capers, pickled onions bring a vibrant pink hue to your dishes, making them visually appealing. When using pickled onions as a substitute, use a similar amount to what you would use for capers. Here are some dishes where you can try them out:

    • Smoked Salmon Bagels
    • Pasta Primavera
    • Chicken Piccata
    Substitute For Capers

    FAQ'S

    Can I Leave Capers Out Of A Recipe?

    Yes, you can leave capers out of your recipe. You can substitute them with roughly chopped Kalamata olives at a 1:1 ratio, or simply omit them if your recipe already calls for olives.

    What Do Capers Do For A Recipe?

    Capers add a tangy burst of flavor to dishes, providing a briny and pungent taste that complements savory recipes. They are commonly used in Mediterranean cuisine and are best added near the end of cooking to maintain their flavor and texture.

    Can Citrus Fruits Be Used As A Caper Substitute?

    Yes, you can use lemon and lime as a substitute for capers, but use them sparingly to avoid making the dish too tart.

    Enjoy The Capers Substitutions

    While capers may be a unique and versatile ingredient in cooking, there are many substitutes that can provide similar flavors and textures. From fresh herbs like thyme to tangy pickled onions, there are plenty of options to choose from depending on your dish and personal taste preferences.

    What other caper alternatives have you tried? Is there a particular substitute that stands out to you? We would love to hear your feedback and experiences with substituting capers in recipes. Share your thoughts in the comments below!

    Cheesy Mexican Steak And Rice

    September 16, 2024 by Angela Milnes

    Cheesy Mexican Steak And Rice.

    Indulge in a deliciously cheesy and savory meal with this Mexican Steak And Rice recipe! Tender steak bites, perfectly seasoned and cooked, are combined with creamy queso and fluffy rice to create a dish that's bursting with flavor. Ideal for a hearty dinner that will please the whole family, this steak and rice recipe is quick, easy, and incredibly satisfying. Let’s get started on this mouthwatering meal!

    Mexican steak and rice on plate.
    [feast_advanced_jump_to]

    If you love this steak and rice recipe, you'll also want to try Colombian Sabana De Res topped with Cojita Cheese.

    Why This Recipe Works

    Making Mexican Steak and Rice with Queso Cheese brings together robust flavors and textures that are irresistible. Tender steak seasoned with traditional Mexican spices like cumin and chili powder pairs perfectly with fluffy rice cooked in a savory tomato sauce. The addition of creamy queso cheese adds a rich and indulgent touch, making this Steak And Rice Mexican Style bowl a comforting and satisfying meal that captures the essence of Mexican cuisine.

    🥘 Ingredients

    Mexican steak and rice ingredients.
    • White Rice: Serves as the base of the dish, providing a neutral backdrop that absorbs the flavors of the other ingredients, making it fluffy and tender when cooked.
    • Minced Garlic: Infuses the dish with a pungent and aromatic flavor that is essential to building the savory base of the recipe.
    • Chicken Broth: Used instead of water to cook the rice, it enriches the overall flavor of the dish, adding a subtle meaty essence.
    • Sirloin Steak: A lean and flavorful cut of beef that cooks quickly, providing a rich, meaty component that pairs well with the creamy queso.
    • Gordo’s Queso Cheese Dip: Melty and creamy, this cheese dip brings a delightful cheesy texture and a savory, slightly spicy taste that binds all the elements of the dish.
    • Chopped Parsley: Adds a fresh, herbal touch to the dish, enhancing its visual appeal and introducing a burst of color and freshness (optional for topping).

    For the complete list of ingredients with measurements and instructions, please see the recipe card at the bottom of the post.

    📖  Substitutions & Variations

    • A side of avocado cream or guac = the perfect creamy, fresh contrast to savory steak and rice.
    • Swap tomato sauce for green enchilada sauce for a tangy, spicy twist—don’t forget the cilantro and lime!
    • Mix in chipotle peppers for smoky heat, plus black beans and corn for extra texture and flavor.

    🔪How To Make Steak And Rice Mexican Style

    Cooking rice in a skillet.

    Step One: In a large skillet, heat the oil over medium heat. Add the rice and cook, stirring occasionally, until it starts to brown slightly.

    Cooking rice in a skillet.

    Step Two: Once the rice is lightly toasted, add the onions and garlic, and sauté for 1-2 minutes on medium to low heat until fragrant. Pour in the chicken broth and tomato sauce into the skillet with the rice.

    Cooking rice in a skillet.

    Step Three: Bring the mixture to a boil and allow it to boil for 2 minutes, stirring occasionally. Then, cover the skillet, reduce the heat to low, and let it simmer for 20 minutes.

    Uncooked .steak in a skillet.

    Step Four: While the rice is cooking, melt the butter in another large skillet over medium-high heat. Add the sliced steak and seasonings, and stir to mix everything well.

    Cooking steak in a skillet.

    Step Five: Cook the steak until it reaches your desired doneness, then remove it from the skillet. After the rice has simmered for 20 minutes, turn off the heat but keep the skillet covered. Allow the rice to sit undisturbed for another 10 minutes to continue absorbing the flavors.

    Cooked queso rice in a skillet.

    Step Six: Fluff the cooked rice with a fork and transfer it to a serving plate. Top with the cooked steak. Drizzle warm queso cheese dip over the steak and rice. Garnish with chopped parsley or cilantro if desired.

    💡 Hint: Arrange a generous portion of the steak and rice in a bowl or on a plate. Then sprinkle fresh chopped cilantro or parsley over the dish for a pop of color and fresh herbal flavor. You can also add for a citrusy touch, and perhaps some salsa or hot sauce for those who enjoy a bit of extra spice.

    👩‍🍳 Expert Tips

    Follow these tips to make the best steak and rice bowl:

    • Pick a tender cut like sirloin, flank, or skirt steak—marinating makes it even better!
    • Sear it hot for a tasty crust, then cook to your perfect doneness (medium-rare is a classic go-to).
    • Let it rest before slicing against the grain—keeps it juicy and melt-in-your-mouth good!

    💭 FAQs

    Can I Meal Prep Steak And Rice?

    Steak and rice meal prep is easy. for convenient and delicious meals throughout the week. Prepare a large batch of steak and rice, then portion it into individual containers once cooled. Store these containers in the refrigerator for up to 4 days. When ready to eat, simply reheat in the microwave or on the stove until heated through. This meal prep ensures you have a hearty and flavorful meal ready to enjoy with minimal effort during busy weekdays.

    How Do I Prevent The Mexican Rice From Becoming Mushy?

    To prevent rice from becoming mushy, ensure you use the correct ratio of liquid to rice. Typically, for Mexican rice dishes, the ratio is 1 cup of rice to 1 ¾ cups of liquid (a combination of broth and tomato sauce).

    Also, avoid stirring the rice too frequently while it's cooking to maintain its texture. Once it's done cooking, let it rest covered for a few minutes off the heat to finish steaming and fluff gently with a fork before serving. This method helps maintain the rice's individual grains and ensures a perfect texture for your dish.

    How To Store Steak And Rice Leftovers?

    Transfer any leftover steak and rice into airtight containers or resealable bags. Store them in the refrigerator promptly after cooking, ideally within 2 hours.

    🧂Serving Suggestions

    Mexican Steak and Rice can be served on it's own, however if sharing with a group and looking for steak and rice side dishes, I'd recommend the following:

    • Salsa: Strawberry Jalapeno Salsa, whether mild or spicy, adds a burst of flavor that enhances the steak and rice. It provides acidity and a touch of heat, balancing out the richness of the dish and adding depth of taste.
    • Grilled or Air Fryer Roasted Vegetables add a variety of textures and flavors that complement the savory steak and rice. They also provide vitamins and minerals, balancing out the meal with freshness and nutrition.
    • A Mango Arugula Salad provides a crisp contrast to the Mexican steak and rice. It adds brightness with its mix of vegetables and acidity from the vinaigrette, enhancing the overall dining experience.
    • Homemade Guacamole: Creamy guacamole or avocado slices add richness and a smooth texture that pairs beautifully with the tender steak and fluffy rice. They also provide healthy fats that complement the meal.
    • Instant Pot Refried Beans or Instant Pot Black Beans seasoned with Mexican spices offer a hearty and satisfying element to the dish. They provide protein and fiber, making the meal more filling and nutritious.
    • Warm Plantain Tortillas or crispy chips serve as a versatile accompaniment for wrapping up the steak and rice or scooping up bites with salsa. They add a fun and interactive element to the meal.
    Queso steak and rice on plate.

    🍽 Try These Easy Rice Dishes

    • Easy Garlic Rice With Cilantro in a white bowl with a wooden spoon.
      Easy Garlic Rice With Cilantro
    • Instant Pot Cajun Rice And Beans Recipe.
      Instant Pot Cajun Rice And Beans Recipe
    • Long grain White Rice Instant Pot Recipe.
      Long Grain White Rice Instant Pot Recipe
    • Instant Pot Wild Rice Blend With Pomegranates.
      Instant Pot Wild Rice Blend With Pomegranates

    Did you make this recipe? Leave a review and a ⭐⭐⭐⭐⭐ rating below, or tag us in our Facebook Group! Alternatively, bookmark it in your browser or save to Pinterest.

    Cheesy Mexican Steak And Rice.

    Mexican Steak And Rice

    Angela Milnes
    Spice up your dinner with this Mexican Steak and Rice! Tender, flavorful steak is served over perfectly seasoned rice for a dish that's bursting with bold, zesty flavors. It’s an easy, satisfying meal that brings a taste of Mexico to your table!
    5 from 3 votes
    Print Recipe Pin Recipe Rate this Recipe
    Prep Time 5 minutes mins
    Cook Time 30 minutes mins
    Additional Time 0 minutes mins
    Total Time 35 minutes mins
    Course Dinners
    Cuisine Mexican
    Servings 5 Servings
    Calories 583 kcal

    Ingredients
      

    • 1 cup of white rice
    • 3 tablespoon of vegetable oil
    • 1 onion chopped
    • 1 tablespoon minced garlic
    • 2 cups chicken broth
    • 8 oz can of tomato sauce
    • ½ teaspoon cumin
    • ½ teaspoon smoked paprika
    • ½ teaspoon onion powder
    • ½ teaspoon chili powder
    • 1 lb sirloin steak sliced to your liking
    • 2 tablespoon butter
    • 16 oz of Gordo’s queso cheese dip original flavor
    • Chopped parsley for topping optional

    Instructions
     

    • Toast the Rice: In a large skillet, heat the oil over medium heat. Add the rice and cook, stirring occasionally, until it starts to brown slightly. Once the rice is lightly toasted, add the onions and garlic, and sauté for 1-2 minutes on medium to low heat until fragrant.
    • Simmer the Rice: Pour in the chicken broth and tomato sauce into the skillet with the rice. Stir well to combine everything. Bring the mixture to a boil and allow it to boil for 2 minutes, stirring occasionally. Then, cover the skillet, reduce the heat to low, and let it simmer for 20 minutes.
    • Cook the Steak: While the rice is cooking, melt the butter in another large skillet over medium-high heat. Add the sliced steak and seasonings, and stir to mix everything well. Cook the steak until it reaches your desired doneness, then remove it from the skillet.
    • Rest the Rice: After the rice has simmered for 20 minutes, turn off the heat but keep the skillet covered. Allow the rice to sit undisturbed for another 10 minutes to continue absorbing the flavors.
    • Serve: Fluff the cooked rice with a fork and transfer it to a serving plate. Top with the cooked steak. Drizzle warm queso cheese dip over the steak and rice. Garnish with chopped parsley or cilantro if desired.

    Notes

    Choose the Right Cut: Opt for a tender cut of steak like sirloin steak, flank steak or skirt steak. Marinate the steak beforehand for extra tenderness and flavor.
    Searing the Steak: Start by searing the steak over high heat to create a nice crust and seal in the juices. Cook to your desired level of doneness—medium-rare to medium is typically recommended for tender cuts.
    Resting: Let the steak rest for a few minutes after cooking before slicing it against the grain. This ensures the juices redistribute evenly throughout the meat, keeping it tender and flavorful.

    Nutrition

    Serving: 1gCalories: 583kcalCarbohydrates: 29gProtein: 34gFat: 37gSaturated Fat: 18gPolyunsaturated Fat: 5gMonounsaturated Fat: 5gTrans Fat: 0.2gCholesterol: 137mgSodium: 2144mgPotassium: 744mgFiber: 2gSugar: 9gVitamin A: 1088IUVitamin C: 6mgCalcium: 381mgIron: 4mg
    Print Recipe Pin Recipe Rate this Recipe
    Tried this recipe?Let us know how it was!

    Why Not Try These Easy Rice Dishes

    • Instant Pot Cajun Rice And Beans Recipe
    • Easy Garlic Rice With Cilantro
    • Instant Pot Wild Rice Blend With Pomegranates
    • Best Carrot Rice Recipe
    • Cauliflower Fried Rice

    Crave-Worthy Chicken Tamale Pie (With Cheesy Cornbread Topping!)

    September 16, 2024 by Angela Milnes

    Best Chicken Tamale Pie Recipe.

    If cozy comfort food is calling your name, this Chicken Tamale Pie is the answer. It’s cheesy, saucy, and topped with golden cornbread—basically tamale vibes without the rolling or steaming. Ready in under an hour and family-approved!

    Chicken Tamale Pie.

    Tamale pie is a cold-weather favorite, but honestly, I make this year-round. It’s the ultimate fusion of taco night meets casserole magic. I was inspired to make this after serving my Slow Cooker Million Dollar Chicken and wanting that same flavor—faster.

    Pair this with my Black Bean Corn Salsa or Air Fryer Corn on the Cob for a Tex-Mex feast.

    [feast_advanced_jump_to]

    💖 Why This Recipe Works

    • One-Pan Wonder: Everything bakes in one dish for minimal cleanup and maximum flavor.
    • Crowd Pleaser: Cheesy, saucy, and comforting—this one’s always a hit with guests and picky eaters alike.
    • Freezer Friendly: Make ahead and freeze for a quick weeknight win.

    ⭐ Star Ingredients

    Chicken Tamale Pie Ingredients.
    • Jiffy Corn Muffin Mix: Shortcut alert! It makes a fluffy, golden cornbread base that soaks up all that saucy goodness.
    • Shredded Chicken: Use rotisserie chicken or meal-prepped shredded chicken breast for maximum convenience and protein.
    • Enchilada Sauce: Tangy, smoky, and bold—it’s what ties the whole dish together. Homemade or store-bought both work!
    • Colby Jack Cheese: Melty, mild, and just gooey enough to give you those stretchy cheese pulls you’ll want to Instagram.

    For the complete list of ingredients with measurements and instructions, please see the recipe card at the bottom of the post.

    📖  Substitutions & Variations

    • Vegetarian swap: Use black beans or pinto beans instead of chicken. Add extra corn, peppers, or zucchini.
    • Spicy twist: Add chipotle in adobo or hot sauce to the enchilada sauce for a smoky kick.
    • Cheesy overload: Use a Mexican cheese blend or add cream cheese to the filling for richness.
    • Topping idea: Sprinkle crushed tortilla chips on top before baking for crunch.
    • Gluten-free version: Use a certified GF corn muffin mix and check your enchilada sauce label.
    • Low-carb twist: Try a cauliflower or almond flour cornbread base if you're watching carbs.

    Craving more Tex-Mex flavors? Don’t miss my Chicken and Cabbage Stir Fry or this Easy Sheet Pan Nachos Recipe!

    🔪How To Make Chicken Tamale Pie

    Corn muffin mix, sour cream, egg, corn, and the melted butter in a bowl.
    1. Step 1: Preheat the oven to 400° and spray a 9-inch pie dish with non-stick cooking spray. In a medium-sized bowl, add the corn muffin mix, sour cream, egg, corn, and the melted butter.
    Tamale pie mixture in a bowl.
    1. Step 2: Stir until everything is mixed together. Pour into the prepared dish and bake for 15 minutes or until golden. 
    Onion, garlic, taco seasoning, chicken and enchilada sauce in a bowl.
    1. Step 3: In a medium-sized bowl, add the onion, garlic, taco seasoning, chicken, and ½ cup of enchilada sauce and stir until mixed together, set aside.
    Baked tamale pie.
    1. Step 4: Once you take the dish out of the oven, using the end of a small round wooden spoon, poke holes all over the cornbread. 
    Enchilada sauce poured over chicken tamale pie.
    1. Step 5: Pour the remaining ¼ cup of enchilada sauce all over and spread to make sure it gets in the holes. Add the chicken mixture all over the top and spread around as well.
    Chicken tamale pie topped with a pie.
    1. Step 6: Top the chicken tamale pie with cheese.
    Chicken tamale pie on a plate.
    1. Step 7: Bake the tamale pie again for 20 minutes. Once done, slice and serve your Mexican tamale pie!
    Chicken tamale pie served on a plate.
    1. Step 8: Top with extra sour cream, parsley, and a side of corn

    👩‍🍳 Expert Tips

    • Use rotisserie chicken for speed and flavor. It’s pre-cooked and juicy—just shred and go!
    • Don’t skip poking holes in the cornbread—it helps all that enchilada goodness soak in.
    • Add fresh toppings like sliced avocado, jalapeños, or a dollop of guac for next-level flavor.

    💭 FAQs

    Can I make chicken tamale pie ahead of time?

    Yes! Assemble the dish, cover tightly, and refrigerate for up to 24 hours before baking.

    Can I freeze chicken tamale pie?

    Absolutely. Let it cool completely, then wrap tightly and freeze for up to 3 months. Reheat from frozen at 350°F.

    What’s the best enchilada sauce to use?

    Homemade is great, but store-bought works too. Choose mild or spicy depending on your heat preference.

    Can I use a different protein in tamale pie?

    Totally. Shredded turkey, ground beef, or a meat-free crumble all work well in place of chicken.

    💖 Serving Suggestions

    Pair your Mexican Tamale Pie with these sides for a complete dinner:

    • Avocado Salad: Fresh and creamy, a perfect balance to the warm pie.
    • Mango Pineapple Salsa: Sweet and zesty, ideal for spooning on top.
    • Air Fryer Corn on the Cob: Crispy outside, juicy inside—great with Tex-Mex!
    • Honey Butter Skillet Corn: Scoopable and corn-loaded—yes, please!
    • Cilantro Lime Rice: Classic and simple, ideal for soaking up extra sauce.
    Chicken tamale pie on a serving plate.

    🍽 Related Pie Recipes To Enjoy

    • Hearty Beef Pot Pie With Celery And Carrots and s lice of pie cut out.
      Easy Beef Pot Pie With Celery And Carrots
    • Instant Pot Chicken Pot Pie Soup.
      Instant Pot Chicken Pot Pie Soup
    • Easy Air Fryer Pot Pies Recipe.
      Easy Air Fryer Pot Pies Recipe
    • Weight Watchers Crustless Pumpkin Pie.
      Weight Watchers Crustless Pumpkin Pie

    Did you make this recipe? Leave a review and a ⭐⭐⭐⭐⭐ rating below, or tag us in our Facebook Group! Alternatively, bookmark it in your browser or save to Pinterest.

    Best Chicken Tamale Pie Recipe.

    Chicken Tamale Pie Recipe

    Angela Milnes
    Savor the flavors of a classic tamale with this easy Chicken Tamale Pie! Juicy, seasoned chicken is layered under a fluffy cornbread topping, creating a comforting dish that's full of flavor. Perfect for a cozy dinner, this pie is sure to be a family favorite!
    5 from 4 votes
    Print Recipe Pin Recipe Rate this Recipe
    Prep Time 10 minutes mins
    Cook Time 50 minutes mins
    Additional Time 0 minutes mins
    Total Time 1 hour hr
    Course Dinners
    Cuisine Mexican
    Servings 4 Servings
    Calories 687 kcal

    Ingredients
      

    • 1 8 oz box of jiffy corn muffin mix
    • ½ cup of sour cream
    • 1 egg
    • ½ cup corn kernels frozen or canned
    • 2 tablespoon melted butter
    • 1 large onion diced frozen or raw
    • 2 cloves garlic minced
    • 1 tablespoon taco seasoning
    • 2 cups shredded chicken cooked
    • ¾ cup enchilada sauce divided
    • 2 cups of shredded Colby jack cheese

    Instructions
     

    • Preheat the oven to 400° and spray a 9 inch pie dish with non stick cooking spray. In a medium sized bowl add the corn muffin mix, sour cream, egg, corn and the melted butter and stir until everything is mixed together. Pour into the prepared dish and bake for 15 minutes or until golden. 
    •  2. In a medium sized bowl add the onion, garlic, taco seasoning, chicken and ½ cup of enchilada sauce and stir until mixed together, set aside. Once you take the dish out the oven, using the end of a small round wooden spoon poke holes all over the cornbread. 
    •  3. Pour the remaining ¼ cup of enchilada sauce all over and spread to make sure it gets in the holes. Add the chicken mixture all over top and spread around as well. Top with the cheese and bake again for 20 minutes. 
    •  4. Once done slice and serve! Top with extra sour cream and parsley! 

    Notes

    Use Rotisserie Chicken: Save time by using pre-cooked rotisserie chicken or leftover shredded chicken. It adds flavor and cuts down on prep time.
    Resting Time: Allow the tamale pie to cool for about 10-15 minutes before serving. This helps the flavors meld together and makes it easier to slice and serve.
    Enchilada Sauce: Use a good-quality enchilada sauce for layers of flavor. You can use store-bought or homemade sauce according to your preference.

    Nutrition

    Serving: 1gCalories: 687kcalCarbohydrates: 44gProtein: 38gFat: 40gSaturated Fat: 20gPolyunsaturated Fat: 16gCholesterol: 196mgSodium: 1273mgFiber: 4gSugar: 17g
    Print Recipe Pin Recipe Rate this Recipe
    Tried this recipe?Let us know how it was!

    Easy Chicken Yaki Soba Recipe

    September 16, 2024 by Angela Milnes

    Easy Chicken Yaki Soba Recipe.

    Get ready to delight your taste buds with this flavorful Chicken Yaki Soba! This quick and easy stir-fry dish combines tender marinated chicken, fresh vegetables, and savory noodles for a meal that's both satisfying and versatile. Perfect for busy weeknights, this recipe will quickly become a family favorite.

    chicken yaki soba
    [feast_advanced_jump_to]

    💖 Why This Recipe Works

    • Quick and Easy: This Yaki Soba recipe is perfect for busy weeknights. With simple ingredients and straightforward steps, you can have a delicious meal on the table in no time.
    • Flavor-Packed: The combination of marinated chicken, fresh vegetables, and savory soy sauce creates a burst of flavors in every bite. The addition of shrimp adds a delightful seafood twist.
    • Versatile and Customizable: You can easily adapt this recipe to your taste by adding your favorite vegetables or proteins. It's a great way to use up leftover ingredients and make a wholesome, satisfying dish.

    ⭐ Star Ingredients

    Chicken Yaki Soba Ingredients.
    • Chicken Thighs: These provide juicy, flavorful protein that pairs perfectly with the other ingredients, absorbing the savory flavors of the sauce.
    • Bean Sprouts: Adds a crunchy texture and a fresh, slightly nutty flavor, complementing the noodles and other vegetables.
    • Chopped Onion: Brings a sweet and savory depth to the dish, enhancing the overall flavor profile.
    • Red Pepper: Adds a vibrant color and a sweet, crisp bite, balancing the savory and umami flavors.
    • Pickled Ginger: Provides a tangy and slightly spicy kick, brightening the dish and adding complexity.
    • Green Pepper: Offers a fresh, slightly bitter crunch that contrasts nicely with the other sweet and savory ingredients.
    • Shrimp: Adds a delicate, sweet seafood flavor and a tender texture, enhancing the protein variety in the dish.
    • Soy Sauce: Infuses the dish with a rich umami flavor, tying all the ingredients together with its salty and savory notes.
    • Egg: Adds richness and a creamy texture when cooked and mixed into the noodles, making the dish more hearty and satisfying.
    • Green Onions: Adds a fresh, mild onion flavor and a pop of color, enhancing both the taste and visual appeal of the dish.
    • Vegetable Oil: Used for cooking the ingredients, ensuring they don't stick to the pan and adding a slight richness.
    • Sesame: Adds a nutty flavor and a bit of crunch, complementing the other ingredients and enhancing the dish's texture.

    For the complete list of ingredients with measurements and instructions, please see the recipe card at the bottom of the post.

    📖  Substitutions & Variations

    • Beef Yaki Soba Swap the chicken for thinly sliced beef. Cook the beef the same way, ensuring it’s seared on high heat for a flavorful dish.
    • Vegetable Yaki Soba For a vegetarian option, replace the chicken with a variety of your favorite vegetables like bell peppers, mushrooms, and snap peas. Add tofu for extra protein.
    • Seafood Yaki Soba Try adding scallops, or a mix of seafood to your shrimp. Seafood cooks quickly, so add it towards the end to prevent overcooking.
    • If you're missing any of the typical Yaki Soba sauce ingredients, try these substitutes:
    • Oyster Sauce: Hoisin sauce or a mix of soy sauce and a bit of sugar can work in a pinch.
    • Worcestershire Sauce: Substitute with a mix of soy sauce and a splash of vinegar.
    • Mirin: Use a mixture of rice vinegar and a bit of sugar if mirin is unavailable.

    🔪How To Make Chicken Yaki Soba

    marinated chicken for yaki soba
    1. Step 1: In a large bowl, mix the chopped chicken thighs, half the bean sprouts, 1 tablespoon of vegetable oil, salt, and pepper. Leave to marinate for half an hour.
    chicken yaki soba
    1. Step 2: Heat a frying pan with the remaining 1 tablespoon of vegetable oil. Add the regular onion, green onions, bell pepper, and the remaining bean sprouts. Stir-fry for 4-5 minutes until the vegetables are tender.
    yaki soba in a skillet
    1. Step 3: Add the marinated chicken thighs and shrimp to the pan. Stir-fry until the chicken and shrimp are cooked through.
    chicken yaki soba
    1. Step 4: Add the cooked egg noodles, beaten eggs, and soy sauce to the pan. Mix everything together and continue to stir-fry until the eggs are fully cooked. When serving, sprinkle with sesame seeds and add pickled ginger for garnish.
    chicken yaki soba

    👩‍🍳 Expert Tips

    Follow these tips to make the best Yaki soba:

    • Prep Ingredients First: Have all your ingredients prepped before you start. This dish cooks quickly, so being ready is essential.
    • Use High Heat And A Large Pan: Cook on high heat using a large pan or wok for the best stir-fry texture. This helps sear the chicken and vegetables quickly.

    💭 FAQs

    Can I use other proteins instead of chicken in Yaki Soba?

    Yes, you can substitute chicken with beef, pork, shrimp, or even tofu. Just make sure to adjust the cooking time based on your protein choice to ensure it's properly cooked.

    What type of noodles should I use for Yaki Soba?

    For the most authentic flavor, use traditional Yaki Soba noodles, which are slightly thicker and a bit chewy. If you can’t find them, you can substitute with other types of stir-fry noodles or even ramen noodles.

    Can I make this dish vegetarian?

    Absolutely! To make the recipe vegetarian, you can skip the chicken and use tofu or other plant-based proteins. Be sure to adjust the sauce to taste, as some pre-made sauces may contain animal products.

    How do I store leftovers of this dish?

    Leftovers can be stored in an airtight container in the fridge for up to 2-3 days. When reheating, add a little water or soy sauce to refresh the noodles, as they may dry out in the fridge.

    💖 Serving Suggestions

    • Gyoza (Japanese Dumplings): These savory dumplings filled with ground meat and vegetables are a perfect accompaniment, providing a crispy contrast to the noodles.
    • Miso Soup: A warm, comforting bowl of miso soup with tofu, seaweed, and green onions complements the flavors of Yaki Soba beautifully.
    • Stir Fried Edamame: Edamame pods sprinkled with sea salt make for a simple and healthy side dish that pairs well with the noodles.
    • Japanese Pickles (Tsukemono): These pickles add a refreshing crunch and tangy flavor that balances the richness of the Yaki Soba.
    • Tempura Vegetables: Lightly battered and fried vegetables, such as sweet potatoes, carrots, and zucchini, offer a delightful texture and taste contrast.
    chicken yaki soba

    🍽 Winner Winner, More Chicken Dinners

    • One Skillet Chicken Thighs with Butternut Squash.
      One Skillet Chicken Thighs With Butternut Squash
    • Chicken Stuffed With Spinach And dates.
      Spinach Stuffing for Chicken Breast with Dates
    • Air Fryer Crispy Chicken Wings.
      Air Fryer Crispy Chicken Wings
    • Slow Cooker Million Dollar Chicken Casserole.
      Slow Cooker Million Dollar Chicken Casserole

    Did you make this recipe? Leave a review and a ⭐⭐⭐⭐⭐ rating below, or tag us in our Facebook Group! Alternatively, bookmark it in your browser or save to Pinterest.

    Easy Chicken Yaki Soba Recipe.

    Chicken Yaki Soba

    Angela Milnes
    Savor the flavors of Japan with this Chicken Yaki Soba! Stir-fried noodles, tender chicken, and crisp veggies are tossed in a savory, umami-rich sauce, creating a deliciously satisfying dish. It's a quick and easy meal that's perfect for busy weeknights or a tasty lunch!
    5 from 4 votes
    Print Recipe Pin Recipe Rate this Recipe
    Prep Time 5 minutes mins
    Cook Time 10 minutes mins
    Additional Time 20 minutes mins
    Total Time 35 minutes mins
    Course Dinners
    Cuisine Japanese
    Servings 3 Servings
    Calories 351 kcal

    Ingredients
      

    • 2 Chicken Thighs
    • 1 Cup Soy Sprouts
    • 1 Whole Chopped onion
    • ¼ Cup Red pepper
    • 1 tablespoon Pickled Ginger
    • ¼ Cup Green pepper
    • 6 Whole Shrimp
    • 2 tablespoon Soy Sauce
    • 1 Egg
    • 3 tablespoon Green Onions
    • 1 tablespoon Vegetable Oil
    • 1 tablespoon Sesame oil

    Instructions
     

    • In a large bowl, mix the chopped chicken thighs, half the bean sprouts, 1 tablespoon of vegetable oil, salt, and pepper.
    • Leave to marinate for half an hour.
    • Heat a frying pan with the remaining 1 tablespoon of vegetable oil.
    • Add the regular onion, green onions, bell pepper, and the remaining bean sprouts.
    • Stir-fry for 4-5 minutes until the vegetables are tender.
    • Add the marinated chicken thighs and shrimp to the pan.
    • Stir-fry until the chicken and shrimp are cooked through.
    • Add the cooked egg noodles, beaten eggs, and soy sauce to the pan.
    • Mix everything together and continue to stir-fry until the eggs are fully cooked.
    • When serving, sprinkle with sesame seeds and add pickled ginger for garnish.

    Notes

    Prep Ingredients First Have all your ingredients prepped before you start. This dish cooks quickly, so being ready is essential.
    Use High Heat and a Large Pan Cook on high heat using a large pan or wok for the best stir-fry texture. This helps sear the chicken and vegetables quickly.

    Nutrition

    Calories: 351kcalCarbohydrates: 15gProtein: 20gFat: 26gSaturated Fat: 6gPolyunsaturated Fat: 9gMonounsaturated Fat: 9gTrans Fat: 0.1gCholesterol: 132mgSodium: 1079mgPotassium: 701mgFiber: 8gSugar: 4gVitamin A: 6097IUVitamin C: 16mgCalcium: 94mgIron: 5mg
    Print Recipe Pin Recipe Rate this Recipe
    Tried this recipe?Let us know how it was!

    More Easy Recipes

    • Mango Arugula Salad
    • Instant Pot Wild Rice Blend With Pomegranates
    • Roasted Beetroot Salad With Honey Mustard Dressing
    • Creamy Pan Fried Salmon Fillet
    • Classic Tuna Tartare Recipe
    • Best Carrot Rice Recipe

    Easy Smoked Salmon Dip With Capers

    September 16, 2024 by Angela Milnes

    Easy Smoked Salmon Dip Recipe.

    This smoked salmon dip with capers is creamy, zesty, and just the right amount of fancy. It's the kind of no-fuss recipe that impresses without the stress—perfect for last-minute guests or a savory snack moment.

    Easy Smoked Salmon Dip Recipe.

    Smoked salmon dips are popping up on every stylish snack board for a reason—they're rich, elegant, and ridiculously easy to make. This version brings that briny bite of capers, the tang of lemon, and fresh dill to balance it all out.

    If you’re into bold flavors, you’ll also love my Baked Crispy Salmon Bites or Smoked Salmon Bruschetta With Avocado. Craving more dips? Try this Caramelized Onion Dip With Greek Yogurt.

    [feast_advanced_jump_to]

    💖 Why This Recipe Works

    • Creamy & Luxurious: Cream cheese, mayo, and sour cream create the dreamiest base.
    • Flavor-Packed: Smoked salmon, capers, lemon, and dill = bold, balanced flavor.
    • Fast & Foolproof: Ready in minutes with just a quick blend—no cooking required! It pairs perfectly with our Air Fried Beet Chips Recipe.

    ⭐ Star Ingredients

    Smoked Salmon Dip Ingredients.
    • Smoked Salmon: The star of the show—rich, savory, and packed with umami. Go for cold-smoked for the smoothest texture.
    • Cream Cheese: Adds thickness and a mild tang that makes this dip irresistibly creamy.
    • Capers: Tiny flavor bombs! They bring briny contrast and elevate the salmon like nothing else.

    📖  Substitutions & Variations

    • Spice It Up: Add hot sauce, cayenne, or chopped jalapeños for heat.
    • Herb Lovers: Swap dill for parsley, chives, or tarragon—fresh herbs always win.
    • Extra Zing: Add lemon zest or double the capers for more punch.
    • Avocado Boost: Stir in mashed avocado + lime juice for a creamy, fresh twist.
    • Canned Salmon Swap: Not ideal, but works in a pinch—just adjust seasoning.

    If you love creamy dips with a seafood vibe, you might also enjoy my Italian Octopus Salad or Beet Cured Salmon.

    🔪 How To Make Smoked Salmon Dip With Capers

    smoked salmon dip ingredients in the food processor
    1. Step 1: In a food processor, add the cream cheese, mayonnaise, sour cream, and the juice of the lemon. Process until well combined.
    smoked salmon dip ingredients in the food processor
    1. Step 2: Next add the smoked salmon, capers, dill (be sure to remove the stems), salt, and pepper and process.
    smoked salmon dip ingredients in the food processor
    1. Step 3: Make sure you don’t process the dip for too long, so you still have small chunks of smoked salmon for texture.
    smoked salmon dip ingredients in the food processor
    1. Step 4: Serve with toast, crostini or baguette slices. Your easy Salmon dip is now ready to enjoy!

    💡Hint: Chill for 30 minutes before serving to let the flavors mingle and mellow—totally worth the wait!

    smoked salmon dip in a bowl

    👩‍🍳 Expert Tips

    • Use high quality smoked salmon: It makes or breaks the dip. Look for silky, cold-smoked slices.
    • Soften cream cheese: Room temp cream cheese blends smoother and faster.
    • Don’t overblend: A few salmon chunks give great texture—no baby food vibes here!

    🥪 Bonus Lunchbox Tip (Kid-Friendly!)

    Turn this dip into a fun lunchbox feature! Spread it onto a wrap with sliced cucumbers and spinach, then roll and slice into pinwheels. Or pack it with whole grain crackers and veggie sticks for a DIY snack box. Just make sure to include an ice pack to keep it safe until lunchtime.

    Smoked Salmon Dip on a baguette

    💭 FAQs

    Can I make salmon dip ahead of time?

    Yes, this dip can be made a day or two ahead. In fact, letting the flavors meld together in the fridge overnight often enhances the taste. Just cover it well and store it in the refrigerator. Before serving, give it a quick stir and adjust the seasoning if needed.

    Can I use canned salmon instead of smoked for salmon dip?

    While canned salmon can work in a pinch, smoked salmon provides a unique flavor that makes this dip special. If you decide to use canned salmon, consider adding a little extra seasoning to boost the flavor and texture.

    How do I store leftover salmon dip?

    Absolutely! If you like a little heat, try adding a dash of hot sauce or a pinch of cayenne pepper to the dip. Alternatively, a small amount of finely chopped jalapeños can give it a fresh, spicy kick.

    💖 Serving Suggestions

    Here are my favorite sides to serve with Smoked Salmon Dip:

    • Crispy Bagel Chips: The perfect salty crunch for this creamy dip.
    • Cucumber Slices: Fresh, light, and great for low-carb snacking.
    • Crudité Platter: Bell peppers, celery, and cherry tomatoes make a colorful combo.
    • Pita Wedges: Warm, soft pita is great for scooping.
    • Lemon Dill Crackers: Add an extra citrus-herb layer to each bite.
    Smoked salmon dip in a bowl.

    🍽 Try These Simple And Easy Dips

    • Best Caramelized Onion Dip With Chives.
      Best Caramelized Onion Dip With Chives
    • Instant pot buffalo chicken dip in a dish.
      Instant Pot Buffalo Chicken Dip
    • Greek Beetroot Dip.
      Best Beetroot Dip Recipe (Greek Dip)
    • Whipped Feta Dip.
      Creamy Whipped Feta Dip (With Greek Yogurt & Garlic)

    Did you make this recipe? Leave a review and a ⭐⭐⭐⭐⭐ rating below, or tag us in our Facebook Group! Alternatively, bookmark it in your browser or save to Pinterest.

    Easy Smoked Salmon Dip Recipe.

    Smoked Salmon Dip With Capers

    Angela Milnes
    Elevate your appetizer game with this creamy and flavorful Smoked Salmon Dip! Rich smoked salmon is blended with cream cheese, fresh herbs, and a hint of lemon for a dip that's as elegant as it is delicious. Perfect for spreading on crackers or pairing with veggies, it’s a crowd-pleaser for any gathering!
    5 from 4 votes
    Print Recipe Pin Recipe Rate this Recipe
    Prep Time 10 minutes mins
    Cook Time 0 minutes mins
    Additional Time 0 minutes mins
    Total Time 10 minutes mins
    Course Appetizers
    Cuisine American
    Servings 8 Servings
    Calories 180 kcal

    Ingredients
      

    • 8 oz Cream Cheese
    • 4 oz Smoked Salmon
    • ½ teaspoon Fresh Lemon Juice
    • ¼ cup Mayonnaise
    • ¼ cup Sour Cream
    • 2 tablespoon Chopped Fresh Dill
    • 1 tablespoon Capers
    • Salt to taste
    • Freshly Ground Black Pepper to taste

    Instructions
     

    • Prepare the creamy base in a food processor, add the cream cheese, mayonnaise, sour cream, and the juice of the lemon. Process until well combined.
    • Then add the smoked salmon, capers, dill (make sure to remove the stems), salt, and pepper and process
    • Make sure you don’t let it process for too long, so you keep little chunks of smoked salmon for texture.
    • Serve and Enjoy

    Notes

    Use High-Quality Smoked Salmon: The quality of the smoked salmon will significantly impact the flavor of your dip. Choose a high-quality, well-smoked salmon for the best taste.
    Soften Cream Cheese: Ensure the cream cheese is softened to room temperature before mixing. This will make it easier to blend with the other ingredients and create a smooth, creamy texture.

    Nutrition

    Calories: 180kcalCarbohydrates: 2gProtein: 5gFat: 17gSaturated Fat: 7gPolyunsaturated Fat: 4gMonounsaturated Fat: 4gTrans Fat: 0.01gCholesterol: 39mgSodium: 276mgPotassium: 98mgFiber: 0.1gSugar: 1gVitamin A: 488IUVitamin C: 1mgCalcium: 51mgIron: 1mg
    Print Recipe Pin Recipe Rate this Recipe
    Tried this recipe?Let us know how it was!

    More Salmon And Fish Recipes

    • Creamy Pan Fried Salmon Fillet
    • Salmon Sushi Balls Recipe
    • Chilean Sea Bass With Lime, Chili And Ginger
    • Baked Seabass With Lemon and Herbs (Chilean)

    Easy Orange Carrot Ginger Juice

    September 12, 2024 by Angela Milnes

    Easy Orange Carrot Ginger Juice.

    Brighten your day with this quick and vibrant Orange Carrot Ginger Juice! It's sweet, citrusy, and just spicy enough to wake up your taste buds. Perfect for busy mornings, post-workout sips, or a healthy pick-me-up any time of day!

    Orange Carrot Ginger Juice in a glass with a yellow straw.

    This orange carrot juice combo is a go-to when you want something refreshing and nourishing. Fresh ginger adds a zingy edge that balances the natural sweetness of carrots and oranges. It’s great in the warmer months but also a cozy vitamin C boost in the winter.

    If you love this, check out our Beetroot Juice, Watermelon Juice, or Vegan Banana Avocado Smoothie next!

    [feast_advanced_jump_to]

    💖 Why This Recipe Works

    • Refreshing and Flavorful: The perfect balance of sweet, tart, and spicy.
    • Quick & Easy: Ready in minutes using a blender or juicer.
    • Nutrient-Packed: Loaded with vitamin C, antioxidants, and natural goodness.

    🛒 Star Ingredients

    Orange Carrot Ginger Juice Ingredients. oranges, carrots, ginger and lemon.
    • Navel Oranges: Juicy and sweet—a citrus base that brightens the whole drink.
    • Carrots: Earthy and subtly sweet, they make the juice rich and smooth.
    • Lemon: A zingy lift that enhances all the other flavors.
    • Ginger: Spicy and warming, ginger gives the juice that little extra zip.

    For the complete list of ingredients with measurements and instructions, please see the recipe card at the bottom of the post.

    📖  Substitutions & Variations

    • Green Twist: Add spinach or kale for a green juice boost.
    • Cucumber Cooler: Add cucumber for extra hydration and a clean finish.
    • Coconut Vibe: Use coconut water instead of plain water for a tropical feel.
    • Minty Kick: Toss in some fresh mint for an herbaceous edge.
    • Beetroot Version: Add a beet for color, fiber, and a deeper earthy flavor.

    🔪How To Make Orange Carrot Ginger Juice

    peeling off the oranges and lemon.
    1. Step 1: Wash all your produce thoroughly. Peel the oranges and lemon, trimming off the white pith.
    trimming the ends of the carrots on a wooden board.
    1. Step 2: Trim the ends off the carrots and discard them, leaving the rest ready for juicing. Peel the ginger with a spoon or knife, ensuring it's clean and ready to add a spicy kick to your juice.
    processing the oranges, lemon, carrots, and ginger through the juicer.
    1. Step 3: Process the oranges, lemon, carrots, and ginger through your juicer, one at a time, until fully extracted.
    vibrant orange juice in a glass.
    1. Step 4: Pour the vibrant orange juice into a glass and serve immediately for the freshest taste. Enjoy!

    💡 Hint: Chill your fruits and veggies before juicing—no ice needed and way more flavor!

    fresh orange ginger carrot juice.

    👩‍🍳 Expert Tips

    • Adjust Ginger to Taste: Start small if you're new to ginger.
    • Drink Fresh: Juice is best right after blending for max nutrients.
    • Strain for Smoothness: Want it silky? Strain your juice for the smoothest sip.
    • Go Organic: If possible, choose organic produce to avoid pesticide residue.
    fresh orange ginger carrot juice.

    💭 FAQs

    Can I make orange carrot ginger juice without a juicer?

    Yes! Just blend the ingredients with a splash of water, then strain through a sieve or nut milk bag.

    Can I adjust the sweetness of orange carrot juice?

    Absolutely! Use sweeter oranges or add a natural sweetener like honey or maple syrup if needed.

    Can I use frozen produce in orange carrot juice?

    While fresh produce is best, pre-cut or frozen carrots and ginger can work in a pinch, though the flavor may differ slightly.

    How can I reduce the acidity in the juice?

    You can reduce the acidity by adding more carrots or a splash of coconut water to balance the tanginess.

    💖 Serving Suggestions

    This zingy juice is perfect with:

    • Granola Bowls: A crunchy breakfast bowl with fruit and yogurt.
    • Avocado Toast: That creamy toast balances the tangy juice.
    • Mango Chicken Salad With Avocado: Pair with a citrus-dressed salad for a refreshing lunch.
    • Kiwi Fruit Salad With Pomegrantes: Make a juicy fruit salad with a glass of this juice on the side.
    holding the glass of fresh orange ginger carrot juice.

    🍽 Try These Simple Juice Recipes

    • Passion Fruit Juice.
      Best Passion Fruit Juice Recipe
    • Cucumber juice in a glass with a straw.
      Easy Celery and Cucumber Juice Recipe
    • Best Butterfly Pea Tea Lemonade in a mason jar with slices of lemon and a white straw.
      Best Butterfly Pea Tea Lemonade Recipe
    • Celery juice in a cup.
      How To Make Celery Juice

    Did you make this recipe? Leave a review and a ⭐ ⭐ ⭐ ⭐ ⭐ rating below, or tag us in our Facebook Group! Alternatively, bookmark it in your browser or save it to Pinterest.

    Easy Orange Carrot Ginger Juice.

    Easy Orange Carrot Ginger Juice

    Angela Milnes
    Easy Orange Carrot Ginger Juice, a refreshing and nutrient-packed blend of oranges, carrots, and ginger, perfect for a zesty health boost!
    5 from 2 votes
    Print Recipe Pin Recipe Rate this Recipe
    Prep Time 15 minutes mins
    Total Time 15 minutes mins
    Course Drinks
    Cuisine Fusion
    Servings 3 Servings
    Calories 200 kcal

    Ingredients
      

    • 6 Navel Oranges
    • 6 Carrots 4 Small And 2 Large Carrots
    • 1 Lemon
    • 1 Inch Ginger

    Instructions
     

    • Wash all your produce thoroughly under running water to remove any dirt or residue.
    • Cut the peel off the oranges and lemon, removing as much of the white pith as possible for a smoother juice.
    • Trim the ends off the carrots and discard them, leaving the rest ready for juicing.
    • Peel the ginger with a spoon or knife, ensuring it's clean and ready to add a spicy kick to your juice.
    • Process the oranges, lemon, carrots, and ginger through your juicer, one at a time, until fully extracted.
    • Pour the vibrant orange juice into a glass and serve immediately for the freshest taste. Enjoy!

    Notes

    Choose Fresh Produce: Use the freshest oranges, carrots, and ginger for the best flavor and nutrient content. Organic options are ideal to avoid pesticides.
    Balance the Ginger: If you're not a fan of strong spice, start with a smaller piece of ginger and adjust to taste.
    Serve Immediately: Fresh juice is most nutritious and flavorful when consumed right after juicing.
    Strain if Needed: If you prefer a smoother juice, strain it using a fine mesh sieve or cheesecloth to remove pulp.
    Chill Ingredients: For a refreshing drink, refrigerate the fruits and vegetables before juicing instead of adding ice.

    Nutrition

    Calories: 200kcalCarbohydrates: 51gProtein: 4gFat: 1gSaturated Fat: 0.1gPolyunsaturated Fat: 0.2gMonounsaturated Fat: 0.1gSodium: 88mgPotassium: 915mgFiber: 11gSugar: 31gVitamin A: 21081IUVitamin C: 192mgCalcium: 170mgIron: 1mg
    Print Recipe Pin Recipe Rate this Recipe
    Tried this recipe?Let us know how it was!

    Best Passion Fruit Juice Recipe

    September 12, 2024 by Angela Milnes

    Passion Fruit Juice.

    Get ready to sip on sunshine with this bold and fruity Passion Fruit Juice Recipe. It’s bright, zesty, and just sweet enough to make your tastebuds dance. One sip and you’ll be dreaming of beach days and summer breezes.

    Passion Fruit Juice in a glass with a yellow straw and yellow teatowel in the background.

    Tropical drinks are totally in right now—especially the ones that are homemade, hydrating, and bursting with vitamins. Passion fruit is a seasonal superstar in spring and summer, and this easy juice recipe is a naturally sweet way to cool down.

    Want more refreshing drink inspo? Try my Citrus Lemon Lime Lemonade, Butterfly Pea Tea Lemonade, or Watermelon Juice next!

    [feast_advanced_jump_to]

    💖 Why This Recipe Works

    • Tropical flavor bomb: Tangy, sweet, and wildly refreshing.
    • Ready in minutes: Minimal ingredients, maximum flavor.
    • Totally versatile: Serve chilled, frozen, or as a mocktail base.

    🥘 Star Ingredients

    Passion Fruit Juice Ingredients. Passionfruit, sugar, ice cubes, lime and water.
    • Passion Fruits – The most important ingrediet! These wrinkly tropical gems bring the tart, exotic goodness.
    • Lime Juice – Brightens the whole thing with an extra citrus zing.
    • Sugar – Just enough to mellow out the tang (adjust to taste!).
    • Cold Water + Ice – Keeps it light, hydrating, and super chill.

    For the complete list of ingredients with measurements and instructions, please see the recipe card at the bottom of the post.

    📖  Substitutions & Variations

    Here are some fun variations to try with passionfruit juice:

    • Passion Fruit Smoothie: Blend the juice with frozen mango and banana.
    • Mint Cooler: Add fresh mint leaves before blending.
    • Coconut Hydrator: Use half coconut water for a beachy twist.
    • Lemonade Remix: Swap lime for lemon and bump up the sugar for a sweet-tart blend.
    • Spicy Surprise: Toss in a pinch of cayenne for a zesty kick.
    • Mocktail Magic: Mix with sparkling water and garnish with a lime wheel.

    If you love this, you’ll definitely want to try my Best Avocado and Apple Smoothie or super chill Vegan Mixed Berry Smoothie next!

    👩🏻‍🍳 Culinary Uses Beyond Beverages

    Here’s the thing—this juice is way too good to just sip and forget. I’ve been using it in all sorts of recipes over the years, and let me tell you, it adds a tropical punch that totally transforms even the simplest dish.

    Here are a few of my favorite ways to use it:

    • Tropical Salad Dressing – I whisk it with a splash of olive oil, a drizzle of honey, and a smidge of mustard. Poured over a mango-avocado salad? Next level.
    • Dessert Sauce – I love drizzling it over Greek yogurt or cheesecake. My daughter calls it “sunshine syrup.”
    • Homemade Sorbet – Mix it with blended pineapple or mango and freeze. No fancy machine needed, just fruity magic in a bowl.
    • Marinade Magic – Combine it with soy sauce, garlic, and lime for a tangy-sweet marinade that’s killer on grilled chicken or prawns.
    • Cake Soak or Glaze – My mum’s trick: brush it over warm cake layers before frosting. It soaks in and makes every bite super moist with a zesty kick. I’ve started doing the same for loaf cakes and even cupcakes!

    👉 Once you make a batch, you’ll find yourself reaching for it way more than you expected—trust me.

    🔪How To Make Homemade Passion Fruit Juice

    passion fruit pulp in a bowl.
    1. Step 1: Slice the passion fruits in half and scoop the pulp into a bowl, aiming for about 1 cup from 10 ripe fruits.
    Adding Lemon To A Juicer.
    1. Step 2: Place the pulp into a blender, pour in 2 cups of water, and blend gently for a few seconds. This will loosen the seeds from the pulp without breaking them apart.
    Straining Blended Mixture Through A Bowl.
    1. Step 3: Strain the blended mixture through a fine mesh strainer or cheesecloth into a pitcher. Press the pulp with the back of a spoon to extract all the juice, then discard the leftover seeds and pulp.
    Straining Passion Fruit Through Pulp.
    1. Step 4: Add the remaining cup of water to the strained juice and stir in the sugar until dissolved. Taste and adjust the sweetness as needed. Mix in the lime juice to add a touch of brightness and balance to the drink.
    Adding Ice Into A Glass.
    1. Step 5: Chill the juice in the fridge for at least an hour, and serve it over ice if you’d like it extra refreshing.
    Passion Fruit In A Glass.
    1. Step 6: For a lovely presentation, garnish with lime slices or a sprinkle of passion fruit seeds before serving. Enjoy the tropical vibes!

    💡Hint: Use chilled water from the start so your juice is instantly refreshing without needing a ton of ice!

    👩‍🍳 Expert Tips

    • Choose wrinkly fruit: Wrinkled = ripe = juicy and sweet.
    • Don’t skip the straining: It’s the best way to get that smooth, sippable texture.
    • Go low on sugar at first: Taste test and sweeten as needed depending on your passion fruits.

    💭 FAQs

    Can I use frozen or canned passion fruit pulp to make passion fruit juice?

    Yes! Frozen or canned pulp works great—just check for added sugar so you can adjust sweetness accordingly.

    How do I know if passion fruit is ripe?

    Look for fruits with deeply wrinkled skin. They may look a little ugly, but that’s when they’re at their sweetest.

    What can I do with the leftover passion fruit seeds?

    Sprinkle them on yogurt, toss them into smoothies for crunch, or roast them as a nutty snack.

    Can I make a large batch of passion fruit juice for a party?

    Yes, this recipe is easy to scale up. Simply multiply the ingredients according to the number of servings you need. Serve in a large pitcher with ice and lime slices for an appealing presentation.

    Passion Fruit Juice In A Glass with a straw.

    💖 Serving Suggestions

    Passion fruit juice pairs beautifully with a variety of dishes and snacks! Here are some ideas:

    • Coconut Shrimp – Sweet and crispy meets tangy and tropical.
    • Tropical Fruit Salad – Mango, pineapple, and kiwi are made for this juice.
    • Honey Garlic Chicken Breast – Light and flavorful combo for a summer lunch.
    • Cheese Board – Pair with soft cheeses and fruit for a fancy brunch.
    • Greek Yogurt Chia Pudding with Raspberries – A creamy, protein-packed breakfast pairing.
    • Crispy Air Fryer Beet Chips – Sweet, salty, and crunchy perfection!
    Passion Fruit Juice In A Glass with a straw.

    🍽 Try These Fruity Recipes

    • kiwi fruit salad.
      Best Kiwi Fruit Salad With Pomegranate
    • Watermelon Salad With Feta and Mint.
      Watermelon Feta Mint Salad
    • Summer fruit tart on a serving plate.
      Vegan Summer Fruit Tart Recipe
    • Peach Caprese Salad With Blueberries.
      Peach Caprese Salad With Blueberries

    Did you make this recipe? Leave a review and a ⭐⭐⭐⭐⭐ rating below, or tag us in our Facebook Group! Alternatively, bookmark it in your browser or save to Pinterest.

    Passion Fruit Juice.

    Passion Fruit Juice Recipe

    Angela Milnes
    This refreshing passion fruit juice recipe is tangy, sweet, and tropical. Easy to make in minutes—perfect for summer sipping or mocktail magic!
    5 from 1 vote
    Print Recipe Pin Recipe Rate this Recipe
    Prep Time 15 minutes mins
    Cool Time 1 hour hr
    Total Time 1 hour hr 15 minutes mins
    Course Drinks
    Cuisine American
    Servings 4 servings
    Calories 51 kcal

    Ingredients
      

    • 8-10 Ripe Passion Fruits Yielding Approximately 1 Cup Of Pulp
    • 3 Cups Water
    • ¼- ½ Cup Sugar Adjust To Taste
    • 1 tablespoon Lime Juice
    • Ice cubes

    Instructions
     

    • Slice the passion fruits in half and scoop the pulp into a bowl, aiming for about 1 cup.
    • Place the pulp in a blender with 2 cups of water. Blend for a few seconds to loosen the seeds.
    • Strain the mixture through a fine mesh strainer or cheesecloth into a pitcher. Press with a spoon to extract all the juice, then discard the seeds.
    • Add the remaining 1 cup of water and stir in sugar until dissolved. Taste and adjust the sweetness. Add lime juice for a zesty kick.
    • Chill the juice for at least 1 hour. Serve over ice for a refreshing drink.
    • Optionally, garnish with lime slices or a few passion fruit seeds before serving.

    Notes

    Pick Ripe Passionfruit: Look for fruits with wrinkled skin; they’re sweeter and have more flavor than smooth, unripe ones.
    Strain the Seeds: If you prefer a smoother juice, use a fine mesh sieve to separate the pulp from the seeds after blending.
    Adjust Sweetness: Taste the juice before adding sugar and adjust based on the natural sweetness of the fruit.
    Use Chilled Water: Start with cold water to make the juice instantly refreshing without diluting it with too much ice.

    Nutrition

    Calories: 51kcalCarbohydrates: 13gProtein: 0.1gFat: 0.1gPolyunsaturated Fat: 0.01gMonounsaturated Fat: 0.003gSodium: 10mgPotassium: 12mgFiber: 0.2gSugar: 13gVitamin A: 27IUVitamin C: 2mgCalcium: 6mgIron: 0.04mg
    Print Recipe Pin Recipe Rate this Recipe
    Tried this recipe?Let us know how it was!

    Easy Air Fryer Cauliflower Pizza Crust

    September 10, 2024 by Angela Milnes

    Easy Air Fryer Cauliflower Pizza Crust.

    Craving pizza without the carbs? This Air Fryer Cauliflower Pizza Crust is your crispy, cheesy, veggie-packed answer. It’s gluten-free, low-carb, keto-friendly, and surprisingly easy to whip up. Whether you're going full veggie or piling it high with toppings, this crust is a game changer for pizza night.

    Easy Air Fryer Cauliflower Pizza Crust.

    Cauliflower crust has become a staple for anyone looking to cut carbs without cutting out comfort food. And when you make it in the air fryer? Game on. You get a golden, crisp edge with a tender bite—no sogginess here! It’s a smart alternative to traditional dough and a fun way to sneak in more veggies (yes, even picky eaters love it).

    If you love Cauliflower, you might like these Cauliflower Steaks , this Purple Cauliflower Puree or our Cauliflower Fried Rice recipe.

    [feast_advanced_jump_to]

    💖 Why This Recipe Works

    • Quick and fuss-free – The air fryer delivers crispy edges fast, no oven required.
    • Low-carb & keto-friendly – Perfect for gluten-free eaters and carb-cutters alike.
    • Customizable – Add your favorite toppings and sauces to make it your own.
    cauliflower pepperoni pizza.

    ⭐ Star Ingredients

    Korean Beef Ingredients.
    • Cauliflower: The star of the show! Riced cauliflower makes a surprisingly sturdy and tasty base.
    • Eggs: Helps bind the crust together so it holds up to toppings.
    • Cheese: Mozzarella or parmesan adds flavor, texture, and golden brown crispiness.
    • Seasonings: Garlic powder, oregano, and a pinch of salt give that classic pizza crust flavor.

    For the complete list of ingredients with measurements and instructions, please see the recipe card at the bottom of the post.

    📖  Substitutions & Variations

    • Dairy-Free – Swap in your favorite dairy-free cheese alternative.
    • Egg-Free – Try a flax egg (1 tablespoon ground flax + 3 tablespoon water) if needed.
    • Flavor Boost – Add dried basil or crushed red pepper to the crust for extra punch.
    • Topping Ideas: Go classic with marinara, mozzarella, and basil, or try a white sauce with spinach and artichokes. Pepperoni, olives, roasted peppers—anything goes!

    🍕 If you’re after more creative crusts, try my Zucchini Lasagna Rolls for another veggie-packed twist.

    🔪 How To Make Cauliflower Pizza Crust In The Air Fryer?

    chopping cauliflower on wooden board.
    1. Step 1: Cut your cauliflower head into small pieces (remove green stem). 
    cauliflower in food processor.
    1. Step 2: Add to a food processor. Pulse the cauliflower until it resembles small crumbs. 
    squeezing water out of cauliflower.
    1. Step 3: Add all the cauliflower crumbs to a kitchen towel or cheesecloth. Twist the cloth until water from the cauliflower comes out. Continue to squeeze until no more water comes out. 
    making cauliflower crust.
    1. Step 4: Add the cauliflower to a large bowl. Add in your eggs, flour, parmesan cheese, salt, and pepper. Mix. 
    making cauliflower crust.
    1. Step 5: Preheat your air fryer to 400 degrees F or 200 celsius. Cut out parchment paper the size of your Air Fryer. Take 2 tablespoon of your cauliflower pizza into the palm of your hand. Roll in a ball, and then flatten into a thin layer.
    air fryer cauliflower pizza crust.
    1. Step 6: Cook the cauliflower base at 400 degrees F for 8 minutes. Flip the pizza over and cook for another 3-4 minutes
    air fryer cauliflower pizza crust.
    1. Step 7: Add your pizza sauce, cheese, and 3 pepperonis’. Cook again at 360 degrees for 4 minutes. 
    air fryer cauliflower pizza crust.
    1. Step 8: Remove with a spatula to your plate or serving dish. Top with parsley, oregano, parmesan cheese, etc. and enjoy!

    💡 Hint: Let the crust cool for a couple of minutes before slicing—it firms up beautifully as it rests!

    air fryer cauliflower pizza crust.

    👩‍🍳 Expert Tips

    Here are some top tips to get the perfect pizza base:

    • Dry is key: Squeezing out that moisture makes or breaks the crust—don’t skip it!
    • No sticking: Always use parchment paper in the air fryer for easy transfer and cleanup.
    • Double batch it: Make two crusts and freeze one for a quick pizza fix later.

    air fryer cauliflower pizza crust.

    💭 FAQs

    Is Cauliflower Pizza Healthy?

    Yes, cauliflower pizza is definitely a healthy option! Not only is fresh cauliflower in carbs and but it's also rich in nutrients like vitamin C and fiber.

    Is air fryer cauliflower pizza crust keto-friendly?

    Yes! This crust is naturally low in carbs and perfect for keto or low-carb diets.

    Why Is My Cauliflower Pizza Crust Soggy?

    If you find your cooked cauliflower pizza crust is too soggy then you may need to ensure the water has been squeezed out as much as possible during the water removal process.

    Can I Freeze Cauliflower Rice Before Making The Base?

    Yes, you can freeze cauliflower rice before using it to make the base for your pizza crust. Freezing cauliflower rice is a convenient way to prepare in advance. Be sure to remove access water from the frozen cauliflower rice once defrosted.

    How Do I make The Cauliflower Pizza Crust Crispy?

    To get a crispy crust, be sure to squeeze out as much moisture from the cauliflower as possible before mixing it with the other ingredients. Also, preheat your air fryer and avoid overcrowding the basket, as this allows for even cooking and crisping.

    💖 Serving Suggestions

    Turn your air fryer cauliflower pizza crust into a full-on meal with these tasty pairings:

    • Simple Avocado Salad – Light and creamy, a fresh contrast to that rich cheesy crust.
    • Roasted Beet & Sweet Potato Salad – Hearty and colorful, great for cooler nights.
    • Banana and Beetroot Smoothie – A fun, vibrant drink the whole fam will love.
    • Passion Fruit Juice Recipe – Refreshing and zippy, great for summer pizza nights.
    • Creamy Herby Ranch Dressing – Use as a salad dressing or a dip for your crust edges—so good!

    And here are a few more fresh ideas:

    • Crispy Smashed Potato Salad – Try this easy Instant Pot Potato Salad for a classic pairing with a healthier twist.
    • Kumara Fries (Sweet Potato Fries) – These add a crispy-sweet contrast and feel indulgent without the guilt.
    • Parmesan Roasted Zucchini – Another low-carb favorite that keeps your meal light but satisfying.
    • Greens & Fancy Fixings – Try a Goat Cheese and Apple Salad with apple, goat cheese, and walnuts or a bowl of mixed greens with lemon vinaigrette for a slightly elevated feel.
    air fryer cauliflower pizza crust.

    🍽 More Pizza Related Recipes

    • pull apart monkey bread mixture in a bundt pan.
      Pizza Monkey Bread: Pizza Pull Apart Bread
    • Caprese Mini Pizzas.
      Mini Pizza Bites with Caprese: Easy, Fresh & Ready in 10 Minutes
    • Cheesy Garlic Bread Pizza.
      Pizza Garlic Bread (Cheesy, Crispy & Ready in 25 Mins!)
    • Easy Easter Pizza For Kids.
      Easy Easter Pizza For Kids

    Did you make this recipe? Leave a review and a ⭐⭐⭐⭐⭐ rating below, or tag us in our Facebook Group! Alternatively, bookmark

    Easy Air Fryer Cauliflower Pizza Crust.

    Easy Air Fryer Cauliflower Pizza Crust

    Enjoy a healthier take on pizza with this Air Fryer Cauliflower Pizza Crust! Crispy, flavorful, and gluten-free, this cauliflower crust is the perfect base for all your favorite toppings. It’s a light and delicious option that makes pizza night guilt-free and absolutely satisfying!
    Prep Time 15 minutes minutes
    Cook Time 15 minutes minutes
    0 minutes minutes
    Total Time 30 minutes minutes
    Serving Size 15 Servings
    Print
    Pin

    Ingredients

    • 1 head of cauliflower
    • 2 Eggs
    • ¼ All Purpose Flour
    • ½ Grated Parmesan Cheese
    • 1 Salt
    • Freshly Ground Black Pepper
    • 2 Mozzarella Cheese shredded
    • ½ Pizza Sauce
    • 45 Pepperonis’

    Instructions

    • Cut your cauliflower head into small pieces (remove green stem). 
    • Add to a food processor. Pulse the cauliflower until it resembles small crumbs. 
    • Add all the cauliflower crumbs to a kitchen towel or cheesecloth. Twist the cloth until water from the cauliflower comes out.
    • Continue to squeeze until no more water comes out. 
    • Add the cauliflower to a large bowl. Add in your eggs, flour, parmesan cheese, salt, and pepper. Mix. 
    • Preheat your air fryer to 400 degrees F or 200 celsius. You do this by setting your air fryer to the temperature for about 5 minutes.
    • Cut out parchment paper the size of your Air Fryer. (This is not necessary, but it does help in the transfer of the pizza to the air fryer. You can also just use a spatula to transfer.)
    • Take 2 tablespoon of your cauliflower pizza into the palm of your hand. Roll in a ball, and then flatten into a thin layer.
    • Add as many pizzas as you can to your parchment paper. My air fryer will fit 4 at a time. 
    • Cook at 400 degrees F for 8 minutes. Flip the pizza over and cook at 400 degrees F for 3-4 minutes (depending on your preference of softness to crunchiness). 
    • Flip the pizza back over again where the first side is on the bottom again. Add your pizza sauce, cheese, and 3 pepperonis’. Cook again at 360 degrees for 4 minutes. 
    • Remove with a spatula to your plate or serving dish. Top with parsley, oregano, parmesan cheese, etc. and enjoy!

    Nutrition

    Calories: 49kcal | Carbohydrates: 2g | Protein: 3g | Fat: 3g | Saturated Fat: 1g | Polyunsaturated Fat: 0.4g | Monounsaturated Fat: 1g | Trans Fat: 0.1g | Cholesterol: 28mg | Sodium: 116mg | Potassium: 139mg | Fiber: 1g | Sugar: 1g | Vitamin A: 33IU | Vitamin C: 18mg | Calcium: 14mg | Iron: 0.3mg

    Notes

    Drain Cauliflower Well: Pat cauliflower dry thoroughly to eliminate excess moisture and achieve a crispier crust.
    Preheat Air Fryer: Ensure your air fryer is preheated before cooking to promote an even and crispy texture.

    Did You Make This Recipe?

    Be sure to share with me on Instagram, Pinterest, or Facebook!

    5 from 3 votes
    Pin Recipe Share Recipe
    air fryer cauliflower pizza crust.

    Can You Freeze Buttermilk?

    September 10, 2024 by Angela Milnes

    Buttermilk in glass.

    Can You Freeze Buttermilk? Oh, I’ve been there! You whip up a recipe that calls for just a little bit of buttermilk, and now you’re left with the rest of the carton wondering what to do with it. Don’t let it go to waste! Freezing buttermilk is totally doable, and I’m here to share some super easy tips on how to store it for future use. Trust me, you’ll be glad you did when your next baking project calls for it!

    Buttermilk in a glass. Can you freeze buttermilk?
    [feast_advanced_jump_to]

    Can You Freeze Buttermilk?

    Yes, you can freeze buttermilk. Freezing buttermilk is a simple way to extend its shelf life and make sure you always have some on hand for your favorite recipes.

    How to Freeze Buttermilk Properly

    • Portion into Ice Cube Trays: Pour leftover buttermilk into ice cube trays or ice trays to create small, manageable portions. This makes it easy to defrost just the amount you need.
    • Transfer to Freezer Bags: Once the buttermilk cubes are frozen solid, remove them from the trays and transfer them into a freezer bag or another airtight storage container. This method helps save space and protects the buttermilk from absorbing freezer odors.
    • Label and Store: Write the date on the freezer bag to keep track of how long it has been in the freezer.

    How to Thaw Frozen Buttermilk

    • Fridge Overnight: The best way to defrost frozen buttermilk is to place it in the refrigerator overnight to prevents any drastic texture changes.
    • Lukewarm Water Bath: If you need it quicker, place the frozen buttermilk in a sealed storage container or freezer bag and submerge it in lukewarm water until it is thawed.
    • Whisk After Thawing: Thawed buttermilk might appear separated. Simply whisk or stir the defrosted buttermilk to restore its consistency before using.

    How Long Does Buttermilk Last in the Freezer?

    Fresh buttermilk can last up to three months in the freezer without significant loss in quality. However, for the best flavor and texture, try to use it within two months.

    Does Freezing Affect Buttermilk?

    Freezing buttermilk may cause it to separate and take on a grainy texture once thawed, but this doesn't affect its taste or its effectiveness in most recipes. While the texture can appear less smooth, a quick stir or whisking will usually restore a more uniform consistency. This change in texture may be more noticeable in uncooked dishes, but in baking or cooking, the difference is typically unnoticeable.

    Tips for Using Frozen Buttermilk

    • Pancakes: Use thawed buttermilk in pancake batter for light, fluffy Buckwheat Pancakes.
    • Baking: Thawed buttermilk is perfect for baking Insatnt Pot Bundt Cake, Zucchini Chocolate Chip Muffins, or Garlic Monkey Bread where it is mixed with other ingredients.
    • Marinades: Use defrosted buttermilk to tenderize chicken or meat in marinades.
    Pancakes on a pan.

    Microwaving as an Option for Defrosting

    If you're in a rush and need buttermilk quickly, you can use the microwave for defrosting. Just place the frozen buttermilk in a microwave-safe dish and defrost it in short bursts, stirring occasionally to ensure it heats evenly. Be cautious not to overheat, as this can alter the texture. While the microwave method is convenient for last-minute needs, it’s best for recipes where slight texture changes won’t be an issue.

    Best Practices for Thawing Buttermilk Safely

    It's important to avoid thawing buttermilk at room temperature, as this can encourage bacterial growth and lead to spoilage. The safest way to thaw frozen buttermilk is in the refrigerator, where it can gradually return to a usable state without risking food safety. This slower method ensures the buttermilk remains fresh and ready for use in your recipes.

    • Place the frozen buttermilk in a microwave-safe dish.
    • Defrost in short intervals, stirring between each to distribute heat.
    • Be careful not to overheat, as this can affect the texture.
    • Ensure quality by using proper labeling, storage, and safe thawing methods.

    FAQ'S

    Can I Freeze Buttermilk In The Carton?

    It’s not recommended; instead, portion it into smaller container or ice cube tray.

    Why Does Buttermilk Separate After Freezing?

    Buttermilk separates due to the water and fat content, but a quick whisk restores its texture.

    Can You Freeze Milk In The Same Way?

    Yes, you can freeze it similarly, but frozen milk may also separate when thawed.

    How Do I Store Defrosted Buttermilk?

    Defrosted buttermilk should be kept in the fridge and used within a few days.

    Homemade Bagel Chips

    September 9, 2024 by Angela Milnes

    Homemade Bagel Chips

    Craving a crunchy, savory snack that's easy to make at home? These Homemade Bagel Chips are the perfect solution! Slice up some leftover bagels, toss them with your favorite seasonings, and bake until golden and crispy. Get ready to transform this simple Bagel Chip Recipe into a snack everyone will love!

    homemade bagel chips
    [feast_advanced_jump_to]

    These easy bagel chips will pair perfectly with our Smoked Salmon Dip or Greek Beetroot Dip or Slow Cooker Artichoke Dip.

    Why This Recipe Works

    • Quick and Easy: Bagel Chip Recipe takes minimal prep and just a few ingredients to whip up these tasty snacks.
    • Flavorful: The everything bagel seasoning delivers a savory, aromatic punch that makes these chips irresistible.
    • Perfect for Dipping: These crispy chips are ideal for pairing with a variety of dips, enhancing your snacking experience.

    🥘 Ingredients

    homemade bagel chips ingredients.
    • Bagels: The base of your chips, bagels offer a dense and chewy texture that crisps up nicely when sliced thinly and baked or air-fried. You can use any type of bagel you prefer, whether plain, whole wheat, or flavored, depending on the taste profile you're aiming for.
    • Olive Oil: This helps to crisp up the bagel slices while adding a subtle, fruity flavor that complements the spices well. Olive oil is also a healthier fat option, contributing to a richer mouthfeel and helping the seasoning stick to the bagels.
    • Everything Bagel Seasoning: A flavorful blend of poppy seeds, sesame seeds, dried garlic, dried onion, and salt. This seasoning adds a burst of flavor to each chip, making them irresistibly savory and aromatic. The diverse textures from the seeds also enhance the crunchiness of the chips.

    For the complete list of ingredients with measurements and instructions, please see the recipe card at the bottom of the post.

    📖  Substitutions & Variations

    • Bagel Boujee: Swap plain bagels for cinnamon raisin and dust ‘em with a lil’ coconut sugar + cinnamon for a sweet-meets-savory vibe. Perfect with honey yogurt dip!
    • Cheese, Please: Instead of everything bagel seasoning, go wild with grated Parmesan or nutritional yeast for a cheesy, umami-packed crunch.
    • Hot & Spicy: Feeling feisty? Toss your bagel slices in a mix of olive oil, smoked paprika, and cayenne for some heat—hello, spicy snacking!
    • Dill Pickle Crunch: Mix dried dill, garlic powder, and a splash of vinegar into the olive oil for pickle-flavored chips (weirdly addictive, trust me).
    • BBQ Bliss: Drizzle with a little BBQ sauce before air frying and pair with ranch dip. It’s like chips and dip had a smoky, tangy love child.

    🔪 How To Make Bagel Chips

    sliced bagel pieces.

    Step One: Cut the bagels into ⅛ inch thick disks for a perfect chip size.

    everything bagel seasoning for bagel chips

    Step Two: In a bowl, combine olive oil with your choice of seasonings. Mix well to blend.

    bagel chips in seasoning.

    Step Three: Add the sliced bagels to the bowl and toss them until they are evenly coated with the seasoned oil. Place the coated bagel disks in the air fryer basket.

    bagel chips in air fryer.

    Step Four: Set the air fryer to 350°F and cook for 9 minutes, shaking the basket at 3-minute intervals to ensure even cooking and crispiness. Plate your bagel chips and serve hot!

    homemade bagel chips

    👩‍🍳 Expert Tips

    • Slice Evenly: Use a serrated knife to cut the bagels into thin, even slices to ensure they cook uniformly. Consistent thickness is key to getting that perfect crispiness.
    • Avoid Overcrowding: Place the bagel slices in a single layer in the air fryer basket. It’s important not to overcrowd the basket to allow hot air to circulate freely around each chip, ensuring even cooking.
    • Shake Regularly: Shake the basket every few minutes to help the chips cook evenly. This prevents them from sticking together and helps achieve an all-around crisp.

    💭 FAQs

    Can I Use Any Type Of Bagel For Making Bagel Chips?

    Yes, you can use any type of bagel to make bagel chips. Plain, whole wheat, cinnamon-raisin, and everything bagels are all excellent choices, each offering a unique flavor profile.

    How Do I Prevent Bagel Chips Becoming Too Hard Or Chewy?

    To avoid bagel chips that are too hard or chewy, slice them thinly and watch closely during cooking. Adjust the air frying time if necessary, as thinner slices may cook faster and require less time than expected.

    Best Way to Store Bagel Chips

    Store bagel chips in an airtight container at room temperature to keep them crisp for up to a week.

    🧂Serving Suggestions

    Here are some of the best sides to serve with Homemade Bagel Chips:

    • Cream Cheese: Pair bagel chips with cream cheese for a creamy and satisfying snack. You can also try flavored cream cheeses like chive, strawberry, a Pecan Bacon Cheese Ball or smoked salmon dip.
    • Hummus: For a healthy and flavorful option, dip your bagel chips in hummus. This is perfect for adding a rich, creamy texture with a hint of garlic and tahini. Check out our Beetroot Hummus recipe here.
    • Spinach Artichoke Dip: Combine your crunchy bagel chips with a creamy, cheesy Spinach Artichoke Dip for a decadent treat.
    • Avocado or Guacamole: Mash some avocado with lime and salt or scoop up some Homemade Guacamole with your bagel chips for a refreshing and healthy option.
    • Salsa: Dip bagel chips in fresh salsa for a light and tangy snack. Choose from classic Tomato Salsa, salsa verde, or our Strawberry Jalapeno salsa for a sweet twist.
    • Classic Tuna Salad or Rotisserie Chicken Salad: Top bagel chips with a scoop of tuna or chicken salad for a filling snack that combines protein and crunch.
    homemade bagel chips

    🍽 Related Recipes

    • edamame stir fry in a white bowl.
      Easy Edamame Stir Fry (15-Minute Protein-Packed Side Dish)
    • Zucchini Egg Bake Recipe.
      Best Zucchini Egg Bake Recipe
    • New Years charcuterie Board.
      New Years Charcuterie Board
    • roasted harissa sweet potatoes on a plate, drizzles with honey and pistachio nuts.
      Harissa Sweet Potato Recipe (Crispy, Spicy & Easy)

    Did you make this recipe? Leave a review and a ⭐⭐⭐⭐⭐ rating below, or tag us in our Facebook Group! Alternatively, bookmark it in your browser or save to Pinterest.

    Homemade Bagel Chips

    Homemade Bagel Chips

    Angela Milnes
    Whip up a crunchy, delicious snack with these Homemade Bagel Chips! Made from your favorite bagels, these crispy chips are perfect for dipping, snacking, or serving alongside your favorite spreads. They're easy to make and add a satisfying crunch to any occasion!
    5 from 3 votes
    Print Recipe Pin Recipe Rate this Recipe
    Prep Time 5 minutes mins
    Cook Time 9 minutes mins
    Additional Time 0 minutes mins
    Total Time 14 minutes mins
    Course Appetizers
    Cuisine American
    Servings 3 Servings
    Calories 275 kcal

    Ingredients
      

    • 2 bagels
    • 2 tablespoon olive oil
    • 2 teaspoon Everything bagel seasoning

    Instructions
     

    • Cut the bagels into ⅛ inch thick disks for a perfect chip size.
    • In a bowl, combine olive oil with your choice of seasonings. Mix well to blend.
    • Add the sliced bagels to the bowl and toss them until they are evenly coated with the seasoned oil.

    Notes

    Slice Evenly: Use a serrated knife to cut the bagels into thin, even slices to ensure they cook uniformly. Consistent thickness is key to getting that perfect crispiness.
    Avoid Overcrowding: Place the bagel slices in a single layer in the air fryer basket. It’s important not to overcrowd the basket to allow hot air to circulate freely around each chip, ensuring even cooking.
    Shake Regularly: Shake the basket every few minutes to help the chips cook evenly. This prevents them from sticking together and helps achieve an all-around crisp.

    Nutrition

    Serving: 1gCalories: 275kcalCarbohydrates: 37gProtein: 7gFat: 10gSaturated Fat: 1gPolyunsaturated Fat: 1gMonounsaturated Fat: 7gSodium: 547mgPotassium: 71mgFiber: 2gCalcium: 13mgIron: 1mg
    Print Recipe Pin Recipe Rate this Recipe
    Tried this recipe?Let us know how it was!

    More Tasty Appetizer Recipes

    • Veggie Train With Bell Peppers
    • Avocado Deviled Eggs
    • Pizza Monkey Bread: Pizza Pull Apart Bread
    • Caprese Mini Pizzas
    • Mini Cheese Stuffed Peppers

    Can You Freeze Lettuce

    September 6, 2024 by Angela Milnes

    Fresh lettuce.

    Lettuce is a common household staple for salads and sandwiches. But what if you have excess lettuce? Can you freeze Lettuce? Let's explore the possibilities, methods, and considerations for freezing lettuce.

    Fresh lettuce. Can you freeze lettuce?
    [feast_advanced_jump_to]

    Can You Freeze Fresh Lettuce?

    Freezing fresh lettuce is possible, but it comes with some caveats. Lettuce has a high water content, due to which it may become limp and mushy after thawing. While it may not be suitable for salads after freezing, frozen lettuce can still be useful in cooked dishes where texture is less critical.

    Does Freezing Affect Lettuce's Taste And Texture?

    Yes, freezing affects both the taste and texture of lettuce. Its high water content causes ice crystals to form during freezing, which can rupture the cell walls. As a result, thawed lettuce often loses its crispness and becomes watery and limp.

    However, the taste relatively remains unchanged. It's generally recommended to consume lettuce fresh for the best texture and flavor.

    How To Freeze Lettuce

    Blanching

    • Wash and Prepare: Rinse thoroughly and pat dry the lettuce. Remove any damaged or wilted leaves.
    • Blanch: Boil water, briefly blanch lettuce leaves for 30 seconds.
    • Ice Bath: Transfer the blanched lettuce to an ice bath.
    • Dry: Pat dry the leaves using a paper towel.
    • Freeze: Spread dry leaves on a baking sheet in a single layer. Freeze until solid and transfer them to a freezer-safe bag or container.

    Freezing Lettuce Without Blanching

    • Wash and Dry: Rinse the lettuce using a salad spinner to remove excess water.
    • Chop: Chop the lettuce into desired sizes for easy use later.
    • Freeze: Spread chopped lettuce on a baking sheet. Freeze until solid and transfer to the freezer-safe bag or container.

    Making Frozen Lettuce Cubes

    • Blend: Blend lettuce with a small amount of water.
    • Freeze: Pour the blended mixture into the ice cube trays and freeze.
    • Store: After freezing, move the lettuce cubes to freezer bags for convenient portioning.

    Can You Freeze Lettuce With Other Leafy Greens?

    Yes, you can freeze lettuce alongside other leafy greens like frozen spinach. Blanching and freezing together can save time and make meal preparation easier.

    Leafy greens.

    How To Thaw Lettuce

    Thawing lettuce is straightforward but should be done carefully to minimize texture loss.

    • Refrigerator Method: Place the frozen lettuce in the fridge and let it thaw overnight. This method helps maintain some of the lettuce's structure.
    • Direct Use: For cooked dishes like stir fries and soups, add frozen lettuce directly to the dish without thawing.

    Types Of Lettuce You Can Freeze

    • Romaine Lettuce: Blanch the leaves briefly before freezing to help preserve their texture and color.
    • Butterhead Lettuce: These leaves are more delicate, so they should be used quickly after thawing, preferably in cooked dishes.
    • Iceberg Lettuce: You can also freeze iceberg lettuce with correct method. Despite being more suitable for freezing, iceberg lettuce still loses some of its crunch after thawing. It is best for recipes where texture is less critical.
    Fresh leafy greens.

    How Long Can Lettuce Stay Frozen?

    Lettuce can stay frozen for up to 6 months. Beyond this period, the quality deteriorates significantly, and it may become too mushy and unappetizing to use even in cooked dishes.

    How Can You Use Thawed Lettuce?

    • Fall Soups and Stews: Add thawed lettuce to soups and stews for added nutrition and flavor.
    • Smoothies: Blend frozen lettuce cube into smoothie for a nutrient boost.
    • Sweet Potato Casseroles: Incorporate thawed lettuce into casseroles where it will blend with other ingredients.
    • Gyro Wraps: Create gyro wraps using thawed lettuce as a filling along with sliced meat, tzatziki sauce, tomatoes, and onions wrapped in pita bread for a delicious Greek dish.
    Gyro wraps.

    FAQ'S

    Is Thawed Lettuce Safe To Eat Raw?

    It’s safe but not recommended due to texture changes. Raw lettuce should be consumed fresh.

    Can You Freeze Shredded Lettuce?

    Yes, shredded lettuce can be frozen following the same methods.

    How Long Can Lettuce Stay In Fridge?

    Lettuce can stay fresh in the refrigerator for up to a week. 

    More Useful Food Articles:

    • Can You Freeze Marshmallows?
    • Is Beetroot Good For You?
    • What Is Shrimp Cocktail
    • What To Do With Leftover Shrimp?
    • What Does Calamari Taste Like
    • What Does Taro Taste Like?

    Easy Homemade Pumpkin Cookies

    September 6, 2024 by Angela Milnes

    Easy Homemade Pumpkin Cookies.

    These Pumpkin Cookies are everything you love about fall, in the form of a chewy, spiced treat! With just the right amount of cinnamon and a soft, melt-in-your-mouth texture, they’re perfect for cozy afternoons, school snacks, or any time you need a little taste of autumn magic.

    Pumpkin Cookies with a bottle of milk.
    [feast_advanced_jump_to]

    💖 Why This Recipe Works

    • Fall in Every Bite: Warm spices and pumpkin create the ultimate autumn flavor experience.
    • Soft and Chewy: These homemade pumpkin cookies have a melt-in-your-mouth texture that’s irresistibly comforting.
    • Perfect for Any Occasion: Great for school snacks, cozy afternoons, or sharing during the fall season!

    ⭐ Star Ingredients

    Ingredients For Pumpkin Cookies.
    • Almond Flour: Brings a nutty flavor and a tender texture, perfect for creating soft, delicious cookies.
    • Baking Soda: Acts as a leavening agent, helping the cookies rise and achieve a light, airy texture.
    • Stevia: Adds sweetness without the calories, making these cookies a healthier treat.
    • Pumpkin Spice: Infuses warmth and a comforting blend of spices, enhancing the autumnal flavor.
    • Cinnamon: Provides a sweet and slightly spicy note, enriching the overall taste profile.
    • Salt: Balances the sweetness and enhances the flavors of other ingredients.
    • Pumpkin Puree: Adds moisture and a mild pumpkin flavor, keeping the cookies soft and chewy.
    • Egg: Serves as a binding agent, holding the ingredients together and adding structure.
    • Butter: Contributes richness and a creamy texture, providing a classic cookie flavor.

    For the complete list of ingredients with measurements and instructions, please see the recipe card at the bottom of the post.

    📖  Substitutions & Variations

    • Coconut twist—mix in shredded coconut for a tropical vibe.
    • Choco delight—sugar-free chocolate chips + pumpkin spice = match made in cookie heaven.
    • Nutty crunch—chopped walnuts add texture and a toasty flavor.
    • Tart & sweet—dried cranberries bring a zingy contrast to the warm spices.
    • Oat-y goodness—rolled oats make ‘em extra chewy and hearty!

    🔪How To Make Pumpkin Cookies

    Mixing pumpkin spice, baking soda, stevia extract, cinnamon, and salt with almond floor.
    1. Step 1: Preheat the oven to 345°F. Line a baking sheet with parchment paper. In a bowl, whisk together the almond flour, baking soda, stevia, pumpkin spice, cinnamon, and salt.
    Mixing pumpkin puree, egg, and butter with almond floor and pumpkin spice mixture.
    1. Step 2: Add the pumpkin puree, egg, and softened butter to the dry ingredients.
    Mixing pumpkin puree, egg, and butter with almond floor and pumpkin spice mixture.
    1. Step 3: Stir everything using a spatula or hand mixer until well combined.
    Preparing pumpkin cookies dough.
    1. Step 4: Check for a cookie dough consistency. It should be soft but hold its shape.
    Pumpkin cookies dough balls.
    1. Step 5: Divide the dough into 13 equal balls. Place them on the baking sheet and gently flatten with your hands.
    Pumpkin cookies dough in cookies shapes.
    1. Step 6: Use a round cookie cutter (smaller than the cookies) to press lightly in the center, creating a circular imprint. Use a small knife to make ⅓-inch lines radiating from the circle.
    Pumpkin cookies dough in cookies shapes are ready to bake.
    1. Step 7: Pinch the ends of each line together with your fingers to shape the cookies. Bake for 12 minutes, or until edges are golden.
    Baked pumpkin cookies on wire rack.
    1. Step 8: Let the cookies cool on the wire rack for 5 minutes. Serve and enjoy!

    👩‍🍳 Expert Tips

    • Sweetener Swap: If replacing stevia, adjust quantities, but the result will still be the same.
    • Shape Smart: Shape your cookies directly on the baking sheet to avoid transferring them.
    • Spice It Up: Add a pinch of nutmeg or ginger for extra warmth.
    • Perfect Edges: Dip the cookie cutter in flour to prevent sticking when shaping.

    💭 FAQs

    How Do I Make The Cookies Softer?

    Increase the pumpkin puree slightly or reduce baking time for a softer texture.

    Why Did My Cookies Turn Out Flat?

    Ensure the butter is softened but not melted and that you use enough almond flour to achieve the right dough consistency.

    Can I Freeze The Dough Instead Of The Cookies?

    Yes, form the dough into balls, freeze on a baking sheet, and transfer to a freezer bag. Bake directly from frozen, adding 1-2 extra minutes.

    What Spices Can I Add For More Flavor?

    Nutmeg, cloves, and ginger can be added to intensify the warm, spiced flavor.

    Best Way To Store Pumpkin Cookies?

    Store the cookies in an airtight container at room temperature for up to 3 days.

    💖 Serving Suggestions

    Here are some great ways to serve pumpkin cookies:

    • Hot Beverages: Pair pumpkin cookies with Spiced Lattes, Chai Tea, or black coffee for a cozy snack.
    • Ice Cream: Serve with a scoop of vanilla or cinnamon ice cream for a warm-and-cold dessert combo.
    • Nut Butter: Serve pumpkin cookies with a side of almond or peanut butter for dipping.
    • Yogurt Parfait: Crumble the cookies over a bowl of Greek yogurt layered with granola and fruit.
    • Pumpkin Butter: Spread pumpkin butter over the cookies for an extra layer of fall flavor.
    Pumpkin cookies with a milk bottle.

    🍽 Pumpkin Lovers, This Way →

    • Pumpkin French Toast Casserole.
      Pumpkin French Toast Casserole
    • Pumpkin Bread.
      Best Pumpkin Bread Recipe
    • Creamy Pumpkin Alfredo.
      Creamy Pumpkin Alfredo
    • Pumpkin Feta Phyllo Cups.
      Pumpkin Feta Phyllo Cups

    Did you make this recipe? Leave a review and a ⭐⭐⭐⭐⭐ rating below, or tag us in our Facebook Group! Alternatively, bookmark it in your browser or save to Pinterest.

    Easy Homemade Pumpkin Cookies.

    Pumpkin Cookies

    Angela Milnes
    These pumpkin cookies are soft, spiced, and perfect for fall! Easy to make and fun to shape, they’re a cozy treat everyone will love.
    5 from 2 votes
    Print Recipe Pin Recipe Rate this Recipe
    Prep Time 10 minutes mins
    Cook Time 12 minutes mins
    Rest Time 5 minutes mins
    Total Time 27 minutes mins
    Course Dessert
    Cuisine American
    Servings 13 Servings
    Calories 118 kcal

    Ingredients
      

    • 180 g. Almond Flour
    • ½ tsp. Baking Soda
    • Pinch Stevia Extract, Powder Feel Free To Use Another Type Of Stevia Or Sweetener, Monk Fruit Is Also A Good Option
    • 1 tsp. Pumpkin Spice
    • 1 tsp. Cinnamon
    • Pinch Salt
    • ¼ Cup Pumpkin Puree
    • 1 Egg
    • ¼ Cup Butter Softened

    Instructions
     

    • Preheat the oven to 345°F. Line a baking sheet with parchment paper. In a bowl, whisk together the almond flour, baking soda, stevia, pumpkin spice, cinnamon, and salt.
    • Add the pumpkin puree, egg, and softened butter to the dry ingredients.
    • Stir everything using a spatula or hand mixer until well combined.
    • Check for a cookie dough consistency. It should be soft but hold its shape.
    • Divide the dough into 13 equal balls. Place them on the baking sheet and gently flatten with your hands.
    • Use a round cookie cutter (smaller than the cookies) to press lightly in the center, creating a circular imprint. Use a small knife to make ⅓-inch lines radiating from the circle.
    • Pinch the ends of each line together with your fingers to shape the cookies. Bake for 12 minutes, or until edges are golden
    • Let the cookies cool on the wire rack for 5 minutes. Serve and enjoy!

    Notes

    Sweetener Swap: If replacing stevia, adjust quantities, but the result will still be the same.
    Shape Smart: Shape your cookies directly on the baking sheet to avoid transferring them.
    Spice It Up: Add a pinch of nutmeg or ginger for extra warmth.
    Perfect Edges: Dip the cookie cutter in flour to prevent sticking when shaping.

    Nutrition

    Calories: 118kcalCarbohydrates: 4gProtein: 3gFat: 11gSaturated Fat: 3gPolyunsaturated Fat: 0.2gMonounsaturated Fat: 1gTrans Fat: 0.1gCholesterol: 22mgSodium: 85mgPotassium: 20mgFiber: 2gSugar: 1gVitamin A: 863IUVitamin C: 0.3mgCalcium: 40mgIron: 1mg
    Print Recipe Pin Recipe Rate this Recipe
    Tried this recipe?Let us know how it was!

    More Desserts Recipes To Try

    • Crispy Peanut Butter Cookies
    • Organic Baked Apples
    • Best Blueberry Crumble Recipe
    • Oreo Marshmallows
    • Sugar Free Banana Muffins
    • Pumpkin Spice Cinnamon Rolls
    • Chocolate Covered Bananas
    • Vanilla French Toast With Strawberries
    • Fluffy Pink Smores Waffles
    • Creamy Egg Salad

    Creamy Instant Pot Tortellini Recipe

    September 5, 2024 by Angela Milnes

    Creamy Instant Pot Tortellini Recipe.

    Instant Pot Tortellini is a fantastic pasta dish for the whole family. It's got everything going for it's full of rich, homemade tomato sauce, tender tortellini, fresh spinach, and grated Parmesan cheese!

    If you love the convenience of your Instant Pot and crave comforting pasta dishes, then this easy Instant Pot Tortellini recipe is perfect for you.

    a plate of creamy tortellini being held with two hands.
    [feast_advanced_jump_to]

    💖 Why This Recipe Works

    • Deliciously Creamy: This tortellini Instant Pot recipe offers a rich, velvety sauce that perfectly coats the tortellini.
    • Efficient Cooking: The Instant Pot cuts down on cooking time and cleanup effort.
    • Versatile Meal: Creamy Tortellini is perfect for a quick weeknight dinner or as an impressive guest meal.

    ⭐ Star Ingredients

    tortellini ingredients.

    Here are the ingredients needed for this Instant Pot Tortellini recipe:

    • Chicken Stock or Chicken Broth: Adds depth and a savory note to the dish, enhancing the flavors of the other ingredients.
    • Heavy Cream: Contributes to the creamy texture of the dish, adding a rich, indulgent feel and helping to balance out the acidity of the tomatoes.
    • Red Bell Pepper: Adds a fresh, slightly sweet crunch that contrasts nicely with the soft tortellini.
    • Large Onion: Provides a base flavor, adding a sweet, tangy note that complements the other ingredients.
    • Tortellini: These filled pasta pockets are the star of the dish, offering a delightful chewy texture and often a cheese or meat filling.
    • Olive Oil: Helps to release the flavors of the garlic and onion and adds a subtle richness.
    • Crushed Garlic: Infuses the dish with a pungent, aromatic flavor that pairs well with the tomatoes and herbs.
    • Thyme & Basil: Add a fragrant, earthy note, enhancing the overall flavor profile of the dish.
    • Salt & Freshly Ground Pepper: Enhance the natural flavors of the ingredients.
    • Chopped Baby Spinach: Offers a pop of color and a fresh, slightly bitter contrast to the rich, creamy sauce.
    • Chopped Tomatoes - Pureed: Creates a bright, tangy sauce that coats the tortellini and balances the richness of the cream.
    • Grated Parmesan Cheese: Melts into the dish, adding a salty, umami kick that enhances the flavors and ties the dish together.

    For the complete list of ingredients with measurements and instructions, please see the recipe card at the bottom of the post.

    📖  Substitutions & Variations

    • Liquid Switch-Up: Not feelin’ chicken stock? Try veggie broth for a plant-based twist or go wild with a splash of white wine for that “I cook like a pro” vibe.
    • Dairy-Free Dream: Swap heavy cream for coconut milk—it’s creamy, dreamy, and gives a little tropical flair. Or use cashew cream if you're feelin' fancy.
    • Protein Party: Toss in some plant-based sausage, grilled shrimp, or crispy tofu cubes to level up the heartiness.
    • Tortellini Remix: Try butternut squash tortellini for a cozy fall spin or sun-dried tomato-stuffed tortellini for an extra punch of flavor.
    • Spice It Up: Want a little heat? A pinch of red pepper flakes or a swirl of harissa paste will wake up your taste buds!

    🔪 How to Cook Instant Pot Tortellini

    using wooden spoon to saute bell pepper and onion.
    1. Step 1: Place the onions, bell pepper, olive oil, and fresh garlic and seasonings into the Instant Pot and saute until softened.
    sautee onions in pot.
    1. Step 2: Once cooked add the Chicken stock and deglaze the pot. Blend the diced tomato in using a food processor or use an immersion blender in a separate bowl.
    tortellini in an instant pot. Green and white pasta.
    1. Step 3: Add the Tortellini to your Instant Pot, followed by the blended tomatoes. Close the Instant Pot lid and pressure cook the Tortellini for 2 minutes on high pressure.
    tortellini and tomatoes in instant pot.
    1. Step 4: Once cooked, perform a quick pressure release and remove the Instant Pot lid once all the steam has escaped. Add the cream and baby spinach to your Tortellini, stirring with a wooden spoon.
    Creamy Tortellini instant pot recipe.
    1. Step 5: Perform a quick pressure release and remove the Instant Pot lid once all the steam has escaped. Add the cream and baby spinach to your Tortellini, stirring with a wooden spoon.
    creamy instant pot tortellini on a plate.
    1. Step 6: Plate your tortellini and sprinkle with parmesan cheese and fresh herbs. Your Instant Pot tortellini is now ready to serve.

    👩‍🍳 Expert Tips

    • Sauté to Build a Flavorful Base: Start by using your Instant Pot’s sauté function to gently cook garlic (and onions if the recipe calls for them) in a bit of butter or oil. This step is key to creating a rich, aromatic foundation for the creamy sauce.
    • Perfect Your Liquid Balance: Follow the recipe’s specified ratios of broth and cream closely. This balance not only generates the steam needed for pressure cooking but also ensures your sauce turns out luxuriously creamy without becoming too watery.
    • Avoid Overcooking the Tortellini: Since tortellini cook very quickly under pressure, adhere to the recommended cooking time and use a quick or careful natural release. This helps maintain their firm texture and prevents them from turning mushy.
    • Finish with a Creamy Kick: Once pressure cooking is complete, stir in any finishing touches like grated Parmesan, cream cheese, or fresh herbs. These additions elevate the dish by enhancing the creaminess and adding a burst of fresh flavor.

    💭 FAQs

    What Is Tortellini Pasta?

    Tortellini is a type of pasta dough that is typically stuffed with cheese or other savory fillings. It is usually served in soup as an easy one-pot meal or as part of a pasta dish and comes in many different shapes and sizes.

    Some popular varieties of tortellini include beef tortellini, spinach tortellini, mushroom tortellini, and cheese tortellini.

    How to Store Leftover Tortellini

    Cooked tortellini can last in the fridge for up to 3 days.
    You can also freeze tortellini for up to 6 months. To keep your tortellini as fresh as possible, try adding a small amount of olive oil to the tortellini before freezing.

    How To Reheat Cold Tortellini?

    To reheat add a splash of olive oil and reheat in a microwave for 30 seconds or over the stove top for 2 minutes.

    💖 Serving Suggestions

    Here are some vegetable sides to serve with Instant Pot Tortellini:

    • Garlic Parmesan Breadsticks: Crispy on the outside, soft on the inside – a perfect match for creamy tortellini.
    •  Air Fryer Roasted Vegetables: Oven-roasted colorful veggies add flavors and a healthy touch to your meal.
    •  Chicken Caesar Salad: Crisp romaine lettuce, parmesan, and Caesar dressing complement the richness of the tortellini.
    •  Sauteed Spinach: Quick and easy, sautéed spinach with garlic provides a nutritious and flavorful side option.
    • Smoked Salmon Bruschetta: Salmon, garlic, basil, and olive oil on toasted baguette slices – a delightful appetizer or side dish.
    •  Air Fryer Parmesan Asparagus: Lightly seasoned spears add a smoky flavor to balance the creamy pasta.
    Creamy Tortellini instant pot recipe.

    🍽 Try These Next

    • Mediterranean Zucchini Stew With Tomatoes.
      Mediterranean Zucchini Stew With Tomatoes
    • Mushroom Risotto in a bowl.
      Creamy Spinach Mushroom Risotto (Easy & Ready in 30 Minutes!)
    • Roasted asparagus with goats cheese.
      Roasted Asparagus With Goat Cheese
    • Almond Milk Mashed Potatoes.
      Best Almond Milk Mashed Potatoes (Dairy Free)

    Did you make this recipe? Leave a review and a ⭐⭐⭐⭐⭐ rating below, or tag us in our Facebook Group! Alternatively, bookmark it in your browser or save to Pinterest.

    Creamy Instant Pot Tortellini Recipe.

    Creamy Instant Pot Tortellini Recipe

    Angela Milnes
    Instant Pot Tortellini is a fantastic pasta dish for the whole family. It's got everything going for it's full of rich, homemade tomato sauce, tender tortellini, fresh spinach, and grated Parmesan cheese!
    This creamy hearty Tortellini Instant Pot recipe is perfect for busy weeknights and is super fast to make
    5 from 3 votes
    Print Recipe Pin Recipe Rate this Recipe
    Prep Time 5 minutes mins
    Total Time 5 minutes mins
    Course Dinners
    Cuisine American
    Servings 3 Servings
    Calories 904 kcal

    Ingredients
      

    • ½ Cup Chicken Stock Or Chicken Broth
    • ½ Cup Heavy Cream
    • ½ Red Bell Pepper - Diced
    • 1 Large Onion - Diced
    • 22 Oz Tortellini Or 650g
    • 1 Teaspoon Olive Oil
    • 1 Teaspoon Crushed Garlic
    • 1 Teaspoon Thyme
    • 1 Teaspoon Basil
    • ¼ Teaspoon Salt
    • ¼ Cup Chopped Baby Spinach
    • 1 Can Chopped Tomatoes - Pureed
    • ¼ Cup Grated Parmesan Cheese

    Instructions
     

    • Place the onions, bell pepper, olive oil and fresh garlic and seasonings into the Instant Pot and saute until softened.
    • Add the Tortellini and chicken stock to your Instant Pot.
    • Place the canned diced tomatoes into a small bowl and blend using an immersion blender. This will make it into a marinara sauce. Once blended add the sauce to the inner pot.
    • Close the Instant Pot lid and set the pressure valve to the closed setting. Pressure-cook the Tortellini for 2 minutes on high pressure.
    • Perform a quick pressure release and remove the Instant pot lid once all the steam has escaped.
    • Add the cream and baby spinach to your Tortellini stirring with a wooden spoon.
    • Plate your tortellini and sprinkle with parmesan cheese and fresh herbs. Your Instant Pot tortellini is now ready to serve.

    Notes

    If you're pressure cooking frozen cheese tortellini instead of fresh tortellini then you'll need to add an extra 3 minutes to the cooking time. To pressure cook frozen tortellini set your Instant Pot to 5 minutes cook time. If using dried tortellini cook for 10-11 minutes.
    Tortellini leftovers can be stored

    Nutrition

    Serving: 1gCalories: 904kcalCarbohydrates: 114gProtein: 36gFat: 35gSaturated Fat: 19gPolyunsaturated Fat: 12gMonounsaturated Fat: -2gTrans Fat: 1gCholesterol: 142mgSodium: 1594mgPotassium: 470mgFiber: 6gSugar: 8g
    Print Recipe Pin Recipe Rate this Recipe
    Tried this recipe?Let us know how it was!

    Check Out These Top Pressure Cooker Recipes:

    Here are some more Instant Pot recipes for your electric pressure cooker:

    • Instant Pot Chicken Noodle Soup
    • Instant Pot Cacio E Pepe
    • Instant Pot Kalua Pork
    • Vegetarian Instant Pot Gumbo
    • Instant Pot Chicken Pot Pie Soup
    • Instant Pot Lobster Tail: Lobster Rolls
    creamy tortellini on a fork.

    Best Lobster Meat Recipes You’ll Love

    September 2, 2024 by Angela Milnes

    Lobster meat recipe ideas.

    Hey there, foodies! If you’re a seafood lover like me, you know there’s nothing quite like the taste of fresh lobster. It’s the ultimate indulgence that turns any meal into a gourmet experience. From comforting soups to elegant pasta dishes, we’ve got 21 mouthwatering lobster recipes that you and your family are going to absolutely adore. Let’s dive into these delectable dishes and get cooking!

    Different lobster meat recipes.
    [feast_advanced_jump_to]

    What Does Lobster Taste Like?

    Lobster is often described as having a delicate, sweet, and slightly briny flavor, with a rich, buttery texture that melts in your mouth. The taste of lobster is unique and distinct, standing out from other types of seafood. Its flavor profile can be influenced by the way it is cooked and the ingredients it is paired with.

    Lobster Bisque

    Creamy and rich, this Lobster Bisque is the ultimate comfort food. With its velvety texture and deep seafood flavor, it’s perfect for a cozy night in. You’ll love how easy it is to make and how impressive it looks when served.

    Dipping bread in lobster bisque.

    Lobster Deviled Eggs

    Add a touch of luxury to your appetizers with these Lobster Deviled Eggs. The creamy filling combined with sweet, tender lobster meat will be a hit at any gathering. They’re a delightful twist on a classic favorite.

    Lobster devilled Eggs.

    Lobster Salad Rolls

    These Lobster Salad Rolls are perfect for a light and refreshing meal. Filled with fresh lobster, crisp veggies, and a tangy dressing, they’re perfect for lunch or a picnic. You’ll love the burst of flavors in every bite!

    Lobster Salad Rolls.

    Lobster Fettuccine In Herbed Cream Sauce

    Treat yourself to this decadent Lobster Fettuccine In Herbed Cream Sauce. The rich, creamy sauce pairs perfectly with tender lobster and al dente pasta. It’s a restaurant-quality dish you can easily make at home.

    lobster pasta in two plates.

    Squid Ink Pasta with Lobster Cream Sauce

    Impress your guests with this stunning Squid Ink Pasta with Lobster Cream Sauce. The dramatic black pasta and creamy lobster sauce make for an unforgettable meal. It’s as delicious as it is visually striking.

    Squid ink lobster pasta in a bowl.

    Butter Lobster Risotto

    Indulge in the creamy, dreamy goodness of Butter Lobster Risotto. The tender lobster pieces and rich, buttery risotto are a match made in heaven. It’s a dish that’s sure to impress anyone who tastes it.

    Lobster risotto on a plate.

    Maine Lobster Rolls

    Nothing beats the classic taste of Maine Lobster Rolls. Packed with fresh lobster meat and just the right amount of mayo, these rolls are a summertime staple. You’ll love the simplicity and deliciousness of this dish.

    Lobster roll on a serving tray.

    Lobster Fried Rice

    Take your fried rice to the next level with this Lobster Fried Rice. The combination of succulent lobster and savory fried rice is simply irresistible. It’s a quick and easy meal that’s bursting with flavor.

    Lobster fried rice in a bowl.

    Lobster Ravioli

    These Lobster Ravioli are little pockets of joy. Filled with sweet lobster meat and a creamy filling, they’re perfect for a special dinner. You’ll love the burst of flavors in every bite.

    Lobster ravioli on a plate.

    Garlic And Herb Grilled Lobster

    Fire up the grill for this Garlic And Herb Grilled Lobster. The smoky, charred flavor combined with the garlic and herb butter is out of this world. It’s a simple yet luxurious dish that’s perfect for summer.

    Garlic and herb grilled lobster on a serving tray.

    Homemade Lobster Stock

    Make the most of your lobster with this Homemade Lobster Stock. It’s perfect for soups, stews, and risotto, adding a rich, deep flavor. You’ll love how versatile and flavorful this stock is.

    Lobster stock in a pot.

    Lobster Pasta Garlic

    This Lobster Pasta Garlic is a garlic lover’s dream. The combination of sweet lobster meat and garlicky pasta is simply divine. It’s a quick and easy dish that’s perfect for a weeknight dinner.

    Lobster pasta on a plate.

    Best Lobster Benedict

    Start your day with the Best Lobster Benedict. This luxurious breakfast dish features poached eggs, lobster, and hollandaise sauce on a toasted English muffin. It’s a decadent way to kick off your morning.

    Lobster benedicts on a plate.

    Lobster Roll Tacos

    Fusion food at its best, these Lobster Roll Tacos combine the best of both worlds. The soft taco shell filled with fresh lobster salad is a fun and delicious twist on the traditional lobster roll.

    lobster tacos.

    Lobster Cakes With Basil

    These Lobster Cakes With Basil are packed with flavor. The sweet lobster meat and fresh basil make for a perfect pairing. They’re great as an appetizer or a light main course.

    Lobster cakes on a plate.

    Seafood Pasta Salad

    This Seafood Pasta Salad is a perfect dish for summer. Packed with lobster, shrimp, and other seafood, it’s light, refreshing, and delicious. You’ll love how easy it is to make and how flavorful it is.

    Salad crab lobster pasta.

    Broiled Lobster Tail

    Simple and elegant, this Broiled Lobster Tail is a showstopper. The tender, juicy lobster meat with a touch of butter and lemon is all you need for a perfect meal. It’s a dish that’s sure to impress.

    Boiled lobster tails.

    Lobster Artichoke Flatbread

    This Lobster Artichoke Flatbread is a gourmet twist on pizza. The creamy artichoke spread and sweet lobster meat make for a delicious combination. It’s perfect for a casual dinner or entertaining guests.

    Lobster artichoke flatbread slices.

    Sous Vide Lobster Tail

    For perfectly cooked lobster every time, try this Sous Vide Lobster Tail. The sous vide method ensures the lobster is tender and juicy. You’ll love how easy it is to make and how delicious the results are.

    Sous vide lobster in a bowl.

    Lobster Pasta Salad

    This Lobster Pasta Salad is a crowd-pleaser. With tender lobster, pasta, and a tangy dressing, it’s perfect for potlucks or family gatherings. It’s a refreshing and delicious dish everyone will love.

    Lobster pasta salad in a bowl.

    Buttery Lobster Tails

    Indulge in the rich, decadent flavor of Buttery Lobster Tails. The combination of sweet lobster meat and melted butter is simply irresistible. It’s a dish that’s perfect for special occasions or whenever you want to treat yourself.

    Lobster tails on a serving tray.

    Enjoy These Lobster Dishes

    There you have it—21 delicious lobster recipes that are sure to delight you and your family. Give them a try and let us know which one is your favorite!

    Easy Vegetarian Instant Pot Gumbo

    September 2, 2024 by Angela Milnes

    Easy Vegetarian Instant Pot Gumbo.

    I'm not joking when I say that this is the Best Vegetarian Instant Pot Gumbo Recipe! It tastes so much like the Disneyland Vegetarian gumbo recipe and is simple to make! This tasty dish is about to be your new favorite vegetarian recipe.

    vegetarian gumbo in a bowl.
    [feast_advanced_jump_to]

    💖 Why This Recipe Works

    • Quick and Simple: This Vegetarian Gumbo cooks effortlessly in an Instant Pot.
    • Rich and Flavorful: Packed with vegetables, herbs, and spices for a hearty, delicious meal.
    • Healthy and Wholesome: Vegetarian Gumbo is a meat-free dish, perfect for vegetarians and health-conscious eaters.

    ⭐ Star Ingredients

    vegetarian gumbo ingredients.
    • Olive Oil: Adds a subtle richness to the dish.
    • Bell Pepper: Adds a refreshing element to the recipe.
    • Onion: Adds a savory and aromatic note that enhances the overall taste profile of the dish.
    • Salted Butter: Enriches the gumbo, contributing to its velvety texture and enhancing the overall richness of the flavors.
    • Minced Garlic: Adds depth and complexity, elevating the overall taste experience.
    • Smoked Paprika: Infuses the gumbo with a distinct smoky flavor.
    • All-Purpose Flour: Used to create a roux, which helps thicken the gumbo.
    • Tony Chachere's Creole Seasoning: Enhance the overall taste and bring a touch of the Creole tradition to the dish.
    • Worcestershire Sauce: Adds a tangy and savory element to the gumbo.
    • Cayenne Powder: Adds a spicy kick and a vibrant heat that brings the dish to life.
    • Frozen Sliced Okra: Holds up well during cooking and provides a delightful chewiness to the dish.
    • Canned Crushed Tomatoes: Contribute a robust tomato flavor, balancing out the other ingredients and adding depth to the overall taste profile.
    • Vegetable Broth or Vegetable Stock: Serves as the base of the gumbo, providing a flavorful liquid that brings all the ingredients together.

    For the complete list of ingredients with measurements and instructions, please see the recipe card at the bottom of the post.

    📖 Creole Seasoning Substitutions

    Creole seasoning is a great flavor for this Vegetarian Gumbo recipe. However, if you don't have any you can substitute it for any Cajun seasoning blend or make up your own creole seasoning. 
    To make your own creole seasoning simply mix an equal measure of the following:

    • Paprika
    • Dried Oregano
    • Ground Black Pepper
    • Dried Basil
    • Kosher Salt
    • Cayenne Pepper 
    • Granulated Onion 
    • Dried Thyme
    • Granulated Garlic

    Once made, you can store your creole seasoning in an airtight container for up to 3 months.

    🔪 How To Make Vegetarian Instant Pot Gumbo?

    sautee veggies for instant pot gumbo.
    1. Step 1: Turn your Instant Pot onto sauté mode. Once it is hot, add your oil and onions. Sauté until translucent for 3 to 5 minutes. Add to your onions your green bell pepper. Sauté for 1 to 2 minutes. Add in your minced garlic. Sauté for one minute. Remove from your instant pot and set aside in a separate bowl.
    making a roux for instant pot gumbo.
    1. Step 2: With your instant pot still on sauté, melt the butter. Once butter is melted, whisk in the flour to build your roux. If the roux is too thick, dough-like, add a splash of the broth to thin it out. If the roux is too thin, whisk in more flour teaspoon at a time. Roux should be a gravy-like consistency.
    making a roux for instant pot gumbo.
    1. Step 3: Add to your roux your cooked vegetables that you set aside. Mix. Add your remaining ingredients, the creole seasoning, Worcestershire sauce, hot sauce, frozen okra, tomatoes, and broth. Set your Instant Pot to high pressure for 5 minutes.
    Instant Pot Gumbo in a bowl.
    1. Step 4: Once your Instant Pot is done cooking, do a quick release by releasing the valve. Serve while warm as is, or over a bed of rice! Enjoy!

    👩‍🍳 Expert Tips

    • This is a great vegetarian recipe and hearty meal that you can whip up in no time. Be sure quick release the recipe once rather than natural release.
    • Add salt and pepper to taste. You can really enjoy this recipe. It has a great plant based protein and is one to add to your recipes notes! 

    💭 FAQs

    What’s the Difference Between Gumbo and Jambalaya?

    Gumbo is a thick stew that typically contains meat or seafood, vegetables, and a roux-based broth. Jambalaya, on the other hand, is more of a rice dish with meat or seafood and vegetables mixed in.

    What Is Worcestershire Sauce?

    Worcestershire Sauce is a popular addition to a lot of recipes - even if you can't say the name! It's made with vinegar and a handful of other ingredients and is often added to seasonings and main dishes to help enhance the flavor.

    Do You Add Toppings to Gumbo?

    If you want to add parmesan cheese on top, that is always a great choice. Fresh cilantro and chives are good, too! You can also garnish your Vegetarian Gumbo with fresh thyme or chopped parsley.

    Best Way to Store Gumbo

    Wondering how long vegan gumbo will stay fresh in the fridge? It will last about 3-4 days if stored properly in an airtight container. You can also freeze creole gumbo. To freeze, cool completely. Ladle into freezer containers, leaving ½-inch headspace. Freeze up to 6 months.

    💖 Serving Suggestions

    Here are my favorite sides to serve with Vegetarian Instant Pot Gumbo Recipe:

    • Rice and Bread: Serve this vegetarian gumbo over white or Brown Rice or with some Cheesy Bread for dipping.
    • Greens: Vegetarian gumbo goes well with a delicious with a side of Collard Greens or Jalapeno Cornbread.
    • Potato Salad: Offering a creamy and tangy contrast, Potato Salad is a refreshing side that pairs well with the hearty flavors of gumbo.
    • Hush Puppies: These Deep Fried Cornmeal Balls are a delightful crunchy accompaniment to the soft texture of gumbo, absorbing its sauce delightfully.
    • Hot Sauce: Be sure to top it off with some green onion and hot sauce for the perfect finishing touches!
    Instant Pot Gumbo in a bowl.

    🍽 Try These Instant Pot Dishes

    • Instant Pot Split Pea Soup.
      Instant Pot Split Pea Soup
    • Instant Pot French Onion Chicken.
      Instant Pot French Onion Chicken
    • Instant Pot Asian Pulled Pork.
      Instant Pot Asian Pulled Pork
    • Easy Vegetarian Instant Pot Gumbo.
      Easy Vegetarian Instant Pot Gumbo

    Did you make this recipe? Leave a review and a ⭐⭐⭐⭐⭐ rating below, or tag us in our Facebook Group! Alternatively, bookmark it in your browser or save to Pinterest.

    Easy Vegetarian Instant Pot Gumbo.

    Vegetarian Instant Pot Gumbo

    Enjoy the bold flavors of the South with this Instant Pot Vegetarian Gumbo! Packed with hearty veggies and savory spices, this plant-based twist on a classic is quick and easy thanks to the Instant Pot. It’s a comforting meal perfect for any night!
    Prep Time 10 minutes minutes
    Cook Time 8 minutes minutes
    Total Time 20 minutes minutes
    Serving Size 6 Servings
    Print
    Pin

    Ingredients

    • 2 tablespoon Olive Oil
    • 1 Bell Pepper Diced
    • 1 Onion Diced
    • 1 ½ tablespoon Minced Garlic
    • ½ Stick Butter
    • ½ Cup All Purpose Flour
    • 2 tablespoon Creole Seasoning
    • 2 tablespoon Worcestershire Sauce
    • 2 tablespoon Cayenne Powder
    • 10 Oz Okra frozen and sliced
    • 14 Can Crushed Tomatoes
    • 4 Cups Vegetable Broth

    Instructions

    • Turn your instant pot onto sauté mode. Once it is hot add your oil and onions. Sauté until translucent for 3 to 5 minutes.
    • Add to your onions your bell pepper. Sauté for 1 to 2 minutes.
    • Add in your minced garlic. Sauté for one minute.
    • Remove from your instant pot and set aside in a separate bowl.
    • With your instant pot still on sauté, melt the butter. Once butter is melted, whisk in the flour to build your roux. If the roux is too thick, dough-like, add a splash of the broth to thin it out. If the roux is too thin, whisk in more flour teaspoon at a time. Roux should be a gravy-like consistency.
    • Add to your roux your cooked vegetables that you set aside. Mix.
    • Add your creole seasoning, Worcestershire sauce, hot sauce, frozen okra, tomatoes, and broth. Set your instant pot to high pressure for 5 minutes.
    • Once your instant pot is done cooking, do a quick release by releasing the valve.
    • Serve while warm as is, or over a bed of rice! Enjoy!

    Nutrition

    Calories: 528kcal | Carbohydrates: 96g | Protein: 20g | Fat: 15g | Saturated Fat: 6g | Polyunsaturated Fat: 2g | Monounsaturated Fat: 6g | Trans Fat: 0.3g | Cholesterol: 20mg | Sodium: 3901mg | Potassium: 4373mg | Fiber: 20g | Sugar: 53g | Vitamin A: 8970IU | Vitamin C: 129mg | Calcium: 209mg | Iron: 13mg

    Notes

    This is a great vegetarian recipe and hearty meal that you can whip up in no time. Be sure quick release the recipe once rather than natural release.
    Add salt and pepper to taste. You can really enjoy this recipe. It's has a great plant based protein and is one to add to your recipes notes! 

    Did You Make This Recipe?

    Be sure to share with me on Instagram, Pinterest, or Facebook!

    5 from 4 votes
    Pin Recipe Share Recipe

    More Delicious Family Recipes

    • Beetroot Hummus
    • Easy Crock Pot Chicken Gravy
    • Slow Cooker Pot Roast With Beer
    • Crock Pot Chili Mac And Cheese
    • Slow Cooker Beef Stroganoff
    • Crispy Okra Chips Recipe
    • Slow Cooker Mongolian Beef
    vegetarian gumbo in a bowl.

    Halloween Candy Charcuterie Board

    August 31, 2024 by Angela Milnes

    Halloween Candy Charcuterie Board.

    Get ready to spook up your snack time with this Halloween Candy Charcuterie Board! This fun and festive spread is perfect for your next Halloween party or a cozy night in with the family. With a delightful mix of cheeses, adorable chocolate spiders, and crunchy Oreo bats, it's both a treat for the eyes and the taste buds. Gather your loved ones and enjoy the magic of this Halloween Charcuterie Board!

    Halloween Candy Charcuterie Board.
    [feast_advanced_jump_to]

    For more fun Halloween treats try one of the following: Halloween Hot Dogs Mummies, Halloween Cherry Pie, Halloween Blondies With M&M’s or these super healthy Halloween Apple Monsters.

    💖 Why This Recipe Works

    A Halloween charcuterie board is the perfect treat to delight your guests! Customizable with a variety of cheeses, fruits, and spooky snacks, it’s visually stunning and easy to assemble. This festive centerpiece allows guests to graze and enjoy a mix of flavors. This quick and easy Halloween Candy Charcuterie Board brings the Halloween spirit to life, making it a guaranteed hit at any gathering.

    ⭐ Star Ingredients

    Halloween Charcuterie Board Ingredients.
    • Mandarin Oranges
    • Celery Stalk
    • Rolos
    • Oreos
    • Thin Pretzel Rods
    • Candy Eyes
    • Melting Chocolate Wafers
    • Cheddar Cubes
    • White Cheddar Cubes
    • Honey Roasted Cashews
    • M&Ms Mini
    • Marshmallows

    For the complete list of ingredients with measurements and instructions, please see the recipe card at the bottom of the post.

    📖  Substitutions & Variations

    • Thin pretzel rods can be swapped with pretzel sticks, breadsticks, or cracker sticks. If you don't have candy eyes, small round candies, raisins, or chocolate chips can work.
    • Mandarin oranges can be substituted with clementines, Tangerines, or small orange slices.
    • For the celery stalk, try using cucumber sticks, carrot sticks, or bell pepper strips.
    • Instead of Rolos, you can use mini Snickers, caramel-filled chocolates, or any small, wrapped candy.
    • Oreos can be replaced with any sandwich cookies, Chocolate Chip Cookies, or Halloween-themed cookies.

    🔪 How To Make This Easy Halloween Charcuterie Board

    Placing celery stack in the center of each peeled orange.
    1. Step 1: Peel the oranges. Cut the celery stalk into thin 1-inch pieces. Place in the center of the oranges to make pumpkin stems.
    Making Halloween Oreo bat treats.
    1. Step 2: Melt the chocolate according to the package. To make the bat Oreos, twist apart the cookie and cut the top in half to make wings. Press those halves into the white filling. 
    Making Oreo bats for Halloween charcuterie board.
    1. Step 3: Place a small amount of melted chocolate in the center of the cookie. Twist apart another cookie and place the top of the cookie on the melted chocolate/wings. Put a small dab of melted chocolate onto the back of Candy Eyes and put it on top of the Oreo.
    Preparing Halloween charcuterie board.
    1. Step 4: To make the spiders, cut a few pretzel rods into .25-inch pieces. Turn the rolo upside down and put a small amount of melted chocolate on the base. Put 4 pretzel legs on the chocolate. Repeat for all rolos. Allow to cool.
    Charcuterie board is ready for Halloween.
    1. Step 5: Once cooled, turn the rolos back over, put a small amount of chocolate on the back of the candy eyes, and put them in place. 
    Halloween Candy Charcuterie Board.
    1. Step 6: Fill the board by first placing the cheese cubes into curved lines on the board. Fill in with the rest of the bats, spiders, pumpkins, etc. Your Halloween Charcuterie is now ready to display!
    Perfect Halloween charcuterie board.

    Can I Make This Halloween Sweet Charcuterie Board Ahead Of Time?

    Yes, you can make a Halloween sweet charcuterie board ahead of time! Here are some tips to keep it fresh and delicious:

    1. Prepare Ingredients: Cut and prep all ingredients the day before. Store fruits and vegetables in airtight containers in the fridge.
    2. Assemble Close to Serving Time: Arrange the board a few hours before your event and cover it tightly with plastic wrap.
    3. Keep Dry Ingredients Separate: Add items like pretzels, cookies, and candies just before serving to prevent them from getting soggy.
    4. Refrigerate Perishables: Keep cheeses, chocolates, and other perishables chilled until you’re ready to serve.
    5. Decorate Last Minute: Add any final Halloween-themed decorations right before guests arrive to keep everything looking fresh.

    More Halloween Charcuterie Board Ideas

    Try a Halloween Charcuterie Board Skeleton: Get creative and arrange your ingredients in the shape of a skeleton. Use the following items to build your spooky skeleton:

    • Head: A small round cheese ball or a carved pumpkin with a spooky face.
    • Ribs: Arrange celery stalks or pretzel rods in rib-like shapes.
    • Spine: Line up a row of cheese cubes.
    • Arms and Legs: Use thin pretzel rods or sliced vegetables.
    • Hands and Feet: Small clusters of grapes or candy bones.

    This fun and festive arrangement will be a hit at any Halloween gathering!

    👩‍🍳 Expert Tips

    • Choose a Theme: Decide on a specific Halloween theme, such as spooky, cute, or elegant. This will guide your choice of ingredients and decorations.
    • Mix Sweet and Savory: Include a balance of sweet and savory items to cater to all taste preferences. Think chocolates, candies, and fruits alongside cheeses, meats, and nuts and super cute Frankenstein Cupcakes.
    • Add Spooky Elements: Incorporate Halloween-themed decorations like candy eyes, gummy worms, and mini pumpkins. Use cookie cutters to shape cheeses and meats into bats, ghosts, or pumpkins.
    • Use Seasonal Colors: Focus on black, orange, and white items to enhance the Halloween vibe. Black olives, orange cheddar, and White Mozzarella can add to the festive look.

    💭 FAQs

    What items should I include on a Halloween Candy Charcuterie Board?

    A well-rounded Halloween board combines a variety of treats to satisfy different tastes. Incorporate a mix of chocolates, gummies, licorice, and novelty candies. Adding savory elements like pretzels, cheese cubes, and cured meats can balance the sweetness. Don't forget to include seasonal fruits such as grapes and apple slices for a refreshing touch.

    How can I make my Halloween Candy Board visually appealing?

    Start by selecting a cohesive color palette, traditionally orange, black, and purple, to create a festive atmosphere. Utilize themed decorations like mini pumpkins, spiders, and skeletons to enhance the Halloween vibe. Arrange candies in patterns or clusters, and use small bowls or ramekins to hold items like candy corn or gummy worms. Incorporating various textures and heights adds visual interest to the board.

    Can I prepare the Halloween Candy Charcuterie Board in advance?

    Absolutely! Assembling your board a few hours before serving is recommended. Cover it and refrigerate to keep perishable items fresh. However, add fruits like apples and pears just before serving to prevent them from browning.

    Are there vegetarian or vegan options for the board?

    Yes, you can create a vegetarian or vegan-friendly board by including plant-based cheeses, hummus, roasted vegetables, and a variety of fruits, nuts, and crackers. Ensure that all candies and treats are suitable for your guests' dietary preferences.

    Best Way to Store Halloween Candy Charcuterie Board

    For leftovers, separate any perishable items and store them in airtight containers for freshness. Keep the board chilled if you plan to serve it later, and add fresh fruit just before serving to avoid browning.

    💖 Serving Suggestions

    • Monster Mash Popcorn Mix: Create a mix of popcorn, candy-coated chocolates, pretzel rods, and marshmallows for a sweet and salty snack that complements the pretzels.
    • Green Monster Mashed Potatoes: Add a spooky twist to classic mashed potatoes with green food coloring and serve them in a cauldron for a fun and festive side dish.
    • Spiderweb Taco Dip: Layer a taco dip with sour cream "spiderwebs" on top and serve with tortilla chips for a crowd-pleasing appetizer.
    • Mummy Hot Dogs: Wrap hot dogs in crescent roll dough to resemble mummies, perfect for a fun and savory handheld snack.
    • Halloween Finger Food Party Snacks: These Halloween Finger food ideas are not only easy to make but also spooky and fun!

    🍽 More Halloween Recipes

    • Halloween Hot Dogs Mummies.
      Halloween Hot Dogs Mummies
    • Spooky Halloween Cherry Pie Recipe.
      Spooky Halloween Cherry Pie Recipe
    • Halloween Apple Monsters.
      Halloween Apple Monsters
    • Halloween Chocolate Covered Strawberries.
      Halloween Chocolate Covered Strawberries

    Did you make this recipe? Leave a review and a ⭐⭐⭐⭐⭐ rating below, or tag us in our Facebook Group! Alternatively, bookmark it in your browser or save to Pinterest.

    Halloween Candy Charcuterie Board.

    Halloween Charcuterie Board

    Angela Milnes
    Get ready to spook and delight with this Halloween Charcuterie Board! Filled with an assortment of creepy-cute snacks, savory treats, and festive sweets, this board is perfect for your Halloween gatherings. It’s a fun, creative way to serve up a variety of flavors that will impress all your ghoulish guests!
    5 from 4 votes
    Print Recipe Pin Recipe Rate this Recipe
    Prep Time 25 minutes mins
    Cook Time 0 minutes mins
    Additional Time 0 minutes mins
    Total Time 25 minutes mins
    Course Appetizers
    Cuisine American
    Servings 6 Servings
    Calories 297 kcal

    Ingredients
      

    • 4-5 Mandarin Oranges
    • 1 Celery Stalk
    • 1 Pkt Rolos 8 individual rolos
    • 12 Oreos
    • ½ cup Thin Pretzel Rods
    • Candy Eyes
    • 3 tablespoon Melting Chocolate Wafers
    • 8 oz Cheddar Cubes
    • ½ cup Honey Roasted Cashews
    • 1 bag M&Ms
    • ½ cup Mini Marshmallows

    Instructions
     

    • Peel the oranges. Cut the celery stalk into thin 1 inch pieces. Place in the center of the oranges to make pumpkin stems. 
    • Melt the chocolate according to the package. To make the bat oreos, twist apart the cookie and cut the top in half to make wings. Press those halves into the white filling. 
    • Place a small amount of melted chocolate in the center of the cookie. Twist apart another cookie and place the top of the cookie on the melted chocolate/wings.
    • Put a small dab of melted chocolate onto the back of candy eyes and put on the top of the oreo.
    • To make the spiders, cut a few pretzel rods into .25 inch pieces. Turn the rolo upside down and put a small amount of melted chocolate on the base.
    • Put 4 pretzel legs on the chocolate. Repeat for all rolos. Allow to cool. 
    • Once cooled, turn the rolos back over and put a small amount of chocolate on the back of the candy eyes and put in place. 
    • Fill the board by first placing the cheese cubes into curved lines on the board. Fill in with the rest of the bats, spiders, pumpkins, etc. Your Halloween Charcuterie is now ready to display!

    Notes

    Choose a Theme: Decide on a specific Halloween theme, such as spooky, cute, or elegant. This will guide your choice of ingredients and decorations.
    Mix Sweet and Savory: Include a balance of sweet and savory items to cater to all taste preferences. Think chocolates, candies, and fruits alongside cheeses, meats, and nuts and super cute Frankenstein cupcakes.
    Add Spooky Elements: Incorporate Halloween-themed decorations like candy eyes, gummy worms, and mini pumpkins. Use cookie cutters to shape cheeses and meats into bats, ghosts, or pumpkins.
    Use Seasonal Colors: Focus on black, orange, and white items to enhance the Halloween vibe. Black olives, orange cheddar, and white mozzarella can add to the festive look.

    Nutrition

    Calories: 297kcalCarbohydrates: 48gProtein: 6gFat: 11gSaturated Fat: 3gPolyunsaturated Fat: 2gMonounsaturated Fat: 6gTrans Fat: 0.01gSodium: 344mgPotassium: 264mgFiber: 3gSugar: 19gVitamin A: 403IUVitamin C: 16mgCalcium: 38mgIron: 5mg
    Print Recipe Pin Recipe Rate this Recipe
    Tried this recipe?Let us know how it was!

    More Easy Halloween Recipes

    • Easy Halloween Cookies
    • Hot Cocoa Bombs: Easy Halloween Treat
    • Vampire Halloween Pretzels
    • Easy Halloween Monster Cookies
    • Halloween Jello Shots
    • Halloween Bean Dip

    Can You Freeze Alfredo Sauce

    August 31, 2024 by Angela Milnes

    Alfredo sauce in a bowl.

    Alfredo sauce, with its creamy richness and signature flavor from Parmesan cheese, is a favorite for many pasta lovers. But what happens when you make too much or want to prepare some in advance? Can You Freeze Alfredo Sauce? The answer is yes, you can! Here's how to freeze Alfredo sauce properly and ensure it remains as delicious as when it was first made.

    Alfredo sauce in a bowl. Can you freeze alfredo sauce?
    [feast_advanced_jump_to]

    Freezing Alfredo Sauce

    Freezing Alfredo sauce is a practical way to extend its shelf life, especially if you have leftovers or want to prepare meals ahead of time. However, due to the ingredients like heavy cream and Parmesan cheese, you need to be careful during the freezing and reheating process to maintain the sauce's creamy texture.

    How to Freeze Alfredo Sauce?

    • Cool Completely: After preparing your Alfredo sauce, let it cool completely. This step is crucial to prevent condensation from forming, which could lead to freezer burn.
    • Portioning: It’s best to freeze Alfredo sauce in individual portions, so you only thaw what you need. You can use ice cube trays to freeze small amounts of Alfredo sauce, which is perfect for single servings or adding to a recipe.
    • Transfer to Containers: Once the sauce is frozen in the ice cube trays, pop out the Alfredo sauce cubes and transfer them to a freezer-safe bag or an airtight container.
    • Label and Store: Always label your sauce container with the date before storing it in the freezer. Alfredo sauce can be frozen for up to three months, but for the best quality, it’s advisable to use it within that period.

    How to Thaw and Reheat Alfredo Sauce?

    • Thaw Overnight: Transfer the frozen Alfredo sauce from the freezer to the fridge overnight to thaw slowly.
    • Reheat Gently: Once thawed, pour the sauce into a pan and reheat it over low heat. Stir continuously to prevent the Alfredo sauce from separating. If the sauce appears too thick, add a splash of heavy cream or milk to bring back its creamy texture.
    • Cook for a Few More Minutes: If the sauce separates slightly, whisk it vigorously over low heat for a few more minutes. Adding a bit of flour can help bring the sauce back together if it becomes too runny.

    How To Use Frozen Alfredo Sauce in Recipes

    • Cooked Pasta: Thaw and heat the sauce before tossing it with cooked pasta for a quick and delicious meal.
    • Baked Dishes: Use the thawed sauce in baked pasta dishes like Lasagna or Alfredo Bake. The sauce will blend well with the other ingredients during baking.
    • Other Recipes: Alfredo sauce can also be used in Casseroles, as a base for Creamy Soups, or as a topping for Vegetables.

    FAQ'S

    Can You Refreeze Alfredo Sauce After It Has Been Thawed?

    No, refreezing Alfredo sauce is not recommended, as it can affect the texture and quality. Freeze the sauce in smaller portions to avoid needing to refreeze.

    How Long Does Alfredo Sauce Stay Good In The Freezer?

    Alfredo sauce stays good in the freezer for up to three months.

    Enjoy Freezing Alfredo Sauce!

    Freezing Alfredo sauce is a convenient way to enjoy this creamy delight whenever you want. By following the right steps, such as cooling completely, using ice cube trays for portioning, and reheating over low heat, you can ensure that your sauce remains rich and flavorful even after freezing. Whether you're pairing it with cooked pasta or using it in a new recipe, frozen Alfredo sauce can be a real time-saver in the kitchen.

    Air Fryer Breakfast Casserole With Sausage

    August 30, 2024 by Angela Milnes

    Air Fryer Breakfast Casserole With Sausage.

    Get ready to enjoy a tasty twist on breakfast with our Air Fryer Breakfast Casserole. It's easy, hearty, and perfect for busy mornings. If you're on the lookout for air fryer breakfast recipes then this hearty breakfast is one you'll want to try!

    Air fryer breakfast casserole slices on a wooden board.
    [feast_advanced_jump_to]

    Why This Recipe Works

    • Quick Morning Meal: The air fryer cuts down cooking time, perfect for busy mornings.
    • Versatile Ingredients: You can add any breakfast favorites - bacon, veggies, or different cheeses.
    • Hearty and Filling: This Sausage Breakfast Casserole provides a satisfying start to your day.

    🥘 Ingredients

    ingredients for air fryer breakfast casserole.

    Here are the ingredients needed for this breakfast casserole recipe:

    • Eggs: Provide structure and a rich, satisfying flavor.
    • Milk: Adds creaminess to the egg mixture, making the casserole moist and luscious.
    • Ground Sausage (Cooked): Brings a savory, meaty element to the dish, adding depth and hearty flavors that make it truly satisfying.
    • Shredded Cheese: Melts to create a gooey layer that not only tastes great but also binds the ingredients together.
    • Frozen Hash Browns, Thawed: Add a comforting potato element to the casserole, providing a nice textural contrast with their crispy exterior and soft interior.
    • Strips Of Bacon (Cooked): Gives the casserole a smoky, salty edge, enhancing the overall savory profile of the dish.
    • Salt: Enhances the natural flavors of the ingredients, making them more pronounced and delicious.
    • Pepper: Adds a touch of heat to balance the richness of the other ingredients, providing a subtle kick that elevates the overall flavor.
    • Garlic Powder: Is a quick way to add a punch of garlicky flavor, which complements the sausage and bacon wonderfully.

    For the complete list of ingredients with measurements and instructions, please see the recipe card at the bottom of the post.

    🔪 How To Make Air Fryer Breakfast Casserole

    Here are the step-by-step instructions for making air fryer breakfast casserole:

    Sausage and bacon and cheese in a mixing bowl.

    Step One: In a bowl, whisk the eggs and milk. Add the remaining ingredients and mix. Crumble the bacon before adding.

    Breakfast casserole mixture in an air fryer.

    Step Two: Pour egg mixture into an 8” pie pan. This pie pan fits my air fryer basket. You can use any dish that fits your basket. A shallow dish helps it cook evenly. We made 2 batches. 

    Cooked casserole in an air fryer.

    Step Three: Cook at 350 for 25 minutes. If the top of the casserole starts to cook faster, cover it with foil to finish. Let sit for 15 minutes after cooking, resting allows the egg to firm up.

    Cut pieces of air fryer breakfast casserole on a chopping board.

    Step Four: Serve with salsa, hot sauce, or ketchup if that’s your thing! 

    👩‍🍳 Expert Tips

    • Line or Grease the Pan: Use parchment paper or grease the pan well to prevent sticking, making cleanup easier.
    • Check for Doneness: Insert a toothpick or knife in the center to make sure the eggs are fully set before serving. If needed, cover the top with foil and cook for a few more minutes.
    • Customize with Veggies: Add veggies like bell peppers, spinach, or onions for extra flavor and nutrients. Just be sure to sauté them beforehand to remove excess moisture.

    💭 FAQs

    What Is A Breakfast Casserole?

    A breakfast casserole is a type of dish that includes eggs, usually other types of dairy like cheese and milk, and a variety of meats such as bacon, sausage or ham. It can also include vegetables like bell peppers, onions or even diced potatoes for an added kick. This all-in-one meal can be prepared ahead of time and refrigerated overnight. This makes it the perfect meal for brunch or a lazy Saturday morning breakfast. Making an air fryer breakfast casserole is even easier than making one in the oven because you don’t need to preheat the appliance.

    Do I Have To Eat Breakfast Casserole For Breakfast?

    No! Many people enjoy eating breakfast casserole for lunch or dinner as well. The great thing about this dish is that it can be served hot or cold and it’s a great way to use leftovers or repurpose ingredients you already have in the house. Breakfast casserole also makes an excellent dish for potlucks or parties. It’s an easy meal to transport and it can feed a large number of people without breaking the bank.

    Is Breakfast Bake And Breakfast Casserole The Same Thing?

    No, breakfast bake and breakfast casserole are not the same. A breakfast bake is typically made with layers of ingredients such as eggs, cheese, bacon or sausage, and toast. It can also include vegetables like bell peppers or onions for added flavor and nutrition. A breakfast casserole, on the other hand, is a bit simpler and usually consists of only a few ingredients like eggs, milk, cheese, and some type of meat. Breakfast casseroles are also often prepared with hash browns as the base for an extra crunchy texture. Both breakfast bakes and breakfast casseroles make delicious meals that are packed with protein and nutrients to fuel your day.

    Do I Need To Use Nonstick Cooking Spray?

    It is not necessary to use the nonstick cooking spray when making this air fryer breakfast casserole. However, it can help if you want to add an extra layer of protection against sticking.

    What Air Fryer Accessories Do I Need For Egg Casserole?

    To make this casserole dish in the air fryer, you will need the following air fryer accessories: a non-stick cake pan that fits in your air fryer basket, and an oven mitt or hot pad to handle the hot pan. You can also print out our Air Fryer Breakfast Casserole Recipe card for easy reference.

    Is Air Fryer Casserole Better Than Oven Baked?

    Air fryer casserole is equally as good as the oven-baked version, but it does come with some added benefits. With an air fryer, you get faster and more even cooking, plus less mess and cleanup. Plus, since the heat is more concentrated in an air fryer, the flavor is often more intense.

    Best Breakfast Meats for Air Fryer Casserole

    The best breakfast meats for an air fryer casserole are bacon, sausage, and ham. The combination of these proteins makes for a delicious meal that is packed with flavor and protein. You can easily add vegetables like bell pepper or spinach to the mix to make it even healthier! Crumbled bacon or bite-sized pieces of ham are best for an air fryer casserole since they cook more quickly and evenly than in the oven. If you’re using sausage, make sure to precook it before adding it to the mix, and look for one that is lower in saturated fat.

    🧂Serving Suggestions

    Here are some of the best sides to serve with Air Fryer Breakfast Casserole:

    • Crispy Hash Browns: Golden and seasoned to perfection, these crunchy hash browns are an ideal match for your casserole.
    • Mixed Berry Salad: A refreshing blend of strawberries, blueberries, and raspberries drizzled with honey for a burst of sweetness.
    • Greek Yogurt Parfait: Layers of Greek yogurt, granola, and fresh fruit for a light and satisfying accompaniment.
    • Maple Glazed Bacon: Crispy bacon strips glazed with maple syrup, offering a sweet and savory contrast.
    • Instant Pot Mini Pancakes: Bite-sized pancakes dusted with cinnamon sugar, making for a delightful breakfast pairing.
    Cut pieces of air fryer breakfast casserole on a chopping board.

    🍽 Related Recipes

    • Cranberry Lime Mocktail.
      Easy Cranberry Lime Mocktail Recipe – No Alcohol, All Sparkle!
    • Food to Your Loved Ones this Holiday Season.
      Give from Your Heart: Give Food to Your Loved Ones this Holiday Season
    • MIni Rainbow Pizza.
      How To Revamp Leftover Pizza
    • One Pan Chicken And Asparagus.
      One Pan Chicken And Asparagus

    Did you make this recipe? Leave a review and a ⭐⭐⭐⭐⭐ rating below, or tag us in our Facebook Group! Alternatively, bookmark it in your browser or save to Pinterest.

    Air Fryer Breakfast Casserole With Sausage.

    Air Fryer Breakfast Casserole

    Angela Milnes
    Easy and Delicious Breakfast Casserole
    5 from 1 vote
    Print Recipe Pin Recipe Rate this Recipe
    Prep Time 5 minutes mins
    Cook Time 25 minutes mins
    Total Time 30 minutes mins
    Course Appetizer
    Cuisine American
    Servings 6 Servings
    Calories 704 kcal

    Ingredients
      

    • 12 Eggs
    • 3 Cups Milk
    • 1 Lb Ground Sausage Cooked
    • 1, ½ Cup Cheese Shredded
    • 20 oz Hash Browns Thawed
    • 8 Strips Bacon Cooked
    • ½ Teaspoon Salt
    • ½ Teaspoon Pepper
    • 1 Teaspoon Garlic Powder

    Instructions
     

    • In a bowl, whisk the eggs and milk
    • Add the remaining ingredients and mix. Crumble the bacon before adding.
    • Pour egg mixture into a 8” pie pan. This pie pan fits my air fryer basket. You can use any dish that fits your basket. A shallow dish helps it cook evenly. We made 2 batches.
    • Cook at 350 for 25 minutes. If the top of the casserole starts to cook faster, cover it with foil to finish.
    • Let sit for 15 minutes after cooking, resting allows the egg to firm up.
    • Serve with salsa, hot sauce or ketchup if that’s your thing!

    Notes

    Line or Grease the Pan: Use parchment paper or grease the pan well to prevent sticking, making cleanup easier.
    Check for Doneness: Insert a toothpick or knife in the center to make sure the eggs are fully set before serving. If needed, cover the top with foil and cook for a few more minutes.
    Customize with Veggies: Add veggies like bell peppers, spinach, or onions for extra flavor and nutrients. Just be sure to sauté them beforehand to remove excess moisture.

    Nutrition

    Calories: 704kcalCarbohydrates: 24gProtein: 31gFat: 48gSaturated Fat: 21gPolyunsaturated Fat: 5gMonounsaturated Fat: 13gTrans Fat: 0.2gCholesterol: 453mgSodium: 1376mgPotassium: 769mgFiber: 1gSugar: 6gVitamin A: 730IUVitamin C: 8mgCalcium: 639mgIron: 3mg
    Print Recipe Pin Recipe Rate this Recipe
    Tried this recipe?Let us know how it was!

    So what are you waiting for grab the air fryer basket and prepare to make a tasty breakfast dish for the whole family. You will love this breakfast sausage egg casserole.

    More Air Fryer Ideas

    Here are some more air fryer recipes you may enjoy!

    • Air Fryer Beef Taquitos
    • Air Fryer Huli Huli Chicken
    • Air Fryer Carrot Fries
    • Air Fryer Onion Rings
    • Air Fryer Broccolini
    • Air Fryer Yellow Squash
    • Air Fryer Baked Potatoes
    • Air Fryer Orange Beef
    • Air Fryer BBQ Chicken Wings
    • Air Fryer Cauliflower Pizza
    Eating casserole with a fork.

    Can You Freeze Chicken Salad

    August 30, 2024 by Angela Milnes

    Chicken salad.

    Chicken salad is a popular and versatile dish, perfect for a quick meal or a potluck. But what if you have leftovers or want to prepare chicken salad in advance? Can you freeze chicken salad to enjoy later? Let's delve into the details of freezing chicken salad, how it affects the taste and texture, and the best methods for freezing and thawing it.

    can you freeze chicken salad
    [feast_advanced_jump_to]

    Can You Freeze Chicken salad?

    Yes, you can freeze chicken salad, but there are some considerations to keep in mind. The type of dressing used and the ingredients in the salad can affect how well it freezes and thaws.

    Does Freezing Chicken Salad Alters Its Taste and Texture?

    Freezing chicken salad can alter its taste and texture. Chicken salad ingredients like mayonnaise can separate and become watery when thawed, while vegetables may lose their crispness. However, with proper preparation and freezing techniques, you can minimize these changes.

    Can You Freeze Chicken Salad With Yogurt Dressing?

    Yes, you can freeze chicken salad with either plain yogurt or Greek yogurt. Chicken salad with yogurt dressing freezes better than mayonnaise-based versions. Yogurt tends to maintain its texture better after thawing, making it a suitable option for freezing.

    Can You Freeze Chicken Salad With Hard Boiled Eggs?

    Freezing chicken salad with eggs can be tricky, as eggs may become rubbery and lose their texture when thawed. If you plan to freeze chicken salad, it's best to add the eggs after thawing.

    Different Methods For Freezing Chicken Salad

    • Using Airtight Containers: Place portions of chicken salad in airtight containers to prevent freezer burn.
    • Freezer Bags: Use freezer bags, squeezing out as much air as possible before sealing.
    • Vacuum Sealing: For the best preservation, use a vacuum sealer to remove all air.

    Freeze Chicken Salad: Step By Step Process

    • Prepare the Salad: Make your chicken salad with ingredients that freeze well, such as cooked chicken, yogurt-based dressings, and crunchy vegetables like celery. Avoid high-water content vegetables like lettuce and cucumbers, which can become mushy.
    • Portion the Salad: Ensure the chicken salad is well mixed before freezing to distribute the ingredients evenly. Divide the chicken salad into individual portions or as per your serving size preferences. This makes it easy to thaw according to need.
    • Use Airtight Containers: Place the portions into airtight containers or freezer bags, removing as much air as possible.
    • Label and Freeze: Label the chicken salad containers with the date and store in the freezer.

    Can You Freeze Chicken Salad With Mayonnaise?

    With mayonnaise, chicken salad tastes best if served fresh. However, freezing a chicken salad recipe with mayonnaise is possible, but the mayonnaise can separate when thawed, resulting in a change in texture. To reduce this effect, consider using a full-fat mayonnaise and mixing it thoroughly before freezing.

    rotisserie chicken salad ingredients

    How Long Does Chicken Salad Last in The Freezer?

    Chicken salad can last up to three months in the freezer when stored properly. Beyond this time, the quality may start to fade.

    How Do You Thaw Frozen Chicken Salad?

    • Refrigerator Thawing: Transfer the leftover chicken salad from the freezer to the refrigerator and let it thaw overnight. Stir the salad well before serving to recombine any separated ingredients.
    • Cold Water Thawing: Defrost chicken salad by placing the sealed container or bag in cold water. Change the water every 25 to 30 minutes until thawed.

    How to Eat Thawed Chicken Salad?

    Thawed chicken salad recipes can be enjoyed as is, or you can refresh it by adding fresh ingredients. Try adding new vegetables or a splash of fresh dressing. Thai Chicken Salad and Chinese Chicken Salad can be revived with fresh herbs and a squeeze of lime or a dash of soy sauce.

    You can also use defrosted chicken salad as a filling for wrap. Or you can make homemade chicken salad sandwiches from it.

    can you freeze chicken salad

    FAQ'S

    Is Frozen Chicken Salad Safe To Eat?

    Yes, frozen chicken salad is safe to eat if it has been stored properly and not left out at room temperature for extended periods. Always check for signs of spoilage before you consume.

    More Useful Food Tips

    • Does Cornmeal Go Bad?
    • Does Brie Cheese Go Bad
    • Edamame vs Mukimame

    Tofu Stir Fry Noodles With Mushroom

    August 29, 2024 by Angela Milnes

    Tofu Stir Fry Noodles With Mushroom.

    Need a quick, tasty dinner that everyone will love? This Tofu Stir Fry Noodles with Mushrooms is a hit in our house! It's hearty, flavorful, and perfect for busy weeknights. Even picky eaters will love this Tofu Mushroom Stir Fry.

    Tofu stir fry noodles in a pan.
    [feast_advanced_jump_to]

    💖 Why This Recipe Works

    • Healthy: Tofu is a Great Source Of Plant Based Protein making this tofu and mushroom stir fry a wholesome choice that supports a healthy diet.
    • Versatility: This Tofu Mushroom Stir Fry dish can easily be adapted to suit any taste preferences or dietary restrictions. You can spice it up, swap out vegetables, or even change the type of noodles to keep it exciting every time.
    • Flavorful Comfort: With its savory, umami-rich sauce and hearty ingredients, tofu stir fry noodles is not only satisfying but also packed with comforting flavors.

    ⭐ Star Ingredients

    Ingredients to make tofu stir fry noodles.
    • Extra firm tofu: The base protein of the dish, chosen for its dense texture that holds up well to frying and absorbs flavors effectively.
    • Low sodium soy sauce: Enhances the umami flavor of the tofu without overpowering the dish with saltiness.
    • Honey: Adds a hint of sweetness to balance the savory flavors in the marinade.
    • Smoked paprika: Adds a smoky element, enriching the marinade’s complexity.
    • Microwaveable udon noodles: Provide a chewy texture that complements the crisp vegetables and soft tofu.
    • Diced pepper: Brings a fresh, slightly sweet crunch and vibrant color to the dish.
    • Scallions: Add a fresh, sharp contrast to the dish, enhancing the visual appeal and providing a burst of oniony flavor.
    • Sesame seeds: Contribute a nutty taste and a decorative touch, improving the texture and visual interest of the dish.

    For the complete list of ingredients with measurements and instructions, please see the recipe card at the bottom of the post.

    📖  Substitutions & Variations

    • Chicken And Broccoli Stir Fry with Noodles: Replace the tofu with chicken breast or thigh pieces for a protein-rich option. Add broccoli for its hearty texture and health benefits. This classic combination makes a fulfilling meal that’s loved by many.
    • Shrimp Stir Fry with Noodles: Swap out the tofu for shrimp for a seafood twist. Cook the shrimp until pink and opaque before adding it to the stir-fry. The subtle sweetness of the shrimp pairs wonderfully with the savory sauce and noodles.
    • Bok Choy Stir Fry Noodles: Incorporate bok choy for a refreshing, slightly crunchy texture. Bok choy adds a burst of freshness and is packed with vitamins. It cooks quickly, making it a perfect addition to your noodle stir-fry.

    🔪 How To Make Tofu Stir Fry Noodles With Mushroom

    Tofu in a frying pan.
    1. Step 1: Start by wrapping the tofu in a clean towel and pressing it for at least 30 minutes to drain excess water. Chop into 1-inch squares, and marinate in a prepared mix for at least 30 minutes. Cook in a nonstick skillet, reserving the marinade.
    Fried tofu.
    1. Step 2: Fry tofu until golden and set aside. Cook vegetables, then prepare noodles as instructed. Thicken the marinade with cornstarch and mix with noodles, vegetables, and tofu in the skillet off the heat. Serve garnished with sesame seeds or scallions.
    Tofu stir fried noodles in a skillet

    👩‍🍳 Expert Tips

    • Press The Tofu: To get crispy tofu, press it thoroughly to remove as much moisture as possible before cooking. This helps it absorb the flavors of the marinade and achieve a satisfying texture.
    • Use Fresh Mushrooms: Opt for fresh mushrooms and clean them gently with a damp cloth instead of washing them under water, which can cause them to absorb moisture and become soggy when cooked.
    • Cook Noodles Al Dente: Be sure to cook your noodles just until al dente before adding them to the stir fry. This prevents them from becoming too soft or mushy when mixed with the other ingredients and sauce.

    💭 FAQs

    Can I substitute tofu with another protein?

    Yes! You can replace tofu with chicken, shrimp, or even bok choy for a plant-based twist. These options work well with the stir-fry's flavors.

    How do I store leftovers?

    Store leftovers in an airtight container in the refrigerator for up to 3-4 days. You can also freeze the stir fry for up to 2 months and reheat it in a skillet with a little water or extra sauce.

    How do I keep the tofu from breaking while stir-frying?

    Use extra firm tofu, press it to remove excess moisture, and cut it into larger cubes before frying. This helps the tofu stay intact during stir-frying.

    What noodles can I use instead of udon noodles?

    You can use other types of noodles like rice noodles, soba noodles, or egg noodles as alternatives to udon noodles in this recipe.

    Best Way to Store Stir Fry

    Cool the stir fry to room temperature, then store it in an airtight container in the refrigerator. It will keep well for 3-4 days. For longer storage, freeze your tofu stir fry in an airtight container. It can be kept frozen for up to 2 months.

    💖 Serving Suggestions

    • For a tasty stir fry meal, consider pairing it with a few simple sides to enhance the experience.
    • A light Cucumber Salad with a sesame dressing adds a refreshing crunch, while Crispy Spring Rolls offer a delightful textural contrast.
    • Steamed greens like Baby Bok Choy or kale provide a healthy and vibrant complement.
    • Kick off the meal with a warm bowl of Miso Soup for a comforting start, and consider adding kimchi for a spicy, tangy kick that enhances the robust flavors of the stir fry.
    • These stir fry side dishes bring variety and balance, making your meal both satisfying and complete.
    Tofu stir fried noodles with mushroom.

    🍽 More Fantastic Recipes

    • Hawaiian Garlic Shrimp.
      Hawaiian Garlic Shrimp Recipe (20 Minutes, So Flavorful!)
    • Mango and Pineapple Salsa in a white bowl.
      Mango and Pineapple Salsa (Perfect With Fish)
    • Carrot And Raisin Salad With Pineapple.
      Carrot And Raisin Salad With Pineapple
    • Cold Chicken Pasta Salad With Italian Dressing.
      Cold Chicken Pasta Salad With Italian Dressing

    Did you make this recipe? Leave a review and a ⭐⭐⭐⭐⭐ rating below, or tag us in our Facebook Group! Alternatively, bookmark it in your browser or save to Pinterest.

    Tofu Stir Fry Noodles With Mushroom.

    Tofu Stir Fry Noodles

    Angela Milnes
    Whip up a deliciously satisfying meal with this Tofu Stir Fry Noodles! Tender tofu, crisp veggies, and perfectly cooked noodles are tossed in a savory, umami-rich sauce. It's a quick and easy dish that's packed with flavor, making it a perfect weeknight dinner!
    5 from 4 votes
    Print Recipe Pin Recipe Rate this Recipe
    Prep Time 1 hour hr
    Cook Time 5 minutes mins
    Additional Time 0 minutes mins
    Total Time 1 hour hr 5 minutes mins
    Course Vegan
    Cuisine Japanese
    Servings 3 Servings
    Calories 342 kcal

    Equipment

    • Large Frying Pan
    • Wok (Optional)

    Ingredients
      

    • 1 Package Extra Firm Tofu
    • ¼ cup Low Sodium Soy Sauce
    • 1 tablespoon Honey
    • 1 tablespoon Sesame Oil
    • ¼ cup Rice Wine Vinegar
    • 2 tablespoon Water
    • 1 teaspoon Garlic Powder
    • 1 teaspoon Onion Powder
    • ½ teaspoon Smoked Paprika
    • 1 Package Microwaveable Udon Noodles
    • ½ cup Bell Pepper diced
    • ½ cup Broccoli diced
    • ½ cup White Button Mushrooms diced
    • ½ cup Water Chestnuts diced
    • 1 teaspoon Cornstarch
    • 1 teaspoon Sesame Seeds
    • ¼ Cup Scallions

    Instructions
     

    • Wrap the tofu in a clean towel and press it for at least 30 minutes to remove excess water. Then, cut it into 1-inch squares.
    • Mix the marinade ingredients in a small bowl. Soak the tofu cubes in the marinade, making sure they are evenly coated. Let them sit for at least 30 minutes.
    • Heat a nonstick skillet over medium heat and place the tofu cubes in a single layer, setting aside the leftover marinade. Fry each side for 1-2 minutes until golden and crispy.
    • Remove the tofu from the skillet and set it aside.In the same skillet, add the chopped vegetables and cook for 2-3 minutes until they begin to soften.
    • Prepare the noodles according to the package instructions.
    • Mix 1 teaspoon of cornstarch into the remaining marinade.
    • Remove the skillet from the heat. Add the cooked noodles, thickened marinade, and sautéed vegetables, mixing well to allow the cornstarch to thicken the sauce from the residual heat.
    • Return the fried tofu to the skillet and gently mix to reheat the tofu.
    • Serve the stir fry garnished with sesame seeds or scallions, as you like.

    Notes

    Opt for fresh mushrooms and clean them gently with a damp cloth instead of washing under water, which can cause them to absorb moisture and become soggy when cooked.

    Nutrition

    Calories: 342kcalCarbohydrates: 47gProtein: 20gFat: 12gSaturated Fat: 2gPolyunsaturated Fat: 6gMonounsaturated Fat: 4gSodium: 792mgPotassium: 822mgFiber: 14gSugar: 9gVitamin A: 554IUVitamin C: 16mgCalcium: 374mgIron: 7mg
    Print Recipe Pin Recipe Rate this Recipe
    Tried this recipe?Let us know how it was!

    More Fantastic Vegan Recipes

    • Vegan Beetroot And Black Bean Burger
    • Vegan Pumpkin Waffles
    • Raw Vegan Bread
    • Vegan Mango Chutney
    • Vegan Avocado Toast
    Tofu stir fried noodles.

    21+ Cold Dip Recipes For Your Party

    August 27, 2024 by Angela Milnes

    Lobster meat recipe ideas.

    Looking to impress your guests with some delicious and refreshing appetizers? Cold Dip recipes are the perfect solution for your next party! Easy to prepare and full of flavor, these dips are ideal for pairing with a variety of snacks like fresh veggies, crispy chips, or warm bread. Dive into these crowd-pleasing cold dip recipes and add a tasty twist to your party spread.

    Cold dip recipes for a party.
    [feast_advanced_jump_to]

    Why We Love Cold Dips

    Cold dips are a party favorite for many reasons. They are incredibly versatile, offering a wide range of flavors and textures to suit any palate. These dips are also easy to prepare ahead of time, making party planning a breeze. Whether you prefer creamy, tangy, or spicy, cold dips can be customized to your liking with fresh, healthy ingredients. Perfect for any occasion, they pair wonderfully with veggies, chips, or bread, making them a crowd-pleasing addition to any gathering. Plus, their refreshing coolness is especially delightful on a warm day, providing a tasty and satisfying snack that's both delicious and convenient.

    Why not try our Caramalized Onion Dip Greek Yogurt Recipe, our tasty Smoked Salmon Dip or this tasty Slow Cooker Spinach Artichoke Dip.

    21+ Easy Party Cold Dip Recipes 

    Dutch Creamy Leek Dip

    This Dutch Creamy Leek Dip is a unique and flavorful option for your party. Its smooth, rich texture and delicate leek flavor make it a standout appetizer that pairs perfectly with crackers or fresh veggies.

    Creamy leek dip in a bowl served with carrots and bread.

    Cream Cheese Crudite Dip

    Cream Cheese Crudite Dip is a classic, crowd-pleasing option. It’s creamy, tangy, and perfect for dipping an array of fresh, crisp vegetables. Your guests will love the simplicity and flavor!

    Cream cheese dip in a bowl topped with cherry tomatoes.

    Jalapeno Corn Dip

    Add a little spice to your party with Jalapeno Corn Dip. This dip combines sweet corn with spicy jalapenos for a deliciously zesty snack that's perfect with tortilla chips or fresh veggies.

    Jalapeno corn dip in a bowl.

    Smoked Queso And Chorizo Dip

    Smoked Queso And Chorizo Dip brings a smoky, savory flavor that’s hard to resist. This hearty dip is perfect for pairing with crispy chips and is sure to be a hit at your gathering.

    Smoked queso dip in a skillet.

    Pesto Rosso Dip

    Pesto Rosso Dip is a vibrant and flavorful addition to your party spread. Made with sun-dried tomatoes and fresh basil, this dip is perfect with breadsticks, crackers, or fresh veggies.

    Pesto rosso in a bowl.

    Creamy White Bean Dip 

    Creamy White Bean Dip is a smooth and delicious option for your appetizer table. Its mild, creamy flavor pairs well with a variety of dippers, making it a versatile and crowd-pleasing choice.

    White bean dip served with naan bread.

    Red Pepper Hummus Dip

    Red Pepper Hummus Dip is a delicious twist on classic hummus. The roasted red peppers add a sweet, smoky flavor that’s perfect for dipping fresh veggies or pita bread.

    Red pepper hummus.

    Instant Pot Salsa Dip

    Instant Pot Salsa Dip is a quick and easy way to impress your guests. This fresh, flavorful dip is perfect for pairing with tortilla chips and adds a refreshing, tangy touch to your party snacks.

    Tomato salsa dip in a bowl.

    Loaded Layered Hummus Dip

    Loaded Layered Hummus Dip is a fun and tasty twist on traditional hummus. With layers of fresh veggies, olives, and feta, it’s a colorful and flavorful dip that's perfect with pita chips or veggies.

    Loaded layered hummus dip.

    Pistachio Pesto Dip 

    Pistachio Pesto Dip offers a nutty and herby flavor that’s both unique and delicious. Serve it with breadsticks, crackers, or fresh vegetables for a delightful appetizer.

    Pistachio pesto dip in a bowl.

    Mexican Layered Dip

    Mexican Layered Dip is a party favorite with its layers of beans, guacamole, salsa, and cheese. It’s a hearty and flavorful dip that pairs perfectly with tortilla chips.

    Mexican layered dip with layers of beans, guacamole, salsa, and cheese.

    Cream Cheese Shrimp Dip

    Cream Cheese Shrimp Dip is a creamy and indulgent option that’s sure to impress. The combination of cream cheese and shrimp creates a rich and flavorful dip that's perfect with crackers or bread.

    Cream cheese shrimp dip served with nachos.

    Dill Pickle Dip 

    Dill Pickle Dip is a tangy and refreshing choice for pickle lovers. Its unique flavor pairs wonderfully with chips or fresh veggies, adding a zesty twist to your appetizer spread.

    Dill pickle dip served nachos.

    Green Dip

    Green Dip is a vibrant, herb-packed dip that’s delicious. Perfect for dipping fresh veggies or bread, it’s a refreshing and flavorful addition to your party.

    Green dip.

    Blue Cheese Roasted Pecan Dip

    Blue Cheese Roasted Pecan Dip combines the bold flavor of blue cheese with the crunch of roasted pecans. This dip is a sophisticated and tasty option that pairs well with crackers or fresh veggies.

    Blue cheese pecan dip in a bowl.

    Slow Cooker Spinach Artichoke Dip

    Slow Cooker Spinach Artichoke Dip is a warm, creamy favorite that can also be served chilled. Packed with spinach and artichokes, it’s a flavorful and hearty dip perfect for any gathering.

    Spinach artichoke dip.

    Greek Beetroot Dip 

    Greek Beetroot Dip is a vibrant and healthy option that’s sure to stand out. The sweet and earthy flavor of beets combined with Greek yogurt makes it a delicious and visually appealing dip.

    Beetroot dip in a bowl.

    Creamy Whipped Feta Dip

    Creamy Whipped Feta Dip  is a rich and tangy dip that's perfect with fresh veggies or pita bread. The smooth, creamy texture and bold flavor make it a party favorite.

    Whipped feta dip.

    Artichoke Parmesan Dip 

    Artichoke Parmesan Dip  is a cheesy, savory delight that's perfect for any party. Serve it with crackers or bread for a deliciously rich appetizer that’s sure to be a hit.

    Artichoke parmesan dip in a bowl.

    Homemade Tzakziki Sauce

    Homemade Tzakziki Sauce is a refreshing, cucumber-yogurt dip that's perfect for a light and healthy appetizer. Pair it with fresh veggies or pita bread for a cool and creamy treat.

    Greek tzatziki dip in a bowl.

    Creamy Miso Mayo Dipping Sauce

    Creamy Miso Mayo Dipping Sauce is a unique and flavorful dip that adds an umami kick to your appetizer spread. Perfect for dipping veggies or as a spread for sandwiches.

    Miso mayo dip in a bowl.

    Smoked Salmon Dip 

    Smoked Salmon Dip is a rich and indulgent dip that’s perfect for a sophisticated appetizer. The smoky flavor of the salmon combined with creamy ingredients makes it a delicious choice for crackers or bread.

    Smoked salmon dip in a bowl.

    Extra Tips for Making Cold Dips

    1. Use Fresh Ingredients: Fresh herbs, vegetables, and high-quality dairy products can make a significant difference in flavor.
    2. Balance Flavors: Aim for a good mix of flavors—sweet, salty, tangy, and spicy—to create a well-rounded dip.
    3. Texture Matters: Consider the texture of your dip; a combination of smooth and chunky ingredients can add an interesting contrast.
    4. Chill Properly: Allow enough time for your dip to chill in the refrigerator. This helps the flavors to meld together and enhances the overall taste.
    5. Add Crunch: Incorporate ingredients like nuts, seeds, or finely chopped vegetables for a delightful crunch.
    6. Taste and Adjust: Always taste your dip before serving and adjust the seasoning if necessary. Sometimes a little extra salt, lemon juice, or spice can make all the difference.
    7. Garnish: A sprinkle of fresh herbs, a drizzle of olive oil, or a dash of paprika can add a final touch of flavor and make your dip visually appealing.
    8. Pairing: Serve with a variety of dippers like fresh veggies, crackers, chips, or bread to accommodate different preferences.

    More Easy Party Appetizers To Try!

    • Mini Cheese Stuffed Peppers
    • Beetroot Hummus Recipe
    • Pizza Monkey Bread
    • Salmon Sushi Balls
    • Veggie Train With Bell Peppers

    21 Healthy Zucchini Recipes

    August 26, 2024 by Angela Milnes

    Zucchini recipe ideas.

    Looking to spice up your dinner routine? Zucchini is your answer! This versatile veggie can be transformed into delightful dishes that your family will love. As a busy mom, I appreciate how nutritious, delicious, and easy zucchini recipes can be. From comforting bakes to light soups, zucchini has you covered. Dive into these 21 Healthy Zucchini Recipes and find new family favorites for dinner tonight!

    Healthy Zucchini Summer Recipes For family Meals.
    [feast_advanced_jump_to]

    Why Add Zucchini To Your Meals?

    Cooking zucchini can be fun and tasty. Whether it’s grilled zucchini, grated, sliced, or roasted, zucchini adds a fresh and versatile twist to your dishes. Its mild flavor pairs well with a variety of ingredients, making it a perfect addition to any meal. Plus, it’s packed with nutrients and low in calories, making it a healthy choice for your family.

    21 Zucchini Recipe Ideas You'll Love

    Try these favorite zucchini recipes today!

    Baked Zucchini And Squash

    Baked Zucchini And Squash is a simple, delicious way to enjoy these veggies, featuring yellow squash as a key ingredient along with zucchini. With a light seasoning and a quick bake in the oven, this dish is..........

    Baked Zucchini And Squash.

    Zucchini Egg Bake Nests With Kale

    Start your day right with Zucchini Egg Bake Nests With Kale These savory nests are packed with protein and veggies, making them a perfect, wholesome breakfast or brunch option.

    Tomato Zucchini Pie

    Tomato Zucchini Pie is a delightful blend of fresh tomatoes, zucchini, and cheese in a flaky crust. It’s a beautiful and tasty dish that's great for lunch or dinner.

    Tomato Zucchini Pie.

    Low Carb Zucchini Fritters

    Enjoy a healthy twist on a classic with Low Carb Zucchini Fritters. These crispy, golden fritters are light, flavorful, and perfect as a snack or side dish.

    Low Carb Zucchini Fritters.

    Panko Crusted Baked Zucchini Fries

    Crunchy on the outside and tender on the inside, Panko Crusted Baked Zucchini Fries are a delicious and healthier alternative to traditional fries. They’re a hit with kids and adults alike!

    Panko Crusted Baked Zucchini Fries.

    Cold Zucchini Soup

    Cool off with a refreshing bowl of Cold Zucchini Soup. This chilled soup is light, creamy, and packed with flavor, making it perfect for hot summer days.

    Cold Zucchini Soup.

    Zucchini Rice Gratin

    Zucchini Rice Gratin is a comforting and cheesy dish that combines tender zucchini with creamy rice. It’s an easy, satisfying meal that’s perfect for any night of the week.

    Parmesan Roasted Zucchini Slices

    Parmesan Roasted Zucchini Slices are a crispy, cheesy delight that make the perfect side dish or snack. Made with Parmesan cheese, olive oil, and fresh basil, they are both flavorful and easy.

    Parmesan Roasted Zucchini Slices.

    Pizza Zucchini Boats

    Enjoy a fun and healthy twist on pizza with Pizza Zucchini Boats. Loaded with your favorite toppings, these zucchini boats are a delicious way to satisfy pizza cravings without the guilt.

    Pizza Zucchini Boats.

    Zucchini Quiche With Cheddar And Herbs

    Zucchini Quiche With Cheddar And Herbs is a savory, cheesy delight. Packed with fresh herbs and zucchini, this quiche is perfect for brunch, lunch, or a light dinner.

    Zucchini Quiche With Cheddar And Herbs.

    Zucchini Fritter Mediterranean Rice Bowls

    Zucchini Fritter Mediterranean Rice Bowls are a flavorful and nutritious meal. With crispy zucchini fritters, fresh veggies, and a tangy dressing, these bowls are a delicious way to enjoy a healthy dinner.

    Zucchini Fritter Mediterranean Rice Bowls.

    Zucchini Casserole

    Zucchini Casserole is a comforting dish that’s easy to make and packed with flavor. Layers of zucchini, cheese, and a creamy sauce make this casserole a family favorite.

    Zucchini Casserole.

    Parmesan Squash And Tomato Bake

    Parmesan Squash And Tomato Bake is a colorful and delicious side dish. The combination of fresh tomatoes, squash, and Parmesan cheese makes this bake a crowd-pleaser.

    Parmesan Squash And Tomato Bake.

    Feta Scallion Zucchini Fritters In Tomato Sauce

    Feta Scallion Zucchini Fritters In Tomato sauce are a savory and satisfying meal. The crispy fritters pair perfectly with the rich, tangy tomato sauce for a dish that’s full of flavor.

    Feta Scallion Zucchini Fritters In Tomato Sauce.

    Zucchini Mushroom Pasta

    Zucchini Mushroom Pasta is a light and flavorful dish that’s perfect for any night of the week. Using zucchini pasta as a healthy and low-carb alternative to traditional pasta, this dish combines tender zucchini, earthy mushrooms, and pasta for a delicious.

    Zucchini Mushroom Pasta.

    Zucchini Vegan Kofta Curry

    Zucchini Vegan Kofta Curry is a hearty and flavorful dish that’s perfect for vegan and vegetarian diets. The zucchini koftas are packed with spices and simmered in a rich curry sauce.

    Zucchini kofta curry in a bowl.

    Cheesy Zucchini Chicken And Rice

    Cheesy Zucchini Chicken And Rice is a comforting and easy-to-make dinner. The combination of tender chicken, zucchini, and cheesy rice makes this dish a hit with the whole family.

    Cheesy Zucchini Chicken And Rice.

    Chicken Meatballs With Zucchini Noodles

    Low Carb Chicken Meatballs With Zucchini Noodles are a healthy and delicious meal. The zucchini noodles are a great low-carb alternative to pasta, and the chicken meatballs are flavorful and tender.

    Chicken Meatballs With Zucchini Noodles.

    Loaded Zucchini Hummus

    Loaded Zucchini Hummus is a creamy and nutritious dip that’s perfect for snacking or as an appetizer. Packed with fresh zucchini and topped with your favorite garnishes, it’s a delicious twist on traditional hummus.

    Loaded Zucchini Hummus.

    Zucchini Dal

    Zucchini Moon Dal is a warm and comforting dish that’s packed with flavor. The combination of lentils and zucchini makes this dal a nutritious and satisfying meal.

    Zucchini Dal.

    Enjoy Zucchini Meals In Your Home Today!

    Cook zucchini today and try one of these fantastic zucchini recipe ideas! For a quick and easy side dish, consider a sauteed zucchini recipe that is low carb, gluten-free, and can be enhanced with garlic and butter.

    If you Love Zucchini Try These Zucchini Bread Recipes

    Try these Healthy Zucchini Bread recipes in this post: Zucchini Baking Ideas You'll Love. `

    More Tasty Recipes Collections To Check Out:

    • 20 Cozy Winter Soup Recipes
    • Best Lobster Meat Recipes You’ll Love
    • 31 Best Christmas Finger Foods
    • 15+ Sheet Pan Meals: Recipes Packed With Veggies
    • 21 Delicious Sriracha Recipes
    • 15+ Summer Pasta Salad Recipes
    • New Years Charcuterie Board
    • 21+ Easy Salmon Recipes To Try
    • 21 Tasty Cinco De Mayo Recipes

    15+ Sheet Pan Meals: Recipes Packed With Veggies

    August 26, 2024 by Angela Milnes

    Sheet pan meal ideas.

    Looking for easy and nutritious meal ideas? Sheet pan recipes are your answer! These dishes are not only simple to prepare but also packed with a variety of delicious veggies, like bell peppers. Perfect for busy weeknights or lazy weekends, sheet pan meals offer a hassle-free way to get a wholesome dinner on the table. Toss your ingredients with olive oil before roasting for even cooking and enhanced flavor. Grab your baking sheet and dive into these 15+ Sheet Pan Recipes, and discover how effortless and tasty eating healthy can be!

    15+ Sheet Pan Meals: Recipes Packed With Veggies
    [feast_advanced_jump_to]

    Why Make Sheet Pan Meals?

    Sheet pan meals are a game-changer for busy households. They’re incredibly easy to prepare, requiring minimal cleanup and effort, especially when using a rimmed baking sheet. By cooking everything on one pan, you save time and reduce kitchen mess. Plus, they’re versatile and perfect for packing in a variety of nutritious veggies, making it simple to create balanced, flavorful meals your family will love.

    15 Easy Sheet Pan Dinner Recipes With Vegetables

    Sheet Pan Chicken Fajitas

    These Sheet Pan Chicken Fajitas are a fiesta of flavors with tender chicken and vibrant veggies like bell peppers, all cooked to perfection on one pan. Perfect for a quick and easy family dinner that everyone will love!

    Sheet Pan Chicken Fajitas.

    Sheet Pan Gnocchi

    Say goodbye to boiling water and hello to crispy, golden gnocchi with roasted veggies, all cooked together on a single sheet pan. Sheet Pan Gnocchi is a comforting, easy meal that's ready in no time!

    Sheet Pan Gnocchi Is One Of The Sheet Pan Meals.

    Sheet Pan Salmon With Vegetables

    Enjoy a heart-healthy dinner with this Sheet Pan Salmon And Vegetables recipe. The salmon turns out perfectly tender, and the veggies, including brussels sprouts, are roasted to perfection, making this dish both nutritious and delicious.

    Sheet Pan Salmon With Vegetables.

    Sheet Pan Thai Chicken

    Spice up your dinner routine with Sheet Pan Thai Chicken bursting with exotic flavors and colorful vegetables. It's an easy way to bring a taste of Thailand to your kitchen without the hassle.

    Sheet Pan Thai Chicken.

    Sheet Pan Rainbow Cauliflower

    Brighten up your dinner table with Sheet Pan Rainbow Cauliflower. This vibrant, veggie-packed dish, featuring cherry tomatoes, is as beautiful as it is delicious, making healthy eating a delight.

    Sheet Pan Rainbow Cauliflower.

    Sheet Pan Mediterranean Shrimp

    Take a culinary trip to the Mediterranean with this easy and flavorful Sheet Pan Mediterranean Shrimp recipe. The combination of shrimp, veggies, and herbs creates a dish that's light, fresh, and satisfying.

    Sheet Pan Mediterranean Shrimp.

    Sheet Pan Bratwurst And Roasted Vegetables

    Enjoy the hearty flavors of bratwurst paired with perfectly roasted vegetables, all cooked together on one sheet pan. Season the vegetables with garlic powder, Italian seasoning, salt, and pepper for an enhanced flavor and aroma. Sheet Pan Bratwurst And Roasted Vegetables is a no-fuss, satisfying meal that’s perfect for busy nights.

    Sheet Pan Bratwurst And Roasted Vegetables.

    Fall Sheet Pork Tenderloin With Balsamic Roasted Vegetables

    Embrace the flavors of fall with this Sheet Pork Tenderloin With Balsamic Roasted Vegetables. It’s a cozy, comforting meal that’s easy to prepare and perfect for the cooler months, featuring sweet potatoes that add sweetness and creaminess when roasted.

    Fall Sheet Pork Tenderloin With Balsamic Roasted Vegetables.

    Chicken Thigh Tray Bake

    Juicy chicken thighs and a medley of vegetables make this Chicken Thigh Tray Bake a family favorite. It's an easy, one-pan dinner that's both hearty and healthy.

    Chicken Thigh Tray Bake.

    Sheet Pan Lemon Pepper Chicken, Green Beans And Potatoes

    This Sheet Pan Lemon Pepper Chicken, Green Beans And Potatoes is a classic, simple, and delicious dinner option. The zesty lemon pepper seasoning adds a refreshing twist to this wholesome meal, and a sprinkle of Parmesan cheese on top enhances both flavor and presentation.

    Sheet Pan Lemon Pepper Chicken, Green Beans And Potatoes.

    Sheet Pan Greek Chicken Veggies

    Enjoy the fresh and vibrant flavors of the Mediterranean with this Sheet Pan Greek Chicken Veggies recipe. It's a healthy and delicious dinner that's perfect for any night of the week.

    Sheet Pan Greek Chicken Veggies.

    Sheet Pan Sausage And Veggies

    This Sheet Pan Sausage And Veggies recipe is a quick, easy, and flavorful vegetable dinner, perfect for busy weeknights. It’s a go-to meal your family will love.

    Sheet Pan Sausage And Veggies.

    Sheet Pan Chicken sausage, Peppers And Onion

    Enjoy the classic combination of chicken sausage, peppers, and onions with this easy sheet pan recipe. Sheet Pan Chicken sausage, Peppers And Onion is a delicious, hassle-free meal that's perfect for any night of the week.

    Sheet Pan Chicken sausage, Peppers And Onion.

    Sheet Pan Mediterranean Cod

    Delight in the fresh flavors of this Sheet Pan Mediterranean Cod. The combination of flaky cod, roasted veggies, and Mediterranean seasonings makes for a light and delicious meal.

    Sheet Pan Mediterranean Cod.

    Sheet Pan Chicken Caprese

    This Sheet Pan Chicken Caprese is a beautiful and tasty way to enjoy the classic flavors of caprese salad in a warm, satisfying meal. It's easy, fresh, and perfect for busy nights.

    Sheet Pan Chicken Caprese.

    Sheet Pan Autumn Chicken And Veg

    Celebrate the flavors of autumn with this Sheet Pan Autumn Chicken And Veg recipe. It's a cozy and nutritious meal that brings the best of fall produce to your dinner table.

    Sheet Pan Autumn Chicken And Veg.

    Try Sheet Pan Dinners This Week!

    With their simplicity, minimal cleanup, and delicious flavors, sheet pan dinners are a perfect choice for busy weeknights. Packed with nutritious veggies and endless variety, these meals make healthy eating easy and enjoyable. Give these Veggie Inspired Sheet Pan Recipes a try and discover your new favorite go-to dinners. Happy cooking!

    More Simple Veggie Recipes To Try

    • Mediterranean Orzo Salad With Lemon Vinaigrette
    • Mini Cheese Stuffed Peppers
    • Parmesan Roasted Zucchini
    • Air Fryer Asparagus With Parmesan
    • Cheesy Mashed Cauliflower

    Creamy Italian Sausage And Broccoli Pasta (With Mascarpone)

    August 26, 2024 by Angela Milnes

    Italian sausage and broccoli pasta in a skillet.

    Need a quick, flavor-packed dinner? This Italian Sausage & Broccoli Pasta is a one-pan wonder—savory sausage, crisp broccoli, and orecchiette pasta tossed in a creamy mascarpone sauce. Ready in 20 minutes, it’s perfect for busy nights!

    Italian sausage and broccoli pasta in a skillet.

    There’s something so cozy and satisfying about pasta with Italian sausage and broccoli—and I’ve made a version of this dish in almost every form over the years. Whether I’m whipping it up with leftover roasted veggies or sneaking in greens for my kiddo, it always hits the spot. The creamy mascarpone gives it that “fancy pasta night” feel with barely any effort, and orecchiette is one of those pastas that makes every bite feel intentional.

    If you’re into quick, hearty dinners like Unstuffed Cabbage Roll Soup or Creamy Oven Baked Mac and Cheese, this one’s calling your name.

    [feast_advanced_jump_to]

    💖 Why This Recipe Works

    • Quick and Easy: Ready in about 20 minutes, this sausage, broccoli and pasta dish is perfect for busy weeknights.
    • Rich and Comforting: Combines savory sausage with creamy mascarpone for a comforting meal.
    • Healthy Balance: Packed with nutritious broccoli, this sausage pasta is both delicious and good for you.

    ⭐ Star Ingredients

    Italian Sausage Pasta Ingredients.
    • Orecchiette Pasta – These little “ears” are sauce magnets. They scoop up sausage and mascarpone like champs.
    • Italian Sausage – Go mild for kid-friendliness or spicy for grown-up heat. Either way, it's your flavor anchor.
    • Broccoli Florets – Tossed right into the pasta water—easy, fast, and perfectly tender-crisp.
    • Mascarpone Cheese – The secret to that dreamy, melt-in-your-mouth sauce without a fuss.

    For the complete list of ingredients with measurements and instructions, please see the recipe card at the bottom of the post.

    📖  Substitutions & Variations

    Experiment with different types of sausage to change the flavor profile of your broccoli pasta dish.

    • Chicken Sausage: A lighter swap that still packs flavor.
    • Spicy Sausage: If you enjoy a kick, opt for a spicier sausage like hot Italian sausage or even chorizo to add some heat.
    • Plant-Based Sausage – Want to keep it meat-free? Use your favorite vegetarian or vegan sausage. Look for Italian-style versions with fennel or herbs to keep those classic flavors.
    • No Mascarpone? – Use cream cheese, or blend heavy cream with a spoonful of Parmesan.

    Want a veggie-packed pasta alternative? Try Sweet Potato Gnocchi or Cheesy Mashed Cauliflower.

    🔪 How To Make Italian Sausage And Broccoli Pasta

    Here’s how to make this delicious creamy broccoli sausage pasta dish:

    Chopped onion added to cooked sausage in a skillet.
    1. Step 1: Cook the orecchiette in boiling water for 9 minutes. While it cooks, brown the sausage in a pan over medium heat for 3-4 minutes. Add the diced shallot and sauté for 2 minutes, then stir in minced garlic and red pepper flakes if desired.
    Broccoli added to cooked sausage.
    1. Step 2: When the pasta has about 4 minutes left to cook, add the broccoli florets to the boiling water. Let them cook for 2 minutes. Using a strainer or ladle, transfer the broccoli from the pot to the pan with the sausage. Stir to mix well.
    Mascarpone cheese added to pasta.
    1. Step 3: Once the pasta is cooked, drain it and return it to the pot. Add the mascarpone cheese and stir until the cheese is completely melted and coats the pasta evenly.
    Italian sausage and broccoli pasta in a pan.
    1. Step 4: Add the cheesy pasta to the pan with the sausage and broccoli. Mix everything together to distribute the flavors. Plate up the pasta and enjoy your meal!

    💡Hint: Don’t overcook the broccoli—you want it bright green and just tender for the perfect bite.

    Italian sausage and pasta.

    👩‍🍳 Expert Tips

    • Use high-quality sausage for the best flavor payoff—fresh links or butcher bulk sausage work beautifully.
    • Let the mascarpone come to room temp before adding so it melts faster and more evenly.
    • Serve immediately—this dish is best when the sauce is freshly melted and creamy.

    💭 FAQs

    Can I Make Sausage And Broccoli Pasta Gluten Free?

    Yes, you can easily make this dish gluten-free by substituting the orecchiette with your favorite gluten-free pasta. Just be sure to check the packaging for cooking times as they may vary.

    What Can I Use Instead Of Mascarpone Cheese?

    If you don’t have mascarpone cheese, you can use cream cheese for a similar creamy texture. Alternatively, a mix of heavy cream and a little extra Parmesan can also work well to create a rich and flavorful sauce.

    Can I Cook The Broccoli Separately?

    You can! If you prefer roasted broccoli, toss it in olive oil and roast at 425°F for 15 minutes, then mix it in at the end.

    What’s The Best Way To Store Sausage And Broccoli Pasta?

    Refrigerate in a sealed container for 3–4 days. For longer storage, freeze up to 2 months and thaw in the fridge overnight before reheating.

    💖 Serving Suggestions

    Pair this creamy, cheesy pasta with:

    • Pizza Garlic Bread – Because sauce deserves scooping.
    • Roasted Beets – For a sweet, earthy contrast.
    • Parmesan Roasted Zucchini – Adds crisp texture and complements the creamy sauce.
    • Citrus Roasted Beets – Bright and zippy to balance richness.
    • Simple Avocado Salad – Fresh, green, and light.
    Italian sausage and broccoli pasta in a skillet.

    🍽 More Tasty Pasta Dishes

    • Creamy Cajun Pasta Sauce with Parmesan.
      Creamy Cajun Pasta Sauce with Parmesan
    • Slow Cooker Chicken Bacon Ranch Pasta.
      Slow Cooker Chicken Bacon Ranch Pasta
    • Instant Pot Cacio E Pepe Pasta.
      Instant Pot Cacio E Pepe Pasta
    • Cowboy Butter Pasta In Creamy Sauce, Topped with sliced lemons.
      Cowboy Butter Pasta In Creamy Sauce

    Did you make this recipe? Leave a review and a ⭐⭐⭐⭐⭐ rating below, or tag us in our Facebook Group! Alternatively, bookmark it in your browser or save to Pinterest.

    Italian sausage and broccoli pasta in a skillet.

    Italian Sausage And Broccoli Pasta

    Angela Milnes
    Indulge in a comforting bowl of Sausage Pasta with broccoli! Juicy Italian sausage, tender broccoli, and perfectly cooked pasta come together in a savory, garlic-infused sauce. It's a hearty, flavorful dish that's quick to make and sure to satisfy your cravings!
    5 from 4 votes
    Print Recipe Pin Recipe Rate this Recipe
    Prep Time 5 minutes mins
    Cook Time 10 minutes mins
    Additional Time 0 minutes mins
    Total Time 15 minutes mins
    Course Dinners
    Cuisine Italian
    Servings 4 Servings
    Calories 870 kcal

    Ingredients
      

    • 2 cups Orecchiette Pasta
    • 16 oz Mild Italian Sausage
    • 3 cups Broccoli Florets
    • 1 Shallot diced (about ¼ cup)
    • ½ tablespoon Minced Garlic
    • 8 oz Mascarpone Cheese
    • ½ cup Grated Parmesan Cheese
    • ½ teaspoon Red Pepper Flakes optional depending on heat preference

    Instructions
     

    • Cook the orecchiette in a pot of boiling water. Set a timer for 9 minutes.
    • While the pasta cooks, brown the sausage in a pan over medium heat, which should take about 3-4 minutes
    • To the sausage, add the diced shallot and sauté for 2 minutes. Then, stir in the minced garlic and red pepper flakes if using.
    • When the pasta has about 4 minutes left to cook, add the broccoli florets to the boiling water. Let them cook for 2 minutes.
    • Using a strainer or ladle, transfer the broccoli from the pot to the pan with the sausage. Stir to mix well.
    • Once the pasta is cooked, drain it and return it to the pot. Add the mascarpone cheese and stir until the cheese is completely melted and coats the pasta evenly.
    • Add the cheesy pasta to the pan with the sausage and broccoli. Mix everything together to distribute the flavors.

    Notes

    Choose high-quality Italian sausage for the best flavor. You can use either mild or spicy sausage based on your heat preference.

    Nutrition

    Serving: 1gCalories: 870kcalCarbohydrates: 38gProtein: 31gFat: 65gSaturated Fat: 31gPolyunsaturated Fat: 5gMonounsaturated Fat: 17gCholesterol: 154mgSodium: 1109mgPotassium: 642mgFiber: 3gSugar: 3gVitamin A: 1402IUVitamin C: 64mgCalcium: 257mgIron: 3mg
    Print Recipe Pin Recipe Rate this Recipe
    Tried this recipe?Let us know how it was!

    Air Fryer Chicken Cutlets Panko Recipe

    August 26, 2024 by Angela Milnes

    Air Fryer Chicken Cutlets Panko Recipe.

    This Air Fryer Chicken Cutlets Panko recipe is crispy, juicy, and ready in under 25 minutes! It’s a lighter, mess-free way to enjoy golden chicken cutlets—perfect for busy nights.

    Air Fryer Chicken Cutlets Panko On A Wooden Board.

    As someone who’s tested dozens of air fryer recipes, I can confidently say this method nails the crunch factor without deep-frying. Learning how to make air fryer chicken cutlets taste like your favorite pan-fried version is all about smart prep, seasoning well, and choosing the right breadcrumbs.

    These panko-crusted cutlets are weeknight heroes: fast, golden, and consistently juicy. Pair them with my Air Fryer Roasted Vegetables or some Almond Milk Mashed Potatoes for a comfort meal made simple.

    [feast_advanced_jump_to]

    💖 Why This Recipe Works

    • Crispy & Crunchy: Panko breadcrumbs create that perfect golden crust.
    • Quick & Easy: Dinner on the table in under 25 minutes.
    • Healthier Than Frying: All the crisp, none of the grease.

    ⭐ Star Ingredients

    Chicken cutlets ingredients.
    • Chicken Breasts: Sliced thin and pounded evenly—they cook fast and stay juicy.
    • Panko Breadcrumbs: My go-to for ultimate crunch. They’re lighter and crispier than regular breadcrumbs. Plus, they brown beautifully in the air fryer. Japanese-style panko gives the lightest crunch, while Italian panko adds flavor but browns quicker.
    • Eggs: Help the crumbs stick for an even, golden coating.
    • Flour: A quick dredge in flour makes the coating super clingy and crisp.

    💡 No-Mess Tip: Use parchment rounds or silicone air fryer liners for easy cleanup and less scrubbing.

    For the complete list of ingredients with measurements and instructions, please see the recipe card at the bottom of the post.

    📖  Substitutions & Variations

    • Lemon Herb Chicken Cutlets: Marinate in lemon juice, garlic, and herbs before breading.
    • Parmesan Panko Chicken: Mix grated Parmesan into the breadcrumbs.
    • Herb-Infused: Add dried thyme, oregano, or parsley to the breading.
    • Spicy Kick: Sprinkle cayenne or smoked paprika into the crumb mix.
    • Gluten-Free Option: Use gluten-free panko and almond flour for a GF version.

    Want more crispy air fryer ideas? Try these Baked Parmesan Broccoli Chips or my crunchy Air Fryer Zucchini Fritters.

    🔪 How To Make Air Fryer Chicken Cutlets

    Cutting chicken breasts on chopping board.
    1. Step 1: Warm the air fryer to 380°F (190°C) for approximately 3-5 minutes. Cut each chicken breast horizontally into two thinner slices, yielding four pieces altogether.
    Panko breadcrumbs and egg in separate bowls.
    1. Step 2: Beat the eggs in a shallow bowl. In another bowl, mix panko breadcrumbs with salt and pepper. Put flour in a third bowl. Coat each chicken piece in flour, dip it in the eggs, and then cover it with the panko mixture, pressing the breadcrumbs to ensure they stick.
    Coated chicken breasts in an a air fryer.
    1. Step 3: Arrange the coated chicken cutlets in the air fryer basket in a single layer without overlapping. Lightly mist the chicken cutlets with cooking spray.
    Air fried chicken cutlets in a air fryer basket.
    1. Step 4: Air fry at 380°F (190°C) for 23 minutes, turning the cutlets over halfway through, until they are golden brown and fully cooked. Remove the chicken cutlets from the air fryer and let them sit for a few minutes to cool slightly before serving.

    💡 Hint: Wondering how long to cook chicken cutlets in air fryer? The sweet spot is 23–24 minutes total at 380°F, flipping halfway for even crisp.

    Air fried chicken cutlets on a plate served with lemon slices.

    👩‍🍳 Expert Tips

    • Even Thickness = Even Cooking: Pound chicken to uniform thickness so it cooks evenly.
    • Don’t Crowd the Basket: Cook in batches if needed to keep things crispy.
    • Double Dip for Extra Crunch: Re-coat in egg and panko if you like a thicker crust—just like a schnitzel-style finish!
    • Freeze It: Bread raw cutlets and freeze flat in a single layer. Store in freezer-safe bags for quick future dinners.
    • Freezer Prep Tip: Bread the cutlets, freeze flat, and store in a zip-top bag. When ready to cook, air fry from frozen or thaw overnight in the fridge.

    💭 FAQs

    Can I use regular breadcrumbs instead of panko for this recipe?

    Yes, you can substitute regular breadcrumbs for panko, but keep in mind that panko provides a crispier texture. If you prefer a slightly softer coating, regular breadcrumbs will work just fine.

    Can I prepare these chicken cutlets in advance?

    Absolutely! You can bread the chicken cutlets ahead of time and refrigerate them for a few hours. Just make sure to let them come to room temperature before air frying, so they cook evenly.

    What internal temperature should chicken cutlets reach?

    Always cook until golden and the internal temperature hits 165°F to ensure they’re safe and perfectly juicy.

    Can I freeze air fried chicken cutlets?

    Yes! You can freeze breaded raw cutlets or cooked leftovers. Reheat in the air fryer for best texture.

    What the best dipping sauce for air fryer chicken cutlets?

    Herby ranch dressing, honey mustard, or a spicy mayo all pair beautifully.

    Best way to store chicken cutlets?

    Store in an airtight container in the fridge for 3–4 days. Reheat in the air fryer to keep the crust crisp.

    💖 Serving Suggestions

    Pair your chicken cutlets with low-fuss sides like:

    • Steamed Green Beans
    • Parmesan Asparagus
    • Red Cabbage Slaw
    • Spicy Korean Cucumber Salad:
    • Air Fryer Corn On The Cob:

    Try serving leftovers sliced over salad or stuffed into wraps for lunch!

    Air fried chicken cutlet panko.

    🍽 More Easy Chicken Dinners

    • Slow Cooker Chicken Bacon Ranch Pasta.
      Slow Cooker Chicken Bacon Ranch Pasta
    • Sheet Pan Chicken Fajitas.
      Sheet Pan Chicken Fajitas
    • Instant Pot Chicken Adobo.
      Instant Pot Chicken Adobo
    • Baked Honey Mustard Chicken Tenders.
      Honey Mustard Chicken Tenders

    Did you make this recipe? Leave a review and a ⭐⭐⭐⭐⭐ rating below, or tag us in our Facebook Group! Alternatively, bookmark it in your browser or save to Pinterest.

    Air Fryer Chicken Cutlets Panko Recipe.

    Air Fryer Chicken Cutlets Panko Recipe

    Angela Milnes
    Crisp, golden, and irresistibly delicious—these Air Fryer Chicken Cutlets with Panko are a must-try! Coated in crunchy panko breadcrumbs, these cutlets cook up perfectly in the air fryer, delivering a satisfying crunch with every bite. It’s a simple, healthier take on a classic favorite!
    5 from 4 votes
    Print Recipe Pin Recipe Rate this Recipe
    Prep Time 5 minutes mins
    Cook Time 23 minutes mins
    Additional Time 0 minutes mins
    Total Time 28 minutes mins
    Course Dinners
    Cuisine American
    Servings 2 Servings
    Calories 437 kcal

    Ingredients
      

    • 2 Chicken Breasts
    • ½ cup Panko Breadcrumbs
    • 1 teaspoon Salt
    • ½ teaspoon Black Pepper
    • 2 eggs
    • ¼ cup All Purpose Flour
    • Cooking Spray

    Instructions
     

    • Warm the air fryer to 380°F (190°C) for approximately 3-5 minutes.
    • Cut each chicken breast horizontally into two thinner slices, yielding four pieces altogether.
    • Beat the eggs in a shallow bowl.
    • In a separate shallow bowl, combine the panko breadcrumbs with salt and black pepper.
    • Place the flour in another shallow bowl.
    • First, coat each piece of chicken in flour, then dip it into the beaten eggs, and finally, cover it thoroughly with the panko mixture, pressing the breadcrumbs into the chicken to ensure they stick.
    • Arrange the coated chicken cutlets in the air fryer basket in a single layer without overlapping.
    • Lightly mist the chicken cutlets with cooking spray.
    • Air fry at 380°F (190°C) for 23 minutes, turning the cutlets over halfway through, until they are golden brown and fully cooked.
    • Remove the chicken cutlets from the air fryer and let them sit for a few minutes to cool slightly before serving.

    Notes

    Even Sizing: Ensure your chicken cutlets are of even thickness to promote uniform cooking. You can pound them with a meat mallet to achieve the desired thickness.
    Pat Dry: Before breading, pat the chicken dry with paper towels. This helps the egg wash and panko adhere better, resulting in a crispier coating.
    Seasoning: Season both the flour and panko breadcrumbs with your favorite spices. This adds extra flavor to your cutlets. Consider adding garlic powder, paprika, or Italian seasoning.
    Double Coating: For an extra crunchy exterior, double-dip the chicken. First, dip it in the flour mixture, then the egg wash, and finally in the panko. Repeat the egg wash and panko steps for an extra-thick crust.

    Nutrition

    Serving: 1gCalories: 437kcalCarbohydrates: 23gProtein: 57gFat: 11gSaturated Fat: 3gPolyunsaturated Fat: 2gMonounsaturated Fat: 4gTrans Fat: 0.04gCholesterol: 308mgSodium: 2179mgPotassium: 943mgFiber: 1gSugar: 1gVitamin A: 305IUVitamin C: 3mgCalcium: 67mgIron: 3mg
    Print Recipe Pin Recipe Rate this Recipe
    Tried this recipe?Let us know how it was!

    Crispy Air Fryer Baby Bella Mushrooms

    August 26, 2024 by Angela Milnes

    Air Fryer Baby Bella Mushrooms.

    Crispy air fryer baby bella mushrooms are the ultimate snack hack—crispy, savory, and ready in minutes. Whether you're hosting a party or just need a quick side, these little bites deliver big flavor with minimal effort.

    Air fryer baby bella mushrooms on a plate.

    Mushrooms are having their moment—and baby bellas are the star of the show. They’re hearty, packed with flavor, and roast up like a dream in the air fryer. Plus, they’re the perfect way to sneak in a little extra nutrition without anyone noticing.

    If you’re into easy veggie snacks, you’ll love my Crispy Air Fryer Beet Chips, Air Fryer Cauliflower Bites, and these amazing Air Fryer Onion Rings With Cheese!

    [feast_advanced_jump_to]

    💖 Why This Recipe Works

    • Quick & Easy: Ready in under 15 minutes with just a few pantry staples.
    • Flavor-Packed: Garlic, herbs, and just the right amount of seasoning.
    • Crispy Texture: You get restaurant-style crispy air fryer mushrooms without deep frying.
    • Healthy Choice: A low carb mushroom snack that's big on flavor and light on guilt.

    🍄‍🟫 Star Ingredients

    air fryer baby bella mushrooms ingredients.
    • Baby Bella Mushrooms: Also known as cremini mushrooms, these guys bring a deep, earthy flavor and meaty texture that holds up well in the air fryer.
    • Avocado Oil: High smoke point = crispy perfection without burning.
    • Garlic: Fresh garlic brings bold, aromatic flavor to every bite.
    • Dried Parsley: Just a little sprinkle adds color and herbaceous depth.

    For the complete list of ingredients with measurements and instructions, please see the recipe card at the bottom of the post.

    Are Baby Bella Mushrooms Good for You?

    Absolutely! These mushrooms are low in calories but high in antioxidants like selenium and ergothioneine. They’re also a great source of potassium and B vitamins—aka brain-boosting, immunity-supporting goodness.

    ⭐ Make It Seasonal

    Switch up the herbs and spices to match the vibe of the season:

    • Spring: Add lemon zest and fresh dill for a bright, herby twist.
    • Summer: Toss in fresh basil and cherry tomatoes for a Mediterranean flair.
    • Fall: Mix with a touch of smoked paprika and rosemary for cozy, warming flavor.
    • Winter: Serve with a balsamic glaze and thyme—great for holiday grazing boards.

    Want more to round out the plate? Pair these with this Healthy Quinoa Salad Recipe or serve alongside our Spinach and Ricotta Bake for a veggie-powered dinner win.

    🔪 How To Air Fry Baby Bella Mushrooms

    Mixing the sliced mushrooms, avocado oil, and minced garlic in a bowl.
    1. Step 1: Prep: Clean and slice 16 oz of baby bella mushrooms. Pat mushrooms dry with a clean towel and let them air dry for 10–15 minutes if possible—this helps them crisp instead of steam. Toss with 2 tablespoon avocado oil, 2 minced garlic cloves, ½ teaspoon salt, ¼ teaspoon black pepper, and 1 teaspoon dried parsley..
    Sliced baby bella mushrooms mixture in an air fryer basket.
    1. Step 2: Place the seasoned mushrooms in the air fryer basket, arranging them in a single layer for even cooking. Air fry the mushrooms at 390°F (200°C) for 7-9 minutes, shaking halfway through.
    Air fried baby bella mushrooms on a plate.
    1. Step 3: Let mushrooms rest for 1–2 minutes after cooking—this allows steam to escape and keeps the edges nice and crispy. Once done, remove the mushrooms from the air fryer and place them on a serving plate.

    👩‍🍳 Expert Tips

    • Don't Crowd the Basket: Air flow is everything—work in batches if needed.
    • Even Slicing = Even Cooking: Try to keep mushrooms a similar size.
    • Garlic Watch: Minced garlic can burn fast—toss halfway to prevent this.

    💭 FAQs

    Can I use different types of mushrooms for air fryer mushrooms?

    Absolutely! White button or chopped portobellos also work beautifully.

    Do I need to preheat my air fryer for air fried mushrooms?

    Yes. A preheated basket gives you the crispiest, most even results.

    How do I store leftover Air Fryer Baby Bella Mushrooms?

    Keep in an airtight container in the fridge for up to 3 days. Reheat in the air fryer to crisp them back up.

    Can I add cheese to the mushrooms before air frying?

    Absolutely! Adding a sprinkle of cheese like parmesan or mozzarella on top of the mushrooms before air frying can add extra flavor and a delicious cheesy crust. Just keep an eye on them, as cheese can melt and potentially burn if left too long.

    💖 Serving Suggestions

    Here are some of the best ways to serve Air Fryer Baby Bella Mushrooms:

    • Appetizer Platter: Pair with Homeamde Garlic Parm Sauce or your favorite creamy dip.
    • Toss in a Salad: Add your mushrooms to a Simple Avocado Salad for an instant upgrade.
    • Pasta Add-In: Mix into creamy pasta or Pesto Pasta Noodles Recipe.
    • Grain Bowl Topper: Layer with Roasted Veggies and grains.
    • Stuff a Wrap: Add with Beet Hummus, spinach, and roasted peppers.
    • Next to Eggs: Serve with poached or Scrambled Eggs for a protein-packed breakfast.
    Air fried baby bella mushrooms in a bowl served with lemon slices.

    🍽 Try These Mushroom Recipes

    • Easy Skillet Pan Gnocchi And Mushrooms.
      Easy Skillet Pan Gnocchi And Mushrooms
    • best stuffed mushrooms.
      The Best Stuffed Mushrooms
    • Keto Coq Au Vin.
      Keto Coq Au Vin
    • Tofu Stir Fry Noodles With Mushroom.
      Tofu Stir Fry Noodles With Mushroom

    Did you make this recipe? Leave a review and a ⭐⭐⭐⭐⭐ rating below, or tag us in our Facebook Group! Alternatively, bookmark it in your browser or save to Pinterest.

    Air Fryer Baby Bella Mushrooms.

    Air Fryer Baby Bella Mushrooms

    Angela Milnes
    Get ready for a savory treat with these Air Fryer Baby Bella Mushrooms! These bite-sized mushrooms are cooked to perfection in the air fryer, bringing out their rich, earthy flavor with a delightful crispiness. They’re a quick and tasty appetizer or side dish that’s sure to impress!
    5 from 3 votes
    Print Recipe Pin Recipe Rate this Recipe
    Prep Time 5 minutes mins
    Cook Time 9 minutes mins
    Additional Time 0 minutes mins
    Total Time 14 minutes mins
    Course Vegetables
    Cuisine American
    Servings 3 Serving
    Calories 62 kcal

    Ingredients
      

    • 250 grams Sliced Baby Bella Mushrooms
    • 1 tablespoon Avocado Oil
    • 1 teaspoon Minced Garlic or 1 Garlic Clove Crushed.
    • ½ teaspoon Salt
    • ¼ teaspoon Black Pepper
    • ¼ teaspoon Dried Parsley

    Instructions
     

    • Mix the sliced mushrooms, avocado oil, minced garlic, salt, black pepper, and dried parsley in a bowl until the mushrooms are fully coated with the oil and spices.
    • Heat the air fryer to 390°F (200°C) and allow it to warm up for about 3-5 minutes.
    • Place the seasoned mushrooms in the air fryer basket, arranging them in a single layer for even cooking.
    • Air fry the mushrooms at 390°F (200°C) for 7-9 minutes, shaking the basket halfway through to promote uniform cooking.
    • Once done, carefully remove the mushrooms from the air fryer and place them on a serving plate.
    • Serve the mushrooms right away as a tasty accompaniment or incorporate them into salads, pasta dishes, or as a garnish for rice.

    Notes

    Choose Fresh Mushrooms: Select firm, unblemished baby bella mushrooms for the best flavor and texture.
    Clean Properly: Gently wipe mushrooms with a damp cloth or paper towel to remove dirt. Avoid soaking them in water as mushrooms can absorb moisture, which can affect the texture.
    Even Slicing: Slice mushrooms evenly to ensure they cook uniformly. You can also leave smaller mushrooms whole for variety in texture.

    Nutrition

    Calories: 62kcalCarbohydrates: 3gProtein: 3gFat: 5gSaturated Fat: 1gPolyunsaturated Fat: 1gMonounsaturated Fat: 3gSodium: 586mgPotassium: 272mgFiber: 1gSugar: 2gVitamin A: 0.3IUVitamin C: 2mgCalcium: 6mgIron: 0.5mg
    Print Recipe Pin Recipe Rate this Recipe
    Tried this recipe?Let us know how it was!

    Crispy Mashed Potato Cakes

    August 26, 2024 by Angela Milnes

    Crispy Mashed Potato Cakes.

    These Crispy Mashed Potato Cakes! are a fantastic way to repurpose those extra spuds into something spectacular. Mixed with sharp cheddar, fresh parsley, and a touch of seasoning, each cake fries up to a golden perfection. They’re irresistibly crispy on the outside and wonderfully soft on the inside. Serve your Crispy Potato Cakes as a side dish, a fun appetizer, or a tasty snack — no matter the occasion, they're sure to be a hit!

    crispy mashed potato cakes.
    [feast_advanced_jump_to]

    Why This Recipe Works

    • Perfect For Leftovers: This Crispy Potato Cakes recipe is a brilliant way to use up leftover mashed potatoes, turning them into a new and exciting dish.
    • Deliciously Crispy: The outside of each cake cooks to a perfect golden crisp, offering a satisfying texture contrast to the soft, creamy interior.
    • Versatile: Serve them as a hearty breakfast side, a comforting dinner addition, or even a casual appetizer with a dollop of sour cream.

    🥘 Ingredients

    mashed potato cakes ingredients
    • Vegetable Oil: Used for frying, ensures a crispy exterior.
    • Mashed Potatoes: The creamy base of the cakes, perfect for using leftovers.
    • Shredded Cheddar: Adds a sharp, cheesy flavor.
    • Large Egg: Acts as a binder, enhancing the cakes' texture.
    • Finely Chopped Parsley: Provides a fresh, herby flavor and a pop of color.
    • Salt: Essential for enhancing all the flavors in the dish.
    • All Purpose Flour (optional): Helps stabilize the mixture if it's too moist, making frying easier.
    • Sour Cream: Served on the side for a cool, tangy contrast to the warm cakes.

    For the complete list of ingredients with measurements and instructions, please see the recipe card at the bottom of the post.

    📖  Substitutions & Variations

    • Garlicky Mashed Potato Cakes: Enhance your potato cakes by adding finely minced garlic or garlic powder to the mashed potato mix. This adds a robust flavor that garlic lovers will adore. For an extra garlicky kick, mix some roasted garlic into the potatoes before forming the cakes.
    • Cheesy Jalapeño Potato Cakes: Incorporate shredded jalapeño cheese and finely chopped jalapeños into your potato mixture for a spicy twist. The cheese melts during frying, providing a gooey texture with a spicy kick that pairs well with a cool dollop of sour cream.
    • Herbed Potato Cakes: Mix in a selection of finely chopped fresh herbs like chives, parsley, and thyme. This not only adds color but also a fresh, aromatic taste that elevates the simple potato cake.
    • Sweet Potatoes: Using sweet potatoes as a substitute in your mashed potato cakes can bring a delightful twist to the traditional recipe. Sweet potatoes are rich in flavor and nutrients, offering a naturally sweet taste that contrasts beautifully with savory ingredients.

    🔪 How To Make Potato Cakes With Leftover Mash

    Learn how to make these fried potato cakes with by following these steps. This method ensures your mashed potato cakes come out crispy on the outside and tender on the inside, perfect for a quick snack or side dish.

    mashed potato cake mixture in a bowl

    Step One: Heat a large skillet over medium heat and add enough oil to cover at least half the thickness of the cakes. In a mixing bowl, add the mashed potatoes, beaten egg, shredded cheese, and salt.

    mashed potato cake mixture in a bowl

    Step Two: Mix all ingredients well. If the mixture seems too thin, add flour one tablespoon at a time until the mixture holds together well.

    shaping mashed potato cakes

    Step Three: Scoop out portions of the potato mixture and flatten them into pancake shapes.

    frying mashed potato cakes

    Step Four: Place the cakes in the skillet and cook until golden brown, about 2 minutes on each side. After cooking, transfer the cakes to a paper towel-lined plate to absorb any excess oil. Serve the potato cakes warm with your choice of sour cream, ketchup, hot sauce, or just enjoy them plain!

    crispy mashed potato cakes

    👩‍🍳 Expert Tips

    • Dry Your Potatoes Well: If your mashed potatoes are moist, spread them out on a baking sheet and briefly place them in a warm oven to dry out a bit. Removing excess moisture helps the cakes get crispier when fried and prevents them from becoming soggy.
    • Ensure Even Cooking: Keep all the potato cakes the same thickness and size to ensure they cook evenly. This uniformity prevents some cakes from burning while others may still be getting crispy.
    • Preheat Your Oil: Make sure your oil is hot enough before adding the cakes. Test it by dropping a small bit of the mixture into the oil; if it sizzles right away, the oil is ready. Hot oil seals the exterior quickly, making the cakes crispy rather than greasy.

    💭 FAQs

    Can I Make Vegan Potato Cakes?

    For a vegan version of potato cakes, substitute the egg and cheese with a binding alternative like mashed avocado, a flaxseed meal mixed with water, or commercial vegan egg replacer.

    How To Make Potato Cakes Crispy Not Soggy?

    To ensure your potato cakes are crispy and not soggy, cook them in a hot pan with plenty of oil, allow ample space between them to prevent steaming, and add a bit of flour or breadcrumbs to the mixture if it's too moist.

    Best Way to Store Potato Cakes

    Place leftover potato cakes in an airtight container and store them in the refrigerator. They will keep well for up to 3-4 days. For longer storage, you can freeze your potato cakes. First, let them cool completely, then place them in a single layer on a baking sheet. Once frozen, transfer your potato cakes into a freezer safe bag or container. Store for up to 2 months.

    🧂Serving Suggestions

    Here are some of the best sides to serve with Crispy Mashed Potato Cakes:

    • Sour Cream or Greek Yogurt: Top potato cakes with a dollop of sour cream or Greek yogurt for a creamy texture and a slight tang.
    • Fresh Salads: Serve alongside a crisp Mediterranean Salad, Red Cabbage Coleslaw, or try this Korean Cucumber Salad to balance the richness of the potato cakes.
    • Cured Salmon: For a luxurious brunch, top potato cakes with Cured Beet Salmon, a touch of cream cheese, and capers.
    • Roasted Vegetables: Pair with Roasted Asparagus, Roasted Peppers, or Roasted Brussels Sprouts for a wholesome dinner.
    • Cooked Meats: Serve potato cakes as a side with Thinly Sliced Chicken Breast, Steak, Baby Back Ribs or Pork Chops for a filling meal.
    • Sauces and Dips: Try them with various dips like Tzatziki, Garlic Aioli, or even a Spicy Instant Pot Salsa for added flavor.
    crispy mashed potato cakes

    🍽 Related Recipes

    • Honey Roasted Parsnips and Carrots on a white plate.
      Honey Roasted Parsnips and Carrots
    • Wholewheat Einkorn Crackers.
      Whole Grain Einkorn Crackers With Chia Seeds And Parmesan
    • Best Butternut Squash Soup.
      Best Butternut Squash Soup
    • Chopped Greek Salad in a bowl.
      Chopped Greek Salad with Feta & Olives (Bariatric-Friendly)

    Did you make this recipe? Leave a review and a ⭐⭐⭐⭐⭐ rating below, or tag us in our Facebook Group! Alternatively, bookmark it in your browser or save to Pinterest.

    Crispy Mashed Potato Cakes.

    Crispy Mashed Potato Cakes

    Angela Milnes
    Transform your leftover mashed potatoes into something special with these Crispy Mashed Potato Cakes! Golden and crunchy on the outside, soft and fluffy on the inside, these savory cakes are the perfect side dish or snack. Easy to make and irresistibly delicious!
    5 from 3 votes
    Print Recipe Pin Recipe Rate this Recipe
    Prep Time 5 minutes mins
    Cook Time 12 minutes mins
    Additional Time 0 minutes mins
    Total Time 17 minutes mins
    Course Appetizers
    Cuisine American
    Servings 12 Servings
    Calories 79 kcal

    Ingredients
      

    • 1 tablespoon Vegetable Oil for frying
    • 2 ½ cups Mashed Potatoes
    • ½ cup Cheddar Shredded
    • 1 Egg beaten
    • 1 tablespoon Parsley Finely Chopped
    • ½ teaspoon Salt
    • 1 tablespoon Sour Cream for serving
    • 1 tablespoon All Purpose Flour optional: If you need to thicken the mixture

    Instructions
     

    • Heat a large skillet over medium heat and add enough oil to cover at least half the thickness of the cakes.
    • In a mixing bowl, combine the mashed potatoes, beaten egg, shredded cheese, and salt. If the mixture seems too thin, add flour one tablespoon at a time until the mixture holds together well.
    • Scoop out portions of the potato mixture and flatten them into pancake shapes.
    • Place the cakes in the skillet and cook until golden brown, about 2 minutes on each side.
    • After cooking, transfer the cakes to a paper towel-lined plate to absorb any excess oil.
    • Serve the potato cakes warm with your choice of sour cream, ketchup, hot sauce, or just enjoy them plain!

    Notes

    If your mashed potatoes are moist, spread them out on a baking sheet and briefly place them in a warm oven to dry out a bit. Removing excess moisture helps the cakes get crispier when fried and prevents them from becoming soggy.

    Nutrition

    Calories: 79kcalCarbohydrates: 12gProtein: 2gFat: 3gSaturated Fat: 1gPolyunsaturated Fat: 1gMonounsaturated Fat: 0.4gTrans Fat: 0.01gCholesterol: 14mgSodium: 162mgPotassium: 146mgFiber: 1gSugar: 0.5gVitamin A: 55IUVitamin C: 11mgCalcium: 10mgIron: 0.3mg
    Print Recipe Pin Recipe Rate this Recipe
    Tried this recipe?Let us know how it was!

    Try These Tasty Appetizers Too!

    • Veggie Train With Bell Peppers
    • Greek Beetroot Dip
    • Beetroot Carpaccio
    • Best Stuffed Mushrooms
    • Air Fryer Hasselback Potatoes
    • Mini Cheese Stuffed Peppers

    Can You Freeze Bean Sprouts

    August 26, 2024 by Angela Milnes

    Bean sprouts on a plate.

    Bean sprouts, particularly mung bean sprouts, are a staple in many Asian dishes. Grow mung beans, and you’ll have fresh, crisp mung bean sprouts, which are ideal for stir-frying and other dishes. Their crisp texture and fresh taste make them a popular ingredient. But can you freeze bean sprouts? Learn our top tips and tricks for freezing bean sprouts correctly.

    Bean sprouts in a bowl. Can you freeze bean sprouts?
    [feast_advanced_jump_to]

    Can You Freeze Bean Sprouts?

    Yes, you can freeze bean sprouts, but it’s important to know that the texture may change after freezing. Fresh bean sprouts have a crispness that may become mushy when frozen. However, by following the correct steps, you can minimize these texture changes and maintain as much of their original crispness as possible.

    How To Freeze Bean Sprouts Properly?

    • Blanch Bean Sprouts: Quickly blanch the fresh bean sprouts by immersing them in the boiling water for about 3 minutes, then immediately transfer them to the ice water to stop the cooking process.
    • Drain and Dry the Bean Sprouts: Drain the bean sprouts thoroughly and lay them out on paper towels to dry. Ensuring that the sprouts are completely dry before freezing will help prevent ice crystals from forming, which can affect the texture.
    • Freeze in Single Layers: Spread dried bean sprouts on a baking sheet in a single layer and freeze. Once frozen solid, transfer to a resealable bag or airtight container to prevent clumping.
    • Store Bean Sprouts: Label the freezer bags or containers with the date, and store the frozen bean sprouts in the freezer.

    How To Defrost Bean Sprouts?

    • Refrigerator Method: When you're ready to use the frozen bean sprouts, you can defrost them by placing them in the refrigerator overnight to maintain the texture as much as possible.
    • Cold Water Method: If you’re in a hurry, you can defrost them in cold water, but avoid hot water, as it can make the sprouts too soft. Change the water every 25-30 minutes until they are thawed.
    • Avoid Microwave: Avoid using a microwave to defrost, as it can make the sprouts mushy.

    How Do You Use Frozen Bean Sprouts?

    • Soups: Toss the frozen mushy bean sprouts into hot soups just before serving. They will warm up quickly without becoming overly soft.
    • Noodle Dishes: Incorporate them into noodle dishes like pad Thai or Instant Pot Lo mein. Add them towards the end of cooking to ensure they remain slightly crisp.
    • As a Garnish: Enhance flavor by seasoning the sprouts with soy sauce, sesame oil, or a sprinkle of sesame seeds. Use them as a garnish for added texture on dishes like chickena and vegetable rice bowls.
    Cooked beansprouts and shrimp in a bowl.

    Can You Freeze Different Types Of Sprouts?

    While sprouted mung beans are the most commonly frozen, other types like alfalfa sprouts can also be frozen. The process is similar, but keep in mind that alfalfa sprouts are more delicate and may become even mushier after freezing. It’s best to use frozen alfalfa sprouts in dishes where the texture is less critical.

    Bean sprouts in a bowl.

    How To Keep Bean Sprouts Fresh Longer?

    If you’re not planning to freeze your bean sprouts but want to keep them fresh for as long as possible, store them in a bowl of cold water in the refrigerator. Change the water daily to maintain freshness. This method can keep your bean sprouts fresh for up to a week.

    FAQ'S

    How Long Should You Store Frozen Bean Sprouts For Optimal Quality?

    They can last for up to a year, but for the best quality, it’s recommended to use them within a few months.

    Does Freezing Affect The Flavor Of Bean Sprouts?

    Freezing can slightly alter the flavor of bean sprouts. While they maintain most of their original taste, some find that they lose a bit of their freshness and crispness, which can affect the overall flavor profile.

    Enjoy Frozen Bean Sprouts!

    Freezing bean sprouts is a practical way to extend their shelf life, especially if you have a large batch that you can't use immediately. While the texture may change after freezing, blanched and well-stored bean sprouts can still be a great addition to your cooked dishes. By following these steps, you can freeze bean sprouts and enjoy their flavor in your meals for months to come.

    Can You Freeze Tamales

    August 26, 2024 by Angela Milnes

    Tamales on a wooden board.

    Tamales are a beloved dish in many households, but what happens when you have too many to eat at once? Can you freeze tamales to enjoy them later without compromising their taste and texture? Let’s explore the ins and outs of freezing tamales, whether they are homemade, store-bought, cooked, or uncooked.

    can you freeze tamales? here are some tamales on a chopping board ready to be frozen.
    [feast_advanced_jump_to]

    Can You Freeze Tamales?

    Yes, you can freeze tamales. Whether you’re dealing with leftover tamales, homemade tamales, or a large batch that you want to store for later, freezing tamales is a practical way to preserve them.

    How To Freeze Tamales

    • Cool Completely: Before you freeze tamales, make sure they cool completely. This helps prevent freezer burn and preserves the texture of the tamale dough.
    • Wrap Each Tamale: Wrap each tamale individually in plastic wrap or aluminum foil. This protects them from drying out and freezer burn. Corn husk provides some protection, but additional wrapping ensures they stay fresh.
    • Use Freezer Bags or Containers: Place the wrapped tamales in freezer bags or a freezer-safe container. Arrange them in a single layer to avoid squishing them and remove excess air.
    • Label and Freeze: Label the freezer bags or containers with the date, and then place tamales in the freezer.

    Can You Freeze Uncooked Tamales?

    Yes, you can freeze uncooked tamales. If you’re making tamales in large batches, freezing some of them uncooked can save time later. Follow the same wrapping and storage steps, but place the uncooked tamales directly into the freezer in an airtight container without cooking them first. When ready to eat, thaw them in the fridge overnight and then steam them as usual.

    tamales

    How To Thaw Frozen Tamales

    • Thaw tamales in the refrigerator overnight to maintain the texture of the masa.
    • Do not thaw uncooked tamales at room temperature to avoid bacterial contamination.

    How To Reheat Frozen Tamales

    • Steaming: The most common method to reheat tamales is by steaming them. Place the tamales in steamer basket over boiling water. Steam the tamales for about 20-30 minutes until they are heated through.
    • Microwave: For a quicker option, you can reheat tamales in the microwave. Wrap each tamale in a damp paper towel and microwave on medium power for 2-3 minutes, or until warmed through. Be cautious, as microwaving can sometimes alter the texture of the masa dough.
    • Oven: You can also reheat tamales in the oven. Preheat the oven to 350°F (175°C). Place tamales on a baking sheet, wrap them in aluminum foil, and heat for about 15-20 minutes.

    What About The Taste And Texture?

    When properly frozen and reheated, tamales retain much of their original taste and texture. Cooked tamales maintain their flavor, while uncooked tamales taste just as fresh when cooked after freezing.

    Can You Freeze Tamales With Different Fillings?

    Yes, tamales with various fillings, whether they contain meat, cheese, or vegetables, can all be frozen. Just ensure that the fillings are fully cooked before freezing to maintain safety and quality.

    How To Enjoy Thawed And Reheated Tamales

    • Refried Beans: The creamy texture and savory taste of refried beans complement the masa dough in tamales, making them a classic combination.
    • Canned Black Bean And Corn Salsa and Homemade Guacamole: Fresh, tangy salsa and creamy guacamole add brightness and contrast to the rich, dense tamales, enhancing the overall taste experience.
    • Garlic Confit: The rich, buttery flavor of garlic confit can add a savory depth to tamales, especially if they’re filled with meats like pork or beef.
    • Orange Cranberry Sauce: This tangy and sweet sauce can offer a refreshing contrast to the earthy flavors of tamales, particularly if they have a savory filling. It’s a great option if you want to introduce a hint of sweetness to your meal.

    FAQ'S

    How Long Can You Store Tamales In The Freezer?

    Properly stored tamales can last in the freezer for up to 6 months without significant loss of flavor or texture.

    Is It Better To Freeze Tamales Uncooked Or Cooked?

    Both cooked and uncooked tamales freeze well. Freezing them uncooked allows you to have fresh-tasting tamales when you’re ready to cook them later.

    Try Freezing Tamales Today!

    Freezing tamales is a convenient way to preserve their delicious taste and texture for future meals. Whether you’re freezing cooked or uncooked tamales, following the right steps will ensure they stay fresh and flavorful. By wrapping them properly and storing them in airtight containers, you can enjoy tamales anytime, without any loss in quality.

    Can You Freeze Pepperoni?

    August 23, 2024 by Angela Milnes

    Pepperoni slices.

    Can You Freeze Pepperoni? The answer is yes! Discover the easy way to freeze pepperoni for longer freshness. Learn how freezing pepperoni can help you stock up and enjoy this tasty treat whenever you need it. Can you freeze pepperoni? Let's find out together!

    pepperoni slices
    [feast_advanced_jump_to]

    Can You Freeze Pepperoni Slices?

    Yes, you can freeze sliced pepperoni. Freezing pepperoni slices is a great way to extend their shelf life and ensure you always have this versatile ingredient on hand for pizzas or other dishes.

    How To Freeze Pepperoni?

    • Separate the pepperoni slices to avoid sticking.
    • Lay slices on a parchment-lined baking sheet without overlapping and freeze meat for about an hour.
    • Once frozen, transfer the slices to a heavy-duty freezer bag.
    • Remove as much air as possible from the bag to prevent freezer burn, then seal tightly.
    • Label the bag with the date and contents, then place in the freezer.

    Can You Freeze Pepperoni Rolls?

    Yes, you can freeze pepperoni rolls by wrapping them tightly in plastic wrap before placing them in an airtight freezer bag. This helps prevent freezer burn and keeps the rolls fresh during storage.

    Simply wrap each individual pepperoni roll securely in plastic wrap, ensuring it is well-sealed to maintain its flavor and texture. Once wrapped, place the rolls in a suitable container or bag, label them with the date, and store them in the freezer for future enjoyment.

    Can You Freeze Pepperoni Rolls?

    How Long Does Sliced Pepperoni Last In The Freezer?

    Pepperoni slices can last for approximately 6 to 8 months when stored correctly in airtight containers or freezer bags.

    How To Thaw Pepperoni?

    • Refrigerator Method: Transfer the pepperoni slices from the freezer to the refrigerator. Allow them to thaw overnight or for at least 8 to 9 hours. This method ensures a gradual and safe thaw.
    • Cold Water Method: If you need to defrost pepperoni slices quickly, place them in a sealed plastic bag and submerge in cold water. Change this water every 30 minutes until thawed, which usually takes about 1-2 hours.
    • Microwave Method: For a rapid thaw, use the defrost setting on your microwave. Place the pepperoni on a microwave-safe plate and defrost in short intervals, checking frequently to avoid partial cooking.

    Can You Refreeze Pepperoni?

    Refreezing pepperoni is possible, but it may affect the texture and flavor. If you choose to refreeze, make sure the frozen pepperoni was thawed in the refrigerator and hasn't been left out at room temperature for more than two hours. For best results, try to consume the pepperoni within a few weeks after refreezing.

    What To Do With Leftover Pepperoni?

    • Air Fryer Cauliflower Pizza: Use a few slices of pepperoni as a topping for a healthy cauliflower crust pizza made in the air fryer. Add your favorite veggies and cheese for a delicious, low-carb option.
    • Pepperoni Lasagna: Layer pepperoni slices into your lasagna along with the usual layers of pasta, ricotta cheese, marinara sauce, and mozzarella for a unique twist.
    • Pizza Pasta Casserole: Mix cooked pasta with marinara sauce, pepperoni, cheese, and any other favorite pizza toppings. Bake until bubbly for a comforting and hearty dish.
    • Antipasto Kabobs: Skewer pepperoni slices with cheese cubes, olives, cherry tomatoes, and other antipasto ingredients for a quick and tasty appetizer or snack.
    • Pepperoni Salad: Toss pepperoni slices into a fresh Chopped Italian Salad with greens, cherry tomatoes, cucumbers, olives, and a zesty Italian dressing for added flavor.
    can you freeze pepperoni slices?

    More Uses For Pepperoni

    • Pepperoni Dip: Mix chopped pepperoni with cream cheese, sour cream, and shredded cheese, then bake until hot and bubbly. Serve this delicious dip with your favorite Pull Apart Pizza Bread for a perfect appetizer.
    • Pepperoni Chips: Bake pepperoni slices until crispy to make a low-carb snack that's perfect for dipping or enjoying on its own.
    • Pepperoni Pizza Rolls: Wrap pepperoni and cheese in Pizza Dough, then bake until golden and gooey for a quick and easy snack or meal.

    FAQ'S

    What Meat Is Pepperoni?

    Pepperoni is a type of cured meat commonly found in delis. It is a popular choice among cured meats for its spicy flavor and is often used as a topping on pizzas, pasta dishes, and sandwiches.

    Where Does Pepperoni Come From?

    Pepperoni, a popular deli meat, has its origins in the United States. It was developed by Italian immigrants who adapted traditional salami recipes to create the spicier and flavorful pepperoni.

    Is Pepperoni Gluten Free?

    Pepperoni itself is typically gluten-free as it is made from a mixture of beef and pork, seasoned with spices. However, cross-contamination can occur during processing or packaging, so it’s essential to check the specific brand or product label to ensure it is gluten-free if you have gluten sensitivities or allergies.

    More helpful Food Tips

    • Best Substitute For Dijon Mustard
    • Fish Stock Substitute
    • What Is Shrimp Cocktail
    • Best Substitute For Sun Dried Tomatoes

    Can You Freeze Coleslaw?

    August 21, 2024 by Angela Milnes

    Coleslaw in plates ready to be served.

    Can You Freeze Coleslaw? As a busy mom who loves to maximize every meal, I’ve often wondered if coleslaw can be frozen. After some trial and error, I've discovered the best methods to keep that crunchy, tangy goodness intact. Join me as I share my top tips for freezing coleslaw the right way. Read on to learn more and make the most out of your coleslaw!

    Red cabbage coleslaw. Can you freeze coleslaw?
    [feast_advanced_jump_to]

    Can you freeze coleslaw?

    Yes, you can freeze coleslaw. Coleslaw is traditionally made with shredded cabbage, shredded carrots, and a mayo-based dressing along with seasonings. Coleslaw is usually served fresh for the best texture. However, you can still freeze coleslaw for convenience.

    Why Freeze Coleslaw?

    Freezing coleslaw, including leftover coleslaw, can be a practical solution for preserving excess portions and preventing food wastage. By freezing leftover coleslaw, you can extend it's shelf life and enjoy it later.

    Can you freeze coleslaw with mayonnaise in it?

    While you can freeze coleslaw with mayonnaise-based dressing, the mayo may affect the cabbage texture when frozen and thawed. To counter this, consider making freezer slaw with a vinegar-based dressing instead for optimal results when freezing.

    Cabbage coleslaw.

    How To Freeze Slaw the Right Way

    To Freeze Raw Cabbage Mix:

    • Blanching: Briefly blanch the cabbage to help preserve its texture and color. Submerge it in boiling water for a minute, then quickly transfer it to an ice bath to stop the cooking process.
    • Drain and Dry: Thoroughly drain and pat dry the cabbage to prevent freezer burn.
    • Portion and Pack: Divide the mix into portions and pack them into freezer bag or airtight containers. Remove excess air to prevent freezer burn.
    • Label and Freeze: Label the bags with the date and freeze them. Unprepared coleslaw mix can be stored in the freezer for up to 12 months.

    To Freeze Prepared Coleslaw Mix (with dressing):

    • Dressing Consideration: If the coleslaw is already mixed with a dressing, it’s best to use a vinegar-based dressing rather than a creamy one, as the latter can separate and become watery when thawed.
    • Freeze Flat: Spread the coleslaw mix in a thin layer in freezer bags and freeze flat for easier storage and quicker thawing.
    • Label and Freeze: Label the bags with the date and freeze them. Prepared coleslaw mix can be stored in the freezer for up to 3 months.

    Best way to defrost Coleslaw

    • Thaw in Refrigerator: Thaw coleslaw in the refrigerator overnight.
    • Drain Excess Liquid: Drain any excess liquid that may have accumulated during freezing and thawing.
    • Refresh Texture: If the texture of thawed coleslaw is too soft, you can add fresh cabbage or a fresh dressing to revive it.

    5 Delicious Recipes Using Coleslaw Mix

    • Keto Coleslaw: Create a keto-friendly coleslaw by mixing shredded raw cabbage with mayonnaise, apple cider vinegar, a low-carb sweetener, and mustard for a creamy and tangy side dish that complements any meal.
    • Pulled Pork Crunch: Combine Red Cabbage Coleslaw mix with Keto Pulled Pork for a flavorful and crunchy meal.
    • Coleslaw Wraps: Fill tortillas with freezer coleslaw, grilled chicken or tofu, green bell pepper, sliced avocado, and cilantro. Drizzle with lime juice for a refreshing twist.
    • Thai Chicken Fusion: Mix Chinese Chicken Salad with Thai Stir-Fry flavors for an exotic and satisfying dish.
    • Spicy Coleslaw Cheesesteak Quesadillas: Layer coleslaw mix, shredded cheese, black beans, and jalapeños between tortillas. Cook until crispy and serve with Black Bean And Corn Salsa and sour cream for a spicy twist on a classic quesadilla.

    More Useful Articles

    • The Gaps Diet And Pregnancy
    • Panzanella with Mozzarella

    Can You Freeze Oysters

    August 19, 2024 by Angela Milnes

    Oysters on ice.

    Can you freeze oysters? If you've ever had a surplus of these delicious shellfish and wondered how to keep them fresh, you're not alone. Freezing oysters can be the solution you're looking for, and it's really simple? Learn How to Freeze Oysters correctly with this simple guide.

    Oysters. Can you freeze oysters?
    [feast_advanced_jump_to]

    Can You Freeze Oysters?

    Yes, you can freeze oysters. Freezing oysters is a viable option to extend their shelf life. However, the process of freezing oysters requires careful handling to ensure they stay fresh and maintain their texture and flavor.

    Ways To Freeze oysters

    • Whole Oysters: This method is ideal if you have enough freezer space and want to keep the oysters intact for recipes that require oysters on the half shell.
    • Shucked Oysters: If you need to save space and plan to use the oysters in soups, stews, or other recipes where they don't need to be in the shell, this is the preferred method.

    How Do You Prepare Fresh Oysters for Freezing

    Before freezing oysters, it’s crucial to start with fresh, live oysters. A live oyster will have its shell tightly closed or will close it when tapped, indicating that it's still alive.

    To prepare, rinse the oyster shells under cold running water to remove any mud, sand, or debris. If you plan to shuck oysters before freezing, use a stiff brush to clean the shells thoroughly.

    How to Freeze Whole Oysters

    • Direct Freezing Method: Place the cleaned oysters with oyster shell in moisture-resistant freezer bags. Label with freezing date and place the packaged oysters in the coldest part of the freezer, ideally at a temperature of 0°F (-18°C) or lower.
    • Blanching Method: Boil oysters for 30 seconds, transfer to an ice bath. Place on a towel to drain, pat dry and then place the oysters in moisture-resistant freezer bag. Label oysters with the date and store in the coldest part of the freezer.

    How to Freeze Shucked Oysters

    • Collect Liquor: Carefully shuck oysters over a bowl to collect the oyster liquor, a flavorful juice that helps preserve the oyster meat during freezing.
    • Clean and Pour: Ensure all pieces of shell and sand are removed. Pour the collected liquor over the oysters.
    • Pack and Seal: Place oysters in a freezer-safe container or freezer bag. Seal the oyster bag or container tightly to prevent freezer burn, which can affect the oysters' texture and flavor.
    • Label and Freeze: Label the oyster container with the date to keep track of how long the oysters have been in the freezer.
    Oysters not in the shell.

    What Happens to Oyster Meat When Frozen?

    When oysters are frozen, the oyster meat can undergo changes in texture. Ice crystals form within the meat, which can lead to a slightly different mouthfeel when thawed. Despite this, frozen oysters can still be delicious, especially when used in cooked dishes like soups, chowders, and stews.

    How Long Can You Store Frozen Oysters?

    Frozen oysters can be stored in the freezer for up to 3 months. While they may be safe to eat beyond this period, the flavor and texture may begin to degrade.

    How to Thaw Frozen Oysters?

    • Refrigerator Thawing: Place the frozen oysters in the refrigerator and let them thaw slowly for about 24 hours. Once thawed, rinse the oysters under cold water to remove any ice crystals or debris.
    • Avoid Microwave: It’s not recommended to thaw oysters in the microwave, as this can cause uneven thawing and may start to cook the oysters, affecting their texture.

    How To Use Thawed Oysters in Recipes

    • Soups and Stews: Add thawed oysters to seafood soups or stews for a rich, briny flavor. They pair well with ingredients like potatoes, corn, and leeks.
    • Casseroles: Mix thawed oysters into casseroles with rice or pasta for a hearty meal. A creamy sauce can enhance their natural flavor, making the dish even more delectable.
    • Pasta Dishes: Toss thawed oysters with pasta, garlic, and a splash of white wine. Add some fresh herbs like parsley or basil for a burst of freshness.
    • Grilled or Baked: Place thawed oysters on the half shell, top with a mixture of breadcrumbs, Parmesan cheese, and herbs, then grill or bake until golden brown for a tasty appetizer.

    Can You Eat Thawed Oysters Raw?

    While it’s possible to eat thawed oysters raw, the only downside is that the texture may not be as firm as fresh oysters. For raw consumption, fresh oysters are generally preferred.

    oysters in a shell.
    FAQ'S

    Can You Refreeze Oysters?

    Yes, freezing oysters is possible, but it's not advisable to refreeze them once thawed. Refreezing alters texture, resulting in mushiness and flavor loss. It can also raise the risk of bacterial growth, impacting food safety. Only thaw the amount of oysters needed.
    Can You Freeze Other Shellfish Like Clams and Mussels?

    Yes, similar to oysters, you can freeze other shellfish such as clams and mussels. The process is much the same. Clam meat and mussels can also be used in various cooked dishes after thawing. Read here to learn more about Green Mussels V's Black Mussels.

    Freezing Oysters The Right Way!

    Freezing oysters is a practical way to preserve this delicious seafood for future use. Whether you freeze them shucked or in their shells, the key is to follow proper freezing and thawing methods to maintain their freshness and flavor. While there might be slight changes in texture, frozen oysters can still make for a tasty and convenient ingredient in your favorite recipes.

    More Tips For Freezing Different Foods:

    • Can You Freeze Scrambled Eggs
    • Can You Freeze Eggnog?
    • Can You Freeze Croissants
    • « Previous Page
    • 1
    • …
    • 8
    • 9
    • 10
    • 11
    • 12
    • …
    • 19
    • Next Page »
    Angela Milnes.

    Hi I'm Angela

    Welcome to Eat Your Beets where you'll find Healthy and Nutritious Family Recipes that are tasty and simple to cook.

    More About Me

    Spring Recipes

    • edamame stir fry in a white bowl.
      Easy Edamame Stir Fry (15-Minute Protein-Packed Side Dish)
    • Best Gravlax Salmon With Dill (Cured Salmon).
      Best Gravlax Salmon With Dill (Cured Salmon)
    • One Pan Chicken And Asparagus.
      One Pan Chicken And Asparagus
    • Chicken And Cabbage Stir Fry Recipe.
      Chicken And Cabbage Stir Fry Recipe
    • Zucchini Egg Bake Recipe.
      Best Zucchini Egg Bake Recipe
    • How To Make Sun Dried Tomatoes Without Oil.
      How To Make Sun Dried Tomatoes Without Oil – Easy Oven Method

    Popular Recipes 💗

    • best stuffed mushrooms.
      The Best Stuffed Mushrooms
    • Slow Cooker Chicken Bacon Ranch Pasta.
      Slow Cooker Chicken Bacon Ranch Pasta
    • Baked Ricotta On A Spoon.
      Bariatric Friendly Ricotta Bake Recipe
    • Fun Veggie Train With Bell Peppers.
      Fun Veggie Train With Bell Peppers
    • Best Blueberry Smoothie Bowl topped with fruit.
      Best Blueberry Smoothie Bowl Recipe
    • Grilled Eggplant With Lemon Dip.
      Grilled Eggplant With Lemon Dip
    • Air Fryer Asparagus with Parmesan.
      Air Fryer Asparagus with Parmesan
    • Sheet Pan Chicken Fajitas.
      Sheet Pan Chicken Fajitas

    Footer

    As Seen In

    As Seen In.
    • Facebook
    • Pinterest

    Privacy Policy

    Accessibility Policy

    ↑ Back To Top

    Copyright © 2025 | Eat Your Beets | All Rights Reserved

    Rate This Recipe

    Your vote:


    A rating is required
    A name is required
    An email is required