​

Eat Your Beets

  • About
  • Spring Recipes
  • Vegetables
  • Side Dishes
  • Recipe Index
menu icon
go to homepage
  • About
  • Spring Recipes
  • Vegetables
  • Side Dishes
  • Recipe Index
    • Facebook
    • Pinterest
  • subscribe
    search icon
    Homepage link
    • About
    • Spring Recipes
    • Vegetables
    • Side Dishes
    • Recipe Index
    • Facebook
    • Pinterest
  • ×
    Sign Up To Our Newsletter →
    Home » Recipe index

    Baked Spaghetti Squash

    May 9, 2024 by Angela Milnes

    Baked spaghetti squash on a tray.

    If you've been trying to cut carbs and are looking for a healthy and flavorful low-carb recipe, this Baked Spaghetti Squash recipe is perfect in more ways than one. The tender, buttery spaghetti squash noodles perfectly complement the savory sauce and the meat, making it one dish packed with deliciousness that's perfect for the whole family.

    Baked spaghetti squash on a tray.
    [feast_advanced_jump_to]

    💖 Why This Recipe Works

    • My favorite part about this recipe is that it is actually a super filling and comforting meal that I could make for the entire family.
    • I've made roasted spaghetti squash in the past, but the flavors and textures with this one is unmatched.
    • It truly has to be one of my favorite spaghetti squash recipes of all time.

    ⭐ Star Ingredients

    You'll need some simple pantry staples to make this baked spaghetti squash recipe.

    • Spaghetti squash: The main ingredient, it forms the base of this dish and gives it its characteristic texture.
    • Butter: Used for roasting the squash, it adds a rich, buttery flavor.
    • Tomatoes: Both chopped tomatoes and paste are used to create a flavorful sauce.
    • Aromatics: Onions and garlic lend depth to the flavor profile.
    • Ground sirloin: Adds a meaty, hearty element to the dish. Can be replaced with any lean ground meat.
    • Peppers: Red and green peppers add color, crunch, and a mild sweetness.
    • Herbs: Fresh basil and ground oregano infuse the dish with aroma and freshness.
    • Seasonings: A mix of Italian and spaghetti seasonings, seasoned pepper, garlic salt, and brown sugar enhance the overall flavor.
    • Parmesan cheese: Finishes the dish with a salty, tangy bite and a deliciously melty topping.

    How To Make The Baked Spaghetti Squash

    Ready with all the ingredients? Here's what you'll need to do to make this recipe.

    Step One: Rinse the squash in cold water, and pat dry with paper towels. With a sharp chef's knife, cut the spaghetti squash in half lengthwise, and with a spoon scoop out the seeds. Place the squash halves in a baking dish or a rimmed baking sheet, cut side up.

    Butternut squash halves.

    Step Two: Melt a teaspoon of butter in the microwave, brush it on the inside of the Squash, and bake at 350 for 45 to 50 minutes, or until done. Remove from oven, and cool. 

    Step Three: When the Squash is cool enough to handle, take a fork and shred the inside until the strands appear like spaghetti. Remove the noodles/strands, place them in a dish, and set aside.

    Step Four: Place the ground sirloin in a large skillet, sprinkle with garlic salt and seasoned pepper, and cook until well done. This will be the bulk of the filling for the baked spaghetti squash.

    Step Five: Drain grease from meat on paper towels and crumble the meat into a fine crumble. Leave on fresh paper towels to continue draining. 

    Step Six: Chop onion, and place in skillet with a teaspoon of butter, and sauté until onion is slightly browned. Return meat to skillet, and mix in onion.  Add canned tomatoes, and cut them into bite-size pieces. 

    Step Seven: Add tomato paste, fill the can with water 2 times, and add to skillet. Press clove of garlic, and add to skillet. Cut bell peppers into small pieces, and add to skillet. 

    Butternut spaghetti squash on a tray.

    Step Eight: Sprinkle Italian seasoning, oregano, sweet basil, seasoning, and brown sugar into skillet, and stir well.  Continue to cook for 30 minutes on medium to medium-low.

    Step Nine: Add squash strands to the skillet, and mix all together until blended. Remove the skillet from the stove, and spoon the mixture into the squash shells. 

    Step Ten: Top the baked spaghetti squash with Parmesan cheese, and bake for 30 minutes, or until cheese is browned and bubbly. Remove from oven, cool slightly, and serve with a small salad.

    Expert Tips And Tricks To Nail This Recipe

    Ready to give this baked spaghetti squash recipe a try? Here are some tips and tricks you might want to take note of.

    • I used seasoning salt and other seasoning mixes, but you could just stick to using salt and pepper if you want to keep it simple.
    • Red pepper flakes can be a good addition if you want a bit of heat into the mixture. Skip it if you prefer a mild flavor in your baked spaghetti squash
    • If you're using olive oil, make sure you don't use too much oil. A little goes a long way in this recipe. Remember that you just want to cook spaghetti squash until it is lightly browned.
    • Use a sharp knife to cut spaghetti squash perfectly. Use a fork to remove the squash strands and squash flesh such that it resembles the strands of spaghetti.
    • Make sure you place the squash upright on a parchment-lined baking sheet.
    • Add the cheese towards the end while cooking spaghetti squash. You could also use mozzarella cheese or cheddar cheese if you want to.
    • Chicken sausage can also be a great alternative to the ground sirloin I used for the recipe. You can crumble the sausage after it is done cooking and add it to the squash half.
    • If you're using chicken sausage or any processed meat, remember to control the amount of additional salt you're using, or you'll risk adding too much salt.
    • Don't forget to poke holes before roasting spaghetti squash, even after you cut in half. This will ensure that the winter squash doesn't explode in the oven and is cooked from within.

    How To Store Roasted Spaghetti Squash?

    • Cooling: Allow the baked spaghetti squash to cool to room temperature after baking.
    • Refrigeration: Store the cooled spaghetti squash in an airtight container or resealable plastic bag in the refrigerator.
    • Duration: Baked spaghetti squash can be stored in the refrigerator for 3 to 5 days.
    • Reheating: Reheat the spaghetti squash in the microwave or oven until warmed through before serving.

    💖 Serving Suggestions

    This baked spaghetti squash recipe is perfect as a pasta alternative, great for those on a low-carb diet.

    • Marinara Sauce: A classic choice, marinara sauce adds flavor and moisture to the spaghetti squash. You can serve it on top of the squash or toss the strands of squash in the sauce.
    • Pesto: Pesto, whether traditional basil or with a twist like sun-dried tomato or spinach, adds vibrant flavor to the spaghetti squash. Drizzle it over the squash or mix it in for a delicious combination.
    • Grilled or Roasted Vegetables: Grilled or roasted vegetables such as bell peppers, zucchini, eggplant, or cherry tomatoes complement the lightness of spaghetti squash and add extra flavor and texture.

    🍽 More Recipes To Try Next

    • Hawaiian Garlic Shrimp.
      Hawaiian Garlic Shrimp Recipe (20 Minutes, So Flavorful!)
    • Mango and Pineapple Salsa in a white bowl.
      Mango and Pineapple Salsa (Perfect With Fish)
    • Carrot And Raisin Salad With Pineapple.
      Carrot And Raisin Salad With Pineapple
    • Cold Chicken Pasta Salad With Italian Dressing.
      Cold Chicken Pasta Salad With Italian Dressing

    Did you make this recipe? Leave a review and a ⭐⭐⭐⭐⭐ rating below, or tag us on our Facebook Page! Alternatively, bookmark it in your browser or save to Pinterest.

    Baked spaghetti squash on a tray.

    Baked Spaghetti Squash

    Angela Milnes
    Enjoy a healthy and flavorful meal with this Baked Spaghetti Squash! Tender strands of spaghetti squash are roasted to perfection, offering a deliciously light and low-carb alternative to pasta.
    5 from 4 votes
    Print Recipe Pin Recipe Rate this Recipe
    Prep Time 5 minutes mins
    Cook Time 50 minutes mins
    Additional Time 30 minutes mins
    Total Time 3 hours hrs 25 minutes mins
    Course Dinners
    Cuisine American
    Servings 3 Servings
    Calories 297 kcal

    Ingredients
      

    • 1 tablespoon Spaghetti Squash
    • 1 tablespoon Butter
    • 1 Teaspoon Garlic Salt
    • Pinch Seasoned Pepper
    • ½ Pound Ground Sirloin
    • 1 Can Chopped Tomatoes
    • 1 Can Tomato Paste
    • 1 tablespoon Medium Onion
    • 1 Clove Garlic
    • ½ tablespoon Red Bell Pepper
    • ½ tablespoon Green Pepper
    • 1 Tablespoon Italian Seasoning
    • 1 teaspoon Ground Oregano
    • 1 teaspoon Sweet Basil
    • 1 tablespoon Spaghetti Seasoning
    • 1 tablespoon Brown Sugar

    Instructions
     

    • Rinse the squash in cold water, and pat dry with paper towels. With a sharp chef's knife, cut the spaghetti squash in half lengthwise, and with a spoon scoop out the seeds. Place the squash halves in a baking dish or a rimmed baking sheet, cut side up.
    • Melt a teaspoon of butter in the microwave, and brush it on the inside of the Squash, and bake at 350 for 45 to 50 minutes, or until done. Remove from oven, and cool. 
    • When the Squash is cool enough to handle, take a fork and shred the inside until the strands appear like spaghetti. Remove the noodle/strands, and place in a dish and set aside.
    • Place the ground sirloin in a large skillet, sprinkle with garlic salt and seasoned pepper, and cook until well done. This will be the bulk of the filling for the baked spaghetti squash.
    • Drain grease from meat on paper towels and crumble the meat into a fine crumble. Leave on fresh paper towels to continue draining. 
    • Chop onion, and place in skillet with a teaspoon of butter, and sauté until onion is slightly browned. Return meat to skillet, and mix in onion.  Add canned tomatoes, and cut into bite size pieces. 
    • Add tomato paste, and fill the can with water 2 times and add to skillet. Press clove of garlic, and add to skillet. Cut bell peppers into small pieces, and add to skillet. 
    • Sprinkle Italian seasoning, oregano, sweet basil, seasoning, and brown sugar into skillet, and stir well.  Continue to cook for 30 minutes on medium to medium low.
    • Add squash strands to skillet, and mix altogether until blended. Remove skillet from stove, and spoon mixture into Squash shells. 

    • Top the baked spaghetti squash with Parmesan cheese, and bake for 30 minutes, or until cheese is browned and bubbly. Remove from oven, cool slightly and serve with a small salad.

    Notes

    I used seasoning salt and other seasoning mixes, but you could just stick to using salt and pepper if you want to keep it simple.
    Red pepper flakes can be a good addition if you want a bit of heat into the mixture. Skip it if you prefer a mild flavor in your baked spaghetti squash
    If you're using olive oil, make sure you don't use too much oil. A little goes a long way in this recipe. Remember that you just want to cook spaghetti squash until it is lightly browned.
    Use a sharp knife to cut spaghetti squash perfectly. Use a fork to remove the squash strands and squash flesh such that it resembles the strands of spaghetti.
    Make sure you place the squash upright on a parchment lined baking sheet.
    •  

    Nutrition

    Serving: 1gCalories: 297kcalCarbohydrates: 24gProtein: 18gFat: 16gSaturated Fat: 7gPolyunsaturated Fat: 1gMonounsaturated Fat: 6gTrans Fat: 1gCholesterol: 61mgSodium: 1502mgPotassium: 1132mgFiber: 6gSugar: 15gVitamin A: 1271IUVitamin C: 29mgCalcium: 147mgIron: 6mg
    Print Recipe Pin Recipe Rate this Recipe
    Tried this recipe?Let us know how it was!

    More Recipes to Try

    Enjoyed this unique way to cook spaghetti squash? Inspired to try some more delicious and easy-to-make recipes? Here are a few good ideas to try out.

    • Air Fryer Cauliflower
    • Best Butternut Squash Soup
    • Air Fryer Broccolini
    • Dill Chicken
    • Traeger Pork Chops
    • Kale Butternut Squash Salad

    Does Broccoli Go Bad?

    May 9, 2024 by Angela Milnes

    Fresh broccoli florets in a bowl.

    Do you have a stash of broccoli in the fridge and want to know how long broccoli can last before they’re no longer safe to eat? In this article, we'll answer the question: Does Broccoli Go Bad? We'll look at signs that indicate your broccoli is no longer fresh and discuss the best storage methods for broccoli.

    Does Broccoli Go Bad
    [feast_advanced_jump_to]

    Does Broccoli Go Bad?

    Yes, both raw and cooked broccoli can go bad over time. Fresh broccoli, including its florets and heads, should have a firm texture and vibrant green color.

    Spoiled Broccoli

    How Long Does Broccoli Last?

    Broccoli, often dubbed the "best broccoli," is a beloved Vegetable that can elevate any meal with its crisp texture and vibrant green color. Here is how long broccoli lasts before it loses its best taste and starts to turn that dreaded yellowish color:

    • Shelf Life of Broccoli Florets: When you buy pre-cut broccoli florets from the store, they typically stay good for about 3 to 5 days in the fridge. Check for any yellowing or wilting; if you spot it, it's time to use them up.
    • Shelf Life of Broccoli Heads: If you've purchased whole broccoli heads, they tend to stay fresh longer. You can expect them to be at their best for about 7 to 14 days when stored properly in the crisper drawer.
    • Raw vs. Cooked Broccoli: Raw broccoli generally has a shorter shelf life compared to cooked broccoli. Once you've cooked broccoli, it should be consumed within 3 to 5 days if it is refrigerated properly.
    Half Fresh and half spoiled Broccoli

    How To Tell If Your Broccoli Has Gone Bad?

    Like all fresh produce, broccoli doesn't last indefinitely and can become spoiled over time. Recognizing the signs of bad broccoli can help you avoid an unpleasant culinary experience.

    1. Smell Fresh

    Fresh broccoli has a distinctive, earthy smell. An unpleasant odor is often the first sign that your broccoli is going bad. If the smell is noticeably off or stronger than usual, it's best to avoid eating the broccoli.

    2. Color Changes

    One of the most visible signs of spoiled broccoli is a change in color. Fresh broccoli is a vibrant green, but as it starts to decay, it may develop yellowish or brown spots. If you have yellow broccoli, it's a sure sign that it's past its prime.

    3. Texture

    The texture of broccoli can also indicate its freshness. Fresh broccoli stalks are firm, and the florets have a crisp texture. If the broccoli stalk becomes soft or the florets develop a slimy texture, it's a clear indication that the broccoli is bad.

    4. Mold Growth

    Mold spores on broccoli are a definite sign of spoilage. Mold may appear as fuzzy spots on the broccoli florets or stalk, and it can range in color from white to black. Consuming moldy broccoli can lead to foodborne illnesses, so it's crucial to discard any broccoli showing signs of mold growth.

    Once cooked, broccoli starts to lose its freshness fairly quickly. Leftovers should be stored properly and consumed within a few days. If cooked broccoli starts developing a bad odor, changes in color, or a slimy texture, it's best not to consume it.

    Broccoli Gone Bad

    How To Store Broccoli?

    By following these storage tips and being mindful of the shelf life of broccoli, you can enjoy this versatile vegetable at its best.

    1. Store Whole Broccoli

    Whole broccoli is best stored in the fridge, specifically in the crisper drawer where air circulation is optimal.

    To store fresh broccoli, start by putting the whole head in a plastic bag, but don't seal it completely as some air circulation is beneficial. This method can help your broccoli stay fresh for just a couple of weeks.

    2. Store Cut Broccoli

    If you've already cut into your broccoli, the storage process changes slightly. Cut broccoli should be placed in an airtight container. It should be lined with paper towels to absorb any excess moisture, which leads to a slimy texture.

    Again, store this in the crisper bin of your fridge for maximum freshness.

    3. Freeze Broccoli

    To freeze broccoli, start by washing it in cold water and cutting it into florets. Blot dry with paper towels to remove moisture then spread out on a baking sheet to freeze.

    Once frozen, transfer the broccoli florets into an airtight container or a plastic bag to store. Frozen broccoli can last up to a year in the freezer if properly stored.

    4. Store Cooked Broccoli

    Cooked broccoli starts to degrade faster than raw. Once cooled, place it in an airtight container and store it in the fridge. It's best consumed within a few days.

    How Can You Revive Limp Broccoli?

    If your broccoli has gone limp, don't throw it away just yet. Trim the end of the stalk and loosely wrap it in a damp paper towel. Place it in a glass of water like a bouquet of flowers and leave it in the fridge overnight. Often, it will perk right back up!

    Broccoli Recipes

    Here are some of the best ways to cook broccoli:

    • Tossing Magic: Broccoli tossed in olive oil and roasted to perfection can be a game-changer for your meal. This brings out the natural sweetness of a vegetable and gives it a delightful, slightly crispy texture.
    • Whole Head Wonder: When cooking broccoli, remember to use the whole head, including the stem. It's not just the florets that are tasty - the stem is equally so. Don't let it go to waste!
    • Cooking to Perfection: Achieving the perfect texture is crucial when cooking broccoli. Aim for a soft but firm consistency. A bright green color is usually a good indicator that the broccoli is cooked just right.
    • Flavor Pioneers: Garlic, lemon, and Parmesan cheese are popular ingredients to pair with broccoli. You can also make this Low Carb Broccoli Salad.
    • Caramelized Delight: If you're looking for an innovative way to savor broccoli, try caramelizing it with garlic. This cooking technique adds a new layer of depth and complexity to the flavor of broccoli, making it a dish you'll want to revisit time and again.

    Enjoying Your Broccoli

    In conclusion, broccoli, like all fresh produce, can spoil. Proper storage can help extend its shelf life. Watch for signs of spoilage like a bad smell, mold, or discoloration. If broccoli looks dull or smells off, discard it. Fresh broccoli from a local farmer's market tastes better.

    More Useful Articles

    • What Does Starfruit Taste Like
    • Does Coconut Oil Go Bad
    • Does Brie Cheese Go Bad
    • What Is Truffle Butter
    • Does Fudge Go Bad
    • The Best Food For Healthy Skin

    Does Coconut Water Go Bad

    May 9, 2024 by Angela Milnes

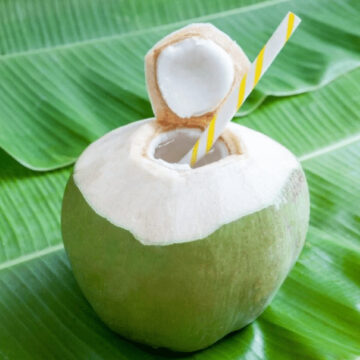
    Fresh green coconut with a straw in it.

    Coconut water is one of the most popular trends. Its natural, refreshing taste and Superior Hydration have led millions to make it a regular part of their diet.Although coconut water may be delicious, questions about its shelf life persist, prompting the inquiry: Does Coconut Water Go Bad?

    This article will answer that question. From shelf life to storage tips learn about the shelf life of coconut water and enjoy.

    Straw in a green coconut. Does coconut water go bad.
    [feast_advanced_jump_to]

    Does Coconut Water Go Bad?

    Yes, coconut water does go bad. Like any other perishable food or beverage, coconut water has a certain shelf life, after which its quality starts deteriorating.

    This is primarily due to the Natural Enzymes Present In The Water, which start breaking down the product over time.

    Does Coconut Water Expire?

    Yes! Even when stored correctly, both bottled coconut water and fresh coconut water have a limited shelf life.

    Always check the 'best before' date on the bottle of store-bought coconut water, and remember that fresh coconut water will only last a couple of days in the fridge.

    How Long Does Coconut Water Last?

    Like all natural products, coconut water has a shelf life that needs to be considered. Understanding how long coconut water lasts under different conditions can help you enjoy it at its best.

    Freshly Opened Coconut Water

    Once you crack open a fresh coconut, the clock starts ticking. Fresh coconut water is highly perishable and should ideally be consumed immediately after opening to ensure the best quality.

    The freshness of freshly opened coconut water can start deteriorating within 1-2 days if stored in the refrigerator.

    Unopened Coconut Water

    Bottled coconut water or unopened coconut water, on the other hand, has a significantly longer shelf life.

    Thanks to ultra-high temperature (UHT) processing, most bottled coconut waters can stay shelf stable for about 9-12 months when stored correctly.

    This method eliminates bacteria, extending the product's longevity without requiring refrigeration.

    Leftover Bottled Coconut Water

    Once a bottle of coconut water is opened, it's best to consume it within 3-5 days. Leftover coconut water, even if refrigerated, can start to lose its peak quality after this period.

    Post-Expiry Coconut Water

    If you have a bottle of coconut water that's a few months past its expiry date, use your senses before consuming.

    Check for changes in color, smell, or taste, and any signs of mold. If anything seems off, it's best to err on the side of caution and discard it.

    How To Tell If Coconut Water Has Gone Bad?

    Coconut water is a refreshing and hydrating drink. However, like all natural products, it can spoil over time. Here are some key points to help you determine if your coconut water has turned bad:

    • Check the Expiration Date: To check if your coconut water has gone bad, simply look at the expiration date on the packaging, often called the 'best by date'. If this date has passed, it's a sign that the coconut water may no longer be safe to consume.
    • Observe the Color: Fresh coconut water is usually clear or slightly cloudy. If your coconut water starts to turn pink, this could be a sign of oxidation. While pink coconut water is still perfectly safe to drink, it indicates that the product is starting to age.
    • Smell Test: Spoiled coconut water often gives off a strong smell. If your coconut water has an off-putting or sour odor, it's likely that it has gone bad.
    • Taste Test: If the coconut water tastes sour or off in any way, it's best not to drink it. This is a clear sign that the coconut water has spoiled.
    • Physical Signs: In addition to color changes, expired coconut water might have mold or other visible signs of spoilage. Before drinking coconut water, always inspect it carefully.

     If you have any doubts about your coconut water, it's best to dispose of it rather than risk consuming spoiled coconut water.

    What If You Drink Spoiled Or Expired Coconut Water?

    Drinking bad coconut water, especially one that's past its expiration date, can potentially do more harm than good.

    If you've taken a few sips of spoiled coconut water, it may not be safe to continue consumption anymore. Neglecting the expiration dates and drinking spoiled coconut water can expose you to the danger of Foodborne Illnesse.

    How To Store Coconut Water?

    Coconut water has become a popular and refreshing drink for hydration. However, it's important to know how to store coconut water properly to ensure it lasts as long as possible without spoiling.

    Store Unopened Coconut Water

    If you've bought bottled coconut water from the store, it's best stored in a cool and dry area until it's opened. A kitchen cabinet or food pantry is often the ideal place.

    The unopened coconut water doesn't need to be refrigerated and can last quite a while if stored correctly in these conditions.

    Store Fresh Coconut Water

    Fresh coconut water, on the other hand, needs to be stored differently. Once a coconut is opened, the water inside begins to lose its freshness.

    Freshly opened coconut water should be consumed immediately for the best taste. However, if you have any leftovers, it needs to be stored properly to prevent spoilage.

    Leftover coconut water should be poured into an open container and then tightly sealed. The key here is cold preservation. The coconut water should then be placed in the refrigerator.

    Can You Freeze Coconut Water?

    Yes, freezing coconut water is indeed possible and can be a great way to preserve its freshness. Once you've freshly opened the coconut water, it's best to freeze it promptly as it can spoil when left at room temperature for too long.

    By freezing coconut water, you can prolong its usability and savor it whenever you wish. Just remember to thaw it properly before drinking, to ensure you get the full flavor.

    Delightful Coconut Water Recipes To Sip On

    Coconut water, often referred to as nature's sports drink, is not only a refreshing and hydrating beverage but also a versatile ingredient for creating delicious drinks.

    • Classic Coconut Cooler: Combine fresh coconut water with a splash of lemon juice for a classic and refreshing coconut cooler. Add ice cubes for extra chill and enjoy the tropical goodness with every sip.
    • Coconut Lemonade: Elevate your regular lemonade by mixing in some coconut water. The combination of lemon juice and the natural sweetness of coconut water creates a delicious drink that's perfect for a hot day.
    • Coconut and Fruit Infusion: Get creative by infusing your coconut water with slices of your favorite fruits like strawberries, pineapples, or oranges. The result is a fruity and refreshing beverage that's packed with vitamins and electrolytes.
    • Coconut Smoothie: Blend coconut water with coconut meat and a variety of fruits for a creamy coconut smoothie. This delicious drink can serve as a satisfying snack or a post-workout recovery treat.
    • Coconut Mojito Mocktail: Combine coconut water with fresh mint leaves, a squeeze of lemon, and a dash of honey for a non-alcoholic take on the classic mojito. It's a tropical delight that's both refreshing and alcohol-free.
    • Coconut Iced Coffee: For a unique twist on your morning coffee routine, use coconut water as the base for your iced coffee. The subtle sweetness of coconut water complements the rich coffee flavor beautifully.

    FAQ's

    How Does Coconut Water Taste?

    When you drink coconut water, especially from young coconuts, you’re greeted with a refreshing and mildly sweet taste. This is due to the natural sugars present in it, which contribute to its unique flavor profile.

    Unlike coconut milk which is rich and creamy, coconut water boasts a light, crisp taste that’s subtle yet satisfying. The natural flavor of coconut water makes it a fresh source of hydration that’s delightful.

    Enjoy Coconut Water

    In conclusion, like any other natural product, coconut water does indeed go bad. Once opened, it's advisable to consume it within 24-48 hours to ensure it maintains its freshness and taste.

    Even unopened bottles or cans have a shelf life, usually indicated by the 'best before' date on the packaging. Therefore, while coconut water is a refreshing beverage, it's important to consume it while it's still fresh and store it properly to prevent spoilage.

    More Useful Articles

    • What Does Starfruit Taste Like?
    • Does Coconut Oil Go Bad?
    • What Goes With Beetroot Salad
    • What Is Truffle Butter?

    Does Brie Cheese Go Bad

    May 9, 2024 by Angela Milnes

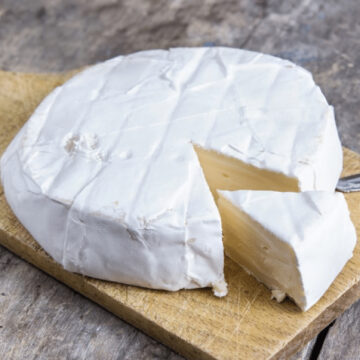
    Fresh brie cheese on wooden board.

    Does Brie Cheese Go Bad? - with everything from storage tips to how long it can last, read on to learn more about the best ways to store brie and when to throw it away.

    Does Brie Cheese Go Bad
    [feast_advanced_jump_to]

    Does Brie Cheese Go Bad?

    Brie cheese (a soft cheese) is susceptible to going bad due to its high moisture content and the microorganisms present in it. 

    Without proper storage, Brie cheese can also be exposed to other bacteria and molds in the environment, which can cause spoilage. 

    The process of ripening, which gives Brie its distinct flavor and texture, can also continue to the point where the cheese becomes overripe and unpleasant to eat. Therefore, while Brie cheese is a delightful treat, it's crucial to enjoy it before these factors compromise its quality.

    Spoiled Brie Cheese

    How Long Does Brie Last?

    Brie cheese, a delicacy among soft cheeses, is prized for its creaminess and rich flavor. However, the question often arises - how long does Brie cheese last? 

    Here's the shelf life of Brie under different storage conditions: room temperature, in the fridge, and in the freezer.

    Brie Cheese At Room Temperature

    While Brie cheese is best served at room temperature, it shouldn't be kept at room temperature for extended periods. 

    It can remain at room temperature for up to 2 hours when serving, but any leftover Brie should be promptly refrigerated to maintain peak quality.

    Brie Cheese In The Refrigerator

    Storing Brie in the refrigerator is the ideal way to preserve its quality. If properly stored in the refrigerator, Brie can have a shelf life extending beyond this timeframe. 

    Compared to other soft cheeses like blue cheese, Brie does have a relatively short shelf life, but it can still be enjoyed for several weeks if stored correctly.

    Brie Cheese In The Freezer

    For those times when you have leftover Brie that won't be consumed within a few weeks, the freezer can come to your rescue. 

    While freezing Brie may alter its texture, it can extend its life up to six months. It's recommended to use frozen Brie in cooked dishes where the texture change is less noticeable.

    How Do You Know That Brie Cheese Has Gone Bad?

    Like all natural mold-ripened cheeses, Brie can spoil over time. Here are some signs to look out for that indicate your Brie cheese has gone bad:

    • Change in Rind Color: The white rind of Brie cheese may start to show blue or green spores if the cheese has gone bad. This is an indication of unwanted mold growth.
    • Off Odor: Brie has a mild, slightly earthy smell when fresh. If it starts to give off an unpleasant or strong smell similar to strong-smelling foods, it might be spoiled. A slight ammonia smell is normal for aged Brie, but a strong ammonia odor indicates spoilage.
    • Flavor Change: Fresh Brie has a rich, buttery flavor. If this flavor changes slightly or becomes overly tangy, it could be a sign of spoilage.
    • Texture Changes: Brie cheese should have a soft, creamy texture. If the cheese present becomes hard, dry, or slimy, likely, the Brie is no longer good to eat.
    Spoiled Brie

    How To Store Brie Cheese?

    Storing Brie cheese properly is essential to maintain its good quality and prolong its shelf life. Here are some tips for storing Brie effectively:

    • Original Packaging: If unopened, the Brie can be stored in its original packaging. The original wrap is designed to let the cheese to breathe, protecting it from drying out.
    • Cheese Drawer: The cheese drawer of your fridge is an ideal place for storing Brie. It provides a stable temperature, which is crucial for proper storage.
    • Airtight Container: Once the Brie is opened, if you have any leftover Brie, store it in an airtight container. This will prevent it from absorbing odors of other foods in the fridge.
    • Wax Paper, Aluminum Foil, or Parchment Paper: Instead of plastic wrap, use wax paper, parchment paper, or aluminum foil to wrap your Brie before putting it in the container. These materials allow the cheese to breathe better than plastic wrap does.

    Remember, the goal of storing Brie is to preserve its creamy texture and rich flavor. Proper storage methods can help achieve this.

    Can You Freeze Brie Cheese?

    Yes, you can freeze Brie cheese, but be aware that freezing can alter its creamy texture. Frozen Brie may become grainy or mealy, affecting taste and mouthfeel.

    Freezing is recommended for Brie in cooked dishes where texture changes are less noticeable. Consider how the cheese will be used post-freezing.

    FAQ's

    What Does Brie Cheese Taste Like?

    When you eat Brie, you’re greeted with a unique flavor profile that’s an absolute delight to the palate. Eating Brie offers an experience of rich, creamy, and slightly tangy flavors that are both mild and sophisticated. 

    When baked, Brie cheese transforms into a decadent dish, its texture becoming more gooey and its flavor intensifying, offering a hint of earthiness. Whether enjoyed raw or heated, Brie cheese provides a culinary journey that is as pleasurable as it is memorable.

    So, Does Brie Cheese Go Bad?

    While Brie cheese can go bad due to its high moisture content and susceptibility to molds and bacteria, recognizing the signs of spoilage, such as changes in rind color, odor, flavor, or texture, is crucial. 

    To savor Brie cheese at its best, it's recommended to consume it before it goes bad. Enjoy brie with on crackers or on Raw Bread for a tasty treat!

    More Useful Articles

    • What Does Starfruit Taste Like?
    • Does Coconut Oil Go Bad?
    • What Goes With Beetroot Salad
    • What Is Truffle Butter?

    Tangerine vs Clementine: What's the Difference?

    May 9, 2024 by Angela Milnes

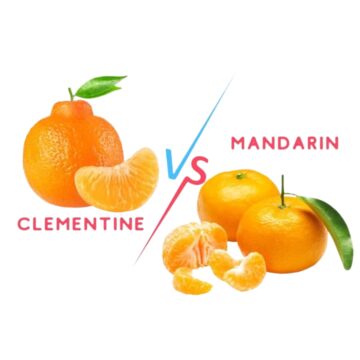
    Ever wondered what's the difference between a tangerine and a clementine? Even though they have similar names and appearances, there are actually some key differences to keep in mind. So here are key differences between Tangerine Vs Clementine!

    Tangerine Vs Clementine
    [feast_advanced_jump_to]

    The Differences Between Tangerine and Clementine

    Let's unravel the mystery between two citrus superstars: tangerines and clementines. They may look similar at first glance, but these zesty wonders have their unique characteristics. Here are four key differences that set them apart:

    Tangerine vs Clementine: Origins

    Tangerine Origin

    Tangerines, one of the many hybrid citrus cultivars, are a delightful member of the citrus fruits family. Originating from Southeast Asia, these small, sweet oranges have journeyed across the world, winning hearts with their easy-to-peel skin and juicy segments.

    The name "tangerine" comes from Tangier, Morocco, a port from which the first batch of these citrus fruits were shipped to Europe. So when you're enjoying a tangerine, remember you're savoring a piece of global history!

    Clementine Origin

    On the other hand, clementines (Citrus Clementina) are a charming blend of both tangerines and sweet oranges. Known as the crown jewels among citrus fruit, they were born in the lush groves of Algeria by Father Clement Rodier, from whom they get their name.

    These little gems are seedless, making them a perfect on-the-go snack. When you bite into a clementine, you're enjoying its sweet tang and partaking in a rich agricultural legacy.

    Tangerine vs Clementine: Taste

    Tangerine Taste

    Tangerines, one of the most popular citrus fruits, are favored for their perfectly balanced flavor. Their taste buds-pleasing profile combines a sweet and tangy flavor that is refreshing and satisfying.

    The slightly tart flavor of tangerines adds an interesting twist to its overall sweetness, making it a delightful snack to enjoy any time of the day. The refreshing taste of tangerines makes them a favorite addition to many fruit salads and desserts.

    Clementine Taste

    On the other hand, clementine oranges are known for their sweeter taste compared to their citrus counterparts. They have a distinctively sweet flavor with just a hint of tanginess, which gives them a refreshing and balanced flavor profile.

    Clementines are less tart than tangerines; hence, they appeal to those who prefer a sweeter, less acidic citrus fruit. These qualities make clementines a popular choice for a refreshing snack or a sweet dish addition.

    Tangerine vs Clementine: Color, Size and Texture

    Color, Size and Texture of Tangerine

    Tangerines, a hybrid citrus cultivar, are known for their distinctive darker reddish-orange color and slightly tougher skins. They are smaller in size compared to other citrus fruits but pack a punch with their sweet, tangy flavor.

    The skin's texture is a bit rough, indicative of its resilience and ability to protect the juicy pulp inside. While tangerines contain seeds, they typically have fewer seeds than other citrus varieties, making them a convenient snack option.

    The bright orange color and the slightly tougher skin give the tangerine its unique identity in the citrus family.

    Color, Size and Texture of Clementine

    On the other hand, Clementines are another variety of hybrid citrus cultivars that are often mistaken for tangerines due to their similar appearance. On closer look, clementines have a brighter orange color and softer skin.

    The peel of a Clementine is smooth, glossy, and easily removable, making it a favorite among children and adults alike. One of the key features of clementines is that they are largely seedless fruit, making consumption hassle-free.

    When comparing tangerines and seedless clementines, the latter often wins the popularity contest due to its user-friendly nature.

    Tangerine vs Clementine: Availability

    Tangerine Availability

    Tangerines are generally available in the colder months, from October through April, with their peak season in winter. They are grown in various parts of the world, including the United States, China, and Spain.

    In the US, they are mostly cultivated in California and Florida, so that availability may vary depending on your location.

    Clementine Availability

    Clementines, often referred to as "Christmas oranges," are typically in season from November through January, making them a popular fruit during the holiday season.

    They are grown in countries like Spain, Morocco, and some parts of the United States. Similar to tangerines, their availability can depend on your geographical location.

    Tangerine vs Clementine: Culinary Applications

    Tangerine Culinary Applications

    Tangerines, with their sweet-tart flavor and easy-to-peel skin, are versatile ingredients in the culinary world. They can be eaten fresh or used in salads, desserts, and savory dishes.

    Their juice serves as a delightful addition to Cocktails, marinades, and sauces, adding a tangy citrus note. The zest of tangerines is also used to infuse flavor into Baked Goods, Dressings, and Spice Rubs.

    Furthermore, tangerines can be used to make marmalades or candied peel, enhancing the depth of flavor in various recipes.

    Clementine Culinary Applications

    On the other hand, clementines are known for their sweet, almost honey-like flavor and are often enjoyed as a refreshing snack.

    However, their culinary uses extend far beyond that. Like tangerines, they can be used in salads and desserts, providing a burst of citrusy sweetness.

    Their juice is excellent in beverages, marinades, and sauces, while their zest can add a unique flavor to baked goods and pastries. Clementines are also popular for making preserves, thanks to their sweet taste and high pectin content.

    Tangerine vs Clementine: Variety

    Tangerine Variety

    Tangerines are a specific variety of the mandarin orange, often referred to as Mandarin Tangerines. They are smaller and less rounded than sweet oranges. Their bright, pebbly skin is easy to peel, and they have a distinctively sweet-tangy flavor.

    Although they are part of the Mandarin family, not all mandarins are tangerines. This variety of mandarin is more cold-tolerant than sweet oranges, navel oranges, and blood oranges, making it a popular choice in cooler climates. Following Are The Types Of Tangerine:

    1. Dancy Tangerine: Often called the "Christmas tangerine" because it ripens in late December. It's small, sweet, and slightly tart with a rich aroma.
    2. Honey Tangerine (Murcott): Known for its sweet flavor, this variety is juicy and has a deep orange color. It's usually available from January to April.
    3. Sunburst Tangerine: This variety is seedless, making it a favorite among consumers. It's juicy and sweet and is typically available from November to January.
    4. Fairchild Tangerine: Named after David Fairchild, who introduced many fruit and vegetable crops to the United States. It's seedless, easy to peel, and available from November to January.
    5. Fallglo Tangerine: A larger variety that's seedless and easy to peel. It's available from October to November.
    6. Royal Mandarin (Temple Orange): It is not technically a tangerine but belongs to the Mandarin family. It's large, sweet, and easy to peel.
    7. Satsuma Mandarin: Another member of the Mandarin family, these are seedless, easy to peel, and extremely cold-hardy. They're usually available from October to December.

    Clementine Variety

    Clementines, on the other hand, are a cross between a sweet orange and a mandarin. Known as clementine oranges, these small, seedless fruits are prized for their juicy and sweet flavor.

    They are slightly smaller than tangerines and have a deep orange color. Unlike tangerines, they are less tolerant of cold and are often grown in regions that also produce navel and blood oranges. Here are a few notable ones:

    1. Algerian Clementine: This is the original clementine, first discovered in Algeria. It's small, sweet, and seedless with a deep orange color.
    2. Nules Clementine: Originating from Spain, this variety is larger than the Algerian Clementine but just as sweet. It's also seedless and has a slightly lighter color.
    3. Monreal Clementine: This variety is known for its large size and intense flavor. It has a bright orange color and contains a few seeds.
    4. Marisol Clementine: A Spanish variety that's sweet and slightly acidic. It's seedless and has a vibrant orange color.
    5. Oroval Clementine: Another Spanish variety, it's appreciated for its sweetness, juiciness, and seedless nature.

    Tangerine vs Clementine: Which One Is Better?

    In conclusion, tangerines and clementines are both delicious fruits that offer a variety of culinary applications. Tangerines are known for their sweet-tart flavor and easy-to-peel skin, while clementines are smaller and sweeter in taste.

    Both fruits come in wide varieties, each offering unique flavor profiles and characteristics. No matter which one you choose, tangerines and clementines make a delicious addition to any dish.

    More Useful Articles

    • Tangerine Vs Orange
    • What Does Radish Taste Like?
    • What Does Sriracha Taste Like?

    Tangerine vs Orange: What's the Difference?

    May 7, 2024 by Angela Milnes

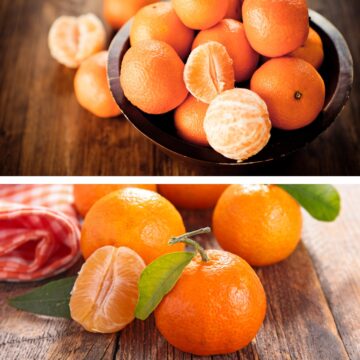
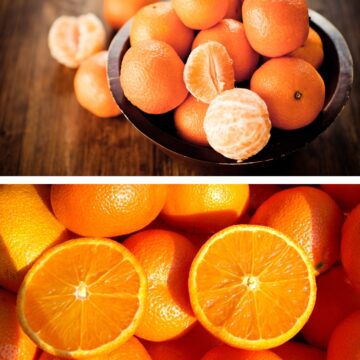
    Tangerines and oranges.

    Ever wondered what the difference between a tangerine and an orange is? Many people think that they are basically the same fruit, just with different names. Whether you’re a fan of both oranges and tangerines or simply curious about which variety packs more of a punch in terms of flavor, get ready for some juicy details as we take on Tangerine Vs Orange.

    Tangerine vs Orange.
    [feast_advanced_jump_to]

    The Differences Between Tangerine And Orange

    Tangerines and oranges are both popular citrus fruits that are often confused due to their similar appearance and taste. However, there are several differences between these two fruits.

    Tangerine vs Orange: Origins

    Tangerines, a member of the citrus family and relative to the mandarin orange, are believed to have originated in Southeast Asia. They belong to the Citrus Tangerina species and were named after Tangier, a port in Morocco from where they were first shipped to Europe in the 19th century.

    The term "tangerine" was later used to refer to all varieties of mandarins and mandarin hybrids, including both tangerines and oranges.

    On the other hand, oranges originated in ancient China and were later spread across the world by traders and explorers.

    Orange belongs to the Citrus x Sinensis species of the citrus family. Like tangerines, oranges were also named after the Sanskrit word for orange tree, "naranga". The term "orange" is now used globally to refer to the sweet, pulpy fruit we know and love today.

    Tangerine vs Orange: Taste

    Tangerines tend to have a sweeter taste than most oranges. They are known for their vibrant sweet and tangy flavour.

    When comparing tangerines and oranges, you'll find that the former has a more pronounced citrus aroma and a less acidic profile. This makes tangerines a great choice for those who enjoy a fruit that's not too overpowering but still packs a punch in terms of flavor.

    On the other hand, oranges tend to have a slightly more tart flavor. The taste of an orange is a unique combination of sweetness with a hint of bitterness, which balances out the overall flavor.

    Tangerine vs Orange: Shape

    Tangerines tend to be smaller in size compared to most oranges. When comparing the physical characteristics of tangerines and oranges, you'll notice that tangerines typically have a bright orange color with a thin skin that peels off quite easily.

    Tangerines are often referred to as 'baby oranges' due to their petite size and thinner skin. The skin often appears loose, giving the fruit a slightly wrinkled look.

    In contrast, oranges tend to be larger and have tighter skin compared to tangerines. Oranges differ in that they usually possess a thick skin that's harder to peel. Their rind is a vibrant yellowish-orange, which is significantly brighter than the tangerine's skin.

    The thickness of the peel offers a certain robustness to the oranges, protecting the juicy interior. The orange's thick, tight skin and its round shape make it one of the most recognizable fruits in the citrus fruit family.

    Tangerine vs Orange: Availability

    Tangerines, a variety of mandarin oranges, are known for their pebbly skin and juicy flesh. They are particularly popular between November and May, which is when they are in season and at their sweetest.

    Tangerines thrive in tropical climates, and their availability tends to be seasonal, with varieties like the Dancy and Honey being available from mid-December through January.

    Oranges, on the other hand, are a more familiar fruit to many and are typically available year-round. The domestic availability of fresh oranges has seen a slight decline over the past two decades but has stabilized over the last decade.

    Oranges also grow well in tropical climates, and certain specialty types like tangelos are available from November to February.

    Tangerine vs Orange: Culinary applications

    Tangerines have a wide range of culinary applications. They are often used in salads, desserts, and savory dishes for a burst of citrusy freshness. The Juice of tangerines can also be used as a marinade for meat or a base for sauces and dressings.

    Furthermore, the zest of a tangerine can add a vibrant touch to baked goods and cocktails. When considering tangerine vs orange in cooking, tangerines tend to have a stronger, sweeter flavor, making them a favored choice for recipes that call for a more pronounced citrus element.

    Meanwhile, oranges are used in sweet and savory dishes around the world. Orange juice is staple in many kitchens, used not only as a refreshing beverage but also in cooking and baking. It can tenderize meat, add a tangy note to sauces, and give a moist texture to cakes.

    The zest of an orange can be used to infuse flavor into sugar, salt, or oil. The increase in orange consumption in culinary applications speaks to its versatility, as it can be used in everything from salads and salsas to cakes and cocktails.

    Tangerine vs Orange: Variety

    Tangerines, a type of mandarin, have various delightful varieties like Clementine, Dancy, and Murcott. Clementines are small, sweet, and seedless with easy-to-peel bright orange skin.

    Dancy tangerines offer a rich, spicy taste with deep orange-red skin. Murcott tangerines, or honey tangerines, are loved for their sweet flavor and juicy texture.

    Oranges, on the other hand, come in various types, each with its own unique characteristics. Navel oranges (sweet oranges), named after their navel-like formation opposite the stem end, are particularly loved for their sweet taste and lack of seeds.

    Valencia oranges and blood oranges are another beloved variety of oranges. Valencia orange is famous for its excellent juice-producing capabilities. While blood orange, characterized by its deep red flesh and distinct raspberry-like flavor, stand out among other orange varieties.

    FAQ'S

    Are Tangerines And Oranges Interchangeable In Recipes?

    In recipes, the tangerines and oranges can be substituted, but keep in mind the sweetness and flavor intensity of tangerines might alter the final taste of your dish.

    Tangerine Vs Orange: Which One Is Better?

    Ultimately, when it comes to orange Vs. tangerine orange, both offer unique flavors that can elevate any dish. Tangerines are well-loved for their bright flavor and easy-to-peel skin, while oranges have the added benefit of being available year-round and having a more robust flavor.

    Depending on what type of recipe you are making and the flavor profile you are looking for, either tangerine or orange can be used to give your dish a delicious citrusy twist.

    More Useful Articles:

    • Tangerine V's Manderin
    • Tangerine Vs Clementine
    • How To Make Celery Juice
    • How To Make Beet Juice
    • Easy Strawberry Lemon Popsicles

    What Does Radish Taste Like?

    May 7, 2024 by Angela Milnes

    Fresh raw radishes.

    Ever wondered, "What Does Radish Taste Like?" You're not alone! This crispy, peppery veggie often sparks curiosity. Picture biting into a fresh radish; it's a unique blend of spicy and sweet flavors that awaken your palate.

    Whether eaten raw or cooked, radishes add a delightful punch to any dish. Explore the fascinating world of radishes with me and discover the vibrant taste they bring to the table.

    What Does Radish Taste Like?
    [feast_advanced_jump_to]

    What Does Radish Taste Like? 

    Raw radish has a crisp and juicy texture. This root vegetable tastes slightly peppery with a bit of a spicy kick. When bitten into, it offers a fresh and slightly tangy flavor. Overall, radishes add a crunchy zest to salads and dishes.

    Do Raw Radish Taste Like Carrots?

    While radishes and carrots are root vegetables that can be enjoyed raw, their flavors are distinct. Radishes have a sharper, peppery taste and a crisp texture, different from carrots' sweet, mild flavor and crunchy texture.

    So, no, raw radish does not taste like carrots. If you're looking for a similar taste to carrots, parsnips or sweet potatoes might be closer matches.

    Raw Vegetables

    Are Radishes Spicy or Sweet?

    Raw radish tastes spicy due to the presence of chemical compounds known as isothiocyanates.

    This spiciness gives them their distinct, sharp bite. However, beneath this fiery exterior, radishes also possess an earthy taste that's quite pleasant.

    Some radishes, mainly when they are young and small, can have a milder sweet flavor alongside their characteristic heat.

    Is Radish Bitter?

    Radishes are usually not bitter, with a crisp, peppery taste, especially when eaten raw. Taste can vary based on the radish type and preparation.

    Some may have a hint of bitterness, but spicier notes usually dominate. Radish leaves can be more bitter than the root.

    What Do Steamed Radishes Taste Like?

    Steamed radishes offer a unique culinary experience. When steamed, raw, peppery bite transforms into a mellow, earthy flavor.

    The process brings a surprising sweetness, softening their texture and tempering their natural spiciness.

    Most importantly, the mild taste of steamed radishes makes them a flexible component in various dishes. They absorb the flavors of the foods they're cooked with, providing a subtle, delicious backdrop in every bite.

    Steamed Radishes

    What Do Roasted Radishes Taste Like?

    The roasting process transforms the radish's naturally spicy and peppery flavor into something more mellow, slightly sweet, and creamy.

    Though still retaining a hint of their original peppery taste, roasted radishes have been likened to potatoes in flavor and texture, offering a surprising and delightful alternative for your palate.

    Roasted Radishes

    Different Types of Radishes And Their Tastes

    Here are some types of radishes, along with their taste descriptions:

    • Daikon Radish: Daikon radishes are a type of white radish that originates from East Asia. They have pale yellow skin and are known for their mild flavor. Daikon radish has sweet, nutty taste and crisp and less peppery, making them a versatile ingredient in many dishes.
    • Watermelon Radish: As the name suggests, these radishes have a beautiful pink interior resembling a watermelon with deep green skin. They taste slightly less peppery than red radishes but have a nice crunch. They're perfect for adding color to salads and other dishes.
    • White Radish: White radishes, also known as winter radishes, are often larger and have a milder flavor than their red counterparts. They have a crisp texture and a slightly sweet, slightly spicy flavor.
    • Red Radish: Red radishes are the most common type of radish. They have vibrant red skin and a white interior. They offer a peppery hot flavor that can be quite strong. Some people describe the taste as a spicy kick refreshing in salads and salsas.
    • Winter Radish: Winter radishes are typically more giant and have a stronger flavor than summer radishes. They range in color from white to black, and their taste can be anywhere from mildly peppery to very spicy.
    • Black Radish: Known for its distinctive black or dark brown skin, it has a strong, peppery flavor that can be intense. It's larger and has a firm texture that holds up well to cooking.
    • French Breakfast Radish: This variety is known for its elongated shape and two-toned coloration - red at the top and white at the tip. The French breakfast radish has a milder flavor than other radishes, making it a great addition to salads or as a snack.
    • Green Radish: Green radishes are an Asian variety with green skin and flesh. They have a crisp texture and a slightly sweet and spicy flavor, similar to a daikon radish but with a bit more bite.
    • Pink Radish: These radishes have vibrant pink skin and a slightly sweet flavor. They're less peppery than red radishes and add a beautiful color to any dish.
    • Spanish Black Radish: This radish has rough, black skin with white flesh inside. It's known for its strong, spicy flavor. Spanish black radishes are typically eaten raw in salads or can be cooked for a milder taste.
    • Icicle Radish: These are white, carrot-shaped radishes with a mild-to-hot flavor, depending on their size. Icicle radishes are crispy and can be eaten raw or added to stir-fries.
    • Malaga Violet Radish: This purple-skinned radish has a bright white interior. It has a crisp texture and a sweet yet slightly spicy flavor.

    How Do You Take the Bitterness Out of Radishes?

    To take the bitterness out of radishes, you can soak them in cold water. First, slice or dice the radishes into your desired size. Then, place the sliced radishes in a bowl of cold water and let them soak for 10-15 minutes.

    This process helps to leach out some of the bitter compounds, reducing their intensity. After soaking, drain the radishes and pat them dry before using them in your recipe.

    FAQ'S

    Can I Eat Radish Leaves Raw?

    Yes, radish greens are safe to eat raw. The leafy tops are edible and can be enjoyed in various forms like sprouts, microgreens, or mature leaves.

    Adding them to salads is a simple way to include radish greens in your diet. The flavor may vary with age, some becoming spicier as they mature.

    Are Radishes Better Cooked or Raw?

    Raw radishes are known for their crisp, crunchy texture and slightly spicy bite that many find refreshing. However, cooking radishes can tame this spicy bite, revealing a unique sweetness.

    The choice between raw and cooked radishes often boils down to personal preference, with some favoring the pungent crunch of raw radishes, while others prefer the mellow sweetness of cooked ones.

    Enjoy the Taste Of Raddish In Your Meals

    Radish has a sharp, peppery flavor that is distinct from other vegetables. It's not as sweet or mild as carrots or celery, but it does have a unique and flavorful taste. The flavor of radishes can vary from mild to notably spicy, depending on the type you select.

    When cooked, their spiciness mellows out, becoming softer in texture, so you get the best of both worlds - a flavorful bite with a softer feel. A butter dab can help amplify the innate sweetness in radishes.

    More Useful Articles

    • Best Cinco De Mayo Desserts
    • Sabana De Res Recipe
    • Blueberry Crumble Recipe
    • Canned Beetroot Vs Fresh
    • 15 Zucchini Baking Recipes

    What Does Sriracha Taste Like

    May 6, 2024 by Angela Milnes

    Sriracha sauce in a bowl with a spoon.

    Are you into spicy food? Want to spice up your dishes? If so, you've likely heard of Sriracha. But What Does Sriracha Taste Like? This popular Asian hot sauce is now widespread, but grasping its unique flavor can be tricky.

    In this article, we'll explore what makes Sriracha special - from its zesty taste to how it pairs with various dishes. Find out if it's perfect for your next culinary adventure.

    What Does Sriracha Taste Like
    [feast_advanced_jump_to]

    What Does Sriracha Taste Like?

    Sriracha, a famous hot chili sauce, is known for its intriguing blend of flavors. It's spicy, thanks to the chili peppers it's made from, but it also has a hint of sweetness due to the added sugar.

    Along with these two dominant flavors, you'll also notice a strong garlic undertone and a tangy taste that adds depth to the sauce.

    So, while sriracha is spicy, it's not only about the heat - the slight sweetness and tangy flavor balances out the spice, making it a well-rounded and versatile condiment that can add a flavorful punch to various dishes.

    Is Sriracha The Same As Hot Sauce?

    Sriracha and hot sauce are both spicy condiments but with differences. Hot sauces, like Frank's Red Hot, have various flavors and heat levels on the Scoville scale, made from chili peppers and other spices.

    Sriracha, with a thicker texture, is a paste of chili peppers, vinegar, garlic, sugar, and salt, offering a milder spiciness compared to other hot sauces.

    Is Sriracha The Same As Hot Sauce

    Is Sriracha Similar To Ketchup?

    Sriracha and ketchup have similarities but differ in key ways. Both are condiments used for flavor, but ketchup is sweet and tangy, while sriracha is spicy and garlicky.

    Ketchup is thick and pourable, while sriracha is a thicker paste that clings to food, delivering its unique flavors.

    Ketchup in a bowl

    Is Tabasco Sauce The Same As Sriracha?

    Sriracha is known for its heat, though milder compared to Tabasco or Cholula hot sauces. While Sriracha is commonly used as an ingredient in dishes, Tabasco is a spicier, thinner sauce typically used as a condiment.

    Tabasco boasts a simple recipe of chili peppers and distilled vinegar, in contrast to Sriracha's intricate flavor profile crafted from sweet chilis, Thai spices, and aged red peppers.

    What To Serve With Sriracha Sauce?

    Whether you love spicy foods or just adore the zesty zing of sriracha. This versatile condiment can be go with different dishes like:

    • Garlic Bread: The robust flavor of sriracha pairs well with the buttery and garlicky taste of garlic bread. Just spread a thin layer of sriracha on your garlic bread before baking for an extra kick.
    • Roasted Vegetables or Stir Fries: Drizzle some Sriracha over your favorite roasted vegetables or stir-fries. The sauce's heat complements the veggies' natural sweetness, enhancing their flavor.
    • Sour Cream: Mix sriracha with sour cream to make a spicy dip. This combination is perfect for dipping fried foods like Onion Rings or Air Fryer French Fries.
    • Grilled Meats: Sriracha can be used as a marinade or glaze for grilled meats. Its spicy and tangy flavor adds a delicious depth to the smoky taste of the meat. Try it with Smoked Turkey Breast.
    • Melted Butter: Combine sriracha with melted butter for a spicy and creamy sauce. This sauce is perfect for drizzling over popcorn, tossing with Air Fryer BBQ Chicken Wings, or dipping seafood like Instant Pot Lobster Tail and Shrimp Scampi Spaghetti.
    • Mexican Cuisine: Sriracha is a staple condiment in Thai cuisine but also pairs well with Mexican dishes. Add it to Pineapple and Mango Tacos, Instant Pot Beef Enchiladas, or Nachos to enjoy sriracha in a new way.

    Best Sriracha Brands

    Here are some other brands of sriracha:

    • Shark Brand Sriracha: Known for its medium heat level and versatility.
    • Huy Fong Foods Sriracha: Aka "Rooster Sauce," famous for its garlic-forward flavor.
    • Kikkoman Sriracha Hot Chili Sauce: Offers a unique blend of spiciness, sweetness, and umami.
    • Lee Kum Kee Sriracha Chili Sauce: Renowned for its balance of spiciness and tanginess.
    • Yellowbird Blue Agave Sriracha Sauce: Sweetened with blue agave instead of sugar.
    • Tabasco Sriracha Sauce: Offers a unique twist on the traditional Thai sauce.

    Best Substitutes For Sriracha

    If you're looking for Sriracha substitutes in your dishes, there are several options to consider. Sambal Oelek is often recommended as it shares a similar spicy and slightly sweet flavor profile with sriracha.

    • Another excellent alternative is Chili Garlic Sauce, which offers a similar tanginess to Sambal Oelek but with an added kick from garlic. It's an exciting choice for those who enjoy a bit of extra spice.
    • Gochujang, a staple in Korean cuisine, is also worth considering. This chili paste delivers a unique blend of spicy, sweet, and savory flavors, making it an exciting substitute for sriracha.
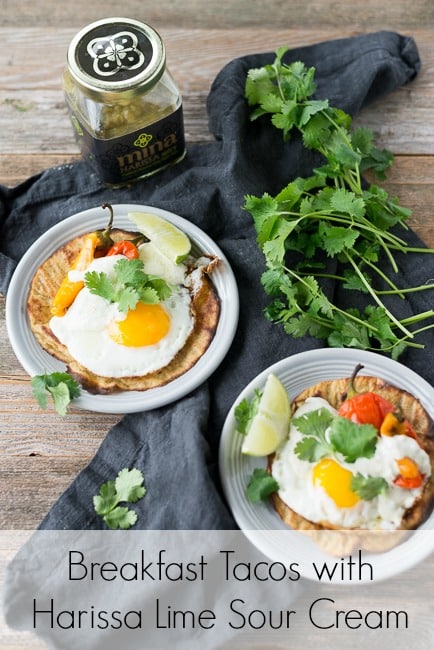
    • Harissa, a fiery chili pepper paste integral to North African and Middle Eastern cuisine, can diversify the taste of your meals with its unique mix of smoked chili peppers, garlic, olive oil, and various spices. Try these Breakfast Tacos with Harissa Lime Sour Cream.
    • Tabasco and Louisiana Hot Sauce can be suitable substitutes for those who prefer more familiar hot sauce brands. Each offers a unique flavor blend, so you should try a few to find the one that best suits your palate.

    Where Does Sriracha Come From?

    Sriracha, a popular hot sauce in the culinary world, is linked to Thailand and Vietnam. It's named after Si Racha, a town in Thailand where it was first made with Thai bird's eye chilies.

    The well-known worldwide version is made by Huy Fong Foods, founded by Vietnamese immigrant David Tran. Tran modified the traditional Thai recipe to craft his own sriracha after moving to the US.

    What Is Sriracha Sauce Made Of?

    This Asian-style spicy sauce, also known as "rooster sauce" for the rooster on its bottle, is a popular dip loved worldwide.

    Its vibrant color and robust flavor come from red jalapeno peppers, serrano peppers, distilled vinegar, and garlic. Sugar, salt, and xanthan gum are added for sweetness, balance, and thickness.

    Does Sriracha Contain Fish?

    Fish in Sriracha sauce can vary by brand. Popular ones like Huy Fong are vegan and fish-free. Some homemade versions add fish sauce for extra flavor.

    Note: Lee Kum Kee's Sriracha is fish extract-free.

    Wrapping Up

    Sriracha offers a distinctive blend of spicy, sweet, and savory flavors, enhancing any meal with its flavorful punch. Whether in dipping sauces or marinades, this Thai condiment adds a layer of warmth and taste that tantalizes the palate.

    More Useful Articles

    • Do Peanuts Go Bad?
    • Does Chicken Broth Go Bad?
    • Top 12 Paprika Substitutes
    • Does Fish Sauce Go Bad?

    21 Tasty Cinco De Mayo Recipes

    May 5, 2024 by Angela Milnes

    Cinco De Mayo Recipes.

    I'm really looking forward to Cinco De Mayo and the festivities. It's been on my mind for a while. I've compiled a list of my favorite Cinco De Mayo Recipes from Mexican food, including a breakfast option, because why not start celebrating early?

    These recipes are simple, flavorful, and require minimal ingredients - ideal for the entire family to enjoy. Let's dive into the world of vibrant flavors and culinary delights with these easy Cinco de Mayo Recipes!

    Cinco De Mayo Recipes
    [feast_advanced_jump_to]

    Easy Cinco De Mayo Recipes

    Cinco de Mayo is almost here and widely celebrated in the US. If you're like me, you might be searching for easy, tasty recipes to enhance the festivities on this important day that goes beyond Mexican Independence Day.

    From customizable tacos to flavorful salsas, these recipes are simple to make and bring a taste of Mexican culture to your home.

    Discover our favorite Cinco De Mayo recipes here and don't forget to see our list of Cinco De Mayo Desserts for after your main!

    1. Chilaquiles Rojos

    If you're looking to spice up your breakfast routine, you've got to try this Chilaquiles Rojo Recipe. This traditional dish is a delightful mix of lightly spicy and tangy flavors, thanks to the red sauce that coats those crispy Plantain Tortilla pieces.

    It's simple, hearty, and oh-so-satisfying. Serve it with a side of refried beans or top it with a fried egg. Trust me, your taste buds will thank you!

    Chilaquiles Rojos

    2. Pineapple Pico de Gallo

    I'm thrilled to share something that's quickly become a staple at our family table Pineapple Pico De Gallo. This delightful twist on the traditional pico combines the sweetness of pineapple with the classic flavors of tomatoes, onions, cilantro, and a dash of lime, creating a perfect blend of sweet and tangy.

    It's incredibly versatile, making it a fantastic addition to chips, grilled meats, or tacos, and it's easy to whip up, too. 

    pineapple pico de gallo salsa

    3. Sopa de Fideo

    Sopa de Fideo is a comforting Mexican noodle soup with a savory tomato base, one of the essential Cinco de Mayo recipes for celebrating Cinco de Mayo Day. Serve it with warm tortillas or crusty bread to complete the meal. Easy, yummy, and a family go-to, perfect for celebrating Cinco de Mayo!

    Sopa de Fideo

    4. Mahi-Mahi Fish Tacos

    Mahi-Mahi Fish Tacos with Pineapple Salsa are all about the perfect blend of flavors; think tender mahi-mahi with a light, natural sweetness, paired with the zesty kick of pineapple salsa. It's like a mini tropical getaway in every bite.

    And to round it all off, I love serving these with a side of creamy coleslaw and some crispy tortilla chips. Trust me, it's a combo that just works wonders and you will be enjoying it all week long.

    Mahi-Mahi Fish Tacos

    5. Easy Aperol Margarita Recipe

    The Easy Aperol Margarita mixes tequila with sweet, bitter, and citrus flavors for a revitalizing cocktail. Ideal with tortilla chips and guacamole, it's simple yet satisfying for any occasion.

    Aperol Margarita Recipe

    6. Barbacoa Burrito Bowls

    Barbacoa Burrito Bowls, a dish that's as flavorful as it is easy to whip up. Picture this: tender, slow-cooked meat that's been marinated in a rich blend of spices, and served over a bed of warm Garlic Rice. It's got that perfect mix of savory, a hint of spice, and just a touch of sweetness.

    And the best part? You can top it off with whatever you've got on hand - think fresh salsa, a dollop of sour cream, maybe some shredded cheese, or a sprinkle of cilantro.

    Barbacoa Burrito Bowls

    7. Classic Margarita with Lime Oleo-Saccharum

    Let's dive into a fun twist on the beloved Margarita today, jazzing it up with Lime Oleo-Saccharum. This little addition amps up the citrus notes, giving us a flavor that's both familiar and excitingly different.

    Pair it with easy bites like chips and guacamole or a refreshing taco salad, and you've got yourself a crowd-pleaser for any gathering.

    Margarita with Lime Oleo-Saccharum

    8. Coconut Crusted Fish Tacos

    Let's talk about whipping up something fresh and zesty for dinner tonight - Coconut Crusted Fish Tacos With Mango Salsa which gives a sweet and tangy flavor. They’re crunchy, sweet, and tangy, all in one bite. Perfect with a side of guacamole or Air Fryer Sweet potato fries for a simple, tasty meal the family will love.

    Coconut Crusted Fish Tacos

    9. Chicken Birria Tacos

    Chicken Birria Tacos is a simple yet flavorful choice for dinner. It is a simple meal that brings a little excitement to your dinner table. They're rich with spices and feature tender shredded chicken perfect for filling tacos. Pair them with onions, cilantro, and lime for an easy, satisfying meal.

    Chicken Birria Tacos

    10. Mexican Sopes Recipe

    Mexican Sopes is a classic dish, the kind of comfort food that brings families together around the dinner table. These little corn masa boats are a delightful blend of savory flavors, with a slightly crispy outside and a soft, warm inside.

    Topped with refried beans, cheese, lettuce, and your choice of meat, making each bite an explosion of taste. You can serve them alongside some fresh Strawberry Jalapeno Salsa, a dollop of sour cream, or a slice of avocado to add even more yum to your meal.

    Mexican Sopes

    11. Gluten-Free Chicken Taquitos

    Whipping up a batch of Chicken Taquitos has been a game changer in our house, especially on those busy weeknights.

    These taquitos are packed with a juicy, savory chicken filling that's just bursting with flavor, all while keeping things gluten-free for those with dietary needs. I love serving them with a simple side of guacamole and salsa for dipping.

    Chicken Taquitos

    12. Beef Tamale Casserole

    Beef Tamale Casserole has that hearty Slow Cooker Mongolian Beef flavor we all love, mixed with a little kick of spice and the sweet, comforting taste of cornbread. It's simple, straightforward goodness.

    And the best part? You can serve it up with a side of your favorite greens or a scoop of salsa for an extra burst of freshness. Trust me, it's a weeknight winner that'll have the whole family asking for seconds.

    Beef Tamale Casserole

    13. Beef Enchilada Casserole with Corn Tortillas

    Beef Enchilada Casserole with Corn Tortillas is like a cozy hug on a plate. It packs a hearty mix of savory beef, a hint of spice, and the comforting taste of corn tortillas all baked together into one delicious meal.

    Serve it up with a side of rice or a crisp green salad, and you've got a weeknight winner that the whole family will love.

    Beef Enchilada Casserole with Corn Tortillas

    14. Mexican Bean Salad

    This Mexican Bean Salad is a game changer. It's vegan, gluten-free, and grain-free, so pretty much everyone at your table can dig in without a worry. The flavors? Think bright, and zesty, with just the right kick of spice.

    It's like a little fiesta in a bowl. And serving it? Super versatile. Plop it on top of some greens for a hearty salad, scoop it up with chips for a snack, or even use it to top off your favorite tacos.

    Mexican Bean Salad

    15. Homemade Guacamole

    There's something truly special about Guacamole that just hits the spot every time. It's got this rich, creamy texture with a hint of lime and just the right kick of jalapeño that keeps you coming back for more.

    Plus, it's so versatile! Whether you're spreading it on warm, crunchy tortilla chips or using it to top off your favorite taco night dishes, this guacamole brings a fresh, homemade touch that makes any meal feel a bit more special.

    Homemade Guacamole

    16. Authentic Slow Cooker Birria

    If you're looking for a main course that packs a punch of flavor, you've got to try making Authentic Slow Cooker Birria (Birria de Res). This dish is all about tender, juicy beef simmered in a rich and slightly spicy sauce that's just bursting with warmth and depth. It's the kind of meal that feels like a hug in a bowl.

    Serve it up with some warm tortillas, a sprinkle of fresh onion and cilantro, and a squeeze of lime for a simple yet satisfying dinner.

    Slow Cooker Birria

    17. Mexican Corn Salad Recipe

    Mexican Corn Salad Recipe bursting with sweet and tangy flavors, thanks to the fresh corn, lime, and a hint of chili. It's the perfect side dish to jazz up your backyard BBQs or to bring a pop of color and taste to your dinner table.

    You can serve it alongside grilled chicken, or tacos, or just scoop it up with tortilla chips. Trust me, it's simple, delicious, and sure to be a hit with the family!

    Mexican Corn Salad

    18. Mole Chilaquiles

    Bursting with the rich flavors of Mexico, with just the right amount of spice to tantalize your taste buds Mole Chilaquiles a hearty blend of crispy tortilla chips smothered in savory mole sauce, is the ultimate comfort food for the Cinco de Mayo occasion.

    Served alongside a dollop of creamy sour cream and a sprinkle of fresh cilantro, it's a meal that brings the family together around the table in no time.

    Mole Chilaquiles

    19. Queso Fundido With Chorizo

    Dive into the ooey-gooey goodness of melted cheese blended with Spicy Chorizo for a flavor explosion! Serve it up with crispy tortilla chips for the ultimate crowd-pleasing appetizer at your next gathering.

    Queso Fundido With Chorizo

    20. Shredded Mexican Chicken (Instant Pot + Slow Cooker)

    Let your Instant Pot or slow cooker do the heavy lifting as you create tender, juicy Shredded Meixcan Chicken bursting with authentic Mexican flavors. Perfect for tacos, burritos, or atop a bed of rice for a quick and delicious weeknight dinner, it is one of the best Cinco de Mayo recipes.

    Shredded Mexican Chicken

    21. Elote Corn (Mexican Street Corn Recipe!)

    Experience the tangy and savory delight of Mexican Street Corn right in your own kitchen! Slathered with creamy mayo and sprinkled with cotija cheese and chili powder, this grilled corn on the cob is the ideal side dish for your backyard BBQ.

    Elote Corn

    22. Pollo Asado Al Carbon: Mexican Grilled Charcoal Chicken

    Fire up the grill and savor the smoky flavors of tender, juicy chicken marinated in traditional Mexican spices. Pair your Pollo Asado Al Carbon with grilled vegetables and a side of warm tortillas for a mouthwatering outdoor feast that will have everyone coming back for seconds.

    Pollo Asado Al Carbon

    23. Jalapeno Watermelon Margarita

    Cool off with a refreshing twist on the classic margarita featuring the subtle heat of jalapeño paired with the sweetness of watermelon. Serve your Jalapeno Watermelon Margarita over ice in a salt-rimmed glass for a zesty cocktail that's perfect for summer soirées.

    Jalapeno Watermelon Margarita

    24. Mexican Cheeseburgers

    Elevate your burger game with the bold flavors of Mexico! Top your grilled patties with gooey melted cheese, spicy salsa, and creamy guacamole for south-of-the-border Mexican Cheeseburgers.

    Mexican Cheeseburgers

    25. Chipotle Corn Salsa Recipe

     Add a zesty kick to your snacking game with this flavorful chipotle corn salsa! Perfect for dipping with tortilla chips or spooning over grilled meats, this easy-to-make Chipotle Corn Salsa will be a hit at any party or picnic.

    Chipotle Corn Salsa

    26. Bean and Cheese Dip

    Dive into creamy goodness with this irresistible bean and cheese dip. Packed with beans and gooey melted cheese, Bean And Cheese Dip is the ultimate comfort food snack for game day or movie night. Serve it alongside crispy tortilla chips or warm flour tortillas for dipping delight!

    Bean and Cheese Dip

    27. Bell Pepper Fajitas

    Celebrate Cinco de Mayo with Bell Pepper Fajitas! Whisk olive oil with garlic and spices. Cook bell peppers and onions in a skillet. Serve in a sheet pan with homemade or store-bought tortillas and your favorite toppings. Enjoy a versatile and delicious dish with friends and family. Perfect for a festive gathering or a flavorful meal.

    Bell Pepper Fajitas

    Here are More Recipes To Try!

    • 21+ Easy Salmon Recipes
    • 15+ Easy Cauliflower Recipes
    • 15+ Best Summer Salads Recipes
    • Best Homemade Hummus Recipes
    • Healthy Thanksgiving Side Dishes

    Best Cinco De Mayo Desserts

    May 4, 2024 by Angela Milnes

    Cinco De Mayo Desserts.

    Looking for sweet treats to spice up your Cinco de Mayo celebration? Look no further! We've rounded up some delicious Cinco De Mayo Desserts that are perfect for your fiesta. From refreshing coconut lime treats to indulgent cheesecakes and everything in between, these desserts are sure to satisfy your sweet tooth while adding a festive flair to your table.

    Different Cinco De Mayo Desserts.
    [feast_advanced_jump_to]

    Fresas con Crema (Strawberries and Cream)

     Indulge in the delightful combination of fresh strawberries and creamy goodness with Fresas con Crema. Each bite bursts with the natural sweetness of ripe strawberries perfectly complemented by the smooth, velvety texture of the cream. Consider topping it off with a dollop of freshly whipped cream and a sprinkle of ground cinnamon to enhance the flavors even more.

    Strawberries and cream in two glasses.

    Coconut Lime Tres Leches Cake

     Transport your taste buds to the tropics with Coconut Lime Tres Leches Cake. This dessert offers a harmonious blend of tropical coconut and zesty lime flavors that mingle with the richness of the tres leches-soaked cake. Serve it with a side of fresh fruit or a generous dollop of whipped cream for a delightful treat that will leave everyone craving more.

    Coconut Lime Tres Leches Cake Slice Topped With Lime Slice.

    Easy Margarita Cupcakes

     Add a playful twist to your Cinco de Mayo dessert spread with Easy Margarita Cupcakes. These delightful treats capture the tangy and citrusy essence of a classic margarita cocktail in every bite. The citrus-infused cake pairs perfectly with a tangy lime frosting, creating a burst of flavor that's both refreshing and indulgent

    Margarita cupcakes each in a separate plate.

    Sopapilla Cheesecake

     Treat your taste buds to a heavenly fusion of creamy cheesecake and cinnamon-sugar bliss with Sopapilla Cheesecake. Each bite offers a perfect balance of sweetness and warmth, making it an irresistible addition to your Cinco de Mayo festivities. Drizzle with honey or caramel sauce for an extra touch of sweetness that elevates this dessert to new heights.

    Pouring honey over sopapilla cheesecake.

    Easy Coconut Lime Ice Cream

     Beat the heat with the refreshing flavors of Easy Coconut Lime Ice Cream. This creamy treat combines the tropical essence of coconut with the zesty kick of lime, creating a palate-pleasing dessert that's perfect for summer celebrations like Cinco de Mayo. Garnish with fresh lime zest or toasted coconut flakes for an added burst of flavor and texture.

    Coconut lime ice cream in three bowls, served with lime.

    Cinnamon Glazed Grilled Pineapple

      Elevate your Cinco de Mayo dessert game with Cinnamon Glazed Grilled Pineapple. This simple yet sophisticated dessert features sweet and caramelized pineapple slices brushed with a warm cinnamon glaze. Serve these grilled pineapple slices with a scoop of vanilla ice cream for a delightful contrast of temperatures and textures that's sure to impress your guests.

    Cinnamon glazed grilled pineapple slices served with ice cream in a plate.

    No-Bake Strawberry Margarita Cheesecake

     Treat yourself to a boozy twist on a classic dessert with No-Bake Strawberry Margarita Cheescake. This indulgent cheesecake combines the tangy flavors of a margarita with the freshness of ripe strawberries, all nestled atop a buttery graham cracker crust. Garnish with a slice of lime and a sprinkle of graham cracker crumbs for added flair and flavor.

    Strawberry Margarita Cheesecake.

    Mexican Hot Chocolate Cookies

    Indulge your sweet tooth with the rich and spicy flavors of Mexican Hot Chocolate Cookies. These decadent treats feature a chocolatey base infused with warming spices like cinnamon and cayenne pepper, creating a unique and irresistible flavor profile. Pair them with a glass of cold milk for the ultimate indulgence.

    Mexican Hot Chocolate Cookies.

    Bacardi Rum Cake

    Bacardi Rum Cake, is packed with a punch of flavor that'll have you coming back for more. And guess what? It goes just perfectly with a scoop of vanilla ice cream or a dollop of whipped cream on top!

    Bacardi Rum Cake.

    Mazapan (Mexican Peanut Candy)

    Now, let's talk about Mazapan, that Mexican Peanut Candy that's like a little piece of heaven in your mouth. Its sweet, nutty goodness pairs so well with a hot cup of coffee or tea. Trust me, it's a match made in snack heaven!

    Mazapan slices.

    Easy Air Fryer Churros

    Next on the list, we've got those Easy Air Fryer Churros. Oh boy, talk about a crispy, cinnamon-sugar delight! They're so versatile, that you can enjoy 'em on their own or dip 'em in some melted chocolate or caramel sauce for an extra treat.

    Air fryer churros in a basket.

    Boozy Margarita Cupcakes

    Oh, and don't even get me started on those Boozy Margarita Cupcakes! They're like a party in your mouth with that tangy lime flavor and a hint of tequila. Perfect for a girls' night in or any celebration, really!

    Coconut Tres Leches Cake

    And let's not forget about that Coconut Tres Leches Cake. It's moist, it's creamy, it's coconutty goodness all in one bite! Serve it up with some fresh berries or a sprinkle of toasted coconut for a tropical twist.

    Serving coconut Tres leche cake slice.

    Chocolate-covered Jalapeno Peppers

    Now, here's a unique one for ya - Chocolate Covered Jalapeno Peppers. Yep, you heard me right! Sweet chocolate meets spicy jalapenos for a flavor explosion that'll leave you wanting more.

    Tres Leches Layered Cake

    Moving right along, we've got that Tres Leches Layered Cake, dripping with creamy goodness. It's like a slice of pure indulgence that'll satisfy any sweet tooth craving.

    Layered Tres leches cake.

    The Best Abuelita Hot Chocolate Brownies

    Oh, and you can't forget about The Best Abuelita Hot Chocolate Brownies. Rich chocolatey brownies infused with that classic Abuelita hot chocolate flavor? Yes, please! They're the perfect treat for cozying up on a chilly evening.

    Abuelita Hot Chocolate Brownies.

    Vegan Blueberry Pie

    A classic favorite - Vegan Blueberry Pie is bursting with juicy blueberries and wrapped in a flaky, golden crust that's so irresistible, that even non-vegans will be coming back for seconds!

    Vegan blueberry pie in a plate.

    Flan de Coco (Easy Puerto Rican Coconut Flan Recipe)

    Next up, we're taking a trip to the tropics with Flan de Coco - a dreamy, creamy coconut flan that's a breeze to whip up. With its luscious texture and delicate coconut flavor, it's the perfect ending to any meal, especially when served alongside a scoop of velvety vanilla ice cream.

    Coconut flan de coco.

    Arroz con Leche Recipe (Mexican Rice Pudding)

    Get ready to indulge in a comforting classic with Arroz con Leche, Mexican Rice Pudding. This creamy concoction, infused with hints of cinnamon and vanilla, is like a warm hug in a bowl. Pair it with a slice of churro cake for the ultimate dessert duo!

    Arroz con leche in a mug.

    Churro Cake

    Speaking of churros, who can resist the temptation of Churro Cake? With its cinnamon-sugar goodness and fluffy layers of cake, it's a decadent treat that's sure to satisfy your sweet tooth. Serve it up at your next gathering and watch it disappear in seconds!

    Churro cake.

    Apple Pie Tacos

    Switching gears a bit, let's taco 'bout a fusion masterpiece - Apple Pie Tacos! These crunchy shells filled with warm, spiced apples and topped with a dollop of whipped cream are a fun twist on a classic dessert. They're guaranteed to be a hit with kids and adults alike!

    Apple pie tacos.

    Mexican Chocolate Cake

    Get ready to spice things up with Mexican Chocolate Cake. Rich, moist, and infused with a kick of cinnamon and chili, it's a dessert that packs a punch. Top it off with a drizzle of dulce de leche for an extra indulgent treat.

    Mexican chocolate cake slices.

    Easy Chocolate Flan

    Chocolate lovers, rejoice! We've got just the thing to satisfy your cravings - Easy Chocolate Flan. This decadent dessert combines the creaminess of traditional flan with the rich flavor of chocolate for a match made in dessert heaven.

    Chocolate flan slice in a plate.

    Dulce De Leche Ice Cream

    Cool off with a scoop of Dulce de Leche Ice Cream. Creamy, caramel-infused goodness that's perfect for hot summer days or anytime you need a sweet pick-me-up. Serve it in a cone or alongside your favorite dessert for a delightful treat.

    Dulce De Leche Ice Cream.

    Lemon Drizzle Cake With Almond Flour (Gluten- Free Recipe)

    For those craving something light and citrusy, Lemon Drizzle Cake with Almond Flour is just the ticket. Made with gluten-free almond flour and fresh lemon zest, it's a refreshing twist on a classic dessert that's sure to brighten your day.

    Gluten free lemon drizzle cake in a plate.

    Margarita Cheesecake Bars

    Get ready to fiesta with Margarita Cheesecake Bars! These tangy treats combine the zesty flavor of a margarita with the creamy indulgence of cheesecake for a dessert that's simply irresistible. Serve them up at your next party and watch them disappear before your eyes!

    Margarita cheesecake bars in a plate.

    Easy Flan de Coco 

    Last but not least, we've got that Easy Flan de Coco (with Coconut Milk). Creamy caramel meets tropical coconut for a dessert that's simply divine. Serve it up after dinner or as a sweet ending to any meal. Trust me, your taste buds will thank you!

    Flan De Coco In A Plate.

    Enjoy Cinco De Mayo Desserts Today!

    Enjoy these delicious desserts any time but especially on Cinco De Mayo!

    Best Jamaican Oxtail Recipe For Slow Cooker

    May 1, 2024 by Angela Milnes

    Jamaican Oxtail Stew.

    Craving rich, fall-off-the-bone flavor? This Slow Cooker Jamaican Oxtail Recipe is slow-simmered in bold Caribbean spices for a soul-warming stew that’s tender, saucy, and unforgettable.

    jamaican oxtail stew in a bowl.

    This dish shines during cooler months or special occasions when only a big pot of Jamaican comfort food will do. But really, it’s an all-year gem. Whether you're meal prepping, hosting Sunday dinner, or feeding a hungry crowd—this oxtail and beans stew brings the vibes.

    If you're loving this, you’ll want to check out my Skillet Chicken With Artichokes and Sun-Dried Tomatoes and Slow-Cooker Ribs with Homemade Sauce—more cozy meals with depth and soul.

    [feast_advanced_jump_to]

    💖 Why This Jamaican Oxtail Stew Works Every Time

    • Deep, complex flavor: Browning the oxtails first creates a rich base, while slow simmering brings out every note.
    • Protein-rich & satisfying: Oxtail is a collagen-rich cut that delivers both nutrients and indulgence.
    • Authentic Jamaican twist: Caribbean seasonings, Maggi bouillon, and a kiss of heat from crushed peppers make this legit.
    Jamaican Oxtail Ingredients..

    ⭐ Star Ingredients

    • Oxtail: The showstopper. Marbled and meaty, perfect for slow-cooked stews that taste even better the next day.
    • Crushed Hot Pepper & Smoked Paprika: Layers of spice and smoky depth that mimic the soul of traditional island cooking.
    • Red Beans & Tomato Paste: These round out the dish, bringing texture and a touch of earthiness to balance the richness.

    For the complete list of ingredients with measurements and instructions, please see the recipe card at the bottom of the post.

    📖 Substitutions & Variations

    • Spice it up: Add whole Scotch bonnet peppers for that fiery Jamaican heat.
    • Pressure Cooker Shortcut: Cut your cooking time in half by making this in the Instant Pot—still rich and tender.
    • Make it sweeter: Add a touch of brown sugar and allspice for a slightly sweet, spiced gravy.
    • Lower sodium: Replace Maggi with low-sodium beef broth and balance with fresh herbs.
    • Serve it low-carb: Skip the rice and pair it with roasted cabbage steaks or cauliflower mash.

    If you love slow-simmered island flavors, try my Beetroot Sweet Potato Salad or Spicy Jamaican Jerk Pasta With Shrimp.

    🔪 How To Make This Jamaican Oxtail Recipe

    making jamacian oxtail stew
    1. Step 1: Rinse the tails with running water, place in a bowl, add salt, pepper, spices, and teriyaki sauce. Mix thoroughly and marinate in the refrigerator for 6 hours.
    Jamaican Oxtail Stew
    1. Step 2: Cut onions, carrots, and green onions into large chunks. Sauté the vegetables in a frying pan until translucent.
    Jamaican Oxtail Stew
    1. Step 3: Heat oil in a thick-walled pan, then fry the marinated oxtails until browned.
    Jamaican Oxtail Stew
    1. Step 4: Combine fried oxtails, vegetables, tomato paste, and a bouillon cube in a pot. Cover with boiling water, dissolve starch in ½ cup water, and add. Cook on low for 2 ½ hours. Add beans and cook for another 30 minutes. Once the oxtails are tender and flavors meld, serve hot, garnished with thyme if desired. Enjoy with rice or your favorite side.

    💡 Hint: Browning the oxtail well at the start gives you that deep flavor. Don’t skip this step—it’s where the magic begins!

    Jamaican Oxtail Stew

    👩‍🍳 Expert Tips

    • Use a Dutch oven or cast iron pot for even heat and flavor concentration.
    • Skim the fat after simmering if needed, or refrigerate overnight and remove solidified fat for a lighter stew.
    • Batch cook & freeze—this gets even better the next day and freezes like a dream.
    Jamaican Oxtail Stew

    💭 FAQs

    Can I use a pressure cooker for Jamaican oxtail stew?

    Yes! Use all the same ingredients and reduce cook time to about 45 minutes under high pressure, plus 15 for natural release.

    What makes Jamaican oxtail unique?

    The spice profile—allspice, garlic, thyme, and Scotch bonnet—and slow braising give it that iconic depth and heartiness.

    How do I thicken Jamaican stew naturally?

    A starch slurry helps, but you can also mash some beans or let it reduce uncovered for the last 15 minutes.

    Can I make this Jamaican oxtail recipe ahead of time?

    Absolutely. Like most Caribbean stews, this gets better as it sits. Perfect for meal prep or make-ahead hosting.

    💖 Serving Suggestions

    Wondering what to serve with this Jamaican oxtail recipe for slow cooker:

    • Jalapeno Cornbread or Oaty Flatbread for soaking up that rich sauce.
    • Creamy Mashed Plantains for a classic Caribbean side.
    • Avocado Salad to add freshness and cool down the spice.
    • Roasted Brussels Sprouts With Maple Syrup for a sweet-savory contrast.
    • Coconut Rice or Turmeric Carrot Rice for a tropical touch.

    🍽 More Fantastic Recipes To Try

    • Hawaiian Garlic Shrimp.
      Hawaiian Garlic Shrimp Recipe (20 Minutes, So Flavorful!)
    • Mango and Pineapple Salsa in a white bowl.
      Mango and Pineapple Salsa (Perfect With Fish)
    • Carrot And Raisin Salad With Pineapple.
      Carrot And Raisin Salad With Pineapple
    • Cold Chicken Pasta Salad With Italian Dressing.
      Cold Chicken Pasta Salad With Italian Dressing

    Did you make this recipe? Leave a review and a ⭐⭐⭐⭐⭐ rating below, or tag us on our Facebook Page! Alternatively, bookmark it in your browser or save to P

    Jamaican Oxtail Stew.

    Jamaican Oxtail Recipe

    Angela Milnes
    Indulge in the rich, savory flavors of this Jamaican Oxtail recipe! Cooked to tender perfection, the oxtails are simmered in a flavorful blend of herbs, spices, and traditional Jamaican seasonings.
    5 from 5 votes
    Print Recipe Pin Recipe Rate this Recipe
    Prep Time 3 hours hrs
    Cook Time 2 hours hrs
    Total Time 5 hours hrs
    Course Dinners
    Cuisine Jamaican
    Servings 4 Servings
    Calories 797 kcal

    Ingredients
      

    • 2 pounds Oxtails chopped in chunks
    • 1 cup Red Beans canned
    • 3 tablespoon Teriyaki Sauce
    • 1 ½ tablespoon Starch
    • 1 Maggi Bouillon Cube
    • 1 tspn Crushed Pepper Flakes
    • 2.5 oz Red Bell Pepper chopped
    • 3 tablespoon Tomato Paste
    • 1 Onion
    • 1 Carrot
    • 4 stalks Green Onion
    • 1 tsp. Garlic Powder
    • 1 ½ tsp. Smoked Paprika
    • 1 tsp. Coriander
    • pinch Salt and Pepper
    • 4 tablespoon Vegetable Oil

    Instructions
     

    • Rinse the tails with running water, place in a bowl, add salt, pepper, spices, and teriyaki sauce. Mix thoroughly and marinate in the refrigerator for 6 hours.
    • Cut onions, carrots, and green onions into large chunks. Sauté the vegetables in a frying pan until translucent.
    • Heat oil in a thick-walled pan, then fry the marinated oxtails until browned.
    • Combine fried oxtails with vegetables, tomato paste, and bouillon cube in a pot. Cover with boiling water, dissolve starch in ½ cup water, and add to the pot.
    • Cook over low heat for 2 ½ hours. Add beans and continue cooking for an additional 30 minutes.
    • Once the oxtails are tender and the flavors have melded, serve the Jamaican oxtail dish hot, garnished with fresh thyme if desired. Enjoy this flavorful and hearty meal with rice or your favorite side dish.

    Notes

    Preheat Pans for Even Cooking: Preheat your pans before adding ingredients to ensure even cooking and prevent sticking.
    Brine Poultry for Juiciness: Brining poultry in a saltwater solution before cooking helps retain moisture and enhances flavor.
    Use Fresh Herbs as Garnish: Elevate dishes with a sprinkle of fresh herbs just before serving for a pop of color and added freshness.

    Nutrition

    Serving: 1gCalories: 797kcalCarbohydrates: 22gProtein: 75gFat: 46gSaturated Fat: 14gPolyunsaturated Fat: 10gMonounsaturated Fat: 18gTrans Fat: 0.1gCholesterol: 249mgSodium: 1080mgPotassium: 414mgFiber: 5gSugar: 6gVitamin A: 3635IUVitamin C: 6mgCalcium: 90mgIron: 11mg
    Print Recipe Pin Recipe Rate this Recipe
    Tried this recipe?Let us know how it was!

    Strawberry Popsicle Recipe With Lemon (Naturally Sweet & Tangy)

    April 30, 2024 by Angela Milnes

    Strawberry Lemon Popsicles.

    These Strawberry Lemon Popsicles are icy, tangy, and perfectly sweet—a fruity favorite that comes together in minutes. This strawberry popsicle recipe is the ultimate frozen treat for summer.

    Strawberry Lemon Popsicles.

    Strawberry and lemon are a classic summer duo—one sweet, one zingy, and together? Absolute magic. These popsicles are a hit for pool parties, BBQs, and lazy afternoons when the kids need a cold treat. They’re made with real fruit, no artificial colors, and sweetened just enough to let the berries shine. I

    If you're looking for more frozen fruit fun, try our Pineapple Coconut Popsicles With Lime or Papaya Banana Yogurt Ice Cream With Cashews.

    [feast_advanced_jump_to]

    💖 Why This Recipe Works

    • Refreshing Summer Treat: These strawberry lemonade popsicles are a fun, hydrating way to beat the heat.
    • Burst of Flavor: Sweet strawberries and tangy lemon bring a fresh, fruity zing in every bite.
    • Easy to Make: Simple ingredients, minimal mess—great for kids to help with!

    ⭐ Star Ingredients

    Strawberry Lemon Popsicles Ingredients.
    • Fresh Strawberries – I always grab the juiciest berries I can find at the market—ripe strawberries give these pops that naturally sweet, bright flavor and that pretty pink hue.
    • Lemons, Juiced – Fresh lemon juice is a must here. It gives just the right zingy punch and keeps the pops from being overly sweet.
    • Water – Keeps the texture light and icy. You can also sub sparkling water for a fizzy feel.
    • Agave Nectar – My go-to for natural sweetness. It blends beautifully without overpowering the fruit.

    For the complete list of ingredients with measurements and instructions, please see the recipe card at the bottom of the post.

    📖  Substitutions & Variations

    • Coconut Water Base – Swap out the regular water with coconut water for a tropical, lightly sweet twist.
    • Maple-Sweetened Version – Use maple syrup instead of agave for a warm, caramel-like depth—especially good with ripe strawberries.
    • Strawberry Kiwi Pops – Toss in a peeled kiwi for a tangy green boost that adds both flavor and color.
    • Creamy Layered Pops – Fill molds halfway with the strawberry mix, freeze until just firm, then top with coconut yogurt and freeze fully for a fun two-tone treat.

    Want more fruity ideas? Don’t miss our Blueberry Smoothie Bowl and Easy Dragon Fruit Smoothie recipes.

    🔪How To Make Strawberry Lemon Popsicles?

    Strawberry Lemon Popsicles

    Step One: Remove the crowns from the strawberries and wash them.

    strawberry lemon popsicle juice in blender.

    Step Two: In a blender, add fresh lemon juice, strawberries, water and agave nectar. Blend until it is all smooth.

    Strawberry Lemon Popsicles

    Step Three: Pour the blended mixture into molds, leaving a bit of space at the top. Insert sticks and freeze for at least 6 hours or overnight.

    pineapple coconut popsicle

    Step Four: To unmold, run warm water over the outside for a few seconds and gently release the pops.

    💡Hint: No popsicle molds? Use small paper cups and wooden sticks instead. Easy, budget-friendly, and just as fun!

    Strawberry Lemon Popsicles

    👩‍🍳 Expert Tips

    • Pulse or Puree: For smooth strawberry lemon popsicles, fully blend. For a bit of texture, pulse to leave fruit bits.
    • Use Sparkling Water: Adds a light, fizzy texture and makes the pops feel extra fancy.
    • Freeze-Dried Strawberry Boost: Blend in 1 tablespoon of freeze-dried strawberry powder to intensify flavor and color.
    • Layer for Style: Try layering the strawberry mix with yogurt or coconut milk for a swirl effect.
    • Freeze Flat: Lay molds or cups flat in the freezer for even freezing. Freeze for at least 6 hours—overnight is ideal.

    💡Extra Mix Tip: Got extra strawberry lemonade blend? Pour it into ice cube trays for smoothie boosters or fruit-infused drinks.

    💭 FAQs

    Can I Use Frozen Strawberries in This Strawberry Popsicle Recipe?

    Absolutely! This strawberry popsicle recipe works great with either fresh or frozen strawberries—just toss them in straight from the freezer.

    How Do I Store Homemade Popsicles?

    After making this strawberry popsicle recipe, store the pops in an airtight container or wrap individually in parchment to avoid sticking. Lay flat in the freezer and enjoy within 2–3 months.

    Can I Make These Popsicles Without Molds?

    Absolutely! Use small paper cups and insert wooden sticks once the mixture starts to firm up (after ~1 hour in the freezer).

    What Can I Add For Extra Flavor?

    Try herbs like mint or basil, citrus zest, or a splash of orange or grapefruit juice. Swirling in jam or layering with yogurt also adds a gourmet touch.

    💖 Serving Suggestions

    Here are some great ways to serve these popsicles:

    • Serve on Citrus Ice: Arrange your popsicles over crushed lemon or lime ice for a zesty, colorful presentation at parties.
    • Layered Pop Bar: Serve alongside coconut yogurt, melted dark chocolate, or a sprinkle of shredded coconut and let everyone customize their dip and toppings.
    • Pops in a Jar: Pop one into a mason jar of sparkling water for a fun fizzy float that turns into a drink as it melts.
    Strawberry Lemon Popsicles

    🍽 More Summer Recipes You'll Love

    • Pineapple Coconut Popsicles With Lime.
      Pineapple Coconut Popsicles With Lime
    • Homemade Strawberry Lemonade.
      Homemade Strawberry Lemonade -Refreshing Summer Drink!
    • Strawberry Puree.
      Strawberry Puree Recipe for Babies, Cocktails & More
    • Fresh Fruit Strawberry Sangria.
      Strawberry Sangria Recipe (With Mint)

    Did you make this recipe? Leave a review and a ⭐⭐⭐⭐⭐ rating below, or tag us in our Facebook Group! Alternatively, bookmark it in your browser or save to Pinterest.

    Strawberry Lemon Popsicles.

    Strawberry Popsicle Recipe With Lemon (Naturally Sweet & Tangy)

    Angela Milnes
    Cool off with these refreshing Strawberry Lemon Popsicles! Bursting with the sweet flavor of ripe strawberries and the zesty kick of fresh lemon, these popsicles are the perfect treat for a hot day.
    5 from 4 votes
    Print Recipe Pin Recipe Rate this Recipe
    Prep Time 10 minutes mins
    Cook Time 0 minutes mins
    Total Time 10 minutes mins
    Course Desserts
    Cuisine American
    Servings 12 Servings
    Calories 19 kcal

    Ingredients
      

    • 1 pound Fresh strawberries
    • 2 Lemons juiced
    • 1 Cup Water
    • ¼ Cup Agave nectar

    Instructions
     

    • Remove the crowns from the strawberries and wash them.
    • In a blender, add fresh lemon juice, strawberries, water and agave nectar. Blend until it is all smooth.
    • Carefully pour the blended mixture into popsicle molds, leaving a small gap at the top to allow for expansion during freezing. Then, insert wooden popsicle sticks into the center of each mold, ensuring they are positioned securely.
    • Place the filled molds in the freezer and allow them to freeze for at least 6 hours or until completely solid.
    • Once the popsicles are fully frozen, remove them from the molds by running warm water over the outside of the popsicle mold for a few seconds.
    • Gently pull the popsicles out and place them on a serving tray or plate. Serve immediately and enjoy the refreshing taste of your homemade Strawberry Lemon Popsicles!

    Notes

    Minimize Waste: To use up extra strawberry lemonade mix, pour it into ice cube trays, freeze for later. Cover with plastic wrap to keep fresh, avoid freezer odors.
    Enhance Sweetness: Try agave nectar, maple syrup, or simple sugar syrup to adjust popsicle sweetness to your liking.
    Optimal Mixing: Use granulated sugar in the strawberry lemonade mix for consistent sweetness and smooth blending.
    Freshness is Key: Use fresh lemon juice for a vibrant, zesty flavor in your popsicles. Bottled lemon juice works as an alternative when needed.

    Nutrition

    Calories: 19kcalCarbohydrates: 5gProtein: 0.2gFat: 0.1gSaturated Fat: 0.01gPolyunsaturated Fat: 0.02gMonounsaturated Fat: 0.002gSodium: 2mgPotassium: 25mgFiber: 1gSugar: 4gVitamin A: 4IUVitamin C: 10mgCalcium: 5mgIron: 0.1mg
    Print Recipe Pin Recipe Rate this Recipe
    Tried this recipe?Let us know how it was!

    Easy Blueberry Crumble Recipe (Almond Flavor)

    April 29, 2024 by Angela Milnes

    Blueberry Crumble topped with granola in a baking dish.

    This Easy Blueberry Crumble is everything you want in a summer dessert—bubbly berries, a golden topping, and just enough sweetness to keep you going back for one more spoonful.

    Blueberry Crumble topped with granola in a baking dish.

    There’s something timeless about a warm Blueberry Crumble—simple, cozy, and always a hit at the table. Whether you’re baking for a crowd or treating yourself on a quiet night in, this easy dessert brings big comfort with minimal fuss.

    If you love easy, feel-good treats, you might also enjoy our Creamy Vanilla Eclair Cake or the refreshing No-Churn Vegan Mango Sorbet. For something floral and fancy, try this Creamy Lavender Cheesecake. Or keep it playful with Chocolate Covered Bananas and our tropical-inspired Papaya Banana Yogurt Ice Cream. Dessert doesn’t have to be complicated—it just has to be delicious.

    [feast_advanced_jump_to]

    💖 Why This Recipe Works

    • Texture Heaven: Juicy berries meet a crisp oat topping—classic and comforting.
    • Quick to Prep: Simple ingredients, minimal effort, and no rolling pin required.
    • Flavor-Packed: Lemon zest, maple syrup, and cinnamon take it from basic to bakery-worthy.

    ⭐ Star Ingredients

    Blueberry Crumble Ingredients.
    • Fresh Blueberries: Use ripe, plump berries for that juicy burst. I give mine a quick rinse and dry so the filling doesn’t get watery.
    • Maple Syrup: Adds a subtle, earthy sweetness and blends beautifully with the lemon.
    • Cornstarch: My go-to thickener—it keeps the filling luscious, not runny.
    • Lemon Zest + Juice: Brightens the flavor and balances the sweetness like a charm.
    • Cinnamon: Just a pinch warms up the whole crumble and makes your kitchen smell amazing.

    For the complete list of ingredients with measurements and instructions, please see the recipe card at the bottom of the post.

    📖  Substitutions & Variations

    • Oats: Rolled or quick oats work, but old-fashioned oats give the best texture.
    • Make it a Bar: Bake longer and chill before cutting into blueberry crumble bars.
    • Almond Crunch: Add sliced almonds to the topping for extra nutty texture.
    • Berry Swap: Try mixing in raspberries, blackberries, or even chopped peaches.
    • Crumble Pie: Pour the filling into a pie crust and top with crumble for a rustic pie twist.

    Looking for more fruit-filled ideas? Try my Strawberry Lemon Popsicles or Honey Bun Cake With Vanilla Glaze.

    🔪How To Make This Easy Blueberry Crumble Recipe?

    Blueberries.
    1. Step 1: Preheat the oven to 350 degrees Fahrenheit. Rinse and drain the blueberries and be sure to remove any stems from the blueberries. 
    Granola in a bowl, butter and cinnamon in a small bowl, a whole lemon, and blueberries.
    1. Step 2: Take a 9 by 9-inch or a 9 by 13-inch baking dish, and mix together the blueberries, maple syrup, cornstarch, lemon zest, lemon juice, and cinnamon.
    Oats, vanilla almond granola, brown sugar, and salt in a bowl.
    1. Step 3: In a medium bowl, stir together the oats, vanilla almond granola, brown sugar, and salt. Mix in the butter. Pour the oat mixture over the fruit filling and place the remaining 4 tablespoons of cold butter on top of the mixture.
    Baked blueberry crumble.
    1. Step 4: Bake for 45 minutes or until bubbly, crisp, and golden brown. Serve your Blueberry Crumble with vanilla ice cream.

    💡Hint: Let it cool 10 minutes before serving—this helps the filling set and keeps scoops from sliding everywhere.

    Blueberry crumble on a plate served with a spoon.

    👩‍🍳 Expert Tips

    • Frozen Berries? Use them straight from the freezer—but add 1 extra teaspoon of cornstarch to help absorb moisture.
    • Don’t Skimp on Zest: The lemon zest brightens everything. I use a microplane for super-fine flecks.
    • Watch the Edges: If they’re bubbling too fast, tent loosely with foil to prevent overbrowning.

    💭 FAQs

    Can I use frozen blueberries for blueberry crumble?

    Yes, frozen blueberries work wonderfully in this recipe. There's no need to thaw them; just use them straight from the freezer. This helps maintain their shape and prevents the filling from becoming too watery.

    How do I prevent the crumble topping from becoming soggy?

    To keep the topping crisp, ensure that the blueberry filling is properly thickened. Using cornstarch or flour helps achieve this. Also, baking the crumble until the topping is golden brown and the filling is bubbly will help in achieving the desired texture.

    How should I store leftover blueberry crumble?

    Store any leftover blueberry crumble in an airtight container in the refrigerator. It will stay fresh for about 2-3 days. Reheat individual servings in the microwave or enjoy them cold.

    Can I add other fruits to this easy blueberry crumble?

    Absolutely! Many fruits pair well with blueberries. Consider adding sliced peaches, blackberries, raspberries, or even rhubarb for a unique twist. Just ensure the total fruit volume remains consistent with the recipe to maintain the right balance of filling and topping.

    Blueberry crumble in a dish.

    💖 Serving Suggestions

    • Vanilla Ice Cream: Classic, creamy, and made for melty goodness.
    • Coconut Whipped Cream: Dairy-free and delicious with a tropical vibe.
    • Crème Fraîche: Tangy, rich, and a little fancy.
    • Toasted Almonds or Pecans: For extra crunch and nutty flavor.
    • Fresh Lemon Zest: Just a sprinkle for brightness before serving.
    Blueberry crumble on a plate.

    🍽 Try More Easy Desserts

    • Peach Pie Bars.
      Homemade Peach Pie Bars – Sweet, Simple, and So Good!
    • Papaya Banana Yogurt Ice Cream with Cashews.
      Best Banana Yogurt Ice Cream (With Papaya)
    • Creamy Vanilla Eclair Cake.
      Creamy Vanilla Eclair Cake
    • The Best No Bake Banana Pudding.
      The Best No Bake Banana Pudding

    Did you make this recipe? Leave a review and a ⭐⭐⭐⭐⭐ rating below, or tag us in our Facebook Group! Alternatively, bookmark it in your browser or save to Pinterest.

    Blueberry Crumble topped with granola in a baking dish.

    Easy Blueberry Crumble Recipe

    Angela Milnes
    Enjoy the perfect blend of sweet and crunchy with this Easy Blueberry Crumble! Juicy blueberries are topped with a buttery, golden crumble that’s irresistibly crisp.
    5 from 4 votes
    Print Recipe Pin Recipe Rate this Recipe
    Prep Time 5 minutes mins
    Cook Time 45 minutes mins
    Total Time 50 minutes mins
    Course Desserts
    Cuisine American
    Servings 6 Servings
    Calories 352 kcal

    Ingredients
      

    • 2 pounds Fresh Blueberries
    • ⅓ cup Maple Syrup
    • 3 tablespoon Cornstarch
    • ¼ teaspoon Lemon Zest
    • 2 tablespoon Fresh Lemon Juice
    • ¼ teaspoon Cinnamon
    • 1 cup Old Fashioned Oats
    • 1 cup Vanilla Almond Granola store bought makes it easy
    • ½ cup Lightly Packed Brown Sugar
    • ¼ teaspoon Kosher Salt
    • 4 tablespoon Unsalted Melted Butter

    Instructions
     

    • Preheat the oven to 350 degrees Fahrenheit. Rinse and drain the blueberries and be sure to remove any stems from the blueberries. 
    • Take a 9 by 9 inch or a 9 by 13 inch baking dish, mix together the blueberries, maple syrup, cornstarch, lemon zest, lemon juice and cinnamon.
    • In a medium bowl, stir together the oats, vanilla almond granola, brown sugar and salt. Mix in the butter.
    • Pour the oat mixture over the fruit filling and place the remaining 4 tablespoons of cold butter on top of the mixture.
    • Bake for 45 minutes or until bubbly, crisp and golden brown. Serve your Blueberry Crumble with vanilla ice cream.

    Notes

    Blueberry Preparation: For a thick and luscious blueberry layer in the crumble, coat fresh or frozen blueberries in a corn flour mixture before adding to the filling.
    Blueberry Options: Fresh blueberries are great, but frozen berries works too. Let frozen blueberries thaw to room temperature before using to avoid excess moisture in the dish.

    Nutrition

    Calories: 352kcalCarbohydrates: 57gProtein: 4gFat: 13gSaturated Fat: 6gPolyunsaturated Fat: 1gMonounsaturated Fat: 4gTrans Fat: 0.3gCholesterol: 22mgSodium: 176mgPotassium: 201mgFiber: 3gSugar: 33gVitamin A: 250IUVitamin C: 2mgCalcium: 63mgIron: 2mg
    Print Recipe Pin Recipe Rate this Recipe
    Tried this recipe?Let us know how it was!

    Mickey Mouse Cake Pops

    April 28, 2024 by Angela Milnes

    Mickey Mouse Cake Pops on a white plate.

    Mickey Mouse Cake Pops are the cutest party treat on a stick—perfect for birthdays, playdates, or any day you’re feeling that Disney magic. These are way easier to make than you think, and the best part? The kids can help too!

    Mickey Mouse Cake Pops on a white plate.

    There’s something timeless about Mickey Mouse—and these Disney-themed desserts are always a hit. Whether you're throwing a Mickey Mouse party or just want to recreate that Disney World magic at home, these cake pops are a total win. They’re easier than a layered cake but still look super impressive on any dessert table.

    Want more delicious treats? Try my Chocolate Covered Bananas, Pineapple Coconut Popsicles, or No-Churn Vegan Mango Sorbet for a themed dessert spread.

    [feast_advanced_jump_to]

    💖 Why These Disney Cake Pops Are So Fun

    • Kid-friendly fun: A hands-on kitchen project little ones love (especially when they get to add Mickey’s ears!).
    • No fancy tools needed: Just cake, frosting, chocolate melts, and a little Disney spirit.
    • Perfect party bites: A great alternative to a full Mickey cake—bite-sized, mess-free, and adorable.

    🌟 Star Ingredients

    Mickey Mouse Cake Pops Ingredients.
    • Crumbled Cake: This is your base—moist, flavorful, and easy to mold. You can use boxed cake or your fave homemade recipe.
    • White Cake Frosting: Helps bind everything together. I like cream cheese frosting for an extra-rich flavor.
    • White Almond Bark: Makes the perfect coating—smooth, glossy, and lightly sweet with a hint of almond.
    • Melting Wafers: Use them for Mickey’s ears and decoration. Go wild with colors or stick to red, yellow, and black for that classic Mickey look.

    For the complete list of ingredients with measurements and instructions, please see the recipe card at the bottom of the post.

    Variations and Substitutions

    • Black candy melts: Swap in for the ears or for adding tiny details without food coloring.
    • Minnie twist: Add a piped-on bow or a sprinkle bow for a cute Minnie Mouse cake pop version.
    • Flavor swaps: Red velvet and chocolate cake are the most popular, but lemon or strawberry can be super fun too.

    These are also super easy to dress up for the season—just switch up the colors! Think red and green for Christmas, pastels for Easter, or black and orange for Halloween Mickeys. They're such a fun way to turn a classic into a holiday-ready treat without much extra effort.

    How To Make Mickey Mouse Cake Pops?

    Use this section for process shots, alternating between the step and image showing the step. Users don't like seeing process shots cluttering up the recipe card, so include your process shots here.

    broken up cake in a bowl.
    1. Step 1: In a large mixing bowl, add the cake and frosting, and mix well until the cake becomes like firm batter. Form batter into 1 ½” balls. Set aside. Melt the white almond bark in a bowl using a microwave. Heat 30 seconds at a time until fully melted. Add a splash of oil if needed.
    cake pops dipped in red chocolate.
    1. Step 2: Add a few drops of red coloring until you reach fire engine red. Dip the cake pop stick into the melted chocolate about a half inch. Then stick it into the cake ball. Repeat for all the Mickey mouse cake balls. Dip cake pops into the red chocolate until fully coated. Place upright in a holder or foam base to allow the chocolate to harden. Before the chocolate hardens, take two melting wafers and stick them in the cake pop to form Mickey’s ears. 
    dipping half of mickey mouse cake pops into brown chocolate.
    1. Step 3: Melt the almond bark in a bowl using a microwave. Heat 30 seconds at a time until fully melted or according to package directions. Add a splash of oil if needed. Dip the hardened cake pops in the melted chocolate covering the Mickey's ear and half of the cake pops. Leaving the red exposed on the bottom. 
    a plate of mickey mouse themed cake pops.
    1. Step 4: Melt half a block of white almond bark in a bowl using a microwave. Heat 30 seconds at a time until fully melted. Add a splash of oil if needed. Add a drop of yellow and mix. Once the cake pops have hardened, dab some yellow chocolate between the red and brown chocolate to form yellow buttons using an unused cake pop stick. Let the Mickey Mouse cake pops finish hardening and enjoy!

    💡Hint: For clean, glossy finishes, add a teaspoon of oil to your melted chocolate and tap off any excess coating before decorating.

    7 Mickey Mouse Cake Pops on a plate next to a teatowel.

    👩‍🍳 Expert Tips

    • Use a foam block or cardboard box with holes to dry pops upright and avoid flat spots.
    • Tap off excess chocolate gently before it hardens for a smooth finish.
    • Prep in batches: Stick all the pops, then dip, then decorate—it keeps things neater (and more fun with kids).
    • Work quickly: Melting wafers harden fast, so have all decorations ready before dipping.

    FAQs

    What’s the best cake to use for these Disney cake pops?

    Chocolate and red velvet are most popular for their rich flavor and color, but you can use any cake you like.

    Can I make cake pops in advance?

    Yes! Store in an airtight container in the fridge for up to 5–6 days, or freeze undecorated pops for longer storage.

    What can I use instead of candy melts?

    White chocolate chips or almond bark work well—just be sure to add a bit of oil for smoother dipping.

    How do I keep cake pops from falling off the stick?

    Dip the stick in melted chocolate before inserting into the cake ball—this helps it stay put once chilled.

    Mickey Mouse Cake Pops In A Plate

    💖 Serving Suggestions

    • Add to a themed dessert table for a Mickey or Disney birthday party.
    • Wrap individually with ribbon for party favors.
    • Stick in a foam block and use as a centerpiece.
    • Serve with fruit skewers for a colorful, kid-friendly snack platter.
    • Pair with a Disney movie night for a full themed experience.

    🍽 More Fantastic Desserts

    You'll want to check out more easy and simple desserts here on Eat Your Beets.

    • The Best No Bake Banana Pudding.
      The Best No Bake Banana Pudding
    • Smores Fluff With Mini Marshmallows.
      Smores Fluff With Mini Marshmallows
    • Moist Honey Bun Cake With Vanilla Glaze.
      Moist Honey Bun Cake With Vanilla Glaze
    • Funfetti Oreo Pops.
      Funfetti Oreo Pops

    Did you make this recipe? Leave a review and a ⭐⭐⭐⭐⭐ rating below,

    Mickey Mouse Cake Pops on a white plate.

    Mickey Mouse Themed Cake Pops

    Angela Milnes
    Mickey Mouse Cake Pops are fun, delicious treats on a stick decorated to look like Mickey, perfect for parties or a special Disney-themed snack.
    5 from 4 votes
    Print Recipe Pin Recipe Rate this Recipe
    Prep Time 20 minutes mins
    Cook Time 2 minutes mins
    Total Time 22 minutes mins
    Course Desserts
    Cuisine American
    Servings 15 Servings
    Calories 45 kcal

    Equipment

    • 15 Cake Pop Sticks

    Ingredients
      

    • ½ Prepared cake crumbled (13x9 cake)
    • 2 tablespoons of White cake frosting
    • 4 cubes of White almond bark
    • 4 cubes of Almond bark
    • 30 Chocolate melt wafers any colors (for the ears)
    • Red food coloring
    • Yellow food coloring

    Instructions
     

    • In a large mixing bowl, add the cake and frosting, and mix well until the cake becomes like firm batter. Form batter into 1 ½” balls. Set aside.
    • Melt the white almond bark in a bowl using a microwave. Heat 30 seconds at a time until fully melted. Add a splash of oil if needed. Add a few drops of red coloring until you reach fire engine red. 
    • Dip the cake pop stick into the melted chocolate about a half inch. Then stick it into the cake ball. Repeat for all the Mickey Mouse cake balls.
    • Dip cake pops into the red chocolate until fully coated. Place upright in a holder or foam base to allow the chocolate to harden.
    • Before the chocolate hardens, take two melting wafers and stick them in the cake pop to form Mickey’s ears. 
    • Melt the almond bark in a bowl using a microwave. Heat 30 seconds at a time until fully melted or according to package directions. Add a splash of oil if needed.
    • Dip the hardened cake pops in the melted chocolate covering the Mickey's ear and half of the cake pops. Leaving the red exposed on the bottom. 
    • Melt half a block of white almond bark in a bowl using a microwave. Heat 30 seconds at a time until fully melted. Add a splash of oil if needed. Add a drop of yellow and mix.
    • Once the cake pops have hardened, dab some yellow chocolate between the red and brown chocolate to form yellow buttons using an unused cake pop stick. 
    • Let the Mickey Mouse cake pops finish hardening and enjoy!

    Notes

    Melting Almond Bark: When melting the almond bark, make sure you use a microwave-safe bowl, and keep stirring the mixture several times in between until you get a smooth, even mixture.
    Frosting Flavor Variation: To bring in a bit of flavor variation, I would also recommend using cream cheese frosting instead of regular frosting to make the Mickey Mouse cake pop.
    Cake Flavor Choices: While you can use almost any flavor of cake to make cake pops, chocolate cake and red velvet cake are hands down, the best choices.
    Achieving the Perfect Shell: If the candy melting wafers aren't creating that perfect hard shell around the cake ball, you can add a couple of drops of vegetable oil into them and give it a good mix before you dip the cake balls in it.
    Uniform Surface Preparation: Remember to tap the Mickey Mouse cake pops lightly and remove the excess chocolate to get a uniform, clean surface to work with and add all the details on.
    Protecting the Work Surface: To keep the chocolate from getting on the surface of your countertop, spread parchment paper on your cookie sheet or working area.

    Nutrition

    Calories: 45kcalCarbohydrates: 8gProtein: 1gFat: 1gSaturated Fat: 1gPolyunsaturated Fat: 0.2gMonounsaturated Fat: 0.2gCholesterol: 10mgSodium: 67mgPotassium: 11mgFiber: 0.1gSugar: 6gVitamin A: 15IUCalcium: 7mgIron: 0.3mg
    Print Recipe Pin Recipe Rate this Recipe
    Tried this recipe?Let us know how it was!

    Chocolate Caramel Bark

    April 28, 2024 by Angela Milnes

    Chocolate Caramel Bark.

    This Chocolate Caramel Bark with M&M's and Peanuts is the ultimate sweet and salty treat! Layers of rich chocolate, gooey caramel, and crunchy peanuts create a deliciously addictive bite. Topped with colorful M&M's, it's perfect for parties, gift-giving, or whenever you’re craving a simple but indulgent snack.

    Chocolate Caramel Pretzel Bark ingredients
    [feast_advanced_jump_to]

    💖 Why This Recipe Works

    • Decadent Treat: This Chocolate Caramel Bark recipe is a luxurious blend of sweet and salty flavors.
    • Easy to Follow Recipe: Even beginners can whip up this delightful dessert with ease.
    • Ideal for Gifting: Its indulgent taste and beautiful presentation make it a perfect gift option.

    ⭐ Star Ingredients

    Chocolate Caramel Bark Ingredients.
    • Semi-Sweet Chocolate: Forms the rich, decadent base of your bark, providing a deep chocolate flavor that's not overly sweet, allowing the other ingredients to shine.
    • Mini Salted Pretzels: Add a delightful crunch and a hint of saltiness to the bark, creating a perfect sweet-salty balance with the chocolate and caramel in chocolate pretzel bark.
    • M&M’s: Add a pop of color to the salted caramel bark and their candy-coated shells provide an extra burst of sweetness and texture.
    • Peanuts, Chopped: Add a satisfying crunch and nutty flavor that complements the sweet chocolate and caramel, creating a deliciously complex bark.

    For the complete list of ingredients with measurements and instructions, please see the recipe card at the bottom of the post.

    🔪 How To Make Chocolate Caramel Bark

    Chocolate Caramel Pretzel Bark
    1. Step 1: Begin with a parchment-lined baking sheet (parchment paper prevent mixture from sticking) and place your pretzels in an even layer.
    Chocolate Caramel Pretzel Bark
    1. Step 2: Melting Chocolate in the Microwave. If you choose to melt the chocolate in the microwave, start off with a microwave-safe bowl. Place the chocolate and cook in 30-second increments, stirring well after each increment, until
    Chocolate Caramel Pretzel Bark
    1. Step 3: Pour the melted chocolate over the pretzels, and place M&M’s and peanuts in an even layer on top of the chocolate.
    Chocolate Caramel Pretzel Bark
    1. Step 4: In a medium saucepan, heat sugar over medium heat, stirring constantly. The sugar will begin to form clumps and will eventually melt into a light amber color. Continue stirring as the sugar can easily burn.
    Chocolate Caramel Pretzel Bark
    1. Step 5: Once the sugar is completely melted, add the butter. The butter will bubble, so be careful. Stir the butter into the sugar until it is completely melted. Use a whisk to stir the sugar and butter together. Drizzle the heavy cream into the mixture and stir.
    Chocolate Caramel Pretzel Bark
    1. Step 6: Allow it to boil for 1-2 minutes. Remove from heat and stir in sea salt, allowing the caramel to set up. Once the caramel is done (you can also use a candy thermometer to know if it is done), pour it over the pretzels. You may not use all of the caramel. Cover and place in the refrigerator to chill for several hours. For a quicker set, it can be placed in the freezer.
    Best Chocolate Caramel Bark Recipe

    Tips For Making Great Chocolate Caramel Bark

    • Chocolate Tempering: For an extra shiny and smooth chocolate layer, try tempering your chocolate before pouring it over the pretzels.
    • Topping Variation: Experiment with different toppings like coconut flakes or dried fruit for a unique twist on your bark.
    • Caramel Thickness: Adjust the amount of heavy cream for thicker or thinner caramel sauce depending on your preference.
    • Perfect Chocolate Melting Technique: To ensure a smooth and rich texture for your chocolate caramel bark, it's essential to gently melt chocolate using a double boiler method or in short bursts in the microwave, stirring frequently to avoid overheating.

    Optional Additions

    • Crushed Candy Canes: Add a festive peppermint flavor and colorful crunch. Sprinkle them over the melted chocolate layer before it sets for a holiday twist.

    Substitutions

    • Chocolate Chips: Can substitute the semi-sweet chocolate for melting as the base layer, providing a smooth texture and rich flavor. They can also be added as an optional topping for extra chocolatey bursts in your caramel chocolate bark.
    • Brown Sugar: Can be used as an optional substitute for white sugar in the homemade salted caramel, adding a richer flavor and deeper color.

    How To Store Caramel Bark

    • Room Temperature Storage: Chocolate bark can be stored in an airtight container at room temperature for up to 2 weeks.
    • Refrigerator Storage: If you want to store it for longer, you can keep it in the fridge for up to 4 weeks.
    • Alternative Wrapping Methods: A container is always best but you can also wrap the bark in cling film or aluminum foil.

    💖 Serving Suggestions

    • As Part of a Dessert Platter: When entertaining or for special occasions, chocolate caramel barks can be included in a dessert platter alongside other items such as Fruits, nuts, cheeses, and different Sweets.
    • With Ice Cream: For a decadent dessert, your salted caramel pretzel bark can be broken into smaller pieces and served over Ice Cream. The contrast of the cold ice cream with the sweet and slightly salty crunch of the bark makes for an irresistible combination.

    FAQ'S

    Why Is It Called Chocolate Bark?

    The word is used because the chocolate resembles the bark of a tree.

    How Do You Keep Chocolate Bark From Melting?

    The best way to stop chocolate bark from melting is to store it in a cool dry place. Chocolate bark can be stored in the fridge, but it should be wrapped tightly so that it doesn't absorb any moisture from the air.

    What Is the Best Chocolate for Bark?

    The best chocolate for bark is either milk chocolate or dark chocolate. You can use any type of chocolate you like, but these two are the most popular.

    🍽 More Fantastic Desserts

    • Blueberry Angel Biscuits With Cream Cheese Topping.
      Homemade Angel Biscuits With Blueberries And Cream Cheese
    • Pumpkin waffles with maple syrup served on a plate.
      Vegan Pumpkin Waffles (Crispy, Fluffy & Dairy-Free)
    • Cherry Cobbler Gluten Free.
      Gluten Free Fruit Cobbler Recipe
    • Best Pink Oreo Millecrepes.
      Best Pink Oreo Millecrepes

    Did you make this recipe? Leave a review and a ⭐⭐⭐⭐⭐ rating below, or tag us on our Facebook Page! Alternatively, bookmark it in your browser or save to Pinterest.

    Chocolate Caramel Bark.

    Chocolate Caramel Bark

    Angela Milnes
    Chocolate Caramel Bark is a sweet and salty treat with gooey caramel layered on rich chocolate.
    5 from 4 votes
    Print Recipe Pin Recipe Rate this Recipe
    Prep Time 5 minutes mins
    Cook Time 3 minutes mins
    Additional Time 7 hours hrs
    Total Time 7 hours hrs 8 minutes mins
    Course Desserts
    Cuisine American
    Servings 8 Servings
    Calories 5472 kcal

    Ingredients
      

    • 2 Cups Semi-Sweet Chocolate
    • 1 ½ Cups Mini Salted Pretzels
    • ½ Cup M&M’s
    • ½ Cup Peanuts chopped
    • Homemade Salted Caramel:
    • 1 Cup Sugar
    • ½ Cup Butter
    • ½ Cup Heavy Cream
    • ¼-½ teaspoon Sea Salt

    Instructions
     

    • Begin with a parchment-lined baking sheet (parchment paper prevents the mixture from sticking) and place your pretzels in an even layer.
    • Double-Boiler Method: Melting Chocolate in the Microwave. If you choose to melt the chocolate in the microwave, start off with a microwave-safe bowl. Place the chocolate and cook in 30-second increments, stirring well after each increment, until completely melted and smooth.
    • Pour the melted chocolate over the pretzels, and place M&M’s and peanuts in an even layer on top of the chocolate.
    • In a medium saucepan, heat sugar over medium heat, stirring constantly. The sugar will begin to form clumps and will eventually melt into a light amber color. Continue stirring as the sugar can easily burn. Once the sugar is completely melted, add the butter. The butter will bubble, so be careful. Stir the butter into the sugar until it is completely melted. Use a whisk to stir the sugar and butter together.
    • Drizzle the heavy cream into the mixture and stir. Allow it to boil for 1-2 minutes. Remove from heat and stir in sea salt, allowing the caramel to set up.
    • Once the caramel is done (you can also use candy thermometer to know if it is done), pour it over the pretzels. You may not use all of the caramel.
    • Cover and place in the refrigerator to chill for several hours. For a quicker set, it can be placed in the freezer.
    • Cut your chocolate caramel pretzel bark into squares and serve your chocolate bark!

    Notes

    Chocolate Tempering: For an extra shiny and smooth chocolate layer, try tempering your chocolate before pouring it over the pretzels.
    Topping Variation: Experiment with different toppings like coconut flakes or dried fruit for a unique twist on your bark.
    Caramel Thickness: Adjust the amount of heavy cream for thicker or thinner caramel sauce depending on your preference.
    Perfect Chocolate Melting Technique: To ensure a smooth and rich texture for your chocolate caramel bark, it's essential to gently melt chocolate using a double boiler method or in short bursts in the microwave, stirring frequently to avoid overheating.

    Nutrition

    Calories: 5472kcalCarbohydrates: 571gProtein: 62gFat: 338gSaturated Fat: 186gPolyunsaturated Fat: 24gMonounsaturated Fat: 93gTrans Fat: 4gCholesterol: 416mgSodium: 2956mgPotassium: 2996mgFiber: 43gSugar: 403gVitamin A: 4999IUVitamin C: 4mgCalcium: 562mgIron: 33mg
    Print Recipe Pin Recipe Rate this Recipe
    Tried this recipe?Let us know how it was!

    More Cookies Recipes

    • Reese’s Cookies With Popcorn
    • Animal Sprinkle Circus Cookies
    • Chewy Chocolate Peppermint Cookies
    • Funfetti Cake Mix Cookies With Cream Cheese
    • Banana Chocolate Chip Cookies
    Chocolate Caramel Pretzel Bark

    Hazelnut Chocolate Bark

    April 28, 2024 by Angela Milnes

    Hazelnut Chocolate Bark.

    Love chocolate bark? You've got to try this crunchy Hazelnut Chocolate Bark recipe. It is super easy to put together, and is one of the best ways to put some chocolate to use. This makes for a great quick treat you can make in advance and enjoy any time of the day. It's one of the easiest chocolate bark recipes I've ever come across.

    hazelnut Chocolate Bark
    [feast_advanced_jump_to]

    Why You'll Love This Chocolate Bark Recipe

    • Irresistible Taste: You'll love the yummy mix of chocolate and hazelnuts in this treat, satisfying your sweet tooth and nutty cravings.
    • Easy Chocolate Bark Recipe: Making Hazelnut Chocolate Bark is easy with just a few ingredients and steps, making it a quick dessert choice for any time.
    • Versatile Snack: Whether it's a quick treat for yourself, a party dessert, or a thoughtful gift, Hazelnut Chocolate Bark is a versatile snack suitable for various occasions.

    If you love this recipe be sure to check out the following bark recipes: Strawberry White Chocolate Bark, Chocolate Caramel Bark or this super tasty Toasted Almond And Cranberry Bark .

    Recipe Ingredients

    • Semi-Sweet Chocolate Morsels: Form the base of your chocolate bark, providing a rich, slightly sweet chocolate flavor that's not too overpowering.
    • Raw Hazelnuts: Add a delightful crunch to your chocolate bark, along with a nutty flavor that pairs perfectly with the semi-sweet chocolate.
    hazelnut Chocolate Bark Ingredients.

    How to Make Chocolate Bark?

    Hazelnut Chocolate Bark.

    Step One: Preheat the oven to 350 degrees. Place the hazelnuts on a baking sheet and roast in the oven for 10 minutes. Once they are roasted, remove from the oven and let them cool for about 5 minutes. Then place the hazelnuts in a kitchen towel and shake around, until all the skins fall off the hazelnuts.

    Hazelnut Chocolate Bark.

    Step Two: Then melt the chocolate morsels in the microwave in increments of 30 seconds, until fully melted.

    Hazelnut Chocolate Bark.

    Step Three: Spread out the chocolate and candy over the rimmed baking sheet using a butter knife until it is spread out and even.

    Hazelnut Chocolate Bark.

    Step Four: Spread out the hazelnuts over the chocolate. Place the baking sheet in the fridge and let cool for at least 30 minutes. Then break into pieces and serve.

    Hazelnut Chocolate Bark.

    Expert Tips For Making Hazelnut Bark

    • Proper Melting Technique: Melt the chocolate gently using a double boiler or microwave in short intervals, stirring frequently to avoid burning.
    • Add Toppings Quickly: If you're adding toppings like sea salt or dried fruits, do so immediately after spreading the chocolate to ensure they stick properly.
    • Even Spread: Ensure an even chocolate layer on the baking sheet or parchment paper for consistent thickness throughout the bark.
    Hazelnut Chocolate Bark.

    Variations

    • Frosty Cranberry Bliss: Creamy melted white chocolate combined with the tangy sweetness of dried cranberries, creating a refreshing twist on traditional bark.
    • Dark Pistachio Delight: Rich dark chocolate mingled with crunchy pistachios, offering a decadent and nutty flavor profile for a delightful treat.
    • Almond Crunch Sensation: Smooth milk melted chocolate blended with crispy almonds and crushed candy canes, delivering a satisfying crunch in every bite of this indulgent bark.
    • Marbled Peanut Butter Dream: A decadent marbled chocolate bark featuring creamy milk chocolate, velvety peanut butter, and chunks of peanut butter cups.
    • Toasty Coconut Dream: Semi-sweet chocolate chips adorned with toasted coconut flakes, adding a tropical flair to the classic hazelnut bark recipe.
    Hazelnut Chocolate Bark.

    How To Store Chocolate Bark

    • Room Temperature: Store the chocolate bark in an airtight container at a cool room temperature, away from direct sunlight and heat sources.
    • Refrigeration: For longer shelf life, especially in warm climates, you can store the bark in the refrigerator. Ensure it's well-sealed to prevent absorption of odors.
    • Freezing: Hazelnut Chocolate Bark can be frozen for extended storage. Wrap it tightly in plastic wrap and place it in a freezer-safe container or bag.
    • Thawing: When ready to enjoy frozen bark, let it thaw in the refrigerator to maintain its texture and prevent condensation from forming on the surface.

    What To Serve With Chocolate Bark?

    • Fresh Berries: Serve a side of fresh raspberries, strawberries, or blueberries to add a burst of fruity freshness that complements the richness of the homemade chocolate bark.
    • Vanilla Ice Cream: Pair the hazelnut chocolate bark with a scoop of creamy vanilla ice cream for a contrasting temperature and texture experience.
    • Coffee or Espresso: Enjoy a cup of freshly brewed coffee or espresso alongside the bark to enhance the chocolate flavors and provide a warm beverage pairing.
    Hazelnut Chocolate Bark.

    Hazelnut Chocolate Bark

    Angela Milnes
    If you're craving a simple, yet decadent treat, this Hazelnut Chocolate Bark is for you! With rich dark chocolate and the irresistible crunch of roasted hazelnuts, it’s the perfect homemade sweet to share or enjoy yourself.
    5 from 3 votes
    Print Recipe Pin Recipe Rate this Recipe
    Prep Time 10 minutes mins
    Cook Time 5 minutes mins
    45 minutes mins
    Total Time 1 hour hr
    Course Desserts
    Cuisine American
    Servings 8 Servings
    Calories 307 kcal

    Ingredients
      

    • 1 Bag Chocolate Chips
    • 1 Cup Hazelnuts

    Instructions
     

    •  Preheat the oven to 350 degrees. Place the hazelnuts on a baking sheet and roast in the oven for 10 minutes.
    • Once they are roasted, remove from the oven and let them cool for about 5 minutes.
    • Then place the hazelnuts in a kitchen towel and shake around, until all the skins fall off the hazelnuts.
    • Then melt the chocolate morsels in the microwave in increments of 30 seconds, until fully melted.
    • Spread out the chocolate and candy over the rimmed baking sheet using a butter knife until it is spread out and even.
    • Spread out the hazelnuts over the chocolate. Place the baking sheet in the fridge and let cool for at least 30 minutes. Then break into pieces and serve.

    Notes

    Proper Melting Technique: Melt the chocolate gently using a double boiler or microwave in short intervals, stirring frequently to avoid burning.
    Add Toppings Quickly: If you’re adding toppings like sea salt or dried fruits, do so immediately after spreading the chocolate to ensure they stick properly.
    Even Spread: Ensure an even chocolate layer on the baking sheet or parchment paper for consistent thickness throughout the bark.

    Nutrition

    Calories: 307kcalCarbohydrates: 30gProtein: 2gFat: 21gSaturated Fat: 8gPolyunsaturated Fat: 1gMonounsaturated Fat: 7gPotassium: 223mgFiber: 1gSugar: 25gVitamin A: 3IUVitamin C: 1mgCalcium: 47mgIron: 1mg
    Print Recipe Pin Recipe Rate this Recipe
    Tried this recipe?Let us know how it was!

    More Recipes to try

    • Berry Granola Bites
    • Best Hot Cocoa Dip
    • Best Turtle Brownies Recipe
    • No-Churn Vegan Mango Sorbet
    • Easy No Bake Lavender Cheesecake
    • Chocolate Covered Bananas
    • Christmas Charcuterie Board
    • Sugared Cranberries
    • Reese’s Cookies With Popcorn
    • Creamy Vanilla Eclair Cake
    • Traditional Banana Cream Pie

    Best Candied Bacon Recipe

    April 28, 2024 by Angela Milnes

    Best Candied Bacon Recipe.

    This Best Candied Bacon Recipe is crispy, sweet, smoky, and completely irresistible! Whether you're making it for brunch, game day, or just because—this bacon candy (also known as pig candy or million dollar bacon) is always the first thing to disappear. Bonus? It only takes 5 minutes of prep!

    Best Candied Bacon Recipe.

    Candied bacon is one of those recipes that feels indulgent but is secretly so simple. It's a crowd-pleaser at parties, potlucks, and brunch spreads—and it's just as perfect served on its own as it is crumbled into a BLT Turkey Wrap or layered on a mini Homemade Pizza. I first made it as a snack for a family BBQ and now it's on repeat for everything from charcuterie boards to holiday breakfasts.

    [feast_advanced_jump_to]

    💖 Why This Recipe Works

    • Only 4 Ingredients: No fancy tools or ingredients required—just pantry staples and bacon.
    • Customizable: Sweet, spicy, smoky, or nutty—this recipe is a flavor playground.
    • Crispy, Glazed Perfection: The sugar caramelizes while baking for the ultimate crunchy-chewy texture.

    ⭐ Star Ingredients

    Candied Bacon Ingredients.
    • Thick-Cut Bacon: Holds up best in the oven and crisps beautifully while staying meaty. Avoid thin bacon—it cooks too fast and can burn.
    • Maple Syrup: Maple Syrup: Adds depth and a rich sweetness that balances the salty bacon. Use Homemade Maple Syrup for best results.
    • Light Brown Sugar: Helps create the signature candy-like crust and sticky glaze.
    • Black Pepper: Cuts the sweetness and adds a bold, savory twist that takes it over the top.

    For the complete list of ingredients with measurements and instructions, please see the recipe card at the bottom of the post.

    📖  Substitutions & Variations

    • Spice it up! I love adding a little heat to my candied bacon—try a pinch of cayenne or red pepper flakes for a sweet and spicy kick.
    • Honey swap! No maple syrup? No problem! Swap it with honey for a slightly richer sweetness that caramelizes beautifully.
    • Brown sugar twist! Want a deeper flavor? Dark brown sugar brings extra molasses goodness for a richer, more intense glaze.
    • Extra crunch! Sprinkle on some crushed pecans or sesame seeds before baking for a fun, nutty twist that takes it to the next level!

    Be sure to chek out my recipes for Greek Beetroot Dip and Homemade Bagel Chips.

    🔪How To Make Candied Bacon

    Mixing maple syrup, brown sugar, and black pepper in a bowl.
    1. Step 1: Preheat the oven to 400 degrees Fahrenheit. In a small bowl, mix the maple syrup, brown sugar, and black pepper and mix until well combined.
    Uncooked bacon strips on baking sheet lined with parchment paper.
    1. Step 2: Line a baking sheet with parchment paper or aluminum foil and spray with nonstick. Cut the bacon strips in half and place on the foil-lined baking sheet. Do not overlap them.
    Brushing bacon strips on a baking sheet.
    1. Step 3: Brush the mixture over the bacon on both sides.
    Seasoned bacon strips on a baking tray.
    1. Step 4: Bake for 18-20 minutes in the oven.
    Candied bacon strips in a jar.
    1. Step 5: Place your candied bacon onto a cooling rack and allow it to cool.
    Candied bacon strip in a hand.
    1. Step 6: Enjoy your candied bacon.

    💡Hint: For super crispy results, place a wire rack over your baking sheet and lay the bacon on top so the heat circulates all around.

    Candied bacon in a jar.

    👩‍🍳 Expert Tips

    • Use thick-cut bacon for best results—thin slices cook too quickly and may burn before the sugar caramelizes.
    • Watch closely in the last 5 minutes—candied bacon can go from perfect to burnt fast!
    • Let it cool completely on a rack before serving. This sets the glaze and gives that signature crunch.

    💭 FAQs

    What is candied bacon made of?

    Candied bacon—aka pig candy or million dollar bacon—is made by brushing bacon with a sugar-based glaze (usually maple syrup and brown sugar), then baking it until crispy and caramelized.

    Is candied bacon salty or sweet?

    Both! The brown sugar and syrup create a sweet, sticky coating, while the bacon keeps its savory, salty edge.

    Can I make spicy candied bacon?

    Absolutely! Just add a pinch of cayenne, chili powder, or crushed red pepper to the maple glaze.

    How do I store candied bacon?

    Store in an airtight container in the fridge for up to 3 days. Reheat in a 350°F oven for 5 minutes to crisp it back up.

    Can I make candied bacon ahead of time?

    Yes! Make a day in advance, cool completely, and store in the fridge. Warm in the oven just before serving.

    💖 Serving Suggestions

    Some great ways to use bacon candy:

    • On a Charcuterie Board: Pair with cheeses, crackers, and nuts for a sweet-salty surprise.
    • Crumbled into Salads: Toss into a Fall Harvest Salad or Caesar for extra crunch.
    • Breakfast Upgrade: Serve with buckwheat pancakes, pumpkin waffles, or alongside eggs for a deluxe brunch.
    • In Sandwiches or Wraps: Adds amazing flavor to turkey clubs or BLTs.
    • As a Cocktail Garnish: Add a candied bacon slice to Bloody Marys or maple bourbon drinks!
    Cooked candy bacon strips in a jar.

    🍽 More Recipes With Bacon

    • Slow Cooker Chicken Bacon Ranch Pasta.
      Slow Cooker Chicken Bacon Ranch Pasta
    • Crispy Roasted Sweet Potatoes (with Bacon).
      Crispy Roasted Sweet Potatoes (with Bacon)
    • German Fried Cabbage With Bacon Bits.
      German Fried Cabbage With Bacon Bits
    • Smoked Texas Twinkies with Bacon And Brisket.
      Smoked Texas Twinkies with Bacon And Brisket

    Did you make this recipe? Leave a review and a ⭐⭐⭐⭐⭐ rating below, or tag us in our Facebook Group! Alternatively, bookmark it in your browser or save to Pinterest.

    Best Candied Bacon Recipe.

    Candied Bacon

    Angela Milnes
    Treat yourself to the ultimate sweet and savory delight with Candied Bacon! Crispy bacon strips are coated in a rich glaze of brown sugar and pepper, then baked to perfection.
    5 from 5 votes
    Print Recipe Pin Recipe Rate this Recipe
    Prep Time 5 minutes mins
    Cook Time 20 minutes mins
    Total Time 25 minutes mins
    Course Appetizer
    Cuisine American
    Servings 6 Servings
    Calories 96 kcal

    Ingredients
      

    • ½ Pound Bacon Slices
    • ¼ Cup Maple Syrup
    • 2 tablespoon Light Brown Sugar
    • Pinch Black Pepper

    Instructions
     

    • Preheat the oven to 400 degrees Fahrenheit. In a small bowl, mix the maple syrup, brown sugar, and black pepper and mix until well combined.
    • Line a baking sheet with parchment paper or aluminum foil and spray with nonstick. Cut the bacon strips in half and place on the foil-lined baking sheet. Do not overlap them.
    • Brush the mixture over the bacon on both sides.
    • Bake for 18-20 minutes in the oven.
    • Place your candied bacon onto a cooling rack and allow it to cool.
    • Enjoy your candied bacon.

    Notes

    • To ensure evenly cooked bacon, use thick-cut bacon strips.
    • Keep an eye on the bacon as it cooks - it can go from perfect to burned quickly!
    • If you want a more savory flavor, add additional seasonings such as cayenne or garlic powder.
    • Let the candied bacon cool before serving. This will help keep it crispy.

    Nutrition

    Serving: 1gCalories: 96kcalCarbohydrates: 13gProtein: 8gFat: 2gSaturated Fat: 1gSodium: 758mgPotassium: 36mgSugar: 12gCalcium: 18mgIron: 0.04mg
    Print Recipe Pin Recipe Rate this Recipe
    Tried this recipe?Let us know how it was!

    Easy Garlic Rice With Cilantro

    April 28, 2024 by Angela Milnes

    Easy Garlic Rice With Cilantro in a white bowl with a wooden spoon.


    ​​Ready to upgrade your rice game? This bold and zesty Cilantro Garlic Rice is fluffy, herby, and garlicky in all the best ways. It’s a simple side with major flavor that’ll steal the show at any meal.

    Easy Garlic Rice With Cilantro in a white bowl with a wooden spoon.

    This dish is having a total moment—think cozy Filipino garlic rice (aka sinangag) meets vibrant, herb-fresh energy from Latin American cooking. It’s perfect for family dinners, meal prep magic, or when plain rice just won’t cut it.

    If you love easy garlic rice recipes like my Spinach Feta Rice Casserole or crave flavor-packed sides like Paprika Grilled Shrimp, this will be your new go-to.

    [feast_advanced_jump_to]

    💖 Why This Recipe Works

    • Flavor bomb: Garlic + cilantro = herby, punchy perfection.
    • Budget-friendly: Pantry staples, big payoff.
    • Meal-flexible: This herb rice side dish plays nice with everything—veggies, meats, or eggs.

    ⭐ Star Ingredients

    Garlic Rice Ingredients, rice, water., garlic, cilantro and vermacili.
    • Basmati or long grain rice – The fluffy foundation. It holds its shape and soaks up every bit of flavor, giving you that perfect fluffy garlic rice texture.
    • Fresh garlic – Super Important. Packs the bold, savory punch that defines this dish.
    • Vermicelli noodles – Toasted for a nutty crunch and subtle depth.
    • Cilantro – The fresh herb that brings brightness and balance to the garlic’s intensity.

    For the complete list of ingredients with measurements and instructions, please see the recipe card at the bottom of the post.

    📖  Substitutions & Variations

    • Try jasmine rice for a slightly stickier, more fragrant base.
    • Swap vermicelli with broken angel hair or omit if you prefer pure rice texture.
    • Use butter instead of oil for a cozy, rich version.
    • Add soy sauce for a savory twist (your rice with fresh herbs may change color a bit!).
    • Mix in red pepper flakes for a spicy kick.
    • Use parsley if cilantro isn’t your herb soulmate.

    Pair this rice with my Cheesy Mexican Steak and Rice or cozy Chicken Tamale Pie.

    🔪How To Make Cilantro Garlic Rice

    Use this section for process shots, alternating between the step and image showing the step. Users don't like seeing process shots cluttering up the recipe card, so include your process shots here.

    rice soaking in water in a blue bowl.
    1. Step 1: Wash your rice at least 5 times, or until the water isn’t cloudy anymore.
    melting butter and adding garlic to a pot.
    1. Step 2: Mince your garlic. In a medium size pot, over medium-high heat, heat up some oil. Once the oil is hot, add garlic and cook for about 30 seconds, or until fragrant.
    adding vermecili to a pot with garlic and butter.
    1. Step 3: Add the vermicelli and cook for an additional 3-4 minutes on medium heat, or until the garlic and vermicelli are golden brown. Add your washed rice to the pot, then the water and salt. Stir until well combined.
    garlic rice in a pot combined with cilantro.
    1. Step 4: Bring the pot with rice to high heat without a lid and bring to a boil.  Reduce heat, cover with a lid and let it cook for 16-18 minutes. Remove from the stove and stir the rice. Garnish with some cilantro or parsley.

    💡Hint: Rinsing your rice really well makes it extra fluffy and prevents it from clumping.

    cilantro garlic rice in a bowl with a wooden spoon and green teatowel.

    👩‍🍳 Expert Tips

    • Using leftover rice? Go for it! Just make sure it’s cold, dry, and broken up before stir-frying.
    • Top with garlic chips or a drizzle of garlic-infused oil for bonus flavor points.
    • Double it up for batch cooking—it reheats beautifully and freezes like a champ.

    💭 FAQs

    Can I Make Cilantro Garlic Rice Using Leftover Rice?

     Yes! Just use cold, separated grains and heat it gently in a skillet. It’s an easy garlic rice recipe trick that works like magic.

    Why Is My Garlic Cilantro Rice Turning Mushy?

     It’s usually too much water or not rinsing well. Use long-grain rice and rinse until water runs clear.

    How To Store Garlic Rice With Cilantro?

    Your leftover fried garlic rice can be refrigerated for up to 3 days, if not more.

    How Do I Reheat Cilantro Garlic Rice?

     Add a splash of water, cover, and microwave or reheat in a skillet over medium heat for 2-3 minutes.

     Is This The Same as Filipino Garlic Rice?

     This recipe blends the Filipino garlic rice method with fresh herb vibes from Latin cuisine—so it’s a little fusion-y in the best way.

    💖 Serving Suggestions

    Here are some of the best sides to serve with cilantro garlic rice?

    • Top with a fried egg for a savory breakfast bowl.
    • Serve with Air Fryer Broccolini for a crisp green side.
    • Pair with Slow Cooker Mongolian Beef.
    • Add to a grain bowl with avocado and tofu.
    • Scoop into burritos or wraps with beans and salsa.
    • Match with Air Fryer Cauliflower With Teriyaki Sauce.

    Feeding little ones? Skip the cilantro, stir in sweet peas or corn, and sprinkle with cheese to turn this into a kid-approved side.

    garlic rice in a bowl with cilantro

    🍽 Pair Rice With These High Protein Dishes

    Want a protein dish to pair with cilantro garlic rice? Try one of these recipes.

    • Creamy Tuscan Salmon With Sundried Tomatoes.
      Creamy Tuscan Salmon With Sundried Tomatoes
    • Best Air Fryer Stuffed Chicken Breast.
      Best Air Fryer Stuffed Chicken Breast
    • Best Vegan Baked Beans Recipe
    • Baked Crispy Salmon Bites on Rice.
      Baked Crispy Salmon Bites on Rice

    Did you make this recipe? Leave a review and a ⭐⭐⭐⭐⭐ rating below, or tag us in our Facebook Group! Alternatively, bookmark it in your browser or save to Pinterest.

    Easy Garlic Rice With Cilantro in a white bowl with a wooden spoon.

    Easy Garlic Rice With Cilantro

    Angela Milnes
    Elevate your meal with this flavorful Garlic Rice with Cilantro! Infused with the rich aroma of garlic and topped with fresh cilantro, this rice dish is the perfect side for any main course.
    5 from 4 votes
    Print Recipe Pin Recipe Rate this Recipe
    Prep Time 5 minutes mins
    Cook Time 5 minutes mins
    Additional Time 10 minutes mins
    Total Time 20 minutes mins
    Course Side Dishes
    Cuisine Filipino
    Servings 4 Servings
    Calories 446 kcal

    Ingredients
      

    • 2 cups Basmati Rice or Long Grain
    • 4 cups Water
    • ⅓ cup Vermicelli
    • 4 Cloves Garlic
    • ½ teaspoon Salt
    • 1 tablespoon Vegetable Oil
    • 1 tablespoon Parsley Or Cilantro optional for serving

    Instructions
     

    • Wash your rice at least 5 times, or until the water isn’t cloudy anymore. Mince your garlic.
    • In a medium size pot, over medium-high heat, heat up some oil. Once the oil is hot, add garlic and cook for about 30 seconds, or until fragrant.
    • Add the vermicelli and cook for an additional 3-4 minutes on medium heat, or until the garlic and vermicelli are golden brown.
    • Add your washed rice to the pot, then the water and salt. Stir until well combined. Bring the pot with rice to high heat without a lid and bring to a boil. 
    • Reduce heat, cover with a lid and let it cook for 16-18 minutes. Remove from the stove and stir the rice. 
    • Enjoy your Filipino fried rice while warm. You can garnish it with some cilantro or parsley, but that is optional.

    Notes

    Soy Sauce Addition: Soy sauce can be another great addition to the rice sinangag. You can add it towards the end on the cooled rice.
    Oil Choices for Frying Garlic: I have used vegetable oil to stir fry the garlic and prepare the crispy garlic, but you can also choose to use olive oil or any other neutral oil of your choice. Butter can also be a great choice for this recipe, as it can lend some extra deliciousness to this rice recipe.
    Seasoning: In addition to salt, I would also recommend adding some crushed black pepper to season the Filipino garlic fried rice.
    Color Change with Soy Sauce: Adding the soy sauce in may cause the white rice to take on a bit of color, but that's completely okay!
    Cookware Options: While I have used a pot for this recipe, you can also use a rice cooker, a large wok or a large skillet to make garlic rice.
    Garlic-Flavored Toppings: I also love topping this fried garlic rice with a little drizzle of garlic-flavored oil and some fried garlic right before serving for some extra garlicky goodness.

    Nutrition

    Serving: 1gCalories: 446kcalCarbohydrates: 91gProtein: 8gFat: 4gSaturated Fat: 1gPolyunsaturated Fat: 2gMonounsaturated Fat: 1gTrans Fat: 0.02gCholesterol: 1mgSodium: 96mgPotassium: 133mgFiber: 2gSugar: 0.1gVitamin A: 1IUVitamin C: 1mgCalcium: 43mgIron: 1mg
    Print Recipe Pin Recipe Rate this Recipe
    Tried this recipe?Let us know how it was!
    garlic rice in a bowl with cilantro

    Pineapple Coconut Popsicles With Lime

    April 28, 2024 by Angela Milnes

    Pineapple Coconut Popsicles With Lime.

    Cool off with these Pineapple Coconut Popsicles—a tropical frozen treat bursting with fresh pineapple, creamy coconut milk, and a splash of zesty lime. They’re sweet, tangy, and ridiculously easy to make!

    Pineapple Coconut Popsicles With Lime.

    These pineapple coconut popsicles were born out of a heatwave and a serious craving for something cold, creamy, and tropical. I had a ripe pineapple sitting on the counter, a can of coconut milk in the pantry, and my daughter was begging for something “beachy and frozen.”

    A quick blitz in the blender, a squeeze of lime, and BOOM—summer magic on a stick. They've been on repeat ever since, especially when we need a healthy, feel-good snack that feels like vacation in a bite. You'll also want to try our Strawberry Lemon Popsicles! They are super tasty

    [feast_advanced_jump_to]

    💖 Why This Recipe Works

    • Just 4 Ingredients: Quick, no-fuss, and naturally sweet.
    • Tropical Vibes: Pineapple + coconut + lime = sunshine on a stick.
    • Healthier Treat: Rich in vitamin C and totally kid-approved.

    ⭐ Star Ingredients

    Pineapple Coconut Popsicles.

    To make these creamy pineapple and coconut popsicles, here's what you'll need.

    • Ripe Pineapple – I always go for the juiciest fresh pineapple I can find—sweet and sun-ripened is key.
    • Full-Fat Coconut Milk – Makes these pops silky and rich; skip the lite stuff for the best texture.
    • Lime Juice – Adds brightness that balances the creaminess.
    • Honey – Just enough natural sweetness to make them dessert-worthy without overdoing it.

    For the complete list of ingredients with measurements and instructions, please see the recipe card at the bottom of the post.

    📖  Substitutions & Variations

    • Use Other Fruits: Mango, blueberries, or strawberries work great too.
    • Sweetener Swap: Try maple syrup or agave if you're avoiding honey.
    • Extra Texture: Add shredded coconut or chia seeds before freezing.

    For more sunny-day inspiration, check out our favorite summer recipes like Blueberry Yogurt Bites, Watermelon Mint Salad, and Mango Pineapple Smoothie—all perfect for keeping cool and refreshed!

    🔪How To Make Pineapple Coconut Popsicles

    Got your ingredients ready? Here's how to make these refreshing popsicles.

    pineapple coconut popsicle mixture in blender
    1. Step 1: Peel and core the pineapple, then cut in smaller pieces, so it fits the blender. 
    pineapple coconut popsicle mixture in blender
    1. Step 2: In the blender, add the cut pineapple, can of coconut milk, the juice of 1 lime and honey.
    pineapple coconut popsicle mixture in blender
    1. Step 3: Blend the ingredients until you get a smooth liquid.
    pineapple coconut popsicle
    1. Step 4: Pour the liquid into the popsicle molds.
    pineapple coconut popsicle
    1. Step 5: Place a popsicle stick in each popsicle molds.
    pineapple coconut popsicle
    1. Step 6: Freeze your pineapple coconut popsicles for at least 6 hours before serving.
    pineapple coconut popsicle

    👩‍🍳 Expert Tips

    • Freeze Fully: Let them set at least 6 hours for the perfect pop.
    • Trouble Unmolding? Run the molds under warm water to loosen.
    • Zest It Up: Add a bit of lime zest for an extra citrus kick.
    • Go Creamy: Always choose full-fat coconut milk for that
    Pineapple Coconut Popsicles With Lime Recipe

    💭 FAQs

    What Can I Use Instead Of Honey?

    Maple syrup or agave are great alternatives. You can also use a touch of regular sugar if needed.

    What Else Can I Add To Coconut Pineapple Popsicles?

    In addition to the coconut milk and pineapple chunks, you can also add in some shredded coconut to bring some texture and extra coconut flavor to these popsicles. I would recommend adding the shredded coconut towards the end, after you've blended the base popsicle mixture together.

    How To Store Pineapple Coconut Ice Blocks?

    Once frozen, transfer to a freezer-safe bag or container. They'll keep for a few weeks.

    💖 Serving Suggestions

    • Enjoy on a hot day as a cooling snack.
    • Serve with tropical drinks at summer parties.
    • Garnish with shredded coconut before freezing for a fancy look.
    Pineapple Coconut Popsicles With Lime.

    🍽 More Recipes Using Summer Fruits

    • Papaya Banana Yogurt Ice Cream with Cashews.
      Best Banana Yogurt Ice Cream (With Papaya)
    • Homemade Strawberry Lemonade.
      Homemade Strawberry Lemonade -Refreshing Summer Drink!
    • Vegan Banana Avocado Smoothie Recipe.
      Avocado And Banana Smoothie (Vegan)
    • Strawberry Puree.
      Strawberry Puree Recipe for Babies, Cocktails & More

    Did you make this recipe? Leave a review and a ⭐⭐⭐⭐⭐ rating below, or tag us in our Facebook Group! Alternatively, bookmark it in your browser or save to Pinterest.

    Pineapple Coconut Popsicles With Lime.

    Pineapple Coconut Popsicles

    Angela Milnes
    Cool off with these tropical Coconut Pineapple Popsicles! Bursting with the creamy goodness of coconut milk and the sweet, juicy flavor of pineapple, these popsicles are a refreshing treat that’s perfect for hot summer days.
    5 from 4 votes
    Print Recipe Pin Recipe Rate this Recipe
    Prep Time 10 minutes mins
    Cook Time 6 hours hrs
    Additional Time 10 minutes mins
    Total Time 6 hours hrs 20 minutes mins
    Course Desserts
    Cuisine American
    Servings 10 Servings
    Calories 148 kcal

    Ingredients
      

    • 1 Pineapple
    • 1 Can Coconut Milk
    • 1 Lime juiced
    • ¼ cup Honey

    Instructions
     

    • Peel and core the pineapple, then cut in smaller pieces, so it fits the blender. 
    • In the blender, add the cut pineapple, can of coconut milk, the juice of 1 lime and honey. Blend until you get a smooth liquid.
    • Pour the pineapple juice over your popsicle mold.
    • Place a popsicle stick in each popsicle mold. Freeze for at least 6 hours before serving.

    Notes

    Freezer Time: Remember to allow these pineapple popsicles at least 6 hours of freezer time, ideally overnight. Doing this will ensure that the popsicles are frozen solid, just the way they should be.
    Lime Juice Addition: I have added some lime juice to the popsicle mixture to brighten up this frozen dessert and make it more healthy. If you want, you can also add some lime zest to it to enhance its taste.
    Full-Fat Coconut Milk: Remember to use full-fat coconut milk for this recipe- this will ensure that the popsicles have a nice and creamy taste.
    Removing Popsicles: If you're having trouble getting your popsicles out, you can dip the mold in a bowl of hot water for just a few seconds and then get them out.
    Molds Type: You can use any kind of molds for this recipe. I like to use the silicone ones that don't need me to use any popsicle sticks- they come with their in-built plastic sticks.

    Nutrition

    Calories: 148kcalCarbohydrates: 21gProtein: 1gFat: 8gSaturated Fat: 7gPolyunsaturated Fat: 0.1gMonounsaturated Fat: 0.4gSodium: 6mgPotassium: 194mgFiber: 1gSugar: 16gVitamin A: 56IUVitamin C: 46mgCalcium: 21mgIron: 2mg
    Print Recipe Pin Recipe Rate this Recipe
    Tried this recipe?Let us know how it was!

    Antipasto Kabobs

    April 28, 2024 by Angela Milnes

    Antipasto Kabobs.

    Have you ever tried Antipasto Kabobs? If not, you're missing out! Antipasto Kabobs are a delicious and easy way to enjoy all your favorite antipasto ingredients in one bite. Enjoy this tasty antipasto kabobs recipe at your next party!

    Antipasto kabobs on a plate.
    [feast_advanced_jump_to]

    💖 Why This Recipe Works

    • Keto-Friendly: These kabobs fit perfectly into a low-carb, high-fat diet.
    • Versatile and Customizable: You can easily swap out the ingredients to suit your taste.
    • Perfect Party Food: These make a tasty and visually appealing addition to any party spread.
    Ingredients To Make Antipasto Kabobs.

    ⭐ Star Ingredients

    Antipasto Kabobs Ingredients.
    • Sliced Pepperoni or Salami: Adds a savory, salty kick that is iconic to antipasto dishes.
    • Fresh Mozzarella Pearls: Small, bite-sized pieces of creamy cheese that add a soft texture and mild flavor to contrast the cured meats.
    • Green or Black Olives: Brings a tangy, briny taste that complements the other ingredients.
    • Small Whole Banana Peppers: Add a touch of spice and crunch, enhancing the overall flavor profile.
    • Cherry Tomatoes: Provide a fresh balance to the salty and savory elements.
    • Small Skewers: Making it easy to eat and perfect for parties. You can get cute party Cocktail Skewers here!

    How To Make Antipasto Kabobs?

    Step One: Slide a banana pepper onto each skewer. Add a cherry tomato to each skewer, followed by three mozzarella pearls and another cherry tomato.

    Step Two: Continue by sliding an olive onto each skewer, and complete the skewer with a slice of pepperoni or salami.

    Step Three: Serve the Antipasto Kabobs immediately for a fresh appetizer, or chill them before serving if preferred.

    Antipasto kabobs on a plate.

    Expert Tips For Nailing This Kebob

    • Keep Ingredients Balanced: Make sure to balance the flavors of salty meats with creamy cheeses, tangy olives, and fresh veggies. This creates a well-rounded flavor profile in each bite.

    Variations

    • Mediterranean-inspired Kabobs - Swap pepperoni for slices of grilled chicken, add feta cheese cubes, and cucumber chunks, and drizzle with tzatziki sauce.
    • Surf and Turf Kabobs - Alternate slices of cooked shrimp and steak cubes with cherry tomatoes, mozzarella pearls, and fresh basil leaves for a hearty option.
    • Veggie Lover's Kabobs - Skewer grape tomatoes, marinated artichoke hearts, roasted bell peppers, and cucumber slices instead of cheese and cured meat slices.

    Storage Instructions

    • Storage: While best served fresh, you can store any leftovers in the refrigerator for up to 2 days. Just be aware that the antipasto skewers may become soggy, so it's best to remove the ingredients from the skewers before storing them.

    💖 Serving Suggestions

    • Marinated Vegetables: Pair the antipasto kabobs with a refreshing platter of marinated vegetables drizzled with olive oil salad dressing, making it a perfect party appetizer.
    • Cheese Tortellini: Serve the antipasto kebabs alongside cooked creamy instant pot tortellini for a satisfying and flavorful side dish.
    • Caprese Salad: Pair the antipasto kabobs with a refreshing Caprese Salad drizzled with Italian dressing for a classic Italian-inspired accompaniment.
    • Instant Pot Puttanesca Pasta: Prepare a batch of flavorful Instant Pot puttanesca pasta, loaded with tomatoes, olives, capers, and anchovies, to complement the bold flavors of the antipasto kabobs.
    Antipasto kabobs.

    🍽 More Recipes To Try

    • Hawaiian Garlic Shrimp.
      Hawaiian Garlic Shrimp Recipe (20 Minutes, So Flavorful!)
    • Mango and Pineapple Salsa in a white bowl.
      Mango and Pineapple Salsa (Perfect With Fish)
    • Carrot And Raisin Salad With Pineapple.
      Carrot And Raisin Salad With Pineapple
    • Cold Chicken Pasta Salad With Italian Dressing.
      Cold Chicken Pasta Salad With Italian Dressing

    Did you make this recipe? Leave a review and a ⭐⭐⭐⭐⭐ rating below, or tag us on our Facebook Page! Alternatively, bookmark it in your browser or save to Pinterest.

    Antipasto Kabobs.

    Antipasto Kabobs

    Angela Milnes
    These Antipasto Kabobs are the ultimate party appetizer, bringing together all the classic flavors of a traditional antipasto platter into a fun, bite-sized treat!
    5 from 4 votes
    Print Recipe Pin Recipe Rate this Recipe
    Prep Time 10 minutes mins
    Cook Time 0 minutes mins
    0 minutes mins
    Total Time 10 minutes mins
    Course Appetizers
    Cuisine Mediterranean
    Servings 4 Servings
    Calories 269 kcal

    Equipment

    • 4 Kabob Skewers

    Ingredients
      

    • 1 Cup Sliced Pepperoni
    • 1 Cup Fresh Mozzarella Pearls
    • 1 Cup Olives Green or Black
    • 1 Cup Banana Peppers
    • 1 Cup Cherry Tomatoes

    Instructions
     

    • Slide a banana pepper onto each skewer. Add a cherry tomato to each skewer, followed by three mozzarella pearls and another cherry tomato.
    • Continue by sliding an olive onto each skewer, and complete the skewer with a slice of pepperoni or salami.
    • Serve the Antipasto Kabobs immediately for a fresh appetizer, or chill them before serving if preferred.

    Notes

    Keep Ingredients Balanced: Make sure to balance the flavors of salty meats with creamy cheeses, tangy olives, and fresh veggies. This creates a well-rounded flavor profile in each bite.

    Nutrition

    Calories: 269kcalCarbohydrates: 5gProtein: 11gFat: 24gSaturated Fat: 7gPolyunsaturated Fat: 2gMonounsaturated Fat: 10gTrans Fat: 0.5gCholesterol: 36mgSodium: 999mgPotassium: 252mgFiber: 2gSugar: 2gVitamin A: 420IUVitamin C: 34mgCalcium: 121mgIron: 1mg
    Print Recipe Pin Recipe Rate this Recipe
    Tried this recipe?Let us know how it was!

    More Recipes to try

    • Garlic Rice With Cilantro
    • Healthy Quinoa Salad
    • Air Fryer Crab Cakes
    • Avocado Salad
    • Veggie Train With Bell Peppers
    • Crispy Mashed Potato Cakes

    Reese's Cookies With Popcorn

    April 27, 2024 by Angela Milnes

    Reese's Cookies With Popcorn.

    This recipe for Reese's Cookies With Popcorn is my go-to when I crave something uniquely delicious and easy to make. It's a simple blend of crunchy, salty popcorn with the rich, chocolaty goodness of Reese's pieces, all baked into a cookie that's out of this world.

    Reese's Cookies With Popcorn.
    [feast_advanced_jump_to]

    If you love cookies be sure to check out these Big Fat Chewy Chocolate Chip Cookies and this tasty Chewy Flapjack recipe.

    💖 Why This Recipe Works

    • Unique Twist on a Classic: These Reese's cookies are a unique twist on your classic peanut butter cookies, which I love the most.
    • Minimal Prep Time: Plus, Reese's Cookies With Popcorn need minimal prep time, which I'm always down for.
    • Versatile Recipe: I also love bringing a bit of variation to them by adding some peanut butter cups to the cookie dough and turning them into peanut butter cup cookies, but more on that later.

    ⭐ Star Ingredients

    Ingredients to make Reese's cookies.
    • Salted Butter Softened: Gives your cookies a rich, buttery base, while the salt boosts the flavor. If you prefer, you can opt for unsalted butter in your Rees's peanut butter cookie recipe to suit your taste.
    • Granulated Sugar And Light Brown Sugar: Sweeten your cookies, with brown sugar adding a caramel-like depth of flavor.
    • Creamy Peanut Butter: Gives your cookies a deliciously nutty flavor, complementing the Reese's Pieces candies perfectly.
    • Large Egg: Acts as a binding agent, helping to hold all the ingredients together while also adding moisture.
    • Pure Vanilla Extract: Enhances the flavors in your cookies, adding a touch of sweetness that balances out the savory peanut butter cookie dough.
    • All-Purpose Flour: Forms the structure of your cookies, giving them their shape and texture.
    • Baking Soda: Acts as a leavening agent, helping your cookies rise and spread during baking.
    • Salt: Enhances all the flavors in your cookies, balancing out the sweetness and intensifying the peanut butter flavor.
    • Reese's Pieces Candies: Add a pop of color, a bit of crunch, and an extra dose of peanut butter flavor to your cookies.
    • Popcorn (Popped): Adds a unique twist of texture and a slightly salty flavor, providing a delightful contrast to the sweet, chewy cookies.

    For the complete list of ingredients with measurements and instructions, please see the recipe card at the bottom of the post.

    📖  Substitutions & Variations

    • Reese’s overload? Yes, please! I love pressing mini peanut butter cups into the dough before baking—just that little extra effort turns these into the ultimate peanut butter cup cookies my family can’t resist.
    • Chocolate chip twist! A handful of chocolate chips in the dough gives you that perfect mix of melty chocolate and creamy peanut butter—seriously, what’s not to love?
    • Peanut butter lovers unite! Mixing in mini peanut butter cups or Reese’s peanut butter chips makes every bite extra rich, extra nutty, and extra delicious.
    • Go all out! Sprinkle some Reese’s pieces on top before baking for a colorful, crunchy, peanut-buttery finish—because more is always better!

    🔪How To Make The Reese's Cookies With Popcorn

    Preparing Reeses cookies dough.
    1. Step 1: In the bowl of a stand mixer fitted with the paddle attachment, beat the butter, sugar, brown sugar, peanut butter, egg, and vanilla together until fluffy. Slowly add the flour mixture to the wet mixture, beating until you get a sticky dough. Fold in the Reese's candies. Preheat oven to 350 degrees F.
    Reeses cookies on a wire rack.
    1. Step 2: Line a baking sheet with parchment paper. Set aside. Using a cookie scoop, place the cookie dough balls on a baking sheet lined with parchment paper or a cookie sheet and bake until golden brown. Top with popcorn while they are still warm. Allow them to sit on a cooling rack to cool before serving.
    Reese's cookies with popcorn.

    👩‍🍳 Expert Tips

    • Peanut Butter Selection: I would recommend using natural peanut butter to make these cookies.
    • Butter Type: Remember to use room-temperature butter for this recipe. This will help the cookies have the perfect shape and structure.
    • Dry Ingredients Ratio: The perfect proportion of flour, salt, and baking soda is crucial when it comes to this recipe, and most other baked goods, so keep that in mind when you bake these Reese's cookies.

    💭 FAQs

    Can I use microwave popcorn for this recipe?

    Yes, you can use microwave popcorn; however, it's best to choose plain or lightly salted varieties to control the flavor balance. If you opt for buttered popcorn, be mindful of the additional butter content in the recipe to prevent the cookies from becoming too greasy.

    How do I prevent the popcorn from becoming soggy in the cookies?

    To maintain the popcorn's crunchiness, add it to the cookie dough after baking, while the cookies are still warm. This method allows the popcorn to adhere to the cookies without absorbing too much moisture, preserving its texture.

    Can I store these cookies, and how long do they stay fresh?

    Store the cookies in an airtight container at room temperature. They will remain fresh for up to three days. For longer freshness, you can refrigerate them for up to a week.

    Is it necessary to use both Reese's Pieces and chopped Reese's Peanut Butter Cups?

    Using both adds depth to the flavor and variety to the texture. However, if you prefer, you can use just one or the other, depending on your taste preferences or what you have on hand.

    💖 Serving Suggestions

    Here are some of the best drinks to serve with Reese’s Cookies with Popcorn:

    • Hot Cocoa Dip: Serve Reese’s cookies with popcorn alongside the hot cocoa dip for a warm, chocolatey treat that perfectly complements the salty crunch of the popcorn.
    • Oreo Milkshake: Pair Reese’s cookies Oreo milkshake for a tasty dessert experience. The creamy, rich flavors of the milkshake enhance the sweet and salty notes of the cookies and popcorn, making for an irresistible treat.
    • Vanilla Milkshake: Why not serve these tasty cookies with a vanilla Milkshake With Sprinkles. I love to dip my cookies into milkshake, they just taste way better.
    Reese’s cookies on a plate.

    🍽 More Crave-Worthy Cookies

    • Best Holiday Spiced Cookies.
      Best Holiday Spiced Cookies
    • Best Brown Butter Cookies Recipe.
      Best Brown Butter Cookies Recipe
    • Chocolate peanut butter cookies on a tray.
      Chocolate Peanut Butter Cookies
    • Red velvet cookies on a plate.
      Best Red Velvet Cookies Recipe

    Did you make this recipe? Leave a review and a ⭐⭐⭐⭐⭐ rating below, or tag us in our Facebook Group! Alternatively, bookmark it in your browser or save to Pinterest.

    Reese's Cookies With Popcorn.

    Reese’s Cookies With Popcorn

    Angela Milnes
    Indulge in a sweet and salty treat with these Reese’s Cookies with Popcorn! These soft, chewy cookies are loaded with chunks of Reese’s peanut butter cups and crunchy popcorn, creating an irresistible combination of flavors and textures.
    5 from 4 votes
    Print Recipe Pin Recipe Rate this Recipe
    Prep Time 20 minutes mins
    Cook Time 12 minutes mins
    Total Time 32 minutes mins
    Course Desserts
    Cuisine American
    Servings 24 Cookies
    Calories 160 kcal

    Ingredients
      

    • ½ cup Salted Butter 1 stick softened
    • ½ cup Granulated Sugar
    • ½ cup Light Brown Sugar
    • ½ cup Creamy Peanut Butter
    • 1 Egg
    • ½ teaspoon Pure Vanilla Extract
    • 1 cup All Purpose Flour
    • ½ teaspoon Baking Soda
    • ¼ teaspoon Kosher Salt
    • 1 cup Reese’s Pieces Candies
    • 1 Bag Popcorn

    Instructions
     

    • Preheat oven to 350 degrees F. Line a baking sheet with parchment paper. Set aside.
    • In the bowl of a stand mixer fitted with the paddle attachment, beat the butter, sugar, brown sugar, peanut butter, egg, and vanilla together until fluffy.
    • Slowly add the flour mixture to the wet mixture, beating until you get a sticky dough.
    • Fold in the Reese's pieces candies.
    • Using a cookie scoop, place the cookie dough balls on a baking sheet lined with parchment paper or cookie sheet and bake until golden brown.
    • Top with popcorn while they are still warm.
    • Allow them to sit on a cooling rack or a wire rack and cool completely before you serve them.

    Notes

    Peanut Butter Selection: I would recommend using natural peanut butter to make these cookies.
    Butter Type: Remember to use room-temperature butter for this recipe. This will help the cookies have the perfect shape and structure.
    Dry Ingredients Ratio: The perfect proportion of flour, salt, and baking soda is crucial when it comes to this recipe, and most other baked goods, so keep that in mind when you bake these Reese's cookies.

    Nutrition

    Calories: 160kcalCarbohydrates: 19gProtein: 3gFat: 9gSaturated Fat: 4gPolyunsaturated Fat: 1gMonounsaturated Fat: 3gTrans Fat: 0.2gCholesterol: 17mgSodium: 120mgPotassium: 74mgFiber: 1gSugar: 13gVitamin A: 128IUCalcium: 15mgIron: 0.4mg
    Print Recipe Pin Recipe Rate this Recipe
    Tried this recipe?Let us know how it was!

    More Cookies Recipes

    • Soft And Yummy Banana Pudding Cookies
    • Funfetti Cake Mix Cookies With Cream Cheese
    • Chocolate Peanut Butter Cookies
    • Peppermint Chai Latte Candy Cane Cookies
    • Chewy Chocolate Peppermint Cookies
    • Brown Butter Cookies
    • Red Velvet Cookies Recipe

    Pastel Dyed Deviled Eggs

    April 27, 2024 by Angela Milnes

    Pastel Dyed Deviled Eggs.

    These Pastel Dyed Deviled Eggs are the perfect recipe to try out at Easter. My family adores Easter deviled eggs! They are perfect as a game day snack, a baby shower appetizer, or as a nice side to serve as an Easter appetizer.

    Pastel Dyed Deviled Eggs Recipe
    [feast_advanced_jump_to]

    Why This Recipe Works

    • Beauty Appeal: This one's one of my favorite dyed deviled egg recipes, simply because of how beautiful they turn out.
    • Color Preference: If you're not too fond of the bright-colored deviled eggs that you'd most likely come across, these pastel easter eggs are sure to appeal to you.
    • Quick and Easy: With just 20 minutes of cooking time, this is one recipe you can't go wrong with. And you can also make these colorful deviled eggs ahead of time.

    🥘 Ingredients

    Dyed Easter Deviled Eggs
    • Large Eggs: The main ingredient, provides a creamy base for the filling and a firm shell for the pastel color.
    • Pastel Food Coloring: Transforms the eggs into vibrant, fun colors, adding a festive touch to the dish.
    • Mustard & Dry Mustard: Adds a tangy kick to the egg yolk filling, balancing the creaminess of the other ingredients.
    • Ketchup: Provides a hint of sweetness and tanginess that complements the mustard in the filling.
    • Mayonnaise: Enhances the creaminess of the filling, making it rich and smooth.
    • Vinegar: Brightens up the flavors in the filling, adding a bit of acidity that cuts through the richness.
    • Sugar: Balances the tanginess of the mustard and vinegar, rounding out the flavors in the filling.

    For the complete list of ingredients with measurements and instructions, please see the recipe card at the bottom of the post.

    📖  Substitutions & Variations

    • Hot Sauce: Offers a tangy and spicy boost, perfect for those who enjoy a bit of heat with their appetizer.
    • Fresh Dill: Adds a refreshing herbal touch that complements the creamy filling of the eggs.
    • Freshly Cracked Black Pepper: Gives a spicy kick that enhances the flavors of the deviled eggs.

    🔪How To Make Dyed Deviled Eggs?

    slicing boiled eggs in half.

    Step One: In a large saucepan or a large pot add your eggs, cover with cold water and salt. Bring the eggs to a boil for 4-5 minutes on high heat, making sure you cover pot with a saucepan lid. Reduce the heat to low and cook for 20 minutes. Remove the eggs from the hot water using a slotted spoon and drain the eggs. Place eggs in a large bowl and fill with cold water.

    mixing egg yolk.

    Step Two: Let the eggs sit for 15 minutes until completely cooled. Peel eggs and set to the side. Slice the eggs into half lengthwise and remove the egg yolks and place the egg yolks in a medium-sized bowl. Add the mustard, ketchup, dry mustard, mayonnaise, vinegar, and sugar, and mash together until smooth. Cover and refrigerate for 1-2 hours.

    Dyed Easter Deviled Eggs

    Step Three: In 4 small bowls add 1 cup of water and 2-3 drops of the desired food coloring. Place 1 color in each bowl whisk to combine. Add your hard-boiled egg whites evenly split to each bowl. Set to the side for 1 hour or until you achieve the desired color you want. ing tray. Pat lightly to dry.

    Dyed Easter Deviled Eggs

    Step Four: Once they are colored remove the eggs and place on a paper towel-covered large baking tray. Pat lightly to dry. Use a small ice cream scoop or a piping bag and portion out the egg yolk mixture and place a scoop on each egg half. Garnish the dyed deviled eggs and enjoy!

    👩‍🍳 Expert Tips

    • Color Intensity: Remember that the longer you leave the egg whites in the food coloring, the more intense the color will be. If you want a more subtle, natural shade, soak the egg whites in the colored water for no more than 15 minutes.
    • Drying Technique: Remember to pat dry before you add the deviled egg filling inside. You can also let the egg whites rest on a plate lined with paper towels to soak up all the excess moisture.
    • Advance Preparation: You can actually prep this recipe in advance too. Simply make the hard-boiled eggs a day or two earlier and refrigerate them until you're ready to try out this recipe.
    • Seasoning: In addition to the mayonnaise, you can also add some salt and pepper to season the colored deviled eggs filling.
    • Flavor Enhancement: Another great idea to make the filling for these dyed deviled eggs more flavorful is to add some Worcestershire sauce to the egg yolk mixture. Remember to mash yolks carefully using a fork or the back of a spoon for best results.
    • Freshness: These dyed deviled eggs are best to make and enjoy fresh. This isn't one of those recipes that you can prep in advance.

    💭 FAQs

    Can I Use Any Other Natural Food Coloring Instead?

    While gel food coloring is the classic, most simplest way to get those perfect colored egg whites, you can also choose to use a natural food coloring if you really want.

    Beet Juice can be a great idea if you want the egg whites to have that nice, pink hue and pureed spinach leaves can bring a nice green color to the egg whites. You can also use grape juice if you want a subtle purple color to your egg whites.

    Are Pickled Eggs And Pastel Dyed Deviled Eggs The Same?

    Pickled eggs and Pastel Dyed Deviled Eggs are not the same. Pickled eggs are submerged in a vinegar solution for preservation and flavor, while Dyed Deviled Eggs are colored with food dye and filled with a seasoned yolk mixture. The former is for preservation and tangy taste, the latter for visual appeal and taste as an appetizer.

    🧂Serving Suggestions

    • Serve at Holiday Gatherings: These colorful deviled eggs are perfect for Easter or any holiday celebration, adding a festive touch to your appetizer spread.
    • Pair with Fresh Herbs: Garnish the deviled eggs with fresh herbs like dill or parsley to enhance the flavor and presentation.
    • On a Party Platter: Arrange the dyed deviled eggs on a serving tray with other bite-sized appetizers like mini sandwiches or veggies for a complete snack platter.
    • As a Game Day Snack: These deviled eggs are a great addition to a game day snack table, offering a creamy and tangy bite that's sure to be a crowd-pleaser.
    Dyed Easter Deviled Eggs

    🍽 Related Recipes

    • einkorn angel hair and cherry tomato pasta in a white bowl.
      One-Pan Einkorn Angel Hair Pasta with Cherry Tomatoes
    • Salmon Dill Puree.
      Lemon Dill Salmon Mousse (Bariatric Friendly)
    • close-up-watermelon-slices-with-blackberry-plastic-disposable-cup-perfect for a summer party.
      How To Host An Awesome Summer Party
    • Oven baked lobster tail with garlic butter and lemon.
      How To Cook Lobster Tail At Home

    Did you make this recipe? Leave a review and a ⭐⭐⭐⭐⭐ rating below, or tag us in our Facebook Group! Alternatively, bookmark it in your browser or save to Pinterest.

    Pastel Dyed Deviled Eggs.

    Pastel Dyed Deviled Eggs

    Angela Milnes
    Brighten up your Easter table with these Pastel Dyed Deviled Eggs! These classic deviled eggs get a festive twist with beautifully dyed pastel hues.
    5 from 3 votes
    Print Recipe Pin Recipe Rate this Recipe
    Prep Time 12 minutes mins
    Cook Time 20 minutes mins
    Total Time 32 minutes mins
    Course Appetizers
    Cuisine American
    Servings 28 Servings
    Calories 46 kcal

    Ingredients
      

    • 14 Eggs
    • 4 drops Pastel Pink Food Coloring
    • 4 drops Pastel Yellow Food Coloring
    • 4 drops Pastel Blue Food Coloring
    • 4 drops Pastel Purple Food Coloring
    • 3 tablespoon Mustard
    • 3 tablespoon Ketchup
    • 1 teaspoon Dry Mustard
    • 3 tablespoon Mayonnaise
    • 1 tablespoon Vinegar
    • 1 tablespoon Sugar

    Instructions
     

    • In a large saucepan or a large pot add your eggs, cover with cold water and salt. Bring the eggs to a boil for 4-5 minutes on high heat, making sure you cover pot with a saucepan lid.
    • Reduce the heat to low and cook for 20 minutes. Remove the eggs from the hot water using a slotted spoon and drain the eggs.
    • Place eggs in a large bowl and fill with cold water. Let the eggs sit for 15 minutes until completely cooled. Peel eggs and set to the side.
    • Slice the eggs into half lengthwise and remove the egg yolks and place the egg yolks in a medium-sized bowl. Add the mustard, ketchup, dry mustard, mayonnaise, vinegar, and sugar, and mash together until smooth. Cover and refrigerate for 1-2 hours.
    • In 4 small bowls add 1 cup of water and 2-3 drops of the desired food coloring. Place 1 color in each bowl whisk to combine.
    • Add your hard-boiled egg whites evenly split to each bowl. Set to the side for 1 hour or until you achieve the desired color you want. Once they are colored remove the eggs and place on a paper towel-covered large baking tray. Pat lightly to dry.
    • Use a small ice cream scoop or a piping bag and portion out the egg yolk mixture and place a scoop on each egg half. Garnish the dyed deviled eggs and enjoy!

    Notes

    Color Intensity: Remember that the longer you leave the egg whites in the food coloring, the more intense the color will be. If you want a more subtle, natural shade, soak the egg whites in the colored water for no more than 15 minutes.
    Drying Technique: Remember to pat dry before you add the deviled egg filling inside. You can also let the egg whites rest on a plate lined with paper towels to soak up all the excess moisture.
    Seasoning: In addition to the mayonnaise, you can also add some salt and pepper to season the colored deviled egg filling.
    Flavor Enhancement: Another great idea to make the filling for these dyed deviled eggs more flavorful is to add some Worcestershire sauce to the egg yolk mixture. Remember to mash yolks carefully using a fork or the back of a spoon for best results.
    Freshness: These dyed deviled eggs are best to make and enjoy fresh. This isn't one of those recipes that you can prep in advance.

    Nutrition

    Calories: 46kcalCarbohydrates: 1gProtein: 3gFat: 3gSaturated Fat: 1gPolyunsaturated Fat: 1gMonounsaturated Fat: 1gTrans Fat: 0.01gCholesterol: 82mgSodium: 73mgPotassium: 38mgFiber: 0.1gSugar: 1gVitamin A: 129IUVitamin C: 0.1mgCalcium: 14mgIron: 0.4mg
    Print Recipe Pin Recipe Rate this Recipe
    Tried this recipe?Let us know how it was!

    More Egg Recipes

    • Bacon And Egg Casserole Recipe
    • Avocado Deviled Eggs Recipe
    • Tik Tok Egg Boil
    • Zucchini Egg Bake Recipe

    What Do Clams Taste Like

    April 27, 2024 by Angela Milnes

    Ever asked What Do Clams Taste Like? Or are you looking for an intriguing way to mix up your usual dinner routine? With their unique texture and slightly briny flavor, clams can be a delicious surprise in any dish. Today we'll share some tips on preparing clams and answer questions about the taste of clams.

    [feast_advanced_jump_to]

    What do clams taste Like?

    Cooked clams offer a unique culinary experience. They are characterized by a slightly briny flavor that reflects their marine habitat.

    When you cook clams, their taste becomes more pronounced and savory, often compared to a blend of salty sea air and sweet, tender meat.

    The texture is soft yet slightly chewy, making them a delightful addition to many dishes.

    The key to maintaining the slightly briny flavor of cooked clams is to avoid overcooking them, as it can toughen their texture and mask their natural flavors.

    Are Clams Rubbery?

    The allure of clam meat lies in its unique blend of flavors and textures. Often described as having a chewy texture, it's not uncommon for newcomers to find it slightly rubbery.

    This is due to the nature of the mollusk's muscle tissue, which is designed to maintain prolonged contractions, resulting in a firm, dense texture.

    It's this very characteristic that also gives clam meat its distinctive chewiness. While some might initially find this texture off-putting, many appreciate it as an integral part of the clam-eating experience.

    Do Clams Taste Good?

    Clams have a unique taste that's often described as slightly fishy. If you enjoy seafood, clams taste good.

    Their distinctive flavor is marked by a slightly sweet undertone, complementing their overall briny, oceanic taste.

    The taste of clams can be similar to other types of shellfish, but they carry a unique profile that sets them apart.

    Do Clams Taste Like Chicken?

    Clams do not taste like chicken. Their flavor is unique and often described as mild but not overwhelmingly fishy.

    Clam taste can vary from sweet to salty, depending on the time of year and the specific species. Some people describe the texture as slightly chewy with a hint of saltwater and a fish-like undertone.

    Even though they are a type of seafood, clams do not taste the same as other sea creatures. Each has its own distinct taste and texture. Therefore, clams have a unique flavor profile that is quite different from that of chicken.

    Chicken and clams.

    Do Clams Taste Like Mussels?

    Clams and mussels share a similar oceanic taste, but subtle differences exist.

    While both possess a salty flavor reminiscent of the sea, mussels are often described as having a milder flavor than clams.

    Clams often exhibit a stronger, fishier flavor, whereas mussels maintain a gentle, almost bland profile, making them popular for those who appreciate a less potent seafood experience.

    This mild flavor sets mussels apart, allowing them to blend seamlessly with various dishes without overpowering other ingredients.

    Which Tastes Better, Oysters or Clams?

    Clams are often compared to oysters but the taste of clams can vary depending on the species and time of the year.

    While some describe the taste as salty and fish-like, others note a distinct sweetness distinguishing them from their shellfish counterparts.

    Clams can also have a soft or slimy texture, adding to their unique palate profile. When it comes to comparing clams and oysters, it's a matter of personal preference.

    Oysters have a more pronounced buttery flavor, which some may prefer, while others might find the unique taste of clams more appealing.

    Read here: How to freeze Oysters!

    Clams and oysters.

    What Is a Good Substitute for Clams?

    Multiple suitable substitutes can offer a comparable flavor and texture when searching for an adequate replacement for clams.

     Mussels are often recommended as they have a very close flavor profile to clams, providing a similar fishy flavor and texture when cooked. Oysters are another alternative that can be used in place of clams.

    They offer a distinct flavor that, while different from clams, can still work well in most recipes that call for fresh clams. King oyster mushrooms are a fantastic substitute for those following a vegetarian or vegan diet.

    They replicate the texture of clams surprisingly well and, when seasoned correctly, can closely mimic the unique, slightly briny taste of fresh clams. Another Plant Based Option is firm tofu, which can absorb flavors well and offer a similar bite to clams. Be sure to read this article on How To Store Clams correctly.

    What Do Canned Clams Taste Like?

    Canned clams offer a delicious taste that enhances various kitchen dishes. They are often described as having a delicate, fishy flavor that ranges from mild to salty, depending on the variety of clam.

    Some canned clams have a sweet flavor and firm texture, making them a versatile ingredient for many recipes.

    While fresh clams are often praised for their quality, canned clams have their merits, including a robust umami-packed brine that contributes to their unique taste.

    Despite their canned nature, they retain a meaty and firm texture, particularly those sourced from the ocean.

    Clams in an opened can.

    What Is the Taste of Fried Clams?

    The taste of fried clams is a delightful culinary experience that seafood lovers cherish. The distinct fried clams taste combines the natural sweetness of the clam meat, perfectly balanced with a hint of the ocean's brininess.

    When deep-fried, the clams gain an added layer of complexity with a crispy, golden exterior that gives way to tender, juicy flesh within.

    The coating, often a blend of bread crumbs and seasonings, adds a unique texture and flavor profile that complements the clams' inherent taste.

    Cooked clams on a plate.

    Do Steamed Clams Taste Good?

    Known for their unique taste, steamed clams offer a subtle yet distinct flavor that is appealing.

    The steamed clams taste is not overpowering; it offers an ideal mix of sweetness and saltiness, subtly infused with a touch of the sea.

     Unlike some seafood, they don't have an overly fishy flavor, which makes them a favorite among many.

    When steaming clams, it's crucial to ensure they taste fresh. Fresh clams have a clean, brine taste reminiscent of the sea, enhancing the dining experience.

    What Are Different Types of Clams?

    • Soft-Shelled Clams: Also known as steamers, soft-shelled clams are a popular variety. They get their name due to their thin, brittle shells. The taste is more delicate than other types, making them a preferred choice for many seafood lovers.
    • Hard Clams: These clams have a sturdy shell and are also called quahogs. They come in various sizes, from small (little necks) to large (Instant Pot Clam Chowder). Despite the tougher shell, they can also have a somewhat delicate flavor.
    • Razor Clams: Named for their long, slender shape resembling a straight razor, they are often prized for their sweet and delicate taste. They're typically found in the Pacific Northwest and are a staple in many regional dishes.
    • Bot Clams: These clams are unique, also known as mud clams or eelgrass clams. They are not as common as other types but are still enjoyed by many for their distinct flavor.
    • Littleneck Clams: These are the smallest type of hard shell clams and are known for their sweet and tender meat. Their delicate taste makes them a favorite in dishes like clams casino.
    • Manila Clams: Introduced from Japan, these clams have become a dominant species in the Pacific Northwest. They are smaller than most other clams but pack a flavorful punch.
    • Geoduck Clams: Pronounced "gooey-duck," these clams have a long siphon or "neck" stretching several feet. They have a unique taste and texture, different from the more delicate flavors of other clam varieties.
    • Surf Clams: These clams are typically found in deep water and are harvested commercially. They have a strong, briny flavor and are often used in soups and chowders.
    Cooked clams in skillet.

    FAQ'S

    Is It Safe To Eat Raw Clams?

    Raw clams, often served on the half shell, are generally considered safe to eat. They offer a unique culinary experience with their slightly salty taste that genuinely captures the essence of the sea.
    However, it’s important to note that not all clams should be eaten raw. There’s always a risk associated with consuming any raw or undercooked food, and clams are no exception.

    How Do You Know If Clams Are Bad To Eat?

    When detecting if clams are bad to eat, your senses are usually the most reliable tool.
    One of the critical signs that clams have gone bad is an overpowering sour or bitter flavor, which starkly contrasts their natural oceanic flavor.
    A fresh clam should have a mild, salty taste that reminds you of the sea. If you notice an off-putting smell or a strange taste, especially a sour or bitter one, it’s often a clear indicator that the clam has gone bad.
    Additionally, the texture can also provide clues. Fresh clams are plump and firm, while bad clams often have a slimy or mushy texture.

    Are Clams Good For Your Health?

    Consuming clams can have potential risks and benefits for your health. Clams Are A Rich Source Of Lean Protein, Healthy Fats, Minerals And Other Nutrients such as vitamin C and iron.
    However, there are certain risks associated with the consumption of clams. These include High Cholesterol Levels, especially when consumed with too much butter, and the potential for allergic reactions.
    In extreme cases, consuming improperly handled clams can Cause Food Poisoning Symptoms ranging from vomiting and diarrhea to memory loss and even paralysis.

    Enjoy The Taste Of Clams In Your Diet

    Clams offer a unique experience with their slightly salty, slightly sweet taste. They can provide an exquisite and flavorful addition to many dishes when cooked properly.

    However, there is always a risk associated with consuming raw or undercooked clams due to the potential for bacteria that could cause illness. Therefore, handling them safely and cooking them thoroughly before eating them is essential.

    Ultimately, clams offer a unique and delicious taste of the sea that can be enjoyed in moderation to maintain good health. With proper storage and handling, you can bring home some of the ocean's bounty and experience its unique flavor firsthand.

    Seafood Recipes You May Enjoy:

    • Instant Pot Fish Tacos
    • Creamy Pan Fried Salmon
    • Instant Pot Lobster Rolls
    • Instant Pot Shrimp Boil
    • Instant Pot Shrimp Scampi

    Does Cashew Milk Go Bad? How To Store?

    April 24, 2024 by Angela Milnes

    A glass and a bottle of cashew milk and a bowl of cashews.

    Cashew milk has become incredibly popular but Does Cashew Milk Go Bad? This article will answer your questions about cashew mil, how to store it and when to know it has expired.

    does cashew milk go bad?
    [feast_advanced_jump_to]

    Does Cashew Milk Go Bad?

    Just like any other plant-based milk, cashew milk can indeed go bad. Fresh cashew milk, which is usually homemade, has a shorter shelf life while store-bought pasteurized cashew milk can last unopened for several months due to the preservatives and the pasteurization process that kills bacteria.

    Interestingly, there's also shelf-stable almond milk and cashew milk available in the market. These variants undergo a special packaging process that allows them to be safely stored at room temperature until opened. After opening, they need to be refrigerated and consumed within a week or so.

    How Long Does Cashew Milk Last?

    The shelf life of cashew milk depends on whether it's homemade or store-bought, and whether it's opened or unopened.

    • Store-Bought Cashew Milk: Store-bought cashew milk in a refrigerated carton, however, can last up to two weeks after opening if kept constantly chilled.Unopened, it generally has a long shelf life and can be used until the 'use by date' printed on the milk carton. This makes it a convenient option for those with a dairy allergy.
    • Homemade Cashew Milk: Homemade cashew milk, similar to homemade almond milk, usually lasts up to seven days when continuously refrigerated and properly stored. Always remember, the key to maintaining the best quality of cashew milk is proper storage - keep it refrigerated and tightly sealed when not in use.

    How to Know if Cashew Milk Has Gone Bad?

    Cashew milk, like other plant-based milks, can indeed go bad. There are a few signs that indicate spoiled cashew milk.

    • Unpleasant Smell: Fresh cashew milk has a mild, nutty aroma. If it starts to emit a sour or weird smell, it's likely gone bad.
    • Sour Taste: Cashew milk should have a creamy, slightly sweet taste. If it tastes sour, it's best to discard it.
    • Change in Texture: Fresh cashew milk has a smooth consistency. If it becomes chunky or develops a thick layer, it's a sign of spoilage.
    • Past its 'Best By' Date: While an unopened carton of cashew milk can last until the 'best before' date, once opened, it typically lasts about one week when properly stored in the refrigerator. If it's past this time, it's safer to throw it out.

    It's crucial to note the storage instructions and expiration dates on plant-based milk products to ensure their freshness and safety.

    Does Cashew Milk Expire?

    Yes, cashew milk does expire. Just like expired almond milk, it can develop an unpleasant smell, sour taste, and change in texture.

    The expiration date on carton is a good indicator of its shelf life when unopened. Once opened, it should be consumed within 7-10 days for the best quality.

    What if You Drink Expired Cashew Milk?

    Drinking expired cashew milk can lead to discomfort, much like if you were to drink expired almond milk or dairy milk. You may experience digestive discomfort, such as bloating, diarrhea, or stomach cramps. It's always best to avoid consuming expired products.

    Can You Use Cashew Milk for Cooking and Baking After the Expiration Date?

    While it might be tempting to use expired cashew milk in cooking and baking, it's not recommended. The expiration date on the package is there for a reason — it indicates the estimated time until the product may start to deteriorate in quality and safety.

    If your cashew milk has passed its expiration date, it's important to check for signs of spoilage. If any of spoilage signs are present, it's best to discard the milk.

    Even in cooking and baking, using spoiled milk can affect the taste of dishes and potentially cause foodborne illness. It is important to always prioritize safety when using food products that have expired. Don't add expired cashew milk to your smoothies!

    cashew milk in a bottle

    How to Store Cashew Milk Correctly?

    Like all perishable items, it requires proper storage to maintain its freshness and prevent spoilage. To store cashew milk correctly and prevent spoilage, follow these steps:

    • Unopened Cashew Milk: When dealing with unopened cashew milk cartons, ensure they are properly stored in a dark place, away from direct sunlight or heat.
    • Refrigeration for Freshness: Once opened, transfer the cashew milk to the refrigerator promptly. It may stay fresh for up to seven days when stored in the main body of the fridge, not on the fridge door.
    • Airtight Container: If you're making homemade cashew milk, store it in the clean, airtight container to prevent air exposure and potential contamination.
    • Extended Shelf Life: For longer-term storage of homemade cashew milk, consider freezing it. Cashew milk can be stored in the freezer for up to six months.

    Remember that proper storage practices are key to maintaining the quality and safety of cashew milk, ensuring it remains suitable for consumption.

    Can You Freeze Cashew Milk?

    Yes, you can freeze cashew milk. However, keep in mind that the texture might change upon thawing, making it potentially less suitable for drinking straight but still usable for cooking or baking purposes.

    Always remember to leave some space at the top of your container when freezing, as the milk will expand.

    cashew milk in a bottle
    What Is Cashew Milk?

    Cashew milk is a plant-based, dairy-free milk alternative made from cashews. It is a popular option for individuals who are Vegan, Lactose Intolerant, or allergic to cow's milk.

    Cashew milk has creamy texture with a slightly sweet, nutty flavor. It can be used in a variety of ways such as in coffee and Tea, with cereal, in Smoothies, in baking, in Hot Chocolate, and in cooking.

    Alternative Milks To Cashew Milk

    Oat milk, rice milk, Coconut Milk, Almond Milk, and soy milk are all other alternative milks to cashew milk. These types of milk, along with other plant milk options, present a healthy alternative to cow's milk.

    Each milk offers unique nutritional profiles and flavors. Like cashew milk, each of these other alternative milks is a great choice for those seeking dairy-free options due to dietary restrictions or personal preference.

    So, Does Cashew Milk Go Bad?

    In conclusion, cashew milk, like all dairy alternatives, does have a shelf life and can go bad. Generally, an opened container of cashew milk will stay fresh for almost about 7-10 days in the refrigerator.

    More Useful Articles:

    • How To Freeze Beets: A Step By Step Guide
    • Does BBQ Sauce Go Bad
    • Does Salad Dressing Go Bad?
    • 12 Paprika Substitutes
    • What to Serve With Shrimp Cocktail

    Does Mustard Go Bad?

    April 24, 2024 by Angela Milnes

    Small bowls of mustard and lemon slices and garlic bulbs on a wooden board.

    Mustard is a popular condiment that is used in many different dishes. It has a unique flavour and can add zing to any meal. It is often used in sandwiches, hot dogs, and other dishes. But Does Mustard Go Bad? And if so, how do you know when it's time to throw it out? This article will answer those questions and provide tips on storing mustard properly.

    does mustard go bad
    [feast_advanced_jump_to]

    Does Mustard Go Bad?

    Yes, mustard can go bad. It will start to lose its flavour and potency over time, so it's best to use it up within a year or two of purchase.

    It should stay good when properly stored. However, if you see any signs of organic growth such as mould or deterioration, it's best to discard it. If mustard is not stored and handled properly, there is a high chance of bacteria growth.

    How Long Does Mustard Last?

    Mustard can last very long as long when stored properly. Mustard had a long shelf life which is about 2 years, but it will still be safe to eat after that.

    As with most food items, the flavour and texture of mustard will gradually degrade, so it's best to use it up within that window. Keep your mustard stored in a cool and dark place such as a Kitchen Cabinet and be sure to store the date on the label.

    does mustard go bad

    How Can You Tell if Mustard Is Bad?

    With a few simple tricks, you can learn to identify expired mustard:

    • Check Expiration: The first thing you should do when checking to see if mustard is bad is to check the expiration date. If the best-by date has passed then you may find you have spoiled mustard. Mustard typically has a shelf life of about one year, so if the expiration date has passed, it's probably time to toss it.
    • Look for Signs of Mould: Another way to tell if mustard is bad is to look for signs of mould. Mould can cause food to spoil and make it unsafe to eat. So open the jar or squeeze bottle and take a look inside. If you see any mould on the mustard, it's best to throw it away.
    • Smell the Mustard: Another way to tell if mustard has gone bad is to smell it. Mustard that has gone bad will usually have a sour or unpleasant odour. If the mustard doesn't smell right, it's best to discard it. When your serving mustard goes bad, it usually emits a sour smell.

    Does Open Mustard Need to Be Refrigerated?

    Some people recommend refrigerating opened mustard if it is not used quickly enough, while others believe that storing it in the pantry or cupboard is sufficient.

    Best Ways to Store Mustard

    There are some ways to preserve your unused mustard and retain quality.

    • Freeze Mustard: Mustard freezes well and can be stored in the freezer for up to six months. To freeze mustard, place the mustard in a freezer-safe container or bag and squeeze out as much air as possible. Label and date the container, then place it in the freezer.
    • Refrigerate Mustard: Mustard will keep for up to two years if stored in the refrigerator. Be sure to store the mustard in a clean, airtight container and label it with the date it was made.
    • Canning Mustard: To can homemade mustard, sterilize jars and lids by boiling them for 10 minutes. Fill the jars with mustard, leaving ½ inch of headspace at the top of each jar. Remove any air bubbles, then wipe the rims of the jars with a clean cloth. Place the lids on the jars and screw on the rings until they are finger-tight. Process the jars in a boiling water bath for 10 minutes. Let the jars cool for 24 hours before checking the seals. Store sealed jars in a cool, dark place for up to one year.

    Top Storage Tips

    • Store in a Cool Dry Place: Mustard is best stored in a cool, dry place like the pantry or cupboard.
    • Keep Mustard Jar Tightly Sealed: It is important to keep mustard tightly sealed when not in use, as exposure to air can cause the flavour to fade. An airtight container or jar is ideal for storing mustard.
    • Use Within 6 Months: An opened bottle of mustard should be used within 6 months for the best flavour. If stored properly, unopened mustard can last for up to 2 years.

    Different Types of Mustard

    Mustard comes in several flavors and varieties. Here are a few different mustard types:

    • Yellow Mustard: This is the most common type of mustard, and it is made from ground yellow mustard seeds. It is great for use in sauces and marinades for dishes like Honey Mustard Chicken, as well as a condiment on its own. Yellow mustard is sometimes referred to as American mustard.
    • Dijon Mustard: Made from brown and black mustard seeds, along with white wine and spices, Dijon mustard is a classic French mustard. It has a richer and more complex flavour than yellow mustard, making it ideal for use in vinaigrettes, sauces, and marinades.
    • Honey Mustard: Honey mustard is a blend of yellow or Dijon mustard with honey and other flavorings. It can be used as a dipping sauce for BBQ Chicken Wings, or as an ingredient in salad dressings.
    • Spicy Brown Mustard: This bold-flavoured mustard is made from coarsely ground brown seeds. It is generally spicy, but can also have a smoky flavour. It is commonly used in sandwich spreads and marinades.
    • Horseradish Mustard: This zingy mustard is made from ground yellow or brown seeds along with horseradish, vinegar, and spices. It adds a spicy kick to sandwiches, burgers, and Bacon Wrapped Hot Dogs.

    No matter what type of mustard you prefer, there are many ways to keep it flavorful by following these simple tips. With proper storage and care, you can enjoy a long mustard shelf life.

    does mustard go bad

    FAQ'S

    What Is Mustard and Where Does It Come From?

    Mustard is a condiment made from the seeds of a mustard plant. The origins of the word “mustard” are unknown, but it may have derived from the Latin word mustum, meaning “young wine.”
    The modern-day preparation of mustard begins with the grinding of mustard seeds into a powder. This powder is mixed with water, vinegar, lemon juice or other liquids to create different types of mustard. Mustards can be hot or mild and come in many colors, such as bright yellow, brown, or black.

    Store Mustard For Longer

    In summary, mustard can go bad!. However, if you follow our tips on storing it and keeping it fresh, your yellow mustard should last longer than if you leave it out on the counter.

    More Helpful Cooking Tips

    • Best Substitute For Dijon Mustard
    • Best Clam Juice Substitute
    • 12 Paprika Substitutes
    • How To Freeze Fresh Herbs The Right Way
    • What to Serve With Shrimp Cocktail
    • Can You Freeze Cooked Turkey

    Does Horseradish Go Bad? How To Store?

    April 24, 2024 by Angela Milnes

    raw horse radishes.

    Horseradish is a great condiment that adds a delicious zing to many recipes. But Does Horseradish Go Bad? If used too late, it could ruin the taste and texture of you're perfectly prepared dish. No one wants that! Today l'll share tips on how to know if horseradish has expired.

    Does Horseradish Go Bad? How To Store?
    [feast_advanced_jump_to]

    Does Horseradish Go Bad?

    Both Horseradish root and horseradish sauce can go bad and can expire. Horseradish sauce generally retains its quality for a few months past the date on the label, and storing it in the fridge can further extend its expiration date by up to 2-3 months.

    Can Horseradish Sauce Go Bad if Unopened?

    An unopened jar of horseradish sauce can last for quite some time if properly stored. Whether you buy it from a store or make it at home, an unopened jar of horseradish sauce can maintain its quality for a year or more. The duration depends on the way it's prepared and the ingredients used.

    This is because the seal prevents exposure to air, moisture, and bacteria that could cause spoilage. Store it in a cool, dry, dark place like a pantry or kitchen cabinet to maximize its shelf life.

    However, once the jar is opened, the sauce should ideally be consumed within 1 to 2 months to enjoy the best quality.

    How Can You Tell if Horseradish Is Bad?

    Here's a guide on how you can tell if horseradish has gone bad:

    • Visual Inspection: First and foremost, check for signs of mold. Fresh horseradish roots should appear firm and devoid of mold or unusual spots. If you notice mold growth, it's an obvious sign that your horseradish has gone bad.
    • Texture: Horseradish root should feel firm to the touch. It might indicate that the horseradish has spoiled if it feels soft, mushy, or spongy.
    • Smell: A potent, spicy aroma is typical for horseradish. If you detect an off odor, it may mean that the horseradish has started to spoil.
    • Taste: While it's not recommended to taste potentially spoiled food, a bitter taste can sometimes indicate that horseradish root has spoiled.

    How Can You Tell if Horseradish Sauce Is Bad?

    Checking if homemade horseradish sauce has gone bad is similar to other condiments like cocktail sauce.

    • Color: A change in color from its usual creamy white or light beige can be the first sign.
    • Smell: If it smells off or has visible mold, it's time to discard it.
    • Taste: The signature spicy taste of horseradish sauce turning bitter also indicates spoilage. Regular checks can help ensure you're not consuming spoiled condiments.
    • Expiration Date: Although horseradish doesn't have a traditional expiration date like most food products, bottled horseradish typically remains suitable for 3 to 4 months if stored in the refrigerator once opened. Always check the date on the label, and remember that the sauce usually retains quality for up to a few months past this date.
    horseradish sauce

    How Long Does Horseradish Last?

    Horseradish last longer if follow these tips:

    Horseradish Root

    • Fresh horseradish: Horseradish roots can be stored in the refrigerator for one to two months. The exact duration depends on how the roots were stored before you bought them. If you want to extend the shelf life to 6 months, consider storing the horseradish roots in the freezer.
    • Grated horseradish root: If you're grating fresh horseradish, ensure that you use clean cutlery to avoid microbial contamination. To preserve its freshness, store the horseradish in the refrigerator and use it within a few weeks.
    • Outer layer: To maintain freshness, wrap the horseradish root in aluminum foil and store it in the fridge. You don't need to remove the outer layer of skin. Just trim the top and bottom. Doing this will prevent it from getting bruised.

    Horseradish Sauce

    • Store-bought sauce: If refrigerated, the shelf life of commercially prepared horseradish, which is usually available in jars or bottles, extends to 3 to 4 months post-opening.
    • Homemade horseradish sauce: Your own horseradish sauce should be stored in the fridge and can last for a few weeks, depending on the ingredients used.
    • Bottled horseradish: Unopened jars of horseradish can be stored for several months if kept in a cool, dark place.
    horseradish sauce

    How Do You Store Horseradish?

    Horseradish shelf life can be extended if you choose the proper storage method.

    Storing Horseradish Root in the Pantry

    • Start with a fresh root. The fresher it is, the longer it will last.
    • Wash the horseradish root thoroughly to remove any dirt or debris.
    • Dry the root completely. Any moisture left on the root can cause it to spoil faster.
    • Wrap the horseradish root in a paper towel. This helps absorb excess moisture and keeps the root from drying out too quickly.
    • Place the wrapped root in an airtight bag or container. This helps preserve its freshness and prevent it from spoiling.
    • Store the bag or container in a dark, cool place like a pantry or cupboard. The horseradish root should last for one to two weeks this way.

    Storing Horseradish Root in the Fridge

    • Consider putting your food in a container or airtight bag and keeping it in the vegetable drawer of your refrigerator. The cooler temperature and controlled humidity help prolong the shelf life of the horseradish root. The horseradish root can last up to four weeks if stored this way.

    Storing Horseradish Root in the Freezer

    • Cut the horseradish root into small, manageable pieces. Place these pieces in a freezer-safe airtight bag or container. Put the bag or container in the freezer. The extremely low temperature will keep the horseradish root from spoiling.Frozen horseradish root can last for up to six months.

    Storing Horseradish sauce

    Horseradish sauce should be stored in a jar or airtight container in the fridge. This should last for around 2-3 weeks. For longer storage options consider freezing horseradish sauce for 2-3 months.

    Best Way to Use Fresh Horseradish?

    • Simple Condiment: Fresh horseradish can be grated or finely chopped and used as a simple condiment. It adds a spicy kick to meals and is great on its own. You can eat horseradish raw, but remember it's pretty potent, so use sparingly.
    • Mixed with Other Sauces: One of the best ways to eat horseradish is to mix it with other sauces. This works particularly well with cream-based sauces, as the creaminess counteracts the spiciness of the horseradish. Try adding some to your next homemade Aioli or tartar sauce for an extra burst of flavor.
    • Complement to Prime Rib: Fresh horseradish tastes good when served alongside prime rib. The sharpness of the horseradish perfectly balances the richness of the meat. Grate some fresh horseradish over your cooked prime rib before serving.
    • Roast Beef Sandwiches: Another classic pairing for horseradish is roast beef. Whether it's a sandwich or a full-roast beef dinner, a dollop of horseradish sauce can elevate the dish to new heights.
    • Horseradish Cream: Mix grated horseradish with sour cream to create a creamy horseradish sauce. This mixture is ideal for dipping vegetables or chips or using as a topping for Baked Potatoes. The sour cream helps to mellow out the horseradish heat, making it more palatable for those who aren't fans of spicy foods.

    FAQ'S

    What’s Horseradish Made Of?

    Renowned for its pungent aroma and taste, horseradish is a root vegetable part of the mustard plant family.

    The primary source of its distinct flavor is its large, white root, which releases volatile oils that create its signature heat when cut or grated.

    This process transforms the humble root into the potent condiment we know and love, prepared horseradish. As a member of the Mustard Family, horseradish carries a strong flavor profile, enhancing dishes with its unique kick.

    Can You Eat Raw Horseradish Root?

    Yes, you can eat horseradish root raw. However, be prepared for a robust, pungent flavor that can be intense.
    The freshly grated horseradish roots have a potent, spicy heat that quickly hits the nose but dissipates just as fast, leaving a pleasant aftertaste.

    Can You Eat Expired Horseradish?

    While eating horseradish past its expiration date isn’t necessarily dangerous, it’s not recommended. The potency and flavor of horseradish can deteriorate over time, leading to a less satisfying culinary experience.

    More importantly, if the horseradish has been improperly stored or shows signs of mold, consuming it could result in an upset stomach.

    Store Horseradish Well To Enjoy

    With the proper storage methods, you can make horseradish last even longer. To achieve the best results, storing it in a cool and dark place is recommended.

    More Articles You May Enjoy

    • Do Raisins Go Bad?
    • Fish Stock Substitute
    • Can Walnuts Go Bad?
    • Does Mustard Go Bad?

    Do Walnuts Go Bad? What Are The Signs?

    April 24, 2024 by Angela Milnes

    Shelled and unshelled walnuts.

    Are you someone who loves to whip up a delicious, nutty snack in your kitchen? If so you may be asking, Do Walnuts Go Bad? When added to dishes, walnuts can provide just the right texture and flavor but they do have a shelf life. In this article, we will share how long walnuts last and guide you on how to store them to ensure their freshness is maintained for extended periods.

    Shelled walnuts. Do walnuts go bad?
    [feast_advanced_jump_to]

    Do Walnuts Go Bad?

    Yes, walnuts can indeed go bad. Yes, when the oils in the walnuts oxidize, they develop a bitter and unpleasant taste, a condition commonly known as rancidity. This process can occur more quickly when the nuts are exposed to heat, light, or humidity.

    It's essential to store walnuts properly to maintain their freshness. However, even in shell walnuts, with the best storage conditions, walnuts may taste stale, indicating they have begun to spoil.

    Shelled walnuts.

    How Long Do Shelled Walnuts Last In The Pantry?

    The shelf life of shelled walnuts at room temperature can range from about 2 to 4 weeks and up to two months above room temperature under optimal conditions. It is crucial to store these nutritious nuts in a cool, dry, and dark place to ensure they stay fresh for the longest possible period.

    Preserving walnuts in an Airtight Container can also help maintain their best quality. These timeframes are estimates, and the actual freshness of the walnuts may vary based on factors such as the specific storage conditions and the freshness of the walnuts when bought.

    Do Dry Walnuts Expire?

    Yes, dry walnuts do expire. Generally, dry walnuts last 12 months if stored properly in cool and dry conditions. However, it's important to note that the quality may deteriorate after this period due to oxidation and potential mold growth.

    Walnuts in shells.

    How Long Do Unshelled Walnuts Last?

    Like most in-shell nuts, unshelled walnuts have a significantly longer shelf life than their shelled counterparts. When stored properly, unshelled walnuts can keep fresh at room temperature for about a year to two years.

    The shell acts as a natural barrier, protecting the nut inside from air, light, and humidity exposure, thereby keeping the walnuts fresh for an extended period.

    Store unshelled walnuts in a cool, dark, and dry location is recommended for optimal freshness. You can enjoy walnuts' rich, earthy flavor for months when stored in this manner.

    Unshelled walnuts in a bowl.

    Can Walnuts Go Bad In The Freezer?

    Both unshelled and shelled walnuts can be stored in the freezer to extend their shelf life. Even after this period, they remain safe to consume, offering a practical solution for those who want to keep these nutritious nuts on hand.

    It's important to note that walnuts can eventually still go rancid despite being frozen due to their high oil content, but this process is significantly slowed down in the freezer.

    Therefore, while freezing extends the shelf life of walnuts, it doesn't indefinitely preserve them. So, consuming them within a year of freezing is best for optimal freshness and taste.

    How Can You Tell If Walnuts Are Bad?

    There are a few ways to determine whether walnuts have gone bad:

    • Taste: The most common way to tell if walnuts have gone bad is by their taste. Fresh walnuts have a mild, sweet flavor. When walnuts go rancid, they develop an unpleasant taste, often compared to the flavor of cooking oil past its prime.
    • Odor: Rancid walnuts often emit strong odors. If your walnuts smell like paint thinner, or rancid oil, it's a clear sign that they've turned. A fresh walnut should have a slightly nutty aroma, but any strong or chemical-like smell is a red flag.
    • Color: Fresh walnuts are light in color. If your walnuts have turned dark brown or black, they may have gone bad. In some cases, this color change could be due to oxidation, but it's best to err on caution and avoid eating them.
    • Texture: Fresh walnuts should be firm, while rancid ones may become soft and mushy. If your walnuts feel overly soft or shriveled, it might be a sign that they're no longer good to eat.
    • Mold Growth: This is a sign that your walnuts have gone bad. Any signs of mold contamination, net forming, or organic growth mean the nut is unsafe to eat. Always inspect the nut closely, especially if you have shelled walnuts.

    Is It Ok To Eat Expired Walnuts?

    Indeed, like many other foods, walnuts don't technically expire but instead have a recommended use-by date.

     It's generally safe to consume them even after this date, provided they show no signs of spoilage.

    However, if the walnuts have been kept for an extended period beyond this date, they might not be advisable for consumption, particularly for those with sensitive stomachs.

    Consuming bad walnuts could lead to uncomfortable gastrointestinal issues such as bloating and heartburn; in some instances, it may cause diarrhea and nausea.

    Why Do Walnuts Need To Be Refrigerated?

    Whether shelled or unshelled, walnuts must be refrigerated to preserve their freshness and nutritional content for longer periods.

    Refrigeration slows the oxidation process and helps maintain the quality of the nuts.

    However, storing them in an airtight container is essential to prevent them from absorbing odors from other foods in the refrigerator. Refrigeration is your best bet to avoid rancid nuts and enjoy fresh, tasty walnuts for longer.

    Best Ways To Store Walnuts

    Here are detailed steps on how to store walnuts in the pantry, fridge, and freezer:

    Storing Walnuts In The Pantry

    • Whole Walnuts: Unshelled walnut has a longer shelf life than shelled ones because their hard shell protects them from light, heat, and humidity exposure. To store whole walnuts, keep them in a cool, dark, dry place in your pantry.
    • Shelled Walnuts: If you've already cracked open your walnuts, the best way to store them in the pantry is by placing them in an airtight container to protect them from air and moisture. However, shelled walnuts stored in the pantry won't last as long as unshelled walnuts or those stored in the fridge or freezer.
    A girl holding a jar of unshelled walnuts.

    Storing Walnuts In The Fridge

    • Storing walnuts in the fridge can help them retain their freshness for longer. Before you keep walnuts in the refrigerator, make sure they're dry to prevent them from developing mold.
    • Store your shelled or ground walnuts in a sealed container or a zip-lock bag to avoid absorption of smells from other food items in the refrigerator.
    • The fridge's cold temperature slows the oxidation process, making walnuts rancid. This approach could prolong the usability of walnuts for up to six months.

    Freezing Walnuts

    • To freeze walnuts, spread them out on a baking sheet in a single layer. This step helps to freeze the walnuts individually, preventing them from clumping together.
    • Once the walnuts are frozen, transfer them to a freezer bag or airtight container. Make sure to squeeze out any excess air before sealing the bag or container.
    • Frozen walnuts' shelf life is up to a year. They don't need to be thawed before use and can be used straight from the freezer in most recipes.

    Expert Storage Tips

    • Check Freshness: Before storing, ensure the walnuts are fresh. Fresh walnuts have a clean, nutty aroma and light color. If they smell rancid or look dark, they might be spoiled.
    • Away from Heat: It's advised to store walnuts away from heat-emitting appliances such as stoves or ovens since exposure to heat can accelerate their spoilage, making them rancid quickly.
    • Avoid Humidity: Moisture can lead to mold growth, so always store walnuts in dry conditions.
    • Limit Exposure to Light: Light can also hasten spoilage, so storing your walnuts in a dark place is best.
    • Seal Properly: Whether using airtight containers or freezer bags, seal them properly to keep air out and maintain freshness.
    • Rotate Your Stock: Use the oldest nuts first and add new ones to the back or bottom of your storage container. This method, known as stock rotation, helps ensure you always use the freshest nuts.
    • Regular Checks: Regularly check your stored walnuts for signs of spoilage. Discard any that look or smell off.
    • Airtight Containers: It is recommended to store chopped walnuts in airtight containers and shield them from exposure to air to avoid rancidity.

    Do Raisins Go Bad?

    April 24, 2024 by Angela Milnes

    Raisins on a wooden spoon.

    Are you a fan of raisins? If so you may be asking Do Raisins Go Bad?Although raisins have a longer shelf life than fresh fruit, they can spoil if not stored properly. In this article, we'll answer the question and share how long raisins will stay suitable for your cooking and baking needs.

    raisins on a spoon
    [feast_advanced_jump_to]

    So, Do Raisins Go Bad? 

    Raisins have a longer shelf life compared to other dry fruits, and this is because the dehydration process removes moisture, making it hard for bacteria and mold to grow.

    Therefore, under proper storage conditions, raisins can last for months or even years without going bad. However, it's important to note that in a hot and humid climate, the shelf life of raisins might be compromised. The increased temperature and humidity can reintroduce moisture into the dried fruit, potentially leading to spoilage.

    Do Rasins Go Bad? Rasins on a table

    How Long Do Raisins Stay Good For?

    Like many dry fruits, Raisins have a much longer shelf life when compared to their fresh counterpart. The shelf life of dried fruits and raisins depends on various factors, including the best-before date, how they are stored, and whether they are opened or unopened.

    Unopened Raisins:

    • If kept in a cool, dark place and properly sealed, unopened raisins can last up to 1-2 years beyond their "best by" date.
    • Storing unopened raisins in the pantry is perfect as it ensures a stable temperature and shields them from light exposure.

    Opened Raisins:

    • Once opened, raisins can stay good for about six months.
    • If you want to keep opened raisins fresh for longer, it's important to seal them correctly and store them in a cool and dark spot.
    • If you will keep your opened raisins fresh for a longer time, consider refrigerating them. When refrigerated in a tightly sealed container, raisins can last about a year.
    raisins in a cup

    How Do You Know When Raisins Have Gone Bad?

    • Color Change: Fresh raisins typically have a dark brown color. If your raisins have turned black or have noticeable color changes, this might indicate that they've gone bad.
    • Organic Growth: If you notice any mold or other organic growth on the surface of the raisins, it's a clear sign that they're spoiled. 
    • Smell: Raisins should have a sweet, fruity aroma. They've likely gone bad if they give off a sour or unpleasant odor.
    • Texture: Regarding raisins, it is essential to remember that they should be soft and chewy. If they have become hardened or excessively dry, this could indicate that they are spoiled.
    • Taste: While this should be your last resort due to potential health risks, if the raisins taste sour or off in any way, they're likely spoiled.
    raisins in a bowl

    What Does Mold on Raisins Look Like?

    • Mold on raisins appears as a fuzzy substance in colors ranging from white to blue-green or black.
    • It may also change the color of the raisins and give off a sweet or tangy smell. Consuming moldy raisins can be harmful, so they should be discarded if mold is detected.

    How to Store Raisins After Opening

    Storing in the Pantry:

    • Ensure your pantry is a cool, dark, and dry place. Raisins prefer to be stored away from direct sunlight as it can dry them out further and alter their taste.
    • After opening, transfer unused raisins into a resealable plastic bag or an airtight container. This will keep them fresh and prevent them from absorbing unwanted odors from other foods.
    • If stored properly, raisins can last for about 6 months in the pantry.

    Storing in the Fridge:

    • If you have enough fridge space, you can extend the shelf life of raisins to approximately one year by storing them there.
    • The cooler temperature slows down the rate at which they lose moisture and flavor.
    • It's important to store raisins in a tightly sealed container or resealable bag, just like you would with pantry items.
    • The lower temperature also helps prevent mold growth, keeping your raisins fresh and safe for up to a year.

    Storing in the Freezer:

    • For long-term storage, consider freezing your raisins. Frozen raisins can last for up to 2 years.
    • For freezing raisins, first spread them evenly on a baking sheet lined with parchment paper. Then, freeze them for several hours until they are firm and thoroughly frozen. This prevents them from clumping together.
    • Once frozen, move the raisins into a freezer-safe, airtight container or bag. Make sure it's tightly sealed to avoid freezer burn and absorption of other food odors.
    • When ready to use them, thaw your frozen raisins at room temperature for a few hours or in the fridge overnight.

    FAQ'S

    Is It Ok to Eat Expired Raisins?

    The "expiration date" on a pack of raisins usually indicates the "best by" date. It predicts when the product may start losing its quality and not necessarily when it becomes harmful.

    As a dried fruit, raisins have a much long shelf life and can often be consumed safely months past their expiration date.
    If the raisins have developed an off smell, taste, or appearance, it's best to err on the side of caution and discard them.

    What Are Raisins?

    Raisins are dried grapes dehydrated over a long period, resulting in dried fruit. This process concentrates the grape's sweetness and significantly extends its shelf life.The result is a small, wrinkly, and delightful treat that can be enjoyed independently or used in various culinary applications.

    Raisins are particularly popular in Baked Goods, providing natural sweetness and a pleasing chewy texture.

    Keeping Raisins Good

    Raisins are a healthier snack with a significantly longer shelf life than other fresh fruits. However, storing them correctly is essential to ensure they remain safe to consume.

    Unopened raisins can be stored in the pantry for up to 2 years, while opened raisins should be stored in an Airtight Container in the fridge or freezer.

    Discard the raisins if you detect any mold, discoloration, or strange smells, as these are signs of spoilage. With proper storage and care, raisins can be enjoyed for many months after opening - remember to check the dates before eating!

    More Useful Articles:

    • What Are The Sweetest Apples?
    • Can You Freeze Marshmallows?
    • Best Substitute For Juniper Berries

    55 Foods That Start With Z

    April 20, 2024 by Angela Milnes

    Foods That Start With Z.

    Welcome to the wonderful world of zany, zesty and zippy foods! Did you know there are many foods that start with Z? From Ziti pasta with cream sauce to Zucchini Fritters, and even a classic Zigarolli dish.

    We'll explore all these unique eats plus plenty more in this blog post—so grab your chopsticks or forks; it's time to take a flavor journey with foods that start with the letter Z.

    [feast_advanced_jump_to]

    Best Foods Beginning With Z

    In the culinary world, there are many foods with z as their first letter—and they're all delicious. Take a look at our top picks for best foods beginning with Z.

    Ziti Pasta

    Ziti pasta is one of the most popular Italian pastas. This long and tubular-shaped pasta is often paired with savory tomato sauce for a hearty, yet healthy meal.

    Baked Ziti is a great Italian cuisine and can be made with all types of pasta, from ziti to farfalle. This classic casserole dish gets its flavor from the savory roasted tomatoes and tender pasta, but it's also elevated by the melted cheese on top.

    Zucchini

    You can't have ziti without some zucchini! This green summer squash comes in many varieties and is popular when sliced into spirals to make zoodles, or "zucchini noodles".

    Zucchini noodles on a plate.

    Zucchini Fritters

    While you may be familiar with zucchini chips, zucchini fritters are also a delicious way to enjoy this versatile veggie.

    These crispy treats are typically made with shredded zucchini, egg, flour and seasoning for a crunchy treat that's perfect as an appetizer or side dish. Try making Air Fryer Zucchini Fritters with this fantastic recipe!

    Zucchini fritters on a plate.

    Zucchini Bread

    Zucchini bread is a sweet treat that can be enjoyed all year long. This soft and fluffy quick bread gets its rich flavor from the zucchini mixed with cinnamon, applesauce or butter, brown sugar, and vanilla extract.

    Zucchini bread is one of the easiest and tastiest breads to make at home, and it’s perfect for breakfast, a midday snack, or even a great addition to toddler lunches.

    Have you tried any of these amazing foods beginning with Z? What's your favorite way to eat zucchini or ziti pasta

    What to Serve With Zucchini Bread?

    You can enjoy eating zucchini bread alongside a wide range of dishes. For a classic pairing, try serving it with a bowl of homemade soup—its mild flavor pairs well with the richer flavors in soups and stews.

    Zucchini bread on a wooden board.

    Zinfandel Grapes

    Another great food to start with the letter Z is zinfandel grapes.

    These robust and fruity wine grapes are popular for their deep red color and intense flavors of berry and cherry.

    Fresh zinfandel grapes.

    Zucotto

    Zucotto is a classic Italian dessert that makes use of many different types of foods beginning with the letter Z.

    This rich and creamy treat is typically made with layers of panna cotta, amaretto cookies, chocolate sponge cake, and whipped cream—but there are endless variations to this dish.

    Zucotto.

    Zoni

    Zoni is a Japanese soup that has mochi rice cakes and is traditionally enjoyed during the New Year. This savory soup is typically made with dashi, soy sauce and mirin and is almost always served with rice cake cakes and sweet soy sauce.

    Zapikanka

    If you're looking for a traditional Eastern European food try Zapikanka.

    What Is Zapikanka?

    Zapikanka also known as Polish pizza is a toasted sub or baguette covered and served piping hot with mushrooms, melted cheese polish meat, and tomato ketchup.

    Zapikanka in a hand.

    Zhaliang

    Zhaliang is a Chinese fried dough (crispy youtiao filled with savory and sweet fillings such as pork floss, ham and chicken.

    This unique dish is often enjoyed for breakfast or as a snack, and it's truly a treat for all your senses—the salty meat paired with the crispy fried dough and sweet syrup makes this dish truly special.

    Zha jiang mian 

    Zha jiang mian is a Chinese dish made with noodles, pork, and vegetables in a black bean sauce. It is typically served as a main course.

    Zha jiang mian.

    Zharkoye 

    Zharkoye is a Russian stew made with beef, potatoes, carrots, and onions in a tomato-based sauce. It is typically served as a main course.

    Zharkoye being served with fork.

    Zhoug 

    Zhoug is a Yemeni hot sauce made with chili peppers, cumin, garlic, and other spices. It is typically used as a condiment or topping.

    Zhoug in a bowl.

    Zander 

    Zander is a type of freshwater fish that is native to Europe. It is also known as pikeperch or perch. Zander typically have a greenish-brown coloration and can grow to be over two feet long.

    Zander in foil.

    Zarzuela 

    Zarzuela is a type of Spanish seafood stew that typically contains fish, shellfish, and vegetables. It is often flavored with saffron and garlic and served with bread or rice.

    Zarzuela in a bowl.

    Zerde

    Zerde is a traditional Turkish dessert made from rice, nuts, and spices. It is typically served chilled with a sweet syrup for an indulgent and creamy treat. Whether you're looking for something sweet to eat or just love trying unique dishes from around the world, zerde is the perfect food to start with the letter Z!

    Zerde served in a cup.

    Zoodles

    Zoodles are a delicious alternative to traditional pasta. These spiralized zucchini noodles make for the perfect base for many different kinds of sauces and toppings.

    Zoodles are great with melted butter or a sprinkle of parmesan cheese, but they also taste great with your favorite tomato-based sauce. Whether you like classic marinara or pesto, zoodles are a tasty and healthy way to enjoy all your favorite pasta flavors!

    Making zucchini noodles.

    Zeppole 

    Zeppole are Italian fried dough balls that are traditionally served during Carnival season. Made from pate choux dough, zeppole can be plain or filled with cream, jelly, or chocolate and is often dusted with powdered sugar, cinnamon sugar or chocolate sauce.

    Frying zeppole.

    Zacuscă 

    Zacuscă is a Romanian dish made with eggplant, tomatoes, peppers, and onions. It is typically served as a side dish or appetizer.

    Zamalek Salad 

    Zamalek salad is an Egyptian dish made with cucumbers, tomatoes, onions, and mint. It is typically served as a side dish or appetizer.

    Zigzag Vine Fruit

    Zig zag fruit is an Australian fruit that is rich in flavor. It is typically added to smoothies or eaten on its own as the perfect afternoon snack.

    Zopf

    Zopf is a traditional Austrian and Swiss bread that is eaten for breakfast or as a snack. This soft and fluffy loaf gets its rich flavor from the combination of wheat flour, yeast, milk, and eggs.

    Zopf is golden brown and is sometimes called Sunday bread as it was traditionally eaten on Sunday mornings.

    Zwiebelrostbraten

    Zwiebelrostbraten is an Austrian Dish that consists of cubes of roast beef seared in oil before being baked in a cream-based sauce. It is typically served as a main course and is topped with fried onion rings.

    Zwetschge

    Zwetschge is a type of plum that is native to Central Europe. The fruit is oval in shape and has a dark purple skin. Zwetschge plums are used in a variety of dishes, including pies, tarts, and jams.

    Prune plums usually called Zwetschge.

    ZA'Atar

    Za'atar is a spice blend that originates from the Middle East. This Middle Eastern spice blend typically includes herbs such as thyme or oregano, along with spices such as sumac or sesame seeds.

    Za'atar is used to flavor a variety of dishes, including meats, vegetables, and breads.

    ZA'Atar in a wooden tray.

    Zephyr Squash

    Zephyr squash is a type of winter squash that is similar in appearance to pumpkins. The squash is native to North America and was first cultivated by the Native Americans.

    Today, zephyr squash is grown throughout the world and is a popular ingredient in pies, soups, and stews.

    Zwiebelrostbraten

    Zwiebelrostbraten is a traditional German dish consisting of beef tenderloin that has been cooked in butter, onions, and wine. It is typically served with boiled potatoes to create an easy-to-make, yet satisfying meal.

    Zwetschkenknödel

    Zwetschkenknödel is a traditional Austrian dish consisting of German plum dumplings that are filled with a mixture of dried plums and walnuts. This hearty dish is typically served as a main course and pairs perfectly with rich gravy or sweet applesauce.

    Zwetschkenknödel.

    Zupas

    Zupas is a type of Colombian soup made from beef broth and potatoes. It is typically served with capers and other seasonings to add a bit of flavor. Zupas can be eaten on its own or as a side dish or appetizer.

    Zebra Cakes

    Zebra cakes are a type of cupcake that gets its name from the distinctive chocolate and white stripes on top.

    These mini-cakes are typically filled with cream cheese or lemon filling and have chocolate frosting.

    Decorated zebra cake.

    Zampone 

    Zampone is a type of Italian sausage that is made from pork and often contains ground pork rinds. It has a creamy texture and is typically seasoned with garlic and other spices, including nutmeg or cloves.

    Zampone can be served on its own or as part of another dish.

    Zigarelli

    Another popular Italian dish beginning with Z is Zigarelli. This savory pasta dish is typically made with ziti or penne, tomato sauce and sausage. It's a hearty meal that's great for dinner time or taking to a potluck.

    Zhu Pa Bing 

    Zhu pa bing is a traditional Chinese dish that consists of wide, flat flour pancakes. They are usually made with scallions and other herbs and can be served as an appetizer or side dish.

    Zhu Pa Bing.

    Zongzi 

    Zongzi is a traditional Chinese dish consisting of sticky rice and other ingredients, such as meat or beans. The ingredients are wrapped in bamboo leaves and cooked to create this savory treat. Zongzi can be made on its own or served alongside other dishes.

    Zongzi dish.

    Zotter Chocolates 

    Zotter chocolates are a popular brand of chocolate that is made in Austria. They come in a variety of flavors, from classic dark or milk chocolate to unusual varieties such as green peas and pumpkin seeds.

    Zotter chocolates are known for their high-quality ingredients and unique tastes.

    Zotter chocolate bars.

    Zurich-Style Veal  

    Zurich-style veal is a type of veal that is typically made from the hind leg of a calf. This popular Swiss dish consists of thin slices of veal that are pan-fried with butter and spices, and then served with vegetables or potatoes. Zurich-style veal is a classic Swiss dish that is sure to please.

    Zurich style veal on a plate.

    Zurich Goulash  

    Zurich goulash is a traditional dish that comes from the city of Zurich in Switzerland. It consists of beef, onions, and other spices, including paprika and caraway seeds.

    Zurich goulash.

    Zucchini Soup

    Zucchini soup is a light and refreshing dish that is typically made using zucchini, tomatoes, and onions. This soup can be served either chilled or warm and makes for a great appetizer or side dish.

    Potato soup is a popular dish that gets its flavor from a blend of spices, including cayenne pepper and paprika.

    Potato Soup is typically made with potatoes and vegetables like carrots, celery, and onion. This soup makes for a great light lunch or dinner.

    Zesty potato soup.

    Zereshk Polo (Chicken and Rice Soup)

    Zereshk polo is a popular Persian dish made with rice and chicken. This delicious soup is flavored with saffron and other spices, including cinnamon and cloves. It's typically served as an appetizer for special occasions or celebrations.

    Ziguener Suppe (Gypsy Soup)

    Ziguener Suppe, also known as gypsy soup, is a popular German dish that is typically made with ground beef or pork. It's seasoned with tomato sauce and other spices, including garlic and basil. This hearty stew-like soup makes for a great main course any time of year.

    Ziguener Suppe.

    Zurek (Polish Sour Rye Soup)

    Zurek is a traditional Polish soup that gets its sour flavor from fermented rye flour. This hearty soup is typically made with pork or sausage and can be served either hot or cold. It's a popular dish for special occasions or cold winter days.

    Zurek soup.

    Zupa Grochowa (Polish Pea Soup)

    Zupa grochowa is a popular Polish soup made from dried peas and pork or ham. This hearty soup has a strong savory flavor that comes from the combination of spices, including garlic and paprika.

    Zupa grochowa is traditionally served as a main course and makes for a satisfying meal on cold winter days.

    Zupa grochowa in a bowl.

    Zupa Ogorkowa (Polish Cucumber Soup)

    Zupa ogorkowa is a traditional Polish soup made from cucumbers, onions, and other vegetables. This light and refreshing dish gets its distinctive flavor from the use of dill, garlic, and other aromatic spices.

    Zupa ogorkowa is typically served as an appetizer or side dish and makes for a great complement to a variety of meals. Whether you're looking for something light and refreshing or hearty and satisfying, this Polish soup is sure to please!

    Zuppa Toscana (Tuscan Soup)

    Zuppa Toscana is a popular Italian soup that gets its rich flavor from the addition of bacon and kale. This hearty soup also contains potatoes, onions, and garlic for a delicious combination of flavors.

    Instant Pot Zuppa Toscana Soup is typically served as a main course and makes for a filling meal on cold winter days.Pair it with toasted Tuscan bread or sour dough for a great meal.

    Making zuppa Toscana In the Instant Pot.

    Zurito (Asturian Garlic Soup)

    Zurito, also known as Asturian garlic soup, is a traditional Spanish dish that gets its distinctive flavor from the use of fresh garlic and onions.

    This hearty soup is made with beef broth or stock and typically served with crusty bread for dipping. Zurito is a popular dish in the region of Asturias.

    Zambian Chicken Soup 

    Zambian chicken soup is a popular dish in Zambia that is made with fresh chicken, vegetables, and aromatic spices.

    This hearty soup is typically simmered for several hours to allow the flavors to develop, resulting in a rich and delicious broth.

    Zambian chicken soup.

    Zimbabwean Beef and Vegetable Soup 

    Zimbabwean beef and vegetable soup is a popular dish in Zimbabwe that gets its distinctive flavor from the unique blend of spices used.

    Zimbabwean soup is made with ground beef, onions, carrots, and potatoes, making it a filling and satisfying meal. It's typically served as a main course with crusty bread or cooked rice on the side.

    Zest

    Zest is made by grating or shaving the outer, colorful layer of citrus fruits. Zest can be used in both sweet and savory dishes to add a burst of flavor and aroma.

    Some common uses for citrus fruit zest include adding it to marinades, salad dressings, baked goods, and stir-fries. It can also be used to infuse liquids like water or milk with a bright citrusy flavor. With its versatile taste and aroma, zest is sure to add a refreshing and delicious kick to any dish.​

    Making lemon zest.

    Zuni Pueblo Corn Soup 

    Zuni Pueblo corn soup is a popular dish in New Mexico that is made with fresh, seasonal ingredients. Zuni Pueblo Corn soup gets its distinctive flavor from the Native American blend of herbs and spices used to season it.

    It's often served as a main course and makes for a satisfying meal on cold.

    Zuni pueblo corn soup in a bowl. 

    Zuppa Inglese 

    Zuppa Inglese is an Italian trifle made with layers of sponge cake, custard, and fruit. It is typically served cold and can be garnished with whipped cream or chocolate shavings.

    Zabaglione

    To end our list of best foods beginning with Z, we have to mention the decadent dessert: Zabaglione. This classic Italian custard is made with egg yolks, sugar and marsala or sherry wine. It's the perfect sweet treat to end a meal!

    Tasty Foods That Start With Z

    Did you know there were so many delicious foods that start with the letter Z? Which one of these zany zingy eats?

    How many foods starting with Z have you tried?

    Best Strawberry Jalapeno Salsa (Ready In 10 Minutes)

    April 18, 2024 by Angela Milnes

    Best Strawberry Jalapeno Salsa "Pico de Gallo" with chives.

    Ready in 10 minutes, this Strawberry Jalapeno Salsa Recipe is sweet, spicy, and straight-up delicious. It’s the perfect fruity strawberry pico de gallo for summer cookouts, BBQs and pot lucks.

    Best Strawberry Jalapeno Salsa "Pico de Gallo" with chives.

    Strawberry jalapeno salsa is my favorite twist on the classic pico de gallo—equally bright, sweet, and spicy. It's a colorful, refreshing salsa with strawberries that turns heads at every summer potluck. Whether you spoon it over fish tacos or scoop it up with tortilla chips, this salsa is a game-changer.

    If fruity flavor is your thing, you’ve got to try my tropical Pineapple Mango Salsa or serve this with my Burrata Bruschetta.

    [feast_advanced_jump_to]

    💖 Why This Recipe Works

    • Balance: This strawberry salsa is a perfect balance of sweet, spicy, tangy, and fresh.
    • So Easy: Made with only 6 ingredients and ready in 10 minutes.
    • Flexible: Serve this salsa as a dip, topping, or vibrant side dish.

    ⭐ Star Ingredients

    Ingredients to make strawberry jalapeno salsa.
    • Strawberries – Juicy and sweet, these ruby-red gems bring fruity vibes that make this salsa sing. Ripe but firm is the sweet spot!
    • Jalapeños – A little fire never hurt! These add that spicy punch. Mellow it out by ditching the seeds—or keep them in for a bold kick.
    • Red Onion – Adds that sharp crunch and contrast. Want it milder? Give it a quick soak in cold water first.

    For the complete list of ingredients with measurements and instructions, please see the recipe card at the bottom of the post.

    📖Substitutions & Variations

    • Extra Zing: If you’re all about that extra zing, toss in a little lime zest along with the lemon juice—it takes the freshness up a notch!
    • Hate Cilantro? I love using cilantro in this salsa. However, if you're not a fan of cilantro, mint makes this dish extra bright and refreshing, while basil adds a sweet, summery twist.
    • Avocado Fan? For a creamy update add diced avocado, a swirl of Greek yogurt, or a few spoonfuls of coconut cream.
    • Feeling fancy? A drizzle of extra virgin olive oil can give this salsa a silky, restaurant-level upgrade.

    This salsa is a next-level topping for grilled meats, Air Fryer Salmon Fillets, Texas Smoked Turkey Breast, or Creamy Cajun Pasta with Parmesan.

    🔪How To Make Strawberry Jalapeno Salsa

    diced strawberries in a white bowl.
    1. Step 1: Wash, hull, and dice your strawberries. Set aside in a large bowl. Finely dice red onion, jalapeños (remove seeds for less heat), and chop cilantro. In a large bowl add your strawberries and onions.
    diced strawberries and red onion in a dish with limes wedges on the side.
    1. Step 2: Next add the diced peppers and cilantro. Add the salt and pepper. Add the lime juice and toss to combine. Chill for at least 1–2 hours to let the flavors meld together.
    watermelon chopped in half.
    1. Step 3: Chop your watermelon in half. Scoop out the watermelon ready to add the chilled salsa mix.
    scooped out watermelon.
    1. Step 4: Scoop out the watermelon ready to add the chilled salsa mix. Serve and enjoy!
    strawberry jalapeno salsa in a melon bowl.

    💡Hint: For the best flavor and texture, I like to use ripe but firm strawberries, and dice everything evenly for the perfect scoop.

    👩‍🍳 Expert Tips

    • Ripe Strawberries: Use strawberries that are fully ripe but not mushy—they’ll hold their shape and taste sweeter.
    • Add Honey: If your berries aren’t super sweet, a tiny bit of honey can bring out their flavor.
    • Want Less Heat? Remove the seeds and membranes from the jalapeño before dicing.
    • Don't Forget To Chill: Let the salsa chill for a couple of hours before serving—it gets better the longer it sits.
    Strawberry jalapeno salsa in a bowl and chips on the side.

    💭 FAQs

    Can I use frozen strawberries to make strawberry jalapeno salsa?

    Fresh is best. Frozen strawberries release too much water and lose their texture when thawed—making the strawberry salsa mushy.

    How spicy is strawberry jalapeno salsa?

    That’s totally up to you! For a mild salsa, remove the seeds from the jalapeño. For more heat, leave them in or swap in a spicier pepper like serrano.

    Can I prepare strawberry jalapeño salsa in advance?

    Absolutely! This jalapeño strawberry salsa actually tastes better after a few hours in the fridge. Just don’t make it more than a day in advance for the best texture.

    How to store strawberry pico de gallo?

    If you have any leftover strawberry salsa, you can transfer it to a good quality container with a lid (ideally airtight containers), and refrigerate for up to 3 days.

    🍓 Serve In a Watermelon Bowl!

    Looking to make a splash at your next party? Try serving this Strawberry Jalapeño Salsa in a watermelon bowl!

    "This Strawberry Jalapeño Salsa was so popular at my aunt’s 60th birthday. I served mine in a hollowed-out watermelon bowl and it was scraped clean in minutes!"

    Not only does it look stunning on the table, but the juicy watermelon complements the sweet-and-spicy salsa perfectly. You can scoop out the watermelon flesh (save it for smoothies!) and use the rind as a rustic, summery bowl that doubles as a conversation starter.

    More Serving Suggestions:

    • Serve this strawberry salsa as a dip with tortilla chips, plantain chips, or veggie sticks.
    • Spoon it over grilled chicken, Coconut Shrimp, fish or steak for a bold flavor boost. I love it on my Salmon Bruschetta.
    • You can go the easy way and serve it with your other Mexican favorites like Plantain Tortillas, Vegan Tacos and Burritos.

    Perfect for BBQs, picnics, baby showers, or summer potlucks!

    Strawberry jalapeno salsa in a watermelon bowl and chips on the side.

    🍽 More Fantastic Side Dishes

    • Jalapeno Coleslaw.
      Creamy Jalapeno Coleslaw (With Lime)
    • Honey Skillet Corn.
      Easy Honey Butter Skillet Corn – Fresh, Frozen, or Canned!
    • red cabbage coleslaw.
      Red Cabbage Coleslaw Recipe
    • best stuffed mushrooms.
      The Best Stuffed Mushrooms

    Did you make this recipe? Leave a review and a ⭐⭐⭐⭐⭐ rating below, or tag us in our Facebook Group! Alternatively, bookmark it in your browser or save to Pinterest.

    Best Strawberry Jalapeno Salsa "Pico de Gallo" with chives.

    Strawberry Jalapeno Salsa

    Angela Milnes
    Add a burst of sweet and spicy flavor to your table with this Jalapeno Strawberry Salsa! Juicy strawberries and zesty jalapeños come together for a fresh, vibrant salsa that’s perfect for dipping or topping grilled meats.
    5 from 5 votes
    Print Recipe Pin Recipe Rate this Recipe
    Prep Time 10 minutes mins
    Cook Time 10 minutes mins
    Additional Time 0 minutes mins
    Total Time 20 minutes mins
    Course Salads
    Cuisine Mexcian
    Servings 4 Servings
    Calories 55 kcal

    Ingredients
      

    • 3 cups Strawberries sliced stems removed
    • 1 Lime zested and juiced
    • 4-5 Jalapeno’s diced seeds removed
    • 1 Red onion diced
    • ½ cup Fresh Cilantro finely chopped
    • pinch Salt to taste
    • pinch Pepper to taste

    Instructions
     

    • Prepare all of your ingredients and set to the side.
    • In a large bowl add your ingredients and toss to combine.
    • Cover and refrigerate for 2 hours before serving.

    Notes

    Remember to choose the best strawberries for this recipe- you can pick some up from your local farmer’s market. The strawberries should be fully ripe and washed with cold water before being used.
    If the strawberries you’re using aren’t too sweet, you can add some granulated sugar or honey into the salsa too.
    Red onions lend the perfect balance of flavor and texture to this salsa. If you don’t have them, you can use white onions instead.
    Chopped tomatoes can also be an excellent addition to this strawberry salsa.
    This strawberry salsa can be serve immediately or allowed to rest in the refrigerator for a while.

    Nutrition

    Calories: 55kcalCarbohydrates: 14gProtein: 1gFat: 0.4gSaturated Fat: 0.04gPolyunsaturated Fat: 0.2gMonounsaturated Fat: 0.1gSodium: 4mgPotassium: 268mgFiber: 4gSugar: 7gVitamin A: 308IUVitamin C: 88mgCalcium: 32mgIron: 1mg
    Print Recipe Pin Recipe Rate this Recipe
    Tried this recipe?Let us know how it was!

    If you love this recipe be sure to check out this Tomatillo Salsa. Both Salsa's would go perfect with Traeger Smoked Pork Chops or Quick Salmon Patties.

    Strawberry jalapeno salsa in a watermelon bowl and chips on the side.

    Do Peanuts Go Bad?

    April 18, 2024 by Angela Milnes

    Shelled peanuts in a bowl.

    Do Peanuts Go Bad? The answer is yes. Peanuts do expire and the length of time they last will depend on how and where they are stored. Today we'll share top tips to know when your peanuts have past the expiration date and share how to store peanuts correctly. enjoy.

    Do Peanuts Go Bad
    [feast_advanced_jump_to]

    Do Peanuts Go Bad?

    Do peanuts go bad? Yes, peanuts can go bad over time. While they don't necessarily spoil quickly, they can gradually lose quality and become rancid or stale if not stored properly.

    Peanuts are particularly susceptible to moisture, heat, and exposure to air. When stored in bulk bins or containers that aren't airtight, their shelf life can be shortened.

    Do Unshelled Peanuts Go Bad?

    Unshelled peanuts can indeed go bad, especially if not stored correctly. While the outer shells provide a certain level of natural protection, unshelled peanuts can still be susceptible to moisture, heat, and air.

    Do Shelled Peanuts Go Bad?

    Yes, shelled peanuts can go bad if not stored properly. While shelling removes their protective outer layer, shelled peanuts can still stay edible for a certain period.

    However, without proper storage, they can lose their freshness, and their quality may deteriorate over time.

    Do Processed Peanuts Go Bad?

    Yes, processed peanuts, including opened roasted peanuts, can go bad if not stored properly. While processing methods can extend their shelf life, they are not immune to deterioration.

    Processed peanuts can still be vulnerable to factors that affect their quality over time. To ensure they stay edible and retain their quality, it's important to store processed peanuts correctly, allowing them to stay fresh and enjoyable for longer periods.

    Do Frozen Peanuts Go Bad?

    Frozen peanuts have a much longer shelf life compared to fresh or room-temperature peanuts. When properly stored in the freezer, frozen peanuts can remain safe for an extended period.

    However, while freezing preserves their quality, frozen foods can still deteriorate over time due to freezer burn or changes in texture.

    It's recommended to label and date frozen peanuts and consume them within a reasonable time frame to ensure the best taste and texture.

    Does Peanut Flour Go Bad?

    Yes, peanut flour can go bad over time. Similar to other food products, peanut flour is susceptible to factors such as moisture, heat, and exposure to air, which can lead to deterioration in flavor, texture, and overall quality.

    Signs that peanut flour has gone bad include an off or rancid smell, a change in color, or the presence of mold. To extend the shelf life of peanut flour, it's advisable to store it in a cool, dry place, preferably in an airtight container.

    Does Peanut Flour Go Bad

    Does Peanut Oil Go Bad?

    Yes, peanut oil can go bad over time. Like many other types of cooking oils, peanut oil is susceptible to oxidation, which can lead to a change in flavor, aroma, and overall quality.

    Exposure to light, heat, and air can accelerate the process of oil spoilage. Signs that peanut oil has gone bad include a rancid smell, an off taste, or a cloudy appearance.

    To increase the longevity of peanut oil, it's recommended to store it in a cool, dark place, tightly sealed to minimize air exposure.

    Does Peanut Oil Go Bad

    Does Peanut Butter Go Bad?

    Yes, peanut butter peanut butter can go bad, although its shelf life is relatively long compared to other foods. Over time, peanut butter can experience changes in flavor, texture, and quality.

    Signs that peanut butter has gone bad include an off or rancid smell, a change in color, separation of oil, or the presence of mold. Natural peanut butter, which often lacks preservatives, may have a shorter shelf life than commercial varieties.

    Does Peanut Butter Go Bad

    How Long Do Peanuts Last?

    The shelf life of peanuts largely depends on how they are stored. In their original packaging, bottled peanuts can last for several months to a year, particularly if stored in a cool, dry location at room temperature.

    Vacuum-packed peanuts tend to have a longer shelf life. However, to ensure their freshness for as long as possible, it's advisable to store peanuts in an airtight container in a dry and cool location.

    Unshelled Peanuts Shelf life

    • Room Temperature: They can last for about 3 to 4 months when kept in a cool, dry place.
    • Refrigerator: When stored in the refrigerator, unshelled peanuts can last for up to 6 months.
    • Freezer: In the freezer, unshelled peanuts can last for up to a year.

    Shelled Peanuts Shelf life

    • Room Temperature: Once shelled, peanuts are more exposed to the environment and will last for about 1 to 2 months if kept in an airtight container in a cool, dry place.
    • Refrigerator: If refrigerated, shelled peanuts can last for up to 4 months.
    • Freezer: Shelled peanuts can be frozen for up to 6 months.

    Store Peanuts To Keep Them Fresh

    Proper storage ensures that your peanuts remain flavorful and ready to enjoy in various recipes or as a satisfying snack. Whether they're shelled, unshelled, raw, or processed, the right storage methods can make a significant difference in preserving the taste and texture of your peanuts.

    Store Unshelled Peanuts

    • Unshelled peanuts require proper storage to preserve their quality and prevent them from deteriorating. Unlike their in-shell counterparts, unshelled peanuts are more vulnerable to external factors, such as moisture and direct sunlight.
    • To maintain their freshness, store unshelled peanuts in a cool and dry area, away from the harmful effects of direct sunlight. By protecting them from prolonged exposure to sunlight, you help prevent any potential moisture buildup that could affect their taste and texture.

    Store Shelled Peanuts

    • When it comes to storing shelled raw peanuts, it's important to provide them with the right conditions to maintain their freshness. Unlike in-shell peanuts, shelled peanuts are more susceptible to moisture and air.
    • To keep them in prime condition, transfer your shelled peanuts to an Airtight Container. This helps create a barrier against any moisture or air that could compromise their taste and texture.
    Shelled Peanuts

    Roasting Peanuts For Storage

    • Roasting peanuts is a method that not only enhances their flavor but also contributes to their longevity in storage. Roasted peanuts tend to have a longer shelf life compared to raw ones, maintaining their best quality for an extended period.
    • When you roast peanuts before storing them, you not only create a delicious snack but also ensure that you're preserving their taste and texture at their peak. This makes them an excellent choice for snacking, cooking, or adding a nutty crunch to your favorite dishes.
    • If you need a roasting tray, here is our recommended top pick! It's budget-friendly, good quality, and a great roasting tray for roasting peanuts.
    Roasted Peanuts

    Boiling Peanuts For Storage

    • Boiling peanuts can be an effective way to store them, especially if you're looking for a different flavor profile. Boiled peanuts have a unique texture and taste, and the boiling process can help extend their shelf life.
    • When you boil peanuts before storing them, it can impact their texture and flavor, making them softer and more savory. This method can be particularly popular in some regional cuisines.
    • Keep in mind that boiled peanuts are best stored kept in an airtight container in the refrigerator to maintain their quality over time. You can also store boiled peanuts in bags and use a tight seal bag clip to keep them airtight!
    Boiled Peanuts

    Freezing Peanuts For Storage

    • Freezing peanuts is an excellent way to extend their shelf life while preserving their freshness. To freeze peanuts, place them in a freezer bag, and remove as much air as possible to avoid freezer burn.
    • This method keeps the peanuts from becoming rancid and maintains their quality for an extended period. When you're ready to use them, simply thaw the frozen peanuts in the refrigerator or use them directly in recipes that require cooking or roasting.

    Signs Of Spoiled Peanuts

    Identifying rancid peanuts involves recognizing several spoilage signs that can affect their taste and overall quality.

    • Bad peanuts may exhibit mold growth, giving them an off-color appearance. When you eat expired peanuts, you might notice a sour or bitter taste, a stark contrast to the pleasant taste of fresh peanuts.
    • Stale or old peanuts tend to smell sour, another indication of spoilage. If peanuts have passed their expiry date or show signs of deterioration, such as an unusual appearance, texture, or smell, it's best to avoid eating them.
    Spoiled Peanuts

    What Do Peanuts Taste Like?

    Peanuts have a distinctive nutty flavor that is both rich and slightly earthy.

    This flavor profile is accompanied by a satisfying crunch when bitten into, making peanuts a popular choice for snacking and adding texture to various dishes such as Instant Pot Peanut Chicken And Noodles.

    So, Do Peanuts Go Bad?

    Peanuts can indeed go bad over time if not stored properly. Whether shelled or unshelled, raw or processed, peanuts will eventually expire. To maintain freshness store then in airtight containers using the methods shown above.

    More Articles You May Enjoy:

    • Does Mustard Go Bad?
    • What Do Clams Taste Like?
    • Does Cashew Milk Go Bad?

    What Does Plantain Taste Like?

    April 9, 2024 by Angela Milnes

    Plantain.

    Are you curious about the flavor of plantain? 'What Does Plantain Taste Like?' What is a Plantaina and now we have the chance to discuss what these fruits taste like. This starchy, versatile fruit resembles a banana but has a unique taste that will delight any palate.

    Plantains have been used in many different diets worldwide and are becoming increasingly popular - for a good reason! In this article, we'll explore what plantains taste like and some exciting ways to prepare them.

    What Does Plantain Taste Like
    [feast_advanced_jump_to]

    What Are Plantains?

    Plantains, often called "cooking bananas," are banana cultivars, a staple food in many tropical regions worldwide. They belong to the genus Musa, including the sweet, dessert bananas we're more familiar with.

    However, plantains are not fruits in the conventional sense; instead, they are treated more like vegetables due to their firm texture and starchy content. Depending on their ripeness, they can be found with yellow or black skin.

    Unlike dessert bananas, plantains are commonly cooked before eating, whether boiled, baked, or fried, and are used in various savory dishes. Their unique flavor and versatility make them essential to numerous culinary traditions.

    Are Raw Bananas Called Plantains?

    Many people think plantains are unripe bananas, but this isn't true.

    Raw bananas, often called plantains, are a distinct variety of the banana family. "plantain" is widely used to differentiate them from the sweet or dessert bananas we are more familiar with.

    Yellow plantains share a closer resemblance to traditional bananas due to their softer texture. A critical distinction between bananas and plantains lies in their consumption methods.

    Unlike bananas which can be eaten raw, like most fruits, plantains require cooking before eating.

    The most noticeable difference lies in their appearance. Plantains have thicker skin that is tougher and harder to peel than regular bananas. This thicker skin acts as a protective layer for the starchy fruit inside.

    What Does Plantain Taste Like

    Types of Plantains

    1. Horn Plantains: (Plátano Cuerno): These large plantains, measuring around 12-14 inches long, have a green hue when unripe, offering a starchy Green Plantain Taste. They turn yellow and black as they ripen, developing a semi-sweet flavor.
    2. French Plantains: (Plátano Francés): Medium-sized at around 7-8 inches long, these plantains are also green when unripe, providing a similar starchy taste to green plantains. They gradually turn yellow and then dark, with their flavor becoming semi-sweet as they ripen.
    3. Dominican Plantains: (Plátano Dominicano): Smaller in size, typically about 6 inches long, these start off green, with the characteristic Green Plantain Taste. They turn yellow with black spots when ripe, signaling the development of a slight-sweet flavor.
    4. Nino Plantains: (Plátano Niño) are the most minor plantains, usually 4-5 inches long. They are green when unripe, offering the green plantain taste, and develop a semi-sweet flavor as they turn yellow during ripening.
    5. African Plantains: These very large plantains, often 15 inches or more in length, are typically green when unripe, offering a starchy taste. Their color turns yellow and then black when fully ripe, indicating the emergence of a semi-sweet flavor.
    6. Machos Plantains: These medium-sized plantains, typically around 8-10 inches long, start as green, providing the typical Green Plantain Taste. As they ripen, turning deep yellow with black spots, they develop a semi-sweet flavor reminiscent of an overripe, yellow plantain.

    How Would You Describe the Taste of Plantains?

    Plantain's taste is a unique experience for the taste buds, often described as a cross between a banana and a potato.

    Raw plantains have a starchy texture akin to a raw potato, and their flavor can be pretty bland, almost like a squash. As they ripen, they take on a slightly sweet flavor that hints at their banana lineage.

    However, green plantains' taste is different. Unlike their ripe counterparts, green plantains are not sweet. Instead, they have a dry, somewhat woody texture with a slightly bitter aftertaste.

    This bitterness can be a surprise to first-time tasters, but it's this distinct flavor that makes them a versatile ingredient in many dishes around the world.

    What Does Plantain Taste Like

    Do Plantains Taste Like Bananas or Sweet Potato?

    Plantain taste like a unique blend of sweet potatoes and regular bananas but with a distinctive twist. However, it's important to note that raw plantains do not taste like bananas. Unlike bananas, plantains have a savory flavor reminiscent of a sweet potato.

    Compared to bananas, plantains are less sweet, giving them a more versatile flavor profile and allowing them to be used in sweet and savory dishes.

    The texture of plantains also differs from that of bananas. When cooked, plantains have a soft texture similar to sweet potatoes, adding a satisfying mouthfeel to various culinary creations.

    What Tastes Better, Plantain or Banana?

    In comparing the taste of plantains and bananas, it's clear that they offer distinct flavor profiles. Raw bananas are typically sweet and creamy, often used in desserts or as a snack.

    Unlike bananas, plantains have a starchier texture and a more mild, savory taste. Their less sweet and more neutral flavor makes them versatile for various dishes beyond just desserts.

    Do Plantains Taste Sweet?

    Plantains have a slightly sweet taste, especially when they are ripe. Their sweet flavor is subtle and less pronounced than other fruits.

    The sweetness of plantains truly shines when cooked, as the heat tends to bring out their natural sugars. However, they can also be eaten raw but tend to be starchy and not as sweet.

    What Do Unripe Plantains Taste Like?

    Unripe green plantains, though not as sweet as their ripe counterparts, carry a unique culinary charm. Their mild flavor, which is more savory than sweet, makes them adaptable to various dishes.

    Raw plantain has a starchy texture, likened to a potato's, and its taste is often described as bland when the peel transitions from green to yellow.

    What Does Plantain Taste Like

    Are Ripe Plantains Sweeter Than Unripe?

    Ripe plantains taste like their close relatives, and the unripe green dessert bananas have a distinctive taste that sets them apart in the fruit family.

    As they ripen, plantains undergo a transformation that enhances their natural sugars, resulting in a slightly sweeter flavor profile than their unripe counterparts.

    What Does Plantain Taste Like

    What Do Plantain Chips Taste Like?

    The natural sugars in sweet plantains, particularly ripe green ones, caramelize during cooking. This caramelized sugar gives the chips a distinctive flavor that is both unique and addictive.

    Their color, a beautiful golden brown, is a visual treat as well. It's a testament to their perfect cooking, indicative of the delicate balance between heat and timing that transforms simple plantains into these delicious chips. The caramelized sugar adds to their sweetness and contributes to the rich hue of these sweet plantain chips.

    The ripe green plantains, when cooked to perfection, offer a taste that is irresistibly addictive. The combination of caramelized sugar and the unique flavor of sweet plantains makes these chips a must-try for anyone seeking a new culinary adventure.

    What Does Plantain Taste Like

    Are Plantains (Weeds) Edible?

    Yes, plantains (weeds) are edible. They are highly nutritious and contain calcium and vitamins A, C, and K. The immature, soft leaves are edible in their raw form, whereas the mature ones require cooking.

    What Does Plantain Taste Like

    How Many Ways Can You Cook a Plantain?

    Plantains are incredibly versatile and can be used in a variety of dishes. Here are some ways you can cook plantains:

    1. Baked Plantains: Another way to cook plantains is to bake them. This method often results in a sweeter taste, which makes them perfect for sweet dishes. You can slice plantains or leave them whole to bake.
    2. Boiled Plantains: If you're looking for a wholesome option, try boiling your plantains. Boil plantains can be used as a side dish or incorporated into rice dishes.
    3. Grilled Plantains: Grilling plantains can give them a unique flavor. You can grill them on medium heat until they are slightly charred. They can be eaten as is or added to savory dishes.
    4. Plantain Chips: Thinly sliced plantains can be deep-fried to make crispy chips. These can be salted and eaten as a snack.
    5. Mashed Plantains: Boiled plantains can be mashed and served as a side dish or used in baked goods. Mashed plantains are a staple in many Caribbean and African cuisines.
    6. Plantain Soup: In some cultures, plantains make hearty soups. The plantains are usually boiled until soft and blended into a thick soup.
    7. Plantain Bread: Ripe plantains can be mashed and used as a key ingredient in baking. Plantain bread is a sweet and moist baked good that's a great way to use overripe plantains.
    8. Plantain Pancakes: For a breakfast twist, mash ripe plantains and use them in your pancake batter. The result is a sweet, fluffy pancake that's sure to be a hit.
    9. Plantain Lasagna: Also known as "Pastelon," a Puerto Rican dish where sweet, ripe plantains are layered with meat and cheese, similar to Italian lasagna.
    10. Twice Fried Plantains: Tostone is a dish made from green plantains which undergo a two-step frying process. Firstly, the plantains are peeled and sliced, then fried. After that, they're smashed and subjected to an additional round of frying.

    What Is the Shelf Life of Plantains?

    Remember, the shelf life of plantains can vary based on how ripe they are when you buy them and how they are stored. Always check your plantains for signs of spoilage like mold, off smell, or excessively soft texture before consuming. Here are some details about the shelf life of plantains and how to store them:

    Room Temperature

    1. Unripe plantains can last up to 1 week at room temperature.
    2. Ripe plantains should be consumed within a few days if kept at room temperature.

    Refrigerator

    1. If you want to extend the shelf life of ripe plantains, you can refrigerate them. This can make them last for about 1-2 weeks.
    2. Keep them in the vegetable compartment of your refrigerator to ensure ideal moisture levels.

    Freezer

    1. You can freeze plantains to extend their shelf life significantly, up to several months.
    2. Before freezing, peel them in a freezer-safe bag or container.

    Drying

    1. Dried plantains also have a long shelf life. They can be stored for up to a year if properly dried and stored in an airtight container.
    2. To dry plantains, slice them thinly and place them in a dehydrator or oven set at a low temperature.

    So, What Does Plantain Taste Like?

    Plantains can have a slightly sweet flavor when fully ripe, but their taste depends on how they are cooked. Unripe plantains taste similar to potatoes and can be cooked like them in many recipes.

    Ripe plantains, however, are sweeter with subtle notes of banana. Fried plantains tend to have an even sweeter flavor.

    Plantains are incredibly versatile ingredients that can be used to make various dishes. No matter what you choose to make with plantains, remember that moderation is essential when consuming them.

    More Useful Food Fact Articles:

    • Best Clam Juice Substitute
    • What Does Shrimp Taste Like?
    • Best Liquid Smoke Substitute
    • Best Substitute For Sun Dried Tomatoes
    • Green Mussels Vs Black Mussels

    Easy Easter Pizza For Kids

    April 4, 2024 by Angela Milnes

    Easy Easter Pizza For Kids.

    Your children are going to hop up with joy when they see this easy Easter Pizza! Super easy to put together, this pizza is the perfect way to get your kids on board and enjoy an Easter themed culinary delight.

    Italian food is an absolute favorite in my household, which is why, this recipe is my favorite easy Easter dinner or lunch.

    Easter Pizza for kids.
    [feast_advanced_jump_to]

    💖 Why This Recipe Works

    • Fun and Interactive: Kids will love helping to decorate this festive, Easter-themed pizza.
    • Customizable: You can easily adjust ingredients to accommodate your child’s favorite flavors.
    • Quick and Easy: This Fun Easter Bunny Pizza is straightforward, making it perfect for a busy holiday.

    ⭐ Star Ingredients

    easter pizza ingredients.

    To make the Italian Easter pie, you'll need just a few simple ingredients

    • Pizza Dough: Is the base of your pizza, creating a canvas for other ingredients and baking up crispy outside, soft inside, with the perfect chewiness.
    • Pitted Olives Or Black Olives: Add a burst of savory flavor. Their slight bitterness balances the richness of the cheese and the sweetness of the tomatoes.
    • Marinara Sauce: Provides tangy, sweet, and herby notes that complement all the other toppings.
    • Mini Mozzarella Balls: Melt beautifully, creating pockets of creamy, gooey cheese that kids love.
    • Cheese With Classic Flavor: Could be a cheddar or mozzarella, it melts well and gives the pizza a traditional, familiar flavor that's sure to be a hit with kids.
    • Cherry Tomatoes: Offer a pop of color and a fresh, slightly sweet contrast to the other richer toppings.
    • Leeks, Dill: Bring mild, sweet, and fresh flavors to pizzas, making them a great way to add greens to a kid-friendly meal.

    For the complete list of ingredients with measurements and instructions, please see the recipe card at the bottom of the post.

    📖  Substitutions & Variations

    • Switch up the sauce! Not a fan of marinara? Try pesto for a fresh, herby twist or white sauce for a creamy, kid-approved alternative.
    • More veggie fun! Swap cherry tomatoes for bell peppers, zucchini, or even shredded carrots to sneak in extra color and crunch.
    • Cheese it up! Mozzarella is a classic, but I love using a mix of cheddar for extra flavor or ricotta for a creamy surprise.
    • Bunny ear creativity! Use breadstick dough or even puff pastry instead of pizza dough for a fun, flaky twist on those adorable bunny ears!

    🔪How To Make Easter Pizza

    rolling out pizza dough base.
    1. Step 1: Separate 2 ounces from the dough for the "ears" of the bunnies. Roll out the rest of the dough into a circle about 0.2 inch thick on a lightly floured surface. Place the dough on parchment paper.
    adding cheese to pizza base.
    1. Step 2: Grate the cheese on a coarse grater. Place around the edge of the scone. Form a rim as shown in the photo.
    making easter pizza by adding ingredients.
    1. Step 3: Spread the marinara sauce over the whole pie. Spread the mozzarella and sliced tomatoes. Add the olive and onion rings. Divide the remaining dough into 12 equal parts. Make "ears". Moisten the edges with water and "glue the ears" as in the photo.
    Easter Bunny Pizza.
    1. Step 4: Bake pizza in a 392°F preheated oven until the bottom crust is golden brown, 12-15 minutes. Slightly cool pizza and draw eyes and spouts with a food coloring pen (or balsamic sauce). Decorate with dill.
    easter bunny pizza.

    👩‍🍳 Expert Tips

    Ready to give this easy recipe a try? You might want to take note of these little tips and tricks.

    • To add more flavor to the pizza, you can also top it with a drizzle of olive oil.
    • You can also brush some beaten egg mixture on the exposed parts of the top crust of the pizza to lend it a nice shine.
    • While mozzarella cheese is the best choice for this recipe, you can also experiment and add some more kinds of cheese like ricotta cheese and basket cheese. In fact, you can also use a mix of two or more cheeses.
    • If you have any excess dough leftover that you want to store for later, transfer it to a large bowl and cover the top with plastic wrap. This can then be refrigerated for 2-3 days.
    • I love having lots of toppings on my Easter Pizza, and if you do too, you can also create a deep dish pizza for kids. Simply assemble the dough and the toppings in a springform pan instead of a baking dish.
    • If you want to add an egg wash to the pastry, crack and beat an egg. Spread the beaten eggs wash on the pastry for a golden crunch.

    💭 FAQs

    What Other Toppings Can I Use?

    With pizza, there are endless topping options. Most Italian recipes call for the use of classic ingredients like basil leaves, tomatoes and olives, but you can also experiment and try out toppings like sliced bell peppers, capers, jalapenos, mushrooms, onions, broccoli, pineapple and even grilled and chopped chicken.

    What type of dough is best for a kid-friendly Easter pizza?

    For simplicity and taste, using store-bought pizza dough is recommended. It saves preparation time and ensures a soft, chewy crust that children enjoy. If you prefer homemade options, whole wheat or gluten-free doughs are available, but ensure they meet your family's dietary preferences.

    How can I make the pizza visually appealing for children?

    Incorporate colorful toppings to create fun shapes or images. For example, arranging vegetables and cheeses to form an Easter bunny or egg design can make the pizza more engaging. Using mini mozzarella balls, cherry tomatoes, and various bell peppers can add vibrant colors and textures.

    Can I prepare the pizza in advance?

    Yes, you can prepare the pizza up to the baking stage. Assemble the pizza, cover it, and refrigerate for up to 24 hours. When ready to bake, preheat your oven and bake as directed. This approach allows for a stress-free cooking experience, especially when involving children.

    What are some alternative toppings suitable for kids?

    Children often prefer simple flavors. Consider using mild cheeses like mozzarella, lean meats such as chicken or turkey, and a variety of vegetables like bell peppers, mushrooms, and olives. Allowing kids to choose and arrange their own toppings can also make the experience more enjoyable for them.

    Best Way to Store Pizza

    After allowing the pizza to cool, promptly place it in a sealed airtight container or tightly wrap it with plastic to preserve its freshness, and then refrigerate. Freeze the pizza by tightly wrapping it in plastic, then store it in a freezer-safe bag or container with minimal air to prevent freezer burn.

    💖 Serving Suggestions

    These are my favorite sides to serve with easter pizza for kids.

    • Rainbow Veggie Train: Colorful bell pepper, cucumber, and carrot sticks for a crunchy and nutritious side.
    • Cheesy Garlic Bread Bites: Mini garlic bread pieces smothered in melted cheese for a deliciously cheesy kick.
    • Easter Bunny Salad: Create cute bunnies from hard boiled eggs and place on a salad.
    • Fruit Kabobs: Skewer a mix of juicy melon, pineapple, and berries for a sweet and refreshing option.
    Easter Pizza for kids.

    🍽 More Kid-Friendly Snacks

    • Healthy Celery Snacks Grinch Party Food.
      Healthy Celery Snacks Grinch Party Food
    • Vampire Halloween pretzels in a bowl.
      Vampire Halloween Pretzels: Spooky Treat for Kids
    • Lego Rice Krispie Treats.
      Lego Rice Krispie Treats
    • Mini Pufts Halloween Jello Shots.
      Mini Puft Ghostbusters Halloween Jello Shots

    Did you make this recipe? Leave a review and a ⭐⭐⭐⭐⭐ rating below, or tag us in our Facebook Group! Alternatively, bookmark it in your browser or save to Pinterest.

    Easy Easter Pizza For Kids.

    Easy Easter Pizza for Kids

    Angela Milnes
    This super fun easter pizza is great for the kids. Make a easter bunny pizza using these simple instructions and ingredients.
    5 from 3 votes
    Print Recipe Pin Recipe Rate this Recipe
    Prep Time 5 minutes mins
    Cook Time 15 minutes mins
    Total Time 20 minutes mins
    Course Appetizers
    Cuisine American
    Servings 6 Servings
    Calories 459 kcal

    Ingredients
      

    • 9 oz Pizza Dough
    • 10 Pitted Olives Or Black Olives
    • 2 To 3 tablespoon Marinara Sauce
    • 15 Mini Mozzarella Balls
    • 2 To 3 oz Cheese With Classic Flavor
    • 4 Cherry Tomatoes
    • Leeks Dill - a little.

    Instructions
     

    • Separate the Dough for the Bunny Ears: Separate 2 ounces from the dough for the "ears" of the bunnies. Roll out the rest of the dough into a circle about 0.2 inch thick on a lightly floured surface. Place the dough on parchment paper.
    • Grate the Cheese: Grate the cheese on a coarse grater. Place around the edge of the scone. Form a rim as shown in the photo.
    • Top the Easter Pizza Crust: Spread the marinara sauce over the whole pie. Spread the mozzarella and sliced tomatoes. Add the olive and onion rings.Step
    • Prepare the Bunny Ears and Attach: Divide the remaining dough into 12 equal parts. Make "ears". Moisten the edges with water and "glue the ears" as in the photo. Bake pizza in a 392°F preheated oven until the bottom crust is golden brown, 12-15 minutes.
    • Bake, Cool and Follow up with More Toppings: Slightly cool pizza and draw eyes and spouts with food coloring pen (or balsamic sauce). Decorate with dill.

    Notes

    To add more flavor to the pizza, you can also top it with a drizzle of olive oil.
    You can also brush some beaten egg mixture on the exposed parts of the top crust of the pizza to lend it a nice shine.
    While mozzarella cheese is the best choice for this recipe, you can also experiment and add some more kinds of cheese like ricotta cheese and basket cheese. In fact, you can also use a mix of two or more cheeses.
    If you have any excess dough leftover that you want to store for later, transfer it to a large bowl and cover the top with plastic wrap. This can then be refrigerated for 2-3 days.
    I love having lots of toppings on my Easter Pizza, and if you do too, you can also create a deep dish pizza for kids. Simply assemble the dough and the toppings in a springform pan instead of a baking dish.
    If you want to add an egg wash to the pastry, crack and beat an egg. Spread the beaten eggs wash on the pastry for a golden crunch.

    Nutrition

    Serving: 1gCalories: 459kcalCarbohydrates: 25gProtein: 25gFat: 28gSaturated Fat: 13gPolyunsaturated Fat: 11gMonounsaturated Fat: 3gCholesterol: 82mgSodium: 908mgPotassium: 85mgFiber: 2gSugar: 3gVitamin A: 389IUVitamin C: 3mgCalcium: 186mgIron: 1mg
    Print Recipe Pin Recipe Rate this Recipe
    Tried this recipe?Let us know how it was!

    More Pizza Recipes To Try

    If you loved this easy pizza recipe, and are inspired to try some more such recipes, here are a few good ones you might want to take a look at.

    • Air Fryer Cauliflower Pizza
    • Pizza Monkey Bread
    • Valentines Pizza: Heart Shaped Pizza
    • Cheesy Garlic Bread Pizza
    • Caprese Mini Pizzas
    Easter Pizza for kids.

    What Are the Sweetest Apples?

    March 19, 2024 by Angela Milnes

    Sweetest apples.

    Ah, the sweet smell of freshly picked apples. The crunch as you sink your teeth into a juicy apple is one of life's simple pleasures - and picking the right type of apple for snacking can make all the difference when it comes to enjoying something truly special.

    But with so many varieties out there, how do you choose what are the sweetest apples? In this article, we'll be taking an in-depth look at some of the best types of apples around so that you can find your new favorite!

    Fresh apples.
    [feast_advanced_jump_to]

    What Are the Sweetest Apples?

    When it comes to apples, everyone has a different preference. Some people like apples tart and tangy, while others prefer sweet and crisp.

    However, if you're in the latter category, you're in luck! There are plenty of apple varieties that are known for their high sugar content and sweet flavor. Here are 21 of the sweetest apples you can find:

    1. Golden Delicious Apples

    If you're wondering, "What are the sweetest apples?" look no further than Golden Delicious apples. These golden-hued gems live up to their name, offering a honeyed sweetness that is hard to beat.

    The Golden Delicious apple variety is known for its unique balance of sweet flavor and subtle tartness, making it a versatile choice for both eating raw and cooking. Their sugar level can range from 11 to 15 Brix units.

    Their rich, sweet taste makes them a favorite among apple lovers, and once you've tried a perfectly ripe Golden Delicious apple, it's not hard to see why. So next time you search for a sweet, flavorful apple, consider the Golden Delicious!

    Golden Delicious Apples.

    2. Pink Lady Apples

    If you're on the hunt for some of the sweetest apples out there, Pink Lady apples should definitely be on your list. These delightful fruits, with their vibrant pink hue and crisp texture, offer a unique balance of sweetness and tartness.

    They are a cross between Golden Delicious apples and Lady Williams apples, inheriting the best traits from both - the honeyed sweetness of Golden Delicious and the late-season tartness of Lady Williams.

    This blend of flavors makes the Pink Lady apple a versatile choice for both eating fresh and incorporating into your favorite recipes. So, next time you're at the grocery store, try Pink Lady apples - you might find your new favorite fruit!

    Pink lady apples.

    3. Envy Apples

    For those seeking a truly sweet apple experience, Envy apples are an excellent choice. This apple variety is a unique cross between Royal Gala and Braeburn apples, two popular varieties that originated in New Zealand.

    The result of this special blend is the Envy apple, which boasts a sweet taste and low acid content that many find irresistible. On average, Envy apples have a Brix value of approximately 12-15, making them one of the sweetest apple varieties.

    Not only do they have a pleasingly sweet flavor, but their slow discoloration after being sliced makes them perfect for presentations or fruit platters.

    Envy Apples.

    4. Red Delicious Apples

    Red Delicious apples, one of the sweetest apple varieties, are popular for those who love super sweet flavors. The skin of a Red Delicious apple is a striking deep red, almost burgundy, that makes it easily recognizable.

    The taste is uniquely sweet with a hint of light refreshing tartness, providing a perfect balance. They have a sugar level measured around 10-12 degrees Brix, contributing to their sweet flavor profile.

    Its white flesh is juicy and crisp, making every bite of this sweet apple a delightful experience. In summary, the Red Delicious apple stands out for its rich color, super sweet flavor, and satisfying crunch.

    Red Delicious Apples.

    5. Honeycrisp Apples

    Honeycrisp apples, developed at the University of Minnesota, are a delightful variety known for their honey-sweet taste and exceptional crispness.

    The skin of a Honeycrisp apple is a distinctive mottled red over a yellow background, inviting fresh eating. With a sugar level that can reach 15 Brix units, they are among the sweetest apples, making them perfect for desserts like apple pie or apple butter.

    Whether enjoyed fresh or cooked, the unique balance of sweetness and tartness in Honeycrisp apples offers a flavorful experience that's hard to beat.

    Honeycrisp apples are on of the sweetest apples.

    6. Ambrosia Apples

    Ambrosia apples, first discovered as a chance seedling in British Columbia, Canada, are another variety known for their honey-sweet juiciness.

    The skin of an Ambrosia apple is a stunning blend of red and gold, reflecting its sweet and juicy nature. The taste is characterized by a natural sweetness rarely matched by other apple varieties, making it one of the sweetest apples available.

    With sugar levels often surpassing 15 Brix units, the Ambrosia apple offers a uniquely sweet experience. Whether eaten fresh or used in cooking, its exceptional sweetness and juiciness delight every bite.

    Ambrosia apples in a plastic bag and without bag.

    7. Sweetie Apples

    Sweetie apples, a modern apple variety from New Zealand, are a delightful cross between Royal Gala apples and Braeburn.

    Their skin is vibrant red with hints of green, displaying a pleasing contrast. Sweetie apples are one of the sweetest apple varieties available for those with a sweet tooth.

    The taste is a perfect blend of crisp texture and natural sweetness, often surpassing other apples in sugar content. With a sweeter taste naturally reaching up to 16 Brix units, Sweetie apples offer a satisfyingly sweet crunch that makes them a favorite among apple lovers.

    Sweetie Apples.

    8. Gala Apples

    Gala Apples, a popular commercial apple variety, originated from New Zealand and are now loved worldwide. Recognizable by their pinkish-orange stripes over a yellow background, gala apples are known for their sweet flavor and crisp flesh.

    The sugar level in Gala apples is quite high, making them one of the sweetest apple varieties. Apart from being enjoyed fresh, Gala apples are excellent for autmn, adding a sweet and juicy component to apple pies.

    The Gala apple tree grows between 20 and 25 feet in height and width, offering a bountiful harvest of these delightful apples.

    Gala Apples.

    9. Jazz Apples 

    Jazz apples, a captivating blend of Braeburn parent apples and Royal Gala were first developed in New Zealand. Their beautiful skin is a mottled red over a yellow-green base, reflecting the sweet-tart flavor that lies within.

    Jazz apples offer a unique taste experience, combining the sweet taste of an apple with a pear-like fruity tartness. With sugar levels often reaching 14-15 Brix units, they are indeed one of the sweetest apple varieties.

    Whether enjoyed fresh or used in cooking, Jazz apples' complex flavors and sweetness make them a versatile and delicious choice.

    Jazz Apples.

    10. Kiku Apples 

    Kiku apples, a delightful variety discovered as a natural mutation of Fuji apples, hail from Japan. They are notable for their attractive striped, ruby-red skin contrasting beautifully with their crisp, bright white flesh.

    Kiku apples are known for their delicate, sweet flavor and are reputed to be one of the sweetest apples, often surpassing Fuji apples in sugar content.

    With a sugar level that can reach up to 17-18 Brix units, they indeed offer a sweeter apple experience. Whether savored fresh or used in culinary creations, Kiku apples' crisp texture and intense sweetness make them a truly delicious choice.

    Kiku Apples.

    11. Braeburn Apples 

    Braeburn apples, first discovered in New Zealand, are an enticing apple variety known for their perfect balance of sweet and tart. They have a striking appearance with a reddish-orange blush against green undertones.

    The flavor profile of Braeburn apples is complex, offering a sweet taste with hints of spice, making them one of the more uniquely flavored sweet apples.

    While their sugar level can reach up to 12-15 Brix units, their balanced sweetness sets them apart. Braeburn apples' crisp texture and distinct flavor make them a versatile and popular choice, whether eaten fresh or used in baking and cooking.

    Braeburn Apples.

    12. Ginger Gold Apples

    Ginger Gold apples, first discovered in Virginia, USA, are a delightful variety known for their early ripening.

    They have a distinctive appearance, starting as under-ripe green apples and maturing to a soft yellow with a slightly waxy touch. Ginger Gold apple has a delicate, sweet flavor with a hint of spice, making it one of the sweetest yellow-green apples.

    While exact sugar levels may vary, they're typically sweeter than many early varieties. Whether savored fresh or used in baking, Ginger Gold apples' crisp texture and sweet-tart balance make them a versatile and much-loved choice.

    Ginger Gold Apples.

    13. Cosmic Crisp Apples

    Cosmic Crisp apples, a variety bred at the Washington State University Tree Fruit Research and Extension Center, are an exciting addition to the apple family.

    The name 'Cosmic' was inspired by the striking lenticels on the apple surface, reminiscent of a starry sky. Cosmic crisp apple is a cross between Enterprise and Honeycrisp apples, resulting in a sweet apple that balances sugar and acidity perfectly.

    The Cosmic Crisp apples have a sugar level that can range from 11-15 Brix units, making them versatile for a variety of uses, from baking to adding a sweet crunch to fruit salads.

    Cosmic Crisp Apples.

    14. Pixie Crunch Apples

    Pixie Crunch apples, developed by Purdue University in the USA, are a unique apple variety renowned for their sugary sweet taste. These small-sized apples have a beautiful deep red skin that adds to their visual appeal.

    The Pixie Crunch apple offers an exceptionally sweet, crisp flavor, with sugar levels reaching 16-18 Brix units, making them one of the sweetest apples available. Despite being small, they have a punchy flavor and texture.

    Pixie Crisp Apples.

    15. Opal Apples

    The Opal apple, recognized as one of the sweetest apple varieties, has a fascinating origin. This apple cultivar, known as 'UEB 32642', is a natural crossbreed of 'Golden Delicious' and 'Topaz,' originating from the Czech Republic in 1991.

    The Opal apple's vibrant yellow color encases a uniquely sweet and juicy taste, with flavor notes of banana, coconut, and pear. Its high sugar levels make it a delightful snack and a versatile ingredient in culinary arts.

    Opal Apples.

    16. Spencer Apples

    Spencer apples, known for their incredibly sweet taste, are a delightful result of a cross between McIntosh and Golden Delicious apples.

    This variety originated in Canada's British Columbia in 1959. These apples boast a captivating red blush color, akin to their McIntosh parent, with a honey-sweet taste reminiscent of Golden Delicious apples.

    Spencer apple is firm and crisp, delivering a unique sweet-tart flavor that is more sweet than tart, making it a naturally sweeter apple variety. Spencer apple's versatile uses range from fresh eating to baking, adding a sweet twist to cake or various other culinary delights.

    Spencer Apples.

    17. Pacific Rose Apples

    The Pacific Rose Apple, a sweet variety of apples, originates in New Zealand. It is a cross between the Gala and Splendour varieties, resulting in a stunning rose-pink hue.

    The taste is delicate and sweet, with a subtle balance of tropical, citrus, and floral nuances. Pacific Rose Apples is a dessert apple that adds a naturally sweeter touch to desserts and salads.

    The sugar level is higher than the Gala apple, making it one of the sweetest apples available. Its brix level, a measure of sweetness, is notably high, further enhancing its dessert suitability.

    Pacific Rose Apples.

    18. Lady Williams Apples

    The Lady Williams apple, originating from Australia, is a deep dark red apple with yellowish-green flesh.

    It's known for its balanced sugar-acid taste, which starts tart when harvested young and matures into a sweet and tangy flavor. While the exact brix level isn't readily available, it's considered one of the sweetest apples available.

    Its firm, crisp, and juicy texture makes it an excellent choice for various culinary uses, including fresh consumption, baking, and cider production.

    Lady Williams Apples.

    19. Jonagold Apples

    The Jonagold apple, a sweeter apple naturally, was developed in the 1940s at Cornell University's New York State Agricultural Experiment Station.

    It's a cross between the mellow Golden Delicious and tart Jonathan apples, presenting a vibrant blend of yellow-green and rosy-orange hues often marked with red spots or stripes.

    The taste profile of a Jonagold apple is unique, balancing sweet, honeyed notes with a subtle tanginess. While the exact sugar level isn't available, it's known for its high-quality sweetness.

    The versatility of this apple variety makes it ideal for both fresh consumption and various culinary uses, including baking and cider production.

    Jonagold Apples.

    20. Snow Apples

    Snow apples, also known as Fameuse, are a unique variety of apples originating from Quebec, Canada. They are recognized for their bright red or crimson exterior and interior flesh that may display streaks of red and pink hues depending on growing conditions.

    The flavor is notably sweet, making them a naturally sweeter apple, with complex notes of warm spices, wine, and a hint of strawberry-like scent. Their high sugar levels contribute to this distinctive sweetness. 

    Snow Apples.

    21. Fuji Apples

    Fuji apples, renowned for their sweetness, are one of the sweetest apple varieties available. Their skin is a beautiful blend of red and yellow, giving them a warm, inviting appearance.

    The taste of Fuji apples is predominantly sweet, owing to high levels of natural sugars, with a subtle tart undertone that adds to their complex flavor profile.

    The sugar level in a Fuji apple can reach up to 16-18 Brix units, making it one of the sweetest apples on the market. Overall, Fuji apples offer a deliciously sweet apple experience with their vibrant color, high sugar content, and pleasingly crisp texture.

    Fuji Apples.

    What Is Brix Unit?

    The Brix unit is a measure used to quantify the amount of sugar in an aqueous solution. One degree Brix represents the weight of 1 gram of sucrose dissolved in one hundred grams of a solution, corresponding to a sugar concentration of 1% by weight.

    In relation to apples, a higher Brix value generally indicates a sweeter apple. However, the specific Brix value can vary significantly between different apple varieties. For instance, a tart Granny Smith apple may have a Brix value of around 12-15, while a sweet Fuji apple might have a Brix value of 16-18.

    So, What Are Your Favorite Sweet Apples?

    In conclusion, many different kinds of sweet apples have their own flavor profiles. From the Opal apple to the Lady Williams apple and Snow Apple, each variety has a unique sweetness and is used in culinary delights. We also have an awesome post on Apple Flavors, which explains why these apples taste so great. Or we have a fantastic Vegan Mixed Berry Smoothy recipe, where you may wish to add some of these apples for extra taste.

    Whether you're looking for a sweet snack or to bake something delicious, these apples have you covered! We've also shared some recipes for you to try these sweet apples in. Try out some of these recipes and enjoy the sweetness of apples today!

    Try These Apple Recipes From Eat Your Beets

    • Best Goat cheese Apple Salad
    • Avocado And Apple Smoothie
    • Organic Baked Apples

    Valentines Pizza: Heart Shaped Pizza Recipe

    February 14, 2024 by Angela Milnes

    Valentines Pizza: Heart Shaped Pizza Recipe.

    This super cute Heart Shaped Pizza is the perfect Valentine’s Pizza for the one you love. The pizza starts with a red-sauce base and is topped with mozzarella cheese and other tasty ingredients perfect for your special someone.

    valentines heart pizza.
    [feast_advanced_jump_to]

    Why This Recipe Works

    • Romantic Twist: A heart-shaped pizza adds a fun, loving touch to your Valentine’s meal.
    • Personalized Toppings: Customize with your partner’s favorite ingredients for a truly special dinner.
    • Easy and Delicious: This Valentines Pizza recipe is simple to follow, yet results in scrumptious pizza.

    🥘 Ingredients

    Heart Shaped Pizza.

    Here are the ingredients needed to make your heart shaped pizza.

    • Warm Water: Activates the yeast, starting the proofing process for the dough.
    • Flour: Provides the structure for the pizza dough, creating a canvas for your toppings.
    • Instant Yeast: Helps the dough rise, creating a light and airy pizza crust. (We use SAF Instant Yeast)
    • Sugar: Feeds the yeast, aiding in the dough’s rise, and adds a hint of sweetness to balance the flavors.
    • Salt: Enhances the flavors of the other ingredients and gives the dough a savory taste.
    • Olive Oil: Enriches the dough, providing a subtle fruity flavor and a tender texture.
    • Tomato Paste or Pizza Sauce: Acts as the base layer, offering a tangy sweetness that complements the cheese and other toppings.
    • Cheese: Melts over the pizza, adding a creamy, savory element that ties all the flavors together.
    • Cherry Tomatoes: Add a burst of juicy sweetness, giving contrast to the savory elements.
    • Basil Leaves: Contribute a fresh, peppery flavor, elevating the overall taste and adding a pop of color.

    For the complete list of ingredients with measurements and instructions, please see the recipe card at the bottom of the post.

    📖  Substitutions & Variations

    You can customize your heart-shaped pizza however you want. Feel free to add other toppings such as pepperoni, mushrooms, olives, onions and more.

    • Heart Shaped Tomatoes: You could turn your tomatoes into hearts for a cuter presentation. Simply slice the tomatoes in half and make them look like little hearts.
    • Heart Shaped Pepperoni: Cut pepperoni into cute hearts and place the pepperoni hearts onto your pizza.

    Enjoy Your Valentine's Pizza!

    No matter who you are celebrating Valentine's Day with this year, this homemade heart-shaped pizza will surely be a hit. Enjoy!

    🔪How To Make A Heart Shaped Pizza?

    Here is a step-by-step guide for making heart-shaped pizza. This recipe will make a deep dish pizza dough rather than thin crust pizzas.

    adding butter to bowl.

    Step One: In a large bowl combine the water, olive oil, salt, sugar and yeast. Mix the ingredients and add the flour using a sift.

    add flour to pizza dough mixture.

    Step Two: Knead the dough. The dough should be soft and not sticky in your hands.

    leaving dough in bowl to rise.

    Step Three: Shape your Pizza dough into a ball. Grease a bowl and place the dough into the bowl. Cover with cling film and make 3-4 holes with toothpicks. Leave the dough in a warm place for 45 minutes.

    tomatoes on a chopping board.

    Step Four: Cut the cherry tomatoes into halves and set aside.

    make pizza dough into heart shape.

    Step Five: Line a baking tray with baking paper and roll out the dough into a circle. Then cut out to form a heart shape.

    heart pizza with marinara sauce.

    Step Six: Spread sauce or tomato paste across your heart-shaped pizza dough.

    shredded pizza on cheese pizza.

    Step Seven: Add grated cheese to your Valentine's Pizza and place the tomatoes on top of the cheese.

    heart pizza with tomatoes and shredded cheese.

    Step Eight: Bake your heart-shaped pizza in the oven at a temperature of 350°F. The pizza should bake for 20 minutes until golden brown. Transfer your delicious heart shaped pizza to a plate, garnish with fresh basil and serve immediately.

    valentines heart pizza.

    👩‍🍳 Expert Tips

    • Activate Your Yeast Right: Use warm water (around the temperature recommended in the recipe) to mix with olive oil, salt, sugar, and yeast. This step ensures the yeast wakes up properly, which is key for a light and airy crust.
    • Perfect Your Dough Knead: When kneading the dough, aim for a soft, smooth consistency that isn’t sticky. If the dough feels too sticky, add a touch more flour gradually. This helps create a tender yet structured base for your pizza.
    • Shape with a Personal Touch: Roll the dough out into a circle first, then carefully cut out a heart shape. For extra precision, consider lightly sketching the heart outline on your dough with a knife before cutting—it’s a small trick that can elevate your presentation.
    • Keep a Watchful Eye on the Oven: The recipe suggests baking at 350°F for 20 minutes until golden. Since ovens can vary, check your pizza a couple of minutes early. This helps ensure the crust doesn’t overbake and that your toppings remain perfectly melted.

    💭 FAQs

    How can I shape my pizza dough into a heart without a special cutter?

    If you don't have a heart-shaped cutter, you can form the heart shape by hand. Start by rolling your dough into a circle. Then, use a knife or kitchen scissors to carve out the top indentations and the bottom point, creating a heart shape. This method allows you to customize the size and thickness of your pizza.

    What are some creative topping ideas for a heart-shaped pizza?

    Beyond traditional toppings like pepperoni and mozzarella, consider using heart-shaped ingredients to enhance the festive look. For example, fold pepperoni slices in half and cut them into heart shapes using scissors. Additionally, you can use a small heart-shaped cookie cutter to create heart-shaped pieces of cheese or vegetables, adding a personalized touch to your pizza.

    How do I store and reheat leftover heart-shaped pizza?

    Store any leftover pizza in an airtight container in the refrigerator for up to three days. To reheat, place the slices on a baking sheet and warm them in a preheated oven at 375°F (190°C) for about 5-7 minutes, or until the crust is heated through and the cheese is bubbly. This method helps maintain the pizza's texture and flavor.

    Can I prepare the heart-shaped pizza in advance?

    Yes, you can prepare the pizza ahead of time. Assemble the pizza up to the point of baking, cover it, and refrigerate. When ready to bake, preheat your oven and bake as directed. This approach is convenient for special occasions, allowing you to enjoy the celebration without last-minute preparation.

    Best Way to Store Pizza

    After allowing the pizza to cool, promptly place it in a sealed airtight container or tightly wrap it with plastic to preserve its freshness, and then refrigerate. Freeze the pizza by tightly wrapping it in plastic, then store it in a freezer-safe bag or container with minimal air to prevent freezer burn.

    🧂Serving Suggestions

    These are my favorite sides to serve with heart shaped pizza.

    Mushroom Risotto: Creamy risotto infused with earthy mushrooms, adding a touch of elegance to your Valentine's pizza night.

    Parmesan Fries: Irresistible fries sprinkled with Parmesan cheese for a gourmet touch.

    Chocolate Dipped Strawberries: End the meal with a sweet note – indulge in luscious chocolate-dipped strawberries for a romantic dessert.

    valentines heart pizza.

    🍽 Related Recipes

    • edamame stir fry in a white bowl.
      Easy Edamame Stir Fry (15-Minute Protein-Packed Side Dish)
    • Chicken And Cabbage Stir Fry Recipe.
      Chicken And Cabbage Stir Fry Recipe
    • Zucchini Egg Bake Recipe.
      Best Zucchini Egg Bake Recipe
    • New Years charcuterie Board.
      New Years Charcuterie Board

    Did you make this recipe? Leave a review and a ⭐⭐⭐⭐⭐ rating below, or tag us in our Facebook Group! Alternatively, bookmark it in your browser or save to Pinterest.

    Valentines Pizza: Heart Shaped Pizza Recipe.

    Valentines Heart Shaped Pizza

    Angela Milnes
    This heart shaped pizza starts with a red-sauce base and is topped with mozzarella cheese and other tasty ingredients perfect for your special someone.
    5 from 3 votes
    Print Recipe Pin Recipe Rate this Recipe
    Prep Time 15 minutes mins
    Cook Time 10 minutes mins
    45 minutes mins
    Course Appetizer
    Cuisine Italian
    Servings 2 Servings
    Calories 1335 kcal

    Ingredients
      

    • 3 ¼ Cups All Purpose Flour
    • 3 ½ Teaspoon Kosher Salt
    • ¼ Teaspoon Active Dry Yeast
    • 1 ½ Cups Warm Water
    • 3 Tablespoons Oil
    • 6 Cherry Tomatoes
    • ½ Cup Tomato Paste
    • 1 ½ Cups Shredded Cheese We Used mozzarella
    • 1 Tablespoon Basil

    Instructions
     

    • In a large bowl combine the water, olive oil, salt, sugar and yeast. Mix the ingredients and add the flour using a sift.
    • In a large bowl combine the water, olive oil, salt, sugar and yeast. Mix the ingredients and add the flour using a sift.
    • Shape your Pizza dough into a ball. Grease a bowl and place the dough into the bowl. Cover with cling film and make 3-4 holes with toothpicks. Leave the dough in a warm place for 45 minutes.
    • Cut the cherry tomatoes into halves and set aside.
    •  Line a baking tray with baking paper and roll out the dough into a circle. Then cut out to form a heart shape.
    • Spread sauce or tomato paste across your heart-shaped pizza dough.
    • Add grated cheese to your Valentine’s Pizza and place the tomatoes on top of the cheese.
    • Bake your heart-shaped pizza in the oven at a temperature of 350°F. The pizza should bake for 20 minutes until golden brown. Transfer your delicious heart shaped pizza to a plate, garnish with fresh basil and serve immediately.

    Notes

    To freeze your pizzas: Tightly wrap it in plastic, then store it in a freezer-safe bag or container with minimal air to prevent freezer burn.

    Nutrition

    Calories: 1335kcalCarbohydrates: 172gProtein: 44gFat: 52gSaturated Fat: 18gPolyunsaturated Fat: 8gMonounsaturated Fat: 20gTrans Fat: 0.1gCholesterol: 85mgSodium: 5160mgPotassium: 1063mgFiber: 9gSugar: 10gVitamin A: 2097IUVitamin C: 26mgCalcium: 667mgIron: 12mg
    Print Recipe Pin Recipe Rate this Recipe
    Tried this recipe?Let us know how it was!

    Best Valentines Desserts to Go With Pizza

    Forget the round table pizza, try a heart-shaped pizza today with one of these desserts:

    • Vegan Chocolate Covered Strawberries
    • No Bake Cherry Limeade Cheesecake
    • Berry Granola Bites
    • Love Heart Fruit Tart
    • Easy Chocolate Valentine Pretzels

    Air Fryer Egg Bites With Bacon 

    February 8, 2024 by Angela Milnes

    Air Fryer Egg Bites With Bacon.

    If you're looking for a high-protein snack for breakfast or lunch then why not try these Air Fryer Egg Bites With Bacon? They're a delightful addition to your breakfast cuisine, easy to make, and can be stored in the fridge for up to four days. You're going to love this delicious air fryer recipe!

    Air Fryer Egg Bites With Bacon On A Wooden Table.
    [feast_advanced_jump_to]

    💖 Why This Recipe Works

    • Quick and Effortless: The air fryer makes these Air Fryer Egg Bites With Bacon a breeze to prepare.
    • Protein-Packed Breakfast: Start your day right with these bacon-filled, high-protein bites.
    • Versatile and Customizable: Easily add your favorite veggies or cheese for personalized flavors.

    ⭐ Star Ingredients

    air fryer egg bites with bacon ingredients.
    • Eggs: Form the base of this dish, providing a high-protein, creamy texture that's both satisfying and nutritious.
    • Shredded Cheese (Cheddar): Melts into the egg bites, adding a rich, tangy flavor and a gooey texture that makes each egg bite even more delicious.
    • Bacon Slices (Pre-cooked and Chopped): Lends a smoky, savory note to the egg bites, providing an irresistible crunch that contrasts wonderfully with the soft eggs and cheese.
    • Salt and Pepper: Enhance the natural flavors of the other ingredients, making their tastes even more pronounced.
    • Dried Parsley: Adds a subtle herby flavor that complements the eggs and bacon, while also adding a pop of color for visual appeal.
    • Paprika: Infuses the egg bites with a sweet-smoky flavor and a vibrant color, enhancing the overall taste profile of the dish.
    • Garlic Powder: Gives a punch of pungent, slightly spicy flavor that deepens the savory taste of the egg bites.
    • Minced Onions (Dried): Add a sweet, slightly sharp flavor that cuts through the richness of the eggs and cheese, balancing out the dish perfectly. You can also use chopped green onions.

    For the complete list of ingredients with measurements and instructions, please see the recipe card at the bottom of the post.

    📖  Substitutions & Variations

    • Ditch the bacon – Swap it out for sautéed mushrooms, spinach, or bell peppers for a delicious vegetarian twist that’s still packed with flavor.
    • Mix up the cheese – Try feta for a tangy bite, pepper jack for a little heat, or Swiss for a mild, melty alternative.
    • Spice it up – Add a dash of cayenne, smoked paprika, or even a little hot sauce to the egg mix for an extra kick in every bite!

    🔪How To Make Air Fryer Egg Bites With Bacon

    mixture for making egg bites.
    1. Step 1: Preheat your air fryer at 340°F for five minutes. Add all of your ingredients to a large bowl and whisk together.
    mixture for making egg bites.
    1. Step 2: Add your silicone cupcake liners to your air fryer. Add as many as you can to fill your basket, but do not overcrowd it. Spray your cupcake liner with cooking spray. Pour your egg mixture into the silicone liner ¾ of the way.
    Making egg bites in an air fryer.
    1. Step 3: Air fry your egg bites at 340°F for 8 minutes.
    Air fried egg bite holding in a hand.
    1. Step 4: Remove the egg bites from the air fryer and enjoy them while warm.
    Air Fried egg bites with bacon on a wooden board.

    👩‍🍳 Expert Tips

    • Perfect Your Bacon: Pre-cook the bacon until it’s just about crispy before crumbling it into the egg mixture. This way, the bacon delivers a smoky punch without risking overcooking when the egg bites go into the air fryer.
    • Smooth Egg Base: Whisk your eggs (along with any milk or seasonings) until the mixture is completely smooth. A uniform egg base helps each bite set evenly and yields a soft, custardy center.
    • Use the Right Molds: Pour the egg mixture into air fryer–safe silicone molds or mini muffin cups. These molds ensure that your egg bites keep their shape and cook evenly, plus they make cleanup quick and hassle-free.
    • Mind Your Timing: Air fryers can vary in performance, so check your egg bites a minute or two before the recommended cooking time. This small adjustment ensures that the center remains perfectly creamy and prevents any overcooking.

    💭 FAQs

    Are Whole Eggs Necessary For Making Egg Bites?

    While whole eggs are commonly used in making egg bites, you can also use just the egg whites if you prefer. Simply cook eggs as scrambled eggs for a lighter version of this dish.

    How To Make Your Egg Bites More Fluffy?

    Lighten up your air fryer egg bites by mixing in baking powder with beaten eggs for fluffy, tender bites that take your meal prep to the next level!

    How To Store Air Fryer Egg Bites?

    If you intend to consume the egg bites within 3-4 days, store them in a airtight container in the refrigerator. For longer storage, you can freeze the egg bites by placing them in a freezer-safe container or wrapping them tightly with plastic wrap.

    💖 Serving Suggestions

    These are my favorite sides to serve with Air Fryer Egg and Bacon Bites.

    • Vegan Avocado Toast: Pair air fryer egg bites with avocado toast for a tasty, nutritious meal. Top toasted bread with mashed avocado, salt, pepper, and red pepper flakes for added flavor.
    • Berry SalaD With Goat Cheese: Make a mixed greens berry salad with your favorite veggies and a light vinaigrette dressing. The crisp greens and tangy dressing balance the richness of the air fryer egg bites.
    • Roasted Potatoes: Roast small potatoes with olive oil, salt, pepper, and herbs until crispy and golden. The hearty, savory potatoes pair perfectly with the creamy egg bites.
    Air Fryer Egg Bites With Bacon.

    🍽 More Air Fryer Recipes

    • Air Fryer Bok Choy on a white plate covered in paprika.
      Air Fryer Bok Choy
    • Air Fryer Carrot Fries.
      Crispy Air Fryer Carrot Fries
    • How To Roast Peppers In Air Fryer.
      How To Roast Peppers In Air Fryer
    • Air Fryer Chicken Fajitas With Cotija Cheese.
      Air Fryer Chicken Fajitas With Cotija Cheese

    Did you make this recipe? Leave a review and a ⭐⭐⭐⭐⭐ rating below, or tag us in our Facebook Group! Alternatively, bookmark it in your browser or save to Pinterest.

    Air Fryer Egg Bites With Bacon.

    Air Fryer Egg Bites With Bacon 

    Angela Milnes
    These Air Fryer Egg and Bacon Bites are the perfect quick breakfast or snack! With crispy bacon and fluffy eggs cooked to perfection in the air fryer, they’re easy to make and packed with flavor. Great for busy mornings or meal prep, these bites will keep you satisfied and energized throughout the day!
    5 from 3 votes
    Print Recipe Pin Recipe Rate this Recipe
    Prep Time 8 minutes mins
    Cook Time 8 minutes mins
    Total Time 16 minutes mins
    Course Air Fryer Recipes
    Cuisine American
    Servings 6 Servings
    Calories 106 kcal

    Ingredients
      

    • 6 Eggs
    • ¼ Cup Cheddar Cheese Shredded
    • 3 Slices Cooked Bacon
    • ½ Teaspoon Salt
    • ½ Teaspoon Pepper
    • 1 Teaspoon Parsley Dried
    • ⅛ Teaspoon Paprika
    • 1 Teaspoon Garlic Powder
    • 1 Teaspoon Minced Onions Dried

    Instructions
     

    • Preheat your air fryer at 340° for five minutes.
    • Add all of your ingredients to a large bowl and whisk together.
    • Add your to your instant pot. Add as many as you can to fill your basket, but do not overcrowd it.
    • Spray your cupcake liner with cooking spray lightly.
    • Pour your egg mixture to the silicone liner ¾ of the way.
    • Air fry at 340°F for 8 minutes.
    • Remove the egg bites from the air fryer and enjoy them while warm.

    Notes

    Lighten up your air fryer egg bites by mixing in baking powder with beaten eggs for fluffy, tender bites that take your meal prep to the next level!

    Nutrition

    Calories: 106kcalCarbohydrates: 2gProtein: 8gFat: 7gSaturated Fat: 3gPolyunsaturated Fat: 1gMonounsaturated Fat: 3gTrans Fat: 0.02gCholesterol: 172mgSodium: 355mgPotassium: 107mgFiber: 0.2gSugar: 1gVitamin A: 309IUVitamin C: 1mgCalcium: 62mgIron: 1mg
    Print Recipe Pin Recipe Rate this Recipe
    Tried this recipe?Let us know how it was!

    More Easy Recipes For You To Try:

    • Air Fryer Baked Potato Recipe
    • Air Fryer Asparagus with Parmesan
    • Air Fryer Sweet Potatoes
    • Air Fryer Carrot Fries
    • Air Fryer Turkey Legs
    • Air Fryer Yorkshire Pudding
    • Jiffy Jalapeno Cornbread Recipe

    How To Make Garlic Confit

    February 6, 2024 by Angela Milnes

    How To Make Garlic Confit.

    Wondering how to make Garlic Confit and put it to use in your foods? Garlic confit is a super savory, versatile, and incredibly delicious condiment crafted by slow-roasting garlic. Get the recipe for easy garlic confit here!

    Garlic confit in a ramekin dish.
    [feast_advanced_jump_to]

    💖 Why This Recipe Works

    • Versatility: Me and my family are obsessed with garlic, and this recipe in particular is a total hit because of how versatile it is.
    • Ease of Preparation: This slow-roasted garlic dish is supremely easy to make, and we all love spreading it on our toasted bread, and sandwiches and adding it to anything and everything.
    • Convenience: We like to make a big batch, cooked slowly and refrigerate it, and store it for later. Then, all we do is get this Garlic Confit out at room temperature and put it to use!

    ⭐ Star Ingredients

    Garlic confit ingredients.
    • Fresh Garlic Bulbs: The main ingredient, they become sweet and mellow when confit, transforming into a versatile culinary treat.
    • Olive Oil: Acts as both a cooking medium and flavor enhancer while making garlic confit.
    • Fresh Thyme: Adds an aromatic herbal note that complements the garlic's sweetness.
    • Salt: Enhances the natural flavors of the garlic and thyme.
    • Black Pepper: Adds a subtle heat that offsets the sweetness of the confit garlic.

    For the complete list of ingredients with measurements and instructions, please see the recipe card at the bottom of the post.

    📖  Substitutions & Variations

    • Switch up the oil! Olive oil is classic, but try avocado oil for a milder taste or butter for a rich, indulgent twist.
    • Get herby! No thyme? No problem! Rosemary, sage, or even a few bay leaves add an aromatic touch.
    • A little heat never hurts! Toss in red pepper flakes or a whole chili for a subtle spicy kick.
    • Citrusy twist! A strip of lemon peel in the oil gives the garlic a light, fresh zing that brightens up every bite.

    🔪How To Make Garlic Confit

    Preparing garlic bulbs on chopping board.
    1. Step 1: Preheat your oven to 275 degrees Fahrenheit. Cut and remove the top third of the garlic bulbs. 
    Garlic bulbs and oil in a baking tray.
    1. Step 2: Place the garlic in a loaf pan and add the olive oil to it. Make sure that you also pour enough olive oil on top of the garlic. Pour just enough so they are covered. Add the springs of thyme and spread them between the garlic.
    Baked garlic bulbs in a baking dish.
    1. Step 3: Put the small baking dish in the oven for 1 hour and 15 minutes or until the garlic cloves become buttery soft and golden brown.
    Serving garlic confit with a spoon.
    1. Step 4: Remove from the oven and let it cool off for 20 minutes. Squeeze the cooked garlic cloves out of each head and place in a bowl. Pour the olive oil over the garlic and mash.
    Garlic Confit In a bowl.

    👩‍🍳 Expert Tips

    • Cooking Oil Variations: I've used olive oil for this recipe, but you can also use extra virgin olive oil or any other neutral vegetable oil. You can also try using avocado oil too.
    • Herb Substitutions: If you don't have fresh thyme that the recipe calls for, you can also make do with dried thyme instead.
    • Flavor Experimentation: You can also choose to experiment with other flavors by adding in other Italian herbs like rosemary, bay leaves, Basil, and oregano.
    • Adding Heat: If you want to bring a bit of heat to the garlic-infused oil, you can also throw in some red pepper flakes.

    💭 FAQs

    Can I Use Pre-Peeled Garlic Cloves To Make Garlic Confit?

    You sure can! If you are able to get raw garlic cloves that are peeled, you can totally use them instead of using whole heads of garlic.

    Can I Make Tomato And Garlic Confit?

    Yes, you can make a garlic and tomato confit by adding chopped tomatoes to the baking dish then using a slotted spoon, scoop up the tomatoes and add to the garlic confit mixture at the end.

    How To Store Garlic Confit?

    Storing garlic confit is super easy. All you need to do is transfer the confit to an airtight freezer-safe container and refrigerate it. You can store the garlic confit for up up to 1 month with the cloves peeled.

    💖 Serving Suggestions

    These are my favorite sides to serve with Garlic confit.

    • Air Fryer Cheesesteak Egg Rolls: Spread garlic confit inside cheesesteak egg rolls before air frying, or mix into a dipping sauce for an extra flavor boost. Quick and delicious!
    • Roasted Veggies: One of my favorite ways to use garlic confit is to team it up with my favorite stir-fried or Roasted Veggies. It just adds an amazing flavor to them and is a great way to serve veggies in my opinion.
    • As a Sandwich Spread: Believe it or not, the simple confit garlic can also be a wonderful Sandwich spread or an addition to your homemade wraps. The golden brown cloves of garlic can take the flavors of even a simple sandwich to the next level.
    • As a Dip: The flavorful garlic confit and garlic oil can actually be used for dipping Cheesy Bread and your other favorite snacks.
    • Mashed Potatoes: Stir garlic confit into your mashed potatoes for an extra burst of flavor.

    🍽 More Savory Recipes to Keep on Hand

    • Best Caramelized Onion Dip With Chives.
      Best Caramelized Onion Dip With Chives
    • Creamy And Herby Ranch Dressing.
      Creamy And Herby Ranch Dressing
    • Whipped Feta Dip.
      Creamy Whipped Feta Dip (With Greek Yogurt & Garlic)
    • Homemade Olive Tapenade With Crostini.
      Homemade Olive Tapenade Hummus With Crostini

    Did you make this recipe? Leave a review and a ⭐⭐⭐⭐⭐ rating below, or tag us in our Facebook Group! Alternatively, bookmark it in your browser or save to Pinterest.

    Garlic confit in a small bowl.
    How To Make Garlic Confit.

    How To Make Garlic Confit

    Angela Milnes
    Garlic confit is garlic cloves cooked slowly in oil until they're super soft and sweet, perfect for spreading on bread or adding to recipes.
    5 from 4 votes
    Print Recipe Pin Recipe Rate this Recipe
    Prep Time 10 minutes mins
    Total Time 10 minutes mins
    Course Appetizers
    Cuisine American
    Servings 6 Servings
    Calories 1919 kcal

    Ingredients
      

    • 8-10 Garlic Bulbs
    • 2-3 Cup Olive Oil
    • 10-12 Springs Fresh Thyme
    • Pinch Salt Optional
    • Pinch Black Pepper

    Instructions
     

    • Preheat your oven to 275 degrees Fahrenheit. Cut and remove the top third of the garlic bulbs. 
    • Place the garlic in a loaf pan and add the olive oil to it. Make sure that you also pour enough olive oil on top of the garlic. Pour just enough so they are covered. Add the springs of thyme and spread them between the garlic.
    • Put the small baking dish in the oven for 1 hour and 15 minutes or until the garlic cloves become buttery soft and golden brown. Remove from the oven and let it cool off for 20 minutes.
    • Squeeze out the garlic cloves out of each head and place in a bowl. Pour the olive oil over the garlic and mash.

    Notes

    Oil Variations: I’ve used olive oil for this recipe, but you can also use extra virgin olive oil or any other neutral vegetable oil. You can also try using avocado oil too.
    Herb Substitutions: If you don’t have fresh thyme that the recipe calls for, you can also make do with dried thyme instead.
    Adding Heat: If you want to bring a bit of heat to the garlic-infused oil, you can also throw in some red pepper flakes.

    Nutrition

    Serving: 1gCalories: 1919kcalCarbohydrates: 2gFat: 216gSaturated Fat: 30gPolyunsaturated Fat: 180gSodium: 102mg
    Print Recipe Pin Recipe Rate this Recipe
    Tried this recipe?Let us know how it was!

    More Easy Recipes:

    • Canned Black Bean And Corn Salsa Recipe
    • Easy Air Fryer Roasted Potatoes
    • Honey Butter Skillet Corn
    • Air Fryer Carrot Fries
    • Air Fryer Almond Crusted Chicken
    • Cheesy Mexican Steak And Rice

    Vegan Beetroot And Black Bean Burger

    February 1, 2024 by Angela Milnes

    Vegan Beetroot And Black Bean Burger.

    Ready for a tasty and nutritious twist on the classic burger? This Vegan Beetroot and Black Bean Burger is packed with flavor and color! Made with wholesome ingredients and easy to prepare, it's a hit with vegans and non-vegans alike. Let's fire up the grill and get cooking!

    Beetroot and black bean burger.
    [feast_advanced_jump_to]

    💖 Why This Recipe Works

    • Flavorful and Nutritious: Packed with the earthy sweetness of beetroot and the protein-rich goodness of black beans, this beetroot and black bean burger is both satisfying and nutritious.
    • Easy to Make: This beet burger recipe simplifies the process of making vegan burgers, making it accessible for all home cooks.
    • Versatile and Customizable: You can easily customize the toppings and condiments to suit your taste preferences, making this Beetroot Burger a versatile option for any meal.

    ⭐ Star Ingredients

    Ingredients to make beetroot and black bean burger.
    • Beets: Provides a vibrant color and earthy flavor to the burger patties.
    • Rolled Oats: Adds texture and helps bind the ingredients together.
    • Walnuts: Imparts a nutty taste and adds richness to the beetroot and black bean burger.
    • Black Beans: Offers protein and contributes to the burger's texture.
    • Red Onion: Adds sweetness and depth of flavor to the beetroot and black bean burger mixture.
    • Garlic: Enhances the savory profile of the burgers.
    • Cumin: Adds a warm, smoky flavor to the patties.
    • Basil: Provides a hint of herbal freshness to the beetroot and black bean burger.
    • Tomato Paste: Adds umami richness and depth to the burger mixture.
    • Soy Sauce: Enhances the savory taste and adds a hint of saltiness.
    • Salt and Pepper: Seasonings to enhance the overall flavor of the burgers.
    • Oregano: Adds a savory, Mediterranean flavor to the burger patties.
    • Thyme: Contributes a subtle earthy flavor to the beetroot and black bean burger.
    • Rosemary: Infuses the burgers with a fragrant, pine-like aroma.
    • Oil for Frying: Used to cook the burger patties to a crispy exterior.

    For the complete list of ingredients with measurements and instructions, please see the recipe card at the bottom of the post.

    📖  Substitutions & Variations

    • I can never get enough BBQ, so I love slathering my beetroot burger in vegan BBQ sauce, topping it with grilled onions and fresh tomatoes, and then—because why not?—drizzling on even more sauce.
    • If you’re like me and crave a little spice, adding diced jalapeño and smoked paprika to the mix is a game-changer. Top it with avocado, spicy vegan mayo, and cilantro for the ultimate creamy-meets-spicy combo.
    • I’m all about Mediterranean flavors, so I love throwing in roasted beets and sun-dried tomatoes, then loading it up with hummus, crisp cucumbers, and a sprinkle of vegan feta. It’s fresh, tangy, and absolutely delicious!

    🔪How To Make A Beetroot And Black Bean Burger

    Stirring chopped onion and garlic in a pan.
    1. Step 1: Grate the beetroot and drain the black beans. Add butter to a large skillet and melt completely over medium heat. Stir in the onions and cook for 3-4 minutes. Add the garlic and cook until fragrant.
    Adding spices to sauteed onions and garlic in a pan.
    1. Step 2: Add your choice of spices (e.g., cumin, smoked paprika) and season generously with salt and pepper.
    Shredded beetroot added to sauteed onion and garlic for beetroot burger.
    1. Step 3: Combine the sautéed onions and garlic with the grated beetroot and canned or pre-cooked black beans. Mash the black beans slightly with a fork or potato masher.
    Sautéing shredded beetroot for beetroot burger.
    1. Step 4: Mix well to combine all the ingredients. Saute until soft and cooked.
    Blending sauteed beetroot and black beans mixture in a blender.
    1. Step 5: Add your beetroot and black bean mixture and oats to the food processor and blitz for 2 minutes.
    Frying beetroot and black beans mixture  burger patties.
    1. Step 6: Shape the mixture into burger patties. Heat some oil in the skillet over medium heat. Cook the patties for about 3-4 minutes on each side, until they are crispy and heated through.
    Vegan beetroot and black bean burger on a serving tray.
    1. Step 7: Place the patties, sliced tomato, and onion on buns and add your favorite toppings.
    Beetroot and black bean burger.
    1. Step 8: Enjoy your beetroot black bean burgers! Serve with your favorite sides.

    👩‍🍳 Expert Tips

    • Squeeze Out Excess Moisture From Beets: After shredding the beets, use a clean cloth or paper towel to squeeze out excess moisture. This will help the patties hold together better and prevent them from being too watery, ensuring a firm and delicious result for your veggie burger recipes.
    • Chill The Mixture: Refrigerate the burger mixture for at least 30 minutes before forming patties. This helps the ingredients bind together more effectively, making the patties easier to shape and cook.

    💭 FAQs

    Why do my black bean burgers fall apart?

    Burgers may fall apart if the mixture is too wet or lacks proper binding agents. Ensure you're using a binding agent like ground flaxseed or chia seeds mixed with water. If the mixture feels too wet, adding more flour can help achieve the right consistency. Additionally, making smaller patties can help them hold together better during cooking.

    Can I use cooked beetroot instead of raw in this burger recipe?

    While raw beetroot is recommended for its texture and flavor, you can use cooked beetroot if preferred. Keep in mind that cooked beets may alter the burger's texture and color slightly. Grate the cooked beetroot finely before mixing it into the patty mixture.

    How can I make these burgers spicier?

    To add more heat to your burgers, consider incorporating spices like chili powder, cayenne pepper, or finely chopped fresh chili peppers into the patty mixture. Adjust the quantity to suit your spice tolerance. Additionally, spicy condiments like vegan sriracha mayo can enhance the heat level when serving.

    Can I freeze these burgers for later use?

    Yes, these burgers freeze well. It's recommended to freeze them uncooked. Place the patties on a baking sheet lined with parchment paper, ensuring they don't touch each other, and freeze until solid. Once frozen, transfer them to an airtight container or freezer bag. When ready to cook, you can bake or pan-fry them directly from frozen, adding a few extra minutes to the cooking time.

    💖 Serving Suggestions

    These are some of the best sides to serve with Vegan Beetroot and Black Bean Burger.

    • Sweet Potato Fries: Crispy and sweet, these fries are a perfect complement to the savory beetroot and black bean burger.
    • Hasselback Potatoes: Thinly sliced and roasted to perfection, Hasselback potatoes provide a deliciously crispy and tender side dish.
    • Stuffed Mushrooms: Savory stuffed mushrooms filled with cheese and herbs add a rich and earthy flavor that pairs well with beet burgers.
    • Butternut Squash Salad: A hearty salad with roasted butternut squash, arugula, goat cheese, and a balsamic vinaigrette adds a sweet and tangy element to veggie burgers.
    • Red Cabage Coleslaw: A refreshing and tangy coleslaw made with cabbage, carrots, and a creamy dressing offers a nice contrast to the veggie burger.
    Beetroot and black bean burger.

    🍽 Try These Vegan Side Dishes

    • Easy Vegan White Bean Stew.
      Easy Vegan White Bean Stew
    • Best Vegan Baked Beans Recipe
    • Almond Milk Mashed Potatoes.
      Best Almond Milk Mashed Potatoes (Dairy Free)
    • Best Vegan Fall Harvest Salad.
      Best Vegan Fall Harvest Salad

    Did you make this recipe? Leave a review and a ⭐⭐⭐⭐⭐ rating below, or tag us in our Facebook Group! Alternatively, bookmark it in your browser or save to Pinterest.

    Vegan Beetroot And Black Bean Burger.

    Vegan Beetroot And Black Bean Burger

    Angela Milnes
    Satisfy your cravings with this hearty and flavorful Vegan Beetroot and Black Bean Burger! Packed with nutritious ingredients like earthy beets and protein-rich black beans, this burger is as wholesome as it is delicious. With a perfect balance of savory and slightly sweet flavors, it's an excellent plant-based alternative that doesn't skimp on taste or texture. Serve it up with your favorite toppings and a side of crispy fries for a meal that's sure to impress vegans and non-vegans alike!
    5 from 4 votes
    Print Recipe Pin Recipe Rate this Recipe
    Prep Time 10 minutes mins
    Cook Time 13 minutes mins
    Total Time 23 minutes mins
    Course Dinners
    Cuisine American
    Servings 4 Servings
    Calories 299 kcal

    Ingredients
      

    • 2 cups Beets Shredded
    • ½ cup Rolled Oats
    • ½ cup walnuts
    • 1 Can Black Beans
    • 1 Red Onion
    • 2 Garlic Cloves
    • 1 teaspoon Cumin
    • ½ teaspoon Basil
    • 1 tablespoon Tomato Paste
    • 2 tablespoon Soy Sauce
    • pinch Salt
    • Pinch Pepper
    • 1.2 teaspoon Oregano
    • ½ teaspoon Thyme
    • ½ teaspoon Rosemary
    • 1 tablespoon Olive Oil for frying

    Instructions
     

    • Grate the beetroot and drain the black beans.
    • Add butter to a large skillet and melt completely over medium heat.
    • Stir in the onions and cook for 3-4 minutes.
    • Add the garlic and cook until fragrant.
    • In a large mixing bowl, combine the sautéed onions and garlic with the grated beetroot and canned or self cooked black beans. Mash the black beans slightly with a fork or potato masher.
    • Add your choice of spices (e.g., cumin, smoked paprika) and season generously with salt and pepper.
    • Mix well to combine all the ingredients.
    • Add your beetroot and black bean mixture and oats to the food processor and blitz for 2 minutes.
    • Shape the mixture into burger patties.
    • Heat some oil in the skillet over medium heat. Cook the patties for about 3-4 minutes on each side, until they are crispy and heated through.
    • Place the patties, sliced tomato and onion on buns and add your favorite toppings. Enjoy your beetroot black bean burgers!

    Notes

    Squeeze Out Excess Moisture from Beets: After shredding the beets, use a clean cloth or paper towel to squeeze out excess moisture. This will help the patties hold together better and prevent them from being too watery, ensuring a firm and delicious result for your veggie burger recipes.
    Chill the Mixture: Refrigerate the burger mixture for at least 30 minutes before forming patties. This helps the ingredients bind together more effectively, making the patties easier to shape and cook.

    Nutrition

    Serving: 1gCalories: 299kcalCarbohydrates: 34gProtein: 12gFat: 14gSaturated Fat: 2gPolyunsaturated Fat: 8gMonounsaturated Fat: 4gSodium: 562mgPotassium: 630mgFiber: 10gSugar: 6gVitamin A: 63IUVitamin C: 7mgCalcium: 74mgIron: 4mg
    Print Recipe Pin Recipe Rate this Recipe
    Tried this recipe?Let us know how it was!

    More Easy Beetroot Recipe Ideas

    • Beet Cured Salmon
    • Roasted Beetroot Salad With Pomegranate
    • Beetroot Juice
    • Best Beetroot Carpaccio
    • Canned Beetroot Vs Fresh Beetroot
    • Beetroot Ravioli With Goat Cheese

    Best Air Fryer Stuffed Peppers

    January 14, 2024 by Angela Milnes

    Best Air Fryer Stuffed Peppers.

    These Air Fryer Stuffed Peppers are the ultimate weeknight win—flavor-packed, veggie-loaded, and ready in no time flat.

    Best Air Fryer Stuffed Peppers.

    Stuffed peppers are a total comfort classic, and the air fryer makes them quick, crispy, and easy—no oven required. You’ll get perfectly tender peppers with a golden top and flavorful filling in under 10 minutes.

    I’ve tested them with everything from taco-seasoned ground beef to leftover quinoa, and they always turn out great. If you love veggie-packed mains, try my Crispy Air Fryer Avocado Fries or Air Fryer Tater Tot Casserole next!

    [feast_advanced_jump_to]

    💖 Why This Recipe Works

    • Healthy and Flavorful: Lean protein, veggies, and whole grains in one tidy, tasty package.
    • Effortless Cooking: The air fryer keeps everything easy—no baking trays or oven babysitting needed.
    • Flexible Filling: Swap in your favorite meats, grains, or even make it low-carb with cauliflower rice.

    ⭐ Star Ingredients

    Stuffed pepper ingredients.
    • Ground Turkey – I love using turkey here because it’s lean but still flavorful, and it soaks up all those herbs and spices like a champ. You can easily swap it for ground chicken or beef if that’s what you have on hand.
    • Cooked Rice – This is the filler that brings it all together. I usually use jasmine or basmati for a little extra fragrance, but brown rice or even quinoa works great too.
    • Bell Peppers – Red and yellow are my favorites for their natural sweetness, but green works perfectly if you like a bit more bite. Choose ones that are firm and wide enough to hold that delicious stuffing!

    For the complete list of ingredients with measurements and instructions, please see the recipe card at the bottom of the post.

    📖  Substitutions & Variations

    • Meat Swap: Use ground beef, Italian sausage, or shredded rotisserie chicken.
    • Low-Carb Option: Sub cauliflower rice for regular rice to keep it keto-friendly.
    • Dairy-Free: Skip the cheese or use a plant-based melt like Violife or Miyoko's.
    • Spicy Kick: Add chopped jalapeños or crushed red pepper flakes to the mix.
    • Veggie Boost: Stir in chopped spinach, corn, or black beans.
    • Color Variety: Use red, yellow, or orange peppers for a sweeter flavor profile and pretty presentation.

    Love easy veggie meals? You’ll also love my Air Fryer Onion Rings or Air Fryer Sweet Potatoes for more crispy, colorful sides.

    🔪 How To Make Air Fryer Stuffed Peppers?

    Stuffed pepper ingredients in a skillet pan.
    1. Step 1: In a large skillet or Instant Pot saute and brown the ground meat. Add the oil and spices. Cook for 3 minutes on medium-high heat. Add the rice, onions, and diced tomatoes. Cook for 5 minutes.
    Cooking stuffed pepper ingredients in a skillet pan.
    1. Step 2: Cook for 3 minutes on medium-high heat. Add the rice, onions, and diced tomatoes. Cook for 5 minutes.
    Stuffing bell pepper halves with cooked ground turkey.
    1. Step 3: Cut the bell pepper in half and remove the seeds. Scoop the meat and rice filling into each pepper half.
    Stuffed peppers in air fryer basket.
    1. Step 4: Place in the stuffed pepper halves into the air fryer basket.
    Cooked stuffed peppers in air fryer basket.
    1. Step 5: Cook at 400 for 6-8 minutes or until peppers start to brown.
    Air fried stuffed peppers on a plate.
    1. Step 6: Garnish the bell peppers with Romano cheese.

    💡Hint: Use similarly sized peppers so they cook evenly—and don’t overcrowd the basket. Air needs to circulate to get that perfect texture!

    👩‍🍳 Expert Tips

    • Preheat your air fryer for better browning and faster cook time.
    • Choose firm peppers that can hold their shape when softened.
    • Use a cookie scoop or spoon with a flat edge to pack the filling neatly into each pepper half.
    • Want a crispy cheese top? Run the peppers under a broiler for 1–2 minutes after air frying if you like a browned finish.

    💭 FAQs

    What are stuffed peppers made of?

    Classic stuffed peppers usually include a mix of ground meat, cooked rice, veggies, and cheese. This air fryer version keeps things healthy and fast without skimping on flavor.

    Should I blanch peppers before stuffing?

    No, you don’t need to blanch the peppers before stuffing them. The air frying cooking process will soften the peppers and make them tender.

    Can I use different colored bell peppers?

    Yes! You can use different colored bell peppers if you wish. Bell peppers come in a variety of colors due to their ripening process. Green bell peppers are the least ripe and red bell peppers are the ripest. The longer they stay on the vine, the sweeter they become. Try mixing it up and stuff your peppers using the green peppers, yellow, red and orange peppers.

    How do I make low carb air fryer stuffed peppers?

    Simply swap cooked rice for cauliflower rice. You’ll still get a hearty, flavorful filling without the extra carbs.

    How do I store and reheat air fried stuffed peppers?

    Refrigerate leftovers in an airtight container for up to 4 days. Reheat in the microwave or air fryer. These freeze well too—just thaw in the fridge overnight and reheat before serving.

    💖 Serving Suggestions

    These are my favorite sides to serve with stuffed rice peppers:

    • Asparagus With Goat Cheese – Crispy, savory, and loaded with flavor.
    • Air Fryer Sweet Potatoes: Crunchy and slightly sweet, a delightful contrast to the savory peppers.
    • Parmesan Breadsticks – Buttery and cheesy, great for scooping up any extra filling.
    • Spicy Lasagna Soup with Oregano – Warm, cozy, and full of Italian vibes.
    • Creamy Ranch Dip with Veggie Chips – For a crunchy, creamy contrast.

    💡Leftovers? Chop up a few stuffed peppers and use them as a taco or burrito filling, or toss into a grain bowl with greens, beans, and salsa for a next-day lunch.

    Stuffed red peppers on white plate.

    🍽 More Super Veggie Dishes

    • roasted harissa sweet potatoes on a plate, drizzles with honey and pistachio nuts.
      Harissa Sweet Potato Recipe (Crispy, Spicy & Easy)
    • Cranberry Lime Mocktail.
      Easy Cranberry Lime Mocktail Recipe – No Alcohol, All Sparkle!
    • Food to Your Loved Ones this Holiday Season.
      Give from Your Heart: Give Food to Your Loved Ones this Holiday Season
    • MIni Rainbow Pizza.
      How To Revamp Leftover Pizza

    Did you make this recipe? Leave a review and a ⭐⭐⭐⭐⭐ rating below, or tag us in our Facebook Group! Alternatively, bookmark it in your browser or save to Pinterest.

    Best Air Fryer Stuffed Peppers.

    Best Air Fried Stuffed Peppers

    Angela Milnes
    These Air Fryer Stuffed Peppers are a quick and healthy meal, filled with seasoned ground meat, rice, and veggies, all cooked to perfection in the air fryer!
    5 from 5 votes
    Print Recipe Pin Recipe Rate this Recipe
    Prep Time 15 minutes mins
    Cook Time 15 minutes mins
    Total Time 30 minutes mins
    Course Air Fryer Recipes
    Cuisine American
    Servings 3 Servings
    Calories 421 kcal

    Ingredients
      

    • 1 Pound Ground Turkey or any ground meat of your choosing such as beef or chicken
    • 1 Tablespoon Olive Oil
    • ½ Cup Chopped Tomatoes seasoned with garlic and basil.
    • ¼ Cup Green Onion Chopped
    • 1 Teaspoon Garlic Powder
    • 1 Tablespoon Dry Parsley or 2 Tablespoons of fresh parsley
    • Salt And Pepper
    • 1 Cup Cooked Rice
    • 1 Cup Romano Cheese Shredded

    Instructions
     

    • In a large skillet or Instant Pot saute and brown the ground meat. Add the oil and spices. Cook for 3 minutes on medium-high heat. Add the rice, onions, and diced tomatoes. Cook for 5 minutes.
    • Cut the bell pepper in half and remove the seeds. Scoop the meat and rice filling into each pepper half and place in the air fryer basket.
    • Cook at 400 for 6-8 minutes or until peppers start to brown.
    • Garnish the bell peppers with Romano cheese.

    Notes

    Choose Melting Cheese: Use cheeses like Monterey Jack or Oaxaca that melt well.
    Preheat Air Fryer: Make sure to preheat the air fryer for a crispy coating.

    Nutrition

    Calories: 421kcalCarbohydrates: 19gProtein: 48gFat: 17gSaturated Fat: 7gPolyunsaturated Fat: 2gMonounsaturated Fat: 7gTrans Fat: 0.03gCholesterol: 118mgSodium: 537mgPotassium: 603mgFiber: 1gSugar: 1gVitamin A: 306IUVitamin C: 5mgCalcium: 384mgIron: 2mg
    Print Recipe Pin Recipe Rate this Recipe
    Tried this recipe?Let us know how it was!

    Best Worcestershire Sauce Substitute: 13 Alternatives

    January 14, 2024 by Angela Milnes

    Worcestershire sauce substitutes.

    If you're a lover of delicious sauces and marinades, chances are you've heard of Worcestershire sauce. It adds amazing depth to any dish and can take your cooking to a whole new level.

    Unfortunately, it isn't always easy to track down! That is why we have created the ultimate guide for finding the best Worcestershire sauce substitute. Discover our top choices for great Worcestershire substitutes that will keep your meals flavorful!

    Different sauces each in a separate bowl.
    [feast_advanced_jump_to]

    What Is Worcestershire Sauce?

    Worcestershire sauce is a widely used condiment with a rich and savory flavor. It is a fermented liquid sauce made from a blend of various ingredients, including vinegar, molasses, tamarind, garlic, onions, anchovies, and various spices. The sauce undergoes a Fermentation Process to develop its distinct taste.

    Worcestershire sauce in a bowl.

    Finding the Best Worcestershire Sauce Substitute

    Let's explore 13 Worcestershire sauce alternatives, each boasting its unique blend of flavors and versatility:

    1. Soy Sauce

    One of the most popular and easily accessible Worcestershire sauce substitutes is soy sauce. Its deep, salty, and umami flavor profile makes it an ideal replacement, especially in savory dishes like Beef Stew or Marinades for Grilled Meats.

    To use soy sauce as a substitute, use an equal amount of soy sauce in place of Worcestershire sauce in your recipes.

    2. Fish Sauce

    For those seeking a bold umami flavor, fish sauce can be an excellent choice as a Worcestershire sauce alternative.

    Made from fermented anchovies, fish sauce delivers a rich and pungent taste, enhancing the flavors of Soups, Stir-Fries, and other cooked dishes.

    Use equal parts fish sauce as a substitute for Worcestershire sauce to bring a distinctive twist to your meals.

    Fish sauce in a bottle and in a bowl.

    3. Balsamic Vinegar

    Balsamic vinegar offers a sweet and tangy flavor, making it a unique substitute for Worcestershire sauce. While not as savory, it can still add depth to your dishes, particularly in salad dressings or glazes for roasted meats.

    To replace Worcestershire sauce with Balsamic Vinegar, use an equal amount and adjust other seasonings to balance the flavor notes.

    Balsamic vinegar in a jar and grapes.

    4. Apple Cider Vinegar

    Another tangy alternative is apple cider vinegar, which provides a fruity acidity to your dishes. This substitute works well in BBQ sauce or marinades, where Worcestershire sauce is typically called for.

    To use apple cider vinegar as a replacement, mix it with a pinch of brown sugar to add some sweetness to your recipes.

    Learn more about "Does Apple Cider Vinegar Go Bad?"

    Apple cider vinegar in a bottle and apples on side.

    5. Malt Vinegar

    With its sharp and slightly sweet flavor, malt vinegar can serve as an adequate Worcestershire sauce replacement. It pairs well with dishes like meat pies or gravies.

    To use malt vinegar as a substitute, combine it with equal parts soy sauce for a balanced umami and salty flavor.

    Bottles of malt vinegar.

    6. Hot Sauce and Lime Juice

    For a zesty and spicy substitute, combine hot sauce and lime juice. This duo adds a burst of heat and acidity, ideal for enhancing the taste of seafood dishes or marinades.

    Mix equal parts Hot Sauce and lime juice to achieve the desired flavor profile.

    Hot sauce and lime juice in a glass.

    7. Anchovy Paste

    If you're looking to maintain the anchovy flavor found in traditional Worcestershire sauce, anchovy paste can be a great substitute.

    It provides a concentrated umami kick, perfect for adding depth to various recipes. Use an equal amount of anchovy paste as a replacement for Worcestershire sauce in your dishes.

    Anchovy Paste.

    8. Red Wine Vinegar

    Red wine vinegar offers a tangy and fruity flavor that can work well as a substitute for Worcestershire sauce. It is a suitable option in salad dressings, marinades, or glazes for roasted vegetables.

    Use an equal amount of red wine vinegar in place of Worcestershire sauce and adjust other seasonings accordingly.

    Red wine vinegar in a bowl.

    9. Coconut Aminos

    For a gluten-free and soy-free alternative, coconut aminos can be an excellent choice. It provides a mild umami flavor, that works well in various dishes like Stir Fries, Noodles and marinades.

    Use an equal amount of coconut aminos as a substitute for Worcestershire sauce.

    10. Tamarind Paste

    Tamarind paste offers a unique sweet and sour taste, similar to the tamarind used in traditional Worcestershire sauce. It can be an exciting substitute in curry dishes or stir-fries, where a touch of tanginess is desired.

    Replace Worcestershire sauce with an equal amount of tamarind paste for an exotic twist.

    Tamarind paste.

    11. Ketchup Soy Sauce

    Combining ketchup and soy sauce can yield a quick and flavorful Worcestershire sauce alternative. The sweetness of ketchup balances the saltiness of soy sauce, providing a versatile substitute for various recipes.

    Mix equal parts ketchup and soy sauce to use as a replacement.

    Ketchup soy sauce.

    12. Hoisin Sauce

    Hoisin sauce offers a complex and sweet flavor with a hint of umami, making it a delightful substitute for Worcestershire sauce. It works well in marinades, glazes, Wraps or stir-fry sauces.

    Use an equal amount of Hoisin Sauce as a replacement and adjust other seasonings to taste.

    Hoisin sauce is one of the best Worcestershire sauce substitute.

    13. Tomato Puree

    For a milder Worcestershire sauce alternative, try using tomato puree. Substitute an equal amount of tomato puree and adjust seasonings as desired.

    It offers tanginess and sweetness, perfect for pasta sauces, stews, Tomato Soups and meat dishes. Enhance the flavor with a pinch of brown sugar and a dash of soy sauce or fish sauce for umami.

    Tomato puree's rich texture elevates dishes like Spaghetti Bolognese, Chili, and Braised Meats, making it a versatile substitute. Experiment with proportions to suit your taste preferences.

    Tomato puree.

    Ways to Add Worcestershire Sauce Alternatives Into Classic Recipes

    Incorporating Worcestershire sauce substitutes into classic recipes like Vegan Beetroot And Blackean Burger, Instant Pot Meatloaf, or Roasted Vegetables can elevate the flavors of these dishes. Here are some best ways to do it:

    • Burgers: Mix the Worcestershire sauce substitute like soy sauce or balsamic vinegar into the ground meat along with seasonings before shaping patties. This infuses burgers with a savory, umami-rich taste. Grill or cook as usual for a delicious twist on classic burgers.
    • Meatloaf: Replace Worcestershire sauce with an equal amount of tomato puree or soy sauce in the meatloaf mixture. These substitutes will provide a similar depth of flavor, resulting in a moist and flavorful meatloaf. Remember to adjust other seasonings to complement the substitute used.
    • Roasted Vegetables: Drizzle a mixture of the Worcestershire sauce substitute, such as balsamic vinegar or soy sauce, and olive oil over the vegetables before roasting. The combination of flavors will add complexity to the vegetables and enhance their natural sweetness.
    • Marinades: Create a marinade using the Worcestershire sauce substitute, combined with ingredients like garlic, mustard, and brown sugar, to marinate meats before grilling or baking. This will infuse the meat with a delightful blend of sweet and savory flavors.
    • Sauces and Dressings: Incorporate the Worcestershire sauce substitute into homemade BBQ sauces or Salad Dressings to enhance the taste. Blend it with other ingredients like ketchup, mustard, honey, and vinegar to create a unique and flavorful sauce.

    FAQ'S

    Are Worcestershire Sauce Substitutes Suitable for Specific Dietary Preferences, Such as Vegan or Gluten-Free Diets?

    Yes, many Worcestershire sauce substitutes are suitable for specific dietary preferences like vegan and gluten-free diets.

    Options such as soy sauce, tamarind, coconut aminos, or balsamic vinegar are naturally vegan and gluten-free, providing savory and umami flavors without animal products or gluten.

    Try These Worcestershire Sauce Substitutes

    Discovering the best Worcestershire sauce substitute opens up culinary options. Whether you are seeking a veg-friendly choice, a milder taste, or a cultural twist, explore alternatives to match your preferences.

    From soy sauce to balsamic vinegar, each brings a unique flavor to elevate dishes. Homemade versions allow customization and experimentation for a sauce that's truly yours. When out of Worcestershire sauce, embrace new substitutes to enhance meals with exceptional taste.

    What Does Paprika Taste Like?

    January 14, 2024 by Angela Milnes

    Paprika in a bowl with a spoon.

    Wondering What Does Paprika Taste Like? Paprika is one of the most popular spices for flavoring your dishes. It has a unique taste that can add depth and complexity to all types of recipes. But what does this red powder actually taste like?

    In this article, we'll take an in-depth look at the flavor profile of paprika and discuss ways you can use it in your cooking. From making smoky sauces to spicing up salads, let's explore why paprika has become such an essential part of kitchens worldwide!

    smoked paprika.
    [feast_advanced_jump_to]

    What Is Paprika?

    Paprika is a powdered spice made from grinding dried red peppers called bell pepper, usually from the Capsicum annuum family. Depending on the different types of paprika, it can range in color from mild orange-red to deep scarlet.

    Commonly used in Spanish and Hungarian cuisines, paprika plays a key ingredient role and has become popular worldwide for its intense flavor and ability to add complexity to dishes. The bright orange-red color also brings vibrancy to any plate. 

    What Does Paprika Taste Like?

    Paprika tastes like a mellow, mild version of its spicy cousin, chili pepper. It has a subtle smoky flavor that can range in intensity based on the paprika you're using. With paprika, you get just enough spice to bring out the flavor profile of your dish without overpowering it with too much heat.

    Paprika contains fruity notes reminiscent of bell peppers and a hint of smokiness due to its drying process. Some types of paprika also pack more of a punch and can be spicy, while others have a milder, slightly sweet taste.

    Smoked Paprika Taste

    Smoked paprika has an earthy flavor profile that will tantalize your taste buds. It is made from smoked red sweet peppers, which have been ground into a powder after they have been smoked over wood fires. The smoked paprika taste adds an extra spicy kick to your favorite dishes.

    The smokiness of this ingredient creates a complex flavor that pairs perfectly with meaty dishes like chicken, beef, and fish. Even if you're not a fan of spicy foods, smoked paprika is sure to delight you with its sweeping sweetness.

    How to Use Paprika in Cooking?

    Paprika is an incredibly versatile spice used for all kinds of dishes. From salads and dressings to Air Fryer Roasted Vegetables, soups, egg dishes, and stews, its flavor pairs particularly well with fish and poultry.

    Paprika adds an interesting smokiness to sauces and marinades while also working well in rubs for meat.

    Paprika can also top off dishes like Dyed Deviled Eggs or Instant Pot Macaroni And Cheese for a vibrant pop of color. No matter how you use it, paprika is the perfect way to add zest to your dishes!

    Types Of Paprika

    Smoked Spanish Paprika

    Smoked Spanish paprika, also known as pimentón de la Vera, is one of the most popular types of paprika.

    It's made from peppers that are dried over an oak wood fire for several weeks, giving it its distinctive smoky flavor and aroma.

    Smoked Spanish paprikas add depth to dishes like paella and stews. It's available in different varieties, from mild to hot (Picante).

    The earthy flavor of Spanish smoked paprika is unique, and it's worth trying if you're looking to experiment with new flavors.

    Sweet Paprika

    On the other end of the spectrum is sweet paprika, made from sweeter peppers. This type has a milder flavor and less heat than smoked paprika. It's great for adding a subtle sweetness to dishes without overpowering them with spices.

    Sweet paprika can be used in all kinds of recipes, from soups to sauces, and it goes well with vegetables.

    Hungarian Paprika

    Hungarian paprika is another popular type of spice. It's made from peppers grown in Hungary and has a much milder flavor than smoked varieties, with little to no heat.

    Hungarian paprika is great for adding color to dishes without overpowering them with spices. It's commonly used in Hungarian stews and goulashes and can also be used in soups, sauces, and marinades.

    Using Paprika in Spice Rubs

    Adding spice rubs to your favorite dishes can spice up the flavor, add texture, and make a delicious dish even more appealing. Using paprika in spice blends is a great way to achieve this. Paprika lends spice and a vibrant hue for aesthetic appeal and a subtle smoky flavor.

    Often used alone or combined with other spices, it's one of the most versatile ingredients in your spice cabinet! Paprika typically comes as a fine powder which allows you to play around with different recipes and spice blends. Experimenting with flavors is an excellent way to find the perfect blend for any dish!

    Paprika vs Cayenne Pepper

    Paprika and Cayenne Pepper are two fiery spices with similarities and differences. They are both great for the Anti Inflamatory Diet.

    Paprika is typically made from sweet red bell peppers that have been dried and finely ground. It has a mild flavor, with a smoky flavor depending on the type. Depending on its origin and preparation, it can range in heat from mild to hot.

    Cayenne pepper is made from dried chili peppers. It has a bright red color and an intense heat that can overwhelm some palates. The heat of cayenne pepper comes primarily from capsaicin, one of the active compounds found in chili peppers.

    Paprika vs Ordinary Chili Powder

    Regarding spicing meals and adding flavor, paprika, and chili powder are popular options. So which one should you choose? Here is a comparison of the two ingredients to help you make an informed decision.

    Paprika is made from sweet bell peppers that have been dried and ground into a powder. It has a mild, sweet flavor and can range in color from orange-red to deep red. Paprika is used for color and flavor and often provides a red hue to Spanish dishes such as paella.

    Ordinary chili powder, on the other hand, is made from ground chilis mixed with other spices like cumin, oregano, garlic powder, and/or onion powder. It has more kick than paprika but less heat than cayenne pepper or hot sauce. Chili powder is usually used in Mexican dishes such as tacos or enchiladas.

    Best Way to Store Paprika

    An airtight container is by far the best way to store paprika. Not only is this a great way to ensure that air and moisture won't interact with it, but it also ensures that there's no interaction from other smells in your pantry that could overtake the paprika flavor.

    Furthermore, keeping your airtight container in a cool and dark place, such as a cupboard or pantry, will help extend its shelf-life further and keep your paprika as flavorful as possible.

    Add Paprika to Your Spice Cabinet Today!

    No matter what dish you're preparing, paprika is a must-have ingredient for your spice cabinet. Not only does paprika add a burst of flavor and color to your meals, but it also comes with a variety of health benefits.

    Whether you're looking for something smoky like smoked paprika, something sweet like paprika de la Vera, or maybe even something spicy like hot paprika paprika has a flavor for every cooking occasion. So go ahead, add paprika to your spice cabinet, and give your dishes a delicious taste of paprika today!

    21 Easy Kale Recipes That Taste Amazing

    January 14, 2024 by Angela Milnes

    Kale recipes ideas.

    Today at The Instant Pot Table we are sharing 20 Easy Kale Recipes That Are Super Tasty. For a long time, I didn't have a clue how to cook kale. It was not a food I grew up eating. However, Kale is full of nutrition and there are lots of benefits of kale. 

    Kale is a dark leafy green packed with Vitamins and Minerals. It's a great food to use in family meals, salad,s and smoothies. We love adding kale to our meals and smoothies and today I'm sharing some great recipes for you to try.

    Easy kale recipes for the family.
    [feast_advanced_jump_to]

    21 Healthy and Easy Kale Recipes

    Whether you're looking for Kale smoothie recipes or some fantastic Kale salad recipes look no further. There are plenty of ideas in this post. I'll also share more nutritional facts about Kale further in this post.

    Braised Kale, Bacon And Egg On Toast Recipe

    This Instant Pot Recipe is good to serve during lunch or dinner. This healthy meal will surely be loved by your whole family. Do not miss this recipe and try it now!

    Braised kale and egg.

    Sweet Potato, Kale, And Shrimp Skillet

    This sweet potato, kal,e and shrimp skillet recipe is so quick and easy to prepare that you might just get hooked by the simplicity that only a one-pan meal can provide. You can use either fresh or frozen shrimp in this recipe. Serve it with some bread on the side for an even heartier meal! 

    Sweet potato, shrimps, and kale in a skillet.

    Kale Pesto Avocado Grilled Cheese

    This whole-wheat kale pesto avocado grilled cheese recipe makes for a quick and satisfying supper—and it comes together faster than you can get takeout! Simply slice an avocado and make some homemade or store-bought pesto, and put it on two pieces of whole-wheat bread with some shredded mozzarella.

    Breakfast Pizza With Kale Pesto And Sun Dried Tomatoes

    This breakfast pizza with kale pesto and sun-dried tomatoes is made with a crust that has been pre-baked for ten minutes and then topped with delicious toppings like sun-dried tomatoes, basil pesto, mozzarella cheese, and baby kale. The result? A perfectly tasty combination of flavorful vegetables!

    Kale pesto breakfast pizza.

    Avocado Toast With Lemon And Kale

    This avocado toast with lemon and kale pesto is the perfect breakfast (although, you might want it as a snack too!) It's super-quick to make, tasty, and satisfying. The kale pesto gives the recipe an amazing flavor and adds freshness!

    Avocado toast with massaged kale.

    Kale And Quinoa Salad With Lemon Vinaigrette

    This kale and quinoa salad is packed with goodness, made with healthy ingredients like lemon juice, garlic, red onion, fresh parsley, & olive oil. Kale gives this salad its beautiful color while the quinoa helps you feel full for hours. The result is a wonderful dish that's good to include in your dinner or lunch.

    Kale and quinoa salad on a plate served with a fork.

    Grilled Kale Salad with Berries & Nectarines

    This grilled kale salad is a light and healthy meal that tastes as great as it looks. The sweetness of the berries and nectarines goes perfectly with the earthy flavor of the kale, creating a combination that's hard not to love!

    Grilled kale salad with nectarine.

    Healthy & Easy Massaged Kale Salad

    This healthy and easy massaged kale salad recipe is the perfect light lunch or dinner. It takes just a few minutes to whip up, and you'll love snacking on the leftovers later in the week. Healthy never tasted so good!

    Kale salad prosciutto parmesan on a plate.

    Couscous Kale Salad

    This couscous kale salad with pesto dressing is an easy light meal that's packed full of nutrition. It's quick to make, too, so it can easily become a weeknight staple in your home!

    Kale couscous salad in a bowl.

    Greek Kale Salad With Avocado

    This Greek kale salad is a healthy and tasty recipe. The dressing made from avocado, lemon juice, garlic, and dill brings out the flavors in the other ingredients, creating a delicious salad that you'll want to make again and again!

    Greek kale salad on a plate.

    More Simple Kale Recipes

    Spiralized Sweet Potato, White Bean And Kale Bake

    This spiralized sweet potato, white bean, and kale bake is a healthy meal that can be made in advance. It's perfect for using up leftover vegetables or prepping on the weekend for an easy dinner during the week. Plus, it's vegan-friendly!

    Sweet potato, white bean, and kale bake in a skillet.

    Kale Tomato Dal

    This kale tomato dal is a hearty, nourishing meal, full of healthy vegetables and Indian spices. Make it in your trusted Instant Pot or pressure cooker for an easy dinner in no time!

    Kale tomato dal in a pot served with lemon wedge.

    Kale Stir Fry With Crispy Curried Tofu

    This kale stir-fry is made with crispy curried tofu and a rainbow of vegetables: red bell pepper, carrots, onion, and broccoli. It's quick to make and full of flavor! Plus, it's vegan and gluten-free!

    Kale stir fry with crispy curried tofu in a bowl.

    Curried Cauliflower Rice Kale Soup (Paleo, Vegan)

    This curried cauliflower rice kale soup is a delicious, warm, and comforting meal that can be served as a light dinner or a satisfying lunch. It's vegan, gluten-free, and packed with flavor!

    Curried cauliflower rice kale soup.

    Easy Kale Feta Egg Toast

    This kale feta egg toast is a delicious and easy breakfast that can be served as a light dinner as well! The combination of smoked paprika, sesame seeds, and avocado will make your taste buds sing.

    Fale feta egg Florentine on a plate.

    Kale Tomato Tortellini Soup

    This kale tomato tortellini soup is a delicious, comforting meal that's ready in just 10 minutes. Plus, it can be made in one pot! With no prep or chopping required, this easy dinner recipe is sure to become a weeknight favorite.

    Kale tomato tortellini soup in a bowl.

    Quinoa Stuffed Butternut Squash With Cranberries And Kale

    This quinoa-stuffed butternut squash is a hearty meal that's perfect for an easy dinner. The combination of kale, cranberries, and goat cheese gives the recipe endless flavor!

    Stuffed butternut with kale.

    Kale And Eggplant Baked Ziti

    This kale and eggplant-baked ziti is an easy dinner recipe that's made with hearty ziti noodles, fresh kale, and marinara sauce. It's topped off with some melted mozzarella cheese for the perfect comforting dish.

    Kale baked eggplant in a dish.
    • « Previous Page
    • 1
    • …
    • 13
    • 14
    • 15
    • 16
    • 17
    • …
    • 19
    • Next Page »
    Angela Milnes.

    Hi I'm Angela

    Welcome to Eat Your Beets where you'll find Healthy and Nutritious Family Recipes that are tasty and simple to cook.

    More About Me

    Spring Recipes

    • edamame stir fry in a white bowl.
      Easy Edamame Stir Fry (15-Minute Protein-Packed Side Dish)
    • Best Gravlax Salmon With Dill (Cured Salmon).
      Best Gravlax Salmon With Dill (Cured Salmon)
    • One Pan Chicken And Asparagus.
      One Pan Chicken And Asparagus
    • Chicken And Cabbage Stir Fry Recipe.
      Chicken And Cabbage Stir Fry Recipe
    • Zucchini Egg Bake Recipe.
      Best Zucchini Egg Bake Recipe
    • How To Make Sun Dried Tomatoes Without Oil.
      How To Make Sun Dried Tomatoes Without Oil – Easy Oven Method

    Popular Recipes 💗

    • best stuffed mushrooms.
      The Best Stuffed Mushrooms
    • Slow Cooker Chicken Bacon Ranch Pasta.
      Slow Cooker Chicken Bacon Ranch Pasta
    • Baked Ricotta On A Spoon.
      Bariatric Friendly Ricotta Bake Recipe
    • Fun Veggie Train With Bell Peppers.
      Fun Veggie Train With Bell Peppers
    • Best Blueberry Smoothie Bowl topped with fruit.
      Best Blueberry Smoothie Bowl Recipe
    • Grilled Eggplant With Lemon Dip.
      Grilled Eggplant With Lemon Dip
    • Air Fryer Asparagus with Parmesan.
      Air Fryer Asparagus with Parmesan
    • Sheet Pan Chicken Fajitas.
      Sheet Pan Chicken Fajitas

    Footer

    As Seen In

    As Seen In.
    • Facebook
    • Pinterest

    Privacy Policy

    Accessibility Policy

    ↑ Back To Top

    Copyright © 2025 | Eat Your Beets | All Rights Reserved

    Rate This Recipe

    Your vote:


    A rating is required
    A name is required
    An email is required