​

Eat Your Beets

  • About
  • Spring Recipes
  • Vegetables
  • Side Dishes
  • Recipe Index
menu icon
go to homepage
  • About
  • Spring Recipes
  • Vegetables
  • Side Dishes
  • Recipe Index
    • Facebook
    • Pinterest
  • subscribe
    search icon
    Homepage link
    • About
    • Spring Recipes
    • Vegetables
    • Side Dishes
    • Recipe Index
    • Facebook
    • Pinterest
  • ×
    Sign Up To Our Newsletter →
    Home » Recipe index

    Bacon Wrapped Air Fryer Hot Dogs

    October 5, 2024 by Angela Milnes

    Bacon Wrapped Air Fryer Hot Dogs.

    Want to upgrade your hot dog game without firing up the grill? These crispy, juicy bacon wrapped hot dogs in air fryer are salty, smoky, and seriously satisfying—done in under 15 minutes!

    Bacon Wrapped Air Fryer Hot Dogs.

    These bacon-wrapped hot dogs are a game day favorite, summer BBQ hero, and weeknight winner all in one. The air fryer gives you crispy bacon without the mess, and the combo of juicy hot dog + smoky bacon? Absolute magic. If you’re into easy mains like Air Fryer Chicken Fajitas With Cotija Cheese or Air Fryer BBQ Chicken Wings, this one’s a must-try.

    [feast_advanced_jump_to]

    💖 Why This Recipe Works

    • Easy: Using an air fryer to make bacon-wrapped hot dogs is an easy way to upgrade your everyday meal.
    • Party Food: This air fryer hot dogs recipe makes a great snack for parties or game-day gatherings. The crispy bacon adds texture and flavor.
    • Versatile: You can customize the toppings to suit every taste. Try Keto Hot Dog Buns or pair them with Goat Cheese Dip for a low-carb option.

    ⭐ Star Ingredients

    Bacon wrapped hot dog ingredients.
    • Hot Dogs: Choose good-quality beef hot dogs with a snappy casing—they hold up well and taste amazing after air frying.
    • Bacon: Regular or thick-cut bacon both work. I like to stretch the slices slightly when wrapping to ensure even crisping.
    • Hot Dog Buns: Go for soft buns that can hold up to juicy bacon-wrapped dogs. Lightly toasted is best for contrast.

    For the complete list of ingredients with measurements and instructions, please see the recipe card at the bottom of the post.

    📖  Substitutions & Variations

    • Turkey Dogs: Use turkey sausages instead of pork for a lighter option.
    • Chili Cheese Dogs: Add chili and cheese for an indulgent twist.
    • Mini Bacon-Wrapped Dogs: Use cocktail sausages or cut hot dogs in half. Wrap with half a slice of bacon and secure with a toothpick. Great for lunchboxes or birthday parties!
    • Dry Rub Seasoning Hack: Before air frying, dust bacon with:
      • Brown sugar + chili powder (sweet heat).
      • Paprika + garlic powder (BBQ-style).
      • Everything bagel seasoning (trend-friendly!).

    Looking for more fun, flavorful twists? Try these with Air Fryer Onion Rings or Air Fryer Cauliflower Pizza on the side.

    🔪 How To Make Air Fryer Hot Dogs?

    Uncooked hotdog wrapped in uncooked bacon on a wooden board.
    1. Step 1: Wrap each uncooked hot dog with 1 slice of uncooked bacon. Completely wrap the hotdog.
    Bacon wrapped hot dogs in air fryer basket.
    1. Step 2: Place each wrapped hotdog in the air fryer basket and cook at 400°f for 10-12 minutes, depending on how cooked you prefer your bacon.
    Cooked bacon wrapped hot dogs in air fryer basket.
    1. Step 3: Remove the bacon-wrapped hotdogs from the air fryer and let them sit for 1 minute.
    Hot dog in bread bun.
    1. Step 4: Clean and dice jalapeño.
    Hot dog wrapped in bacon stuffed in bread bun.
    1. Step 5: Place the hotdog in a bun and top with cheese, onion, and jalapeños. You can use toasted buns if you prefer.
    Bacon wrapped hot dogs on a serving tray.
    1. Step 6: These cooked hotdogs are juicy and pack a punch full of flavor, but if you need more, you can add mustard, ketchup, or BBQ sauce.
    Eating bacon wrapped hot dog.

    Best Toppings For Hot Dogs

    • Bacon and cheese.
    • BBQ sauce, diced onion, and cheddar cheese.
    • Yellow mustard and relish.
    • Ketchup, mayonnaise and diced pickles.
    • Chili and cheese.

    👩‍🍳 Expert Tips

    • Preheat the air fryer before adding the hot dogs.
    • Make sure bacon is wrapped tightly.
    • Don’t overcrowd the basket—cook in batches if needed.
    • Overlap ends slightly and secure with a toothpick (if needed).
    • Stretch the bacon slightly to get full coverage with fewer gaps. This helps reduce curling and ensures crisp, even cooking.

    💭 FAQs

    What Is A Hot Dog Wrapped In Bacon Called?

    The bacon-wrapped hot dog is often referred to as a “baconator” a “bacon-wrapped wiener or a Danger Dog. A bacon-wrapped hotdog is also sometimes called pig in blankets. Whatever you call it, this dish is sure to be a hit! Hot dogs air fry well and taste delicious with your favorite toppings.

    Do You Cook Bacon Before Wrapping?

    No need—just wrap raw bacon around the hot dog and let the air fryer do it's magic.

    What Is The Best Bacon For Air-Fried Bacon Wrapped Hot Dogs?

    For this recipe, it is best to use thick-cut bacon. Thin-cut bacon slices can easily become too crisp when cooked in the air fryer. You can use regular bacon or even turkey bacon if you prefer. Both will give the same smoky flavor and make the best hot dogs.

    How To Store Air Fried Hot Dogs

    Store leftovers in an airtight container in the fridge for 2–3 days. Freeze for up to 3 months.

    💖 Serving Suggestions

    Pair these bacon wrapped hot dogs in air fryer with:

    • Potato Salad: Try Smashed Potato Salad.
    • Coleslaw: Red Cabage Coleslaw is light and crunchy.
    • Baked Beans: Like Vegan Baked Beans for a flavor punch.
    • Corn on the Cob: Try Air Fryer Corn On The Cob for an easy veggie.
    • French Fries: Air Fryer French Fries are crispy and classic.
    • Berry Salad: Try a Berry Salad Recipe With Goat Cheese for balance.

    Use leftover bacon hot dogs in:

    • Quesadillas with cheese and BBQ sauce.
    • Sliced on pizza.
    • Diced in mac & cheese.
    • Chopped into breakfast hash.
    Air fried hot dogs wrapped in bacon.

    🍽 Try More Fantastic Air Fryer Sides

    • Air Fryer Bok Choy on a white plate covered in paprika.
      Air Fryer Bok Choy
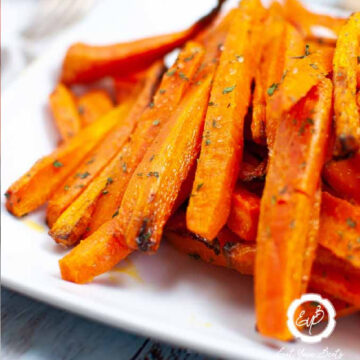
    • Air Fryer Carrot Fries.
      Crispy Air Fryer Carrot Fries
    • How To Roast Peppers In Air Fryer.
      How To Roast Peppers In Air Fryer
    • Air Fryer Crispy Chicken Wings.
      Air Fryer Crispy Chicken Wings

    Did you make this recipe? Leave a review and a ⭐⭐⭐⭐⭐ rating below, or tag us in our Facebook Group! Alternatively, bookmark it in your browser or save to Pinterest.

    Bacon Wrapped Air Fryer Hot Dogs.

    Air Fryer Hot Dogs

    Angela Milnes
    Try these bacon wrapped hot dogs in air fryer! You'll love how simple this recipe is.
    5 from 3 votes
    Print Recipe Pin Recipe Rate this Recipe
    Prep Time 10 minutes mins
    Cook Time 12 minutes mins
    Total Time 22 minutes mins
    Course Dinners
    Cuisine American
    Servings 8 Servings
    Calories 263 kcal

    Ingredients
      

    • 8 Hotdogs
    • 8 Slices Bacon
    • Shredded Cheese
    • 1 Fresh Jalapeño
    • ¼ Cup Diced Onion
    • 8 Hot Dog Buns
    • 1 Tbsp Ketchup
    • 1 Tbsp Mustard

    Instructions
     

    • Wrap each uncooked hotdog with 1 slice of uncooked bacon. Completely wrap the hotdog.
    • Place each wrapped hotdog in the air fryer basket and cook at 400°f for 10-12 minutes depending on how cooked you prefer your bacon.
    • Remove the bacon-wrapped hotdogs from the air fryer and let them sit for 1 minute.
    • Clean and dice jalapeño.
    • Place the hotdog in a bun and top with cheese, onion, and jalapeños. You can use toasted buns if you prefer.
    • These bacon-wrapped hotdogs are juicy and pack a punch full of flavor but if you need more, you can add mustard, ketchup or bbq sauce.

    Notes

    How To Get The Bacon Extra Crispy?
    Preheat the air fryer for a few minutes before putting in your bacon-wrapped hot dogs. Make sure your bacon is completely wrapped around the hotdog to ensure you cook the hot dogs evenly.

    Nutrition

    Calories: 263kcalCarbohydrates: 32gProtein: 10gFat: 11gSaturated Fat: -9gPolyunsaturated Fat: 3gMonounsaturated Fat: 4gTrans Fat: 0.01gCholesterol: 20mgSodium: 704mgPotassium: 144mgFiber: 1gSugar: 4gVitamin A: 43IUVitamin C: 1mgCalcium: 78mgIron: 3mg
    Print Recipe Pin Recipe Rate this Recipe
    Tried this recipe?Let us know how it was!

    Crispy Almond Crusted Chicken (Air Fried or Oven Baked)

    October 5, 2024 by Angela Milnes

    Air Fryer Almond Crusted Chicken.

    Crispy, golden, and ready in just 20 minutes, this Air Fryer Almond Crusted Chicken brings big crunch and serious staying power. Thanks to the almonds and lean chicken, it’s a satisfying, feel-good dinner that keeps everyone happy—without the mess of traditional frying.

    Air Fryer Almond Crusted Chicken.

    This one’s got that weeknight dinner magic: simple ingredients, quick cook time, and a crunchy coating that rivals fried chicken. It’s naturally gluten-free, great for meal prep, and loved by picky eaters too.

    If you're into crispy mains, check out my Air Fryer Butterfly Chicken, Air Fryer Sausage Quiche, or these juicy Buffalo Chicken Tenders.

    [feast_advanced_jump_to]

    💖 Why This Recipe Works

    • Crispy Without the Calories – The air fryer transforms almonds into a crunchy, golden crust—no deep fryer needed.
    • Nutty, Satisfying Flavor – The almond coating adds rich texture and long-lasting energy.
    • Air Fryer or Oven? Your Call! – Whether you're team air fryer or oven-baked, this recipe delivers that crave-worthy crunch with minimal effort.

    ⭐ Star Ingredients

    air fryer almond crusted chicken ingredients.
    • Almonds – The real crunch heroes! I always use raw almonds and pulse them just enough to get those rough, craggy crumbs—none of that fine dust here. That texture is key for a crust that actually crunches and doesn't just melt into mush.
    • Chicken Breasts – Butterfly them like a pro! Thinner cuts cook quicker and more evenly, and bonus: more surface area for that delicious almond coating to cling to. It's basically crust-to-chicken ratio perfection.
    • Cornstarch – My secret weapon for the ultimate crispy grip. It gives the egg something to stick to and creates a nice dry base so the almond coating doesn’t slide off mid-fry.

    For the complete list of ingredients with measurements and instructions, please see the recipe card at the bottom of the post.

    📖  Substitutions & Variations

    • Use Almond Flour – Great for a finer crust and ideal for gluten-free or low-carb eaters.
    • Spicy Kick – Add smoked paprika, chili powder, or cayenne to the almond mix.
    • Add Cheese – Mix in grated Parmesan for a cheesy, nutty crust.
    • Switch the Nuts – Walnuts or pecans also crisp up beautifully.
    • Add Herbs – I like to add dried rosemary or thyme for a fragrant addition.
    • Make It Keto-Friendly – Skip the cornstarch and use crushed pork rinds or coconut flour instead.

    Pair your tenders with my popular Strawberry Jalapeno Salsa recipe or herby Quinoa Salad for a balanced plate.

    ♨ Make Almond Crusted Chicken Tenders

    • Want a kid-friendly twist? Slice your chicken breasts into strips before dredging and coating. Crispy almond chicken tenders are quick to cook, easy to dip, and perfect for lunchboxes or party platters. Just reduce the cook time slightly—around 9–10 minutes in the air fryer should do the trick!

    🔪 How To Make Crispy Almond Crusted Chicken

    almonds in food processor.
    1. Step 1: Add your almonds to a food processor. Pulverize your almonds to the size of crumbs. Separate into three bowls your corn starch with natural seasoning, almonds, and eggs.
    bowls with egg, ground almond and corn starch and a piece of chicken breast being dredged in the mixture.
    1. Step 2: Coat your boneless, skinless chicken breasts in corn starch on both sides. Transfer them to your egg mixture, and fully coat. Finally, transfer your breast to your almonds, on both sides.
    almond crusted chicken in air fryer basket.
    1. Step 3: Preheat your air fryer to 385 Degrees Fahrenheit for 5 minutes. Transfer the chicken tenders to your air fryer.
    almond crusted chicken in air fryer.
    1. Step 4: Spray with oil and cook your chicken for 12 minutes at 385 Or until they reach an internal temperature of 165°F. Serve your crispy chicken breast and enjoy warm!
    Crispy air fried chicken on a plate.
    1. Step 5: If oven baking Preheat oven to 400°F (200°C) and line a baking tray with parchment or a rack. Coat chicken tenders as above. Place on tray, mist lightly with oil, and bake for 18–20 minutes, flipping halfway through. Finish with 1–2 minutes under the broiler for a golden finish.

    💡Hint: Press the coating in firmly so it stays on and gets super crisp during cooking!

    👩‍🍳 Expert Tips

    • Space Them Out – Avoid crowding the air fryer basket so each piece crisps properly.
    • Use a Thermometer – Hit that 165°F sweet spot without overcooking.
    • Batch Cook & Freeze – Cripsy almond chicken breast freezes beautifully, raw or cooked!

    💭 FAQs

    What type of almonds should I use for the crust?

    Finely chopped or crushed raw almonds are ideal for creating a crunchy coating. Using a food processor can help achieve a consistent texture.

    Can I use almond flour instead of crushed almonds?

    Yes, almond flour can be used as a substitute for a smoother crust. It provides a similar nutty flavor with a finer texture.

    How do I get the coating to stick when preparing crispy almond chicken?

    Dredge the chicken in cornstarch and seasonings, then dip it into beaten eggs before pressing it into the crushed almonds. Be sure to follow the steps in the correct order!

    Is crispy almond chicken healthy?

    Yes! Almonds add heart-healthy fats, fiber, and vitamin E. This recipe is high in protein, low glycemic, and totally satisfying—especially when baked or air fried.

    How to store air fryer almond covered chicken?

    Cool completely and refrigerate in an airtight container for 3–4 days. Reheat in the air fryer to revive that crispy texture.

    💖 Serving Suggestions

    Here are my favorite appetizers to serve with crusted chicken.

    • Wild Rice Pilaf: – Hearty and herby.
    • Air Fryer Sweet Potato Fries – Sweet meets savory.
    • Roasted Asparagus With Goat Cheese – More golden crunch.
    • Roasted Brussels Sprouts with Maple – A little sweet, a little earthy.
    • Roasted Red Pepper Hummus – A creamy dip pairing.
    Almond crusted chicken on a plate.

    🍽 More Super Easy Chicken Recipes

    • Slow Cooker Chicken Bacon Ranch Pasta.
      Slow Cooker Chicken Bacon Ranch Pasta
    • Sheet Pan Chicken Fajitas.
      Sheet Pan Chicken Fajitas
    • Instant Pot Chicken Adobo.
      Instant Pot Chicken Adobo
    • Baked Honey Mustard Chicken Tenders.
      Honey Mustard Chicken Tenders

    Did you make this recipe? Leave a review and a ⭐⭐⭐⭐⭐ rating below, or tag us in our Facebook Group! Alternatively, bookmark it in your browser or save to Pinterest.

    Air Fryer Almond Crusted Chicken.

    Almond Crusted Chicken Air Fryer Or Oven Bakes

    Angela Milnes
    Delight in the crunch of golden-brown Almond Covered Chicken, expertly air-fried to perfection for a guilt-free treat.
    5 from 3 votes
    Print Recipe Pin Recipe Rate this Recipe
    Prep Time 10 minutes mins
    Cook Time 12 minutes mins
    Total Time 21 minutes mins
    Course Air Fryer Recipes
    Cuisine American
    Servings 4 Servings
    Calories 428 kcal

    Ingredients
      

    • 1 Cup Almonds
    • ½ Cup Cornstarch
    • Natures Seasoning
    • 2 Eggs Beaten
    • 2 Chicken Breasts Fat Trimmed (Butterfly Your Breasts to Make 4 Thinner Breasts)

    Instructions
     

    • Add your almonds to a food processor. Pulverize your almonds to the size of crumbs.
    • Separate into three bowls your corn-starch with natural seasoning, almonds, and eggs.
    • Fully coat your boneless skinless chicken breasts in corn-starch on both sides.
    • Transfer then to your egg mixture, fully coat.
    • Finally, transfer your breast to your almonds, on both sides.

    Air Fryer Almond Crusted Chicken

    • Preheat your air fryer to 385 Degrees Fahrenheit for 5 minutes.
    • Transfer your almond crusted chicken tenders to your air fryer. Spray with oil and cook your chicken for 12 minutes at 385 Or until they reach an internal temperature of 165°F.
    • Serve your crispy chicken breast and enjoy!

    Oven Baked Almond Crusted Chicken

    • If oven baking Preheat oven to 400°F (200°C) and line a baking tray with parchment or a rack.
    • Coat chicken tenders as above. Place on tray, mist lightly with oil, and bake for 18–20 minutes, flipping halfway through.
    • Finish with 1–2 minutes under the broiler for a golden finish.

    Notes

      • Space Them Out – Avoid crowding the air fryer basket so each piece crisps properly.
      • Use a Thermometer – Hit that 165°F sweet spot without overcooking.
      • Batch Cook & Freeze – Almond Crusted Chicken Breast freezes beautifully, raw or cooked!
      • To make into almond crusted chicken tenders, slice into strips and reduce the cook time slightly—around 9–10 minutes in the air fryer should do the trick!

    Nutrition

    Calories: 428kcalCarbohydrates: 22gProtein: 34gFat: 23gSaturated Fat: 3gPolyunsaturated Fat: 5gMonounsaturated Fat: 13gTrans Fat: 0.03gCholesterol: 154mgSodium: 164mgPotassium: 711mgFiber: 5gSugar: 2gVitamin A: 153IUVitamin C: 1mgCalcium: 114mgIron: 2mg
    Print Recipe Pin Recipe Rate this Recipe
    Tried this recipe?Let us know how it was!

    Easy Air Fryer Roasted Potatoes

    October 5, 2024 by Angela Milnes

    Easy Air Fryer Roasted Potatoes.

    Super crispy on the outside and soft and tender on the inside- these Air Fryer Roasted Potatoes are the perfect side dish you can put together in minutes and pair with practically any other main of your choice. With a super simple seasoning mix and 5 minutes of prep time, you can get these delicious potatoes ready!

    air fryer roasted potatoes.
    [feast_advanced_jump_to]

    💖 Why This Recipe Works

    • Effortless Cooking: Prepare these Air Fryer Roasted Potatoes with ease, saving time while achieving a crispy texture and savory flavor.
    • Healthier Option: Enjoy a guilt-free side dish with reduced oil usage in the air fryer, ensuring a deliciously crispy result.
    • Versatile Side: These Air Fryer Roast Potatoes are a perfect accompaniment to various dishes, adding a satisfying crunch and taste versatility to your meals.

    ⭐ Star Ingredients

    roasted potato ingredients.
    • Baby Red and Gold Potatoes: The main ingredient, their small size ensures quick cooking and a creamy interior with a crispy exterior.
    • Olive Oil: Helps to crisp up the potatoes in the air fryer, while adding a subtle, earthy flavor.
    • Black Pepper: Adds a mild heat and depth of flavor, enhancing the overall taste of the potatoes.
    • Salt: Amplifies the natural flavors of the potatoes, making them more savory and satisfying.

    For the complete list of ingredients with measurements and instructions, please see the recipe card at the bottom of the post.

    📖  Substitutions & Variations

    • Craving some heat? Toss in chili powder and chopped garlic for a fiery, flavor-packed kick in every bite.
    • Go herby with a sprinkle of garlic powder and Italian seasoning—simple, savory, and totally delicious.
    • Give your potatoes a Cajun twist with a bold, zesty seasoning blend that brings the perfect punch of spice!

    🔪How To Make Air Fryer Roasted Potatoes

    roasted potatoes chopped.
    1. Step 1: Wash potatoes thoroughly. Slice the baby potatoes in half or into bite-sized pieces. Place them in a large bowl.
    adding oil to potatoes.
    1. Step 2: Drizzle the potatoes with the oil and cover with the salt and pepper. Toss the potatoes around in the bowl to get a nice coating.
    seasoned potatoes in air fryer basket.
    1. Step 3: Toss the potatoes in the Air Fryer basket evenly. Cook at 400 degrees for 10 minutes. Toss well and cook for another 10 minutes or until they are golden brown and crispy.
    roasted potatoes on a plate.
    1. Step 4: Let cooked potatoes cool for a few minutes. Serve air-fried potatoes and enjoy!

    👩‍🍳 Expert Tips

    Check out these tips for making crispy roasted potatoes:

    • Oil Options: While I used regular olive oil in this recipe, feel free to use extra virgin olive oil for a different flavor profile if available in your kitchen.
    • Potato Varieties: Experiment with different potato types like baby potatoes, Yukon gold, Russet potatoes, yellow, or red potatoes for varied textures and flavors in your roasted dish.
    • Oven Roasting Option: If you lack an Air Fryer, roast your seasoned potatoes in the oven after ensuring they're thoroughly dried to achieve a similar crispy result.

    💭 FAQs

    Can I Use Frozen Potato Chunks For Air Fryer Roasted Potatoes?

    While fresh potatoes are recommended, you can use frozen potato chunks for air fryer roasted potatoes by adjusting the cooking time accordingly.

    Are Air Fryer Roasted Potatoes Healthier Than Traditional Fried Potatoes?

    Yes, air fryer roasted potatoes are considered a healthier alternative to traditional fried potatoes as they use less oil for cooking.

    How To Store Leftovers?

    For any remaining potatoes, store them in an airtight container in the refrigerator for 2-4 days to maintain their freshness and flavor.

    💖 Serving Suggestions

    Pair Air Fryer Roasted Potatoes With These side dishes:

    • Roast Chicken: Tender and flavorful, roast chicken pairs perfectly with roasted potatoes. The savory flavors of the chicken complement the crispy exterior and creamy interior of the potatoes.
    • Grilled Steak: Juicy and hearty, grilled steak is a delicious match for roasted potatoes. The rich flavors of the steak contrast nicely with the crispy texture of the air fryer potatoes, creating a satisfying meal.
    • Garlic Aioli: Whip up a creamy garlic aioli for a flavorful dip that complements the roasted potatoes perfectly.
    • Spicy Chipotle Mayo: Add a kick to your meal with a spicy chipotle mayo dip, adding a smoky and spicy twist to each bite.
    • Herb Infused Sour Cream: Elevate your dining experience with a herb-infused sour cream dip, enhancing the flavors of the roasted potatoes.
    • Salmon Fillets: For a lighter option, consider serving roasted potatoes with grilled or baked salmon fillets. The delicate flavor and flaky texture of the salmon complement the creamy potatoes beautifully, while the crispy skin adds a satisfying crunch.
    roasted potatoes on a plate.

    🍽 More Fantastic Air Fryer Recipes

    • Crispy Air Fryer Avocado Fries Recipe.
      Crispy Air Fryer Avocado Fries Recipe
    • Air Fryer Smoked Turkey Legs.
      Best Air Fryer Smoked Turkey Legs
    • Air Fryer Bok Choy on a white plate covered in paprika.
      Air Fryer Bok Choy
    • Philly Cheesesteaks With Sauteed Peppers and melted cheese.
      Air Fryer Philly Cheesesteaks With Sauteed Peppers

    Did you make this recipe? Leave a review and a ⭐⭐⭐⭐⭐ rating below, or tag us in our Facebook Group! Alternatively, bookmark it in your browser or save to Pinterest.

    Easy Air Fryer Roasted Potatoes.

    Easy Air Fryer Roasted Potatoes

    Angela Milnes
    These Air Fryer Roasted Potatoes are crispy on the outside, soft and fluffy on the inside, and seasoned to perfection! With minimal effort, the air fryer transforms simple potatoes into a delicious side dish that pairs well with any meal.
    5 from 4 votes
    Print Recipe Pin Recipe Rate this Recipe
    Prep Time 5 minutes mins
    Cook Time 20 minutes mins
    Total Time 25 minutes mins
    Course Appetizers
    Cuisine American
    Servings 6 Servings
    Calories 216 kcal

    Ingredients
      

    • 3 Ibs Baby Red and Gold Potatoes
    • 2 tablespoon Olive Oil
    • 2 teaspoon Black Pepper
    • 2 teaspoon Black Pepper
    • 2 teaspoon Salt

    Instructions
     

    • Wash potatoes thoroughly. Slice the baby potatoes in half or into bite sized pieces. Place them in a large bowl.
    • Drizzle the potatoes with the oil and cover with the salt and pepper. Toss the potatoes around in the bowl to get a nice coating.
    • Toss the potatoes in the Air Fryer basket evenly. Cook at 400 degrees for 10 minutes. Toss well and cook for another 10 minutes or until they are golden brown and crispy.
    • Let cooked potatoes cool for a few minutes. Serve air fried potatoes and Enjoy!

    Notes

    Oil Options: While I used regular olive oil in this recipe, feel free to use extra virgin olive oil for a different flavor profile if available in your kitchen.
    Potato Varieties: Experiment with different potato types like baby potatoes, Yukon gold, Russet potatoes, yellow, or red potatoes for varied textures and flavors in your roasted dish.
    Oven Roasting Option: If you lack an Air Fryer, roast your seasoned potatoes in the oven after ensuring they're thoroughly dried to achieve a similar crispy result.

    Nutrition

    Calories: 216kcalCarbohydrates: 40gProtein: 3.3gFat: 5gSaturated Fat: 1gPolyunsaturated Fat: 1gMonounsaturated Fat: 3gSodium: 1564mgPotassium: 955mgFiber: 5gSugar: 2gVitamin A: 5IUVitamin C: 45mgCalcium: 28mgIron: 2mg
    Print Recipe Pin Recipe Rate this Recipe
    Tried this recipe?Let us know how it was!

    More Air Fryer Recipes:

    • Air Fryer Roasted Carrots
    • Air Fryer Onion Rings
    • Beef Taquitos Air Fryer Recipe
    • Air Fryer Chicken Wings
    • Air Fryer Nachos With Pulled Pork
    • Air Fryer Chicken Tenders With Buffalo Sauce

    Quick Chicken Curry Air Fryer Recipe

    October 5, 2024 by Angela Milnes

    Quick Chicken Curry Air Fryer Recipe.

    If you're looking for a quick Chicken Curry Air Fryer Recipe then this is the one for you! Made in the air fryer, this curry is full of flavor and can be on the table in just 30 minutes.

    This air fryer chicken curry is super easy and quick to make and is packed full of flavor. Made with chicken breasts, this curry is perfect for a midweek meal or weekend dinner.

    Quick Chicken Curry Air Fryer Recipe.
    [feast_advanced_jump_to]

    💖 Why This Recipe Works

    • Tantalizing Flavor: Aromatic spices combine to create a chicken curry that's bursting with flavor.
    • Effortless Preparation: Air fryer curry chicken is a simple dish and a stress-free meal.
    • Healthy and Satisfying: Enjoy a protein-packed dish with this curry chicken air fryer recipe. If you love curry why not try this Pumpkin Curry Soup!

    ⭐ Star Ingredients

    air fryer chicken curry ingredients.
    • Olive Oil: This not only prevents the chicken from sticking but also helps in infusing the flavors of the spices into the meat.
    • Yellow Onion (Chopped): Add a sweet and slightly pungent flavor that forms the base for any good curry, contributing depth and aroma.
    • Garlic Cloves: Lends a robust, earthy flavor that complements the spices, adding a layer of complexity to the curry.
    • Curry Powder: Imparts a warm, exotic flavor with its blend of various spices, giving the curry its distinctive taste.
    • Ginger Powder: Adds a spicy, slightly sweet flavor and aroma that pairs wonderfully with the curry powder, enhancing its warmth.
    • Salt: Brings out the natural flavors of the chicken and balances the spices, making the curry more savory.
    • Chicken Breasts (Diced): Provide a lean, tender protein that absorbs the flavors of the curry beautifully.
    • Corn-Starch Mixed With Water: Acts as a thickening agent, giving the curry a rich, hearty consistency that clings to the chicken pieces.
    • Heavy Cream: Adds a luxurious, velvety texture and a hint of sweetness that tempers the heat of the curry, making it more balanced and satisfying.
    • Chopped Cilantro: Provides a fresh, citrusy note that cuts through the richness of the curry, adding a burst of freshness.
    • Cayenne Powder (For A Spicier Option): For those who like it hot, cayenne pepper can add an extra kick, intensifying the heat of the curry and adding another layer of flavor.

    For the complete list of ingredients with measurements and instructions, please see the recipe card at the bottom of the post.

    📖  Substitutions & Variations

    • Boneless Chicken Thighs: You can swap the chicken breast for boneless skinless chicken thighs. The cooking time will be the same.
    • Coconut Milk: You can switch the heavy cream for coconut milk in this air fryer curry recipe.
    • Curry Paste: You can use curry powder or your favorite curry paste in this air fryer chicken curry.

    🔪 How To Make Air Fryer Chicken Curry

    chicken curry ingredients in a bowl.
    1. Step 1: In a mixing bowl, add the chicken, onion, and garlic.
    chicken curry ingredients mixed in a bowl.
    1. Step 2: Add the oil and spices and mix. Marinate for 30 minutes.
    chicken curry mixture in a pan sitting in the air fryer.
    1. Step 3: Place the curry into a pan that fits your air fryer basket. Use a shallow pan to spread out the chicken. Set the air fryer to 400°f and cook for 15 minutes.
    chicken curry in the air fryer basket.
    1. Step 4: Set the air fryer to 400°f and cook for 15 minutes.
    chicken curry in the air fryer basket.
    1. Step 5: Remove cooked chicken and juices to a mixing bowl. Add cream and cornstarch slurry. Mix.
    chicken curry in the air fryer basket.
    1. Step 6: Place back in the pan and the air fryer basket. Cook at 400°F for 7 more minutes. Remove and serve. Top your air fryer curry with chopped cilantro or fresh coriander and pair it with basmati rice and fresh, warm naan.

    👩‍🍳 Expert Tips

    • Create a Smooth Slurry: When preparing the cornstarch slurry, ensure that it is well-mixed and free of lumps. To achieve this, gradually add cold water to the cornstarch while constantly whisking. This prevents the cornstarch from clumping and ensures a smooth consistency. You can use a fork or a small whisk to mix the slurry thoroughly. Aim for a smooth, lump-free texture to avoid any undesirable lumps in your curry.

    💭 FAQs

    What Is Chicken Curry?

    Chicken curry is a dish that originates from India and is made with a variety of different spices. The most common spices in chicken curry are cumin, turmeric, garam masala, and chili powder. Curry can be made with either chicken breasts or thighs and is usually served with rice or naan bread.

    How Long Do I Cook Chicken Curry In The Air Fryer?

    Cooking time for chicken curry will vary depending on the size and thickness of your chicken. For this recipe, cook time is set at 15 minutes, plus another 7 minutes however you may need to adjust this time depending on the size of your chicken.

    Can I Make Chicken Curry Ahead Of Time?

    This chicken curry air fryer recipe can easily be made ahead of time. Simply prep the recipe as directed and store in the fridge for up to 24 hours. When ready to eat, cook in the air fryer as directed.

    What Size Pan Do I Use In The Air Fryer?

    When cooking chicken curry in the air fryer you will need to use an 8x8 inch baking dish or an air fryer cake barrel that fits snugly in your air fryer. This will ensure that the chicken cooks evenly and doesn't stick to the bottom of the pan.

    💖 Serving Suggestions

    Pairing your air-fried chicken curry with complementary sides can enhance the overall dining experience. Here's a list of items you can serve with air fryer chicken curry:

    • Basmati or Jasmine Rice: Serve your chicken curry with fragrant and fluffy basmati or jasmine rice. The mild flavor of these rice varieties complements the rich and spicy chicken curry.
    • Naan Bread: Soft and fluffy naan bread is perfect for soaking up the delicious curry sauce. You can also try different varieties like garlic naan or whole wheat naan.
    • Roti or Chapati: A healthier alternative to naan, whole wheat roti or chapati provides a wholesome accompaniment to chicken curry.
    • Cucumber Raita: Cool down the spice with a refreshing cucumber raita. This yogurt-based side dish with cucumber, mint, and spices adds a refreshing element to the meal.
    • Green Bean Salad: A simple Green Bean salad with a squeeze of lemon juice can provide a refreshing contrast to the richness of the curry.
    • Papadum: Crispy papadums or poppadoms are a popular accompaniment to Indian meals. They add a delightful crunch and can be served on the side.
    Quick Chicken Curry Air Fryer Recipe.

    🍽 More Chicken Recipes

    • Slow Cooker Chicken Teriyaki.
      Slow Cooker Chicken Teriyaki
    • Baked Honey Mustard Chicken Tenders.
      Honey Mustard Chicken Tenders
    • Instant Pot Recipes.
      Best Instant Pot Pesto Chicken 
    • Easy Crock Pot Chicken Gravy.
      Easy Crock Pot Chicken Gravy

    Did you make this recipe? Leave a review and a ⭐⭐⭐⭐⭐ rating below, or tag us in our Facebook Group! Alternatively, bookmark it in your browser or save to Pinterest.

    Quick Chicken Curry Air Fryer Recipe.

    Quick Chicken Curry Air Fryer Recipe

    Angela Milnes
    This Air Fryer Chicken Curry is quick, flavorful, and perfect for busy weeknights! Juicy chicken and a rich, spiced curry sauce make it a delicious meal, ready in no time. Serve with rice or naan for a complete dish!
    5 from 4 votes
    Print Recipe Pin Recipe Rate this Recipe
    Prep Time 45 minutes mins
    Cook Time 22 minutes mins
    Total Time 1 hour hr 7 minutes mins
    Course Air Fryer Recipes
    Cuisine Indian
    Servings 4 Servings
    Calories 352 kcal

    Ingredients
      

    • 2 tablespoon Olive Oil
    • 1 Onion Chopped (1 cup)
    • 4 Garlic Cloves minced (1, ½ Tbsp)
    • 5 Teaspoons Curry Powder
    • 1 Teaspoon Ginger Powder
    • Pinch Salt
    • 1, ½ Ibs Chicken Breasts diced into 1-inch cubes
    • 1 teaspoon Corn Starch mixed with 2 teaspoon water
    • ⅓ Cup Heavy Cream
    • 1 tablespoon Cilantro Chopped for garnish
    • 1 Teaspoon Cayenne Powder Optional for spicier option

    Instructions
     

    • In a mixing bowl, add the chicken, onion, and garlic. Add the oil and spices and mix. Marinade for 30 minutes.
    • Place curry into a pan that fits your air fryer basket. Use a shallow pan to spread out thechicken.
    • Set the air fryer to 400°f and cook for 15 minutes.
    • Remove cooked chicken and juices to a mixing bowl. Add cream and corn-starch slurry. Mix.
    • Place back in the pan and air fryer basket. Cook at 400°f for 7 more minutes.
    • Remove and serve topped with chopped cilantro and paired with basmati rice and fresh warm naan.

    Notes

    Create a Smooth Slurry: When preparing the cornstarch slurry, ensure that it is well-mixed and free of lumps. To achieve this, gradually add cold water to the cornstarch while constantly whisking. This prevents the cornstarch from clumping and ensures a smooth consistency. You can use a fork or a small whisk to mix the slurry thoroughly. Aim for a smooth, lump-free texture to avoid any undesirable lumps in your curry.

    Nutrition

    Calories: 352kcalCarbohydrates: 7gProtein: 38gFat: 19gSaturated Fat: 7gPolyunsaturated Fat: 2gMonounsaturated Fat: 8gTrans Fat: 0.02gCholesterol: 117mgSodium: 206mgPotassium: 742mgFiber: 2gSugar: 2gVitamin A: 583IUVitamin C: 6mgCalcium: 47mgIron: 2mg
    Print Recipe Pin Recipe Rate this Recipe
    Tried this recipe?Let us know how it was!

    More Easy Air Fryer Recipes

    If you love this air fryer recipe for chicken curry, you'll want to check our the following air fryer recipes:

    • Air Fryer Asparagus
    • Air Fryer Thin Sliced Chicken Breast
    • Air Fryer Corn On The Cob
    • Air Fryer Roasted Vegetables
    • Air Fryer Broccolini
    • Air Fryer Hasselback Potatoes
    • Air Fryer Zucchini Fritters
    • Air Fryer Korean Beef
    Quick Chicken Curry Air Fryer Recipe.

    Instant Pot French Onion Chicken

    October 5, 2024 by Angela Milnes

    Instant Pot French Onion Chicken.

    Introducing a delicious Instant Pot French Onion Chicken Recipe! With the Instant Pot, tender chicken breasts are smothered in a rich and flavorful French onion sauce. Say hello to a delicious twist on a classic dish that's perfect for any night of the week!

    French onion chicken in two bowls.
    [feast_advanced_jump_to]

    💖 Why This Recipe Works

    • Versatile: What I absolutely love about this French Onion Chicken recipe is the fact that it is one of the most versatile recipes I've ever tried in my kitchen.
    • Easy: This recipe is quite literally a total family favorite, and more so for me, because it comes together so easily and effortlessly.
    • Gluten Free: It is gluten-free, and a great way to enjoy all those French onion flavors, but in a meal that is filling and and nutritious. If you love French onion soup, you've definitely got to give this recipe a shot.

    ⭐ Star Ingredients

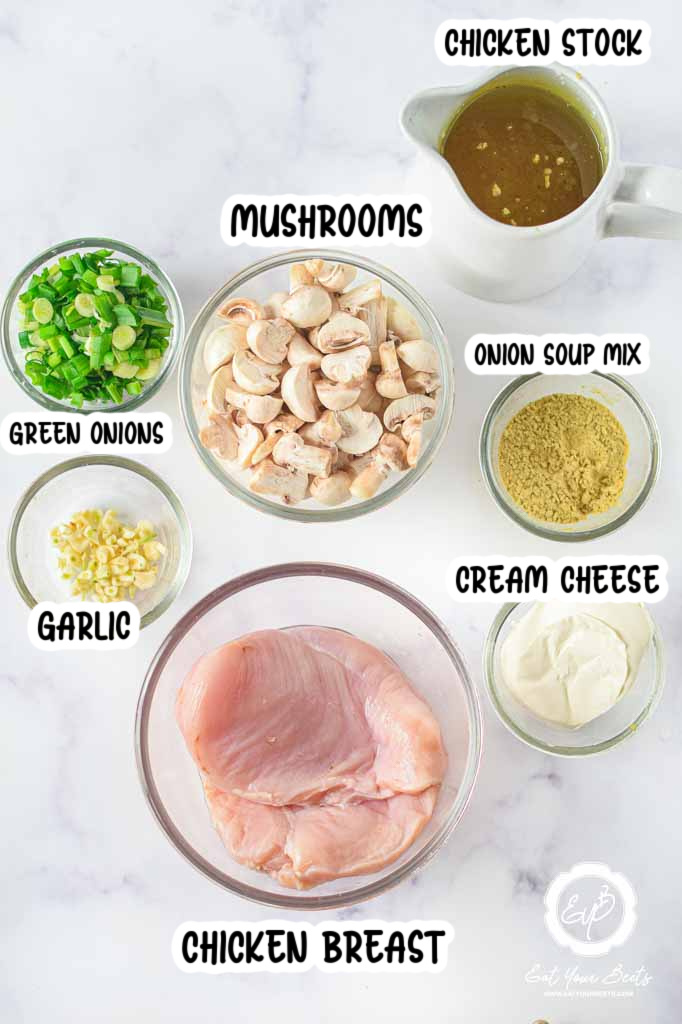
    French onion chicken ingredients.

    To make the French onion chicken, here's what you'll need.

    • Low Sodium Chicken Stock: Provides a flavorful base, ensuring that the chicken is juicy and tender.
    • French Onion Soup Mix: Adds a rich, savory flavor that gives the dish its distinctive French onion character.
    • Chopped Garlic: Infuses the dish with a robust, aromatic element that complements the other flavors perfectly.
    • Chicken Breasts: The main protein in the dish, these contribute a hearty and satisfying element.
    • Mushrooms: Add a delicious earthy flavor and a meaty texture that enhances the overall dish.
    • Cream Cheese: Gives the dish a creamy, velvety finish, adding a luxurious touch to the flavors.
    • Spring Onion: Adds a fresh, zesty note, providing a nice contrast to the rich flavors of the dish.

    For the complete list of ingredients with measurements and instructions, please see the recipe card at the bottom of the post.

    📖  Substitutions & Variations

    Like most French onion recipes, there is a bit of variation and experimentation that you can do with this recipe.

    • The onions should be cooked on medium high heat until they turn golden brown.
    • A classic French onion soup or chicken recipe needs you to have lots and lots of caramelized onions for that rich, bold flavor. For this recipe, I've used a ready French onion soup mix to make things simple.
    • If you really want to do it the authentic way, you can started off with sautéing some sliced onions in your Instant Pot. I would recommend yellow onions to make French onion chicken.
    • These caramelized onions can also add a nice bit of texture to the dish and when you team it up with a classic cheese like Gruyere cheese, it is sure to be a match made in heaven.
    • Remember to add a bit of beef stock or beef broth to the caramelized onion. This will help you recover all the brown bits which pack in the maximum flavor.
    • To caramelize onions, you can use a bit of olive oil or butter- it all depends on your personal preference.

    🔪 How To Make French Onion Chicken

    Chicken stock and onion soup mix in an Instant Pot.
    1. Step 1: Turn on the Instant Pot and select the sauté button. Add 1 ½ cups of low-sodium chicken stock.
    Stirring chicken stock and onion soup mix in an Instant Pot.
    1. Step 2: Stir in French onion soup mix (stir properly so that there are no lumps), mix, and add garlic.
    Chicken breasts added to chicken stock and onion soup mix in instant pot.
    1. Step 3: Add chicken breasts to the stock. Next, evenly top with diced mushrooms and place the block of cream cheese in the middle. Do not stir as it will melt while cooking. CANCEL the SAUTE button. Select the PRESSURE COOK button on HIGH PRESSURE for 15 minutes. (Make sure the valve is in the SEALING position.)
    Mushrooms and chicken breasts added to chicken stock and onion soup mix in instant pot.
    1. Step 4: Once the pressure-cooking cycle is over. Allow pressure to release naturally for 5 minutes, then Quick Release pressure by manually moving the valve from SEALING to VENTING position.
    Mushrooms and chicken breasts added to chicken stock and onion soup mix in instant pot.
    1. Step 5: Select the CANCEL button and take the lid off carefully. Remove the chicken pieces, shred them, and set aside.
    Shredded chicken on a plate.
    1. Step 6: Select the SAUTE button, whisk the soup with the help of a spatula, and let the soup simmer on medium-low heat for 2-3 minutes, stirring occasionally.
    Shredded chicken mixed in French onion mixture.
    1. Step 7: Return the shredded chicken breast back to the soup, along with finely diced spring onions, and stir through.
    French onion chicken cooked in instant pot.
    1. Step 8: Select the CANCEL button. Serve immediately hot with crusty bread, a bowl of pasta, or mashed potatoes.
    Instant Pot french onion chicken on a plate.

    👩‍🍳 Expert Tips

    • If you want the French onion chicken to have some extra flavor and a nutritional punch, you can use beef stock or beef broth instead of the chicken broth that the recipe calls for.
    • For this recipe, we've used chicken breasts, but you can use any other boneless or bone-in cut of meat of your choice. Chicken thighs are a great option, because they are much more tender, and pack in a lot of flavor too.
    • If you want to tenderize your chicken breast, you can use a meat mallet to break down the fibers before you add them to the soup.
    • To tie everything together, you can also add a dash of olive oil into the mix.
    • Cheese and butter can be two other interesting additions to this dish. You can use Gruyere cheese, Swiss cheese or any other shredded cheese of your choice.
    • I would highly recommend adding the cheese towards the end and letting the dish simmer for a couple of extra minutes until you get that creamy, melted cheese on the top.
    • You can also add a bay leaf or two into the mix for some extra flavor. I also love adding balsamic vinegar to tie all the flavors together.
    • I've used my Instant Pot to make this French onion chicken, but you can also use your crock pot or just stick to a large skillet that you can place over your stove top to put the dish together.

    💭 FAQs

    What type of onions should I use for French Onion Chicken?

    Yellow onions are commonly used due to their balance of sweetness and acidity, which enhances the caramelization process. However, white or sweet onions can also be used based on personal preference.

    How can I ensure my onions caramelize properly?

    Caramelizing onions requires patience. Cook thinly sliced onions over medium-low heat, stirring occasionally, until they become golden brown and sweet. This process can take 30-40 minutes. Adding a pinch of sugar can aid in caramelization.

    What type of cheese is best for topping French Onion Chicken?

    Gruyère cheese is traditionally used for its excellent melting properties and nutty flavor. If unavailable, Swiss or mozzarella cheese can be suitable substitutes

    What side dishes complement French Onion Chicken?

    This dish pairs well with mashed potatoes, roasted vegetables, or a fresh green salad, balancing the rich flavors of the chicken and onions.

    Best Way to Store French Onion Chicken

    You can store the French onion chicken in an airtight container for 3 days in the refrigerator or around 3 months in the freezer.

    💖 Serving Suggestions

    Here are my favorite vegetables to serve with Instant Pot French Onion Chicken:

    • Mashed Potatoes: Creamy mashed potatoes provide a delicious and comforting side that pairs well with the rich flavors of French Onion Chicken.
    • Roasted Brussels Sprouts With Maple Syrup, or Green Beans, add a nice contrast in texture and flavor.
    • Grilled Asparagus: Asparagus, lightly grilled and seasoned, adds a touch of elegance and freshness to the meal.
    • Purple Cauliflower Mash: For a low-carb option, consider cauliflower mash as a substitute for traditional mashed potatoes.
    French onion chicken on a plate served with a fork.

    🍽 Try These Instant Pot Dishes

    • Instant Pot Split Pea Soup.
      Instant Pot Split Pea Soup
    • Instant Pot French Onion Chicken.
      Instant Pot French Onion Chicken
    • Instant Pot Asian Pulled Pork.
      Instant Pot Asian Pulled Pork
    • Easy Vegetarian Instant Pot Gumbo.
      Easy Vegetarian Instant Pot Gumbo

    Did you make this recipe? Leave a review and a ⭐⭐⭐⭐⭐ rating below, or tag us in our Facebook Group! Alternatively, bookmark it in your browser or save to Pinterest.

    Instant Pot French Onion Chicken.

    Instant Pot French Onion Chicken

    Angela Milnes
    This Instant Pot French Onion Chicken is a savory, flavor-packed dish that brings together the rich taste of caramelized onions with tender, juicy chicken.
    5 from 4 votes
    Print Recipe Pin Recipe Rate this Recipe
    Prep Time 5 minutes mins
    Cook Time 30 minutes mins
    Total Time 35 minutes mins
    Course Dinners
    Cuisine French
    Servings 4 Servings
    Calories 332 kcal

    Ingredients
      

    • 1 ½ Cups Low Sodium Chicken Stock
    • 1 Pkt Onion Soup Mix
    • 1 Teaspoon Chopped Garlic
    • 2 Large Chicken Breasts
    • 1 ½ Cups Mushrooms Diced
    • 200 G Cream Cheese
    • ½ Cup Spring Onion Finely Diced

    Instructions
     

    • Turn on the Instant Pot and select the sauté button.
    • Add 1 ½ cups of low-sodium chicken stock. Stir in French onion soup mix (stir properly so that there are no lumps), mix, and add garlic.
    • Add chicken breasts to the stock. Next, evenly top with diced mushrooms and place the block of cream cheese in the middle, do not stir as it will melt while cooking.
    • CANCEL the SAUTE button. Select the PRESSURE COOK button on HIGH PRESSURE for 15 minutes. (Make sure the valve is in the SEALING position).
    • Once the pressure-cooking cycle is over. Allow pressure to release naturally for 5 minutes then quick release pressure by manually moving the valve from SEALING to VENTING position.
    • Select the CANCEL button and take the lid off carefully. Remove the chicken pieces, shred them and set aside.
    • Select SAUTE button, whisk the soup with the help of a spatula, and let the soup simmer on medium low heat for 2-3 minutes, stirring occasionally.
    • Return the shredded chicken breast back to the soup, along with finely diced spring onions, and stir through.
    • Select the CANCEL button. Serve immediately hot with crusty bread, a bowl of pasta, or mashed potatoes.

    Notes

    If you want the French onion chicken to have some extra flavor and a nutritional punch, you can use beef stock or beef broth instead of the chicken broth that the recipe calls for.
    For this recipe, we've used chicken breasts, but you can use any other boneless or bone-in cut of meat of your choice. Chicken thighs are a great option, because they are much more tender, and pack in a lot of flavor too.
    If you want to tenderize your chicken breast, you can use a meat mallet to break down the fibers before you add them to the soup.
      • To tie everything together, you can also add a dash of olive oil into the mix.

    Nutrition

    Calories: 332kcalCarbohydrates: 6gProtein: 30gFat: 21gSaturated Fat: 11gPolyunsaturated Fat: 1gMonounsaturated Fat: 6gTrans Fat: 0.01gCholesterol: 123mgSodium: 339mgPotassium: 714mgFiber: 1gSugar: 3gVitamin A: 830IUVitamin C: 5mgCalcium: 69mgIron: 1mg
    Print Recipe Pin Recipe Rate this Recipe
    Tried this recipe?Let us know how it was!

    More Instant Pot Chicken Recipes:

    If you enjoyed trying out this recipe, and are inspired to try out some more such fun and flavorful chicken breast recipe options, here are a few good ones you can try out.

    • Instant Pot Pesto Chicken
    • Instant Pot Chicken Adobo
    • Instant Pot Shredded Chicken
    • Instant Pot Chicken Pot Pie Soup
    • Mango Chicken Salad With Avocado
    French onion chicken on two plates.

    Easy Crock Pot Chicken Gravy

    October 5, 2024 by Angela Milnes

    Easy Crock Pot Chicken Gravy.

    This is a super easy, no-fuss recipe for Crock Pot Chicken Gravy. Simply place all of the ingredients into the crockpot and let it do its thing! In just a few hours, you'll have tender, juicy chicken smothered in a rich and flavorful gravy. You'll love this Crockpot Chicken and Gravy Recipe.

    chicken and gravy ingredients.
    [feast_advanced_jump_to]

    💖 Why This Recipe Works

    • Effortless Cooking: The crock pot does all the work, leaving you free to relax.
    • Rich and Creamy: This chicken gravy is full of flavor, perfect for a cozy dinner.
    • Versatile Pairing: Great with Almond Milk Mashed Potatoes, biscuits or rice, suiting different taste preferences.

    ⭐ Star Ingredients

    chicken and gravy ingredients.
    • Chicken Breasts: This lean protein is the star of the dish, becoming incredibly tender and flavorful as it slow cooks in the flavorful gravy.
    • Cream of Chicken Soup: Forms the base for the gravy, providing a rich and creamy texture that coats the chicken beautifully.
    • Ranch Seasoning Mix: Brings a burst of tangy, herby flavor to the gravy, complementing the creaminess of the soup and the natural flavor of the chicken.
    • Chicken Broth Or Water: Helps adjust the consistency of the gravy and, if using broth, can add even more savory depth to the dish.

    For the complete list of ingredients with measurements and instructions, please see the recipe card at the bottom of the post.

    🔄 Substitutions & Variations

    • Meat Swap: Use chicken thighs for extra juiciness or turkey breast for a leaner option.
    • Dairy-Free Option: Substitute coconut milk or cashew cream for a creamy, dairy-free gravy.
    • Extra Flavor Boost: Add garlic powder, onion powder, or smoked paprika for a richer taste.

    🔪How To Make Crock Pot Chicken Gravy

    chicken and gravy with flour on it in a slow cooker.
    1. Step 1: Put the boneless skinless chicken breasts into the slow cooker into the slow cooker.
    chicken and gravy in a slow cooker.
    1. Step 2: Add the cream of chicken soup, ranch seasoning, and chicken broth/water.
    chicken and gravy in a slow cooker.
    1. Step 3: Cook for 4-6 hours on low or 2-3 hours on high.
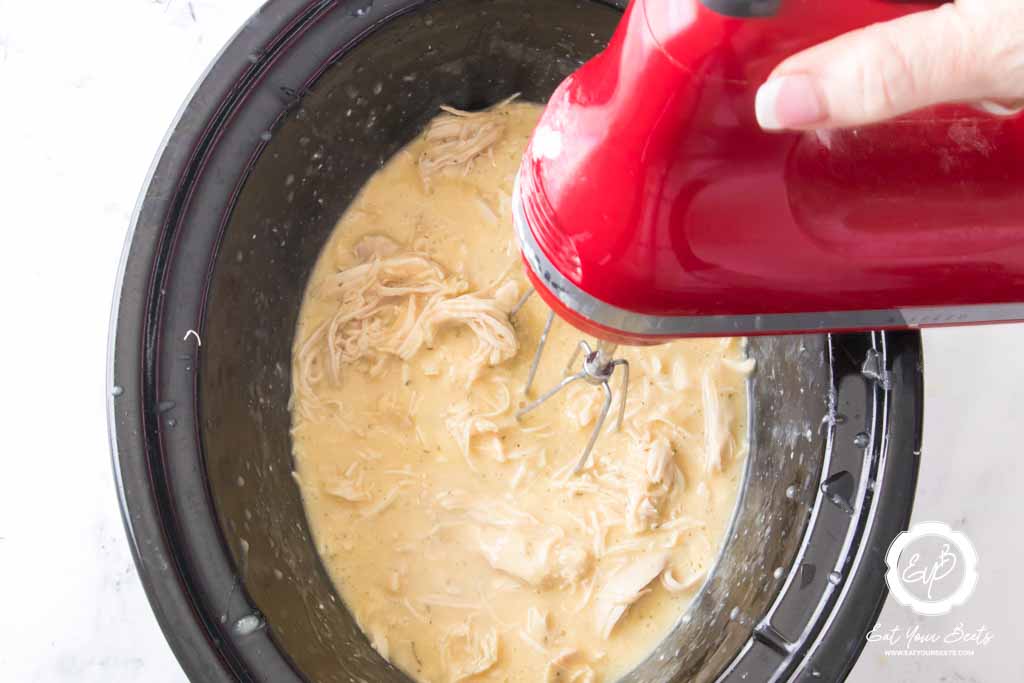
    crock pot chicken being shredded.
    1. Step 4: After the cooking time has passed, shred the chicken using two forks or a hand mixer.
    mashed potato in a bowl.
    1. Step 5: Mix everything together and put it on top of mashed potatoes!
    crock pot chicken and gravy in a bowl.
    1. Step 6: Add any other toppings you'd like and enjoy! I like to add a dollop of sour cream and chives.

    👩‍🍳 Expert Tips

    • Use chicken breasts or thighs for this recipe. I prefer to use chicken breasts, as they are leaner and will result in a healthier dish. However, chicken thighs will work just as well.
    • Be sure to use low-sodium chicken broth. This will help to keep the sodium content of the dish down.
    • If you want a thicker gravy, you can add some cornstarch to the juices before adding them to the crock pot.
    • Add some garlic powder and onion powder to my chicken and gravy for extra flavor. However, this is completely optional.
    • This recipe can easily be doubled or tripled if you need to feed a large crowd.
    • Leftovers can be stored in the fridge for up to four days.

    💭 FAQs

    Is Chicken And Gravy A Low Carb Recipe?

    This recipe (without the mashed potatoes) is suitable for those following a low-carb diet, as it is high in protein and low in carbohydrates.

    How To Shred The Chicken?

    If you want to shred the chicken, simply remove it from the crock pot and place it on a cutting board. Using two forks, pull the chicken apart until it is shredded.

    Should I Brown The Chicken Before Adding It To The Crock Pot?

    No, you don't need to brown the chicken before adding it to the crock pot. However, if you want to, you can brown the chicken in a skillet over medium-high heat for a few minutes on each side. This will give the chicken some extra flavor.

    My Gravy Is Thin, How Do I Thicken It?

    If your gravy is thin, you can thicken it by whisking in a cornstarch slurry. To make a cornstarch slurry, mix together 1 tablespoon of cornstarch with 2 tablespoons of water and whisk until the cornstarch is dissolved. Add the cornstarch slurry to the gravy and stir until it thick.

    Can You Make This Chicken Recipe Ahead Of Time?

    Yes, you can make the gravy ahead of time. Simply prepare the gravy according to the recipe instructions and store it in a covered container in the fridge for up to 4 days. When you're ready to serve, reheat the gravy on the stovetop over low heat until it is warmed through.

    💖 Serving Suggestions

    Here are some sides you can serve with crock pot chicken and gravy.

    • Broccoli smothered in cheese sauce. It's the perfect accompaniment to chicken and gravy.
    • Delicious Roasted Brussels Sprouts With Maple Syrup are a delicious and healthy side dish.
    • Mashed potatoes are a classic side dish to serve with chicken and gravy. Get this famous Instant Pot Mashed Potato Recipe here!
    • These Southern Green Beans are a delicious and easy side dish.
    • Rich and creamy Spinach is the perfect side for chicken and gravy.
    • This Air Fryer Parmesan Asparagus recipe is a delicious side dish for any meal.
    crock pot chicken and gravy in a bowl.

    🍽 Winner Winner, More Chicken Dinners

    • One Skillet Chicken Thighs with Butternut Squash.
      One Skillet Chicken Thighs With Butternut Squash
    • Chicken Stuffed With Spinach And dates.
      Spinach Stuffing for Chicken Breast with Dates
    • Air Fryer Crispy Chicken Wings.
      Air Fryer Crispy Chicken Wings
    • Slow Cooker Million Dollar Chicken Casserole.
      Slow Cooker Million Dollar Chicken Casserole

    Did you make this recipe? Leave a review and a ⭐⭐⭐⭐⭐ rating below, or tag us in our Facebook Group! Alternatively, bookmark it in your browser or save to Pinterest.

    Easy Crock Pot Chicken Gravy.

    Crock Pot Chicken and Gravy

    Angela Milnes
    This simple crock pot chicken gravy recipe is one of the best! sImple and tasty you'll love the flavors of this dish.
    5 from 4 votes
    Print Recipe Pin Recipe Rate this Recipe
    Prep Time 3 minutes mins
    Cook Time 3 hours hrs
    Total Time 3 hours hrs 3 minutes mins
    Course Dinners
    Cuisine American
    Servings 6 Servings
    Calories 220 kcal

    Ingredients
      

    • 4 Chicken Breasts
    • 1 Can Cream Of Chicken Soup 10.5
    • 1 Pkt Ranch Seasoning Mix
    • 1 Cups Chicken Broth

    Instructions
     

    • Put the chicken breasts into the slow cooker.
    • Add the cream of chicken soup, ranch seasoning, and chicken broth/water.
    • Cook for 4-6 hours on low or 2-3 hours on high.
    • After the cooking time has passed, shred the chicken using two forks or a hand mixer.
    • Mix everything together and put it on top of mashed potatoes!
    • Add any other toppings you'd like and enjoy!

    Notes

    Use chicken breasts or thighs for this recipe. I prefer to use chicken breasts, as they are leaner and will result in a healthier dish. However, chicken thighs will work just as well.
    Be sure to use low-sodium chicken broth. This will help to keep the sodium content of the dish down.
    If you want a thicker gravy, you can add some cornstarch to the juices before adding them to the crock pot.

    Nutrition

    Calories: 220kcalCarbohydrates: 4gProtein: 33gFat: 7gSaturated Fat: 2gPolyunsaturated Fat: 1gMonounsaturated Fat: 2gTrans Fat: 0.02gCholesterol: 101mgSodium: 689mgPotassium: 589mgSugar: 0.4gVitamin A: 139IUVitamin C: 2mgCalcium: 16mgIron: 1mg
    Print Recipe Pin Recipe Rate this Recipe
    Tried this recipe?Let us know how it was!

    More Slow Cooker Recipes?

    If you love this gravy slow cooker chicken, why not try the following recipes?

    • Slow Cooker Pot Roast With Beer
    • Slow Cooker Beef Stroganoff
    • Crock Pot Chili Mac And Cheese
    • Slow Cooker Mongolian Beef
    • Slow Cooker Rump Roast With Baby Carrots
    crock pot chicken and gravy in a bowl.

    Instant Pot Pork Roast

    October 5, 2024 by Angela Milnes

    Instant Pot Pork Roast.

    Looking for Instant Pot Pork Roast Recipes? Look no further. This delicious Instant Pot pork roast recipe is an easy, tasty and delicious roast. Perfect as a Sunday roast or for a dinner party. Enjoy this tasty pressure cooker pork roast meal.

    Instant pot pork roast on a white plate.
    [feast_advanced_jump_to]

    💖 Why This Recipe Works

    • This Instant Pot Pork Roast recipe is a real crowd-pleaser. Whether you’re looking for a hearty, weeknight meal or want to impress guests with an easy yet sophisticated dinner, this pork roast recipe is sure to earn rave reviews.
    • The combination of seasonings and herbs gives the pork roast incredible flavor, while the pressure cooker ensures that the meat stays moist and tender. Plus, the recipe is incredibly simple to follow—you won’t believe how easy it is to make!

    ⭐ Star Ingredients

    instant pot pork roast ingredients.
    • Pork Shoulder (trimmed): A flavorful and tender cut perfect for slow cooking, ensuring a juicy and succulent pork roast.
    • Seasonings (Salt, Pepper, Onion Powder, Minced Garlic): A well-balanced blend enhancing the pork's natural taste, creating a savory and aromatic profile.
    • Olive Oil: Adds richness and helps in browning the pork, contributing to the overall depth of flavor.
    • Caldo de Pollo Powder: Infuses a delicious chicken flavor, elevating the taste of the broth and enhancing the overall dish.
    • Water: Provides the necessary liquid for the Instant Pot, contributing to the creation of a flavorful broth.
    • Soy Sauce: Introduces umami and saltiness, enhancing the savory notes of the pork roast.
    • Russet Potatoes: A classic addition that absorbs the delicious flavors of the broth, becoming tender and flavorful.
    • Baby Carrots: Offers a sweet and vibrant complement to the savory pork, creating a well-rounded and visually appealing dish.
    • Butter: Adds richness and a velvety texture to the broth, enhancing the overall mouthfeel of the dish.
    • Cornstarch: Used for thickening the broth, creating a luscious and flavorful gravy for the pork roast.
    • Parsley (for garnish): Fresh parsley adds a burst of color and a hint of freshness, elevating the visual appeal of the dish.

    For the complete list of ingredients with measurements and instructions, please see the recipe card at the bottom of the post.

    📖  Substitutions & Variations

    • Garlic Type: Garlic powder can be used in place of the minced garlic. Just remember to adjust the amount accordingly and use ¼ teaspoon for each clove of minced garlic.
    • Swap Veggies: You can switch out the potatoes and carrots for other vegetables like squash, sweet potatoes or mushrooms. Make sure to adjust cooking time as needed.
    • Water: You can switch the water for chicken broth or beef broth for pressure cooking. This will add extra flavor to your pork roast.

    🔪 How To Cook Instant Pot Pork Roast

    Pork roast marinated in a bowl.
    1. Step 1: Add the pork roast to a large bowl. Season with onion powder, salt and pepper, and garlic.  Set the Instant Pot to sauté and add the oil. Add the pork roast and sear the meat on all sides. 
    Marinated pork roast in an instant pot.
    1. Step 2: Remove the meat and set aside. Cancel the Instant Pot and add 2 tablespoons of water. Using a wooden spatula, scrape the bottom of the instant pot liner to deglaze any seared meat. Add the remaining water and Caldo de Pollo. Stir well.
    Pork roast in an instant with carrots and potatoes.
    1. Step 3: Cube the meat and potatoes and add them to the instant pot with the carrots. Add the soy sauce and any juices from the meat that was set aside. Pressure cook on high pressure 12 minutes. Let the pressure naturally release for 10 minutes following cooking then release the pressure manually if needed. Remove the pork roast, potatoes, and carrots and set aside. 
    Instant Pot pork roast on a plate.
    1. Step 4: Set the Instant Pot to sauté and whisk in the butter and cornstarch. Once the sauce has thickened, remove it from the heat. Serve pork roast and vegetables with the gravy poured over. Garnish with parsley.
    Serving pork roast with a spoon.

    👩‍🍳 Expert Tips

    • Start with fresh or thawed meat. Frozen meat will require extra cooking time.
    • Use high-quality seasonings for the most flavorful pork roast.
    • Remember to deglaze the instant pot after searing the meat to ensure maximum flavor in your gravy.
    • Let the pressure naturally release for 10 minutes after cooking to provide extra tenderness and moisture in the meat.
    • Add some fresh rosemary for an added layer of flavor and aroma. The rosemary pairs well with the pork roast and compliments the other seasonings and spice mixture used in the recipe.
    • Enjoy your delicious Instant Pot Pork Roast!

    💭 FAQs

    What Cut Is Pork Roast?

    Pressure cook pork roast is a cut of pork that has been cooked with the bone in. It’s usually quite large, making it perfect for serving a crowd. The best cut is generally pork shoulder, pork butt or pork loin roast.

    Can I Use Boneless Pork Roast?

    Yes, you can. Boneless pork roast can also be used in this recipe, but it’s important to note that the cooking time will need to be adjusted accordingly. If you choose to use a boneless cut of pork, reduce the cooking time by 5 minutes before releasing pressure and checking for doneness.

    Why Is My Pork Roast Tough?

    Make sure to use accurate cooking times and always let the pressure naturally release to help prevent toughness. A fork-tender roast should be cooked for the recommended time.

    How Long to Cook Pork Roast in Instant Pot?

    Cook time 12 minutes + pressure build time. This recipe is for a 2lb Pork Shoulder Roast...but what about other-size pork roasts? This recipe works for both Instant Pot Pork Butt, Pork loin and Shoulder Pork.

    How Long to Cook 3LB Pork Roast in Instant Pot?

    For a 3-pound pork roast cook in the pressure cooker for 25 minutes.

    How Long to Cook 5LB Pork Roast in Instant Pot?

    Cook a 5-pound pork roast in the Instant Pot for 35 minutes.

    How To Cook Frozen Pork In The Instant Pot?

    Simply add an extra 10 minutes to the cooking times for fresh pork roast.

    Best Way to Store Roast Meat

    Any leftover pork roast can be stored in an airtight container and kept in the refrigerator for up to 3 days. If you have a large amount of leftovers, it can also be frozen for later use.

    💖 Serving Suggestions

    Wondering what to make with pork roast? This Instant Pot Pork Roast goes great with many sides. Here are a few suggestions:

    • Mashed Potatoes: Creamy mashed potatoes are a classic side that pairs well with the savory flavors of pork roast. The potatoes can soak up the delicious gravy.
    • Roasted Vegetables: Roast vegetables like carrots, Brussels sprouts, or parsnips alongside the pork for a flavorful and nutritious side.
    • Applesauce: The natural sweetness of applesauce complements the savory pork, creating a delightful contrast.
    • Instant Pot Green Beans: Steamed or sautéed green beans offer a crisp and fresh side, balancing the richness of the pork.
    • Red Cabbage Coleslaw: A light and tangy coleslaw can provide a refreshing contrast to the hearty pork roast.
    • Baked Sweet Potatoes: The sweetness of baked sweet potatoes pairs well with the savory pork, creating a well-balanced meal.
    • Dinner Rolls or Cheesy Bread: Serve with fresh rolls or Air Fryer Cheesy Bread to mop up the flavorful juices and gravy from the pork.
    • Cranberry Orange Sauce: For a touch of sweetness and tartness, cranberry sauce complements the pork roast beautifully.
    • Long Grain White Rice or Quinoa Salad: A side of rice or quinoa can absorb the flavorful juices from the pork, providing a hearty and satisfying accompaniment.

    Feel free to mix and match these side dishes based on your preferences and create a well-rounded and delicious meal with your pork roast.

    Pork roast on a plate.

    🍽 More Instant Pot Recipes

    • Instant Pot Cajun Chicken and Rice.
      Instant Pot Cajun Chicken and Rice
    • Creamy Instant Pot Tortellini Recipe.
      Creamy Instant Pot Tortellini Recipe
    • Instant Pot Kielbasa And Cabbage.
      Instant Pot Kielbasa And Cabbage
    • Instant Pot Enchilada Soup.
      Instant Pot Enchilada Soup

    Did you make this recipe? Leave a review and a ⭐⭐⭐⭐⭐ rating below, or tag us in our Facebook Group! Alternatively, bookmark it in your browser or save to Pinterest.

    Instant Pot Pork Roast.

    Instant Pot Pork Roast

    Angela Milnes
    This Instant Pot Pork Roast is tender, juicy, and bursting with flavor! It's a perfect option for a comforting weeknight dinner or a special family gathering. The pressure cooker locks in all the savory goodness, making this roast super easy and quick to prepare. You’ll love how simple it is to get a delicious, fall-apart pork roast with minimal effort!
    5 from 3 votes
    Print Recipe Pin Recipe Rate this Recipe
    Prep Time 10 minutes mins
    Cook Time 12 minutes mins
    Total Time 22 minutes mins
    Course Instant Pot Recipes
    Cuisine American
    Servings 6 Servings
    Calories 281 kcal

    Ingredients
      

    • 2 Ibs Pork Shoulder trimmed
    • ½ Teaspoon Salt
    • ½ Teaspoon Pepper
    • 1 Teaspoon Onion Powder
    • 1 Tablespoon Minced Garlic
    • 2 Teaspoons Olive Oil
    • 1 Teblespoon Caldo de Pollo Powder
    • 2 Cup Water
    • 1 Teaspoon Soy Sauce
    • 2 Russet Potatoes
    • 2 Cups Baby Carrots
    • 1 Tablespoon Butter
    • 1 Tablespoon Cornstarch
    • 1 tablespoon Parsley for Garnish

    Instructions
     

    • Add the pot roast into a large bowl. Season with onion powder, salt and pepper, and garlic. 
    • Set the Instant Pot to sauté and add the oil. Add the pork roast and sear the meat on all sides. Remove the meat and set aside. 
    • Cancel the Instant Pot and add 2 tablespoons of water. Using a wooden spatula, scrape the bottom of the instant pot liner to deglaze any seared meat. Add the remaining water and Caldo de Pollo. Stir well.
    • Cube the meat and potatoes and add them to the instant pot with the carrots. Add the soy sauce and any juices from the meat that was set aside. 
    • Seal the Instant Pot lid and pressure valve. Set the pressure cook button to high pressure for 12 minutes. Pressure will build for 15 minutes.
    • Let the pressure naturally release for 10 minutes following cooking then release the pressure manually if needed. Remove the pork roast, potatoes, and carrots and set aside
    • Set the Instant Pot to sauté and whisk in the butter and cornstarch. Once the sauce has thickened, remove it from the heat. 
    • Serve pork roast and vegetables with the gravy poured over. Garnish with parsley.

    Notes

    Start with fresh or thawed meat. Frozen meat will require extra cooking time.
    Use high-quality seasonings for the most flavorful pork roast.
    Remember to deglaze the instant pot after searing the meat to ensure maximum flavor in your gravy.
    Let the pressure naturally release for 10 minutes after cooking to provide extra tenderness and moisture in the meat.
    Add some fresh rosemary for an added layer of flavor and aroma. The rosemary pairs well with the pork roast and compliments the other seasonings and spice mixture used in the recipe.
    Enjoy your delicious Instant Pot Pork Roast!

    Nutrition

    Calories: 281kcalCarbohydrates: 20gProtein: 21gFat: 13gSaturated Fat: 4gPolyunsaturated Fat: 1gMonounsaturated Fat: 5gTrans Fat: 0.1gCholesterol: 67mgSodium: 704mgPotassium: 759mgFiber: 3gSugar: 3gVitamin A: 6400IUVitamin C: 8mgCalcium: 51mgIron: 3mg
    Print Recipe Pin Recipe Rate this Recipe
    Tried this recipe?Let us know how it was!

    More Tasty Pork Recipes:

    If you love pork check out these favorite pork recipes. They are super yummy.

    • Air Fryer Nachos With Pulled Pork
    • Keto Pulled Pork
    • Instant Pot Kalua Pork

    We hope you enjoy this delicious Instant Pot pork roast recipe!

    Instant pot pork roast served on a plate.

    Instant Pot Feta Pasta Salad

    October 5, 2024 by Angela Milnes

    Instant Pot Feta Pasta Salad.

    If you're looking for something Greek-inspired and delicious, this Instant Pot Feta Pasta Salad dish is for you! Feta cheese, olives, and a simple dressing come together to create a salad that's perfect for a summer picnic or potluck.

    Feta pasta salad in a bowl.
    [feast_advanced_jump_to]

    💖 Why This Recipe Works

    • Creamy and Tangy: The feta cheese adds a delightful richness and tang to this pasta salad.
    • Easy Preparation: With the Instant Pot, this feta pasta recipe is both convenient and quick to prepare.
    • Perfect for Parties: This versatile Greek Pasta is a crowd-pleaser, ideal for picnics or potlucks.

    ⭐ Star Ingredients

    Instant Pot Feta Pasta Salad ingredients.
    • Tricolor Rotini Pasta: Adds color and texture to the salad.
    • Feta Cheese: Brings a creamy and tangy element to the pasta salad.
    • Cucumber: Balances out the flavors and adds a hint of coolness.
    • Cherry Tomatoes: Contribute a burst of sweetness and juiciness to the pasta salad.
    • Kalamata Olives: Are a good source of healthy fats, adding depth and complexity to the overall taste.
    • Red Onion: Adds a mild spiciness and a touch of sharpness to the pasta salad.
    • Italian Dressing: Adds a tangy and herbaceous note, enhancing the overall taste of the salad.

    🔄 Substitutions & Variations

    • Pasta Swap: Use orzo, penne, or whole wheat pasta for a different texture or added fiber.
    • Dairy-Free Option: Replace feta with dairy-free feta or marinated tofu crumbles for a vegan version.
    • Flavor Boost: Add roasted red peppers, sun-dried tomatoes, or artichoke hearts for extra Mediterranean flair.

    🔪 How To Make Instant Pot Feta Pasta Salad

    tri colored pasta cooked in the instant pot.
    1. Step 1: Place pasta in the Instant Pot and submerge in water. Add enough water to cover the pasta.
    tri colored pasta cooked in the instant pot.
    1. Step 2: Seal the lid and pressure valve and cook on high for 6 minutes. Quick-release pressure and drain pasta. Run cold water over pasta for a few minutes. Let the pasta cool.
    making instant pot greek pasta in instant pot.
    1. Step 3: Add chopped vegetables and dressing to the cooked pasta and gently fold to mix.
    Instant Pot Feta Pasta Salad in a bowl.
    1. Step 4: Finally, add the feta cheese and enjoy! Garnish your feta pasta salad with fresh basil leaves and serve!
    Instant Pot Feta Pasta Salad.

    👩‍🍳 Expert Tips

    • Use Rotini for Texture: Rotini is ideal for holding onto the dressing and other ingredients, but feel free to substitute with other pasta shapes like fusilli or penne if you prefer.
    • Add Fresh Herbs for Extra Flavor: To enhance the Greek flavors, add some fresh basil or oregano into the salad along with the feta. It will elevate the dish with a burst of fresh taste.
    • Chill Before Serving: Let the salad sit in the fridge for at least 30 minutes before serving. This allows the flavors to meld together and the pasta to fully absorb the dressing.
    • Customize the Veggies: Feel free to mix in other Greek salad ingredients like bell peppers, Kalamata olives, or even artichoke hearts for added variety and nutrition.

    💭 FAQs

    Is Colored Pasta Healthy?

    Yes! There is no difference in the nutritional value of colored pasta. The only difference is in appearance. Colored pasta can be fun to eat and may even make you more likely to eat your veggies!

    Why Use Rotini Pasta?

    We use rotini pasta in this dish because it's a great shape for holding onto the dressing and other ingredients. Plus, it's just plain fun to eat! You can use any type of pasta you like, but we think rotini is the best choice for this particular dish.

    The Best Way To Store Greek Pasta

    Once you've made the Feta Cheese Pasta Salad, allow it to cool to room temperature. Afterward, refrigerate it into an airtight container for 2-3 days.
    Avoid freezing to maintain the salad's texture. Before serving leftovers, gently toss to redistribute the dressing and flavors.

    💖 Serving Suggestions

    These are my favorite dishes to serve with feta pasta:

    • Grilled Lamb Chops: Lamb Chops are a delicious and easy way to get your Greek fix. You could also try Instant Pot Lamb Chops for something easy and quick.
    • Asian Steak Skewers: These Steak Skewers are packed with flavor and make a great side dish for feta pasta.
    • Greek Chicken Kabobs: Chicken kabobs are full of flavor and perfect for a summer BBQ. Also try Shrimp Kabobs, they are tasty and simple to cook.
    Instant Pot Feta Pasta Salad in a bowl.

    🍽 Try These Easy Pasta Dishes

    • Italian sausage and broccoli pasta in a skillet.
      Creamy Italian Sausage And Broccoli Pasta (With Mascarpone)
    • Slow Cooker Chicken Bacon Ranch Pasta.
      Slow Cooker Chicken Bacon Ranch Pasta
    • Instant Pot Cacio E Pepe Pasta.
      Instant Pot Cacio E Pepe Pasta
    • Cowboy Butter Pasta In Creamy Sauce, Topped with sliced lemons.
      Cowboy Butter Pasta In Creamy Sauce

    Did you make this recipe? Leave a review and a ⭐⭐⭐⭐⭐ rating below, or tag us in our Facebook Group! Alternatively, bookmark it in your browser or save to Pinterest.

    Instant Pot Feta Pasta Salad.

    Instant Pot Feta Pasta Salad

    Angela Milnes
    This Instant Pot Feta Pasta is a creamy, delicious dish that comes together effortlessly! With tangy feta, juicy cherry tomatoes, and perfectly cooked pasta, it's a quick and satisfying meal perfect for busy weeknights.
    5 from 3 votes
    Print Recipe Pin Recipe Rate this Recipe
    Prep Time 10 minutes mins
    Cook Time 3 minutes mins
    Total Time 16 minutes mins
    Course Side Dish
    Cuisine Greek
    Servings 10 Servings
    Calories 210 kcal

    Ingredients
      

    • 12 oz Tricolor Rotini Pasta
    • 1 Cucumber peeled and diced
    • 1,½ Cups Cherry Tomatoes quartered
    • ¼ Cup Black Olives sliced
    • ½ Cup Red Onion Chopped
    • 1, ½ Cup Italian Dressing

    Instructions
     

    • Place pasta in the instant pot and submerge in water. Add enough water to cover the pasta. Seal lid and pressure valve and cook on high for 6 minutes.
    • Quick-release pressure and drain pasta. Run cold water over pasta for a few minutes. Let pasta cool.
    • Add chopped vegetables and dressing to the pasta and gently fold to mix.
    • Enjoy!

    Nutrition

    Calories: 210kcalCarbohydrates: 18gProtein: 6gFat: 913gSaturated Fat: 4gPolyunsaturated Fat: 4gMonounsaturated Fat: 3gTrans Fat: 0.02gCholesterol: 20mgSodium: 665mgPotassium: 161mgFiber: 1gSugar: 5gVitamin A: 253IUVitamin C: 7mgCalcium: 129mgIron: 1mg
    Print Recipe Pin Recipe Rate this Recipe
    Tried this recipe?Let us know how it was!

    More Easy Pasta Recipes To Bookmark

    • Italian Sausage And Broccoli Pasta
    • Instant Pot Cacio E Pepe Pasta
    • Creamy Cajun Pasta Sauce With Parmesan
    • Jamaican Jerk Pasta With Shrimp
    • Pasta With Pancetta and Peas
    • Air Fryer Chicken And Shrimp Alfredo
    • Instant Pot Tortellini Carbonara

    The Best No Bake Banana Pudding

    October 5, 2024 by Angela Milnes

    The Best No Bake Banana Pudding.

    This No Bake Banana Pudding is the best I've ever had. The rich creamy pudding is full of flavor with just a few simple ingredients. Whether you're feeding a crowd or just craving something sweet on a lazy afternoon, this no-fuss banana pudding is ready in under 15 minutes, chilled and served with all the nostalgic vibes. Let’s dig in!

    a spoonful of No Bake Banana Pudding over a mason jar of the creamy dessert.
    [feast_advanced_jump_to]

    Banana pudding is a timeless Southern favorite that’s especially popular during the warmer months—think BBQs, picnics, and potlucks. It’s cool, creamy, and hits that perfect balance of fruity and comforting. This recipe was inspired by my obsession with creamy classics like my Old Fashioned Banana Cream Pie. It also pairs like a dream with this fresh and fruity Summer Fruit Tart—so go ahead and double the dessert!

    💖 Why This Recipe Works

    • Creamy and comforting without the baking fuss.
    • Takes just 15 minutes to whip up and chill.
    • Kid-friendly and a total crowd pleaser. This easy banana pudding recipe will be your new summer go-to.

    🌟 Star Ingredients

    No Bake Banana Pudding ingredients. Bananas, milk, instant pudding, cool whip and vanilla wafers.
    • Banana Instant Pudding – it’s the flavor hero! This is your shortcut to bold banana flavor without having to wait for bananas to overripen. Trust me—it makes the whole thing come together in a flash.
    • Cool Whip – top tip - thaw it first! Thaw it first, then gently fold it in for that dreamy, cloud-like texture. It keeps the pudding light and luscious. If you’re feeling fancy, go homemade—totally works too.
    • Vanilla Wafers – the secret to soft crunch. These humble cookies soak up just the right amount of pudding and turn perfectly soft and cake-like. No bake banana pudding just wouldn’t be the same without them.

    For the complete list of ingredients with measurements and instructions, please see the recipe card at the bottom of the post.

    📖  Substitutions & Variations

    • Vanilla Vibes – Out of banana pudding? Swap in vanilla for a subtler twist.
    • Dairy-Free? – Almond milk + non-dairy whipped topping = still delish.
    • From Scratch Whipped Cream – Ditch the Cool Whip if you’re feeling chef-y.
    • Jar It Up – Layer your no bake banana pudding in cute mason jars, top with sprinkles or chocolate chips, and boom—party dessert!

    💡 Love a bit of crunch? Why not add some of this Chocolate Bark with Hazelnuts on top for a sweet, nutty upgrade!

    🍌 How To Make No Bake Banana Pudding?

    Use this section for process shots, alternating between the step and image showing the step. Users don't like seeing process shots cluttering up the recipe card, so include your process shots here.

    mixing banana pudding mix in a bowl with milk.
    1. Step 1: In a large bowl, add your instant pudding mix along with the milk. Whisk until smooth.
    Cool whip being mixed with banana pudding in a glass bowl.
    1. Step 2: Gently fold in the thawed Cool Whip. Don’t stir—fold! It keeps the texture fluffy.
    Crushed vanilla wafers layered on top of banana pudding and cool whip ready to mix.
    1. Step 3: Add sliced bananas and crushed vanilla wafers. Fold them in with love.
    Creamy no bake banana pudding in a glass bowl ready to chill or serve.
    1. Step 4: Chill it in the fridge (10 minutes minimum, longer if you can wait!). Before serving, top with extra banana slices and more crushed cookies.

    💡 Pro Tip: Got time? Let it chill longer. The wafers soften, the flavors meld, and you get that just-right texture everyone raves about.

    No Bake Banana Pudding.

    👩‍🍳 Expert Tips

    • Be Gentle – Folding (not mixing!) keeps your pudding light and airy.
    • Plan Ahead – Make this in the morning and chill until dinner. Flavors = even better.
    • Banana Wisdom – Slice your bananas just before serving. A little lemon juice keeps 'em from going brown if you're prepping ahead.

    💭 FAQs

    Can I make banana pudding ahead of time?

    Yes, and you should! A few hours in the fridge lets everything come together. Just wait to add banana slices until serving.

    How do I prevent bananas from turning brown in banana pudding?

    Slice them fresh or toss in a splash of lemon juice. Works like a charm.

    Can I use different cookies instead of vanilla wafers?

    Totally! Graham crackers, shortbread, even chocolate chip cookies work if you’re out of wafers or just feeling wild.

    Is it okay to use homemade whipped cream instead of Cool Whip?

    Yes! Whip your heavy cream until stiff peaks form and use it one-for-one. It’s fresh, fluffy, and fancy.

    How long does no bake banana pudding last in the refrigerator?

    Up to 3 days in the fridge, but best within 24 hours while the bananas are still fresh and the wafers haven’t gone too soft.

    💖 Serving Suggestions

    These are my favorite ways to dress up no bake banana pudding for summer gatherings:

    • Fresh Berry Medley – Adds bright color and a tangy twist.
    • Toasted Coconut Chips – A little crunch and tropical flair.
    • Ginger Snap Cookies – Adds a spicy contrast to the sweetness.
    • Whipped Cream Swirl – Extra indulgent and oh-so-pretty.

    Looking for the perfect Summer Menu...why not pair this dessert with these Air Fryer BBQ Chicken Wings and a fresh Mediterranean Green Bean Salad for a full-on flavor-packed feast.

    No Bake Banana Pudding.

    🍽 More Super Simple Desserts

    • Creamy Vanilla Eclair Cake.
      Creamy Vanilla Eclair Cake
    • No-Churn Vegan Mango Sorbet.
      No-Churn Vegan Mango Sorbet
    • Traditional Banana Cream Pie.
      Old Fashioned Banana Cream Pie
    • Blueberry Angel Biscuits With Cream Cheese Topping.
      Homemade Angel Biscuits With Blueberries And Cream Cheese

    Did you try this recipe? Leave a comment, drop a ⭐⭐⭐⭐⭐, or tag me in our Facebook Group! And if you’re the bookmarking type—go ahead and pin this baby for later.

    The Best No Bake Banana Pudding.

    No-Bake Banana Pudding

    Angela Milnes
    This No-Bake Banana Pudding is the easiest and most delicious dessert you'll ever make! Creamy layers of pudding, fresh bananas, and vanilla wafers come together for a classic treat that's perfect for any occasion—no oven required!
    5 from 4 votes
    Print Recipe Pin Recipe Rate this Recipe
    Prep Time 5 minutes mins
    Total Time 5 minutes mins
    Course Desserts
    Cuisine American
    Servings 6 Servings
    Calories 373 kcal

    Ingredients
      

    • 1, 3.5 Oz Banana Instant Pudding
    • 1, ½ Cup Cold Milk
    • 8 Oz Cool Whip Thawed
    • 2 Cups Vanilla Wafers Crushed
    • 2 Bananas Sliced

    Instructions
     

    • In a large bowl add your instant banana pudding along with the milk. Whisk until smooth.
    • Once the pudding has thickened, fold in the cool whip. You want to fold the cool whip in to keep your mixture thick.
    • Next add in your bananas and crushed vanilla wafers by folding them in.
    • Store in an airtight container if not immediately serving.
    • To serve, place extra sliced bananas and crushed vanilla wafers on top!

    Notes

    When folding in the whipped topping, gently incorporate it into the pudding mixture to maintain its light texture without overmixing.

    Nutrition

    Calories: 373kcalCarbohydrates: 68gProtein: 5gFat: 10gSaturated Fat: 4gPolyunsaturated Fat: 3gMonounsaturated Fat: 2gTrans Fat: 0.1gCholesterol: 14mgSodium: 333mgPotassium: 308mgFiber: 2gSugar: 42gVitamin A: 190IUVitamin C: 3mgCalcium: 119mgIron: 0.1mg
    Print Recipe Pin Recipe Rate this Recipe
    Tried this recipe?Let us know how it was!

    Slow Cooker Pot Roast With Beer

    October 5, 2024 by Angela Milnes

    Slow Cooker Pot Roast With Beer.

    Have you ever wanted to cook a chuck pot roast in the slow cooker that is full of flavor, but falls apart when you touch it? Well, this is the perfect recipe for you! This Slow Cooker Pot Roast with Beer is not only full of flavor, but it is also fall-apart tender. Try beer-braised pot roast in your crock pot today!

    Slow cooker pot roast with beer.
    [feast_advanced_jump_to]

    💖 Why This Recipe Works

    • Deep, Savory Flavor: The beer pot roast lends a rich, unique taste to the classic pot roast.
    • Minimal Effort: With the slow cooker doing the hard work, it's easy to prepare.
    • Comfort Food: This hearty Slow Cooker Pot Roast is perfect for a cozy family meal or gathering.

    ⭐ Star Ingredients

    Ingredients to make Pot roast.
    • Roast Chuck: This cut of beef is tender and flavorful, especially when slow-cooked.
    • Large Onion: Adds a depth of flavor to the roast, enhancing its savory taste.
    • Carrots: Provide a sweet contrast to the savory beef and absorb the flavors of the cooking liquid.
    • Celery Stalks: Contribute a slightly salty, savory flavor and a crunchy texture.
    • Lipton Dry Onion Soup Mix: A convenient source of seasoning that gives the roast a rich, oniony flavor.
    • Beer: Intensifies the flavor of the roast and tenderizes the meat as it cooks slowly.
    • Beef Broth or Water: Helps to keep the roast moist and tender while adding to the overall flavor.

    For the complete list of ingredients with measurements and instructions, please see the recipe card at the bottom of the post.

    📖  Substitutions & Variations

    • Potatoes: You can use Yukon gold potatoes or switch for sweet potatoes if you prefer a sweet potato mash as a base for your tender beef.
    • Herbs: If you want to add some fresh herbs try adding fresh thyme, fresh rosemary and ground black pepper to the broth.
    • Garlic: You can add garlic cloves to enhance the flavors of your tender roast.
    • Beer: If you don't have Bud Light, you can use brown ale or stout beer for a good pot roast.

    🔪 How to Make Slow Cooker Pot Roast With Beer

    Adding veggies to slow cooker for a pot roast.
    1. Step 1: Place your celery, onions, and carrots in the bottom of a slow cooker.
    Adding onion soup mix to pot roast.
    1. Step 2: Top your veggies with Lipton Onion Soup Mix.
    Raw pot roast in the slow cooker.
    1. Step 3: Next, pour a beer over the top of your veggies along with a cup of beef broth.
    pot roast in the slow cooker.
    1. Step 4: Then place your roast on top. Ensure the vegetables and the roast are covered with the liquid.
    Cooked pot roast in the slow cooker being served with serving spoon.
    1. Step 5: Slow Cook on low for 6-8 hours until your roast is cooked through and tender.
    Cooked pot roast in the slow cooker.
    1. Step 6: Using two forks or a Mix N Chop, shred the roast.
    Mashed potato in a bowl.
    1. Step 7: Place mashed potatoes into a bowl.
    Pot roast and mashed potatoes in a bowl.
    1. Step 8: Serve your pot roast over the mashed potatoes.

    What Pot Roast Seasoning Should I Use?

    In this chuck roast recipe, we use a combination of dry onion soup mix and beer to create the best pot roast seasoning, but you could also use:

    • Wine: Helps to tenderize the meat and adds a depth of flavor that complements the richness of the roast.
    • Beef Broth: Forms the base of the liquid in which the roast cooks, providing a savory, meaty flavor that enhances the taste of the pot roast.
    • Apple Cider Vinegar: Balances the richness of the roast and adds a subtle tanginess to the dish.
    • Dijon Mustard: Brings a sharp, tangy element to the roast, complementing the other flavors and adding complexity to the dish.
    • Soy Sauce: Lends a deep umami flavor and saltiness to the roast, enhancing the overall savory profile of the dish.
    • Garlic Powder: Adds a warm, aromatic note that pairs well with the other ingredients and boosts the flavor of the pot roast.
    • Salt and Black Pepper: Are essential seasonings that enhance the natural flavors of the ingredients and balance the overall taste of the dish.
    Pot roast on mashed potatoes served in a bowl.

    👩‍🍳 Expert Tips

    • Using Beer: The beer will cook-off. However, if you don’t want to use a beer, simply use more beef broth or water.

    💭 FAQs

    What Is The Best Cut Of Meat For Pot Roast?

    The best cuts of meat for pot roast are chuck roast, bottom round roast, or rump roast. This recipe used chuck roast beef which is a well-marbled cut of meat that is perfect for slow cooking.

    What Is Lipton Onion Soup Mix?

    Lipton onion soup mix is a dry onion soup mix that you can find in the seasoning aisle of your grocery store. It's an easy way to add flavor to your chuck roast, and it pairs well with the beer in this recipe.

    How Long Does It Take To Slow Cook Pot Roast?

    You will need to cook this pot roast in the slow cooker for 6-8 hours. This makes for a very tender and flavorful pot roast that is perfect for a winter meal. If you don't have much time, you can switch this recipe to a pressure cooker and cook much faster.

    The Best Way To Store Roast With Beer

    Store roast beef in the fridge in an air-tight container.
    You can freeze this pot roast recipe for 2-3 months in an airtight container.

    💖 Serving Suggestions

    These are some great sides to serve with pot roast:

    • Instant Pot Mashed Potatoes are a great pairing when it comes to pot roast. They soak up all of the flavorful juices from the roast and veggies, making for a delicious and comforting meal.
    • Another great option is to serve your pot roast with Air Fryer Roasted Vegetables. This is a great way to get your veggies in, and they pair well with the rich flavors of the pot roast.
    • If you are looking for a carb to pair with your pot roast, biscuits are a great option. They are perfect for soaking up all of the delicious juices from the pot roast.
    • Air Fryer Roasted Potatoes are another great side dish to pair with your pot roast. They are simple to make, and they go well with the rich flavors of the pot roast.
    • Baked Sweet Potatoes are a great way to get your veggies in, and they pair well with the flavors of your roast beef.
    • Instant Pot Green Beans are a great side dish to pair with your pot roast. They add color and variety to your main meal.
    • Cheesy Cauliflower Mash is a great low-carb option to pair with your pot roast. It's a delicious and healthy alternative to mashed potatoes, and it pairs well with beef. You can also try Purple Cauliflower Mash!
    • Instant Pot Hawaiian Rolls are a great way to soak up all of the flavorful juices from your pot roast.
    Slow cooked pot roast in a bowl.

    🍽 More Slow Cooker Recipes to Try

    • Slow Cooker Chicken Chili.
      Slow Cooker Chicken Chili
    • Slow Cooker Chicken Teriyaki.
      Slow Cooker Chicken Teriyaki
    • Slow Cooker Million Dollar Chicken Casserole.
      Slow Cooker Million Dollar Chicken Casserole
    • Slow Cooker meatball Subs.
      Slow Cooker Meatball Subs

    Did you make this recipe? Leave a review and a ⭐⭐⭐⭐⭐ rating below, or tag us in our Facebook Group! Alternatively, bookmark it in your browser or save to Pinterest.

    Slow Cooker Pot Roast With Beer.

    Slow Cooker Pot Roast With Beer

    Angela Milnes
    This slow cooker pot roast with beer is delicious and packed with flavor. Tender and full of juices you will love.
    5 from 3 votes
    Print Recipe Pin Recipe Rate this Recipe
    Prep Time 10 minutes mins
    Cook Time 6 hours hrs
    Total Time 6 hours hrs 10 minutes mins
    Course Dinners
    Cuisine American
    Servings 6 Servings
    Calories 462 kcal

    Ingredients
      

    • 3-5 Ib Roast Chunk
    • 1 Onion Diced
    • 4 Carrot Diced
    • 4 Celery Stalk Diced
    • 2 Lipton Onion Mix
    • 1 Can Bud Light 16 Oz
    • 1 Cup Beef Broth

    Instructions
     

    • Place your celery, onions and carrots in the bottom of a slow cooker.
    • Top your veggies with Lipton Onion soup mix.
    • Next, pour a beer over the top of your veggies along with a cup of beef broth.
    • Next, place your roast on top.
    • TIP: The beer will cook off. However, if you don’t want to use a beer, simply use more beef broth or water. You want to cover the vegetables and the roast.
    • Slow Cook on low for 6-8 hours until your roast is cooked through and tender.
    • Using two forks or a Mix N Chop, shred the roast.
    • Serve over mashed potatoes or with buttered bread!

    Notes

    Using Beer: The beer will cook-off. However, if you don’t want to use a beer, simply use more beef broth or water.

    Nutrition

    Calories: 462kcalCarbohydrates: 8gProtein: 45gFat: 26gSaturated Fat: 12gPolyunsaturated Fat: 2gMonounsaturated Fat: 13gTrans Fat: 2gCholesterol: 154.3mgSodium: 393mgPotassium: 957mgFiber: 2gSugar: 3gVitamin A: 6836IUVitamin C: 4mgCalcium: 63mgIron: 5mg
    Print Recipe Pin Recipe Rate this Recipe
    Tried this recipe?Let us know how it was!

    More Easy Recipes

    You may also want to try the following recipes:

    • Parmesan Roasted Zucchini
    • Easy Crock Pot Chicken Gravy
    • Slow Cooker Beef Stroganoff
    • Slow Cooker Chicken Bacon Ranch Pasta
    • Slow Cooker Rump Roast With Baby Carrots
    • Crock Pot Chili Mac And Cheese
    • Mini Cheese Stuffed Peppers

    Pizza Garlic Bread (Cheesy, Crispy & Ready in 25 Mins!)

    October 5, 2024 by Angela Milnes

    Cheesy Garlic Bread Pizza.

    Garlic bread meets pizza in the cheesiest, crunchiest way possible—this Easy Pizza Garlic Bread is about to be your new favorite shortcut dinner or snack.

    Cheesy Garlic Bread Pizza.

    Whether it’s Friday night comfort food or a fun cooking activity with the kids, garlic bread pizza is a total win. It’s everything you love about cheesy garlic bread and classic pizza—baked into one golden, gooey masterpiece. And the best part? You don’t need pizza dough or any fancy prep. Just grab a loaf, pile on your toppings, and bake.

    This one’s perfect for lazy weekends, movie nights, or serving alongside mains like Spinach And Ricotta Bake, Cacio e Pepe, or Hawaiian Garlic Shrimp. It’s quick, totally customizable, and 100% delicious.

    [feast_advanced_jump_to]

    💖 Why This Recipe Works

    • Two Favorites Combined: Garlic bread + pizza = guaranteed family hit.
    • Big Flavor, Minimal Effort: You get melty cheese, crispy edges, and bold flavor with barely any prep.
    • Kid-Friendly & Fun: Let everyone add their own toppings for a build-your-own pizza night.

    ⭐ Star Ingredients

    cheesy garlic bread ingredients.

    Here’s what makes this cheesy flavored garlic bread pizza so good:

    • Garlic Bread Loaf – I use store-bought garlic bread to keep it simple, but you can level it up by brushing French bread with your own garlic butter mix. Either way, you get a crispy, buttery base with bold flavor.
    • Shredded Mozzarella – I always recommend shredding it fresh—pre-shredded doesn’t melt as evenly. It’s the secret to that stretchy, gooey finish we all crave.
    • Pizza Sauce & Pepperoni – A classic combo. The tangy sauce keeps things balanced, and the pepperoni adds that salty, slightly spicy punch that makes it feel like real-deal pizza.

    For the complete list of ingredients with measurements and instructions, please see the recipe card at the bottom of the post.

    📖  Substitutions & Variations

    • No pizza sauce? Use marinara, tomato paste with Italian seasoning, or even pesto for a herby twist.
    • Skip the meat and go veggie with mushrooms, spinach, or sliced bell peppers.
    • Try other cheeses like provolone, cheddar, parmesan, gouda, or a shredded Italian blend.
    • Make it spicy with red pepper flakes or jalapeños.
    • Drizzle with olive oil or melted butter before baking for extra crispness and flavor.

      Want another easy, cheesy idea? Try my Caprese Mini Pizzas or Mini Chicken Pot Pies—both are crowd-pleasing bites.

    🔪How To Make Cheesy Garlic Bread Pizza

    marinara sauce on garlic bread.
    1. Step 1: Put the garlic bread on a baking sheet. Add however much sauce you'd like. The bread will absorb some, so keep that in mind.
    pepperoni and cheese on garlic bread.
    1. Step 2: Add cheese and pepperoni, and then add even more cheese! Place in the oven and bake for 20-25 minutes at 350 degrees.
    pepperoni and cheese on garlic bread.
    1. Step 3: Place in the oven and bake for 20-25 minutes at 350 degrees.
    Cheesy Garlic Bread Pizza cooked on a baking tray.
    1. Step 4: Top your garlic bread pizza with parsley and serve.

    💡Hint: Want ultra-crispy edges? Brush the bread edges with melted butter or olive oil before baking.

    Cheesy Garlic Bread Pizza.

    👩‍🍳 Expert Tips

    • Fresh is best: Use fresh garlic and hand-shredded cheese for maximum flavor and melt.
    • Don’t skimp on sauce: Garlic bread soaks it up fast—so go generous or you’ll miss that saucy pizza bite.
    • Make it a pizza bar: Slice your garlic loaf into sections and let everyone choose their own toppings. Fun + no complaints at dinner!

    💭 FAQs

    Can I Cook Garlic Pizza Bread In The Air Fryer?

    Yes. Whilst this recipe is designed to be cooked in the oven, you could cook cheesy garlic bread in the air fryer. Just be sure to Preheat your air fryer to 200C/400F first, then cook for 4-5 minutes until golden brown and crispy.

    What Bread To Use For Garlic Bread Pizza?

    Pre-made garlic bread loaves are super convenient, but French bread or ciabatta with homemade garlic butter works great too.

    Can I Make This Bread Pizza Using Pizza Stone?

    Absolutely, you can prepare cheesy garlic bread pizza on a pizza stone, preheat oven to spread the high heat of your pizza oven for an equally delicious crust.

    What Is The Best Cheese For Cheesy Garlic Bread?

    Mozzarella for melt, parmesan for sharpness, cheddar for richness, and provolone for balance. Mix and match for cheesy perfection.

    How To Store Leftover Garlic Pizza Bread?

    Wrap slices in foil or store in an airtight container. Keep in the fridge for up to 3 days. Reheat in the oven or air fryer for best results

    🧂Serving Suggestions

    Serve pizza garlic bread with:

    • Spicy Lasagna Soup with Oregano for a warm, cozy pairing
    • Italian Chopped Salad for a crunchy, tangy balance
    • Stuffed Cucumber Boats if you want something cool and fresh
    • Air Fryer Onion Rings for a crispy party platter vibe

    🎉 DIY Pizza Table Idea: Hosting friends or feeding a crowd? Set up a pizza garlic bread station with dipping sauces like marinara, ranch, and pesto oil, plus easy sides like Air Fryer Sweet Potato Fries and Smoked Salmon Bruschetta. It’s a fun, fuss-free way to serve everyone’s favorites.

    Cheesy Garlic Bread Pizza.

    🍽 Love Garlic? Try These Tasty Meals

    • Fiery Ginger Garlic Shrimp (Chinese Shrimp).
      Fiery Ginger Garlic Shrimp (Chinese Shrimp)
    • Baked Brie with Garlic and Honey.
      Baked Brie With Garlic and Honey: The Ultimate Easy Party Appetizer
    • Homemade Garlic Parm Sauce.
      Homemade Garlic Parm Sauce
    • Easy Garlic Rice With Cilantro in a white bowl with a wooden spoon.
      Easy Garlic Rice With Cilantro

    Did you make this recipe? Leave a review and a ⭐⭐⭐⭐⭐ rating below, or tag us in our Facebook Group! Alternatively, bookmark it in your browser or save to Pinterest.

    Cheesy Garlic Bread Pizza.

    Cheesy Garlic Bread Pizza

    Angela Milnes
    Cheesy Garlic Bread Pizza: garlic bread topped with melty cheese and pizza toppings for an easy, delicious twist.
    5 from 5 votes
    Print Recipe Pin Recipe Rate this Recipe
    Prep Time 2 minutes mins
    Cook Time 18 minutes mins
    Total Time 25 minutes mins
    Course Appetizers
    Cuisine American
    Servings 4 Servings
    Calories 231 kcal

    Ingredients
      

    • 1 Garlic Bread Loaf
    • 1 Jar Pizza Sauce
    • 2 Cups Shredded Mozzarella
    • 20 Pepperoni Slices
    • Parsley

    Instructions
     

    • Put the garlic bread on a baking sheet.
    • Add however much sauce you’d like. The bread will absorb some, so keep that in mind.
    • Add cheese. Add pepperoni, and then add even more cheese!
    • Place in the oven and bake for 20-25 minutes at 350 degrees. (Preheat first)
    • Top your Cheesy Garlic Bread Pizza with parsley if you want. Serve with a side of tomato ketchup in a small bowl for a delightful dining experience!

    Notes

    Fresh Mozzarella Cheese: For the best melt, grate your own mozzarella instead of buying pre-shredded cheese; it melts more smoothly and evenly.
    Fresh Garlic: Use fresh garlic and mince it finely for a vibrant flavor; jarred garlic can sometimes have a more muted taste.

    Nutrition

    Calories: 231kcalCarbohydrates: 11gProtein: 17gFat: 14gSaturated Fat: 8gPolyunsaturated Fat: 1gMonounsaturated Fat: 4gCholesterol: 55mgSodium: 1323mgPotassium: 587mgFiber: 3gSugar: 7gVitamin A: 1119IUVitamin C: 12mgCalcium: 309mgIron: 2mg
    Print Recipe Pin Recipe Rate this Recipe
    Tried this recipe?Let us know how it was!

    Easy Air Fryer Chicken And Shrimp Alfredo

    October 5, 2024 by Angela Milnes

    Easy Air Fryer Chicken And Shrimp Alfredo.

    If you're looking for an easy weeknight dinner option, you'll love this Air Fryer Chicken and Shrimp Alfredo Pasta. The creamy homemade Alfredo sauce is made with just a few ingredients, and the chicken and shrimp can be cooked right in the air fryer.

    fettucine, shrimp and chicken alfredo on a plate.
    [feast_advanced_jump_to]

    Why This Recipe Works

    • Make At Home: Chicken and shrimp Alfredo is a delicious, restaurant-quality meal that you can easily make at home.
    • Tasty Sauce: This dish features tender chicken breast and juicy shrimp, both of which are cooked in a rich Alfredo sauce.
    • Simple Yet Impressive: Chicken and shrimp Alfredo is the perfect meal for a date night in or a special occasion. It's sure to impress your guests, but it's also easy enough to make on a weeknight.

    🥘 Ingredients

    chicken and shrimp alfredo ingredients.

    For chicken shrimp alfredo recipe, you will need ingredients for the shrimp and chicken as well as ingredients for the creamy sauce and pasta. Here's what you'll need:

    • Chicken- Use boneless chicken breast or thighs and dice it up into chunks.
    • Shrimp- I like to use jumbo shrimp since it tends to shrink a little after it's cooked, but you can use any type you like.
    • Steak seasoning- I recommend investing in a good steak seasoning from your local butcher for best results.
    • Butter- You will want to use unsalted butter. Set it out on the counter for about 30-minutes to soften.
    • Heavy Cream- If you don't have heavy cream, you can make it. To make 1 cup of heavy cream, melt ¼ cup of butter and slowly whisk in ¾ cup milk.
    • Garlic minced- You can use fresh garlic cloves and mince them or you can buy already made minced garlic in a jar.
    • Grated parmesan-Freshly grated parmesan is best, but you can use shredded parmesan cheese as well.
    • Nutmeg- Nutmeg adds a unique flavor that combines everything for a delicious taste.
    • White pepper- You can use white pepper, black pepper, or peppercorns for a little spice.
    • Parsley-Use fresh parsley, chopped and diced for additional flavor.
    • Pasta- Use your favorite fettuccini noodles, penne pasta or broccoli to serve over you chicken and shrimp Alfredo over.

    For the complete list of ingredients with measurements and instructions, please see the recipe card at the bottom of the post.

    📖  Substitutions & Variations

    • Garlic Powder: Swap minced garlic for garlic powder to easily enhance the flavor of your this recipe without compromising taste.
    • Cajun Seasoning: For a twist on the classic Shrimp and Chicken Alfredo recipe, use Cajun seasoning instead of steak seasoning to infuse the dish with bold flavors.

    🔪 How To Make Air Fryer Chicken and Shrimp Alfredo?

    shrimp and chicken in an air fryer.

    Step One: Spray your air fryer basket with olive oil to ensure the chicken and shrimp do not stick.

    shrimp in air fryer basket covered in paprika.

    Step Two: Season the chicken and shrimp with steak seasoning, or your favorite spices. Then, add shrimp and chicken in the air fryer basket.

    cooked shrimp in air fryer.

    Step Three: Set the temperature for 350℉ and cook the chicken and shrimp for 20 minutes or until cooked through.

    making alfredo sauce in a skillet.

    Step Four: While the chicken and shrimp are cooking, melt the butter in a medium sized saucepan. Then, add in the heavy cream.

    air fryer shrimp sauce.

    Step Five: Once the cream has heated up add in garlic and parmesan cheese. Whisk continuously.

    air fryer shrimp sauce.

    Step Six: Once the parmesan cheese is melted and mixed, add in the nutmeg, white pepper and parsley. Stir to combine.

    air fryer chicken and shrimp alfredo.

    Step Seven: Prepare your pasta over the stovetop, following the directions on the box, or saute some broccoli if you want a low carb meal.

    air fryer chicken and shrimp alfredo.

    Step Eight: Serve your chicken and shrimp Alfredo over the pasta or broccoli and Enjoy!

    fettucine, shrimp and chicken alfredo on a plate.

    👩‍🍳 Expert Tips

    • Use freshly grated Parmesan cheese for the Alfredo sauce; it melts better and adds a richer flavor than pre-shredded cheese.
    • Opt for raw, deveined shrimp and pat them dry before cooking to ensure they sear nicely and integrate well into the sauce.

    💭 FAQs

    What Kind Of Chicken Should I Use?

    You can use any kind of chicken you like for this recipe, but boneless, skinless chicken breasts are the best choice. Chicken thighs will also work well.

    Can I Make Chicken And Shrimp Ahead Of Time?

    Yes, you can make this dish ahead. Cook the pasta and chicken/shrimp as directed, then store in an airtight container in the fridge. When ready to eat, reheat everything in the air fryer for a few minutes until warmed through.

    My Sauce Didn't Turn Out Creamy, What Happened?

    Sauces may curdle if milk or cream is heated rapidly. If your sauce lacks creaminess, it may be due to quick addition of milk/cream or high heat. To avoid this, add milk/cream gradually while whisking. Alternatively, simmer the sauce gently.

    🧂Serving Suggestions

    Here are my favorite vegetables to serve with Air Fryer Chicken and Shrimp Alfredo:

    • Air Fryer Asparagus: Toss asparagus with olive oil, garlic, and Parmesan. Airfry for a flavourful tender result.
    •  Crispy Caesar Salad: Combine crisp romaine, homemade croutons, and Caesar dressing for a classic and refreshing side.
    •  Green Beans: Sauté green beans in lemon-infused butter for a zesty and vibrant accompaniment.
    • Corn On The Cob: Grill or boil corn, then slather with a mixture of butter and Parmesan for a tasty twist.
    fettucine, shrimp and chicken alfredo on a plate.

    🍽 Related Recipes

    • einkorn angel hair and cherry tomato pasta in a white bowl.
      One-Pan Einkorn Angel Hair Pasta with Cherry Tomatoes
    • Salmon Dill Puree.
      Lemon Dill Salmon Mousse (Bariatric Friendly)
    • close-up-watermelon-slices-with-blackberry-plastic-disposable-cup-perfect for a summer party.
      How To Host An Awesome Summer Party
    • Oven baked lobster tail with garlic butter and lemon.
      How To Cook Lobster Tail At Home

    Did you make this recipe? Leave a review and a ⭐⭐⭐⭐⭐ rating below, or tag us in our Facebook Group! Alternatively, bookmark it in your browser or save to Pinterest.

    Easy Air Fryer Chicken And Shrimp Alfredo.

    Easy Air Fryer Chicken and Shrimp Alfredo

    Angela Milnes
    Discover a delightful twist on a classic with Air Fryer Chicken and Shrimp Alfredo, offering a quick, flavorful, and evenly cooked meal.
    5 from 4 votes
    Print Recipe Pin Recipe Rate this Recipe
    Prep Time 15 minutes mins
    Cook Time 20 minutes mins
    Total Time 35 minutes mins
    Course Dinners
    Cuisine American
    Servings 4 Servings
    Calories 1013 kcal

    Ingredients
      

    • 2 Chicken Breast Diced
    • 1 Ib Shrimp
    • Steak Seasoning
    • ½ Cup Unsalted Butter
    • 2 Cups Heavy Cream
    • 2 tablespoon Garlic Minced
    • 3 Cup Parmesan Grated
    • Pinch Nutmeg
    • 1 teaspoon White Pepper
    • 2 tablespoon Parsley
    • 1 Pkt Fettuccine Noodles

    Instructions
     

    • Spray your air fryer basket with olive oil to ensure the chicken and shrimp do not stick.
    • Season the chicken and shrimp with steak seasoning, or your favorite spices. Then, add shrimp and chicken in the air fryer basket.
    • Set the temperature for 350℉ and cook the chicken and shrimp for 20 minutes or until cooked through.
    • While the chicken and shrimp are cooking, melt the butter in a medium sized saucepan. Then, add in the heavy cream. Stir to combine.
    • Once the heavy cream has heated up add in garlic and parmesan cheese. A tip here is to add 1 c of parmesan cheese at a time to ensure all the parmesan has been incorporated.
    • Once the parmesan cheese is melted and mixed, add in the nutmeg, white pepper and parsley. Stir to combine.
    • Prepare your pasta over the stovetop, following the directions on the box, or saute some broccoli if you want a low carb meal.
    • Serve your chicken and shrimp Alfredo over the pasta or broccoli and Enjoy!

    Notes

    Use freshly grated Parmesan cheese for the Alfredo sauce; it melts better and adds a richer flavor than pre-shredded cheese.
    Opt for raw, deveined shrimp and pat them dry before cooking to ensure they sear nicely and integrate well into the sauce.

    Nutrition

    Calories: 1013kcalCarbohydrates: 9gProtein: 54gFat: 86gSaturated Fat: 54gPolyunsaturated Fat: 3gMonounsaturated Fat: 23gTrans Fat: 1gCholesterol: 430mgSodium: 1379mgPotassium: 532mgFiber: 0.4gSugar: 4gVitamin A: 3213IUVitamin C: 6mgCalcium: 1064mgIron: 2mg
    Print Recipe Pin Recipe Rate this Recipe
    Tried this recipe?Let us know how it was!

    More Easy Air Fryer Recipes

    • Air Fryer Chimichangas
    • Air Fryer Huli Huli Chicken
    • Air Fryer Carrot Fries
    • Air Fryer Orange Beef
    • Air Fryer BBQ Chicken Wings
    • Air Fryer Cheesesteak Egg Rolls
    • Air Fryer Sliced Potatoes
    • Air Fryer Cauliflower Pizza
    • Air Fryer Asparagus with Parmesan

    Best Spanakopita With Puff Pastry

    October 5, 2024 by Angela Milnes

    Spanakopita With Puff Pastry on a plate next to a fork.

    Love Greek spinach pie? Then buckle up, because this Spanakopita with Puff Pastry is your new weeknight obsession. We’re ditching the delicate phyllo and going all-in on flaky, buttery puff pastry. It’s golden, crisp, and ready to impress at brunch, lunch, or your next cozy dinner.

    Spanakopita With Puff Pastry on a plate next to a fork.

    This easy take on classic spanakopita is everything I want in a savory pie: rich filling, minimal effort, and layers of flavor in every bite. Puff pastry gives it that golden crunch without the stress of phyllo sheets—no flaking out mid-assembly here!

    Spanakopita is especially perfect for spring get-togethers, brunch tables, or cozy evenings when you want something hearty but not heavy. It's especially dreamy with a Mediterranean-style spread—try it alongside my Greek Beetroot Dip, Pickled Cucumbers and Tomatoes, or serve with slices of this juicy Thin Sliced Chicken Breast Air Fryer recipe for a full-on flavor combo.

    [feast_advanced_jump_to]

    💖 Why This Recipe Works

    • Golden & Crispy – Puff pastry gives this a next-level crunch while hugging that dreamy spinach-feta filling.
    • Fuss-Free – No layering paper-thin phyllo—just roll, fill, and bake!
    • Crowd-Pleasing – Appetizer, lunch, snack, or dinner... it’s always a hit.

    🛒 Star Ingredients

    Spinach Pie Ingredients.
    • Spinach – The green hero. Earthy, fresh, and packed with nutrients—it’s the heart of the pie.
    • Feta Cheese – Tangy, salty, and bold. Use block feta for that authentic Greek punch.
    • Puff Pastry – Buttery, flaky, and wildly easy. This shortcut makes everything feel gourmet.

    For the complete list of ingredients with measurements and instructions, please see the recipe card at the bottom of the post.

    📖 Substitutions & Variations

    • Cream Cheese Boost – Want it extra rich? Stir in a couple tablespoons of cream cheese for an ultra-creamy center.
    • Tomato Twist – Add chopped cherry tomatoes for bursts of juicy sweetness.
    • Spinach Swap – Baby spinach works great if you're short on time (no chopping needed).
    • Frozen Spinach? – Totally fine! Just thaw and squeeze the life out of it—nobody wants soggy puff pastry.

    For the ultimate spread, pair your puff pastry spanakopita with a Mediterranean Farro Salad, a scoop of Creamy Beetroot Hummus, or this flavorful Cold Chicken Pasta Salad for a little protein-packed balance.

    🔪 How To Make Spanakopita With Puff Pastry?

    Onions and spinach in a skillet.
    1. Step 1: Preheat the oven to 350°F (175°C). Line a 9x9 baking dish with parchment paper and lightly spray with nonstick cooking spray.
    Cooking onions and spinach in a skillet.
    1. Step 2: Heat olive oil in a large skillet over medium heat. Sauté the chopped onion, green onions, and garlic until soft and fragrant. Add the spinach in batches, cooking until just wilted. Remove from heat and let cool slightly.
    Eggs, ricotta cheese, feta cheese, salt, black pepper, and dill weed in a bowl.
    1. Step 3: In a large mixing bowl, combine the eggs, ricotta, crumbled feta, salt, pepper, and dill. Stir in the cooled spinach mixture until everything is well combined.
    Pastry puff in a baking sheet.
    1. Step 4: Lay one sheet of puff pastry in the bottom of your prepared baking dish.
    Spinach mixture in a pan.
    1. Step 5: Spread the spinach and cheese filling evenly over the pastry.
    Spinach pie with pastry on top.
    1. Step 6: Top with the second puff pastry sheet and brush with olive oil (or an egg wash if you want a glossy top).
    Cooked spinach pie with pastry on top.
    1. Step 7: Bake for 35–40 minutes, or until the pastry is golden brown and puffed.
    Cooked spanakopita with puff pastry.
    1. Step 8: Let the spanakopita cool for at least 5 minutes before slicing. Serve warm or at room temperature.

    💡 Hint: If your puff pastry is frozen, be sure to thaw it in the fridge overnight or on the counter for about 30 minutes—don’t rush it or it’ll crack when you unfold it.

    Spanakopita with puff pastry on a plate.

    👩‍🍳 Expert Tips

    • No Soggy Pastry! – Always squeeze excess water from thawed frozen spinach.
    • Use Block Feta – Pre-crumbled feta lacks that rich, tangy punch—go for the real deal!
    • Egg Wash for Extra Shine – Want that bakery-style golden top? Brush with an egg wash before baking.

    💭 FAQs

    Can I use homemade puff pastry for spanakopita?

    Yes, you can use homemade puff pastry. Roll out the pastry dough on a lightly floured surface to create your pastry sheet.

    Can I make spanakopita ahead of time?

    Absolutely. Assemble the pie, cover, and refrigerate until ready to bake. You can also freeze it before baking—just add a few extra minutes to the bake time.

    Can I use silverbeet instead of spinach in spanakopita?

    Yes! Silverbeet (aka Swiss chard) works great. Just remove the tough stems and chop the leaves finely before cooking, just like spinach.

    How do I store leftover spanakopita with puff pastry?

    Refrigerate leftovers in an airtight container for up to 3 days. Reheat in the oven to keep the pastry crispy.

    💖 Serving Suggestions

    Want to take your spanakopita with puff pastry from snack to showstopper? Pair it with:

    • Mango Arugula Salad – Sweet, peppery, and just the right zing.
    • Chicken Stuffed with Spinach and Dates – Fancy-ish but totally doable.
    • Homemade Olive Tapenade with Crostini – Salty, snappy, and scoopable.
    • Cranberry Lime Mocktail – A zesty sip to keep things cool.
    Spanakopita puff pastry on a plate.

    🍽 More Recipes Using Spinach

    • Best Spinach And Ricotta Bake Recipe.
      Best Spinach And Ricotta Bake Recipe
    • Spinach Egg Muffins With Mozzarella Cheese.
      Spinach Egg Muffins With Mozzarella Cheese
    • Easy Slow Cooker Spinach Artichoke Dip.
      Easy Slow Cooker Spinach Artichoke Dip
    • Best Cabbage, spinach And Potatoes recipe.
      Best Cabbage and Spinach Potatoes Skillet (Easy One-Pan Meal!)

    Did you make this recipe? Leave a review and a ⭐⭐⭐⭐⭐ rating below, or tag us in our Facebook Group! Alternatively, bookmark it in your browser or save to Pinterest.

    Spanakopita With Puff Pastry on a plate next to a fork.

    Spanakopita With Puff Pastry

    Angela Milnes
    Spanakopita with puff pastry blends flaky layers with savory spinach and feta filling for a delightful twist on a Greek classic.
    5 from 4 votes
    Print Recipe Pin Recipe Rate this Recipe
    Prep Time 27 minutes mins
    Cook Time 38 minutes mins
    Total Time 1 hour hr 10 minutes mins
    Course Dinners
    Cuisine Greek
    Servings 8 Servings
    Calories 518 kcal

    Ingredients
      

    • 4 Tablespoons Olive Oil Divided
    • 1 Onion Chopped
    • 1 Bunch Green Onions Sliced
    • 2 Cloves Garlic Minced
    • 2 Pounds Spinach
    • 2 Eggs
    • ½ Cup Ricotta Cheese
    • 5 Ounce Feta Cheese Crumbled
    • 1 Teaspoon Salt
    • ½ Teaspoon Black Pepper
    • ½ Teaspoon Dill Weed
    • 2 Sheet Puff Pastry

    Instructions
     

    • Preheat the oven to 350°.
    • Line a 9 x 9 baking dish with parchment paper. Spritz with nonstick cooking spray.
    • In an extra-large skillet over medium heat, pour 3 tablespoons of olive oil and heat through. Add the onion, green onions, and garlic, cooking until the onions are soft. Add the spinach in batches, cooking until it wilts. Remove from heat.
    • Meanwhile, in a large bowl, stir together the eggs, ricotta cheese, feta cheese, salt, black pepper, and dill weed.
    • Stir the cheese mixture into the spinach mixture until well blended.
    • Place one sheet of puffs pastry in the bottom of the prepared baking dish. Add the spinach mixture and top with the remaining sheet of puff pastry.
    • Brush with the remaining olive oil.
    • Bake for 40 minutes or until the puff pastry is golden brown.
    • Garnish and serve warm.

    Notes

    No Soggy Pastry! – Always squeeze excess water from thawed frozen spinach.
    Use Block Feta – Pre-crumbled feta lacks that rich, tangy punch—go for the real deal!
    Egg Wash for Extra Shine – Want that bakery-style golden top? Brush with an egg wash before baking.

    Nutrition

    Calories: 518kcalCarbohydrates: 35gProtein: 14gFat: 38gSaturated Fat: 11gPolyunsaturated Fat: 4gMonounsaturated Fat: 20gTrans Fat: 0.004gCholesterol: 65mgSodium: 910mgPotassium: 736mgFiber: 4gSugar: 2gVitamin A: 10839IUVitamin C: 33mgCalcium: 249mgIron: 5mg
    Print Recipe Pin Recipe Rate this Recipe
    Tried this recipe?Let us know how it was!

    Instant Pot White Chicken Chili

    October 5, 2024 by Angela Milnes

    Instant Pot White Chicken Chili.

    This Instant Pot White Bean Chicken Chili is delicious, creamy and packed with protein. White Bean Chicken Chili is one recipe you'll come back to time and again. If you’re looking for a warm and filling family dinner, then you’ll want to try the best white Chicken Chilli Instant Pot recipe around!

    instant pot white chicken chili.
    [feast_advanced_jump_to]

    Why This Recipe Works

    • Flavorful and Hearty: This chili is packed with spices, white beans, and tender chicken.
    • Quick Weeknight Dinner: Use your Instant Pot for a fast, satisfying meal.
    • Healthy and Wholesome: White Chicken Chili is a well-rounded dish that's both nutritious and delicious.

    💖 Why This Recipe Works

    • Flavorful and Hearty: This chili is packed with spices, white beans, and tender chicken.
    • Quick Weeknight Dinner: Use your Instant Pot for a fast, satisfying meal.
    • Healthy and Wholesome: White Chicken Chili is a well-rounded dish that's both nutritious and delicious.

    ⭐ Star Ingredients

    Instant Pot white chili chicken ingredients.

    Here are the ingredients needed for your white bean chicken chili Instant Pot recipe:

    • Medium Onion: Adds a sweet, slightly sharp flavor that forms the base of the chili.
    • Green Bell Pepper: Brings a mild, sweet note and a satisfying crunch to the dish.
    • Shredded Chicken: The protein star of the dish, it absorbs the flavors of the broth and spices, adding a hearty element to the chili.
    • Green Chiles: Adds a spicy kick and tangy flavor that gives the chili its distinctive character.
    • Cream Cheese: Melts into the broth, creating a creamy, rich texture that makes the chili more satisfying.
    • Great Northern Beans: These mild, tender beans bulk up the chili and absorb all the wonderful flavors.
    • Salt and Black Pepper: Basic seasonings that enhance the natural flavors of the ingredients.
    • Garlic Powder, Cumin and Cayenne Pepper: Add depth, warmth, and a bit of heat to the chili, giving it a complex flavor profile.
    • Low-Sodium Chicken Broth: Forms the flavorful base of the chili, it adds depth and enhances the flavors of the other ingredients.

    For the complete list of ingredients with measurements and instructions, please see the recipe card at the bottom of the post.

    📖  Substitutions & Variations

    • Skinless Chicken: Yes, you can use skinless chicken breasts or skinless boneless chicken thighs instead of cooked chicken. Just cook the fresh chicken breast for the same time of 10 minutes. Once the chicken chili has pressure cooked, shred chicken using forks.
    • Garlic Cloves: You can use fresh garlic cloves instead of garlic powder in this Instant Pot White Chicken Chili. You'll need to add about 4 or 5 cloves (minced) and cook as instructed.
    • Cannellini Beans: Yes, you can use cannellini beans instead of great Northern beans in this Instant Pot White Chicken Chili. Just make sure to rinse and drain the beans before adding them to the Instant pot.
    • Vegetables: You can add other vegetables like frozen corn, carrots or potatoes to this Instant Pot White Chicken Chili. Just add them with the green chilies and cook as instructed.

    📖 Optional Toppings

    Looking for some great toppings to go with your white bean chicken chili? Here are some great topping suggestions:

    • Fresh Cilantro
    • Fresh Lime Juice
    • Tortilla Chips
    • Jalapeno Peppers
    • Tortilla Strips
    • Shredded Cheese
    • Sour Cream

    🔪 How To Make Instant Pot White Bean Chicken Chili

    white chili chicken mixture in instant pot.
    1. Step 1: Turn your Instant Pot onto sauté mode. Lightly spray the bottom of your pan with olive oil cooking spray. Once the inner pot becomes hot, add bell pepper and onion. Stir occasionally for about 3 to 5 minutes until the vegetables become translucent and cook through.
    white chili chicken mixture in instant pot.
    1. Step 2: Add to your Instant Pot the shredded chicken and green chilies. Next, add the Great Northern beans, salt, pepper, garlic powder, ground cumin, cayenne pepper, cream cheese, and the chicken stock or broth. Lock the lid and pressure cook for 10 minutes.
    instant pot.
    1. Step 3: Once the slow cooker has finished cooking, do a manual release by bringing the sealing valve toward you to release the pressure.
    Instant Pot White Chicken Chili.
    1. Step 4: Serve this Instant Pot White Chicken Chili in your favorite soup bowl and top with your favorite garnishes!

    👩‍🍳 Expert Tips

    • Sauté for Depth: Begin by using the sauté function to cook onions, garlic, and spices. This step deepens the flavor profile and creates a solid base for your chili.
    • Perfect Chicken Texture: Use boneless, skinless chicken and cook it just long enough under pressure so it remains tender. Once done, shred the chicken directly in the pot to blend seamlessly with the other ingredients.
    • Balance Your Flavors: Incorporate white beans, green chilies, and quality chicken broth. A pinch of cumin, chili powder, and a splash of lime juice brighten the dish—taste and adjust the seasoning once the pressure has released.
    • Creamy Finishing Touch: For extra richness, stir in a bit of cream cheese or heavy cream after pressure cooking. Top with fresh cilantro and a squeeze of lime to add a vibrant finish.

    💭 FAQs

    What Is White Chicken Chili?

    White Chicken Chili is a creamy, flavorful chili made with white beans and shredded chicken that’s thickened up with some cream cheese. It’s the perfect meal for chilly winter nights when you need something comforting and hearty.

    What Makes Instant Pot White Bean Chicken Chili So Great?

    This Instant Pot White Bean Chicken Chili is so easy to make and is packed with flavor. You’ll be pleased to know that it also makes excellent leftovers, so you can enjoy it for days after cooking! Instant Pot White Chicken Chili also freezes well, making it a great recipe to double up and freeze some portions for later on.

    What Are Great Northern Beans?

    Cannellini beans and Great Northern beans are both white and very similar in taste. Both are high in fiber, low in fat, and have zero cholesterol potentially making them a perfect addition to any diet. These beans are a great pantry staple to keep in your cupboard. With that said, yes, cannellini beans and Great Northern beans interchangeable. Cannellini beans are different in shape from Great Northern beans.

    How To Prep White Chicken Chili Ahead Of Time?

    To prep this Instant Pot white chicken chili ahead of time, you can dice the onion and pepper in advance. Also, precook the chicken ready for shredding and drain and rinse the cannellini beans in advance. This can make it easier to prepare your white bean chili chicken recipe for later.

    Can I Use Frozen Chicken Breasts In This Chili?

    You can also use frozen chicken breasts in this white chicken chili recipe but will need to add an extra 2 minutes to the pressure cook time. So you'll be pressure-cooking the chicken chili for 12 minutes instead of 10 minutes.

    Why Is There No Chili Powder In This Recipe?

    This Instant Pot White Chicken Chili recipe doesn't call for chili powder since the green chilies provide enough flavor to the chili. If you want to add extra flavor, then feel free to add chili powder or tabasco sauce according to your preference.

    Best Way to Store White Chicken Chili

    Store any leftover white chicken chili in an airtight container in your refrigerator for up to 4 days. You can also freeze the chili for up to 3 months. Allow to cool completely before transferring to a freezer-safe container or bag and freezing.

    💖 Serving Suggestions

    Here are my favorite sides to serve with Instant Pot White Chicken Chili:

    • Mexican Street Corn: Grilled corn on the cob smothered in mayo, cheese, and chili powder brings a street food vibe to your table, elevating the meal.
    • Jalapeño Cornbread: Spice up your side game with jalapeño-infused cornbread, a perfect contrast to the creamy and mild white chicken chili.
    • Roasted Sweet Potato Fries: Oven-roasted sweet potato wedges offer a sweet and savory balance, creating a satisfying accompaniment to the savory white chicken chili.
    • Brown Rice: Nutty brown rice serves as a wholesome and hearty alternative, soaking up the delicious flavors of the white chicken chili.
    • Chinese Chicken Salad: A crisp side salad with green beans, chicken pieces, and a tangy vinaigrette adds a refreshing and light contrast to the chili.
    • If you’d like to learn how to Make Rice In The Instant Pot then check out this easy steamed rice recipe.
    Instant Pot White Chicken Chili.

    🍽 More Instant Pot Recipes

    • Instant Pot Cajun Chicken and Rice.
      Instant Pot Cajun Chicken and Rice
    • Creamy Instant Pot Tortellini Recipe.
      Creamy Instant Pot Tortellini Recipe
    • Instant Pot Kielbasa And Cabbage.
      Instant Pot Kielbasa And Cabbage
    • Instant Pot Enchilada Soup.
      Instant Pot Enchilada Soup

    Did you make this recipe? Leave a review and a ⭐⭐⭐⭐⭐ rating below, or tag us in our Facebook Group! Alternatively, bookmark it in your browser or save to Pinterest.

    Instant Pot White Chicken Chili.

    Instant Pot White Chicken Chili

    Angela Milnes
    This Instant Pot White Chicken Chili is a quick, flavorful dish with tender chicken, white beans, and green chilies. It's rich, comforting, and ready in no time. Top with your favorite garnishes for a satisfying meal!
    5 from 4 votes
    Print Recipe Pin Recipe Rate this Recipe
    Prep Time 5 minutes mins
    Cook Time 25 minutes mins
    Total Time 30 minutes mins
    Course Dinners
    Cuisine American
    Servings 6 To 8 Servings
    Calories 415 kcal

    Ingredients
      

    • ½ Medium Onion Diced
    • 1 Green Bell Pepper Finely Diced
    • 1- Pound Shredded Chicken Cooked (Chicken Breast or Rotisserie Chicken)
    • 4 oz Green Chiles 1 Can Undrained
    • 6 Ounces Cream Cheese Cubed
    • 29 oz Great Northern Beans Drained & Rinsed (Canned Beans)
    • 1 Teaspoon Salt
    • 1 Teaspoon Black Pepper
    • 2 Teaspoon Garlic Powder
    • 2 Teaspoon Cumin
    • ¼ Teaspoon Cayenne Pepper
    • 2 Cups Low-Sodium Chicken Broth or Chicken Stock

    Instructions
     

    • Turn your Instant Pot onto sauté mode. Lightly spray the bottom of your pan with olive oil cooking spray. Once the inner pot becomes hot, add bell pepper and onion. Stir occasionally for about 3 to 5 minutes until the vegetables become translucent and cook through.
    • Add to your Instant Pot the shredded chicken and green chilies.
    • Add the great Northern beans, salt, pepper, garlic powder, round cumin, cayenne pepper, cream cheese, and chicken stock or broth.
    • Lock the lid on your Instant pot and close the valve to seal the pressure. Set your Instant Pot to pressure cook on high pressure for 10 minutes.
    • Once the slow cooker has finished cooking, do a manual release by bringing the sealing valve toward you to release the pressure.
    • Serve this Instant Pot White Chicken Chili in your favorite soup bowl and top with your favorite garnishes!

    Notes

    Garlic Cloves: You can use fresh garlic cloves instead of garlic powder in this Instant Pot White Chicken Chili. You'll need to add about 4 or 5 cloves (minced) and cook as instructed.
    Cannellini Beans: Yes, you can use cannellini beans instead of great Northern beans in this Instant Pot White Chicken Chili. Just make sure to rinse and drain the beans before adding them to the Instant pot.
    Vegetables: You can add other vegetables like frozen corn, carrots or potatoes to this Instant Pot White Chicken Chili. Just add them with the green chilies and cook as instructed.

    Nutrition

    Calories: 415kcalCarbohydrates: 36gProtein: 33gFat: 16gSaturated Fat: 7gPolyunsaturated Fat: 2gMonounsaturated Fat: 5gCholesterol: 85mgSodium: 628mgPotassium: 843mgFiber: 8gSugar: 3gVitamin A: 532IUVitamin C: 21mgCalcium: 127mgIron: 4mg
    Print Recipe Pin Recipe Rate this Recipe
    Tried this recipe?Let us know how it was!

    Try These Tasty Pressure Cooker Recipes Today!

    Here are some more favorite Instant Pot recipes to try:

    • Instant Pot Kalua Pork
    • Instant Pot Cacio E Pepe Pasta
    • Instant Pot Shredded Chicken
    • Instant Pot Chinese Dumpling Soup
    • Instant Pot Vegetarian Chili
    • Instant Pot Enchilada Soup
    • Instant Pot Shrimp Scampi
    • Instant Pot Chicken Pot Pie Soup
    • Instant Pot Fish Tacos
    white chili chicken in a glass bowl.

    Air Fryer Crispy Orange Beef

    October 5, 2024 by Angela Milnes

    Air Fryer Crispy Orange Beef.
    Air Fryer Crispy Orange Beef on white rice.

    Tender sirloin in a tangy orange glaze… yes, please! This Air Fryer Crispy Orange Beef brings that bold Chinese takeout flavor home—minus the deep fryer. It’s crispy, saucy, and totally craveable in under 30 minutes.

    Craving that crispy, saucy takeout vibe without the greasy guilt or wait time? This Crispy Orange Beef brings the magic of Chinese takeout right to your air fryer. It’s bold, zesty, and satisfies those sweet-savory cravings in under 30 minutes.

    This dish is perfect for cooler months when comfort food is calling, or anytime you’re in the mood for a quick fakeout feast. It’s a total win on its own, but I love serving it with veggie-packed sides to balance the richness. Try it with air fryer broccoli, a simple cabbage stir fry, or even crispy green bean fries. Want something fresh and crunchy? My beet and feta salad or a quick jalapeno coleslaw works beautifully too.

    [feast_advanced_jump_to]

    💖 Why This Recipe Works

    • Ready in 30 minutes – Quick prep, fast cook, dinner done.
    • Seriously good sauce – That sweet-tangy orange glaze is pure magic.
    • Kid-friendly – Skip the sauce for picky eaters or drizzle it over rice and veggies to stretch the flavor.

    ⭐ Star Ingredients

    Crispy orange beef ingredients inlcuding sirloin steak and flavorings.
    • Top Sirloin – Tender, lean, and perfect for quick air frying. It crisps up beautifully without drying out.
    • Cornstarch – The secret to that golden crunch—no deep fryer needed.
    • Orange Zest – Adds bold, fresh citrus flavor that makes the sauce pop.
    • Soy Sauce – Balances the sweetness with salty, umami depth.

    For the complete list of ingredients with measurements and instructions, please see the recipe card at the bottom of the post.

    📖  Substitutions & Variations

    • Veggie boost – Toss in bell peppers, broccoli, or snow peas.
    • Add heat – Mix in red pepper flakes or chili paste for a spicy kick.
    • Gluten-free – Use tamari instead of soy sauce and arrowroot instead of cornstarch.
    • Lower sugar – Skip the molasses and use a little honey or orange marmalade.
    • Make it a bowl – Serve over cauliflower rice or soba noodles for a hearty meal.

    If you’re on an air fryer kick like me, don’t miss these other reader favorites: crispy salmon bites, air fryer cod fillet, and our ever-popular air fryer butterfly chicken. They’re all quick, flavorful, and perfect for weeknight wins!

    🔪How To Make Air Fryer Crispy Orange Beef

    Beef and cornstarch in a bowl.
    1. Step 1: First, cut your steak into bite-sized pieces or strips. Then, place it in a bowl and mix it with ¼ cup cornstarch. You want the steak to be fully coated.
    crispy Orange beef pieces in air fryer.
    1. Step 2: Put a layer of steak in your air fryer basket, and spray it with cooking oil. You do not want to overcrowd the steak. Depending on the size of your Air Fryer, you will need to do 3-batches.
    Cooked crispy orange beef in air fryer basket.
    1. Step 3: Cook your steak in the air fryer at 380°F for 6 minutes per batch. The hot oil will make your beef nice and crispy.
    Making orange beef sauce.
    1. Step 4: While the steak is cooking, mix all of the remaining ingredients including the brown sugar molasses into a small saucepan. Then, cook the sauce on medium-high heat for about 5 minutes.
    Crispy orange beef and sauce in a white bowl.
    1. Step 5: When all the batches are cooked, transfer your fried beef to a large bowl. Then, pour the orange sauce over the steak until completely coated.
    Air fried orange beef served with rice on a plate.
    1. Step 6: Garnish with sesame seeds or green onions. Serve and enjoy.

    💡Hint: Don’t crowd the air fryer basket—it keeps the beef crispy, not soggy!

    👩‍🍳 Expert Tips

    • Cut evenly – Uniform slices = even crispiness and faster cooking.
    • Make the sauce while the beef cooks – Save time and get everything hot and ready at once.
    • Orange zest = flavor bomb – Don’t skip it! It’s what makes the sauce pop.

    💭 FAQs

    What Is Orange Beef?

    It’s a Chinese-American dish made with crispy fried beef and a tangy-sweet orange sauce. Think orange chicken, but beefier and bolder. The dish is similar to many other orange flavored dishes such as orange chicken and Slow Cooker Mongolian Beef.

    Do You Need To Preheat The Air Fryer?

    Not for this recipe. It crisps up perfectly from a cold start.

    What Type Of Beef Is Best For Orange Beef?

    Sirloin is ideal, but flank steak works too. Just slice it thin—about ¼ inch thick.

    How To Store Leftover Crispy Orange Beef

    Let it cool, then store in an airtight container in the fridge for 2–3 days. Reheat in the air fryer for best results.

    💖 Serving Suggestions

    This crispy orange beef is super versatile—serve it with:

    • Steamed white rice or cauliflower rice for a simple base
    • Vegetable stir fry with broccoli, carrots, or bell peppers
    • Asian-style sides like chilled feta beet salad, jalapeno slaw, or quinoa salad with sesame dressing
    • As a bowl – Add avocado, edamame, and sesame seeds for a full meal
    • Low-carb? Eat it solo with air fried bok choy or spicy cucumber salad
    • Salads: Serve with a kale apple salad with pomegranates or a beetroot carpaccio.
    Air fryer orange beef served with cooked rice.

    🍽 You'll Love These Air Fryer Dishes

    • Air Fryer Chicken Fajitas With Cotija Cheese.
      Air Fryer Chicken Fajitas With Cotija Cheese
    • Air Fryer Green Beans Crispy & Delicious.
      Air Fryer Green Beans Crispy & Delicious
    • Perfectly Seasoned Air Fryer Pork Chops.
      Air Fryer Boneless Pork Chops (Perfectly Seasoned)
    • Easy Air Fryer Cauliflower Pizza Crust.
      Easy Air Fryer Cauliflower Pizza Crust

    Did you make this recipe? Leave a review and a ⭐⭐⭐⭐⭐ rating below, or tag us in our Facebook Group! Alternatively, bookmark it in your browser or save to Pinterest.

    Air Fryer Crispy Orange Beef.

    Crispy Orange Beef Air Fryer Recipe

    Angela Milnes
    Craving takeout but want something quicker and healthier? This Air Fryer Orange Beef has all the flavors of your favorite Chinese dish with a crispy texture and a sweet, tangy orange sauce. The air fryer makes it easy to get that perfect crunch without deep frying, and it’s ready in a fraction of the time!
    5 from 4 votes
    Print Recipe Pin Recipe Rate this Recipe
    Prep Time 10 minutes mins
    Cook Time 18 minutes mins
    0 minutes mins
    Total Time 28 minutes mins
    Course Air Fryer Recipes
    Cuisine Asian
    Servings 2 Servings
    Calories 467 kcal

    Ingredients
      

    • 1 Pound Sirloin Beef thinly sliced about ¼ inch thick
    • ¼ Cup Corn Starch thinly sliced about ¼ inch thick
    • ¼ Cup Fresh Orange Juice
    • 2 tablespoon Orange Zest
    • 1 ½ tablespoon Fancy Molasses
    • ½ tablespoon Rice Vinegar
    • 1 tablespoon Soy Sauce
    • 1 tablespoon Cloves Garlic minced
    • ½ tablespoon Ginger Powder
    • ½ tablespoon Sesame Oil
    • ½ Cup Green Onion chopped (plus more for garnish)

    Instructions
     

    • Mix your steak and ¼ cup cornstarch together in a bowl. Mix well so that the steak is fully incorporated with the starch. Place in air fryer basket and spray with oil.
    • Cook in the air fryer at 380°f for 6 minutes per batch, do not over crowd the meat. 
    • While your steak is cooking, mix all of the remaining ingredients in a small saucepan. Cook on medium for about five minutes allowing the flavors to simmer.
    • Once your steak has finished cooking in the air fryer, transfer to a large bowl. Add your sauce over the steak and mix well.
    • Serve over rice, or noodles. Top with sesame seeds or green onions and enjoy!

    Notes

    Orange Flavor: Use a zester or cheese grater to create your orange zest from orange peel. You could also add a spoon of Orange Marmalade to this tasty Chinese beef recipe.

    Nutrition

    Calories: 467kcalCarbohydrates: 35gProtein: 53gFat: 12gSaturated Fat: 4gPolyunsaturated Fat: 2gMonounsaturated Fat: 5gCholesterol: 134mgSodium: 642mgPotassium: 1225mgFiber: 2gSugar: 15gVitamin A: 337IUVitamin C: 30mgCalcium: 123mgIron: 5mg
    Print Recipe Pin Recipe Rate this Recipe
    Tried this recipe?Let us know how it was!

    Tilapia Fish Tacos (Instant Pot Method)

    October 5, 2024 by Angela Milnes

    Instant Pot Fish Tacos on a white plate.

    Taco night just got a major upgrade! These Tilapia Fish Tacos are tender, flavorful, and cooked to perfection in less than 20 minutes. No frying, no fuss—just juicy, seasoned fish and all your favorite toppings wrapped in a warm tortilla.

    Instant Pot Fish Tacos on a white plate.

    These aren’t your average fish tacos. This is a taco recipe where the fish is gently steamed in the Instant Pot—keeping it tender, juicy, and mess-free.

    Don’t have an Instant Pot? No problem! You can easily pan-fry, bake, or air-fry the seasoned tilapia for equally tasty results. However you cook it, these tilapia fish tacos come out fresh, zesty, and perfect for taco night.

    These Instant Pot fish tacos will pair beautifully with Jalapeño Coleslaw, Cilantro Garlic Rice, or Mango Pineapple Salsa—a fresh, flavorful trio that turns taco night into a full-on fiesta.

    [feast_advanced_jump_to]

    💖 Why This Recipe Works

    • Quick and Easy: These Instant Pot fish tacos go from frozen to flavorful in under 20 minutes.
    • Fresh and Zesty: The homemade garlic aioli and citrus zest give each bite a punch of bright flavor.
    • Healthier Option: Steamed tilapia means no breading or frying—just clean, simple goodness.

    ⭐ Star Ingredients

    instant pot fish tacos ingredients.

    It's time to get out that shopping list! You won't need much for these quick and easy Tilapia fish tacos. Here's what you need:

    • Tilapia Fillets: Mild, flaky, and budget-friendly. Cooks beautifully in the pressure cooker and soaks up taco seasoning like a champ.
    • Taco Seasoning: Your go-to spice mix for bold, smoky, Mexican-inspired flavor.
    • Garlic Aioli (with mayo, garlic, lemon/lime): Tangy, creamy, and made in minutes—this sauce takes your tacos to the next level.
    • Tortillas (or shells): Use flour, corn, or even lettuce wraps for a lighter b

    For the complete list of ingredients with measurements and instructions, please see the recipe card at the bottom of the post.

    📖  Substitutions & Variations

    • Other Fish Options: Cod, mahi mahi, salmon, red snapper, halibut, sea bass, or grouper all work well. Choose firm, white fish for best texture.
    • Fresh vs. Frozen: You can use either—just adjust the cook time (8 minutes fresh, 18 minutes frozen).
    • Use Lime Instead of Lemon: Prefer lime juice? Go for it—it pairs beautifully with the aioli and fish.
    • Pan-Fried Fish Tacos: Want crispy edges? Use the same seasoning and pan-fry tilapia in a bit of oil for 2–3 minutes per side.
    • Air Fryer Fish: Air fry seasoned tilapia at 375°F for 8–10 minutes for a crispy, no-oil option.
    • Topping Ideas: Mango salsa, avocado slices, red cabbage slaw, crumbled queso fresco, or pickled onions.

    Try these fish tacos with my Black Bean And Corn Salsa or Strawberry Pico De Gallo for fresh topping options, or pair it with Orzo Asparagus Salad for a complete meal.

    🔪 How To Make Tilapia Fish Tacos In The Instant Pot?

    seasoned fish.
    1. Step 1: First, place your frozen tilapia fillets on top of a sheet of aluminum. Sprinkle each fish fillet with taco seasoning. Seal your foil packet from each side.
    fish in foil in the instant pot.
    1. Step 2: Place 1 & ½ cups of water in the bottom of your Inner pot. Place the trivet inside your Instant Pot. Place your tilapia fillets on top of the trivet. Pressure cook your frozen Tilapia fish on high pressure for 8 minutes.
    maklng fish taco cream.
    1. Step 3: While your fish is cooking, make your aïoli sauce. Combine the mayonnaise, minced garlic, lemon juice, lemon zest, and a dash of salt and pepper. Set aside and refrigerate until ready to serve.
    cooked tilapia fish.
    1. Step 4: Once cooked, do a quick pressure release and remove the tilapia fish from the inner pot.
    shredded tilapia fish.
    1. Step 5: Shred your tilapia fillets, and place tilapia pieces (taco filling) on your favorite taco shell whether it be a low-carb tortilla, lettuce wrap, flour tortilla, or corn! 
    Instant Pot Fish Tacos on a white plate.
    1. Step 6: Top it with the aïoli sauce, cilantro, and any other toppings you would enjoy on your fish taco such as tomatoes, cabbage slaw, avocado etc!

    💡Hint: Use foil to keep the fish moist and mess-free. You can also swap for parchment if avoiding aluminum.

    Instant Pot Fish Tacos on a white plate.

    👩‍🍳 Expert Tips

    • Minimize fishy flavor: A few drops of lemon or lime juice before seasoning helps tone it down.
    • Steamer basket hack: If you don’t want to wrap the fish, place it directly in a steamer basket inside your pot.
    • Batch cook & freeze: Make extra taco-seasoned fish and freeze for a quick meal later.

    💭 FAQs

    Why use tilapia for Instant Pot fish tacos?

    Tilapia is perfect for pressure cooking—it’s mild, flaky, and cooks fast. Plus, it’s super affordable.

    Can I use fried fish for tacos instead?

    Definitely! Pan-fried or deep-fried fish works great. Just season well and use your favorite method.

    How long does tilapia take to cook in the Instant Pot?

    About 8 minutes if fresh, or 18 minutes if frozen. Always check that it's cooked through and flakes easily.

    Are Instant Pot Tilapia Fish Tacos healthy?

    Yes! It uses steamed fish, fresh toppings, and homemade sauce—no breading or frying required.

    Can I freeze the fish taco filling?

    Yes. Cool completely, store in a freezer-safe container, and freeze for up to 2 months..

    💖 Serving Suggestions

    These sides make the perfect match for your Tilapia fish tacos:

    • Black Beans – Hearty and savory with a hint of spice.
    • Guacamole & Chips – Creamy, crunchy, and always a crowd-pleaser.
    • Refried Beans – Classic comfort food that’s filling and flavorful.

    Need more inspo? Try these recipes too:

    • Sheet Pan Chicken Fajitas – Great for a mix-and-match taco night.
    • Shrimp Cakes With Hot Sauce – A spicy seafood twist that complements taco flavors.
    • Vegan Baked Beans – Sweet, smoky, and super satisfying on the side.
    Instant Pot Fish Tacos on a white plate.

    🍽 Try These Easy Instant Pot Recipes

    • Instant Pot Lobster Tail: Lobster Rolls.
      Instant Pot Lobster Tail: Lobster Rolls
    • Instant Pot Wild Rice Blend With Pomegranates.
      Instant Pot Wild Rice Blend With Pomegranates
    • Instant Pot Shrimp Scampi Recipe.
      Instant Pot Shrimp Scampi Recipe
    • Instant Pot Recipes.
      Best Instant Pot Pesto Chicken 

    Did you make this recipe? Leave a review and a ⭐⭐⭐⭐⭐ rating below, or tag us in our Facebook Group! Alternatively, bookmark it in your browser or save to Pinterest.

    Instant Pot Fish Tacos on a white plate.

    Tilapia Fish Tacos (Instant Pot)

    Angela Milnes
    These Instant Pot Fish Tacos are a quick and easy way to enjoy perfectly tender, seasoned fish. With minimal effort, you'll have a fresh and flavorful meal that's perfect for any occasion. Just add your favorite toppings and enjoy!
    5 from 4 votes
    Print Recipe Pin Recipe Rate this Recipe
    Prep Time 5 minutes mins
    Cook Time 25 minutes mins
    Total Time 30 minutes mins
    Course Dinners
    Cuisine Mexcian
    Servings 4 Servings
    Calories 591 kcal

    Ingredients
      

    • 1 Pound Tilapia Fillets
    • 2 Tablespoon Taco seasoning
    • 1 Cup Mayonaise.
    • 1 Tablespoon Lemon Juice
    • 1 Tablespoon Lemon Zest
    • 1 Tablespoon Minced Garlic
    • Pinch Salt And Pepper Seasonings.
    • 4 Flour Tortillas

    Instructions
     

    • First, place your frozen tilapia fillets on top of a sheet of aluminium. Sprinkle each fish fillet with taco seasoning.
    • Seal your foil packet from each side.
    • Place 1 & ½ cups of water in the bottom of your Inner pot. Place the trivet inside your Instant Pot.
    • Place your aluminium foil packet tilapia fillets on top of the trivet.
    • Next, close the Instant Pot Lid. Close the seal by pushing it away from you. Pressure cook your frozen Tilapia fish on high pressure for 18 minutes.
    • While your fish is cooking, make your aïoli sauce. Combine the mayonnaise, minced garlic, lemon juice, lemon zest, and a dash of salt and pepper.
    • Set aside and refrigerate until ready to serve.
    • Once the time is completed, do a quick pressure release by bringing the valve toward you.
    • Once all the pressure is released remove the lid from your pressure cooker.
    • Shred your tilapia fillets, and place tilapia pieces (taco filling) on your favorite taco shell whether it be a low-carb tortilla, lettuce wrap, flour tortilla, or corn! 
    • Top it with the aïoli sauce, cilantro, and any other toppings you would enjoy on your fish taco such as tomatoes, cabbage slaw, avocado etc!

    Notes

    • Pan-Fried Fish Tacos: Want crispy edges? Use the same seasoning and pan-fry tilapia in a bit of oil for 2–3 minutes per side.
    • Air Fryer Fish: Air fry seasoned tilapia at 375°F for 8–10 minutes for a crispy, no-oil option.

    Nutrition

    Calories: 591kcalCarbohydrates: 18gProtein: 23gFat: 46gSaturated Fat: 8gPolyunsaturated Fat: 26gMonounsaturated Fat: 10gTrans Fat: 0.1gCholesterol: 75mgSodium: 737mgPotassium: 412mgFiber: 2gSugar: 2gVitamin A: 155IUVitamin C: 5mgCalcium: 69mgIron: 2mg
    Print Recipe Pin Recipe Rate this Recipe
    Tried this recipe?Let us know how it was!

    Air Fryer Sweet And Sour Chicken

    October 5, 2024 by Angela Milnes

    Air Fryer Sweet And Sour Chicken.

    Craving that takeout-style flavor with a healthier twist? This Air Fryer Sweet and Sour Chicken is crispy, juicy, and tossed in sticky-sweet sauce—all in under 25 minutes! It’s a fast, flavor-packed win for busy weeknights.

    Air Fryer Sweet And Sour Chicken.

    Sweet and sour chicken is a classic favorite at Chinese takeout spots—but making it at home in the air fryer means you control the ingredients (and skip the deep fryer). This version delivers bold flavor and crispy chicken using just a few pantry staples. It’s my go-to when we’re craving a fakeaway dinner, and it’s been a hit every time.

    Each serving has around 300–350 calories and 25g protein—making it a great weeknight dinner that feels indulgent but fits your goals.

    If you love Asian-inspired dinners like my Slow Cooker Chicken Teriyaki or Spicy Korean Cucumber Salad, this one’s going to be a new favorite.

    [feast_advanced_jump_to]

    💖 Why This Recipe Works

    • Healthful Twist – Crispy chicken, no deep frying.
    • Quick & Easy – From fridge to table in under 30 minutes.
    • Balanced Flavors – That classic sweet and sour sauce, made from scratch.

    ⭐ Star Ingredients

    Sweet and sour chicken ingredients.
    • Chicken Thighs or Breasts – I like thighs for their juiciness, but breasts work too. Cut into cubes for maximum surface area = more crisp.
    • Cornstarch – The key to that crispy, golden crust. Don’t skip it!
    • Pineapple & Peppers – Adds sweetness, crunch, and color. I always use canned pineapple for ease.

    For the complete list of ingredients with measurements and instructions, please see the recipe card at the bottom of the post.

    📖  Substitutions & Variations

    • Soy Sauce: Add to the sauce for extra umami depth.
    • Apple Cider Vinegar: A fruity, tangy swap for rice vinegar.
    • Brown Sugar: Adds a molasses-rich depth versus white sugar.
    • Keto Version: Skip the pineapple and use a low-sugar ketchup alternative.
    • Spicy Twist: Add a dash of chili flakes or a sliced jalapeño.
    • Stir Fry Chicken Air Fryer Style: Toss leftovers into a wok with veggies for a next-day stir fry.
    • Need it low-carb? This recipe is easy to adapt—skip the sugar and pineapple for a keto-friendly version that’s still big on flavor.

    Try this with my Air Fryer Bok Choy or Air Fryer Crispy Orange Beef for a full air fryer Chinese recipe night.

    🔪 How To Make Air Fryer Sweet And Sour Chicken? 

    Seasoned chicken pieces in an air fryer.
    1. Step 1: Fully coat the chicken bites in cornstarch, salt, and pepper. Place the coated chicken cubes evenly in an oil-sprayed air fryer basket, and spray the chicken with oil. Cook on 380 for 8 minutes. Shake the basket halfway. 
    Cooking chicken and veggies in air fryer.
    1. Step 2: After 8 minutes, shift the crispy chicken bites to one half and add the vegetables and pineapple to the other side. Finish cooking for 8 more minutes. Mix after 4 minutes.
    Sweet and sour sauce in a pan.
    1. Step 3: While cooking chicken, mix the sauce ingredients into a medium saucepan over medium heat. Bring to a boil then remove to cool and thicken. 
    Sweet and sour chicken in an air fryer basket.
    1. Step 4: Pour sauce over chicken and vegetables. Mix and garnish with sesame seeds and green onions. Optionally, serve your Air Fryer Sweet and Sour Chicken bites on rice.

    💡 Hint: To make air fried Asian chicken even crispier, don’t overcrowd the basket and preheat your air fryer.

    Air fried sweet and sour chicken on a white plate.

    👩‍🍳 Expert Tips

    • Don’t Crowd the Basket: Air needs to circulate to crisp things up.
    • Double Batch for Meal Prep: This reheats well in the air fryer for 5 minutes at 350°F.
    • Swap in Potato Starch: For an ultra-crispy coating.

    💭 FAQs

    What Is Sweet And Sour Chicken?

    A crispy Chinese-style chicken dish coated in tangy-sweet sauce made from vinegar, sugar, and tomato-based ingredients

    At What Temperature Is Chicken Considered Safe To Eat?

    If you're worried that the chicken isn't cooked all the way, use a meat thermometer and check the internal temperature. As long as it reads 165 degrees, it's done and ready to enjoy!

    Can You Make Keto Sweet and Sour Chicken?

    Absolutely! Just add in more veggies and leave out the rice. It's low carb without having to get rid of any of the flavors.

    What Veggies Go With Sweet and Sour Chicken?

    Bell peppers, onions, and pineapple are classic. For heat, add fresh jalapeños.

    Reheating Sweet and Sour Chicken in the Air Fryer

    Pop leftovers in the air fryer at 350°F for 4–6 minutes. It revives the crisp and keeps the sauce sticky.

    💖 Serving Suggestions

    Wondering what to serve with this sweet and sour chicken air fryer recipe? Try the following:

    • Steamed Jasmine Rice – A classic base.
    • Garlic Sesame Bok Choy – A quick stir fry with loads of flavor.
    • Vegetable Lo Mein – Noodles meet sweet and sour sauce = match made in heaven.
    • Cauliflower Rice – A low-carb option for a lighter dinner.
    • Egg Rolls or Dumplings – To make it a full fakeaway feast.

    Turn this into stir fry chicken air fryer style the next day—just toss leftover chicken and sauce with extra veggies in a hot skillet or wok for a quick second meal.

    Sweet and sour chicken on a white plate served with a fork.

    🍽 Try These Air Fryer Dishes

    • Air Fryer Butterfly Chicken With Citrus.
      Air Fryer Butterfly Chicken With Citrus
    • Air Fryer Green Beans Crispy & Delicious.
      Air Fryer Green Beans Crispy & Delicious
    • Air Fryer Chicken Cutlets Panko Recipe.
      Air Fryer Chicken Cutlets Panko Recipe
    • Air Fryer Cod Fillet.
      Air Fryer Cod Fillet

    Did you make this recipe? Leave a review and a ⭐⭐⭐⭐⭐ rating below, or tag us in our Facebook Group! Alternatively, bookmark it in your browser or

    Air Fryer Sweet And Sour Chicken.

    Air Fryer Sweet and Sour Chicken

    Angela Milnes
    This Air Fryer Sweet and Sour Chicken is perfect for busy weeknights when you’re craving something flavorful but want to keep it quick and simple.
    5 from 4 votes
    Print Recipe Pin Recipe Rate this Recipe
    Prep Time 15 minutes mins
    Cook Time 16 minutes mins
    Total Time 31 minutes mins
    Course Air Fryer Recipes
    Cuisine Asian
    Servings 4 Servings
    Calories 380 kcal

    Ingredients
      

    • 1 Pound Chicken Breasts Cut Into 1 ½ Inch chunks.
    • ½ Teaspoon Salt
    • ½ Teaspoon Pepper
    • ½ Cup Corn Starch or Potato Starch
    • 1 Can Pineapple Chunks Canned
    • 1 Onion Chopped
    • 1 Red Bell Pepper Seeds Removed, Chopped
    • 1 Green Bell Pepper Seeds Removed, Chopped
    • 2 Green Onions For Garnish

    For The Sauce

    • ¼ Cup Ketchup
    • ¼ Cup Sugar
    • ¼ Cup Rice Vinegar
    • ¼ Cup Water
    • 1 ½ Tablespoons Minced Garlic
    • 1 ½ Tablespoons Pineapple Juice

    Instructions
     

    • Fully coat the chicken bites in cornstarch, salt, and pepper.
    • Place the coated chicken cubes evenly in an oil-sprayed air fryer basket, and spray the chicken with oil.
    • Cook on 380 for 8 minutes. Shake the basket halfway. 
    • After 8 minutes, shift the crispy chicken bites chicken to one half and add the vegetables and pineapple to the other side. Finish cooking for 8 more minutes. Mix after 4 minutes.
    • While cooking chicken, mix the sauce ingredients into a medium saucepan over medium heat. Bring to a boil then remove to cool and thicken. 
    • Pour sauce over chicken and vegetables. Mix and garnish with sesame seeds and green onions.
    • Optionally, serve your Air Fryer Sweet and Sour Chicken bites on top of rice.

    Notes

    Air Fryer Space: For evenly cooked sweet and sour chicken with a crispy finish, avoid overcrowding the air fryer basket. This allows optimal air circulation around each piece.
    Crispy Coating Choice: Opting for potato starch as your chicken coating can give a crispier texture than traditional flours or starches.

    Nutrition

    Calories: 380kcalCarbohydrates: 62gProtein: 26gFat: 3gSaturated Fat: 1gPolyunsaturated Fat: 1gMonounsaturated Fat: 1gTrans Fat: 0.01gCholesterol: 73mgSodium: 567mgPotassium: 843mgFiber: 4gSugar: 40gVitamin A: 1286IUVitamin C: 83mgCalcium: 60mgIron: 1mg
    Print Recipe Pin Recipe Rate this Recipe
    Tried this recipe?Let us know how it was!

    Instant Pot Enchilada Soup

    October 5, 2024 by Angela Milnes

    Instant Pot Enchilada Soup.

    Get ready for a tasty bowl of Instant Pot Enchilada Soup! It's quick, easy, and full of Tex-Mex goodness. Using the Instant Pot makes it a breeze. Enjoy a simple and satisfying dinner with this delicious Chicken Enchilada Soup Recipe. Let's dig in!

    Instant Pot Enchilada Soup
    [feast_advanced_jump_to]

    💖 Why This Recipe Works

    • Comfort in a Bowl: Chicken enchilada soup offers the warmth and richness of traditional enchilada flavor.
    • Instant Pot Efficiency: You can pressure cook a hearty meal quickly and easily using your Instant Pot.
    • Versatile and Customizable: You can add your choice of toppings for a personalized flavor experience.

    ⭐ Star Ingredients

    enchilada soup ingredients.

    Here are the ingredients needed for enchilada soup:

    • Red Onion: Adds a hint of sweetness and crunch to the soup, providing a nice contrast to the other flavors.
    • Olive Oil: Used for sautéing the onion, it adds a subtle richness to the dish.
    • Knorr Caldo con Sabor de Pollo: Imparts a deep, savory flavor to the soup. Can be substituted with low sodium chicken broth.
    • Water: Provides the liquid base for the soup, allowing all the flavors to meld together.
    • Skinless Chicken Breasts or Thighs: The main protein in this dish, they absorb the flavors of the spices and enchilada sauce well.
    • Chili Powder: Adds a spicy kick to the soup, enhancing the Mexican flavor profile.
    • Ground Cumin: Lends an earthy, warm flavor that's integral to the dish's signature taste.
    • Garlic Powder: Brings a robust, aromatic note that complements the other flavors.
    • Red Enchilada Sauce: Infuses the soup with a tangy, slightly spicy flavor that's characteristic of enchiladas.
    • Melting Cheese (such as Velveeta): Gives the soup a creamy, cheesy element that makes it satisfying and comforting.
    • Masa Harina: A type of corn flour that thickens the soup and gives it a slight corn flavor. Can be substituted with cornstarch.

    Garnish Ingredients

    • Tortilla Strips: Adds a delightful crunch to the soup, contrasting nicely with its creaminess.
    • Shredded Cheese: Melts into the hot soup, adding another layer of cheesy goodness and making the dish even more comforting.
    • Diced Avocado: Brings a creamy, buttery texture and a fresh taste that balances out the spicy and savory flavors.
    • Fresh Pico de Gallo With Diced Tomatoes: This fresh salsa adds a burst of tangy, refreshing flavor, complementing the rich soup beautifully.

    For the complete list of ingredients with measurements and instructions, please see the recipe card at the bottom of the post.

    📖 Toppings for Chicken Enchilada Soup

    There are plenty of delicious toppings you can add to your Instant Pot Enchilada Soup. Here are a few of our favorites:

    • Cooked rice. Learn How To Cook Instant Pot Rice with this simple recipe.
    • Tortilla strips
    • Shredded cheddar cheese
    • Fresh pico de gallo
    • Chopped cilantro
    • Sliced jalapeños
    • A dollop of sour cream
    • Crushed tortilla chips
    • Fresh Lime juice
    • Fresh chopped cilantro

    🔪 How to Make Instant Pot Chicken Enchilada Soup

    saute onion in instant pot with wooden spoon.
    1. Step 1: Set the Instant Pot to sauté. Once hot, add the oil and diced onion. Sauté the onions for 5-8 minutes or until translucent. Add water and powdered bouillon or chicken broth and stir to mix.
    enchilada sauce and chicken breast in instant pot.
    1. Step 2: Add the chicken breasts, chili powder, cumin and garlic powder to the Instant Pot. Close the Instant Pot lid and seal the pressure valve. Cook on high pressure for 8 minutes.
    enchilada sauce in instant pot.
    1. Step 3: Quickly release the pressure on your electric pressure cooker. Remove the chicken breasts and shred them. Set the Instant Pot to sauté. Once the soup is simmering, add the enchilada sauce, and cubed melting cheese.
    enchilada soup and wooden spoon in instant pot.
    1. Step 4: Stir until the cheese is melted. Next, whisk in the masa harina. The enchilada soup will continue to thicken as you stir. Serve the soup topped with fresh pico, shredded cheese, and tortilla strips.
    Instant Pot Enchilada Soup

    👩‍🍳 Expert Tips

    • For a spicier soup, add some cayenne pepper or diced jalapeño.
    • Be sure to whisk the masa harina into the soup before adding the chicken.
    • For extra cheesy soup, add a cup of shredded cheese when serving.
    • If your chicken enchilada soup is too thick, stir in a little bit of water to thin it out.
    • Make sure to let the pressure release naturally before opening the lid!

    If you love this recipe be sure to check out this Instant Pot Shredded Chicken and Parmesan Breadsticks recipe.

    💭 FAQs

    How To Make Enchilada Soup Thicker?

    You can use either masa harina or cornstarch to thicken your Instant Pot Enchilada Soup. Mase Harina will give the soup a unique flavor, while cornstarch is better for those who prefer milder flavors.

    Whisk ⅓ cup of cornstarch into 2 tablespoons of cold water before adding it into the soup.

    Do I Have To Use Knorr Chicken Broth?

    No, you do not have to use Knorr chicken broth. You can substitute with 5 cups of regular store-bought or homemade chicken broth and skip the water.

    Can I Use Homemade Enchilada Sauce?

    Yes, you can use homemade enchilada sauce to make this Instant Pot Enchilada Soup. We recommend using red enchilada sauce for optimal flavor.

    Can I Use a Different Kind Of Cheese?

    Yes, you can replace the melting cheese with shredded cheese if you prefer. Just add 1 cup of your favorite Mexican shredded cheese in place of the melting cheese.

    You could also add 2 tablespoons of cream cheese to make this Instant Pot soup recipe even more creamy.

    Can I Use Frozen Chicken Breasts?

    Yes. If you are using frozen chicken breasts, increase the cooking time to 10 minutes and then do a quick release. The same goes for frozen chicken thighs. Just be sure to use boneless, skinless chicken thighs for this recipe.

    You can also use rotisserie chicken in this Instant Pot enchilada soup recipe. Simply add it to the recipe when you add the shredded chicken to the pot.

    Can I Add Beans To Enchilada Soup?

    Yes, if you which to add some canned beans to this recipe you can add some pinto beans, kidney beans or black beans at the end with the shredded chicken.

    Best Way to Store Enchilada Soup

    Your Instant Pot Enchilada Soup in sealed containers in the refrigerator for a fresh experience that lasts 3-4 days. Freeze it. Easily transfer the soup into freezer-safe containers or sturdy freezer bags, providing a savory option for up to 2-3 months.

    💖 Serving Suggestions

    This Chicken Enchilada Soup is a perfect meal all on its own. But if you’d like to add some sides, here are some of our favorite accompaniments:

    • Pressure Cooker Spanish Rice: This classic side adds a hearty, flavorful complement to the rich, savory soup.
    • Instnt Pot Refried Beans: Creamy and earthy, these beans offer a smooth contrast to the soup's spiciness.
    • Jalapeno Cornbread: Slightly sweet and crumbly, cornbread adds a comforting touch to the meal.
    • Roasted Vegetables: Caramelized and smoky, roasted veggies bring color and balance to the dish.
    • Fresh Kiwi Fruit Salad: A refreshing, sweet contrast that cleanses the palate and lightens the meal.
    Instant Pot Enchilada Soup

    🍽 More Instant Pot Recipes

    • Instant Pot Cajun Chicken and Rice.
      Instant Pot Cajun Chicken and Rice
    • Creamy Instant Pot Tortellini Recipe.
      Creamy Instant Pot Tortellini Recipe
    • Instant Pot Kielbasa And Cabbage.
      Instant Pot Kielbasa And Cabbage
    • Instant Pot Chicken Adobo.
      Instant Pot Chicken Adobo

    Did you make this recipe? Leave a review and a ⭐⭐⭐⭐⭐ rating below, or tag us in our Facebook Group! Alternatively, bookmark it in your browser or save to Pinterest.

    Instant Pot Enchilada Soup.

    Instant Pot Enchilada Soup

    Angela Milnes
    Get ready to enjoy a bowl of comfort with this Instant Pot Enchilada Soup! It's a quick and easy recipe that packs all the bold flavors of classic enchiladas into a warm, hearty soup. Perfect for busy weeknights, this dish will have your family coming back for seconds.
    5 from 3 votes
    Print Recipe Pin Recipe Rate this Recipe
    Prep Time 5 minutes mins
    Cook Time 18 minutes mins
    Additional Time 0 minutes mins
    Total Time 23 minutes mins
    Course Lunch
    Cuisine Mexcian
    Servings 4 Servings
    Calories 2153 kcal

    Ingredients
      

    • ½ Red Onion Diced
    • 1 tablespoon Olive Oil
    • 5 tablespoon Knorr Caldo Con Sabor de Pollo Powdered Chicken Bouillon
    • 5 Cups Water
    • 1 Pound Chicken Breasts Skinless and Boneless
    • 1 teaspoon Chili Powder
    • 1 teaspoon Ground Cumin
    • 2 teaspoon Garlic Powder
    • 1 Can Red Enchilada Sauce 10 oz
    • 1, 16 oz Velveeta Cut into cubes
    • ¾ Cup Masa Harina

    Garnish Ingredients

    • 2 Tortilla strips
    • 1 tablespoon Cheese Shredded
    • ½ Avocado Diced
    • ¼ Cup Pico De Gallo

    Instructions
     

    • Set the Instant Pot to sauté. Once hot, add the oil and diced onion. Sauté the onions for 5-8 minutes or until translucent.
    • Add water and powdered bouillon or chicken broth and stir to mix.
    • Add the chicken breasts, chili powder, cumin and garlic powder to the Instant Pot.
    • Close the Instant Pot lid and seal the pressure valve. Cook on high pressure for 8 minutes.
    • Quickly release the pressure on your electric pressure cooker.
    • Remove the chicken breasts and shred them.
    • Set the Instant Pot to sauté. Once the soup is simmering, add the enchilada sauce, and cubed melting cheese. Stir until the cheese is melted.
    • Once the cheese is melted, whisk in the masa harina. The enchilada soup will continue to thicken as you stir.
    • Once the soup is thick, fold in the shredded chicken.
    • Serve the soup topped with fresh pico, shredded cheese, and tortilla strips. Extra garnish could be sliced jalapeños, chopped cilantro, and a dollop of sour cream and don't forget some tortilla chips.

    Notes

    For a spicier soup, add some cayenne pepper or diced jalapeño. Be sure to whisk the masa harina into the soup before adding the chicken.
    For extra cheesy soup, add a cup of shredded cheese when serving. If your chicken enchilada soup is too thick, stir in a little bit of water to thin it out.

    Nutrition

    Calories: 2153kcalCarbohydrates: 138gProtein: 204gFat: 86gSaturated Fat: 42gPolyunsaturated Fat: 5gMonounsaturated Fat: 16gTrans Fat: 0.1gCholesterol: 508mgSodium: 8792mgPotassium: 3724mgFiber: 7gSugar: 47gVitamin A: 6093IUVitamin C: 9mgCalcium: 3077mgIron: 11mg
    Print Recipe Pin Recipe Rate this Recipe
    Tried this recipe?Let us know how it was!

    Try These Pressure Cooker Soup Recipes

    From chicken tortilla soup to tasty panera rice soup, here are some of our best Instant Pot soup recipes.

    • Purple Cabbage Soup
    • Instant Pot Split Pea Soup
    • Homemade Bean and Bacon Soup
    • Vegetarian Carrot And Leek Soup
    • Instant Pot Chicken Barley Soup
    • Instant Pot Chinese Dumpling Soup
    • Butternut Squash Soup
    • Instant Pot Clam Chowder
    Instant Pot Enchilada Soup

    Air Fryer Huli Huli Chicken (Hawaiian Chicken Recipe)

    October 5, 2024 by Angela Milnes

    Air Fryer Huli Huli Chicken.

    Say aloha to bold flavor! This Air Fryer Huli Huli Chicken is sweet, tangy, and full of tropical flair—a perfect way to bring Hawaiian vibes to your dinner table. Crispy on the outside, juicy on the inside, it's fast, flavorful, and totally irresistible.

    Air Fryer Huli Huli Chicken.

    Whether you're craving a sunny escape on a weeknight or looking to spice up your summer BBQ rotation, this Air Fryer Hawaiian Chicken delivers all the island flavor without needing a grill. It's easy, crowd-pleasing, and pairs beautifully with tropical sides like grilled pineapple or Instant Pot glazed carrots.

    Perfect for summer BBQs, luau-themed parties, or meal-prep Sundays.

    If you love this flavor-packed chicken, you'll also want to check out our Air Fryer Orange Beef and Cheesy Mashed Cauliflower for more quick, satisfying meals with big flavor.

    [feast_advanced_jump_to]

    💖 Why This Recipe Works

    • Incredibly Flavorful – The signature pineapple-soy marinade makes every bite sing with sweet, salty, and tangy notes.
    • Air Fryer Magic – You get grill-like results in under 20 minutes, no flipping over fire required.
    • Meal-Prep Friendly – Marinate overnight and air fry fresh when you need it. Great hot or cold!

    🌟 Star Ingredients

    Huli Huli Chicken ingredients.
    • Boneless Chicken Thighs – I love using thighs here because they stay juicy and soak up the marinade like a sponge. Chicken breasts work too, but thighs are truly unbeatable for tenderness.
    • Pineapple Puree – This is the heart of the tropical flavor! I usually blend canned pineapple chunks or use store-bought puree. It adds sweetness and helps tenderize the chicken.
    • Soy Sauce & Ketchup – A classic combo that adds savory umami and acidity. I always use low-sodium soy sauce and my favorite no-sugar ketchup to keep things balanced.

    For the complete list of ingredients with measurements and instructions, please see the recipe card at the bottom of the post.

    📖  Substitutions & Variations

    • Chicken Breasts: Swap for a leaner option.
    • Teriyaki Marinade: Use your favorite teriyaki sauce instead of homemade.
    • Fresh Ginger Glaze: Add grated ginger and extra garlic for punchy flavor.
    • Spicy: Add more chili flakes or a splash of sriracha.
    • Gluten-Free: Use tamari or gluten-free soy sauce.

    Try these recipes next if you're in the mood for island-inspired flavor: Carrot And Raisin Salad With Pineapple, Mango Arugula Salad or Hawaiian Garlic Shrimp.

    🔪 How To Make Air Fryer Huli Huli Chicken

    Soy sauce, ketchup, pineapple puree, ginger, garlic, and chili flakes in a blender.
    1. Step 1: First, add the soy sauce, ketchup, pineapple puree, ginger, garlic, and chili flakes to the blender.
    Making Huli Huli chicken marination sauce.
    1. Step 2: Blend together to make your marinade.
    marinating chicken pieces in a sauce mixture.
    1. Step 3: Next, place your chicken thighs in a bowl with a lid. Pour ½ of the marinade over the chicken. Make sure it fully coats the chicken. Then, put the lid on the bowl and place the chicken in the refrigerator for at least 3 hours.
    Marinated chicken pieces in an air fryer.
    1. Step 4: After you've allowed the chicken to marinate, add the chicken thighs to your air fryer.
    Huli Huli chicken in an air fryer.
    1. Step 5: Cook at 380°F for 18 minutes. Flip the chicken halfway through. Check that your chicken is cooked through.
    Huli huli chicken and rice on plate.
    1. Step 6: After you've allowed the chicken to marinate, add the chicken thighs to your air fryer.

    💡 Hint: Let the chicken rest 5 minutes before slicing—it locks in moisture and keeps the flavor juicy.

    Air fried huli huli chicken and rice on plate.

    👩‍🍳 Expert Tips

    • Marinate Overnight: For the most flavorful Hawaiian chicken, I recommend allowing it to marinate overnight.
    • Use Half the Marinade: Save some for drizzling later—it’s gold.
    • Batch Cooking: Don’t overcrowd the basket. Work in two rounds if needed.
    • Watch the Glaze: Add sauce at the end to avoid burning sugars.

    💭 FAQs

    What is Huli Huli chicken?

    Huli Huli Chicken is a Hawaiian favorite made with a soy-pineapple marinade and traditionally cooked over open flame. "Huli" means "turn" in Hawaiian, referring to the constant flipping during grilling.

    Can I use fresh pineapple with Huli Huli chicken?

    Absolutely! Blend fresh pineapple chunks with a splash of water to make your own puree.

    Can I grill Huli Huli chicken instead of air fry?

    Yes—grill over medium heat for about 6-8 minutes per side, basting as you go.

    Can I freeze Huli Huli Chicken?

    Yes! Cool completely, store in an airtight container, and freeze up to 3 months.

    How To Store leftover Hawaiian chicken?

    Store leftovers in the fridge for up to 3 days. Reheat in the air fryer at 350°F for 3–4 minutes to keep them juicy.

    💖 Serving Suggestions

    Serve your Huli Huli Chicken with:

    • Grilled Pineapple Spears: For that sweet-and-savory island flair.
    • Cauliflower Rice Stir Fry: Light, healthy, and packed with flavor.
    • Instant Pot Glazed Carrots: The perfect sweet contrast.
    • Cucumber Pineapple Slaw: Cool, crunchy, and citrusy.
    • Hibiscus Iced Tea: Refreshing and fruity to round things out.

    What To Do With Leftovers?

    • Slice and add to rice bowls or wraps.
    • Serve cold on salad with a tropical vinaigrette.
    • Toss into noodle stir-fry with extra sauce.

    🍽 More Easy Chicken Dishes

    • Slow Cooker Chicken Bacon Ranch Pasta.
      Slow Cooker Chicken Bacon Ranch Pasta
    • Sheet Pan Chicken Fajitas.
      Sheet Pan Chicken Fajitas
    • Instant Pot Chicken Adobo.
      Instant Pot Chicken Adobo
    • Baked Honey Mustard Chicken Tenders.
      Honey Mustard Chicken Tenders

    Did you make this recipe? Leave a review and a ⭐⭐⭐⭐⭐ rating below, or tag us in our Facebook Group! Alternatively, bookmark it in your browser or save to Pinterest.

    Air Fryer Huli Huli Chicken.

    Air Fryer Huli Huli Chicken

    Angela Milnes
    Air Fryer Hawaiian Chicken brings the bold flavors of Hawaii straight to your kitchen! This sweet and tangy chicken is marinated in a delicious mix of pineapple juice, soy sauce, and brown sugar, then cooked to perfection in the air fryer for a crispy finish.
    5 from 4 votes
    Print Recipe Pin Recipe Rate this Recipe
    Prep Time 3 hours hrs
    Cook Time 18 minutes mins
    0 minutes mins
    Total Time 3 hours hrs 18 minutes mins
    Course Air Fryer Recipes
    Cuisine American
    Servings 4 Servings
    Calories 1071 kcal

    Ingredients
      

    • 3 lbs Chicken Thighs
    • 1 Cup Brown Sugar
    • ¾ Cup Soy Sauce
    • ¾ Cup Ketchup
    • ½ Cup Pineapple Purée
    • 3 Tbsps Ground Ginger
    • 3 Tbsps Minced Garlic
    • 1 tablespoon Chili Flakes

    Instructions
     

    • Mix together your soy sauce, ketchup, pineapple purée, ginger, garlic, and chili flakes. Marinade your chicken thighs in this sauce mixture for at least three hours if not overnight.
    • Add your chicken thighs to your air fryer. Depending on how many thighs you’re cooking you may need to do a couple of batches. Do not overcrowd your thighs.
    • Cook at 380° for 18 minutes or until internal temp reaches 165°. Flip after 9 minutes 
    • Serve your chicken thighs over rice, noodles, or vegetables. Enjoy!

    Notes

    Use half the marinade: I only use half of the sauce when marinating the chicken. The rest of the sauce I put in a container to pour over the chicken after it is done cooking.
    Marinate overnight: For the most flavorful Hawaiian chicken, I recommend allowing it to marinate overnight.
    Don't overcrowd the chicken: You may have to do several batches of chicken depending how many chicken thighs you use. Overcrowding will result in less appetizing huli huli chicken.
    Check the chicken with a thermometer: To ensure your chicken is cooked all the way through, use a meat thermometer to check it. The internal temperature should be 165° F.

    Nutrition

    Calories: 1071kcalCarbohydrates: 80gProtein: 62gFat: 57gSaturated Fat: 15gPolyunsaturated Fat: 12gMonounsaturated Fat: 24gTrans Fat: 0.3gCholesterol: 333mgSodium: 3151mgPotassium: 1145mgFiber: 2gSugar: 66gVitamin A: 1103IUVitamin C: 15mgCalcium: 122mgIron: 5mg
    Print Recipe Pin Recipe Rate this Recipe
    Tried this recipe?Let us know how it was!
    Huli huli chicken being served with a fork.

    Crispy Air Fryer BBQ Chicken Wings

    October 5, 2024 by Angela Milnes

    Air Fryer BBQ Chicken Wings with carrots and dip.

    Air Fryer BBQ Chicken Wings are your go-to for quick, juicy, finger-lickin’ dinners. These wings come out crispy, saucy, and downright addictive—all with way less mess than the grill.

    Air Fryer BBQ Chicken Wings with carrots and dip.

    These wings are a triple win: fast, flavorful, and family-approved. Whether you’re feeding a hungry crew or just want something easy and delicious, this recipe brings the flavor without the fuss.

    Love air fryer chicken? Try my Air Fryer Huli Huli Chicken, Air Fryer Butterfly Chicken With Citrus or Air Fried Sweet and Sour Chicken next!

    [feast_advanced_jump_to]

    💖 Why This Recipe Works

    • Grill-like flavor: The air fryer crisps the skin beautifully, giving you that charred BBQ taste without firing up the grill.
    • Quick & easy: From prep to plate in under 30 minutes—perfect for busy weeknights.
    • Versatile: Customize with your favorite BBQ sauce or spice blend to suit your taste.

    ⭐ Star Ingredients

    BBQ Chicken Wings ingredients. wings and sauce.
    • Chicken wings: I use full-size wings—they stay juicy and crisp up beautifully. Split them if you’ve got picky eaters (drumettes are always a hit here!).
    • Cavender’s Greek Seasoning: My go-to spice blend. It saves time and adds instant flavor with zero fuss.
    • Worcestershire sauce: Just a splash gives the wings that deep, savory kick everyone loves but can’t quite name.
    • Sweet Baby Ray’s BBQ Sauce: Thick, sweet, and tangy—perfect for clinging to the wings. Use your fave if you want to switch it up!

    For the complete list of ingredients with measurements and instructions, please see the recipe card at the bottom of the post.

    📖  Substitutions & Variations

    • Garlic Honey BBQ Wings: Add garlic powder and a drizzle of honey for a sweet and savory twist.
    • Spicy BBQ Wings: Mix in some cayenne pepper or hot sauce to turn up the heat.
    • Asian-Inspired Wings: Swap BBQ sauce for a mix of soy sauce, hoisin, and ginger.
    • Lemon Pepper Wings: Use lemon juice and cracked black pepper for a zesty alternative.
    • Dry Rub Wings: Skip the sauce and use your favorite dry rub seasoning.
    • Boneless Wings: Use chicken tenders instead of wings for a boneless option.
    • Pair these wings with my Garlic Cilantro Lime Rice or Parmesan Asparagus for a complete meal.

    🔪 How To Make Air Fryer BBQ Chicken Wings?

    Use this section for process shots, alternating between the step and image showing the step. Users don't like seeing process shots cluttering up the recipe card, so include your process shots here.

    Worcestershire sauce in a bowl.
    1. Step 1: In a mixing bowl, add the Cavender’s, oil, vinegar, and Worcestershire. Mix well. Make sure it's not lumpy from the seasoning. Place wings in the bowl and coat well.
    Chicken wings seasoned in BBQ sauce.
    1. Step 2: Use a grill brush or a spoon to cover each wing with a nice layer of BBQ glaze. Cover with plastic wrap. Next, place the wings in the fridge for 3-8 hours. The longer they marinate, the more tender the wings will be. Don't marinade for more than 12 hours. 
    Raw BBQ Chicken wings in air fryer.
    1. Step 3: Place the wings in the air fryer basket, leaving room between the wings. Cook chicken wings at 400℉ for 10-12 minutes.
    8 Cooked BBQ chicken wings in the air fryer.
    1. Step 4: Coat wings in BBQ sauce. Then, flip, and cook the wings at 350℉ for 5 minutes. Give the wings a few minutes to cool before serving.

    💡Hint: For extra crispy skin, pat the wings dry with paper towels before marinating.

    crispy Air fried BBQ chicken wings in a bowl with carrots and dip.

    👩‍🍳 Expert Tips

    • Don't overcrowd the basket: Cook in batches if necessary to ensure even cooking and crispiness.
    • Use a meat thermometer: Ensure the internal temperature reaches 165°F (74°C) for safe consumption.
    • Double the sauce: For extra saucy wings, toss them in additional BBQ sauce after cooking.

    💭 FAQs

    Should Chicken Wings Be Thawed Before Air Frying?

    For best results, yes. Thawed wings absorb marinade better and cook more evenly. If cooking from frozen add an extra 5 minutes cooking time.

    How Many Chicken Wings Fit in the Air Fryer?

    The bigger the air fryer, the more wings you can cook. Just make sure to space them out so they are not overlapping.  It depends on your air fryer size. A 4-quart air fryer fits about 6 wings; a 6.5-quart can handle up to 12.

    How To Store BBQ Chicken Wings?

    Allow wings to cool, then store in an airtight container in the fridge for up to 3 days or freeze for up to 3 months.

    💖 Serving Suggestions

    These are my favorite dishes to serve with BBQ chicken wings:

    • Coleslaw with Jalapeno Peppers: A crunchy, spicy slaw that cuts through the richness of the wings.
    • Vegan Baked Beans: Sweet, smoky, and hearty—classic BBQ pairing for chicken wings.
    • Air Fryer Zucchini Fritter: Crispy veggie bites that make a great contrast to saucy wings.
    • Beetroot and Feta Salad: Light, tangy, and vibrant—balances the BBQ flavors with a bit of earthy freshness.
    • Air Fryer Sliced Potatoes: Crispy on the outside, fluffy on the inside—basically the perfect side.
    • Creamy Herby Ranch Dressing: Great as a dipping sauce for wings or drizzled over a fresh garden salad.
    BBQ chicken wings.

    🍽 More Air Fryer Chicken Recipes

    • Air Fryer Chicken Fajitas With Cotija Cheese.
      Air Fryer Chicken Fajitas With Cotija Cheese
    • Best Air Fryer Stuffed Chicken Breast.
      Best Air Fryer Stuffed Chicken Breast
    • Air Fryer Crispy Chicken Wings.
      Air Fryer Crispy Chicken Wings
    • Air Fryer Sweet And Sour Chicken.
      Air Fryer Sweet And Sour Chicken

    Did you make this recipe? Leave a review and a ⭐⭐⭐⭐⭐ rating below, or tag us in our Facebook Group! Alternatively, bookmark it in your browser or save to Pinterest.

    Air Fryer BBQ Chicken Wings with carrots and dip.

    Air Fryer BBQ Chicken Wings

    Angela Milnes
    Looking for a quick and easy dinner idea? These Crispy and flavorful BBQ Chicken Wings are an absolute must-try! With just the right amount of crunch and a deliciously sticky BBQ glaze, they’re the ultimate finger-licking good entrée that the whole family will love. Perfect for busy weeknights or game day snacks!
    5 from 4 votes
    Print Recipe Pin Recipe Rate this Recipe
    Prep Time 15 minutes mins
    Cook Time 15 minutes mins
    0 minutes mins
    Total Time 30 minutes mins
    Course Dinners
    Cuisine American
    Servings 3 Servings
    Calories 1089 kcal

    Ingredients
      

    • 4 lbs Chicken wings
    • 2 Tbsps Greek Seasoning
    • 2 Tbsps Olive Oil
    • 2 Tbsps Worcestershire Sauce
    • 1 Tbsps White Vinegar
    • 1 ½ Cup Sweet Baby Rays BBQ Sauce

    Instructions
     

    • In a mixing bowl, add the Cavender’s, oil, vinegar, and Worcestershire. Mix well. Make sure it's not lumpy from the seasoning.
    • Place wings in the bowl and coat well. Use a grill brush or a spoon to cover each wing with a nice layer of BBQ glaze. Cover with plastic wrap.
    • Next, place the wings in the fridge for 3-8 hours. The longer they marinate, the more tender the wings will be. Don't marinade for more than 12 hours. 
    • Place the wings in the air fryer basket, leaving room between wings. Cook chicken wings on 400℉ for 10-12 minutes.
    • Coat wings in BBQ sauce. Then, flip, and cook wings on 350℉ for 5 minutes.
    • Give the wings a few minutes to cool before eating. 
    • Serve air fryer bbq chicken wings and Enjoy!

    Notes

    • Don't overcrowd the basket: Cook in batches if necessary to ensure even cooking and crispiness.
    • Use a meat thermometer: Ensure the internal temperature reaches 165°F (74°C) for safe consumption.
    • Double the sauce: For extra saucy wings, toss them in additional BBQ sauce after cooking

    Nutrition

    Calories: 1089kcalCarbohydrates: 67gProtein: 62gFat: 63gSaturated Fat: 16gPolyunsaturated Fat: 12gMonounsaturated Fat: 28gTrans Fat: 1gCholesterol: 251mgSodium: 1861mgPotassium: 1056mgFiber: 5gSugar: 49gVitamin A: 977IUVitamin C: 5mgCalcium: 256mgIron: 8mg
    Print Recipe Pin Recipe Rate this Recipe
    Tried this recipe?Let us know how it was!

    Korean Beef Air Fryer Recipe

    October 5, 2024 by Angela Milnes

    Korean Beef Air Fryer Recipe.

    Air Fryer Korean Beef is my not-so-secret weapon for fast weeknight dinners that still taste like low-key ordered takeout. Juicy, flavorful, and ready in about 20 minutes, this recipe is perfect when your stomach's growling and your schedule's saying nope to anything complicated.

    Korean beef ribs on a plate.
    [feast_advanced_jump_to]

    Inspired by the traditional Korean dish Beef Bulgogi, this air fryer version is simple, bold, and totally customizable. It’s one of those recipes that works all year round—but honestly? It shines on those busy nights when you need dinner on the table fast.

    And if you’re looking for the perfect veggie sidekick? You’ve gotta try my Air Fryer Bok Choy—the crispy, garlicky greens are a match made in dinner heaven.

    💖 Why This Recipe Works

    • Versatile AF: The sweet, savory marinade goes with rice, wraps, veggies—whatever you’ve got!
    • Fast & fuss-free: Minimal prep, no pan babysitting. Your air fryer does the heavy lifting.
    • Crazy flavorful: The beef soaks up all the Korean-style marinade goodness in just minutes.
    • Meal prep approved: Double the batch and you've got leftovers for wraps, bowls, or tacos.

    ⭐ Star Ingredients

    korean Beef ingredients.

    To make Korean beef in the Air Fryer, you'll need just 5 simple ingredients.

    • Marinated Beef Steak: Juicy, tender, and full of umami from that sweet-savory Korean marinade.
    • Bell Peppers: Sweet, colorful, and add crunch. Mix and match red, yellow, or orange.
    • Sesame Oil: Adds that warm, nutty flavor that screams “Korean BBQ.”
    • Green Onions: Brightens things up with a peppery kick.
    • Sesame Seeds: Bring the crunch and a pretty finish.

    For the complete list of ingredients with measurements and instructions, please see the recipe card at the bottom of the post.

    📖  Substitutions & Variations

    • Spicy Kick: Toss in red pepper flakes or a squirt of gochujang for heat.
    • Sweeter Touch: Add brown sugar to the marinade for that sweet-savory balance.
    • Ginger Love: Fresh or ground ginger adds a punchy, earthy note—amazing with rice.
    • Toasted Sesame Seeds: Upgrade the crunch and flavor with toasted ones if you’ve got ‘em.
    • Low-Sodium Swap: Use low-sodium soy sauce if you're watching the salt.

    🔪 How To Make Air Fryer Korean Beef?

    Sliced bell peppers in bowl.
    1. Step 1: Slice the peppers into thin strips and set aside. 
    bell peppers and beef in bowl.
    1. Step 2: Slice meat into bite-size pieces and set aside.
    Seasoned beef and peppers in air fryer basket.
    1. Step 3: Add the beef and the peppers to a mixing bowl and coat in the sesame oil. If you don't have sesame oil, you can use any vegetable oil instead. Add the beef and peppers to a pan that fits your air fryer basket.
    Air fried Korean beef in air fryer basket.
    1. Step 4: Cook at 400° for 15-20 minutes, tossing the beef and peppers every 5 minutes.  Remove the beef and peppers and serve with rice. Garnish with chopped green onions and sesame seeds. 

    .

    Korean beef on a plate.

    👩‍🍳 Expert Tips

    • Go Thin or Go Home: Slice your beef nice and thin so it cooks fast and soaks in that marinade.
    • High Heat = Magic: 400°F is your friend for crispy edges and juicy centers.
    • Don’t Skip the Toss: Stir every 5 minutes for even cooking—no sad, overcooked beef here!
    • Marinade Matters: Let the beef soak for at least 15 minutes if you have the time. More = better flavor.
    • Make It a Meal: Add in shredded carrots, mushrooms, or bok choy for a one-basket dinner.

    💭 FAQs

    What Kind of Beef Should I Use For This Recipe?

    You can use almost any cut of beef to make this easy and delicious recipe. Just make sure you cut the beef into thin slices and then marinate it.

    Can I Use Ground Beef For This Recipe?

    You could try and replicate the same recipe by using ground beef instead of thinly sliced beef, but you'll need to cook the beef in a pan or a skillet instead of your Air Fryer for best results.

    Can I Cook the Beef in a Pan?

    You can! If you don't have an Air Fryer, you can also use a good quality non stick pan or your cast iron skillet to pan fry the beef until it is nice and cooked. Just make sure you cook it on medium high heat for best results.

    Can I Use Any Other Meat for This Recipe?

    You can! While beef is the traditional and best choice for this recipe, you can also use ground turkey or ground chicken instead, if that's what you have at hand.

    How Do I Use Leftover Korean BBQ Beef?

    If you have any leftovers, you can use them as a filling for your lettuce wraps. Top the beef strips with some shredded carrot, green onions and a generous spread of spicy mayo or any other toppings of your choice.

    Best Way to Store Korean Beef

    Your leftovers can be refrigerated for 2-3 days. You can freeze Korean beef in the freezer. Store your frozen beef in for 2-3 months.

    💖 Serving Suggestions

    I always love serving this beef bowl as a complete meal. I start off with a base of some jasmine rice or white rice, top it with some sliced beef, and finish off with a side of some steamed or pan-fried veggies.

    • Korean beef usually tastes great with veggies like bok choy, shredded carrots, Broccolini, and more peppers.
    • I love serving Korean Beef with Sticky White Rice or using it as a filling to whip up some Korean Beef Tacos.
    Serving Korean beef with chopsticks.

    🍽 More Air Fryer Recipes

    • Air Fryer Smoked Turkey Legs.
      Best Air Fryer Smoked Turkey Legs
    • Air Fryer Fish Nuggets with lemon wedges.
      Crispy Air Fryer Fish Nuggets (Cod) – Easy, Healthy & Ready in 20 Minutes
    • Air Fryer Bok Choy on a white plate covered in paprika.
      Air Fryer Bok Choy
    • Air Fryer Catfish Nuggets.
      Best Air Fryer Catfish Nuggets Recipe

    Did you make this recipe? Leave a review and a ⭐⭐⭐⭐⭐ rating below, or tag us in our Facebook Group! Alternatively, bookmark it in your browser or save to Pinterest.

    Korean Beef Air Fryer Recipe.

    Air Fryer Korean Beef

    Angela Milnes
    Air Fryer Korean Beef is a quick and flavorful dish that brings the taste of Korean BBQ to your kitchen with ease. The beef is marinated in a savory-sweet blend of soy sauce, garlic, and ginger, then cooked to perfection in the air fryer. It's crispy on the edges, tender on the inside, and pairs perfectly with rice or veggies for a simple yet delicious meal!
    5 from 4 votes
    Print Recipe Pin Recipe Rate this Recipe
    Prep Time 10 minutes mins
    Cook Time 20 minutes mins
    0 minutes mins
    Total Time 30 minutes mins
    Course Air Fryer Recipes
    Cuisine Korean
    Servings 4 Servings
    Calories 517 kcal

    Ingredients
      

    • 1 ½ Pound Ground Beef
    • 3 Bell Peppers red, yellow, and or orange.
    • 2 Tbsps Sesame Oil
    • 2-3 Stems Green Onion
    • Sesame Seeds

    Instructions
     

    • Slice the peppers into thin strips and set aside. 
    • Slice meat into bite-size pieces and set aside.
    • Add the beef and the peppers to a mixing bowl and coat in the sesame oil. If you don't have sesame oil, you can use any vegetable oil instead.
    • Add the beef and peppers to a pan that fits your air fryer basket and cook at 400° for 15-20 minutes, tossing the beef and peppers every 5 minutes. 
    • Remove the beef and peppers and serve with rice. Garnish with chopped green onions and sesame seeds. 

    Notes

    To lend the beef a bit of tanginess, you can add a dash of rice vinegar into it.
    If you're adding the rice vinegar, you might also want to throw in a bit of soy sauce to balance everything out. If you're more conscious about your food, use low sodium soy sauce.
    If you're like me and want to bring a bit of heat, you can also add some red pepper flakes into the marinade.
    If you prefer that tinge of sweetness, you can add a bit of brown sugar into the marinade.
    Ground ginger can also be a fantastic addition to this beef mixture. It will lend the thinly sliced beef some earthy undertones that taste amazing when paired with some brown rice or sticky rice.
    If you can, use toasted sesame seeds instead of regular sesame seeds for the recipe. They are more crunchy and flavorful.
    Don't forget to top the beef with some chopped green onions and some more red pepper flakes or ground fresh ginger.

    Nutrition

    Calories: 517kcalCarbohydrates: 5gProtein: 30gFat: 41gSaturated Fat: 14gPolyunsaturated Fat: 4gMonounsaturated Fat: 18gTrans Fat: 2gCholesterol: 121mgSodium: 118mgPotassium: 649mgFiber: 2gSugar: 4gVitamin A: 2799IUVitamin C: 114mgCalcium: 37mgIron: 4mg
    Print Recipe Pin Recipe Rate this Recipe
    Tried this recipe?Let us know how it was!

    More Air Fryer Recipes

    If you enjoyed this air fryer Korean Beef recipe try the following air fryer recipes:

    • Air Fryer Onion Rings
    • Air Fryer Stuffed Peppers
    • Air Fryer Chimichangas
    • Air Fryer French Toast
    • Air Fryer Tater Tot Casserole
    • Air Fryer Beef Taquitos

    Air Fryer Chicken Caesar Salad

    October 5, 2024 by Angela Milnes

    Chicken Caesar Salad Air Fryer Recipe.

    You're going to love this delicious salad recipe. It's literally the Chicken Caesar Salad, ever! If you're looking for air fryer chicken breast ideas, add this simple salad recipe to your radar!

    Chicken Caesar Salad Air Fryer Recipe.

    Everyone loves a good chicken caesar salad. The crunch of the lettuce, the flavor of the toppings and dressing, and the boost of protein added from the chicken are all great to eat! The best part about enjoying salads like this one is that they're really not hard to make at all!

    If you love this combo, you might also enjoy my Air Fryer Chicken Tenders with Buffalo Sauce or this Arugula Frittata with Tomatoes, perfect pairings for lunch or dinner.

    [feast_advanced_jump_to]

    💖 Why This Recipe Works

    • Quick but Gourmet: Ready in under 20 minutes but tastes restaurant-worthy.
    • Air Fried Chicken: Crispy, juicy, and a healthier protein option.
    • Customizable: Works with romaine, spinach, or kale and your fave toppings. You can also use this Homemade Caesar Salad Dressing to use with this salad.

    ⭐ Star Ingredients

    Chicken Caesar Salad Ingredients.
    • Chicken Breast: Air frying locks in moisture and gives a golden crust without deep frying—my favorite fast and healthy protein hack.
    • Romaine Lettuce: Classic Caesar crunch and sturdy enough to hold up under rich dressing.
    • Parmesan Cheese: Adds salty, nutty depth and that signature Caesar finish.
    • Caesar Dressing: Whether homemade or store-bought, it’s the creamy anchor that makes this salad sing.

    For the complete list of ingredients with measurements and instructions, please see the recipe card at the bottom of the post.

    📖  Substitutions & Variations

    • Swap romaine for baby spinach or kale.
    • Add chopped cooked bacon or roasted chickpeas for texture.
    • Use dairy-free Caesar dressing and vegan cheese for a plant-based option.
    • Toss in croutons or even air fryer tofu cubes for crunch and protein.

    If you love salads with crunch and flavor, check out our Chopped Greek Salad with Feta and Olives or Zesty Red Cabbage Slaw.


    🔪 How To Make Air Fryer Chicken Caesar Salad?

    raw Chicken in air fryer.
    1. Step 1: Place a piece of chicken breast in the air fryer basket. Be sure to spray olive oil on the bottom of the basket first so that the chicken breast doesn’t stick.
    Cooked chicken breast in the air fryer basket.
    1. Step 2: Next, sprinkle both sides of the chicken breast with garlic salt.
    Cooked chicken breast in the air fryer basket.
    1. Step 3: Place the air fryer basket in the air fryer. Set your temperature to 380 and cook for 8 minutes. While the chicken breast is in the air fryer, build your salad.
    spinach leaves in a bowl.
    1. Step 4: Start by adding your spinach or romaine lettuce.
    spinach leaves and ranch dressing.
    1. Step 5: Add your parmesan cheese and the Caesar dressing. Use sparingly.
    Diced chicken on chopping board.
    1. Step 6: Once the chicken breast has cooked through in the air fryer, dice it into bite-sized pieces. Top your salad with the chicken breast and enjoy!

    💡 Hint: For even more flavor, try marinating the chicken in a little lemon juice and olive oil beforehand.

    Chicken Caesar Salad in a bowl.

    👩‍🍳 Expert Tips

    • Don’t overcrowd the air fryer—cook chicken in batches if needed.
    • Use freshly grated parmesan for the best flavor.
    • Chop your lettuce into bite-sized pieces for easier eating (and better dressing coverage).

    💭 FAQs

    What’s the best lettuce for Caesar salad?

    Romaine is traditional, but baby spinach or kale also work well.

    Can I use frozen chicken in the air fryer?

    Yes, just add 4–6 minutes to the cook time and be sure to check the internal temp.

    Is Caesar dressing gluten-free?

    Some are! Always check the label, especially if using croutons or bottled dressing.

    What makes this the best Air Fried Chicken Caesar Salad?

    It’s all about balance—crispy air fryer chicken, creamy dressing, and crisp greens in one easy, satisfying meal.

    Chicken Caesar Salad.

    💖 Serving Suggestions

    • Garlic Parmesan Asparagus: Crispy spears with a cheesy kick.
    • Lemon Herb Quinoa Salad: Light, fluffy, and packed with citrusy goodness.
    • Smoked Texas Twinkies with Bacon And Brisket: These go great with a refreshing salad.
    • Roasted Sweet Potato Wedges: Sweet, savory, and a perfect contrast to the salad.
    • Crusty Garlic Bread: A classic side to soak up those Caesar dressing remnants.
    Chicken Caesar Salad.

    🍽 More Salad Recipes To Try

    • Chopped Greek Salad in a bowl.
      Chopped Greek Salad with Feta & Olives (Bariatric-Friendly)
    • Cold Chicken Pasta Salad With Italian Dressing.
      Cold Chicken Pasta Salad With Italian Dressing
    • Watermelon Salad With Feta and Mint.
      Watermelon Feta Mint Salad
    • Beet Sweet Potato Salad.
      Beet And Sweet Potato Salad With Feta

    Did you make this recipe? Leave a review and a ⭐⭐⭐⭐⭐ rating below, or tag us in our Facebook Group! Alternatively, bookmark it in your browser or save to Pinterest.

    Chicken Caesar Salad Air Fryer Recipe.

    Air Fryer Chicken Caesar Salad

    Angela Milnes
    You’re going to love this delicious salad recipe. It’s literally the Best Chicken Caesar Salad. Hearty, healthy and crispy to perfection!
    5 from 3 votes
    Print Recipe Pin Recipe Rate this Recipe
    Prep Time 5 minutes mins
    Cook Time 8 minutes mins
    0 minutes mins
    Total Time 2 hours hrs 13 minutes mins
    Course Salads
    Cuisine American
    Servings 1 Serving
    Calories 481 kcal

    Ingredients
      

    • 1 Chicken Breast
    • 2 Cups Spinach
    • 1 Tablespoon Parmesan Cheese
    • 2 Tablespoons Caesar Dressing
    • ½ Teaspoon Garlic Salt
    • ¼ Cup Croutons

    Instructions
     

    • Place a piece of chicken breast in the air fryer basket. Be sure to spray olive oil on the bottom of the basket first so that the chicken breast doesn’t stick.
    • Next, sprinkle both sides of the chicken breast with garlic salt.
    • Place the air fryer basket in the air fryer. Set your temperature to 380 and cook for 8 minutes. While the chicken breast is in the air fryer, build your salad.
    • Start by adding your spinach or romaine lettuce.
    • Add your parmesan cheese and the Caesar dressing. Use sparingly.
    • Once the chicken breast has cooked through in the air fryer, dice it into bite-sized pieces. Top your salad with the chicken breast and enjoy!

    Notes

    When cooking more than one chicken breast in the air fryer, make sure to leave space between each piece for proper air circulation. This ensures even cooking and crispiness on all sides. If your air fryer basket is small, cook in batches rather than overcrowding. You can keep the cooked pieces warm in the oven while finishing the rest.

    Nutrition

    Calories: 481kcalCarbohydrates: 9gProtein: 53gFat: 25gSaturated Fat: 5gPolyunsaturated Fat: 11gMonounsaturated Fat: 6gTrans Fat: 0.03gCholesterol: 160mgSodium: 1960mgPotassium: 1194mgFiber: 2gSugar: 1gVitamin A: 5743IUVitamin C: 20mgCalcium: 150mgIron: 3mg
    Print Recipe Pin Recipe Rate this Recipe
    Tried this recipe?Let us know how it was!

    Stuffed Cucumber Boats

    October 5, 2024 by Angela Milnes

    Stuffed Cucumber Boats.

    Get ready for a tasty snack with our Stuffed Cucumber Boats – simple, fresh, and bursting with flavor. Easy to make and even easier to enjoy, these bites are perfect for any occasion. Let's dive in!

    Stuffed Cucumber Boats
    [feast_advanced_jump_to]

    These Cucumber boats will pair perfectly with a Arugula Frittata With Tomatoes or a hearty Slow Cooker Bacon Ranch Pasta dish!

    💖 Why This Recipe Works

    • Summer-Perfect: These stuffed cucumber boats are a refreshing, light bite for warm weather days.
    • Simple Preparation: With few ingredients and steps, it's an easy recipe to whip up.
    • Healthy and Tasty: Not only delicious, these Cucumber Boats low-carb and packed with Nutritious Veggies.

    ⭐ Star Ingredients

    Stuffed Cucumber Boats ingredients.
    • Mini Cucumbers: The main ingredient, they serve as the "boats," providing a refreshing crunch.
    • Chopped Grilled Chicken Pieces: Adds protein and a smoky flavor to the dish.
    • Cherry Tomatoes: Brings a sweet, tangy note and vibrant color.
    • Hummus: Used as a spread, it lends a creamy texture and rich, savory flavor.
    • Red Onion: Delivers a sharp, spicy kick that contrasts nicely with the other ingredients.
    • Crumbled Feta Cheese: Offers a salty tang that rounds out the flavors and adds a hint of creaminess.

    For the complete list of ingredients with measurements and instructions, please see the recipe card at the bottom of the post.

    📖  Substitutions & Variations

    • Cayenne Pepper: Can be used as an optional ingredient in this recipe to add a spicy kick. Sprinkle lightly over the hummus before adding other toppings for an enhanced flavor profile.
    • Salt And Pepper: Boost the flavor combination of the ingredients when sprinkled to taste after assembling the cucumber boats. They enhance the freshness and richness of the ingredients.
    • Bell Peppers: Adding bell pepper to Stuffed Cucumber Boats brings a sweet tanginess, enhancing the taste. The crisp bell pepper contrasts well with creamy hummus and tender chicken.
    • Turkey Bacon: turkey bacon Can be used as a substitute for grilled chicken pieces to add a smoky, crisp texture. Chop it into small bits and mix with the hummus in a small bowl for a flavorful base.
    • Chicken Salad: A flavorful, protein-rich alternative to grilled chicken pieces in your cucumber boat recipe. Offers creamy texture and added taste. Enhances the boats with rich, savory flavors for a more satisfying dish.

    🔪 How To Make Stuffed Cucumber Boats?

    Stuffed Cucumber Boats
    1. Step 1: Cut each cucumber in half lengthwise, scoop the seeds and flesh out from the center by using a small spoon.
    Stuffed Cucumber Boats
    1. Step 2: Smooth a tablespoon of hummus into each cucumber half. You may want to make Homemade Hummus or shop bought hummus.
    Stuffed Cucumber Boats
    1. Step 3: Top each cucumber boat half with the red onion, tomatoes and grilled chicken.
    Stuffed Cucumber Boats
    1. Step 4: Sprinkle with feta and place your cucumber boats ready to serve.

    👩‍🍳 Expert Tips

    • Choose Crisp Cucumbers: Opt for a firm, fresh cucumber such as English cucumber or Persian cucumber for a crunchy base that won't get soggy.

    💭 FAQs

    What Is A Good Substitute for Hummus?

    If you want a different base for your cucumber boats then you can substitute the hummus with cream cheese, greek yogurt or even a white bean dip.

    Can I Freeze Cucumber Boats?

    I wouldn’t recommend freezing these cucumber boats as the cucumbers will become watery and the texture will be off.

    Best Way to Store Cucumber Filled Boats

    These stuffed cucumbers will last in the fridge for up to two days. However, I would recommend eating them within the first day for the best taste and texture.

    💖 Serving Suggestions

    Here are my favorite appetizers to serve with Air Fryer Chicken and Shrimp Alfredo:

    • Light Snacks: These cucumber boats make a great light lunch or snack. If you’re looking for something heartier, you could serve them with Cheesy Garlic Pizza Bread or Sweet Potato French Fries.
    • As A Larger Meal: For something for hearty try serving these cucumber boats with Skillet Pan Gnocchi And Mushrooms or a easy Spinach Egg Muffins With Mozzarella Cheese.
    Stuffed Cucumber Boats

    🍽 Try These Easy Appetizers Next

    • BLT Stuffed Cherry Tomatoes Appetizer (Keto).
      BLT Stuffed Cherry Tomatoes Appetizer (Keto)
    • Cantaloupe Melon And Prosciutto Skewers.
      Cantaloupe Melon And Prosciutto Skewers
    • Caprese skewers on a wooden board ready to be served.
      Best Make Ahead Caprese Skewers
    • Fun Veggie Train With Bell Peppers.
      Fun Veggie Train With Bell Peppers

    Did you make this recipe? Leave a review and a ⭐⭐⭐⭐⭐ rating below, or tag us in our Facebook Group! Alternatively, bookmark it in your browser or save to Pinterest.

    Stuffed Cucumber Boats.

    Stuffed Cucumber Boats

    Angela Milnes
    Stuffed Cucumber Boats are a tasty, easy snack with chicken, tomatoes, hummus, onion, feta, and optional bell pepper in crisp cucumber.
    5 from 4 votes
    Print Recipe Pin Recipe Rate this Recipe
    Prep Time 25 minutes mins
    Total Time 25 minutes mins
    Course Appetizer
    Cuisine Mediterranean
    Servings 8 Servings
    Calories 63 kcal

    Ingredients
      

    • 4 Mini Cucumbers
    • ¼ Cups Chopped Grilled Chicken Pieces
    • 8 tablespoon Hummus
    • ¼ Cup Red Onion Chopped Finely
    • ¼ Cup Feta Cheese Crumbled

    Instructions
     

    • Cut each cucumber in half lengthwise, scoop the seeds and flesh out from the center by using a small spoon.
    • Smooth a tablespoon of hummus into each cucumber half.
    • Top each cucumber boat half with the red onion, tomatoes, grilled chicken, and feta cheese.
    • Serve your cucumber boats immediately, or chill before serving if desired.

    Notes

    Choose Crisp Cucumbers: Opt for a firm, fresh cucumber such as English cucumber or Persian cucumber for a crunchy base that won’t get soggy.

    Nutrition

    Calories: 63kcalCarbohydrates: 6gProtein: 4gFat: 3gSaturated Fat: 1gPolyunsaturated Fat: 1gMonounsaturated Fat: 1gCholesterol: 8mgSodium: 113mgPotassium: 257mgFiber: 2gSugar: 2gVitamin A: 133IUVitamin C: 5mgCalcium: 51mgIron: 1mg
    Print Recipe Pin Recipe Rate this Recipe
    Tried this recipe?Let us know how it was!

    Don't Miss These Fantastic Appetizers

    • Instant Pot Tortellini Carbonara
    • Roast Beetroot Salad
    • Instant Pot Pork Roast
    • Instant Pot Shredded Chicken
    • Best Antipasto Kebobs
    • Cucumber Shrimp Bites
    Stuffed Cucumber Boats

    Best Shrimp Cucumber Bites

    October 5, 2024 by Angela Milnes

    Best Shrimp Cucumber Bites.

    If you love Shrimp then these Shrimp Cucumber Bites are perfect for you! They are easy to make, and so delicious. Find out how to make these tasty cucumber shrimp appetizers in 5 simple steps.

    Shrimp cucumber bites.
    [feast_advanced_jump_to]

    💖 Why This Recipe Works

    • Fresh and Light: The cucumber base makes this a refreshing appetizer or snack.
    • Quick and Easy: With minimal ingredients, these Cucumber Shrimp Appetizers come together in just minutes.

    ⭐ Star Ingredients

    shrimp cucumber bites ingredients.
    • Cream Cheese: Provides a creamy, tangy base for the toppings, and its softness makes it easy to spread on the cucumber slices.
    • Dry Ranch Mix: Adds a burst of savory, herby flavors to the cream cheese, enhancing its taste.
    • Dill Weed: Offers an aromatic touch that pairs well with both the shrimp and cucumber, adding depth to the flavor profile.
    • Cucumbers: Used as the 'cracker' in this recipe, they offer a fresh, crisp, and hydrating bite that contrasts the creamy cheese and rich shrimp.
    • Fresh Dill Sprigs: Serve as a garnish that not only looks beautiful but also gives a fresh, herby kick that complements the other flavors.
    • Fully Cooked Shrimp: The star of the show, providing a lean topping that brings a taste of the sea to these bites. You don't need to cook shrimp again in the recipe.

    For the complete list of ingredients with measurements and instructions, please see the recipe card at the bottom of the post.

    📖  Substitutions & Variations

    • Lime Juice: Serves as an optional topping for enhancing the zestiness of these cucumber shrimp appetizers.
    • Herb Cream Cheese: For a flavorful twist on traditional cucumber bites, substitute regular cream cheese with herb cream cheese for an added depth of flavor.

    🔪 How To Make Shrimp Cucumber Bites

    Ingredients to make shrimp cucumber bites.
    1. Step 1: In a small bowl, combine the cream cheese, ranch mix, and dill weed. Stir until completely mixed together.
    Peeling cucumber.
    1. Step 2: Peel the cucumbers, rinse them in cold water, and peel the skins if desired.
    Sliced cucumber on chopping board.
    1. Step 3: Slice the cucumbers into ¼ – ½ inch slices and arrange on a baking sheet or tray.
    Sliced cucumber on tray.
    1. Step 4: Spread about ½ teaspoon of the cream cheese mixture on each cucumber slice.
    Adding cream cheese to cucumber slices.
    1. Step 5: Top each cream cheese-covered cucumber with a tiny sprig of dill.
    Shrimp added to cucumber slices.
    1. Step 6: Add one shrimp to the center of each cucumber. Cover the prepared shrimp cucumber bites and place them in the refrigerator for at least 1 hour to allow the flavors to meld. Serve the chilled shrimp cucumber bites as a refreshing appetizer.
    Cucumber shrimp bites.

    👩‍🍳 Expert Tips

    • Shrimp Selection: When selecting shrimp, look for ones that are plump and have a pinkish-gray color. Avoid shrimp that are discolored or have black spots.
    • Cream Cheese Quality: Opt for full-fat cream cheese to enhance the creaminess, allowing for a richer taste and smoother texture in your mixture.

    💭 FAQs

    What Does Shrimp Taste Like?

    Shrimp have a delicate flavor that is often described as sweet and salty. They can be eaten cooked or raw, and are a popular ingredient in many dishes.

    Do I Have To Peel The Cucumber?

    Peeling the cucumber for cucumber shrimp bites is entirely up to your preference. Leaving the peel on adds a bit of color, texture, and extra nutrients to your shrimp bites. It also helps the cucumber slices hold their shape better, making them easier to handle as an appetizer.

    Best Way To Store Cucumber Bites?

    Store unused shrimp mixture in an airtight container in the refrigerator for up to 24 hours. Keep leftover cucumber slices in a separate airtight container, wrapped with a damp paper towel in the fridge, for up to 2 days.

    💖 Serving Suggestions

    These are my favorite dishes to serve with cucumber shrimp bites:

    • Avocado Salsa: Chunky avocado, diced red onion, and cilantro create a zesty salsa to complement the shrimp bites.
    • Greek Yogurt Dip: Mix Greek yogurt with garlic and dill for a creamy dip that adds a cool contrast.
    • Air Fryer Chicken Wings: Indulge in the perfect blend of crispy air fryer chicken wings paired with refreshing shrimp cucumber bites for a delightful balance of savory and crisp.
    Shrimp cucumber bites and a bowl of shrimps.

    🍽 You'll Love These Shrimp Recipes

    • Crispy Coconut Shrimp with Orange Marmalade Dip.
      Crispy Coconut Shrimp Recipe with Orange Marmalade Dip
    • Shrimp scampi spaghetti with spinach in a bowl.
      Easy Shrimp Scampi Spaghetti With Spinach
    • Easy Air Fryer Chicken And Shrimp Alfredo.
      Easy Air Fryer Chicken And Shrimp Alfredo
    • Easy Shrimp Cakes With Hot Sauce.
      Easy Shrimp Cakes With Hot Sauce

    Did you make this recipe? Leave a review and a ⭐⭐⭐⭐⭐ rating below, or tag us in our Facebook Group! Alternatively, bookmark it in your browser or save to Pinterest.

    Best Shrimp Cucumber Bites.

    Best Shrimp Cucumber Bites

    Angela Milnes
    Looking for a fresh and easy appetizer that’s sure to impress? These Shrimp Cucumber Bites are just the thing! Crisp cucumber slices are topped with succulent shrimp and a dollop of zesty cream cheese, making for a light and flavorful bite that’s perfect for any occasion. Whether you’re hosting a party or just want a quick snack, these little bites are as simple to make as they are delicious.
    5 from 4 votes
    Print Recipe Pin Recipe Rate this Recipe
    Prep Time 20 minutes mins
    Additional Time 17 minutes mins
    Total Time 37 minutes mins
    Course Appetizers
    Cuisine American
    Servings 48 Servings
    Calories 22 kcal

    Ingredients
      

    • 8 oz Cream Cheese Softened
    • 1 oz Dry Ranch Mix
    • ½ teaspoon Dill Weed
    • 2 Large Cucumbers
    • Sprig Fresh Dill
    • 6 Oz Cooked Shrimp

    Instructions
     

    • In a small bowl, combine the cream cheese, ranch mix, and dill weed. Stir until completely mixed together.
    • Rinse the cucumbers in cold water and peel the skins if desired.
    • Slice the cucumbers into ¼ – ½ inch slices and arrange on a baking sheet or tray.
    • Spread about ½ teaspoon of the cream cheese mixture on each cucumber slice.
    • Top each cream cheese-covered cucumber with a tiny sprig of dill.
    • Add one shrimp to the center of each cucumber.
    • Cover the prepared shrimp cucumber bites and place them in the refrigerator for at least 1 hour to allow the flavors to meld. Serve the chilled shrimp cucumber bites as a refreshing appetizer.

    Notes

    Shrimp Selection: When selecting shrimp, look for ones that are plump and have a pinkish-gray color. Avoid shrimp that are discolored or have black spots.
    Cream Cheese Quality: Opt for full-fat cream cheese to enhance the creaminess, allowing for a richer taste and smoother texture in your mixture.

    Nutrition

    Calories: 22kcalCarbohydrates: 1gProtein: 1gFat: 2gSaturated Fat: 1gPolyunsaturated Fat: 0.1gMonounsaturated Fat: 0.4gCholesterol: 9mgSodium: 79mgPotassium: 27mgFiber: 0.1gSugar: 0.4gVitamin A: 79IUVitamin C: 0.4mgCalcium: 8mgIron: 0.04mg
    Print Recipe Pin Recipe Rate this Recipe
    Tried this recipe?Let us know how it was!

    Try The Following Easy Appetizers

    • Crispy Mashed Potato Cakes
    • Air Fryer Crab Cakes
    • Baked Salmon Cauliflower Rice Sushi
    • Salmon Sushi Balls Recipe
    • Homemade Bagel Chips
    • Veggie Train With Bell Peppers
    • Stuffed Cucumber Boats

    Bacon Broccoli (In A Creamy Sauce)

    October 5, 2024 by Angela Milnes

    Best Creamy Broccoli Bacon Recipe.

    This Creamy Broccoli Bacon Recipe is crunchy, cheesy, and packed with flavor—aka everything broccoli wishes it could always be. You only need six ingredients, and dinner’s ready fast.

    Best Creamy Broccoli Bacon Recipe.

    Broccoli and bacon are already a match made in food heaven, but add a splash of cream and a handful of melty cheese, and you’ve got comfort food magic. This recipe is great for busy weeknights, picky eaters, or sneaking more veggies onto the table without complaints.

    If you're into easy, family-friendly recipes like my Low Carb Broccoli Salad or Air Fryer Zucchini Fritters, this one's going to be a hit.

    [feast_advanced_jump_to]

    Why This Recipe Works

    • Only six ingredients: No complicated prep, just big flavor.
    • Creamy, cheesy, and craveable: Comfort food with real ingredients.
    • Great way to eat more veggies: Even broccoli skeptics approve.

    ⭐ Star Ingredients

    Creamy broccoli bacon ingredients.

    You just need a few simple ingredients to make this broccoli bacon recipe!

    • Broccoli Florets: I love using fresh florets here—just chop them small so they cook evenly and soak up all that creamy goodness.
    • Bacon: Salty, crispy, and impossible to resist. I usually cook extra for snacking while the rest of the dish simmers.
    • Heavy Cream: Adds rich, velvety texture to balance the saltiness of the bacon and keep everything lush.
    • Mozzarella: Melts like a dream and pulls everything together into cheesy bliss.

    For the complete list of ingredients with measurements and instructions, please see the recipe card at the bottom of the post.

    🔄 Substitutions & Variations

    • Turkey bacon or pancetta are great swaps if you want a leaner or gourmet twist.
    • Go dairy-free with coconut cream and your favorite non-dairy cheese.
    • Add mushrooms, spinach, or bell peppers for extra color and nutrition.
    • Swap broccoli for cauliflower to change things up or lower the carb count.
    • Toss in shredded rotisserie chicken to turn it into a full meal.
    • Use cheddar instead of mozzarella if you like a stronger cheese flavor.

    Craving more veggie-forward comfort food? Try my Spanakopita With Puff Pastry or Stuffed Mushrooms next.

    🔪 How To Make Creamy Broccoli Bacon

    Sauteing bacon in skillet.
    1. Step 1: Cook the bacon in a skillet until it's done. Take out the bacon and let the grease drain on a paper towel.
    Sauteing chopped onion in skillet.
    1. Step 2: Add the chopped onion to the skillet, using the remaining bacon grease to cook it, and sauté for 2-3 minutes.
    Cooking broccoli and garlic in a skillet.
    1. Step 3: Put the florets in the skillet and let it cook for about 3 minutes. It should be bright green in color. Add in the garlic and stir.
    Pouring cream into broccoli and bacon in a skillet.
    1. Step 4: Pour the cream into the skillet and reduce the heat to low to allow the cream to thicken, which should take about 3-4 minutes.
    Bacon and broccoli in creamy garlic sauce.
    1. Step 5: Once the sauce has thickened up, add in the bacon and toss to combine all the ingredients. Add mozzarella cheese and let it melt.
    Cooked bacon and broccoli in cream.
    1. Step 6: Top with more bacon and even chives or green onions. Now you're ready to serve this fantastic creamy veggie dish!

    💡Hint: Chop broccoli small so it cooks fast and blends better with the sauce. No one wants to fight a giant tree on their fork.

    Creamy broccoli and bacon in garlic sauce.

    👩‍🍳 Expert Tips

    • Cook bacon in batches: Don’t overcrowd the pan—crispy bacon wins every time.
    • Finely chop broccoli: Smaller pieces cook evenly and soak up the creamy sauce.
    • Season the cream sauce: A pinch of salt and a tiny dash of nutmeg take it up a notch.

    💭 FAQs

    Can I use frozen broccoli for creamy broccoli bacon?

    Yes, you could use frozen broccoli if you'd like but I do think that fresh broccoli tastes better. Frozen broccoli will release water and moisture and could make the dish soggy.

    Can I reheat this creamy broccoli bacon?

    Absolutely. Gently warm it on the stovetop or in the microwave. Add a splash of cream if it thickens too much.

    The best way to store broccoli and bacon dish?

    If you have leftovers from this broccoli and bacon recipe, you're in luck! Just add them to an airtight container and store them in the fridge for 2-3 days.

    Is creamy broccoli bacon keto-friendly?

    Yes! Just make sure your bacon and cream are low-carb options. It’s a great low-carb side dish packed with flavor.

    💖 Serving Suggestions

    These are my favorite dishes to serve with creamy broccoli bacon:

    • Roasted Potatoes: Crispy and golden, perfect for soaking up the sauce.
    • Wild Rice Pilaf: : Hearty and wholesome with a nutty flavor.
    • Sweet Potato Fries: That sweet-savory combo is a winner.
    • Honey Garlic Chicken Breast or Pan Fried Salmon: Make it a full meal!
    • Quinoa with Roasted Vegetables: For extra protein and texture.

    Looking for more cozy veggie sides? Try Air Fryer Carrot Fries or Air Fryer Stuffed Peppers next!

    Cooked bacon and broccoli in a skillet.

    🍽 More Tasty Broccoli Recipes

    • Crispy Parmesan Broccoli Chips.
      Crispy Parmesan Broccoli Chips
    • Chicken Broccoli Cashew Stir Fry.
      Chicken Broccoli Cashew Stir Fry
    • Best Low Carb Broccoli Salad.
      Best Low Carb Broccoli Salad
    • Italian sausage and broccoli pasta in a skillet.
      Creamy Italian Sausage And Broccoli Pasta (With Mascarpone)

    Did you make this recipe? Leave a review and a ⭐⭐⭐⭐⭐ rating below, or tag us in our Facebook Group! Alternatively, bookmark it in your browser or save to Pinterest.

    Best Creamy Broccoli Bacon Recipe.

    Creamy Broccoli Bacon Recipe

    Angela Milnes
    This Creamy Broccoli Bacon dish is a delicious blend of tender broccoli, crispy bacon, and a rich, creamy sauce. It’s the perfect side dish or low-carb main course that’s both comforting and full of flavor!
    5 from 4 votes
    Print Recipe Pin Recipe Rate this Recipe
    Prep Time 5 minutes mins
    Cook Time 12 minutes mins
    Total Time 17 minutes mins
    Course Dinners
    Cuisine American
    Servings 4 Servings
    Calories 530 kcal

    Ingredients
      

    • 8 Slices Bacon Diced
    • 1 tablespoon Onion Diced
    • 5 tablespoon Minced Garlic
    • 1 ½ Cup Heavy Cream
    • 1 Pound Broccoli Florets
    • 1 Cup Mozzarella Shredded

    Instructions
     

    • Cook the bacon in a skillet until it's done. Take out the bacon and let the grease drain on a paper towel.
    • Add the chopped onion to the skillet (use the bacon grease to cook it!) and cook it for 2-3 minutes.
    • Put the florets in the skillet and let it cook for about 3 minutes. It should be bright green in color. Add in the garlic and stir.
    • Pour the cream into the skillet and reduce the heat to low. This will help the cream thicken up and should take about 3-4 minutes.
    • Once the sauce has thickened up, add in the bacon and toss to combine all the ingredients.
    • Add mozzarella cheese and let it melt. Top with more bacon and even chives or green onions.

    Notes

    Small Florets: Make sure that when you're cutting the florets, you make them smaller in size. You want to be able to eat them without feeling like you're chewing on a giant tree!

    Nutrition

    Calories: 530kcalCarbohydrates: 18gProtein: 19gFat: 44gSaturated Fat: 26gPolyunsaturated Fat: 3gMonounsaturated Fat: 12gTrans Fat: 0.02gCholesterol: 135mgSodium: 531mgPotassium: 635mgFiber: 3gSugar: 5gVitamin A: 2197IUVitamin C: 108mgCalcium: 344mgIron: 1mg
    Print Recipe Pin Recipe Rate this Recipe
    Tried this recipe?Let us know how it was!

    Air Fryer Chicken Shawarma With Pickled Topping

    October 5, 2024 by Angela Milnes

    Air Fryer Chicken Shawarma wrapped in foil.

    Get bold, juicy flavor fast with this Air Fryer Chicken Shawarma! It’s spiced just right, super easy to make, and perfect for wraps, bowls, or salads—no grill required.

    Air Fryer Chicken Shawarma wrapped in foil.

    Forget takeout—this homemade version is fast, flavor-packed, and surprisingly simple. Cooking chicken shawarma in the air fryer means no babysitting a grill and no greasy mess.

    Just tender chicken, creamy tahini, and a crisp salad rolled into the ultimate Middle Eastern chicken wrap. For more quick favorites, try my Air Fryer Bang Bang Salmon or Air Fryer Crispy Orange Beef.

    [feast_advanced_jump_to]

    💖 Why This Recipe Works

    • Authentic flavor, simplified – Big Middle Eastern flavor with everyday ingredients.
    • Quick and hands-off – The air fryer cooks everything evenly with no flipping or frying.
    • So many ways to serve – Wrap it, bowl it, or plate it up with rice and salad.

    ⭐ Star Ingredients

    Chicken shawarma ingredients on a table.
    • Boneless Chicken – I’ve tested this with both breasts and thighs—thighs win for tenderness and juicy flavor every time, especially in high-heat air fryer cooking. But chicken breast still works great if you marinate it well.
    • Shawarma Marinade – This is where the magic happens. A vibrant blend of garlic, cumin, lemon, paprika, turmeric, and a touch of cinnamon gives the chicken that deep, layered flavor you’d expect from a street food stall. Don’t skip the marinade time—it makes all the difference.
    • Tahini Sauce – Creamy, nutty, and just the right contrast to the spice.
    • Naan or Pita Bread – Soft, warm, and ideal for scooping up all that goodness.
    • Fresh Salad Mix – Tomato, cucumber, parsley, red onion, and vinegar for crunch and zip.

    For the complete list of ingredients with measurements and instructions, please see the recipe card at the bottom of the post.

    🔄 Substitutions & Variations

    • Different Protein – Try lamb, beef, or tofu for a tasty twist.
    • Low-Carb Option – Serve in lettuce cups or over cauliflower rice.
    • No Tahini? – Hummus or cashew cream works as a creamy sub.
    • Bowl Version – Skip the wrap and serve it over greens, rice, or quinoa.
    • Meal Prep Friendly – Marinate ahead, cook fresh!

    Love these flavors? You’ll also enjoy my Air Fryer Chicken Wings or Air Fryer Turkey Legs.

    🔪 How To Make Air Fryer Chicken Shawarma

    Chicken shawarma spices in a bowl.
    1. Step 1: First, preheat your air fryer to 400°F for 5 minutes. Then, mix all the chicken seasoning ingredients in a medium-sized bowl.
    Chicken marinated with spices in a bowl.
    1. Step 2: Cut your chicken into thin slices. Then, add the sliced chicken to the seasoning mix, coating the chicken well.
    Marinated chicken in air fryer basket.
    1. Step 3: When ready to cook your marinated chicken, line the air fryer basket with aluminum foil, creating a tray with raised edges to keep in the marinade. Air fry the chicken at 400°F for 8-10 minutes or until the internal temperature reaches 160°F. 
    Chopped salad in a bowl.
    1. Step 4: While your chicken is cooking, add all the salad ingredients (diced tomatoes, cucumbers, a minced red onion, fresh chopped parsley, white wine vinegar, salt, and pepper) to a small bowl, and mix well. Set aside.
    Cooked chicken, chopped veggies, and tahini paste each in separate bowl.
    1. Step 5: In a small mixing bowl, mix ½ cup tahini paste, ⅓ cup warm water, 2 teaspoon lemon juice, 1 tablespoon minced garlic, ¼ teaspoon cumin, ¼ teaspoon salt, and 2 ½ teaspoon parsley, dried until the sauce is smooth and creamy.
    Adding cooked chicken and tahini paste over naan bread.
    1. Step 6: Once your chicken is done cooking, add to your naan bread or pita bread the lemon tahini sauce, and cooked chicken slices.
    Adding cooked chicken, chopped veggies, and tahini paste over naan bread.
    1. Step 7: Top with your salad. Fold and bring the edges together.
    Foil wrapped chicken shawarma on a wooden board.
    1. Step 8: Wrap in foil, ready to enjoy.

    💡Hint: Marinate overnight for maximum flavor and faster prep the next day.

    Air fryer chicken shawarma on wooden board.

    👩‍🍳 Expert Tips

    • Rest the chicken before serving to lock in juiciness.
    • Use foil in the basket to catch juices and keep cleanup easy.
    • Warm your wraps before filling—they’re way more flexible and delicious.

    Quick Pickled Topping (Optional but Highly Recommended)

    Want to level up your shawarma wrap? Add a quick-pickled topping! It gives your wrap that tangy, zippy bite you'd get from a street cart—and it only takes 10 minutes.

    How to Make It:

    • ½ red onion, thinly sliced
    • ¼ cup white vinegar (or lemon juice)
    • ½ teaspoon sugar
    • ¼ teaspoon salt

    Mix everything in a small bowl and let it sit while you prep the rest of the recipe. You’ll end up with bright, punchy pickled onions that cut through the richness of the tahini and spices beautifully.

    💡Try this with thinly sliced radishes or cucumbers too—just as tasty and just as easy!

    💭 FAQs

    What Is Chicken Shawarma?

    A Middle Eastern spiced chicken dish, traditionally grilled. This air fryer version is quicker but just as flavorful.

    Why Make Chicken Shawarma In An Air Fryer?

    It cooks fast, stays juicy, and skips the grease—less mess, more flavor.

    Where Do I Find Shawarma Spices?

    Check the spice aisle of well-stocked grocery stores, especially those with a diverse selection of international or Middle Eastern foods. Look for pre-packaged Shawarma spice blends or individual spices like cumin, coriander, paprika, turmeric, and cinnamon. To make your own DIY Shawarma Spice Mix combine the following ingredients: 1 teaspoon cumin, 1 teaspoon paprika, ½ teaspoon turmeric, ¼ teaspoon cinnamon, ¼ teaspoon ground cloves, ½ teaspoon garlic powder, ½ teaspoon onion powder, salt & pepper to taste.

    Best Way to Store Chicken Shawarma

    Refrigerate in separate containers up to 4 days. Freeze chicken for up to 3 months.

    What can I do with leftover chicken shawarma?

    Leftover shawarma chicken is super versatile! Toss it into salads, layer it in a quesadilla with cheese, or use it as a topping for flatbread pizza with veggies and a swirl of tahini. It’s also great in grain bowls with rice or quinoa for an easy next-day lunch.

    💖 Serving Suggestions

    Serve this air fryer chicken shawarma with:

    • Garlic Tahini Sauce – Dip or drizzle—either way, it’s a must.
    • Tabbouleh Salad – Bright and herby with lemon and bulgur.
    • Hummus with Olive Oil – Creamy and smooth for scooping.
    • Fattoush Salad – Crisp veggies + pita = texture heaven.
    • Lebanese Rice Pilaf – Toasted vermicelli + fluffy rice = classic combo.
    • Cucumber Yogurt Sauce – Cool and refreshing with a squeeze of lemon.
    Chicken shawarma wrapped in foil on a wooden board.

    🍽 More Air Fried Foods

    • Air Fryer Crispy Orange Beef.
      Air Fryer Crispy Orange Beef
    • Air Fryer Butterfly Chicken With Citrus.
      Air Fryer Butterfly Chicken With Citrus
    • Perfectly Seasoned Air Fryer Pork Chops.
      Air Fryer Boneless Pork Chops (Perfectly Seasoned)
    • Air Fryer Bok Choy on a white plate covered in paprika.
      Air Fryer Bok Choy

    Did you make this recipe? Leave a review and a ⭐⭐⭐⭐⭐ rating below, or tag us in our Facebook Group! Alternatively, bookmark it in your browser or save to Pinterest.

    Air Fryer Chicken Shawarma wrapped in foil.

    Air Fryer Chicken Shawarma

    Angela Milnes
    Craving a quick and flavorful meal? This Air Fryer Chicken Shawarma is perfectly seasoned with warm spices and cooks up tender and juicy. Serve it in pita with fresh veggies and your favorite sauce for an easy, delicious dinner!
    5 from 4 votes
    Print Recipe Pin Recipe Rate this Recipe
    Prep Time 15 minutes mins
    Cook Time 8 minutes mins
    Total Time 6 hours hrs 23 minutes mins
    Course Dinners
    Cuisine Indian
    Servings 4 Servings
    Calories 450 kcal

    Ingredients
      

    • 1½ Ibs Chicken Breast about 3 breasts
    • 2 tablespoon Olive Oil
    • 4 Slices Naan Bread
    • 1 tablespoon Minced Garlic
    • 1 teaspoon Lemon Juiced
    • 1 Tsp Cumin
    • 1 teaspoon Paprika
    • ¼ teaspoon Turmeric
    • ¼ Tsp Ground Cinnamon
    • 1 teaspoon Salt
    • ½ teaspoon Black Pepper

    Tahini Sauce

    • ½ Cup Tahini Paste
    • ⅓ Cup Warm Water
    • 2 tablespoon Lemon Juice
    • 1 tablespoon Minced Garlic
    • ¼ teaspoon Salt
    • 2 ½ teaspoon Parsley Dried

    Salad

    • 1 Cup Dried Tomatoes
    • 1 Cup Cucumber Diced
    • 2 tablespoon Red Onion
    • 1 teaspoon Lemon Juice
    • 1 teaspoon White Wine Vinegar
    • 2 Tsp Olive Oil
    • 2 tablespoon Parsley Chopped
    • 1 tablespoon Parsley Chopped
    • 1 teaspoon Salt
    • 1 teaspoon Pepper

    Instructions
     

    • When you are ready to cook, preheat your air fryer to 400° for 5 minutes.
    • In a medium-size bowl, add all your ingredients for the chicken seasoning. Mix.
    • Cut your chicken into slices.
    • Add your chicken slices to your chicken seasoning mix. You can cook right away, or you can allow them to marinate. Best to marinate for at least six hours or overnight.
    • When ready to cook, line your air fryer with aluminum foil creating a tray with raised edges to keep in the marinade.
    • Cook at 400°F for 8-10 minutes or until internal temperature reaches 160°F. 
    • While your chicken is cooking, add all the salad ingredients to a small bowl stir, and mix well. Set aside.
    • Add all the ingredients for the tahini sauce in a small mixing bowl and mix until the sauce is smooth and creamy. Set aside.
    • Once your chicken is done cooking, you’re ready to assemble your Shawarma.
    • Add to your pita bread or flatbread your lemon tahini sauce, chicken slices, and top with your salad.
    • Fold and bring the edges together. Enjoy!

    Notes

    Chicken Prep: You can cook the chicken right away, or you can leave the chicken overnight to marinate in the seasoning. It's best to allow the shawarma meat to sit for at least 6 hours.

    Nutrition

    Calories: 450kcalCarbohydrates: 42gProtein: 13gFat: 29gSaturated Fat: 4gPolyunsaturated Fat: 8gMonounsaturated Fat: 13gCholesterol: 3mgSodium: 1567mgPotassium: 1231mgFiber: 7gSugar: 12gVitamin A: 803IUVitamin C: 24mgCalcium: 130mgIron: 5mg
    Print Recipe Pin Recipe Rate this Recipe
    Tried this recipe?Let us know how it was!

    Best Air Fryer Stuffed Chicken Breast

    October 5, 2024 by Angela Milnes

    Best Air Fryer Stuffed Chicken Breast.

    Craving something crispy, juicy, and a little bit fancy without the fuss? This Air Fryer Stuffed Chicken Breast recipe is about to become your new favorite weeknight wonder.

    Best Air Fryer Stuffed Chicken Breast.

    When you’re tired of plain old chicken, stuffed chicken is the ultimate glow-up. And when you cook it in the air fryer? Even better. This combo of savory spices, melty cheese, and sweet apple slices tucked inside a golden chicken breast hits all the right notes—perfect for autumn or anytime you want to feel like a dinner hero.

    I’ve tested this recipe every which way—overstuffed versions, fancier cheeses like brie, even leftover cranberry sauce from the holidays. No matter the variation, this air fryer stuffed chicken breast always turns out juicy, crispy, and packed with flavor. It’s one of those recipes I turn to when I want something easy that feels just a little bit extra.

    Want more air fryer dinner ideas? Check out my Air Fryer Chicken Shawarma or Quick Chicken Curry Air Fryer Recipe!

    [feast_advanced_jump_to]

    💖 Why This Recipe Works

    • Low-effort, high-reward: Looks impressive, tastes incredible, but comes together fast.
    • Kid-approved and adult-worthy: That melty cheese and hint of sweetness make it a crowd-pleaser.
    • Air fryer magic: Quick cook time, crispy outside, juicy inside—no oven required.

    ⭐ Star Ingredients

    Stuffed chicken breast ingredients.

    To make the air fried stuffed chicken breast, here's what you'll need.

    • Chicken breasts – Choose skinless, boneless ones for easy stuffing and juicy results.
    • Munster cheese – This creamy, melty cheese adds rich flavor and melts like a dream inside the chicken.
    • Apples – Thin slices add a natural sweetness that balances the savory spices. Pink Lady or Gala work beautifully.
    • Apple cider vinegar – Just a splash in the sauce brings everything together with a tangy twist.

    For the complete list of ingredients with measurements and instructions, please see the recipe card at the bottom of the post.

    🔄 Substitutions & Variations

    • Cheese Swap: Use brie, provolone, mozzarella, or sharp cheddar for a different flavor and melt.
    • Fruit Twist: Swap apples for pears, figs, or dried cranberries—especially cozy in the fall.
    • Herb Boost: Add rosemary, thyme, or smoked paprika to deepen the flavor.
    • Go Mediterranean: Try spinach and feta for a Greek-inspired filling.
    • Creamy Spinach: Mix softened cream cheese with wilted spinach and garlic for a creamy, crowd-pleasing combo.
    • Cordon Bleu Style: Add a layer of ham and Swiss cheese for a take on the classic.
    • Bacon-Wrapped: Wrap each stuffed breast in bacon before air frying for extra crisp and flavor.
    • Tex-Mex Twist: Stuff with jalapeños, cheddar, and taco seasoning for a spicy kick.
    • Veggie Packed: Add chopped sun-dried tomatoes, olives, or sautéed mushrooms for a savory profile.

    If you're into these creative twists, you might also love my Best Air Fryer Cheesesteak Egg Rolls or Air Fryer Huli Huli Chicken.


    🔪 How To Make Air Fried Stuffed Chicken Breasts

    Once you have your ingredients ready, here's what you'll need to do to make the stuffed chicken breasts.

    Seasoned chicken breasts in air fryer basket.
    1. Step 1: Season the chicken breast with ½ of the spices. Place each chicken breast in the air fryer basket and spray with oil. Cook at 400°f for 8 minutes.
    Butter melting in a skillet.
    1. Step 2: While cooking, melt the butter in a pan over medium heat and add the apple cider vinegar and remaining spices. Bring the sauce to a boil and stir until the sauce thickens. Set aside.
    Stuffed chicken breasts on a wooden board.
    1. Step 3: Remove and let cool to touch. Using a sharp knife, slice a pocket into the side of the chicken breast. 
    Air fried stuffed chicken breast with cheese and apple.
    1. Step 4: Slice the Munster cheese into small triangles and stuff the chicken with the slices of apples and cheese in layers.
    Munster stuffed chicken in air fryer.
    1. Step 5: Return the cooked stuffed chicken to the air fryer basket, brush with the sauce and then cook for 12 more minutes. 
    Stuffed chicken breast ready to be served.
    1. Step 6: Remove, let cool and enjoy. 

    💡Hint: Using thicker chicken breasts or air frying from frozen? Just increase the final cook time by 5–10 minutes and use a meat thermometer to check for 165°F in the thickest part.

    Air fryer stuffed chicken breast on a plate.

    👩‍🍳 Expert Tips

    • Use a meat thermometer for perfect doneness—especially helpful when cooking from frozen or with extra-large chicken breasts.
    • Thicker cuts may need an extra 3–5 minutes per side. Don’t overcrowd the basket so the hot air can circulate fully.
    • Frozen stuffed chicken can go straight into the air fryer. Just add 7–10 minutes to the total cook time and brush with oil midway through to help crisp the outside.

    💭 FAQs

    What’s the best way to stuff a chicken breast?

    Use a sharp knife to cut a deep pocket along the side—don’t slice all the way through. Spoon or layer your filling gently inside.

    Can I make air fried stuffed chicken breast from frozen?


    Yes! Just increase the cook time by 7–10 minutes and check with a thermometer to ensure it hits 165°F internally.

    What other fillings work well with stuffed chicken breast?

    Try softened cream cheese mixed with spinach and sun-dried tomatoes or goat cheese and caramelized onions.

    How do I store and reheat leftover stuffed chicken breast?

    Pop leftovers in an airtight container in the fridge for up to 3 days. Reheat in the air fryer or microwave with a splash of oil to keep it moist.

    💖 Serving Suggestions

    Make it a meal with these tasty sides:

    • Creamy Tomato Basil Soup – Cozy and classic (pairs like a dream with the cheesy center).
    • Air Fryer Tater Tot Casserole – Total comfort food.
    • Simple Avocado Salad – Bright, creamy, and refreshing.
    • Crispy Air Fryer Carrot Fries or Okra Chips – Sweet, crunchy perfection.
    • Beet Sweet Potato Salad – Vibrant and earthy with a zingy dressing.
    • Watermelon Feta Mint Salad – For a low-carb but indulgent twist.

    💡Leftovers? Slice the stuffed chicken and layer it into wraps with spinach and honey mustard, or chop it up for a protein-packed fall salad with pecans and dried cranberries.

    Stuffed chicken breasts on a plate.

    🍽 Related Air Fryer Reicpes

    • Air Fryer Huli Huli Chicken.
      Air Fryer Huli Huli Chicken (Hawaiian Chicken Recipe)
    • Best Air Fryer Stuffed Chicken Breast.
      Best Air Fryer Stuffed Chicken Breast
    • Air Fryer Bok Choy on a white plate covered in paprika.
      Air Fryer Bok Choy
    • Crispy Air Fryer Avocado Fries Recipe.
      Crispy Air Fryer Avocado Fries Recipe

    Did you make this recipe? Leave a review and a ⭐⭐⭐⭐⭐ rating below, or tag us in our Facebook Group! Alternatively, bookmark it in your browser or save to Pinterest.

    Best Air Fryer Stuffed Chicken Breast.

    Air Fryer Stuffed Chicken Breast

    Angela Milnes
    Air Fryer Stuffed Chicken Breast with Apple and Cheese is a delicious twist on a classic! Juicy chicken breasts are stuffed with sweet, crisp apples and creamy cheese, then air-fried to golden perfection. The combination of savory chicken, sweet apples, and melted cheese creates a flavorful and satisfying dish that's perfect for an easy yet impressive dinner!
    5 from 5 votes
    Print Recipe Pin Recipe Rate this Recipe
    Prep Time 10 minutes mins
    Cook Time 18 minutes mins
    Total Time 30 minutes mins
    Course Air Fryer Recipes
    Cuisine American
    Servings 3 Servings
    Calories 451 kcal

    Ingredients
      

    • 3 Chicken Breast Skinless
    • 1 Teaspoon Onion Powder
    • 1 Teaspoon Garlic Powder
    • ½ Teaspoon Salt
    • ½ Teaspoon Pepper
    • 1 Tablespoon Parsley
    • 1 Cup Apple Cider Vinegar
    • ½ Butter Stick
    • 1 Apple Thinly sliced
    • 4-5 Slices Munster Cheese

    Instructions
     

    • Season the chicken breast with ½ of the spices. Place each chicken breast in the air fryer basket and spray with oil. Cook at 400°f for 8 minutes.
    • While cooking, melt the butter in a pan over medium heat and add the apple cider vinegar and remaining spices. Bring the sauce to a boil and stir until the sauce thickens. Set aside
    • Remove and let cool to touch. Using a sharp knife, slice a pocket into the side of the chicken breast. You can also experiment with other kinds of cheeses like feta cheese, cheddar cheese, pepper jack cheese mozzarella cheese or even some shredded Parmesan cheese.
    • Slice the Munster cheese into small triangles and stuff the chicken with the slices of apples and cheese in layers.
    • Return the cooked stuffed chicken to the air fryer basket, brush with the sauce and then cook for 12 more minutes.
    • Remove, let cool and enjoy.

    Notes

    • Use a meat thermometer for perfect doneness—especially helpful when cooking from frozen or with extra-large chicken breasts.
    • Thicker cuts may need an extra 3–5 minutes per side. Don’t overcrowd the basket so the hot air can circulate fully.
    • Frozen stuffed chicken can go straight into the air fryer. Just add 7–10 minutes to the total cook time and brush with oil midway through to help crisp the outside.

    Nutrition

    Calories: 451kcalCarbohydrates: 11gProtein: 57gFat: 17gSaturated Fat: 8gPolyunsaturated Fat: 1gMonounsaturated Fat: 5gTrans Fat: 0.1gCholesterol: 180mgSodium: 892mgPotassium: 1040mgFiber: 2gSugar: 7gVitamin A: 593IUVitamin C: 7mgCalcium: 295mgIron: 1mg
    Print Recipe Pin Recipe Rate this Recipe
    Tried this recipe?Let us know how it was!

    Air Fryer Roasted Carrots

    October 5, 2024 by Angela Milnes

    Air Fryer Roasted Carrots.

    If you love roasted carrots then you'll want to try this easy Air Fryer Roasted Carrots recipe. If you love roasted vegetables, then there's a good chance you'll enjoy these roasted carrots made easily in the air fryer!

    Air Fryer Roasted Carrots In A Bowl.
    [feast_advanced_jump_to]

    Why This Recipe Works

    • Perfectly Roasted: The air fryer ensures evenly roasted carrots with a delightful crunch.
    • Healthy Side Dish: Enjoy this nutrient-rich, low-calorie side with any main course.
    • Easy and Quick: With minimal prep time, these Air Fried Carrots are ready in a flash.

    🥘 Ingredients

    ingredients for air fryer roasted carrots.

    Here are the ingredients for perfectly seasoned roast baby carrots in the air fryer:

    • Baby Carrots: Have a sweet, slightly earthy flavor and a pleasing crunch that becomes beautifully tender when air-fried.
    • Olive Oil: Ensures the carrots get a nice roasting in the air fryer. It also helps the herbs and spices stick to the carrots, enhancing their flavor.
    • Thyme: Adds a subtle, earthy flavor that complements the natural sweetness of the carrots.
    • Oregano: Adds a hint of peppery sharpness, creating a nice contrast with the sweet carrots and other herbs.
    • Cracked Black Pepper: Introduces a touch of heat and pungency, adding depth to the overall flavor profile.
    • Salt: Brings out the natural flavors of the carrots and balances the sweetness with a savory note.

    For the complete list of ingredients with measurements and instructions, please see the recipe card at the bottom of the post.

    🔄 Substitutions & Variations

    • Sweet & Savory: Drizzle honey or maple syrup over the carrots before air frying for a caramelized finish.
    • Spicy Twist: Add cayenne pepper or smoked paprika for a kick of heat.
    • Cheesy Goodness: Sprinkle with Parmesan or nutritional yeast for a deliciously cheesy flavor.

    🔪 How To Cook Air Fryer Roasted Carrots

    Here is a step-by-step guide to roasting carrots in your air fryer machine.

    seasoning for roasted carrots.

    Step One: Preheat the air fryer to 380. Add the olive oil and seasonings to a large bowl, and stir to mix together.

    baby carrots in a bowl.

    Step Two: Place carrots in the bowl.

    baby carrots seasoned in a bowl.

    Step Three: Toss carrots to coat with the seasoning mixture and salt and pepper.

    roasted carrots in the air fryer basket.

    Step Four: Add carrots in a single layer to the air fryer basket, and air fry for 15-18 minutes, tossing the basket halfway through cooking.

    roasted carrots on a white plate.

    👩‍🍳 Expert Tips

    • Cut Carrots Evenly: For consistent cooking, cut your carrots into uniform pieces. This ensures they all cook evenly in the air fryer, resulting in perfectly roasted carrots.
    • Experiment with Seasonings: While thyme and oregano are great, feel free to try adding garlic powder, rosemary, or even a touch of honey or maple syrup for a sweet twist.
    • Don’t Overcrowd the Basket: Arrange the carrots in a single layer in the air fryer basket to allow the hot air to circulate evenly. Overcrowding can result in uneven cooking.
    • Adjust Cooking Time for Thickness: If you prefer your carrots more tender, slice them thinner to reduce the cooking time. For thicker pieces, extend the cook time by a few minutes.

    💭 FAQs

    Can You Roast Baby Carrots?

    Yes, you can cook baby carrots in the air fryer! Simply follow the same steps as for larger carrots that are peeled and cut into uniform pieces. The smaller size of baby carrots makes them particularly suitable for roasting in the air fryer because they cook quickly and evenly.

    Do Carrots Cook Fast In The Air Fryer?

    Carrots cook very quickly in the air fryer, usually in about 10 minutes. Depending on the size and thickness of the carrots, they may need to be cooked for a few minutes longer.

    You can check on the air fryer roasted carrots by inserting a fork into them- if they are soft, they are done. If you are looking for a quicker cook time, you can slice the carrots into thin strips. These will cook in about 5-7 minutes.

    Overall, air fryer carrots are a healthy and easy way to add some extra veggies to your diet! And, they can be cooked in a matter of minutes- making them perfect for a busy weeknight meal.

    Do I Need To Peel Carrots?

    No, you don't need to peel baby carrots. It is often recommended to leave the peel on baby carrots to preserve their nutrients.

    However, if you prefer to peel them before cooking, this will not affect the flavor or texture of your finished dish when air frying.

    Can I Season Baby Carrots Another Way?

    Yes, you can season baby carrots in a variety of ways. Some popular options include using herbs like thyme and oregano, as well as spices like black pepper and salt.

    You can also use a combination of different seasonings to create your custom flavor profile for example some like to use garlic powder combined with a little olive oil and herbs.

    If you're looking for sweet roasted air fryer carrots then try using brown sugar or toss the carrots in mapley goodness maple syrup.

    You can also roast them in the air fryer with some butter or olive oil, or you can get creative and add some scallions and dried cranberries to the mix!

    No matter how you choose to season your air fryer carrots, they are sure to be delicious and nutritious.

    Are Baby Carrots Thin Carrots?

    There is some debate about whether baby carrots are the same as thin carrots. Some people argue that baby carrots and thin carrots are two different varieties of carrots, while others believe that baby carrots are simply regular carrots that have been cut down to smaller sizes for convenience.

    Best Way To Store Cooked Carrots

    Refrigerate leftover roasted carrots in an airtight container for 2-3 days. For longer storage, freeze in a labeled freezer bag or container.
    Freeze cooked carrots on a baking sheet, then transfer to a freezer-safe container for up to 2-3 months.

    🧂Serving Suggestions

    These are some great dishes to serve with roasted carrots:

    • Maple Brussels Sprouts: Crispy sprouts with a sweet kick.
    • Tasty Quinoa Salad: Light and citrusy, a perfect grain pairing.
    • Parmesan Roasted Asparagus: A cheesy veggie delight.
    • Air Fried Sweet Potatoes: Creamy, orange goodness on the side.
    • Kale and Apple Salad: Fresh, vibrant, and packed with antioxidants.
    • Air Roasted Potatoes: Crispy spuds with a zesty twist.
    • Grilled Zucchini with Parmesan: Simple, savory, and satisfying.
    • Caprese Salad Skewers: A bite-sized burst of tomato, mozzarella, and basil joy.
    Air fryer roasted carrots served with a fork

    🍽 Related Recipes

    • edamame stir fry in a white bowl.
      Easy Edamame Stir Fry (15-Minute Protein-Packed Side Dish)
    • Chicken And Cabbage Stir Fry Recipe.
      Chicken And Cabbage Stir Fry Recipe
    • Zucchini Egg Bake Recipe.
      Best Zucchini Egg Bake Recipe
    • New Years charcuterie Board.
      New Years Charcuterie Board

    Did you make this recipe? Leave a review and a ⭐⭐⭐⭐⭐ rating below, or tag us in our Facebook Group! Alternatively, bookmark it in your browser or save to Pinterest.

    Air Fryer Roasted Carrots.

    Air Fryer Roasted Carrots

    Angela Milnes
    If you love roasted carrots then you'll want to try this easy air fryer roasted carrots recipe
    5 from 3 votes
    Print Recipe Pin Recipe Rate this Recipe
    Prep Time 5 minutes mins
    Cook Time 18 minutes mins
    Total Time 23 minutes mins
    Course Side Dish
    Cuisine American
    Servings 6 Servings
    Calories 21 kcal

    Ingredients
      

    • 1 IB Bag Of Baby Carrots
    • 1 tablespoon Olive Oil
    • ½ teaspoon Thyme
    • ½ teaspoon Cracked Black Pepper
    • ½ teaspoon Salt

    Instructions
     

    • Preheat the air fryer to 380. 
    • Add the olive oil and seasonings to a large bowl, and stir to mix together.
    • Place carrots in the bowl, and toss carrots to coat with the seasoning mixture and salt and pepper.
    • Add carrots in a single layer to the air fryer basket, and air fry for 15-18 minutes, tossing the basket halfway through cooking.

    Notes

    No, you don't need to peel baby carrots. It is often recommended to leave the peel on baby carrots to preserve their nutrients.

    Nutrition

    Calories: 21kcalCarbohydrates: 0.2gProtein: 0.03gFat: 2gSaturated Fat: 0.3gPolyunsaturated Fat: 0.2gMonounsaturated Fat: 2gSodium: 194mgPotassium: 4mgFiber: 0.1gSugar: 0.01gVitamin A: 32IUVitamin C: 0.3mgCalcium: 2mgIron: 0.1mg
    Print Recipe Pin Recipe Rate this Recipe
    Tried this recipe?Let us know how it was!

    More Air Fryer Recipes:

    Here are some more fantastic air fryer recipes you can make in your air fryer or the Instant Pot using the air fryer basket and Instant Pot air fryer lid.

    • Air Fryer Huli Huli Chicken
    • Air Fryer Chicken Wings
    • Air Fryer Sweet Potatoes
    • Air Fryer Enchiladas With Turkey and Black Beans
    • Best Air Fryer Cheesesteak Egg Rolls
    • Air Fryer Cheese Bread
    • Quick Chicken Curry Air Fryer Recipe
    • Air Fryer Chicken Shawarma
    • Air Fryer Yorkshire Pudding

    Air Fryer Butterfly Chicken With Citrus

    October 5, 2024 by Angela Milnes

    Air Fryer Butterfly Chicken With Citrus.

    This Air Fryer Butterfly Chicken (aka spatchcock chicken) is crispy on the outside, juicy on the inside, and bursting with bright citrus flavor. It’s a quick, delicious way to level up your weeknight dinner—no oven required.

    Air Fryer Butterfly Chicken With Citrus.

    I’ve been making butterfly chicken for years, and once I tried it in the air fryer—game over. The even heat gives you juicy meat and golden, crisp skin in half the time of oven roasting. Adding citrus to the marinade? That’s my secret weapon. The lemon, lime, and orange not only tenderize the meat but give it a fresh, zesty punch that cuts through the richness just right.

    If you're into easy, flavor-loaded air fryer recipes, try my Air Fryer Tater Tot Casserole or Air Fryer Cauliflower Pizza Crust—both family-tested and approved!

    [feast_advanced_jump_to]

    💖 Why This Recipe Works

    • Bright Citrus Flavor: The combination of lemon, lime, and orange juices infuses the chicken with a tangy freshness.
    • Even Cooking: Butterflying the chicken allows it to cook evenly in the air fryer, resulting in a perfectly roasted bird.
    • Quick & Easy: With minimal prep and cook time, this dish is both convenient and delicious.

    ⭐ Star Ingredients

    Butterfly chicken ingredients.
    • Whole Butterflied Chicken: Removing the backbone and flattening the chicken ensures even cooking.
    • Lemon, Lime, and Orange Juices: Freshly squeezed juices provide the best flavor, but bottled versions work in a pinch.
    • White Wine Vinegar: Adds a subtle tang that complements the citrus.
    • Olive Oil: Helps crisp the skin and keeps the meat moist.
    • Spices: Garlic powder, parsley, salt, and thyme enhance the overall flavor profile.

    For the complete list of ingredients with measurements and instructions, please see the recipe card at the bottom of the post.

    🔄 Substitutions & Variations

    • No Whole Chicken? Use chicken thighs or breasts—adjust cooking time for smaller cuts.
    • Different Marinade: Swap citrus juices for balsamic vinegar and honey for a richer glaze.
    • Spice It Up: Add paprika, cayenne, or chili flakes for a bolder kick.

    ✨ Want to round it out? Serve with Air Fryer Bok Choy, Beet And Sweet Potato Salad, or a crisp Simple Avocado Salad for a colorful, well-balanced plate.

    🔧 Air Fryer Size & Cook Time Tips

    Wondering if your air fryer can handle a whole spatchcock chicken? I’ve tested this in several models, and here’s what I’ve learned:

    • Air Fryer Size: A 5.8-quart air fryer can typically fit a 4 to 5-pound butterflied chicken. If your air fryer is smaller, consider using split chicken breasts or thighs instead.
    • Cook Time Guide: For a 4-pound chicken, air fry at 360°F for about 35–40 minutes. Larger birds (closer to 5 lbs) may need up to 45 minutes. Always flip halfway and use a meat thermometer to check the thickest part reaches 165°F.
    • Pro Tip: Let the chicken rest for 10–15 minutes after cooking to lock in juices—it makes a big difference in tenderness!

    🔪 How To Make Air Fryer Butterfly Chicken?

    Nothing is hard about this recipe. It just takes a little chopping, mixing, and marinating. Follow the steps below for a healthy air fryer chicken recipe.

    Making lemon sauce for butterfly chicken.
    1. Step 1: Slice 1 lemon into whole slices, and add it to a mixing bowl. Next, combine the rest of the ingredients minus the chicken into the mixing bowl. Mix to combine.
    Lemon sauce and chicken in pan.
    1. Step 2: Add the chicken to the mixing bowl. Flip the chicken from the chicken breast side to the bottom of the chicken two to three times to coat it. Then, allow the chicken to marinate in the citrus seasonings in the refrigerator for 30 minutes.
    Butterfly chicken in air fryer basket.
    1. Step 3: Next remove the backbone from the chicken, use a knife to cut through the breast bone, and flatten the Chicken using a mallet. The raw meat should now be shaped like a butterfly. Using a baking dish that fits both the chicken and air fryer basket, place the chicken in the pan. Pour the marinade over the chicken but don’t overfill the pan. Place the lemon slices on top of the chicken.
    Cooked butterfly chicken in air fryer basket.
    1. Step 4: Finally, place the chicken in the air fryer and cook it at 350℉ for 30 minutes or until the internal temp reaches 165℉. Remove the chicken from the air fryer and carve it up. Whether you love the chicken breast, the leg, or chicken thigh meat, serve your chicken and garnish with lemon and parsley if you desire.
    Air fried butterfly chicken on a plate with lemons and oranges on table.

    👩‍🍳 Expert Tips

    • Butterflying the Chicken: Use sharp kitchen shears to remove the backbone, then press down on the breastbone to flatten.
    • Marinating Time: While 30 minutes is sufficient, marinating overnight will deepen the flavors.
    • Checking Doneness: Use a meat thermometer to ensure the chicken reaches the safe internal temperature.
    • Rest Is Key: After air frying, let the chicken rest for 10–15 minutes before slicing. This helps the juices redistribute so your meat stays tender and flavorful—not dry.

    💭 FAQs

    What Is Air Fryer Citrus Butterfly Chicken?

    Air Fryer Citrus Butterfly Chicken is a delicious and healthy way to cook chicken. The chicken is first marinated in a mixture of lemon juice, garlic, and spices. Then, it is placed in an air fryer and cooked until crispy and golden brown.

    The resulting chicken is juicy and full of flavor, and the lemon-garlic sauce provides a perfect finishing touch. Air Fryer Citrus Butterfly Chicken is a simple and healthy recipe that is sure to please the whole family.

    How Do I Butterfly A Chicken?

    To butterfly a chicken, start by removing the backbone. Then, use a sharp knife to carefully cut through the breastbone. Once the chicken is open, flatten it out and tuck in the wings.

    Can I Use Boneless, Skinless Chicken Breasts Or Thighs?

    Yes, you can use either chicken breasts or thighs for this recipe. However, the cook time will be reduced. I prefer to use a whole chicken because it comes out crispy on the outside and juicy on the inside.

    Can I Make This Recipe Ahead Of Time?

    Yes, you can marinate the chicken in the fridge for up to 24 hours before cooking. This step is not necessary, but it will help to infuse more flavor into the meat.

    How To Store Leftover Air Fried Chicken

    To store leftover air fryer chicken, let the chicken cool completely. Then, transfer it to an airtight container and place it in the fridge for up to four days.

    Butterfly chicken on a tray served with lemon slices.

    💖 Serving Suggestions

    Air fryer butterfly chicken is perfectly served with a simple salad of mixed greens, tomatoes, and avocado. But, if you want more than a salad, here are some more side ideas:

    • Air Fryer Sweet Potatoes
    • Low Carb Broccoli Salad
    • Almond Milk Mashed Potatoes
    • Crispy Smashed Potato Salad
    • Roasted Maple Brussel Sprouts
    • Cilantro Garlic Rice

    What Can I Do With Leftover Air Fryer Butterfly Chicken?

    Leftover butterfly chicken is super versatile! Shred it for tacos, slice it into wraps or sandwiches, toss it into a salad, or stir it into soups and pasta dishes for an easy protein boost. It also reheats well in the air fryer—just a few minutes at 350°F and it's good as new!

    Butterfly chicken with sliced lemon for garnish.

    🍽 More Easy Chicken Dishes

    • Slow Cooker Chicken Bacon Ranch Pasta.
      Slow Cooker Chicken Bacon Ranch Pasta
    • Sheet Pan Chicken Fajitas.
      Sheet Pan Chicken Fajitas
    • Instant Pot Chicken Adobo.
      Instant Pot Chicken Adobo
    • Baked Honey Mustard Chicken Tenders.
      Honey Mustard Chicken Tenders

    Did you make this recipe? Leave a review and a ⭐⭐⭐⭐⭐ rating below, or tag us in our Facebook Group! Alternatively, bookmark it in your browser or save to Pinterest.

    Air Fryer Butterfly Chicken With Citrus.

    Air Fryer Butterfly Chicken

    Angela Milnes
    Looking for a quick and juicy chicken recipe that's perfect for weeknights? This Air Fryer Butterfly Chicken is just what you need! By butterflying the chicken, you get perfectly even cooking with a crispy outside and tender inside. Plus, it's ready in no time thanks to the air fryer!
    5 from 3 votes
    Print Recipe Pin Recipe Rate this Recipe
    Prep Time 45 minutes mins
    Cook Time 30 minutes mins
    Total Time 15 minutes mins
    Course Dinners
    Cuisine American
    Servings 2 Servings
    Calories 175 kcal

    Ingredients
      

    • 2 Lemons
    • ¼ Cup Lime juice
    • ¼ Cup White Wine Vinegar
    • 2 Tablespoons Olive Oil
    • 1 Tablespoon Garlic
    • 2 Teaspoons Parsley
    • 1 Teaspoon Thyme
    • 1 Teaspoon Salt

    Instructions
     

    • Slice 1 lemon into whole slices. Add to mixing bowl
    • Combine the rest of the ingredients minus the chicken to the mixing bowl. Mix
    • Add the chicken to the mixing bowl. Flip the chicken two to three times to coat it. 
    • Let rest in the fridge for 30 minutes 
    • Using a pan, the fits both the chicken and air fryer basket, place the chicken in the pan. pour marinade over the chicken but don’t over fill the pan
    • Place lemon slices across the top of the chicken.
    • Cook at 350℉ for 30 minutes or until internal temp reaches 165°
    • Remove the chicken and carve. 
    • Garnish with lemon and parsley.

    Notes

    To butterfly a chicken, start by removing the backbone. Then, use a sharp knife to carefully cut through the breastbone. Once the chicken is open, flatten it out and tuck in the wings.

    Nutrition

    Calories: 175kcalCarbohydrates: 14gProtein: 2gFat: 14gSaturated Fat: 2gPolyunsaturated Fat: 2gMonounsaturated Fat: 10gSodium: 6mgPotassium: 219mgFiber: 3gSugar: 3gVitamin A: 95IUVitamin C: 69mgCalcium: 46mgIron: 1mg
    Print Recipe Pin Recipe Rate this Recipe
    Tried this recipe?Let us know how it was!
    Butterfly chicken with sliced lemon for garnish on a try.

    Simple Air Fryer Cheese Bread

    October 5, 2024 by Angela Milnes

    Simple Air Fryer Cheese Bread.

    Craving something delicious and easy? This Air Fryer Cheese Bread is just the recipe you need! It’s super simple to make and loaded with cheesy, flavorful goodness. With the perfect balance of crispy edges and melty cheese, this bread is sure to be a hit with everyone!

    Air fryer cheese bread on a tray served with a bowl of ketchup.
    [feast_advanced_jump_to]

    💖 Why This Recipe Works

    • Quick And Easy: Air Fryer Cheesy Bread is a quick and easy recipe that uses pizza dough and an Air Fryer to make an amazing appetizer or side dish. It is perfect for parties or game-day snacks.
    • Crispy: This Air Fryer Cheese Bread is crispy on the outside and soft and gooey on the inside. It is loaded with mozzarella cheese and Italian spices for a scrumptious flavor everyone will love.
    • Versatile: You can also add some Parmesan cheese on top for extra flavor. Or you could dip your cheese bread into Cheese Fondue.

    ⭐ Star Ingredients

    Air Fryer Cheese Bread Ingredients.

    For this cheesy bread recipe, you'll need a few ingredients:

    Pizza Dough

    • Flour- Do not pack the flour. Instead scoop it into the measuring cup and level it off with a butter knife to get the perfect measurement. You will also need more for dusting and rolling the dough.
    • Yeast- You will use dry yeast. Yeast helps the dough rise making it fluffy and delicious.
    • Water- To activate the yeast and blend the flour, you'll need warm water. Make sure it is 110℉.
    • Sugar- Sugar is a food for your yeast. It gives it a boost to grow and multiply resulting in moist, fluffy dough.
    • Olive oil- I use extra virgin olive oil, but you could also use canola oil or vegetable oil as well.
    • Salt-Salt helps to combine the gluten in the dough. Without salt, the dough will rise faster than it should, leading to less flavor and a weak structure.

    Optional Toppings

    • Mozzarella cheese- I use shredded mozzarella cheese, but you could use cheddar, Pepper jack, or your favorite cheese.
    • Italian seasoning- Italian seasoning gives your cheesy bread that garlic bread flavor that combines perfectly with the cheese.
    • Butter- Set the butter out about 30 minutes before using to soften it. This makes it easier to spread on your dough.

    For the complete list of ingredients with measurements and instructions, please see the recipe card at the bottom of the post.

    📖  Substitutions & Variations

    • Add Heat: Add a few red pepper flakes to the cheddar cheese mix and give this cheesy bread a kick of spice.
    • Add Garlic: Add some garlic powder and butter mixture to make this into an air fryer garlic bread. Cheesy garlic bread is delicious and will add more flavor to this recipe.

    🔪 How To Make Air Fryer Cheese Bread

    A large bowl of flour, butter stick, a small bowl of olive oil and salt.
    1. Step 1: First, add warm water to a large mixing bowl with the yeast. Stir and mix. Then, let the yeast proof for about 5 minutes.
    Making bread dough in bowl.
    1. Step 2: Next, add the sugar, flour, olive oil, and salt to the yeast mixture. Mix until fully incorporated.
    Bread dough in a large bowl.
    1. Step 3: With a hook, knead the dough for about 5 minutes on medium speed. Or, knead the dough with your hands on a lightly floured surface for 10 minutes. Roll the dough into a large ball, and transfer it to a lightly oiled bowl.
    Cutting dough on chopping board.
    1. Step 4: Cover the dough with a clean towel, and let it sit for about 2 hours or until it has doubled in size. Next, move the dough to a lightly floured surface and divide it into two sections.
    Rolled out dough on wooden board.
    1. Step 5: Roll out the dough using your rolling pin.
    Bread dough in pan and a stick of butter.
    1. Step 6: Using 1 tablespoon of butter, grease your pie pan. Transfer your pizza dough to your pan. Press to flatten down on the bottom of the pan.
    Cheesy bread dough in air fryer basket.
    1. Step 7: With your air fryer preheated to 380°F, cook your dough for 5 minutes. Once the dough is cooked, add 1 tablespoon of butter, ¾ cup of cheese, and ½ teaspoon of Italian seasoning.
    Cheesy bread in air fryer basket.
    1. Step 8: Place your cheesy bread back into the air fryer at 380°F for another 5 minutes. Slice into pieces. Repeat steps 6-9 with the second cheesy bread. Serve and Enjoy!
    Air fried cheese bread on a serving tray.

    👩‍🍳 Expert Tips

    • Using Store-Bought Dough: If you're short on time, feel free to use pre-made pizza dough. Just roll it to an 8-inch diameter before baking. It will speed up the process without sacrificing too much on taste or texture.
    • Cheese Variations: While mozzarella is a great base, you can experiment with other cheeses like cheddar, Parmesan, or even a blend of your favorites for added depth of flavor. Don't be afraid to mix and match.
    • Perfecting Crispy Edges: For the crispiest results, ensure you brush the dough with butter before cooking. This step gives the bread a golden, crispy edge that complements the gooey melted cheese inside.
    • Customize Seasonings: Add a pinch of garlic powder or red pepper flakes to the butter for a kick of flavor. Customizing your seasoning is a great way to personalize this dish to your taste preferences.

    💭 FAQs

    What Kind of Cheese Can I Use In This Recipe?

    You can use any type of shredded cheese that you like. I typically use mozzarella, but cheddar or Parmesan would also be delicious.

    Can I Use Store-Bought Pizza Dough?

    Yes, you can! Just make sure to roll it out into an 8 inch diameter like you would with the homemade dough. Using pre-made pizza dough makes this recipe easier and faster.

    Can I Make Air Fryer Cheesy Bread Ahead of Time?

    Unfortunately, this recipe is best made fresh and served immediately. Otherwise, the bread will become soggy from the sauce and cheese. However, you can prepare the dough ahead of time. Simply make the dough, cover it with plastic wrap and place it in the refrigerator until you are ready to bake and assemble your cheesy bread.

    How Do I Know When the Air Fryer Cheesy Bread Is Done?

    The bread is done when the cheese is melted and bubbly, and the dough is golden brown and crispy.

    Best Way to Store Cheese Bread

    To store cheese bread, let it cool completely, then wrap it in plastic or foil, or place it in an airtight container. Keep it at room temperature for up to 2-3 days.

    💖 Serving Suggestions

    Here are my favorite sides to serve with Air Fryer Cheesy Bread:

    • Instant Pot Spaghetti and Meatballs: Serve the cheesy bread alongside Instant Pot spaghetti and meatballs. The cheesy bread can be used to soak up the delicious tomato sauce from the spaghetti and complement the flavors of the meatballs.
    • Instant Pot Chicken Alfredo: Pair the cheesy bread with Instant Pot chicken alfredo for a comforting and indulgent meal. The cheesy bread can be enjoyed alongside the creamy pasta dish, adding an extra layer of flavor and texture.
    • Instant Pot Chipotle Chicken Pasta: Serve the cheesy bread with Instant Pot chipotle chicken pasta for a spicy and cheesy combination. The cheesy bread can help balance out the heat from the chipotle sauce and enhance the overall flavor of the dish.
    • Easy Bake Bacon Alfredo: Accompany the cheesy bread with easy bake bacon alfredo for a decadent and satisfying meal. The cheesy bread can be dipped into the creamy alfredo sauce and enjoyed with the crispy bacon for a delicious flavor experience.
    Cheese Bread.

    🍽 More Air Fryer Recipes

    • Air Fryer Catfish Nuggets.
      Best Air Fryer Catfish Nuggets Recipe
    • Air Fryer Cod Fillet.
      Air Fryer Cod Fillet
    • Air fryer cauliflower with teriyaki sauce and sesame seeds.
      Air Fryer Cauliflower With Teriyaki Sauce
    • Crispy Air Fryer Avocado Fries Recipe.
      Crispy Air Fryer Avocado Fries Recipe

    Did you make this recipe? Leave a review and a ⭐⭐⭐⭐⭐ rating below, or tag us in our Facebook Group!e this recipe? Leave a review and a ⭐⭐⭐⭐⭐ rating below, or tag us in our Facebook Group! Alternatively, bookmark it in your browser or save to Pinterest.

    Simple Air Fryer Cheese Bread.

    Air Fryer Cheese Bread

    Angela Milnes
    This Air Fryer Cheesy Bread is a deliciously gooey and golden snack or side dish that’s ready in minutes! Perfectly crisp on the outside with a melted, cheesy center, this easy recipe is great for pairing with soups, salads, or enjoying on its own. It’s the ultimate comfort food that you can whip up quickly using your air fryer!
    5 from 4 votes
    Print Recipe Pin Recipe Rate this Recipe
    Prep Time 15 minutes mins
    Cook Time 6 minutes mins
    Additional Time 0 minutes mins
    Total Time 2 hours hrs 22 minutes mins
    Course Appetizers
    Cuisine American
    Servings 2 Servings
    Calories 933 kcal

    Ingredients
      

    • ¾ Cup Warm Water 110 degrees F
    • 1 Teaspoon Sugar
    • 1, ⅛ Teaspoon Dry Yeast
    • 1, ¾ Cups All Purpose Flour plus more for dusting
    • 1 Tablespoon Olive Oil
    • 1 Teaspoon Salt
    • 1, ½ Cups Mozzarella Cheese Shredded
    • 1 Tablespoon Italian Seasoning
    • 4 Tablespoons Butter

    Instructions
     

    • Make the Dough
    • When ready to cook your pizza, preheat your air fryer to 380°F.
    • Add to a large bowl your warm water, and yeast. Stir and mix. Allow your yeast to proof for about five minutes.
    • After the five minutes, add in your sugar, flour, olive oil, and salt. Mix until fully incorporated. 
    • Knead with the dough hook for about five minutes on medium speed if using a stand mixer. If using your hands, transfer the dough ball to a lightly floured flat surface and knead for about 10 minutes. 
    • Transfer your dough ball to a lightly oiled bowl. Cover with a clean towel for 2 hours, or until doubled in size.

    Assemble the Cheesy Bread

    • Once your dough has doubled in size, remove your dough ball to a lightly floured surface. Divide your ball into two sections.
    • Roll your dough using a rolling pin until it is 8 inches in diameter. 
    • Using 1 tablespoon of butter, grease your pie pan. Transfer your pizza dough to your pan. Press to flatten down on the bottom of the pan.
    • With your air fryer preheated to 380°F, cook your dough for 5 minutes.
    • Remove, and then top your dough with 1 tablespoon butter, ¾ cup cheese, and ½ tablespoon Italian seasoning. Cook for another 5 minutes.
    • Repeat steps 2 to 5 for your second cheesy bread.
    • Serve and enjoy!

    Notes

    Add Garlic: Add some garlic powder and butter mixture to make this into an air fryer garlic bread. Cheesy garlic bread is delicious and will add more flavor to this recipe.
    Add Heat: Add a few red pepper flakes to the cheddar cheese mix and give this cheesy bread a kick of spice.

    Nutrition

    Calories: 933kcalCarbohydrates: 90gProtein: 31gFat: 50gSaturated Fat: 27gPolyunsaturated Fat: 3gMonounsaturated Fat: 17gTrans Fat: 1gCholesterol: 127mgSodium: 1873mgPotassium: 236mgFiber: 4gSugar: 3gVitamin A: 1310IUVitamin C: 0.1mgCalcium: 489mgIron: 6mg
    Print Recipe Pin Recipe Rate this Recipe
    Tried this recipe?Let us know how it was!

    Easy Air Fryer Recipes

    • Air Fryer Baked Potato Recipe
    • Air Fryer Corn On The Cob
    • Air Fryer Asparagus With Parmesan
    • Thin Sliced Chicken Breast Recipe
    • Air Fryer Cauliflower With Teriyaki Sauce
    • Air Fryer Cod Fillet
    • Air Fryer Almond Crusted Chicken
    • Chicken Caesar Salad Air Fryer
    • Air Fryer Pot Pies

    Crispy Air Fryer Potato Wedges With Paprika

    October 5, 2024 by Angela Milnes

    Air Fryer Potato Wedges.

    These crispy air fryer potato wedges are crunchy, golden, and ready in minutes! A foolproof side or snack with big flavor and no deep frying.

    Air Fryer Potato Wedges.

    Potato wedges in the air fryer are the ultimate side—fast, foolproof, and way healthier than deep frying. I’ve been making these on repeat for easy weeknight dinners and kid-approved snack plates.

    If you love crispy veggie sides, don’t miss my air fryer carrot fries, crispy air fryer asparagus, or air fried cauliflower bites.

    [feast_advanced_jump_to]

    💖 Why This Recipe Works

    • Crispy perfection: Crispy outside, fluffy inside with zero deep frying
    • Simple and Easy: Easy to season and totally customizable
    • One Bowl: Minimal cleanup—just one bowl and the air fryer!

    ⭐ Star Ingredients

    Potato wedges ingredients.
    • Russet potatoes – These are a must for your wedges! Their starchy texture gets super crispy on the outside while staying fluffy inside. I always leave the skins on for extra crunch and fiber.
    • Olive oil – Just a little goes a long way. It helps the spices cling and gives the wedges that golden finish without making them greasy.
    • Paprika & garlic – I use smoked paprika and fresh minced garlic for flavor that pops. It’s the perfect combo of savory, earthy, and just a little sweet.

    For the complete list of ingredients with measurements and instructions, please see the recipe card at the bottom of the post.

    📖  Substitutions & Variations

    • Yukon Gold twist – Swap in Yukon Golds for a buttery bite with crisp edges
    • Spicy wedges – Add cayenne or chili powder for a kick
    • Garlic Parmesan – Toss wedges with parmesan and Italian herbs before serving
    • No oil? – Try a quick spritz of spray oil or skip entirely for a lighter bite
    • Air fryer sweet potato wedges – Sub in sweet potatoes for a sweet-and-savory version
    • Vegan cheesy – Use nutritional yeast instead of Parmesan for a dairy-free boost

    Looking for more crispy sides? Don’t miss my Air Fryer Okra Chips or air fryer sweet potato fries!

    🔪 How To Make Air Fryer Potato Wedges

    Potato wedges on a chopping board.
    1. Step 1: Preheat your air fryer for 5 minutes at 400°F. Wash and slice your potatoes into half-lengthwise wedges. Transfer your potato wedges to a large bowl. Add the oil and spices. Toss together so that the potatoes are evenly coated in the oil and seasonings.
    Seasoned potato wedges in an air fryer.
    1. Step 2: Add your seasoned potato wedges to the air fryer. Add as many as your basket can afford but make sure to not overcrowd them. Depending on the size of your air fryer, you may need to do this in batches.
    Cooked potato wedges in an air fryer.
    1. Step 3: Cook at 400°F for 10 minutes or until golden brown.
    crispy Air fried potato wedges on a plate.
    1. Step 4: Sprinkle your air-fried potato wedges with parmesan. Serve and eat warm. Enjoy!
    💡Hint: For even crispier wedges, soak the raw potato slices in cold water for 15–30 minutes, then pat dry before seasoning.

    Switch It Up with Global Flavors

    Most recipes for air fryer potato wedges rely on the classics—paprika, garlic powder, and a sprinkle of Parmesan. Delicious? Totally. But if you’re craving something a little bolder, why not travel the world through your spice rack?

    Try tossing your wedges with za’atar for a Middle Eastern twist, Cajun seasoning for a Southern-style kick, or curry powder for an earthy, spiced vibe. It’s an easy way to keep things exciting and cater to more adventurous taste buds.

    👩‍🍳 Expert Tips

    • Don’t skip preheating—it makes a huge difference in crispiness!
    • Always pat potatoes dry before tossing with oil and seasonings.
    • For ultra-crispy results, cook in batches and avoid stacking wedges in the basket.

    💭 FAQs

    How do I know when crispy air fried potato wedges are done?

    They're done when golden brown, fork-tender inside, and crisp on the edges. A quick poke test should feel soft in the center.

    Can I freeze leftover potato wedges?

    Yes! Freeze in a single layer first, then transfer to a freezer bag. Reheat straight from frozen in the air fryer at 375°F until warmed through.

    Are these wedges gluten-free?

    Totally! Just double-check your seasoning blends and cheese if using pre-grated Parmesan.

    💖 Serving Suggestions

    Here are some great sides to serve with air fried potato wedges:

    • Mango Arugula Salad: Light, fresh, and peppery with a sweet twist.
    • Mango Pineapple Salsa: Fruity and zesty, perfect for balance
    • Roasted Red Pepper Hummus: Creamy, smoky, and dip-worthy.
    • Crispy Onion Rings: Extra crunch to go all-in on crispy comfort.
    Air fried potato wedges on a serving plate.

    🍽 More Great Air Fryer Recipes

    • Bacon Wrapped Air Fryer Hot Dogs.
      Bacon Wrapped Air Fryer Hot Dogs
    • Easy Air Fryer Pot Pies Recipe.
      Easy Air Fryer Pot Pies Recipe
    • Air Fryer Huli Huli Chicken.
      Air Fryer Huli Huli Chicken (Hawaiian Chicken Recipe)
    • Air Fryer Smoked Turkey Legs.
      Best Air Fryer Smoked Turkey Legs

    Did you make this recipe? Leave a review and a ⭐⭐⭐⭐⭐ rating below, or tag us in our Facebook Group! Alternatively, bookmark it in your browser or save to Pinterest.

    Air Fryer Potato Wedges.

    Air Fryer Potato Wedges

    Angela Milnes
    Crispy, seasoned potato wedges made easy in the air fryer for a delightful snack.
    5 from 4 votes
    Print Recipe Pin Recipe Rate this Recipe
    Prep Time 5 minutes mins
    Cook Time 6 minutes mins
    Total Time 15 minutes mins
    Course Side Dish
    Cuisine American
    Servings 4 Servings
    Calories 221 kcal

    Ingredients
      

    • 3 Russet Potatoes
    • 2 Tablespoons Olive Oil
    • 1 Teaspoon Paprika
    • 1 Tablespoon Minced Garlic
    • ¼ Cup Parmesan Cheese
    • 1 Teaspoon Onion Powder

    Instructions
     

    • Preheat your air fryer for 5 minutes at 400°F.
    • Wash your recipe potatoes.
    • Slice your potatoes into half lengthwise wedges.
    • Transfer your potato wedges to a large bowl. Add the oil and spices. Toss together so that the potatoes are evenly coated in the oil and seasonings.
    • Add your seasoned potato wedges to the air fryer. Add as many as your basket can afford but make sure to not overcrowd them. Depending on the size of your air fryer, you may need to do this in batches.
    • Cook at 400°F for 10 minutes or until golden brown.
    • Sprinkle your air fried potato wedges with parmesan. Serve and eat warm. Enjoy!

    Notes

    Blanching For Texture: Consider blanching the potato wedges in boiling water before air frying to achieve a fluffy interior and crispy exterior.
    Even Cooking: Ensure even cooking by shaking the air fryer basket halfway through the cooking process, promoting consistent browning and texture.

    Nutrition

    Calories: 221kcalCarbohydrates: 31gProtein: 6gFat: 9gSaturated Fat: 2gPolyunsaturated Fat: 1gMonounsaturated Fat: 6gCholesterol: 4mgSodium: 110mgPotassium: 703mgFiber: 2gSugar: 1gVitamin A: 297IUVitamin C: 10mgCalcium: 105mgIron: 2mg
    Print Recipe Pin Recipe Rate this Recipe
    Tried this recipe?Let us know how it was!

    Best Air Fryer Sliced Potatoes (Easy Recipe)

    October 5, 2024 by Angela Milnes

    Best Air Fryer Sliced Potatoes.

    These Air Fryer Sliced Potatoes are crispy, cheesy, and totally irresistible. Whether you’re making them for dinner, a game-day snack, or just because—you’ll love how fast and easy they are. They’re one of my go-to easy air fryer recipes, and my whole family devours them every time.

    Best Air Fryer Sliced Potatoes.

    There’s something magical about thin sliced potatoes in the air fryer. They get those beautifully golden edges, stay soft inside, and need barely any oil. Plus, this recipe is super flexible—you can go full comfort food with bacon and cheese, or lighten it up with a vegan twist.

    If you’re a fan of crunchy sides like my Air Fryer Potato Wedges or snacky bites like Air Fryer Beet Chips, this one will be right up your alley.

    [feast_advanced_jump_to]

    💖 Why This Recipe Works

    • Crispy & tender – The best of both worlds in every bite.
    • Customizable – Go cheesy and savory or skip the bacon for a plant-based option.
    • Fuss-free – No flipping, no frying, no stress.

    ⭐ Star Ingredients

    Ingredients need to make air fried potato slices.
    • Russet Potatoes – My go-to for air frying. They’re starchy enough to get ultra crispy on the outside while staying fluffy inside. Just slice ‘em thin and let the air fryer do its magic.
    • Cheddar Cheese – Melts into the potatoes for that irresistible cheesy pull. Go sharp if you like a tangy bite or mild for a more classic feel.
    • Bacon – Adds salty crunch and smoky flavor. I always cook mine first and crumble it over hot potatoes so it stays crispy.
    • Olive Oil – Helps the edges crisp up perfectly without needing loads of fat—just a light brush and you're good to go.

    For the complete list of ingredients with measurements and instructions, please see the recipe card at the bottom of the post.

    🔪 How To Make Air Fryer Sliced Potatoes

    Bacon bits in skillet.
    1. Step 1: Cook the bacon in a medium skillet over medium-low heat, until crispy. When the baking is complete, set it on a paper towel to remove the grease. Then, using your hands or a fork, break the bacon into little pieces.
    Potato slices in air fryer basket.
    1. Step 2: Slice the potatoes thinly and wash them thoroughly. Remove the chives from their stems and dice them. Lightly brush each of the potato slices with olive oil. Arrange potatoes in a single layer in the air fryer basket. Season the potatoes with salt and pepper
    Cooked potato slices in the air fryer basket.
    1. Step 3: Cook at 400 degrees for 17-18 minutes, lightly shaking the basket once halfway through cooking. Top each of the potatoes with cheese, then bacon, then a few chives.
    Air fried potato slices on a plate.
    1. Step 4: Bake in the air fryer for an additional 2 minutes. Remove your cheese and bacon-sliced potatoes from the air fryer, and serve hot!

    💡Hint: Don’t skip drying the potato slices—it’s the key to getting crispy air fryer potatoes without any sogginess!

    cheesy thin Potato slices on a plate.

    👩‍🍳 Expert Tips

    • Go thin – Thin sliced potatoes = faster, crispier potatoes. Think about ⅛ inch thick.
    • Soak if you prep ahead – Sliced potatoes can be stored in cold water in the fridge to keep them from browning.

    FAQ'S

    Can I use sweet potatoes for this air fryer potato recipe?

    Yes! Thin sliced sweet potatoes work beautifully—just follow the same instructions. You can even add cinnamon for a cozy twist.

    Can I use an Instant Pot air fryer lid to air fry potatoes?

    Totally! The air fryer lid works just as well—just keep an eye on cook time as it may run slightly hotter.

    How do I store and reheat sliced air fryer potatoes?

    Let them cool, store in an airtight container, and refrigerate for up to 3 days. Reheat in the air fryer for 2–3 minutes to crisp them back up.

    Can I prep air fried sliced potatoes ahead of time?

    Absolutely. Slice your potatoes and store them in water until you're ready to season and cook.

    💖 Serving Suggestions

    Here are some great suggestions that pair well with thin sliced air fryer potatoes.

    • Roast Chicken – Try this Instant Pot Whole Chicken Recipe, or try our Thin Sliced Chicken Air Fryer recipe.
    • Steak Bites – Instant Pot Steak Bites are a great protein pairing.
    • Bang Bang Salmon – A little spicy, a little creamy—so good with potatoes.
    • Roasted Veggies – Try Roasted Brussels Sprouts With Maple Syrup, Gourmet Carrots, or even Air Fryer Sweet Potatoes.
    • Salad – Use these as a topper for Chicken Caesar Salad or alongside my Mango Chicken Salad.
    Air fryer potato slices on a plate. with cheese and bacon melted on top.
    Best Air Fryer Sliced Potatoes.

    Air Fryer Sliced Potatoes With Bacon And Cheese

    Angela Milnes
    These air fryer sliced potatoes with bacon and cheese are the perfect side dish for any meal!
    5 from 3 votes
    Print Recipe Pin Recipe Rate this Recipe
    Prep Time 5 minutes mins
    Cook Time 17 minutes mins
    Additional Time 2 minutes mins
    Course Side Dish
    Cuisine American
    Servings 12 Servings
    Calories 48 kcal

    Ingredients
      

    • 2 Russet Potatoes
    • 3 Slices Bacon
    • ½ Stalks Chives
    • 1-2 tablespoon Olive Oil
    • Salt And Pepper

    Instructions
     

    • Cook the bacon in a medium skillet over medium-low heat, until crispy. When the baking is complete, set it on a paper towel to remove the grease. Then, using your hands or a fork, break the bacon into little pieces
    • Slice the potatoes thinly and wash them thoroughly
    • Remove the chives from their stems and dice them
    • Lightly brush each of the potato slices with olive oil
    • Arrange potatoes in a single layer in the air fryer basket
    • Season the potatoes with salt and pepper
    • Cook at 400 degrees for 17-18 minutes, lightly shaking the basket once halfway through cooking
    • Top each of the potatoes with cheese, then bacon, then a few chives
    • Bake in the air fryer for an additional 2 minutes.

    Notes

    Use thin sliced potatoes in the air fryer. Thin slices cook faster and more evenly than thick slices.
    If you want extra crispy potatoes, preheat your air fryer for 3-5 minutes before adding the potatoes. This will help them to cook up nice and crispy.
    For extra flavor, you can add some seasoning to the potatoes before cooking. Try using garlic powder, onion powder, or even some dried herbs.

    Nutrition

    Calories: 48kcalCarbohydrates: 6gProtein: 1gFat: 2gSaturated Fat: 0.4gPolyunsaturated Fat: 0.3gMonounsaturated Fat: 1gTrans Fat: 0.003gCholesterol: 2mgSodium: 35mgPotassium: 158mgFiber: 0.5gSugar: 0.2gVitamin A: 3IUVitamin C: 2mgCalcium: 5mgIron: 0.3mg
    Print Recipe Pin Recipe Rate this Recipe
    Tried this recipe?Let us know how it was!

    Air Fryer Sloppy Joe Cornbread Casserole Recipe

    October 5, 2024 by Angela Milnes

    Air Fryer Sloppy Joe Cornbread Casserole Recipe.

    If you're a fan of Sloppy Joes and cornbread then you're going to love this Air Fryer Sloppy Joe Cornbread Casserole. This is the best air fryer casserole I've tasted and it's super easy to cook.

    This hearty and delicious air fryer casserole is made with ground beef and everyday pantry staples. It tastes amazing and the kids love it too!

    Air fryer sloppy joe cornbread casserole slice on a plate.
    [feast_advanced_jump_to]

    💖 Why This Recipe Works

    • There are many reasons to love air fryer casserole, but perhaps the biggest one is its convenience and versatility.
    • Not only does the Cornbread Casserole make a great weeknight meal, it can also be easily served at parties or potlucks.
    • Furthermore, an air fryer makes cooking this dish a breeze, allowing you to easily cook up an entire casserole in just a matter of minutes.

    ⭐ Star Ingredients

    Sloppy Joe Cornbread Casserole ingredients.

    Here are the ingredients to make Air Fryer Sloppy Joe cornbread casserole:

    • Green Bell Pepper (Diced): Provides a vibrant pop of color and a crunchy texture that contrasts nicely with the hearty ground beef.
    • Ground Beef: Offers a rich, savory flavor that forms the base of the casserole.
    • Yellow Onion (Diced): Add a subtle sweetness and depth of flavor that complements the robustness of the ground beef.
    • Garlic Powder, Salt, And Pepper: Infuse the beef with additional flavors, enhancing its natural savory notes.
    • Brown Sugar: Introduces a hint of sweetness, balancing out the savory elements and adding complexity to the overall flavor profile.
    • Ketchup and Yellow Mustard: Tomato sauce provides tangy and slightly sweet notes, creating the classic sloppy joe flavor we all know and love.
    • Egg and Milk: Are used in preparing the cornbread mix, the egg adds structure while milk adds moisture, ensuring a fluffy and moist cornbread topping.
    • Jiffy Cornbread Mix: Forms a deliciously comforting, slightly sweet topping that pairs wonderfully with the savory sloppy joe filling.

    For the complete list of ingredients with measurements and instructions, please see the recipe card at the bottom of the post.

    📖  Substitutions & Variations

    • Add Cheese: Yes. To add cheddar cheese to your Sloppy Joe cornbread casserole, wait until the cornbread mix is fully cooked and then sprinkle shredded cheese over top. Place the dish back in the air fryer and cook for an additional 5 minutes, or until the cheese is melted and bubbly and the casserole is golden brown. Sloppy Joe cornbread casserole with cheddar cheese makes a delicious and satisfying meal that the whole family will love!
    • Add Sloppy Joe Seasoning: You can buy sloppy Joe seasoning from the supermarket, however, I prefer to make my own so I can control how much salt and sugar is added to the dish.
    • Tofu: You can also use chopped tofu for a vegetarian-friendly option.
      Whichever protein you choose, the results will be equally delicious!
    • Swap Ground Beef: If you don't have ground beef on hand, there are a few different substitutes that can be used in for the meat mixture in Sloppy Joe cornbread casserole.
    • Turkey: You can substitute ground turkey, chicken, or crumbled sausage.
    • Beans: Beans, and lentils are a great non-meat option.

    🔪 How To Make Sloppy Joe Cornbread Casserole in the Air Fryer?

    Here is a step-by-step guide for making delicious air fryer casserole sloppy Joe cornbread style!

    Sausage meat and chopped veggies for sloppy joes in skillet.
    1. Step 1: In a large skillet, Sauté the ground beef, chopped onions, and green bell pepper. Add the garlic powder, salt, and pepper for seasoning. Cook until brown.
    Sloppy joe ingredients in skillet.
    1. Step 2: Once the ground beef mixture is browned, add the mustard, ketchup, and brown sugar. Cook the Sloppy Joe mixture for a further 5 minutes. Place the sloppy Joe beef mixture into a casserole baking pan sprayed with nonstick cooking spray.
    Mixing water, egg, milk, and sweet cornbread mix in a bowl.
    1. Step 3: In a medium-sized bowl, add the water, egg, and milk to the sweet cornbread mix. Whisk until the cornbread mixture is smooth.
    Cornbread batter poured over the Sloppy Joe mixture.
    1. Step 4: Carefully pour the cornbread batter over the Sloppy Joe mixture. Cook at 350° for 15 minutes or until cornbread is cooked through. Serve the cooked casserole garnished with sliced green onions or chopped parsley.
    Air fried Sloppy Joe cornbread casserole slice on a fork.

    👩‍🍳 Expert Tips

    When pouring the batter onto your sloppy joe mixture, you want to make sure that there are no air pockets underneath the cornbread layer.

    If you love this recipe be sure to check out these delicious recipes: Slow Cooker Million Dollar Chicken Casserole, Crock Pot Chili Mac And Cheese and German Fried Cabbage With Bacon Bits.

    💭 FAQs

    How to Make A Thicker Cornbread Layer?

    To create a thicker cornbread layer in your Sloppy Joe cornbread casserole, simply use less liquid when preparing the batter. You can also add additional cornmeal or flour to ensure that your cornbread is sturdy and holds its shape once cooked.

    What Makes The Cornbread Rise?

    There are a few factors that can cause cornbread to rise, including using an acidic ingredient in the batter, such as buttermilk or lemon juice. You can also use baking powder as a rising agent, or add some honey or sugar to help leaven the cornbread mixture. Experiment with different ingredients and cooking methods to find the best way to make your cornbread rise.

    What Keeps Cornbread Moist?

    There are a few different factors that can help keep cornbread moist, including using the correct ratio of wet to dry ingredients. Additionally, you can add some extra moisture by brushing melted butter or oil onto the cornbread before cooking, or by adding a layer of sour cream on top.

    Can I Make Sloppy Joe Casserole In The Oven?

    Yes, you can make Sloppy Joe cornbread casserole in the oven. Simply preheat your oven to 350° and prepare the cornbread batter according to the recipe. Pour the Sloppy Joe mixture into a baking dish or pan and top with the cornbread batter. Bake for around 15-20 minutes, until golden brown.

    Why Do People Put Sugar In Cornbread?

    Some people choose to add sugar to their cornbread recipe in order to balance out the savory flavors of the corn and butter. Additionally, adding sugar can help create a more tender and fluffy texture in the cornbread, as well as making it taste sweeter overall. Whether you prefer your cornbread sweet or savory, there are plenty of delicious variations to choose from!

    Where To Buy Jiffy Mix?

    You can buy jiffy cornbread mix from most major grocery stores or online at Amazon. Cornbread mixture is a versatile mix that can be used for both savory and sweet recipes, so it's a great pantry staple to have on hand!

    The Corn Bread Has Not Completely Baked. What Should I Do?

    If you find you have partially baked cornbread after the cooking time ends, pop the sloppy joe casserole back into the air fryer for another 3-4 minutes.

    How To Store Cornbread Casserole?

    To store the cornbread casserole, wrap it tightly with plastic or foil and place in the refrigerator. Cornbread casserole should last for 3-4 days when stored properly.
    Yes, you can freeze cornbread casserole. To do so, make the casserole according to the recipe and let it cool completely. Then, transfer the casserole to an airtight container or freezer-safe baking dish, and either freeze for up to 1 month.

    💖 Serving Suggestions

    These are my favorite sides to serve with cornbread casserole

    • Vegetables such as Broccoli or Air Fryer Green Beans
    • Red Cabbage Slaw
    • Roasted Potatoes or Sweet Potato Fries
    • Instant Pot Mac And Cheese
    • German Fried Cabbage With Bacon Bits
    • Crispy Okra Chips
    • Air Fryer Beet Chips
    • Air Fryer Catfish Nuggets
    • Air Fryer Potato Wedges
    • Crispy Onion Rings or Carrot Fries
    • Creamed Corn. You can make creamed corn using frozen corn or canned corn.
    Air Fried Sloppy Joe Casserole on a plate.

    🍽 Try These Air Fryer Dishes

    • Air Fryer Butterfly Chicken With Citrus.
      Air Fryer Butterfly Chicken With Citrus
    • Air Fryer Green Beans Crispy & Delicious.
      Air Fryer Green Beans Crispy & Delicious
    • Air Fryer Chicken Cutlets Panko Recipe.
      Air Fryer Chicken Cutlets Panko Recipe
    • Air Fryer Cod Fillet.
      Air Fryer Cod Fillet

    Did you make this recipe? Leave a review and a ⭐⭐⭐⭐⭐ rating below, or tag us in our Facebook Group! Alternatively, bookmark it in your browser or save to Pinterest.

    Air Fryer Sloppy Joe Cornbread Casserole Recipe.

    Sloppy Joe Cornbread Casserole

    Angela Milnes
    Sloppy Joe cornbread casserole is tasty, hearty and packed with flavor.
    5 from 5 votes
    Print Recipe Pin Recipe Rate this Recipe
    Prep Time 5 minutes mins
    Cook Time 5 minutes mins
    Total Time 5 minutes mins
    Course Dinners
    Cuisine American
    Servings 6 Servings
    Calories 433 kcal

    Ingredients
      

    • 1 Green Bell Pepper Diced
    • 1 Pound Ground Beef
    • ½ Onion Diced
    • 1 Teaspoon Garlic Powder
    • ½ Teaspoon Salt
    • ½ Teaspoon Pepper
    • 3 Tablespoon Brown Sugar
    • ¾ Cup Ketchup
    • Teaspoon Yellow Mustard
    • 12 Cups Water
    • 1 Egg
    • ⅓ Cup Of Milk
    • 1 Box Jiffy Cornbread Mix

    Instructions
     

    • In a large skillet Sauté the ground beef, chopped onions and green bell pepper. Add the garlic powder, salt and pepper for seasoning. Cook until brown.
    • Once the ground beef mixture is browned add the mustard, ketchup and brown sugar. Cook the Sloppy Joe mixture for a further 5 minutes.
    • Place the sloppy Joe beef mixture into a casserole baking pan. The air fryer casserole dish should be 8 inches.
    • I like to use a
      non stick baking pan
      sprayed with non stick cooking spray as this helps with easy cleanup.
    • In a medium-sized bowl add the water, egg and milk to the sweet cornbread mix. Whisk until the cornbread mixture is smooth.
    • Carefully pour the cornbread batter over the Sloppy Joe mixture.
    • You want to make sure that there are no air pockets underneath the cornbread layer.
    • Place the prepared baking dish or pan into the air fryer.
    • Cook at 350° for 15 minutes or until cornbread is cooked through. 
    • Serve the Sloppy Joe cornbread casserole garnished with extra sliced green onions or chopped parsley if desired. Enjoy!

    Notes

    When pouring the batter onto your sloppy joe mixture, you want to make sure that there are no air pockets underneath the cornbread layer.

    Nutrition

    Calories: 433kcalCarbohydrates: 44gProtein: 17gFat: 21gSaturated Fat: 7gPolyunsaturated Fat: 1gMonounsaturated Fat: 10gTrans Fat: 1gCholesterol: 82mgSodium: 882mgPotassium: 408mgFiber: 3gSugar: 21gVitamin A: 314IUVitamin C: 18mgCalcium: 70mgIron: 3mg
    Print Recipe Pin Recipe Rate this Recipe
    Tried this recipe?Let us know how it was!

    More Delicious Air Fryer Recipes

    If you love this You're going to love This Sloppy Joe Cornbread Casserole Recipe then you'll love the following delicious dinners:

    • Authentic Air Fryer Chicken Shawarma
    • Air Fryer Asparagus
    • Air Fryer Huli Huli Chicken
    • Air Fryer BBQ Chicken Wings
    • Air Fryer Turkey Legs
    • Best Air Fryer Stuffed Chicken Breast
    • Air Fryer Tater Tot Casserole
    • Air Fryer Yellow Squash

    Easy Air Fryer Quiche (With Sausage)

    October 5, 2024 by Angela Milnes

    Easy Air Fryer Sausage Quiche.

    This Air Fryer Quiche with sausage is the ultimate no-fuss brunch win. It’s got a golden crust, cheesy egg filling, and savory sausage in every bite—no oven-watching required. Whether you’re meal-prepping or feeding a weekend crowd, this one’s got your back.

    Air Fryer Sausage Quiche.

    Quiche in the air fryer? Total game changer. It gives you all the goodness of a traditional baked quiche—fluffy eggs, gooey cheese, flaky crust—but with way less hassle. It's the ultimate egg bake without the oven—fluffy, flavorful, and done in under 30 minutes thanks to the air fryer. Perfect for busy mornings or lazy weekend brunches.

    Bonus: reheating quiche in the air fryer keeps it just as crispy and fresh as day one. If you love this, check out my Air Fryer Breakfast Casserole and Air Fryer Egg Bites too!

    [feast_advanced_jump_to]

    💖 Why This Recipe Works

    • No soggy crust—just crisp, golden goodness.
    • Full of hearty, cheesy sausage flavor.
    • A great easy breakfast idea for busy mornings or lazy weekends.
    • Air fryer = faster cook time and even heat.
    • Easy to customize with your favorite add-ins.

    ⭐ Star Ingredients

    Here are the ingredients for this easy quiche recipe:

    sausage quiche ingredients.
    • Pre-made pie crust – Flaky, buttery, and makes this whole thing way easier.
    • Cooked breakfast sausage – Savory and satisfying. Swap in bacon or ham if that’s what you’ve got.
    • Shredded cheddar – Melts beautifully and adds that sharp, creamy flavor.
    • Eggs – The star of the show. Use six large ones for that fluffy texture.
    • White onion – Adds sweetness and depth without overpowering.
    • Salt + pepper – Just enough to round out the flavor without taking over.

    For the complete list of ingredients with measurements and instructions, please see the recipe card at the bottom of the post.

    📖  Substitutions & Variations

    • Use Swiss or mozzarella instead of cheddar.
    • Swap sausage for crumbled bacon, ham, or even a veggie sausage.
    • Add chopped spinach, bell peppers, or mushrooms for extra color and flavor.
    • Want a crustless option? Try making this as an air fryer tortilla quiche with a wrap as the base.
    • Dairy-free? Use your fave plant-based cheese and milk.

    Want more brunch inspo? Try my Air Fryer French Toast or Cheese Steak Egg Rolls.

    🔪 How To Make Quiche In The Air Fryer?

    Here are the instructions for cooking sausage and cheese quiche.

    rolled out pie crust.
    1. Step 1: Pre-heat the air fryer to 325°f. (If the sausage has not been cooked, cook sausage in a skillet until golden brown. Roll out the dough using a Rolling Pin and flatten it to fit the 8” pie pan.
    rolled out pie crust.
    1. Step 2: Place the deep dish pie crust in the pie plate and form it in the pan. Cut the remaining crust outside the pan. You are welcome to make a homemade pie crust in advance, however, we used a pre-made one.
    pie crust in air fryer.
    1. Step 3: Mix the shredded sharp cheddar cheese and sausage mixture. Add to the pan.
    egg mixture in bowl.
    1. Step 4: In a mixing bowl, whisk the eggs and add the seasoning.
    egg mixture in bowl with pepper.
    1. Step 5: Pour egg mixture into the pan.
    sausage quiche in air fryer basket with cheese sprinkled on top.
    1. Step 6: Once the quiche filling is in position, place the pan into the air fryer basket and cook at 325°f for 15 minutes until the center is firm
    cooked sausage quiche in air fryer basket.
    1. Step 7: Remove the basket from the air fryer and let the quiche cool.
    cooked sausage quiche in air fryer basket.
    1. Step 8: Serve Your quiche on it's own or with your favorite salad.

    💡Hint: Don’t overfill! Leave a little room at the top of the crust for the quiche to puff up.

    air fryer sausage quiche.

    👩‍🍳 Expert Tips

    • A toothpick in the center should come out clean—just like a cake!
    • Let it cool slightly before slicing so it holds together better.
    • Make two and freeze one for busy mornings—future you will thank you.
    • Want to make individual quiches? Use ramekins or silicone muffin cups for mini versions—perfect for portion control or meal prep.

    How to Reheat Quiche in an Air Fryer

    Wondering how to reheat quiche in an air fryer without drying it out? The air fryer does a great job bringing back that just-baked texture—crispy crust, warm fluffy center, and all. Here's how to do it right:

    Reheating Refrigerated Quiche

    1. Preheat air fryer to 300°F (150°C).
    2. Place quiche slice in the basket (no overlapping).
    3. Heat for 3–5 minutes, or until warmed through.
    4. Optional: Cover loosely with foil for the first 2–3 minutes if you're worried about over-browning.

    Reheating Frozen Quiche

    1. Preheat air fryer to 300°F (150°C).
    2. Place frozen quiche in the basket (unwrap fully).
    3. Air fry for 10–12 minutes, flipping halfway if it’s a crustless version or tortilla-based.
    4. Check the center with a toothpick or knife to make sure it’s hot all the way through.

    💡Hint: Always check for doneness in the center—it should be steaming hot with melted cheese and no cool spots.

    💭 FAQs

    What is quiche?

    Quiche is a French-style savoury tart made from eggs, milk or cream, cheese and vegetables. It can be served hot or cold at any time of day, making it the perfect meal for breakfast, lunch, dinner or even as an after-school snack. This easy quiche recipe is made with sausage and tastes amazing! The kids will love it! Try this French tart today. It's one of my favorite quiche recipes.

    Is this quiche like an egg bake?

    Yes, it's similar to a classic egg bake—fluffy eggs, savory fillings, and a crust—but made even easier in the air fryer.

    How long to cook quiche in the air fryer?

    About 15 minutes at 325°F, depending on your air fryer model. Check the center with a toothpick to be sure it’s cooked through

    Can I make this as an air fryer tortilla quiche?

    Totally! Use a large flour tortilla pressed into the pan as a crust. It crisps up nicely and makes a lighter version.

    How do I store leftover air fryer quiche?

    Cool completely, then store slices in an airtight container in the fridge for 2–3 days. To freeze, wrap slices tightly and freeze up to 2 months.

    💖 Serving Suggestions

    Quiche isn’t just a breakfast thing—it’s an anytime, anywhere kind of dish. Here are some favorite ways we love to enjoy this air fryer quiche:

    • Weekend Brunch – Pair with mimosas, kiwi fruit salad, and mini muffins for a stress-free spread everyone loves.
    • Picnic Lunch – Quiche travels well! Slice it up and pack it with a peach caprese salad and strawberry lemonade.
    • Holiday Breakfast – Hosting Easter, Christmas morning, or Mother’s Day? This quiche is make-ahead friendly and frees up your oven.
    • Back-to-School Meal Prep – Make it Sunday, slice it up, and you’ve got easy grab-and-go breakfasts for the week.
    • Potluck Favorite – Quiche holds its shape and still tastes great at room temp, making it perfect for sharing.

    Looking for meals with extra protein? Try Seafood Quiche, Lobster Ravioli or this Cajun Shrimp and Grits Recipe.

    sausage quiche.

    🍽 Try These Easy Air Fryer Recipes

    • Air Fryer Chicken Fajitas With Cotija Cheese.
      Air Fryer Chicken Fajitas With Cotija Cheese
    • Best Air Fryer Stuffed Chicken Breast.
      Best Air Fryer Stuffed Chicken Breast
    • Air Fryer Crispy Chicken Wings.
      Air Fryer Crispy Chicken Wings
    • Air Fryer Sweet And Sour Chicken.
      Air Fryer Sweet And Sour Chicken

    Did you make this recipe? Leave a review and a ⭐⭐⭐⭐⭐ rating below, or tag us in our Facebook Group! Alternatively, bookmark it in your browser or save to Pinterest.

    Easy Air Fryer Sausage Quiche.

    Easy Air Fryer Quiche (With Sausage)

    Angela Milnes
    If you're looking for a quick and easy breakfast or brunch dish, this Air Fryer Sausage Quiche is perfect! Packed with savory sausage and fluffy eggs, this quiche comes out perfectly golden and delicious in the air fryer. Plus, it's a great way to start your day with minimal effort but maximum flavor!
    5 from 1 vote
    Print Recipe Pin Recipe Rate this Recipe
    Prep Time 3 minutes mins
    Cook Time 15 minutes mins
    Total Time 20 minutes mins
    Course Air Fryer Recipes
    Cuisine American
    Servings 12 Servings
    Calories 221 kcal

    Ingredients
      

    • 1 Pie Crust 8-9”
    • 2 Cups Breakfast Sausage Crumbled Pre Cooked
    • 1 ½ Cup Cheddar Cheese Shredded
    • ½ Onion Diced Finely
    • 6 Eggs
    • ½ Teaspoon Pepper

    Instructions
     

    • Preheat Air Fryer: Pre-heat the air fryer to 325°f. (If the sausage has not been cooked, cook sausage in a skillet until golden brown.
    • Roll Dough: Roll out the dough using a rolling pin and flatten it to fit the 8” pie pan.
    • Place Crust In Pan: Place the deep dish pie crust on the pie plate and form it in the pan. Cut the remaining crust outside the pan.You are welcome to make a homemade pie crust in advance, however, we used a pre-made one.
    • Mix Cheese And Sausage: Mix the shredded sharp cheddar cheese and sausage mixture. Add to the pan.
    • Whisk Eggs In a mixing bowl, whisk the eggs and add the seasoning.
    • Pour The Egg Mixture: Pour the egg mixture into the pan.
    • Air Fry Sausage Quiche: Once the quiche filling is in position, place the pan into the air fryer basket and cook at 325°f for 15 minutes until the center is firm
    • Let Cool: Remove the basket from the air fryer and let the quiche cook to allow it to solidify ready to serve.

    Notes

    Don’t Overfill the Pan
    When pouring your egg mixture, leave about ¼ inch of space from the top of the pan to allow the quiche to rise slightly. Overfilling can cause spillage in the air fryer, which can be hard to clean up.
    Check for Doneness with a Toothpick
    Just like with a cake, insert a toothpick in the center of the quiche. If it comes out clean or with minimal crumbs, the quiche is done. If the center is still wet, air fry for another 3-5 minutes.
    Let the Quiche Cool Before Slicing
    Allow your quiche to cool for 5-10 minutes before slicing to let it set. This helps the texture firm up, making it easier to cut neat slices without falling apart.

    Nutrition

    Calories: 221kcalCarbohydrates: 8gProtein: 10gFat: 16gSaturated Fat: 6gPolyunsaturated Fat: 2gMonounsaturated Fat: 6gTrans Fat: 0.1gCholesterol: 111mgSodium: 317mgPotassium: 116mgFiber: 0.5gSugar: 0.3gVitamin A: 277IUVitamin C: 0.5mgCalcium: 118mgIron: 1mg
    Print Recipe Pin Recipe Rate this Recipe
    Tried this recipe?Let us know how it was!

    Cheesy Sausage Cannelloni (With Cottage Cheese)

    October 5, 2024 by Angela Milnes

    Best Sausage Cannelloni Recipe.

    This Sausage Cannelloni is rich, cheesy, and the ultimate cozy dinner. Stuffed with Italian sausage, cottage cheese, herbs, and blanketed in marinara sauce and gooey mozzarella—this baked pasta delivers serious comfort food energy.

    Sausage cannelloni on a plate.

    If there’s one thing I always keep in the freezer, it’s a tray of stuffed pasta. This version takes traditional Italian cannelloni and fills it with bold sausage, creamy cheese, and a pop of tomato.

    I started making this when I ran out of ricotta one night and used cottage cheese instead—and honestly, I’ve never looked back. It’s budget-friendly, easy to prep ahead, and perfect for feeding the whole family (with leftovers to spare). Whether you're baking it in the oven or crisping it up in the air fryer, this dish checks every box.

    If you love a good baked pasta, you’ll also enjoy my Instant Pot Cacio e Pepe Pasta or Air Fryer Stuffed Peppers for more warm, cheesy goodness.

    [feast_advanced_jump_to]

    💖 Why This Recipe Works

    • Flavorful Filling: Sausage and cheese are a match made in pasta heaven.
    • Easy-to-Follow Steps: Whether you’re a beginner or pasta pro, this is simple and satisfying.
    • Versatile Cooking Methods: Bake in the oven or air fry for crispy edges and melty centers.

    ⭐ Star Ingredients

    Sausage cannelloni ingredients.
    • Italian Sausage: Savory, juicy, and full of bold flavor—remove casing before cooking.
    • Cottage Cheese: A creamy, protein-rich substitute for ricotta that works beautifully.
    • Lasagna Sheets: Used in place of traditional cannelloni tubes—easier to stuff and roll.
    • Marinara Sauce: Provides that rich, tangy tomato base and keeps everything moist.

    For the complete list of ingredients with measurements and instructions, please see the recipe card at the bottom of the post.

    📖  Substitutions & Variations

    • No sausage? Use ground beef, chicken, or turkey for a leaner filling.
      Cheese lover? Add a mix of mozzarella, ricotta, and parmesan inside.
      Want extra sauce? Layer with béchamel for a creamy Italian baked pasta vibe.
      Make it veggie: Swap sausage for sautéed mushrooms, zucchini, and spinach.

    Also try Spinach And Mushroom Risotto or Italian Sausage and Broccoli Pasta for more stuffed pasta ideas!

    🔪 How To Make Sausage Cannelloni?

    Cooked sausage meat in a skillet.
    1. Step 1: Bring a skillet to medium heat. Brown the sausage meat. If in a casing, remove the casing. Add salt and pepper. 
    Sauce added to breakfast sausage in a skillet.
    1. Step 2: Once nearly cooked, add 1 cup of marinara or tomato sauce and mix. Remove from the heat and add the cottage cheese. Stir it in.
    Adding cooked sausage to cannellini.
    1. Step 3: Coat the bottom of your baking pan with a light layer of marinara sauce. Lay the lasagna sheets flat and add 2 tablespoons of meat. Roll the noodles until closed.
    Sausage cannelloni rolls in air fryer.
    1. Step 4: Place rolled cannelloni on the baking sheet. Whisk the egg and brush the cannelloni with the egg wash. If you prefer to use cannelloni shells, that is fine, but I find rolling after adding the filling easier and it saves time.
    Uncooked sausage cannelloni rolls in air fryer.
    1. Step 5: Add a baking sheet to the air fryer and cook at 350°f for 5 minutes, remove, and add the remaining sauce and mozzarella cheese to the top of the cannelloni.
    Sausage cannelloni rolls on a plate.
    1. Step 6: Return to the air fryer and cook at 350°f for 3-5 minutes or until cheese is melted. Now your cannelloni is ready to serve! Cover with parmesan and enjoy!

    💡Hint: Rolling with lasagna sheets instead of stuffing dry cannelloni tubes saves time—and avoids mess.

    Serving sausage cannelloni with a fork.

    👩‍🍳 Expert Tips

    • Use fresh lasagna sheets: They’re easier to roll and bake up beautifully tender.
      Balance bold sausage flavors: The creamy cheese helps mellow the spice. Add garlic or red pepper flakes if you like a kick!
      Don’t overfill: A little goes a long way—too much filling will spill out or cause uneven cooking.
      Air fryer tip: Place parchment under the cannelloni to prevent sticking and cleanup hassle.

    💭 FAQs

    What is cannelloni pasta?

    Believe it or not, I didn't try cannelloni until my 30's and boy was it good. Cannelloni is a type of Italian pasta dish that consists of large tubes of thin pasta sheets that are filled with meat, vegetables, or cheese. The Cannelloni is then baked in an oven and served with a creamy marinara sauce. This is a rich dish and a favorite recipe you will simply love.

    What is the difference between cannelloni and manicotti?

    Cannelloni is an Italian pasta made from sheets rolled into tubes, while manicotti are pre-formed tubes, often ridged. Both are stuffed and baked.

    Can I make sausage cannelloni ahead of time?

    Yes! Assemble it the day before, cover, and refrigerate. Bake when ready.

    Can I bake sausage cannelloni instead of air frying?

    Definitely. Bake at 350°F for 30–35 minutes until the top is golden and bubbly.

    Can I bake sausage cannelloni in the oven?

    Yes, baked cannelloni is an Italian comfort food that can be air fried or baked. To bake in the oven simply follow the same instructions as for the air fryer, but instead of air frying, cook in a preheated oven at 350°F for 30-35 minutes or until cheese is golden and bubbly. Enjoy!

    Is cottage cheese a good substitute for ricotta?

    Yes! It adds a similar creaminess but is often more affordable and higher in protein.

    How do I store leftover cannelloni?

    Store cooled leftovers in an airtight container in the fridge for up to 4 days. Freeze for up to 3 months. Thaw overnight in the fridge before reheating.

    💖 Serving Suggestions

    Here are my favorite appetizers to serve with Sausage Cannelloni:

    • Garlic Breadsticks: Warm, buttery garlic bread sticks with a hint of garlic to soak up the savory flavors of the sausage cannelloni.
    • Classic Caesar Salad: Crisp romaine lettuce, parmesan, and Caesar dressing – a refreshing contrast to the rich pasta.
    • Air Fryer Asparagus: Tasty asparagus spears coated in Parmesan and cooked until tender.
    Serving sausage cannelloni on a plate.

    🍽 More Tasty And Easy Recipes

    • Apple Grapefruit Salad.
      Apple Grapefruit Salad (Easy & Refreshing Citrus Fruit Bowl)
    • roasted harissa sweet potatoes on a plate, drizzles with honey and pistachio nuts.
      Harissa Sweet Potato Recipe (Crispy, Spicy & Easy)
    • How To Make Sun Dried Tomatoes Without Oil.
      How To Make Sun Dried Tomatoes Without Oil – Easy Oven Method
    • One Skillet Chicken Thighs with Butternut Squash.
      One Skillet Chicken Thighs With Butternut Squash

    Did you make this recipe? Leave a review and a ⭐⭐⭐⭐⭐ rating below, or tag us in our Facebook Group! Alternatively, bookmark it in your browser or save to Pinterest.

    Best Sausage Cannelloni Recipe.

    Best Sausage Cannelloni Recipe

    Angela Milnes
    This Sausage Cannelloni recipe is a hearty and satisfying dish that’s packed with flavor! Tender pasta tubes are filled with a savory sausage and ricotta mixture, then baked to perfection in a rich marinara sauce topped with bubbly melted cheese. It’s the perfect comfort food for family dinners or special gatherings and will surely become a favorite!
    5 from 4 votes
    Print Recipe Pin Recipe Rate this Recipe
    Prep Time 15 minutes mins
    Cook Time 13 minutes mins
    Total Time 30 minutes mins
    Course Air Fryer Recipes
    Cuisine Italian
    Servings 5 Servings
    Calories 167 kcal

    Ingredients
      

    • 1 Ib Italian Sausage links, or unpacked ground
    • ⅛ Teaspoon Pepper
    • ¼ Teaspoon Salt
    • ½ Cup Cottage Cheese
    • 2 Cups Marinara Sauce
    • 10 Pre Soaked Lasagna Sheets
    • 1 Egg
    • 1 Cup Mozzarella Cheese
    • ½ Cup Shredded Parmesan cheese Shredded

    Instructions
     

    • Bring a skillet to medium heat. Brown off the sausage meat. If in a casing, remove the casing. Add salt and pepper. 
    • Once nearly cooked, add 1 cup of marinara or tomato sauce and mix. Remove from heat and add the cottage cheese. Stir it in.
    • Coat the bottom of your baking pan with a light layer of marinara sauce.Lay the lasagna sheets flat and add 2 tablespoons of meat.
    • Roll the noodle until closed. Place rolled cannelloni on the baking sheet. Whisk the egg and brush the cannelloni with the egg wash. If you prefer to use cannelloni shells that is fine but I find rolling after adding the filling easier and it saves time.
    • Add a baking sheet to the air fryer and cook at 350°f for 5 minutes, remove and add the remaining sauce and mozzarella cheese to the top of the cannelloni.
    • Return to air fryer and cook at 350°f for 3-5 minutes or until cheese is melted.Now your cannelloni is ready to serve! Cover with parmesan and enjoy!

    Notes

    To Make It More Hearty: If you're looking for an even heartier meal, try adding some fresh spinach or other vegetables for a veggie-packed version of this classic.

    Nutrition

    Calories: 167kcalCarbohydrates: 8gProtein: 13gFat: 10gSaturated Fat: 5gPolyunsaturated Fat: 1gMonounsaturated Fat: 3gTrans Fat: 0.004gCholesterol: 63mgSodium: 976mgPotassium: 362mgFiber: 1gSugar: 4gVitamin A: 739IUVitamin C: 7mgCalcium: 238mgIron: 1mg
    Print Recipe Pin Recipe Rate this Recipe
    Tried this recipe?Let us know how it was!

    Air Fryer Nachos With Pulled Pork

    October 5, 2024 by Angela Milnes

    Air Fryer Nachos With Pulled Pork.

    Looking for the ultimate crispy nachos recipe with minimal fuss? These Air Fryer Nachos With Pulled Pork are cheesy, crunchy, and layered with Tex-Mex flavor—your new go-to air fryer appetizer for game days, movie nights, or lazy weekends. Ready in under 30 minutes!

    Air Fryer Nachos With Pulled Pork.
    [feast_advanced_jump_to]

    Nachos are one of those genius throw-it-together meals that feel fancy without trying. I first made these on a Friday night with leftover pulled pork and a handful of random toppings—we devoured the entire pan in minutes. Now it’s a weeknight classic at our place.

    If you love these, don’t miss my Air Fryer Chimichangas, Crispy Okra Chips, or Best Air Fryer Onion Rings—all perfect sides for snack-style dinners.

    💖 Why This Recipe Works

    • Quick & Satisfying: Dinner in under 30 minutes with pantry staples.
    • Crispy & Gooey: Melty cheese and crunchy chips, no sogginess here.
    • Versatile & Family-Friendly: Add your favorite toppings, skip what you don’t.

    ⭐ Star Ingredients

    air fryer pork nacho ingredients on a table.
    • Pulled Pork: Use leftover pulled pork or carnitas for bold, savory flavor.
    • Tortilla Chips: Go for thick, sturdy chips that won’t fall apart under pressure.
    • Fiesta Blend Cheese: Melts like a dream and adds serious flavor.

    📖  Substitutions & Variations

    • Meat Swap: Try Shredded Chicken, carnitas, or seasoned ground beef.
    • Vegetarian Version: Skip the meat and load up on pinto beans, refried beans, and grilled peppers.
    • Cheese Options: Monterey Jack, cheddar, or dairy-free cheese all work great.
    • Homemade Chips: Slice corn tortillas, spritz with oil, and air fry till crisp.

    Also delicious with my Pineapple Mango Salsa or Mango Guacamole.

    🔪 How To Make Air Fryer Nachos With Pulled Pork

    Pulled pork, taco seasoning, garlic powder, and hot sauce in a bowl.
    1. Step 1: Add the pulled pork, taco seasoning, garlic powder, and hot sauce to an oven-safe bowl and mix.
    Pulled pork mixture in an air fryer.
    1. Step 2: Place the bowl in the air fryer basket and cook at 400°f for 3 minutes.
    Tortilla chips in an air fryer.
    1. Step 3: Add shop-bought or homemade tortilla chips to a 9” pie pan.
    Nachos and pulled pork in the air fryer basket.
    1. Step 4: Drizzle melted cheese sauce over all the chips.
    Making nachos with pulled pork in an air fryer.
    1. Step 5: Top with shredded pork, beans, jalapeno peppers, and shredded cheese. Place the pan in the air fryer basket and cook at 400°F for 5 minutes, until the chips are extra crispy and the cheese is melted. 
    Air fried nachos with pulled pork.
    1. Step 6: Top your pulled pork nachos with tomatoes, onions, cilantro, and a dollop of sour cream. Enjoy!

    💡Hint: Layer toppings evenly so every bite gets a bit of everything.

    👩‍🍳 Expert Tips

    • Avoid Soggy Chips: Use pre-cooked or strained toppings to keep chips crispy.
    • Use a Pie Pan: Keeps everything contained and evenly cooked.
    • Double Cheese Layer: For extra gooeyness, do one layer of chips and cheese, then repeat.

    💭 FAQs

    How do I prevent nachos from becoming soggy in the air fryer?

    Add fresh toppings like sour cream or guacamole after air frying. Keep meat and beans from being too wet.

    Can I make my own tortilla chips for these nachos?

    Yes, you can create homemade tortilla chips by cutting flour tortillas into triangles, brushing them with a bit of oil on each side, and air frying them in a single layer at 375°F (190°C) for 2-3 minutes on each side, or until golden brown and crispy

    What toppings work well with pulled pork nachos?

    Try tomatoes, beans, corn, olives, jalapeños, onions, cilantro, and cheese.

    Can I prepare these nachos in advance?

    Assemble just before cooking, but you can prep ingredients like shredded pork and chopped veggies ahead.

    Best way to store air fryer nachos?

    Store leftover nachos in an airtight container in the refrigerator. Remove perishable toppings like sour cream or guacamole before storing, adding them later to maintain freshness.

    💖 Serving Suggestions

    • Strawberry Jalapeño Salsa: Sweet-heat combo that’s perfect for pork.
    • Mango & Pineapple Salsa: Adds tropical zing.
    • Charred Corn Salad With Tomatoes: Bright and hearty.
    Air fried nachos with pulled pork on a plate.

    🍽 Tasty Air Fryer Recipes

    • Air Fryer Chicken Fajitas With Cotija Cheese.
      Air Fryer Chicken Fajitas With Cotija Cheese
    • Best Air Fryer Stuffed Chicken Breast.
      Best Air Fryer Stuffed Chicken Breast
    • Air Fryer Crispy Chicken Wings.
      Air Fryer Crispy Chicken Wings
    • Air Fryer Sweet And Sour Chicken.
      Air Fryer Sweet And Sour Chicken

    Did you make this recipe? Leave a review and a ⭐⭐⭐⭐⭐ rating below, or tag us in our Facebook Group! Alternatively, bookmark it in your browser or save to Pinterest.

    Air Fryer Nachos With Pulled Pork.

    Air Fryer Nachos With Pulled Pork

    Angela Milnes
    Air Fried Nachos are the ultimate quick and easy snack! Perfectly crispy tortilla chips topped with melted cheese, seasoned meat, and your favorite toppings, all cooked in just minutes. Whether you're making them for a party or a weeknight treat, these nachos will be a hit with everyone
    5 from 3 votes
    Print Recipe Pin Recipe Rate this Recipe
    Prep Time 10 minutes mins
    Cook Time 8 minutes mins
    Total Time 18 minutes mins
    Course Air Fryer Recipes
    Cuisine American
    Servings 2 Servings
    Calories 2241 kcal

    Ingredients
      

    • 2 Cups Pulled Pork
    • 2 Tablespoons Taco Seasoning
    • 1 Teaspoon Garlic Powder
    • 1-2 Teaspoons Hot Sauce
    • 4-5 Cups Tortilla Chips
    • 1 Cup Nacho Cheese Sauce canned Ricos brand is the best.
    • 1 Cup Cheese Shredded
    • 1 Cup Black Beans Cooked And Drained
    • 5-10 Pickled Jalapenos
    • 1 Roma Tomato Diced
    • ½ Cup Sour Cream
    • 1 Stalk Green Onion
    • 3-4 Sprigs Cilantro

    Instructions
     

    • Add the pulled pork, taco seasoning, garlic powder, and hot sauce to an oven-safe bowl and mix.
    • Place the bowl in the air fryer basket and cook at 400°f for 3 minutes.
    • Add shop-bought or homemade tortilla chips to a 9” pie pan.
    • Drizzle melted cheese sauce over all the chips.
    • Top with shredded pork, bean, jalapeno peppers, and shredded cheese. 
    • Place pan in the air fryer basket and cook at 400°f for 5 minutes Until chips are extra crispy and cheeses are melted. 
    • Top your Air Fryer Nachos with tomatoes, onions, cilantro, and a dollop of sour cream. Enjoy!

    Notes

    Before adding the pulled pork to your nachos, ensure it’s not too wet to avoid soggy chips; a quick strain or pat down with a paper towel can help.
    Opt for thick, restaurant-style tortilla chips that can hold up to the weight of the toppings without breaking, ensuring a sturdy base for your nachos.

    Nutrition

    Calories: 2241kcalCarbohydrates: 237gProtein: 74gFat: 117gSaturated Fat: 34gPolyunsaturated Fat: 26gMonounsaturated Fat: 20gTrans Fat: 0.2gCholesterol: 203mgSodium: 4433mgPotassium: 1037mgFiber: 22gSugar: 45gVitamin A: 3340IUVitamin C: 16mgCalcium: 947mgIron: 9mg
    Print Recipe Pin Recipe Rate this Recipe
    Tried this recipe?Let us know how it was!

    Want even more game day snacks? Try Air Fryer Potato Wedges, Catfish Nuggets, or Beet Chips next.

    A piece of nachos holding in a hand

    Crispy Air Fryer Beef Taquitos (Easy & Flavor-Packed!)

    October 5, 2024 by Angela Milnes

    Best Air Fryer Taquitos: Beef Taquitos.

    These Air Fryer Beef Taquitos are golden, crispy, and so easy to make—it’s like taco night with a crunchy twist, ready in under 10 minutes!

    Best Air Fryer Taquitos: Beef Taquitos.

    When you need a quick kitchen win, these air fryer beef taquitos have your back. Crispy, savory, and ready fast—they’re perfect as a snack, appetizer, or easy dinner.

    I’ve made them with everything from taco beef to leftover roast, and even my picky eater loves them. Craving more crispy handheld bites? Try my Air Fryer Cheesesteak Egg Rolls or Air Fryer Crispy Chicken Wings!

    [feast_advanced_jump_to]

    💖 Why This Recipe Works

    • Quick Cooking: Done in under 10 minutes—faster than delivery.
    • Grease-Free Crispiness: Air fried means crunchy, not greasy.
    • Weeknight Hero: No mess, minimal prep, total crowd-pleaser.

    ⭐ Star Ingredients

    beef taquitos ingredients.
    • Shredded Beef: seasoned to taste. We like Homemade Asada, Taco Seasoning or any Steak Seasoning.
    • Yellow Corn Tortillas: Yellow corn tortillas crisp beautifully in the air fryer and have that classic taquito flavor. Also be sure to check out our Plantain Tortillas Recipe.
    • Shredded Cheese (optional but fab) – I like a combo of sharp cheddar and Monterey Jack for creaminess and a bit of bite.

    For the complete list of ingredients with measurements and instructions, please see the recipe card at the bottom of the post.

    📖  Substitutions & Variations

    • Chicken Taquitos: Use shredded rotisserie or cooked chicken with cumin and garlic powder.
    • Cream Cheese Filling: Mix cream cheese with chicken for a creamy twist.
    • Spicy Beef Taquitos: Add green chiles, hot sauce, or chili powder to the meat.
    • Taco Style: Use ground beef and taco seasoning for a quick weeknight version.
    • Dairy-Free: Skip the cheese or use plant-based cheddar shreds.
    • Gluten-Free: Most corn tortillas are naturally gluten-free—just check the label!

    For another flavor-packed tortilla snack, check out my Air Fryer Chimichangas next!

    🔪 How To Make Air Fryer Beef Taquitos

    Filling tortilla with shredded beef.
    1. Step 1: Lay out the tortillas and fill them with shredded beef. Roll the tortillas shut and close with a toothpick if needed. Repeat until the meat is gone.
    Taquitos in the air fryer basket.
    1. Step 2: Place taquitos in the air fryer basket and spray with oil. Leave some space to allow airflow. 
    Cooked taquitos in the air fryer basket.
    1. Step 3: Cook on 380 for 8 minutes or until the corn shell is crispy and golden.
    Air fried taquitos on a plate.
    1. Step 4: Enjoy with your favorite toppings. 

    💡Hint: If your tortillas crack while rolling, warm them in a damp paper towel in the microwave for 15–20 seconds to make them pliable.

    Taquitos on a plate served with a bowl of sauce.

    👩‍🍳 Expert Tips

    • Roll Tight: Keeps the filling secure and ensures even cooking.
    • Oil Lightly: A quick spritz is all you need—too much oil can make them soggy.
    • Don’t Crowd the Basket: Space them out so the hot air can crisp them up on all sides.
    • Seal Without Toothpicks: For a cleaner look, brush the tortilla seam with a little beaten egg and press gently to seal. No poking, no mess—just neat, crispy taquitos ready to go.

    🧊 Make-Ahead & Freezer Instructions

    Want to prep these taquitos ahead of time? Here’s how to make them freezer-friendly for quick meals later:

    • To Freeze Before Cooking: Assemble and roll the taquitos, then place them in a single layer on a baking sheet. Freeze until solid, then transfer to a freezer-safe bag or container. They’ll keep for up to 3 months.
    • To Cook from Frozen: No need to thaw! Place frozen taquitos in the air fryer and cook at 380°F for 13–15 minutes, flipping halfway through, until golden and heated through.
    • To Freeze After Cooking: Let the taquitos cool completely, then wrap individually or store in an airtight container. Reheat in the air fryer at 350°F for 5–7 minutes for crispy results.

    💡Pro Tip: If you're batch-prepping, label your freezer bag with the cook time and temp so you can skip the guesswork later!

    💭 FAQs

    What Is A Taquito?

    A taquito is a small rolled tortilla filled with meat and sometimes cheese, then fried or air fried until crispy. Think of it as a crunchy taco’s cooler cousin.

    Are Flautas And Taquitos The Same?

    Flautas and taquitos are similar, but not the same. Air fryer flautas are typically larger than a taquito and are usually made with flour tortillas instead of corn tortillas.

    How To Seal Taquitos Correctly?

    Instead of using toothpicks, brush the seam with beaten egg and press gently to seal. No filling leakage, no poking!

    Do I Need To Preheat My Air Fryer To Cook Beef Taquitos?

    No. You won’t need to preheat the air-fryer for this beef taquitos recipe.

    💖 Serving Suggestions

    Here are some sides and toppings to serve with taquitos.  

    Pair your air fryer beef taquitos with:

    • Pineapple Mango Salsa – Sweet, juicy, and great with crispy beef.
    • Instant Pot Tomato Salsa – Easy, classic, and full of flavor.
    • Strawberry Jalapeño Salsa – A bold, fruity twist on a classic.
    • Guacamole or Sour Cream – For creamy dipping goodness.
    • Spanish Rice or Refried Beans – Hearty, traditional sides.
    • Charred Corn Salad – Bright, smoky, and fresh.

    Want to level it up? Try layering flavors with zesty toppings like citrus zest, a drizzle of cilantro lime crema, or some quick-pickled onions for a pop of acidity and crunch. These little extras go a long way in making your taquitos unforgettable.

    Taquitos on a plate served with a bowl of sauce.

    🍽 Try More Air Fried Foods

    • Air Fryer Butterfly Chicken With Citrus.
      Air Fryer Butterfly Chicken With Citrus
    • Air Fryer Green Beans Crispy & Delicious.
      Air Fryer Green Beans Crispy & Delicious
    • Air Fryer Chicken Cutlets Panko Recipe.
      Air Fryer Chicken Cutlets Panko Recipe
    • Air Fryer Salmon Fillets.
      Air Fryer Salmon Fillets (Fresh or Frozen)

    Did you make this recipe? Leave a review and a ⭐⭐⭐⭐⭐ rating below, or tag us in our Facebook Group! Alternatively, bookmark it in your browser or save to Pinterest.

    Best Air Fryer Taquitos: Beef Taquitos.

    Air Fryer Taquitos (Beef)

    Angela Milnes
    You’re going to love this Beef Taquitos Air Fryer recipe! Simple and easy to make, these crispy, flavorful taquitos are perfect as an appetizer, snack, or even a meal. Filled with seasoned beef and air-fried to golden perfection, they’re a deliciously satisfying dish that everyone will enjoy!
    5 from 4 votes
    Print Recipe Pin Recipe Rate this Recipe
    Prep Time 10 minutes mins
    Cook Time 10 minutes mins
    0 minutes mins
    Total Time 20 minutes mins
    Course Dinners
    Cuisine Mexcian
    Servings 12 Servings
    Calories 191 kcal

    Ingredients
      

    • 1 Pound Shredded Beef Season to Taste
    • 12 Yellow Corn Tortillas
    • 1 Cup Shredded Cheese optional

    Instructions
     

    • Lay out the tortillas and fill them with shredded beef. 
    • Roll the tortillas shut and close with a toothpick if needed. Repeat until the meat is gone.
    • Place taquitos in the air fryer basket and spray with oil. Leave some space to allow airflow. 
    • Cook on 380 for 8 minutes or until the corn shell is crispy and golden.
    • Enjoy with your favorite toppings. 

    Notes

    To ensure that your taquitos are properly sealed and won’t leak out the filling, you can use toothpicks. Take a toothpick and stick it through the center of the rolled taquito to hold it together.
    No. You won’t need to preheat the air-fryer for this beef taquitos recipe. 

    Nutrition

    Calories: 191kcalCarbohydrates: 12gProtein: 10gFat: 12gSaturated Fat: 5gPolyunsaturated Fat: 1gMonounsaturated Fat: 4gTrans Fat: 0.5gCholesterol: 36mgSodium: 99mgPotassium: 158mgFiber: 2gSugar: 0.3gVitamin A: 95IUCalcium: 94mgIron: 1mg
    Print Recipe Pin Recipe Rate this Recipe
    Tried this recipe?Let us know how it was!

    Pumpkin French Toast Casserole

    October 5, 2024 by Angela Milnes

    Pumpkin French Toast Casserole.

    If you’re on the hunt for an easy and delicious breakfast, this Pumpkin French Toast Casserole is just what you need! With a few simple ingredients, you can prep it the night before, so in the morning, all that’s left to do is pop it in the oven. Your family will love waking up to the warm, cozy smell of this yummy casserole!

    Pumpkin french toast casserole.
    [feast_advanced_jump_to]

    💖 Why This Recipe Works

    • Seasonal Delight: Embrace the flavors of fall with this pumpkin-spiced breakfast favorite.
    • Make-Ahead Magic: Prepare the night before for a stress-free, delicious morning meal.
    • Crowd Pleaser: This pumpkin French toast casserole recipe is sure to impress at brunches, potlucks, or family gatherings.

    ⭐ Star Ingredients

    Pumpkin french toast pudding ingredients.
    • Eggs: Provide structure and richness to the casserole, helping bind all ingredients together.
    • Vanilla Extract: Infuses a sweet, aromatic flavor that complements the pumpkin and spices.
    • Ground Cinnamon: Enhances the dish with its warm, sweet-spicy taste, perfect for pumpkin recipes.
    • Ground Cloves: Add a warm and spicy flavor, contributing to the overall autumnal feel of the casserole.
    • Ground Nutmeg: Complements the pumpkin with its warm, nutty flavor, boosting the overall taste.
    • White Sugar: Sweetens the casserole, balancing out the savory and spiced elements.
    • Pumpkin Puree: Brings the essential pumpkin flavor, adding creaminess and a fall-themed twist to the classic French toast.
    • Texas Toast Loaf: Ideal for soaking up the egg and pumpkin mixture, ensuring a soft and custardy interior.
    • Brown Sugar: Adds a deeper sweetness, contributing to a caramel-like flavor when baked.
    • All Purpose Flour: Helps thicken the casserole, ensuring it holds together well.
    • Cold Butter: Adds richness and a buttery flavor to this pumpkin french toast casserole, enhancing its overall taste.

    For the complete list of ingredients with measurements and instructions, please see the recipe card at the bottom of the post.

    📖  Substitutions & Variations

    • Maple Syrup: Drizzle maple syrup over the baked French toast casserole before serving for an extra touch of sweetness and depth.
    • Cream Cheese: Makes toast casserole creamier and adds a yummy tangy taste. Just put little spoonfuls of cream cheese between the bread cubes and pumpkin mix for an extra special treat.
    • Challah Bread: Replace the Texas toast with challah bread, cut into 1-inch cubes, to enhance your Pumpkin French Toast Casserole. The challah's rich, eggy texture superbly absorbs the custard, creating an indulgently soft and flavorful base.
    • Pumpkin Pie Spice: Can be used as a substitute for the ground cinnamon, cloves, and nutmeg, simplifying the seasoning process with its all-in-one flavor. Add it to both the egg mixture and the topping for a consistent, warm spice throughout the casserole.

    🔪 How To Make Pumpkin French Toast Casserole?

    eggs cracked into a bowl.
    1. Step 1: Preheat oven to 350 degrees F. Grease a 9x13-inch baking dish. Crack your eggs into a bowl.
    bowl with pumpkin french toast mixture.
    1. Step 2: In a bowl, whisk together the eggs, vanilla extract, cinnamon, cloves, nutmeg, and white sugar.
    Pumpkin french toast pudding ingredients.
    1. Step 3: After adding the pumpkin puree, combine the ingredients and gently stir until you have a creamy pumpkin egg batter.
    Pumpkin French Toast Bake.
    1. Step 4: Next, arrange the bread cubes in a single layer in the prepared baking dish and pour the pumpkin and egg mixture over the bread cubes. Toss to coat the cubed bread.
    Pumpkin French Toast Bake.
    1. Step 5: Stir brown sugar, cinnamon, flour, and butter together with a fork in a small bowl until the mixture is crumbly.
    Pumpkin French Toast Bake.
    1. Step 6: Sprinkle the crumble mixture over the pumpkin French toast cubes.
    pumpkin french toast bake served on plates.
    1. Step 7: Place the baking pan or casserole dish in a preheated oven and bake for 30 to 40 minutes until golden brown on top.
    Pumpkin french toast casserole.
    1. Step 8: Your pumpkin French toast casserole is ready to serve.
    pumpkin french toast bake served on plates.

    👩‍🍳 Expert Tips

    • Use Day-Old Bread: For the best texture, use day-old bread or slightly stale bread. It absorbs the pumpkin custard without getting too soggy, resulting in a more stable, well-textured casserole.
    • Toast the Bread First: If you’re using fresh bread, lightly toast it before adding it to the egg mixture. This step helps prevent the bread from becoming too mushy while baking.
    • Experiment with Spices: While cinnamon, cloves, and nutmeg are traditional, feel free to experiment with a pinch of ginger or allspice to elevate the flavors and make the casserole uniquely your own.
    • Top with Nuts or Streusel: For extra crunch, add chopped nuts like pecans or walnuts into the topping. This adds a delicious texture contrast to the soft casserole.

    💭 FAQs

    Can I Use French Bread in This Recipe?

    Yes, you can use French bread in this recipe. Simply slice it into 1-inch pieces and proceed with the recipe as directed.

    Do I Have To Use Pumpkin Puree?

    No, you don't have to use pumpkin puree in this recipe. You can substitute mashed banana, applesauce, or even pumpkin pie filling. The pumpkin flavor is what makes this pumpkin French toast stand out so if you can use it then do.

    What Else Can I Add To This Casserole?

    If you want to get creative, there are a few other things you can add to this casserole. Try adding some chopped nuts, dried fruit, or chocolate chips. You could also top it with a streusel topping before baking.

    How Do You Keep French Toast Casserole From Getting Soggy?

    The best way to keep this casserole from getting soggy is to make sure that the bread is nice and dry before you add it to the egg mixture. You can do this by letting the bread sit out overnight or by toasting it lightly. Additionally, make sure not to overcook the casserole. Using a day-old French bread or bread slices that are not fresh can help to prevent a soggy casserole.

    The Best Way To Store French Toast Casserole

    Store any leftovers covered in the refrigerator for up to 3 days.
    Place in an airtight container or freezer bag and store for up to three months.
    If frozen, thaw in the refrigerator overnight before reheating.

    💖 Serving Suggestions

    These are my favorite toppings to serve with pumpkin French toast casserole:

    • Greek Yogurt: The Greek yogurt adds a creamy tanginess that perfectly complements the sweetness of the French toast.
    • Whipped Cream: Whipped cream adds a fluffy and indulgent touch, enhancing the richness of the French toast.
    • Cinnamon Apple Slices: Cinnamon apple slices provide a warm and comforting contrast, adding a burst of flavor and texture to the dish.
    Pumpkin french toast casserole.

    🍽 Pumpkin Lovers, Don’t Miss These

    • Pumpkin Crunch Cake
    • Easy Homemade Pumpkin Cookies.
      Easy Homemade Pumpkin Cookies
    • Pumpkin Spice Cinnamon Rolls.
      Pumpkin Spice Cinnamon Rolls
    • Pumpkin spice latte in a cup.
      Pumpkin Spice Latte

    Did you make this recipe? Leave a review and a ⭐⭐⭐⭐⭐ rating below, or tag us in our Facebook Group! Alternatively, bookmark it in your browser or save to Pinterest.

    Pumpkin French Toast Casserole.

    Best Pumpkin French Toast Casserole Recipe

    Angela Milnes
    Treat yourself to the ultimate fall breakfast with the Best Pumpkin French Toast Casserole! Soft, buttery bread is soaked in a spiced pumpkin custard, then baked to golden perfection. Topped with a sweet, crumbly streusel, this casserole is a cozy, flavorful dish that's perfect for holiday mornings or a weekend treat!
    5 from 4 votes
    Print Recipe Pin Recipe Rate this Recipe
    Prep Time 5 minutes mins
    Cook Time 40 minutes mins
    Total Time 45 minutes mins
    Course Dessert
    Cuisine French
    Servings 12 Servings
    Calories 252 kcal

    Ingredients
      

    • 8 Eggs
    • 1 Teaspoon Vanilla Extract
    • 2 Teaspoons Ground Cinnamon
    • ½ Teaspoon Ground Cloves
    • ¼ Teaspoon Ground Nutmeg
    • 1 Tablespoon White Sugar
    • 1 Can Pumpkin Puree 15 Ounce Can
    • 1 Loaf Thick Sliced Bread Texas Loaf Cut Into 1 Inch Cubes
    • ⅓ Cup Brown Sugar
    • ¼ Teaspoon Ground Cinnamon
    • 2 Tablespoons All Purpose Flour
    • 1 Tablespoon Butter Softened

    Instructions
     

    • Preheat oven to 350 degrees F. Grease a 9x13-inch baking dish.
    • In a bowl, whisk together the eggs, vanilla extract, cinnamon, cloves, nutmeg, and white sugar.
    • After adding the pumpkin puree, combine the ingredients and gently stir until you have a creamy pumpkin egg batter.
    • Next arrange the bread cubes in a single layer in the prepared baking dish and pour the pumpkin and egg mixture over the bread cubes. Toss to coat the cubed bread.
    • Stir brown sugar, cinnamon, flour, and butter together with a fork in a small bowl until the mixture is crumbly.
    • Sprinkle the crumble mixture over the pumpkin french toast cubes.
    • Place the baking pan or casserole dish in a preheated oven and bake until golden brown on top. This should take 30 to 40 minutes to make pumpkin french toast casserole ready to serve.

    Notes

    Moisture Retention: For moist and tender pumpkin muffins, avoid overmixing the batter. Mix until just combined and be careful not to overbake, which can lead to dryness.
    Texture Trick: For a moist and tender crumb, incorporate ingredients like grated cheese, diced vegetables (e.g., bell peppers, onions), or cooked bacon into the batter.

    Nutrition

    Calories: 252kcalCarbohydrates: 38gProtein: 10gFat: 6gSaturated Fat: 2gPolyunsaturated Fat: 2gMonounsaturated Fat: 2gTrans Fat: 0.1gCholesterol: 112mgSodium: 321mgPotassium: 206mgFiber: 4gSugar: 12gVitamin A: 5702IUVitamin C: 2mgCalcium: 106mgIron: 3mg
    Print Recipe Pin Recipe Rate this Recipe
    Tried this recipe?Let us know how it was!

    More Pumpkin Recipes

    • Pumkin Spice Latte
    • Pumpkin Spiced Cinnamon Rolls
    • Weight Watchers Crustless Pumpkin Pie
    • Vegan Pumpkin Waffles
    • Delicious Pumpkin Bread Buns
    Pumpkin French Toast casserole with whipped cream.

    What Does Liver Taste Like?

    October 5, 2024 by Angela Milnes

    uncooked liver.

    Wondering What Does Liver Taste Like? This post will explain it in easy terms. Whether you're thinking about trying liver or just want to know more, we'll talk about its flavor, texture, and why some people like it while others don’t. By the end, you'll know what to expect and how liver might work in your cooking.

    Raw animal liver on a chopping board.
    [feast_advanced_jump_to]

    What Is A Liver?

    Before we dive into the taste of liver, let's take a step back and discuss what it is. Liver is an offal meat that comes from various animals such as cows, chickens, pigs, or wild game such as deer. Due to its high iron content, it has a very earthy, mineral-like flavor profile.

    Regarding texture, animal livers can range from a slightly chewy and tender consistency or be tougher if not prepared correctly. The liver has a higher fat content than other meat cuts, giving it a richer flavor.

    What Does Liver Taste Like?

    Many people are curious about what raw liver tastes like, and the consensus is that it has a strong and distinct flavor. The raw liver has a slightly metallic flavor that can be off-putting to some and too "gamey" for others.

    However, the well cooked liver takes on a rich and savory flavor that often pairs well with seasonings or sauces. Unlike meat, it doesn't fully absorb the flavors of other ingredients when cooked.

    Many dishes featuring cooked liver have been staples of traditional cuisines worldwide due to its assertive taste and abundance of nutrients.

    What Does Beef Liver Taste Like?

    Beef liver has a distinct taste that many enjoy, while others opt to stay away from it. The beef liver texture is usually tender and soft with a squishy feeling. The flavor is slightly gamey but also beef-like; it can have a pungent taste depending on how it was prepared.

    Eating beef liver can provide a variety of health benefits due to the high contents of nutrition present in it. Many people find beef liver appetizing when cooked correctly with spices and herbs or through techniques such as frying, baking, or boiling with vegetables.

    Cow Liver vs. Calf Liver

    Many people have heard of cow liver before, but fewer may have heard of calf liver. Both of these livers come from the same animals, yet they are not completely interchangeable.

    Generally, cow livers are larger than those of calves due to age differences and metabolic rates. Cow livers tend to be more readily available in a wider range of cuts too.

    However, when it comes to taste, calf liver has a sweet and delicate flavor that some consider superior to that of the somewhat earthier-tasting cow liver though this can depend on personal preference.

    Cow liver and calf liver.

    What Does Chicken Liver Taste Like?

    Chicken liver specifically has an earthy yet still slightly sweet flavor strength that provides a unique taste experience. The texture is surprisingly creamy yet still firm enough to provide a balance between shapes in your dish.

    Sauté sliced onions, mushrooms, and garlic to get the most out of the liver's flavor as you mix them together, and serve as part of a family meal or as an appetizer.

    Chicken liver.

    What Does Duck Liver Taste Like?

    Duck liver is often enjoyed by many as a delicious delicacy when prepared in traditional French dishes like Foie Gras. Its taste has been described as having a buttery, creamy, and delicate flavor with a smooth texture. However, it has also been noted that duck liver can often be unpleasant if eaten raw.

    The raw liver may taste slightly gamey and can be quite rubbery to the bite, but when cooked properly and served with complimentary accompaniments, its rich flavor is said to be quite amazing!

    Cooked duck liver.

    Different Types of Animal Liver

    There are plenty of different types of animal livers that come from various animals. Your liver will have a different flavor and texture depending on the animal.

    For example, cow liver has a milder flavor than chicken or pig liver and can range in texture from tender to chewy depending on how it is cooked.

    Wild game livers such as deer are more intense and gamey in flavor. Whether cooking beef, chicken, or duck livers, the basic cooking techniques remain the same, and all liver is packed with nutrition and flavor.

    Can You Eat Raw Liver?

    Beef liver is a great source of essential nutrients and can be enjoyed in many ways, but you may wonder if it's safe to eat raw beef liver.

    The answer is generally no - as beef liver usually contains parasites. So, many health officials do not recommend eating raw liver of beef. Eating raw liver can cause severe food poisoning.

    It's best to cook beef liver thoroughly to an internal temperature of 145 degrees Fahrenheit before eating it. This will effectively kill the parasites and make beef liver safe for human consumption. Enjoy beef liver with your favorite herbs and spices for a delicious meal!

    Cooking Beef Liver

    Beef liver is a great dish to add to your weeknight cooking routine. It's simple, inexpensive, and packs a flavorful punch. You simply need to know the right way to cook it properly.

    Start by cleaning the liver – rinse it off with cold water and pat dry with paper towels. After cleaning, cut it into thin slices. Next, season it lightly with oil, salt, and pepper.

    Now you're ready for cooking. Heat some oil in a skillet over medium-high heat until it's hot enough that a sprinkle of water sizzles when added.

    Cook the liver for about 4 minutes per side or until it's brown and crispy on the outside and cooked through on the inside – you don't want to overcook it! Serve your beef liver with your favorite side dishes to create an enjoyable meal.

    How To Cook Lamb's Liver

    Lamb liver is a delicious and easy-to-cook dish. Here's a step-by-step guide to help you get the most out of this delicious meal.

    Cooked lamb liver on a plate.

    Ingredients Needed:

    • 1 pound lambs liver, thinly sliced
    • 2 tablespoons olive oil
    • Salt and pepper to taste
    • 1 onion, finely chopped
    • 2 cloves garlic, minced
    • Parsley for garnish

    Directions:

    1. Heat the oil in a large skillet over medium heat.
    2. Add the lamb's liver slices and season with salt and pepper to taste. Brown on both sides until lightly cooked, about 2 minutes per side.
    3. Remove the liver slices from the pan and set them on a plate.
    4. In the same pan, add the chopped onions and minced garlic and sauté until softened, about 5 minutes.
    5. Return the lamb's liver to the pan along with any accumulated juices from the plate and cook until the desired doneness is reached, about 5 more minutes or so, depending on the thickness of the slices.
    6. Serve hot with parsley as a garnish, if desired.

    Note: When cooking liver, ensure it is not overcooked, as it can taste bitter.

    How To Make Liver Tastier

    Now that you know what liver taste like, let's talk about how to make it more palatable.

    The most important thing when cooking with the liver is not overcooking it, as this will dry the meat and make it unappetizingly tough.

    To make it tastier, try marinating your liver in a mixture of herbs and spices before cooking it. This helps to enhance the flavor without overpowering the natural taste of the meat.

    Additionally, adding some acidity, such as lemon juice, can help break down the fibers and tenderize the liver.

    You can also try pairing liver with other ingredients, such as onions, mushrooms, and bacon, to add more depth and complexity of flavor.

    Learning how to prepare liver correctly will help you appreciate this oft-overlooked cut of meat for its full potential!

    Fried Chicken Livers

    If you're looking for a delicious way to enjoy liver, try this fried chicken livers recipe.

    frying chicken livers.

    Ingredients for Frying Chicken Liver

    • 1 pound of chicken livers
    • 2 tablespoons of lemon or lime juice
    • 2 eggs
    • 1 tablespoon of all-purpose flour
    • ½ teaspoon each of smoked paprika and garlic powder
    • Salt and pepper to taste
    • 2 tablespoons of butter for cooking

    Instructions for Frying Chicken Liver

    1. Rinse the chicken livers under cold water and pat them dry with a paper towel.
    2. Crack the eggs into a shallow dish and beat lightly before adding the flour, paprika, garlic powder, lemon or lime juice, salt, and pepper.
    3. Dip each liver into the egg mixture, coating all sides.
    4. Heat the butter in a large skillet over medium-high heat and fry the livers for 4 minutes per side or until golden brown but still tender.
    5. Serve the chicken livers with your favorite side dishes, and enjoy!

    Enjoy Liver Today!

    For those looking to explore the taste of liver, many delicious dishes can be made with it. From Foie Gras to Liver and Mashed Potatoes to Chicken Liver Pâté or Beef Liver with Bacon, the liver can be incorporated into many meals for added taste, texture, and nutrition.

    Enjoy More Cooking Tips With These Articles:

    • Does Distilled Water Go Bad?
    • Does Apple Butter Go Bad?
    • Does Apple Cider Vinegar Go Bad?
    • How To Soak Chia Seeds
    • What Does Kimchi Taste Like?
    • What Does Yorkshire Pudding Taste Like?

    Easy Channa Masala Recipe (Chickpea Curry)

    October 5, 2024 by Angela Milnes

    Easy Channa Masala Recipe (Chickpea Curry).

    Spice up your mealtime with this Channa Masala Recipe! Packed with tender chickpeas simmered in a rich, flavorful tomato-based sauce, it’s a comforting, protein-packed dish that’s perfect with rice or warm naan bread. A must-try for curry lovers!
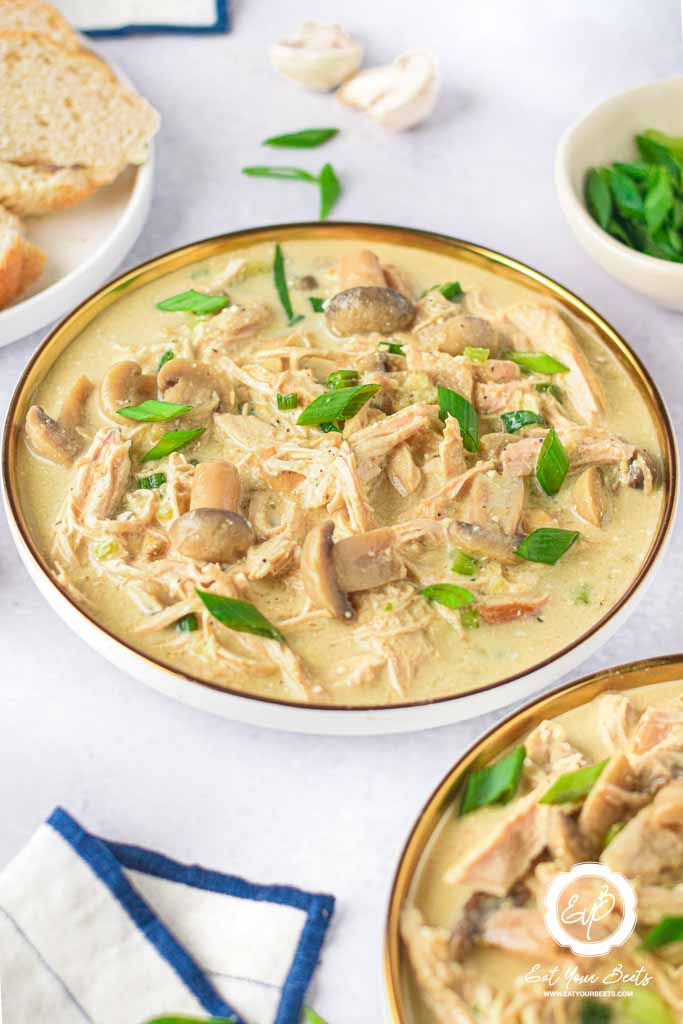
     Easy Channa Masala Recipe (Chickpea Curry) in a bowl.
    [feast_advanced_jump_to]

    💖 Why This Recipe Works

    • Packed with Flavor: Bursting with bold spices and rich, tangy tomato goodness, it’s a dish that delights the taste buds.
    • Protein-Packed: Chickpeas make it a hearty and satisfying meal that’s naturally plant-based.
    • Versatile and Easy: Channa Masala is perfect with rice, naan, or even on its own, and simple enough to whip up on a busy day.

    ⭐ Star Ingredients

    Channa Masala ingredients.
    • Boiled or Canned Chickpeas: Provides the hearty base for this flavorful curry.
    • Vegetable Oil: Used to sauté spices and create a rich masala.
    • Chili Pepper: Adds a hint of heat to the Chana Masala.
    • Cumin: A warm, earthy spice that enhances the authentic flavor of Chana Masala.
    • Coriander: Delivers a citrusy note to balance the spices.
    • Turmeric: Brings a vibrant yellow color and mild flavor.
    • Garam Masala: A blend of aromatic spices for depth and warmth.
    • Chili Powder: Adjusts the spiciness to your preference.
    • Bay Leaf: Infuses the curry with subtle herbal notes.
    • Onion: Forms the aromatic base of the channa masala.
    • Garlic: Elevates the dish with its pungent and savory flavor.
    • Tomato Puree: Adds richness and tanginess to the curry.
    • Tomato Sauce: Enhances the texture and balances the spices.
    • Cilantro: Fresh herb to garnish and add a burst of flavor.
    • Salt: To season and balance the flavors.

    For the complete list of ingredients with measurements and instructions, please see the recipe card at the bottom of the post.

    📖  Substitutions & Variations

    • Vegetable-Loaded Channa Masala: Include diced vegetables like carrots, bell peppers, and spinach to make the dish heartier and more nutritious. Add them after sautéing the onion and garlic so they cook evenly.
    • Coconut Cream Twist: Add ¼ cup of coconut cream or coconut milk during the simmering stage for a creamier, slightly sweet twist. This variation pairs well with steamed rice.
    • South Indian Style: Add curry leaves and mustard seeds while heating the oil. This gives the dish a South Indian flavor profile. Serve with dosa or idli for an authentic experience.

    🔪How To Make Channa Masala

    Cooking onion in skillet for channa masala.
    1. Step 1: Pour oil into a skillet, heat it up. Peel the onion and garlic and chop them finely. Place the onion and garlic in the pan, and add the bay leaf. Cook for 2-3 minutes. Finely chop the chili pepper. Put it in the pan with the spices. Heat the contents of the pan for a minute.
    Cooking chickpeas with tomato puree.
    1. Step 2: Put in the boiled chickpeas. Add the tomato puree and the sauce. Add water or vegetable stock so that the liquid covers the chickpeas. Simmer over low heat for about 15 minutes. A couple of spoonfuls of chickpeas can be mashed with a fork to thicken the gravy. At the end of cooking, add chopped cilantro and salt.
    Channa Masala in a bowl.

    👩‍🍳 Expert Tips

    • Soak Chickpeas Overnight: If using dried chickpeas, soak them overnight and cook with a pinch of baking soda to ensure they are soft and creamy. Canned chickpeas can be rinsed thoroughly to remove excess sodium.
    • Toast the Spices: Toast cumin, coriander, and garam masala in oil before adding the onion and garlic. This enhances the flavors and releases the essential oils from the spices.
    • Add Spices Gradually: Start with smaller quantities of chili powder and garam masala. You can always adjust the spice level later.
    • Fresh Herbs for Garnish: Always garnish with freshly chopped cilantro for a vibrant flavor boost.

    💭 FAQs

    How Do I Thicken The Gravy?

    You can mash a few spoonfuls of chickpeas with a fork and stir them into the curry to naturally thicken the gravy. Alternatively, you can simmer it longer or add a teaspoon of cornstarch dissolved in water.

    How Do I Adjust The Spice Level?

    To reduce spiciness, use fewer chili peppers or omit them entirely. For a spicier version, add more chili peppers, and cayenne powder, or use hot paprika.

    Is Channa Masala Vegan?

    Yes, the recipe is vegan as long as you use plant-based oil and no dairy substitutes like yogurt or ghee.

    💖 Serving Suggestions

    Here are some sides to serve with Channa Masala Recipe:

    • Steamed Basmati Rice: The fluffy, aromatic basmati rice is a classic pairing with channa masala, soaking up the flavorful gravy perfectly.
    • Garlic Naan: Soft and buttery garlic naan complements the spiced chickpea curry beautifully, ideal for scooping up the sauce.
    • Jeera Rice (Cumin Rice): Fragrant rice infused with toasted cumin seeds adds another layer of flavor, harmonizing well with the rich curry.
    • Paratha: Flaky, layered Indian bread like paratha is a filling and delicious choice to serve alongside channa masala.
    • Papadum: Crispy papadum wafers bring a delightful crunch and make an excellent addition to the meal.
    • Samosas: Crispy, golden-brown samosas stuffed with spiced potatoes are a classic pairing, offering a crunchy and savory complement to the channa masala.
    • Vegetable Pakoras: Crispy, spiced fritters made with gram flour and mixed vegetables are an indulgent snack that pairs wonderfully with channa masala.
    Channa Masala in a bowl.

    🍽 You'll Love These Recipes

    • Hawaiian Garlic Shrimp.
      Hawaiian Garlic Shrimp Recipe (20 Minutes, So Flavorful!)
    • Best Carrot Rice Recipe.
      Best Carrot Rice Recipe (With Tumeric and Cinnamon)
    • White bread slices and half loaf on a wooden board served with a jar of jam.
      Homemade White Bread
    • Zesty Cabbage Soup in a white bowl.
      Zesty Cabbage Soup (With Lemon & Herbs – One Pot Wonder!)

    Did you make this recipe? Leave a review and a ⭐⭐⭐⭐⭐ rating below, or tag us in our Facebook Group! Alternatively, bookmark it in your browser or save to Pinterest.

    Easy Channa Masala Recipe (Chickpea Curry).

    Channa Masala Chickpeas

    Angela Milnes
    Channa Masala is a hearty, flavorful chickpea curry with bold spices and a touch of tang. It’s an easy, comforting dish that’s perfect for any night of the week!
    5 from 2 votes
    Print Recipe Pin Recipe Rate this Recipe
    Prep Time 10 minutes mins
    Cook Time 20 minutes mins
    Total Time 30 minutes mins
    Course Dinners, Lunch
    Cuisine Indian
    Servings 2 Servings
    Calories 679 kcal

    Ingredients
      

    • 1 Cup Chickpeas Boiled Or Canned
    • 2 tablespoon Vegetable Oil
    • ½ Chili Pepper
    • ½ teaspoon Cumin
    • ½ teaspoon Turmeric
    • ½ teaspoon Chili Powder
    • 1 teaspoon Coriander
    • 1 teaspoon Garam Masala
    • 1 Bay Leaf
    • ½ Onion
    • 1 Cup Tomato Puree
    • ¼ Cup Tomato Sauce
    • Cilantro
    • ½ teaspoon Salt

    Instructions
     

    • Heat oil in a skillet. Chop onion, garlic, and add to the pan with a bay leaf. Cook for 2-3 minutes. Add chopped chili and spices, cook for 1 minute.
    • Add boiled chickpeas, tomato puree, and sauce. Pour in water or vegetable stock to cover chickpeas.
    • Simmer on low heat for 15 minutes. Mash a few chickpeas to thicken the gravy.
    • Stir in chopped cilantro and salt before serving.

    Notes

    Soak Chickpeas Overnight: If using dried chickpeas, soak them overnight and cook with a pinch of baking soda to ensure they are soft and creamy. Canned chickpeas can be rinsed thoroughly to remove excess sodium.
    Toast the Spices: Toast cumin, coriander, and garam masala in oil before adding the onion and garlic. This enhances the flavors and releases the essential oils from the spices.
    Add Spices Gradually: Start with smaller quantities of chili powder and garam masala. You can always adjust the spice level later.
    Fresh Herbs for Garnish: Always garnish with freshly chopped cilantro for a vibrant flavor boost.

    Nutrition

    Calories: 679kcalCarbohydrates: 83gProtein: 22gFat: 33gSaturated Fat: 5gPolyunsaturated Fat: 18gMonounsaturated Fat: 8gTrans Fat: 0.2gSodium: 1563mgPotassium: 2051mgFiber: 22gSugar: 26gVitamin A: 2176IUVitamin C: 71mgCalcium: 182mgIron: 12mg
    Print Recipe Pin Recipe Rate this Recipe
    Tried this recipe?Let us know how it was!

    Try These Easy Indian Recipes

    • Baked Indian Butter Chicken Thighs
    • Best Tamarind Sauce Recipe
    • Quick Chicken Curry Air Fryer Recipe
    • Best Carrot Rice Recipe

    Best Low Carb Broccoli Salad

    October 4, 2024 by Angela Milnes

    Best Low Carb Broccoli Salad.

    If you're looking for a fresh and healthy side dish that's perfect for any meal, this Best Low Carb Broccoli Salad is a must-try! Packed with crunchy broccoli, savory bacon, and a tangy dressing, this salad is both satisfying and low in carbs.

    Broccoli salad in a bowl.

    As someone managing diabetes and eating low carb after bariatric surgery, I’m always on the hunt for veggie-packed sides that are blood-sugar friendly and actually taste amazing. Broccoli is one of the best low carb veggies out there—loaded with fiber, antioxidants, and that satisfying crunch.

    This low carb broccoli salad is my go-to when I want something fresh, creamy, and totally crave-worthy. It’s right up there with my Keto Tuna Salad with Apple and Pumpkin Seeds and Avocado Salad for easy, healthy wins.

    [feast_advanced_jump_to]

    💖 Why This Recipe Works

    • Low-carb & high-flavor: Every bite is fresh, salty, tangy, and a little creamy.
    • No cooking required: Toss it together in minutes—perfect for busy days.
    • Meal prep friendly: Keeps well in the fridge and even gets better with time.

    🥦 Health Snapshot: Broccoli is low on the glycemic index and rich in sulforaphane, which studies show may help regulate blood sugar and reduce insulin resistance. Perfect if you’re managing diabetes, eating post-bariatric, or simply cutting carbs for metabolic health (source).

    ⭐ Star Ingredients

    Ingredients to make broccoli salad.

    Ready to try this easy broccoli salad recipe? Here's the star ingredients:

    • Broccoli – Raw, chopped florets give this salad its signature crunch and fiber boost. Go fresh, not frozen—trust me.
    • Artichoke hearts – Salty, briny, and underrated. They balance out the rich dressing perfectly.
    • Sunflower seeds – These little guys bring the crunch! You could also try pepitas if you’ve got them.
    • Greek yogurt – Makes the dressing creamy without mayo overload. Plus, hello protein!
    • Lemon zest & juice – Brightens everything up and keeps the salad feeling fresh—not heavy.

    For the complete list of ingredients with measurements and instructions, please see the recipe card at the bottom of the post.

    📖  Substitutions & Variations

    • Use vegan bacon or tempeh bits for a plant-based crunch.
    • Sub Greek yogurt with sour cream or avocado for a different creamy base.
    • No sunflower seeds? Try slivered almonds, chopped pecans, or even toasted sesame seeds.
    • Toss in dried cranberries for a pop of tangy sweetness (if you’re not strict keto).
    • Add shredded cheddar for a classic broccoli bacon salad twist.
    • Skip the artichokes and go for roasted red peppers for a smoky hit.

    Try a global twist:

    • Make it a Greek-style broccoli salad with feta cheese, olives, and sun-dried tomatoes—a bold, briny combo that pops.
    • Craving something brighter? Go Mediterranean with roasted chickpeas, chopped cucumber, and parsley.
    • For a crunchy, zippy version, try an Asian broccoli slaw with carrots, sesame seeds, and a ginger-soy vinaigrette.

    If you're into big flavor bowls, check out my Four Bean Salad, Panzanella with Mozzarella, or Octopus Salad With Baby Spinach for more international inspo!

    🔪 How To Make Low Carb Broccoli Salad

    Chopped broccoli, artichokes, tomatoes, onions, olives cut in half, and sunflower seeds in a bowl.
    1. Step 1: In a large mixing bowl, mix broccoli, artichokes, tomatoes, onions, olives cut in half, and sunflower seeds.
    Making salad dressing in a bowl.
    1. Step 2: In a small bowl, mix all the ingredients for the dressing.
    Mixing broccoli salad in a bowl.
    1. Step 3: Pour dressing over vegetables.
    Broccoli salad in a bowl.
    1. Step 4: Serve and enjoy.

    💡Hint: Want your broccoli a little softer but still crunchy? Blanch it for 30 seconds in boiling water, then plunge into ice water before mixing.

    Broccoli salad in a bowl served with a fork.

    🥗 Extra Crunch Guide: How to Keep Your Broccoli Salad Crisp & Fresh

    Crunch is everything in a good broccoli salad—and nothing’s worse than soggy seeds or wilting veggies. Here’s your go-to guide to help keep every bite fresh, crisp, and full of texture.

    Crunch ComponentHow to Keep It Crisp
    Sunflower seedsStore separately and add just before serving.
    Nuts (almonds, pecans)Keep in a dry container; toast if needed before serving.
    BroccoliUse fresh or blanch 30–60 sec, then ice bath for snap.
    DressingStore separately and mix in just before serving.
    Red onionsSoak in cold water for 10 minutes to mellow and firm up.

    👩‍🍳 Expert Tips

    • Prep your broccoli right: If raw feels too crunchy, give it a super quick blanch. It softens the texture without losing the bite.
    • Keep it crisp: Add seeds and nuts right before serving so they stay crunchy and don’t soak up dressing.
    • Don’t skip the zest: Lemon zest adds brightness that really lifts the whole salad. It’s a little step with big payoff.

    💭 FAQs

    Can I make this broccoli salad ahead of time?

    Yes, absolutely! For best texture, store the dressing separately and mix it in just before serving. If you're using nuts or seeds, keep those out until the last minute so they stay nice and crunchy.

    How can I make broccoli salad more filling?

    If you want to make this salad more filling, consider adding a protein punch! Try grilled chicken, hard-boiled eggs, bacon bits, or even leftover turkey. They keep it low carb and make it meal-worthy.

    Can you freeze broccoli salad?

    Sort of—if you blanch the broccoli first and freeze it plain, it works well. But I don’t recommend freezing the full salad once dressed, as the creamy elements and raw veggies don’t thaw nicely.

    Is this a good option for diabetes or low-carb diets?

    Yes! This salad is packed with fiber-rich broccoli, low in sugar, and has a healthy fat boost from the dressing—ideal for blood sugar balance and post-bariatric eating.

    💖 Serving Suggestions

    Here’s how we love to serve this healthy broccoli salad:

    • With Air Fryer Crispy Chicken Wings for an easy low-carb dinner.
    • Alongside Eggplant Lasagna Rolls or Caprese Mini Pizzas
    • As a bright side for Air Fried Salmon Fillets or Instant Pot Pesto Chicken.
    • Piled into lettuce cups for a light lunch.
    • In a wrap with Beet Hummus and Roasted Veggies if you’re feeling fusion-y.
    • Scooped on top of a Air Fryer Sweet Potato (for a not-so-low-carb twist!)
    Fresh salad in a bowl.

    🍽 More Recipes Using Broccoli

    • Crispy Parmesan Broccoli Chips.
      Crispy Parmesan Broccoli Chips
    • Chicken Broccoli Cashew Stir Fry.
      Chicken Broccoli Cashew Stir Fry
    • Best Creamy Broccoli Bacon Recipe.
      Bacon Broccoli (In A Creamy Sauce)
    • Italian sausage and broccoli pasta in a skillet.
      Creamy Italian Sausage And Broccoli Pasta (With Mascarpone)

    Did you make this recipe? Leave a review and a ⭐⭐⭐⭐⭐ rating below, or tag us in our Facebook Group! Alternatively, bookmark it in your browser or save to Pinterest.

    Best Low Carb Broccoli Salad.

    Low Carb Broccoli Salad Recipe

    Angela Milnes
    Enjoy a healthy and delicious side with this Broccoli Salad! Crisp broccoli, savory bacon, and crunchy seeds are tossed in a creamy dressing.
    5 from 4 votes
    Print Recipe Pin Recipe Rate this Recipe
    Prep Time 10 minutes mins
    Cook Time 0 minutes mins
    Total Time 10 minutes mins
    Course Salads
    Cuisine American
    Servings 4 Servings
    Calories 210 kcal

    Ingredients
      

    • 3 Cups Broccoli Florets
    • ⅓ Cup Artichoke Hearts Chopped
    • ⅓ Cup Dried Tomatoes
    • ⅓ Cup Red Onion Chopped
    • ⅓ Cup Black Olives
    • ¼ Cup Sunflower Seeds
    • 1 ½ Cup Greek Yogurt
    • 1 Whole Lemon juice and zest
    • 3 teaspoon Sweetener
    • 1 ½ Orgeano Oregano
    • 1 tbs Chopped Garlic
    • 1 tbs Dried Basil
    • 1 teaspoon Salt
    • ¼ teaspoon Black Pepper
    • 1 tablespoon Olive Oil

    Instructions
     

    • In a large mixing bowl, mix broccoli, artichokes, tomatoes, onions, olives cut in half, and sunflower seeds.
    • In a small bowl, mix all the ingredients for the dressing.
    • Pour dressing over vegetables. Serve.

    Notes

    • Prep your broccoli right: If raw feels too crunchy, give it a super quick blanch. It softens the texture without losing the bite.
    • Keep it crisp: Add seeds and nuts right before serving so they stay crunchy and don’t soak up dressing.
    • Don’t skip the zest: Lemon zest adds brightness that really lifts the whole salad. It’s a little step with big payoff.

    Nutrition

    Serving: 1gCalories: 210kcalCarbohydrates: 22gProtein: 14gFat: 10gSaturated Fat: 1gPolyunsaturated Fat: 3gMonounsaturated Fat: 5gTrans Fat: 0.01gCholesterol: 4mgSodium: 1126mgPotassium: 747mgFiber: 5gSugar: 8gVitamin A: 557IUVitamin C: 64mgCalcium: 172mgIron: 3mg
    Print Recipe Pin Recipe Rate this Recipe
    Tried this recipe?Let us know how it was!

    Halloween Apple Monsters

    October 4, 2024 by Angela Milnes

    Halloween Apple Monsters.

    These Halloween Apple Monsters are a fun and creative treat that kids will love making and eating! Made with crisp apples, peanut butter, and playful toppings like strawberries and sunflower seeds, they’re perfect for spooky celebrations. Easy to prepare and customizable, these apple monsters are a hit at Halloween parties or as an after-school snack. Simple, delicious, and fun for everyone!

    Halloween apple monsters.
    [feast_advanced_jump_to]

    💖 Why This Recipe Works

    • A Fun and Creative Activity: Kids will love making and eating these cute apple monsters.
    • Perfect for Halloween Fun: These spooky treats are just what you need for your Halloween celebrations.
    • Instagram-Worthy Treats: These adorable apple monsters are sure to get all the likes when you share them!

    ⭐ Star Ingredients

    Ingredients to make Halloween apple monsters.
    • Granny Smith Apples: These tart and crisp apples make the perfect base for our monster mouths, adding a refreshing crunch with every bite!
    • Peanut Butter: Creamy and delicious, it holds everything together while giving a rich, nutty flavor that kids and adults love.
    • Strawberries: Bright red and juicy, they create a fun, spooky tongue that makes these monsters extra playful and tasty.
    • Sunflower Seeds: These little seeds make the cutest monster teeth, adding just the right amount of crunch to the bite.
    • Edible Eyes: These are the magic touch that brings our apple monsters to life and makes them totally adorable (and a little creepy)!

    For the complete list of ingredients with measurements and instructions, please see the recipe card at the bottom of the post.

    📖  Substitutions & Variations

    • Get creative with monster faces! Use pineapple for wild hair, raisins for spooky eyes, or mix and match for a fun, goofy twist.
    • Swap peanut butter for almond butter if you’re feeling fancy—same nutty goodness with a different vibe.
    • Chill your apple monsters before serving for a cool, refreshing crunch that makes them even more fun to eat.
    • Make them bite-sized! Smaller apple pieces = mini monster snacks perfect for little hands (or big snackers).

    🔪How To Make Halloween Apple Monsters

    Cutting strawberries and apple with a sharp knife.
    1. Step 1: Start by cutting the apple into quarters. Lay each quarter flat on its peel side. Carefully cut a 1-inch wedge in the middle of the peel side of each quarter, being sure not to cut all the way through so the quarter stays in one piece. It should now look like a little "mouth." Next, slice the strawberries lengthwise into four pieces.
    Making Halloween monsters by stuffing cut of apple with strawberries and peanut butter and decorating with artificial eyes.
    1. Step 2: Take the apple "mouths" and spread a little peanut butter inside the cutout. This will be the base for the tongue and teeth. Place one of the strawberry slices inside the cutout to resemble a tongue sticking out.
    Apple monsters ready to serve.
    1. Step 3: Add the finishing touches! Poke 6 or 7 sunflower seeds along the top edge of the cutout to look like monster teeth. Then, stick two edible eyes on the top of each apple quarter to give your monster a face.
    Apple monsters prepared for Halloween day.
    1. Step 4: Your spooky and silly Halloween Apple Monsters are ready! Serve them up and enjoy the fun!

    👩‍🍳 Expert Tips

    • Use Smooth Peanut Butter: For an even spread inside the apple mouths, choose smooth peanut butter to avoid any chunks.
    • Choose Fresh, Firm Apples: Pick apples that are firm and crisp, like Granny Smith, to hold up better while you cut and decorate.
    • Make the Wedge Neater: For cleaner cuts, use a sharp knife and slice gently to avoid smashing the apples.

    💭 FAQs

    How Do I Keep The Apples From Turning Brown?

    To keep them fresh, you can squeeze a little lemon juice on the apple slices before you start. It helps prevent browning and keeps them looking fresh!

    Can I Make These Apple Monsters Ahead Of Time?

    Yes, you can prep the apples and toppings, but I recommend assembling them just before serving to keep them fresh and crunchy.

    Can I Use Candy Eyes Instead Of Edible Eyes?

    Absolutely! You can find fun candy eyes at most stores, or use marshmallows with a little icing to make your own spooky eyes.

    Can I Make These Apple Monsters For Kids With Allergies?

    Yes! You can easily adjust the recipe to meet dietary needs by swapping out peanut butter for SunButter and using allergy-friendly toppings.

    How Do I Make The Apple Cuts Clean And Neat?

    Use a sharp knife and cut gently to avoid smooshing the apple. A steady hand helps, and cutting slowly gives you better control!

    💖 Serving Suggestions

    Here are a few ways to serve these Halloween Apple Treats

    • Monster Mash Platter – Arrange your apple monsters on a big platter with extra spooky snacks like pretzel broomsticks, gummy worms, and candy eyeballs for a full Halloween spread.
    • Creepy Crawly Cups – Serve each apple monster in a cup filled with crushed chocolate cookies (aka “dirt”) and add some gummy worms for an extra creepy-crawly touch.
    • Witch’s Cauldron Dip – Place your apple monsters around a bowl of green yogurt dip (blend vanilla yogurt with spinach or matcha) to look like they’re peeking out of a bubbling witch’s brew!

    🍽 More Halloween Recipes

    • Halloween Hot Dogs Mummies.
      Halloween Hot Dogs Mummies
    • Spooky Halloween Cherry Pie Recipe.
      Spooky Halloween Cherry Pie Recipe
    • Halloween Blondies With M&M's.
      Halloween Blondies With M&M's
    • Halloween Chocolate Covered Strawberries.
      Halloween Chocolate Covered Strawberries

    Did you make this recipe? Leave a review and a ⭐⭐⭐⭐⭐ rating below, or tag us on our Facebook Page! Alternatively, bookmark it in your browser or save to Pinterest.

    Three Halloween apple monsters.
    Halloween Apple Monsters.

    Halloween Apple Monsters

    Angela Milnes
    These Halloween Apple Monsters are a fun, easy, and creative treat that kids will love making and eating! With just a few simple ingredients, you can create a spooky snack perfect for Halloween parties or a fun after-school treat.
    5 from 1 vote
    Print Recipe Pin Recipe Rate this Recipe
    Prep Time 10 minutes mins
    Cook Time 0 minutes mins
    Total Time 10 minutes mins
    Course Appetizer
    Cuisine American
    Servings 4 Servings
    Calories 114 kcal

    Ingredients
      

    • 1 Granny Smith Apple
    • 2 tablespoon Peanut Butter
    • 2 Strawberries
    • 28 Sunflower Seeds
    • Edible Eyes

    Instructions
     

    • Start by cutting the apple into quarters. Lay each quarter flat on its peel side. Carefully cut a 1-inch wedge in the middle of the peel side of each quarter, being sure not to cut all the way through so the quarter stays in one piece. It should now look like a little "mouth." Next, slice the strawberries lengthwise into four pieces.
    • Take the apple "mouths" and spread a little peanut butter inside the cutout. This will be the base for the tongue and teeth. Place one of the strawberry slices inside the cutout to resemble a tongue sticking out.
    • Add the finishing touches! Poke 6 or 7 sunflower seeds along the top edge of the cutout to look like monster teeth. Then, stick two edible eyes on the top of each apple quarter to give your monster a face.
    • Your spooky and silly Halloween Apple Monsters are ready! Serve them up and enjoy the fun!

    Notes

    • Use Smooth Peanut Butter: For an even spread inside the apple mouths, choose smooth peanut butter to avoid any chunks.
    • Choose Fresh, Firm Apples: Pick apples that are firm and crisp, like Granny Smith, to hold up better while you cut and decorate.
    • Make the Wedge Neater: For cleaner cuts, use a sharp knife and slice gently to avoid smashing the apples.

    Nutrition

    Calories: 114kcalCarbohydrates: 10gProtein: 3gFat: 8gSaturated Fat: 1gPolyunsaturated Fat: 3gMonounsaturated Fat: 3gSodium: 35mgPotassium: 148mgFiber: 2gSugar: 6gVitamin A: 29IUVitamin C: 6mgCalcium: 13mgIron: 1mg
    Print Recipe Pin Recipe Rate this Recipe
    Tried this recipe?Let us know how it was!
    Apple monsters served in a plate.

    🍽 Related Recipes

    • Cranberry Lime Mocktail.
      Easy Cranberry Lime Mocktail Recipe – No Alcohol, All Sparkle!
    • Food to Your Loved Ones this Holiday Season.
      Give from Your Heart: Give Food to Your Loved Ones this Holiday Season
    • MIni Rainbow Pizza.
      How To Revamp Leftover Pizza
    • One Pan Chicken And Asparagus.
      One Pan Chicken And Asparagus

    Did you make this recipe? Leave a review and a ⭐⭐⭐⭐⭐ rating below, or tag us in our Facebook Group! Alternatively, bookmark it in your browser or save to Pinterest.

    More Halloween Ideas To Try:

    • Halloween Candy Charcuterie Board
    • Halloween Cookies
    • Halloween Monster Cookies
    • Hot Cocoa Bombs
    • Vampire Halloween Pretzels
    • « Previous Page
    • 1
    • …
    • 6
    • 7
    • 8
    • 9
    • 10
    • …
    • 19
    • Next Page »
    Angela Milnes.

    Hi I'm Angela

    Welcome to Eat Your Beets where you'll find Healthy and Nutritious Family Recipes that are tasty and simple to cook.

    More About Me

    Spring Recipes

    • edamame stir fry in a white bowl.
      Easy Edamame Stir Fry (15-Minute Protein-Packed Side Dish)
    • Best Gravlax Salmon With Dill (Cured Salmon).
      Best Gravlax Salmon With Dill (Cured Salmon)
    • One Pan Chicken And Asparagus.
      One Pan Chicken And Asparagus
    • Chicken And Cabbage Stir Fry Recipe.
      Chicken And Cabbage Stir Fry Recipe
    • Zucchini Egg Bake Recipe.
      Best Zucchini Egg Bake Recipe
    • How To Make Sun Dried Tomatoes Without Oil.
      How To Make Sun Dried Tomatoes Without Oil – Easy Oven Method

    Popular Recipes 💗

    • best stuffed mushrooms.
      The Best Stuffed Mushrooms
    • Slow Cooker Chicken Bacon Ranch Pasta.
      Slow Cooker Chicken Bacon Ranch Pasta
    • Baked Ricotta On A Spoon.
      Bariatric Friendly Ricotta Bake Recipe
    • Fun Veggie Train With Bell Peppers.
      Fun Veggie Train With Bell Peppers
    • Best Blueberry Smoothie Bowl topped with fruit.
      Best Blueberry Smoothie Bowl Recipe
    • Grilled Eggplant With Lemon Dip.
      Grilled Eggplant With Lemon Dip
    • Air Fryer Asparagus with Parmesan.
      Air Fryer Asparagus with Parmesan
    • Sheet Pan Chicken Fajitas.
      Sheet Pan Chicken Fajitas

    Footer

    As Seen In

    As Seen In.
    • Facebook
    • Pinterest

    Privacy Policy

    Accessibility Policy

    ↑ Back To Top

    Copyright © 2025 | Eat Your Beets | All Rights Reserved

    Rate This Recipe

    Your vote:


    A rating is required
    A name is required
    An email is required