​

Eat Your Beets

  • About
  • Spring Recipes
  • Vegetables
  • Side Dishes
  • Recipe Index
menu icon
go to homepage
  • About
  • Spring Recipes
  • Vegetables
  • Side Dishes
  • Recipe Index
    • Facebook
    • Pinterest
  • subscribe
    search icon
    Homepage link
    • About
    • Spring Recipes
    • Vegetables
    • Side Dishes
    • Recipe Index
    • Facebook
    • Pinterest
  • ×
    Sign Up To Our Newsletter →
    Home » Recipe index

    Simple Avocado Salad With Lemon Dressing

    January 14, 2024 by Angela Milnes

    Avocado Salad.

    This Simple Avocado Salad is a refreshing, vibrant dish that combines creamy avocados, juicy tomatoes, and crisp cucumbers. Tossed in a light lemon dressing, this super easy salad is perfect for a quick lunch and is ready in under 10 minutes.

    Avocado Salad.

    My simple avocado salad recipe is one of those salads that just works year-round, but it really shines in spring and summer when tomatoes and cucumbers are at their best. It’s perfect for BBQs, meal prep lunches, or whenever you need something light but satisfying.

    This salad was inspired by my love for clean, fresh flavors—like the kind in my Mediterranean Farro Salad and Beet Feta Salad. Honestly, it’s my go-to when I want something quick, nourishing, and totally delish!

    [feast_advanced_jump_to]

    💖 Why This Recipe Works

    • Light, fresh, and ready in under 10 minutes.
    • Packed with healthy fats, fiber, and vitamins.
    • Totally customizable and meal-prep friendly.

    This truly is one of the best avocado salad recipes. It pairs perfectly with Crispy Air Fryer Carrot Fries and is a great side for Thin Sliced Chicken Breast. If you love this recipe then you'll also want to try our tasty Mango Chicken Salad With Avocado or this gorgeous Watermelon Salad with Feta and Mint.

    🌟 Star Ingredients

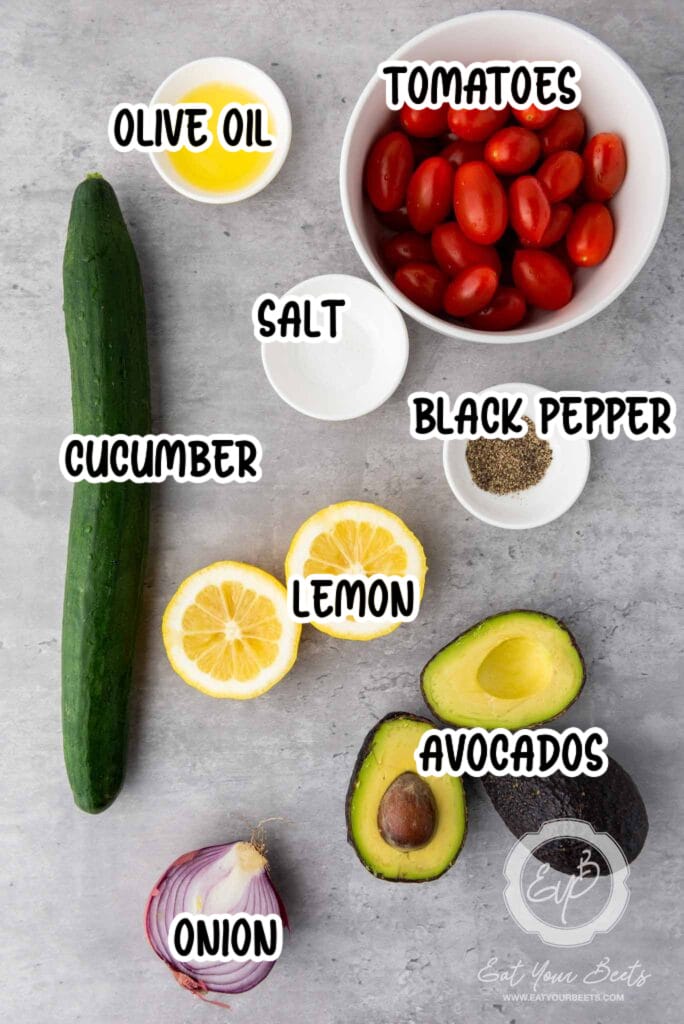
    Avocado Salad Ingredients.
    • Avocados – The creamy hero! Full of heart-healthy fats and fiber, avocado gives this salad its rich texture and satisfying bite.
    • Cherry Tomatoes – Juicy and sweet, they bring that summery pop of color and balance the richness of the avocado.
    • Cucumber – Adds crunch and coolness, making every bite light and refreshing.
    • Red Onion – A sharp, zesty contrast that cuts through the creaminess like a pro.

    📖 Substitutions & Variations

    • No lemon? Use lime juice or apple cider vinegar for tang.
    • Extra kick? Toss in a pinch of cayenne or paprika.
    • Add herbs – Fresh cilantro, parsley, or dill takes this salad next level.
    • Want protein? Add grilled chicken, black beans, or a handful of chickpeas.
    • Craving cheese? Feta crumbles go beautifully with this flavor combo.

    See this Korean Cucumber Salad recipe for a spicy sidekick!

    🥑 How To Make A Simple Avocado Salad

    Once you have all your ingredients ready, here is what you'll need to do to make this simple avocado salad.

    avocado, chopped tomatoes, cucumber and onion in a bowl.
    1. Step 1: Wash all the produce. Cut the crisp cucumber in quarters lengthwise and then dice and add to a large salad bowl. Half the cherry tomatoes. Add to the bowl. Peel and dice the avocados. Add to the bowl. Thinly slice the red onions. Add to the bowl.
    Drizzling lemon juice over salad ingredients in a bowl.
    1. Step 2: Drizzle with lemon juice and olive oil.
    Avocado salad ingredients in a serving bowl, with salt and pepper sprinkled over the top.
    1. Step 3: Next season with salt and pepper.
    Avocado salad in a bowl.
    1. Step 4: Gently toss to combine. Serve immediately or chill briefly.

    💡 Hint: Cut the avocado just before serving to keep it bright and beautiful! If you’re prepping ahead, toss the cubes in a little extra lemon juice to slow browning.

    Avocado salad in a bowl.

    👩‍🍳 Expert Tips

    • Use a ripe-but-firm avocado so it holds its shape in the salad.
    • Thinly slice the red onion for flavor without overpowering each bite.
    • Want it extra zesty? Add lemon zest for a little citrus punch.
    Avocado salad with cucumber, tomatoes and onions.

    Avocado Salad FAQs

    Can I make avocado salad ahead of time?

    You can prep everything but the avocado ahead of time. Add the avocado right before serving for the freshest taste.

    How do I store leftover avocado salad?

    Store it in an airtight container in the fridge for up to 24 hours. The avocado may brown slightly, but it’s still tasty!

    Can I add different tomatoes to this simple avocado salad?

    Yes! Roma, grape, or chopped heirloom tomatoes all work beautifully.

    Can I make my avocado salad creamy?

    Sure! Add a spoonful of Greek yogurt or a mashed avocado into the dressing for a creamier twist.

    What proteins go well with a simple avocado salad?

    Grilled shrimp, shredded chicken, canned tuna, or black beans are all great additions.

    Two bowls of avocado salad.

    💖 Serving Suggestions

    This simple avocado salad is super versatile—pair it with your favorite mains or build a light, summery plate. It’s amazing with:

    • Stuffed Chicken Breast or Honey Mustard Chicken for an easy weeknight dinner
    • Chicken Tamale Pie for a contrast of creamy and savory
    • Texas Smoked Turkey for smoky BBQ vibes
    • Stuffed Portobello Mushrooms if you want a hearty meatless meal
    • Pan-Seared Salmon for a light, balanced combo
    • Or simply serve it with crusty bread, toast, or even inside a wrap!

    Looking for more flavor inspiration? This salad also pairs beautifully with Air Fryer Sweet Potato Fries, Red Cabbage Coleslaw, or Mediterranean Cucumber Salad.

    🍽 More Super Simple Salad Recipes

    • Italian salad in a bowl.
      Best Italian Chopped Salad Recipe (Zesty, High-Protein, Meal Prep Friendly)
    • Berry Salad Recipe With Goat Cheese.
      Fresh Berry Salad Recipe With Goat Cheese (Easy Summer Salad)
    • Italian Octopus Salad With Baby Spinach.
      Italian Octopus Salad With Baby Spinach
    • Mango Arugula Salad.
      Mango Arugula Salad With Walnuts

    Did you make this recipe? Leave a review and a ⭐⭐⭐⭐⭐ rating below, or tag us on our Facebook Page! Alternatively, bookmark it in your browser or save to Pinterest.

    Avocado Salad.

    Avocado Salad

    Angela Milnes
    Enjoy the fresh and vibrant flavors of this Avocado Salad with Tomatoes and Cucumber! Creamy avocado pairs perfectly with juicy tomatoes and crisp cucumber, all tossed in a light vinaigrette for a refreshing and satisfying dish.
    5 from 4 votes
    Print Recipe Pin Recipe Rate this Recipe
    Prep Time 5 minutes mins
    Cook Time 0 minutes mins
    Total Time 5 minutes mins
    Course Salads
    Cuisine American
    Servings 4 servings
    Calories 237 kcal

    Ingredients
      

    • 2 Avocados
    • 1 lbs. Cherry Tomatoes
    • 1 English cucumber
    • ½ Red Onion
    • 1 Lemon juiced
    • 1 tablespoon Olive Oil
    • Salt to taste
    • Black Pepper to taste

    Instructions
     

    • Wash all the produce.
    • Cut the crisp cucumber in quarters lengthwise and then dice and add to a large salad bowl.
    • Half the cherry tomatoes. Add to the bowl.
    • Peel and dice the avocados. Add to the bowl.
    • Thinly slice the red onions. Add to the bowl.
    • Juice the lemon and sprinkle over the ingredients.
    • Add the olive oil to the ingredients. Season everything with salt and black pepper.
    • Gently toss until well combined. Serve chilled.

    Notes

    This avocado salad is made using fresh ingredients like sliced cucumber, diced avocado and lots of lemon juice. Make sure you choose the highest quality ingredients for this recipe, because it really will make a lot of difference.
    If you don't have the grape tomatoes that this recipe calls for, you can use almost any juicy tomatoes of your choices. I would recommend Roma tomatoes
    Don't forget to add some extra lime juice over the salad towards the end, right before you serve. The vitamin C punch you'll be getting is just a nice plus.
    Make sure you choose ripe avocados for this recipe. To keep the avocado from browning, you can drizzle some lime juice into the chopped or diced avocado and give it a good toss.
    If you don't have English cucumbers, you can also choose to use regular cucumber for this recipe.

    Nutrition

    Serving: 1gCalories: 237kcalCarbohydrates: 20gProtein: 4gFat: 19gSaturated Fat: 3gPolyunsaturated Fat: 2gMonounsaturated Fat: 12gSodium: 22mgPotassium: 902mgFiber: 9gSugar: 6gVitamin A: 786IUVitamin C: 53mgCalcium: 47mgIron: 2mg
    Print Recipe Pin Recipe Rate this Recipe
    Tried this recipe?Let us know how it was!

    Easy Chinese Chicken Salad

    January 14, 2024 by Angela Milnes

    Easy Chinese Chicken Salad.

    This Chinese Chicken Salad is the perfect mix of crispy, juicy, and bold. Tossed in a sweet and tangy Asian-style dressing and loaded with crunchy veggies and tender chicken, it’s a fast and flavorful go-to for lunch, dinner, or even meal prep days.

    chinese chicken salad

    This colorful salad is one of those healthy Asian recipes that feels anything but boring. It hits all the right notes—crunchy, savory, fresh, and just a little sweet. Inspired by classic Chinese restaurant salads, this homemade version is made with whole food ingredients and no deep-frying required.

    If you love fusion meals like this, try my Air Fryer Cauliflower With Teriyaki Sauce or Easy Chicken Yaki Soba next.

    [feast_advanced_jump_to]

    💖 Why This Recipe Works

    • Packed with flavor—thanks to a bold soy-ginger dressing and fresh aromatics
    • Great for meal prep—everything holds up well for hours
    • Super flexible—you can mix and match veggies, protein, and toppings

    ⭐ Star Ingredients

    Chinese Chicken Salad Ingredients
    • Napa Cabbage – Crisp, slightly peppery, and holds up like a champ under all that bold dressing. It’s the backbone of any great Chinese chicken salad.
    • Skinless Chicken Thighs – Juicy, flavorful, and perfect for grilling or pan-searing. You could also use leftover rotisserie chicken for a shortcut.
    • Soy Sauce – The umami bomb in your homemade Asian salad dressing. It brings out depth in the chicken and balances the sweet and tangy vinegar and teriyaki.

    For the complete list of ingredients with measurements and instructions, please see the recipe card at the bottom of the post.

    📖  Substitutions & Variations

    • Got leftover wonton strips or crunchy noodles from takeout? Toss them in! They add the perfect crispy bite.
    • This salad is a veggie-lover’s dream—chopped green onions, snow peas, or snap peas bring extra freshness and crunch.
    • Mix up your greens! A combo of red and green cabbage (or even some romaine) gives it more texture and color.
    • Feeling adventurous? Bean sprouts and water chestnuts add a little extra crunch, while canned mandarin oranges bring a sweet, tangy twist.
    • Ramen or chow mein noodles? Yes, please! They make this salad even more satisfying and totally irresistible.

    If you like fusion-style Asian meals like this, you'll also love my Avocado Salad with a sesame twist or Korean Beef with stir-fried veggies.

    🔪How To Make Chinese Chicken Salad

    chinese chicken salad
    1. Step 1: Marinate the chicken thighs in your favorite spice blend or a simple mixture of salt, pepper and a little oil. Grill them on a grill pan until cooked. Cut the cucumber in half. Roast them until lightly charred. Allow the chicken to cool slightly and then slice into thin strips.
    chinese chicken salad
    1. Step 2: Wash the cabbage thoroughly and slice it into thin strips. Place it in a large salad bowl to form the base of the salad.
    chinese chicken salad
    1. Step 3: Chop the cilantro. Slice the chili peppers into thin rings. Grate the carrots. Place the prepared vegetables and herbs in a large bowl. Cut the cucumber into 8 pieces.
    chinese chicken salad
    1. Step 4: Add shredded chicken and cucumbers. Place bay leaf, spices, and garlic in the salad center. Pour in soy sauce, vinegar, and teriyaki sauce. Heat oil and pour over the center. Toss gently and let sit for 15 minutes. Transfer to a plate, sprinkle with sunflower seeds for crunch.

    💡Hint: Pouring hot oil over the aromatics in the salad creates a quick infusion of flavor—don’t skip this step!

    chinese chicken salad in a bowl with chop sticks and jalapenos on the side.

    👩‍🍳 Expert Tips

    Making this Asian salad is super easy, but you might want to note down these little tips and tricks too.

    • For a shortcut, use pre-cooked chicken or shredded rotisserie meat.
    • To reduce bitterness and boost color, soak cabbage in ice water for 10 minutes before draining.
    • Use sesame oil if possible—it adds that iconic toasted, nutty flavor found in many Chinese salad dressings.
    • Want a restaurant-style finish? Add a splash of rice vinegar and sprinkle crispy noodles on top just before serving.

    💭 FAQs

    Can I use pre-cooked chicken for this chinese salad?

    Absolutely! Rotisserie chicken is a convenient and flavorful option that saves preparation time.

    What vegetables are typically included in Chinese Chicken Salad?

    Common ingredients are shredded Napa cabbage, romaine lettuce, shredded carrots, and green onions.

    How can I make the my Asian salad crunchier?

    Keep crunchy toppings (like noodles or nuts) separate until serving. And don’t overdress—light toss just before serving keeps things crisp.

    Can I prepare the salad in advance?

    Yes! Keep the dressing and crunchy bits separate, then combine right before eating for best texture. Store leftovers in the fridge for one day.

    💖 Serving Suggestions

    Here’s what to serve with your Chinese Salad:

    • Grilled or Stir-Fried Protein: Serve the salad alongside Thin Sliced Chicken Breast, Korean Beef, BBQ Pulled Pork, or Air Fryer Shrimp. You can also stir-fry tofu or tempeh for a vegetarian option.
    • Rice or Noodles: Serve the salad with Steamed Rice or Instant Pot Ramen Noodles such as lo mein or chow mein for a more substantial meal.
    • Spring Rolls or Dumplings: Pair the salad with spring rolls, Bao or Dumplings (steamed or fried) for a delightful combination.
    • Soup: Start the meal with a light soup such as hot and sour soup or Egg Drop Soup.
    chinese chicken salad

    🍽 Try More Chinese Inspired Dishes

    • Sheet Pan Chinese Chicken With Green Beans.
      Sheet Pan Chinese Chicken With Green Beans
    • Fiery Ginger Garlic Shrimp (Chinese Shrimp).
      Fiery Ginger Garlic Shrimp (Chinese Shrimp)
    • Instant Pot Chinese Dumpling Soup.
      Best Chinese Dumpling Soup (Instant Pot Recipe)
    • Instant Pot Asian Pulled Pork.
      Instant Pot Asian Pulled Pork

    Did you make this recipe? Leave a review and a ⭐⭐⭐⭐⭐ rating below, or tag us in our Facebook Group! Alternatively, bookmark it in your browser or save to Pinterest.

    Easy Chinese Chicken Salad.

    Easy Chinese Chicken Salad

    Angela Milnes
    Enjoy the fresh and crunchy goodness of this Chinese Chicken Salad! Tender, juicy chicken is paired with crisp veggies and a zesty sesame dressing that’s full of flavor.
    5 from 4 votes
    Print Recipe Pin Recipe Rate this Recipe
    Prep Time 10 minutes mins
    Cook Time 0 minutes mins
    Total Time 10 minutes mins
    Course Side Dish
    Cuisine Chinese
    Servings 4 Servings
    Calories 226 kcal

    Ingredients
      

    For The Salad

    • 1 Whole Napa Cabbage
    • 2 Boneless Skinless Chicken Thighs
    • 1 Cucumber
    • ½ Carrot
    • 1 tbsp. Vegetable Oil
    • ½ Chili
    • Cilantro Bundle
    • Sunflower Seeds

    For The Dressing

    • 2 tablespoon Teriyaki Sauce
    • 2 tablespoon Soy Sauce
    • 1 ½ tablespoon Apple Cider Vinegar
    • 3 tablespoon Olive Oil
    • 1 clove Garlic
    • 1 Bay Leaf
    • 1 teaspoon Coriander
    • 1 teaspoon Curry Powder

    Instructions
     

    • Marinate the chicken thighs in your favorite spice blend or a simple mixture of salt, pepper and a little oil. Grill them on a grill pan until cooked through and juicy.
    • Cut the cucumber in half. Roast them until lightly charred. Allow the chicken to cool slightly and then slice into thin strips. Cut the cucumber into 8 pieces.
    • Wash the cabbage thoroughly and slice it into thin strips. Place it in a large salad bowl to form the base of the salad.
    • Chop the cilantro. Slice the chili peppers into thin rings. Grate the carrots. Place the prepared vegetables and herbs in a large bowl.
    • Add the shredded chicken and cucumbers. Place bay leaf, spices, pressed garlic in the center of the salad. Pour in the soy sauce, vinegar, and teriyaki sauce.
    • Heat the oil in a pan and pour it over the center of the salad. Gently toss and leave for 15 minutes.
    • Transfer the salad to a serving plate and sprinkle with sunflower seeds to give it crunch and visual appeal. Serve the Chinese Chicken Salad immediately to preserve the vibrant colors and textures in each plate.

    Nutrition

    Serving: 1gCalories: 226kcalCarbohydrates: 6gProtein: 13gFat: 17gSaturated Fat: 3gPolyunsaturated Fat: 4gMonounsaturated Fat: 9gTrans Fat: 0.04gCholesterol: 54mgSodium: 906mgPotassium: 344mgFiber: 1gSugar: 3gVitamin A: 1402IUVitamin C: 11mgCalcium: 31mgIron: 1mg
    Print Recipe Pin Recipe Rate this Recipe
    Tried this recipe?Let us know how it was!

    Mediterranean Green Bean Salad

    January 14, 2024 by Angela Milnes

    Mediterranean Green Bean Salad.

    This Mediterranean Green Bean Salad is the perfect side dish to whip up and enjoy this summer. Packing in the goodness of green beans and lots of other fresh ingredients, this delicious dish is super healthy and flavorful. Best of all, it comes together in minutes!

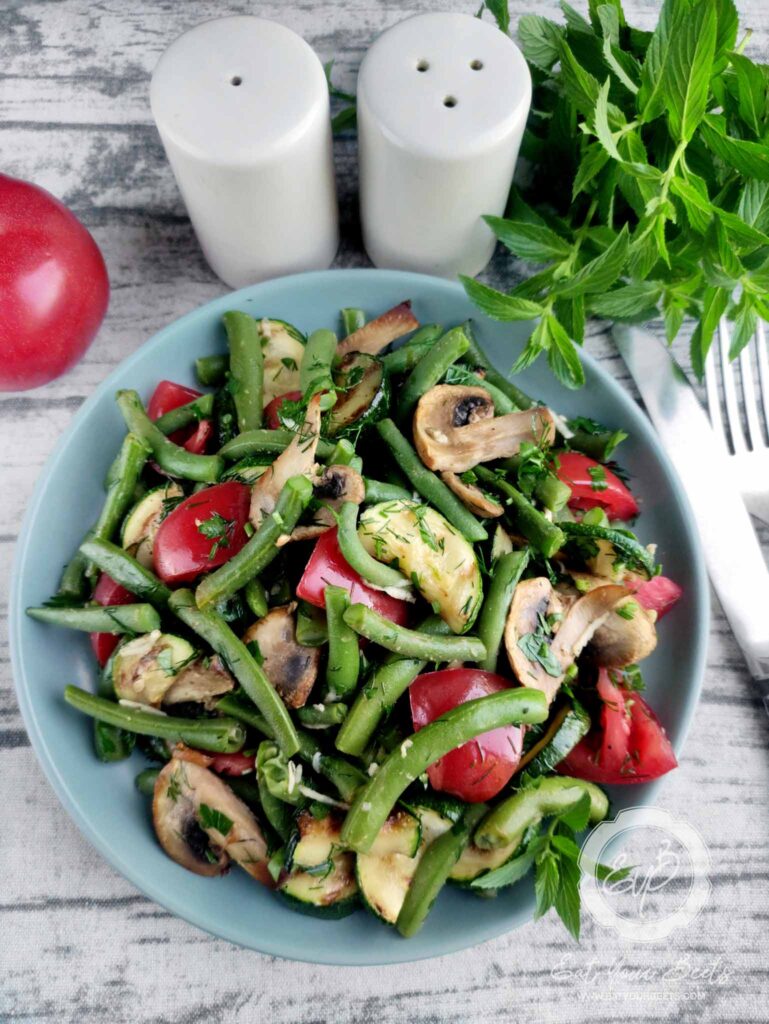
    Green bean salad in a bowl.
    [feast_advanced_jump_to]

    💖 Why This Recipe Works

    • Veggies: My favorite part about this green bean salad is the fact that it is a great way to get lots of veggies on your plate.
    • Tasty: With a delicious, savory dressing, you'll be able to jazz up simple ingredients and transform them into this wickedly delicious marinated green bean salad that you'll love every bite of.
    • Versatile: Plus, the salad is super versatile, which means you can pair it with almost any of your favorite foods.

    ⭐ Star Ingredients

    Green bean salad ingredients.

    To make this fiber and flavor-packed green bean salad, here's what you'll need.

    • String beans: Fresh green beans add crunch and a vibrant color to the salad.
    • Zucchini: Bulks up the salad, adding texture and summer freshness.
    • Tomato: Enhances the salad with juiciness, flavor, and a pop of red color.
    • Dill: Brightens the salad, offering a fresh herby note.
    • Mushrooms: Contribute protein and umami flavor for a hearty touch.
    • Coriander: Adds an extra hint of freshness and unique flavor.
    • Parsley: Elevates the dish with its fresh, slightly peppery taste.
    • Allspice: Infuses the salad with a warm, aromatic flavor profile.
    • Lemon juice: Injects tanginess, enhancing the overall flavor of the salad.
    • Bay leaf: Used in blanching water for an extra layer of subtle flavor.
    • Olive oil: Sautés zucchini and adds richness and healthy fats to the salad.
    • Garlic: Intensifies the salad's flavor with its pungent, spicy kick.
    • Seasonings: A dash of salt (and optional black pepper) balances and enhances flavors.

    For the complete list of ingredients with measurements and instructions, please see the recipe card at the bottom of the post.

    📖  Substitutions & Variations

    • If you don't want to cook green beans, you can also choose to use canned green beans for this recipe.
    • Just remember to drain off the extra liquid before you use them for the recipe. I would also suggest seasoning the beans with some salt and pepper and then using them to make a nice marinated green bean salad.
    • In addition to everything I've added, you can also add in other ingredients to customize the salad.
    • You can also top the salad with a nice salty cheese like goat cheese or feta cheese to enhance its flavor.
    • Roasted cauliflower, halved cherry tomatoes, sliced red onion, and chopped green onions are all great choices.
    • If you want the salad to have an extra crunch factor, you can also add some toasted almonds or pine nuts into the mix.
    • To make this salad protein rich, you can add some grilled chicken or hard boiled eggs into it towards the end.
    • If you're looking for a vegetarian protein instead, cannellini beans and garbanzo beans could be great options to consider.
    • Kalamata olives can bring a nice bit of salty flavor and deliciousness to the salad.

    🔪How To Make Green Bean Salad

    Sliced zucchini and mushrooms on a chopping board.
    1. Step 1: Cut the zucchini into half slices. Chop the mushrooms into slices.
    Fresh green beans.
    1. Step 2: Cut off the tips of the green beans. Cut into small pieces. Boil water in a large pot, add salt and a bay leaf. Add the green beans to the boiling water and cook for about 5-7 minutes. Rinse the beans in a colander and immediately pour ice water or cold water over them.
    Cooked mushrooms on a plate.
    1. Step 3: Grease a grill pan with oil. Arrange the zucchini slices. Cook until lightly charred. Fry the mushroom slices and cool.
    Chopped tomatoes and coriander.
    1. Step 4: Remove the sepals and seeds from the tomato. Cut it into medium cubes. Chop the greens. Mix all the ingredients together and place on a plate to serve. For the dressing, mix the dressing with olive oil, lemon juice, salt, spices, and garlic in a small bowl. Dress the salad. Serve and enjoy.
    Green bean salad on a plate served with fork and knife.

    👩‍🍳 Expert Tips

    While making the green bean salad is super easy, you might want to have these little tips and tricks handy too.

    • If you don't have the lemon juice that the recipe calls for, you can use some vinegar instead. Vinegar helps bring some tanginess and flavor to the salad. Balsamic vinegar is a great choice since it brings a nice bit of umami flavor too.
    • The easiest way to get the perfect crisp tender green beans and have that bright green color for this recipe is to use fresh green beans and then blanch them, just like I did.
    • If you're blanching the fresh green beans, remember to pat dry before you use them in this recipe.
    • You can also use frozen green beans and stir fry them on high heat with a dash of olive oil in a hot pan. This will help you get the crisp green beans you're looking for.
    • I've added lots of fresh herbs to this salad- you can use what you have at hand. I would highly recommend adding chopped fresh basil too, if you can get your hands on it.

    💭 FAQs

    How can I make the green beans in the salad extra crisp and vibrant in color?

    To achieve crisp-tender green beans with a bright green hue, blanch them briefly in boiling salted water and then transfer them to an ice bath to halt the cooking process. This technique preserves their color and crunch.

    Can I prepare the salad in advance?

    Yes, you can prepare the salad ahead of time. After blanching and cooling the green beans, combine them with the other ingredients and refrigerate. This allows the flavors to meld, enhancing the overall taste.

    What are some suitable substitutions if I don't have certain ingredients?

    If you don't have Kalamata olives, you can use green olives or capers for a similar briny flavor. For a vegan version, omit the feta cheese and consider adding chickpeas or toasted nuts for added protein.

    How should I store leftovers, and how long will they keep?

    Store any leftover salad in an airtight container in the refrigerator. It's best consumed within 2-3 days, as the green beans may lose their crispness over time.

    💖 Serving Suggestions

    These are my favorite sides to serve with Green Bean Salad.

    • Instant Pot Poached Chicken: The tender and mild flavor of poached chicken serves as a versatile protein accompaniment to the salad. Its neutral taste allows the vibrant flavors of the Mediterranean green bean salad to shine, creating a balanced and satisfying meal.
    • Paprika Shrimp: Grilled shrimp adds a burst of savory flavor to the salad, enhancing its overall taste profile. The smokiness from the grill and the subtle sweetness of the shrimp complement the freshness of the green beans and the tangy dressing, creating a harmonious combination of flavors and textures.
    • Air-Fried Salmon Fillets: Air-fried salmon offers a crispy exterior and tender, flaky interior that contrasts beautifully with the crispness of the green beans in the salad. The rich, buttery flavor of the salmon adds depth to the dish, while its lightness and nutritional value make it a perfect pairing for the vibrant and refreshing Mediterranean flavors of the salad.
    Mediterranean green bean salad on a plate.

    🍽 More Mediterranean Style Meals

    • Creamy Tuscan Salmon With Sundried Tomatoes.
      Creamy Tuscan Salmon With Sundried Tomatoes
    • Italian Octopus Salad With Baby Spinach.
      Italian Octopus Salad With Baby Spinach
    • Mediterranean Zucchini Stew With Tomatoes.
      Mediterranean Zucchini Stew With Tomatoes
    • Mediterranean Orzo Salad With Lemon Vinaigrette.
      Mediterranean Orzo Salad With Lemon Vinaigrette

    Did you make this recipe? Leave a review and a ⭐⭐⭐⭐⭐ rating below, or tag us in our Facebook Group! Alternatively, bookmark it in your browser or save to Pinterest.

    Mediterranean Green Bean Salad.

    Green Bean Salad

    Angela Milnes
    Fresh, crisp, and full of flavor, this Green Bean Salad is a delightful addition to any meal! Tender green beans are tossed with a tangy vinaigrette, crunchy nuts, and a sprinkle of fresh herbs for a refreshing and satisfying dish.
    5 from 4 votes
    Print Recipe Pin Recipe Rate this Recipe
    Prep Time 5 minutes mins
    Cook Time 0 minutes mins
    Total Time 5 minutes mins
    Course Salads
    Cuisine Mediterranean
    Servings 4 Servings
    Calories 139 kcal

    Ingredients
      

    • ½ lb. String Beans
    • 1 Zucchini
    • ½ Bunch Parsley
    • 1 tomato
    • 1 tablespoon Dill
    • 2 Mushrooms
    • 1 Bay Leaf
    • 1 tsp. Coriander
    • 1 tsp. Allspice
    • pinch Salt
    • 2 tablespoon Lemon Juice
    • 3 tablespoon Olive Oil
    • 1 Garlic Clove

    Instructions
     

    • Cut the zucchini into half slices. Chop the mushrooms into slices.
    • Grease a grill pan with oil. Arrange the zucchini slices. Cook until lightly charred. Fry the mushroom slices and cool.
    • Cut off the tips of the green beans. Cut into small pieces. Boil water in a large pot, add salt and bay leaf.
    • Add the green beans to the boiling water and cook for about 5-7 minutes.
    • Rinse the beans in a colander and immediately pour ice water or cold water over them.
    • Remove the sepals and seeds from the tomato. Cut it into medium cubes. Chop the greens.
    • Mix all the ingredients together and place on a plate to serve. For the dressing, mix the dressing with olive oil, lemon juice, salt, spices and garlic in a small bowl.
    • Dress the salad. 

    Notes

    If you don't have the lemon juice that the recipe calls for, you can use some vinegar instead. Vinegar helps bring some tanginess and flavor to the salad. Balsamic vinegar is a great choice since it brings a nice bit of umami flavor too.
    The easiest way to get the perfect crisp tender green beans and have that bright green color for this recipe is to use fresh green beans and then blanch them, just like I did.
    If you're blanching the fresh green beans, remember to pat dry before you use them in this recipe.
    You can also use frozen green beans and stir fry them on high heat with a dash of olive oil in a hot pan. This will help you get the crisp green beans you're looking for.
    I've added lots of fresh herbs to this salad- you can use what you have at hand. I would highly recommend adding chopped fresh basil too, if you can get your hands on it.

    Nutrition

    Serving: 1gCalories: 139kcalCarbohydrates: 10gProtein: 3gFat: 11gSaturated Fat: 2gPolyunsaturated Fat: 1gMonounsaturated Fat: 8gSodium: 45mgPotassium: 435mgFiber: 4gSugar: 4gVitamin A: 1361IUVitamin C: 34mgCalcium: 63mgIron: 2mg
    Print Recipe Pin Recipe Rate this Recipe
    Tried this recipe?Let us know how it was!

    More Healthy Recipe Ideas

    If you enjoyed making this easy recipe, and are inspired to check out some more such interesting recipes, here are a few you might want to check out.

    • Butternut Squash Mac And Cheese
    • Healthy Thanksgiving Side Dishes
    • Beet And Feta Salad With Walnuts
    • Breakfast Tacos With Harissa Lime Sour Cream
    • Parmesan Crusted Chicken With Mayo
    • Red Cabbage Coleslaw
    Green bean salad on a plate.

    What Does Asparagus Taste Like?

    January 14, 2024 by Angela Milnes

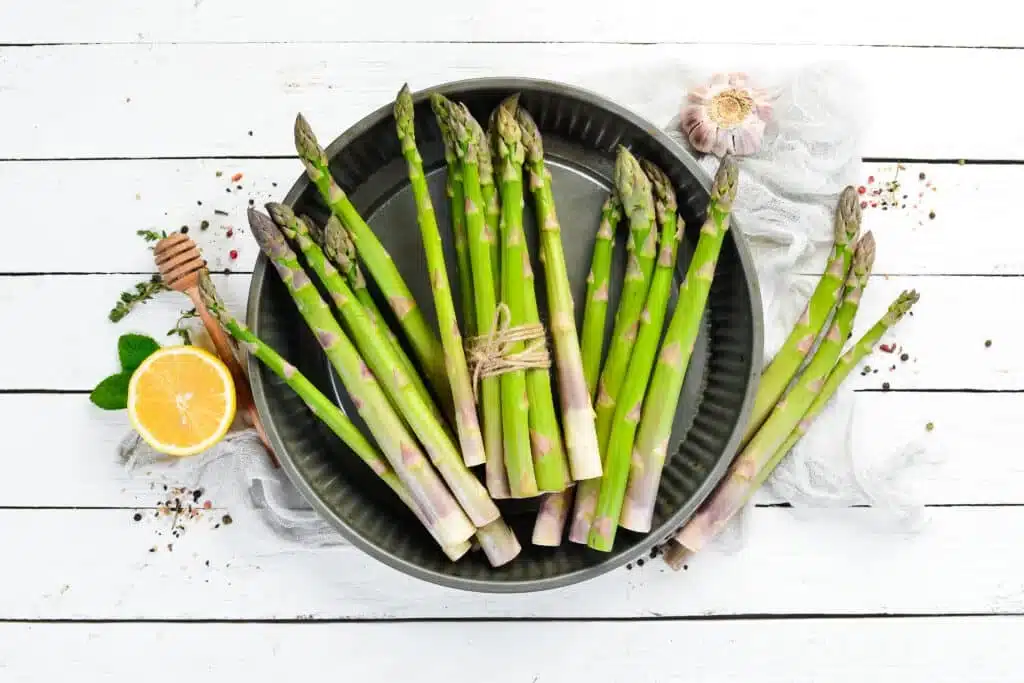
    Asparagus on a serving plate.

    Ever wondered What Does Asparagus Taste Like? Today we will give a detailed guide on the taste profiles of Asparagus and share the best ways to cook this tasty vegetable.

    Asparagus served on a plate.
    [feast_advanced_jump_to]

    What Does Asparagus Taste Like?

    The flavor of asparagus can be likened to that of green beans, although slightly stronger, and the texture of asparagus is similar to that of artichoke hearts.

    Fresh asparagus has a taste that can vary depending on the time of year in which it is harvested. In general, asparagus is slightly sweet and nutty in flavor. Additionally, some describe the taste of asparagus as being similar to that of fresh green peas or alfalfa sprouts.

    While fresh asparagus often has a mild flavor, there are also types of asparagus that are more strongly flavored. For instance, some varieties of asparagus have a slightly bitter taste or spicy taste.

    Green Asparagus

    Green Asparagus is the most common type of asparagus and is typically harvested during the spring and early summer. This variety of asparagus tastes great and has a mild, grassy flavor that is slightly sweet and nutty.

    White Asparagus

    White Asparagus is another type of asparagus that is harvested during the spring months and is great for the Whole Food Diet.

    Compared to green asparagus, white asparagus has a milder flavor and a crunchier texture. White asparagus as a higher concentration of certain vitamins and minerals than green asparagus. The white asparagus taste is more subtle than green and purple asparagus stalks and has a slightly sweet, earthy flavor.

    White and green asparagus.

    Purple Asparagus

    Purple Asparagus is a slightly rare type of asparagus that has a similar flavor to green and white varieties. However, the flavor of purple asparagus tastes sweeter and less pungent than other varieties. Whether you steam asparagus (purple) or serve raw asparagus the flavor profile will be the same.

    Purple asparagus.

    Wild Asparagus

    Wild asparagus is a type of asparagus that is harvested from the wild, rather than grown in a garden. This variety of asparagus is a stronger flavor asparagus than other types and can be used to add an extra dimension of flavor to dishes.

    Wild asparagus is often used in cooking to add a unique flavor and texture to dishes. For example, it can be blanched or sauteed and then added to soups, stews, stir-fries, or Pasta Dishes.

    What Does Canned Asparagus Taste Like?

    Canned asparagus typically has a mild, slightly sweet flavor that is similar to that of fresh asparagus.

    However, canned asparagus may also have a more bitter or earthy taste depending on the type and preparation method used. In general, canned asparagus is less nutrient-dense than fresh asparagus,

    Is Asparagus Healthy?

    So is asparagus good for you? The answer is yes. Asparagus Is Low In Calories And High In Nutrients, making it a great addition to any diet. It is rich in fiber, vitamins A, C, E and K, thiamin, folic acid, niacin and numerous other vitamins and minerals.

    Asparagus contains antioxidants that can help protect against free radical damage and fight the effects of aging. It has a lot of health benefits.

    How Many Calories in Asparagus?

    Asparagus Is A Low Calorie Vegetable that contains only around 20 calories per serving. This makes it an excellent addition to any diet, as including more low-calorie foods in your diet can help you lose weight or maintain a healthy weight.

    Cooked Asparagus vs Raw Asparagus Taste

    The taste of cooked asparagus and raw asparagus can vary significantly depending on how the asparagus is prepared. For instance, cooked asparagus tends to be more tender, while raw asparagus has a crunchier texture.

    Additionally, cooked asparagus usually has a milder flavor than raw asparagus, which can be slightly bitter or earthy.

    Some people prefer the stronger flavor of raw asparagus and enjoy eating it on its own or adding it to dishes for extra flavor and texture. Ultimately, the asparagus flavor of cooked versus raw asparagus is a matter of personal preference, and you should try both varieties to see which one you prefer.

    Young Vs. Old Asparagus Taste

    The taste of asparagus can vary depending on the age of the plant. Young asparagus tends to be more tender and has a milder flavor, while older asparagus is often tougher and has a stronger or sharper taste.

    Young asparagus typically contains higher levels of vitamins and minerals than old asparagus, making it the healthier choice in terms of nutrition. However, older asparagus can be enjoyed in moderation as well and can add extra flavor to dishes or be eaten on its own. If you have the option, opt for young asparagus whenever possible for a healthier and more nutritious option.

    Bunches of asparagus.

    Do You Eat the Entire Asparagus?

    Whether or not you eat the entire asparagus, including the stalk, depends on the variety of asparagus and your personal preferences.

    For example, some varieties of asparagus have tough stalks that may be too difficult to chew or digest. In these cases, it is generally recommended to only eat the tender asparagus tips of the plant to avoid any digestive discomfort.

    On the other hand, there are also varieties of asparagus that have thin, edible asparagus stalks. In these cases, you can eat the entire asparagus spear from tip to stalk without any issues.

    What Does Pickled Asparagus Taste Like

    Pickled asparagus has a slightly sweet and sour flavor, with a crunchy texture. It is often enjoyed as a garnish on burgers or hot dogs or served alongside other pickled vegetables such as carrots and radishes. Pickled asparagus can also be added to salads for an extra zing of flavor.

    How to Make Asparagus More Tasty?

    You can add more taste to the delicate flavor of asparagus by preparing asparagus with flavorful seasonings and sauces. Some tasty options include a drizzle of balsamic vinaigrette or lemon juice, a sprinkle of parmesan cheese, or even a splash of hot sauce.

    Additionally, you can pair asparagus with other flavorful ingredients like garlic, mushrooms, Shallots, and herbs to create more complex and delicious dishes.

    Lemon juice, aromatic herbs or balsamic vinegar can be added to your cooked asparagus to give it a more caramelized flavor when being sauteed.

    Learn How To Freeze Fresh Herbs to use in your future meals here!

    How to Serve Asparagus

    Here are some of my favorite ways to serve asparagus:

    Turkey Bacon Wrapped Asparagus:

    Try making Turkey Bacon Wrapped Asparagus in the oven or air fryer. Simply wrap thick asparagus stalks with crispy, savory bacon, and roast or air fry to your desired crispiness.

    Asparagus With Parmesan Cheese:

    If you choose to griddle asparagus or broil your asparagus then you may want to try pairing Asparagus With Parmesan Cheese.

    The cooking process with meld the fresh flavor of asparagus with the salty and savory taste of parmesan, creating a dish that is packed with flavor.

    Garlic Asparagus:

    When you roast asparagus you may want to add some garlic cloves or minced garlic to enhance the flavor.

    Simply toss your asparagus with olive oil, minced garlic, and salt and pepper before roasting in the oven or air frying. No matter how you like to prepare asparagus, there are endless ways to enjoy its fresh, earthy flavor.

    So next time you're in the mood for something healthy and delicious, be sure to add extra flavor to take eating asparagus to the next level.

    What Does Asparagus Soup Taste Like?

    Asparagus soup is a delicious and savory dish that is perfect for cool weather. It has a rich, creamy texture and a delicately earthy flavor from the fresh asparagus.

    Whether you enjoy it on its own or serve it as an elegant appetizer, there are many ways to make this classic recipe your own.

    Try our Instant Pot Asparagus Soup, it's a real winner and you'll love it!

    Enjoy Asparagus Today!

    It really does depend on the method of cooking, the type of asparagus, and whether it is to be eaten raw or cooked. Either way, asparagus is a healthy and delicious vegetable that is rich in nutrients and flavor.

    More Info Articles To Read:

    • Best Substitute For Juniper Berries

    Celery Ribs vs Celery Stalks

    January 14, 2024 by Angela Milnes

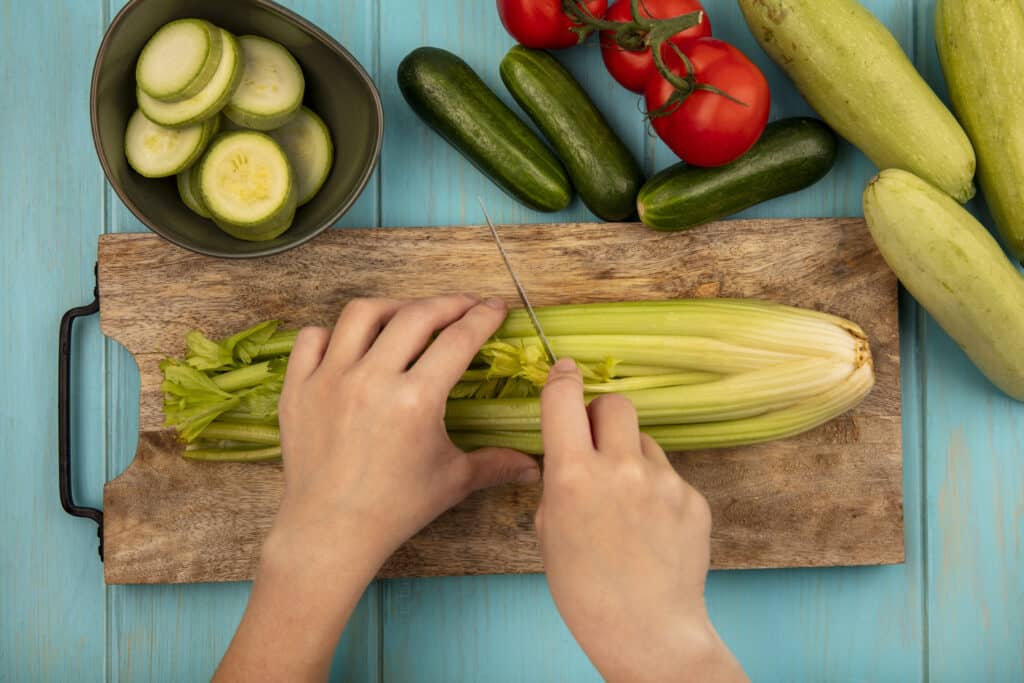
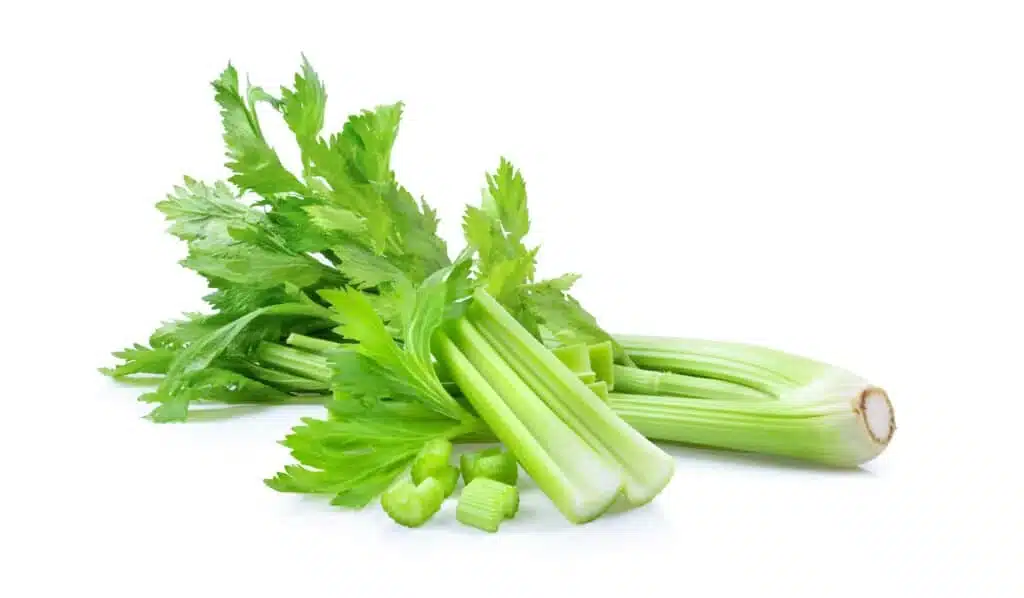
    Fresh celery.

    If you love celery then you may want to know the difference between celery ribs vs celery stalks. You may think that they're the same thing, but there actually are a few key differences between them. Today we will discuss the difference between a single rib of celery and a celery stalk and the how they taste different.

    Celery Ribs Vs Celery Stalks
    [feast_advanced_jump_to]

    What Is Celery?

    Celery is a versatile vegetable and is part of the parsley family and has been around for centuries. It is mostly composed of water, but also contains vitamins, minerals, and fiber. Celery grows in bunches and is harvested when the stalks reach about 6-12 inches tall.

    Celery can be cooked or eaten raw and comes in different shapes and sizes depending on the celery?

    Celery Ribs Vs Celery Stalks

    Is Celery Good for You?

    Celery is packed with vitamins and minerals such as Vitamin K, folate, potassium, dietary fiber, and manganese.

    Celery contains antioxidants that help reduce inflammation in the body which can help improve overall health.

    Celery contains very few calories and chopped celery is a great vegetable to add to your healthy eating plan. How much celery you choose to eat is up to you, but the moderate consumption of celery can provide many health benefits.

    What About Celery Juice?

    Celery juice is packed with antioxidants and can help improve digestive health and reduce risk of certain diseases.

    You can eat a bunch of celery pieces or an entire stalk of celery and either one will provide you with health benefits. However, celery juice is a great way to get your body the vitamins and minerals it needs without having to eat more than you need.

    Celery Ribs Vs Celery Stalks

    What Is a Stalk of Celery

    A stalk of celery is the long, thin stalk that grows from the base of the celery plant. It is the most common form of celery and is widely used for salads, soups, and other dishes. These medium stalks are usually crisp and crunchy when fresh. One stalk of celery contains about 3 to 6 crunchy ribs and can be eaten raw or cooked.

    What Is a Rib of Celery?

    A juice has many health benefits, including providing the body with essential vitamins and rib of celery is thicker than a stalk and has a different shape. It has more flavor than the stalks because it has more surface area for the essential oils to accumulate.

    The ribs are usually used in cooking dishes such as stir-fries, soups, and casseroles as they can stand up to long cooking times without losing their flavor or texture.

    A rib of celery can also be eaten raw, though they may not be as crispy as the. The celery mid rib is found in the center of the rib above the celery root. It is made up of small, tender stalks that can be eaten raw or cooked. Mid ribs are much more flavorful and aromatic than the outermost portion of the rib.

    Celery Ribs Vs Celery Stalks

    What Does 2 Ribs of Celery Mean?

    2 ribs of celery means that you have two pieces of the thicker, ridged ribs from the celery plant. he ribs are usually cut in half length-wise and can then be diced, sliced, chopped or julienned for whatever recipe you're following.

    What Are Celery Hearts?

    Celery hearts are the innermost portion of celery, near root end of the base. They have a more intense flavor than regular celery and are most often used for salads or sandwiches where you want to add a lot of flavor without adding many pieces.

    Celery hearts can be eaten raw but they are best cooked lightly in order to retain their texture.

    Do Celery Stalks Need to Be Peeled?

    Celery stalks do not need to be peeled, though it may be beneficial to peel away the tougher stringy outside layer. This will make the celery easier to chew and digest, while still keeping its crunchy texture.

    Celery Ribs Vs Celery Stalks

    Do You Have to Remove Strings From Celery?

    No you don't have to remove the strings from celery. However it is important to note that when consuming raw celery stalks, they should always be washed thoroughly before eating.

    Some people with sensitive mouths may want to remove the strings as they can be a bit tough on the teeth. However, if cooked for a longer period of time, the strings will become more tender and easier to digest.

    How to Cut Celery Stalks

    Here are the steps for cutting a celery stalk correctly:

    • Diced celery can add a crunchy texture to salads and other dishes. When cutting celery, first cut off the ends of the stalk.
    • Then, if desired, remove the strings by taking a paring knife along one side of the stalk. Alternatively you can use a vegetable peeler.
    • Cut into small pieces or slices depending on your recipe needs.
    • Celery that is chopped too thickly will have an unpleasant fibrous texture.

    To Cut Fresh Celery When Eating Raw:

    • Cut off the ends of the celery stalk.
    • Slice into small sections for dipping or for salads.

    How to Cook Celery Sticks

    • The crunchy texture of freshly cut celery can add flavor and texture to salads ando cook celery sticks, you can either simmer or steam them. Simmering is done by boiling the celery in a pot of water for 8-10 minutes.
    • If steaming, place the celery into a steamer basket and then into boiling water for 5 minutes. Both methods will make the celery softer and easier to chew, while still maintaining its crunchy texture.
    • For an even softer result, you can add a tablespoon of butter or olive oil to the water before boiling or steaming.
    • If desired, you can season the chopped celery with herbs and spices before cooking for additional flavor.
    • Once cooked, enjoy your celery sticks by themselves as a snack, in salads, pastas, soups, and more!

    How to Store Celery in the Refrigerator

    • To store celery, first rinse off any dirt or debris and wrap the stalks in aluminum foil or wax paper. If you plan on using it within a few days, store it in the crisper drawer of your fridge.
    • For longer storage, place your celery sticks into an airtight container or bag. You can wrap the chopped celery in a damp paper towel and place it into an airtight bag inside your refrigerator.
    • Chopped celery should be stored this way for 3-4 days at most before being cooked or used in a recipe.

    Can You Freeze Celery?

    Yes, celery can be frozen for long-term storage. To freeze, wash and chop the celery into sticks or slices. Lay the pieces in an even layer on a baking sheet and place into the freezer until they are frozen solid.

    Can You Freeze a Whole Head of Celery?

    You can freeze an entire head of celery for long-term storage. Wash the celery and wrap it in wax paper followed by an airtight container or bag before placing it into the freezer. To thaw, just place plastic bag over the celery on your kitchen counter at room temperature until thawed. It can then be used as fresh.

    How Long Does Fresh Celery Last at Room Temperature?

    Celery will last at room temperature for up to 1 day before it begins to go bad. It is best to refrigerate or freeze celery as soon as possible after purchasing or harvesting.

    How to Tell if Celery Ribs Have Gone Bad?

    If your celery ribs that have gone bad will show signs of discoloration, wilting, and sliminess.

    The celery stick may have have an off-putting odor. Discard any bunch of celery that is overly limp or has any mold on it. Read here to learn more about celery going bad.

    Does Celery Have Seeds and Can I Eat Them?

    Yes , celery does have seeds and you can eat them. These small, round seeds are black in color and can be found either inside the ribs or at the very bottom of a celery stalk. Celery seeds have an earthy, nutty taste and are commonly used to make soups, salads, pesto sauces and dressings.

    How Do I Remove the Seeds?

    The easiest way to remove the seeds from celery is by using a knife or fork. Simply slice open the rib of the celery and use your knife or fork to scrape out any seeds you find inside. Alternatively, you can also squeeze the two ribs of of the celery together and shake them vigorously until all the seeds have been removed.

    What to Serve With Celery?

    You can serve celery with a variety of different dishes. Try adding chopped celery to soups, stews, salads and other raw vegetable dishes. You can also pair it with roasted or grilled meats and vegetables for added flavor.

    Additionally, you can use the leaves of the celery stalk as garnish on dishes such as sandwiches and Vegan Tacos. For additional flavor, try adding a bit of butter, salt and pepper to the celery when served.

    No matter how you choose to prepare it, celery is sure to add an extra layer of flavor and texture to any dish!

    You can also serve individual ribs or celery sticks with cheese dips, Strawberry Jalapeno Salsa or Beetroot Hummus for a healthy snack. Celery sticks also make the perfect accompaniment to Cheese Platters and can even be used as "scoops" for dip!

    Celery Rib vs Stalk

    In a nutshell, a single stalk full of celery typically consists of multiple ribs. A rib is an individual piece that can be separated from the other pieces and eaten as is. The outside part of the stalk is usually tougher and more fibrous, while the inner ribs tend to be sweeter and crunchier. Enjoy celery as part of a meal or as a crunchy and satisfying snack!

    Try These Appetizer Recipes

    • Zucchini Egg Bake Recipe
    • Mini Cheese Stuffed Peppers
    • Tik Tok Egg Boil
    • Caprese Mini Pizzas
    • Best Stuffed Mushrooms

    Best Substitute For Juniper Berries

    January 14, 2024 by Angela Milnes

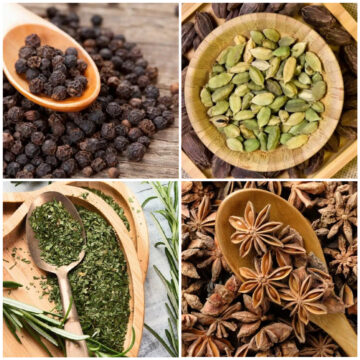
    Substitutes for juniper berries.

    Are you looking for an ingredient to give your dish a unique flavor that juniper berries can offer but do not have access to them? Look no further! We have the perfect substitute for juniper berries to unleash your creativity in cooking. Make delicious dishes without compromising the flavor.

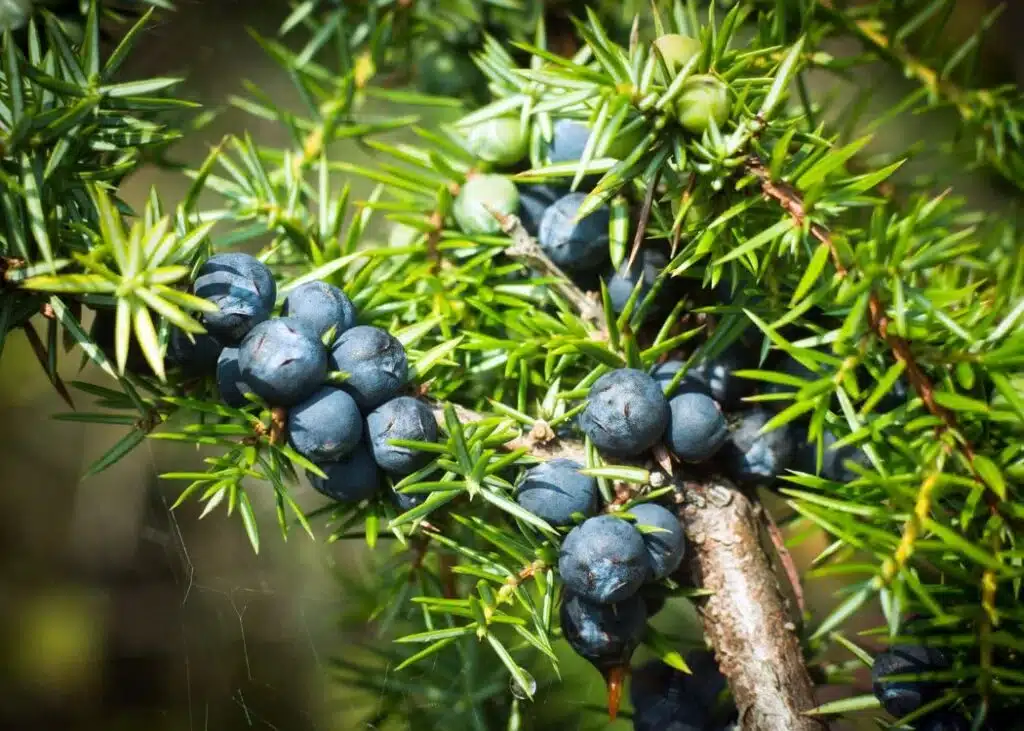
    Juniper berries on a tree.
    [feast_advanced_jump_to]

    Can You Substitute Juniper Berries?

    Yes, if you're unable to find juniper berries or if they're not to your taste, there are several alternatives that can mimic their unique flavor.

    Rosemary, for instance, can provide a similar piney note, while caraway seeds or bay leaves can offer a comparable depth of flavor. Another option is black cardamom, which has a smoky taste that can substitute the robust flavor of juniper berries in savory dishes.

    However, keep in mind that while these substitutes for juniper berries can replicate certain aspects of the juniper berries flavor, they might not perfectly match the distinct combination of sweet, tart, and woody notes that juniper berries provide.

    13 Best Juniper Berry Substitutes

    Here are the 13 best juniper berrie substitutes that elevate your culinary creations.

    From caraway seeds' unique sweetness to the aromatic depth of bay leaves and the spicy allure of star anise, explore 13 creative alternatives that match the distinctive flavor of juniper berries.

    1. Caraway Seeds

    Caraway seeds, which are a member of the carrot family, can be an excellent replacement for juniper berries due to their unique flavor profile. These aromatic seeds have a slightly sweet flavor that aligns with the sweet notes found in juniper berries.

    While they don't perfectly replicate the tartness of juniper berries, their hint of sweetness can provide a similar balance in dishes that call for these berries.

    The quantity of caraway seeds needed to replace juniper berries in recipes may vary, but a good starting point could be to use one caraway seed for every two juniper berries. This ratio allows the caraway to impart its unique sweet taste without overpowering the dish.

    caraway seeds.

    2. Bay Leaf

    Bay leaf, with its subtle flavor and slightly bitter taste, can serve as an effective replacement for juniper berries in various recipes.

    Though not an exact match, the crushed bay leaf can provide a comparable depth of flavor to juniper berries, especially in vegetable and meat dishes. Their unique aromatic profile can add a new dimension to your cooking, similar to the way juniper berries would.

    A good rule of thumb when substituting is to use one crushed bay leaf for every four juniper berries. This ratio allows the bay leaf to impart its unique bitter taste without overpowering the dish.

    Keep in mind that while bay leaves can mimic some aspects of juniper berries' flavor, they might not perfectly replicate the sweet and tart notes that juniper berries provide.

    bay leaves.

    3. Star Anise

    Star anise, derived from the fruit of an evergreen tree, can act as a flavorful substitute for juniper berries in numerous recipes. Its unique sweet and spicy flavor gives it a delicate aroma, making it a suitable alternative.

    Although star anise doesn't perfectly mimic the tart and sweet notes of juniper berries, its robust flavor can provide a similar depth to dishes that originally call for juniper berries.

    When substituting, consider using one star anise for every teaspoon of juniper berries. This is a good starting ratio that allows the star anise to impart its unique flavor without dominating the dish.

    Star anise spice.

    4. Rosemary

    Rosemary, a fragrant herb with a distinct and woody aroma, can be used as a substitute for juniper berries in various savory dishes. Its strong, piney flavor similar to that of juniper berries makes it an excellent alternative.

    Fresh rosemary sprigs can bring a comparable depth and aroma to your cooking, much like the way juniper berries would. Although rosemary doesn't perfectly mimic the tartness of juniper berries, its robust flavor profile can provide a similar impact.

    When substituting, consider using one fresh rosemary sprig for every few juniper berries. This ratio allows the rosemary to impart its unique, pine-like flavor without overpowering the dish.

    Rosemary on a wooden tray.

    5. Lingonberry

    Lingonberries, with their tart taste and woody flavor, make for a compelling substitute for juniper berries in various recipes.

    The similarity in their flavor profiles allows lingonberries to mimic the distinctive taste of juniper berries quite closely.

    When using lingonberries as a substitute, consider a ratio that suits the tartness you desire in your dish, since lingonberries might be slightly more acidic than juniper berries.

    Nonetheless, the unique combination of tart and woody flavor in lingonberries can add an exciting twist to your culinary creations, making them a worthy alternative to juniper berries.

    Lingonberries on a tree.

    6. Allspice Berries

    Allspice berries, with their rich, earthy flavor, can be an intriguing substitute for juniper berries in your cooking.

    The robust and complex taste of allspice berries may not exactly mimic the tartness of juniper berries, but it does offer a similar depth and complexity that can elevate a dish.

    When using allspice as a substitute for juniper berries, it's essential to adjust the quantity to suit your taste preference, as allspice can be quite potent.

    The unique combination of, spicy, sweet ,and earthy flavors in allspice berries can add a new dimension to your culinary creations, making them a worthy alternative to juniper berries.

    Allspice berries.

    7. Dill Spices

    Dill spices, with their unique, woodsy flavor, can be an effective substitute for juniper berries in your recipes.

    The subtle, yet distinct taste of dill spices can mimic the tartness of juniper berries, adding a similar depth and complexity to your dishes.

    When using dill as a substitute for juniper berries, consider adjusting the quantity to match the intensity of flavor you desire, as dill can be quite potent.

    This aromatic herb's woodsy and slightly sweet flavor can enhance your recipes, making it a worthy alternative to juniper berries.

    dill spices.

    8. Juniper Oil

    Juniper oil, an essential oil derived from juniper trees, can serve as a potent substitute for juniper berries in various applications.

    The oil carries the distinct flavor and aroma of the berries, making it an excellent choice when the berries are not readily available.

    When using juniper oil as a substitute for juniper berries, it's important to remember its concentration. A small amount can go a long way in replicating the unique taste of juniper berries.

    This essential oil's robust and woody flavor can add a new depth to your dishes, making it a worthy alternative to juniper berries.

    Lastly, while using juniper oil, remember to adjust other ingredients accordingly to balance the potent flavors.

    Juniper oil in a small bottle.

    9. Black Pepper

    Black pepper, a very special spice in numerous cuisines, can be used as a substitute for juniper berries. While it doesn't perfectly mimic the flavor of juniper berries, its spicy and slightly sweet taste can add flavor to your dishes in a similar way.

    When using black pepper as a substitute for juniper berries, particularly in vegetable soups, you'll find it imparts a lovely taste that complements the fresh produce. The key is to use it sparingly, as its flavor is quite robust.

    This versatile spice's warm and comforting flavor can add depth to your culinary creations, making it a worthy alternative to juniper berries.

    Whole black pepper.

    10. Cardamom

    Cardamom, with a distinct aroma and unique flavor, it can be an excellent substitute for juniper berries. This versatile spice comes in two varieties - green cardamom and black cardamom, both of which can be used in place of juniper berries.

    The green cardamom has a sweet and light flavor, while the larger dark brown pods of black cardamom offer a smoky, robust flavor. These spice pods can be used whole or ground to replace juniper berries in various recipes.

    Their distinct aroma blends well with other herbs, providing a rich, complex flavor that can elevate your dishes. While the taste is different, using cardamom as a substitute for juniper berries can introduce an exciting new flavor dimension to your culinary creations.

    Cardamon in a wooden bowl.

    11. Gin

    Gin, particularly authentic juniper gins, can serve as a unique substitute for juniper berries in various culinary applications.

    The spirit, made from the berries of the juniper tree, carries an intense flavor that mirrors that of juniper berries. This makes gin an ideal substitute when the actual berries are unavailable.

    Its distinct, aromatic qualities can infuse your dishes with the same refreshing essence that juniper berries would offer.

    In essence, using gin as a substitute for juniper berries allows you to maintain the desired flavor profile while adding an exciting twist to your recipes.

    12. Alder Wood Chips

    Alder wood chips, though unconventional, can be used as a substitute for juniper berries in certain culinary contexts. Specifically, when it comes to smoking or grilling meats, alder wood chips can impart a flavor that's reminiscent of the unique, pine-like taste of juniper berries.

    The smoke from these chips permeates the meat, infusing it with a complex, earthy flavor. While the taste is not identical to that of juniper berries, it offers a similar rustic, outdoorsy essence.

    Thus, in specific cooking techniques like grilling, alder wood chips can serve as a creative and functional substitute for juniper berries.

    Alder wood chips.

    13. Hickory Spice

    Hickory spice, known for its milder smoky taste, can work as a substitute for juniper berries in certain dishes.

    When incorporated into spice rubs, hickory spice can mimic the unique flavor of juniper berries, offering a smokey flavor that enhances the overall taste of the dish.

    It works especially well in vegetable recipes where the hickory's subtle smokiness can complement the fresh flavors of the produce.

    By blending hickory spice with other spices, you can create a complex flavor profile that, while not identical to juniper berries, offers a similar depth and rustic charm. So, in the absence of juniper berries, hickory spice can provide a flavorful alternative.

    Hickory spice.

    What Is a Juniper Berry?

    A juniper berry is actually a cone from the juniper shrub and not a true berry, specifically from a species known as Juniperus communis. These "berries" are small, round, and typically blue or black in color.

    They have a tart, slightly sweet flavor with a hint of pine, and are often dried for culinary use. Juniper berries are most famously known for their role in flavoring gin.

    Additionally, they are used in various cuisines worldwide, particularly in European dishes, for their distinctive taste and aroma.

    What Does a Juniper Berry Look Like?

    Juniper berries are the fruits of the juniper shrub, typically pale blue in color and about three millimeters in diameter. Contrary to their name, they are not true berries but fleshy cones.

    These cones are often covered with a white powdery bloom that gives them a frosted appearance. The leaves accompanying the berry are scale-like and resemble those of a white cedar with a bluish hue.

    What Does a Juniper Berry Taste Like?

    Juniper berries have a distinct and robust flavor that sets them apart in the culinary world. The taste of these berries is a complex mix of sweet and bitter, leading to a unique tartness that lingers on the palate.

    The flavor profile is further enhanced by a woody undertone, which adds depth to its overall taste. When crushed, juniper berries release an intensified version of their flavor, making them a preferred choice for dishes that require a strong aromatic component.

    This combination of robust and tart flavor with a woody nuance makes juniper berries a versatile ingredient in many recipes.

    What Are Juniper Berries Used For?

    Juniper berries are a versatile ingredient used in a variety of dishes. Their unique flavor complements savory dishes, adding a robust and tart taste that enhances the overall flavor profile.

    In meat dishes, juniper berries are often used as a spice to add a hint of sweetness. They're also a common addition to sauerkraut dishes, where their tangy flavor balances out the fermented cabbage's sourness.

    Even in sweet dishes, the berries' subtle sweetness can provide an interesting contrast. Juniper berries are also used in vegetable dishes, where their distinct flavor adds depth.

    Beyond their culinary uses, juniper berries are also used to produce natural essential oils due to their strong aroma and medicinal properties.

    So, What Are the Best Substitutes for Juniper Berries?

    In conclusion, if you find yourself without juniper berries, numerous substitutes can replicate or complement their unique flavor.

    Caraway seeds, bay leaves, star anise, and even gin can offer similar aromatic notes, while ingredients like rosemary, lingonberries, and allspice berries bring their own distinct profiles to the table. For a smoky twist, hickory spice and alder wood chips are unconventional but creative alternatives.

    Each substitute can add depth and complexity to your dishes, allowing you to experiment and create delicious meals even when juniper berries are not available.

    Spinach Rice Casserole With Creamy Feta

    January 11, 2024 by Angela Milnes

    Spinach Rice Casserole With Feta Cheese.

    This Spinach Rice Casserole with Feta Cheese is the kind of cozy-meets-fresh dish that makes dinner feel both effortless and exciting. Think creamy feta, fluffy brown rice, savory sautéed spinach, and a kiss of dill—all baked to golden perfection. It’s hearty, flavorful, and comes together with simple ingredients you probably already have at home. Bonus? It makes a great meatless main or the ultimate Mediterranean-style side!

    Cooked Spinach Rice Casserole With Feta Cheese in a skillet.

    Spinach and feta is a flavor combo that never goes out of style—it’s earthy, creamy, salty, and comforting all at once. This spinach rice casserole is a wholesome, flavor-packed bake that brings together hearty grains, leafy greens, and creamy cheese—all in one easy dish that’s perfect for any night of the week. If you love the flavor of spanakopita then you'll want to add this veggie-forward dish to your rotation.

    Inspired by my love for baked Mediterranean flavors, this cheesy casserole pairs beautifully with pan-fried creamy salmon or greek feta salad for a complete meal.

    [feast_advanced_jump_to]

    💖 Why This Recipe Works

    • Easy to Make – Basic pantry staples, minimal chopping, and one pan to bake it all in.
    • Perfect Texture – Creamy, fluffy, and just a little crisp on top.
    • Versatile – Serve it as a vegetarian main or a side dish with grilled meats or paprika shrimp.
    • Packed with Flavor – Feta, dill, garlic, lemon... it’s a flavor-packed bite every time!

    🌟 Star Ingredients

    Spinach Feta Casserole Ingredients in separate bowls.
    • Spinach – Loaded with iron and vibrant green goodness, spinach is the veggie backbone of this dish. You can use fresh or frozen (thawed and squeezed dry).
    • Cooked Brown Rice – Adds a nutty, hearty texture and keeps things filling. Perfect for using up leftovers or meal-prepped rice.
    • Feta Cheese – Brings that salty, creamy, tangy kick that pairs perfectly with the spinach and herbs.
    • Eggs + Sour Cream – This duo helps hold everything together and gives the bake its creamy, fluffy texture with a little tang.

    For the complete list of ingredients with measurements and instructions, please see the recipe card at the bottom of the post.

    📖  Substitutions & Variations

    • No Dill? Try basil, oregano, or a pinch of mint instead.
    • Want Protein? Stir in leftover grilled chicken, cooked turkey, or chickpeas.
    • Extra Cheesy? Add a handful of mozzarella or cheddar for gooey, melty goodness.
    • Amp the Mediterranean Vibes – Toss in olives, sun-dried tomatoes, or chopped artichokes.

    🔪How To Make Spinach Rice Casserole

    Cooking shallots in a skillets.
    1. Step 1: Preheat the Oven to 425°F (220°C). Heat olive oil in a cast iron skillet over medium heat. Sauté the shallots until tender,
    spinach mixture in a pan.
    1. Step 2: Add the spinach and garlic, cooking until the spinach is just warmed. Remove from heat and allow to cool slightly.
    Stirring in rice, feta, dill, salt & pepper, and lemon juice with cooked shallots in a skillets.
    1. Step 3: Combine the cooked spinach mixture with rice, feta cheese, dill, salt, pepper, and a squeeze of fresh lemon juice.
    Sour cream and eggs to beat in a bowl.
    1. Step 4: In a separate bowl, whisk together the eggs and sour cream until smooth.
    egg mixture, spinach, feta and rice combined in a skillet.
    1. Step 5: Pour the egg and sour cream into the rice mixture, stirring thoroughly to combine.
    Cooked spinach feta casserole in a cast Iron skillet.
    1. Step 6: Spread the mixture evenly in the skillet, smoothing the top. Bake for 20-25 minutes, or until the top is light golden brown.
    spinach rice casserole with feta cheese on a plate.
    1. Step 7: Allow the casserole to rest for 5 minutes before serving to let the flavors settle.
    Close view of spinach feta casserole.
    1. Step 8: Serve your spinach rice casserole on its own or with your favorite meat dish.

    💡 Hint: Make this ahead! This spinach rice casserole holds up beautifully in the fridge and tastes even better the next day. Just reheat gently and enjoy leftovers for lunch all week long.

    👩‍🍳 Expert Tips

    • Use Day-Old Rice: It's drier and helps the casserole hold its shape better.
    • Go for Block Feta: Crumble it yourself for a creamier, more flavorful bite.
    • Add a Crunchy Topping: Sprinkle breadcrumbs or crushed crackers on top before baking for a golden, crispy finish that adds texture and extra flavor.

    💭 FAQs

    Can I use frozen spinach in spinach rice casserole?

    Yes, you can use frozen chopped spinach instead of fresh. Just thaw it first and press out excess water with a towel or cheesecloth.

    Do I have to use brown rice?

    Not at all. White rice, basmati, or even quinoa will work—just adjust cook time accordingly.

    Can I bake this in a casserole dish instead of a skillet?

    Yes, you can cook Spinach Rice Casserole in a baking dish! Simply transfer the mixture to a prepared baking dish, spread it evenly, and bake as directed. A 9×13-inch dish works well for most recipes.

    Does spinach rice casserole freeze well?

    Yes! Freeze in slices, wrap tightly, and reheat in the oven or microwave for an easy meal.

    Can I make it dairy-free?

    Swap in dairy-free feta and vegan sour cream if you like—just make sure the texture still holds.

    💖 Serving Suggestions

    This Spinach Rice Casserole with Feta Cheese is delicious all on its own, but here are a few dreamy pairings:

    Pair this spinach rice casserole with Grilled Lemon Herb Chicken or Air Fried Cod Fillet for a filling main, or add Roasted Broccolini and Garlic Parmesan Breadsticks for a cozy vegetarian spread.

    Crispy Spinach Rice Casserole With Feta Cheese on a white plate.

    🍽 More Tasty Casserole Recipes

    • Air Fryer Sloppy Joe Cornbread Casserole Recipe.
      Air Fryer Sloppy Joe Cornbread Casserole Recipe
    • Oven baked sausage casserole in a pot.
      Oven Baked Sausage Casserole Recipe
    • Slow Cooker Million Dollar Chicken Casserole.
      Slow Cooker Million Dollar Chicken Casserole
    • Bacon and egg casserole in a pan.
      Make Ahead Bacon And Egg Casserole Recipe

    Did you make this recipe? Leave a review and a ⭐⭐⭐⭐⭐ rating below, or tag us in our Facebook Group! Alternatively, bookmark it in your browser or save to Pinterest.

    Spinach Rice Casserole With Feta Cheese.

    Spinach Rice Casserole With Feta Cheese

    Angela Milnes
    Whip up this easy Spinach Rice Casserole With Feta Cheese for a cozy, family-friendly dinner! Packed with creamy feta, savory spinach, and fluffy rice.
    5 from 1 vote
    Print Recipe Pin Recipe Rate this Recipe
    Cook Time 25 minutes mins
    10 minutes mins
    Total Time 35 minutes mins
    Course American Recipes, Mediterranean
    Cuisine Main Course
    Servings 4 Servings
    Calories 824 kcal

    Ingredients
      

    • 3 tbsp. Olive Oil
    • ½ Cup Shallot Chopped Fine
    • 10 oz. Frozen Spinach Thawed, Squeezed
    • 2 tbsp. Garlic Minced
    • 3 Cups Brown Rice Cooked
    • ¾ Cup Feta Cheese Crumbled
    • 1 tsp. Dry Dill
    • Pinch Salt
    • Pinch Pepper
    • 4 Eggs
    • ¼ Cup Sour Cream
    • 1 tbsp. Lemon Juice

    Instructions
     

    • Preheat the Oven to 425°F (220°C). Heat olive oil in a cast iron skillet over medium heat. Sauté the shallots until tender.
    • Add the spinach and garlic, cooking until the spinach is just warmed. Remove from heat and allow to cool slightly.
    • Combine the cooked spinach mixture with rice, feta cheese, dill, salt, pepper, and a squeeze of fresh lemon juice.
    • In a separate bowl, whisk together the eggs and sour cream until smooth.
    • Pour the egg and sour cream into the rice mixture, stirring thoroughly to combine.
    • Spread the mixture evenly in the skillet, smoothing the top. Bake for 20-25 minutes, or until the top is light golden brown.
    • Allow the casserole to rest for 5 minutes before serving to let the flavors settle.
    • Serve your spinach rice casserole on its own or with your favorite meat dish.

    Notes

      • Frozen Spinach is Totally Fine: Just thaw and squeeze out any moisture before adding to the skillet.
      • Use Day-Old Rice: It's drier and helps the casserole hold its shape better.
      • Go for Block Feta: Crumble it yourself for a creamier, more flavorful bite.

    Nutrition

    Calories: 824kcalCarbohydrates: 120gProtein: 24gFat: 28gSaturated Fat: 9gPolyunsaturated Fat: 4gMonounsaturated Fat: 13gTrans Fat: 0.02gCholesterol: 197mgSodium: 451mgPotassium: 850mgFiber: 8gSugar: 4gVitamin A: 8773IUVitamin C: 9mgCalcium: 339mgIron: 5mg
    Print Recipe Pin Recipe Rate this Recipe
    Tried this recipe?Let us know how it was!
    Spinach feta casserole in a plate ready to be served.

    Does Flaxseed Go Bad?

    December 15, 2023 by Angela Milnes

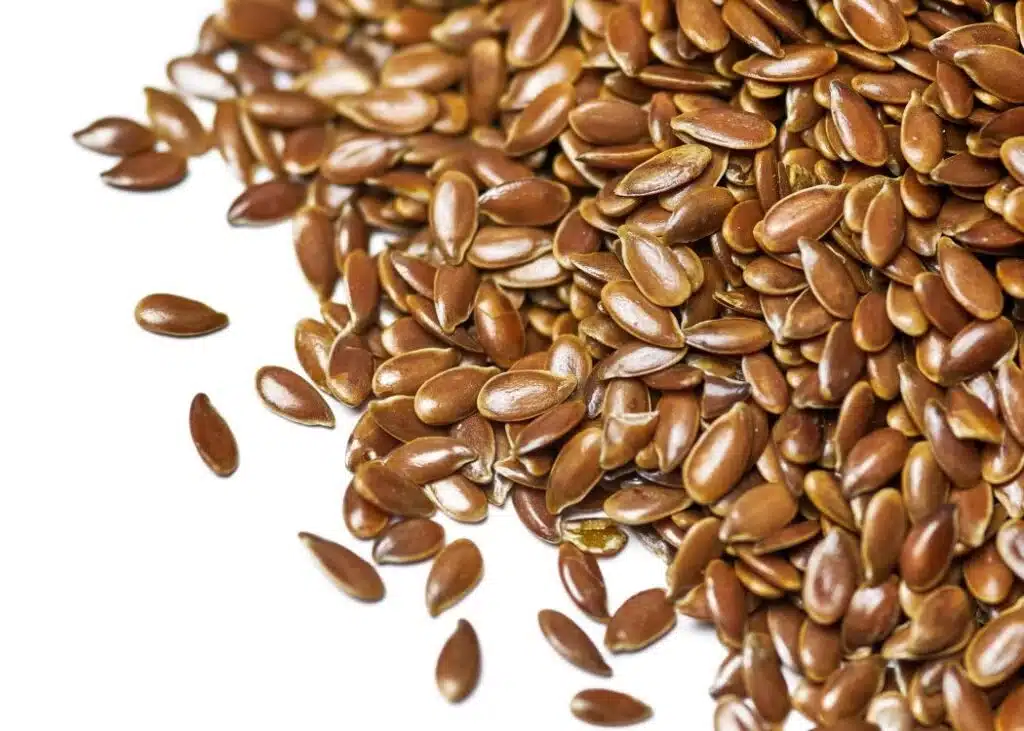
    Flaxseeds in a measuring spoon.

    Flaxseed has quickly become a popular food on the market. It can be added to Smoothies, Salads and more, but Does Flaxseed Go Bad? We'll answer this question in depth so you can ensure the flaxseed you buy remains fresh for a long time.

    Does Flaxseed Go Bad
    [feast_advanced_jump_to]

    Does Flaxseed Go Bad?

    The answer is yes. Regardless of the form - whole flaxseed, ground flaxseed, or opened flaxseed - they all have the potential to spoil over time.

    Whole flaxseeds, despite their hard outer shell can still go bad. Similarly, ground seeds also have a lifespan and can spoil.

    Opened flaxseed is equally susceptible to spoilage. Once the package is opened, these seeds are exposed to air, light, and heat, which can accelerate the spoilage process.

    While flaxseeds are a great addition to any diet, it's important to remember that like any food product, they have a shelf life and can indeed go bad.

    How Long Does Flaxseed Last?

    Whole seeds generally have a longer shelf life for up to 2 years as compared to ground flaxseed which has shelf life for up to 6 months. This is Due To The Unsaturated Fats Present In Flaxseeds which can cause them to go rancid quickly when exposed to air.

    The protective shell of whole seeds helps preserve their freshness for an extended period, while ground flax seeds, being more exposed, tend to spoil faster.

    Does Flaxseed Expire?

    When flaxseed is purchased, it does not typically come with an expiration date printed on the package. Instead, its shelf life depends largely on various factors such as storage conditions and the freshness of the seeds at the time of purchase.

    Therefore, it's important to consider these aspects to ensure you're consuming fresh and beneficial flaxseeds.

    How To Tell If Flaxseed Has Spoiled?

    Flax seeds, whether whole or ground, can go bad over time. It's important to know how to identify spoiled flaxseed to maintain food safety. Here are some tell-tale signs:

    • Bitter Taste: Fresh flaxseed has a mild, nutty flavor. If your flaxseed tastes bitter, it's likely gone rancid and should be discarded.
    • Smell Like Old Paint or Nail Polish Remover: A strong, unpleasant smell similar to old paint or nail polish remover is a clear indication of spoilage. This happens when the oils in the flaxseed oxidize and become rancid.
    • Hard Blocks: If you find hard blocks or clumps in your flaxseed, it indicates that moisture has gotten inside the package. Moisture accelerates the spoiling process and can prompt mold to begin growing.
    • Mold Begins to Grow: Mold is a definite sign of spoilage. If you see any mold, it's best to discard the entire package.
    • Months Past Storing Time: Even when stored properly, flaxseed can still spoil over time. Whole flaxseed typically lasts longer than ground flaxseed. If your flaxseed is several months past the suggested storing time, it may be best to replace it.

    How To Store Flaxseed?

    Flaxseeds, when stored properly, they can retain their benefits for a long period. Here's how to store flaxseeds to ensure they're always fresh.

    1. Preparation For Storage

    Before you store flaxseeds, it's crucial to ensure that the flaxseed container is clean and dry. Any moisture can accelerate the degradation process, leading to spoilage. Whether you're storing whole flaxseed or ground flaxseed, this step is essential.

    2. Choose The Right Flaxseed Container

    An airtight container is an ideal choice for storing flaxseeds. These containers prevent air from entering, which can otherwise speed up the oxidation process and spoil the seeds. Ensure the container is sealed tightly after every use to maintain freshness.

    3. Storing Whole Flaxseeds

    Whole flaxseeds have a hard outer shell that naturally protects the inner seed, and therefore, they have a longer shelf life compared to ground flaxseed.

    You can store whole flaxseeds at room temperature in a pantry, away from heat and light. However, make sure the container is shut properly to keep out pantry bugs.

    4. Storing Ground Flaxseed

    Ground flaxseed that is also known as flax meal is more prone to spoilage due to increased exposure to air. Therefore, it must be properly stored in the refrigerator section or freezer to prolong its shelf life.

    The cold temperature slows down the oxidation process, keeping the flax meal fresh for a longer period.

    5. Using A Bag For Storage

    If you don't have an airtight container, you can also use a bag to store flaxseeds. Just make sure it can be sealed tightly to prevent air exposure. Bags are convenient for storing flaxseed in the fridge or freezer.

    Whether you're storing whole flaxseeds or ground flaxseed, the key is to keep them in an airtight container, sealed tightly, and stored properly away from heat, light, and moisture. Following these steps will ensure your flaxseeds stay fresh for longer.

    FAQ'S

    What Are The Ways To Enjoy Flaxseeds?

    Whether you prefer to eat flaxseeds as whole seeds, ground into flax meal or flaxseed meal, or even used as an egg substitute, here's how to make the most of this superfood:

    Add Flaxseeds To Baked Goods

    One popular way to incorporate flaxseeds into your diet is by adding to baked products. You can sprinkle whole flaxseeds on top of Homemade Bread or Zucchini Chocolate Chip Muffins before baking for a crunchy texture and a nutty flavor.

    Use Flaxseeds As An Egg Substitute

    f you're following a vegan diet or simply want to reduce your egg consumption, flaxseeds can come to your rescue. A 'flax egg', a popular egg substitute is perfect for use in baking recipes.

    Store Flaxseed Well

    In conclusion, flaxseeds, like many other food products can deteriorate, becoming rancid and losing their flavor and taste. To make the most of this seed, it's crucial to store flaxseeds correctly by keeping them in an airtight container in the refrigerator or freezer.

    Learn More About Different Foods Here

    • What Does Starfruit Taste Like?
    • Does Coconut Oil Go Bad?
    • Does Brie Go Bad?
    • What Is Truffle Butter?

    Best Pecan Bacon Cheese Ball Recipe

    December 8, 2023 by Angela Milnes

    Best Pecan Bacon Cheese Ball Recipe.

    Get ready to elevate your snack game with this Pecan Cheese Ball recipe. Creamy cream cheese, triple cheddar, crispy bacon, and crunchy pecans rolled into one delicious ball. Topped with scallions, everything bagel seasoning, and a hint of onion-garlic magic, this recipe is perfect for dipping with your fave crackers or veggies.

    Pecan Bacon Cheese Ball.
    [feast_advanced_jump_to]

    Why This Recipe Works

    • Sensational Flavor Blend: Revel in the perfect harmony of creamy cheddar, crispy bacon, and nutty pecans, delivering a taste sensation that's simply irresistible.
    • Effortless Elegance: Elevate any occasion with this easy-to-make Pecan Bacon Cheeseball, a crowd-pleaser that adds a touch of sophistication to your snack game.
    • Textural Delight: Dive into a medley of textures – from velvety creaminess to crunchy bacon and pecans – creating a satisfying and flavorful experience in every bite.

    🥘 Ingredients

     Pecan Bacon Cheese Ball Ingredients
    • Cream Cheese: Provides a smooth, creamy base that melds all flavors together.
    • Triple Cheddar Cheese: Adds layers of rich, cheesy flavor to the dish.
    • Bacon Bits: Infuse a crispy, smoky element for a savory undertone.
    • Chopped Pecans: Lend a nutty flavor and crunchy texture.
    • Sliced Scallions: Offer a burst of color and a fresh, mild onion note.
    • Milk: Ensures a creamy consistency and ease of mixing.
    • Everything Bagel Seasoning: Elevates the taste with a savory, herby punch.
    • Onion Powder: Enhances the savory depth without overpowering.
    • Garlic Powder: Infuses a gentle warmth and complements overall flavor.
    • Salt: Harmonizes the flavors and enhances the savory elements.
    • Black Crushed Pepper: Rounds out the dish with a subtle hint of heat.

    For the complete list of ingredients with measurements and instructions, please see the recipe card at the bottom of the post.

    📖  Substitutions & Variations

    This recipe is for a bacon pecan cheeseball however you can make many different types of cheese balls. Here are some suggestions:

    • Garlic & Herb Goodness – Cream cheese, fresh herbs, a little onion powder, and a crunchy cracker coating? Yes, please! Perfectly savory and totally addictive.
    • Mediterranean Magic – Sun-dried tomatoes, fresh basil, and a splash of balsamic make this one taste like a fancy little trip to Italy. Roll it in nuts for extra crunch!
    • Spicy & Cheesy – Sharp cheddar + jalapeños + a cayenne kick = a cheeseball with attitude. Coat it in crushed tortilla chips for that extra crunch!
    • Sweet & Tangy – Cream cheese, honey, cranberries, and a hint of cinnamon rolled in crushed graham crackers? Dessert cheeseball, anyone?
    • Brunch Vibes – Smoked salmon, capers, and dill mixed into cream cheese, then rolled in everything bagel seasoning? Basically a bagel without the bagel!

    Feel free to experiment with different flavor combinations to suit your taste preferences and occasions!

    🔪How To Make A Cheese Ball

    Cheeseball Recipe

    Step One: In a medium-sized bowl, combine cream cheese, shredded cheese, all seasonings, and milk. Use a hand mixer to beat cream cheese and cheddar until well combined.

    Cheeseball Recipe

    Step Two: Add half of the bacon bits, fresh green onions, and pecans (chopped into smaller pieces) to the mixture.

    Cheeseball Recipe

    Step Three: Place a piece of plastic wrap on the counter, transfer the cheese ball mixture onto it, and wrap it into a ball shape. Refrigerate the cheeseball for 20 minutes.

    Cheeseball Recipe

    Step Four: In a shallow bowl, combine the remaining chopped pecans, bacon bits, and green onions.

    Cheeseball Recipe

    Step Five: Remove the cheeseball from the fridge and roll it in the prepared coating mixture.

    Cheeseball Recipe

    Step Six: Properly coat your cheeseball. Serve with crackers or your preferred choice. Enjoy!

    Cheeseball Recipe

    👩‍🍳 Expert Tips

    • Wrap and Shape: After mixing your cheeseball ingredients, place plastic wrap on the counter, transfer the mixture onto it, and wrap it up tightly. This makes it easier to shape the cheeseball into a round form.
    • Chill for Easy Handling: Pop the wrapped cheeseball into the fridge for about 20 minutes. Chilling firms up the mixture, making it easier to handle and shape into a perfect round ball.
    • Coating Consistency: When applying the outer coating, ensure an even layer by rolling the cheeseball in a shallow bowl containing your chosen coating. This guarantees a uniform appearance and a delightful combination of flavors in every bite.
    • Gentle Rolling: When rolling the cheeseball in the coating, use a gentle touch to maintain its round shape. A light touch ensures a consistent coating without distorting the ball's form.

    💭 FAQs

    Can I make The Cheeseball Ahead Of Time?

    Yes! In fact, making the cheeseball ahead allows flavors to meld. Just wrap it tightly, refrigerate, and coat it with toppings just before serving.

    Can I Freeze A Cheeseball?

    It's not recommended. Freezing may alter the texture, especially if it has coatings. For the best taste and texture, enjoy it fresh or refrigerate for short periods.

    What If I Don't Have All The Ingredients?

    Get creative! Cheeseballs are versatile. Mix and match ingredients based on what you have. It's all about personal preference and experimenting. a cheeseball can have so much flavor.

    Does It Matter If I Use Pre Shredded Cheese?

    Pre-shredded cheese often contains anti-caking agents to prevent clumping. This can affect the texture and meltability, potentially resulting in a slightly different consistency compared to cheese shredded at home.

    🧂Serving Suggestions

    Serve your cheeseball platter with any of the following items:

    Cheese Balls and Crackers:

    • Classic Bagel Crackers
    • Whole grain crackers
    • Multigrain crisps

    Bread:

    • Sliced baguette
    • Crostini
    • Pita bread triangles

    Vegetables:

    • Cherry tomatoes
    • Baby carrots
    • Cucumber slices
    • Bell pepper strips

    Fruits:

    • Apple slices
    • Grapes (red or green)
    • Pear wedges

    Dips and Spreads:

    • Beetroot Hummus
    • Fig jam
    • Olive tapenade
    • Sour cream

    Chopped Nuts:

    • Almonds
    • Walnuts
    • Pecans

    Pickles and Olives:

    • Gherkins
    • Kalamata Olives
    • Stuffed Green Olives

    Charcuterie:

    • Prosciutto
    • Salami
    • Sliced Ham

    Cheese:

    • Additional cheese varieties to complement the cheeseball

    Dried Fruits:

    • Apricots
    • Figs
    • Raisins

    Mustards:

    • Dijon Mustard or a Dijon Mustard Substitute.
    • Whole-grain mustard

    Chutneys:

    • Mango Chutney
    • Cranberry Chutney
    • Hot Sauce

    Feel free to mix and match items from these categories to create a diverse and delightful spread that complements your cheeseball.

    Cheeseball Recipe

    🍽 Related Recipes

    • einkorn angel hair and cherry tomato pasta in a white bowl.
      One-Pan Einkorn Angel Hair Pasta with Cherry Tomatoes
    • Salmon Dill Puree.
      Lemon Dill Salmon Mousse (Bariatric Friendly)
    • close-up-watermelon-slices-with-blackberry-plastic-disposable-cup-perfect for a summer party.
      How To Host An Awesome Summer Party
    • Oven baked lobster tail with garlic butter and lemon.
      How To Cook Lobster Tail At Home

    Did you make this recipe? Leave a review and a ⭐⭐⭐⭐⭐ rating below, or tag us in our Facebook Group! Alternatively, bookmark it in your browser or save to Pinterest.

    Best Pecan Bacon Cheese Ball Recipe.

    Pecan Bacon Cheese Ball

    Angela Milnes
    Elevate your appetizer game with this irresistible Pecan Cheese Ball! Creamy, savory cheese is mixed with herbs and spices, then rolled in crunchy, buttery pecans for a delightful contrast of textures and flavors.
    5 from 3 votes
    Print Recipe Pin Recipe Rate this Recipe
    Prep Time 5 minutes mins
    Cook Time 0 minutes mins
    Additional Time 15 minutes mins
    Total Time 20 minutes mins
    Course Appetizers
    Cuisine American
    Servings 8 Serving
    Calories 278 kcal

    Ingredients
      

    • 8 oz Cream Cheese
    • 1 cup Shredded Triple Cheddar Cheese
    • ½ cup Bacon Bits
    • ½ cup Chopped Pecans
    • ¼ cup Sliced Scallions
    • 2 tablespoon Milk
    • 2 teaspoon Everything Bagel Seasoning
    • ¼ teaspoon Onion Powder

    Instructions
     

    • In a medium-sized bowl, combine cream cheese, shredded cheese, all seasonings, and milk. Use a hand mixer to beat cream cheese and chedder until well combined.
    • Add half of the bacon bits, fresh green onions, and pecans (chopped into smaller pieces) to the mixture.
    • Place a piece of plastic wrap on the counter, transfer the cheese ball mixture onto it, and wrap it into a ball shape.
    • Refrigerate the cheeseball for 20 minutes.
    • In a shallow bowl, combine the remaining chopped pecans, bacon bits, and green onions.
    • Remove the cheeseball from the fridge and roll it in the prepared coating mixture, ensuring an even coat.
    • Serve with crackers or your preferred choice. Enjoy!

    Notes

    Wrap and Shape: After mixing your cheeseball ingredients, place plastic wrap on the counter, transfer the mixture onto it, and wrap it up tightly. This makes it easier to shape the cheeseball into a round form.
    Chill for Easy Handling: Pop the wrapped cheeseball into the fridge for about 20 minutes. Chilling firms up the mixture, making it easier to handle and shape into a perfect round ball.
    Coating Consistency: When applying the outer coating, ensure an even layer by rolling the cheeseball in a shallow bowl containing your chosen coating. This guarantees a uniform appearance and a delightful combination of flavors in every bite.
    Gentle Rolling: When rolling the cheeseball in the coating, use a gentle touch to maintain its round shape. A light touch ensures a consistent coating without distorting the ball's form.

    Nutrition

    Serving: 1gCalories: 278kcalCarbohydrates: 8gProtein: 11gFat: 23gSaturated Fat: 10gPolyunsaturated Fat: 4gMonounsaturated Fat: 7gCholesterol: 43mgSodium: 510mgPotassium: 113mgFiber: 2gSugar: 2gVitamin A: 563IUVitamin C: 1mgCalcium: 154mgIron: 0.4mg
    Print Recipe Pin Recipe Rate this Recipe
    Tried this recipe?Let us know how it was!

    More Great Recipes

    If you love this Pecan Cheese Ball Recipe then you'' also want to try the following:

    • Easy Texas Smoked Turkey Breast
    • Baked Spaghetti Squash
    • Avocado Salad
    • Air Fryer Shrimp With Paprika And Garlic
    • Smoked Salmon Dip
    • Mini Cheese Stuffed Peppers
    Cheeseball Recipe

    Christmas Snowman Cupcakes

    December 7, 2023 by Angela Milnes

    Christmas Snowman Cupcakes.

    These Christmas Snowman Cupcakes have the perfect balance of flavors and textures and have a cute little look that make them a total winner to make and serve at your next Christmas party.

    Christmas Snowman Cupcakes.
    [feast_advanced_jump_to]

    If you love these snowman cupcakes e sure to enjoy this recipe for Greek Yogurt Protein Cake.

    💖 Why This Recipe Works

    • Simple Ingredients: The beauty of this snowman cupcakes recipe lies in its simplicity. With common ingredients that are easy to find in any kitchen, these cupcakes are a breeze to make.
    • Fun Family Activity: Decorating these cupcakes is a fun activity for the whole family. From making fondant snowmen to adding scarves and hats, everyone can join in to create their own unique snowman friend.
    • Deliciously Moist: These snowman cupcakes are not just visually appealing; they taste heavenly too. The recipe guarantees moist and fluffy cupcakes, ideal for sweet decorations. A delightful treat for both the eyes and taste buds.

    ⭐ Star Ingredients

    Christmas Snowman Cupcakes ingredients labelled.

    Ingredients For Decoration

    • Sweet Straws: Act as the stick arms of your snowman, adding a whimsical and sweet touch to your cupcakes.
    • Marshmallow: Serve as the body of your snowman, providing a fluffy, sweet, and visually appealing element.
    • Colored Candies: Are used to create the eyes, nose, and buttons of your snowman, adding fun pops of color and sweetness.
    • Jam: Can be used for additional decoration or flavoring, offering a fruity contrast to the other ingredients.
    • Food Colorings: Can be used to tint icing or other elements of your cupcakes, allowing for creative customization.

    Ingredients For Cream

    • Curd Cheese: Contributes to the creaminess and tanginess of your cream filling, enhancing the overall richness of your cupcakes.
    • Marshmallow: When melted into the cream, it adds a delightful sweetness and lightness to your snowman cupcakes.
    • Milk: Thins out your cream to the right consistency, ensuring it's easy to work with.
    • Heavy Cream: Is whipped into the cream filling to add richness and help achieve a fluffy texture.

    Ingredients For Dough

    • Powdered Sugar: Sweetens your cupcake dough, while also helping to create a light and tender crumb.
    • Vegetable Oil: Keeps your cupcakes moist and helps to extend their freshness.
    • Egg: Acts as a binding ingredient in your dough, ensuring all the ingredients mix together properly.
    • Vanilla Extract: Adds a hint of warm, aromatic flavor that enhances the taste of your cupcakes.
    • Flour: Is the main structural ingredient in your cupcakes, providing the necessary gluten for them to hold their shape.
    • Baking Soda: Acts as a leavening agent, causing your cupcakes to rise and become fluffy.
    • Yogurt: Adds moisture to your dough, ensuring your cupcakes are soft and tender.

    For the complete list of ingredients with measurements and instructions, please see the recipe card at the bottom of the post.

    📖  Substitutions & Variations

    • Baking Powder: Don't have the soda? You can use some baking powder instead to help the snowmen cupcakes rise and get fluffy.
    • Orange Food Coloring: Can be used as an optional ingredient for the snowman cupcakes, particularly for adding a vibrant touch to the marshmallow or cream to create carrot-nose details. It enhances the visual appeal and brings a more joyful, festive look to each cupcake.

    🔪How To Make Snowman Cupcakes

    cupcake mixture in a bowl.
    1. Step 1: Prepare all ingredients. Mix all dry ingredients for the dough.
    Cupcake lineres for snowman Christmas cupcakes.
    1. Step 2: In paper cupcake liners, put some dough, a little jam, and dough again. Bake in a preheated oven at 190 degrees for about 20 minutes. Cool down.
    Melted marshmallows.
    1. Step 3: Dissolve the marshmallows in hot milk and cool down.
    whipped cream in a bowl for making snowman Christmas cupcakes.
    1. Step 4: Add whipped cream with curd cheese and whisk everything. Put the white frosting on your delicious cupcakes (You can optionally use a piping bag).
    decorated marshmallows on a plate.
    1. Step 5: On marshmallows, paint the faces of the snowmen with food coloring.
    snowman Christmas cupcakes.
    1. Step 6: Put snowman faces on cupcakes. Add sticks - hands and sweets - buttons. Your snowman cupcakes are ready to serve. Enjoy!

    👩‍🍳 Expert Tips

    • Quick Start with Cake Mix: If you want to cut down the cooking time for this recipe, you can start off by simply using some cake mix instead of scratch-making the cupcakes. I would recommend using white cake mix, but if you really love the chocolate flavor, you can also choose to use chocolate cake mix instead.
    • Frosting Choices: You can also choose to use your classic vanilla frosting or vanilla buttercream frosting to frost the cupcakes instead of making it from scratch.
    • Buttery Flavor Boost: To lend some extra flavor and richness to these vanilla cupcakes, you can add some unsalted butter to the cake batter as well.
    • Cool Before Frosting: Remember to frost cupcakes after they have reached room temperature. Once you let the cupcakes cool completely, they'll hold on to the frosting better.

    💭 FAQs

    How Else Can I Decorate the Snowman Cupcakes?


    If you don't have the sweet straws the recipe calls for, you can also choose to use pretzel sticks instead.

    You can also add some cocoa powder and mini chocolate chips to the cupcake batter and top it with some black frosting or black icing to bring a bit of a variation to these melting snowman cupcakes.

    I've used food coloring to draw the eyes and nose for the snowmen, but you can also use a carrot nose and some edible eyes to make the snowman's eyes. This can be great to use as the snowman's buttons.

    How Should I Store Snowman Cupcakes?


    If you have leftover snowman cupcakes, transfer them to an airtight container and refrigerate them for up to 3 days.

    💖 Serving Suggestions

    These are my favorite drinks to serve with snowman cupcakes.

    • Serve with Hot Chocolate or a Mangonada drink.
    • Be sure to check out these delicious Christmas Breakfast Pancakes too, as a fun Christmas treat.
    Cute snowman  cupcakes with smarties buttons.

    🍽 More Sweets for Your Sweet Tooth

    • Papaya Banana Yogurt Ice Cream with Cashews.
      Best Banana Yogurt Ice Cream (With Papaya)
    • Best Pink Oreo Millecrepes.
      Best Pink Oreo Millecrepes
    • Creamy Vanilla Eclair Cake.
      Creamy Vanilla Eclair Cake
    • Traditional Banana Cream Pie.
      Old Fashioned Banana Cream Pie

    Did you make this recipe? Leave a review and a ⭐⭐⭐⭐⭐ rating below, or tag us in our Facebook Group! Alternatively, bookmark it in your browser or save to Pinterest.

    Christmas Snowman Cupcakes.

    Christmas Snowman Cupcakes

    Angela Milnes
    Bring some winter magic to your dessert table with these adorable Snowman Cupcakes! Fluffy cupcakes are topped with creamy frosting and decorated to look like jolly snowmen.
    5 from 3 votes
    Print Recipe Pin Recipe Rate this Recipe
    Prep Time 10 minutes mins
    Cook Time 20 minutes mins
    Total Time 30 minutes mins
    Course Desserts
    Cuisine American
    Servings 8 Servings
    Calories 418 kcal

    Ingredients
      

    Snowman Ingredients

    • 10 Sweet Straws
    • 8 Marshmallow
    • 16 Colored candies
    • 4 tablespoon Jam
    • Food Coloring

    Cream Mixture

    • 250 G Curd Cheese
    • 150g Marshmallow
    • 90 ml Milk
    • 75 ml Heavy Cream

    For The Cake Mix

    • 200 g Powdered Sugar
    • 200 ml Vegetable Oil
    • 2 Eggs
    • ½ teaspoon Vanilla Extract
    • 200g Flour
    • ½ teaspoon Soda
    • 150 mls Yogurt

    Instructions
     

    • Prepare all ingredients. Mix all dry ingredients for the dough.
    • Beat all the remaining ingredients for the dough and add to the dry ones. Knead the dough on medium-high speed using a stand mixer.
    • In paper cupcake liners, put some dough, a little jam and dough again. Bake in a preheated oven at 190 degrees for about 20 minutes. Cool down.
    • Marshmallows dissolve in hot milk. Cool down.
    • Add whipped cream with curd cheese and whisk everything. Put the white frosting on your delicious cupcakes (You can optionally use piping bag).
    • On marshmallows, paint the faces of the snowmen with food coloring.
    • Put snowman faces on cupcakes. Add sticks - hands and sweets - buttons. Your snowman cupcakes are ready to serve. Enjoy!

    Notes

    Quick Start with Cake Mix: If you want to cut down the cooking time for this recipe, you can start off by simply using some cake mix instead of scratch-making the cupcakes. I would recommend using white cake mix, but if you really love the chocolate flavor, you can also choose to use chocolate cake mix instead.
    Frosting Choices: You can also choose to use your classic vanilla frosting or vanilla buttercream frosting to frost the cupcakes instead of making it from scratch.
    Buttery Flavor Boost: To lend some extra flavor and richness to these vanilla cupcakes, you can add some unsalted butter to the cake batter as well.
    Cool Before Frosting: Remember to frost cupcakes after they have reached room temperature. Once you let the cupcakes cool completely, they'll hold on to the frosting better.
    Baking Powder Alternative: Don't have the soda? You can use some baking powder instead to help the snowmen cupcakes rise and get fluffy.

    Nutrition

    Calories: 418kcalCarbohydrates: 45gProtein: 6gFat: 24gSaturated Fat: 4gPolyunsaturated Fat: 14gMonounsaturated Fat: 6gTrans Fat: 0.2gCholesterol: 42mgSodium: 22mgPotassium: 65mgFiber: 1gSugar: 25gVitamin A: 60IUCalcium: 28mgIron: 1mg
    Print Recipe Pin Recipe Rate this Recipe
    Tried this recipe?Let us know how it was!

    More Cupcake Recipes

    • Zucchini Chocolate Chip Muffins
    • Berry Granola Bites
    • Christmas Popcorn Recipe
    • Chewy Chocolate Peppermint Cookies
    • Blood Sucking Vampire Cupcakes

    Best Christmas Popcorn Recipe

    December 1, 2023 by Angela Milnes

    Best Christmas Popcorn Recipe.

    Ready to make your holiday season a bit more magical? My Best Christmas Popcorn Recipe is here to do just that! It's simple, quick, and oh-so-festive, bringing joy and deliciousness straight to your kitchen. Trust me, you'll want to make this delightful Christmas treat a new holiday tradition!

    Christmas Popcorn recipe in a white bowl.
    [feast_advanced_jump_to]

    💖 Why This Recipe Works

    • Family Obsession: The simplicity of this Christmas popcorn recipe is what I love the most about it!
    • Simplicity: There's nothing like enjoying this fun holiday treat while watching Christmas movies- my entire family is obsessed with these!
    • Festive Enjoyment: Another fun idea is that you can make this Christmas popcorn with your kids and turn it into a nice holiday tradition.
    • This Christmas treat would pair perfectly with some Grinch Punch. Give it a try!

    ⭐ Star Ingredients

    Best Christmas Popcorn Recipe ingredients and labelled.
    • Popcorn (Already Popped): Provides a light and fluffy base for our festive treat—no need for popping popcorn at home.
    • White Candy Wafers: Are melted and drizzled over the popcorn, adding a sweet and creamy layer that helps the other ingredients stick.
    • M&Ms (Green and Red): These colorful candies add a festive touch, as well as a delightful chocolatey crunch to the mix.
    • Pretzels: Bring a savory element to the snack, offering a crunchy contrast to the sweetness of the candy and popcorn.
    • Red Sprinkles: Add an extra pop of color and a hint of additional sweetness, enhancing the festive feel of the popcorn with these holiday sprinkles.
    • Green Sprinkles: Similar to the red sprinkles, these contribute to the aesthetic appeal of the Christmas popcorn and add a subtle sugary touch.

    🔪 How To Make Christmas Popcorn?

    popcorn on a tray.
    1. Step 1: On a baking tray (you can use parchment paper), lay out the popped popcorn.
    christmas popcorn recipe on a baking sheet.
    1. Step 2: Then break up half of the pretzels and spread both the broken and whole pieces of pretzel over the popcorn.
    christmas popcorn recipe on a baking sheet. Drizzling chocolate over popcorn.
    1. Step 3: Spread out the M&Ms over the popcorn. Melt the candy wafers in the microwave in increments of 30 seconds, until its melted and liquid. Spread the melted candy wafers over the popcorn mix. Then add the sprinkles to the popcorn mix and toss everything to make sure the ingredients stick to each other.
    christmas popcorn recipe on a baking sheet. Drizzling chocolate over popcorn.
    1. Step 4: Once all ingredients are mixed, allow the popcorn mix to cool. This can be done by leaving the tray at room temperature until the candy has hardened. After the mixture has cooled and the candy has set, gently break apart any large clumps of Christmas popcorn to serve.
    Christmas Popcorn mix in a bowl.

    Expert Tips For Making Christmas Popcorn

    • Popcorn Choice: I have used regular salty popcorn for this recipe, but you can use any other flavored popcorn of your choice. Kettle corn is also a great option to consider.
    • Flavor Contrast: Salted popcorn, in my opinion, brings a nice flavor contrast to the sweetness of the white chocolate and other ingredients.
    • Extra Sweetness Option: If you want some extra sweetness into this holiday popcorn snack mix, you can use white chocolate popcorn.
    • White Chocolate: I have used melted white chocolate because it just helps the red and green candy pop out more. Also, it has a more subtle flavor as opposed to regular melted chocolate.
    • Microwave Melting Tip: When melting the candy wafers, be sure to stir between each 30-second increment to avoid burning the candy. A smooth, evenly melted candy is crucial for even coating.

    Substitutions

    • Candy Wafers Alternative: If you don't have the white candy wafers this recipe calls for, you can use Wilton candy melts or just some regular white chocolate chips.
    • Festive Fun Addition: To bring some more festive fun to this Christmas popcorn recipe, you can go beyond the festive sprinkles and add some crushed candy canes to the mix as well.

    Best Way To Store Christmas Popcorn

    • Storage: You can just move these Christmas treats to an airtight container and store them at room temperature for up to 3 days.
    Christmas Popcorn mix in a bowl.

    FAQ'S

    What Else Can I Add To The Christmas Popcorn Snack Mix?

    Your version of Christmas crunch can have practically anything you want it to have. I like to use salty popcorn tossed with some melted white chocolate, some candy canes, lots of Christmas sprinkles, crushed candy canes and when I'm feeling fancy, I like to make coated popcorn for this snack mix. To do this, I microwave popcorn and melt some red and green candy melts and coat the popcorn in them.

    🍽 Desserts You’ll Love

    • Air Fryer Cinnamon Sugar Soft Pretzels.
      Air Fryer Cinnamon Sugar Soft Pretzels
    • Beetroot Chocolate Cake.
      Best Beetroot Chocolate Cake Recipe (Moist + Festive!)
    • Traditional Banana Cream Pie.
      Old Fashioned Banana Cream Pie
    • Moist Honey Bun Cake With Vanilla Glaze.
      Moist Honey Bun Cake With Vanilla Glaze

    Did you make this recipe? Leave a review and a ⭐⭐⭐⭐⭐ rating below, or tag us on our Facebook Page! Alternatively, bookmark it in your browser or save to Pinterest.

    Best Christmas Popcorn Recipe.

    Best Christmas Popcorn Recipe

    Angela Milnes
    This sweet and salty treat is drizzled with colorful candy melts, sprinkled with holiday cheer, and mixed with your favorite festive add-ins like M&Ms or sprinkles.
    5 from 3 votes
    Print Recipe Pin Recipe Rate this Recipe
    Prep Time 5 minutes mins
    Cook Time 0 minutes mins
    Total Time 5 minutes mins
    Course Desserts
    Cuisine American
    Servings 6 Servings
    Calories 1135 kcal

    Ingredients
      

    • 6 cups Popcorn already popped
    • ½ cup White Candy Wafers
    • ¼ cup M&Ms green and red
    • 1.5 oz Pretzels
    • ½ teaspoon Red Sprinkles
    • ½ teaspoon Green Sprinkles

    Instructions
     

    • On a baking tray (you can use parchment paper), lay out the popped popcorn. Then break up half of the pretzels and spread both the broken and whole pieces of pretzel over the popcorn.
    • Spread out the M&Ms over the popcorn. Melt the candy wafers in the microwave in increments of 30 seconds, until its melted and liquid. 
    • Spread the melted candy wafers over the popcorn mix.
    • Then add the sprinkles to the popcorn mix and toss everything to make sure the ingredients stick to each other.
    • Once all ingredients are mixed, allow the popcorn mix to cool. This can be done by leaving the tray at room temperature until the candy has hardened.
    • After the mixture has cooled and the candy has set, gently break apart any large clumps of Christmas popcorn to serve. You can use your hands to carefully separate the pieces without crushing the popcorn.

    Notes

    Popcorn Choice: I have used regular salty popcorn for this recipe, but you can use any other flavored popcorn of your choice. Kettle corn is also a great option to consider.
    Flavor Contrast: Salted popcorn, in my opinion, brings a nice flavor contrast to the sweetness of the white chocolate and other ingredients.
    Extra Sweetness Option: If you want some extra sweetness into this holiday popcorn snack mix, you can use white chocolate popcorn.
    White Chocolate: I have used melted white chocolate, because it just helps the red and green candy pop out more. Also, it has a more subtle flavor as opposed to regular melted chocolate.
    Candy Wafers Alternative: If you don't have the white candy wafers this recipe calls for, you can use Wilton candy melts or just some regular white chocolate chips.
    Festive Fun Addition: To bring some more festive fun to this Christmas popcorn recipe, you can go beyond the festive sprinkles and add some crushed candy canes to the mix as well.
    Microwave Melting Tip: When melting the candy wafers, be sure to stir between each 30-second increment to avoid burning the candy. A smooth, evenly melted candy is crucial for even coating.

    Nutrition

    Calories: 1135kcalCarbohydrates: 205gProtein: 10gFat: 35gSaturated Fat: 12gPolyunsaturated Fat: 11gMonounsaturated Fat: 7gTrans Fat: 0.02gCholesterol: 13mgSodium: 590mgPotassium: 274mgFiber: 13gSugar: 137gVitamin A: 38IUVitamin C: 0.2mgCalcium: 114mgIron: 5mg
    Print Recipe Pin Recipe Rate this Recipe
    Tried this recipe?Let us know how it was!

    More Holiday Recipes

    • Holiday Spiced Cookies
    • Mickey Mouse Cake Pops
    • Delicious Christmas Brownie
    • Christmas Snowman Cupcakes
    • Christmas Minnie Mouse Cookies

    Easy Texas Smoked Turkey Breast

    November 27, 2023 by Angela Milnes

    Easy Texas Smoked Turkey Breast.

    This juicy and flavorful Texas Smoked Turkey Breast recipe is perfect, mouthwatering BBQ dish that everyone will love. Making it is super easy- you'll need just a few minutes of prep time and really simple pantry staples to put it together.

    Texas Smoked Turkey Breast
    [feast_advanced_jump_to]

    Serve with a delicious Turkey recipe with, Potatoes Au Gratin, Roasted Dutch Carrots or a tasty Beet and Sweet Potato Salad for the perfect meal!

    💖 Why This Recipe Works

    • Simple: My favorite part about this Texas style smoked turkey breast recipe is its flavor and simplicity.
    • Versatile: Plus, this Texas Smoked Turkey Breast is super versatile- you can have it on your menu year round and it is sure to be a total hit with your BBQs and summer potlucks.

    ⭐ Star Ingredients

    Smoked texas Style Turkey Breast.
    • Turkey Breast: The star of the dish, offering lean, flavorful protein.
    • Butter: Gives the turkey a golden brown color and adds richness.
    • Seasonings: Black pepper, salt, and granulated garlic provide a simple but effective flavor profile.

    For the complete list of ingredients with measurements and instructions, please see the recipe card at the bottom of the post.

    📖  Substitutions & Variations

    • Sweet & Smoky – A little brown sugar in the seasoning adds caramelization and a touch of sweetness.
    • Spice it up! Cayenne, smoked paprika, or chipotle powder bring the heat.
    • Herby Upgrade – Add thyme, rosemary, or sage for a classic flavor boost.
    • Butter Swap – Use olive oil instead for a lighter, juicier turkey.
    • BBQ Twist – A Texas-style BBQ rub or brisket rub with kosher salt takes it to the next level!

    🔪How To Make Texas Smoked Turkey Breast

    Texas Smoked Turkey Breast
    1. Step 1: Heat the smoker to 250 degrees. One at a time, starting with the salt, sprinkle the entire turkey with each seasoning.
    Texas Smoked Turkey Breast
    1. Step 2: Place the turkey breast on the smoker and cook for about 1 ½ hours or until the turkey reaches an internal temperature of 150 degrees.
    smoked turkey breast texas style
    1. Step 3: Remove the turkey breast and place it in an aluminum foil boat. Coat with melted butter and wrap with aluminum foil. Remember to wrap the foil tightly.
    Texas Smoked Turkey Breast
    1. Step 4: Continue to cook for 15 minutes or until the internal temperature reaches 160 degrees, then remove and rest for 15-30 minutes. Slice the Texas smoked turkey breast and serve!
    Texas Smoked Turkey Breast

    👩‍🍳 Expert Tips

    Think you're ready to give this smoked turkey recipe a try? Here are some tips and tricks you might want to take note of.

    • If your turkey has already been brined, you can cut the amount of salt you're using in half. Also remember to pat dry the turkey breast before you start to coat it with the spices. Use paper towels.
    • To make sure that no butter leaks out, use 2 pieces of foil to wrap the turkey breast.
    • You can also place a pan in the smoker to catch all the drippings from the smoked turkey. You can then use this to create a nice gravy to go with the Texas style smoked turkey breast.
    • You can also experiment with different seasonings and rubs for your turkey breast. Brown sugar is a great option as it can create a beautiful caramelization and a nice crusty bark on the outside of the turkey breast.
    • You can also try any other packaged dry rub of your choice. I love using the TX brisket rub with a dash of kosher salt.
    • To check if the smoked turkey is cooked to perfection, you'll need to use a probe thermometer or a meat thermometer to check the internal temperature. Once the internal temperature reaches about 165°F on the thickest part of the meat, you'll know your turkey is done.
    • To get that perfect smoke flavor, use a medium smoking wood like oak or pecan. Post oak wood is a great choice. You can use either pellets or wood chips- it's all up to you.
    • While boneless turkey breast is the way to go, if you're using a pack of bone in turkey breast, you might want to first remove the bone and trim the excess fat before you start to rub the spices and seasonings on it.

    💭 FAQs

    Can I use bone-in turkey breast instead of boneless?

    Yes, you can use bone-in turkey breast. Just be sure to remove the bone and trim any excess fat before applying the seasoning.

    What type of wood is best for smoking the turkey breast?

    For the best flavor, use medium smoking woods like oak or pecan. Post oak wood is highly recommended for a great smoky taste.

    How can I keep the turkey breast moist while smoking?

    To keep the turkey breast moist, wrap it tightly in aluminum foil after basting with melted butter. This helps retain moisture during the final stage of cooking.

    Can I store leftovers, and how do I reheat them?

    Yes, you can store leftover turkey breast in an airtight container in the fridge for 3-4 days. To reheat, you can use a microwave or skillet with a bit of butter or stock to keep it moist.

    💖 Serving Suggestions

    These are my favorite sides to serve with Texas style smoke turkey breast:

    • Cranberry Sauce: The best way to enjoy these Texas smoked turkey breasts is to team them up with a fine dipping sauce or a tasty Cranberry Orange Sauce.
    • BBQ Sauce: BBQ sauce is an obvious great option, but you could also try making a simple garlic butter dipping sauce by mixing some of the remaining butter with a little garlic.
    • Veggies: You might want to serve this turkey breast with Mashed Potatoes, Smashed Potato Salad, Steamed Carrots, Broccoli, Air Fryer Asparagus or Crispy Green Beans.

    🍽 Yummy Turkey Recipes You'll Love

    • Moist Turkey Quinoa Meatloaf muffins.
      Moist Turkey Quinoa Meatloaf Muffins
    • BLT Turkey Wraps With Avocado Mayo.
      BLT Turkey Wraps With Avocado Mayo
    • Skillet Ground Turkey Sloppy Joes.
      Skillet Ground Turkey Sloppy Joes
    • Best Turkey Patties with Yogurt and Onion.
      Easy Turkey Patties (High Protein, Low Carb & Freezer Friendly)

    Did you make this recipe? Leave a review and a ⭐⭐⭐⭐⭐ rating below, or tag us in our Facebook Group! Alternatively, bookmark it in your browser or save to Pinterest.

    cooking a smoked turkey breast
    Easy Texas Smoked Turkey Breast.

    Texas Style Smoke Turkey Breast

    Angela Milnes
    Smoked Texas Style Turkey Breast is a delicious and peppery option for your holiday table! Of course, anytime of year would be perfect for this juicy recipe. Tender and moist, this recipe will have everyone asking for more.
    5 from 4 votes
    Print Recipe Pin Recipe Rate this Recipe
    Prep Time 15 minutes mins
    Cook Time 2 hours hrs 45 minutes mins
    Additional Time 15 minutes mins
    Total Time 3 hours hrs 15 minutes mins
    Course Dinners
    Cuisine American
    Servings 4 Servings
    Calories 357 kcal

    Ingredients
      

    • 20 Ounce Turkey Breast
    • ½ Cup Melted Butter
    • 1 ½ Tablespoons Granulated Garlic
    • 1 Tablespoon Coarse Salt
    • 1 Tablespoon Black Pepper

    Instructions
     

    • Heat the smoker to 250 degrees. One at a time, starting with the salt, sprinkle the entire turkey with each seasoning.
    • Place the turkey breast on the smoker and cook for about 1 ½ hours or until the turkey hits an internal temperature of 150 degrees.
    • Remove the turkey breast and place it in an aluminum foil boat. Coat with melted butter and wrap with aluminum foil. Remember to wrap the foil tight.
    • Continue to cook for 15 minutes or until the internal temp reaches 160 degrees, then remove and rest for 15-30 minutes. Slice the Texas smoked turkey breast and serve!

    Notes

    If your turkey has already been brined, you can cut the amount of salt you’re using in half. Also remember to pat dry the turkey breast before you start to coat it with the spices. Use paper towels.
    To make sure that no butter leaks out, use 2 pieces of foil to wrap the turkey breast.
    You can also place a pan in the smoker to catch all the drippings from the smoked turkey. You can then use this to create a nice gravy to go with the Texas style smoked turkey breast.
    You can also experiment with different seasonings and rubs for your turkey breast. Brown sugar is a great option as it can create a beautiful caramelization and a nice crusty bark on the outside of the turkey breast.
    You can also try any other packaged dry rub of your choice. I love using the TX brisket rub with a dash of kosher salt.
    To check if the smoked turkey is cooked to perfection, you’ll need to use a probe thermometer or a meat thermometer to check the internal temperature. Once the internal temperature reaches about 165°F on the thickest part of the meat, you’ll know your turkey is done.
    To get that perfect smoke flavor, use a medium smoking wood like oak or pecan. Post oak wood is a great choice. You can use either pellets or wood chips- it’s all up to you.
    While boneless turkey breast is the way to go, if you’re using a pack of bone in turkey breast, you might want to first remove the bone and trim the excess fat before you start to rub the spices and seasonings on it.

    Nutrition

    Serving: 1gCalories: 357kcalCarbohydrates: 2gProtein: 31gFat: 25gSaturated Fat: 15gPolyunsaturated Fat: 2gMonounsaturated Fat: 7gTrans Fat: 1gCholesterol: 138mgSodium: 3964mgPotassium: 386mgFiber: 0.3gSugar: 0.2gVitamin A: 737IUVitamin C: 0.04mgCalcium: 31mgIron: 1mg
    Print Recipe Pin Recipe Rate this Recipe
    Tried this recipe?Let us know how it was!

    More Super Yummy Recipes to Try

    If you enjoyed trying your hands at this Texas smoked turkey breast and are inspired to try some more BBQ-friendly recipes, here are a few good options.

    • Best Mangonada Recipe
    • Best Summer Fruit Tart
    • Mediterranean Green Bean Salad
    • Creamy Pan Fried Salmon Fillet
    • Homemade Garlic Parm Sauce
    • Dutch Oven Corn Beef And Cabbage
    • Keto Coq Au Vin
    • Sheet Pan Thai Chicken With Lime Wheels
    cooking a smoked turkey breast

    Vegan Mixed Berry Smoothie

    November 26, 2023 by Angela Milnes

    Vegan Mixed Berry Smoothie.

    This easy Mixed Berry Smoothie is a delicious and healthy vegan smoothie that has a beautiful fruity flavor and smooth texture that make it a great healthy snack or breakfast. If you're consciously trying to make healthy eating a part of your life, you might want to give this mixed berry smoothie recipe a try.

    Vegan mixed berry Smoothie
    [feast_advanced_jump_to]

    💖 Why This Recipe Works

    • Delicious: My favorite part about this delicious mixed berry smoothie is the fact that it is super customizable.
    • Fresh or Frozen: If you can't find find fresh berries, you can use frozen berries too, and you'll also have the flexibility of adding in some other frozen fruit if you want to.
    • Healthy: What's more, this frozen berry smoothie packs in a good amount of Vitamin C too, which is another.

    ⭐ Star Ingredients

    To make this healthy mixed berry smoothie, here's all you'll need.

    • Oat Milk: Provides a creamy, dairy-free base for the smoothie, can be replaced with almond milk.
    • Banana: Adds thickness to the smoothie, either fresh or frozen can be used.
    • Mixed Berries: Fresh blackberries, blueberries, and strawberries infuse the smoothie with a burst of fruity flavors and vibrant colors.

    For the complete list of ingredients with measurements and instructions, please see the recipe card at the bottom of the post.

    📖  Substitutions & Variations

    In addition to the berries and fresh fruit, you can also throw in some other add-ons into the smoothie.

    • Almond butter is another great addition to the smoothie, and can really complement the flavor of the frozen mixed berries.
    • To bring some healthy fats into this berry smoothie, you can add some chia seeds, hemp seeds and flax seeds into the mix.
    • Another great way to make your berry smoothies healthy is to add fresh spinach or any other leafy greens of your choice. Trust me, you won't even realize the flavor!

    🔪How To Make Vegan Mixed Berry Smoothie

    Vegan Mixed Berry Smoothie Ingredients
    1. Step 1: Start by washing all your produce and removing the stems from the strawberries and blueberries. Peel your banana and break into 2 or 4 pieces, and add to your blender. Add blackberries, blueberries, and strawberries to the blender.
    Vegan Smoothie made from berries.
    1. Step 2: Then pour your oat milk over your ingredients in the blender. Blend until smooth. Garnish with a strawberry (optional). Serve and enjoy immediately.
    Vegan Smoothie

    👩‍🍳 Expert Tips

    Think you're ready to give this triple berry smoothie recipe a try? Here are some more tips and tricks to help.

    • I used oat milk for this recipe, but you can also use any other non dairy milk of your choice. Soy milk, coconut milk and unsweetened almond milk are all great options.
    • And of course, you can use regular dairy milk too, if you don't want a vegan version of the berry smoothie.
    • If you don't have dietary restrictions, you can also add some vanilla Greek yogurt or plain Greek yogurt into the smoothie.

    If you love this recipe you'll also enjoy this Blueberry Watermelon Salad or this tasty Kiwi Fruit Salad With Pomegranates.

    💭 FAQs

    How Can I Make The Healthy Berry Smoothie Sweeter?

    While this simple berry smoothie packs in a healthy combination of ripe banana and fresh or frozen berries that are all naturally sweet, if you really want some extra sweetness, you can add some apple juice or orange juice into the smoothie. Pure maple syrup is another great addition to this healthy smoothie. And of course, you can always add honey if you want to.

    Can I Use Frozen Fruit For The Smoothie?

    You sure can! You can use any frozen berries of your choice if you can't get your hands on fresh berries. Remember to use good quality mixed frozen berries to get the perfect flavor. If you can, add more of frozen strawberries in particular, as they bring in a natural sweetness that you're looking for in your frozen berry smoothie.

    Can I use frozen berries instead of fresh ones in a vegan mixed berry smoothie?

    Absolutely! Using frozen berries not only gives your smoothie a thicker, creamier texture but also keeps it chilled without the need for ice. Frozen berries are a convenient option and often more affordable, especially when certain fruits are out of sea

    What plant-based milk is best for making vegan mixed berry smoothies?

    The choice of plant-based milk depends on your personal taste and dietary preferences. Options like almond, soy, oat, or coconut milk all work well, each adding its unique flavor and creaminess. For instance, oat milk provides a naturally sweet and creamy base that complements the berries beautifully.

    How can I make my vegan mixed berry smoothie sweeter without using refined sugar?

    To naturally sweeten your smoothie, consider adding ripe fruits like bananas or mangoes, which are rich in natural sugars. You can also incorporate a touch of pure maple syrup, agave nectar, or dates for added sweetness. These options enhance the flavor without relying on refined sugars.

    Best Way to Store Vegan Smoothie

    The best way to store a vegan smoothie depends on how soon you plan to consume it. If you're drinking it within a day, refrigerating it in an airtight container works well, though it's best consumed within 24 hours. For longer storage, freezing smoothies in individual portions can preserve them for up to three months. Simply blend them from frozen or thaw in the fridge overnight. Another option is prepping smoothie kits by portioning ingredients into bags, so you only need to add liquid and blend when ready. Avoid long-term storage in plastic bottles, as glass containers preserve freshness better.

    Vegan Smoothie

    💖 Serving Suggestions

    • As a Healthy Breakfast: Enjoy this refreshing smoothie as a nutritious start to your day, providing a good dose of Vitamin C and energy to kick off the morning.
    • Top with Granola: For added texture, sprinkle some granola on top of the smoothie, enhancing both the crunch and nutritional value.
    • Serve with a Side of Toast: Pair this smoothie with a slice of whole-grain toast or avocado toast for a well-rounded, filling breakfast or snack.
    • As a Post-Workout Refreshment: After a workout, enjoy this smoothie as a revitalizing and hydrating treat to replenish your energy and nutrients.

    🍽 Try These Vegan Side Dishes

    • Easy Vegan White Bean Stew.
      Easy Vegan White Bean Stew
    • Best Vegan Baked Beans Recipe
    • Almond Milk Mashed Potatoes.
      Best Almond Milk Mashed Potatoes (Dairy Free)
    • Best Vegan Fall Harvest Salad.
      Best Vegan Fall Harvest Salad

    Did you make this recipe? Leave a review and a ⭐⭐⭐⭐⭐ rating below, or tag us in our Facebook Group! Alternatively, bookmark it in your browser or save to Pinterest.

    Vegan Mixed Berry Smoothie.

    Mixed Berry Smoothie

    Angela Milnes
    Refresh and energize with this Mixed Berry Smoothie! Packed with a blend of vibrant berries, this smoothie is bursting with natural sweetness and antioxidants.
    5 from 3 votes
    Print Recipe Pin Recipe Rate this Recipe
    Prep Time 5 minutes mins
    Cook Time 1 minute min
    Total Time 6 minutes mins
    Course Drinks
    Cuisine American
    Servings 2 Servings
    Calories 245 kcal

    Ingredients
      

    • 1.5 cup Oat Milk
    • 1 Banana
    • 1 cup Strawberries
    • 1 cup Blackberries
    • 1 cup Blueberries

    Instructions
     

    • Start by washing all your produce and removing the stems from the strawberries and blueberries (if any).
    • Peel your banana and break into 2 or 4 pieces, add to your blender. Add blackberries, blueberries, and strawberries to the blender.
    • Then pour your oat milk over your ingredients in the blender. Blend until smooth.
    • Garnish with a strawberry (optional). Serve and enjoy immediately.

    Notes

    I used oat milk for this recipe, but you can also use any other non dairy milk of your choice. Soy milk, coconut milk and unsweetened almond milk are all great options.
    And of course, you can use regular dairy milk too, if you don't want a vegan version of the berry smoothie. If you don't have dietary restrictions, you can also add some vanilla Greek yogurt or plain Greek yogurt into the smoothie.

    Nutrition

    Serving: 1gCalories: 245kcalCarbohydrates: 54gProtein: 6gFat: 3gSaturated Fat: 0.1gPolyunsaturated Fat: 0.5gMonounsaturated Fat: 0.1gSodium: 88mgPotassium: 584mgFiber: 10gSugar: 36gVitamin A: 610IUVitamin C: 70mgCalcium: 298mgIron: 2mg
    Print Recipe Pin Recipe Rate this Recipe
    Tried this recipe?Let us know how it was!

    More Healthy Recipes to Try

    If you enjoyed this fruit smoothie recipe, and are inspired to try some more delicious and healthy snack recipes, here are some handpicked ones worth checking out.

    If you are looking for other vegan or fruits which you can add to your smoothie, look at these fantastic Apple Flavors or Which Are The Sweetest Apples you may wish to try in your smoothie.

    • Best Mangonada Recipe
    • Cucumber Juice With Greens
    • How To Make Celery Juice
    • Blueberry Almond Crumble Pie
    • Mango Pineapple Smoothie
    Vegan Smoothie

    Zucchini Chocolate Chip Muffins

    November 26, 2023 by Angela Milnes

    Zucchini Chocolate Chip Muffins.

    These Zucchini Chocolate Chip Muffins are packed with that perfect chocolate flavor and are super moist and rich. They take just a few minutes to put together, and are made in the Air Fryer. The versatile zucchini blends perfectly with the intense flavors of the chocolate, and together they make for an incredible healthy snack or dessert.

    Zucchini chocolate chip muffins.
    [feast_advanced_jump_to]

    💖 Why This Recipe Works

    • Use Up Veggies: I'm a big hoarder when it comes to fresh produce, and these zucchini muffins were the perfect way to use up all of those extra zucchini I had at hand.
    • Sweet & Healthy: My favorite part about this Chocolate Chip Zucchini Muffins recipe is the fact that while it is a sweet treat, it actually manages to pack in a healthy veggie too, which makes it a great choice for kids too.
    • Tasty: These muffins are a level up on the classic zucchini bread recipe which you would usually turn to when you've got some extra zucchini to work with.

    ⭐ Star Ingredients

    Zucchini Chocolate chip muffin Ingredients.

    To make these zucchini muffins, here's what you'll need.

    • All Purpose Flour: Provides the main structure for the muffins.
    • Cocoa Powder: Imparts a rich, chocolatey flavor and dark color.
    • Sugar: Sweetens the muffins, enhancing their overall taste.
    • Baking Powder: Ensures the muffins rise properly, resulting in a soft and spongy texture.
    • Egg: Adds moisture and richness to the muffins.
    • Salted Butter: Infuses the muffins with a creamy richness.
    • Vanilla Extract: Elevates the flavors, adding a hint of aromatic sweetness.
    • Whole Milk: Helps combine the ingredients into a smooth batter.
    • Semisweet Chocolate Chips: Provide delightful bursts of melted chocolate in each bite.
    • Zucchini: Forms part of the muffin base, adding structure and a hint of freshness.

    For the complete list of ingredients with measurements and instructions, please see the recipe card at the bottom of the post.

    📖  Substitutions & Variations

    • You could add some chopped walnuts into the zucchini mixture to bring a bit of texture to these muffins.

    🔪How To Make Zucchini Chocolate Chip Muffins

    Dry ingredients in a bowl to make zucchini muffins.
    1. Step 1: In a large bowl, combine all the dry ingredients and mix. Set aside.
    Milk, egg, and butter in bowl.
    1. Step 2: Mix the milk, egg, melted butter, and vanilla in a separate bowl. Mix.
    Adding dry ingredients to milk and egg mixture to make zucchini muffins.
    1. Step 3: Slowly add the dry mixture to the liquid and mix until fully incorporated. 
    Adding grated zucchini to zucchini chocolate muffins mixture.
    1. Step 4: Peel and shred the zucchini using a fine cheese grater. Add shredded zucchini to the batter and fold it in.
    Chocolate zucchini muffins mixture in a bowl.
    1. Step 5: Preheat the air fryer at 350°F. Fold in ¾ cup of chocolate chips.
    Chocolate zucchini muffins mixture in four muffin liners kept in air fryer.
    1. Step 6: Spray jumbo muffin liners and fill ¾ way full. Top batter with 4-5 chocolate chips and place in the air fryer basket. 
    Four zucchini chocolate chip muffins baked in air fryer.
    1. Step 7: Cook at 350°f for 12 minutes or until fully cooked. Use a toothpick to stick in the middle of a muffin. If you have batter on it when you pull it out, continue to cook and test every minute until the zucchini chocolate chip muffins are fully cooked. 
    Chocolate chips muffins.
    1. Step 8: Remove and let cool before removing from muffin liners. Enjoy and store on the counter for 5 days, or in the refrigerator for up to 1 week. 
    Air fried zucchini and chocolate muffins.

    👩‍🍳 Expert Tips

    Ready to try out these zuchinni chocolate chip muffins? Here are some more tips and tricks you might want to note down.

    • I used all purpose flour for this recipe, but you could use whole wheat flour instead if you want the muffins to be healthier.
    • If you have any leftover batter, you can also use the batter made using whole wheat flour and use it to make zucchini bread.
    • I used butter, but if you're looking for make a vegan version of this zucchini muffin recipe, you can use olive oil, coconut oil or any vegetable oil of your choice as a substitute.
    • To substitute the egg, you can use some unsweetened applesauce.
    • For the whole milk that the recipe calls for, you can use almond milk or any dairy-free milk of your choice. Orange juice is also another great option.
    • If you're using baking soda for the recipe, remember to check the proportion as baking soda and baking powder aren't the perfect swap for each other proportion-wise.
    • I would recommend removing the excess water from the grated zucchini before you add it into the muffin mixture.
    • Also remember to grease the muffin cup well or just use paper liners or cupcake liners to make these zucchini muffins.
    • You can also choose to bake these in the oven as opposed to your Air Fryer. Just remember to grease your muffin pan or muffin tin well before you pour in the mixture.
    • If you like this recipe you may also want to try Banana and Pumpkin Muffins or these Homemade Chocolate Peanut Butter Oreos.

    💭FAQs

    Can I Make These Zucchini Chocolate Chip Muffins Gluten Free?

    You totally can. Just swap the all purpose flour in the recipe with some almond flour or oat flour.

    Best Way To Grate Zucchini?

    The best way to grate zucchini for muffins is to use a box grater or a food processor with a grating attachment. Simply trim the ends of the zucchini, wash it thoroughly, and then grate it using the appropriate side of the grater or the grating attachment of the food processor.

    This method ensures uniform and fine grating, which helps the zucchini incorporate evenly into the muffin batter, resulting in moist and delicious muffins.

    Remember to squeeze out any excess moisture from the grated zucchini using a clean kitchen towel or paper towels before adding it to the muffin batter.

    How To Store Zucchini Muffins?

    Since these zucchini muffins are made using shredded zucchini, you may want to store them in the refrigerator or freeze them to keep them fresh. Simply remove the zucchini chocolate chip muffins from the muffin pan and transfer them to an airtight container before you refrigerate them. Store for 2-3 days.

    Can I Freeze Zucchini Muffins

    Yes! This zucchini muffin recipe is freezer friendly! Transfer cooled muffins in to an airtight container before you refrigerate them. Freeze for up to 4 months.

    💖 Serving Suggestions

    These are my favorite ways to serve Zucchini Chocolate Chip Muffins:

    • Fresh Fruit: Serve the muffins with a side of fresh berries, such as strawberries, raspberries, or blueberries, for a refreshing contrast to the rich chocolate and moist zucchini.
    • Yogurt or Whipped Cream: Enjoy the muffins with a dollop of Greek yogurt or whipped cream for a creamy and indulgent addition.
    • Nut Butter: Spread almond butter or peanut butter on the muffins for a protein-rich option that adds a nutty flavor complementing the chocolate chips.
    • Instant Pot Hot Chocolate: Pair the muffins with a comforting cup of homemade instant pot hot chocolate for a warm and indulgent treat.
    • Cheese: Serve the muffins alongside a cheese platter with varieties like mild cheddar or creamy brie for a savory contrast to the sweet muffins.
    Zucchini and chocolate chip muffins ready to be served.

    🍽 More Fantastic Desserts

    • Air Fryer Cinnamon Sugar Soft Pretzels.
      Air Fryer Cinnamon Sugar Soft Pretzels
    • Beetroot Chocolate Cake.
      Best Beetroot Chocolate Cake Recipe (Moist + Festive!)
    • Traditional Banana Cream Pie.
      Old Fashioned Banana Cream Pie
    • Moist Honey Bun Cake With Vanilla Glaze.
      Moist Honey Bun Cake With Vanilla Glaze

    Did you make this recipe? Leave a review and a ⭐⭐⭐⭐⭐ rating below, or tag us in our Facebook Group! Alternatively, bookmark it in your browser or save to Pinterest.

    Zucchini Chocolate Chip Muffins.

    Zuchinni Chocolate Chip Muffins

    Angela Milnes
    Enjoy a delicious twist on a classic treat with these Chocolate Chip Zucchini Muffins! Moist and tender, these muffins are packed with the goodness of zucchini and studded with rich chocolate chips for a perfect balance of sweetness and nutrition.
    5 from 4 votes
    Print Recipe Pin Recipe Rate this Recipe
    Prep Time 15 minutes mins
    Cook Time 12 minutes mins
    Total Time 27 minutes mins
    Course Desserts
    Cuisine American
    Servings 10 Servings
    Calories 326 kcal

    Ingredients
      

    • 2 cups All Purpose Flour aerated
    • ½ cup Cocoa Powder
    • ¼ cup Granulated Sugar
    • ⅓ cup Dark Brown Sugar
    • 2 teaspoon Baking Powder
    • 1 Large Egg
    • 5 tablespoon Salted Butter melted
    • 2 teaspoon vanilla
    • 1 cup Whole Milk
    • 1 cup Semisweet Chocolate Chips divided
    • 1 Zucchini finely shredded

    Instructions
     

    • In a large bowl, combine all the dry ingredients and mix.
    • Set aside.Mix the milk, egg, melted butter, and vanilla in a separate bowl.
    • Mix.Slowly add the dry mixture to the liquid and mix until fully incorporated. 
    • Peel and shred the zucchini using a fine cheese grater.
    • Add shredded zucchini to the batter and fold it in.
    • Pre-heat the air fryer at 350°f
    • Fold in ¾ cup of chocolate chips.
    • Spray jumbo muffin liners and fill ¾ way full. Top batter with 4-5 chocolate chips and place in the air fryer basket. 
    • Cook at 350°f for 12 minutes or until fully cooked. Use a toothpick to stick in the middle of a muffin. If you have batter on it when you pull it out continue to cook and test every minute until the zucchini chocolate chip muffins are fully cooked. 
    • Remove and let cool before removing from muffin liners.
    • Enjoy and store on the counter for 5 days, or the refrigerator for up to 1 week.

    Notes

    I used all purpose flour for this recipe, but you could use whole wheat flour instead if you want the muffins to be healthier.
    If you have any leftover batter, you can also use the batter made using whole wheat flour and use it to make zucchini bread.
    I used butter, but if you're looking for make a vegan version of this zucchini muffin recipe, you can use olive oil, coconut oil or any vegetable oil of your choice as a substitute.
    To substitute the egg, you can use some unsweetened applesauce.
    For the whole milk that the recipe calls for, you can use almond milk or any dairy free milk of your choice. Orange juice is also another great option.
    If you're using baking soda for the recipe, remember to check the proportion as baking soda and baking powder aren't the perfect swap for each other proportion-wise.
    I would recommend removing the excess water from the grated zucchini before you add it into the muffin mixture.
    Also remember to grease the muffin cup well or just use paper liners or cupcake liners to make these zucchini muffins.
    You can also choose to bake these in the oven as opposed to your Air Fryer. Just remember to grease your muffin pan or muffin tin well before you pour in the mixture.

    Nutrition

    Serving: 1gCalories: 326kcalCarbohydrates: 45gProtein: 6gFat: 15gSaturated Fat: 9gPolyunsaturated Fat: 1gMonounsaturated Fat: 4gTrans Fat: 0.2gCholesterol: 35mgSodium: 151mgPotassium: 250mgFiber: 4gSugar: 20gVitamin A: 247IUVitamin C: 0.02mgCalcium: 108mgIron: 3mg
    Print Recipe Pin Recipe Rate this Recipe
    Tried this recipe?Let us know how it was!

    Best Zucchini Chocolate Chip Muffins

    If you enjoyed these zucchini chocolate chip muffins and are inspired to try some more tasty recipes, why not try some Maple Sugar Cookies or make some Vegan Marshmallows to go in your mug of hot cocoa? That would go perfectly with cookies or muffins!

    More Healthy Recipes

    • Mediterranean Green Bean Salad
    • Best Vegan Waffles With Pumpkin
    • Avocado Salad
    • Pistachio Bundt Cake
    • Air Fryer Zucchini Fritters

    Chocolate Covered Bananas

    November 26, 2023 by Angela Milnes

    Chocolate Covered Bananas.

    These Chocolate Covered Bananas are super easy to make. If you're on the hunt for a dairy-free, healthy snack option that beats ice cream, this one can be a great idea. These bananas are naturally gluten-free, and come together in just a few minutes!

    Chocolate Bananas

    The ideal recipe to serve with a banana and beetroot smoothie or a chilled Brazilian Limeade.

    [feast_advanced_jump_to]

    💖 Why This Recipe Works

    • Versatile: I love bananas and how versatile they are, and these delicious chocolate bananas were just the perfect treat for a hot summer day.
    • Fun: Another big plus about this recipe is that you can choose to customize the banana bites with fun toppings of your choice and bring in lots of variations too.
    • Simple: With barely a few minutes of prep time, you can get these rich and delicious chocolate banana bites together.
    Chocolate Bananas

    ⭐ Star Ingredients

    Chocolate chips, banana, coconut oil and sprinkles.

    To make these frozen chocolate covered bananas, here's what you'll need.

    • Bananas: Provide the natural sweetness and act as the base for the chocolate coating.
    • Chocolate chips: Create the rich, indulgent chocolate shell around the bananas.
    • Coconut oil: Assists in hardening the chocolate to form a crisp, shell-like texture.
    • Sprinkles: Add a touch of color and fun, enhancing the visual appeal and texture.

    For the complete list of ingredients with measurements and instructions, please see the recipe card at the bottom of the post.

    📖  Substitutions & Variations

    • Another great idea is to mix some almond butter into the melted chocolate before you dip banana in the chocolate.
    • You can try lots of other variations to these chocolate covered banana pops by adding some additional toppings of your choice.
    • Crushed peanuts or chopped peanuts are great because they bring in a lot of texture.
    • You can also choose to sprinkle some coconut flakes or shredded coconut over the chocolate-covered bananas.

    🔪How To Make Chocolate Covered Bananas

    Chocolate Bananas
    1. Step 1: Peel the bananas and cut them in half.
    Chocolate Bananas
    1. Step 2: Put a lollipop or popsicle stick at the bottom of the banana and put it in for about one inch.
    Chocolate Bananas
    1. Step 3: Melt the chocolate in a microwave-safe bowl for about 1.5-2 minutes or until completely melted. Make sure to check and stir every 30 seconds. Then mix in the coconut oil and let it melt.
    Chocolate Bananas
    1. Step 4: Dip each banana in the chocolate and set aside, letting excess chocolate drip. Sprinkle with sprinkles or any toppings you like. Place the banana pops in the fridge to set.
    Chocolate Bananas

    👩‍🍳 Expert Tips

    While making these chocolate covered bananas is super easy, you might want to take note of these tips and tricks too.

    • If you don't want to use your microwave, you can also choose to melt the chocolate in a double boiler.
    • I let the chocolate harden at room temperature, but you can also choose to freeze banana slices if you want to speed up the process.
    • Remember to lay out the frozen bananas on a baking sheet lined with parchment paper or wax paper before you transfer it to a freezer safe container and freeze it.
    • I used regular chocolate for this recipe, but you can also choose to use dark chocolate too.
    • Add some coconut oil when you melt the chocolate. The melted chocolate and coconut oil help create the perfect chocolate coating for these frozen bananas.

    💭 FAQs

    How Should I Present Chocolate Bananas?

    For a visually appealing presentation, arrange the chocolate-covered bananas neatly on a serving platter or tray. Garnish them with additional toppings such as chopped nuts, coconut flakes, or colorful sprinkles.

    Serve the suggested accompaniments in coordinating glasses or bowls alongside the bananas for a balanced and visually appealing presentation. Consider adding fresh mint leaves or a dusting of cocoa powder for an extra touch of elegance.

    How To Store Chocolate Bananas?

    This recipe is great to use up any remaining bananas that you may have. While these chocolate covered bananas taste best when you serve immediately, you can also freeze them for up to two weeks in an airtight container.

    How To Freeze Chocolate Bananas?

    Just remember to first allow the chocolate covered banana pops to be in the freezer until they're frozen solid, ideally on a baking sheet lined with parchment paper. This should take about 2-3 hours, and once the bananas are frozen, transfer the frozen bananas to a freezer safe container.

    💖 Serving Suggestions

    Here are three delicious suggestions to serve alongside chocolate-covered bananas:

    • Berry Smoothie: Blend together mixed berries, banana, yogurt, and a splash of orange juice for a refreshing berry smoothie. The fruity flavors complement the chocolate-covered bananas perfectly.
    • Chilled Oat Milk: Serve chocolate-covered bananas with a glass of chilled oat milk. The creamy texture and subtle sweetness of oat milk provide a refreshing and dairy-free option to enjoy alongside the indulgent treat.
    • Vanilla Ice Cream: Pair chocolate-covered bananas with a scoop of creamy vanilla ice cream. The combination of cold, smooth ice cream and rich chocolate-covered bananas creates a classic and indulgent dessert experience.
    Chocolate Bananas

    🍽 More Fantastic Desserts

    • The Best No Bake Banana Pudding.
      The Best No Bake Banana Pudding
    • Smores Fluff With Mini Marshmallows.
      Smores Fluff With Mini Marshmallows
    • Moist Honey Bun Cake With Vanilla Glaze.
      Moist Honey Bun Cake With Vanilla Glaze
    • Mickey Mouse Cake Pops on a white plate.
      Mickey Mouse Cake Pops

    Did you make this recipe? Leave a review and a ⭐⭐⭐⭐⭐ rating below, or tag us in our Facebook Group! Alternatively, bookmark it in your browser or save to Pinterest.

    Chocolate Covered Bananas.

    Chocolate Covered Bananas

    Angela Milnes
    Satisfy your sweet tooth with these irresistible Chocolate Covered Bananas! Fresh banana slices are dipped in rich, velvety chocolate and chilled to perfection.
    5 from 4 votes
    Print Recipe Pin Recipe Rate this Recipe
    Prep Time 5 minutes mins
    Cook Time 0 minutes mins
    Additional Time 3 hours hrs
    Total Time 3 hours hrs 5 minutes mins
    Course Desserts
    Cuisine American
    Servings 8 Servings
    Calories 294 kcal

    Ingredients
      

    • 4 Bananas
    • 12 oz. Chocolate Chips
    • 2 tablespoon Coconut Oil
    • Sprinkles

    Instructions
     

    • Peel the bananas and cut them in half.
    • Put a lollipop or popsicle stick at the bottom of the banana and put it in for about one inch.
    • Melt the chocolate in a microwave safe bowl for about 1.5-2 minutes or until completely melted. Make sure to check and stir every 30 seconds. Then mix in the coconut oil and let it melt.
    • Dip each banana in the chocolate and set aside, letting excess chocolate drip. Sprinkle with sprinkles, or any toppings you like.

    Notes

    While making these chocolate covered bananas is super easy, you might want to take note of these tips and tricks too.
    If you don’t want to use your microwave, you can also choose to melt the chocolate in a double boiler.
    I let the chocolate harden at room temperature, but you can also choose to freeze banana slices if you want to speed up the process.
    Remember to lay out the frozen bananas on a baking sheet lined with parchment paper or wax paper before you transfer it to a freezer safe container and freeze it.
    I used regular chocolate for this recipe, but you can also choose to use dark chocolate too.
    Make sure you add some coconut oil when you melt the chocolate. The melted chocolate and coconut oil help create the perfect chocolate coating for these frozen bananas.

    Nutrition

    Serving: 1gCalories: 294kcalCarbohydrates: 41gProtein: 1gFat: 16gSaturated Fat: 11gPolyunsaturated Fat: 0.1gMonounsaturated Fat: 0.2gSodium: 1mgPotassium: 333mgFiber: 2gSugar: 31gVitamin A: 38IUVitamin C: 5mgCalcium: 33mgIron: 0.2mg
    Print Recipe Pin Recipe Rate this Recipe
    Tried this recipe?Let us know how it was!

    More Dessert Recipes

    If you enjoyed these chocolate dipped bananas, and are inspired to try some more fun sweet treat recipes, here are a few handpicked ones to check out.

    • Best Summer Fruit Tart
    • Chocolate Covered Strawberries
    • Vegan Brownie In A Mug
    • Buckwheat Pancakes
    • Organic Baked Apples
    • Lemon Pudding Cake

    Pumpkin Spice Cinnamon Rolls

    November 26, 2023 by Angela Milnes

    Pumpkin Spice Cinnamon Rolls.

    These Pumpkin Spice Cinnamon Rolls are an absolute treat for your taste buds. They're pillowy soft on the inside, luscious and sweet on the outside and perfect for the fall season. If you like cinnamon rolls, you'll fall in love with this pumpkin version of the recipe.

    making pumpkin spice cinnamon rolls.
    [feast_advanced_jump_to]

    💖 Why This Recipe Works

    • Tasty: These truly are the best cinnamon rolls in my opinion.
    • Homemade: Making these Pumpkin Spice Cinnamon Rolls from scratch is a super straightforward process, and you'll love the delicious fall pumpkin flavor shining through.

    ⭐ Star Ingredients

    You'll need just a few simple ingredients to make pumpkin cinnamon rolls.

    pumpkin spice cinnamon roll ingredients.
    • Self-rising flour: Forms the base structure for the cinnamon rolls.
    • Yeast: Helps the rolls rise, creating a fluffy texture.
    • Spices: Nutmeg and cinnamon add warmth and depth to the flavor profile.
    • Eggs: Provide moisture and structural support to the rolls.
    • Milk: Combines with the eggs to create a rich, wet mixture for the dry ingredients.
    • Pumpkin purée: Infuses the rolls with classic fall flavors.
    • Sugar: Sweetens the rolls, enhancing their overall taste.
    • Melted butter: Adds a layer of richness to the cinnamon rolls.
    • Cream cheese: Key ingredient for the cream cheese frosting, adding a tangy sweetness.
    • Additional Milk: Adjusts the consistency of the frosting to the perfect level.

    For the complete list of ingredients with measurements and instructions, please see the recipe card at the bottom of the post.

    📖  Substitutions & Variations

    • Cream Cheese Frosting: Substitute the topping with a cream cheese frosting for a flavorful, topping option.
    • Pecans: Add chopped pecans or walnuts to the filling for a nutty crunch in each bite of your pumpkin spice cinnamon rolls.

    🔪How To Make Pumpkin Spice Cinnamon Rolls

    making pumpkin spice cinnamon rolls.
    1. Step 1: Preheat oven to 320°F. Warm up milk in a microwave-safe bowl(don’t make it too hot, just lukewarm), mix it with dry yeast and granulated sugar until dissolved.
    adding flour to mixing bowl.
    1. Step 2: Leave it in a warm place to proof for about 10 minutes. Add melted butter and eggs, stir gently with a whisk until smooth. 
    cinnamon roll mixture.
    1. Step 3: Add flour gradually to the batter, knead it, and try to form a dough. Dust the table with flour and knead the dough for about 2-3 minutes. Put it back in the bowl and leave it rise in a warm place for at least 30 minutes. 
    cinnamon roll mixture.
    1. Step 4: When the dough is ready, roll it out with a rolling pin, making a rectangular flat shape. Spread pumpkin puree evenly onto it.  
    cinnamon roll mixture.
    1. Step 5: Mix cane sugar, cinnamon, and nutmeg in a mixing bowl, and sprinkle it over the rolled dough. Roll the dough on a lightly floured surface to form a log. Cut it into 1-inch-thick rolls. 
    making pumpkin spice cinnamon rolls.
    1. Step 6: Line a parchment paper onto a 13x9-inch pan and place the cut rolls onto it. Bake for about 20 minutes or until golden brown.
    ingredients for making pumpkin spice cinnamon rolls.
    1. Step 7: In a small bowl, whisk cream cheese, powdered sugar, and pumpkin puree. Add powdered sugar and continue mixing until smooth. If consistency is too thick 1 tablespoon of water can be added.
    making pumpkin spice cinnamon rolls.
    1. Step 8: Pour the mixture evenly onto a freshly baked roll. Leave it to set for 5-10 minutes. Serve with a pinch of cinnamon on top!  
    making pumpkin spice cinnamon rolls.

    👩‍🍳 Expert Tips

    Making these pumpkin spice cinnamon rolls is super easy, but you might want to take note of these little tips and tricks too.

    • To lend these regular cinnamon rolls some extra deliciousness, you can use some dark brown sugar into the mix as well.
    • If you don't have the individual powdered spices that the recipe calls for, you can also choose to use some pumpkin pie spice instead. I love using my homemade Pumpkin Pie Spice for this recipe.
    • You can swap the sugar in the frosting for some maple syrup and turn it into a nice maple cream cheese frosting that works perfectly with these pumpkin cinnamon rolls.
    • You can also add a dash of vanilla extract to the pumpkin cinnamon roll dough to amp up its flavor.
    • If you don't have yeast, you could use some baking powder along with self rising flour to help the dough rise.
    • To lend a bit of texture to these pumpkin spice cinnamon rolls, you can add some chopped nuts of your choice as well, when you're sprinkling the sugar mixture on the dough.
    • You can also prep the cinnamon rolls in advance by making the dough, covering it in plastic wrap and letting it refrigerate overnight.

    💭 FAQs

    Can I Make Vegan Pumpkin Cinnamon Rolls?

    You sure can! Just remember to use vegan butter and some almond milk instead of the regular milk to make these vegan pumpkin cinnamon rolls. You'll also need to swap the cream cheese frosting with a vegan frosting instead.

    How To Store Cinnamon Rolls

    Your leftover homemade cinnamon rolls can be stored in an airtight container for up to 2 days, or longer if they're not frosted.

    🧂Serving Suggestions

    These are my options to serve with cinnamon rolls:

    • Hot Chocolate: Serve the cinnamon rolls with a rich and creamy hot chocolate for a cozy and indulgent treat that complements the warm spices of the rolls.
    • Fresh Fruit Salad: Balance the sweetness of the cinnamon rolls with a refreshing fruit salad made with seasonal fruits like apples, pears, and oranges.
    • Savory Side: Offer a savory side dish such as scrambled eggs, bacon, or breakfast sausage to create a more balanced meal.
    • Warm Apple Cider: Accompany the cinnamon rolls with a mug of warm apple cider infused with cinnamon and cloves for a festive and aromatic beverage option.
    • Milkshake With Sprinkles: Serve your rolls with a creamy vanilla and sprinkles milkshake for a refreshing treat.

    💖 Serving Suggestions

    These are my options to serve with cinnamon rolls:

    • Hot Chocolate: Serve the cinnamon rolls with a rich and creamy hot chocolate for a cozy and indulgent treat that complements the warm spices of the rolls.
    • Fresh Fruit Salad: Balance the sweetness of the cinnamon rolls with a refreshing fruit salad made with seasonal fruits like apples, pears, and oranges.
    • Savory Side: Offer a savory side dish such as scrambled eggs, bacon, or breakfast sausage to create a more balanced meal.
    • Warm Apple Cider: Accompany the cinnamon rolls with a mug of warm apple cider infused with cinnamon and cloves for a festive and aromatic beverage option.
    • Milkshake With Sprinkles: Serve your rolls with a creamy vanilla and sprinkles milkshake for a refreshing treat.
    making pumpkin spice cinnamon rolls.

    🍽 Pumpkin Lovers, Don’t Miss These

    • Pumpkin Crunch Cake
    • Easy Homemade Pumpkin Cookies.
      Easy Homemade Pumpkin Cookies
    • Pumpkin French Toast Casserole.
      Pumpkin French Toast Casserole
    • Pumpkin spice latte in a cup.
      Pumpkin Spice Latte

    Did you make this recipe? Leave a review and a ⭐⭐⭐⭐⭐ rating below, or tag us in our Facebook Group! Alternatively, bookmark it in your browser or save to Pinterest.

    Pumpkin Spice Cinnamon Rolls.

    Pumpkin Cinnamon Rolls

    Angela Milnes
    Indulge in the warm, cozy flavors of fall with these Pumpkin Cinnamon Rolls! Soft, fluffy rolls are filled with a spiced pumpkin filling and topped with a sweet, creamy glaze.
    5 from 4 votes
    Print Recipe Pin Recipe Rate this Recipe
    Prep Time 30 minutes mins
    Cook Time 40 minutes mins
    Additional Time 0 minutes mins
    Total Time 1 hour hr 10 minutes mins
    Course Desserts
    Cuisine American
    Servings 18 Servings
    Calories 113 kcal

    Ingredients
      

    Ingredients For Rolls

    • 1 cup Milk
    • 1 tbs Dry Yeast
    • 2 cups Self Rising Flour
    • 1 teaspoon Cinnamon
    • 1 teaspoon Nutmeg
    • 2 Eggs
    • ½ cup Pumpkin Puree
    • 2 tablespoon Brown Sugar
    • 3 tablespoon Granulated Sugar
    • 180 grams Melted Butter
    • 4 oz Cream Cheese half pack of 8oz Philadelphia cheese

    For The Icing

    • ¼ cup Powdered Sugar
    • ¼ cup Pumpkin Puree
    • 2 tablespoon Milk

    Instructions
     

    • Preheat oven to 320F. Warm up milk in a microwave safe bowl(don’t make it to hot just lukewarm), mix it with dry yeast and granulated sugar until dissolved.
    • Leave it in a warm place to proof for about 10 minutes. Add melted butter and eggs, stir gently with a whisk until smooth. 
    • Add gradually flour to the batter, knead it and try to form a dough. Dust the table with flour and kneed the dough for about 2-3 minutes. Put it back in the bowl and leave it raise in a warm place for at least 30 minutes. 
    • When dough is ready roll it out with a rolling pin making a rectangular flat shape. Spread pumpkin puree evenly onto it.  
    • Mix cane sugar, cinnamon, and nutmeg in a mixing bowl, sprinkle it over the rolled dough. Roll the dough on a lightly floured surface to form a log. Cut it into a 1inch thick rolls. 
    • Line a parchment paper onto a 13x 9 inch pan and place the cut rolls onto it. Bake for about 20 minutes or until golden brown.
    • In a small bowl whisk cream cheese, powdered sugar, and pumpkin puree, add powdered sugar and continue mixing until smooth. If consistency is too thick 1 tablespoon of water can be added.
    • Pour the mixture evenly onto a freshly baked roll. Leave it to set for 5-10 minutes. Serve with a pinch of cinnamon on top!  

    Notes

    To lend these regular cinnamon rolls some extra deliciousness, you can use some dark brown sugar into the mix as well.
    If you don’t have the individual powdered spices that the recipe calls for, you can also choose to use some pumpkin pie spice instead. I love using my homemade Pumpkin Pie Spice for this recipe.
    You can swap the sugar in the frosting for some maple syrup and turn it into a nice maple cream cheese frosting that works perfectly with these pumpkin cinnamon rolls.
    You can also add a dash of vanilla extract to the pumpkin cinnamon roll dough to amp up its flavor.
    If you don’t have yeast, you could use some baking powder along with self rising flour to help the dough rise.

    Nutrition

    Serving: 1gCalories: 113kcalCarbohydrates: 17gProtein: 3gFat: 3gSaturated Fat: 2gPolyunsaturated Fat: 0.3gMonounsaturated Fat: 1gTrans Fat: 0.01gCholesterol: 26mgSodium: 34mgPotassium: 78mgFiber: 1gSugar: 6gVitamin A: 1725IUVitamin C: 0.4mgCalcium: 35mgIron: 0.4mg
    Print Recipe Pin Recipe Rate this Recipe
    Tried this recipe?Let us know how it was!

    More Recipes to Try Out

    If you enjoyed this recipe, you might also want to try out some more of these delicious sweet creations.

    • Best Hot Cocoa Dip
    • Vegan Oreo Milkshake Recipe
    • Vegan Mixed Berry Smoothie
    • Keto Oatmeal Using Almond Milk
    • Poinsettia Sourdough Loaf
    • Pineapple Coconut Popsicles With Lime
    • Christmas Charcuterie Board
    • Million Dollar Bars
    • Hazelnut Chocolate Bark
    making pumpkin spice cinnamon rolls.

    Easy Granola Bites Recipe (With Berries & Yogurt!)

    November 26, 2023 by Angela Milnes

    Berry Granola Bites.

    Need a healthy snack that’s quick, easy, and actually tastes amazing? This Granola Bites Recipe is loaded with wholesome oats, fresh berries, and creamy yogurt—perfect for little hands, snack attacks, or meal prep wins.

    Berry granola bites on a plate.

    We’re always on the hunt for portable snacks that are both nourishing and delicious, and these bite-sized granola treats check all the boxes. They’re made with simple ingredients, naturally sweetened, and easy to freeze for later.

    Think of them as your healthy answer to granola bars, energy bites, and yogurt parfaits—all rolled into one cute muffin cup! If you're into fun no-fuss snacks, you’ll love my Healthy Quinoa Salad and Caprese Skewers too.

    [feast_advanced_jump_to]

    💖 Why This Recipe Works

    • Quick, No-Fuss Prep: With just 5 real ingredients and a muffin tin, you’re on your way to easy granola cups in under an hour.
    • Batch-Friendly & Freezer-Ready: These no bake granola bites are ideal for weekend meal prep or lunchbox planning.
    • Bariatric-Friendly Options: Use sugar-free yogurt and add protein-rich seeds or nut butter for a small, satisfying bite that aligns with bariatric eating plans.

    ⭐ Star Ingredients

    Berry Granola Bites ingredients.
    • Rolled Oats: These form the chewy, hearty base and are full of fiber—perfect for a satisfying snack.
    • Banana: Acts as a natural binder and sweetener, keeping everything together without added sugar.
    • Greek Yogurt: Adds creamy tang and a protein boost, making each bite feel indulgent but wholesome.
    • Berries: Bring natural color, sweetness, and a fruity burst to every bite—use what’s in season!

    Substitutions & Variations

    • Swap banana for peanut butter or almond butter for a higher-protein bite.
    • Use dairy-free yogurt to make these completely vegan and gut-friendly.
    • Add mini chocolate chips or a dusting of cocoa powder for a sweet twist.
    • Mix in chia seeds, hemp hearts, or sunflower seeds for added nutrition.
    • Want granola balls? Roll the mixture into small balls and bake on a lined tray.
    • Turn them into bars by pressing into a parchment-lined dish, baking, and slicing.

    Craving more feel-good bites? Try my Beetroot Chocolate Cake or Blueberry Crumble next!

    🔪 How To Make This Granola Bites Recipe

    Oats, honey and mashed bananas in a bowl.
    1. Step 1: In a large mixing bowl, mash the banana. Add the oats and honey to the mashed banana and mix until well combined.
    Oats and mashed bananas mixture in a bowl.
    1. Step 2: Add the mixture to a muffin pan and divide into 6 cups. Push the mixture to the edges and bottom, so that you are creating a cup.
    Oats and mashed bananas mixture in a muffin tray.
    1. Step 3: Freeze the muffin tray for 30 minutes. Preheat the oven to 350 degrees and bake the cups for 30 minutes.
    Granola bites on a plate, strawberries in small bowl, and in another small bowl are blueberries.
    1. Step 4: Remove from the oven and let cool for 10 minutes. Add the yogurt and berries to each cup and serve immediately.

    💡Hint: If the oat mix is too dry, a teaspoon of melted coconut oil or nut butter will make it easier to mold.

    Granola bites served with berries on a plate.

    👩‍🍳 Expert Tips

    • Don’t Overfill the Muffin Cups: Press firmly into the edges to help the cups hold their shape.
    • Use a Silicone Muffin Tray: Makes removing the cups way easier—no sticking!
    • Make Ahead Tip: Freeze unfilled cups and defrost as needed, then add fresh yogurt and toppings.

    💭 FAQs

    Can I make these granola bites recipe cups nut-free?

    Yes! Stick with banana as your binder and skip the nut butter. You can also add sunflower or pumpkin seeds instead.

    Are these granola cups gluten-free?

    Yes, as long as you use certified gluten-free oats. Double-check your yogurt label if you're avoiding gluten additives.

    Can I skip baking berry granola bites and keep them raw?

    You can—but they’ll be softer and need to stay chilled to hold their shape. Bake if you want a firmer, crunchier bite.

    Can I freeze berry granola bites?

    Absolutely. Freeze the baked cups (without yogurt) in a container for up to 2 months. Just defrost and add fresh toppings when ready.

    Granola bites with berries.

    💖 Serving Suggestions

    • Greek Yogurt & Fresh Berries: Layer extra yogurt on top for a parfait-style breakfast cup.
    • Drizzle with Honey or Maple Syrup: A little natural sweetness goes a long way.
    • Add Whipped Coconut Cream: For a fun dairy-free dessert-style twist.
    • Pair with Hot Chocolate: Try my Instant Pot Hot Chocolate for a cozy combo.
    • Serve as a Light Breakfast: These also make great pre-workout fuel or afternoon pick-me-ups!
    Granola Bites.

    🍽 More Easy Desserts To Enjoy

    • Blueberry Yogurt Bites.
      Yogurt Bites for Babies (No Sugar!) – Easy Frozen Snack for Baby-Led Weaning
    • Best instant pot Greek yogurt With Strawberry Topping.
      Best Instant Pot Greek Yogurt With Strawberry Topping
    • Greek Yogurt Chia Pudding With Raspberries.
      Greek Yogurt Chia Pudding With Raspberries
    • Easy Banana Split Milkshake with A tropical Twist.
      Easy Banana Split Milkshake With A Tropical Twist

    Did you make this recipe? Leave a review and a ⭐⭐⭐⭐⭐ rating below, or tag us in our Facebook Group! Alternatively, bookmark it in y

    Berry Granola Bites.

    Easy Granola Bites Recipe

    Angela Milnes
    Snack time just got a whole lot better with these Berry Granola Bites! Packed with juicy berries, crunchy granola, and a hint of honey, these bite-sized treats are both delicious and nutritious.
    5 from 3 votes
    Print Recipe Pin Recipe Rate this Recipe
    Prep Time 10 minutes mins
    Cook Time 30 minutes mins
    Total Time 40 minutes mins
    Course Dessert
    Cuisine American
    Servings 6 Servings
    Calories 158 kcal

    Ingredients
      

    • 1 ½ cup Rolled Oats
    • 1 Banana
    • 1 cup Yogurt
    • ¼ cup Raw Honey
    • Strawberries for serving
    • Blueberries for serving

    Instructions
     

    • In a large mixing bowl, mash the banana. Add the oats, and honey to the mashed banana and mix until well combined.
    • Add the mixture to a muffin pan and divide over 6 cups. Push the mixture to the edges and bottom, so that you are creating a cup.
    • Freeze the muffin tray for 30 minutes.
    • Preheat the oven to 350 degrees and bake the cups for 30 minutes. Then remove from the oven and let cool off for 10 minutes.
    • Add the yogurt and berries to each cup and serve immediately.

    Notes

    If you don't have old fashioned oats, you could also choose to use quick oats for this recipe.
    Another great idea is to add some Rice Krispies or just any crispy rice cereal into the mix.
    If the oat mixture isn't malleable enough, you can soften it by adding some melted coconut oil into it.
    Another great idea is to use any nut butter or seed butter of your choice into the mixture for these homemade granola bites. Peanut butter, sunflower seed butter and almond butter are some good choices.
    Using a nut butter can be a great idea if you don't have bananas at hand, but still want to put these granola cups together.

    Nutrition

    Serving: 1gCalories: 158kcalCarbohydrates: 31gProtein: 6gFat: 2gSaturated Fat: 0.3gPolyunsaturated Fat: 0.5gMonounsaturated Fat: 0.4gTrans Fat: 0.002gCholesterol: 2mgSodium: 14mgPotassium: 198mgFiber: 3gSugar: 15gVitamin A: 14IUVitamin C: 2mgCalcium: 49mgIron: 1mg
    Print Recipe Pin Recipe Rate this Recipe
    Tried this recipe?Let us know how it was!

    How To Freeze Beets: A Step By Step Guide

    November 26, 2023 by Angela Milnes

    Keeping freezer bag of sliced beetroots in the rack of a freezer.

    Beets are an incredibly versatile and nutritious vegetable that are almost too good to pass up in the grocery store! But if you love beets and have bought too many or just want to save some for later use, it pays to know How To Freeze Beets correctly.

    Today, we will show you exactly How To Freeze Beetroot so that they come out perfect every time. Read on for our comprehensive step-by-step guide.

    Frozen beets. Learn how to freeze beets.
    [feast_advanced_jump_to]

    What Are Beets?

    Beets, also known as beetroot, are root vegetables belonging to the same family as spinach and chard.

    Beets are usually round or oblong in shape with a deep red or purple color, although there are yellow or white varieties.

    Raw beetroots.

    Health Benefits Of Beets

    Beets are not just tasty but also pack a range of health benefits. They are a good source of fiber, vitamins, and minerals that are important for good health. Beets are especially high in folate, which is important for healthy cell growth and development.

    They are also rich in antioxidants that help to keep safe against chronic diseases such as heart disease, cancer, and inflammation. Some studies have even suggested that beets can help to lower the blood pressure, improve exercise performance, and boost brain function.

    Can You Freeze Beets?

    Yes, you can freeze beets. Freezing is a great way to preserve their flavor and nutrients for future use if you love beets. Frozen beets can be easily thawed and added to recipes such as smoothies, soups, stews, and salads. When freezing beets, it's important to properly clean and prepare them first.

    How To Freeze Beets?

    Freezing beets is a simple and convenient way to enjoy their health benefits throughout the year. Whether you have a bumper crop from your garden or want to stock up when they're in season, freezing beets is an easy way to enjoy them year-round.

    Here is a detailed step-by-step guide on how to freeze beets:

    Choose Fresh And Young Beets

    When it comes to freezing beets, it's important to choose fresh and young beets. Look for medium beets to small beets that are free of blemishes or soft spots. Large beets can be tougher and have a less sweet flavor compared to their smaller counterparts.

    Fresh beets are also more nutritious than older ones, so try to use them as soon as possible after harvesting or buying them.

    Beets are root vegetables that store well, but they can lose their flavor and texture over time. By choosing fresh and young beets, you'll ensure that your frozen beets are of the highest quality and taste great in your favorite recipes.

    Fresh beetroots.

    Wash The Beets

    For the best results when freezing beets, it's essential to properly wash them before beginning the process.

    Wash fresh beets by rinsing them under cold running water while gently scrubbing with a vegetable brush that removes any dirt, debris, and potential pests that might be lingering on the surface.

    By thoroughly cleaning the beets, you'll ensure that they're ready for the freezing process and maintain their flavor and nutritional value.

    Washing raw beetroots.

    Boil The Beets

    Boiling the beets is an essential step in the process of how to freeze beets. This step helps to soften the fresh beets, making them easier to peel and prepare for freezing. To boil beets, simply place them in a large stockpot filled with water and cook until tender. When boiling the beets, ensure that they are fully submerged in the boiling water.

    Keep in mind that larger beets may take longer to cook than smaller ones. Whole beets can also be boiled, but it's essential to monitor their tenderness to avoid overcooking. Smaller beets typically cook faster, so adjust the boiling time accordingly.

    Once the beets are tender, you're one step closer to having perfectly frozen beets ready for future use in your favorite recipes.

    Beetroots in a pot.

    Cool The Beets

    After boiling and softening your fresh, homegrown beets, it's important to cool them down quickly to stop the cooking process.

    To do this, prepare a large pot or bowl filled with ice water or cold water. Carefully transfer the hot beets into the cold water, allowing them to cool completely.

    This step not only makes it easier to handle the beets but also helps preserve their texture and flavor when freezing.

    Peel The Beets

    Once your blanched beets have been cooled, it's time to remove the outer skin. This can be done with vegetable peeler or simply by rubbing the skin off with your fingers under running water.

    The process of boiling and cooling the beets makes the skin easier to remove, ensuring that you're left with just the tender, flavorful beet flesh.

    Dice Or Slice The Beets

    When learning how to freeze beets, it is essential to prepare them properly for the freezing process.

    Start using a Sharp Knife and a cutting board to dice or slice the beets into desired sizes. It's a good idea to wear gloves while handling beets to prevent staining your hands.

    Cut the beets into pieces that are about an inch in size, as this will ensure they freeze evenly and are easy to use in future recipes.

    Diced beetroot on a wooden board.

    Arrange The Beets On A Baking Sheet

    To effectively freeze beets, arranging them on a baking sheet is a crucial step. First, place the beets on a clean kitchen towel or paper towel to drain excess water from washing or blanching.

    Then, lay them out evenly on a cookie sheet, ensuring that they do not touch each other, as this will prevent them from sticking together during the freezing process.

    Transfer To Freezer Bags

    Once the beets are arranged on a baking sheet and frozen individually, carefully transfer them into freezer containers or bags.

    To preserve their quality, remove as much air as possible from the bags; using a vacuum sealing system can be highly effective for this purpose.

    If you don't have a vacuum sealer, you can easily freeze the beets by placing them in a freezer bag and tightly wrapping it to eliminate excess air.

    Placing a bag of diced beetroot in a freezer.

    Store In The Freezer

    As the final step in freezing beets, it's essential to store them properly in your freezer. Place the prepared freezer bags or containers with the beets inside the freezer, ensuring they are well-sealed and protected from potential freezer burn.

    Can You Freeze Raw Beets?

    You can freeze raw beets, including both red beets and beet greens. By freezing raw beets and their greens, you can preserve their natural taste and nutritional value, making them a convenient addition to your future meals.

    Can You Freeze Cooked Or Roasted Beets?

    Yes, you can freeze cooked or roasted beets as well. After cooking beets through your preferred method, such as roasting in a roasting pan or using a shallow baking dish, ensure they are cooled completely before proceeding. Freezing cooked beets can be a convenient way to preserve leftovers or to prepare dishes in advance.

    Can You Freeze Beet Juice?

    You can freeze beet juice as a convenient way to preserve its nutrients and flavor for future consumption. To do so:

    • Extract fresh beet juice using a juicer or blender.
    • Pour the beet juice into ice cube trays or freezer-safe containers, leaving space for expansion.
    • Place the trays or containers in the freezer until the juice is completely frozen.
    • Transfer the frozen beet juice cubes to airtight bags or containers to prevent freezer burn.
    • Store the beet juice cubes in the freezer for future use.

    This method allows you to easily thaw and enjoy the desired amount of beet juice whenever needed.

    beetroot juice in a glass.

    Boiling Vs Steaming Beets

    Boiling and steaming are two popular methods for cooking beets before freezing them. Both methods can effectively cook the beets while retaining their flavor and nutritional value. However, steaming beets often results in better color preservation and less nutrient loss compared to boiling.

    To boil beets, simply place them in a large stockpot filled with water and cook until tender.

    On the other hand, to steam beets, use a steamer basket or insert in a pot with a small amount of water, ensuring the beets do not touch the water.

    How To Thaw And Reheat Frozen Beets?

    To thaw and reheat frozen beets, first place them in the refrigerator for several hours or overnight to defrost gently. Once thawed, reheat the beets in a saucepan over low heat with a bit of water, stirring occasionally until warmed through.

    Alternatively, you can also reheat them in a microwave, using a microwave-safe dish and heating in short intervals, stirring in between until heated evenly.

    How To Prevent Freezer Burn On Frozen Beets?

    To prevent freezer burn on beets, blanch, cool, and dry them before sealing in airtight containers or freezer bags. Label the bags with dates and contents for easy tracking. Store beets in the coldest part of the freezer to maintain a consistent temperature.

    How Long Do Beets Last In The Freezer?

    Notes frozen beets can last in the freezer for up to 12 months when properly blanched, cooled, and stored in airtight containers or freezer bags. This extended shelf life allows you to enjoy the beets' flavor and nutritional benefits throughout the year.

    Do Frozen Beets Lose Taste And Texture?

    While freezing beets is a convenient method of preservation, it can lead to some changes in taste and texture. Upon thawing, frozen beets may become slightly softer and lose a bit of their earthy flavor.

    However, if beets are properly blanched, cooled, and stored in airtight containers before freezing, these changes can be minimized.

    How Do You Know If Frozen Beets Have Gone Bad?

    To determine if frozen beets have gone bad, first, check the storage duration using the notes on the frozen beet bags or containers. If stored for more than 12 months, their quality may have deteriorated.

    Upon thawing, examine the beets for any off-odors, sliminess, or discoloration, which are indicators of spoilage. If any of these signs are present, it's best to discard the beets and not consume them.

    Molds on beetroot.

    How To Use Frozen Beets In Recipes

    Here is how to use frozen beets in recipes:

    • Thaw before use: Thaw your frozen beets in the refrigerator before incorporating them into your recipes.
    • Incorporate in smoothies: Blend thawed beets with fruits and vegetables to create nutritious and vibrant smoothies.
    • Use in soups: Add thawed beets to soups or stews, providing extra flavor and nutrition.
    • Beet hummus: Blend thawed beets with chickpeas, tahini, and spices to create a colorful and tasty beet hummus.
    • Roast with olive oil: Toss thawed beets in olive oil and roast until tender, shortening the cooking time compared to fresh beets.
    • Prepare beet salad: Combine roasted beets with lemon juice, herbs, and seasonings for a refreshing beet salad.
    • Tightly wrap for grilling: Wrap thawed beets in foil and grill as a delicious side dish.
    Frozen beetroot in a skillet.

    FAQ'S

    What Do Beets Taste Like?

    Beets have a sweet and earthy taste with a slightly bitter undertone. Some people describe the flavor as similar to that of dirt (in a good way!).

    Overall, the taste of beets can be quite distinctive and may take some getting used to if you haven't tried them before.

    Enjoy Beetroot Everyday

    In conclusion, learning how to freeze beets properly is a valuable skill for preserving the freshness and nutritional value of this versatile vegetable. By following our step-by-step guide, you can enjoy beets all year round in various recipes, from smoothies to soups.

    Moreover, freezing beets will help reduce food waste and save money by allowing you to store your harvest or take advantage of seasonal sales. Happy freezing!

    20+ Colorful Winter Salads To Eat Right Now

    November 26, 2023 by Angela Milnes

    Colorful winter salads.

    The dead of winter may not seem like the most intuitive time to eat big bountiful salads. But what better time is there? In the summer, salads are easy! There are more than enough options for beautiful, colorful, colorful toppings. In the winter, you still have lovely options but some of them are less obvious. 

    However, the New Year is really the best time to nosh on as many greens as you can especially when our bodies naturally crave those starchy, gooey comfort foods that fill us up. I’ve scoured some of my favorite blogs to find over 20+ Colorful Winter Salads to eat right now! You’ll be gobbling up greens before you know it!

    Different winter salads.
    [feast_advanced_jump_to]

    Best Winter Salads For Keeping Healthy

    When it comes to finding the best winter salads you've got to try these tasty options. I'm sure you'll love these winter salad recipes as much as I do. The spinach salad is amazing! I simply love it! Enjoy this list of colorful winter salad recipes and let me know which is your favorite. Whether it's a roasted swet potato salad, a butternut squash salad or a pomegranate salad, these are sure to be your favorite winter salad recipes.

    Winter Kale Salad With Pomegranate, Almond And Cauliflower

    This winter kale salad is the perfect mix of sweet and savory. It's packed with nutritious ingredients like pomegranate, almond, and cauliflower. The dressing is a delicious combination of orange juice, olive oil, honey, garlic powder and herbs.

    Get the recipe for Winter Kale Salad with Pomegranate, Almond & Cauliflower here!

    Kale salad on plates.

    Sticky Sesame Chicken Salad: Best Winter Salad

    Looking for winter salads with chicken? Satisfy your craving for a hot, savory meal with this delightful sticky sesame chicken salad. The crunch of the cabbage and carrots is balanced out by the sweetness of honey and soy sauce. It's great served warm or cold and makes for a fantastic lunch or dinner!

    Get the recipe for Sticky Sesame Chicken Salad here!

    Sticky sesame chicken salad.

    Leafy Greens And Gnocchi Salad: Winter Salad Recipe

    Think Gnocchi bathed in a creamy, herbaceous sauce is the star of this filling winter salad. Tossed with leafy greens and topped with crunchy pumpkin seeds and dried cranberries, this salad is sure to become your favorite winter meal.

    Get the recipe for Leafy Greens & Gnocchi Salad here!

    Sweet onion gnocchi salad in a bowl.

    Spinach Salad With Creamy Chia Vinaigrette

    If you love good winter salads then you're gonna love this spinach salad with creamy chia vinaigrette. Spinach and arugula are combined with a mix of fresh vegetables like celery, onion, and bell peppers for maximum flavor. Then it's drizzled with a creamy vinaigrette made from chia seeds that will have your taste buds dancing!

    Get the recipe for Spinach Salad With Creamy Chia Vinaigrette here!

    Spinach salad with creamy poppyseed vinaigrette.

    Thai Slaw With Coconut Mango Dressing

    This is one of those easy winter salads you can make in no time. Slaw is a classic winter salad recipe with a twist. It's filled with shredded cabbage, carrots and red bell peppers and topped off with a creamy coconut mango dressing. The combination of tangy and sweet flavors makes it the perfect side dish to any meal!

    Get the recipe for Thai Slaw With Coconut Mango Dressing here!

    Thai slaw with coconut mango dressing.

    Citrus Spinach Salad With Feta Cheese

    For a winter salad with lots of orange flavor? Try this citrus spinach salad with feta cheese or goat cheese. It's packed with tons of vitamins and minerals, thanks to the spinach and oranges. The sweetness of the oranges and honey is balanced out by the tangy feta cheese for an amazing flavor combination!

    Get the recipe for Citrus Spinach Salad Here.

    Citrus spinach salad in a bowl.

    Bacon Kale Caesar Salad

    and kale create the perfect combination in this Caesar salad recipe. The crunch of the romaine lettuce is complemented by the smoky bacon flavor and creamy dressing. Get creative with your topping too- add croutons, parmesan cheese, or even pickled onions!

    Get the recipe for Bacon Kale Caesar Salad here!

    Bacon kale Caesar salad in a bowl.

    Chop Salad With Herb Roasted Chicken Pears And Prosciutto Here

    Salad with Herb Roasted Chicken is a great way to get your greens in during winter. This salad combines mixed greens with roasted red peppers, feta cheese, and juicy herb-roasted chicken for an amazing flavor combination. Top it off with a creamy Greek yogurt dressing for a delicious winter salad you'll be sure to love!

    The possibilities for winter salads are endless. From light and refreshing to hearty and filling, these recipes will help you make the most of this chilly season. Be sure to experiment with different ingredients and flavors- you're sure to create a unique winter salad dish that everyone will love! Enjoy!

    Get the ingredients list for salad With Herb Roasted Chicken Pears And Prosciutto here.

    Radish salad with chicken.

    Chipotle Roasted Acorn Squash

    Chipotle Roasted Acorn Squash is a sweet and savory winter salad that's sure to satisfy. Roast the squash until it's soft and caramelized, then top with crunchy walnuts, tangy feta cheese, and a smoky chipotle dressing for an amazing flavor combination. Serve it warm or cold- either way, you won't go wrong with this easy winter salad recipe.

    Learn how to make Chipotle Roasted Acorn Squash With Crispy Prosciutto & Pomegranates.

    Butternut squash salad.

    Harvest Salad With Maple Balsamic Dressing

    Salad with Maple Balsamic dressing is a salad that will have you coming back for more. This healthy salad consists of mixed greens, sweet potatoes, red onions and dried cranberries, topped off with a sweet and tangy maple balsamic dressing. The combination of flavors make this winter salad one you won't forget!

    Get the ingredients for this Salad With Maple Balsamic Dressing here.

    Harvest salad in a bowl.

    Clean & Green Chicken Salad

    Clean Chicken Salad is an amazing winter salad recipe that's sure to be a hit at your next party. This light and refreshing salad combines chopped chicken breast with green apple, celery and walnuts for a flavor combination you won't forget. Topped off with a creamy avocado dressing, this dish is sure to please!

    Here are the ingredients for Clean & Clean Chicken Salad.

    Green chicken salad in a bowl.

    Roasted Delicata Squash, Pear & Pomegrante Salad

    If you love roasted butternut squash then you'll enjoy this delicata Squash, Pear & Pomegrante Salad. Roast the squash until caramelized and top it off with diced pears, pomegranates, salty feta cheese and a light honey-lemon dressing for an amazing flavor combination that will have you coming back for seconds!

    Get the recipe for Roasted Delicatalectable Squash, Pear & Pomegrante Salad here.

    Winter salads are a great way to stay healthy and warm throughout the cold winter months. Experiment with different ingredients and flavors to create a unique dish that you'll love! Enjoy!

    Arugula salad with squash on a plate.

    Arugula Asparagus & Avocado Breakfast Salad

    Asparagus & Avocado Breakfast Salad is a delicious and nutritious way to start your day. This winter salad combines peppery arugula, roasted asparagus spears, creamy avocados and crunchy walnuts for a flavor combination you won't forget.

    Top it off with a zesty lemon dressing for an amazing breakfast experience! Switch the feta for goat cheese or blue cheese for a blue cheese salad option.

    Get the ingredients for Asparagus & Avocado Breakfast Salad here.

    Kale Salad With Almonds And Cranberries

    Salad with Almonds and Cranberries is the perfect winter salad recipe! Massage kale leaves with olive oil, lemon juice, and a pinch of salt to soften them up. Then mix in toasted almonds, tart cranberries, and crumbled feta cheese for a spectacular flavor combination that will have you coming back for more. Add carrot for a twist and enjoy a kale and carrot salad with toasted pine nuts.

    Get the recipe for Kale Salad with Almonds and Cranberries here!

    Kale salad in a bowl

    Pomegrante & Fennel Salad

    Fennel Salad is the perfect winter salad for those looking for something light and refreshing. Combine thinly sliced fennel, juicy pomegranate arils, peppery watercress and crunchy walnuts for a delicious combination of flavors. To make it even better, top it with a herby balsamic vinaigrette or tangy dressing.

    Get the ingredients for Fennel Salad here.

    Autumn Salad With Apples, Pomegrantes & Persimmons

    Apples, Pomegranates & Persimmons are the perfect excuse to enjoy seasonal fruits during the winter months. Enjoy this delicious salad made with crisp apple slices, juicy pomegranate arils, and sweet persimmons. Top off your salad with a zesty honey mustard dressing for a flavor combination you won't forget!

    Add some candied pecans to this easy winter salad recipe you'll love it!

    Pomegranate salad.

    Kale Caesar Salad: Colorful Winter Salad

    This kale salad is the perfect winter salad recipe for a hearty and healthy dish. Massage kale leaves with olive oil, lemon juice, and a pinch of salt to soften them up. Mix in pomegranates

    Kale Caesar Salad from Savory Lotus.

    Kale Caesar salad in a bowl.

    Fennel And Orange Salad

    This Salad is a vibrant and flavorful salad that looks as good as it tastes. This winter salad combines thinly sliced fennel, juicy oranges, toasted pine nuts, and feta cheese for an amazing flavor combination you won't forget. Top off your salad with a light olive oil dressing for the perfect finish!

    Get the ingredients for Fennel and Orange Salad here.

    Fennel salad.

    Beetroot Feta Salad With Walnuts And Dressing

    Winter Salad with Walnuts and Dressing is a great winter salad that looks as good as it tastes. This salad recipe combines roasted beetroots, crunchy walnuts, feta cheese crumbles, and fresh herbs for a flavor combination you won't forget. Top off your salad with a sweet and tangy walnut dressing.

    Get the recipe for this hearty salad here. Beetroot Feta Salad.

    Pouring salad dressing over beetroot salad.

    Ukrainian Vinaigrette Salad With Beetroot

    Ukrainian Salad With Beetroot is the perfect winter salad that will leave you satisfied and overflowing with flavor. This classic Russian salad combines potatoes, carrots, beetroot, and pickles for a unique combination of flavors. Top it off with a tangy vinegar dressing for an amazing flavor experience.

    Add some peas or roasted sunflower seeds to the salad and get the ingredients Ukrainian Vinegret Salad here.

    Vinaigrette salad with beetroot.

    Pan Seared Chicken Orange And Walnut Salad

    Orange and Walnut Salad is a hearty winter salad that packs a punch of flavor. This delicious salad combines pan-seared chicken breast, juicy oranges, crunchy walnuts and feta cheese for an amazing flavor experience. Top off your salad with a tangy orange vinaigrette for the perfect finish!

    Get the ingredients for this Chicken, Orange And Walnut Salad

    Chicken, orange and walnut salad on a plate.

    Seven Layer Salad: Easy Winter Salad Recipe

    Layered Salad is a perfect winter salad that is low in FODMAPs, gluten-free and vegan. This seven-layered salad combines greens, tomatoes, cucumbers, carrots, beets and feta cheese for an amazing flavor combination. Top off your salad with a creamy avocado dressing for the perfect finish!

    Get the ingredients for this tasty layered salad here!

    Layered salad in a jar.

    Tuna Salad With Asian Vinaigrette

    Asian Vinaigrette is a unique winter salad that will surely impress your family and friends. The combination of seared tuna, crunchy vegetables and an umami-packed vinaigrette makes this salad unforgettable! Top off your salad with crispy wonton strips for the perfect finish.

    Get the ingredients for Seared Tuna Salad here.

    Tuna salad.

    More Tasty Winter Salad Recipe Ideas

    For more winter salads why not try one of the following?

    • Smashed Potato Salad
    • Kale Apple Salad With Pomegranates
    • Best Goat Cheese Apple Salad
    • Kale Butternut Squash Salad With Blueberries
    • Roasted Butternut Squash Winter Salad

    Enjoy these favorite colorful winter salads and get ready to nourish your body. Enjoy the season with these healthy and tasty dishes! Happy eating!

    What Does Butternut Squash Taste Like?

    November 26, 2023 by Angela Milnes

    Butternut squash halves.

    What Does Butternut Squash Taste Like? That is the subject for this article today. Butternut squash is an easy-to-cook, delicious veggie that's sure to please.

    With all the nutritional servings of butternut squash and its versatile flavor profile, it's no surprise why so many chefs, women, and foodies make this delectable veggie a regular part of their diets!

    What Does Butternut Squash Taste Like
    [feast_advanced_jump_to]

    What Is Butternut Squash?

    The butternut squash, a type of winter squash, is notable for its unique bell-like form, characterized by a bulbous base that progressively slims down into a sleek neck.

    Its smooth skin is tan when fully matured, contrasting the vibrant, bright orange flesh.

    What Does Cooked Butternut Squash Taste Like?

    Cooking butternut squash brings out its natural sweetness and transforms it into a tender, flavorful dish. The cooking process is simple yet rewarding.

    When cooked, butternut squash develops a caramelized exterior and a soft, buttery interior that's slightly sweet and has a nutty, earthy taste. Some even liken the flavor to a sweetened, concentrated pumpkin.

    Can You Eat Butternut Squash Raw?

    Indeed, you can eat butternut squash raw. It has a slightly sweet taste and a satisfying raw crunch, making it a great addition to various dishes.

    For a delightful twist, consider shaving it into thin ribbons and adding it to your salad with aromatic herbs like bay leaf, chervil, chives, cilantro, and cinnamon. The flavor of raw butternut squash is uniquely nutty and mildly sweet, which pairs wonderfully with various aromatic herbs like sage or rosemary.

    What Does Butternut Squash Taste Like

    Does Butternut Squash Taste Sweet?

    Butternut squash's sweetness is more prominent when it's roasted, as the heat encourages the release of its natural sugars.

    The taste can be reminiscent of brown sugar, adding to its flavor profile's overall sweetness and complexity.

    This combination of sweetness and nuttiness makes butternut squash a delicious ingredient in various dishes.

    Is Butternut Squash Skin Tasty?

    The outer skin of butternut squash, while edible, has a unique taste that varies based on personal preference and cooking methods.

    Some may find the skin slightly bitter, although appropriate seasoning or preparation techniques can offset this.

    What Does Butternut Squash Taste Like

    Can You Eat Butternut Seeds?

    Yes, you can certainly eat butternut seeds. They are not only edible but also quite delicious when roasted. Like pumpkin and sunflower seeds, butternut seeds can be a tasty snack.

    It's worth noting that the seeds from different squash varieties, including butternut, acorn, and spaghetti squash, are edible. The seeds from butternut squash are comparable to pumpkin seeds and can be used in various recipes.

    What Does Butternut Squash Taste Like

    What Is Butternut Squash Similar To?

    Butternut squash shares similarities with several other squashes regarding texture and flavor. The best substitutes are buttercup squash, delicata squash, and honeynut squash.

    What Does Butternut Squash Taste Like

    Buttercup squash is often chosen as a replacement for butternut squash due to its lower calorie content and similar texture. Although smaller in size, Delicata squash also serves as a good substitute.

    Honeynut squash, a hybrid of buttercup and butternut squash, bears a similar shape and outward appearance to butternut squash.

    Acorn squash is another excellent alternative thanks to its similar, slightly less sweet flavor. Each alternative offers a unique flavor profile and can be used interchangeably in most recipes for butternut squash.

    What Does Butternut Squash Taste Like

    Is Butternut Squash A Sweet Potato?

    Butternut squash, despite its starchy texture and sweet flavor that might make you think it's a type of potato, is actually a vegetable.

    This winter squash is part of the gourd family, including other varieties like the pumpkin and the cucumber.

    When cooked, butternut squash becomes quite soft; it's a bit softer than a potato, making it perfect for purees, soups, and roasts.

    Does Butternut Squash Taste Like Carrots?

    Butternut squash, while often compared to carrots in terms of its sweetness and texture, has a taste that is uniquely its own. It carries a sweet, slightly nutty flavor that sets it apart from other vegetables.

    This nuttiness is one of the defining characteristics of butternut squash, giving it a depth of flavor that is both unexpected and delightful.

    Some people describe the taste as a cross between a sweet potato with a touch of carrot-like sweetness. Yet, the nutty undertone is what truly makes butternut squash stand out.

    What Does Butternut Squash Taste Like

    Does Butternut Squash Taste Like Pumpkin?

    Butternut squash and pumpkin indeed taste similar. Many individuals liken the delicious squash taste of butternut squash to that of pumpkin pie without spices.

    Their firm, orange flesh is frequently utilized interchangeably in various recipes due to their matching flavor profiles.

    What Does Butternut Squash Taste Like

    Which Tastes Better, Butternut Squash Or Pumpkin?

    Both butternut squash and pumpkin have unique taste profiles and uses in cooking. However, there are subtle differences between the two.

    When cooked, roasted squash has a slightly sweet, nutty taste, so it's often used in recipes with a subtle sweetness.

    On the other hand, pumpkin has a milder flavor, though it's not as sweet as butternut squash. Both can be used interchangeably in most recipes, but the choice often comes down to personal preference or the specific flavor profile desired for a dish.

    What Does Roasted Butternut Squash Taste Like?

    When you roast butternut squash cubes, it brings a subtle sweetness similar to sweet potatoes but with a distinct twist. As the cubes bake, their natural sugars caramelize and taste nutty, sweet, and earthy.

    This taste profile is amplified by the soft, buttery texture the cubes acquire during roasting. The exterior of the roasted butternut squash cubes becomes slightly crisp, satisfyingly contrasting the creamy interior.

    In comparison, sweet potatoes also have a natural sweetness, but their flavor is more earthy, and their texture is denser.

    Is Butternut Squash Healthy?

    Butternut Squash Is A Highly Healthy Food Choice. It's packed with Vitamin C, crucial in supporting the immune system, promoting skin health, and aiding in iron absorption.

    Besides Vitamin C, butternut squash is also rich in fiber, potassium, and magnesium, all essential for overall well-being.

    Different Types Of Butternut Squash

    Here are some varieties of butternut squash:

    • Waltham Butternut Squash: This is the most common variety. It has a sweet and nutty flavor with a smooth texture.
    • Butterbush Butternut Squash: This variety is compact and ideal for small gardens. It has a sweet flavor similar to the Waltham butternut.
    • Burpee's Butterbush Butternut Squash: A smaller variety perfect for individual servings.
    • Early Butternut Squash: As the name suggests, this variety matures earlier than others.
    • Ultra Butternut Squash: This variety produces larger squashes weighing up to 5 pounds.
    • Ponca Butternut Squash: Known for its high sugar content, making it incredibly sweet.
    • Argonaut Butternut Squash: This jumbo variety can weigh 15-20 pounds.
    • Honeynut Squash: A smaller and sweeter variety than the classic butternut squash.

    Where To Buy Butternut Squash?

    If you're looking to find butternut squash, you're in luck, as it is readily available year-round in almost every major grocery chain.

    Various online sources provide many recipes and ways to prepare this versatile vegetable. From simple roasted butternut squash that turns out perfectly tender with crispy edges to a creamy homemade butternut squash soup full of delicious roasted flavor, there's something for every palate.

    Enjoy The Yummy Butter Squash!

    With its sweet, nutty taste and crunchy texture, it's no wonder why butternut squash has been steadily gaining popularity in recent years.

    Whether you're looking to add a bit of sweetness to your meal or need a nutritious egetable side dish, butternut squash is sure to fit the bill. Its versatile uses and health benefits make it an excellent choice for any kitchen. Give it a go today and savor the exceptional flavor of this remarkable vegetable!

    • How To Cut Butternut Squash (Peeling And Cubing)
    • Butternut Squash Mac And Cheese
    • Roasted Pumpkin Soup

    Purple Cauliflower: A Detailed Guide

    November 26, 2023 by Angela Milnes

    Purple cauliflower.

    Are you looking to get creative with your cooking and explore something new? Purple cauliflower is a special veggie that has caught the attention of chefs and interests cooks, young and old. Its vibrant hue makes it visually stunning, and its rich flavor adds an exciting dimension to any dish.

    If you're ready to take a taste journey into the extraordinary, this purple cauliflower guide will give you all the information you need! With this knowledge, let's explore all this mysterious vegetable has to offer.

    purple cauliflower a detailed guide
    [feast_advanced_jump_to]

    What Is Purple Cauliflower?

    Purple cauliflower is a vibrant and unique variant of the more commonly known white cauliflower.

    This eye-catching vegetable gets its rich purple hue from the presence of anthocyanins, which are natural antioxidants also found in other blue and purple fruits and vegetables like blueberries and red cabbage.

    Is Purple Cauliflower Natural?

    Purple cauliflower may seem like a rare and unusual sight, but it is indeed a naturally occurring vegetable. Just as purple potatoes and purple cabbage get their vibrant hue from anthocyanins, so too does purple cauliflower.

    The purple color is not a result of genetic modification but rather due to natural mutations that have occurred over time in heirloom varieties of the plant.

    These variations are preserved and cultivated by farmers who appreciate the unique colors and flavors they bring to the table. So, rest assured that purple cauliflower, along with other colorful vegetables, is a natural and healthy addition to your diet.

    Different Varieties Of Colored Cauliflower

    Colored cauliflower is visually appealing making it a popular choice among food enthusiasts alike. Here are some of the different varieties of colored cauliflower:

    Purple Cauliflower

    This vibrant variety gets its color from anthocyanins, which are potent antioxidants. Purple cauliflower has a slightly sweeter taste compared to white cauliflower and retains its color when cooked.

    purple cauliflower

    Orange Cauliflower

    Also known as "Cheddar" cauliflower, this brightly colored cauliflower variety has a higher beta-carotene content, giving it its orange hue. It has a slightly creamier texture and a mild, sweet taste, making it perfect for a variety of dishes.

    orange cauliflower

    Green Cauliflower

    Green cauliflower, often called "broccoflower" or "Romanesco," has a distinct spiral pattern and a bright green color. Romanesco has a nuttier flavor and a firmer texture compared to traditional cauliflower. Another variety, called "Green Macerata," has a more typical cauliflower shape with a milder flavor.

    green cauliflower image

    What Does Purple Cauliflower Taste Like?

    Purple cauliflower offers a mild, slightly sweet taste with a hint of nuttiness. Its tender texture makes it a versatile and delicious addition to various dishes.

    Is Purple Cauliflower Healthier Than White Cauliflower?

    Purple cauliflower is indeed considered healthier than white cauliflower, primarily due to its higher antioxidant content. Anthocyanins are powerful antioxidants that prevent cells from damaging and may reduce the risk of chronic diseases.

    In addition, purple cauliflower contains a good amount of vitamin C, just like white cauliflower. Vitamin C is very essential for strengthening the immune system, generating collagen for healthy skin and promoting overall well-being. So, while both varieties provide essential nutrients, purple cauliflower's added benefit of antioxidants makes it a more healthful choice.

    Purple Cauliflower Recipes

    Purple cauliflower is not only a beautiful and vibrant addition to any meal, but it also offers a unique taste that is both delicious and nutritious. Here are five mouthwatering dishes that showcase this colorful vegetable:

    Roasted Purple Cauliflower

    Roasted purple cauliflower brings out the natural sweetness of purple cauliflower by roasting it to perfection. The combination of lemon juice, garlic powder, and olive oil creates a zesty and flavorful coating that enhances the taste of the roasted cauliflower.

    Red pepper flakes add a spicy kick, making this side dish a delightful blend of flavors that will leave you craving more.

    purple cauliflower a detailed guide

    Purple Cauliflower Soup With Parmesan

    A comforting and warm bowl of soup is always a welcome sight, and this recipe takes it to the next level with the addition of purple cauliflower.

    The nutty flavor of parmesan cheese complements the soup's velvety texture, while the presence of black pepper enhances the cauliflower's earthy tones. A sprinkle of fresh parsley adds a touch of freshness to this satisfying dish.

    Purple Cauliflower Salad With Roasted Vegetables

    This vibrant salad is a feast for the eyes as well as the taste buds. This dish brings a medley of flavors and textures, featuring an assortment of roasted vegetables. You can roast vegetables of your choice, such as carrots, asparagus, onions, bell peppers etc.

    The purple cauliflower adds a pop of color, while the lemon juice and olive oil dressing bring everything together in a harmonious blend of tastes.

    purple cauliflower a detailed guide

    Purple Cauliflower Rice And Cheese Casserole

    Transform your favorite cheesy casserole into a healthy and colorful masterpiece with this recipe. The purple cauliflower rice provides a unique twist on the traditional dish, while the combination of cheeses adds a rich and creamy element.

    The addition of garlic powder, red pepper flakes, and black pepper creates a subtle heat that perfectly complements the natural sweetness of the cauliflower.

    Mashed Purple Cauliflower

    This eye-catching twist on classic comfort food is a fantastic way to incorporate purple cauliflower into your menu. The mashed purple cauliflower offers a smooth and creamy texture while adding butter and cream enhances its rich flavor.

    Add a sprinkle of garlic powder to add depth to the dish. Plus, the striking presentation of the vibrant cauliflower makes for an elegant side or protein-filling base. This recipe is one to impress your taste buds and your guests alike! Don't forget to check out our Purple Cauliflower Mash recipe. It's a huge hit with the whole family!

    instant pot cauliflower mash recipe

    How To Store Purple Cauliflower?

    Proper storage of purple cauliflower is essential for maintaining its vibrant color and freshness, making it a delight for home cooks to use in various recipes.

    To store purple cauliflower, first, keep it away from direct sun exposure, as this can cause the color to fade and brown spots. Next, wrap the cauliflower head in parchment paper, which helps to absorb any excess moisture and prevent spoilage.

    Then, place the wrapped cauliflower in an airtight container or resealable plastic bag, ensuring minimal air inside. Store the container in the refrigerator, ideally in the crisper drawer, where it will remain fresh and ready for use.

    How Long Does Purple Cauliflower Last?

    Fresh, whole cauliflower can last about 1-2 weeks when stored properly in the refrigerator. If cut into florets, the shelf life is shorter, usually lasting around 3-5 days. Once cooked, cauliflower should be kept in an airtight container in the fridge and used within 3-5 days.

    If you want to extend the shelf life of cauliflower, you can also freeze it. Blanched cauliflower florets can last up to 9-12 months when stored in a container or freezer bag in the freezer – an easy way to have this healthy veggie on hand for future use.

    From Where To Buy Purple Cauliflower?

    To find the most vibrant and fresh colored cauliflowers, head over to your local farmers market or specialty grocery store, where you can often find a variety of colorful varieties, including purple cauliflower, Japanese eggplant, purple potatoes, purple cabbage and more.

    Enjoy Purple Cauliflower In Your Diet

    In conclusion, purple cauliflower is a nutritious and vibrant vegetable that can add a colorful twist to any meal. With its unique flavor and antioxidant-rich benefits, it's no wonder it's gaining popularity.

    From roasted dishes to casseroles, soups and salads, the possibilities are endless when cooking with purple cauliflower.

    Proper storage and freezing techniques can extend shelf life and sustain vibrant hues. Opt for local farmers' markets or specialty stores to ensure the freshest produce.

    How To Cut Butternut Squash (Peeling And Cubing)

    November 26, 2023 by Angela Milnes

    Butternut squash cubes in a bowl.

    Do you love butternut squash, or do you want to learn the best way to peel and cube butternut squash? If so, you've come to the right place. This article will teach you the best way to peel and cut this delicious vegetable and share some great recipe ideas.

    If you already know how to cut butternut squash safely, check out our Plantain Tortillas recipe or this great recipe for cooking Baked Spaghetti Squash. Or maybe send this to your family member who isn’t sure how to cut up a squash either!

    How To Cut Butternut Squash
    [feast_advanced_jump_to]

    How To Cut Butternut Squash?

    Before you attempt to cut your butternut squash on the cutting board you'll need to peel and clean your veg. Grab a well sharpened knife and veggie peeler and get ready to cut and peel.

    Here is a step-by-step tutorial for preparing butternut squash well.

    How To Cut Butternut Squash

    Step One: Peel Butternut Squash

    Using your knife, cut the top & bottom of the butternut squash so you have a flat surface to rest on while peeling your veg. Next, cut the butternut squash in half.

    Carefully slice down to cut the peel away. If you want to use a vegetable peeler then that's perfectly okay, use a sharp vegetable peeler like the pro swivel vegetable peeler. I find using a knife easier as the butternut squash skin can be a little tough.

    Step Two: Cut Butternut Squash

    For the top half, cut each section of your butternut squash into slices, stack your slices & cut into long strips. Then cut those strips into cubes!

    Cutting butternut squash for the first time can be tricky, so take your time and practice! If you don't want to cut cubes then you can also chop the top half into wedges.

    For the bottom half, cut in half, use a spoon to scoop out the seeds with a large spoon or ice cream scoop. Then lie each half of the cut butternut on it’s side & slice. Take each slice of butternut squash & cube into small pieces.

    How To Cut Butternut Squash

    Note: Don't Use A Dull Knife

    When you prep butternut squash try not to use a dull knife. A dull knife can be dangerous because it can slip off the butternut squash skin and cut you.

    Sharp knives will give you more control when cutting & peeling the veg. Safety First!

    Check Out our article on Knife Safety Tips for kids.

    Can You Eat Butternut Squash Skin?

    Yes, you can eat the skin of butternut squash. It is entirely edible and it contains vitamin A. However, some people prefer to peel the skin off because it can be tough and difficult to chew.

    How Do You Cook Butternut Squash?

    Now you have your butternut squash cubes, you're ready to cook it. You can cook your butternut squash in a variety of ways, such as roasting, sautéing, steaming and boiling. It's also great to add to soups and stews!

    How To Roast Butternut Squash

    To roast butternut squash cubes: Preheat oven to 375°F (190°C). Line baking sheet with parchment paper or lightly grease with oil.

    Place the cubed butternut squash onto baking sheet. Drizzle with olive oil, salt and pepper. Roast for 20 minutes or until softened when pierced with a fork.

    How To Cut Butternut Squash

    How To Saute Butternut Squash?

    To sauté butternut squash cubes: Heat one tablespoon of olive oil in a large frying pan over medium heat. Add cubed butternut squash and cook for 8-10 minutes or until softened and lightly browned. Season with salt and pepper, to taste.

    How To Boil Butternut Squash?

    And that’s it! You now know how to cut butternut squash. Now go ahead & enjoy this delicious winter vegetable in your favorite recipes. Enjoy!

    Can I Cook Butternut Squash In The Instant Pot?

    Yes! Cooking winter squash in the Instant Pot is a great way to save time and still get all of the health benefits from this veggie. Here’s how it’s done:

    Start by cubing your butternut squash (follow instructions above). The butternut squash prep time should take around 5-10 minutes.

    Place the cut butternut cubes in your Instant Pot, add one cup of water or vegetable stock and set to high pressure for 3 minutes.

    Let the steam release naturally for 15 minutes before releasing your Instant Pot manually.

    Once done, you can serve the squash as is or use it in your favorite recipes! Check out this delicious and easy Instant Pot Butternut Squash Soup recipe.

    How To Cut Butternut Squash

    How Long Does Butternut Squash Last?

    Butternut squash will last up to 3 months when stored in a cool, dry place.

    You can also keep it in the refrigerator if you plan on using it within a week or so. Butternut squash can also be frozen for up to 6 months.

    Can You Freeze Butternut Squash?

    Yes, to freeze, cut into cubes and place in an airtight container. When ready to use, defrost in the refrigerator overnight and use as normal.

    How To Tell If Butternut Squash Is Bad

    If your butternut squash has gone bad, you will notice signs such as soft spots or discoloration. If the squash has a sour smell, this is an indication it has gone bad and should be discarded.

    You can also tell if squash has gone bad by tasting it - if it tastes bitter or off then discard immediately.

    How Many Carbs In Butternut Squash?

    Butternut squash contains 22g of carbohydrates per 1 cup serving, making it a great low-carb option.

    Best Butternut Squash Recipes

    Here is a quick list of butternut squash recipes you make with this delicious and versatile vegetable.

    • Roasted Butternut Squash Soup
    • Roasted Butternut Squash Salad
    • Butternut Squash Mac and Cheese
    • Kale Butternut Squash Salad With Blueberries

    I hope you enjoyed this tutorial on how to peel and cut butternut squash! Happy cooking! 🙂

    No-Churn Vegan Mango Sorbet

    November 26, 2023 by Angela Milnes

    No-Churn Vegan Mango Sorbet.

    This no-churn Vegan Mango Sorbet is what summer dreams are made of. With fresh mango flavor and a delicious creamy texture, this frozen treat comes together with just 3 simple ingredients, and is a great dairy free dessert to enjoy on a hot day.

    Mango Sorbet Recipe
    [feast_advanced_jump_to]

    Why This Recipe Works

    • Simple: My favorite part about this vegan mango sorbet recipe has to be its simplicity- you literally need zero prep time to put this together.
    • Tasty: love frozen desserts, especially during the hot summer days, and this recipe has to be one of my favorite frozen treats of all time.
    • Homemade: I never thought I'd be able to nail a homemade sorbet, but this Mango Sorbet recipe was literally so easy to make, there's no way I could go wrong.

    🥘 Ingredients

    Vegan Mango Sorbet Ingredients

    You'll need just 3 simple ingredients to make the vegan sorbet.

    • Frozen mango: Acts as the main ingredient, providing the tropical flavor and icy texture.
    • Maple syrup: Adds a layer of natural sweetness to balance the tartness of the mango.
    • Lime juice: Enhances the mango's sweetness and adds a refreshing zing.

    For the complete list of ingredients with measurements and instructions, please see the recipe card at the bottom of the post.

    📖  Substitutions & Variations

    • I also love adding some coconut cream to the mango sorbet to make it extra creamy.
    • If you enjoyed this sorbet, you might also want to try using other frozen fruit and make different fruit sorbets.
    • Strawberry sorbet can be a great recipe to try out, and you can make it in the exact same way.

    🔪How To Make Mango Sorbet

    Ready to try this easy sorbet recipe? Here's what you'll need to do.

    Use this section for process shots, alternating between the step and image showing the step. Users don't like seeing process shots cluttering up the recipe card, so include your process shots here.

    Mango Sorbet Recipe
    1. Step 1: In a blender or food processor, combine the frozen mango pieces, maple syrup and the juice of 2 limes.
    Mango Sorbet Recipe
    1. Step 2: Process for about 5 minutes, or until fully smooth.
    Mango Sorbet Recipe
    1. Step 3: Spread the smooth mango paste in a deep baking sheet and freeze for at least 3 hours.
    Mango Sorbet Recipe
    1. Step 4: Once frozen scoop your mango sorbet into a bowl and enjoy.

    👩‍🍳 Expert Tips

    Before you jump right into the recipe, you might want to take note of these tips and tricks too!

    • If you don't have lemon juice, lime juice can work just as well.
    • For some extra tanginess and citrusy flavor, you can also add some lime zest in addition to the lime juice.
    • If you're planning to use an additional sweetener for this sorbet, you can use some sugar or simple syrup too.
    • To help the sorbet hold its shape better even when you serve it, you can add some corn syrup into the mixture.
    • You can also add just a pinch of salt to enhance the flavor of the sorbet.
    • If you don't have frozen mango, you can start off this recipe with fresh mangoes too. Another great idea is to freeze the fresh fruit for a few hours before you use it.
    • Remember to use a high powered blender or a good quality food processor to make the fruit puree.

    💭 FAQs

    How can I prevent my mango sorbet from becoming too hard after freezing?

    To maintain a scoopable texture, it's essential to balance the sugar content. Using a simple syrup made from water and sugar helps achieve this balance, preventing the sorbet from freezing too solid.

    What is the best method for storing homemade mango sorbet?

    Store the sorbet in an airtight container in the freezer. To minimize the formation of large ice crystals, consider stirring the sorbet every hour during the first few hours of freezing

    Can I use fresh mangoes instead of frozen ones for this sorbet recipe?

    While frozen mangoes are recommended for a creamy texture, you can use fresh mangoes. If using fresh fruit, freeze the mango chunks overnight before blending to achieve the desired consistency.

    How long does homemade mango sorbet remain fresh in the freezer?

    For optimal flavor and texture, consume the sorbet within one month of freezing. Since it's homemade without preservatives, it's best enjoyed sooner rather than later.

    Best way to store sorbet?

    The best way to store your sorbet is to transfer it to an airtight container, ideally a freezer safe container.

    🧂Serving Suggestions

    Wondering what to serve with sorbet?

    • Granola Berry Cups: Fill small cups or bowls with a mixture of granola and fresh berries, such as strawberries, blueberries, or raspberries. The crunchy granola pairs well with the smooth sorbet, and the berries add a burst of freshness and color.
    • Fresh Fruit Salad: Prepare a simple fruit salad with a combination of your favorite fresh fruits, such as diced mango, pineapple, kiwi, and grapes. The vibrant colors and flavors of the fruit complement the sorbet beautifully.
    • Almond Tuiles: Serve almond tuiles on the side. These thin, crispy cookies provide a delightful crunch and a subtle nuttiness that pairs well with the fruity flavors of the sorbet.
    Mango Sorbet Recipe

    🍽 More Mango Recipe Ideas

    • Best Mango Chutney Recipe: Vegan Recipe.
      Easy Mango Chutney Recipe (Sweet, Tangy & Spicy)
    • Mangonada in a glass.
      Best Mangonada Recipe (Mango Chamoyada Drink)
    • Mango Arugula Salad.
      Mango Arugula Salad With Walnuts
    • Mango Pineapple Smoothie.
      Mango Pineapple Smoothie

    Did you make this recipe? Leave a review and a ⭐⭐⭐⭐⭐ rating below, or tag us in our Facebook Group! Alternatively, bookmark it in your browser or save to Pinterest.

    No-Churn Vegan Mango Sorbet.

    Mango Sorbet

    Angela Milnes
    With fresh mango flavor and a delicious creamy texture, this frozen Mango Sorbet treat comes together with just 3 simple ingredients. It's also dairy free.
    5 from 4 votes
    Print Recipe Pin Recipe Rate this Recipe
    Prep Time 5 minutes mins
    Cook Time 3 hours hrs
    Total Time 3 hours hrs 5 minutes mins
    Course Desserts
    Cuisine American
    Servings 4 Servings
    Calories 200 kcal

    Ingredients
      

    • 2 lbs. Frozen Mango Pieces
    • ¼ cup Maple Syrup
    • 2 Limes juiced

    Instructions
     

    • In a blender or food processor, combine the frozen mango pieces, maple syrup and the juice of 2 limes and process for about 5 minutes, or until fully smooth.
    • Spread the smooth mango paste in a deep baking sheet and freeze for at least 3 hours. Enjoy!

    Notes

    If you don’t have lemon juice, lime juice can work just as well.
    For some extra tanginess and citrusy flavor, you can also add some lime zest in addition to the lime juice.
    If you’re planning to use an additional sweetener for this sorbet, you can use some sugar or simple syrup too.
    To help the sorbet hold its shape better even when you serve it, you can add some corn syrup into the mixture.
    You can also add just a pinch of salt to enhance the flavor of the sorbet.
    If you don’t have frozen mango, you can start off this recipe with fresh mangoes too. Another great idea is to freeze the fresh fruit for a few hours before you use it.
    Remember to use a high powered blender or a good quality food processor to make the fruit puree.

    Nutrition

    Serving: 1gCalories: 200kcalCarbohydrates: 51gProtein: 2gFat: 1gSaturated Fat: 0.2gPolyunsaturated Fat: 0.2gMonounsaturated Fat: 0.3gSodium: 5mgPotassium: 460mgFiber: 5gSugar: 44gVitamin A: 2471IUVitamin C: 92mgCalcium: 58mgIron: 1mg
    Print Recipe Pin Recipe Rate this Recipe
    Tried this recipe?Let us know how it was!

    More Recipes to Try

    If you enjoyed this sweet treat, and are inspired to try some more dessert recipes, here are a few good ones worth checking out.

    • Zucchini Chocolate Chip Muffins
    • Best Hot Cocoa Dip
    • Vegan Oreo Milkshake Recipe
    • Lemon Pudding Cake
    • Poinsettia Sourdough Loaf
    • Keto Oatmeal Using Almond Milk
    • Crustless Pumpkin Pie
    • Christmas Charcuterie Board
    • Organic Baked Apples
    • Brown Sugar Pineapple Ham

    Easy Air Fryer Hasselback Potatoes

    November 26, 2023 by Angela Milnes

    Easy Air Fryer Hasselback Potatoes.

    These Air Fryer Hasselback Potatoes are the ultimate snack or side dish that you can put together in minutes, and enjoy with almost any of your favourite foods.

    air fryer hasselback potatoes
    [feast_advanced_jump_to]

    Why This Recipe Works

    • My favorite part about these delicious Air Fryer Hasselback potatoes is the fact that they're actually healthier than their deep fried counterparts.
    • Deep frying might get the potatoes to crispy perfection, but you'll also be getting more saturated fat.
    • In contrast, using your Air Fryer will get the Hasselback potatoes to get perfectly crispy and will cut down the cooking time too.

    🥘 Ingredients

    Hasselback Potato Ingredients

    Here’s what you’ll need to make these irresistible Air Fryer Hasselback Potatoes:

    • Potatoes – Starchy spuds like Russets work best, but Yukon Gold or red potatoes are solid backups.
    • Oil – A little veggie or olive oil helps crisp things up.
    • Seasonings – We’re talking coriander, turmeric, and paprika for warmth and depth, plus a pinch of salt to bring out all the flavors.

    Wanna freestyle? Swap out the spices for garlic powder, Italian seasoning, or even a sprinkle of chili flakes if you’re feeling spicy.

    For the complete list of ingredients with measurements and instructions, please see the recipe card at the bottom of the post.

    🔄 Substitutions & Variations

    • Cheesy Upgrade: Sprinkle with nutritional yeast or melt some vegan cheese on top for an extra indulgent bite.
    • Herb Lovers: Swap coriander for rosemary or thyme for a more earthy, aromatic twist.
    • Spice It Up: Add a dusting of smoked paprika, cayenne, or chili flakes for a kick of heat.

    🔪How To Make Air Fryer Hasselback Potatoes

    Once you have all the ingredients ready, here's what you'll need to do to make Hasselback potatoes in the Air Fryer.

    SQUARE POTATO

    Step One: Wash the potatoes, dry them. Cut the edges of the tuber to make a cube. Place the cube on a board. On both sides, place sushi sticks. A sharp knife should be used to make non-slash cuts to the sticks in approximately 0.25-inch increments. Guide the knife strictly perpendicular to the board.

    air fryer hasselback recipes

    Step Two: Turn the potatoes 90 degrees and continue slicing in the same manner. Place the prepared potatoes in a bowl. Dilute salt in 2 cups of water. Pour the water into the potatoes so that the liquid completely covers the vegetables. Leave the potato cubes for 15 minutes

    air fryer hasselback recipes

    Step Three: Pat the potatoes dry in a towel. Using a silicone brush, coat the cube on all sides and in between the incisions. Sprinkle spices generously over the potatoes.

    air fryer hasselback recipes

    Step Four: Place the potatoes cut side up in a preheated Air Fryer basket and air fry at 390 degrees Fahrenheit for 20 minutes. Flip potatoes over and continue to cook for 8 more minutes or until the potatoes are fork tender. Transfer hot potatoes to serving pans or onto plates. Top with vegetables, basil leaves or hot pepper to serve. Enjoy!

    air fryer hasselback recipes

    👩‍🍳 Expert Tips

    Ready to give this recipe a try? Here are some more tips and tricks you might want to keep in mind while you're cooking Hasselback potatoes in Air Fryer.

    • Remember to grease your Air Fryer basket well with some olive oil before air frying the Hasselback potatoes. This will keep them from sticking to the basket.
    • Also make sure you leave a bit of space between each potato to ensure even air frying.
    • If you can't find Russet potatoes, you could also try using red potatoes or Yukon gold potatoes for this recipe.
    • Try to choose potatoes that are roughly the same size. If you have some larger potatoes, you can chop them so that they're all roughly the same size.
    • In addition to all the spices and seasonings that I used, you can also experiment and try using other seasonings of your choice. Minced garlic or garlic powder, Italian seasoning and salt and pepper are some good choices.
    • You can also sprinkle some cayenne or chili powder for that spicy kick if you want to.
    • Depending on your personal preference, you can choose to keep the potato skin on or remove them. Potato skins tend to crisp up nicely when you coat them in olive oil, so I would highly recommend keeping them on.
    • The key to making the perfect crispy Air Fryer Hasselback potatoes is to have the right thickness of the potato slices. Thin slices are, obviously, much better than thicker slices.

    💭 FAQs

    Can I use a different type of potato for this recipe?

    Yes, you can substitute Russet potatoes with red potatoes or Yukon gold potatoes. Just ensure they are of similar size for even cooking.

    How can I get the potatoes extra crispy?

    To achieve crispy potatoes, make sure to coat the potatoes with oil before air frying, and leave some space between each potato for even air circulation.

    Can I store leftovers?

    Yes, you can store leftover Hasselback potatoes in an airtight container in the fridge for up to 3 days. Reheat them in the air fryer to maintain the crispiness.

    Can I add other seasonings to the potatoes?

    Absolutely! You can experiment with seasonings like garlic powder, Italian seasoning, cayenne pepper, or chili powder for extra flavor.

    Best Way to Store Hasselback Potatoes

    Your leftover Air Fryer Hasselback potatoes can be stored in the refrigerator for 3 days, if not longer. Just remember to store them in a clean, airtight container to keep it fresh. You can then reheat it in the microwave, but it won't retain its crispy texture. To get those perfect crispy edges, you'll need to reheat it in the Air Fryer.

    🧂Serving Suggestions

    These are my favorite dishes to serve with Hasselback Potatoes:

    • The crispy skin of the Hasselback potatoes can be a nice contrast with any creamy topping. While sour cream is an absolute classic you can never go wrong with, you can also try teaming it up with some Herby Ranch Dressing or even just some grated cheese and your favorite toppings.
    • You can also prepare a simple butter mixture by mixing melted butter with some garlic powder and your favorite herbs and seasonings, and drizzling it over your hasselback potatoes towards the end,
    • Don't forget to top the crispy Air Fryer Hasselback potatoes with some chopped fresh herbs of your choice. Fresh parsley and chives are two good options.
    • These potatoes also go well with burgers, whether it's a Homemade Turkey Burger or Alaskan Salmon Burgers, you can find a great burger recipe to pair with your hasselback potatoes.
    air fryer hasselback recipes

    🍽 Related Recipes

    • edamame stir fry in a white bowl.
      Easy Edamame Stir Fry (15-Minute Protein-Packed Side Dish)
    • Chicken And Cabbage Stir Fry Recipe.
      Chicken And Cabbage Stir Fry Recipe
    • Zucchini Egg Bake Recipe.
      Best Zucchini Egg Bake Recipe
    • New Years charcuterie Board.
      New Years Charcuterie Board

    Did you make this recipe? Leave a review and a ⭐⭐⭐⭐⭐ rating below, or tag us in our Facebook Group! Alternatively, bookmark it in your browser or save to Pinterest.

    Easy Air Fryer Hasselback Potatoes.

    Air Fryer Hasselback Potatoes

    Angela Milnes
    Get ready to enjoy crispy, golden Air Fryer Hasselback Potatoes! With their perfectly sliced, fan-like appearance, these potatoes are not only stunning but also deliciously flavorful.
    5 from 4 votes
    Print Recipe Pin Recipe Rate this Recipe
    Prep Time 5 minutes mins
    Cook Time 20 minutes mins
    Total Time 25 minutes mins
    Course Side Dish
    Cuisine American
    Servings 4 Servings
    Calories 239 kcal

    Ingredients
      

    • 4 Potatoes
    • 2 tbsp. Vegetable Oil
    • ½ tsp. Paprika
    • ½ teaspoon Turmeric
    • ½ tsp. Coriander
    • 1.5 tsp. Salt

    Instructions
     

    • Wash the potatoes, dry them. Cut the edges of the tuber to make a cube. Place the cube on a board. On both sides, place sushi sticks. A sharp knife should be used to make non-slash cuts to the sticks in approximately 0.25-inch increments. Guide the knife strictly perpendicular to the board.
    • Turn the potatoes 90 degrees and continue slicing in the same manner. Place the prepared potatoes in a bowl. Dilute salt in 2 cups of water. Pour the water into the potatoes so that the liquid completely covers the vegetables. Leave the potato cubes for 15 minutes
    • Pat the potatoes dry in a towel. Using a silicone brush, coat the cube on all sides and in between the incisions. Sprinkle spices generously over the potatoes.
    • Place the potatoes cut side up in a preheated Air Fryer basket and air fry at 390 degrees Fahrenheit for 20 minutes.
    • Flip potatoes over and continue to cook for about 8 more minutes or until the potatoes are fork tender.
    • Transfer hot potatoes to serving pans or onto plates. Top with vegetables, basil leaves or hot pepper to serve. Enjoy!

    Notes

    Remember to grease your Air Fryer basket well with some olive oil before air frying the Hasselback potatoes. This will keep them from sticking to the basket.
    Also make sure you leave a bit of space between each potato to ensure even air frying.
    If you can’t find Russet potatoes, you could also try using red potatoes or Yukon gold potatoes for this recipe.
    Try to choose potatoes that are roughly the same size. If you have some larger potatoes, you can chop them so that they’re all roughly the same size.

    Nutrition

    Serving: 1gCalories: 239kcalCarbohydrates: 38gProtein: 6gFat: 8gSaturated Fat: 1gPolyunsaturated Fat: 4gMonounsaturated Fat: 2gTrans Fat: 0.1gCholesterol: 3mgSodium: 143mgPotassium: 952mgFiber: 5gSugar: 2gVitamin A: 310IUVitamin C: 42mgCalcium: 35mgIron: 2mg
    Print Recipe Pin Recipe Rate this Recipe
    Tried this recipe?Let us know how it was!

    More Air Fryer Recipes

    Enjoyed making Hasselback potatoes in Air Fryer? Here are some other cook ways to put your favorite Air Fryer to use!

    • Air Fryer Yellow Squash
    • Air Fryer Sweet Potato Fries
    • Air Fryer Broccolini
    • Air Fryer Baked Potato
    • Air Fryer Lemon Pepper Wings
    • Parmesan Roasted Zucchini
    air fryer hasselback recipes

    Easy Slow Cooker Spinach Artichoke Dip

    November 26, 2023 by Angela Milnes

    Easy Slow Cooker Spinach Artichoke Dip.

    Super creamy, rich and full of flavor, this Slow Cooker Spinach Artichoke Dip is packed with flavor and is surprisingly easy to put together. Perfect for super bowl or any of your favorite get-togethers and parties., you'll love this easy slow cooker dip.

    Slow cooker spinach artichoke Dip
    [feast_advanced_jump_to]

    This recipe pairs great with Dill Roasted Radishes. Or use it as a dip and pair with Air Fryer Buffalo Drumsticks or Air Fryer Beet Chips.

    💖 Why This Recipe Works

    • Simple: My favorite part about this spinach dip is its flavor and simplicity.
    • Creamy: The creaminess from the cheeses, the tanginess from the sour cream and the spinach and artichokes together form this Spinach Artichoke Dip one of the best versatile game day dips ever.
    • Delicious: This has to be the best spinach artichoke dip recipe ever!

    ⭐ Star Ingredients

    Spinach Artichoke Dip Ingredients

    You'll need a few simple ingredients to make this slow cooker spinach artichoke dip.

    • Spinach: Adds a rich, leafy flavor and makes the dip more substantial.
    • Artichoke hearts: Lend the dip its characteristic tangy, slightly sweet taste.
    • Cheese: Parmesan and cream cheese give the dip a creamy texture and a delightful cheesy flavor.
    • Sour cream: Adds tanginess, enhancing the overall flavor profile of the dip.
    • Milk: Helps to adjust the consistency of the dip, making it smoother and easier to spread.
    • Garlic: Fresh minced garlic infuses the dip with a robust, aromatic flavor.
    • Seasonings: Simple salt and pepper are used to season the dip, letting the main ingredients shine.

    For the complete list of ingredients with measurements and instructions, please see the recipe card at the bottom of the post.

    🔄 Substitutions & Variations

    • Dairy-Free Option: Swap cream cheese for a vegan alternative and use dairy-free sour cream.
    • Spicy Twist: Add red pepper flakes, cayenne, or a splash of hot sauce for a kick.
    • Extra Flavor Boost: Mix in caramelized onions or a squeeze of lemon juice to brighten the flavors.

    🔪How To Make Slow Cooker Spinach Artichoke Dip

    Got all the spinach artichoke dip ingredients ready? Here's what you'll need to do next.

    1. Step 1: Add all of the ingredients to the crockpot.
    2. Step 2: Cook on high for 1-2 hours or until all of the cheese is melted and slightly bubbly and it is warm all the way through.
    3. Step 3: Stir well and serve with your favorite cracker or chip.
    Spinach artichoke dip.

    👩‍🍳 Expert Tips

    Think you're ready to give this spinach dip recipe a try? Here are some tips and tricks you might want to take note of.

    • Remember to use full fat cream cheese for this recipe. It really makes a huge difference in the flavor and makes the dip rich and creamy.
    • If you use low fat cream cheese, you'll have to compensate by adding some more of the other kinds of cheese. Use softened cream cheese for best results.
    • Shredded mozzarella cheese is another great addition to this spinach artichoke dip.
    • I used fresh spinach for this recipe, but you could also use frozen spinach if you want to. You should be able to find frozen chopped spinach at your supermarket.
    • Depending on your personal preference, you can choose to use chopped spinach or keep the spinach leaves whole.
    • Fresh baby spinach is another great choice if you don't want to chop the spinach.
    • If you're using frozen spinach, remember to drain off all the excess liquid and remove as much moisture as you can before using it for the recipe.
    • You can also experiment and try adding other seasonings and herbs of your choice. Red pepper flakes and dried basil are two good options.

    💭 FAQs

    Can I use frozen spinach for this recipe?

    Yes, you can use frozen spinach. Just be sure to thaw and drain it well to remove any excess moisture before adding it to the dip.

    How can I make this dip spicier?

    To add some heat, consider adding red pepper flakes, hot sauce, or a bit of cayenne pepper to the dip.

    How should I store leftover spinach artichoke dip?

    Store leftover dip in an airtight container in the fridge for 2-3 days. Reheat it in the microwave or slow cooker before serving.

    What are some ideas for using leftover dip?

    Leftover dip can be used in stuffed chicken breasts, a creamy pasta bake, as a pizza topping, or stuffed inside mushrooms for a tasty twist.

    💖 Serving Suggestions

    • My favorite way to serve spinach artichoke dip is to team it up with some pita chips, Plantain Tortilla Chips and lightly browned baguette slices.
    • You could also serve your spinach dip with pita chips, colorful veggies or place on a platter or with a cheese charcuterie board.
    • If looking for several dips for a platter serve with caramelized onion dip or this east smoked salmon dip recipe.
    Slow cooker spinach artichoke Dip

    🍽 More Slow Cooker Recipes to Try

    • Slow Cooker Chicken Chili.
      Slow Cooker Chicken Chili
    • Slow Cooker Chicken Teriyaki.
      Slow Cooker Chicken Teriyaki
    • Slow Cooker Million Dollar Chicken Casserole.
      Slow Cooker Million Dollar Chicken Casserole
    • Slow Cooker meatball Subs.
      Slow Cooker Meatball Subs

    Did you make this recipe? Leave a review and a ⭐⭐⭐⭐⭐ rating below, or tag us in our Facebook Group! Alternatively, bookmark it in your browser or save to Pinterest.

    Easy Slow Cooker Spinach Artichoke Dip.

    Slow Cooker Spinach Artichoke Dip

    Angela Milnes
    Indulge in the creamy, savory goodness of this Slow Cooker Spinach Artichoke Dip! Packed with tender spinach, tangy artichokes, and rich, melty cheese, this dip is the ultimate crowd-pleaser.
    5 from 5 votes
    Print Recipe Pin Recipe Rate this Recipe
    Prep Time 5 minutes mins
    Cook Time 2 hours hrs
    Total Time 2 hours hrs 5 minutes mins
    Course Appetizer
    Cuisine American
    Servings 4 Servings
    Calories 713 kcal

    Ingredients
      

    • 1 ½ cups Fresh Spinach
    • 10 oz Marinated Artichoke Hearts
    • 18 oz Cream Cheese
    • 1 cup Shredded Parmesan Cheese
    • ½ cup Sour Cream
    • ½ cup Milk
    • 1 tablespoon Minced Garlic or 2-3 cloves
    • ½ teaspoon Black Pepper
    • ½ teaspoon Salt

    Instructions
     

    • Add all of the ingredients to the crockpot.
    • Cook on high for 1-2 hours or until all of the cheese is melted and slightly bubbly and it is warm all the way through.
    • Stir well and serve with your favorite cracker or chip.

    Notes

    Remember to use full fat cream cheese for this recipe. It really makes a huge difference in the flavor and makes the dip rich and creamy.
    If you use low fat cream cheese, you'll have to compensate by adding some more of the other kinds of cheese. Use softened cream cheese for best results.
    Shredded mozzarella cheese is another great addition to this spinach artichoke dip.
    I used fresh spinach for this recipe, but you could also use frozen spinach if you want to. You should be able to find frozen chopped spinach at your supermarket.
    Depending on your personal preference, you can choose to use chopped spinach or keep the spinach leaves whole.
    Fresh baby spinach is another great choice if you don't want to chop the spinach.
    If you're using frozen spinach, remember to drain off all the excess liquid and remove as much moisture as you can before using it for the recipe.
    You can also experiment and try adding other seasonings and herbs of your choice. Red pepper flakes and dried basil are two good options.

    Nutrition

    Serving: 1gCalories: 713kcalCarbohydrates: 18gProtein: 18gFat: 64gSaturated Fat: 34gPolyunsaturated Fat: 2gMonounsaturated Fat: 14gCholesterol: 171mgSodium: 1719mgPotassium: 374mgFiber: 2gSugar: 8gVitamin A: 3922IUVitamin C: 19mgCalcium: 444mgIron: 1mg
    Print Recipe Pin Recipe Rate this Recipe
    Tried this recipe?Let us know how it was!

    More Recipes To Try

    If you enjoyed trying out this easy recipe and are inspired to try your hands at some more fun and interesting recipes, here are a few good handpicked ones to try out.

    • Easy Smoked Salmon Dip
    • Mango and Pineapple Salsa
    • Caesar Dressing
    • Slow Cooker Chicken Bacon Ranch Pasta
    • Instant Pot Cajun Rice And Beans
    • Fun Veggie Train With Bell Peppers
    • Breakfast Sliders With Sausage, Egg And Cheese
    • Chicken Thighs In Honey And Mustard Sauce

    Creamy Lavender Cheesecake (15 Minutes Prep)

    November 26, 2023 by Angela Milnes

    Easy No Bake Lavender Cheesecake.

    Calling all cheesecake lovers—this Lavender Cheesecake Recipe is your next dreamy dessert! Silky, floral, and no baking required, it’s a unique twist that looks fancy but is secretly super easy to make.

    lavender cheesecake

    Lavender desserts are having a moment, and this cheesecake lavender creation is one of my absolute favorites. With its calming aroma, soft purple hue, and rich creamy texture, it's the kind of dessert that turns heads at brunch, baby showers, or afternoon tea.

    If you're into floral flavors, try my no bake cherry limeade cheesecake or cool off with a glass of butterfly pea lemonade.

    [feast_advanced_jump_to]

    💖 Why This Recipe Works

    • Simple: No oven, no fuss—just chill and serve.
    • Creamy: Light, creamy texture with delicate floral flavor.
    • Staples: All you'll need is a few kitchen staples and under 15 minutes of hands-on kitchen time to make this.

    ⭐ Star Ingredients

    Lavender Cheesecake Ingredients.

    To make this no bake lavender cheesecake you'll need a few star ingredients:

    • Lavender syrup – This is what makes the cheesecake sing. I’ve tested a few, and trust me—culinary-grade lavender syrup gives the best balance of floral without tasting like soap. Just a little goes a long way.
    • Cream cheese – Always go full-fat and let it soften first. Cold cream cheese = lumpy filling, and we want that dreamy, smooth texture.
    • Whipped cream – Folded into the filling, it gives this no-bake cheesecake a light, mousse-like finish. I’ve used both homemade and store-bought—both work, but freshly whipped cream makes it extra special.

    For the complete list of ingredients with measurements and instructions, please see the recipe card at the bottom of the post.

    📖  Substitutions & Variations

    • Blueberry swirl – Drop spoonfuls of compote into the batter to make a blueberry lavender cheesecake.
    • Honey lavender cheesecake – Add a drizzle of honey and a few dried buds for elegance. I made a lavender honey cheesecake version and it was devoured in no time.
    • Lemon twist – Add lemon zest and juice for a citrusy kick. Lemon lavender cheesecake is amazing!
    • Vegan version – Use dairy-free cream cheese, coconut whipped cream, and a vegan butter crust.
    • Mini cheesecakes – Divide into cupcake liners for single-serve treats
    • Oreo crust – For a bolder base, swap graham crackers for crushed Oreos.

    If you love no bake treats, try my no bake ocean water cheesecake or vegan brownie in a mug!

    🔪How To Make Lavender Cheesecake

    lavender cheesecake base
    1. Step 1: Add biscuits to a food processor and pulse into fine crumbs or crush them in a large zip lock bag using rolling pin.
    lavender cheesecake base
    1. Step 2: Place the crust into a medium bowl and pour melted butter.
    lavender cheesecake base
    1. Step 3: Mix everything and press crumbs into 8” springform pan into an even layer. Refrigerate for about 30 minutes. 
    making lavender cheesecake filling
    1. Step 4: Beat cream cheese, whipped cream, and sugar in a large bowl.
    making lavender cheesecake filling
    1. Step 5: Use a stand mixer and beat until smooth. Pour lavender syrup and add a few drops of food coloring and beat for additional 2 minutes.
    making lavender cheesecake filling
    1. Step 6: Pour the mixture into the prepared pan.
    lavender cheesecake with cream topping
    1. Step 7: Place the pan in the refrigerator for at least 2-3 hours.
    lavender cheesecake
    1. Step 8: Decorate with wiping cream and lavender. Enjoy!

    💡Hint: Chill the mixing bowl and beaters before whipping cream—it holds volume better and makes the texture extra light.

    👩‍🍳 Expert Tips

    • Always use culinary-grade lavender to avoid bitterness.
    • If using dried lavender instead of syrup, steep it in warm cream, then strain before mixing. I find lavender syrup easier to use.
    • To slice cleanly, dip your knife in hot water and wipe between each cut.

    💭 FAQs

    Can I use a different flavor of syrup instead of lavender?

    Yes! Rose, blueberry, or even vanilla syrup will work beautifully with this cheesecake base.

    How long does lavendar cheesecake need to set in the refrigerator?

    At least 2–3 hours, but overnight is best for a firmer texture.

    Can I make this lavender cheesecake recipe ahead of time?

    Yes, this cheesecake can be made ahead. Store it in the fridge for up to 3 days and it will still be delicious.

    What’s the best way to store leftover lavender cheesecake?

    Cover the cheesecake with wrap or store slices in an airtight container. Chill for up to 3 days.

    💖 Serving Suggestions

    Wondering what to serve with no bake lavendar cheesecake? Try these suggestions:

    • Hot Chocolate: Serve a rich and creamy hot chocolate on the side. The warmth and indulgence of the hot chocolate will contrast nicely with the cool and creamy cheesecake.
    • Earl Grey Tea Latte – The bergamot and floral notes echo the lavender for a soothing tea-time treat.
    • Fresh Berry Compote – Spoon over the cheesecake for color and sweet-tart contrast.
    lavender cheesecake

    🍽 More Delicious Desserts

    • Beetroot Chocolate Cake.
      Best Beetroot Chocolate Cake Recipe (Moist + Festive!)
    • Christmas Pavlova Wreath Berry Meringue.
      Christmas Pavlova Wreath Berry Meringue
    • Greek Yogurt Chia Pudding With Raspberries.
      Greek Yogurt Chia Pudding With Raspberries
    • Pumpkin French Toast Casserole.
      Pumpkin French Toast Casserole

    Did you make this recipe? Leave a review and a ⭐⭐⭐⭐⭐ rating below, or tag us in our Facebook Group! Alternatively, bookmark it in your browser or save to Pinterest.

    Easy No Bake Lavender Cheesecake.

    Creamy Lavender Cheesecake With Graham Crackers

    Angela Milnes
    Treat yourself to a slice of elegance with this Lavender Cheesecake recipe! Delicately infused with the soothing flavor of lavender, this creamy cheesecake is a dreamy dessert.
    5 from 4 votes
    Print Recipe Pin Recipe Rate this Recipe
    Prep Time 10 minutes mins
    Cook Time 2 hours hrs
    Additional Time 2 hours hrs
    Total Time 4 hours hrs 10 minutes mins
    Course Desserts
    Cuisine American
    Servings 8 Servings
    Calories 342 kcal

    Ingredients
      

    • 1 ½ cups Graham Cracker
    • ½ cup Butter melted
    • 1 cup Powdered Sugar
    • 8 Ounce Philadelphia Cream Cheese
    • ½ cup Whipped Cream
    • 5 Drops Purple Food Colouring.
    • 1 tablespoon Lavender Syrup
    • 1 Sprig Dry lavender for garnish

    Instructions
     

    • Add biscuits to a food processor and pulse into fine crumbs or crush them in a large zip lock bag using rolling pin. Place the crust into a medium bowl and pour melted butter. Mix everything and press crumbs into 8” springform pan into an even layer. Refrigerate for about 30 minutes. 
    • Beat cream cheese, whipped cream, and sugar in a large bowl. Use a stand mixer and beat until smooth. Pour lavender syrup and add a few drops of food coloring and beat for additional 2 minutes.
    • Pour the mixture into the prepared pan. Place the pan in the refrigerator for at least 2-3 hours. Decorate with wiping cream and lavender. Enjoy!

    Notes

    Remember to start off with softened cream cheese. It is ideally best to leave the cream cheese at room temperature for a couple hours before you use it for this recipe.
    If you're making whipped cream from scratch, start with chilled heavy cream or whipping cream.
    You can also add a dash of vanilla extract into the mix to enhance the flavor of the cheesecake.
    To bring some tanginess to the cheesecake, you can also add sour cream.
    To add a bit of texture and some luxurious elements to the cheesecake, you can also add some culinary lavender buds into the mixture, and on the top of the cheesecake.
    Before adding the crumb mixture into the pan, make sure you grease the pan with some butter.

    Nutrition

    Serving: 1gCalories: 342kcalCarbohydrates: 31gProtein: 3gFat: 24gSaturated Fat: 14gPolyunsaturated Fat: 1gMonounsaturated Fat: 6gTrans Fat: 0.5gCholesterol: 62mgSodium: 285mgPotassium: 75mgFiber: 1gSugar: 21gVitamin A: 761IUCalcium: 47mgIron: 1mg
    Print Recipe Pin Recipe Rate this Recipe
    Tried this recipe?Let us know how it was!

    Best Avocado Deviled Eggs Recipe

    November 26, 2023 by Angela Milnes

    Best Avocado Deviled Eggs Recipe.

    These Avocado Deviled Eggs are a healthier twist to the classic recipe, and pack in the deliciousness of the rich avocado with some seasoning to take the flavors up a notch.If you love deviled eggs or are an avocado lover, you've got to give this recipe a try.

    Avocado deviled eggs on a plate.
    [feast_advanced_jump_to]

    Why You'll Love Avocado Deviled Eggs

    • Delicious: If you have been looking for some delicious recipes that are easy to recreate, this is one's a great recipe in more ways than one.
    • Fast: It barely takes 20 minutes to put them together, and they end up looking so fancy too!
    • Healthy: And of course, the best part is that they're healthy and super delicious too!

    These eggs would go great with a Dorito Taco Salad or Rotisserie Chicken Salad.

    Recipe Ingredients

    To make the avocado deviled eggs, here's what you'll need.

    • Eggs: The foundation of the recipe, providing a perfect pocket for the creamy filling.
    • Avocados: Contribute a natural creaminess to the yolk mixture.
    • Lime Juice: Adds a refreshing citrusy twist.
    • Smoked Paprika: Infuses a smoky flavor and a spicy kick.
    • Cilantro: Garnishes the dish with freshness and a pop of color.
    Avocado Deviled Eggs Ingredients.

    How To Make Avocado Deviled Eggs

    Once you have all the ingredients ready, here's what you'll need to do to make avocado deviled eggs.

    Six eggs in a pot.

    Step One: Add eggs to a medium pot, and fill halfway with water. Boil over medium-high heat for 10 minutes, then turn off the heat, and cover for 10 minutes.

    Mashed avocado in a bowl.

    Step Two: While the eggs are cooling, chop the cilantro, and cut the avocados in half. Use a spoon to get the avocado out of the shell, and add to a mixing bowl. 

    Smoked paprika on mashed avocado in a bowl.

    Step Three: Add the lime juice and smoked paprika to the bowl, and use a fork to mash it all together.

    Making avocado egg filling for avocado deviled eggs.

    Step Four: After the eggs have been set for 10 minutes, rinse eggs in ice and cold water (notes above), then peel. Slice eggs in half lengthwise, adding the cooked yolks to the avocado mixture. Mix together.

    Adding avocado filing to boiled egg.

    Step Five: Use a piping bag or spoon to add the avocado mixture to the egg halves. 

    Avocado devilled eggs on a plate.

    Step Six: Sprinkle with a pinch of paprika, and chopped cilantro. Chill until ready to serve.

    Keto avocado deviled eggs on a plate.

    Top Tips For Nailing Avocado Eggs

    While making these deviled eggs is super easy, you might want to take note of these little tips and tricks too.

    • If you don't have the lime juice that the recipe calls for, you can use lemon juice instead.
    • To add flavor to the mixture with the avocado and egg yolks, you can add some garlic powder, cayenne pepper, bagel seasoning or just some salt and black pepper.
    • If you want the mixture to have a spicy kick, you can mix in some chili powder or hot sauce.
    • To get the perfect creamy texture for the filling, you can process the egg yolks and the avocado in a food processor.
    • I used finely chopped cilantro to garnish the eggs, but you can also try using chopped green onion or fresh chives.
    • Chopped red onion can also be a good addition to the filling for the avocado deviled eggs.
    • You can also mix some sour cream into the mixture to bring some extra flavor.

    Storage Instructions

    • Refrigeration: After preparing the avocado deviled eggs, promptly refrigerate for 2-3 days.
    • Airtight Container: Store the avocado deviled eggs in an airtight container to prevent them from absorbing odors from other foods in the refrigerator. You can place a layer of paper towel on the bottom of the container to absorb any excess moisture.
    • Covering: If you're storing the avocado-deviled eggs on a plate or platter, cover them tightly with plastic wrap or aluminum foil before placing them in the refrigerator.

    How To Serve Deviled Eggs?

    Your creamy avocado deviled eggs can be served on their own or as a side dish in a nice serving platter.

    • Crisp Bacon: Crumbled bacon adds a savory crunch and smoky flavor that complements the creamy texture of deviled eggs perfectly.
    • Pickled Red Onions: Tangy pickled red onions provide a bright contrast to the richness of deviled eggs. Their acidity cuts through the creamy filling and adds a burst of flavor.
    • Fresh Herbs: Sprinkle chopped fresh herbs such as chives, dill, or parsley over the deviled eggs for a pop of color and a fresh herbal aroma. The herbs enhance the overall presentation and add a subtle layer of flavor.
    Best Avocado Deviled Eggs Recipe.

    Avocado Deviled Eggs

    Angela Milnes
    Give a fresh, creamy twist to a classic favorite with these Avocado Deviled Eggs! Rich avocado is blended with the yolks, creating a smooth and flavorful filling.
    5 from 3 votes
    Print Recipe Pin Recipe Rate this Recipe
    Prep Time 10 minutes mins
    Cook Time 10 minutes mins
    Additional Time 10 minutes mins
    Total Time 30 minutes mins
    Course Appetizers
    Cuisine American
    Servings 6 Servings
    Calories 171 kcal

    Ingredients
      

    • 6 Eggs
    • 2 Avocados
    • 1 tablespoon Lime Juice
    • ¼ teaspoon Smoked Paprika
    • tablespoon Cilantro finely chopped

    Instructions
     

    • Add eggs to a medium pot, and fill halfway with water. Boil over medium high heat for 10 minutes, then turn off the heat, and cover for 10 minutes.
    • While eggs are cooling, chop the cilantro, and cut avocados in half. Use a spoon to get the avocado out of the shell, and add to a mixing bowl. 
    • Add the lime juice and smoked paprika to the bowl, and use a fork to mash it all together.
    • After the eggs have set for 10 minutes, rinse eggs in ice and cold water (notes above), then peel. Slice eggs in half lengthwise, adding the cooked yolks to the avocado mixture. Mix together.
    • Use a piping bag or spoon to add the avocado mixture to the egg halves. Sprinkle with a pinch of paprika, and chopped cilantro. Chill until ready to serve.

    Notes

    If you don’t have the lime juice that the recipe calls for, you can use lemon juice instead.
    To add flavor to the mixture with the avocado and egg yolks, you can add some garlic powder, cayenne pepper, bagel seasoning or just some salt and black pepper.
    If you want the mixture to have a spicy kick, you can mix in some chili powder or hot sauce.

    Nutrition

    Calories: 171kcalCarbohydrates: 6gProtein: 7gFat: 14gSaturated Fat: 3gPolyunsaturated Fat: 2gMonounsaturated Fat: 8gTrans Fat: 0.02gCholesterol: 164mgSodium: 67mgPotassium: 390mgFiber: 5gSugar: 1gVitamin A: 378IUVitamin C: 7mgCalcium: 33mgIron: 1mg
    Print Recipe Pin Recipe Rate this Recipe
    Tried this recipe?Let us know how it was!

    More Healthy Recipes

    If you enjoyed making avocado deviled eggs, and are inspired to try some more such fun and easy recipes, here are a few good ones to check out.

    • Best Low Carb Broccoli Salad
    • Vegan Avocado Toast
    • Avocado Salad
    • Roasted Beetroot Salad With Honey Mustard Dressing
    • Mediterranean Orzo Salad With Lemon Vinaigrette
    • Grilled Eggplant With Lemon Dip

    Best Homemade Maple Syrup Recipe

    November 26, 2023 by Angela Milnes

    Best Homemade Maple Syrup Recipe.

    This Homemade Maple Syrup Recipe is your go-to fix when the real thing runs out—or when you want a quick, delicious syrup using pantry staples. No corn syrup, no weird ingredients, and definitely no running to the store required.

    homemade maple syrup.

    Let’s be real, there’s nothing sadder than waffles without syrup. This quick maple-flavored syrup comes together in under 15 minutes and tastes shockingly close to the store-bought stuff. Whether you're in the middle of pancake emergency mode or just want a clean-label alternative to commercial syrup, this recipe delivers.

    You'll love serving this syrup with Air Fryer French Toast and pairs perfectly with Buckwheat Pancakes or Vegan Waffles With Pumpkin.

    [feast_advanced_jump_to]

    💖 Why This Recipe Works

    • No corn syrup required: Just real sugar and maple extract.
    • Fast and simple: Ready in about 10 minutes with pantry ingredients.
    • Tastes like the real deal: Rich flavor and gorgeous amber color.

    ⭐ Star Ingredients

    Maple Syrup Ingredients.
    • Granulated Sugar: The main base. Dissolves quickly and gives the syrup a silky smooth texture.
    • Dark Brown Sugar: Adds depth, caramel notes, and that classic rich color.
    • Maple Extract: The secret to authentic flavor without boiling maple sap.

    🔪 How To Make Maple Syrup

    homemade maple syrup
    1. Step 1: Bring water to a boil. Add granulated sugar and stir until fully dissolved. Add dark brown sugar and stir until fully dissolved, cooking over medium-high heat.
    homemade maple syrup
    1. Step 2: Reduce the heat and stir until it simmers, then let it simmer for 5 minutes. For a thicker syrup, continue to simmer for 10 more minutes over medium-high heat. Let cool to thicken. Enjoy right away or store in an airtight jar.  

    💡Hint: The longer you simmer, the thicker your syrup becomes. Keep an eye on the heat to avoid boiling over.

    homemade maple syrup

    👩‍🍳 Expert Tips

    • Add vanilla or butter: A splash of vanilla or a pat of butter gives it extra depth and a luxurious finish.
    • Mapeline is a great substitute: If you can’t find pure maple extract, Mapeline imitation works beautifully.
    • Store it right: Let the syrup cool completely, then transfer it to a clean glass jar or bottle. It keeps in the fridge for up to 2 months.
    • Make it thick: For a stickier syrup, simmer longer to reduce and caramelize the sugars.
    homemade maple syrup

    💭 FAQs

    How Is Maple Syrup Actually Made?

    Pure maple syrup is usually crafted from the extract of maple trees. To make the syrup, you collect sap and make sure it is boiled down to a very concentrated form.

    Boiling sap intensifies its flavor, and it creates the perfect sticky and sweet concoction you're looking for.

    Can I make this syrup without brown sugar?

    You can, but you’ll miss the deep flavor and color. If you only have white sugar, add a spoonful of molasses for a similar effect.

    How do I make it thicker?

    Let it simmer longer. The longer it reduces, the thicker and stickier it becomes.

    Is this the same as pure maple syrup?

    Not quite. This is an imitation maple syrup recipe that mimics the taste and consistency of store-bought pancake syrup—without corn syrup.

    💖 How To Use Homemade Maple Syrup?

    • My favorite way of using this homemade syrup is to use it as as teammate to my Air Fryer French Toast and Buckwheat Pancakes.
    • I almost always make this in a big batch, and I've never turned to those packaged pancake syrups ever since.
    • This syrup is so much more than a classic pancake syrup. You can also use it on Vegan Waffles With Pumpkin or add to plain toast.
    • It is the perfect alternative to pure maple syrup during maple syrup season.
    homemade maple syrup

    🍽 Try These Tasty Dessert Recipes

    • The Best No Bake Banana Pudding.
      The Best No Bake Banana Pudding
    • Peach Pie Bars.
      Homemade Peach Pie Bars – Sweet, Simple, and So Good!
    • Cherry Cobbler Gluten Free.
      Gluten Free Fruit Cobbler Recipe
    • Tropical Papaya Berry Bircher With Chia Seeds.
      Tropical Papaya Berry Bircher With Chia Seeds

    Did you make this recipe? Leave a review and a ⭐⭐⭐⭐⭐ rating below, or tag us in our Facebook Group! Alternatively, bookmark it in your browser or

    Best Homemade Maple Syrup Recipe.

    Homemade Maple Syrup

    Angela Milnes
    Enjoy the rich, natural sweetness of Homemade Maple Syrup! With just a few simple ingredients, you can create a delicious, golden syrup that’s perfect for drizzling over pancakes, waffles, or oatmeal.
    4.60 from 5 votes
    Print Recipe Pin Recipe Rate this Recipe
    Prep Time 5 minutes mins
    Cook Time 20 minutes mins
    Additional Time 0 minutes mins
    Total Time 25 minutes mins
    Course Condiments
    Cuisine American
    Servings 2 Servings
    Calories 803 kcal

    Ingredients
      

    • 1 Cup Dark Brown Sugar
    • 1 Cup Granulated Sugar
    • 1 Cup Water
    • 2 teaspoons Maple Extract

    Instructions
     

    • Bring water to a boil. Add granulated sugar and stir until fully dissolved. 
    • Add dark brown sugar and stir until fully dissolved, cooking over medium high heat.
    • Reduce the heat and stir until it simmers, let simmer for 5 minutes. For a thicker syrup, continue to simmer for 10 more minutes over medium high heat.
    • Let cool to thicken. Enjoy right away or store in an airtight jar.  

    Notes

    To add an extra layer of flavor to the sugar maple syrup, you can also add a dash of vanilla extract into the mix.
    Butter can be another great addition to this homemade syrup mixture. It can add a beautiful richness that you wouldn’t even find in pure maple syrup.
    You can make your own maple syrup and refrigerate it for up to 2 months. Remember to use good quality storage containers or just a glass jar to store this homemade pancake syrup.
    If you can’t find the maple extract that is needed for this recipe, Mapeline can be a great substitute to give the syrup that perfect store bought syrup flavor.

    Nutrition

    Serving: 1gCalories: 803kcalCarbohydrates: 208gProtein: 0.1gFat: 0.3gSodium: 38mgPotassium: 148mgSugar: 207gCalcium: 96mgIron: 1mg
    Print Recipe Pin Recipe Rate this Recipe
    Tried this recipe?Let us know how it was!

    Best Turtle Brownies Recipe

    November 26, 2023 by Angela Milnes

    Best Turtle Brownies Recipe.

    Rich, decadent and packed with the crunch of pecans, these Turtle Brownies are insanely delicious. If you love a good chocolate brownie, you've got to give this recipe a try. They're perfect for the holidays when you're entertaining, potlucks or just any time you're craving for some chocolatey brownies.

    Turtle Brownies.
    [feast_advanced_jump_to]

    💖 Why This Recipe Works

    • Simple: The simplicity of this turtle brownie recipe blows my mind away. It comes together with boxed brownie mix and just a few pantry staples, and barely takes 15 minutes of prep time to make.
    • Versatile: Plus, you can bring in lots of variations to the flavor to too- you don't need to just stick to the caramel and pecans.
    • Delicious: This has to be one of the most versatile and delicious dessert recipes out there.

    ⭐ Star Ingredients

    Turtle Brownies Ingredients.

    Here's what you'll need to make these turtle brownies.

    • Brownie mix: Serves as the primary base for the chocolatey goodness.
    • Vegetable oil: Moistens the brownie batter, ensuring a soft, fudgy texture.
    • Eggs: Act as the binding agent, holding the ingredients together.
    • Pecans: Give a delightful crunch, adding an interesting texture contrast.
    • Caramel bits: Enrich the flavor profile with their sweet and buttery taste.

    For the complete list of ingredients with measurements and instructions, please see the recipe card at the bottom of the post.

    📖  Substitutions & Variations

    • To add some extra chocolatey flavor, you can add some more chocolate chips or chocolate chunks into the brownie batter. And you can, of course, top the finished brownies with some chocolate frosting instead of using a caramel sauce or caramel topping.

    🔪How To Make Turtle Brownies From Scratch

    Turtle Brownies Recipe ingredients.
    1. Step 1: Preheat the oven to 325 degrees. Line a pan with parchment paper or grease it with some non-stick cooking spray. Add the brownie mix, oil, water, and eggs to a large bowl.
    turtle brownie mixture in a bowl.
    1. Step 2: Stir with the spatula until combined. Do not overmix. Set a small amount of the pecans, caramel bits, and chocolate chips aside to top the brownies with. Then fold the remaining pecans, caramel bits, and chocolate chips into the batter.
    turtle brownie mixture in a baking pan.
    1. Step 3: Pour batter into the prepared baking pan, spread batter to fill almost filling each of the cavities. Sprinkle a few chopped pecans, caramel bits, and chocolate chips on the top of each.
    turtle brownie mixture in a baking pan.
    1. Step 4: Transfer the pan to the oven and bake for 30 minutes, or until a toothpick inserted into the center comes out clean. Once the brownies are done, remove the pan from the oven, place it on a wire rack, and allow the brownies to cool completely before cutting.  If you have trouble removing the brownies from the pan, gently run a butter knife around all of the edges of each brownie.
    Turtle brownies ready to be served.

    👩‍🍳 Expert Tips

    Ready to try making these turtle brownies? Here are some tips and tricks you might want to keep note of.

    • To add some more crunch factor to these turtle brownies, you can use toasted pecans instead of regular pecans that we used.
    • Semi sweet chocolate chips or dark chocolate chips are two other good additions to the brownie batter.
    • If you're making homemade brownies, and not used a boxed mix, make sure you use the highest quality ingredients like unsweetened cocoa powder (ideally Dutch process cocoa powder), unsalted butter, granulated sugar, baking powder, vanilla extract, baking soda and some light brown sugar for the flour mixture.
    • Remember to use unsweetened or semisweet chocolate chips or chopped chocolate, or you'll end up making the brownies overly sweet.
    • Make sure the brownies cool completely before you try to remove them from the pan and cut them.
    • If you love the flavor of caramel, you can also mix some caramel sauce into the batter as you're pouring it into the prepared pan. Remember not to overmix the caramel layer and let it shine through.

    💭 FAQs

    Can I use a different type of nut in this recipe?

    Yes, you can substitute pecans with walnuts or almonds for a different crunch and flavor. Just make sure to chop them to similar sizes for consistency.

    Can I make the brownies without caramel bits?

    If you don't have caramel bits, you can drizzle caramel sauce over the brownies after they are baked, or mix caramel chunks into the batter for a rich, gooey texture.

    How can I store leftover turtle brownies?

    Store leftover brownies in an airtight container at room temperature for 2-3 days, or refrigerate them for longer shelf life. Reheat in the microwave for a warm treat.

    Can I make these brownies with homemade brownie batter?

    Absolutely! You can use your favorite homemade brownie recipe instead of the boxed mix. Just be sure to adjust the baking time as needed based on your batter consistency.

    Best Way to Store Brownies

    You can store your leftover brownies in an airtight container for 2-3 days, or refrigerate them if you want them to last longer. Remember to warm brownies in the microwave before you serve them.

    💖 Serving Suggestions

    These are my favorite ways to serve brownies:

    • The best, easiest way to serve these caramel pecan brownies is to team them up with some vanilla ice cream and a light drizzle of salted Caramel Sauce.
    • I also like to sprinkle some chopped pecans to bring a fun finishing touch to the brownies.
    • The combination of warm brownies and a Vanilla Milkshake With Sprinkles is a match made in heaven. I love to eat brownies with milkshake.
    turtle brownies are ready to be served.

    🍽 Treat Yourself — Again!

    • Papaya Banana Yogurt Ice Cream with Cashews.
      Best Banana Yogurt Ice Cream (With Papaya)
    • Best Pink Oreo Millecrepes.
      Best Pink Oreo Millecrepes
    • Creamy Vanilla Eclair Cake.
      Creamy Vanilla Eclair Cake
    • Traditional Banana Cream Pie.
      Old Fashioned Banana Cream Pie

    Did you make this recipe? Leave a review and a ⭐⭐⭐⭐⭐ rating below, or tag us in our Facebook Group! Alternatively, bookmark it in your browser or save to Pinterest.

    Best Turtle Brownies Recipe.

    Turtle Brownies

    Angela Milnes
    Indulge in the ultimate chocolate experience with Turtle Brownies! Rich, fudgy brownies are topped with a gooey caramel layer and sprinkled with crunchy pecans.
    5 from 4 votes
    Print Recipe Pin Recipe Rate this Recipe
    Prep Time 15 minutes mins
    Cook Time 30 minutes mins
    Total Time 45 minutes mins
    Course Desserts
    Cuisine American
    Servings 12 Servings
    Calories 477 kcal

    Ingredients
      

    • 18.3 ounce Boxed Brownie Mix
    • ½ cup Vegetable Oil
    • 3 tablespoon Water
    • 2 Eggs
    • 1 cup Pecans
    • 1 cup Caramel Baking Bits
    • 1 cup Chopped Pecans

    Instructions
     

    • Preheat the oven to 325 degrees. Line a pan with parchment paper or grease it with some non stick cooking spray.
    • Add the brownie mix, oil, water, and eggs to a large bowl and stir with the spatula until combined. Do not overmix.
    • Set a small amount of the pecans, caramel bits and chocolate chips aside to top the brownies with. Then fold the remaining pecans, caramel bits and chocolate chips into the batter.
    • Pour batter into the prepared baking pan, spread batter almost filling each of the cavities. Sprinkle a few chopped pecans, caramel bits and chocolate chips on the top of each.
    • Transfer the pan to the oven and bake for 30 minutes, or until a toothpick inserted into the center comes out clean.
    • Once the brownies are done, remove the pan from the oven, place on a wire rack and allow the brownies to cool completely before cutting.  If you have trouble removing the brownies from the pan, gently run a butterknife around all of the edges of each brownie.

    Notes

    To add some more crunch factor to these turtle brownies, you can use toasted pecans instead of regular pecans that we used.
    Semi sweet chocolate chips or dark chocolate chips are two other good additions to the brownie batter.
    If you're making homemade brownies, and not used a boxed mix, make sure you use the highest quality ingredients like unsweetened cocoa powder (ideally Dutch process cocoa powder), unsalted butter, granulated sugar, baking powder, vanilla extract, baking soda and some light brown sugar for the flour mixture.
    Remember to use unsweetened or semisweet chocolate chips or chopped chocolate, or you'll end up making the brownies overly sweet.
    Make sure the brownies cool completely before you try to remove them from the pan and cut them.
    If you love the flavor of caramel, you can also mix some caramel sauce into the batter as you're pouring it into the prepared pan. Remember not to overmix the caramel layer and let it shine through.

    Nutrition

    Serving: 1gCalories: 477kcalCarbohydrates: 51gProtein: 5gFat: 29gSaturated Fat: 4gPolyunsaturated Fat: 10gMonounsaturated Fat: 12gTrans Fat: 0.1gCholesterol: 29mgSodium: 185mgPotassium: 123mgFiber: 2gSugar: 35gVitamin A: 58IUVitamin C: 0.3mgCalcium: 44mgIron: 2mg
    Print Recipe Pin Recipe Rate this Recipe
    Tried this recipe?Let us know how it was!

    More Sweet Treat Recipes

    If you enjoyed making these salted caramel turtle brownies, and want to try some more chocolate recipes, here are a few good ones to try out.

    • Chocolate Covered Bananas
    • Vegan Oreo Milkshake
    • Vegan Brownie In A Mug
    • Hot Cocoa Dip
    • Organic Baked Apples
    • Lemon Pudding Cake
    turtle brownies.

    Chewy Chocolate Peppermint Cookies

    November 10, 2023 by Angela Milnes

    Chewy Chocolate Peppermint Cookies.

    With a delicious cream cheese filling and a chocolatey-minty flavor, these Chewy Chocolate Peppermint Cookies are a total delight. If you love peppermint and are looking for a good recipe to indulge in for all your holiday baking experiments, this one's just perfect. Go beyond the classic Christmas cookies and try out this delicious recipe instead.

    Chewy Chocolate Peppermint Cookies
    [feast_advanced_jump_to]

    💖 Why This Recipe Works

    • Delicious: Coated in crushed peppermint chips, these chewy peppermint choc cookies have a delicious cream cheese filling inside, and have the perfect balance of flavors and textures.
    • Great For Holidays: These chocolate peppermint cookies are perfect for holiday season, and is an amazing recipe to try with your kids too.

    ⭐ Star Ingredients

    You'll need two sets of ingredients to make the chocolate peppermint cookies.

    For The Cookies

    • Unsalted Butter (Cold And Sliced Thin): Provides the fat needed for a rich, moist cookie with a tender crumb.
    • Light Brown Sugar And Granulated Sugar: Sweeteners give your cookies their sweetness, while the molasses in brown sugar adds depth of flavor and moisture.
    • Large Eggs (at room temperature): Act as a binding agent, helping to hold all the ingredients together.
    • Vanilla Extract: Enhances the flavors in your cookies, adding a touch of sweetness and aroma.
    • All Purpose Flour and Cake Flour: Form the structure of your cookies, with cake flour ensuring a tender texture.
    • Unsweetened Cocoa Powder: Gives your cookies a deep chocolate flavor and dark color.
    • Baking Powder, Cornstarch, And Salt: Are the leavening agents that help your cookies rise and maintain their shape, with cornstarch ensuring a soft texture.
    • Peppermint Candy Baking Chips: Infuse your cookies with a festive peppermint flavor and add a delightful crunch.

    For The Peppermint Cream Cheese Filling

    • Cream Cheese (Softened): Creates a creamy, tangy base for your filling, offering a delicious contrast to the sweet, chocolatey cookies.
    • Vanilla Extract And Peppermint Flavoring: Enhance the flavors in your filling, with vanilla adding sweetness and peppermint providing a refreshing, minty taste.
    • Red Food Coloring: Gives your filling a festive red hue, making your cookies visually appealing and fun.
    • Granulated Sugar: Sweetens your filling, balancing out the tanginess of the cream cheese.
    • Candy Cane Baking Chips: Add a delightful crunch to your filling, infusing it with more peppermint flavor and giving your cookies a festive twist.

    For the complete list of ingredients with measurements and instructions, please see the recipe card at the bottom of the post.

    📖  Substitutions & Variations

    • Melted Chocolate: Another great idea is to coat the baked cookies in some melted chocolate and allow them to chill. You can also choose to use melted white chocolate for this if you want to.
    • Double: To make double chocolate peppermint cookies, you can skip adding the peppermint chips into the cookie dough, and just use some dark chocolate chips instead.
    • Chocolate Chips: You can also make some white chocolate chip cookies by adding some white chocolate chips into the cookie dough.

    🔪How To Make Chocolate Peppermint Cookies?

    Once you have all your ingredients ready, here's what you'll need to do to make the cookies.

    Step One: In a medium bowl add the cream cheese, sugar, peppermint flavoring, and vanilla extract. Mix to combine.

    Step Two: Add the red food coloring to the cream cheese filling, mix to combine. Add the candy cane bits to the cream cheese mixture, mix to combine. Place in the refrigerator for 1 hour.

    Step Three: Preheat the oven to 410°F. Line a baking sheet with parchment paper or a baking mat. Set aside.

    Step Four: In the bowl of a stand mixer fitted with a paddle attachment cream butter and sugars on medium speed for 2-3 minutes. Add eggs and vanilla and mix until combined. Scrape down the sides of the bowl as needed.

    Step Five: In a large bowl combine flour, cocoa, baking powder, cornstarch, and salt and make the flour mixture. Measure out everything carefully using a measuring cup. Whisk well. Add the dry ingredients to the wet ingredients. Mix to combine.

    Step Six: Use a large cookie scoop and scoop 3 oz dough balls. Make sure to have an even number of cookie dough balls. Place the balls on a cookie sheet lined with parchment paper.

    Step Seven: Use the palm of your hand to press down on the cookie slightly, so that the cookie dough ball creates a thin disk. Using a small cookie scoop, scoop out a peppermint cheesecake mixture and place one ball on half of the cookies.

    Step Eight: Take the dough ball with the peppermint cheesecake filling and add a second dough ball on top. Roll the dough together to form a ball. Lightly press down on the cookie dough ball in the peppermint baking chips. Place the dough ball on the cookie sheet, ideally one lined with parchment paper.

    Step Nine: Bake for 14-15 minutes or until the dough ball is just barely set and no longer shiny. Remove from the oven and set to the side to let the chocolate peppermint cookies cool on a wire rack or a cooling rack.

    Chewy Chocolate Peppermint Cookies

    👩‍🍳 Expert Tips

    While making these peppermint cookies is super simple, you might want to take note of these little tips and tricks too.

    • Quality: Remember to use the best quality cocoa powder to make these cookies- the flavor will just really shine through. I would recommend using Dutch process cocoa powder to get the most flavorful chocolate peppermint cookies.
    • Candy Cane: If you don't have the crushed peppermint chips to coat the cookies, you can use crushed candy canes or crushed peppermint candies or even some Andes mints to coat the cookies.
    • Remember that the crushed candy cane pieces should be sized just enough-not too chunky and not too fine.
    • Chocolate Chips: A mixture of chocolate chips and crushed candy canes can also be a great addition to the chocolate cookie dough.
    • Flavor: I've used vanilla extract to add flavor to these cookies, but you can also choose to add some peppermint extract to get that nice peppermint flavor if you want to.
    • Butter: If you don't have unsalted butter, you can use salted butter too. Just skip adding the salt that you'll find in the ingredients list.
    • Sugar: If you don't have light brown sugar, you can just stick to using regular brown sugar or just plain granulated sugar if you want to.

    If you love this recipe be sure to check out these delicious Triple Chocolate Chip Cookies or these Oatmeal Cranberry Walnut Cookies. Both recipes taste amazing.

    💭 FAQs

    Can I use salted butter instead of unsalted butter?

    Yes, you can use salted butter; however, it's important to adjust the amount of added salt in the recipe to maintain the desired flavor balance. If using salted butter, consider reducing or omitting the additional salt called for in the recipe.

    How do I achieve the perfect chewy texture in these cookies?

    To achieve a chewy texture, ensure you cream the butter and sugar together until the mixture becomes light and airy. This step incorporates air into the dough, contributing to a chewy consistency. Additionally, baking the cookies until the edges are set but the centers are still soft will help maintain their chewiness.

    Is it necessary to chill the cookie dough before baking?

    Chilling the dough is not strictly necessary for this recipe. The dough can be baked immediately after preparation. However, if you prefer a thicker cookie or wish to enhance the flavors, you can refrigerate the dough for about 30 minutes before baking.

    How should I store these cookies to keep them fresh?

    Store the baked cookies in an airtight container at room temperature. They will remain fresh for up to five days. For longer storage, you can freeze the cookies by placing them in a single layer on a baking sheet, ensuring they are not touching, and freezing until solid. Once frozen, transfer them to a sealed container or zip-top bag, separating layers with parchment paper. They can be stored in the freezer for up to three months.

    Best Way to Store Peppermint Cookies

    Once you've let all the chocolate peppermint cookies cool down, remove them from the cookie sheet and transfer them to an airtight container. These cookies can stay fresh at room temperature for up to 3 days, if not more. You can also choose to make the cookie dough in advance and wrap it up in plastic wrap before you refrigerate or freeze it. If you have any remaining dough, you can store it that way too.

    Chewy Chocolate Peppermint Cookies

    💖 Serving Suggestions

    • Serve with Hot Cocoa: Pair these cookies with a warm cup of hot cocoa or peppermint tea to complement their rich, minty flavor.
    • Add to a Holiday Cookie Platter: Include these cookies as part of a festive cookie platter with other treats like gingerbread or sugar cookies for a variety of holiday flavors.
    • Top with Extra Peppermint: Enhance the minty flavor by sprinkling additional crushed candy cane bits over the cookies before serving.
    • Serve as a Gift: Package these cookies in a decorative tin or box for a thoughtful homemade gift during the holiday season.

    🍽 Cookie Jar’s Still Open

    • Easy Homemade Pumpkin Cookies.
      Easy Homemade Pumpkin Cookies
    • Red velvet cookies on a plate.
      Best Red Velvet Cookies Recipe
    • Reese's Cookies With Popcorn.
      Reese's Cookies With Popcorn
    • Peppermint chai latte candy cane cookies.
      Peppermint Chai Latte Candy Cane Cookies

    Did you make this recipe? Leave a review and a ⭐⭐⭐⭐⭐ rating below, or tag us in our Facebook Group! Alternatively, bookmark it in your browser or save to Pinterest.

    Chewy Chocolate Peppermint Cookies.

    Chewy Chocolate Peppermint Cookies

    Angela Milnes
    These Chewy Chocolate Peppermint Cookies are the perfect holiday treat! With a rich, fudgy center and a hint of peppermint, they’re a festive twist on a classic chocolate cookie.
    5 from 4 votes
    Print Recipe Pin Recipe Rate this Recipe
    Prep Time 25 minutes mins
    Cook Time 15 minutes mins
    Total Time 40 minutes mins
    Course Desserts
    Cuisine American
    Servings 8 Servings
    Calories 1214 kcal

    Ingredients
      

    • 1 ½ cups Unsalted Butter
    • 1 ½ cups Light Brown Sugar
    • 1 cup Granulated Sugar
    • 2 Eggs
    • 3 teaspoons Vanilla Extract
    • 11/2 cups All Purpose Flour
    • 1 ½ cup Cake Flour
    • 1 cup Cocoa Powder
    • 1 teaspoon Baking Powder
    • 1 teaspoon Cornstarch
    • 1 teaspoon Salt
    • 1 cup Peppermint Candy Baking Chips
    • Peppermint Cream Cheese Filling
    • 8 oz Cream Cheese Softened
    • 1 teaspoon Vanilla Extract
    • 1 teaspoon Peppermint Flavoring
    • 1 teaspoon Red Food Coloring
    • ¼ cup Sugar

    Instructions
     

    • Make Cream Cheese Filling: In a medium bowl add the cream cheese, sugar, peppermint flavoring, and vanilla extract. Mix to combine.
    • Add Food Coloring And Candy Canes: Add the red food coloring to the cream cheese filling, mix to combine. Add the candy cane bits to the cream cheese mixture, mix to combine. Place in the refrigerator for 1 hour.
    • Prep Oven And Baking Sheets: Preheat the oven to 410°F. Line a baking sheet with parchment paper or a baking mat. Set aside.
    • Prepare Wet Ingredients: In the bowl of a stand mixer fitted with a paddle attachment cream butter and sugars on medium speed for 2-3 minutes. Add eggs and vanilla and mix until combined. Scrape down the sides of the bowl as needed.
    • Combine Dry Ingredients: In a large bowl combine flour, cocoa, baking powder, cornstarch, and salt and make the flour mixture. Measure out everything carefully using a measuring cup. Whisk well. Add the dry ingredients to the wet ingredients. Mix to combine.
    • Make Cookie Dough Balls: Use a large cookie scoop and scoop 3 oz dough balls. Make sure to have an even number of cookie dough balls. Place the balls on a cookie sheet lined with parchment paper.

    Notes

    Quality: Remember to use the best quality cocoa powder to make these cookies- the flavor will just really shine through. I would recommend using Dutch process cocoa powder to get the most flavorful chocolate peppermint cookies.
    Candy Cane: If you don't have the crushed peppermint chips to coat the cookies, you can use crushed candy canes or crushed peppermint candies or even some Andes mints to coat the cookies.
    Remember that the crushed candy cane pieces should be sized just enough-not too chunky and not too fine.
    Chocolate Chips: A mixture of chocolate chips and crushed candy canes can also be a great addition to the chocolate cookie dough.
    Flavor: I've used vanilla extract to add flavor to these cookies, but you can also choose to add some peppermint extract to get that nice peppermint flavor if you want to.
    Butter: If you don't have unsalted butter, you can use salted butter too. Just skip adding the salt that you'll find in the ingredients list.
    Sugar: If you don't have light brown sugar, you can just stick to using regular brown sugar or just plain granulated sugar if you want to.

    Nutrition

    Serving: 1gCalories: 1214kcalCarbohydrates: 183gProtein: 17gFat: 48gSaturated Fat: 29gPolyunsaturated Fat: 2gMonounsaturated Fat: 12gTrans Fat: 1gCholesterol: 161mgSodium: 470mgPotassium: 401mgFiber: 7gSugar: 88gVitamin A: 1504IUCalcium: 138mgIron: 6mg
    Print Recipe Pin Recipe Rate this Recipe
    Tried this recipe?Let us know how it was!

    More Cookie Recipes

    Loved how delicious these chocolate peppermint cookies turned out? Inspired to try some more fun and interesting cookies? Here are a few handpicked recipes you might want to check out.

    • Whopper Mini Egg Cookies
    • Candy Cane Cookies
    • Healthy Banana Oatmeal Cookies
    • Valentine’s Day Heart Cookies
    • Reese’s Cookies With Popcorn
    • Homemade Pumpkin Cookies
    • Brown Butter Cookies
    • Banana Chocolate Chip Cookies
    Chewy Chocolate Peppermint Cookies

    Easy Mango Chutney Recipe (Sweet, Tangy & Spicy)

    October 31, 2023 by Angela Milnes

    Best Mango Chutney Recipe: Vegan Recipe.

    Ready to level up your condiment game? This Easy Mango Chutney brings sweet, tangy, and spicy flavors together in one spoonful of magic. Perfect for dunking samosas, spooning over grilled meats, or spreading on sandwiches. Once you try this vibrant chutney, plain ketchup just won’t cut it.

    ingredients for mango chutney

    Mango chutney is a staple in Indian and South Asian kitchens but has made its way around the globe for good reason—it's ridiculously versatile. Think of it as the tropical cousin of jam with a bold personality. Whether you're meal prepping or spicing up your roast chicken, this chutney delivers.

    Looking for more mango magic? Try my No-Churn Vegan Mango Sorbet, Mango Pineapple Smoothie, or the Best Mangonada Recipe next!

    [feast_advanced_jump_to]

    💖 Why This Recipe Works

    • Flavor Bomb: Sweet mango, spicy chili, zippy vinegar—all balanced in one jar.
    • Meal-Prep Friendly: Make ahead and store for weeks.
    • Elevates Everything: Serve it with Indian food, charcuterie boards, grilled meats, or even cheese toast.

    🥭 Star Ingredients

    Mango Chutney Ingredients

    To make this easy mango chutney, here's all you'll need.

    • Mango: Ripe or slightly underripe works—either way, it brings the signature sweetness and body to the chutney.
    • Vinegar + Sugar: This sweet-and-sour duo creates that classic chutney tang and helps with preservation.
    • Spices (Turmeric, Cumin, Coriander): These add earthy, warm undertones that make your chutney taste like it simmered for hours.

    For the complete list of ingredients with measurements and instructions, please see the recipe card at the bottom of the post.

    📖  Substitutions & Variations

    • Spice Level: Dial it up with habaneros or keep it mild with red pepper flakes.
    • Indian Twist: Add mustard seeds and curry leaves to the oil before the mango goes in.
    • Zesty Freshness: Stir in chopped mint or cilantro just before cooling.

    Looking for something savory to serve with chutney? Pair it with Air Fryer Chicken Cutlets, Grilled Eggplant, or Rotisserie Chicken Salad for a flavor explosion.

    🔪How To Make Mango Chutney

    Ready to make this easy mango chutney? Here's all you'll need to do.

    chopping ingredients for mango chutney
    1. Step 1: Peel the peppers from the pips and chop finely. Grate the garlic without the peel on a fine grater.
    Chopped mango
    1. Step 2: Peel the mango from the pips. If you want the chutney as a puree, you can remove the peel. Cut the mango into small, evenly sized pieces. Set aside.
    cooking mango to make mango chutney sauce
    1. Step 3: In a medium stock pot or skillet, combine the oil and spicy ingredients. Pour in the spices and heat the entire contents of the skillet for 2 minutes on medium high heat. Pour in the salt and sugar.
    cooking mango to make mango chutney sauce
    1. Step 4: Add diced mango to the skillet with vinegar and water, stirring to coat. Bring to a gentle boil, stirring occasionally, and cook on low to medium heat until the mango softens and the chutney thickens, about 20-25 minutes.
    best mango chutney indian recipe
    1. Step 5: When the chutney reaches the desired consistency, remove the pan from the heat and allow the chutney to cool. The chutney will continue to thicken as it cools. Once cooled, transfer the chutney into clean sterilized glass jars. Seal the jars tightly and store them in the refrigerator. Now your delicious and healthy mango chutney is ready to garnish your dishes!

    💡 Hint: If your chutney thickens too quickly, just add a splash of water to loosen it up. Stir often, and don’t forget—it thickens more as it cools!

    👩‍🍳 Expert Tips

    • Chunky or Smooth? Like it chunky? Just stir and store. Prefer smooth? Blitz it with a stick blender.
    • Too Spicy? Stir in some diced red bell pepper to mellow the heat.
    • Make It Last: For long-term storage, use the water bath canning method.

    💭 Easy Mango Chutney FAQs

    What is mango chutney used for?

    Serve your chutney with Indian curries, samosas, cheese boards, grilled meats, or even as a sandwich spread.

    Can I use frozen mango to make mango chutney?

    Yes! Just thaw it completely and drain any excess liquid before cooking.

    How long does mango chutney last?

    In the fridge, up to 2 weeks. Properly canned and sealed, mango chutney lasts up to a year.

    What makes chutney different from jam?

    Chutney typically includes vinegar and spices, making it savory-sweet with more depth of flavor than jam.

    💖 Serving Suggestions

    Here are my favorite dishes to spoon this chutney over:

    • Indian Dishes: Serve with samosas, pakoras, bhajis, papadums or Garlic Shots. Its sweet and tangy flavor balances the spices in these dishes.
    • Spinach Stuffed Chicken or Pork: Slather it on like BBQ sauce.
    • Roasted Veggies or Potatoes: A dollop adds depth and zing.
    • Wraps or Sandwiches: Think turkey, brie, and mango chutney—YES please.
    • Curries & Rice: A classic use that never gets old. Try our Instant Pot Basmati Rice recipe here!
    best mango chutney indian recipe

    🍽 More Tasty Dip Recipes

    • Best Hot Cocoa Dip.
      Best Hot Cocoa Dip
    • Whipped Feta Dip.
      Creamy Whipped Feta Dip (With Greek Yogurt & Garlic)
    • Greek Beetroot Dip.
      Best Beetroot Dip Recipe (Greek Dip)
    • Easy Smoked Salmon Dip Recipe.
      Easy Smoked Salmon Dip With Capers

    Did you make this recipe? Leave a review and a ⭐⭐⭐⭐⭐ rating below, or tag us in our Facebook Group! Alternatively, bookmark it in your browser or save to Pinterest.

    Best Mango Chutney Recipe: Vegan Recipe.

    Easy Mango Chutney

    Angela Milnes
    This sweet and tangy condiment combines ripe mangoes with a blend of spices, vinegar, and a touch of heat for a delightful balance of flavors.
    5 from 4 votes
    Print Recipe Pin Recipe Rate this Recipe
    Prep Time 5 minutes mins
    Cook Time 35 minutes mins
    Total Time 40 minutes mins
    Course Condiments
    Cuisine Indian
    Servings 10 Servings
    Calories 31 kcal

    Ingredients
      

    • 1 Mango
    • 1 tablespoon Sugar
    • ¼ cup Water
    • ¼ cup Apple Cider Vinegar
    • 1 tablespoon Vegetable Oil
    • ½ teaspoon Cumin
    • ¼ teaspoon Coriander

    Instructions
     

    • Ready to make the mango chutney? Here's all you'll need to do.
    • Peel the peppers from the pips and chop finely. Grate the garlic without the peel on a fine grater.
    • Peel the mango from the pips. If you want the chutney as a puree, you can remove the peel. Cut the mango into small, evenly sized pieces. Set aside.
    • In a medium stock pot or skillet, combine the oil and spicy ingredients. Pour in the spices and heat the entire contents of the skillet for 2 minutes on medium high heat.
    • Pour in the salt and sugar. Add the diced mango to the skillet. Pour in the vinegar and water. Stir to ensure that the mango is well coated with the flavorful liquid.
    • Bring the mixture to a gentle boil to allow the spices to combine and intensify their flavors. Stir periodically to avoid sticking.
    • Continue cooking the chutney on low to medium heat, stirring occasionally.
    • The mango will soften and release its natural sweetness, which, when combined with the spices, will create a juicy and flavorful chutney.
    • Boil the chutney until it thickens to the desired consistency. This usually takes about 20-25 minutes. As the chutney cooks, taste it periodically.
    • Adjust the seasonings to balance the flavor according to your preference. You can add more sweetener, spices or vinegar if needed.
    • When the chutney reaches the desired consistency, remove the pan from the heat and allow the chutney to cool. The chutney will continue to thicken as it cools.
    • Once cooled, transfer the chutney into clean sterilized glass jars. Seal the jars tightly and store them in the refrigerator.
    • Now your delicious and healthy mango chutney is ready to garnish your dishes!

    Notes

    I used fresh mango to make the chutney, but you can also use frozen mango if you want to.
    If you don’t have fresh minced garlic that the recipe calls for, some garlic powder can do the trick.
    You can also add some fresh ginger into the mix to bring in some flavor variation.
    If the chutney ended up more spicy than you like, you can tone it down by adding some finely chopped yellow or red bell pepper into the mix.
    If you don’t want the chutney to be chunky, you can use a potato masher to slightly smash the diced mangoes after they’re done cooking.
    This tangy chutney can stay fresh in the refrigerator for up to a week, if not more. Just remember to use a airtight container or a glass jar with an airtight lid to keep it fresh.
    If you want the chutney to last longer, you can choose to can it too. All you need to do is pour the hot mixture directly into sterilized jars, leaving a bit of space on the top, and then placing the jars in a water bath to seal them shut.

    Nutrition

    Serving: 1gCalories: 31kcalCarbohydrates: 4gProtein: 0.2gFat: 1gSaturated Fat: 0.2gPolyunsaturated Fat: 1gMonounsaturated Fat: 0.4gTrans Fat: 0.01gSodium: 1mgPotassium: 42mgFiber: 0.4gSugar: 4gVitamin A: 225IUVitamin C: 8mgCalcium: 4mgIron: 0.1mg
    Print Recipe Pin Recipe Rate this Recipe
    Tried this recipe?Let us know how it was!

    How To Make Pickled Cucumbers And Tomatoes

    October 31, 2023 by Angela Milnes

    Pickled Cucumbers And Tomatoes.

    These Pickled Cucumbers And Tomatoes are a crunchy, colorful, and ridiculously easy way to add flavor to just about everything. Think sweet, tangy, herby bites that come together with zero canning fuss—just fresh veggies, vinegar, and a jar.

    Pickled cucumbers and tomatoes in a jar.

    This recipe is perfect for summer when tomatoes and cucumbers are overflowing at the market—or anytime you’ve got extras you need to use fast. It’s ideal for busy home cooks who want a shortcut to homemade flavor without spending hours in the kitchen. Plus, quick refrigerator pickles like these last for weeks, so you’ll always have a zippy little side or garnish on hand.

    These pickled veggies were inspired by our Fermented Vegetables Using Apple Cider Vinegar and pair perfectly with this easy Recipe For Pickled Eggplant—both make amazing additions to mezze platters or picnic spreads.

    [feast_advanced_jump_to]

    💖 Why This Recipe Works

    • Zero canning required – No boiling jars or fancy gear.
    • Done in minutes – The veggies do all the work as they sit in the brine.
    • Versatile and flexible – Works with other veggies too!

    ⭐ Star Ingredients

    To make this quick pickled cucumbers and tomatoes, here's all you'll need.

    ingredients for pickled cucumbers and tomatoes.
    • Cucumbers – I’m team Persian or Kirby all the way. They’re mini, mighty, and keep their crunch like champs—exactly what you want in a pickle.
    • Cherry Tomatoes – Sweet, juicy, and bursting with color. They soak up the brine like little flavor bombs and make every bite pop.
    • White Vinegar – The pickling hero. Clean, sharp, and totally essential for that tangy kick we’re all here for.

    For the complete list of ingredients with measurements and instructions, please see the recipe card at the bottom of the post.

    📖  Substitutions & Variations

    • dd more veggies – Toss in cauliflower, carrots, or green beans to make a mixed pickle jar.
    • Change the shape – Try chunked cucumbers instead of slices for a different bite.
    • Swap the spices – Mustard or coriander seeds add a unique twist.
    • Spicy option – Add red pepper flakes or a sliced jalapeño to kick things up.
    • Garlicky goodness – Whole garlic cloves bring extra savory flavor to the brine.

    Craving more veggie-packed snacks? Try my mini cheese stuffed peppers, this fun veggie train or these quick pickled beets.

    🔪 How to Pickle Cucumbers and Tomatoes

    Think you're ready to try pickling cucumbers and tomatoes? Here's the step by step process to do it right.

    sliced cucumber on a chopping board.
    1. Step 1: Rinse the cucumbers, peel them and unpeel them with a mandolin slicer.
    cucumber and tomatoes on a chopping board.
    1. Step 2: Wrap the tomatoes with 2-3 cucumber slices. You can simply roll the cucumbers into a snail.
    herbs and flavors for cucumber and tomatoes.
    1. Step 3: Sterilize the jar and lid. Pour water into a clean jar on a finger and send it to the microwave for 4 minutes on full power. Drain the remaining water. Boil the lid for 2 minutes. Put clean herbs and spices in the jar.
    herbs and flavors for cucumber and tomatoes.
    1. Step 4: Stack cucumbers and tomatoes tightly in a jar. Add salt and sugar. Boil water, fill the jar, cover loosely, and let sit for 1 hour. Drain the water. Remove ⅓ of it and add vinegar. Boil the marinade and pour it over the jar. Seal tightly, check for leaks, place the jar upside down to cool, and store in a dry place.

    💡Hint: For best results, let the pickles sit in the fridge for 24 hours before eating—they’ll get more flavorful by the day!

    pickled tomatoes and cucumbers.

    👩‍🍳 Expert Tips

    • Use firm veggies – They hold up better during the pickling process.
    • Let them marinate – 24 hours minimum is best for flavor development.
    • Store smart – Keep in the fridge and use within 2–3 weeks for peak crunch.

    💭 FAQs

    How long until pickled cucumbers and tomatoes are ready to eat?

    The time required for pickled cucumbers and tomatoes to develop their flavors varies depending on the pickling method used. For quick pickles stored in the refrigerator, they are typically ready to eat after about 24 hours, with flavors continuing to mature over the next few days. If you're using a traditional canning method, the pickles usually need at least two weeks to achieve optimal flavor and texture.

    Can I use any type of cucumber and tomato for pickling?

    For the best results, it's recommended to use pickling cucumbers, which are smaller, firmer, and have fewer seeds than regular cucumbers. As for tomatoes, firm varieties like Roma or cherry tomatoes hold up well during the pickling process. Using ripe, but not overripe, tomatoes ensures they maintain their shape and texture.

    How do I store these pickled cucumbers and tomatoes?

    Store in the fridge in a sealed jar for 2–3 weeks. For longer storage, use a proper canning method.

    Can I adjust the level of sweetness or spiciness in my pickles?

    Absolutely! Adjust the sugar for sweetness, or toss in chili flakes or sliced peppers for heat.

    pickled tomatoes and cucumbers.

    💖 Serving Suggestions

    Here are some great ways to serve pickled cucumbers and tomatoes.

    • As a Side – Perfect with Beetroot Burgers, grilled meats, or BBQ Chicken Wings.
    • On a Charcuterie Board – Adds zing and color to your platter.
    • Taco Topper – Chop and spoon over tacos or a burritos for a crunchy contrast.
    • Salad Upgrade – Mix into salads for brightness and bite.
    • Bagel Bonus – Serve with Smoked Salmon Dip and Homemade Bagel Chips.

    🍽 More Tasty Veggie Recipes

    • Best Recipe For Pickled Eggplant (Pickled Aubergines).
      Best Recipe For Pickled Eggplant (Pickled Aubergines)
    • Almond Milk Mashed Potatoes.
      Best Almond Milk Mashed Potatoes (Dairy Free)
    • Air Fryer Carrot Fries.
      Crispy Air Fryer Carrot Fries
    • Air Fryer Bok Choy on a white plate covered in paprika.
      Air Fryer Bok Choy

    Did you make this recipe? Leave a review and a ⭐⭐⭐⭐⭐ rating below, or tag us in our Facebook Group! Alternatively, bookmark it in your browser or save to Pinterest.

    Pickled Cucumbers And Tomatoes.

    Pickled Cucumbers and Tomatoes

    Angela Milnes
    Brighten up your meals with Pickled Cucumbers and Tomatoes! This zesty, tangy pickle combination features crisp cucumbers and juicy tomatoes marinated in a flavorful brine of vinegar, herbs, and spices.
    5 from 4 votes
    Print Recipe Pin Recipe Rate this Recipe
    Prep Time 4 minutes mins
    Cook Time 2 hours hrs
    Total Time 2 hours hrs 4 minutes mins
    Course Condiments
    Cuisine American
    Servings 6 Servings
    Calories 48 kcal

    Ingredients
      

    • 2 cups Cherry Tomatoes
    • 3 Cucumbers
    • 2 cups Water
    • 1 cup White Vinegar
    • 1 Bay Leaf
    • 1 tsp. Cumin
    • ½ tsp. Cloves
    • 2-3 Sprigs Parsley
    • 1 ½ teaspoon Dill
    • 1 tsp. Salt
    • 2 tsp. Sugar

    Instructions
     

    • Think you're ready to try pickling cucumbers? Here's the step by step process to do it right.
    • Rinse the cucumbers, peel them and unpeel them with a mandolin slicer.
    • Sterilize the jar and lid. Pour water into a clean jar on a finger and send it to the microwave for 4 minutes on full power. drain the remaining water. boil the lid for 2 minutes. put clean herbs and spices in the jar.
    • Wrap the tomatoes with 2-3 cucumber slices. You can simply roll the cucumbers into a snail.

    Notes

    I would recommend adding a few sprigs of fresh dill to bring a nice pop of color and some extra flavor into these quick pickles. If you don't have it, you can add some dried dill instead.
    Whole garlic cloves can also be an amazing addition to the vinegar brine.
    To bring a bit of a spicy kick to these pickles, you can also add some red pepper flakes into the mix.
    You can use either rice wine vinegar or distilled white vinegar or even just rice vinegar to make the pickling brine.

    Nutrition

    Serving: 1gCalories: 48kcalCarbohydrates: 8gProtein: 2gFat: 1gSaturated Fat: 0.1gPolyunsaturated Fat: 0.1gMonounsaturated Fat: 0.1gTrans Fat: 0.002gCholesterol: 1mgSodium: 74mgPotassium: 344mgFiber: 2gSugar: 5gVitamin A: 364IUVitamin C: 16mgCalcium: 43mgIron: 1mg
    Print Recipe Pin Recipe Rate this Recipe
    Tried this recipe?Let us know how it was!

    Air Fryer Sweet Potato Fries

    October 31, 2023 by Angela Milnes

    Air Fryer Sweet Potato Fries.

    Craving a healthy crunch with major flavor? These Air Fryer Sweet Potato Fries are crispy, golden, and made with just a splash of oil—ready in 20 minutes flat!

    Air fryer sweet potato fries on a plate served with sauce and cherry tomatoes.

    I started air frying sweet potato fries during my post-op bariatric phase, and let me tell you—they’ve stuck around for the whole fam. Naturally sweet, high in fiber, and way less greasy than deep-fried versions.

    If you're into veggie-packed, low-oil sides like my Crispy Air Fryer Avocado Fries or Air Fryer Broccolini, then this healthy sweet potato fries recipe is a no-brainer.

    [feast_advanced_jump_to]

    💖 Why This Recipe Works

    • Healthy & Satisfying: Sweet-meets-savory snack with fewer carbs than regular fries.
    • Crisps Like a Dream: The air fryer gives you golden edges without deep frying.
    • Quick & Easy: Ready in under 25 minutes with just 3 ingredients.

    ⭐ Star Ingredients

    Sweet potatoes, oil, salt and pepper.
    • Sweet Potatoes: Naturally sweet and packed with beta-carotene, these make the perfect base. Go for firm, even-sized ones so they cook evenly.
    • Oil (or Spray): A high-smoke-point oil like avocado or vegetable oil helps them crisp up beautifully.
    • Seasonings: Start simple with salt and pepper, or spice things up with garlic powder, smoked paprika, or cayenne.

    📖 Substitutions & Flavor Variations

    • No Oil? Use cooking spray for a lighter option.
    • Smoky & Sweet: Add paprika and a touch of brown sugar.
    • Zesty: A sprinkle of garlic powder and lime zest.
    • Spicy Kick: Try cayenne or chili flakes.
    • Frozen Sweet Potato Fries in Air Fryer? You bet—just follow the same method and add 2 extra minutes.

    Serve these fries with Airt Fryer Cod, Almond Crusted Chicken Breasts, or your favorite Beef Cheeks recipe.

    🔪 How To Make Sweet Potato Fries in Air Fryer

    Uncooked sweet potato slices on a plate.
    1. Step 1: Cut sweet potatoes into even-sized strips, about ¼-inch thick.
    Seasoned sweet potato slices on a plate.
    1. Step 2: Toss with oil (or spray), salt, and any seasoning you like.
    Seasoned sweet potato slices in an air fryer.
    1. Step 3: Preheat your air fryer to 400°F. Spread fries in a single layer in the basket.
    Cooked sweet potato fries in air fryer basket.
    1. Step 4: Air fry for 10–12 minutes, shaking halfway, until crispy and golden brown.

    💡Hint: Don't overcrowd the basket—cook in batches if needed so they get crispy, not soggy.

    ⏲️ Frying Times

    Whether making thin sliced fries or going for crispy air fryer sweet potato wedges, we have the cooking times for you here:

    Cut TypeTempTimeShake/Flip
    Thin Fries400°F10–12 minYes
    Thick Wedges375°F14–16 minYes
    Frozen Fries400°F12–15 minYes
    Air fried sweet potato fries on a plate.

    👩‍🍳 Expert Tips

    • Uniform Cuts = Even Crisping – Keep fries the same size to avoid burning.
    • Preheat Your Air Fryer – Helps start the crisping immediately.
    • Toss in a Bowl – Coats fries evenly with oil and spices.
    • Use Fresh, Dry Sweet Potatoes – Too much moisture = floppy fries.
    • Want ultra crispy fries? Soak cut sweet potatoes in cold water for 30–60 minutes. Pat dry before seasoning to remove excess starch and help with crisping.
    Air fried sweet potato fries, cherry tomatoes, and sauce on a plate.

    FAQ'S

    Why are my sweet potato fries soggy in the air fryer?

    Usually from overcrowding or not drying the potatoes well enough. Spread in a single layer and shake halfway.

    Can I use frozen sweet potato fries in air fryer?

    Absolutely! Just add 2 extra minutes to the cook time.

    What’s the best dipping sauce for sweet potato fries?

    Smoked paprika garlic aioli, sour cream, or my Herby Ranch Dressing are perfect pairings.

    Are sweet potato fries in air fryer good for meal prep?

    Yep! Store leftovers in the fridge and reheat in the air fryer at 350°F for 5–6 minutes.

    💖 Serving Suggestions

    Wondering what to serve with sweet potato fries? Try these options:

    • Pesto Roast Chicken – herbaceous, juicy, and family-friendly.
    • Air Fryer Salmon Fillets – simple and loaded with omega-3s.
    • Breakfast Tacos with Harissa Lime Sour Cream – bold and spicy.
    • Instant Pot Kielbasa and Cabbage – smoky, tangy, and perfect.
    • Beet Salad With Feta And Walnuts – the sweet-savory dream team.

    Or simply pair with a good dipping sauce and call it snack heaven.

    Sweet Potato Fry Dips We Love

    • Smoky Paprika Aioli – Mayo, smoked paprika, garlic, lemon juice.
    • Maple Dijon Dip – Dijon mustard, maple syrup, apple cider vinegar.
    • Avocado Ranch – Mashed avocado, Greek yogurt, garlic powder, dill.
    Sweet potato fries served with sauce and cherry tomatoes.

    🍽 Try These Air Fryer Dishes

    • Air Fryer Butterfly Chicken With Citrus.
      Air Fryer Butterfly Chicken With Citrus
    • Air Fryer Green Beans Crispy & Delicious.
      Air Fryer Green Beans Crispy & Delicious
    • Air Fryer Chicken Cutlets Panko Recipe.
      Air Fryer Chicken Cutlets Panko Recipe
    • Air Fryer Cod Fillet.
      Air Fryer Cod Fillet

    Did you make this recipe? Leave a review and a ⭐⭐⭐⭐⭐ rating below, or tag us in our Facebook Group! Alternatively, bookmark it in your browser or

    Air Fryer Sweet Potato Fries.

    Air Fryer Sweet Potato Fries

    Angela Milnes
    Crispy on the outside, tender on the inside, make sweet potato fries in air fryer with this easy recipe.
    5 from 3 votes
    Print Recipe Pin Recipe Rate this Recipe
    Prep Time 5 minutes mins
    Cook Time 10 minutes mins
    Total Time 15 minutes mins
    Course Side Dishes
    Cuisine American
    Servings 3 Servings
    Calories 262 kcal

    Ingredients
      

    • 3 Sweet Potatoes
    • 1 ½ tablespoon Vegetable Oil
    • 1 ½ teaspoon Salt
    • ½ teaspoon Black Pepper

    Instructions
     

    • Cut sweet potatoes into strips.
    • Add vegetable (or any other) oil. Salt and pepper.
    • Transfer sweet potatoes in an Air Fryer 400F for 10 minutes until you have golden brown fries. Serve.

    Notes

    Make sure you cut the potato fries evenly. The idea is to get them all to crisp up at the same time.
    Make sure you choose an oil that has a high smoke point. If you don’t want to use oil to coat the fries, you can just use some cooking spray instead.
    Choose evenly size sweet potatoes and make sure they’re perfectly seasoned before you layer them in the fryer basket.
    You can try lots of different flavor variations to these Air Fryer sweet potato fries. Garlic powder, kosher salt, black pepper, brown sugar, cayenne pepper and smoked paprika are all great seasoning choices to consider.
    To make sure all the sweet potato fries are seasoned well, toss them in some olive oil and the spices of your choice in a large mixing bowl.
    You can also choose to soak sweet potatoes to get rid of the excess starch, and then use them for the recipe.
    You can also cook frozen sweet potatoes in the same way, and make frozen sweet potato fries in minutes!

    Nutrition

    Serving: 1gCalories: 262kcalCarbohydrates: 45gProtein: 5gFat: 7gSaturated Fat: 1gPolyunsaturated Fat: 4gMonounsaturated Fat: 2gTrans Fat: 0.05gCholesterol: 4mgSodium: 685mgPotassium: 798mgFiber: 7gSugar: 9gVitamin A: 32066IUVitamin C: 6mgCalcium: 72mgIron: 1mg
    Print Recipe Pin Recipe Rate this Recipe
    Tried this recipe?Let us know how it was!

    Does Ghee Go Bad? How To Store

    October 11, 2023 by Angela Milnes

    Scooping out desi ghee from a jar.

    Ghee has been a part of Indian culture for centuries, but Does Ghee Go Bad? You might wonder if your jar of Ghee is still safe to use after its expiration date.

    Today we'll share how to store ghee, how long ghee lasts, and much more! Keep reading for all the answers you need.

    Does Ghee Go Bad
    [feast_advanced_jump_to]

    Does Ghee Go Bad?

    Yes, ghee can indeed go bad over time, especially if not stored correctly. It's important to note that when ghee goes bad, it doesn't spoil like traditional butter but may become rancid.

    Does Ghee Go Bad After Opening?

    Yes, ghee can go bad after opening if not stored properly. Air, moisture, and heat exposure can lead to oxidation, causing it to spoil. According to research, Over time, the milk solids in ghee can begin to oxidize, which can impact the taste and quality of the ghee.

    Does Ghee Go Bad if Unopened?

    Yes, even unopened ghee can go bad over time, although it typically takes a much longer period compared to opened ghee. The quality of unopened ghee may degrade due to factors like improper storage conditions or exposure to extreme temperatures.

    How Long Does Ghee Last?

    Ghee is renowned for its rich, nutty flavor and high smoke point, perfect for frying and sautéing. But how long does ghee last? This depends on a few factors, including whether the jar is opened or unopened and how it's stored.

    Unopened Ghee Shelf Life

    An unopened jar of ghee can last for a significant period of time when stored correctly. It can last up to one year if kept in a dark place, away from sunlight, at room temperature (such as in a kitchen cabinet).

    However, unopened ghee can last for about two years when it is refrigerated.

    Unopened Ghee In A Jar

    Opened Ghee Shelf Life

    Once opened, the shelf life of ghee varies depending on how it is stored. Ghee maintains its best quality for about 3 to 6 months if kept at room temperature.

    However, if you wish to extend its shelf life, open ghee can be stored in the refrigerator, where it can be kept for up to a year.

    Unopened Ghee In A Jar

    Homemade Ghee Shelf Life

    Homemade ghee has a slightly different shelf life. An open jar of homemade ghee can be stored for up to a year and even beyond if there is no noticeable smell or change in appearance.

    How to Tell if Ghee Has Gone Bad?

    Like any other food, ghee can spoil if stored improperly or used after the expiration date. Here's how you can tell if ghee has gone bad:

    • Smell: Fresh ghee has a rich, nutty aroma. It may have gone bad if your ghee has an unpleasant or rancid smell.
    • Taste: Fresh ghee has a slightly sweet and creamy flavor. In contrast, rancid ghee might taste sour or harsh.
    • Appearance: Look for any changes in color and texture. If there is mold or any other unusual growth, it's a clear sign that the ghee has spoiled.
    • Storage Conditions: To extend shelf life, store ghee in a cool, dark, dry place away from heat and direct sunlight. Improper storage can lead to it turning bad more quickly.

    Does Ghee Need to Be Refrigerated?

    Due to the removal of milk solids, ghee is very stable and doesn't spoil as quickly as regular butter, making refrigerated ghee unnecessary.

    Many manufacturers advise pantry storage; it remains safe at room temperature even when not refrigerated. However, if you prefer your ghee to retain its quality for longer, you may choose to refrigerate it.

    How to Store Ghee?

    Storing ghee can be a mystery for those who don't use it frequently. Here's everything you need to know about how to store ghee at room temperature, in the fridge, or even in the freezer.

    1. Store Ghee at Room Temperature

    It is the most common method of storing ghee. Follow these steps:

    • Step 1: Ensure your ghee is in an airtight container. This prevents exposure to air, which can lead to spoilage.
    • Step 2: Place the ghee container in a cool, dark place, away from direct sunlight. A pantry or cupboard is ideal.
    • Step 3: Always use a clean, dry spoon to scoop out ghee. Any moisture introduced to the ghee can cause it to spoil.

    2. Store Ghee in the Fridge

    If you don't use ghee frequently or want to extend the shelf life longer, you can store ghee in the fridge. Here's how:

    • Step 1: Transfer the ghee into an airtight container if it's not already in one.
    • Step 2: Store the container in the fridge. The cold temperature helps to keep the ghee fresher for longer.

    3. Store Ghee in the Freezer

    You can also freeze ghee! This method is perfect for those who love ghee but don't use it often. Here's how to do it:

    • Step 1: Portion the ghee into smaller amounts. This way, you only need to defrost what you'll use, preventing freezer burn.
    • Step 2: Place each portion into a small, airtight container or a freezer-safe bag.
    • Step 3: Store these containers or bags in the freezer. Ghee stored this way can last for up to a year.

    Remember to defrost frozen ghee in the fridge overnight before using it. This will prevent any sudden temperature changes that could impact the quality of the ghee.

    FAQ's

    How Many Calories Are In Ghee?

    A single tablespoon of ghee contains approximately 130 calories. Due to its caloric density, moderation in consumption is advised.

    Does Ghee Taste Like Butter?

    Consuming ghee can be a unique culinary experience as it offers a flavor profile quite different from regular butter.
    The slightly roasted and earthy notes that come from the clarification process add a depth of flavor that sets it apart.

    Despite its distinct taste, ghee can still be used instead of butter or other solid fats in recipes, although it may subtly alter the final flavor.

    Enjoy Ghee In Your Cooking

    Ghee is a safe delicious food item that can last up to a year when stored correctly. Its distinct flavor is ideal for cooking and baking.

    However, it is important to remember that ghee should be consumed responsibly in moderation as part of a balanced diet.

    More Useful Articles

    • Does Broccoli Go Bad?
    • Does Coconut Water Go Bad?
    • Does Flaxseed Go Bad?
    • Does Rice Vinegar Go Bad?

    Banana Peppers vs Pepperoncini

    September 29, 2023 by Angela Milnes

    Pepperoncini and banana peppers.

    Do you know which pepper reigns supreme in the Banana Peppers vs Pepperoncini" showdown? Both banana peppers and pepperoncini bring a unique flavor to any dish, but understanding their differences can elevate your recipes. Read on to learn more about the key differences of pepperoncini and banana peppers.

    Banana Peppers vs Pepperoncini
    [feast_advanced_jump_to]

    Differences Between Banana Peppers and Pepperoncini

    Banana peppers, also called banana chilis or yellow wax peppers, are a type of pepper that brings a wonderful burst of flavor to any dish.

    Pepperoncini peppers, also called golden Greek peppers, sweet Italian peppers, hot chili peppers, or Tuscan peppers, are a colorful and flavorful chili variety that enhances your meals.

    Both are chili pepper family members, known as Capsicum annuum. Despite their similar family, there are distinct differences between these two types of peppers:

    Banana Peppers vs Pepperoncini: Appearance

    Banana Peppers Appearance

    Banana peppers, aptly named for their long, curved shape and vibrant yellow color, are among the most visually distinctive of the two peppers.

    They possess a bright yellow-green waxy skin that is smooth to the touch. The skin of the banana pepper is glossy and firm, reflecting its freshness and quality.

    Inside, you'll find thinner walls compared to many other pepper varieties. The yellow hue of the banana pepper is not just an exterior trait; it extends to the inner flesh as well, adding to its unique visual appeal.

    Pepperoncini Peppers Appearance

    On the other hand, while sharing a similar shape, Pepperoncini peppers have a few distinct differences in appearance.

    They are usually a lighter shade of yellow, often with a tinge of green, and their skin, while still smooth, has a slightly wrinkled texture. Unlike banana peppers, the walls of Pepperoncini are not as thin, giving them a more robust feel.

    Banana Peppers vs Pepperoncini: Taste

    Banana Peppers Taste

    Banana peppers are known for their mild yet tangy flavor. They are a type of mild pepper that gets their name from their long, curved shape and yellow color, resembling a banana.

    Pickled banana peppers are particularly popular, adding a tangy punch to pizzas and sandwiches. They offer a mild tangy flavor with a touch of sweetness that can elevate any dish. Due to its sweetness, it is also called sweet Italian pepper.

    Pepperoncini Peppers Taste

    Pepperoncini, on the other hand, are a bit spicier than banana peppers, offering a slightly more robust flavor. These peppers are also known for their tangy flavor but have a distinct edge that sets them apart.

    Pickled pepperoncini are a staple in Greek and Italian cuisine, often used to add a kick to salads and antipasto platters.

    The key difference between pepperoncini and banana peppers lies in their heat level, with pepperoncini being slightly hotter.

    Banana Peppers vs Pepperoncini: Heat Level

    Banana Peppers Heat Level

    Banana peppers are famous for their mild heat and are popular among those who prefer a less spicy option. With Scoville Heat Units ranging from 0 to 500, banana peppers offer a mildly spicy and tangy flavor that can complement a range of dishes without overpowering them.

    Pepperoncini Peppers Heat Level

    Pepperoncini and banana peppers have similar flavors, but pepperoncini take the lead when it comes to heat. They rank slightly higher on the Scoville scale, with heat units between 100 and 500.

    Although still considered mildly spicy, pepperoncini delivers a more noticeable kick compared to banana peppers, adding a bit of extra zest to your meals.

    Banana Peppers vs Pepperoncini: Uses

    When it comes to the debate of banana peppers vs pepperoncini, the differences might seem subtle but are significant in culinary uses.

    Banana Peppers Uses

    Banana peppers, with their mild heat level, are often used in their pickled form and can be found adorning pizzas or sandwiches. They can also be cooked with meat or other vegetables in a slow cooker, where their sweet and tangy flavor shines through.

    Pepperoncini Peppers Uses

    On the other hand, the slightly spicier pepperoncini peppers are a staple in Greek Salads and Italian antipasti. Like banana peppers, they're often served in their pickled form, adding a bright, tangy flavor to dishes.

    Besides salads, they're also great for stuffing with cheese or pairing with meats, adding a distinctive taste that complements the flavors of the cooking.

    Banana Peppers vs Pepperoncini: Variety

    Banana Peppers Variety

    Banana peppers, a type of chili pepper, come in several varieties including sweet, mild, and hot. They are part of the Capsicum annuum family, which also includes bell peppers and other chili peppers.

    The banana pepper varieties differ mainly in their heat level, influenced by factors like growing conditions and maturity.

    Pepperoncini Peppers Variety

    Pepperoncini, on the other hand, also belongs to the Capsicum annuum family, sharing lineage with bell peppers and chili peppers.

    They are often found in two main varieties: the Italian friggitello and the Greek pepperoncini. Each variety has its own unique characteristics, making them suitable for different culinary uses.

    FAQ's

    Can You Substitute Banana Peppers For Pepperoncini Peppers?

    Yes, you can substitute banana peppers for Pepperoncini peppers and vice versa, as they both belong to the same Capsicum Annuum Family and share many similarities.

    However, it’s important to note that while they may share some flavor characteristics, they are not identical.

    The heat level and flavor profile of these two peppers can vary, so while they can be used interchangeably in many recipes, the end result might not have the exact same flavors.

    Which One Is Better?

    Comparing Banana Peppers and Pepperoncini shows clear distinctions despite their shared family roots. From appearance to flavor and heat levels, each pepper has unique culinary uses, ideal for various dishes.

    When substituting, consider the desired taste and spice level, as results may differ. Both peppers are versatile, enhancing dishes with their distinct flavors.

    Check Out The Following Related Posts

    • Best Chocolate Caramel Bark
    • Pumpkin Spice Latte
    • 30 Items Food Banks Need
    • Fresh Fruit Strawberry Sangria

    Does Almond Butter Go Bad? How To Store?

    September 29, 2023 by Angela Milnes

    Almond butter in a small bowl.

    Does Almond Butter Go Bad? If so, How long will almond butter last? This article will discuss how to know if your Almond butter is still good and the best ways to store Almond butter for longer shelf life.

    Does Almond Butter Go Bad
    [feast_advanced_jump_to]

    Does Almond Butter Go Bad?

    Much like its counterparts in the nut butter family, both homemade and store-bought almond butter can go bad if not stored properly.

    Homemade almond butter typically lasts for about two weeks in the fridge, while a store-bought, unopened jar can last up to its expiration date. Once opened, it's best to consume store-bought almond butter within three months for optimal freshness.

    Always remember to check for spoilage signs such as mold, an off smell, or noticeable changes in texture before consuming, even if it's before the expiration date.

    Why Does Almond Butter Go Bad?

    The reason almond butter goes bad, whether it's homemade or store-bought, relates to how it's stored.

    Almond butter is sensitive to warm temperatures and heat sources, which can accelerate the spoilage process by promoting bacterial growth. That's why leaving an unopened almond butter or an opened jar near a stove or in a warm pantry is a bad idea.

    Instead, keep your almond butter jar in a cool, dark place, or better yet, the refrigerator, to extend its shelf life and maintain its delicious taste and texture.

    How to Tell if Almond Butter Has Gone Bad?

    Here are some signs that your almond butter may have turned rancid:

    • Funny Smell: Fresh almond butter has a pleasant, nutty aroma. If your almond butter smells like old paint or has an unusual odor, it's likely gone bad.
    • Bad Taste: Almond butter tastes rich and slightly sweet when it's fresh. If it has an otherwise unpleasant taste, avoid consuming it.
    • Mold Growth: One of the obvious signs of rancid almond butter is mold growth. If you see black or brown spots or any other unusual signs on the surface, it's time to throw it away.
    • Changes in Texture: Fresh almond butter should be creamy and spreadable. If it becomes hard, dry, or gritty, it's probably old.
    • Past Expiry Date: While almond butter can often last beyond its expiry date if stored properly, it's always a good idea to check the date. If it's significantly past the expiration date, it's safer to discard it.

    If something seems off, it's better to avoid consuming the old almond butter. After all, your health is worth more than a jar of almond butter!

    How to Store Almond Butter to Avoid Spoilage?

    Storing almond butter properly is key to ensuring it retains its quality and stays fresh for as long as possible. Unlike many pantry items, almond butter has specific storage needs that, when met, can significantly extend its shelf life.

    Refrigerate Almond Butter

    Refrigerating almond butter is a fantastic way to prolong its freshness. Once opened, it's best to refrigerate your almond butter to keep it at its prime.

    Even a half-open jar can benefit from being stored in the refrigerator, as it helps maintain the nutty flavor and creamy consistency that we all love. Freshly ground almond butter can last up to three months in the fridge without a problem.

    Freeze Almond Butter for a Longer Shelf Life

    For an even longer shelf life, you can freeze almond butter. Freezing doesn't alter the taste or texture of the almond butter but allows it to stay fresh for up to a year.

    Just ensure to store almond butter in an airtight container to avoid freezer burn and any unwanted flavors from other foods.

    Store Almond Butter in a Dark Place

    If refrigerating or freezing isn't an option, storing almond butter in a dark place, like a kitchen cabinet, can also help extend its shelf life.

    Direct sunlight and warm temperatures can cause the oil in the almond butter to separate and spoil faster.

    Almond Butter In A Jar

    How Long Does Almond Butter Last?

    Nut butter, including almond butter, has a surprisingly long shelf life. Unopened, store-bought almond butter can stay good until the “best by” date printed on the jar, which is typically up to two years from the production date. However, once opened, its lifespan decreases significantly.

    Homemade Almond Butter vs Store-Bought

    When it comes to homemade almond butter, its freshness doesn't last quite as long. Homemade almond butter should be stored in an airtight container and typically kept for about two weeks in the fridge.

    On the other hand, store-bought almond butter, thanks to preservatives, has a longer shelf life. Once opened, it can last three to five months in the refrigerator.

    FAQ's

    How To Add Almond Butter To Your Diet?

    Smoothie Powerhouse: Blend almond butter into your morning Smoothie. It’s a great way to start the day and the nutty flavor pairs well with fruits like bananas and berries.

    Salad Dressings Reinvented: Give your Salad dressings a delicious twist by replacing traditional ingredients with almond butter. Its creamy texture and rich flavor can transform even the simplest salad into a gourmet delight.

    Combat Oil Separation: Almond butters often separate, leaving a layer of oil at the top of the jar. Don’t be put off—this is natural and doesn’t mean the product has gone bad. Just give it a good stir before you eat.

    Breakfast Boost: Start your day by spreading almond butter on whole-grain toast for a filling, delicious Breakfast.

    How Does Almond Butter Taste?

    Fresh almond butter tastes like a delightful journey into the heart of almonds. Its flavor profile is a harmonious blend of sweet and savory, with a depth that sets it apart from other nut butter.
    he first taste reveals the usual nutty aroma, followed by a hint of natural sweetness that underscores the richness of almonds.

    Keep Almond Butter Fresh For Longer

    Almond butter does go bad. Like any food product, its shelf life is finite. The natural oils can turn rancid over time, especially if the almond butter isn't stored properly.

    If it starts to smell off or look like oil paint, it might be time to toss the whole jar. Remember to always check your almond butter's freshness before eating.

    More Useful Articles

    • Does Soy Sauce Go Bad?
    • What Are Caperberries?
    • Does Mustard Go Bad?
    • How To Freeze Beets
    • What Is Purple Cauliflower?

    What Are Caperberries?

    September 29, 2023 by Angela Milnes

    Caperberries in a bowl.

    Have you ever wondered What Are Caperberries? You're not alone - many people have never heard of them! Caperberries are a unique and flavorful ingredient that can add delightful zest to your dishes. So what are caperberries exactly, and how do they taste? Keep reading to find out all about these special culinary treats.

    What Are Caperberries
    [feast_advanced_jump_to]

    What Are Caperberries?

    Caperberries are the fruits of the caper bush (Capparis spinosa), a plant native to the Mediterranean region. They are larger than capers, which are actually the unopened flower buds of the same plant. They are high in antioxidants and have anti-inflammatory properties.

    Where Do Caper Berries Come From?

    Caperberries are fruits of the caper plant, specifically Capparis spinosa, that is native to the Mediterranean region, particularly Southern Europe, the Middle East, and Northern Africa.

    The caper bushes are hardy perennials that have adapted to the climatic conditions of these regions. They are also found in parts of Asia, hinting at a possible origin there.

    The berries themselves are harvested after the caper buds have bloomed and turned into fruit, offering a unique culinary delight in many Mediterranean cuisines.

    Caperberries On A Tree

    Are Capers and Caper Berries the Same?

    While capers and caper berries both come from the same plant, known as the caper shrub or caper bush, they are not the same.

    The key difference lies in their stage of development and their size. Capers, also known as brined capers, are the unopened buds of the caper bush. They are typically harvested when they are small, around the size of a kernel of corn.

    On the other hand, caper berries are the fruits that develop after the flowers of the caper bush have bloomed and been pollinated. They are considerably larger than capers, similar in size to an olive or small grape.

    What Does a Caper Berry Look Like?

    Caper berries are the fruit of the caper plant and bear a striking resemblance to green olives. They are oblong in shape, green-gray in color, and feature a long stem.

    Unlike the tiny buds known as capers, caper berries are considerably larger, being similar in size to an olive or small grape. Inside, they are filled with numerous small seeds that contribute to their unique texture.

    Caperberries In A Plate

    What Do Caper Berries Taste Like?

    Brined caper berries have a unique flavor profile that is both tangy and briny. They are reminiscent of green olives, but with a more pronounced tartness that makes them a popular ingredient in Mediterranean cuisine.

    The tangy caper berries are less intense in flavor compared to the unopened buds known as brined capers, but they still offer a distinctive taste that can elevate many dishes. The briny flavor of caper berries is a result of the pickling process, which infuses them with a delightful tanginess.

    Despite their larger size, the taste of brined caper berries is somewhat milder compared to the sharp, piquant flavor of their smaller counterparts, the brined capers.

    Do Caper Berries Have Seeds?

    Yes, caper berries indeed have seeds. They contain tiny seeds, about the size of mustard seeds, that add a delightful crunch to the overall texture of the berry.

    These seeds are packed with a high concentration of flavor, making them a favorite among home cooks. The seeds not only contribute to the distinct taste of caper berries but also enhance their culinary appeal with an added crunch.

    How Are Caper Berries Grown?

    Growing caper berries requires an understanding of the caper bush’s specific needs and careful attention to the timing of the harvest. Adding it to your garden can be a fulfilling experience, offering both ornamental and culinary benefits.

    • Plant Needs: Caper plants require a sunny position with at least 6 hours of sun per day in summer. They require a minimum temperature of 10 degrees Celsius and grow slowly, reaching maturity in about two years.
    • Bud and Berry Production: The caper bush produces flower buds which, if harvested at the right time, become the capers we use in our kitchens. These small and delicate buds need to be harvested individually by hand each morning as they reach the proper size. If these flowers aren't picked, they blossom and eventually turn into larger caper berries.
    • Propagation: Growing a caper bush from cuttings is a common propagation method. Collect growing caper berry cuttings in the early spring months, using basal portions with six to ten buds for the best results.

    Where Can You Find Caper Berries?

    If you're on the hunt for caper berries, you're in luck! Several grocery and online stores carry various brands of this Mediterranean delicacy.

    Whole Foods Market offers Organic Caper Berries, while Walmart and Amazon list Roland Fine Caper Berries.

    Additionally, you can find Divina Caper Berries at HEB and Alessi Caper Berries in Balsamic Vinegar at Alessi Foods.

    For those seeking nonpareil capers, these are typically the smallest size of caper berries, renowned for their superior flavor and texture.

    What Are Caper Berries Special For?

    Caper berries are a special ingredient known for their versatility in culinary applications, particularly in savory dishes. These tangy, briny fruits can be used much like green olives, adding a burst of flavor and a unique texture to a variety of recipes.

    For example, caper berries can be tossed into a Greek Salad, where they complement the feta cheese, Tomatoes, Cucumbers, and olive oil with their distinct tartness. They are also excellent when paired with smoked salmon, as their tanginess cuts through the richness of the fish, enhancing its delicate flavor.

    Whether they're used in salads, or pasta, or served alongside smoked salmon, caper berries bring a touch of Mediterranean flair to any dish, making them an indispensable addition to many kitchens.

    FAQ'S

    How Can Caper Berries Be Eaten?

    Caper berries are typically sold pickled, adding a tangy flavor and unique texture to various dishes. Here’s how you can enjoy these delightful berries.

    Enjoy as It Is
    Pickled capers have a unique, piquant flavor that can be enjoyed straight from the jar. These snacks or appetizers offer a burst of flavor in every bite.

    Use in Salads
    Add some zing to your salads by tossing in a handful of pickled caper berries. They pair well with fresh greens, tomatoes, cucumbers, and feta cheese. Their briny taste adds depth and complexity to simple salad recipes.

    Incorporate Into Pasta Dishes
    Caper berries can work wonders in pasta dishes too. Try adding them to spaghetti aglio e olio or puttanesca sauce. The salty, briny flavor complements the garlic, olive oil, and tomatoes beautifully.

    Garnish for Fish and Meat Dishes
    Caper berries make a wonderful garnish for fish, chicken, and other meat dishes. They can be used in tartar sauce, served alongside smoked salmon, or used as a topping for grilled steak.

    Use in Cocktails
    Believe it or not, pickled caper berries can also be used in cocktails. They make an excellent and unexpected garnish for martinis and bloody marys, adding a savory twist to these classic drinks.

    enjoy Caperberries In Your Diet

    In conclusion, caperberries are the mature fruits of the caper bush, known scientifically as Capparis spinosa. They are larger than caper buds and contain numerous seeds.

    Typically pickled or brined to bring out their unique flavor, caperberries have a tangy, olive-like taste with a hint of lemon. They are used in Mediterranean cuisine, particularly in Italian, Greek, and Spanish dishes.

    More Useful Articles:

    • Does Almond Butter Go Bad?
    • Does Soy Sauce Go Bad?
    • Does Mustard Go Bad?
    • How To Freeze Beets
    • What Is Purple Cauliflower?

    Does Evaporated Milk Go Bad?

    September 29, 2023 by Angela Milnes

    Evaporated milk in a can.

    Does Evaporated Milk Go Bad? Whether it's for baking purposes, adding creaminess to a sauce or a tasty curry dish, there are plenty of uses for evaporated milk!

    But how should you store evaporated milk? Here are some top tips for extending the the shelf life of evaporated milk.

    Evaporated milk in a can.
    [feast_advanced_jump_to]

    Does evaporated milk go bad?

    Like regular milk, evaporated milk can go bad, but it has a considerably longer shelf life due to its processing.

    Unopened Evaporated Milk

    Unopened canned evaporated milk can last for years beyond its printed date when properly stored in a cool, dry place.

    Unopened Evaporated Milk

    Opened Evaporated Milk

    However, once you've opened the canned evaporated milk, the clock starts ticking. Even when refrigerated, opened evaporated milk should ideally be used within a few days to ensure its quality and safety.

    If you have leftover evaporated milk, make sure to store it in an airtight container in the refrigerator. This way, you can extend its shelf life for up to one week.

    Opened Evaporated Milk

    the Shelf Life of Evaporated Milk

    Like any dairy product, the shelf life of evaporated milk depends on various factors.

    1. Packaging

    Packaging is key in determining evaporated milk's shelf life. Most come in cans with sealed, airtight lids to keep them fresh for years. Check the milk package before purchase, as this affects longevity.

    2. Storage Conditions

    Proper storage is vital for preserving the shelf life of evaporated milk. Store unopened cans in a cool and dry place away from sunlight and temperature fluctuations.

    The optimal storage temperature is around 50°F (10°C). Once opened, transfer any unused portion to an airtight container and refrigerate it.

    3. "Best By" or "Use By" Date

    Check the label on the can for the "best by" or "use by" date. This date indicates the manufacturer's recommendation for the period during which the product is at its peak quality.

    4. Microbial Contamination

    Evaporated milk, like any dairy product, is susceptible to microbial contamination. Proper hygiene when handling milk, utensils, and containers is crucial to preventing spoilage.

    How to tell if evaporated milk has gone bad?

    Evaporated milk, like any other food product, can spoil over time. Here are some signs to look out for:

    • Color Change: Fresh evaporated milk typically has a light caramel color. If it turns darker or develops an off-color, it might have gone bad.
    • Lumps or Thicker Texture: Good-quality evaporated milk should have a smooth texture. If you notice lumps or a curd-like texture, it's a clear sign that the milk has spoiled.
    • Off Smell: Fresh evaporated milk has a slightly sweet smell. If it starts to smell sour or bitter, it's advisable to discard it.
    • Taste: If the evaporated milk tastes sour or off, it's best not to consume it.
    • Can Condition: Check the condition of the can. If it has dents, bulges, or depressed portions, it's safer to discard the milk.
    • Expiry Date: While canned goods can last past their 'best by' date, if the evaporated milk is several years past this date, it may be less than ideal to use.

    How to store evaporated milk properly?

    Understanding how to store evaporated milk properly can extend its shelf life as well as maintain its quality. Here's a guide to help you do just that.

    1. Store Unopened Cans

    Unopened cans of evaporated milk should be stored in a cool, dry place such as a pantry or a cupboard. Avoid exposing the cans to extreme temperatures as it can affect their shelf life and quality.

    2. Freeze Evaporated Milk

    Freezing evaporated milk is a great option if you don't plan on using it immediately. To freeze evaporated milk, pour it into an airtight container, leaving some space for expansion as it freezes.

    Ensure the container is sealed tightly before placing it in the freezer. This way, the milk can be stored for up to six months without losing its flavor.

    Thaw Frozen Evaporated Milk

    When you're ready to use the frozen evaporated milk, let it thaw in the refrigerator overnight. Do not thaw it at room temperature as it can encourage bacterial growth.

    Once thawed, stir it well to recombine any separated components before using.

    Can you use spoiled or expired evaporated milk?

    No, it's not safe to use spoiled or expired evaporated milk. Like any other food product, When evaporated milk spoils, it develops bacteria that may cause foodborne illness if consumed.

    FAQ'S

    Is Sweetened Condensed Milk The Same As Evaporated Milk?

    While both evaporated and condensed milk are made by removing water from regular milk, they are not the same.

    Regular evaporated milk is unsweetened, and its texture is slightly thicker than fresh milk. On the other hand, sweetened condensed milk has sugar added, which gives it a much thicker consistency and a sweet flavor.

    Despite the ‘milk skin’ that can form on both during the heating process, they have distinct uses in cooking due to their different sweetness levels.

    So, unsweetened condensed milk is essentially the same as evaporated milk, but sweetened condensed milk is a substantially different product.

    How To Use Evaporated Milk In Recipes?

    Here’s how you can incorporate it into your cooking:

    In Baking: Evaporated milk can be used instead of fresh milk in baking recipes. It lends a creamy, rich texture to cakes.

    Richer Substitution: You can substitute evaporated milk for regular milk in most recipes. However, keep in mind that it has a richer and creamier consistency.

    In Smoothies and Coffee: Evaporated milk gives body to Smoothies and sweetens coffee, adding a nuanced richness to these beverages.

    In Creamy Soups and Chowders: Add evaporated milk to make Soups and chowders creamier and more indulgent.

    In Desserts: The creaminess of evaporated milk is perfect for desserts like ice cream, Cheesecake, and Bread and butter puddings.

    In Pasta Dishes: Add evaporated milk to pasta dishes like Creamy Mac and Cheese or Spaghetti for a deliciously creamy twist.

    How Does Evaporated Milk Taste?

    Evaporated milk has a unique taste that sets it apart from regular milk. Its flavor is often described as slightly sweet and creamy, with a hint of caramelization.

    This distinctive taste results from the evaporation process, where approximately 60% of the water content is removed, leading to a concentration of the milk’s natural sugars. The heat used during this process also imparts a slightly cooked or toasted flavor

    Enjoy Evaporated Milk

    Evaporated milk can indeed go bad. It's important to note that while canned foods like evaporated milk have a longer shelf life than fresh foods, they are not immune to spoilage.

    Read More Here

    • Does Cream Cheese Go Bad?
    • Does Brie Cheese Go Bad?
    • Best Cheese For Roast Beef Sandwich
    • Best Summer Salads Recipes
    • Colorful Winter Salads

    Does Cream Cheese Go Bad?

    September 29, 2023 by Angela Milnes

    Cream cheese in a bowl with a spoon.

    Does Cream Cheese Go Bad? The answer is yes. Cream cheese does go off eventually. Today we will share the signs that cream cheese has gone bad and teach you how to store cream cheese correctly.

    Does Cream Cheese Go Bad
    [feast_advanced_jump_to]

    So, Does Cream Cheese Go Bad?

    Yes, cream cheese will go bad eventually. This really depends on how it is stored, the temperature and how the cheese is wrapped. Below is a detailed guide for different cream cheese storage methods.

    How Long Does Cream Cheese Last?

    It is important to know how long cream cheese lasts to ensure its best quality and safety.

    • Unopened Package of Cream Cheese: An unopened package of cream cheese, whether it's foil-wrapped cream cheese or in plastic containers, can last up to two months in the fridge. This shelf life assumes that the cream cheese has been stored properly at all times.
    • Opened Cream Cheese: Once opened, cream cheese typically stays fresh for about one to two weeks.
    • Previously Frozen Cream Cheese: If you've previously frozen cream cheese and have thawed it, it's best to use it within two to three weeks. Remember, once thawed, cream cheese should never be refrozen.
    • Prepared Cream Cheese Frosting: Homemade or store-bought cream cheese frosting can last up to three days in the fridge. Always keep it in airtight containers to maintain its freshness.

    How To Identify Expired Or Spoiled Cream Cheese?

    Identifying spoiled or expired cream cheese is very important for food safety. The sell-by, best-by, or use-by date printed on the package provides a guideline, but it's not foolproof.

    An unopened cream cheese might still be safe to consume past its printed date if it makes perfect sense in terms of appearance and smell.

    However, if the cream cheese has turned yellow, gives off a sour smell, or begins to taste sour, these are clear signs of spoilage. Always prioritize your senses over the printed dates when dealing with cream cheeses.

    How To Store Cream Cheese Correctly?

    Whether it's unopened, opened, frozen, or leftover cream cheese, each type requires specific storage techniques to ensure its best quality and safety.

    Here's how to store cream cheese correctly for optimal quality:

    1. Storing Unopened Cream Cheese

    Unopened cream cheese usually comes in foil-wrapped blocks or plastic containers. It's best to keep it in its original packaging and store it in the refrigerated section of your fridge.

    2. Storing Opened Cream Cheese

    For opened cream cheese, the first rule is to ensure it's stored in an air-tight container. Whether you're using the original plastic container or transferring the cream cheese to another container, make sure it's sealed tightly. This prevents any air from entering and spoiling the cream cheese.

    3. Freezing Cream Cheese

    Freezing cream cheese is an option if you want to extend its shelf life even further. While freezing cream cheese can alter its texture, making it crumbly and less spreadable, it's still perfectly fine to use in cooked dishes.

    To freeze cream cheese, place the foil-wrapped block or cream cheese container in a freezer bag to protect it from freezer burn.

    4. Storing Leftover Cream Cheese

    When dealing with leftover cream cheese, it's essential to store it properly to keep its quality. Keep it in an air-tight container to avoid drying out and absorbing odors from other foods in the fridge.

    5. Storing Cream Cheese Frosting

    When it comes to cream cheese frosting, it must be kept in the refrigerator. Store cream cheese frosting in an air-tight plastic container in the refrigerated section of your fridge. This helps maintain the frosting's texture and prevents it from going bad.

    FAQ'S

    What Is The Moisture Content Of Cream Cheese?

    Cream cheese typically has a moisture content of not more than 55% as per some studies

    What Does Cream Cheese Taste Like?

    Cream cheese has a unique flavor profile that is both mild and slightly tangy. Its taste is often described as fresh and creamy, with a subtle sweetness that goes well with various foods.

    The texture is smooth and spreadable, contributing to its overall mouthfeel. The richness derived from the cream makes it a satisfying addition to many dishes, both sweet and savory.

    So, enjoy Your Stored Cream Cheese!

    In conclusion, cream cheese, like other dairy products, does indeed go bad after a certain period. Its lifespan can be extended when properly stored in a plastic container or freezer bags, ensuring it remains fresh for a longer duration.

    However, it is crucial to remember that even under ideal storage conditions, cream cheese won't last forever. Therefore, regular checks for any signs of spoilage are necessary.

    More Useful Articles:

    • Hazelnut Chocolate Bark
    • Easy Breakfast Ideas For Kids
    • Does Evaporated Milk Go Bad?

    Best Hot Cocoa Dip

    September 25, 2023 by Angela Milnes

    Best Hot Cocoa Dip.

    This Hot Cocoa Dip has the perfect hot chocolate flavor, and is an insanely delicious no bake dessert that you can put together in minutes. Dessert dips are a fantastic easy sweet treat to make and serve at holiday parties, and this delicious cocoa dip tastes fantastic!

    Hot Cocoa Dip
    [feast_advanced_jump_to]

    Why Make Hot Cocoa Dip

    • Tasty: On the cold winter nights, there's nothing a good hot chocolate dessert can't fix, and this easy hot cocoa dip is perfect.
    • Customizable: My favorite part about this recipe is the fact that this chocolate dip can be customized as per your preference. You can bring lots of fun variations to it.
    • Great Party Treat: You can top it with your choice of toppings, and serve it with your favorite dippers at your next holiday party.

    Recipe Ingredients

    You'll need just 5 simple ingredients to make hot chocolate dip from scratch.

    • Marshmallow Fluff: Provides a fluffy and sweet base for the cocoa dip.
    • Cool Whip: Adds creaminess and lightness to the texture of the dip.
    • Hershey’s Cocoa (unsweetened): Infuses the dip with a rich, intense chocolate flavor.
    • Mini Marshmallows: Offer a fun texture and added sweetness.
    • Graham Crackers: Serve as the perfect crunchy companion for dipping.
    Hot Cocoa Dip Ingredients

    How To Make Hot Cocoa Dip

    Once you have all the ingredients ready, here's what you'll need to do to make the hot cocoa dip recipe.

    Hot Cocoa Dip

    Step One: In a large mixing bowl, add the Marshmallow fluff, Cool Whip, and cocoa powder. 

    Hot Cocoa Dip

    Step Two: With a hand mixer, blend these ingredients together for about 5 minutes, or until the dip is light and fluffy. Remove in a serving dish and serve with graham crackers.

    Hot Cocoa Dip

    Pro Tips For Nailing Hot Cocoa Dip

    Ready to try out this delicious dessert dip recipe? Here are some more tips and tricks you might want to keep in mind.

    • To lend the hot chocolate dip some extra flavor, you can also add some espresso powder into it along with the hot cocoa mix.
    • I used mini marshmallows as the topping, but you can also top this hot cocoa dip with some whipped cream and mini chocolate chips to bring in a nice variation to it.
    • I would recommend using the best quality hot chocolate mix you can get your hands on for this recipe. It really makes a difference with how the end flavors turn out.
    • You can also use high quality Mexican hot chocolate mix to make a Mexican hot chocolate dip.
    • Remember to serve this dessert dip in a serving bowl right before you want to serve.
    Hot Cocoa Dip

    Optional Toppings

    • Candy Cane: If you're trying this hot chocolate dip recipe for a holiday party, you can also top it with some crushed candy canes in addition to the mini marshmallows.
    • Whipped Cream: I would also recommend topping the hot chocolate dip with some extra whipped cream on the top, some mini chocolate chips and crushed Graham crackers.

    Storage Instructions

    • Fridge: If you have any leftover dip that you want to store for later, you can just transfer it to an airtight container and refrigerate it. In fact, you can also prep it in advance and let it rest in the fridge overnight.The chocolate dip should stay fresh for 2-3 days, if not more.

    What To Serve With Cocoa Dip?

    This hot cocoa dip can be served with some more mini marshmallows, vanilla wafers, Banana Chocolate Chip Cookies, Animal Crackers, Graham crackers and even some Fresh Kiwi Fruit Salad if you want to.

    FAQ'S

    How To Make The Hot Chocolate Dip Thicker?

    If you want this hot chocolate dip to have a bit of a thicker texture and some extra creaminess to it, you can also add some softened cream cheese into the mixture.

    How Can I Make The Hot Chocolate Dip Dairy Free?

    To make a dairy free version of this hot cocoa dip, all you need to do is swap the Cool Whip that the recipe calls for with dairy-free frozen whipped topping of your choice

    Best Hot Cocoa Dip.

    Hot Cocoa Dip

    Angela Milnes
    Warm up with a cozy treat of Hot Cocoa Dip! This creamy, chocolatey dip is perfect for scooping with graham crackers, pretzels, or fruit, delivering all the comforting flavors of a classic hot cocoa in a fun, shareable form.
    5 from 3 votes
    Print Recipe Pin Recipe Rate this Recipe
    Prep Time 10 minutes mins
    Cook Time 1 minute min
    Total Time 11 minutes mins
    Course Desserts
    Cuisine American
    Servings 2 Servings
    Calories 722 kcal

    Ingredients
      

    • 7.5 Ounce Marshmallow Fluff 7.5 oz of Marshmallow Fluff
    • 8 Ounce Cool Whip 8 oz of Cool Whip (Original)
    • ¼ Cup Hershey’s Cocoa unsweetened
    • 2 tablespoon Mini Marshmallows
    • 6 Graham Crackers

    Instructions
     

    • In a large mixing bowl, add the Marshmallow fluff, Cool Whip, and cocoa powder. 
    • With a hand mixer, blend these ingredients together for about 5 minutes, or until the dip is light and fluffy.
    • Remove in a serving dish and serve with graham crackers.
    • Ready to try out this delicious dessert dip recipe? Here are some more tips and tricks you might want to keep in mind.

    Notes

    To lend the hot chocolate dip some extra flavor, you can also add some espresso powder into it along with the hot cocoa mix.
    I used mini marshmallows as the topping, but you can also top this hot cocoa dip with some whipped cream and mini chocolate chips to bring in a nice variation to it.
    If you want this hot chocolate dip to have a bit of a thicker texture and some extra creaminess to it, you can also add some softened cream cheese into the mixture.
    I would recommend using the best quality hot chocolate mix you can get your hands on for this recipe. It really makes a difference with how the end flavors turn out.
    You can also use high quality Mexican hot chocolate mix to make a Mexican hot chocolate dip.
    Remember to serve this dessert dip in a serving bowl right before you want to serve.
    If you’re trying this hot chocolate dip recipe for a holiday party, you can also top it with some crushed candy canes in addition to the mini marshmallows.
    I would also recommend topping the hot chocolate dip with some extra whipped cream on the top, some mini chocolate chips and crushed Graham crackers.

    Nutrition

    Serving: 1gCalories: 722kcalCarbohydrates: 163gProtein: 7gFat: 10gSaturated Fat: 4gPolyunsaturated Fat: 1gMonounsaturated Fat: 3gCholesterol: 18mgSodium: 370mgPotassium: 198mgFiber: 2gSugar: 102gVitamin A: 198IUCalcium: 156mgIron: 2mg
    Print Recipe Pin Recipe Rate this Recipe
    Tried this recipe?Let us know how it was!

    More Dessert Recipes

    If you enjoyed making this hot chocolate dip recipe, and are inspired to try your hands at some more dessert recipes, here are a few handpicked ones to choose from.

    • Chocolate Covered Bananas
    • Chocolate Overnight Oats
    • Zucchini Chocolate Chip Muffin
    • Lemon Pudding Cake
    • Blueberry Smoothie Bowl Recipe
    • Berry Granola Bites
    • Blueberry Almond Crumble

    Easy Air Fryer Broccolini

    September 25, 2023 by Angela Milnes

    Easy Air Fryer Broccolini.

    Air Fryer Broccolini is fast, crispy, and ridiculously easy to make. This tender green side is fresh, flavorful, and ready in just 10 minutes.

    Air Fryer Broccolini

    If you're craving something light yet satisfying, this is your go-to. Baby broccoli cooks up beautifully in the air fryer—slightly charred on the edges, tender on the inside, and full of flavor. It’s a fab way to sneak in more veggies, just like my Air Fryer Zucchini Fritters or Crispy Air Fryer Carrot Fries. Plus, it pairs with everything from grilled mains to veggie bowls.

    [feast_advanced_jump_to]

    💖 Why This Recipe Works

    • Quick & easy: Done in under 10 minutes with hardly any prep.
    • Perfectly roasted texture: Crispy florets and tender stems without turning on the oven.
    • Healthy and flavorful: Simple ingredients, great nutrition, and big on flavor.

    ⭐ Star Ingredients

    Air Fryer Broccolini Ingredients

    You'll need just 4 simple ingredients to Air Fry broccolini.

    • Broccolini: A hybrid of broccoli and Chinese kale, this baby broccoli cooks up sweet and tender with just the right bite. It’s also sneaky healthy—packed with vitamin C, folate, and fiber. Plus, it’s lower in carbs than many sides, making it a nutrient-dense choice whether you're eating clean, low-carb, or just trying to get more greens in your life.
    • Olive oil: Helps achieve a slight char and enhances the broccolini's natural flavor.
    • Seasonings: Salt, pepper, or red pepper flakes add a simple yet effective flavor boost.
    • Lemon juice: Adds a fresh, citrusy kick, brightening up the broccolini's earthy taste.

    For the complete list of ingredients with measurements and instructions, please see the recipe card at the bottom of the post.

    📖  Substitutions & Variations

    • No lemon? Try balsamic glaze or a splash of soy sauce.
    • Feeling fancy? Drizzle with sesame oil and sprinkle sesame seeds.
    • Love heat? Add red pepper flakes, smoked paprika, or a dash of hot sauce.
    • Garlic fans: Fresh or garlic powder—either way, it’s tasty.
    • Craving cheesy? Parmesan or nutritional yeast = flavor magic.
    • Want crunch? Lemon zest or crushed pistachios do the trick.

    Still hungry? Try my Roasted Beet Salad with Feta and Walnuts or Cauliflower Rice Sushi next!

    🔪How To Make Air Fryer Broccolini

    Broccolini on a chopping board with a knife.
    1. Step 1: Wash your broccolini and let the water drain. Pat dry using paper towels. Meanwhile, preheat the Air Fryer. Remove the leaves from the stems. Cut off the ends of the stems and the thicker stalks, and keep the thinner stalks intact.
    Chopped Broccolini in a white bowl.
    1. Step 2: In a large bowl, add the broccolini, olive oil, salt and pepper. Mix until everything is evenly coated.
    Crispy Air Fryer Broccolini in an air fryer basket.
    1. Step 3: Add the broccolini to the Air Fryer basket and air fry for 12 minutes at 375 degrees Fahrenheit. Remember to flip the broccolini over halfway to ensure that the broccolini cooks evenly. The key is to get the broccolini to be al dente.
    crispy air fryer broccolini on a white plate.
    1. Step 4: Remove from the Air Fryer and squeeze some fresh lemon juice, if preferred. 

    💡Hint: Don’t overcrowd the basket—air needs to circulate to get that perfect crispy texture.

    👩‍🍳 Expert Tips

    Ready to make Air Fryer Broccolini? Here are some tips and tricks to take note of.

    • Dry your broccolini well before seasoning to avoid sogginess.
    • Every air fryer runs a little differently—thin stalks might be ready in 8 minutes, but thicker ones may need closer to 12. You want those crispy vegetables with tender stems, not limp greens.
    • Use leftover broccolini in wraps, veggie bowls, pasta, or scrambled eggs the next day—it’s a healthy side dish that keeps on giving.

    💭 FAQs

    Can I use regular broccoli instead of broccolini in the air fryer?

    Yes! Just chop it into smaller florets and increase the cook time slightly. Air Fried Broccolini has a more tender stem, but broccoli works in a pinch.

    Do I need to preheat the air fryer for broccolini?

    No, but a quick 2–3 minute preheat can help everything cook evenly and get a nice golden roast.

    Can I cook frozen broccolini in the air fryer?

    Yep! No need to thaw—just pop it in frozen and add 1–2 minutes to the cooking time. Wait until halfway through to add oil to avoid sogginess.

    How can I make air fryer broccolini extra crispy?

    For extra crispiness, lightly spray the broccolini with olive oil and make sure it’s spread out in a single layer in the air fryer basket. Avoid overcrowding to allow hot air to circulate evenly.

    What seasonings work best for air fryer broccolini?

    Yes! You can toss your broccolini in olive oil, salt, pepper, and any seasonings you like (garlic powder, lemon zest, or chili flakes work great). Just make sure the seasoning is evenly distributed for the best flavor.

    💖 Serving Suggestions

    Looking for the best sides to serve with air fried broccolini? Try these:

    • For a keto-friendly meal, pair with Crispy Salmon Bites or Thin Sliced Chicken Breast in Air Fryer.
    • For a vegan plate, serve alongside Vegan BBQ Baked Beans or dip into Creamy Herby Ranch Dressing.
    • For gluten-free eaters, this is perfect with Beet Sweet Potato Salad or Spinach Rice Casserole with Feta Cheese.
    • Broccolini is a great side for main meals such as Cheesy Mexican Steak And Rice, Chicken Tamale Pie or Beef Sabana de Res.
    Air Fryer Broccolini on a fork.

    🍽 More Tasty Veggie Recipes

    • Air Fryer Asparagus with Parmesan.
      Air Fryer Asparagus with Parmesan
    • pickled beets in a bowl.
      Quick Pickled Beets Recipe (Using Canned Beets)
    • Honey Roasted Parsnips and Carrots on a white plate.
      Honey Roasted Parsnips and Carrots
    • Air Fryer Bok Choy on a white plate covered in paprika.
      Air Fryer Bok Choy

    Did you make this recipe? Leave a review and a ⭐⭐⭐⭐⭐ rating below, or tag us in our Facebook Group! Alternatively, bookmark it in your browser or save to Pinterest.

    Easy Air Fryer Broccolini.

    Air Fryer Broccolini

    Angela Milnes
    This easy Air Fryer broccolini is the perfect side dish for just about any meal. If you love broccolini and stir fries, you've got to give this recipe a try.
    5 from 4 votes
    Print Recipe Pin Recipe Rate this Recipe
    Prep Time 5 minutes mins
    Cook Time 5 minutes mins
    Total Time 10 minutes mins
    Course Vegetables
    Cuisine Mediterranean
    Servings 1 Servings
    Calories 434 kcal

    Ingredients
      

    • 1 pounds Broccolini Heads
    • 2 tablespoon Light Olive Oil
    • Pinch Salt
    • Pinch Black Pepper
    • tablespoon Lemon Juice optional

    Instructions
     

    • Ready to try this roasted broccolini recipe? Here's the step by step process you'll need to follow.
    • Wash your broccolini and let the water drain. Pat dry using paper towels. Meanwhile, preheat the Air Fryer.
    • Remove the leaves off the stems. Cut off the end of the stems and the thicker stalks, and keep the thinner stalks intact.
    • In a large bowl, add the broccolini, olive oil, salt and pepper. Mix until everything is evenly coated.
    • Add to the broccolini to the Air Fryer basket and air fry for 12 minutes on 375 degrees Fahrenheit. Remember to flip the broccolini over halfway to ensure that the broccolini cook evenly.
    • The key is to get the broccolini to be al dente.
    • Remove from the Air Fryer and squeeze some fresh lemon juice, if preferred. 

    Nutrition

    Serving: 1gCalories: 434kcalCarbohydrates: 32gProtein: 16gFat: 28gSaturated Fat: 4gPolyunsaturated Fat: 3gMonounsaturated Fat: 20gSodium: 134mgPotassium: 0.3mgFiber: 5gSugar: 11gVitamin A: 8005IUVitamin C: 416mgCalcium: 320mgIron: 4mg
    Print Recipe Pin Recipe Rate this Recipe
    Tried this recipe?Let us know how it was!

    Best Vegan Oreo Milkshake (Oat Milk Milkshake)

    September 25, 2023 by Angela Milnes

    Two glasses of Oreo milkshake.

    Craving a creamy, chocolatey milkshake that’s totally dairy-free and wildly delicious? This Vegan Oreo Milkshake made with oat milk is it. It’s thick, dreamy, and ready in 5 minutes flat—just toss in a few ingredients and blend away.

    Vegan Oreo Milkshake in a tall glass with a blue and white stripy straw.

    This plant based milkshake is everything a non dairy milkshake should be—sweet, creamy, and totally indulgent. Perfect for hot days or when you need a fast oat milk dessert to impress the kids.

    Want more vegan-friendly sweet treats? Don’t miss my Chocolate Overnight Oats or Banana and Beetroot Smoothie!

    [feast_advanced_jump_to]

    💖 Why This Recipe Works

    • Creamy without the dairy – Oat milk and vegan ice cream = lush, rich texture.
    • Quick and fuss-free – This vegan oreo milkshake needs just 4 ingredients and 5 minutes.
    • Kid-approved and totally nostalgic – Tastes like childhood, but all grown up and plant-based.

    Spoiler alert: this one made my picky daughter do a happy dance—and that’s saying something.

    ⭐ Star Ingredients

    Vegan Oreo Milkshake Ingredients

    You'll need just 4 simple ingredients for this thick Oreo milkshake recipe.

    • Vegan Vanilla Ice Cream – I go for coconut-based for that extra thick, creamy scoop. Almond works too if you want it lighter.
    • Oreos – Roughly crushed for that classic cookies-and-cream vibe. I never measure—I just throw in “a generous handful” and call it a day.
    • Oat Milk – Oat Milk – Naturally thick and slightly sweet, oat milk is hands-down the best for milkshakes. I’ve tested almond and soy, but oat milk gives that rich, creamy finish every time. Want to make homemade oat milk? Blend 1 cup oats with 4 cups cold water, strain, and chill—it’s easy and extra creamy.
    • Vegan Chocolate Chips (Optional) – For a “double chocolate Oreo” situation. Toss them in the blender or use them as a chunky topping!

    For the complete list of ingredients with measurements and instructions, please see the recipe card at the bottom of the post.

    📖  Substitutions & Variations

    • Minty Vibes – Use mint Oreos for a fresh twist.
    • Strawberry Swirl – Blend with strawberry ice cream instead of vanilla.
    • Caramel Drizzle – Top with my Instant Pot Caramel Sauce for a decadent touch.
    • Protein Boost – Add a scoop of vegan protein powder for a post-workout treat.

    🍪 Need Gluten Free Biscuits?

    Swap the Oreos for Kinnikinnick or Back to Nature gluten-free sandwich cookies (U.S.), or if you're in New Zealand, try Lotus Biscoff or Griffins Chocolate Thins—just check the label, as many are accidentally vegan!

    🧋Blender Tips: What Works Best?

    • Vitamix – Perfect for that ultra-smooth milkshake finish. It easily blends frozen ice cream and cookie chunks without needing to stir or scrape down.
    • Ninja – I actually use a Ninja at home, and it works like a charm for this milkshake. Just let the vegan ice cream soften for a minute or two, and it blends everything up perfectly—even when I sneak in extra Oreos or chocolate chips.
    • Bullet Blenders – Totally works for single servings! Crush your Oreos beforehand and pulse to keep things from getting too thick to blend.

    💡 Pro Tip: For the creamiest result, layer oat milk first, then ice cream, then cookies—this helps prevent air pockets and blends faster!

    🔪 How To Make Vegan Oreo Milkshake

    Oreo Milkshake Recipe
    1. Step 1: In a blender add the ice cream, milk, Oreos and chocolate chips and mix until smooth. You can also add some vanilla extract if you want to, for a more pronounced vanilla flavor.
    Oreo Milkshake Recipe
    1. Step 2: Pour in a glass and serve immediately. Enjoy
    Oreo Milkshake Recipe

    💡Love thick shakes? Use less oat milk, add a handful of ice, or throw in a frozen banana. Want it drinkable? Use more oat milk and skip the ice.

    👩‍🍳 Expert Tips

    • Use Barista-Style Oat Milk: It’s thicker and makes your milkshake creamier.
    • Freeze Your Oreos: Cold cookies crush up better and keep the shake chilled.
    • Add Ice: Want it frostier? Blend with 3–4 ice cubes for a milkshake-meets-frozen-dessert texture.

    💭 FAQs

    Are oreos vegan?

    Yes, classic Oreos don’t contain dairy or animal ingredients, but they are processed in facilities that handle milk. Always check the label if you're highly sensitive.

    Can I use other plant-based milks for this vegan oreo milkshake?

    Absolutely! You can use various plant-based milks such as almond, soy, or cashew. Each type will slightly alter the flavor and creaminess of your milkshake, so choose one that suits your taste.

    How do I thicken my vegan oreo milkshake?

    To thicken your milkshake, use less oat milk or add ice cubes. For extra creaminess, blend in frozen fruit or swap some liquid for vegan yogurt or more ice cream.

    Best way to store oreo milkshake

    This milkshake is best served fresh, but if you must save it, store in the freezer for up to a week. Let it thaw for 10–15 minutes or blend with a splash of oat milk to refresh.

    Can I make this Oat milk milkshake in advance for a party?

    You can blend it up, freeze in a shallow container, then re-blend with a splash of oat milk right before serving. It’s a great make-ahead dessert for summer BBQs or birthdays.

    Vegan Oreo Milkshake in a tall glass with a blue and white stripy straw.

    💖 Serving Suggestions

    • Party Style – Serve in mason jars with colorful straws and a cookie on top for a fun treat bar.
    • Paired with a Sweet Bite – Enjoy with my Chocolate Covered Bananas or Zucchini Chocolate Chip Muffins for the full dessert experience.

    🎉 Shake It Up:
    Want to make it extra? Try one (or all) of these topping ideas:

    • Oreo crumb rim (just press crushed Oreos around the glass edge).
    • Coconut whipped cream (store-bought or homemade!)
    • Chocolate or caramel swirl.
    • Vegan rainbow sprinkles.

    🍽 More Tasty Dessert Ideas

    • Vanilla Ice Cream Milkshake With Sprinkles.
      Vanilla Ice Cream Milkshake With Sprinkles
    • Easy Banana Split Milkshake with A tropical Twist.
      Easy Banana Split Milkshake With A Tropical Twist
    • White Chocolate Raspberry Mousse in Glasses.
      White Chocolate Raspberry Mousse in Glasses
    • Toasted Almond and Cranberry Bark.
      Toasted Almond and Cranberry Bark 

    Did you make this recipe? Leave a review and a ⭐⭐⭐⭐⭐ rating below, or tag us in our Facebook Group! Alternatively, bookmark it in your browser or save to Pinterest.

    Two glasses of Oreo milkshake.

    Best Vegan Oreo Milkshake

    Angela Milnes
    Treat yourself to a classic indulgence with this Oat Milk Milkshake! It's the ultimate sweet treat that’s perfect for satisfying your dessert cravings!
    5 from 4 votes
    Print Recipe Pin Recipe Rate this Recipe
    Prep Time 5 minutes mins
    Cook Time 0 minutes mins
    Additional Time 0 minutes mins
    Total Time 5 minutes mins
    Course Vegan
    Cuisine American
    Servings 2 Servings
    Calories 757 kcal

    Ingredients
      

    • 2 cups Vegan Vanilla Ice Cream I used So Delicious vanilla bean coconut milk
    • ½ cup Vegan Milk I used oat milk
    • 10 Oreos
    • ⅓ cup Vegan Semi Sweet Chocolate Chips

    Instructions
     

    • In a blender add the ice cream, milk, Oreos and chocolate chips and mix until smooth.
    • You can also add some vanilla extract if you want to, for a more pronounced vanilla flavor.
    • Pour in a glass and serve immediately. Enjoy!

    Notes

    If you want a thick milkshake, you can use less milk and add a frozen banana into the milkshake mixture.
    Another great trick to adjust the milkshake consistency is to add more vegan whipped cream or more ice cream as opposed to the milk.
    To serve the vegan Oreo milkshake, top with whipped cream and some crushed cookies in chilled glasses. You can also add chocolate syrup on the top if you want to.
    To make Oreo bits from scratch, all you need to do is transfer the Oreo cookies into a Ziploc bag and use a rolling pin to sort of roughly crush the Oreos.
     

    Nutrition

    Serving: 1gCalories: 757kcalCarbohydrates: 95gProtein: 11gFat: 38gSaturated Fat: 19gPolyunsaturated Fat: 3gMonounsaturated Fat: 13gTrans Fat: 0.1gCholesterol: 60mgSodium: 370mgPotassium: 603mgFiber: 6gSugar: 68gVitamin A: 695IUVitamin C: 1mgCalcium: 286mgIron: 10mg
    Print Recipe Pin Recipe Rate this Recipe
    Tried this recipe?Let us know how it was!
    • « Previous Page
    • 1
    • …
    • 14
    • 15
    • 16
    • 17
    • 18
    • 19
    • Next Page »
    Angela Milnes.

    Hi I'm Angela

    Welcome to Eat Your Beets where you'll find Healthy and Nutritious Family Recipes that are tasty and simple to cook.

    More About Me

    Spring Recipes

    • edamame stir fry in a white bowl.
      Easy Edamame Stir Fry (15-Minute Protein-Packed Side Dish)
    • Best Gravlax Salmon With Dill (Cured Salmon).
      Best Gravlax Salmon With Dill (Cured Salmon)
    • One Pan Chicken And Asparagus.
      One Pan Chicken And Asparagus
    • Chicken And Cabbage Stir Fry Recipe.
      Chicken And Cabbage Stir Fry Recipe
    • Zucchini Egg Bake Recipe.
      Best Zucchini Egg Bake Recipe
    • How To Make Sun Dried Tomatoes Without Oil.
      How To Make Sun Dried Tomatoes Without Oil – Easy Oven Method

    Popular Recipes 💗

    • best stuffed mushrooms.
      The Best Stuffed Mushrooms
    • Slow Cooker Chicken Bacon Ranch Pasta.
      Slow Cooker Chicken Bacon Ranch Pasta
    • Baked Ricotta On A Spoon.
      Bariatric Friendly Ricotta Bake Recipe
    • Fun Veggie Train With Bell Peppers.
      Fun Veggie Train With Bell Peppers
    • Best Blueberry Smoothie Bowl topped with fruit.
      Best Blueberry Smoothie Bowl Recipe
    • Grilled Eggplant With Lemon Dip.
      Grilled Eggplant With Lemon Dip
    • Air Fryer Asparagus with Parmesan.
      Air Fryer Asparagus with Parmesan
    • Sheet Pan Chicken Fajitas.
      Sheet Pan Chicken Fajitas

    Footer

    As Seen In

    As Seen In.
    • Facebook
    • Pinterest

    Privacy Policy

    Accessibility Policy

    ↑ Back To Top

    Copyright © 2025 | Eat Your Beets | All Rights Reserved

    Rate This Recipe

    Your vote:


    A rating is required
    A name is required
    An email is required