Vegan Brownie In A Mug
This Vegan Brownie In A Mug is the perfect way to beat those midnight chocolate cravings and satisfy your sweet tooth quickly. You can actually enjoy a warm brownie in less than 10 minutes, and top it with some vegan ice cream for some extra deliciousness if you want to.
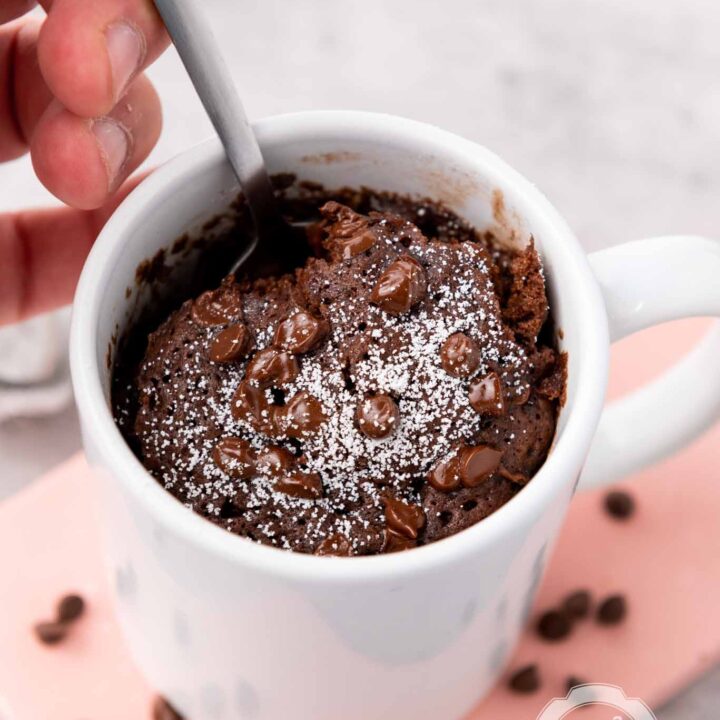
The soft, fudgy brownie is nice and handy in a mug, and topped with some semi-melted chocolate chips for that extra chocolate flavor.

Contents
Why You’ll Love This Recipe
- Comforting: I’m not so much about mug cakes and mug recipes but this microwave brownie in a mug has my heart!
- Tasty: It is the perfect simple and classic chocolate brownie, that will satisfy any chocolate craving in minutes.
- Vegan: Plus, it is vegan, which means you can also make these when you’re hosting a little movie night or a sleepover at your home
Recipe Ingredients
You’ll need just a few simple ingredients to make this vegan brownie in a mug.
- All-purpose flour: Serves as the main structure for the brownie, giving it shape and form.
- Cane sugar: Sweetens the brownie, enhancing its overall taste.
- Cocoa powder: Provides the intense chocolate flavor that defines a brownie.
- Vegan mini chocolate chips: Add extra pockets of melty chocolate goodness.
- Soy milk: Acts as a vegan liquid, contributing to the batter’s consistency.
- Vegetable oil: Ensures the brownie stays moist and rich in texture.
- Vanilla extract: Adds a subtle depth of flavor, complementing the chocolate.
- Baking powder: Helps the brownie rise, creating a fluffy texture.
- Salt: Balances the sweetness and enhances the chocolate flavor.

How to Make the Brownie in a Mug
Once you have your ingredients ready, here’s what you’ll need to do to make the fudgy mug brownie.
Step 1: Combine Dry Ingredients
In a 8 to 12 oz mug, add the dry ingredients- all-purpose flour, cocoa powder, baking powder, salt and sugar. Mix until well combined.


Step 2: Add the Wet Ingredients & Top with Chocolate Chips
Then add the wet ingredients, milk, oil, vanilla extract. Mix until well combined. Add the chocolate chips on top.


Step 3: Microwave Mug Brownie
Put in the microwave for 1 minute and 45 seconds, or add a few more seconds, if it still has lots of wetness.

Step 4: Garnish and Serve Warm
Let it cool off for at least one minute. Garnish with a little confectioners sugar, optional.
Expert Tips
Ready to give this single serving dessert recipe a try? Here are some more tips and tricks to take note of.
- To add some extra flavor to the microwave mug brownie, you can use brown sugar instead of cane sugar.
- To get the perfect fudgy brownie, remember not to overcook it. If you let the brownie mug cake microwave for too long, it’ll turn into a tough brownie.
- Make sure you use a good quality, heavy ceramic mug to make the single serving brownie.
- To get the perfect gooey brownie in a mug, remember to use a fresh leavening agent and the best quality cocoa powder you can get your hands on.

variations
You can try lots of different variations to the brownie mug cake recipe.
- Instead of the vegan chocolate chips, you can use peanut butter chips or some caramel chips into the mix.
- Another great idea is to add some chopped walnuts into the brownie mixture.
- You can also make a dark chocolate version of this brownie in a mug recipe by using dark chocolate chips instead of the regular ones.

What To Serve With This Recipe?
- You can enjoy the vegan brownie mug cake on its own when you’re hit by a brownie craving.
- If you want to go the extra mile, you can team it up with some vanilla ice cream topped on it, or even just some whipped cream.
- I also like to drizzle the brownie mug cake with a bit of caramel sauce or some extra chocolate sauce if I’m feeling fancy.

Vegan Brownie In A Mug
This vegan brownie in a mug is the perfect way to beat those midnight chocolate cravings and satisfy your sweet tooth quickly.
You can actually enjoy a warm brownie in less than 10 minutes, and top it with some vegan ice cream for some extra deliciousness if you want to.
The soft, fudgy brownie is nice and handy in a mug, and topped with some semi-melted chocolate chips for that extra chocolate flavor.
Ingredients
- All-purpose flour: Good quality all purpose flour is a crucial part of the brownie batter.
- Cane sugar: To add some sweetness to the mug brownie, I used cane sugar instead of regular powdered sugar or granulated sugar.
- Cocoa powder: I would recommend using the best quality unsweetened cocoa powder you can get your hands on- it will really make a difference when it comes to the flavor.
- Vegan mini chocolate chips: I used unsweetened chocolate chips for the recipe, but you could also use semi sweet chocolate chips if you want to.
- Soy milk: I used soy milk, but you can use almost any other vegan milk of your choice.
- Vegetable oil: Vegetable oil adds a nice touch of richness to the mug brownie and makes it moist- just like melted butter would. You can use olive oil or coconut oil if you want to.
- Vanilla extract: A dash of vanilla extract is an absolute must for any good chocolate brownie.
- Baking powder: Baking powder helps make the mug brownies nice and fluffy. You can use baking soda instead of you want to.
- Salt: A dash of salt helps balance out the sweetness and the chocolate flavor of the brownie mug cake.
Instructions
How to Make the Brownie in a Mug
Once you have your ingredients ready, here's what you'll need to do to make the fudgy mug brownie.
Step 1: Combine Dry Ingredients
In a 8 to 12 oz mug, add the dry ingredients- all-purpose flour, cocoa powder, baking powder, salt and sugar. Mix until well combined.
Step 2: Add the Wet Ingredients & Top with Chocolate Chips
Then add the wet ingredients, milk, oil, vanilla extract. Mix until well combined. Add the chocolate chips on top.
Step 3: Microwave Mug Brownie
Put in the microwave for 1 minute and 45 seconds, or add a few more seconds, if it still has lots of wetness.
Step 4: Garnish and Serve Warm
Let it cool off for at least one minute. Garnish with a little confectioners sugar, optional.
Notes
Tips & Tricks to Nail the Microwave Mug Brownie Recipe
Ready to give this single-serving dessert recipe a try? Here are some more tips and tricks to take note of.
- To add some extra flavor to the microwave mug brownie, you can use brown sugar instead of cane sugar.
- To get the perfect fudgy brownie, remember not to overcook it. If you let the brownie mug cake microwave for too long, it'll turn into a tough brownie.
- Make sure you use a good quality, heavy ceramic mug to make the single-serving brownie.
- To get the perfect gooey brownie in a mug, remember to use a fresh leavening agent and the best quality cocoa powder you can get your hands on.
Nutrition Information:
Yield: 1 Serving Size: 1Amount Per Serving: Calories: 8306Total Fat: 482gSaturated Fat: 153gTrans Fat: 2gUnsaturated Fat: 299gCholesterol: 749mgSodium: 6249mgCarbohydrates: 974gFiber: 29gSugar: 317gProtein: 111g
More Easy Recipes
If you enjoyed making this easy mug brownie recipe and are inspired to try some more such easy recipes, here are a few good ones you might want to check out.
